| | LRK Home | | Bio Info | | Krash Khronicles | | LAROKE | |
| | BettyLou | | BillyBob's Garage | | Rat Patrol | | Deerslayer | | Elvira | |
| | Land of the Free and Home of the Brave | |
| | Keppylou's Art | | WWI Soldier's Diary | |
BillyBob Work-in-Progress Log
![]()
WHAT'S NEW is a chronological listing of updates to the BillyBob site.
![]()
TRUCK LINKS including vendor sites for old parts, custom parts, and tools as well as sites for classic car and truck organizations
STORE Operating in association with Amazon.com, books, recordings and tools can be purchased.
PLANNING for the restoration including project schedule and cost estimates.
![]()
TRAVELS WITH BILLYBOB With apologies to Steinbeck, this area of BillyBob's Garage will be used to log the trips BillyBob and I make together.
WORK-IN-PROGRESS was the restoration of parts of BillyBob that I could accomplish without a garage up until the summer of 2010 when I finally got enough warehouse space to work in. Now, it also includes the continuing work on BillyBob in the shop.
PRE-RESTORATION includes log entries of minor repairs and adventures between time of purchase and the time when I started restoration, a piece at a time.
JR'S KORNER JR's Korner is the history of BillyBob before I got him authored by my brother, Wm. C. Kephart.
![]()
BILLYBOB MAINTENANCE Ever changing detailing, oil change, lube, etc. maintenance routines specifically developed for BillyBob, including required tools, materials and procedures.
PROJECT PUFFER Chronicles the rebuild of BillyBob's Stovebolt 235 including the installation of a 4-71 blower system.
PARTS SHOP The Parts Shop is a repository of How-To articles. Things that I have done over and over enough times to have developed a procedure. This gives me a checklist and saves brain cells.
STEALTH SHOP Urban residence design with large integrated shop and separate living quarters for a relative or renter.
![]()
You will need the Adobe Acrobat browser plugin to view these wiring diagrams which are in the PDF file format. This format allows zooming and panning. If you don't have this plugin, it can be downloaded and installed (free) from the Adobe site. The button below will take you there.
![]()
BILLYBOB WIRING DIAGRAM Here's the wiring diagram updated with BillyBob's current state 'cepting the third-party strap-on turn-signal director.
STRAP-ON TURN-SIGNAL DIRECTOR/BRAKE LIGHT CIRCUIT This turn signal and brake light circuit diagram shows the current state of the third-party turn-signal director wiring, which will remain in place until I figure out the problems with the OEM turn-signal director. It also shows the OEM headlight switch.
68. Where the Hekawi?
 November
7th 2015 Still mocking
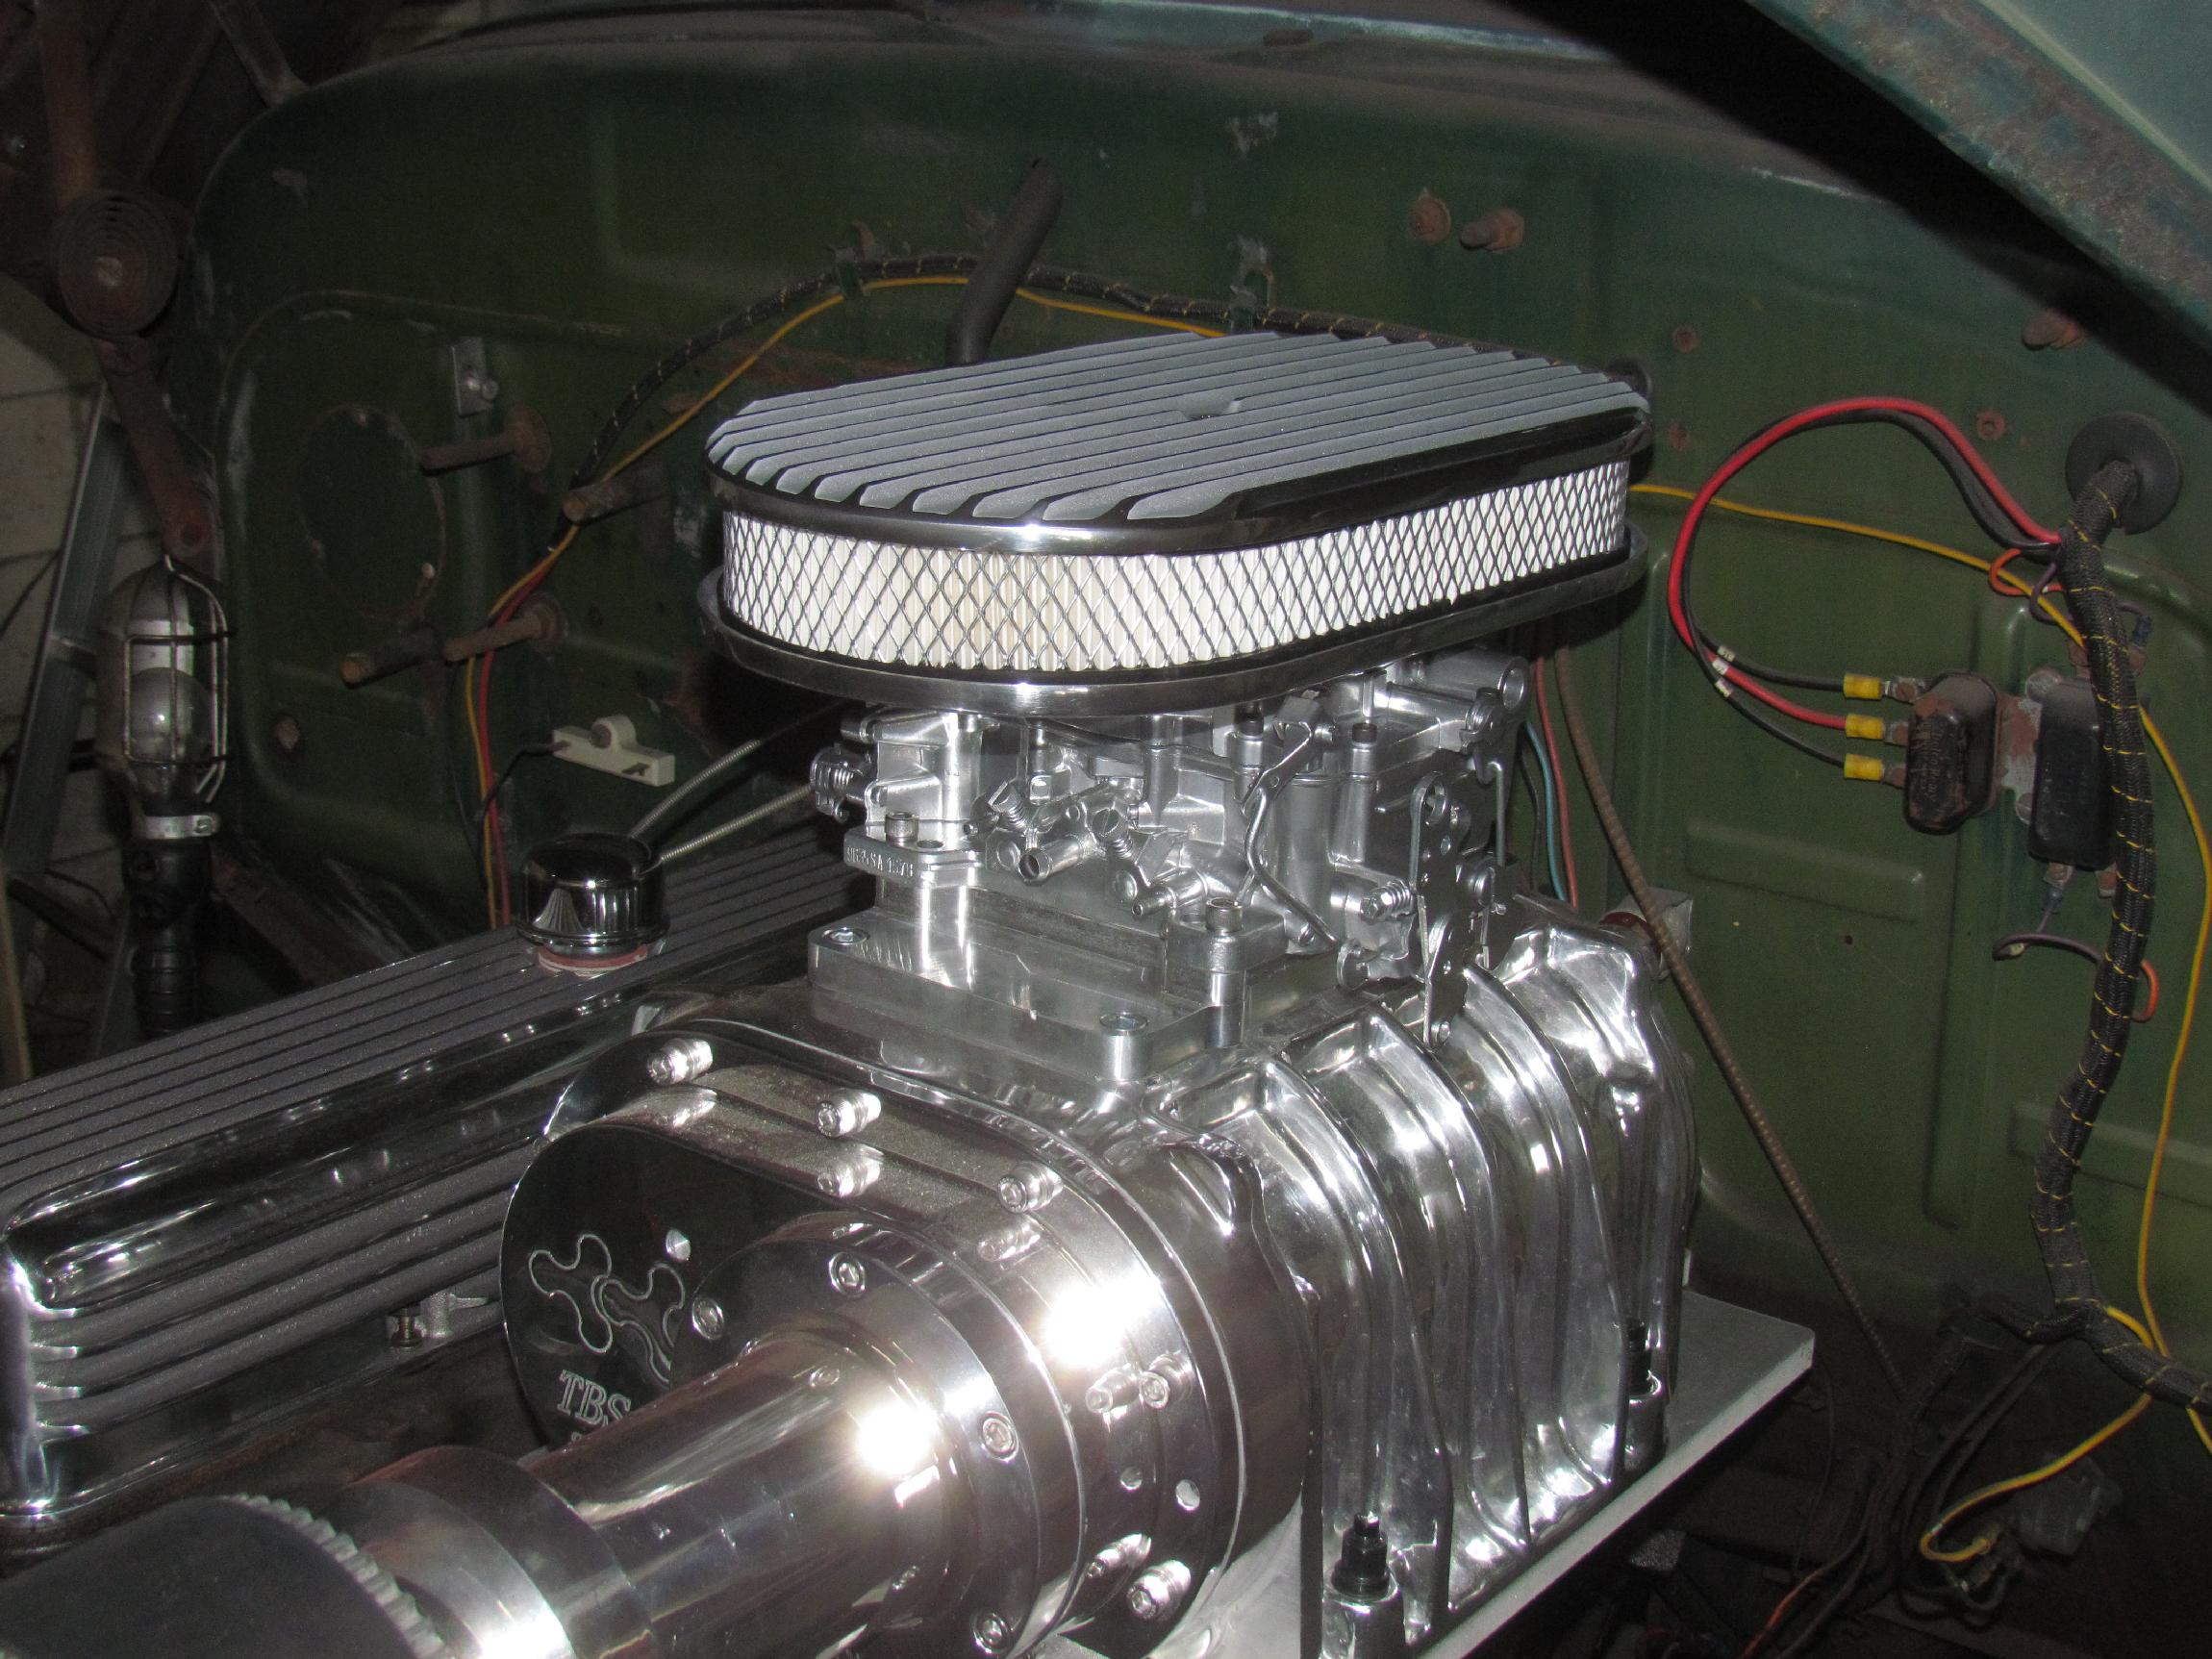
up the 235 stovebolt engine. Got a 4-71 carb adapter plate for Carter
and Holley carbs from an eBay vendor. Found a 600 cfm Carter
AFB carb modified for blower use from Stahl Performance Inc. and a
finned air cleaner, also on eBay.
November
7th 2015 Still mocking
up the 235 stovebolt engine. Got a 4-71 carb adapter plate for Carter
and Holley carbs from an eBay vendor. Found a 600 cfm Carter
AFB carb modified for blower use from Stahl Performance Inc. and a
finned air cleaner, also on eBay.
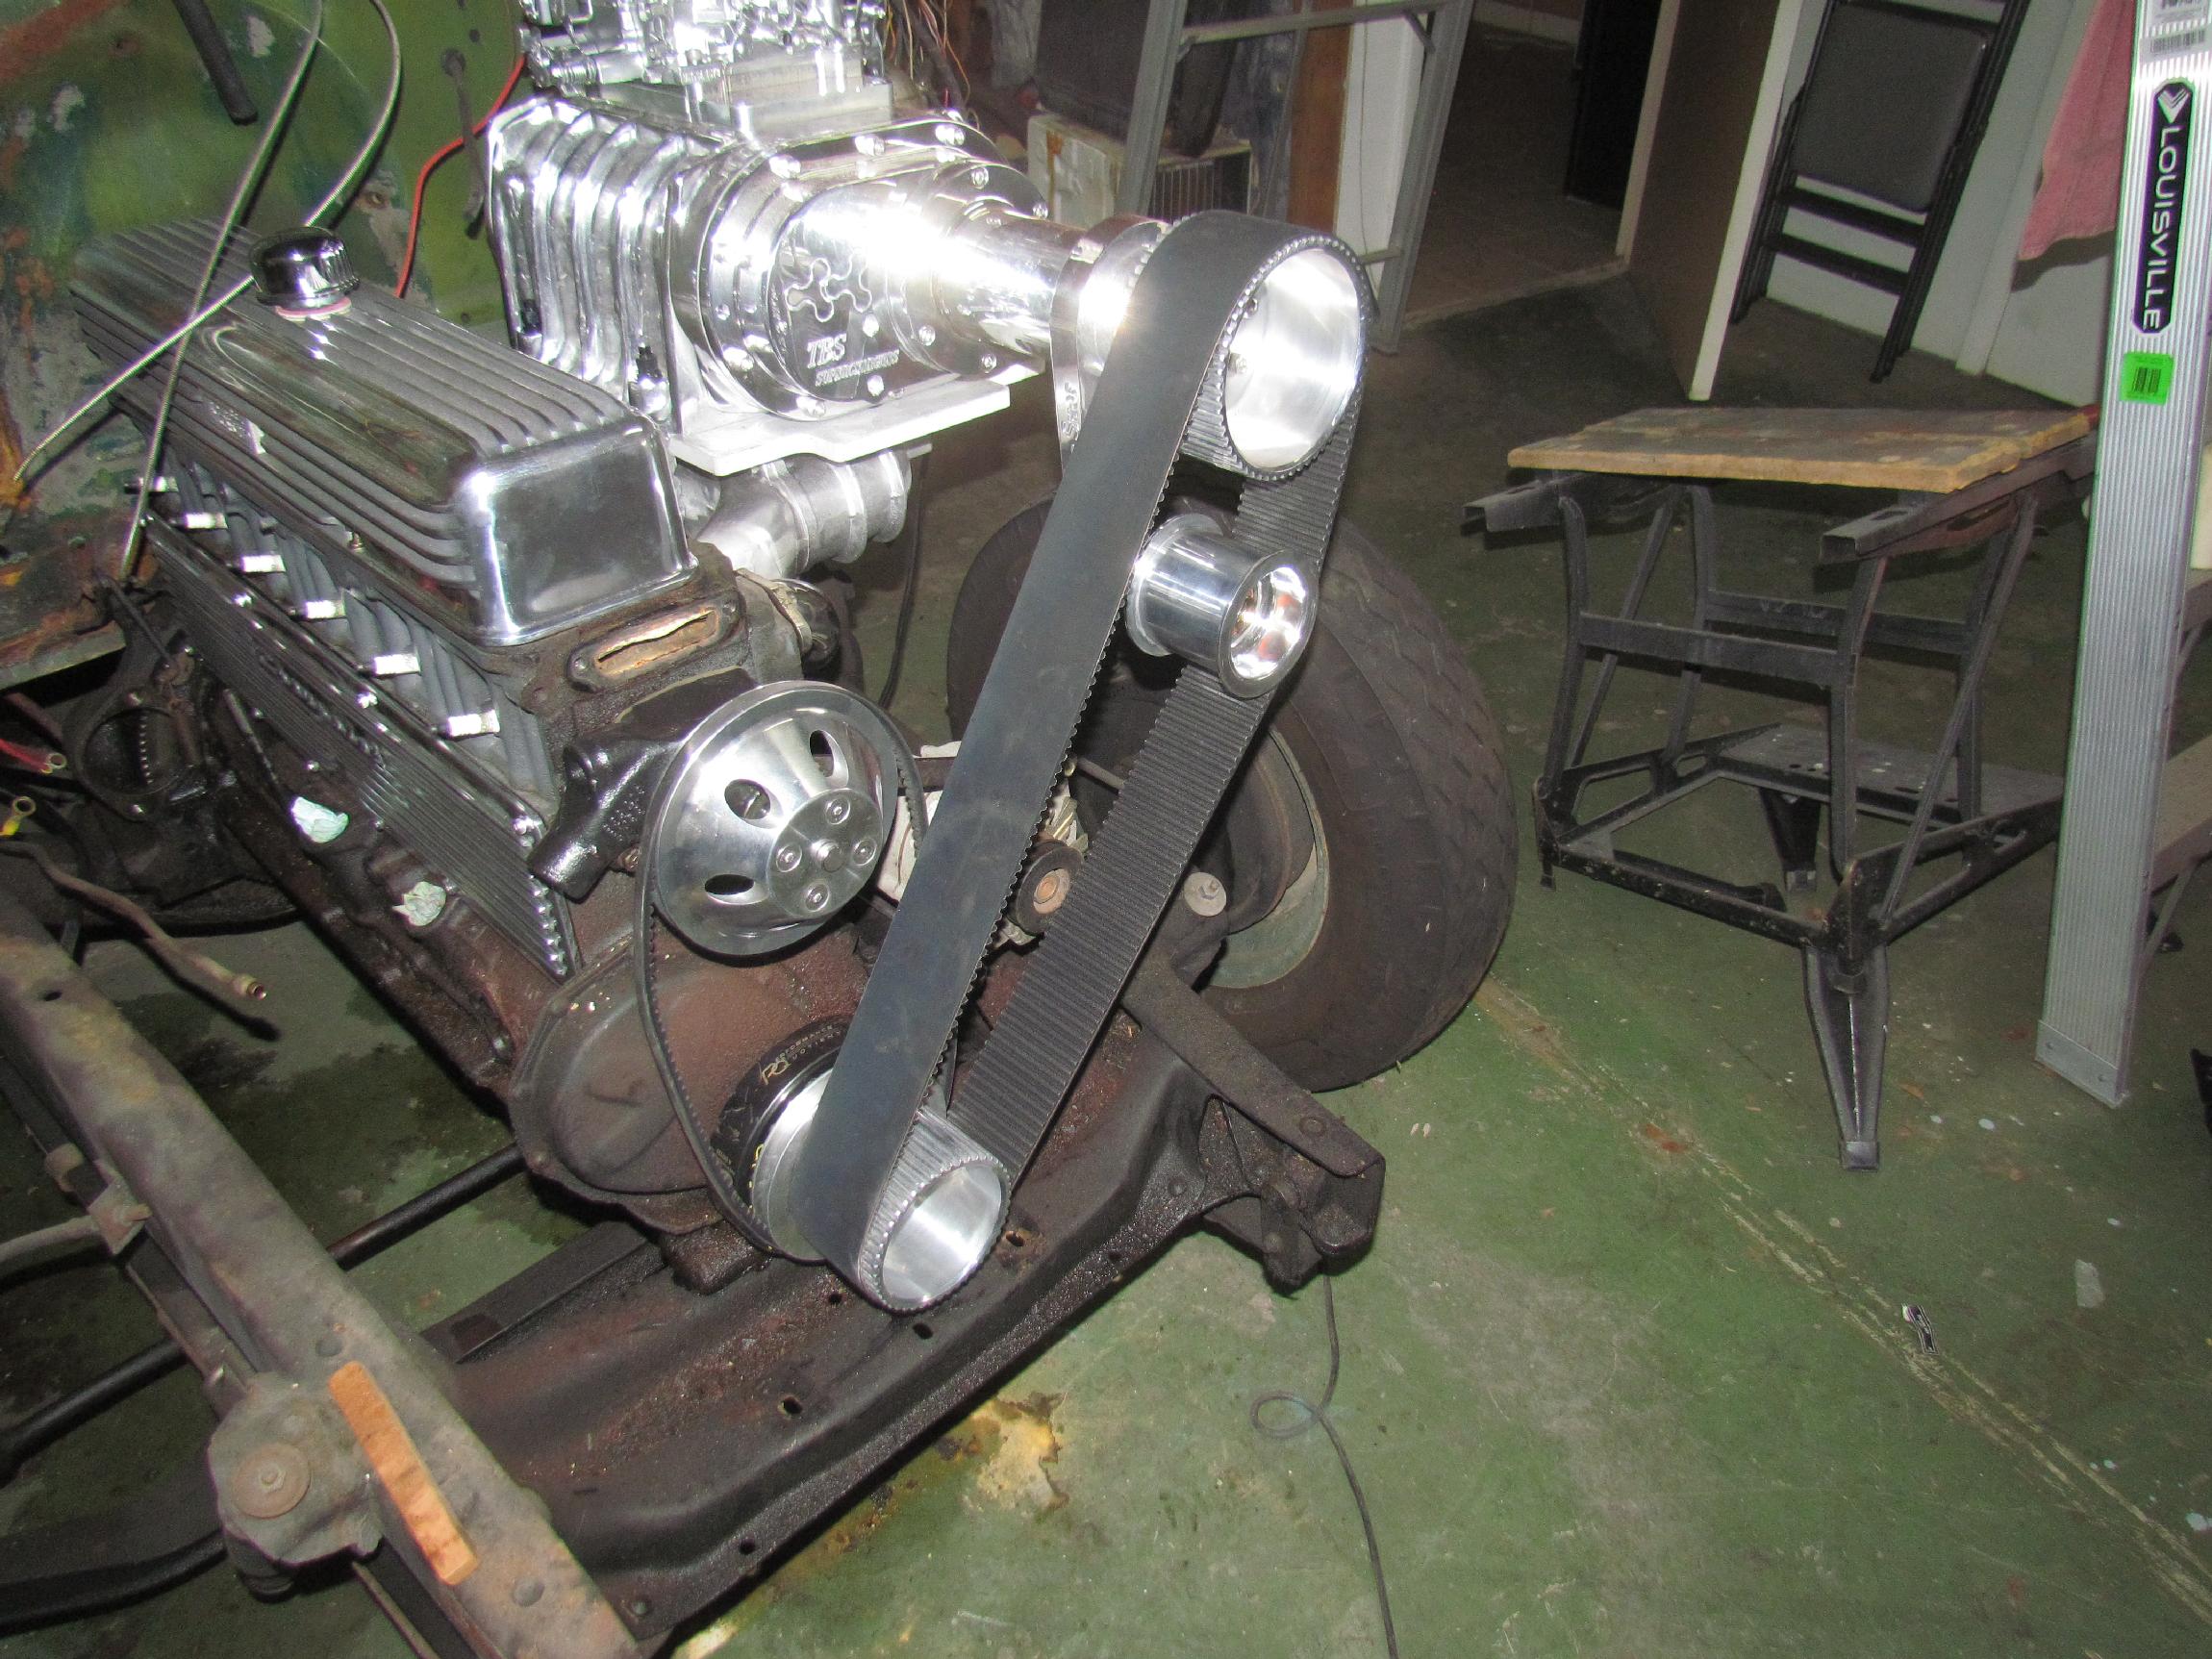
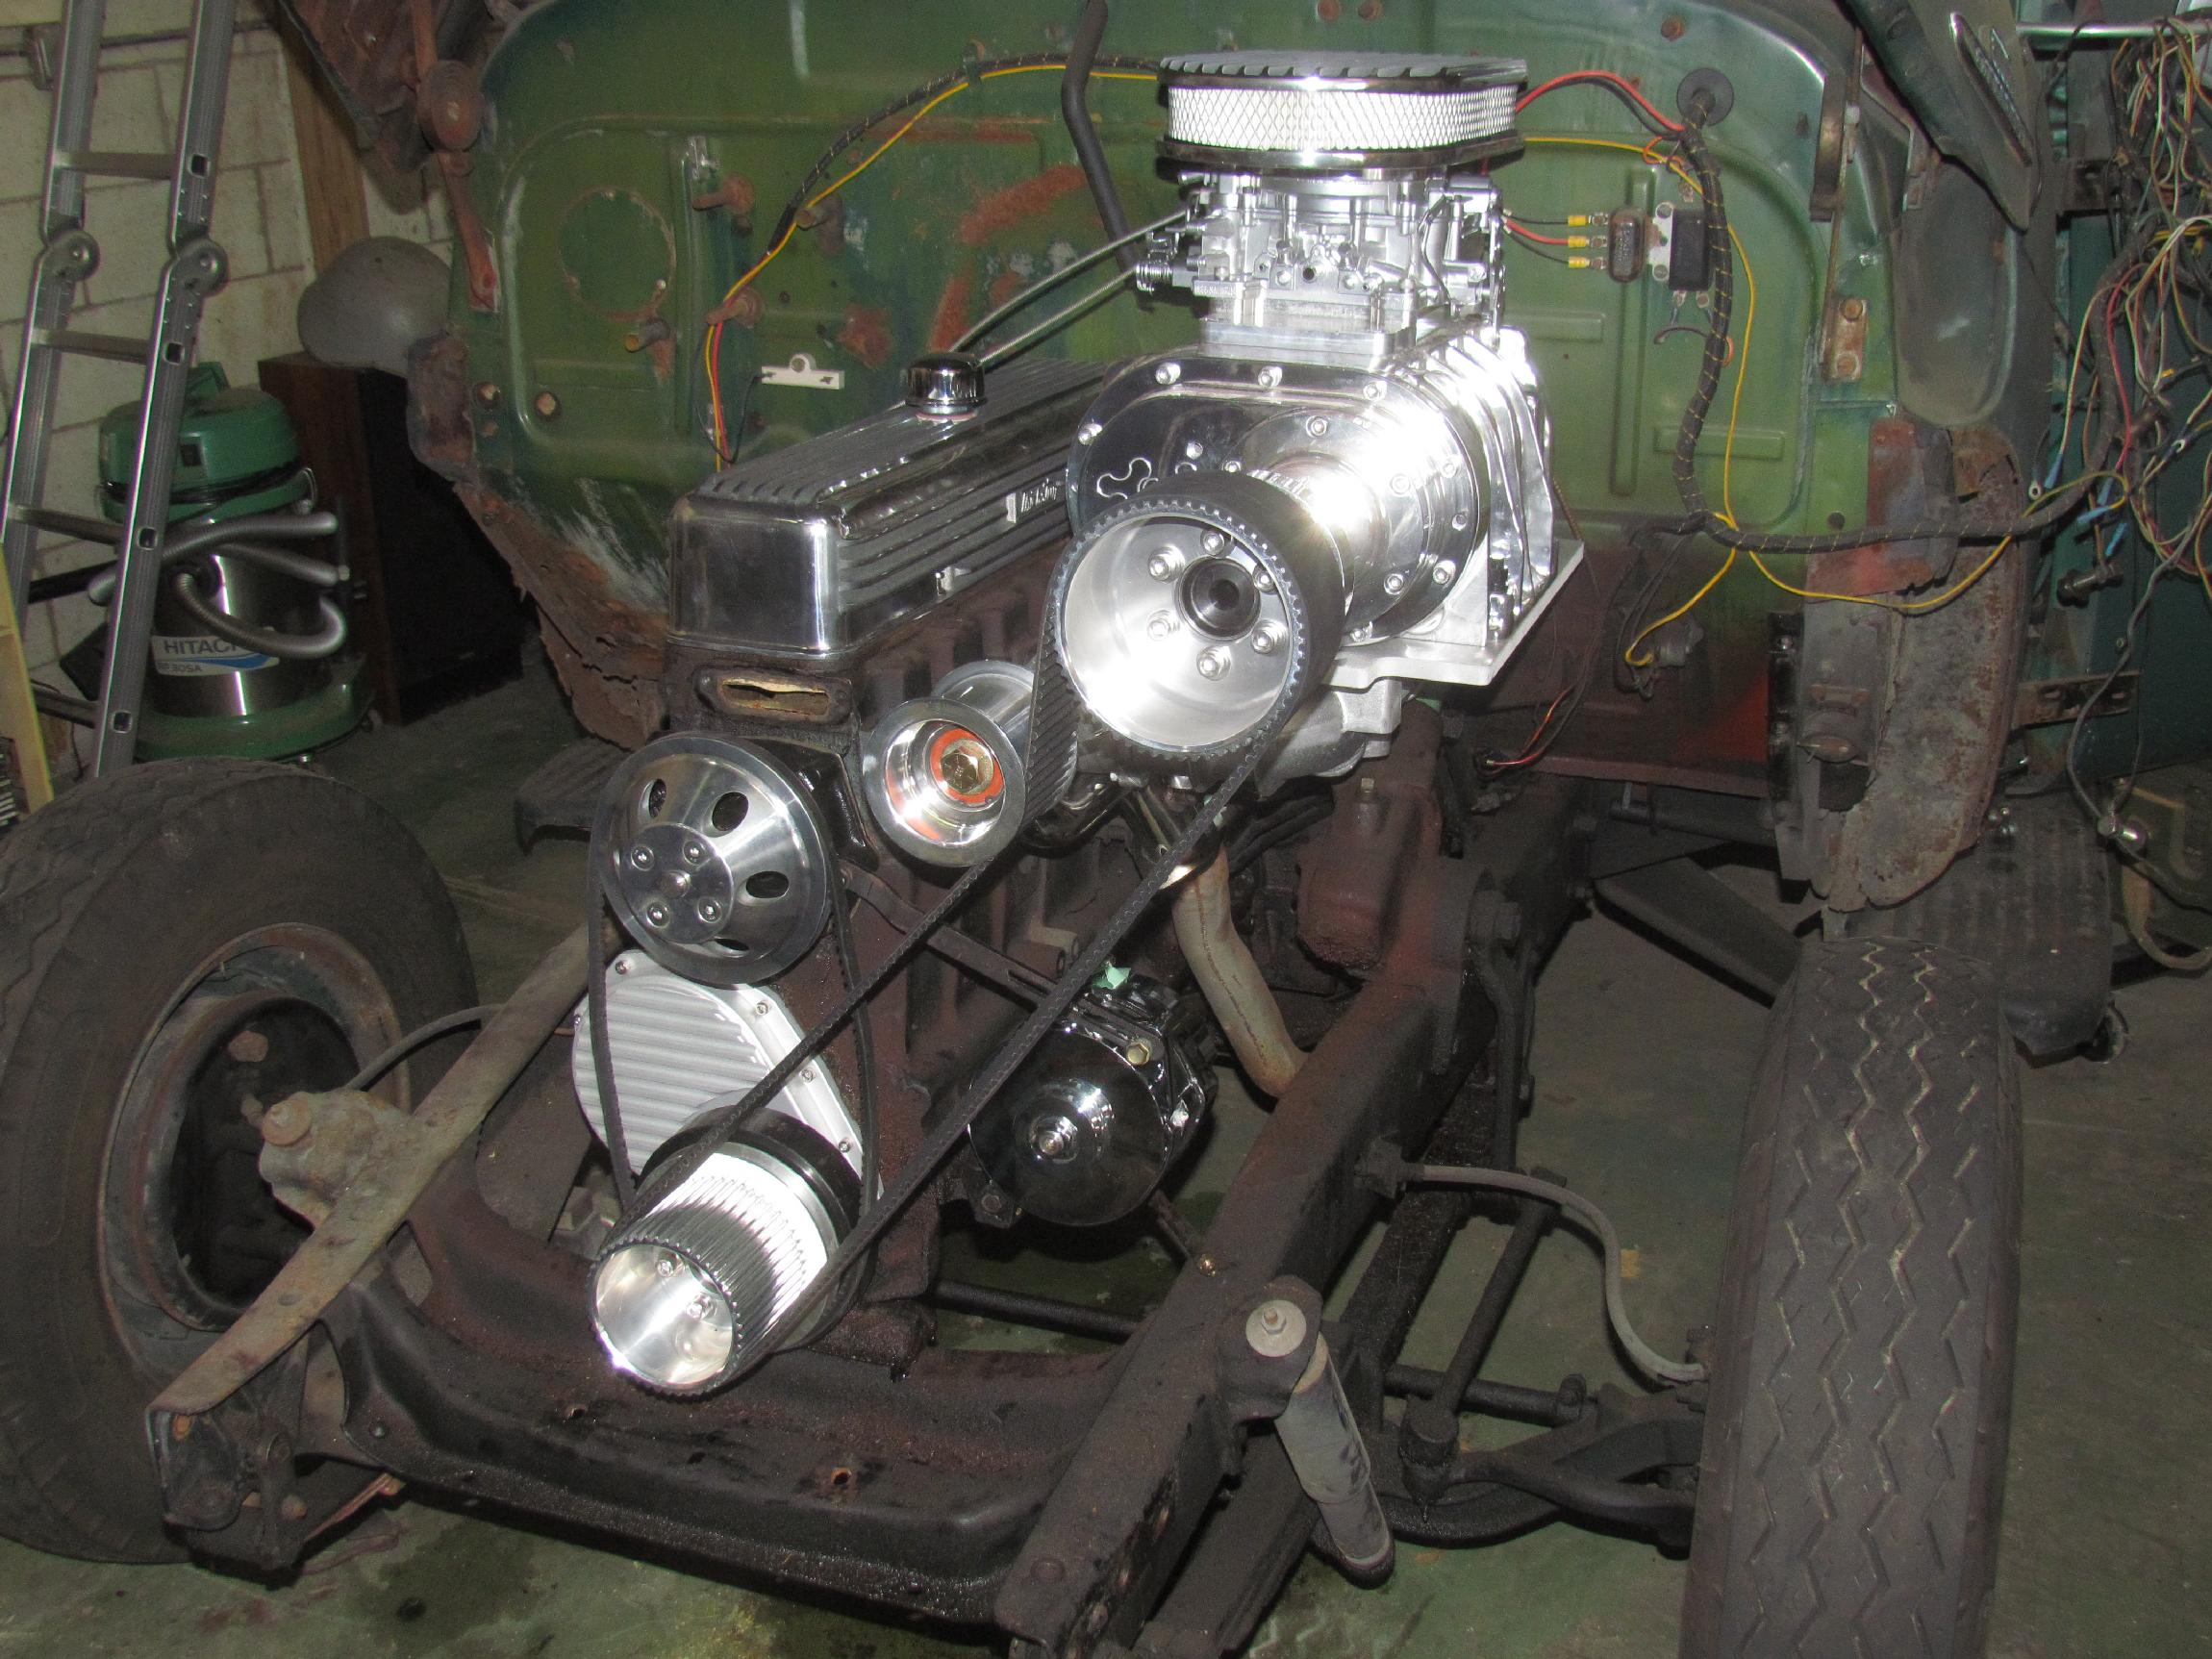
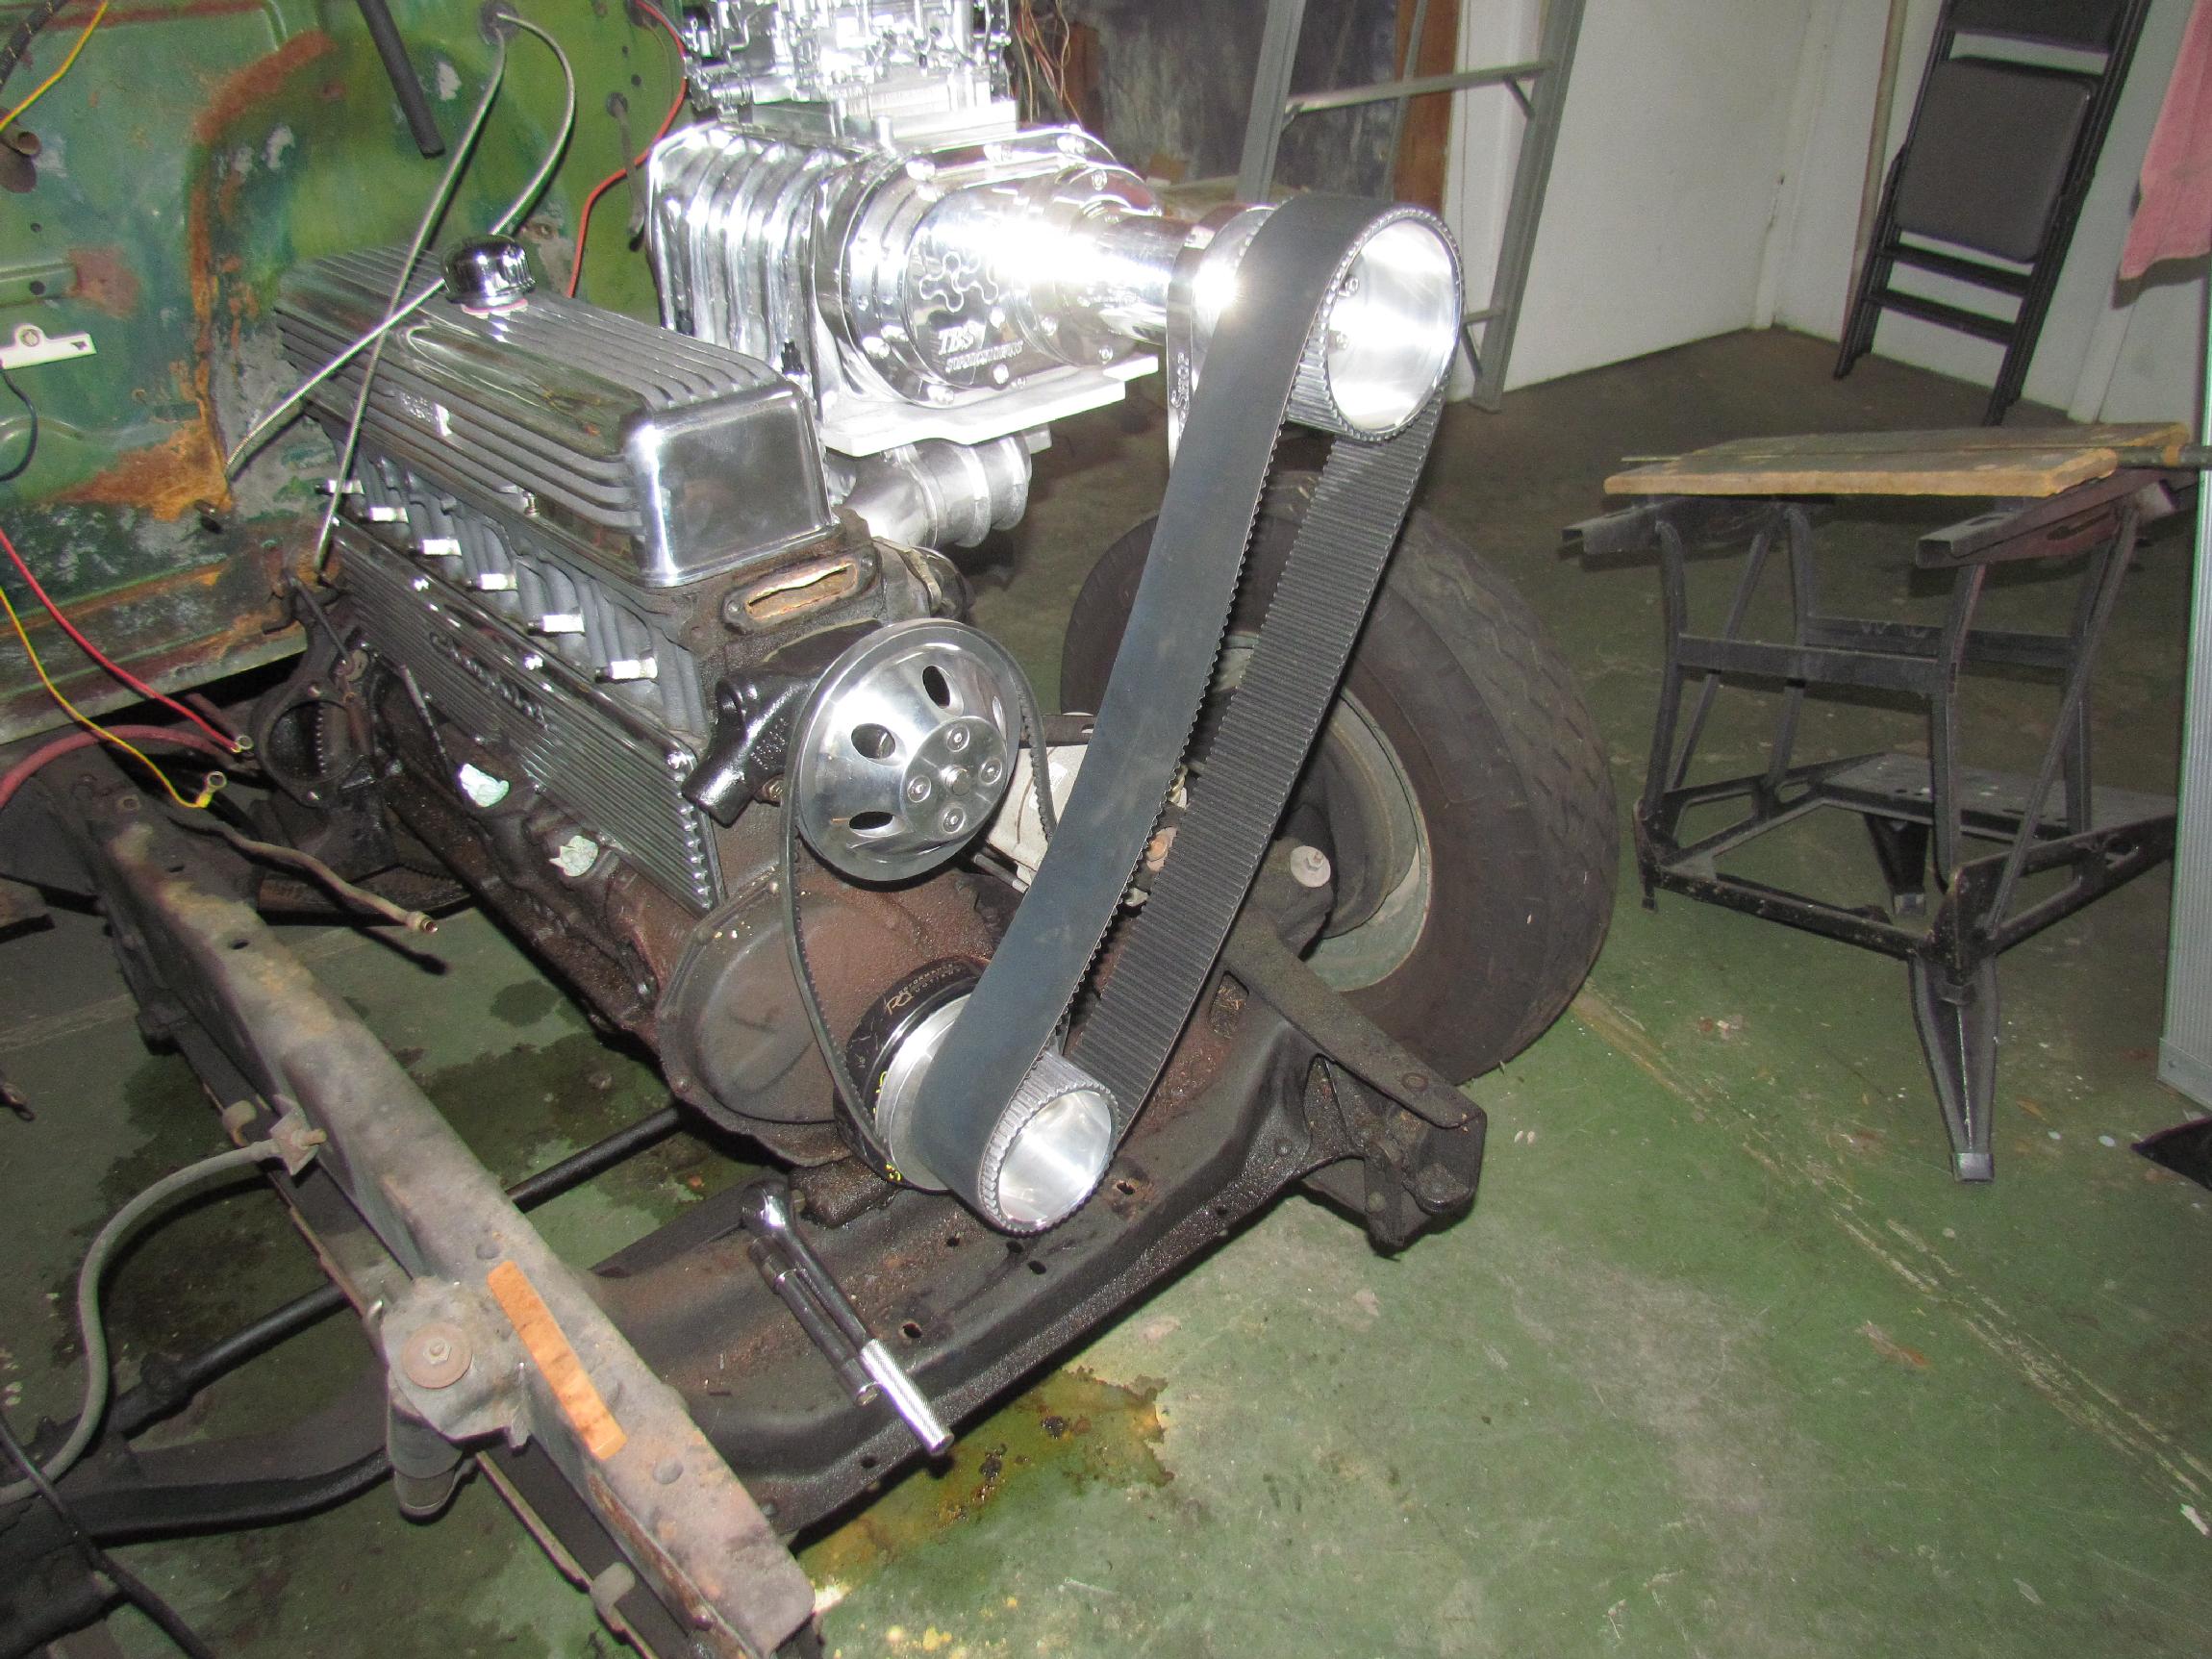 After some research, I discovered the blower belt was a 3" wide 8 mm
belt. Measured the setup several times since I tend to get my
measurements dead nuts on or light years off. I don't know why other
than I can't see worth spit with my Mark I eyes. I kept coming up with
62-1/2" around the pulleys so I ordered a 63" belt from The Blower
Shop. It fits!
After some research, I discovered the blower belt was a 3" wide 8 mm
belt. Measured the setup several times since I tend to get my
measurements dead nuts on or light years off. I don't know why other
than I can't see worth spit with my Mark I eyes. I kept coming up with
62-1/2" around the pulleys so I ordered a 63" belt from The Blower
Shop. It fits!
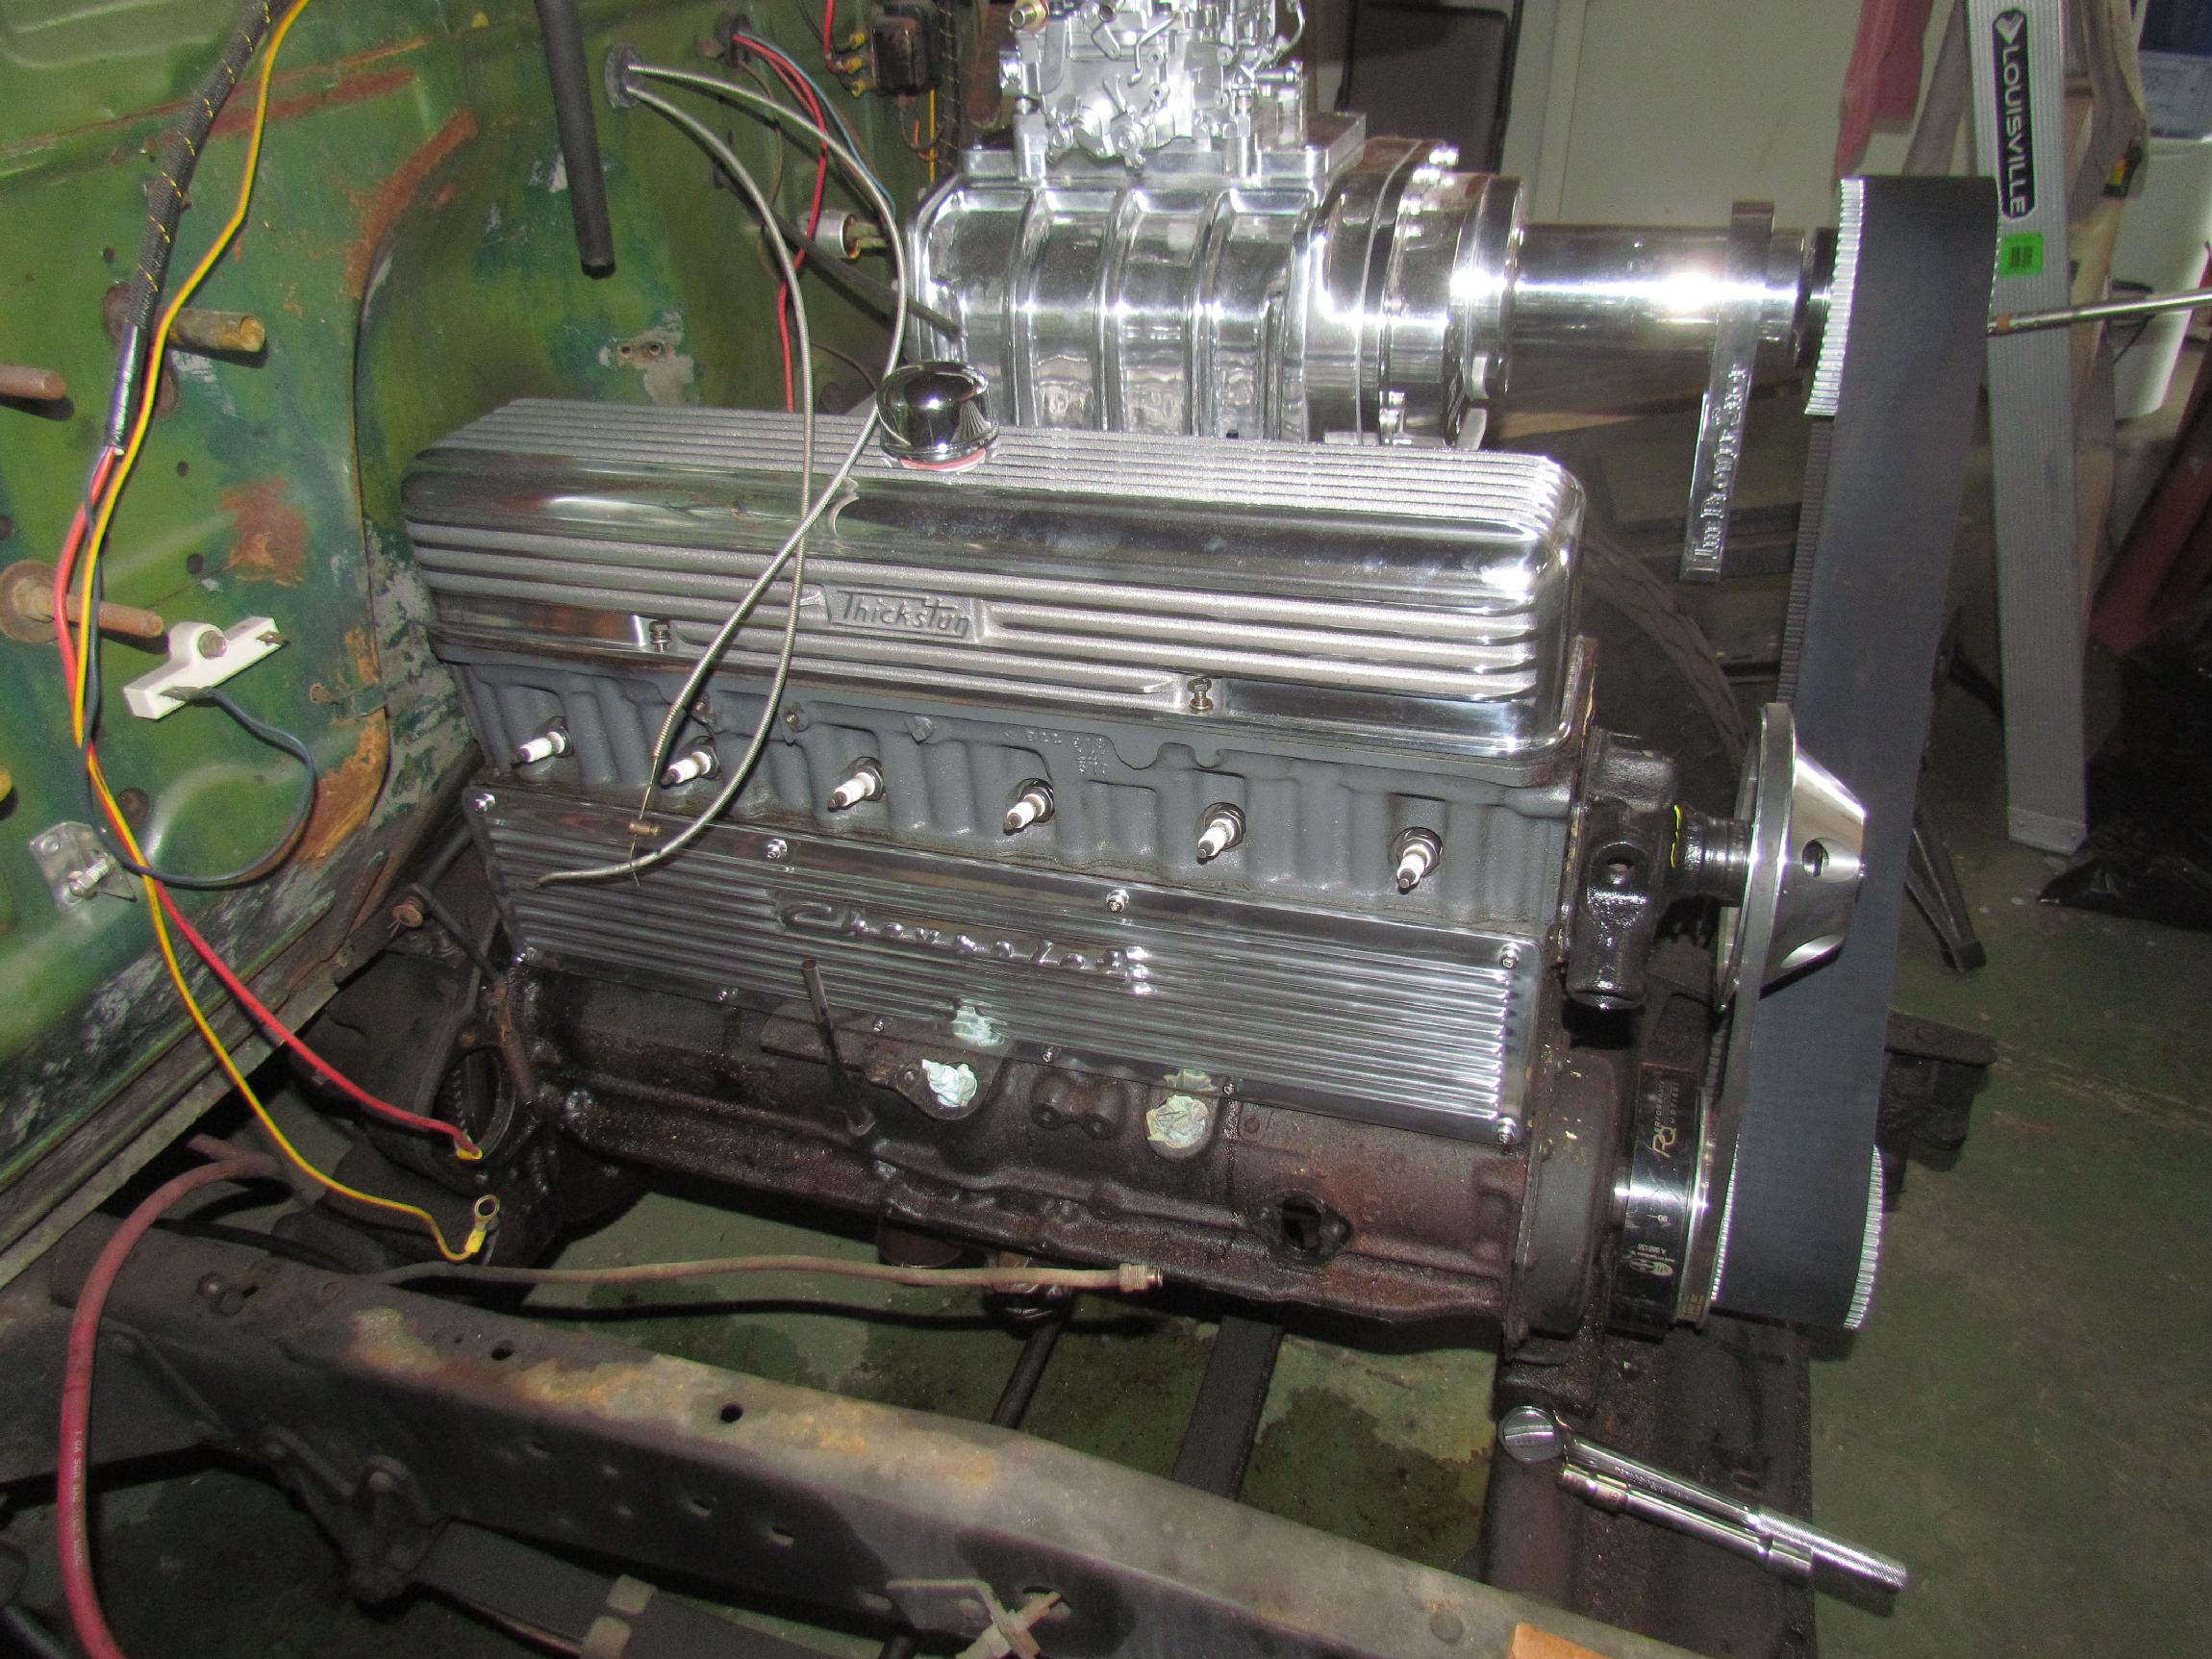 James Larrowe sent me a nice finned "Chevrolet" side cover as a freebie
and I mocked that up also with stainless steel socket bolts. I'm using
the stainless steel socket bolts everywhere I can and, even tho' it's a
mock up with finger tight fasteners, I put 'em in with anti-seize so
they are sure to come back out again.
James Larrowe sent me a nice finned "Chevrolet" side cover as a freebie
and I mocked that up also with stainless steel socket bolts. I'm using
the stainless steel socket bolts everywhere I can and, even tho' it's a
mock up with finger tight fasteners, I put 'em in with anti-seize so
they are sure to come back out again.
 The air cleaner came with a nice stainless threaded rod, flat socket
cap but it was 3/4" too long so I had to cut the bottom off and clean
up the threads. It also was snugged up with anti-seize. With the hood
down, there is about an inch clearance left between air cleaner and
hood bottom.
The air cleaner came with a nice stainless threaded rod, flat socket
cap but it was 3/4" too long so I had to cut the bottom off and clean
up the threads. It also was snugged up with anti-seize. With the hood
down, there is about an inch clearance left between air cleaner and
hood bottom.
 November
14th 2015 Ordered a
2-3/4" Idler Pulley Stand and Tee Nut from JEGS for The Blower Shop
idler arm
and pulley. When I assembled it the idler pulley bolt was not long enuf
to fit the Tee Bolt and I'm not sure that it's even required for this
setup.
November
14th 2015 Ordered a
2-3/4" Idler Pulley Stand and Tee Nut from JEGS for The Blower Shop
idler arm
and pulley. When I assembled it the idler pulley bolt was not long enuf
to fit the Tee Bolt and I'm not sure that it's even required for this
setup.
Worked at taking the glass, hardware and trim out of the doors in preparation for taking them off. The toughest part of this task is getting the nut that secures the lower end of the vent window forward window track assembly off. It is almost always rusted and is about seven inches up from the lower door access opening. You can't see it and you can barely get your arm up in there to find it in the first place. The Stovebolt.com forum was a big help here. I thought I had rounded off the nut on the driver side door when I got my Rigid bore scope out to take a look at the damn thing. I finally got it off with a lot of cursing.
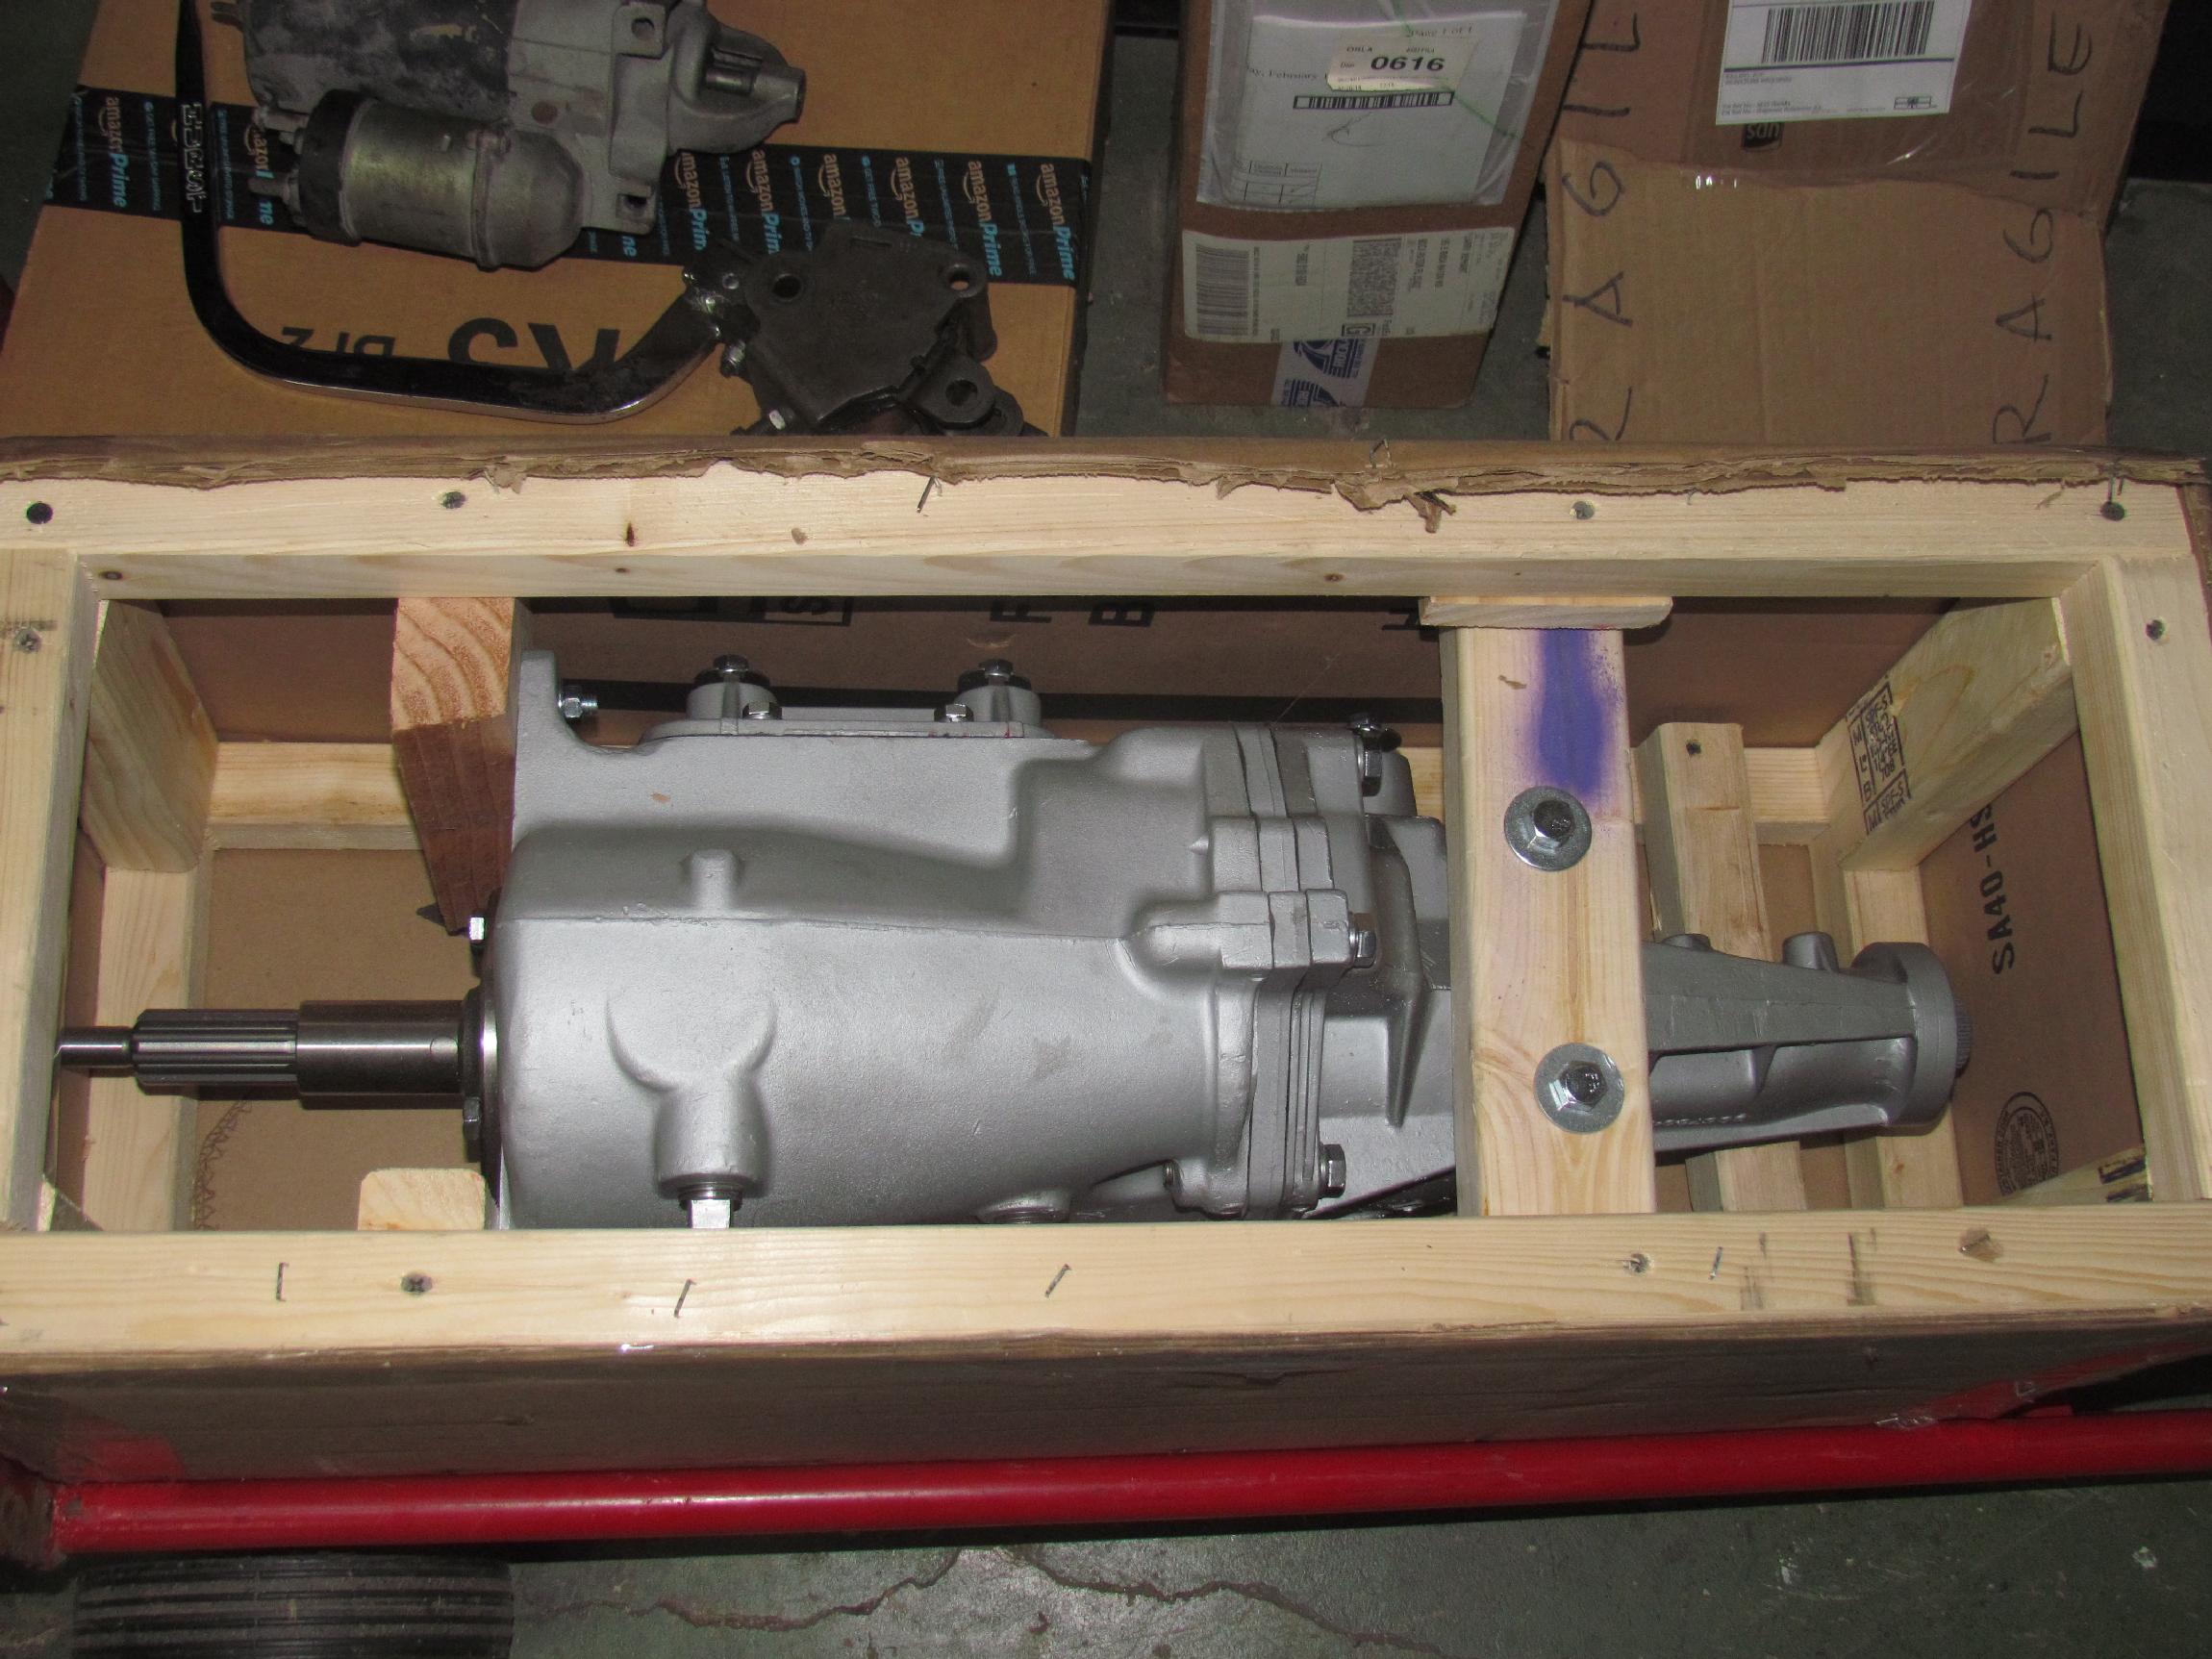 I was going to leave the rest of the driveline of this
build for a later phase but, with the urging of my brother, JR, and my
cousin, Jeremy, and a few others, decided to do it now. With that in
mind, I purchased a rebuilt Muncie M22 "Rockcrusher" four-speed tranny
and that arrived on Thursday. Once the doors are off and the floor cut
away I can mock that up before removing the engine.
I was going to leave the rest of the driveline of this
build for a later phase but, with the urging of my brother, JR, and my
cousin, Jeremy, and a few others, decided to do it now. With that in
mind, I purchased a rebuilt Muncie M22 "Rockcrusher" four-speed tranny
and that arrived on Thursday. Once the doors are off and the floor cut
away I can mock that up before removing the engine.
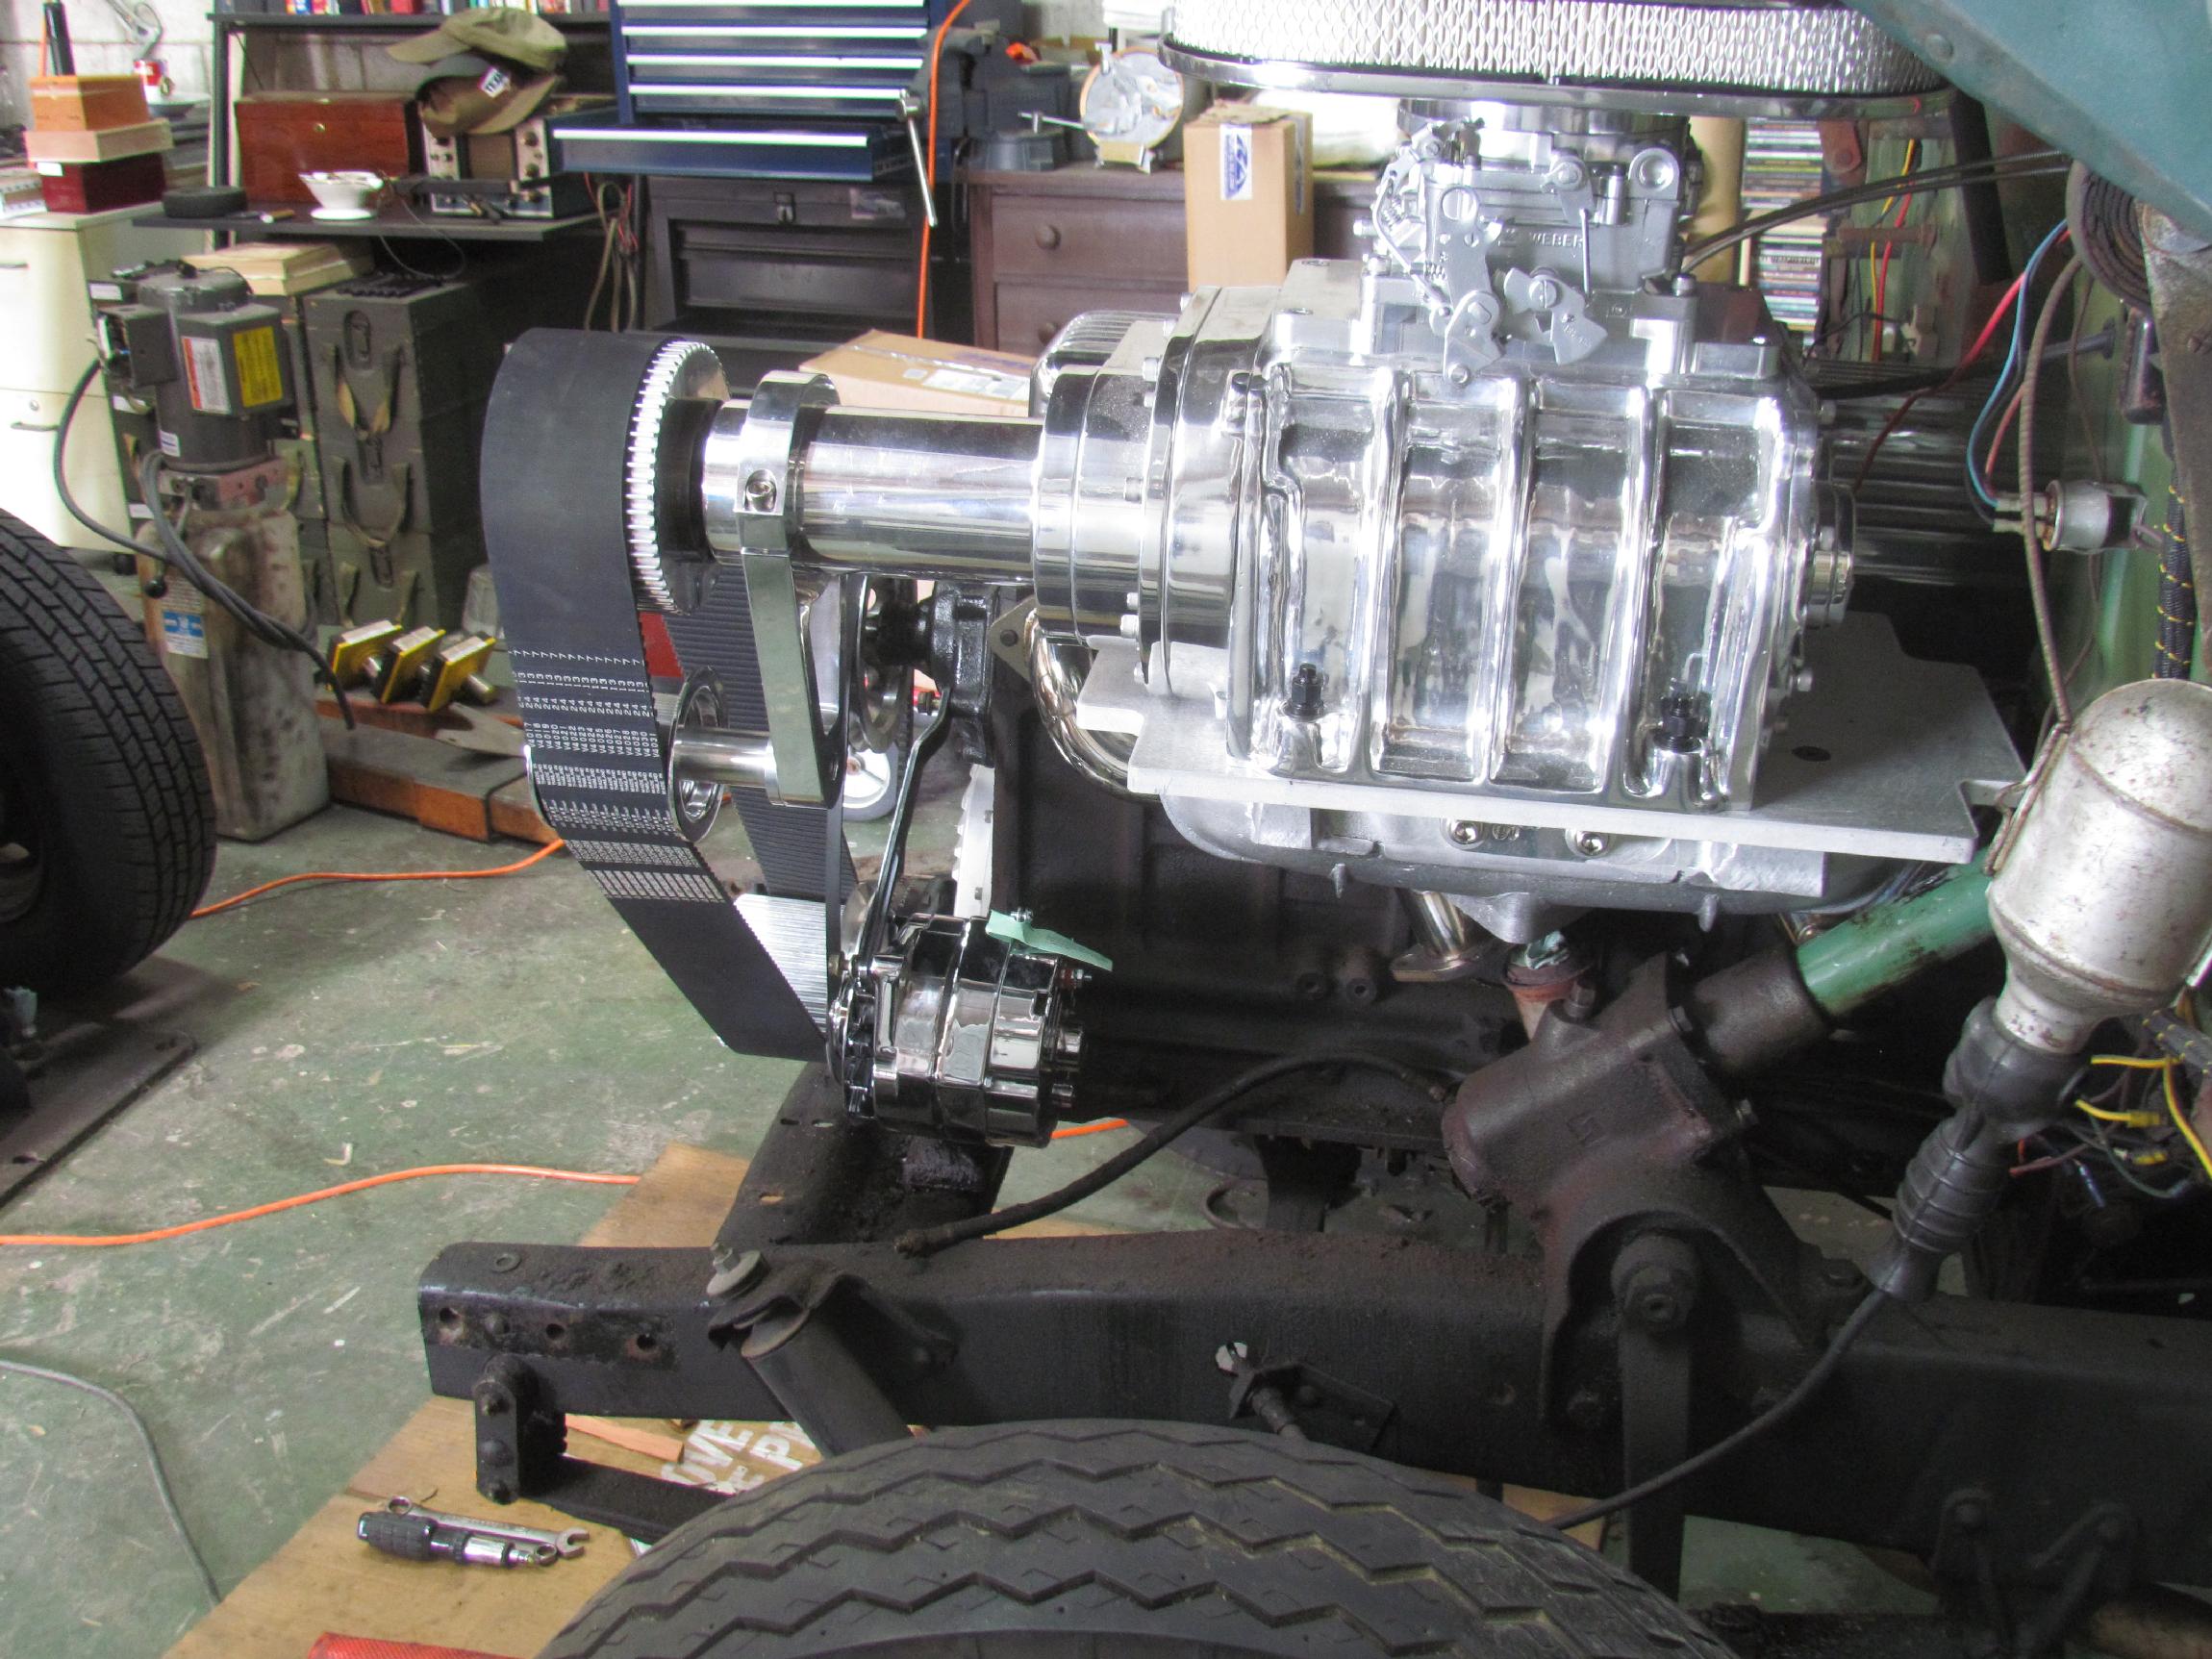 November
21st 2015 Continued the
engine mock up with an alternator I bought from my friend, Mike
Cunningham. It's a chromed 10SI alternator, 100 amp, 1-wire unit from
Tuff Stuff Performance and it fits in nicely.
November
21st 2015 Continued the
engine mock up with an alternator I bought from my friend, Mike
Cunningham. It's a chromed 10SI alternator, 100 amp, 1-wire unit from
Tuff Stuff Performance and it fits in nicely.
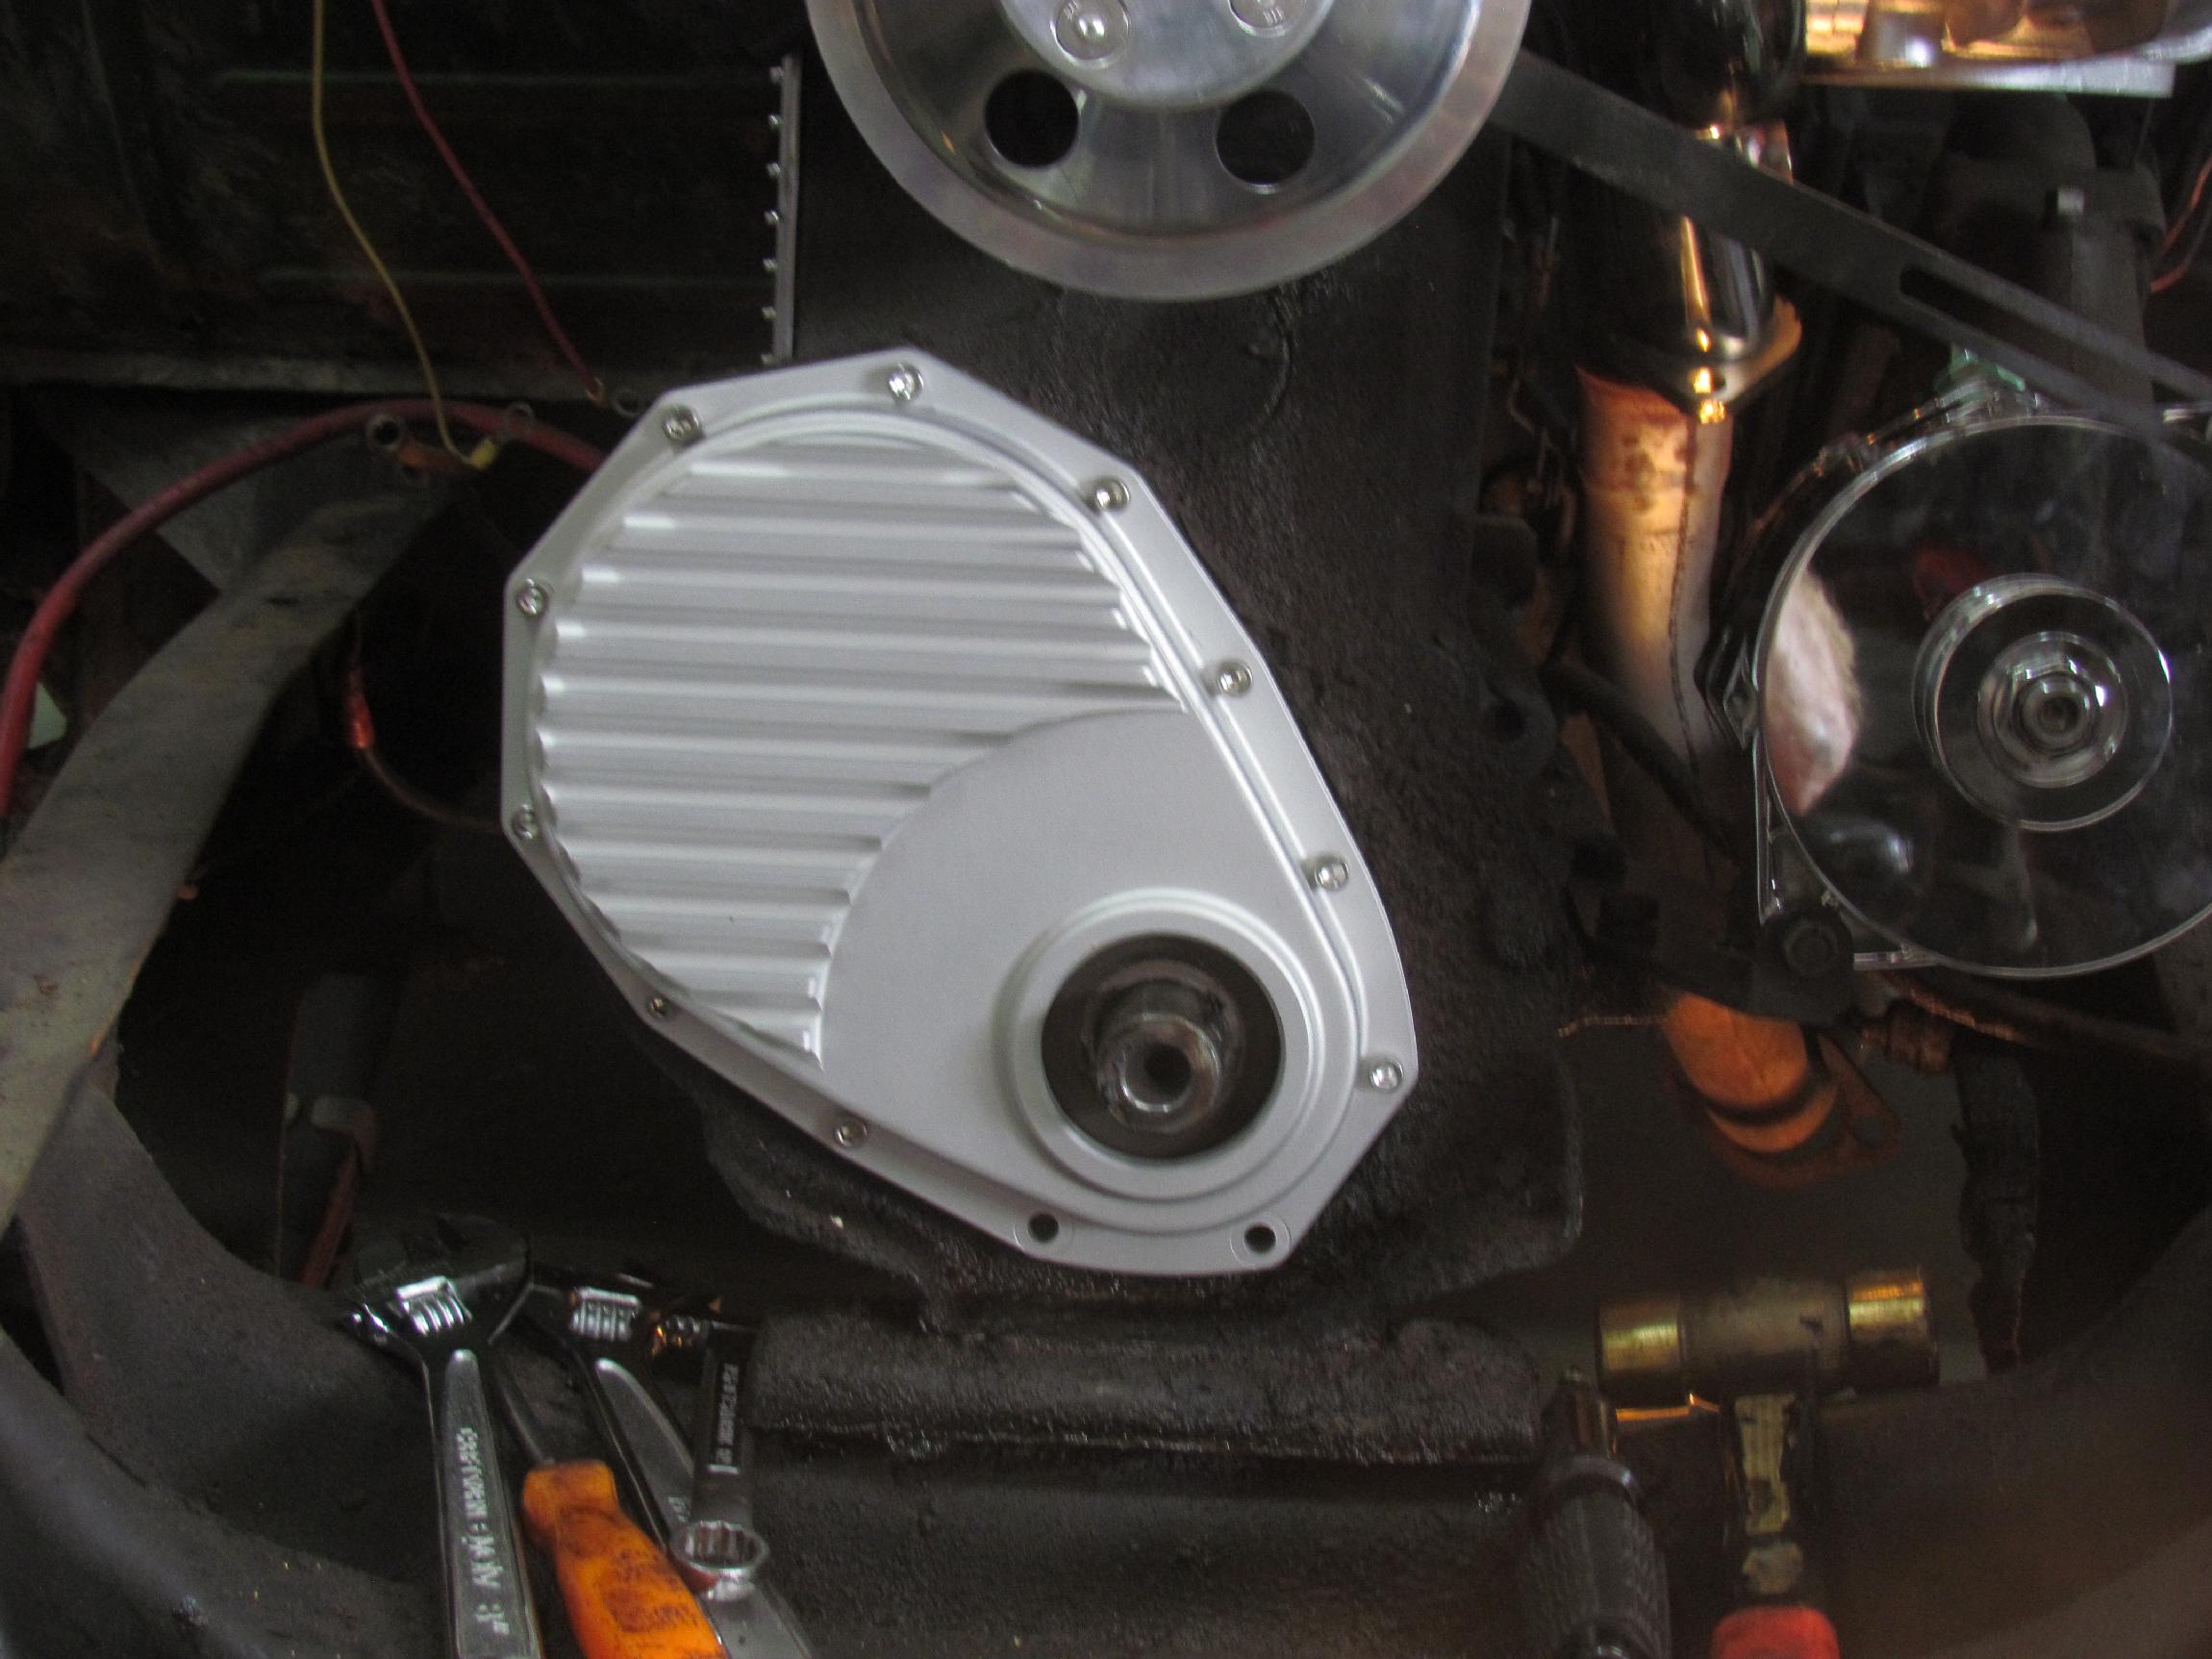 Next, was the installation of a finned, aluminum timing gear cover.
There's a difference between the car stovebolt and the truck stovebolt
engines in this area. The car stovebolts have front engine motor mounts
on the side while the truck engines have a front motor mount. The
bottom two timing cover bolts on the truck engine are accessed from
inside the crankcase and the oil pan has to come off to get at them. If
I didn't already have the pan off, this would have caused an outburst
of blue language in the BillyBob Shop. As it is, modifications will
have to be made when the engine goes together as the aluminum cover
does not make provisions for this quirk. When I had the cover off, I
found that the engine already had the aluminum timing gear, not the
original fiber gear, another dubious GM engineering achievement.
Next, was the installation of a finned, aluminum timing gear cover.
There's a difference between the car stovebolt and the truck stovebolt
engines in this area. The car stovebolts have front engine motor mounts
on the side while the truck engines have a front motor mount. The
bottom two timing cover bolts on the truck engine are accessed from
inside the crankcase and the oil pan has to come off to get at them. If
I didn't already have the pan off, this would have caused an outburst
of blue language in the BillyBob Shop. As it is, modifications will
have to be made when the engine goes together as the aluminum cover
does not make provisions for this quirk. When I had the cover off, I
found that the engine already had the aluminum timing gear, not the
original fiber gear, another dubious GM engineering achievement.
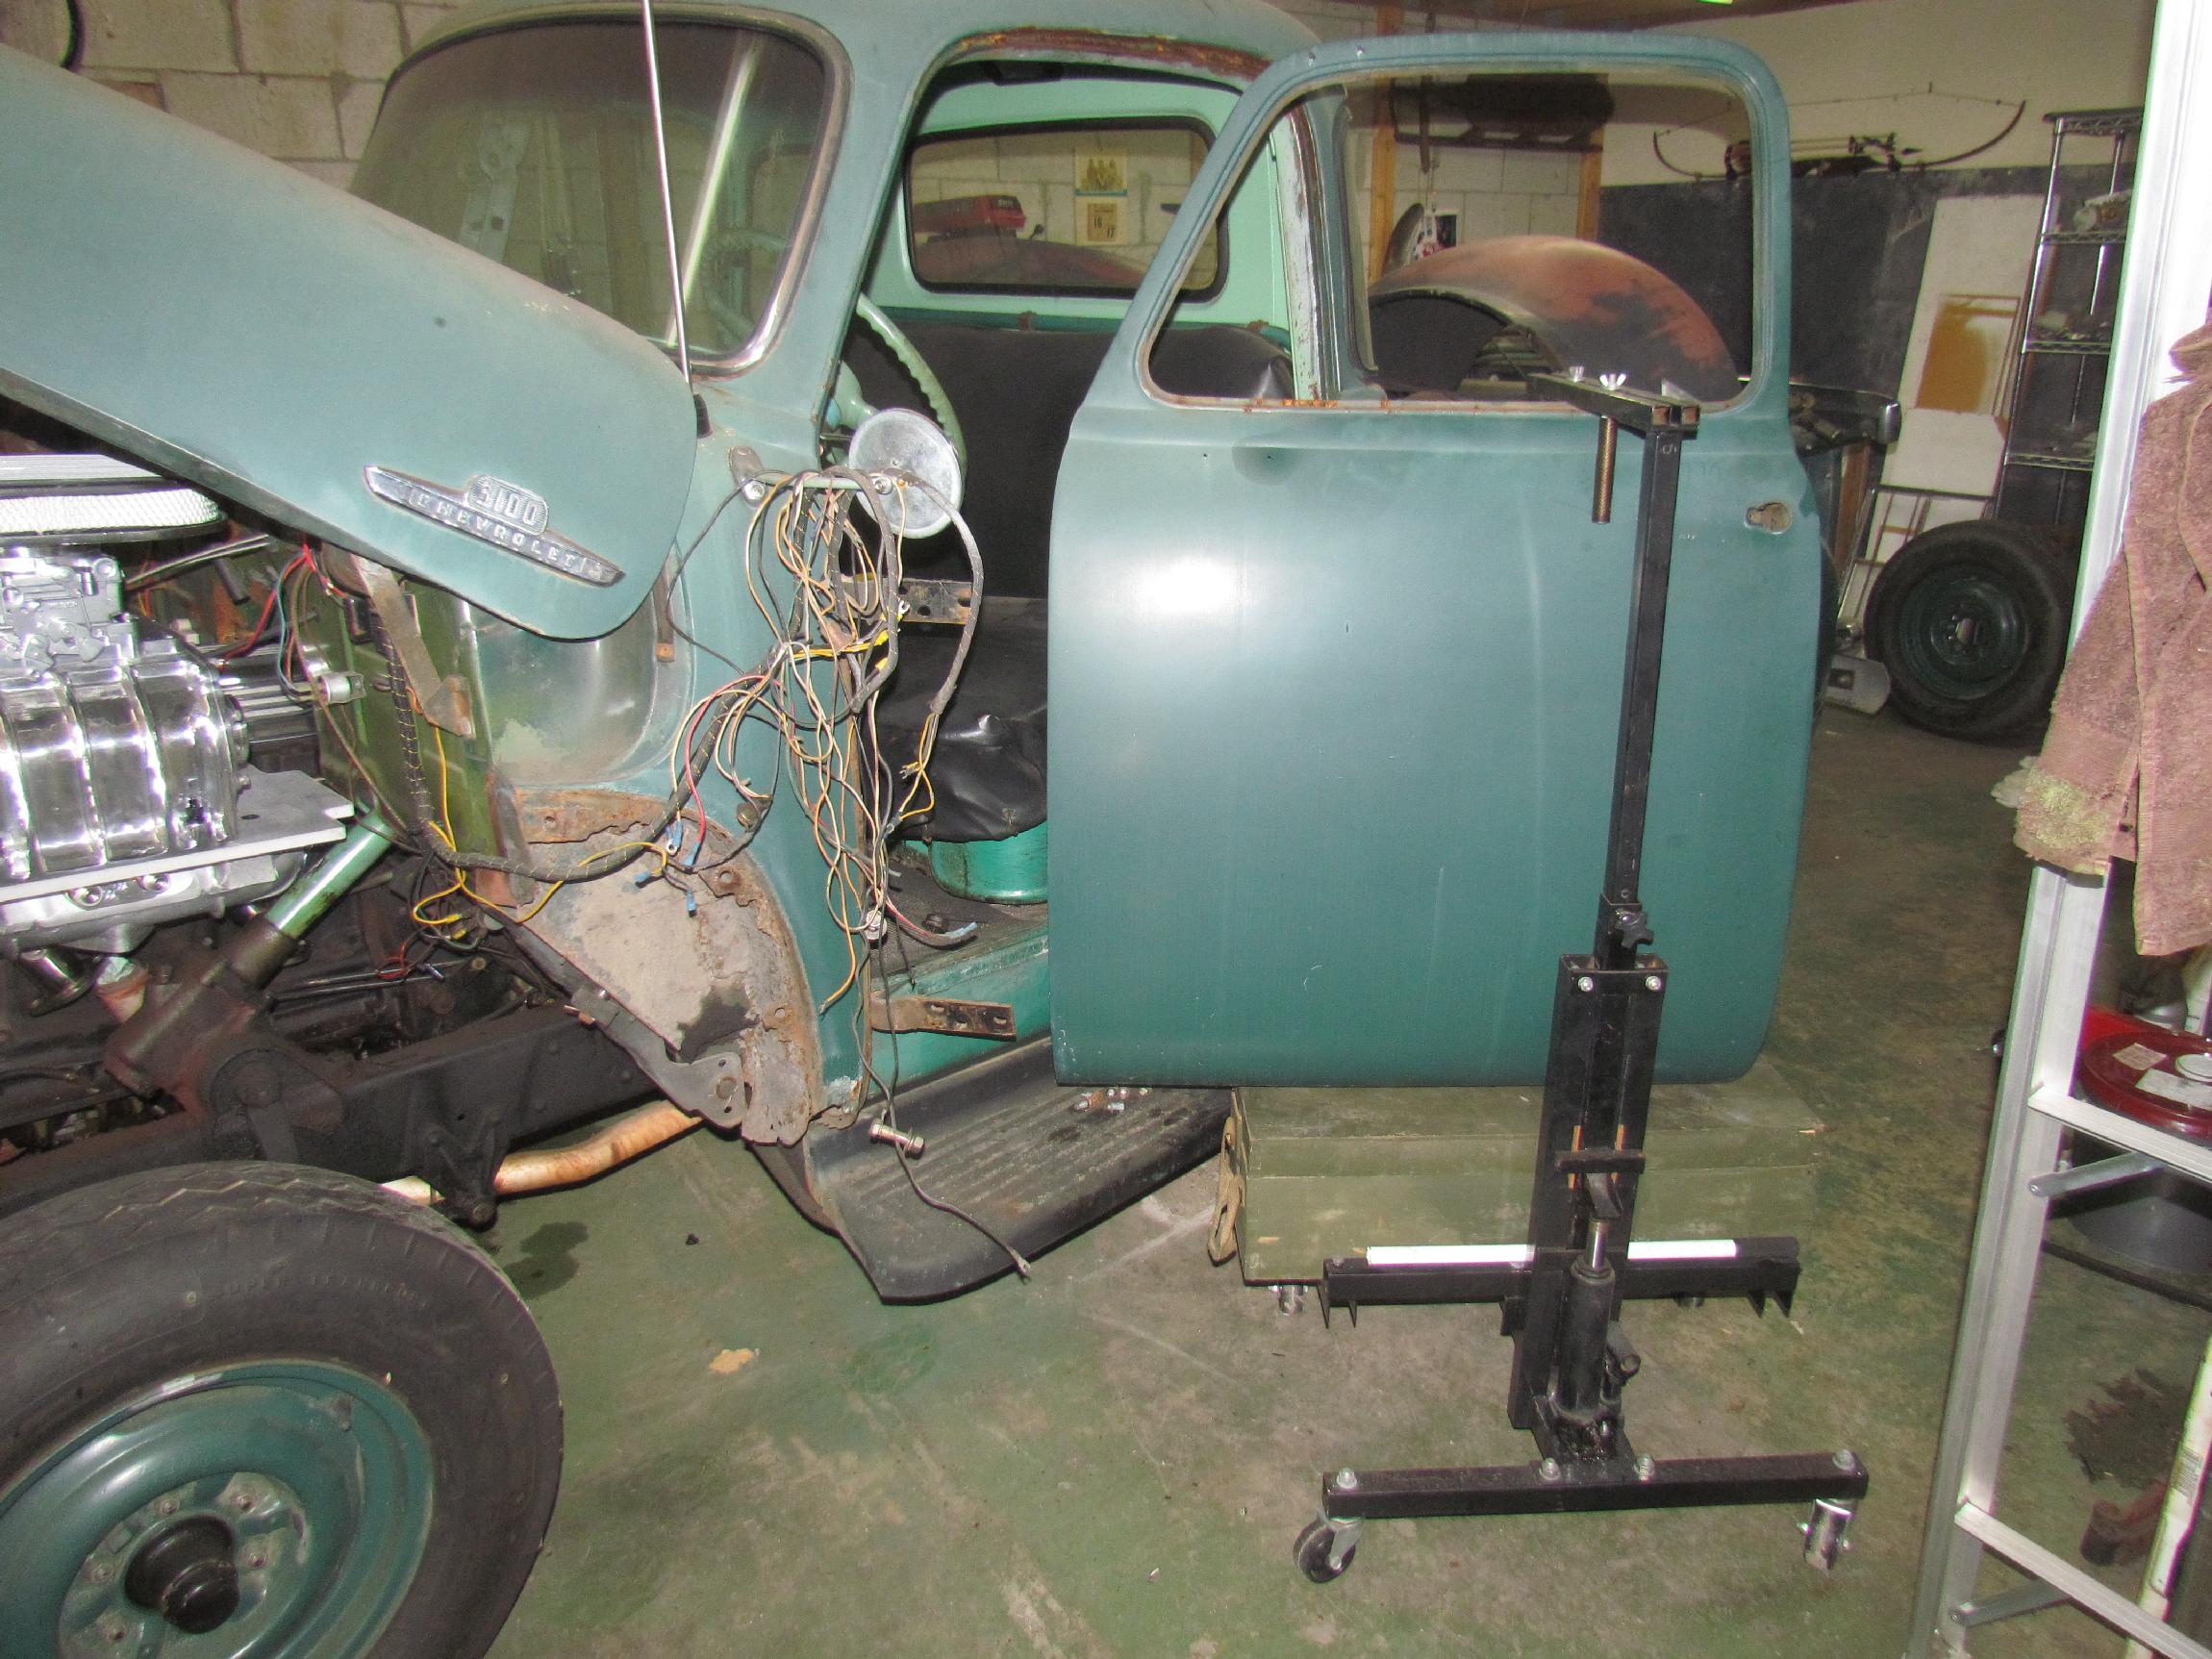 November
25th 2015 Went up to the
Boca warehouse bay first thing and retrieved my "Door Dolly". This is a
tool I found on eBay several years ago that would allow me to remove
and install car doors on my own. At a hundred bucks, the deal was too
good to resist. I finally got to use it on a door for the first time
'tho, in the past, I've used it to lift the nose off of
Deerslayer.
Being made for a car door I had to use one of my Swedish ammo boxes as
a spacer to get it up to truck door height.
November
25th 2015 Went up to the
Boca warehouse bay first thing and retrieved my "Door Dolly". This is a
tool I found on eBay several years ago that would allow me to remove
and install car doors on my own. At a hundred bucks, the deal was too
good to resist. I finally got to use it on a door for the first time
'tho, in the past, I've used it to lift the nose off of
Deerslayer.
Being made for a car door I had to use one of my Swedish ammo boxes as
a spacer to get it up to truck door height.
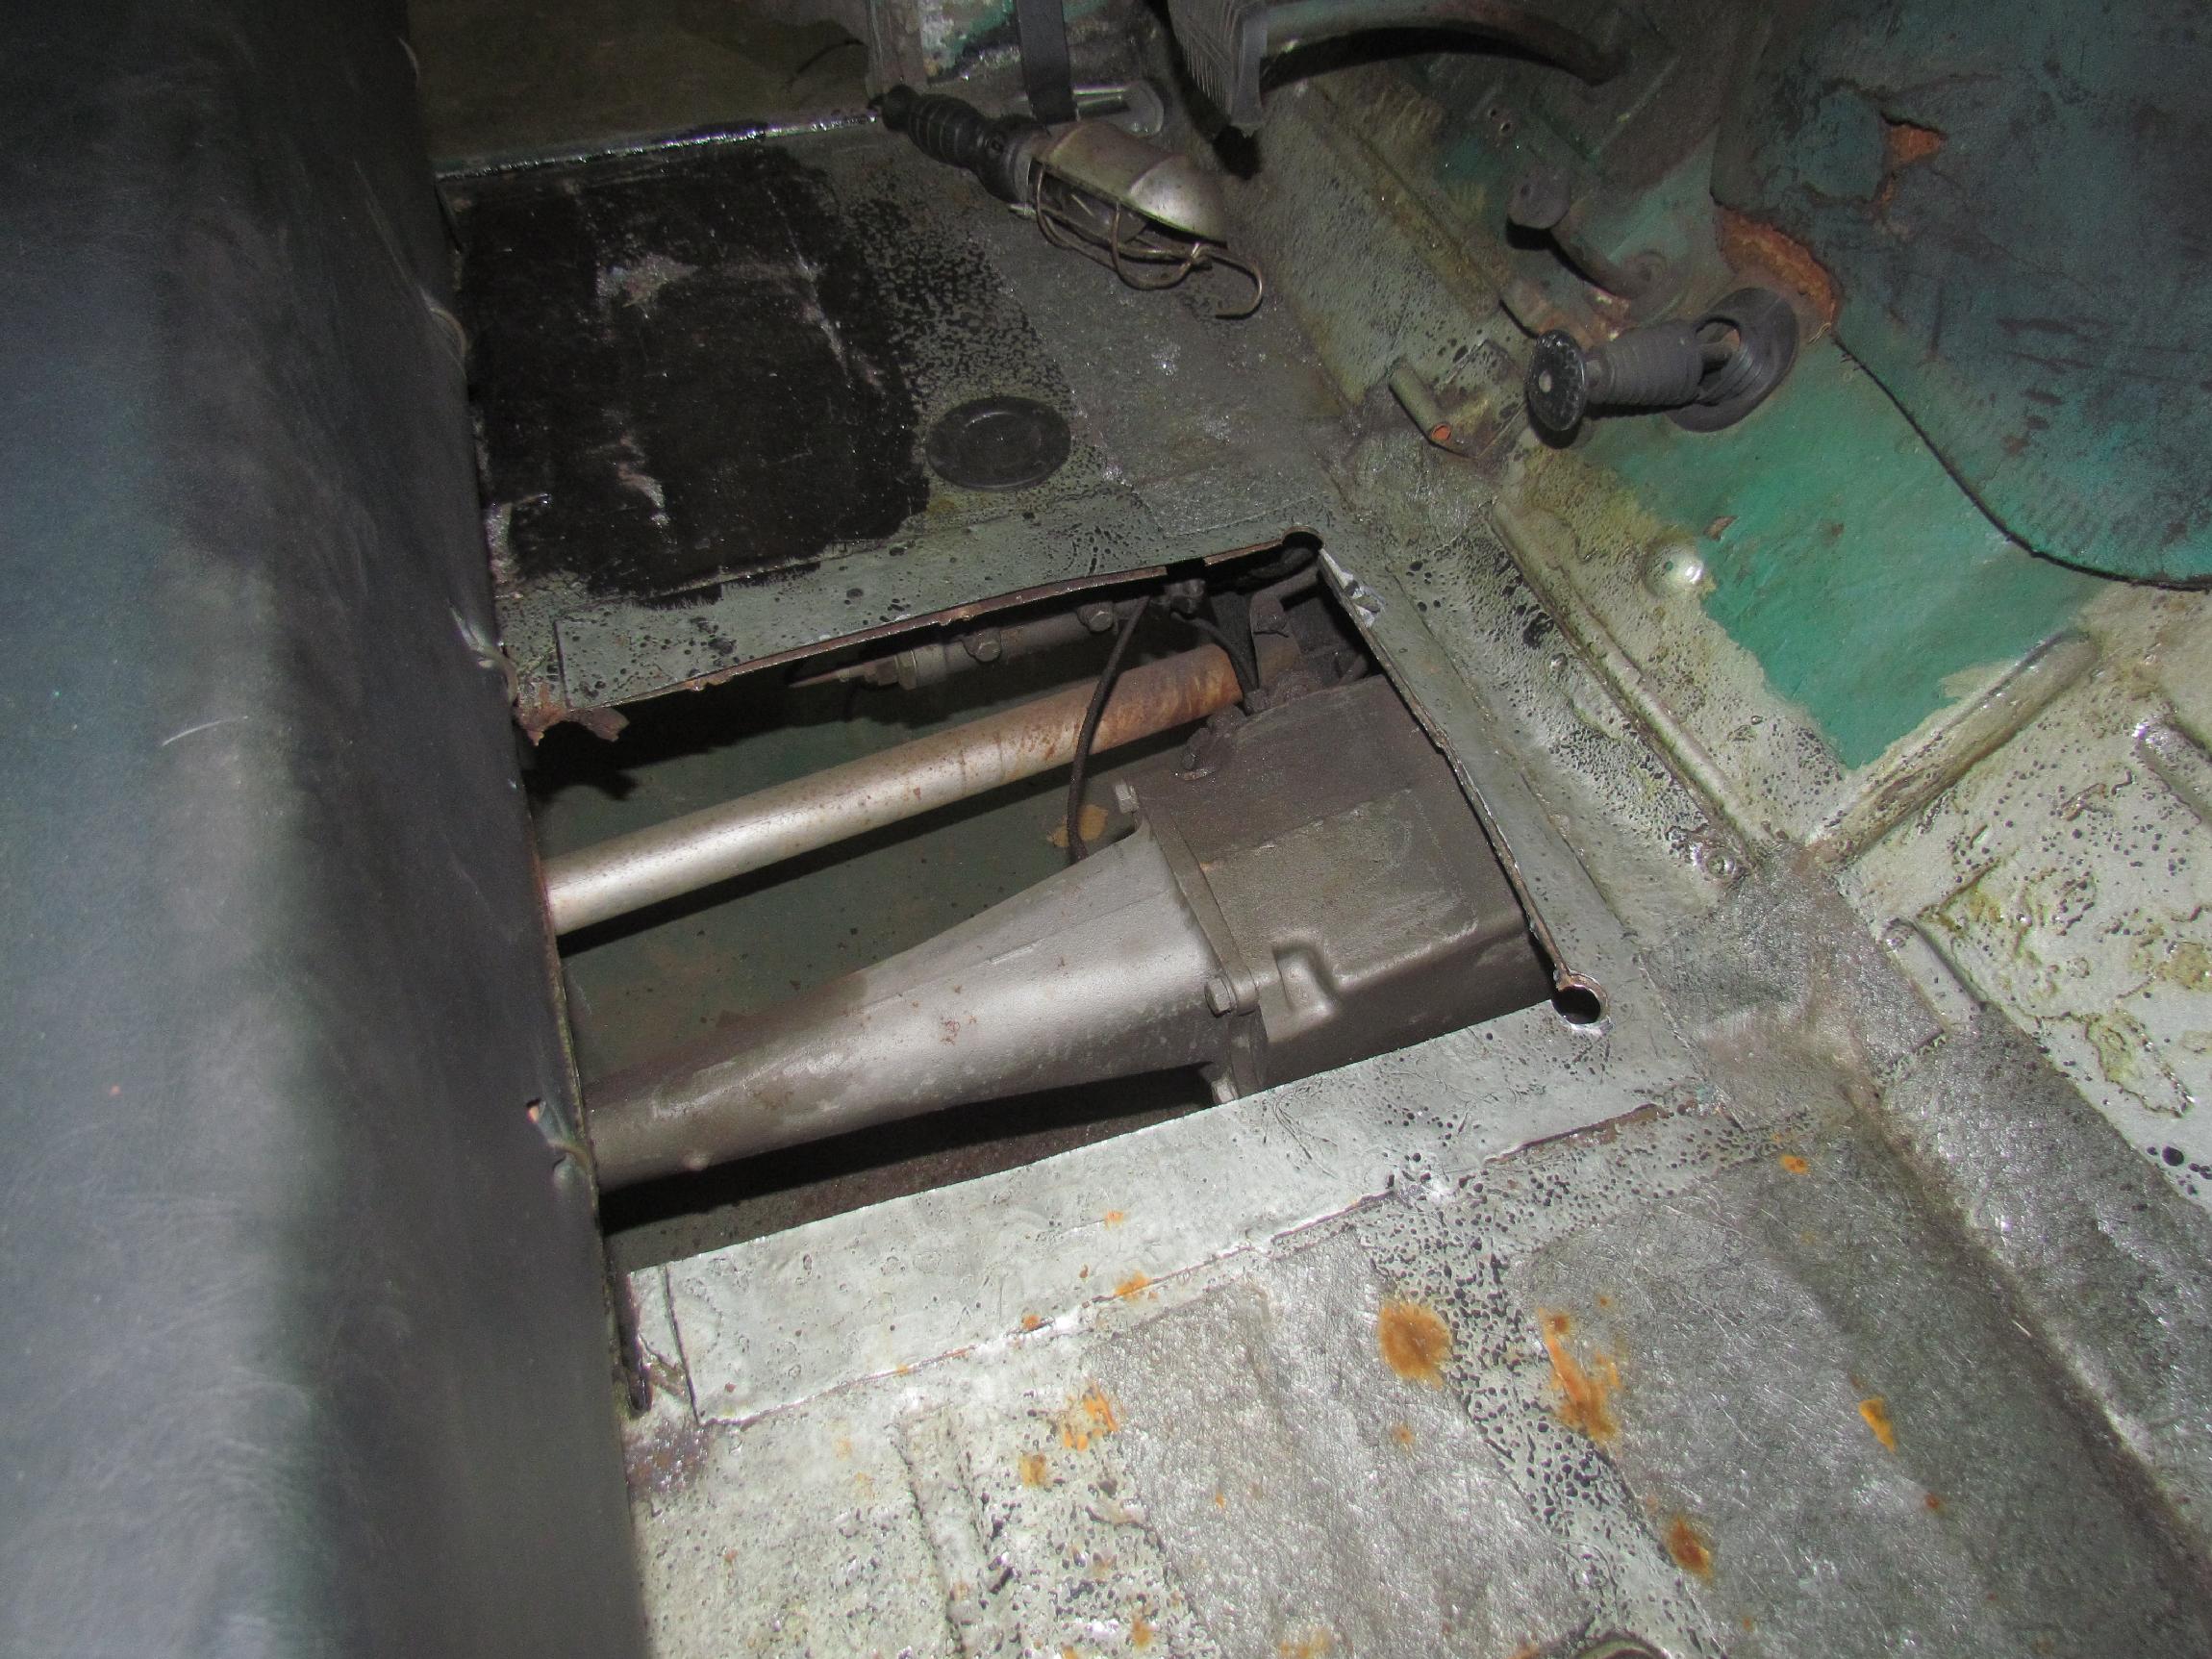 Next,
I cut a hole in the floor for mocking up the new Muncie rockcrusher.I
have a cheap plasma cutter on the way but it's not here yet so, I
struggled away with angle grinder, hole saw and sawsall technique. A
previous owner had covered the original rusty floor in this area with a
sheet of galvanized steel at some point years ago, I had added
to
that with a POR-15 and fiberglass mat kit. I eventfully got it cut but
when I tried to wrestle the piece out, it bit back and caused the only
bloodletting of the day. Then I went and found my US Cavalry gauntlets
from my counterculture days and wenched it out.
Next,
I cut a hole in the floor for mocking up the new Muncie rockcrusher.I
have a cheap plasma cutter on the way but it's not here yet so, I
struggled away with angle grinder, hole saw and sawsall technique. A
previous owner had covered the original rusty floor in this area with a
sheet of galvanized steel at some point years ago, I had added
to
that with a POR-15 and fiberglass mat kit. I eventfully got it cut but
when I tried to wrestle the piece out, it bit back and caused the only
bloodletting of the day. Then I went and found my US Cavalry gauntlets
from my counterculture days and wenched it out.
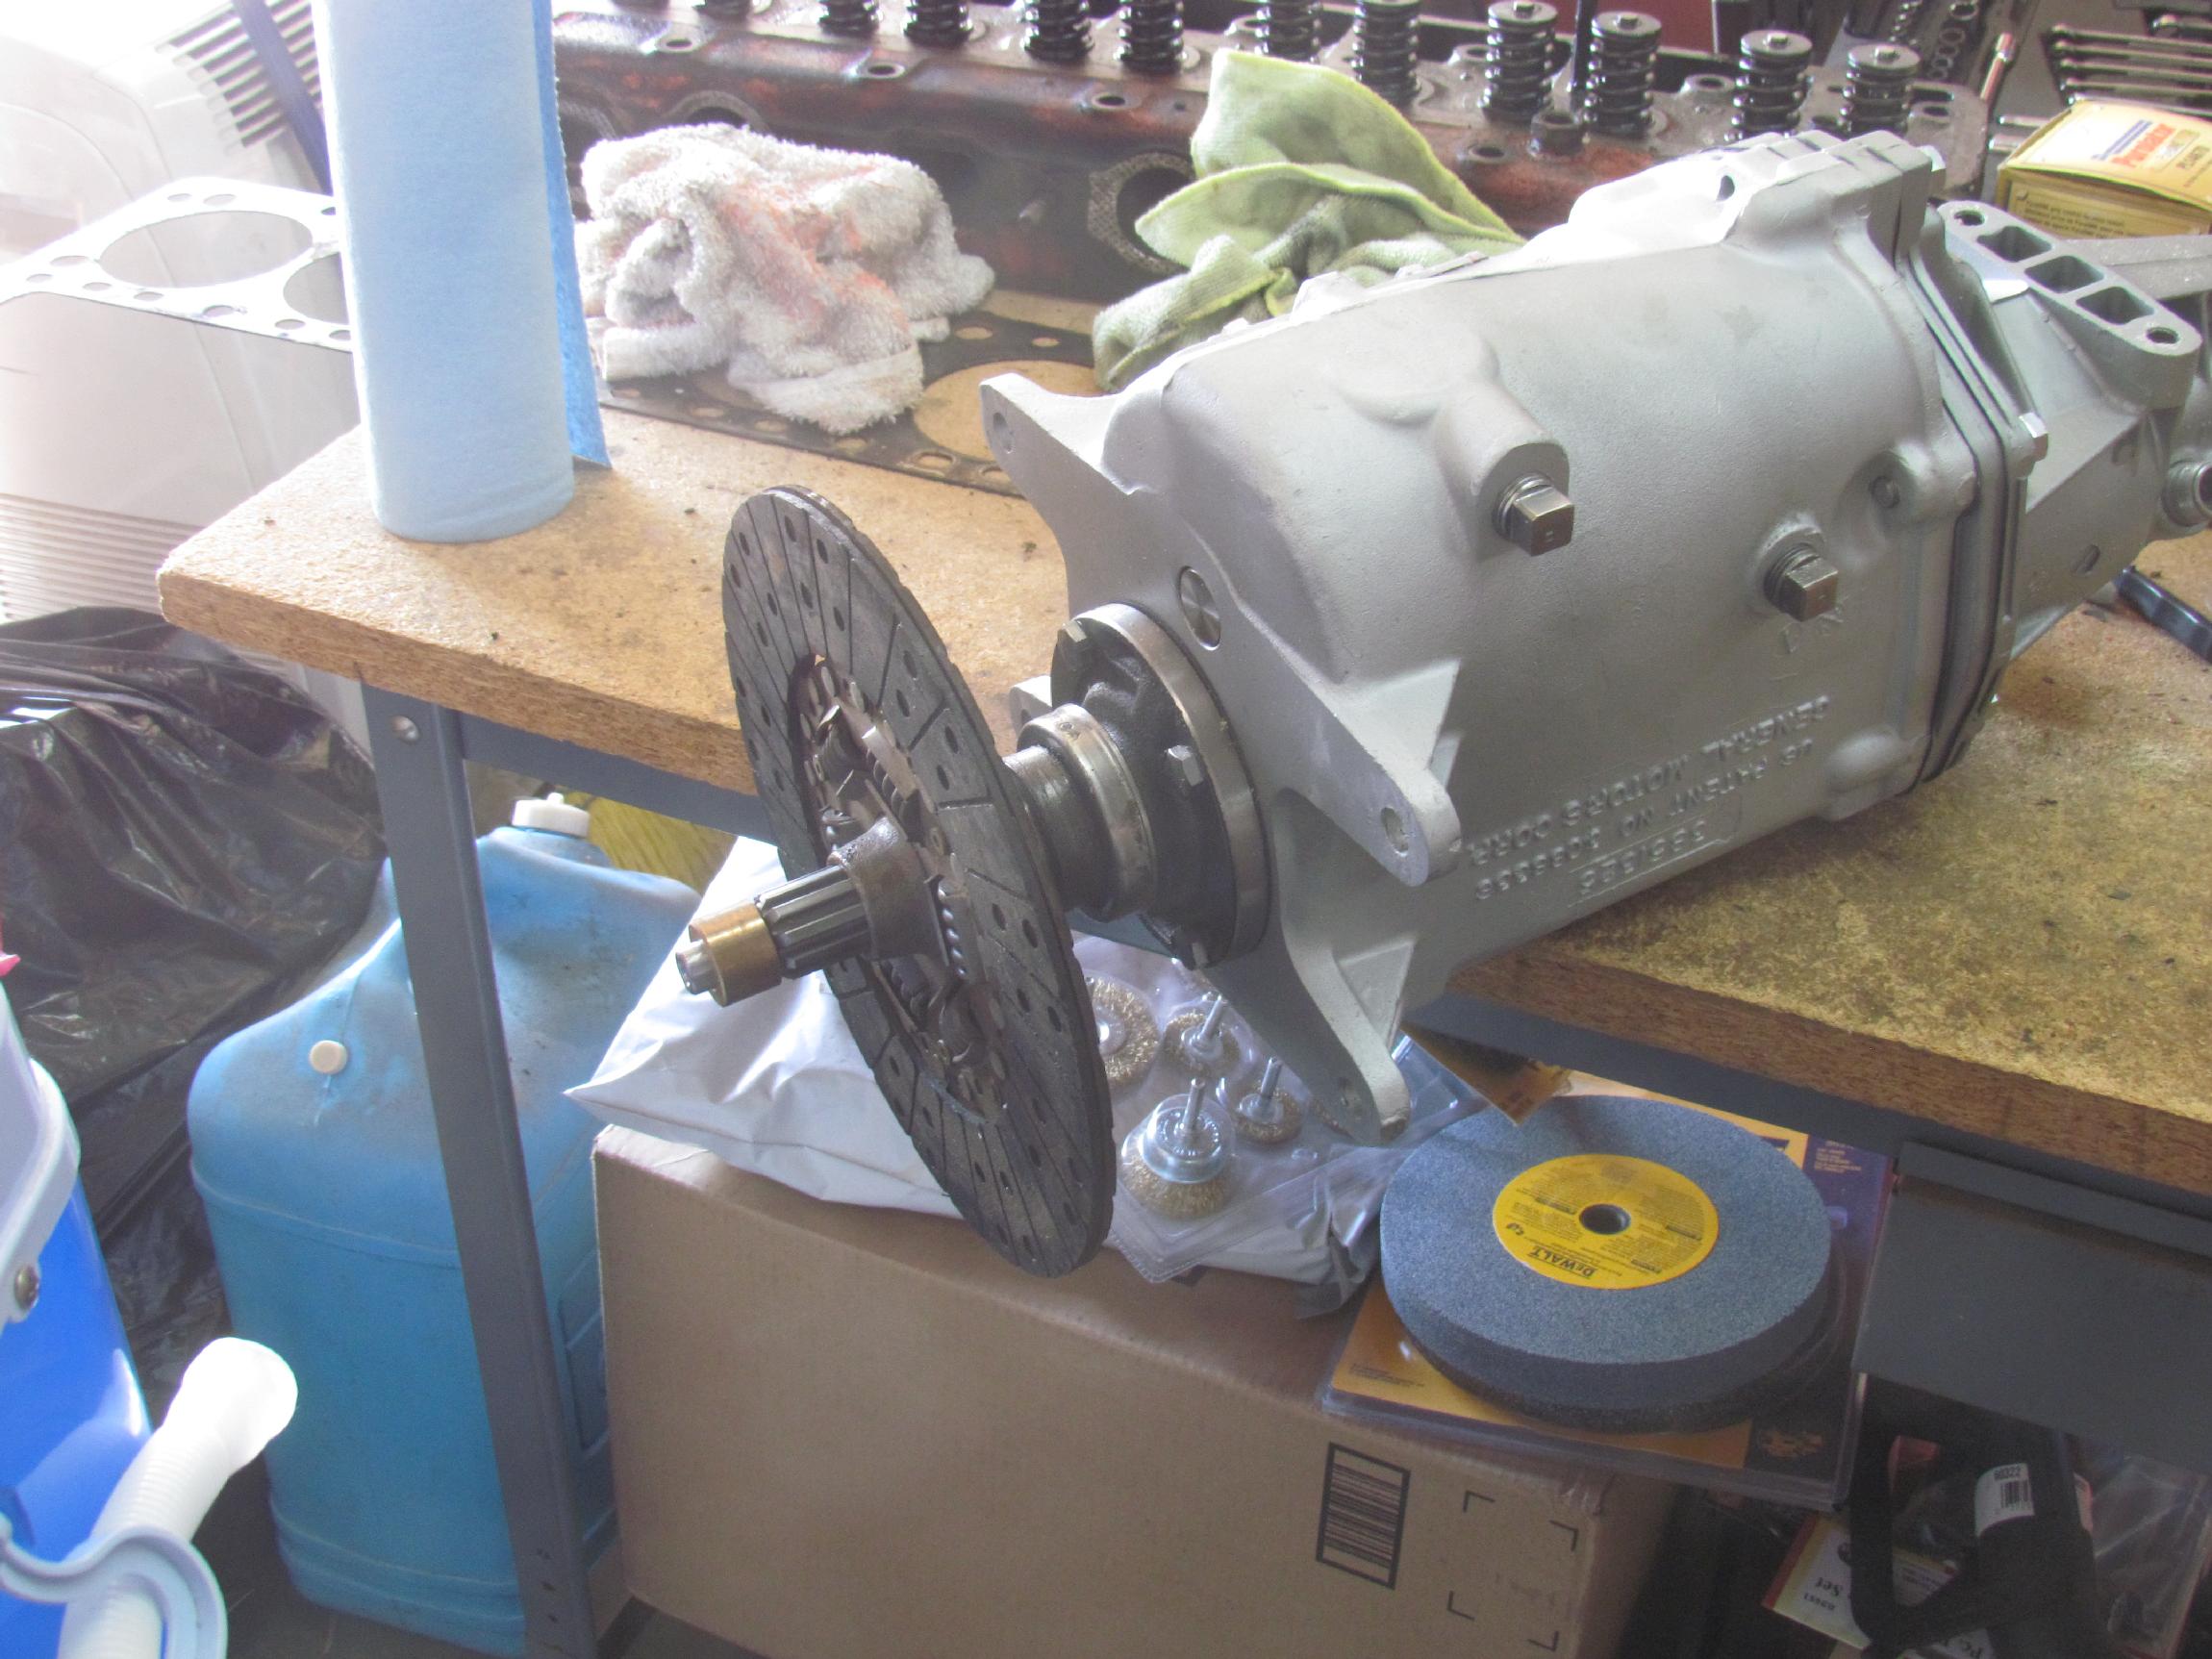 Got
the Muncie M22 four-speed out of its packing and up on the workbench. I
have a spare clutch for BillyBob that Greg Hill gave me at the
Hutchinson truck show in 2008.I wanted to find out if the rockcrusher
was going to fit up to BillyBob before actually crawling under the
truck and cursing it into place. The throwout bearing, friction plate
and pilot bearing from the spare clutch all fit the snout of the M22.
Good! I won't have to remove the clutch for the fit up. I will compare
the lengths of the snout components with the original three-speed when
it comes out and, if they're the same, Bob's your uncle.
Got
the Muncie M22 four-speed out of its packing and up on the workbench. I
have a spare clutch for BillyBob that Greg Hill gave me at the
Hutchinson truck show in 2008.I wanted to find out if the rockcrusher
was going to fit up to BillyBob before actually crawling under the
truck and cursing it into place. The throwout bearing, friction plate
and pilot bearing from the spare clutch all fit the snout of the M22.
Good! I won't have to remove the clutch for the fit up. I will compare
the lengths of the snout components with the original three-speed when
it comes out and, if they're the same, Bob's your uncle.
 November
28th 2015 More than one
guy on various hot rod forums commented that my idler pulley
arrangement was a no-no. It was a bad idea to have the idler pulley on
the "driven side" of the belt. After I thought about it, I too, saw it
as a bad idea. Moving it to the return side of the belt but still
inside brought the belt within 3/8" of the water pump pulley so I moved
it to the outside of the return side of the belt. That should work okay.
November
28th 2015 More than one
guy on various hot rod forums commented that my idler pulley
arrangement was a no-no. It was a bad idea to have the idler pulley on
the "driven side" of the belt. After I thought about it, I too, saw it
as a bad idea. Moving it to the return side of the belt but still
inside brought the belt within 3/8" of the water pump pulley so I moved
it to the outside of the return side of the belt. That should work okay.
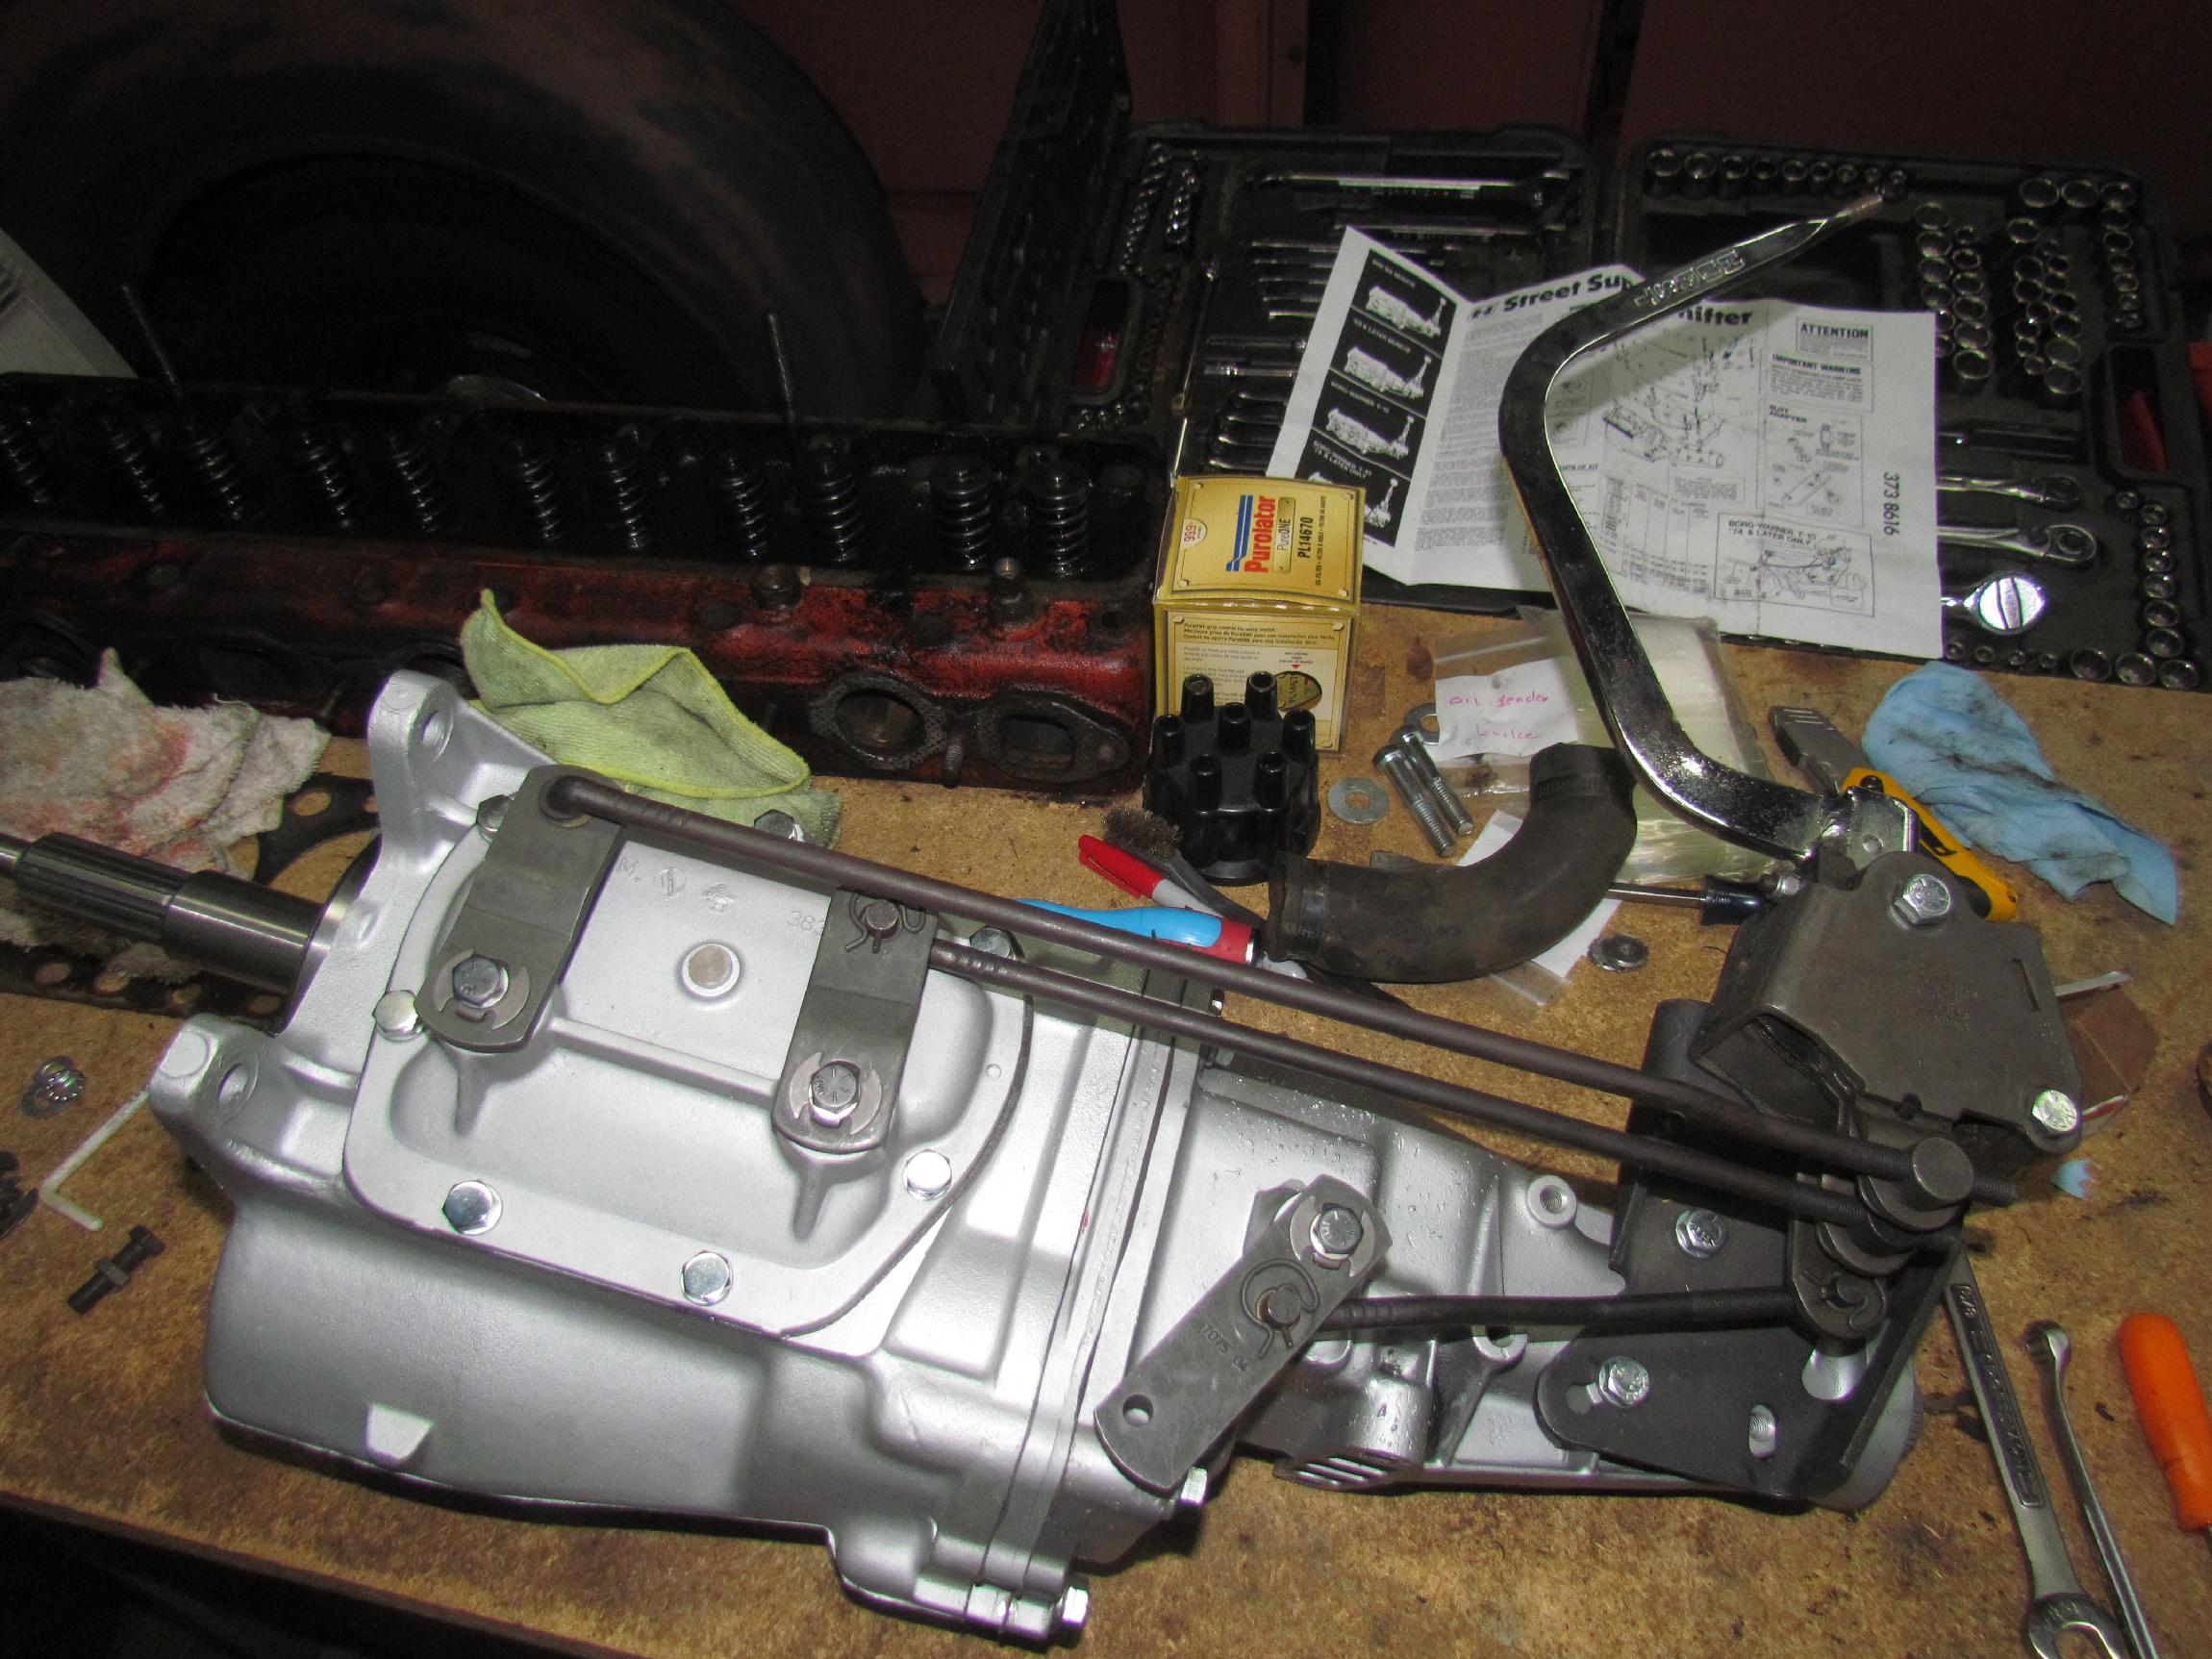 Got
a "bench seat" Hurst four-speed shifter from an eBay seller and a
four-speed installation kit (levers, rods, bushings, etc) from Speedway
Motors, also thru eBay. Mocked that up and adjusted the rods. This kit
is for four different trannys so it took awhile to cipher it out. The
instructions for all four situations are on the same sheet so the fine
print matches that on a prescription drug bottle. That is, unreadable
for these Mark I eyes. I watched a Youtube video of this operation a
couple of times and got it done without resorting to a magnifying glass
to read the instructions.
Got
a "bench seat" Hurst four-speed shifter from an eBay seller and a
four-speed installation kit (levers, rods, bushings, etc) from Speedway
Motors, also thru eBay. Mocked that up and adjusted the rods. This kit
is for four different trannys so it took awhile to cipher it out. The
instructions for all four situations are on the same sheet so the fine
print matches that on a prescription drug bottle. That is, unreadable
for these Mark I eyes. I watched a Youtube video of this operation a
couple of times and got it done without resorting to a magnifying glass
to read the instructions.
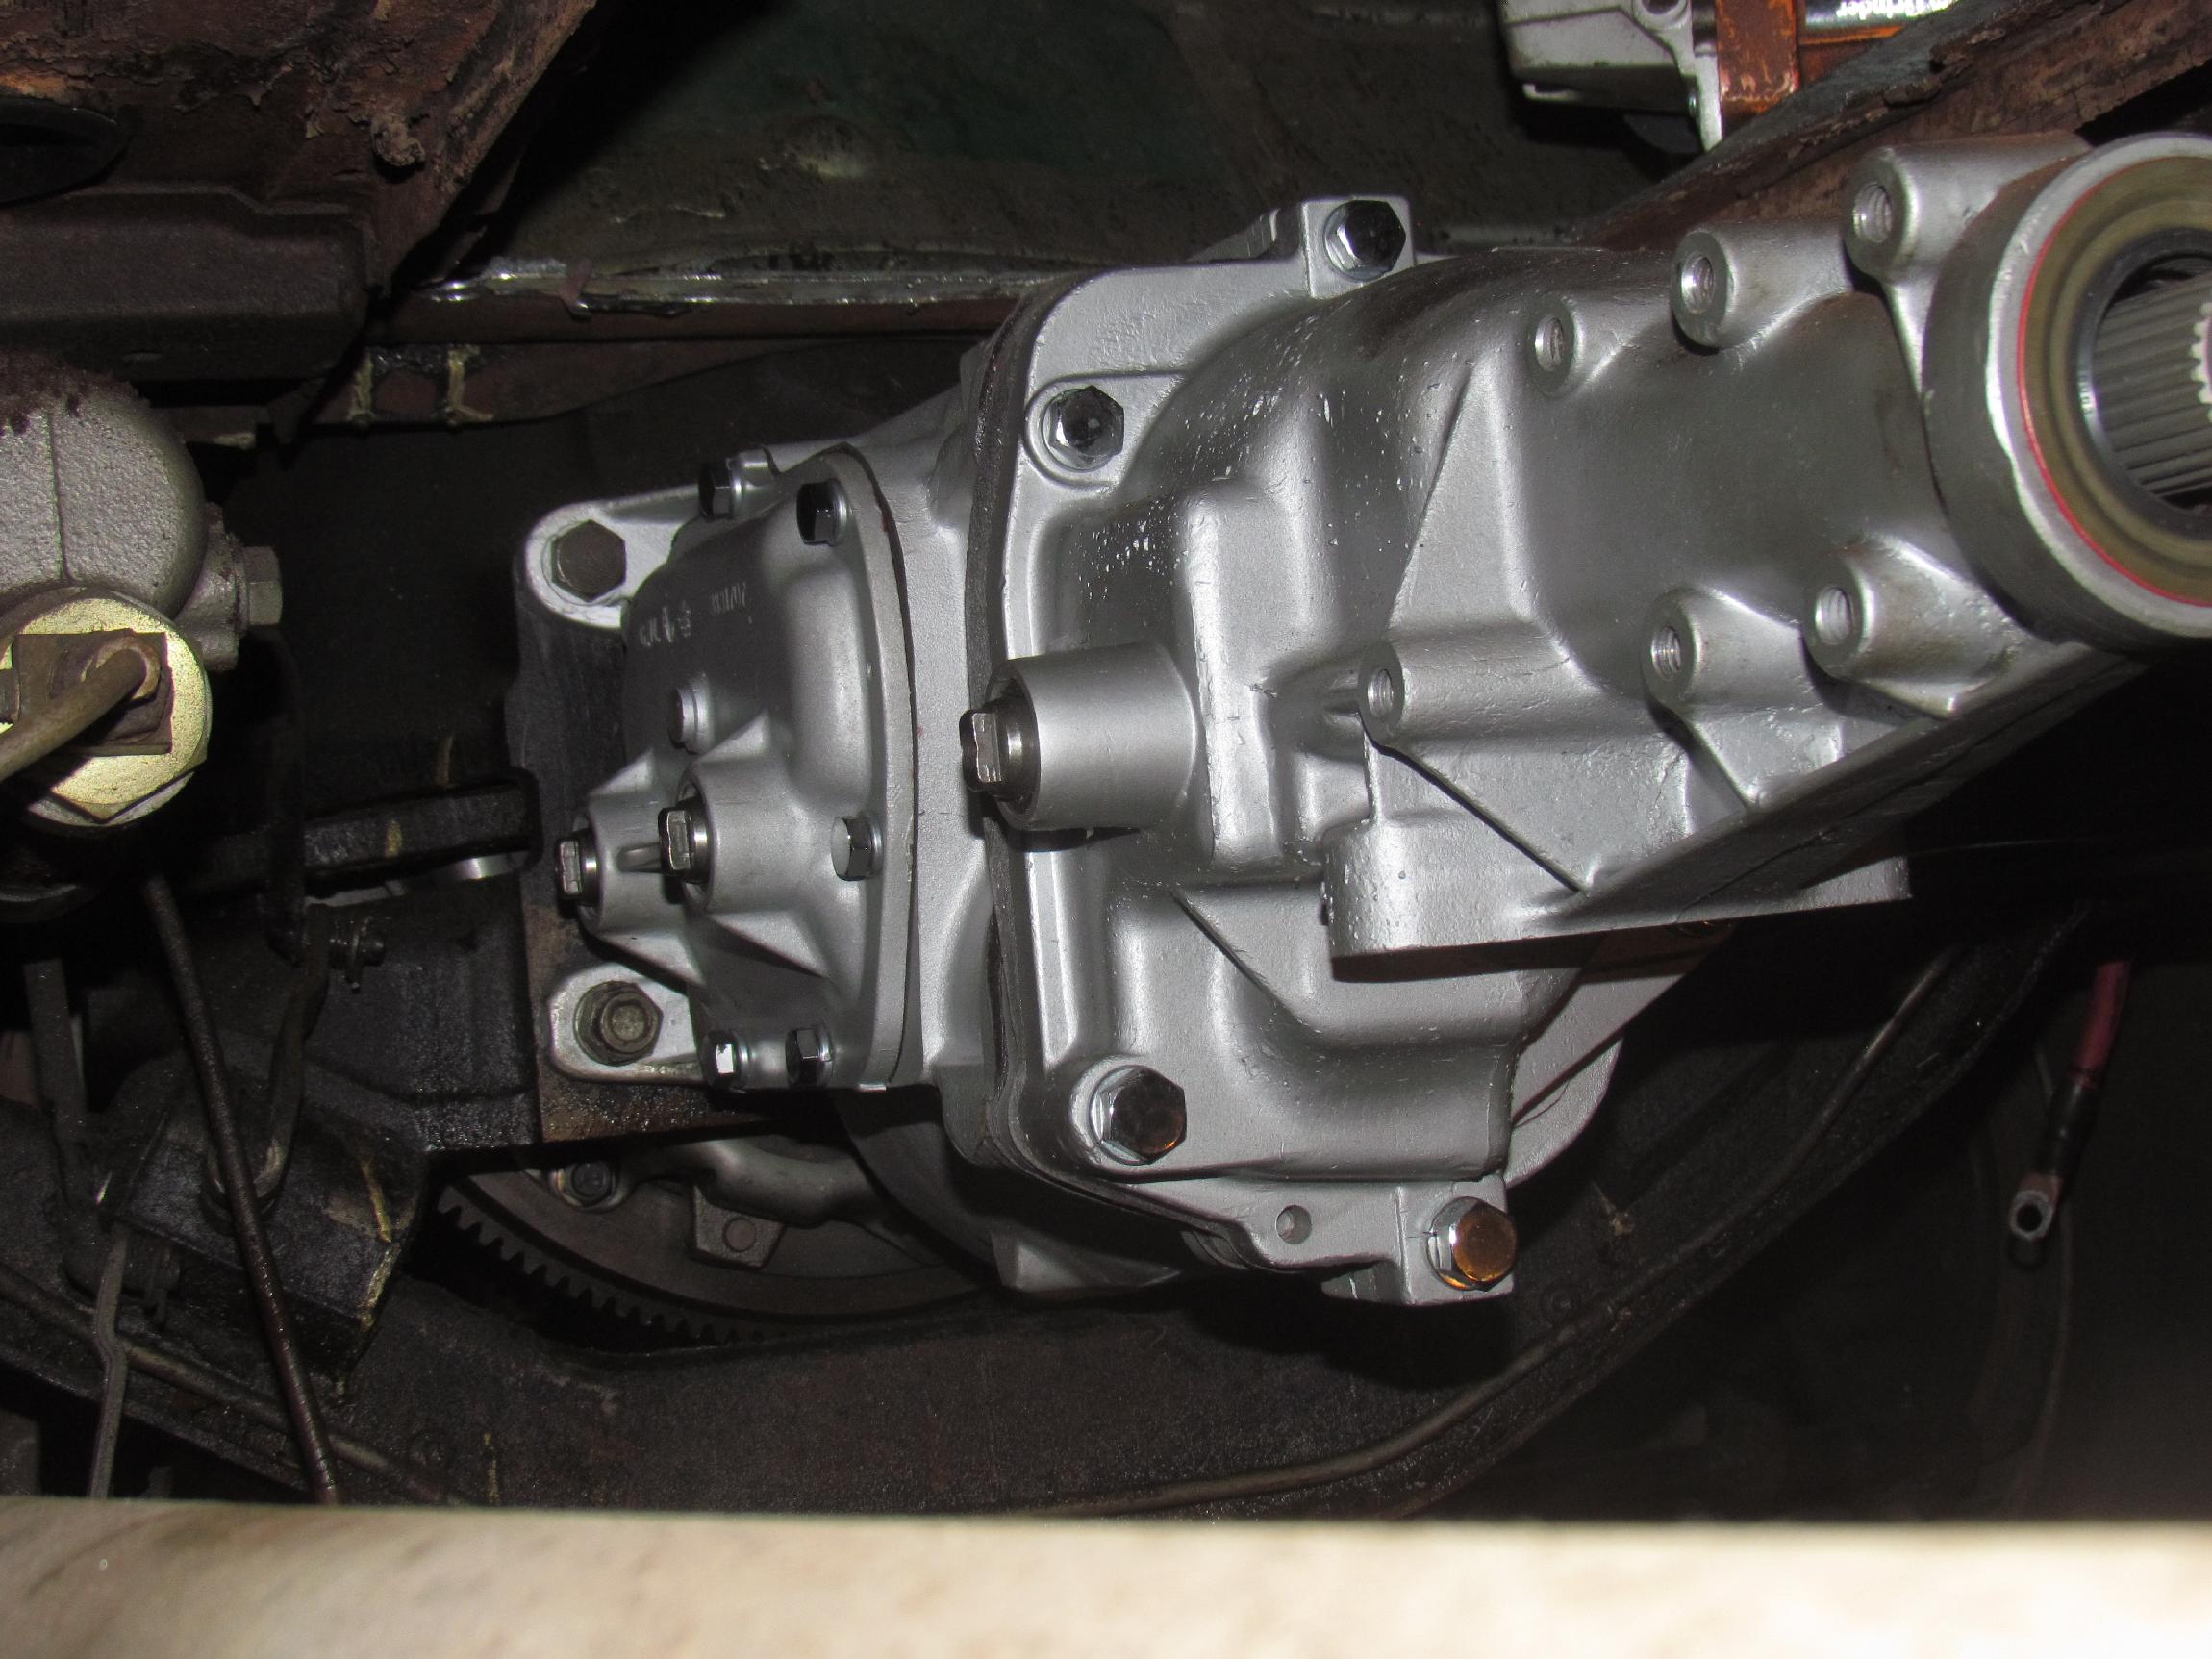 December
5th 2015 Pulled
BillyBob's three speed and fitted up the rockcrusher. I thought the
four speed's bearing retainer might be too big in diameter to fit the
truck bellhousing so I pulled it off to fit the three speed retainer. I
put the two bearing retainers face-to-face and their diameters looked
to be the same. There didn't seem to be a RCH of difference
between them so, I took the M22 retainer over to the truck and fitted
it against to bellhousing hole. It was good to go. Put the M22 retainer
back on the four speed and got it under the truck on my tranny jack. It
fit like a glove. The hurst shifter, not so much. A pocket will have to
be cut into the seat base to accommodate it.
December
5th 2015 Pulled
BillyBob's three speed and fitted up the rockcrusher. I thought the
four speed's bearing retainer might be too big in diameter to fit the
truck bellhousing so I pulled it off to fit the three speed retainer. I
put the two bearing retainers face-to-face and their diameters looked
to be the same. There didn't seem to be a RCH of difference
between them so, I took the M22 retainer over to the truck and fitted
it against to bellhousing hole. It was good to go. Put the M22 retainer
back on the four speed and got it under the truck on my tranny jack. It
fit like a glove. The hurst shifter, not so much. A pocket will have to
be cut into the seat base to accommodate it.
 March
8th 2016 At
a car show a few months back, I was talking with a couple of friends,
Matt and racer Rick, both of whom have carbureted blower rides and they
were relating vapor lock problems with ethanol pump gas.
Both have moved on to more exotic fuel. In an effort to avoid
that, I've added a 1" phenolic carb insulator to isolate the carb some
from the heat of the roots blower. The fly in the buttermilk tho' is
that this wedding cake is now too high to fit under the hood. A
modified hood is in my future.
March
8th 2016 At
a car show a few months back, I was talking with a couple of friends,
Matt and racer Rick, both of whom have carbureted blower rides and they
were relating vapor lock problems with ethanol pump gas.
Both have moved on to more exotic fuel. In an effort to avoid
that, I've added a 1" phenolic carb insulator to isolate the carb some
from the heat of the roots blower. The fly in the buttermilk tho' is
that this wedding cake is now too high to fit under the hood. A
modified hood is in my future.
 March
11th 2016 Wednesday
at the BillyBob Shop started out bad and went downhill from there. Woke
up late. Then, when I came back from grocery shopping, I managed to
knock a model plane off a high shelf while taking off my coat. It broke
into several pieces when it hit the tile floor. My Dad made the model
so I'll be gluing it back together. Then, the office called and I had
to travel up to the Krash Lab to troubleshoot and restore their
intarweb connection. I'm slightly superstitious and when I got back to
the BillyBob Shop, I decided it was a bad day to use power tools .
Looked like it might be turning into a character building day and I
took the easy way out and hunkered down.
March
11th 2016 Wednesday
at the BillyBob Shop started out bad and went downhill from there. Woke
up late. Then, when I came back from grocery shopping, I managed to
knock a model plane off a high shelf while taking off my coat. It broke
into several pieces when it hit the tile floor. My Dad made the model
so I'll be gluing it back together. Then, the office called and I had
to travel up to the Krash Lab to troubleshoot and restore their
intarweb connection. I'm slightly superstitious and when I got back to
the BillyBob Shop, I decided it was a bad day to use power tools .
Looked like it might be turning into a character building day and I
took the easy way out and hunkered down.
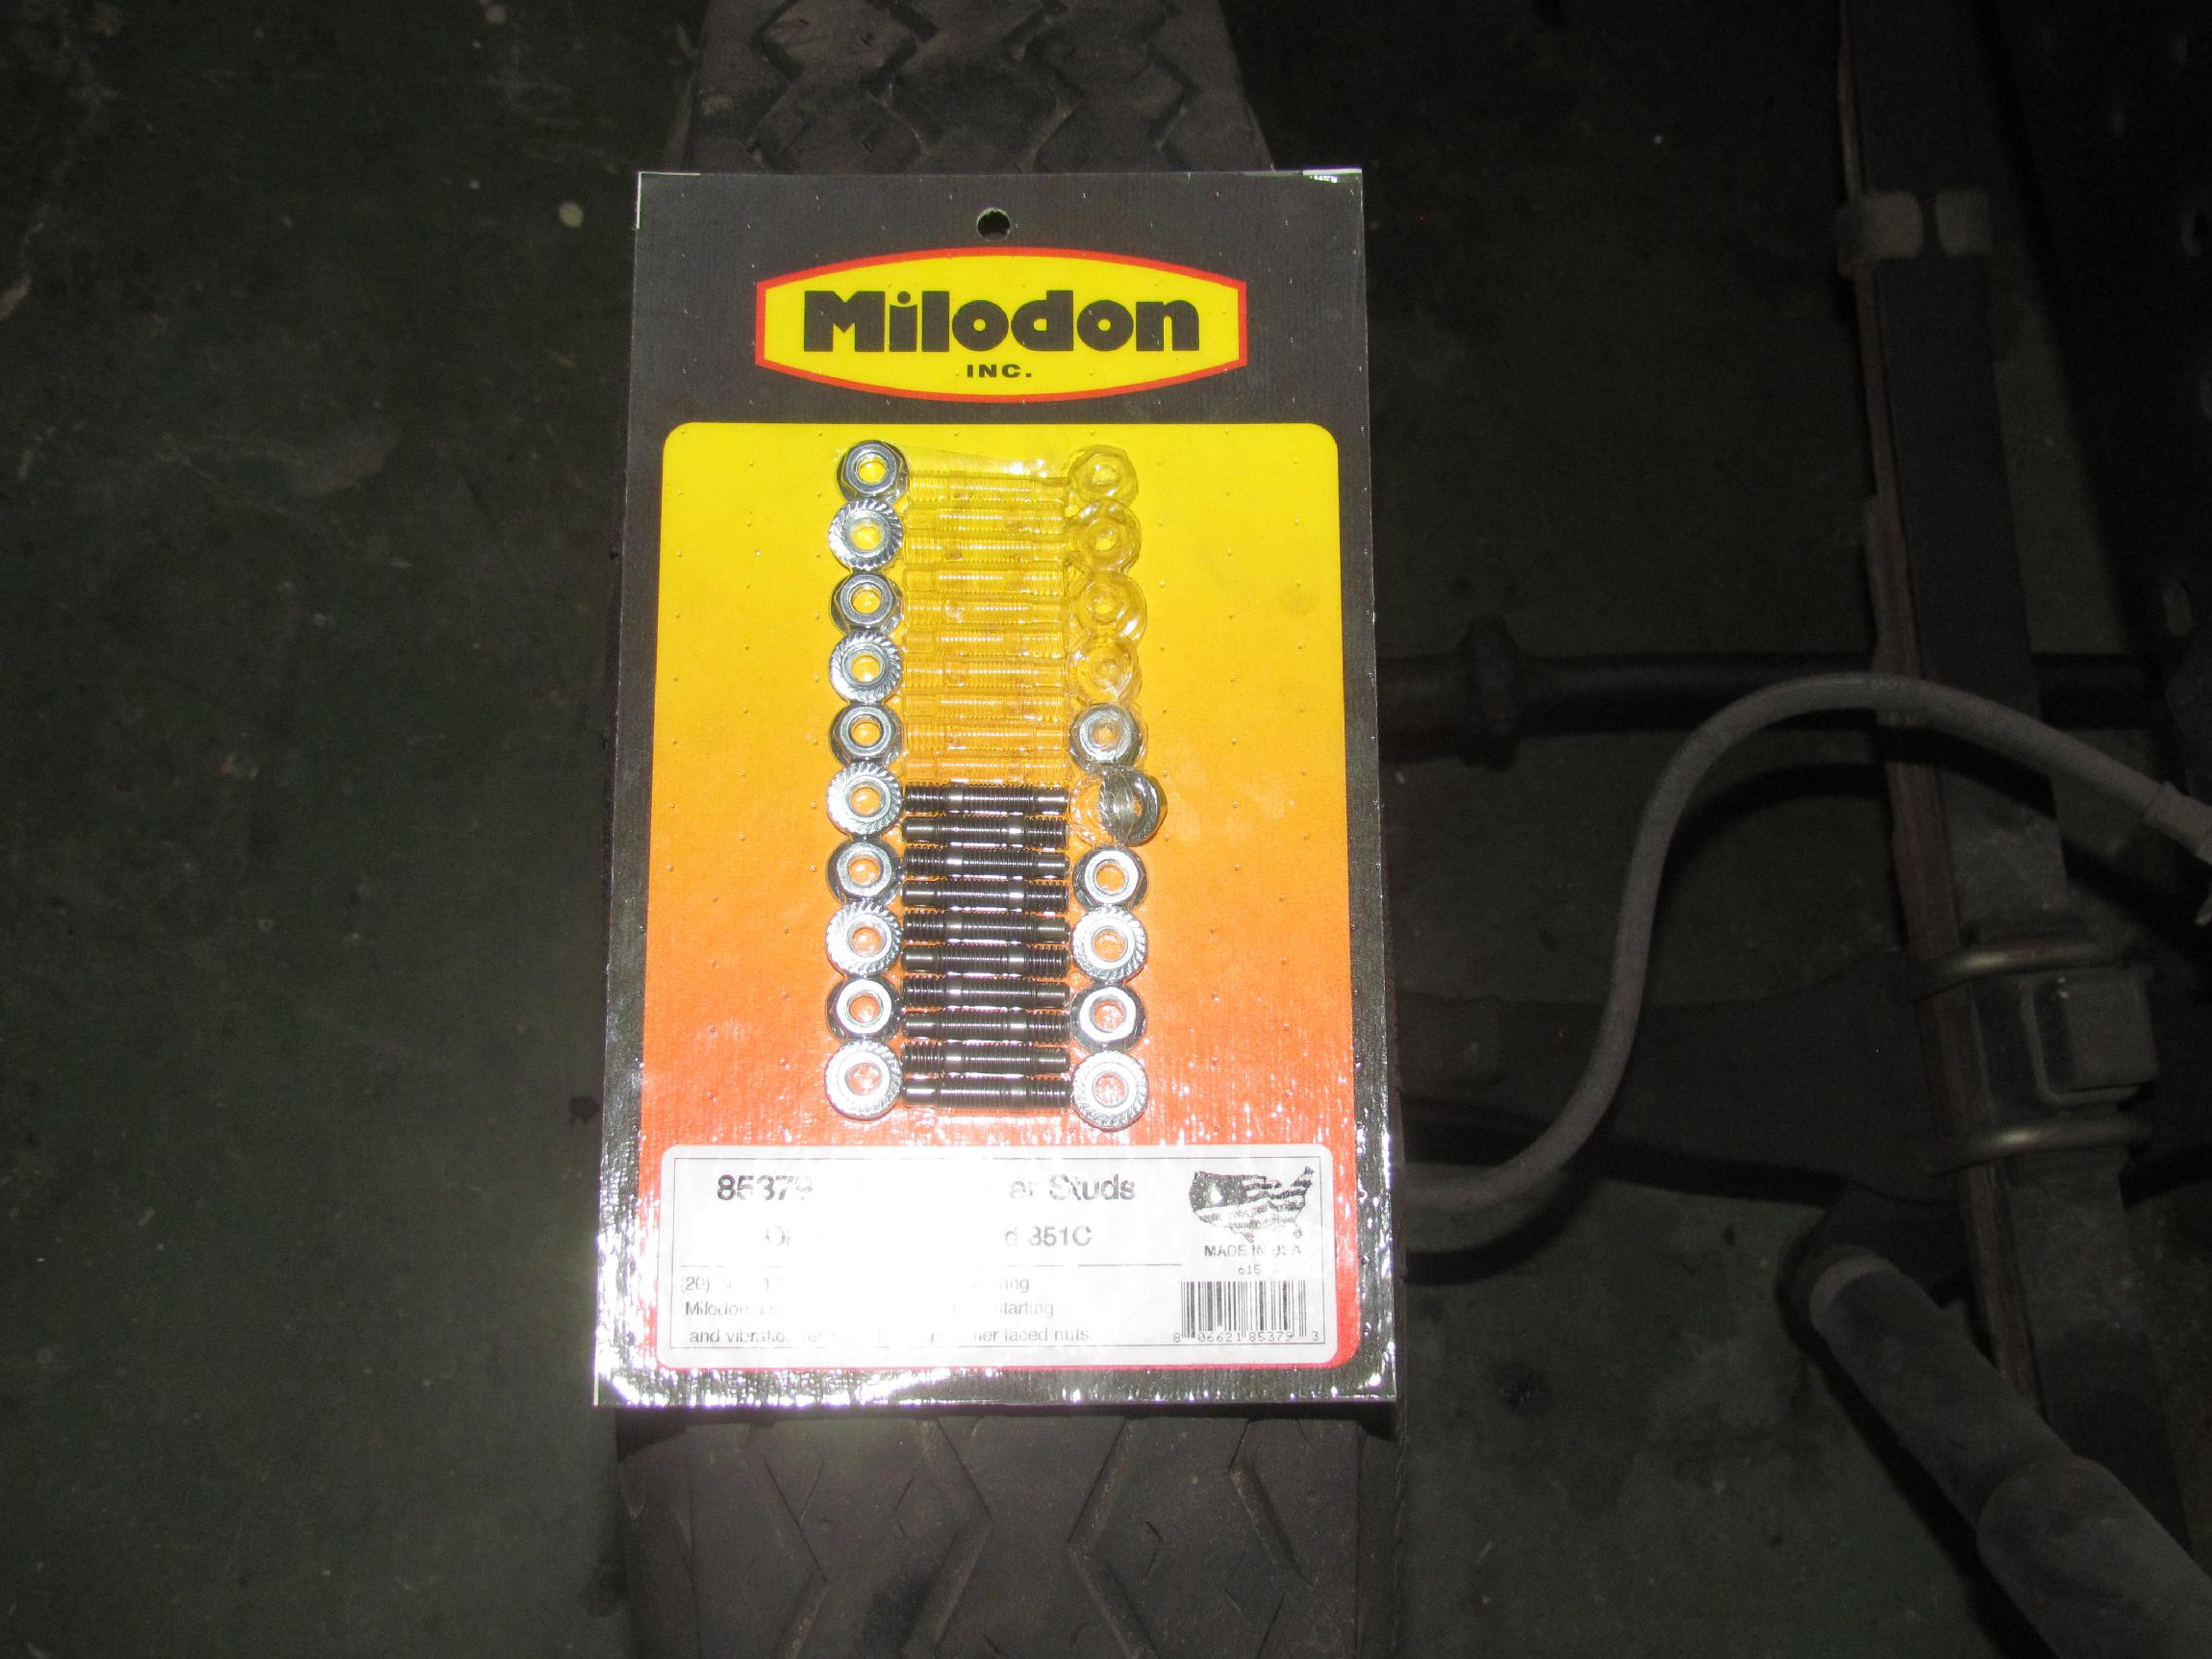
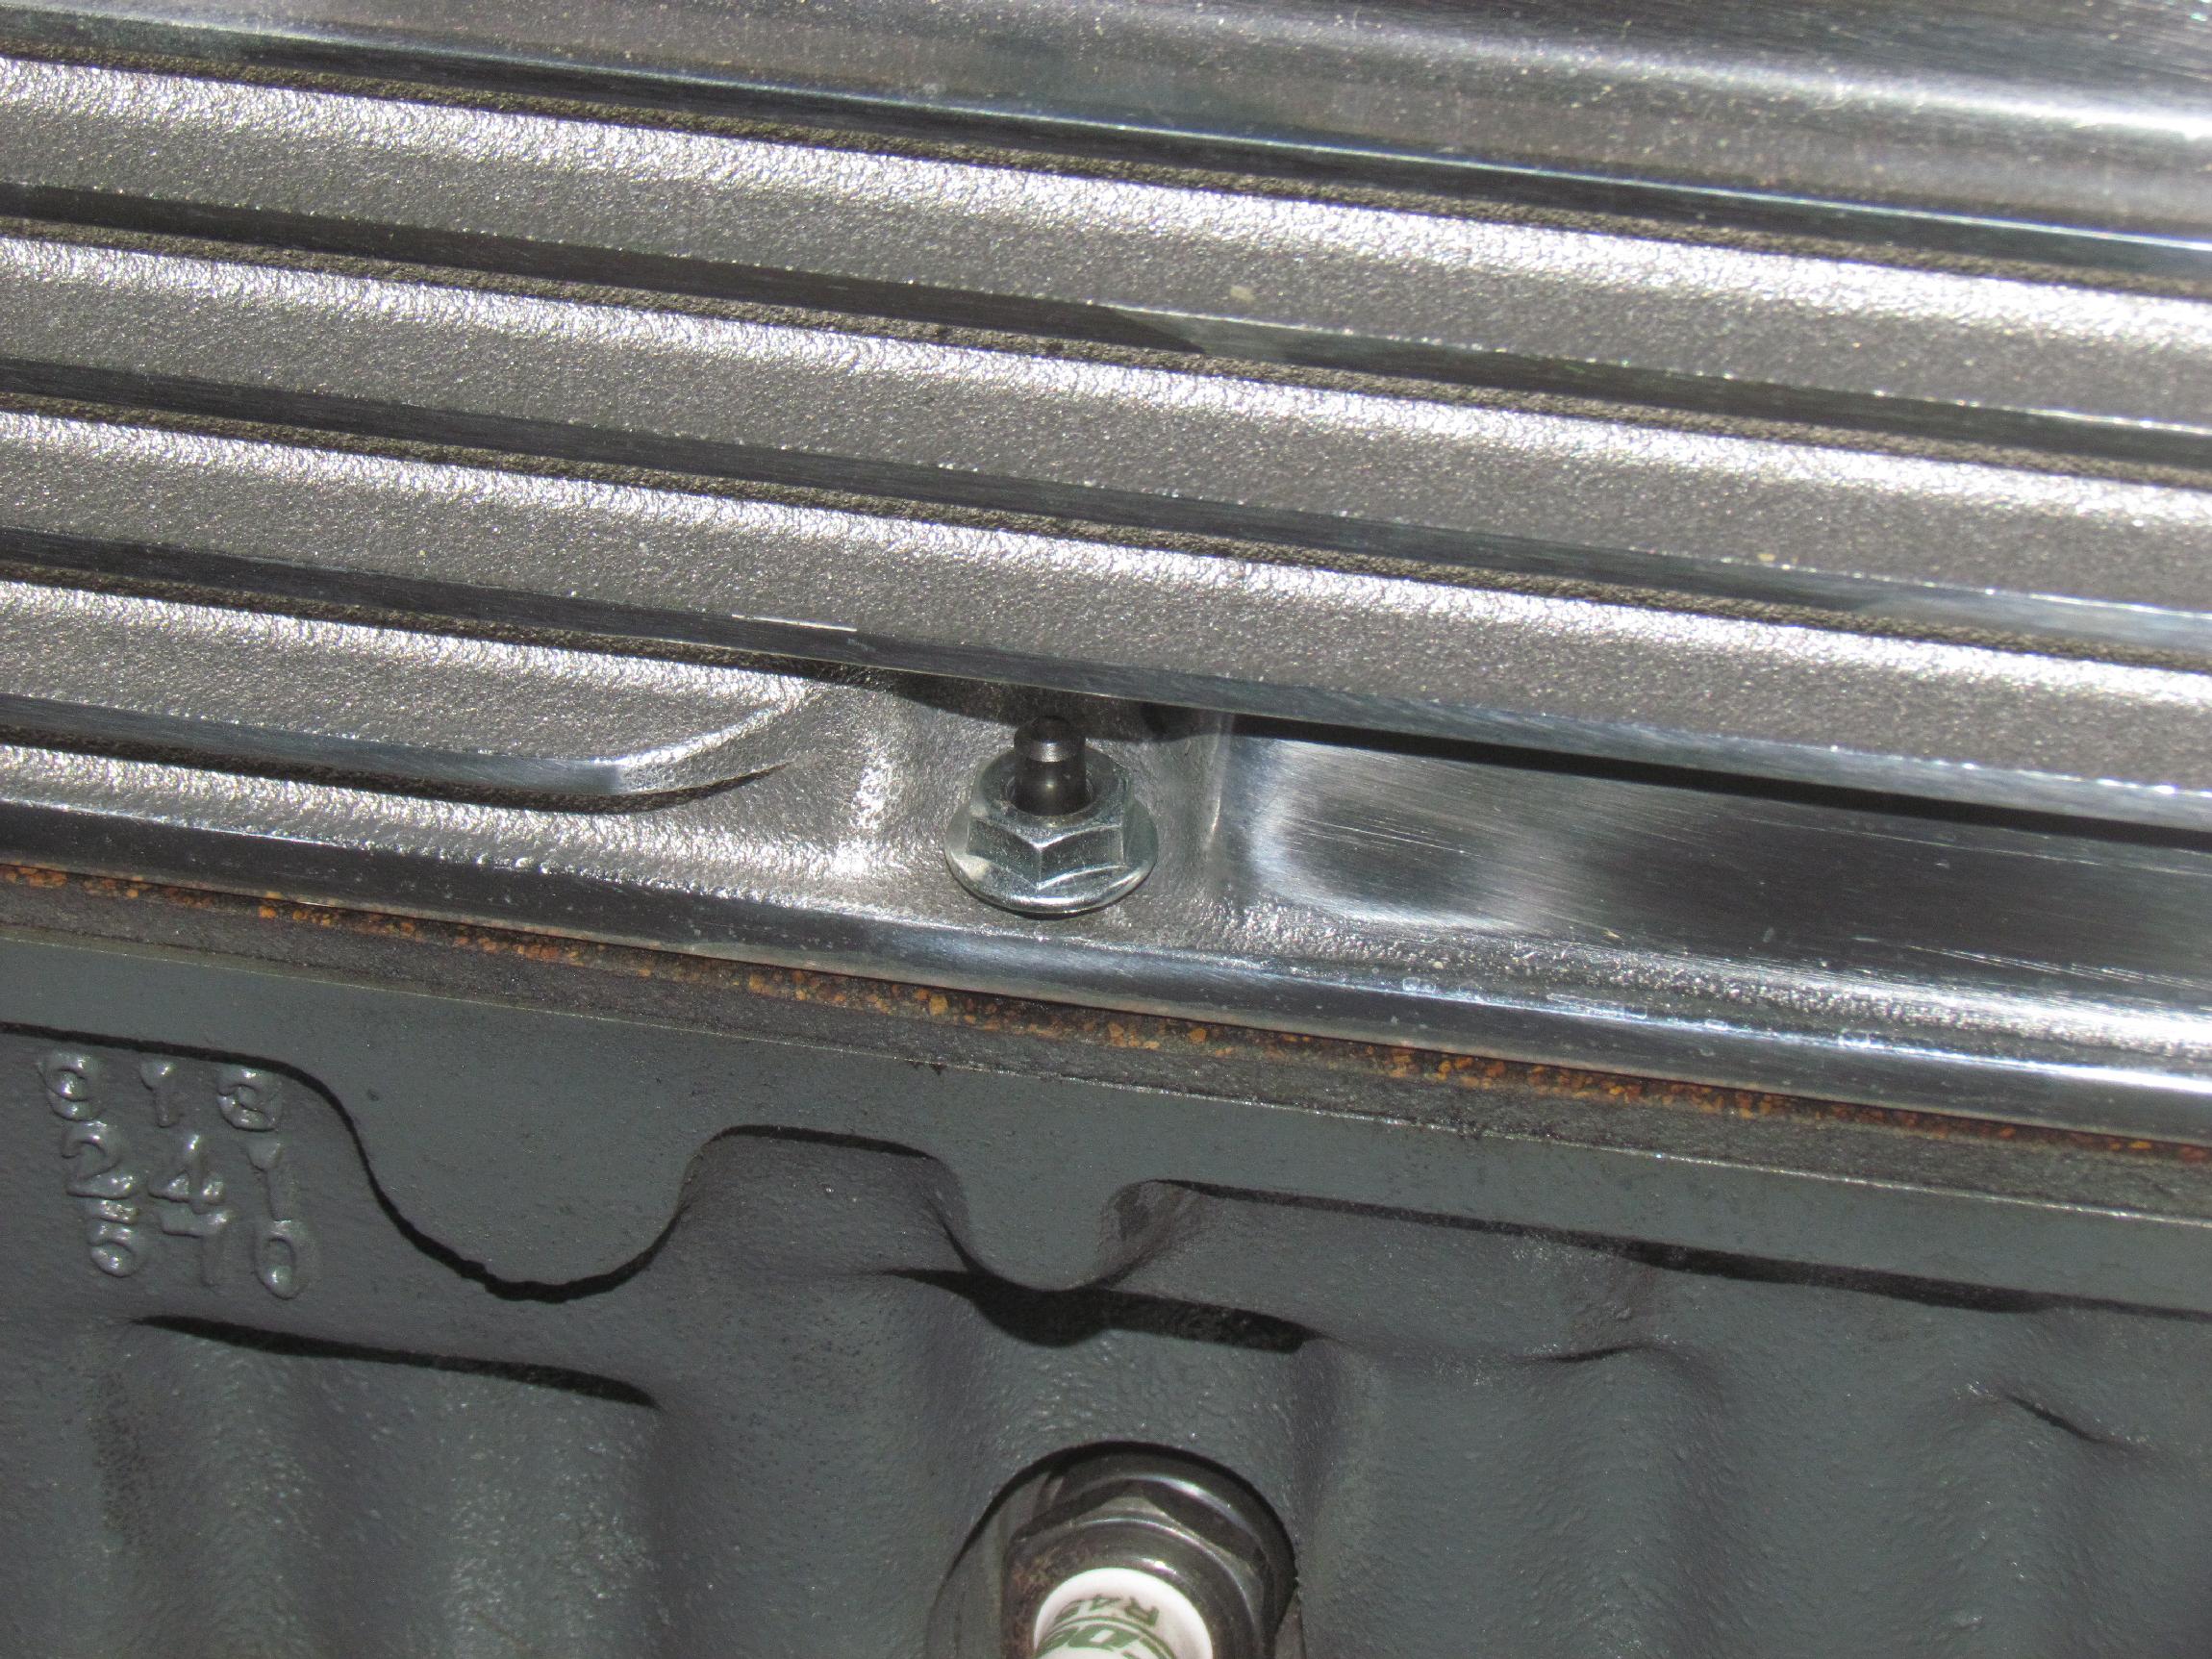 Sometime after four in the
afternoon, Wayne Harlow
showed up with some valve cover studs that he bought for his Mustang
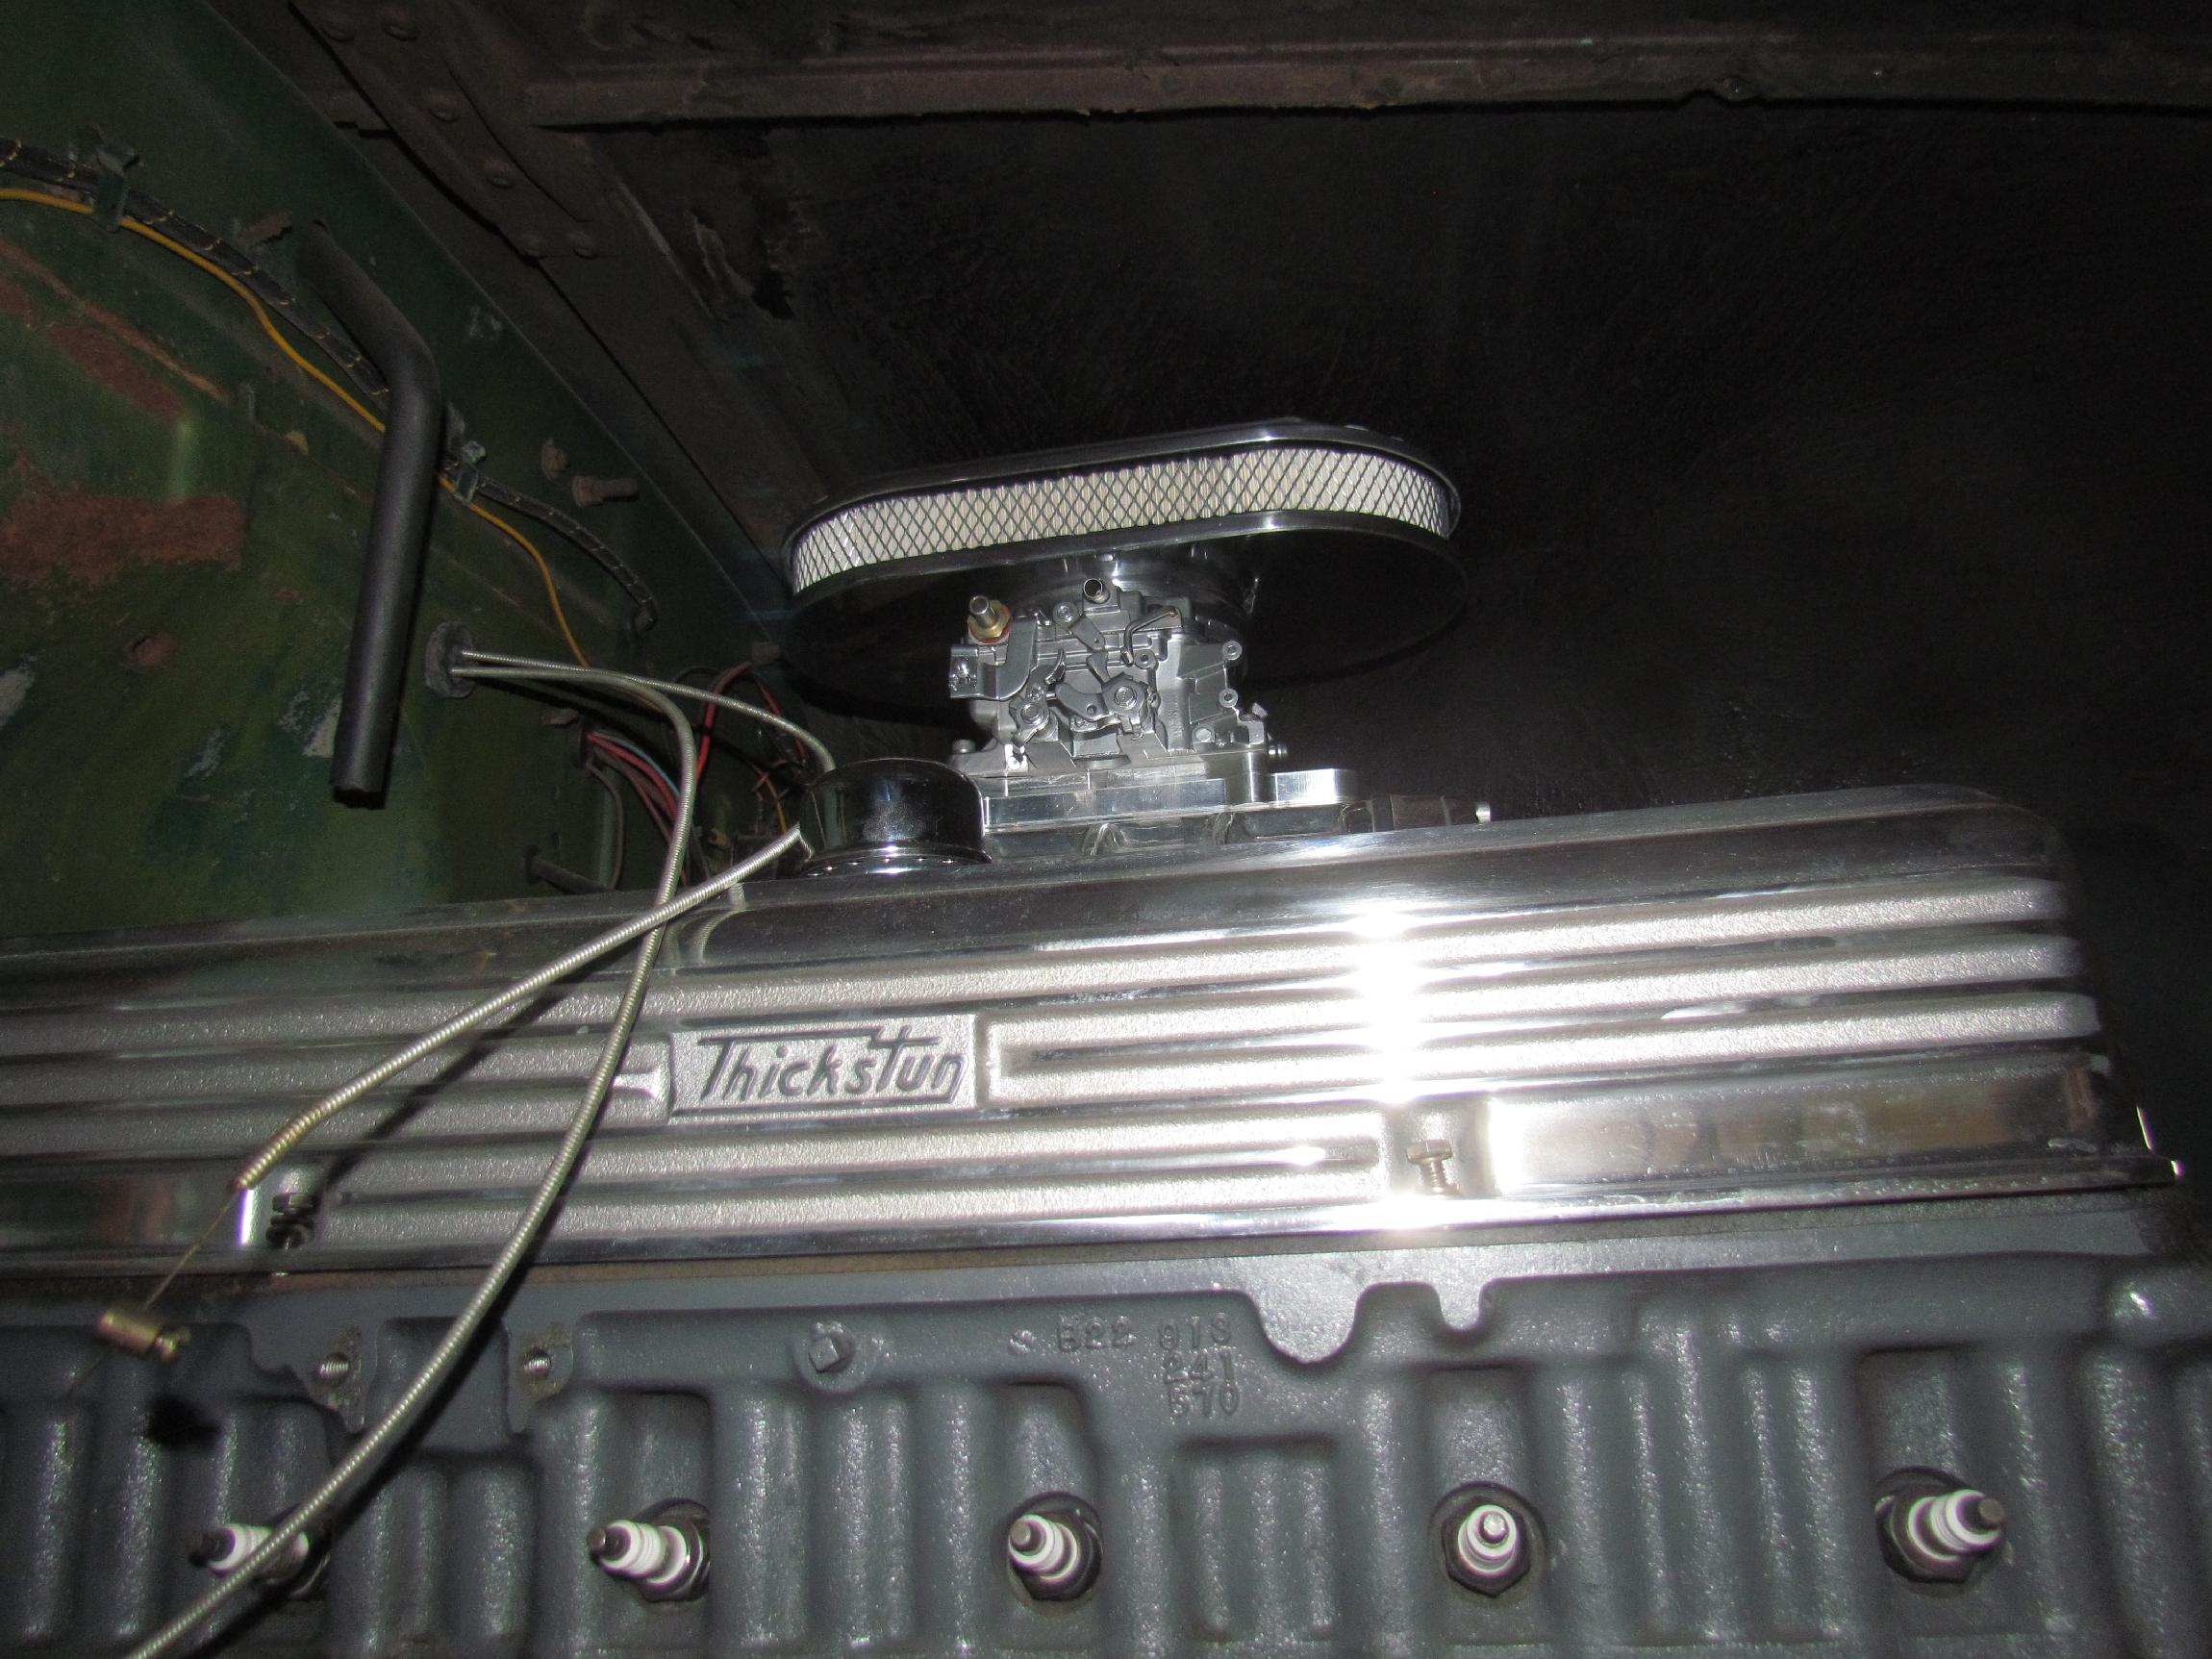
but weren't suitable. I had told him about the Thickstun valve cover
and the trouble I was having trying to get the valve cover bolts in. We
tried Wayne's studs and they worked perfectly. He gave them to me and
the day ended on a good note.
Sometime after four in the
afternoon, Wayne Harlow
showed up with some valve cover studs that he bought for his Mustang
but weren't suitable. I had told him about the Thickstun valve cover
and the trouble I was having trying to get the valve cover bolts in. We
tried Wayne's studs and they worked perfectly. He gave them to me and
the day ended on a good note.
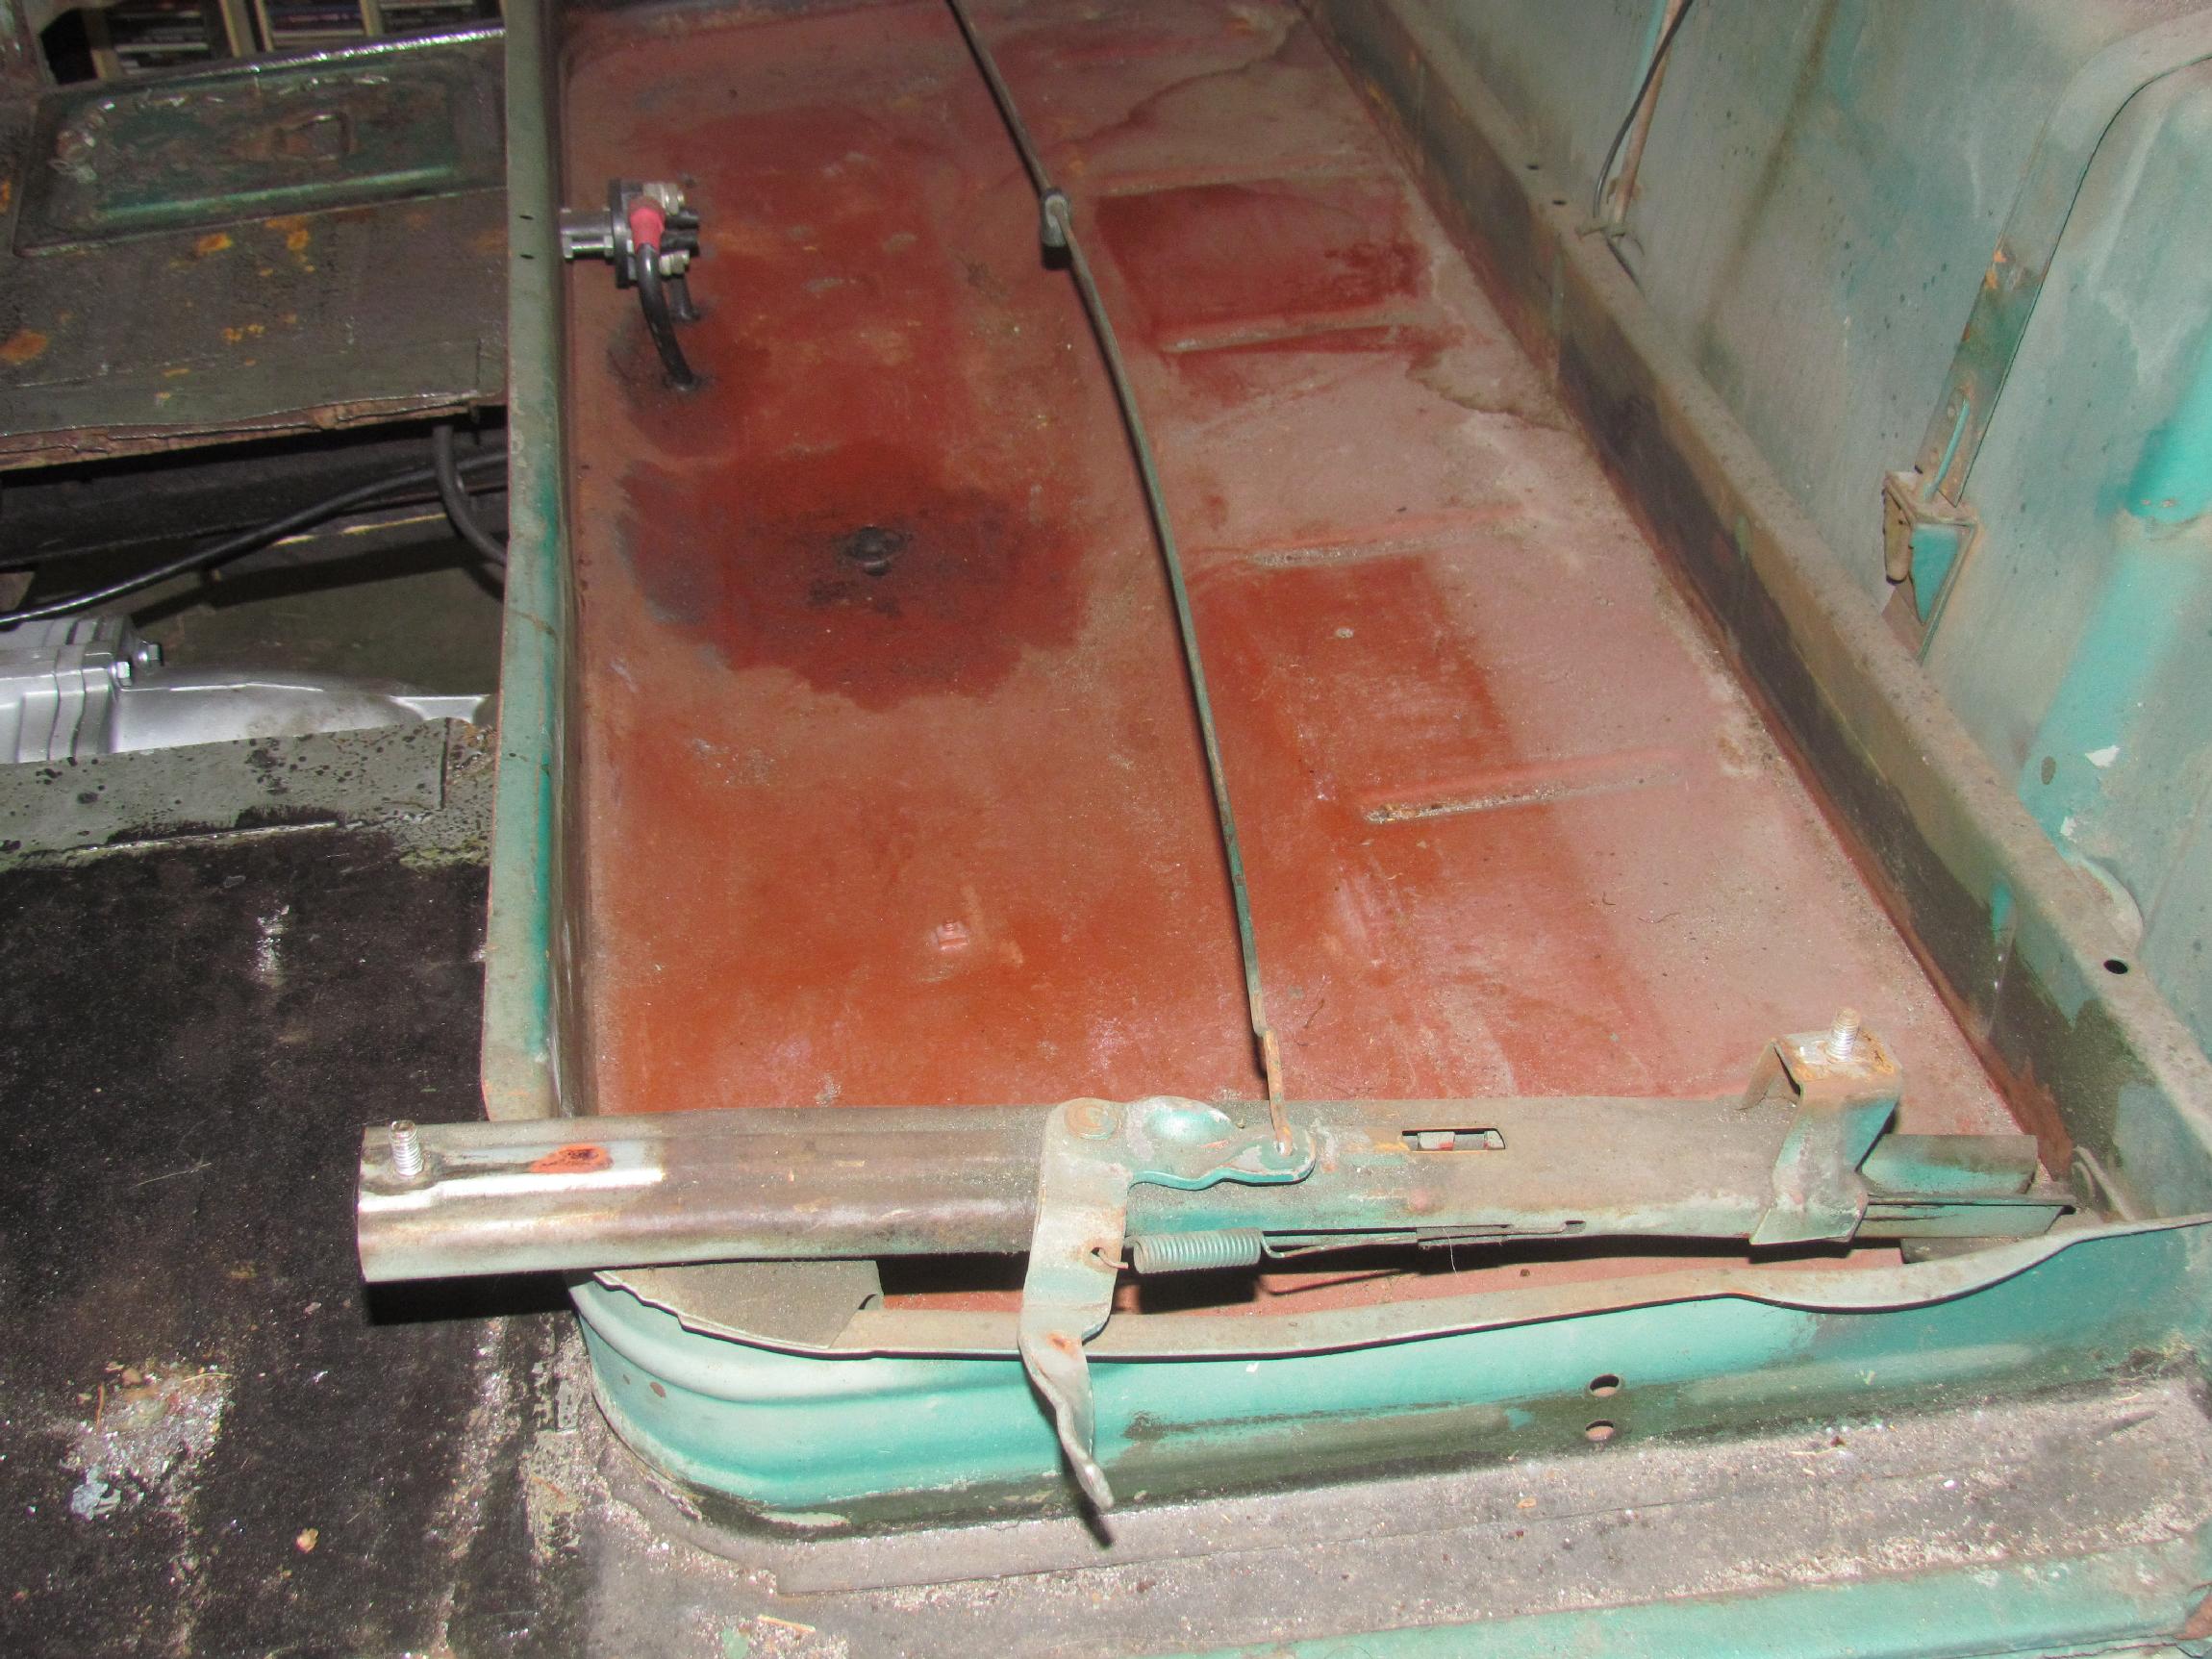 March
16th 2016 Peggy
at Stovebolt.com contacted me about a tech article on how to remove and
re-install the bench seat. Tom Caperton of Whiteville, NC
wrote
the article years ago and I hosted it on the BillyBob Garage site.
Since I have to remove the seat for my cab operations, I offered to
take step-by-step photos for Peggy. Tom's email address has gone dead
and I could not make contact with him. Taking out the seat, tho'
simple, took most of the day due to the documentation aspect and
finding a place to stow the seat parts. Beer of the day was Saratoga
Oatmeal Stout and that didn't speed up the process any.
March
16th 2016 Peggy
at Stovebolt.com contacted me about a tech article on how to remove and
re-install the bench seat. Tom Caperton of Whiteville, NC
wrote
the article years ago and I hosted it on the BillyBob Garage site.
Since I have to remove the seat for my cab operations, I offered to
take step-by-step photos for Peggy. Tom's email address has gone dead
and I could not make contact with him. Taking out the seat, tho'
simple, took most of the day due to the documentation aspect and
finding a place to stow the seat parts. Beer of the day was Saratoga
Oatmeal Stout and that didn't speed up the process any.
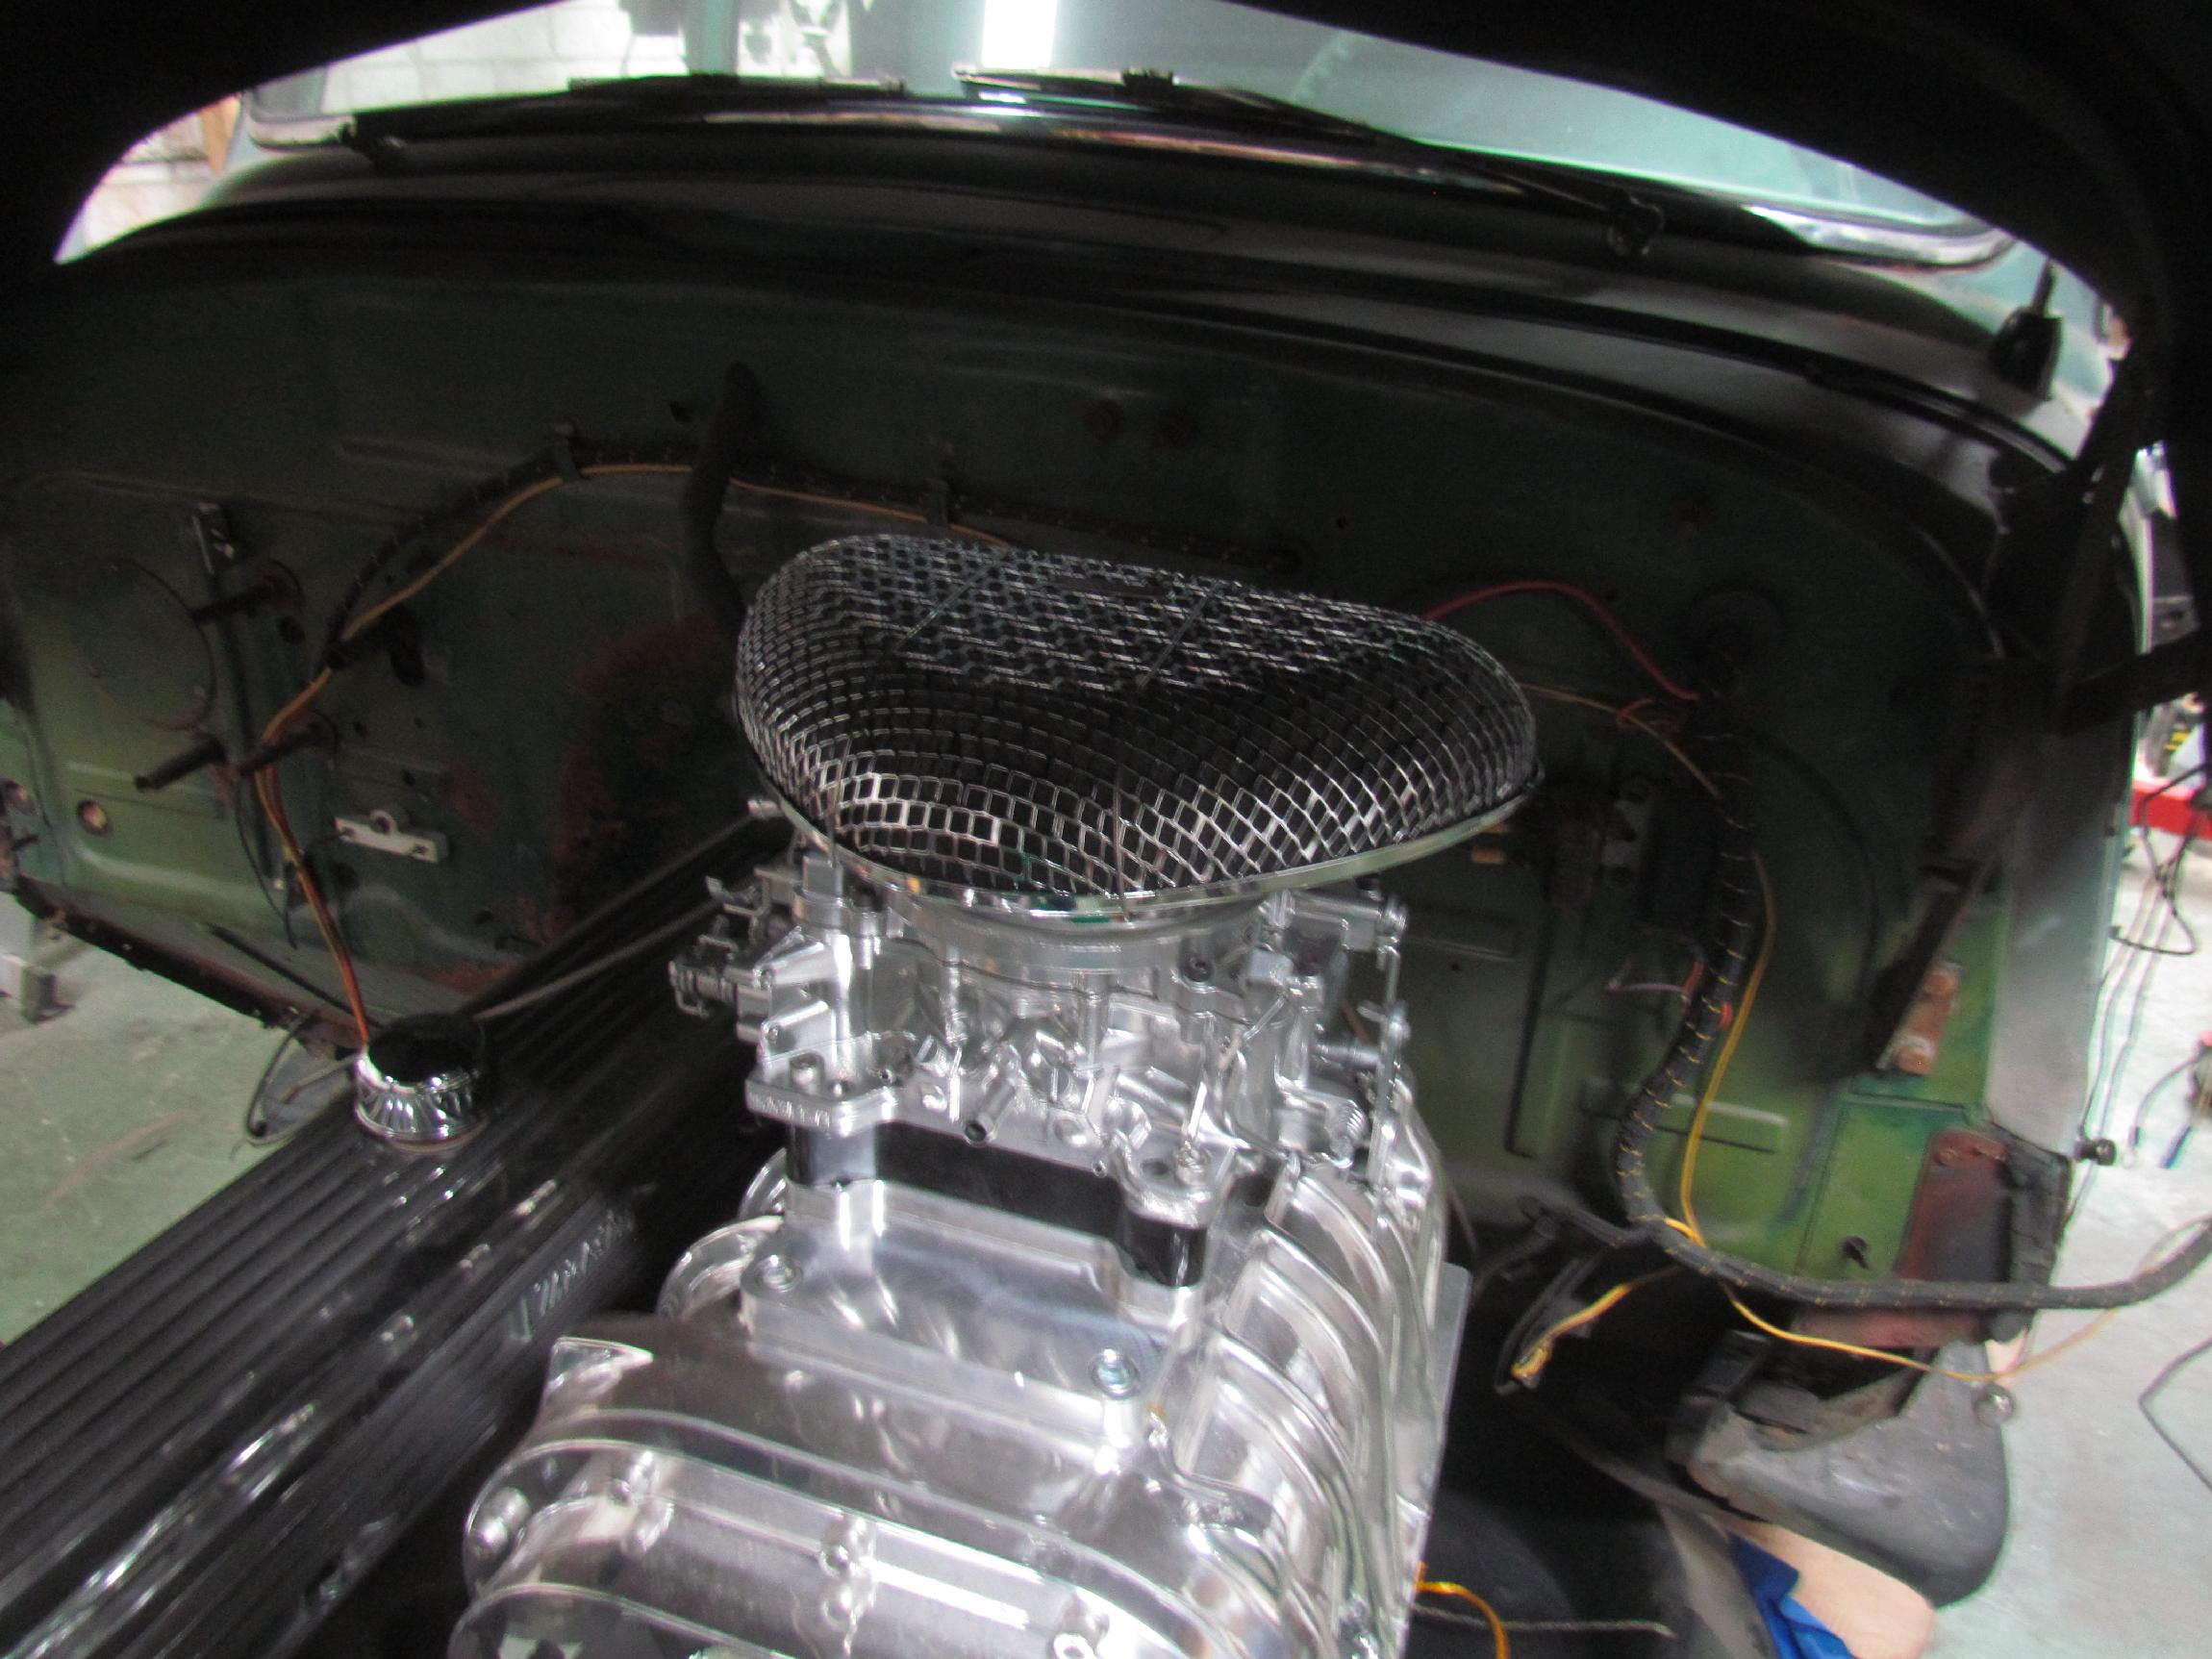 March
22nd 2016 I
found a low profile air cleaner that might solve the hood clearance
problem. Only costs a Jackson and change so if it doesn't work the loss
is small. Installed it last night when I got to the shop and it appears
to have between 1/4" and 3/8" clearance at the closest point between
air cleaner and hood underside. That's good. The only metalwork I want
to do to the hood is to add louvers to get some of the engine heat out.
March
22nd 2016 I
found a low profile air cleaner that might solve the hood clearance
problem. Only costs a Jackson and change so if it doesn't work the loss
is small. Installed it last night when I got to the shop and it appears
to have between 1/4" and 3/8" clearance at the closest point between
air cleaner and hood underside. That's good. The only metalwork I want
to do to the hood is to add louvers to get some of the engine heat out.
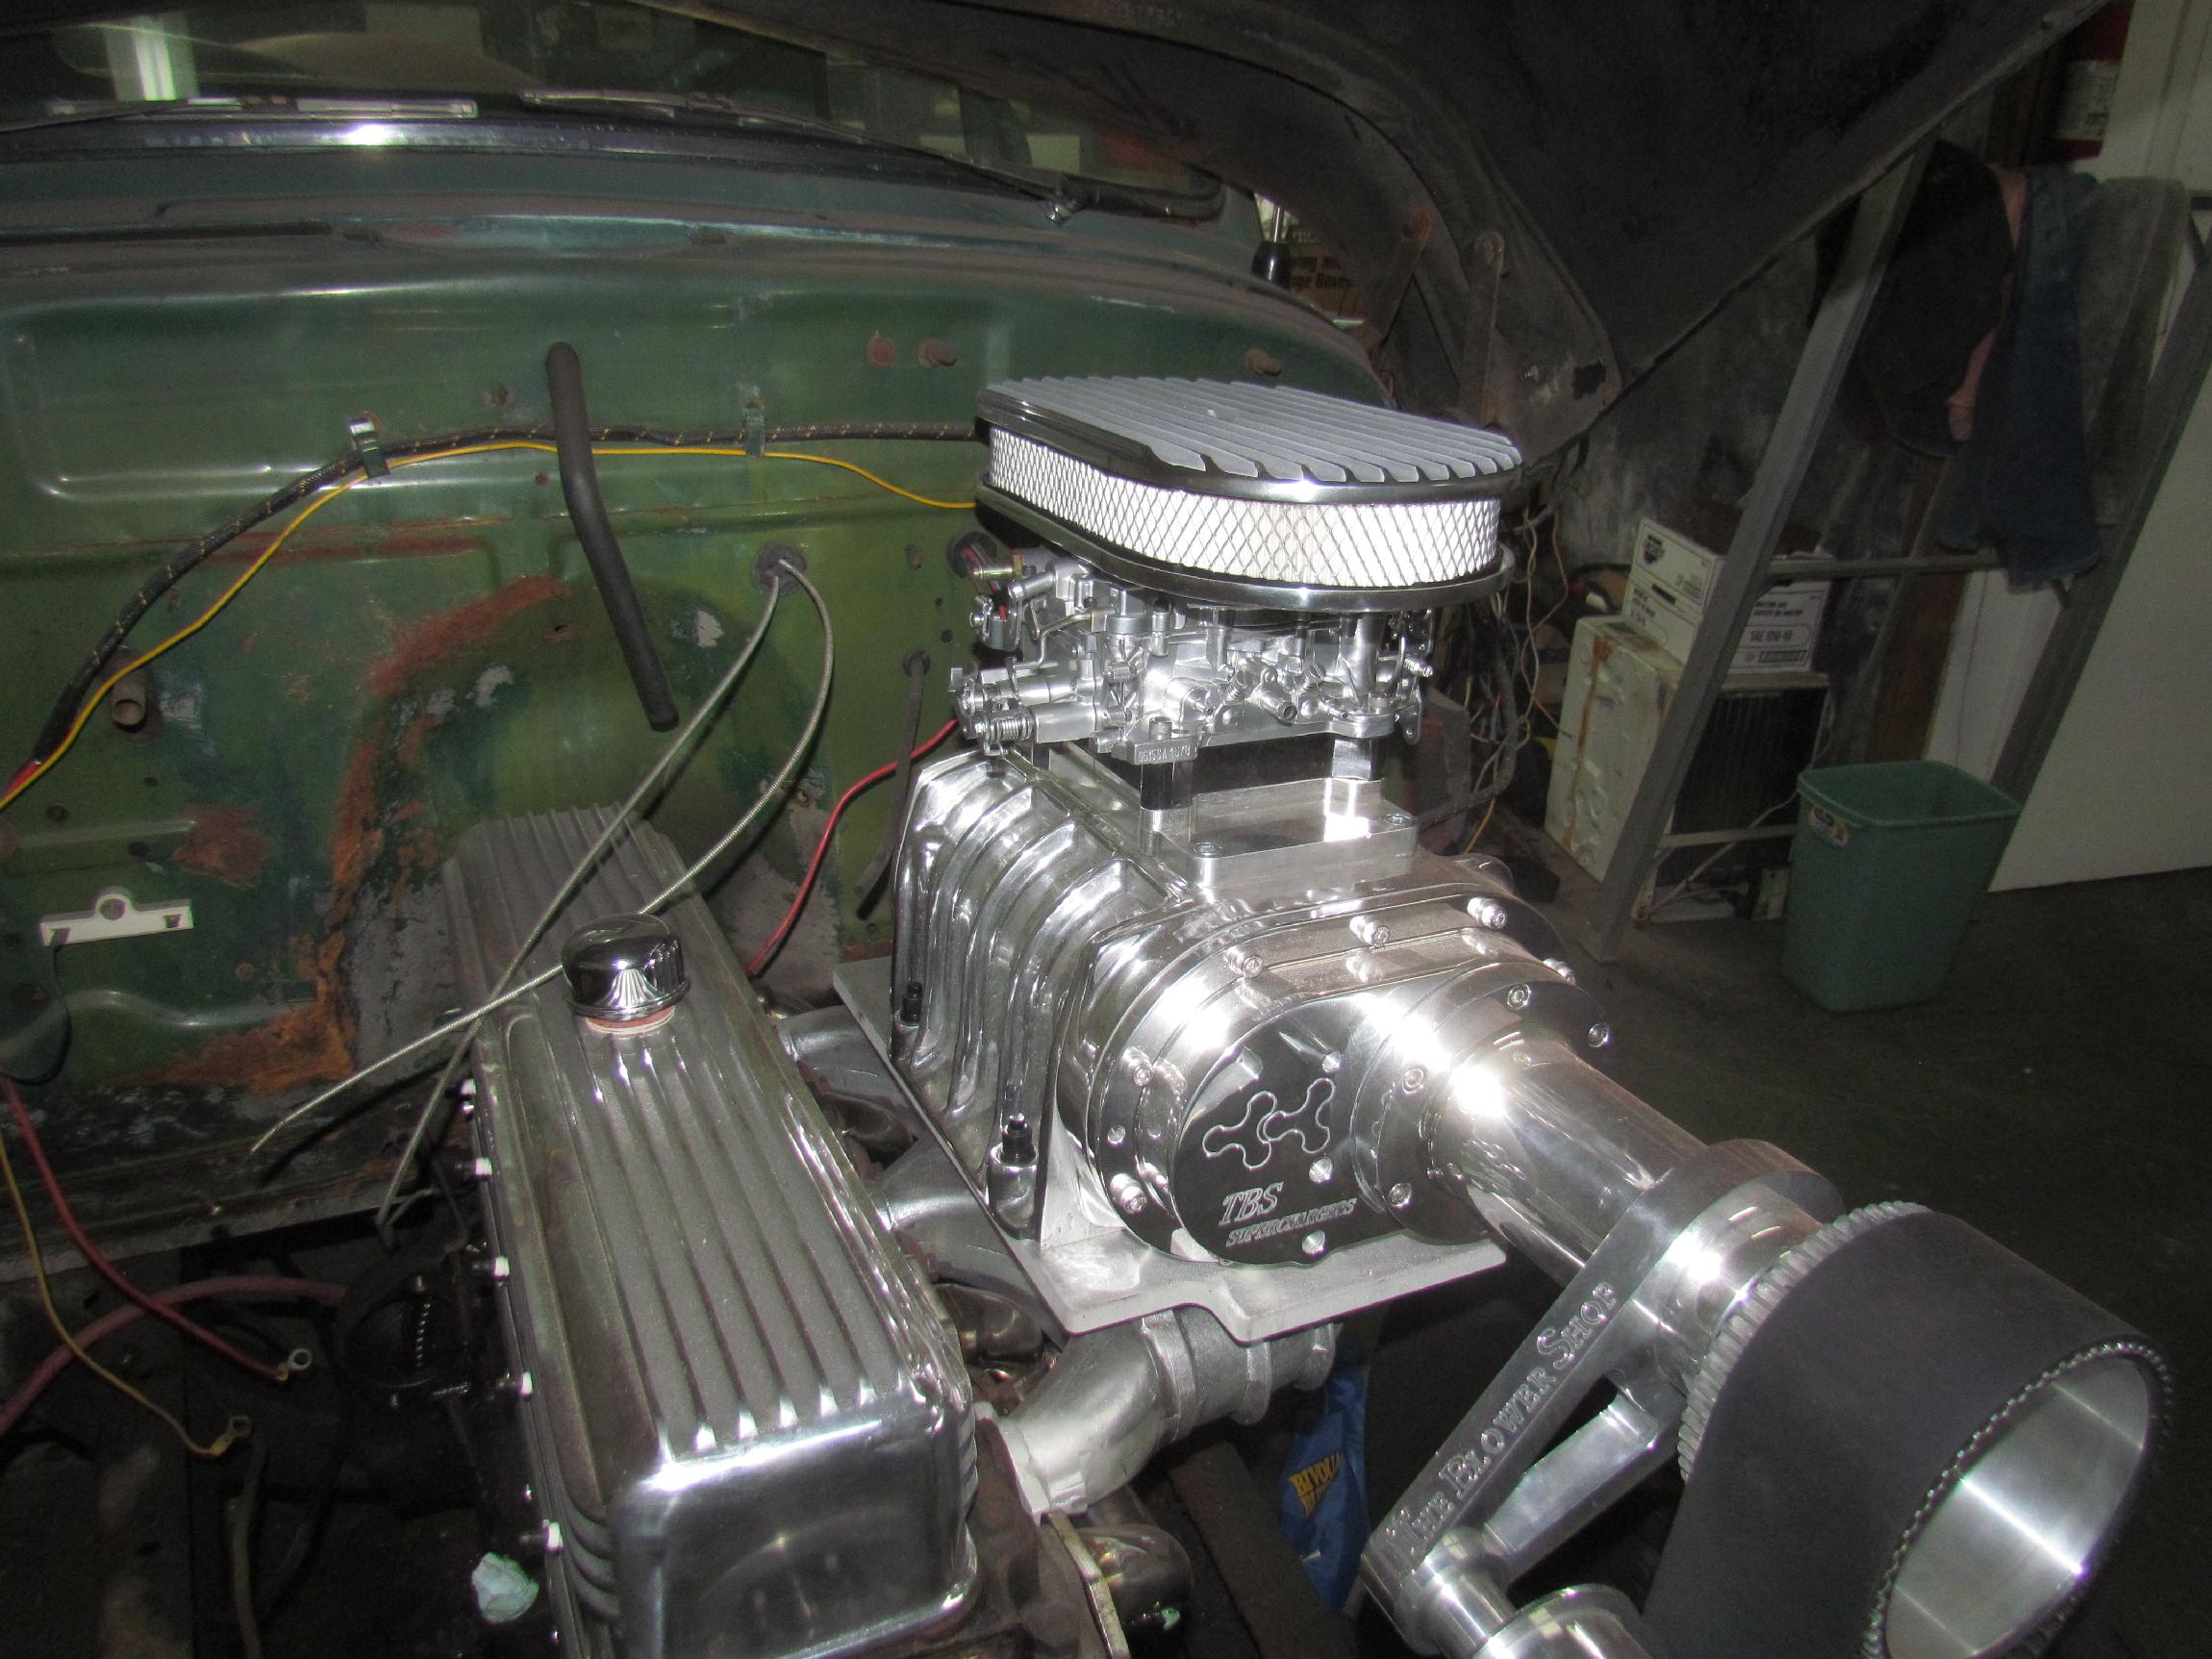
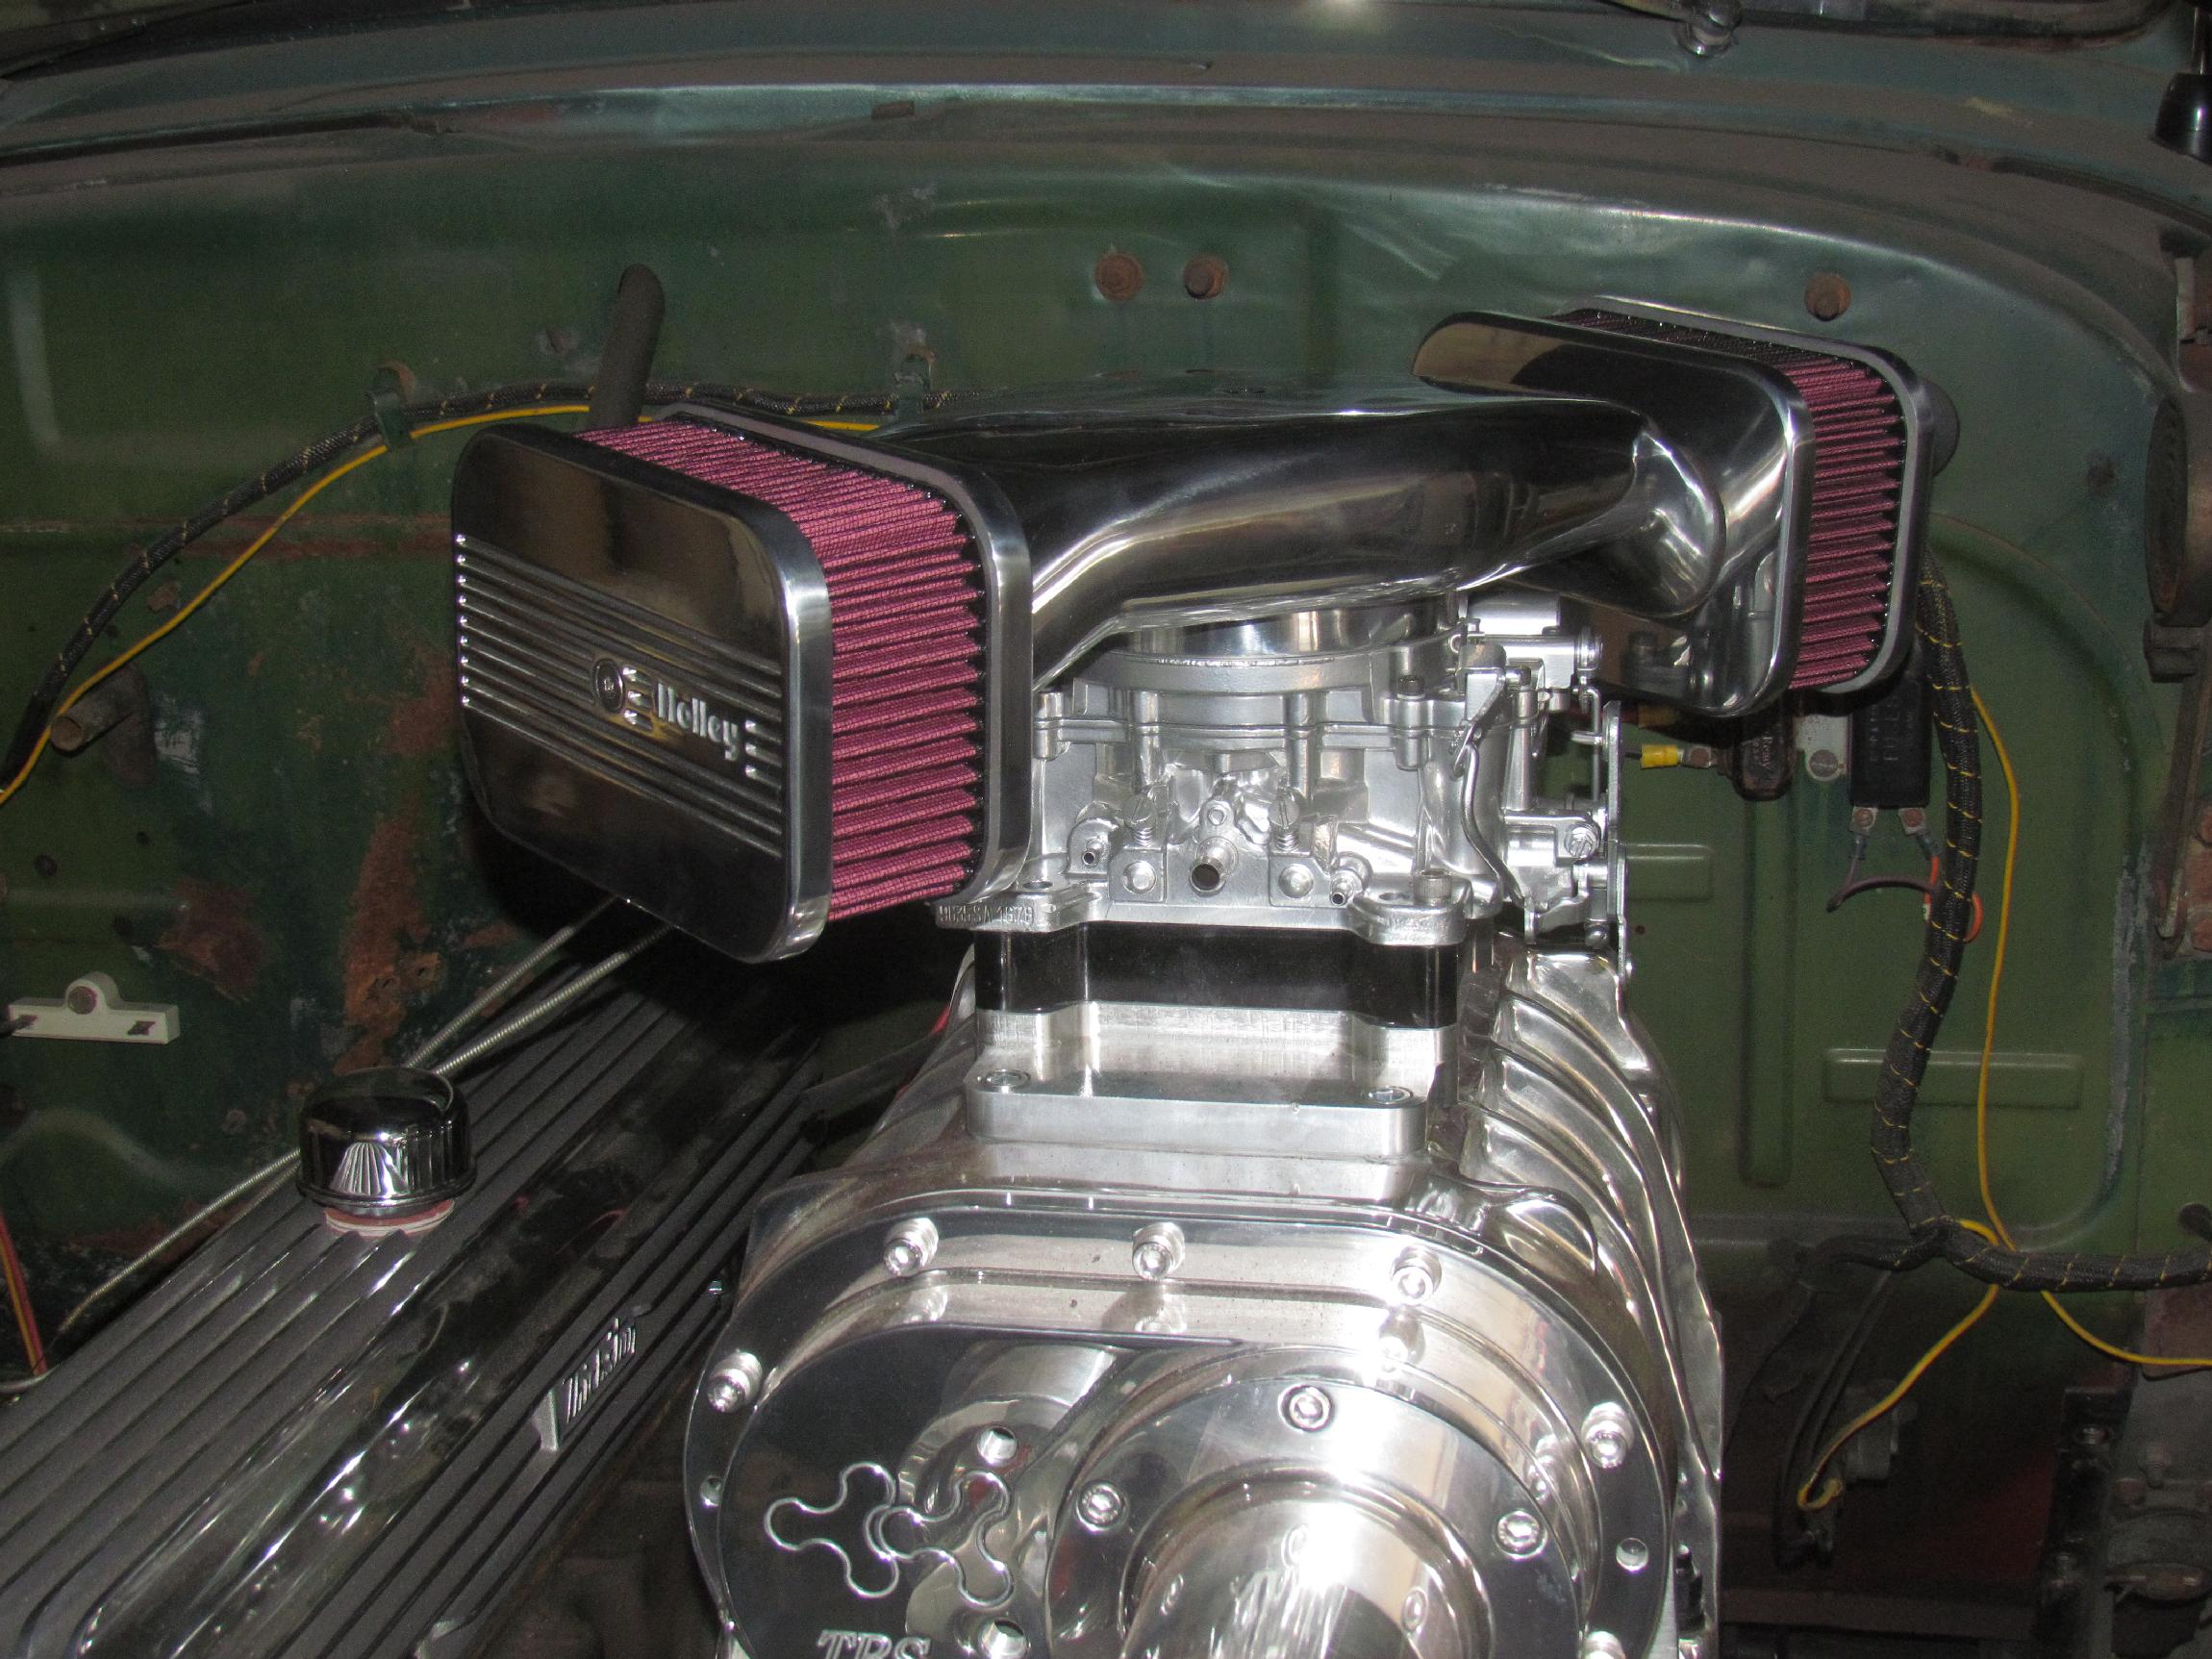 March
27th 2016 A
Facebook reader alerted me to problems with the Edelbrock "Triangle of
Death" air cleaner. When I googled it, it came up as a google search
term before I finished typing it in. There were enuf sad stories about
the foam filter element catching on fire that I continued my low
profile air cleaner search and ordered a Holley cleaner that Mike
Fabian first alerted me to. I installed it yesterday and it clears the
hood if angled as shown. Didn't get much else done other than some Jeep
maintenance. Beer of the day was Sprecher Black Bavarian style lager.
It gave me a mild buzz and heartburn.
March
27th 2016 A
Facebook reader alerted me to problems with the Edelbrock "Triangle of
Death" air cleaner. When I googled it, it came up as a google search
term before I finished typing it in. There were enuf sad stories about
the foam filter element catching on fire that I continued my low
profile air cleaner search and ordered a Holley cleaner that Mike
Fabian first alerted me to. I installed it yesterday and it clears the
hood if angled as shown. Didn't get much else done other than some Jeep
maintenance. Beer of the day was Sprecher Black Bavarian style lager.
It gave me a mild buzz and heartburn.
 April
7th 2016 I've
been planning on a dropped front axle for some time. I want BillyBob to
have a forward rake and I don't want to go independent front suspension
in keeping with the traditional theme as much as practicable. Nostalgia
Sid is the expert in this but, in most cases, you have to ship him an
axle to work with. That was holding me back and I was looking at other
solutions like Summit Racing. They have a 3" dropped axle listed on
eBay.
April
7th 2016 I've
been planning on a dropped front axle for some time. I want BillyBob to
have a forward rake and I don't want to go independent front suspension
in keeping with the traditional theme as much as practicable. Nostalgia
Sid is the expert in this but, in most cases, you have to ship him an
axle to work with. That was holding me back and I was looking at other
solutions like Summit Racing. They have a 3" dropped axle listed on
eBay.
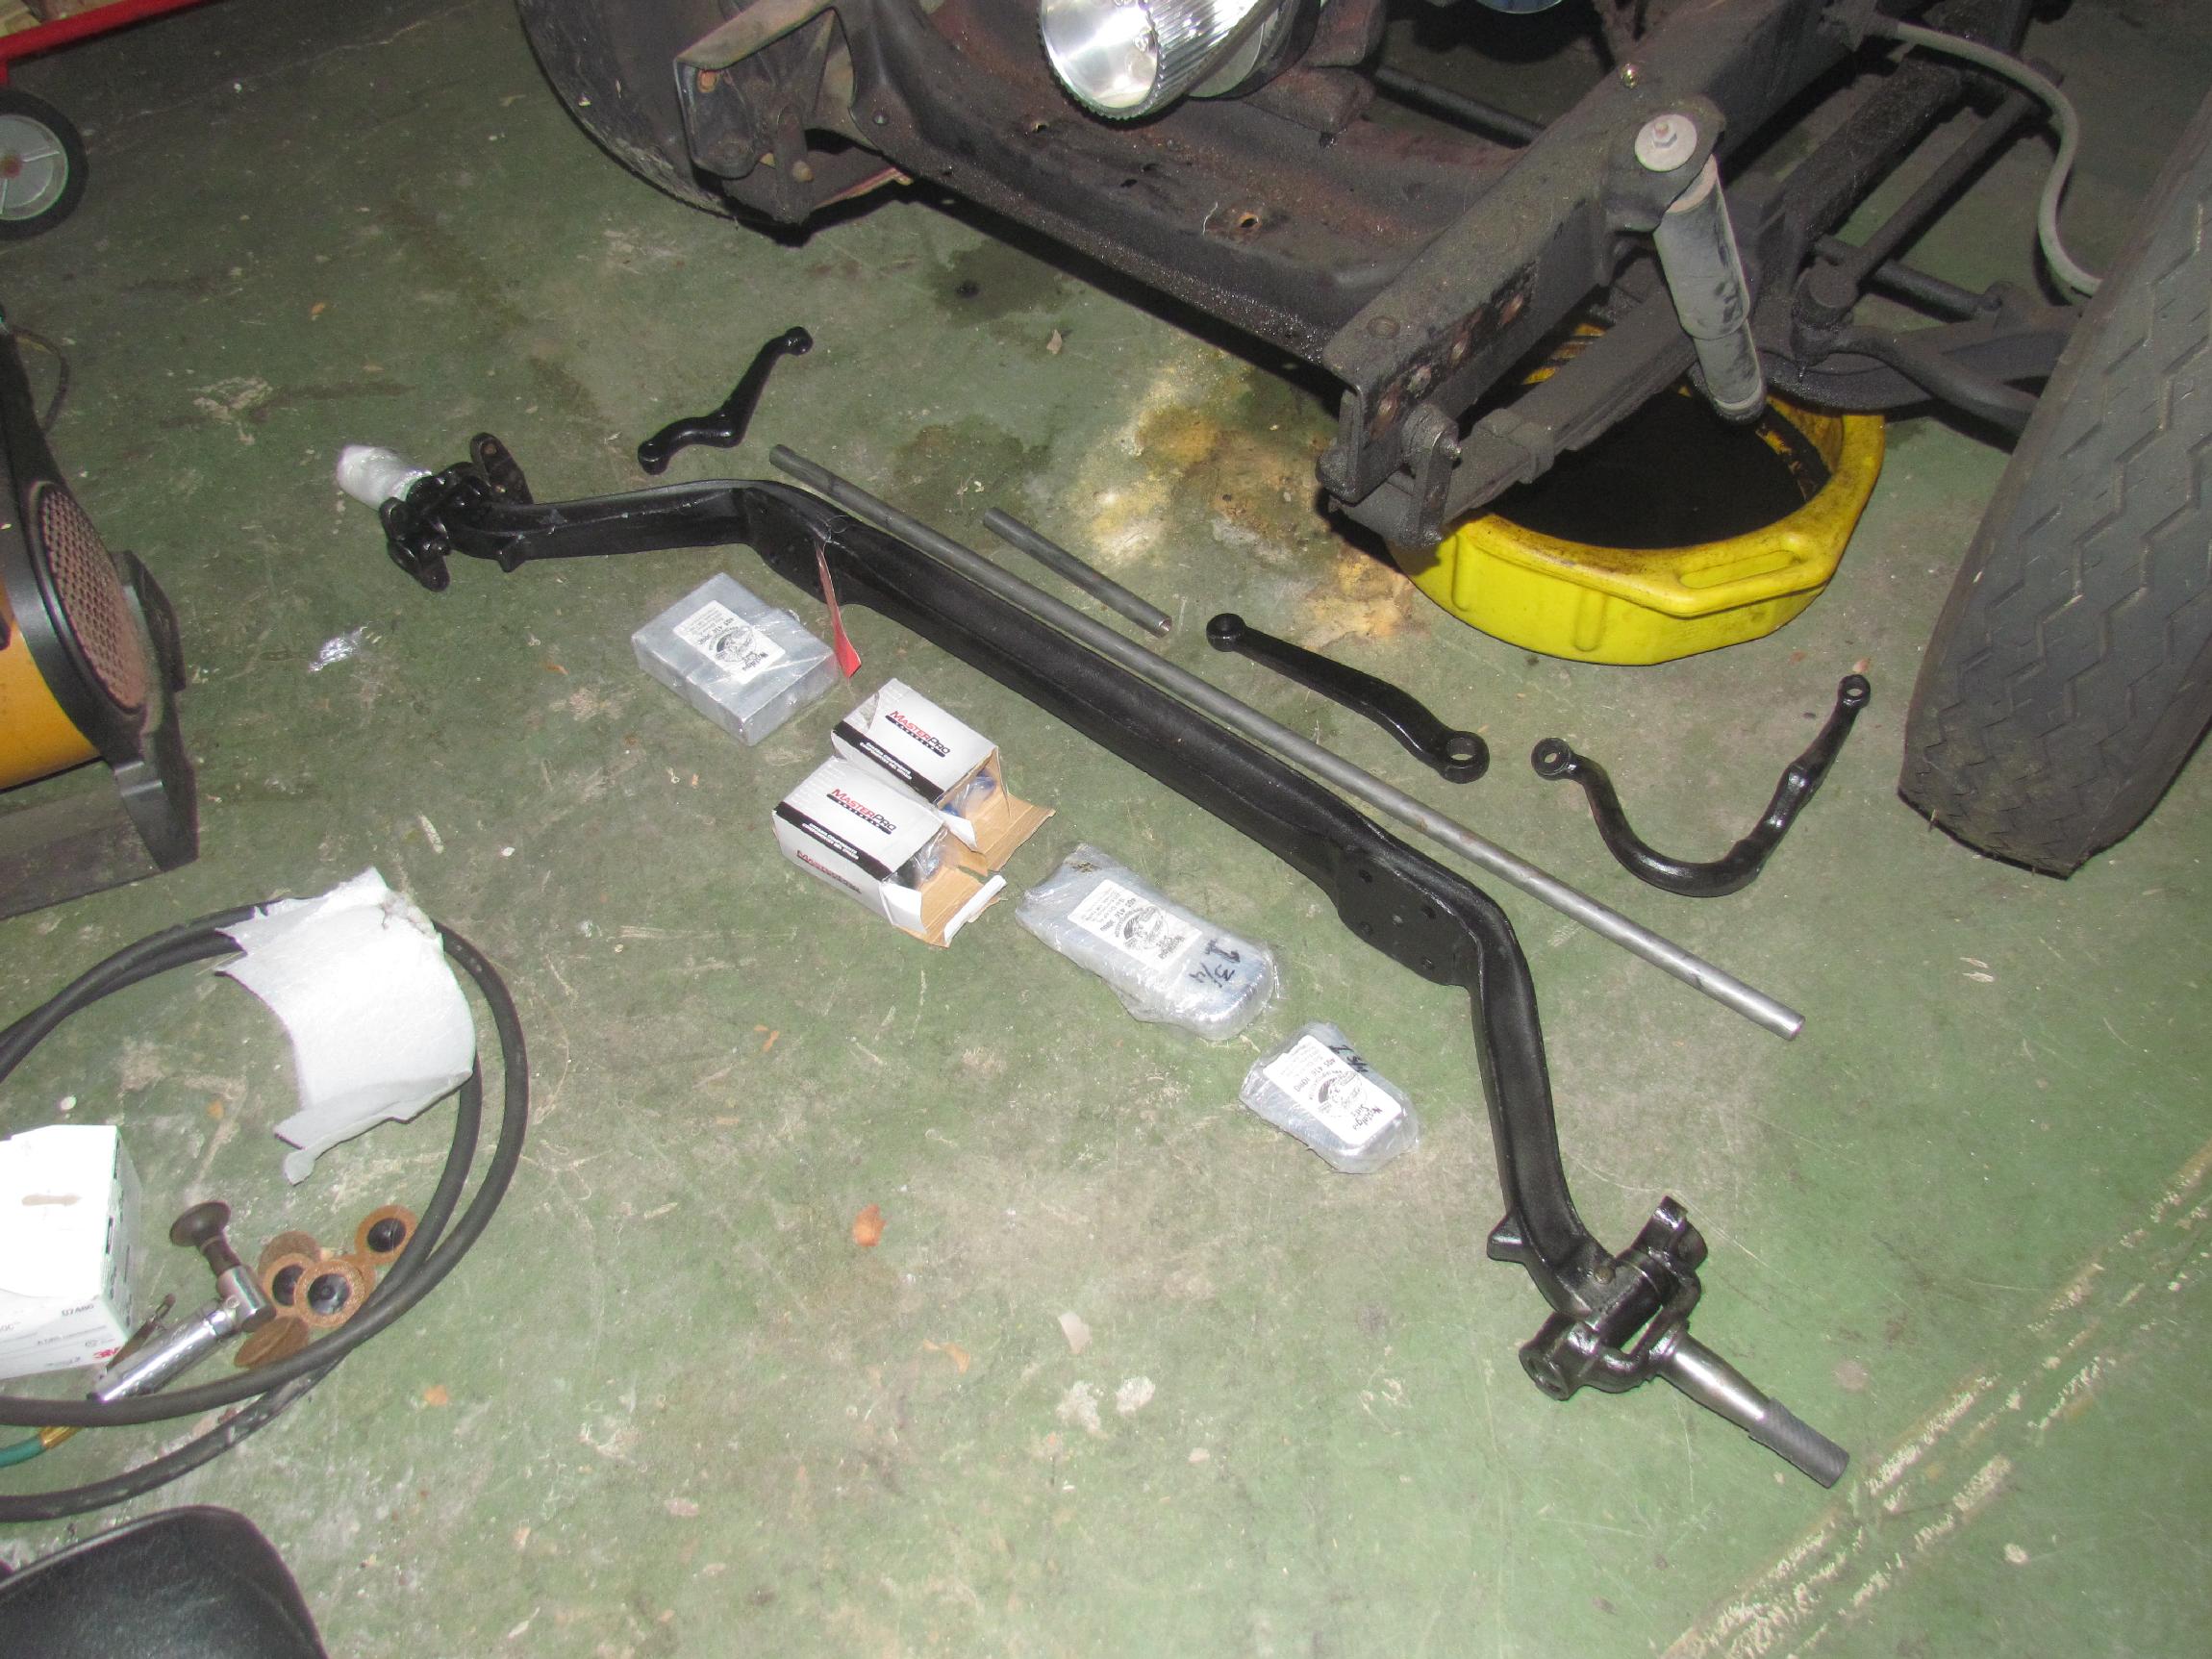
A couple of weeks ago, fellow stovebolter Joe Manco put up a complete Sid's dropped axle assembly for sale at Stovebolt.com. His '48 build had taken a different direction and he had this assembly still in the box. I messaged Joe that I would pay him what he wanted if the other fellow who was interested didn't buy it. A few days passed without any action from the other interested party and Joe sold it to me. It arrived yesterday at the Krash Lab and consists of the 4" dropped axle and spindles already assembled with new kingpins and bushings, modified steering arms with new style ball joints, tie rod with ends and pinch clamps, drag link with ends, modified pitman arm and new u-bolts. Also included were 3" lowering blocks and u-bolts for the rear axle but I may be leaving the rear axle as it is.
As BillyBob's engine sits, it is higher in front than in back. The idea is to set the rake so that the engine levels out. At this point, I'm not sure a four inch drop is enough. I will be mocking this up in the near future to determine that.
This log entry is ripe for posting. The next one will continue with the engine, transmission and chassis mock ups.
| < Back
to Intro |
You can email me at ![]() webmaster@laroke.com
webmaster@laroke.com
Issued Friday April 8, 2016
Updated Friday April 13, 2018
copyright © 1996-2018 Larry Robert Kephart all rights reserved
| | LRK Home | | Bio Info | | Krash Khronicles | | LAROKE | |
| | BettyLou | | BillyBob's Garage | | Rat Patrol | | Deerslayer | | Elvira | |
| | Land of the Free and Home of the Brave | |
| | Keppylou's Art | | WWI Soldier's Diary | |