| | LRK Home | | Bio Info | | Krash Khronicles | | LAROKE | |
| | BettyLou | | BillyBob's Garage | | Rat Patrol | | Deerslayer | | Elvira | |
| | Land of the Free and Home of the Brave | |
| | Keppylou's Art | | WWI Soldier's Diary | |
BillyBob Work-in-Progress Log
![]()
WHAT'S NEW is a chronological listing of updates to the BillyBob site.
![]()
TRUCK LINKS including vendor sites for old parts, custom parts, and tools as well as sites for classic car and truck organizations
STORE Operating in association with Amazon.com, books, recordings and tools can be purchased.
PLANNING for the restoration including project schedule and cost estimates.
![]()
TRAVELS WITH BILLYBOB With apologies to Steinbeck, this area of BillyBob's Garage will be used to log the trips BillyBob and I make together.
WORK-IN-PROGRESS was the restoration of parts of BillyBob that I could accomplish without a garage up until the summer of 2010 when I finally got enough warehouse space to work in. Now, it also includes the continuing work on BillyBob in the shop.
PRE-RESTORATION includes log entries of minor repairs and adventures between time of purchase and the time when I started restoration, a piece at a time.
JR'S KORNER JR's Korner is the history of BillyBob before I got him authored by my brother, Wm. C. Kephart.
![]()
BILLYBOB MAINTENANCE Ever changing detailing, oil change, lube, etc. maintenance routines specifically developed for BillyBob, including required tools, materials and procedures.
PROJECT PUFFER Chronicles the rebuild of BillyBob's Stovebolt 235 including the installation of a 4-71 blower system.
PARTS SHOP The Parts Shop is a repository of How-To articles. Things that I have done over and over enough times to have developed a procedure. This gives me a checklist and saves brain cells.
STEALTH SHOP Urban residence design with large integrated shop and separate living quarters for a relative or renter.
![]()
You will need the Adobe Acrobat browser plugin to view these wiring diagrams which are in the PDF file format. This format allows zooming and panning. If you don't have this plugin, it can be downloaded and installed (free) from the Adobe site. The button below will take you there.
![]()
BILLYBOB WIRING DIAGRAM Here's the wiring diagram updated with BillyBob's current state 'cepting the third-party strap-on turn-signal director.
STRAP-ON TURN-SIGNAL DIRECTOR/BRAKE LIGHT CIRCUIT This turn signal and brake light circuit diagram shows the current state of the third-party turn-signal director wiring, which will remain in place until I figure out the problems with the OEM turn-signal director. It also shows the OEM headlight switch.
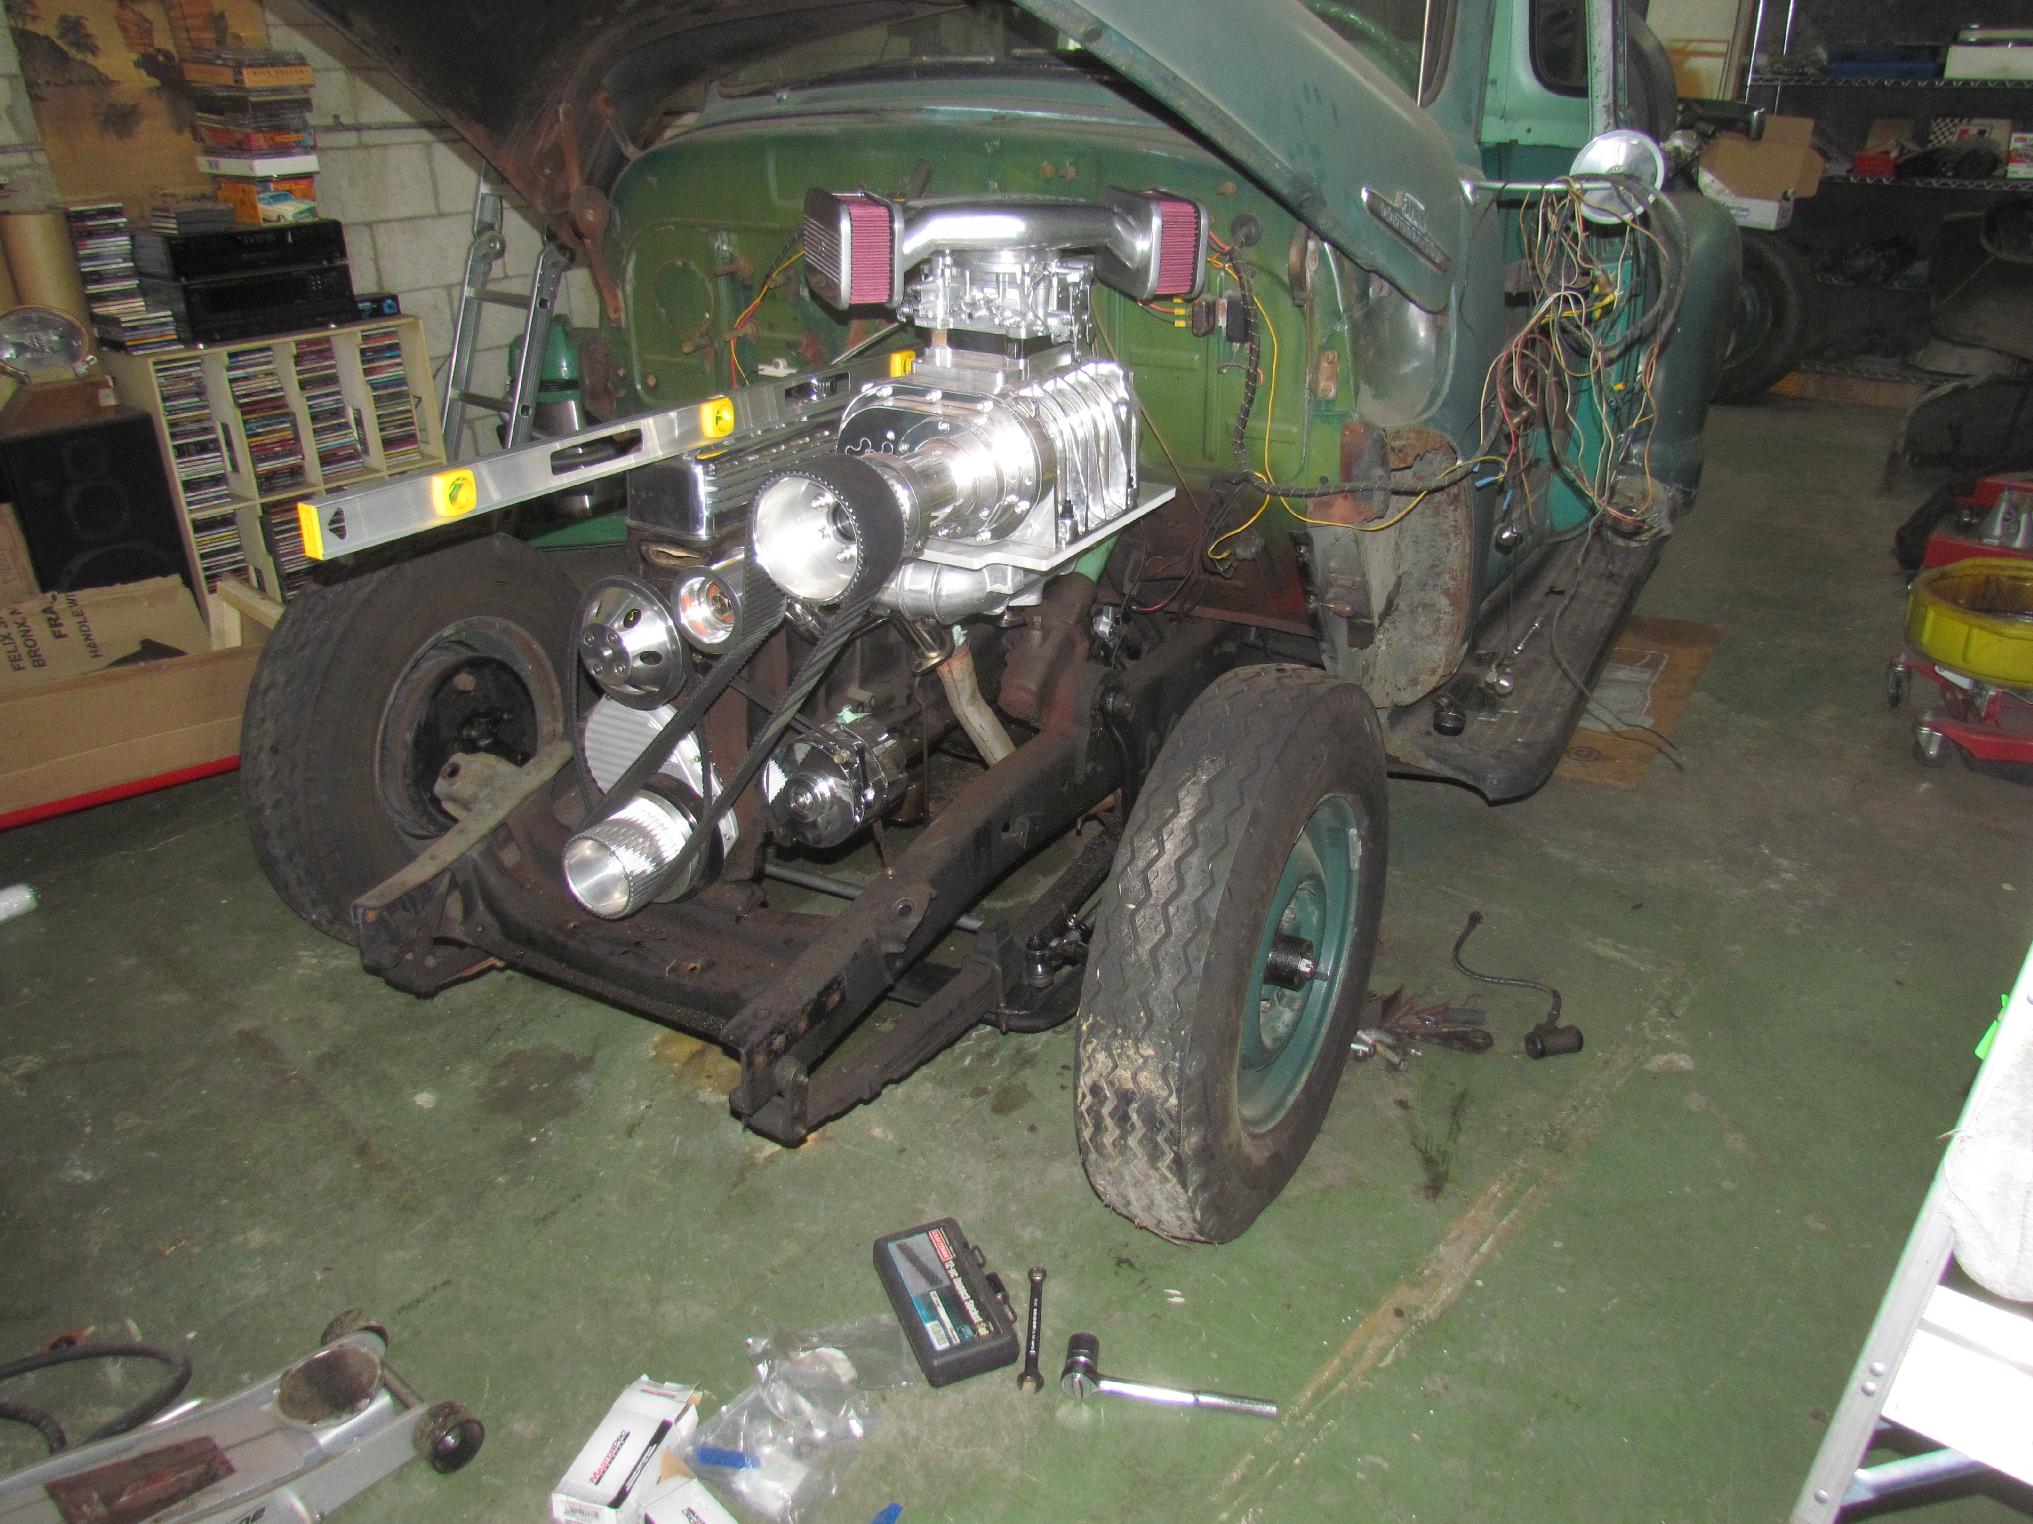
69. Slammin' the nose
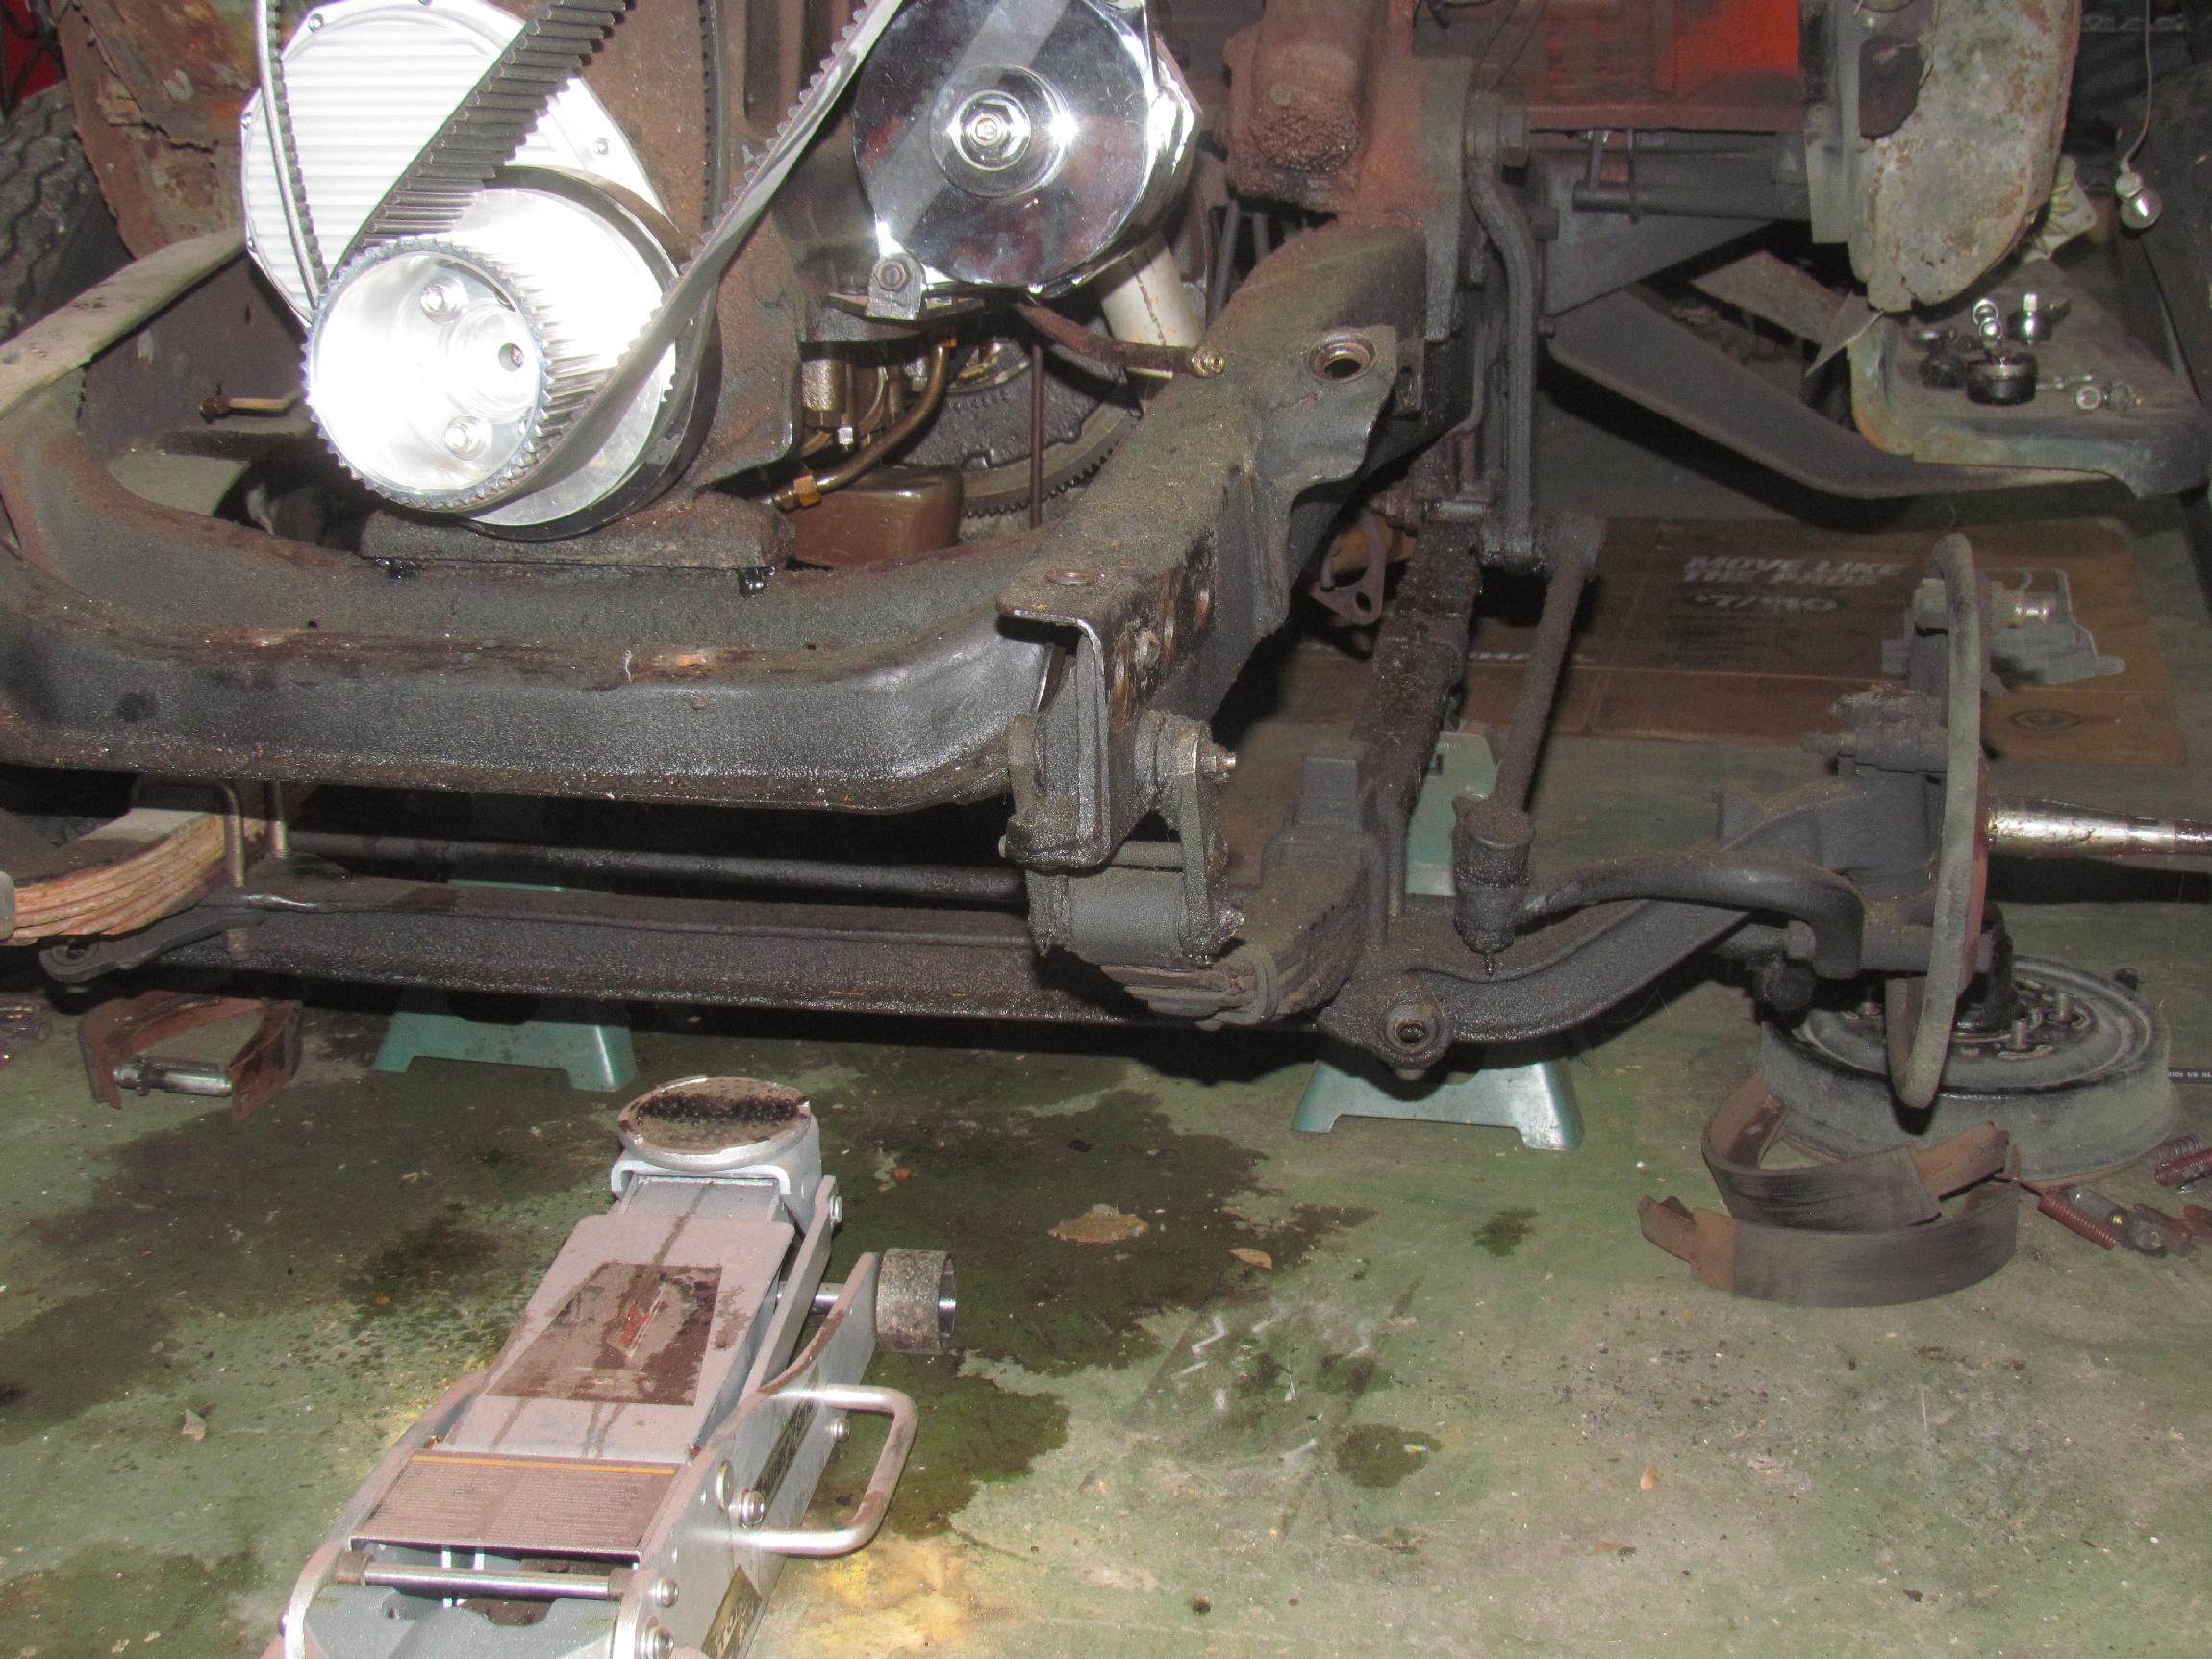 April
9th 2016 Started mocking
up the dropped axle. Dis-assembly was pretty easy considering I've had
most of these items apart before and that I'm putting a lot of new
parts in so I don't have to be overly careful. The pitman arm had never
been off but I have a dedicated puller so that only took a few minutes,
mostly spent finding the puller.
April
9th 2016 Started mocking
up the dropped axle. Dis-assembly was pretty easy considering I've had
most of these items apart before and that I'm putting a lot of new
parts in so I don't have to be overly careful. The pitman arm had never
been off but I have a dedicated puller so that only took a few minutes,
mostly spent finding the puller.
 The new axle was not labeled and, on first notice, looked the
same to me from both sides. Then, I saw the reference holes
for
the castor shims and the bolt-on steering stops, both of which are on
the back side of the axle. the rest of the installation went well until
it was time for the '55 backing
plates to go on the '48 spindles. I discovered the '55 lower bolts to
be of a slightly larger diameter than the holes in the '48 spindles. I
briefly entertained the notion of drilling the spindles out but
discarded that idea before even checking if I, likewise, had to drill
out the modified steering arms which are also attached with these
bolts. Instead, I suspended operations and ruminated the rest of the
afternoon with the beer of the day, Whisper Creek Farm Brewery's
Surplus Honey Citrus Ale. Tasted like IPA to me but, unlike John Kerry,
I'm incapable of discerning sophisticated nuance.
The new axle was not labeled and, on first notice, looked the
same to me from both sides. Then, I saw the reference holes
for
the castor shims and the bolt-on steering stops, both of which are on
the back side of the axle. the rest of the installation went well until
it was time for the '55 backing
plates to go on the '48 spindles. I discovered the '55 lower bolts to
be of a slightly larger diameter than the holes in the '48 spindles. I
briefly entertained the notion of drilling the spindles out but
discarded that idea before even checking if I, likewise, had to drill
out the modified steering arms which are also attached with these
bolts. Instead, I suspended operations and ruminated the rest of the
afternoon with the beer of the day, Whisper Creek Farm Brewery's
Surplus Honey Citrus Ale. Tasted like IPA to me but, unlike John Kerry,
I'm incapable of discerning sophisticated nuance.
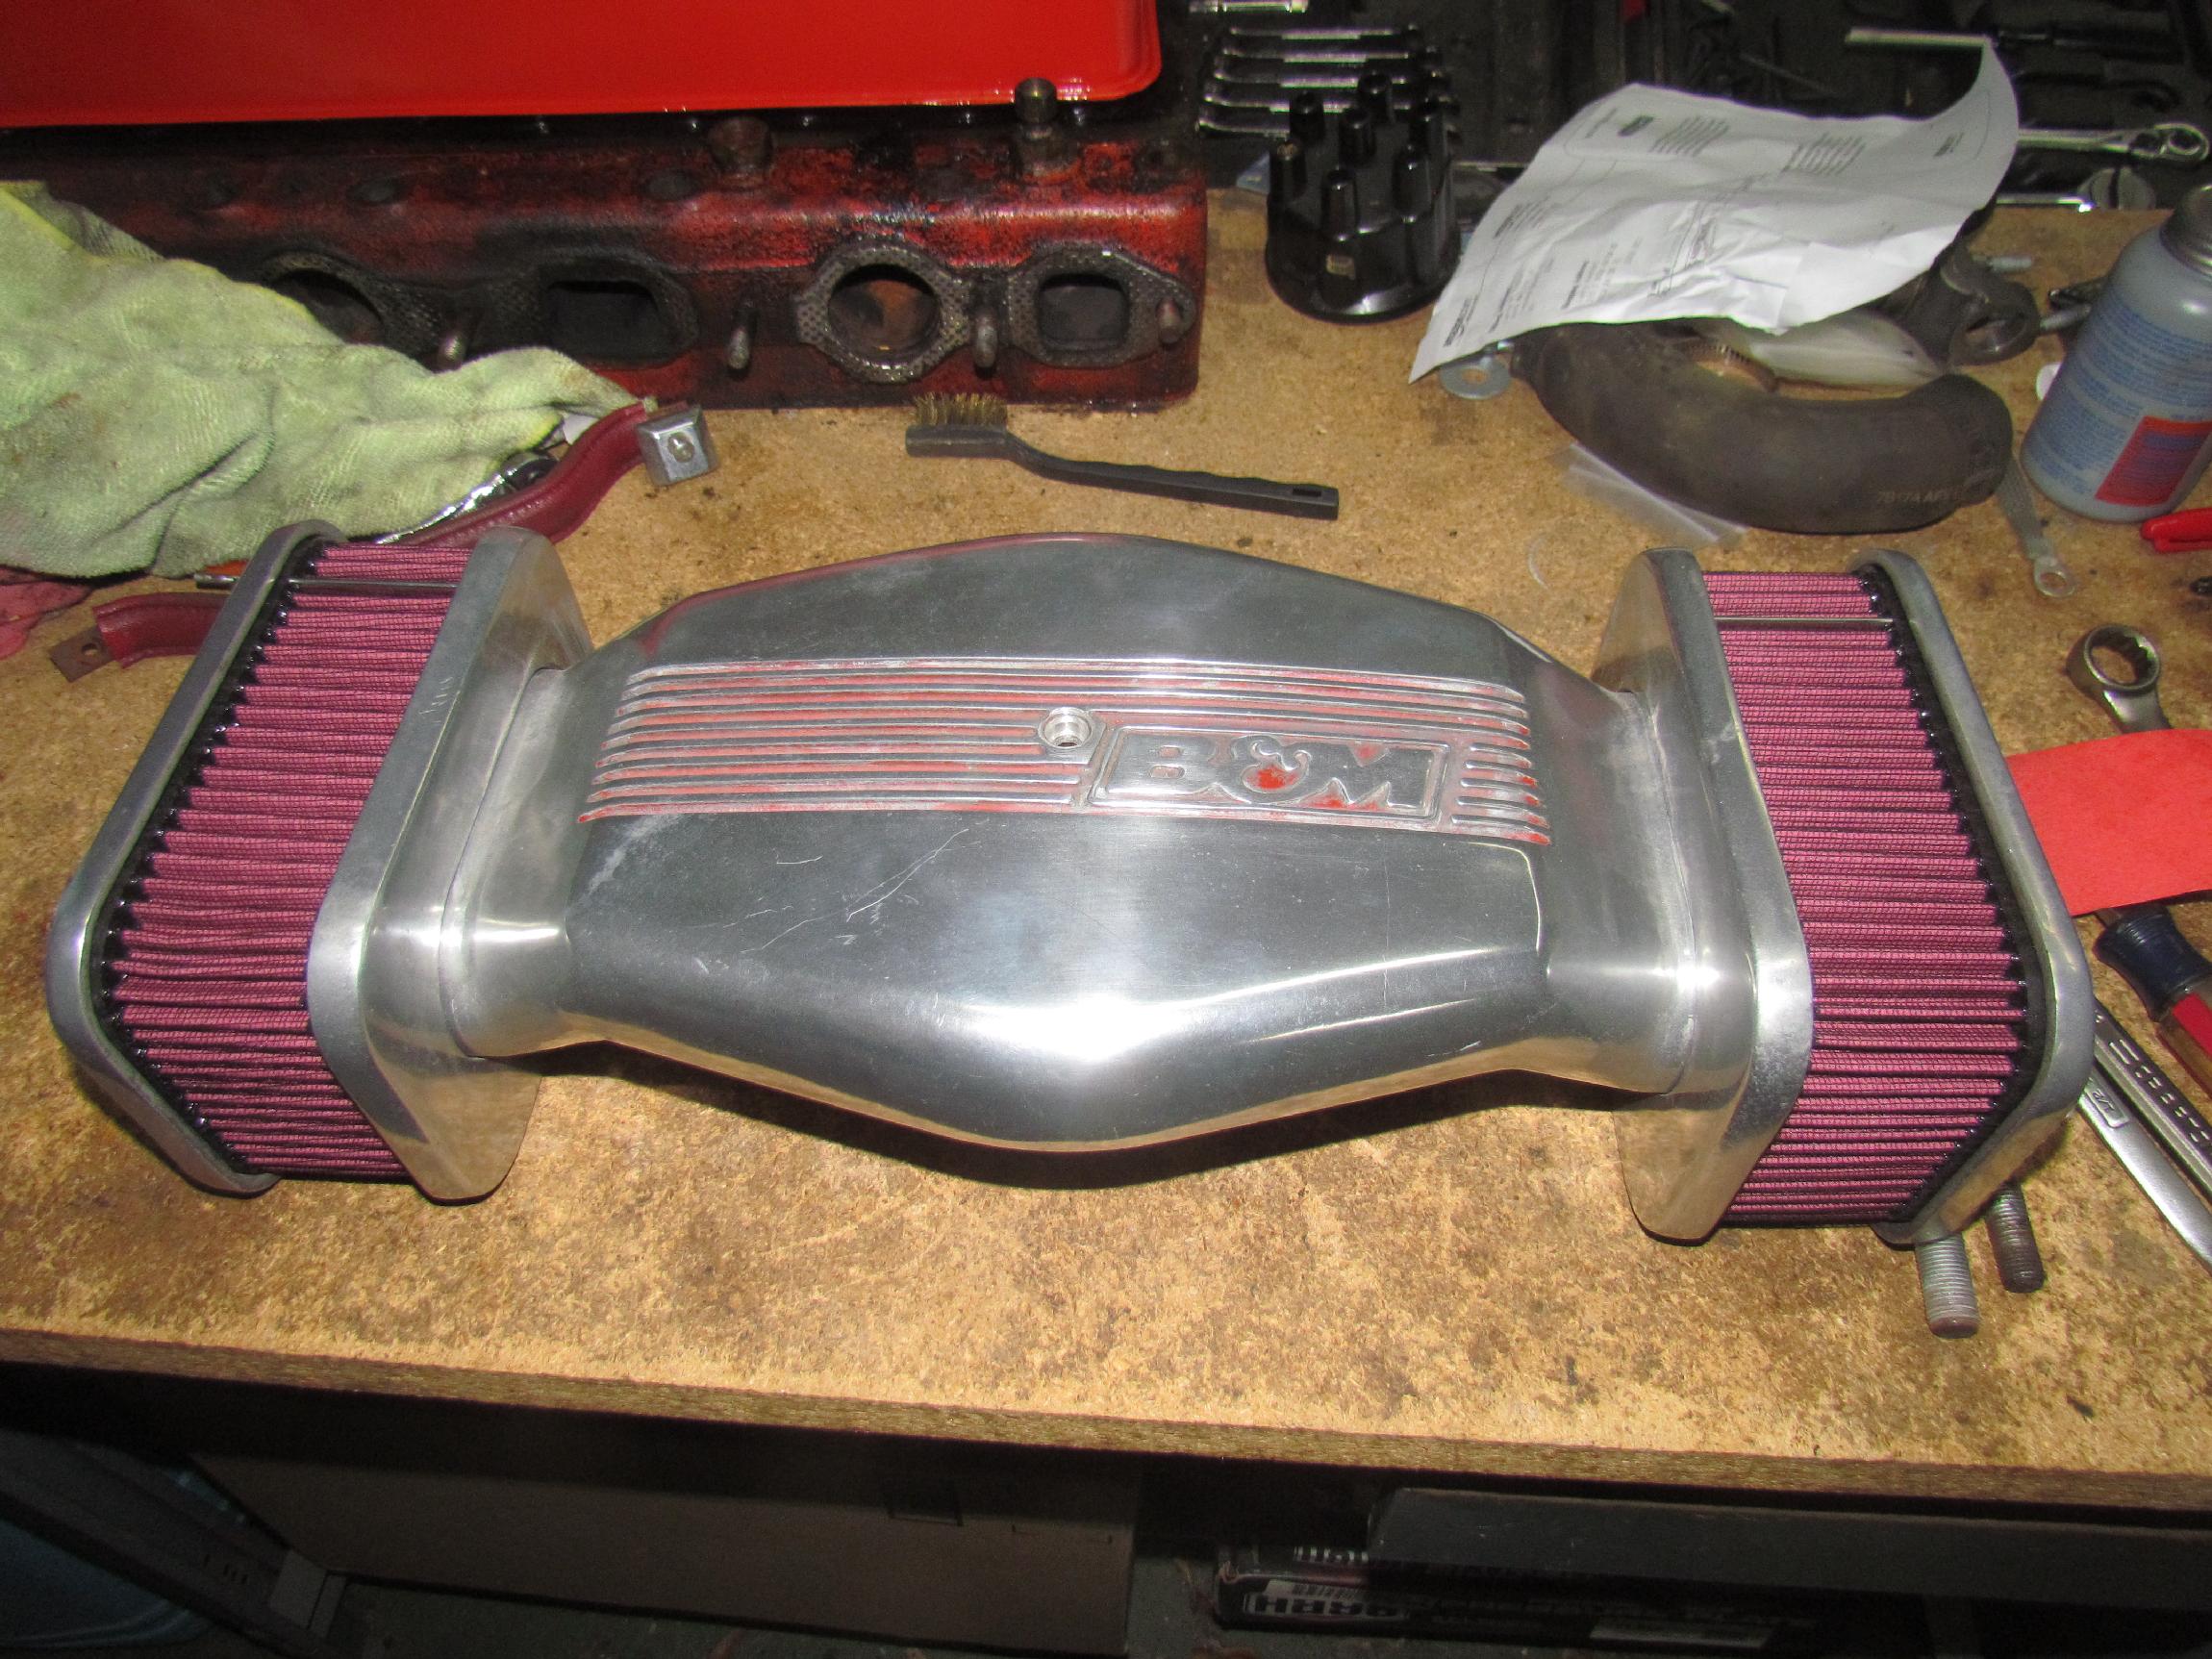 April
11th 2016 Timing
is everything and in the case of the air cleaner, this time I was
out-of-sync. No sooner had the new Holley "hammerhead" air cleaner
arrived when a more vintage B & M version of the design
appeared in an eBay auction. I bid and won the auction. One of the
filter elements
was twisted out of shape so I replaced them with the ones from the
Holley. I took this air cleaner with me to Sunday breakfast and evening
cruise-ins to bounce off the old-timers to try to determine its
pedigree. When did these air cleaners first hit the performance scene?
One friend thought he saw one at a show in the late sixties, but the
general consensus was that it appeared sometime in the eighties. At any
rate, I'm going to go with this one before my air cleaner collection
grows any bigger.
April
11th 2016 Timing
is everything and in the case of the air cleaner, this time I was
out-of-sync. No sooner had the new Holley "hammerhead" air cleaner
arrived when a more vintage B & M version of the design
appeared in an eBay auction. I bid and won the auction. One of the
filter elements
was twisted out of shape so I replaced them with the ones from the
Holley. I took this air cleaner with me to Sunday breakfast and evening
cruise-ins to bounce off the old-timers to try to determine its
pedigree. When did these air cleaners first hit the performance scene?
One friend thought he saw one at a show in the late sixties, but the
general consensus was that it appeared sometime in the eighties. At any
rate, I'm going to go with this one before my air cleaner collection
grows any bigger.
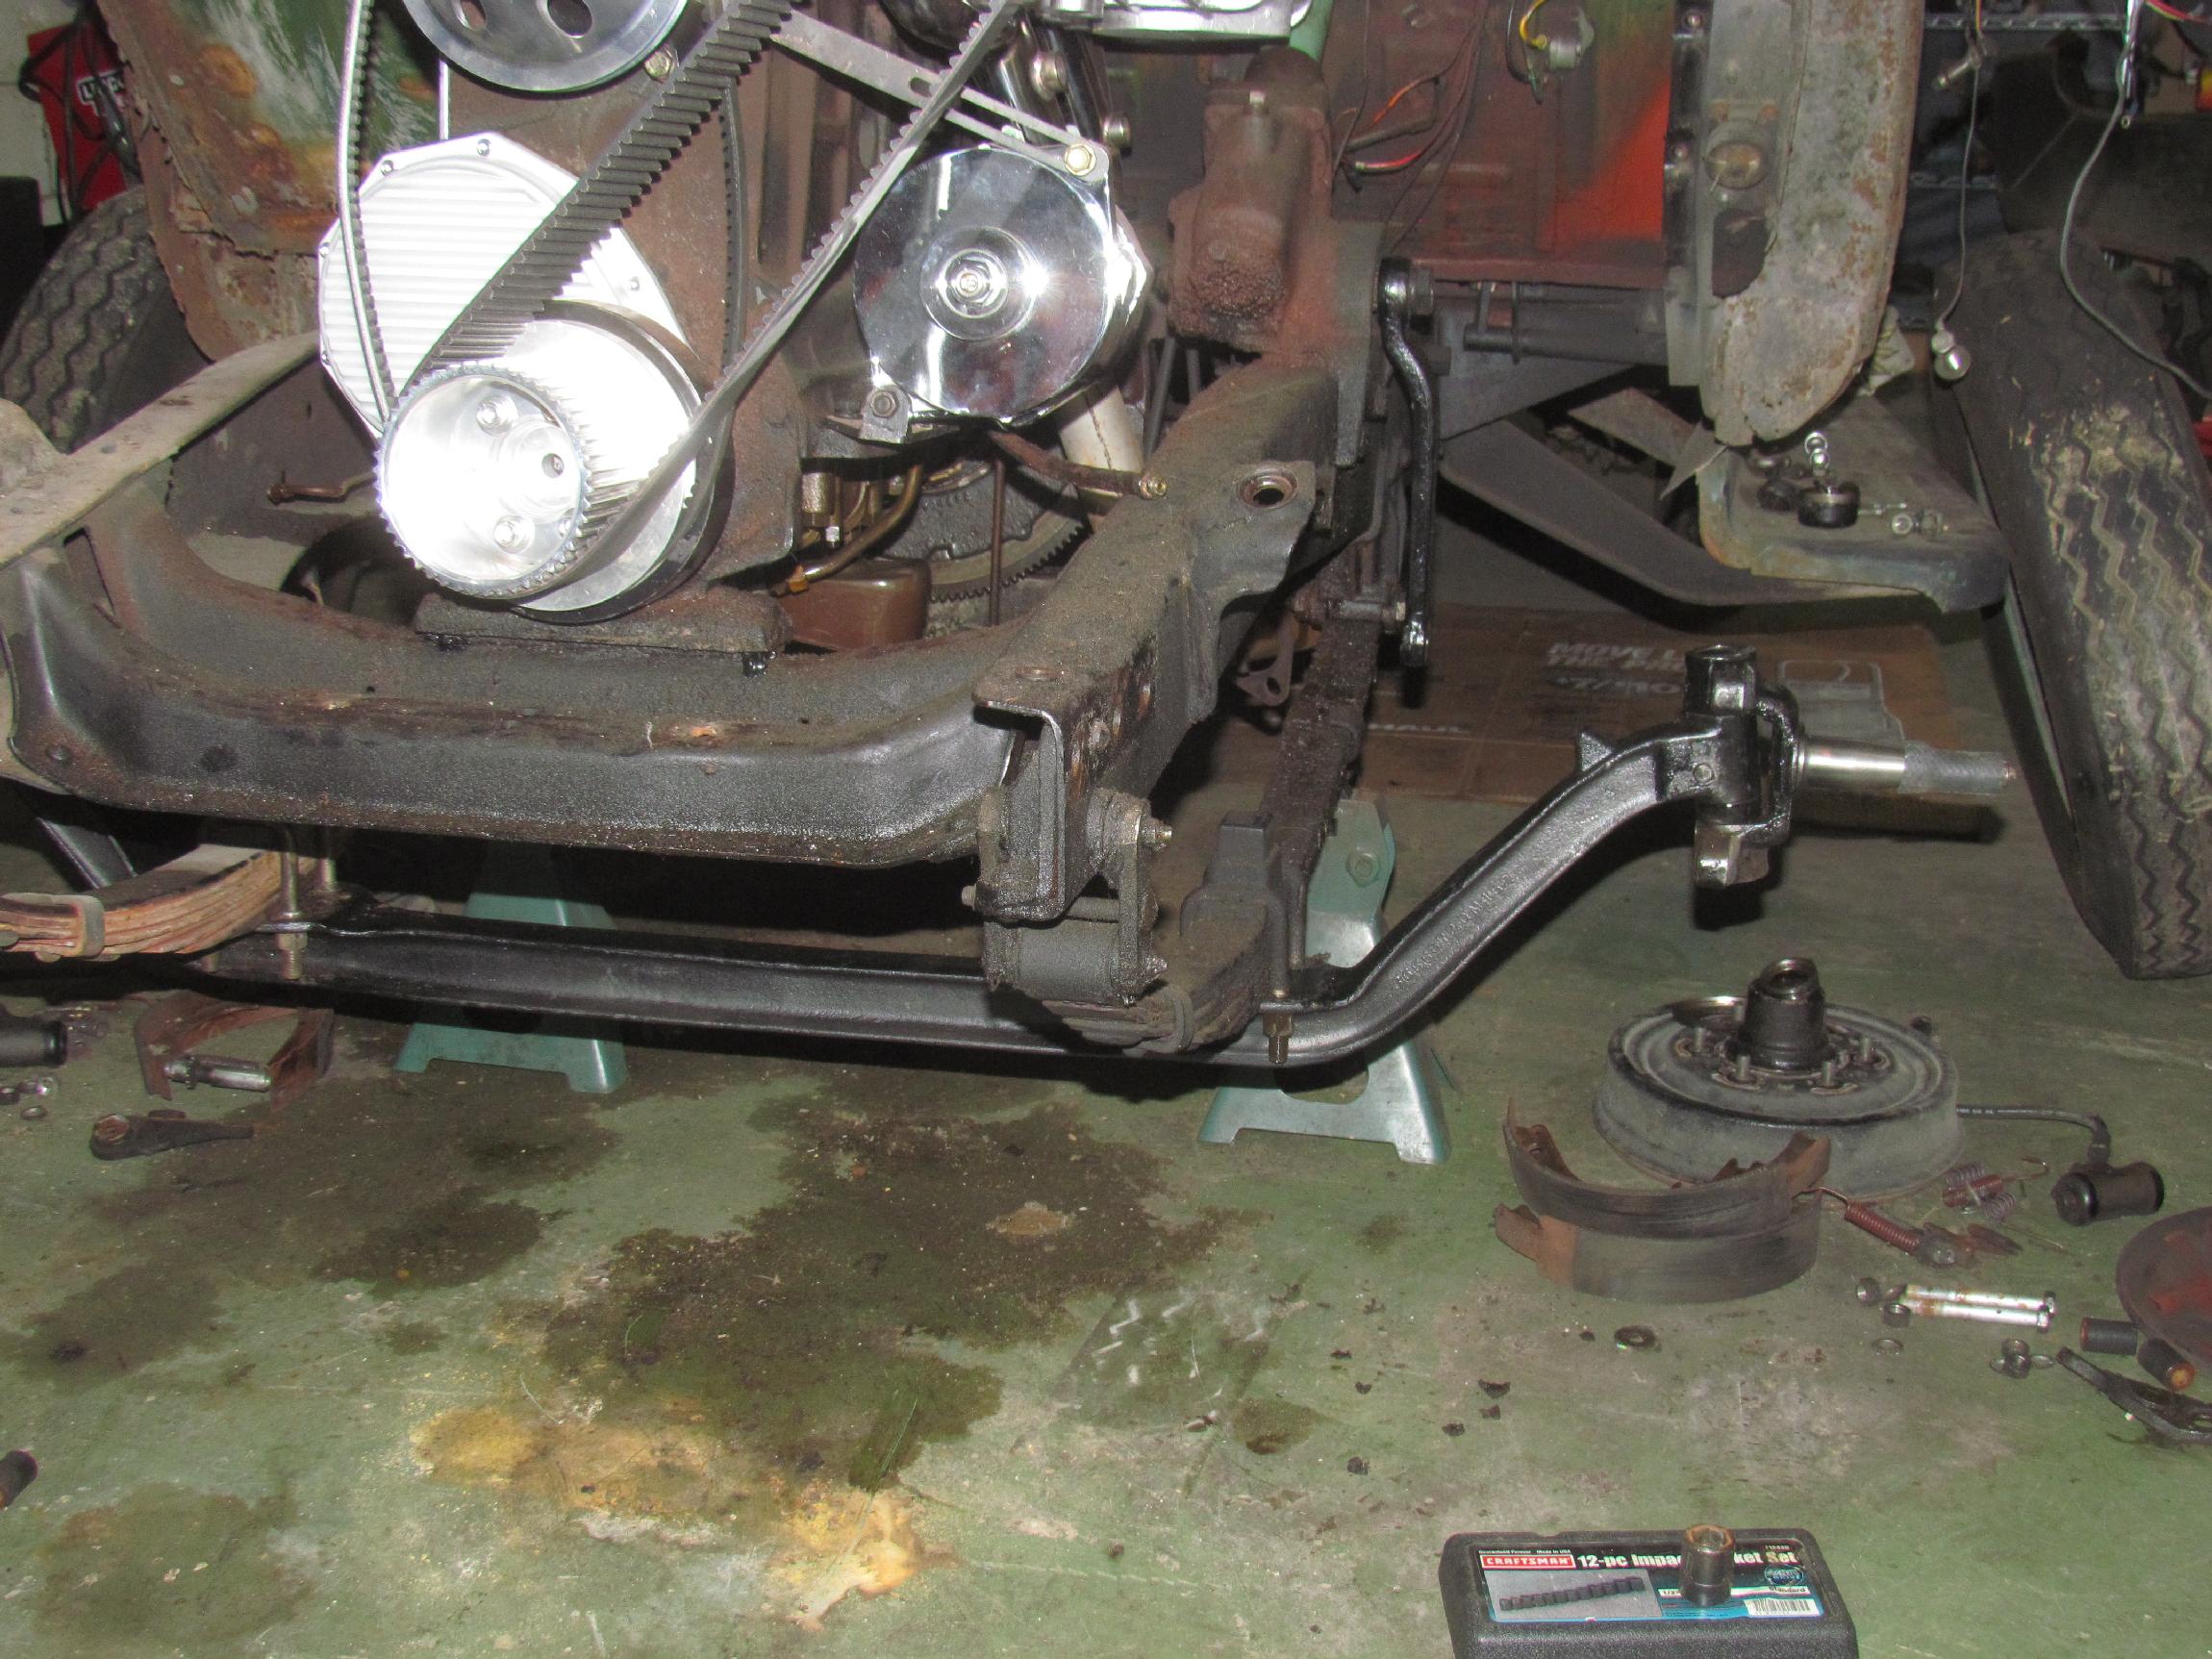
 April
14th 2016 Back
to the dropped axle and the spindle bolt mismatch. The The upper bolts
on BillyBob's '55 spindles are 7/16-20 x 2-1/2" hex head cap screws and
the lower bolts are 1/2-20 x 4", all Grade 8 "armor
coat" bolts that I installed years ago and they are still in good
shape. All the holes in the '48 dropped axle kit from Sid's are 7/16"
with the sole exception of the passenger side steering arm with has
1/2" holes. Go figure. I received 7/16-20 x 4" bolts from
McMaster-Carr today, but they will only be used for mock up purposes. I
am
going to drill out the '48 spindles lower bolt holes and the driver
side steering arm to accept the 1/2-20 x 4" bolts
after all.
April
14th 2016 Back
to the dropped axle and the spindle bolt mismatch. The The upper bolts
on BillyBob's '55 spindles are 7/16-20 x 2-1/2" hex head cap screws and
the lower bolts are 1/2-20 x 4", all Grade 8 "armor
coat" bolts that I installed years ago and they are still in good
shape. All the holes in the '48 dropped axle kit from Sid's are 7/16"
with the sole exception of the passenger side steering arm with has
1/2" holes. Go figure. I received 7/16-20 x 4" bolts from
McMaster-Carr today, but they will only be used for mock up purposes. I
am
going to drill out the '48 spindles lower bolt holes and the driver
side steering arm to accept the 1/2-20 x 4" bolts
after all.
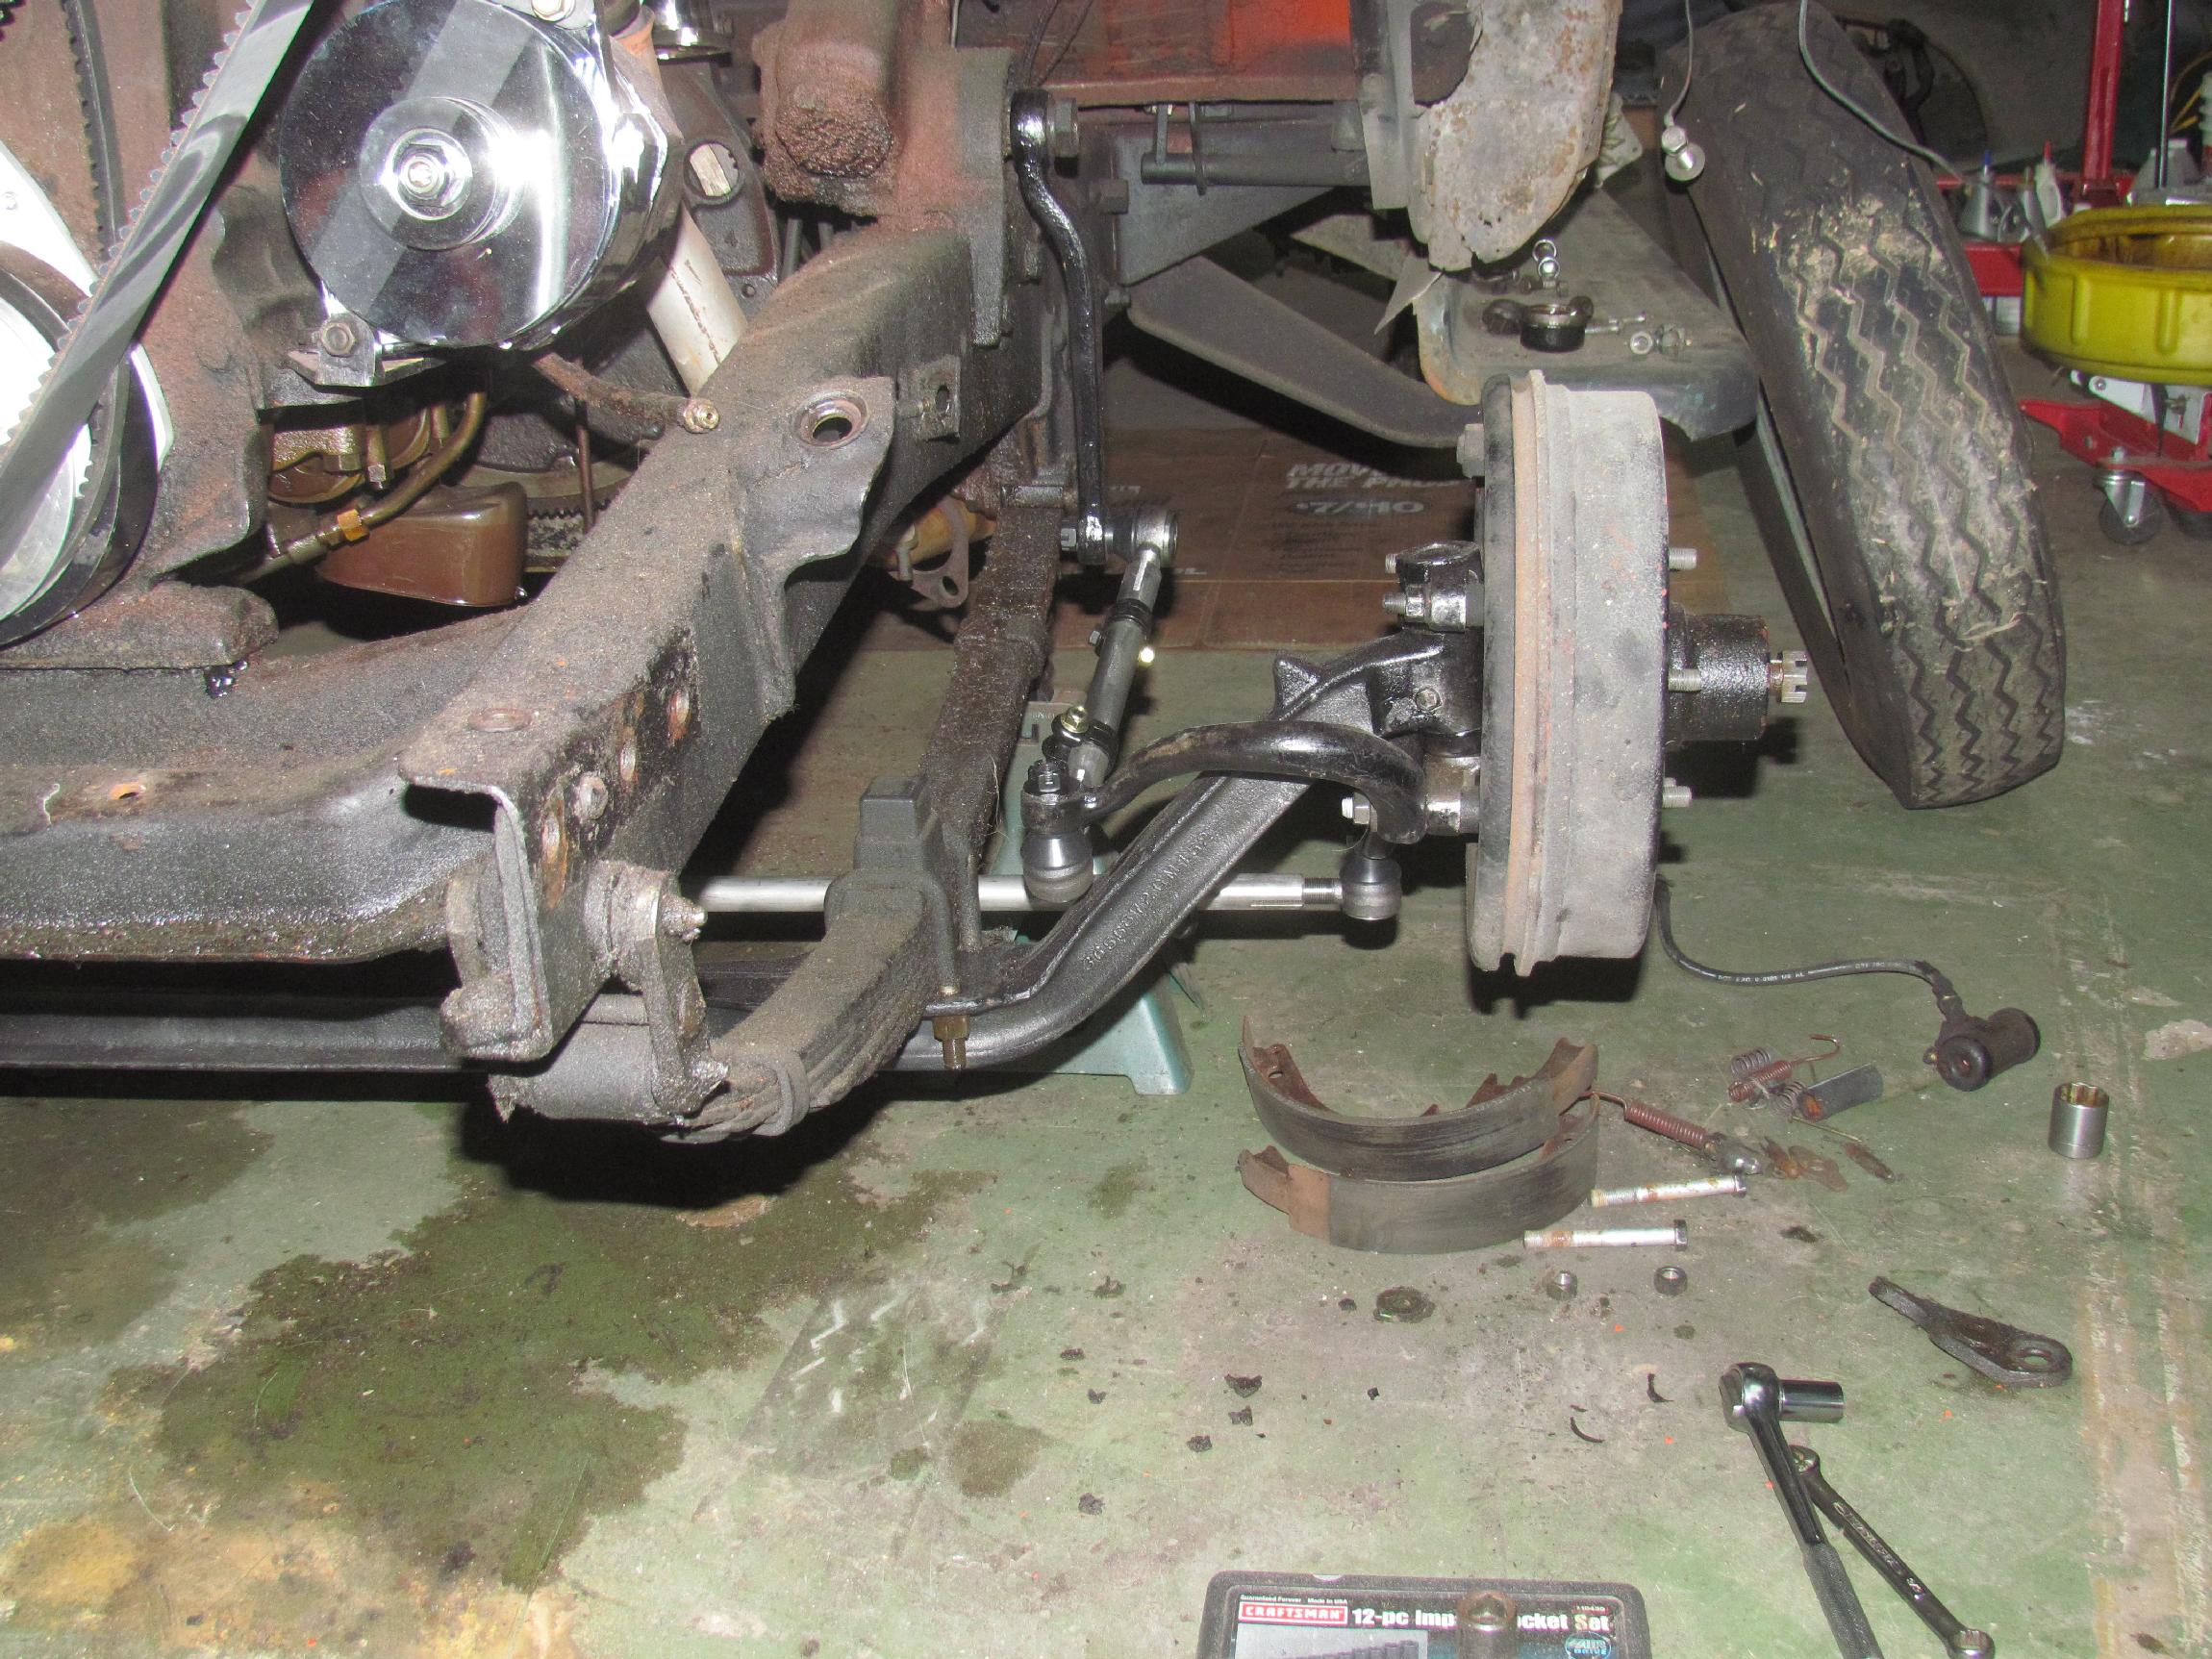
When I got to the shop from the Krash Lab, I put the '55 backing plates on the '48 spindles with the 7/16" bolts, a good fit. Then, the '55 bearings and drum, also a good fit. Then I hit the wall. Damnation! Neither '55 spindle nut will go onto either '48 spindle. Ain't that curious? Time for what FB friend, Don Norris terms DPM, "Deep Ponder Mood"
 April
16th 2016 So,
when I go to order new spindle nuts on the Intarweb, I find that half
ton Chevy truck spindle nuts are 3/4"-20 thread from 1946 thru 1996.
The '55 nuts should fit the '48 spindles. Whiskey-Tango-Foxtrot! I
ordered new spindle nuts anyway and while I'm pondering the situation,
with the assistance of the beer of the day, Sand Creek Brewing
Company's American Pale Ale, Gato (GTO Auto Repair) stopped by to check
his mail. After I
told him about the spindle nuts, he checked the resistance and ran them
down. He did not think the resistance great enough to indicate
cross-threading.
April
16th 2016 So,
when I go to order new spindle nuts on the Intarweb, I find that half
ton Chevy truck spindle nuts are 3/4"-20 thread from 1946 thru 1996.
The '55 nuts should fit the '48 spindles. Whiskey-Tango-Foxtrot! I
ordered new spindle nuts anyway and while I'm pondering the situation,
with the assistance of the beer of the day, Sand Creek Brewing
Company's American Pale Ale, Gato (GTO Auto Repair) stopped by to check
his mail. After I
told him about the spindle nuts, he checked the resistance and ran them
down. He did not think the resistance great enough to indicate
cross-threading.
After Gato departed, I put BillyBob's wheels back on and lowered the truck. The four inch drop almost levels the engine which is what I'm shooting for. I let air out of the tires until the engine was level and discovered I need two more inches to achieve my goal. The springs on BillyBob are stock "rod ride" springs from Eaton. They offer the same springs with a two inch drop so I will order a pair next week.
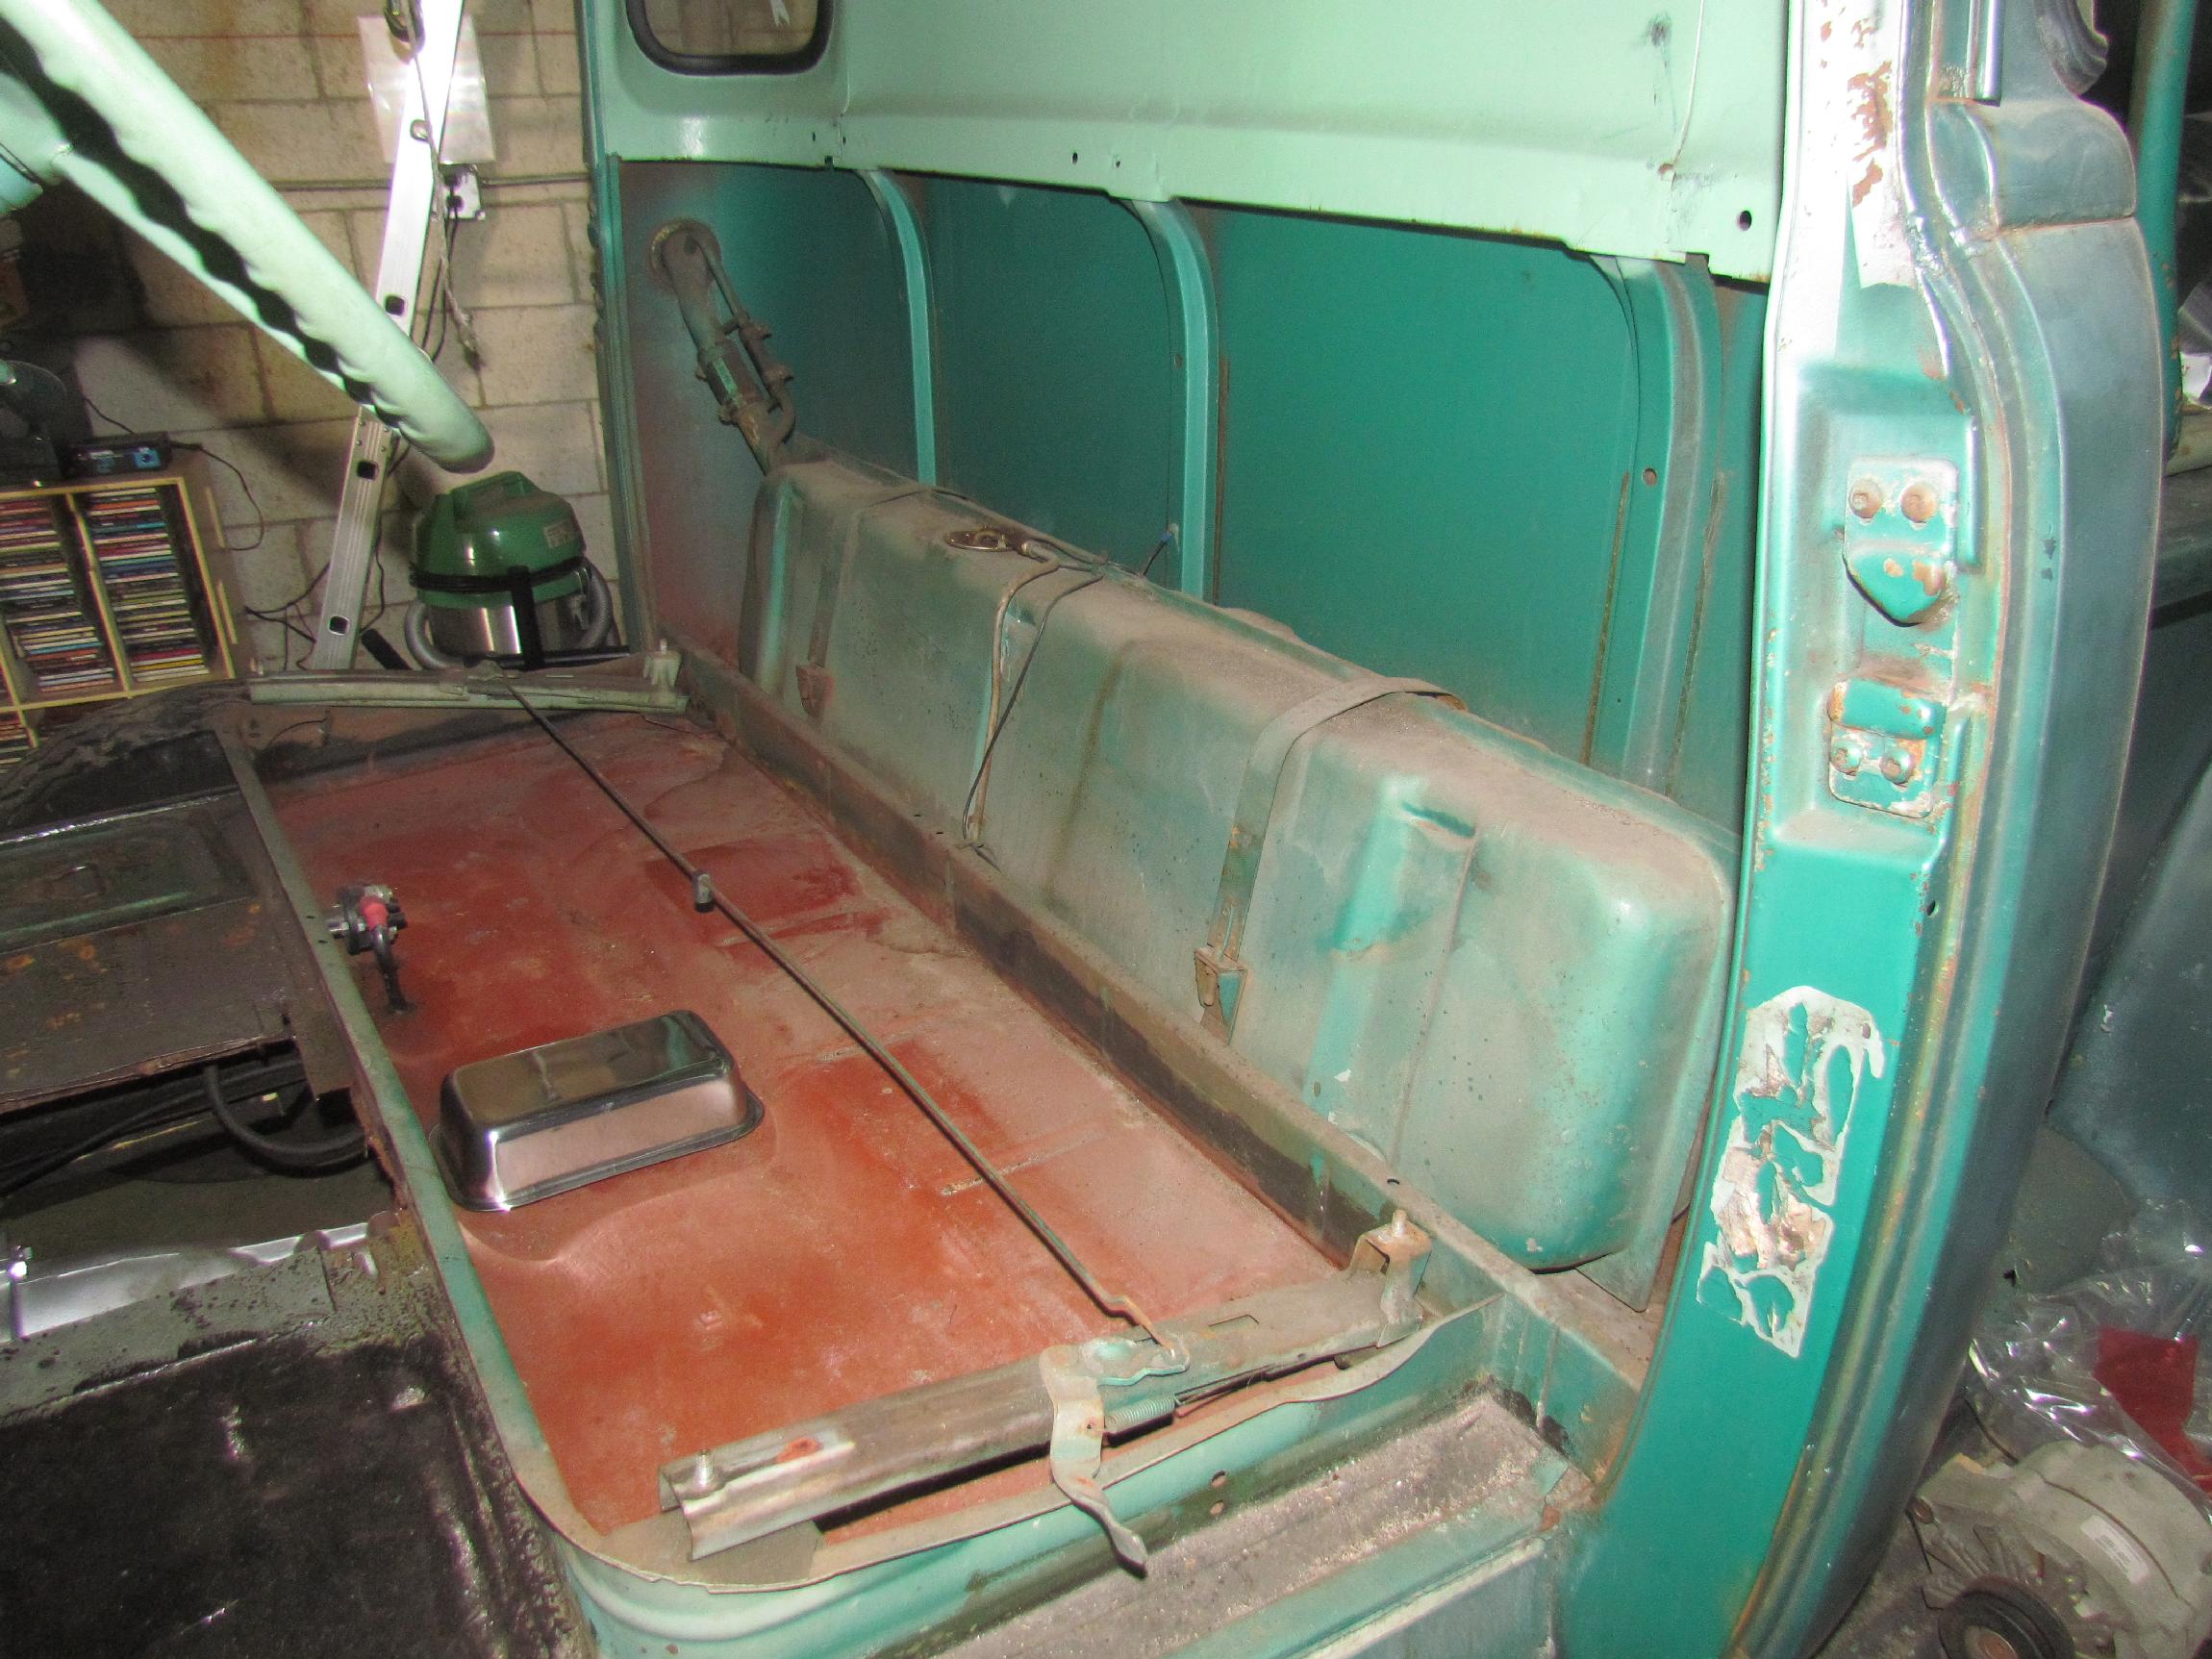 Also
removed BillyBob's gas tank. I drained as much as possible some time
back but there is still a little bit of old gas in the tank. I don't
want anything flammable in the cab when I go to work on the floor with
a
plasma cutter. I'm not sure but I think the last time the tank was out
was when JR owned the truck back in the eighties.
Also
removed BillyBob's gas tank. I drained as much as possible some time
back but there is still a little bit of old gas in the tank. I don't
want anything flammable in the cab when I go to work on the floor with
a
plasma cutter. I'm not sure but I think the last time the tank was out
was when JR owned the truck back in the eighties.
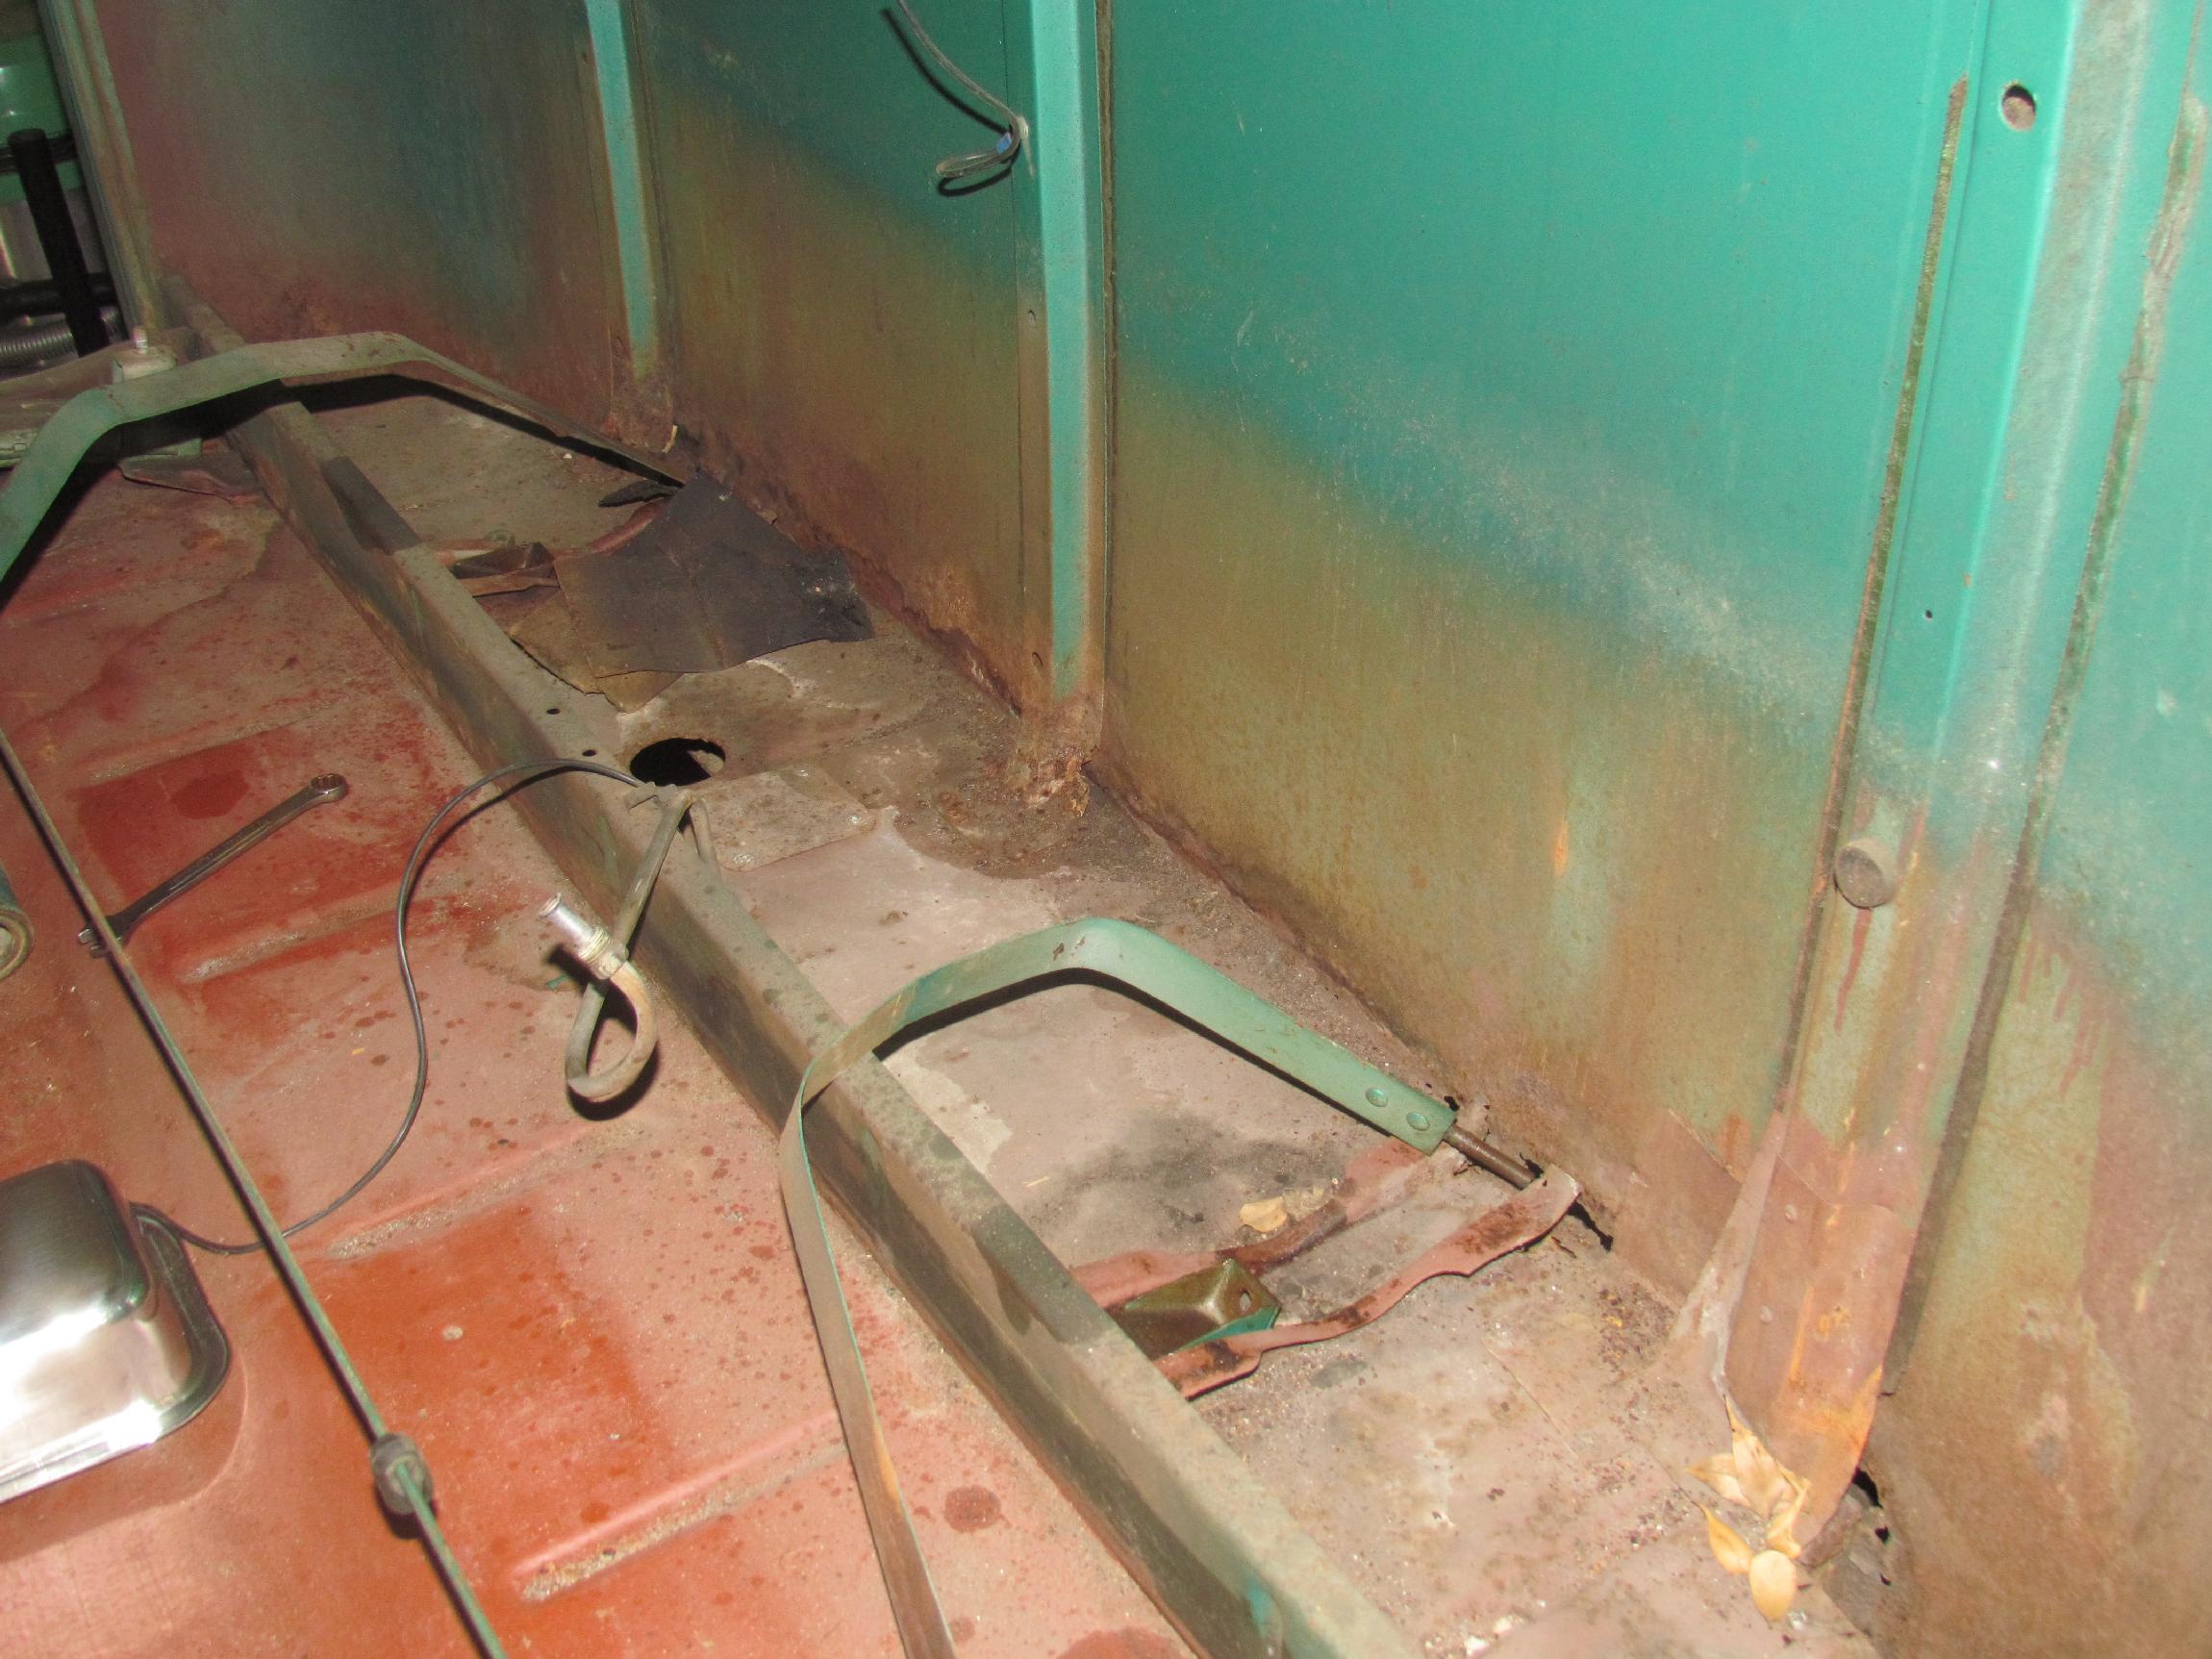 Looks
like we got some fixing to do here. There's some rust damage at the
bottom of the cab back as well as the floor behind the seat base. The
driver side tank strap mount on the back side is almost completely gone
and the passenger side is not in much better shape. I started to think
about it, and while I was in ponder mode again, an old friend
showed up at the shop. I met Paul not long after I arrived in South
Florida in the early seventies. We haven't seen each other for twenty
years or more. Had beers and got caught up. Closed down operations
after Paul left and I was sawin' logs before dark.
Looks
like we got some fixing to do here. There's some rust damage at the
bottom of the cab back as well as the floor behind the seat base. The
driver side tank strap mount on the back side is almost completely gone
and the passenger side is not in much better shape. I started to think
about it, and while I was in ponder mode again, an old friend
showed up at the shop. I met Paul not long after I arrived in South
Florida in the early seventies. We haven't seen each other for twenty
years or more. Had beers and got caught up. Closed down operations
after Paul left and I was sawin' logs before dark.
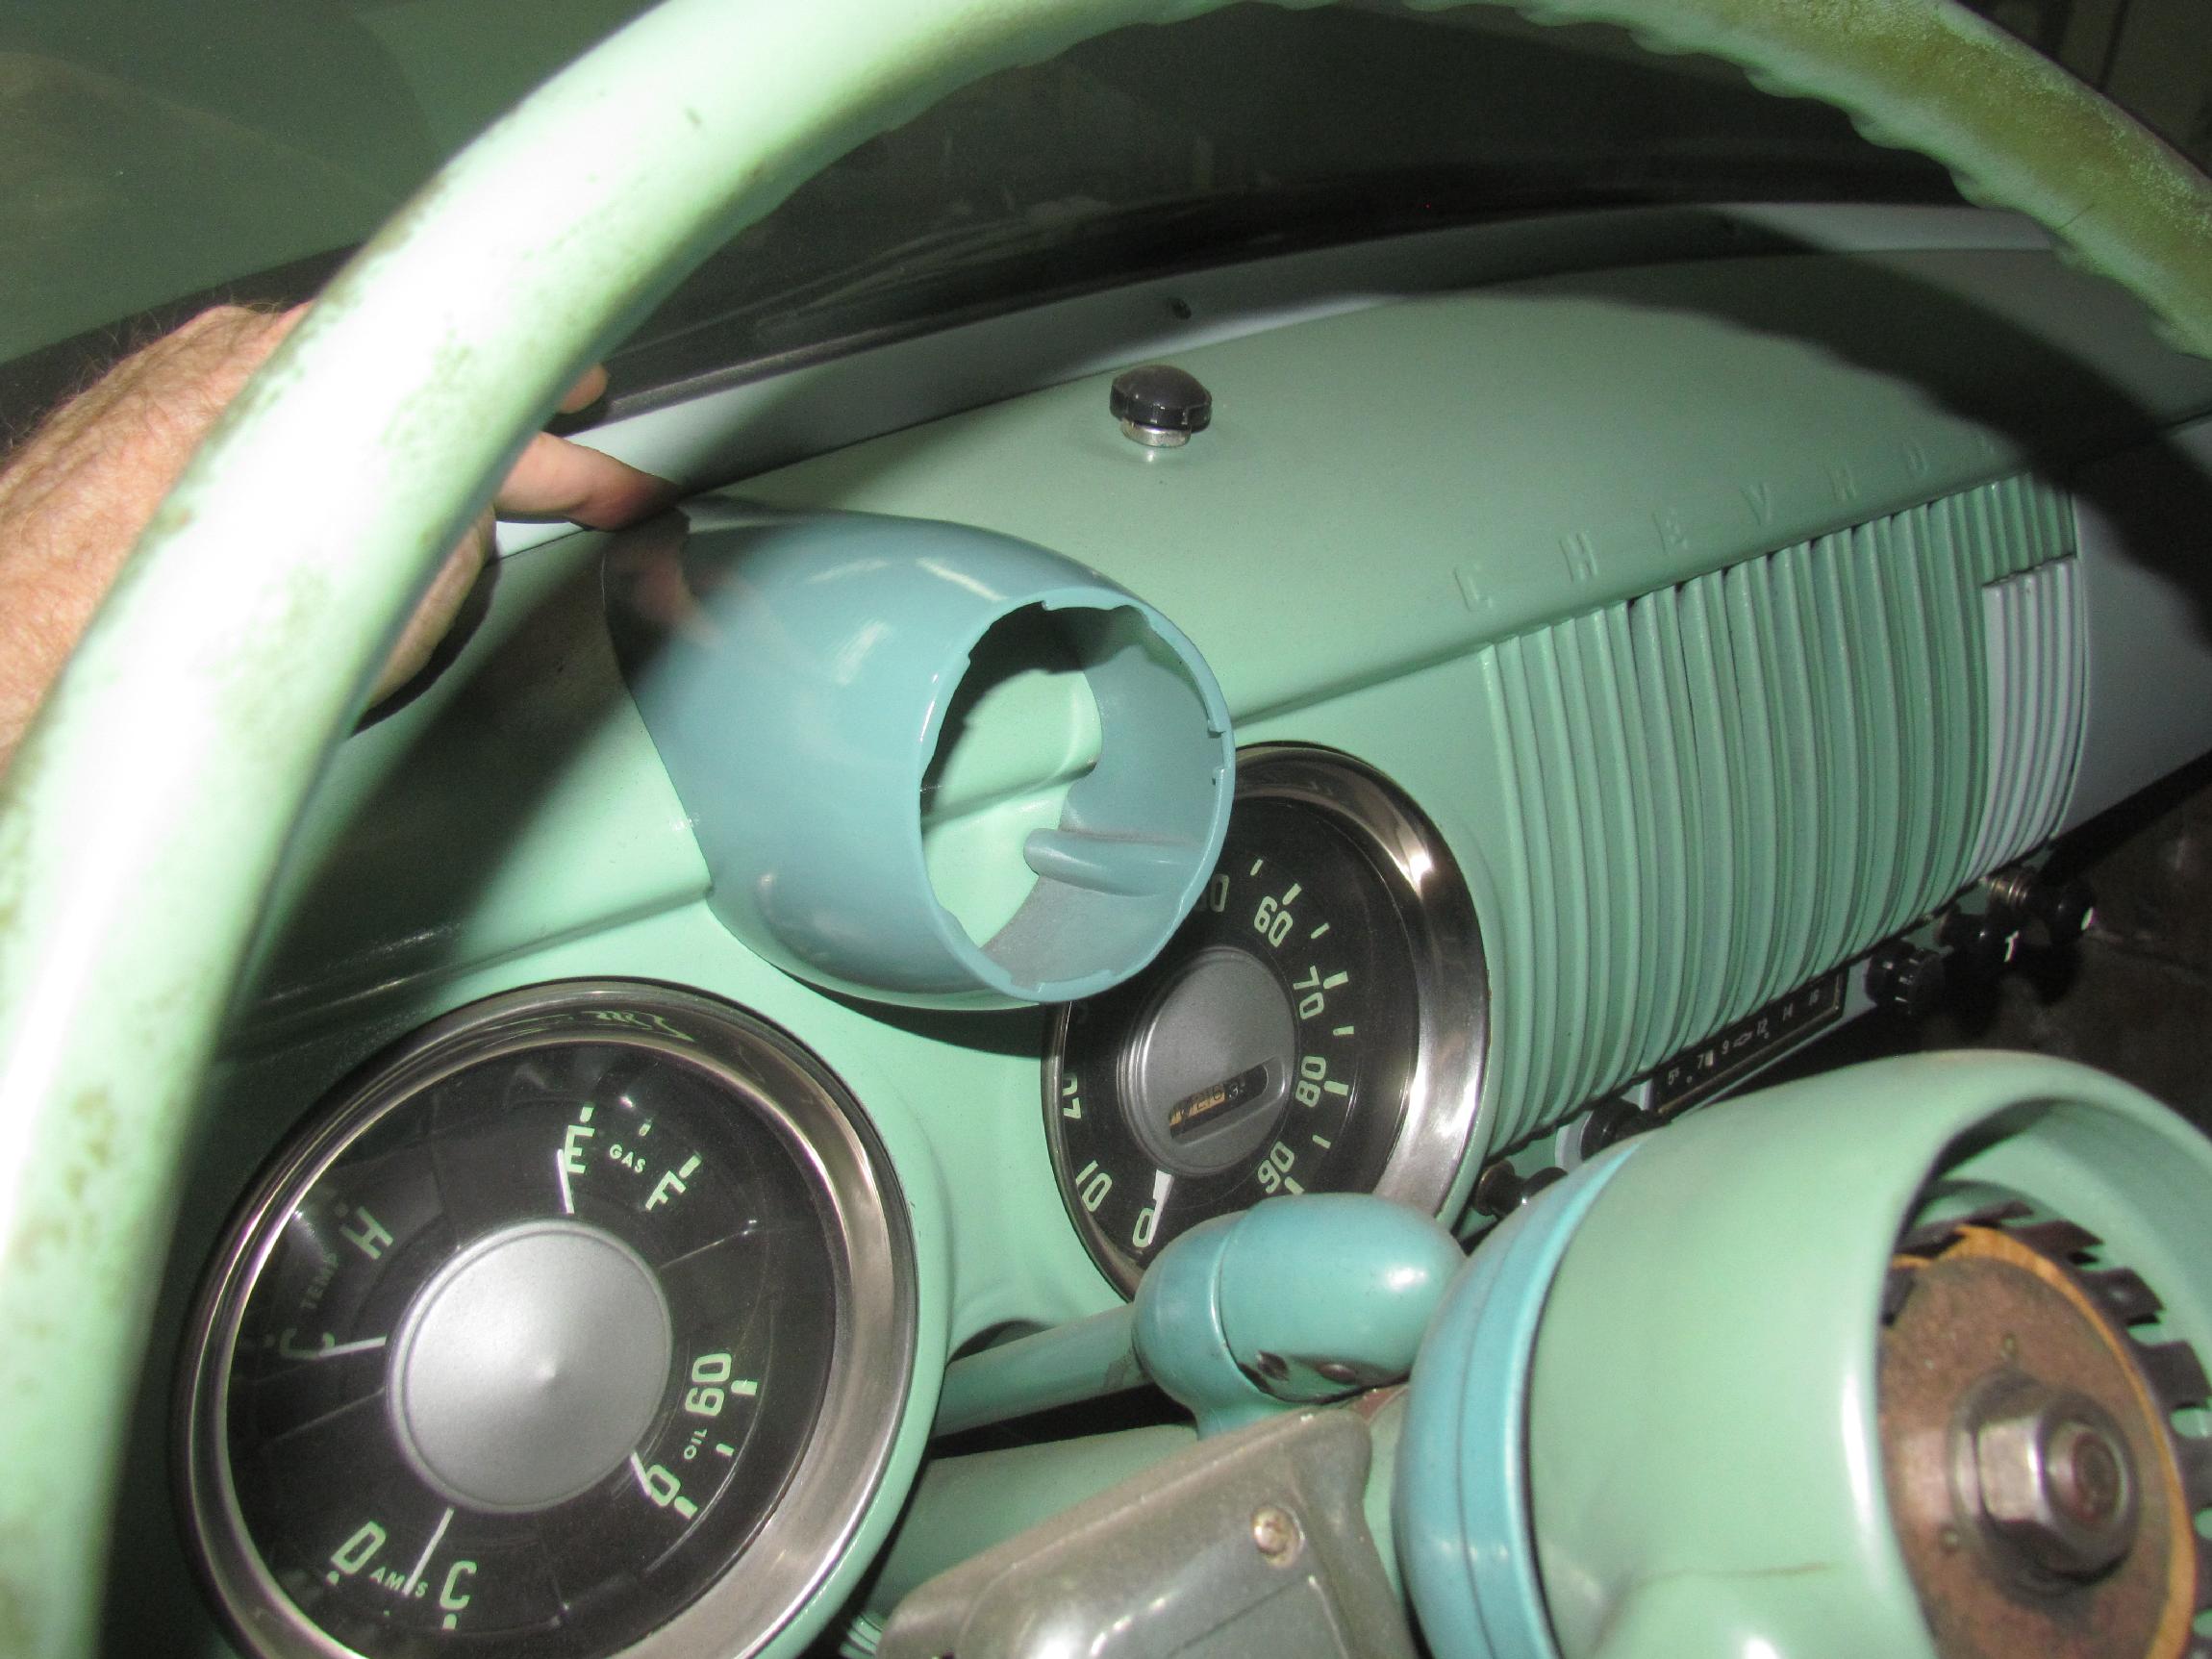
 April
20th 2016 A
week or so back, I bid on and scored a bling item for BillyBob, the
rare clock option for the '54 Chebby truck. This thing only
fits '54-'55 1st Series Chevy trucks and I can't believe many
were
made. I really don't care about the clock but I wanted the housing as I
plan to mount a tach in it. I knew about them but had never seen one
before. When it arrived, I found out it was a pot metal casting, not
sheet metal as I had imagined. It really fits the dash nicely.
April
20th 2016 A
week or so back, I bid on and scored a bling item for BillyBob, the
rare clock option for the '54 Chebby truck. This thing only
fits '54-'55 1st Series Chevy trucks and I can't believe many
were
made. I really don't care about the clock but I wanted the housing as I
plan to mount a tach in it. I knew about them but had never seen one
before. When it arrived, I found out it was a pot metal casting, not
sheet metal as I had imagined. It really fits the dash nicely.
 April
27th 2016 Cut up a
stainless steel bread pan to make an enclosure for the notch I have to
cut in BillyBob's seat base to clear the Hurst shifter. Cut it in half
with the chop saw, then cut off rolled edge flange using an air-powered
saber saw. Finally took to rough shaping with aviation snips. I have
right, left and center snips but never learned the proper way to use
them yet. I just grab one and if it works without deforming the piece I
want to keep, then Bob's your uncle. Beer of the day was Boulder Beer
Company's Emergent White IPA. Tasted like grapefruit.
April
27th 2016 Cut up a
stainless steel bread pan to make an enclosure for the notch I have to
cut in BillyBob's seat base to clear the Hurst shifter. Cut it in half
with the chop saw, then cut off rolled edge flange using an air-powered
saber saw. Finally took to rough shaping with aviation snips. I have
right, left and center snips but never learned the proper way to use
them yet. I just grab one and if it works without deforming the piece I
want to keep, then Bob's your uncle. Beer of the day was Boulder Beer
Company's Emergent White IPA. Tasted like grapefruit.
 April
30th 2016 I was set to
order dropped front springs when I said to myself "Hold on. Back the
truck up a minute." I better get new rear rubber on BillyBob first,
then take new front end drop measurements. With the new forward rake,
BillyBob's stock 650x16 rear tires are looking kinda lost in that rear
fender. I ordered 16" x 7", six lug steel wheels, from Chevs of the
Forties. They arrived on Friday.
April
30th 2016 I was set to
order dropped front springs when I said to myself "Hold on. Back the
truck up a minute." I better get new rear rubber on BillyBob first,
then take new front end drop measurements. With the new forward rake,
BillyBob's stock 650x16 rear tires are looking kinda lost in that rear
fender. I ordered 16" x 7", six lug steel wheels, from Chevs of the
Forties. They arrived on Friday.
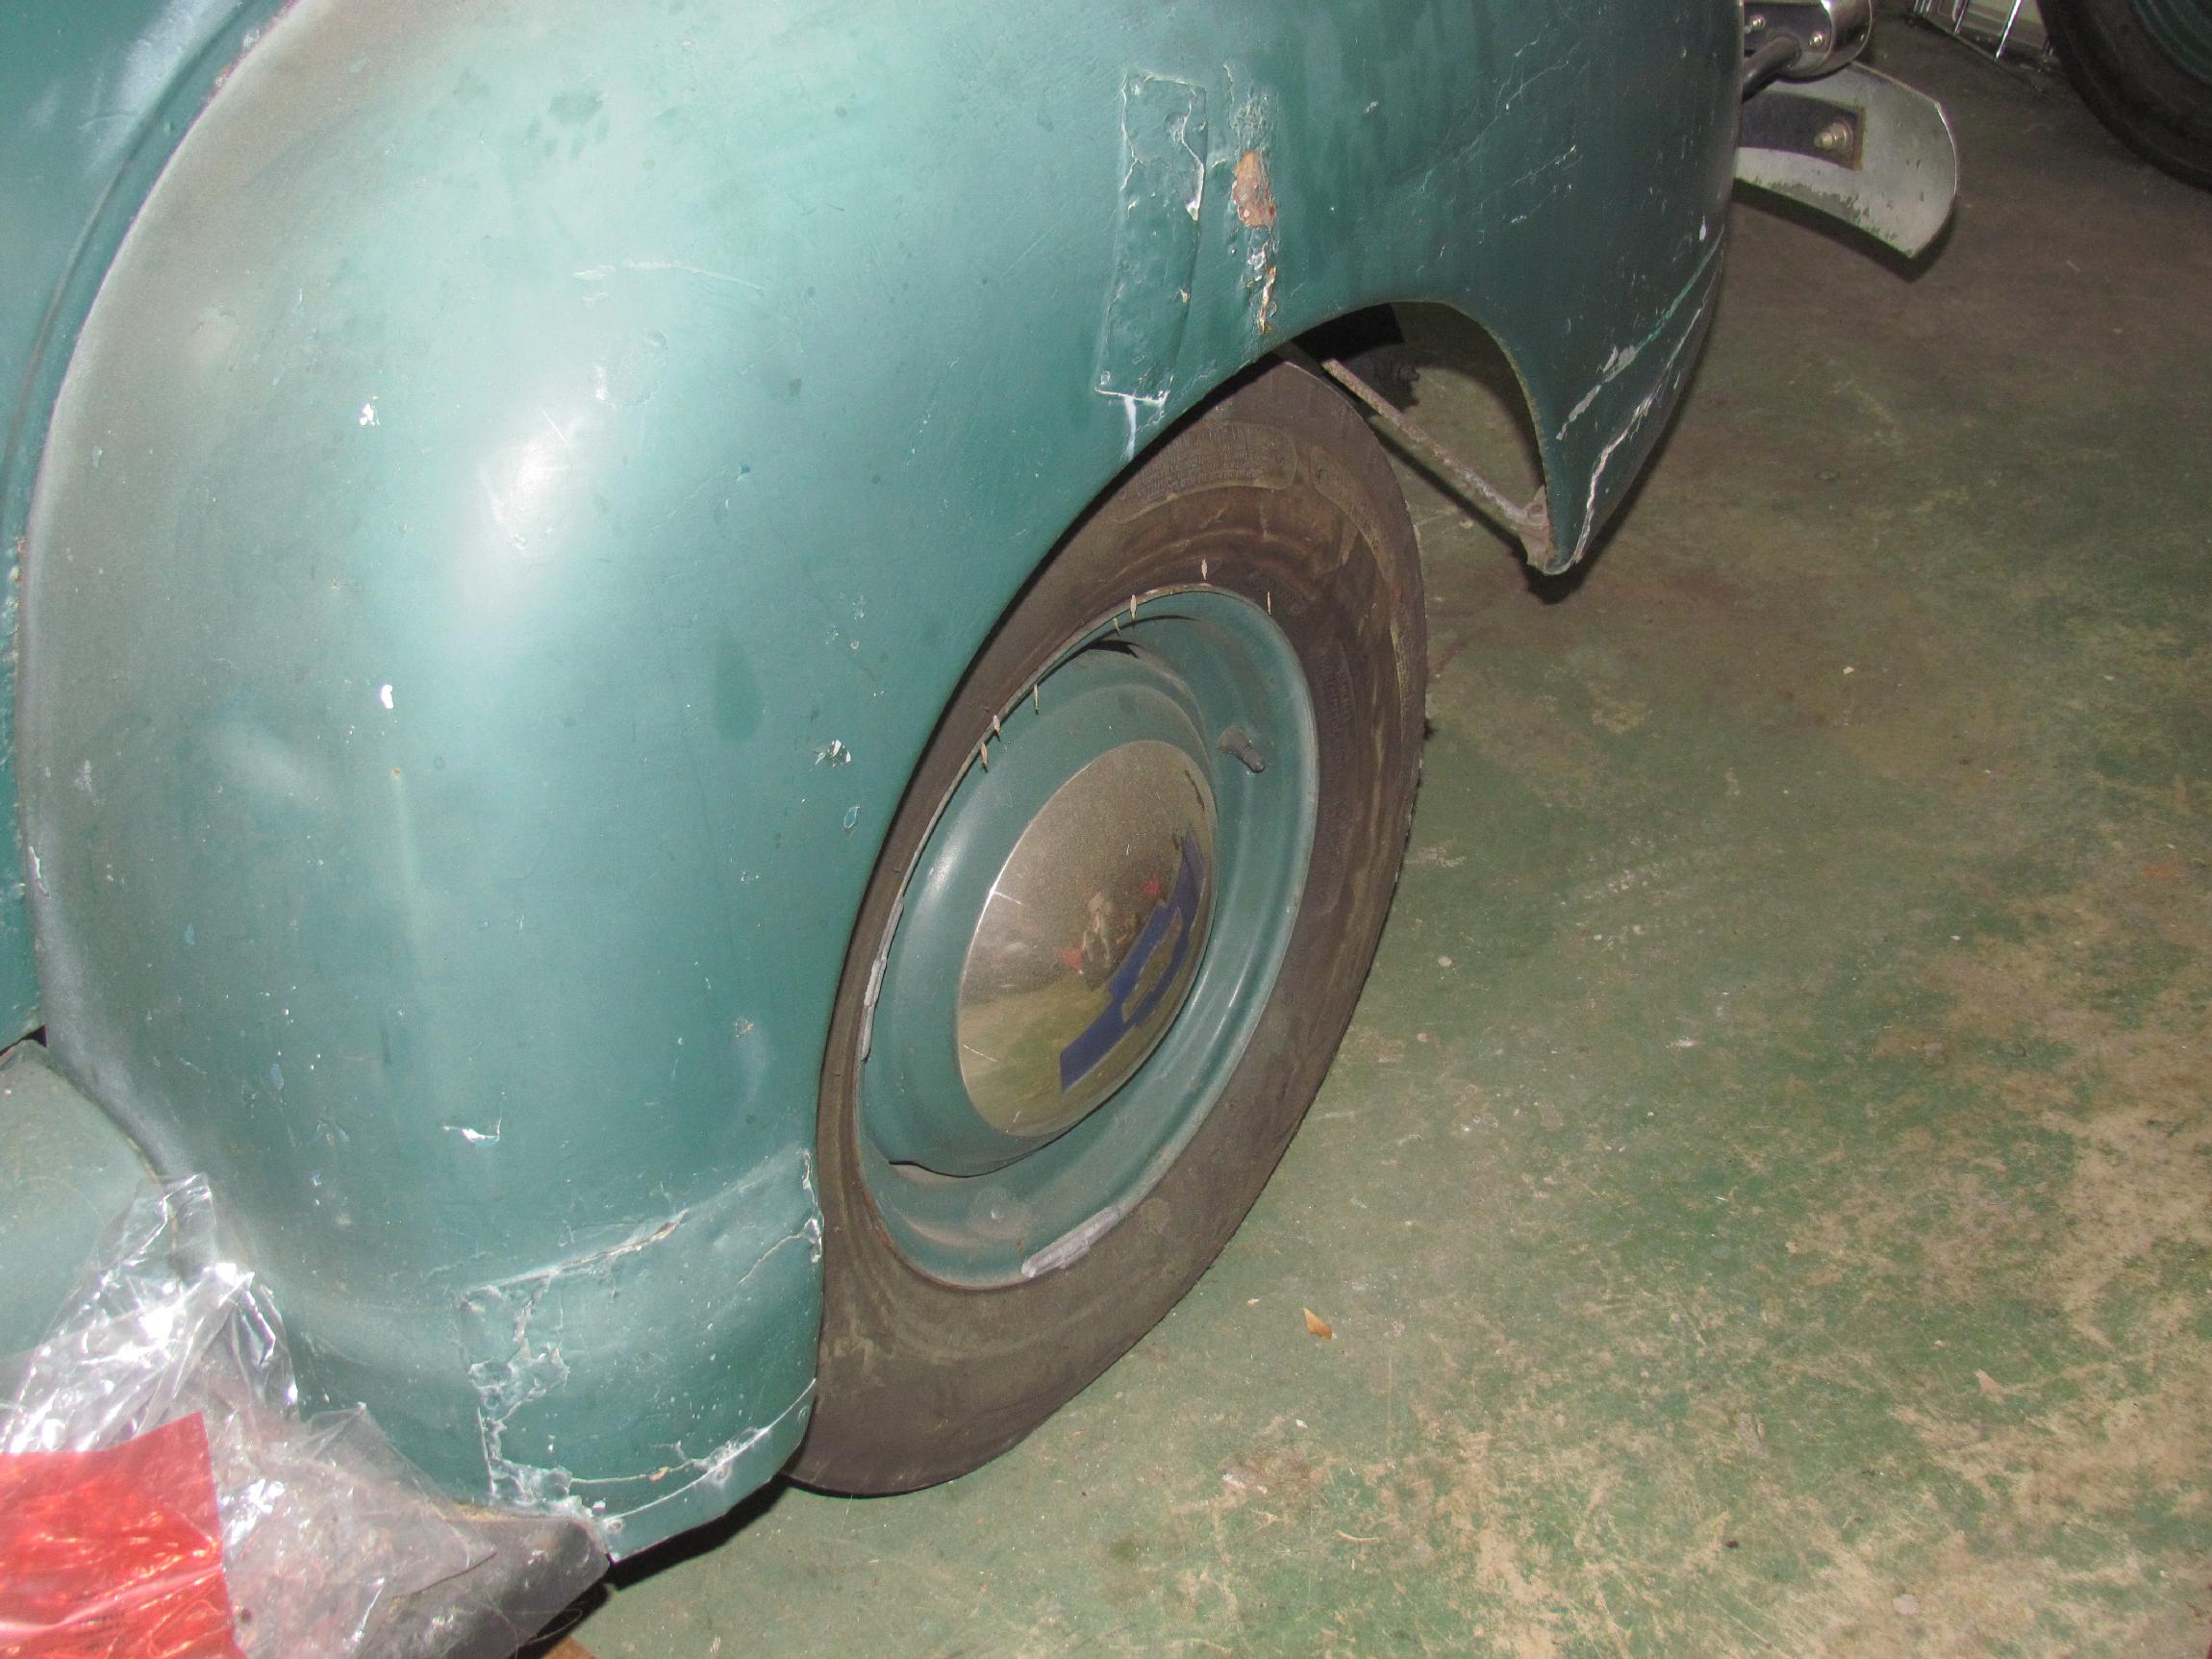
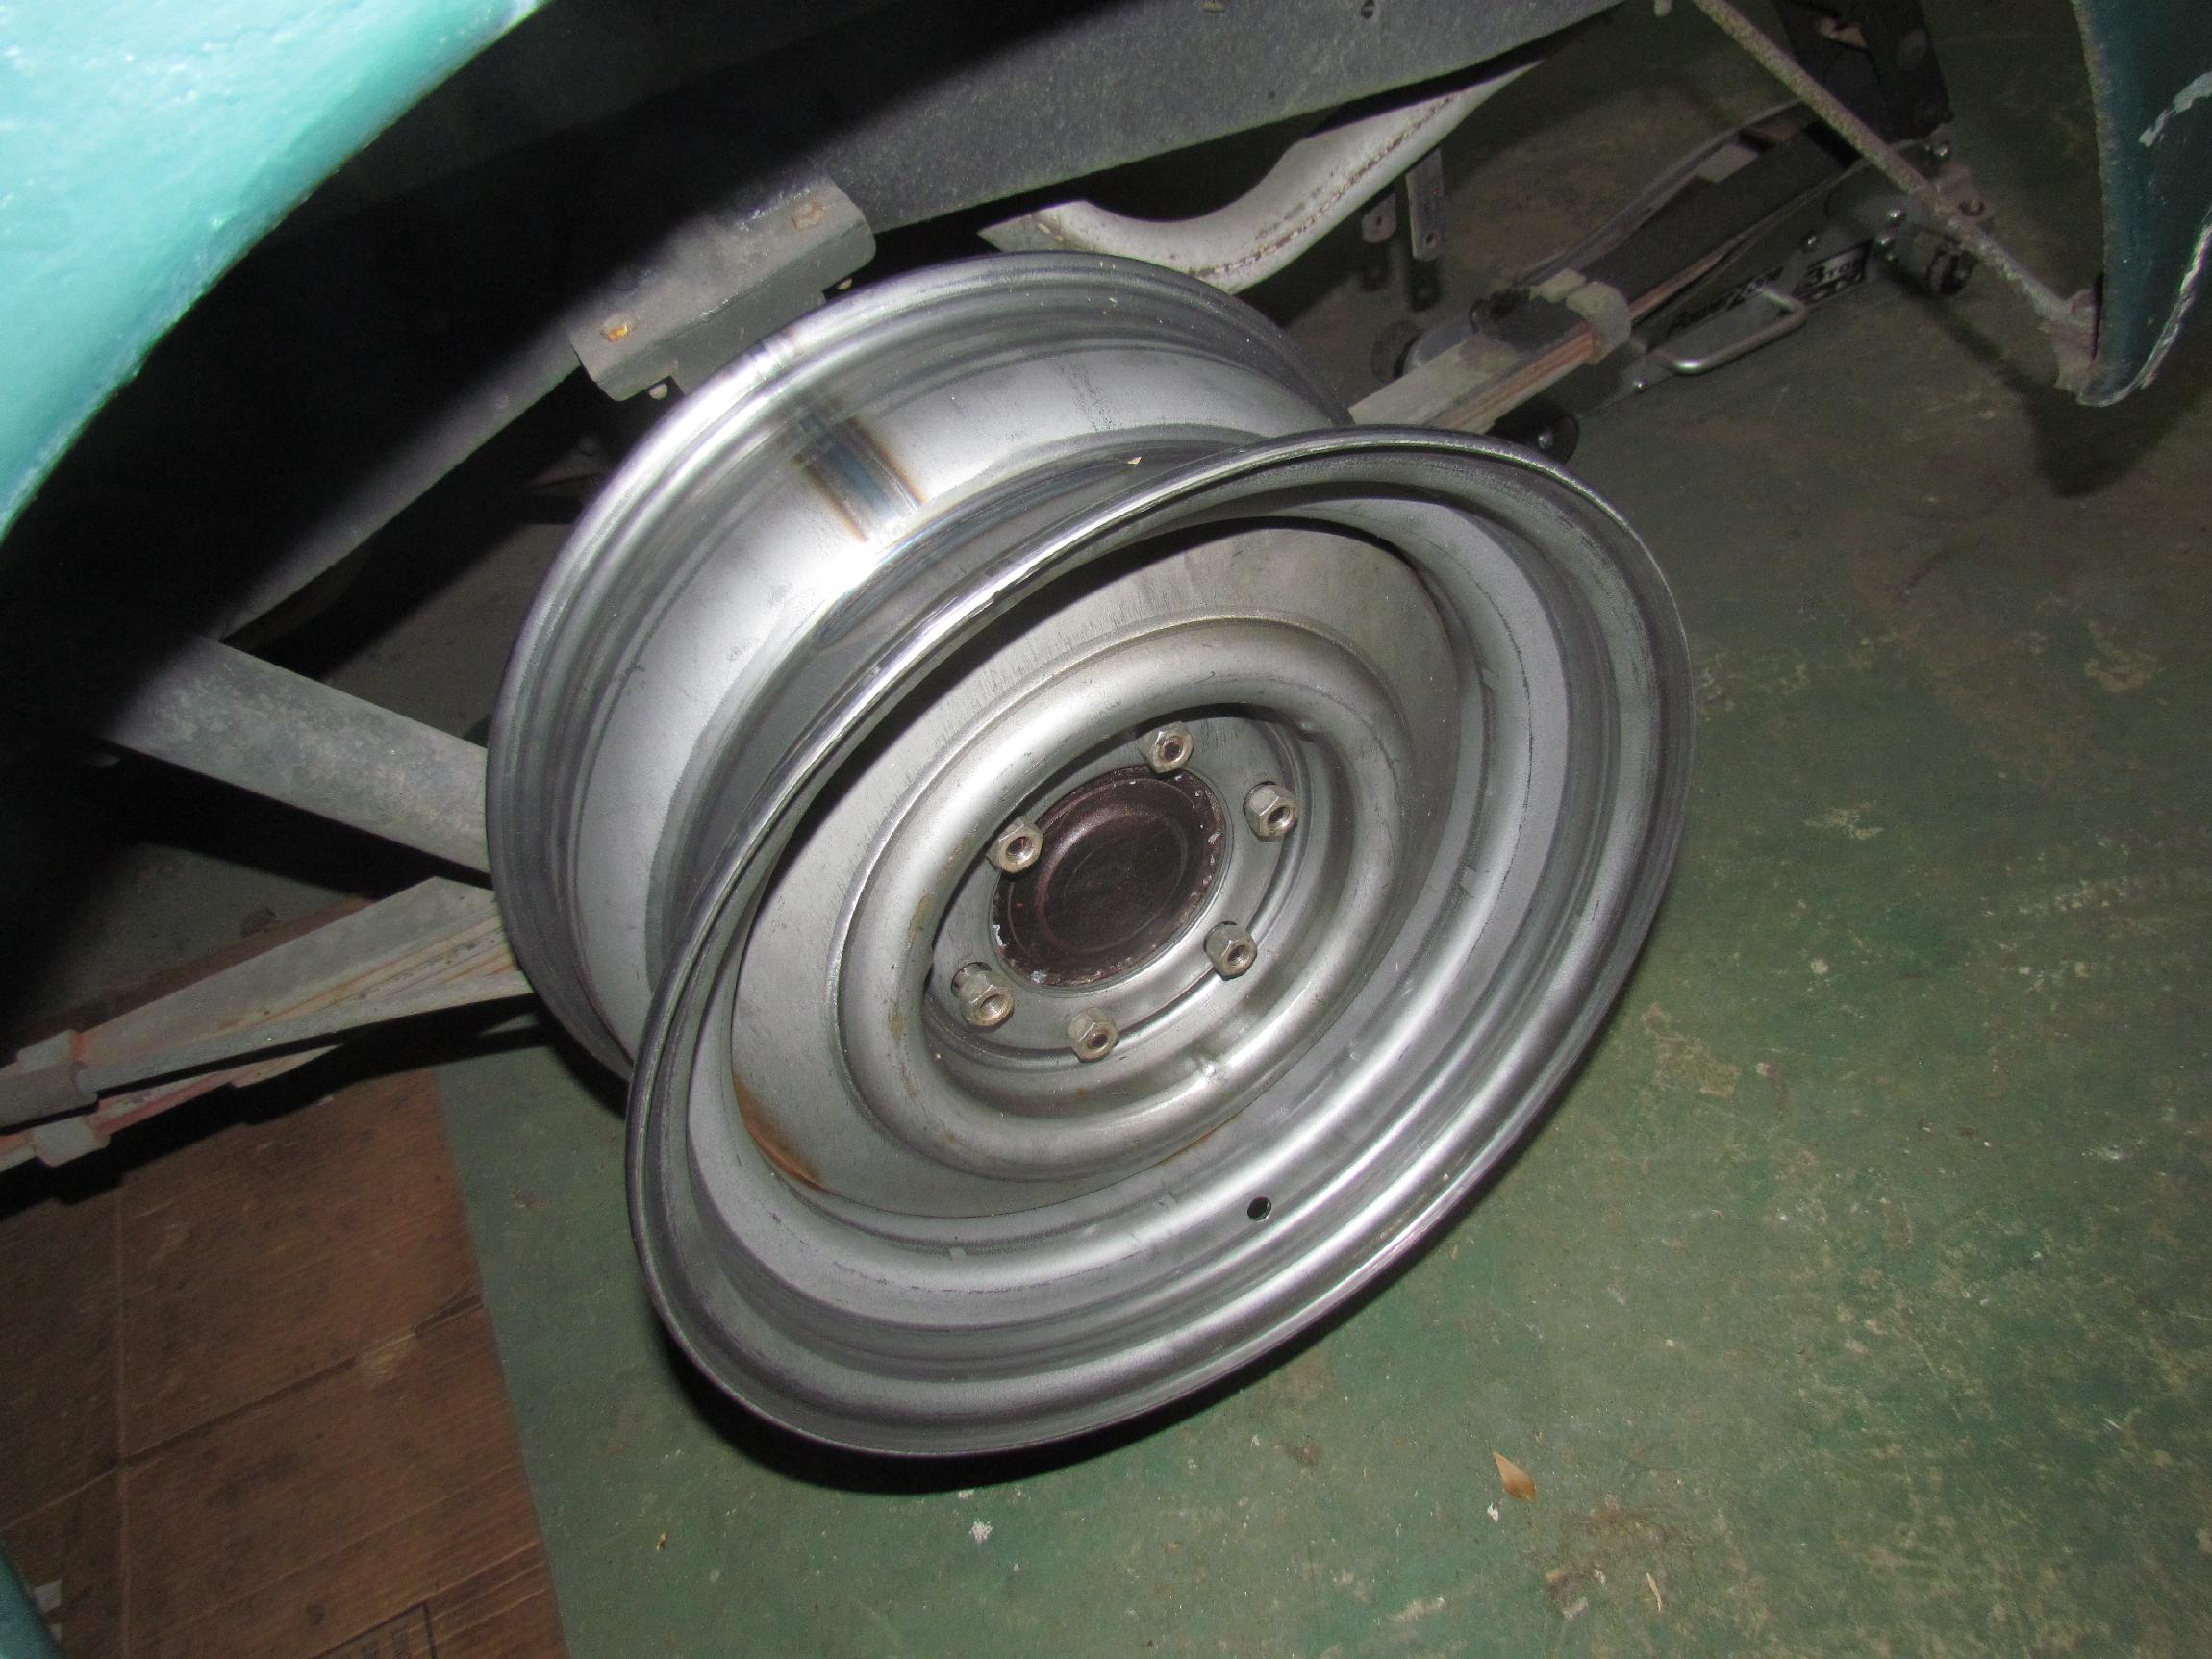 The
original stock wheels are 4-1/2", I believe, with 3" or 3-1/2"
backspacing. The new wheels have 4" backspacing. I jacked up the truck
and mounted one. I have about 1-1/2" clearance between the rim and the
bed side on the back and about the same between the rim and the fender
on the front side. There should be enough room to fit the 890x16
Firestone dirt track tires I ordered from Coker. Coker has a checkered
rep so I'm a bit wary. We will see. I went on to do some detail
painting and other small jobs on both trucks until the heat overtook
me. Beer of the day was nuthin' special.
The
original stock wheels are 4-1/2", I believe, with 3" or 3-1/2"
backspacing. The new wheels have 4" backspacing. I jacked up the truck
and mounted one. I have about 1-1/2" clearance between the rim and the
bed side on the back and about the same between the rim and the fender
on the front side. There should be enough room to fit the 890x16
Firestone dirt track tires I ordered from Coker. Coker has a checkered
rep so I'm a bit wary. We will see. I went on to do some detail
painting and other small jobs on both trucks until the heat overtook
me. Beer of the day was nuthin' special.
 May
3rd 2016 One
of the items I painted on Saturday was the new tach housing. "Detroit
Diesel" Duplicolor Engine Paint is a close match to the hodge-podge of
BillyBob's existing interior colors. The dash and steering column will
be repainted in this color to consolidate things a bit. The engine and
wheels will also be in Detroit Diesel green. I like the Duplicolor
engine paints. They are pretty forgiving of idiot applicators like
myself.
May
3rd 2016 One
of the items I painted on Saturday was the new tach housing. "Detroit
Diesel" Duplicolor Engine Paint is a close match to the hodge-podge of
BillyBob's existing interior colors. The dash and steering column will
be repainted in this color to consolidate things a bit. The engine and
wheels will also be in Detroit Diesel green. I like the Duplicolor
engine paints. They are pretty forgiving of idiot applicators like
myself.
 May
4th 2016 The Firestone
890x16 dirt track tires arrived at the Krash Lab from Coker yesterday.
Unwrapped them when I got to the BillyBob Shop and compared them to the
650x16 front tire on BillyBob. I think this is going to work.
May
4th 2016 The Firestone
890x16 dirt track tires arrived at the Krash Lab from Coker yesterday.
Unwrapped them when I got to the BillyBob Shop and compared them to the
650x16 front tire on BillyBob. I think this is going to work.
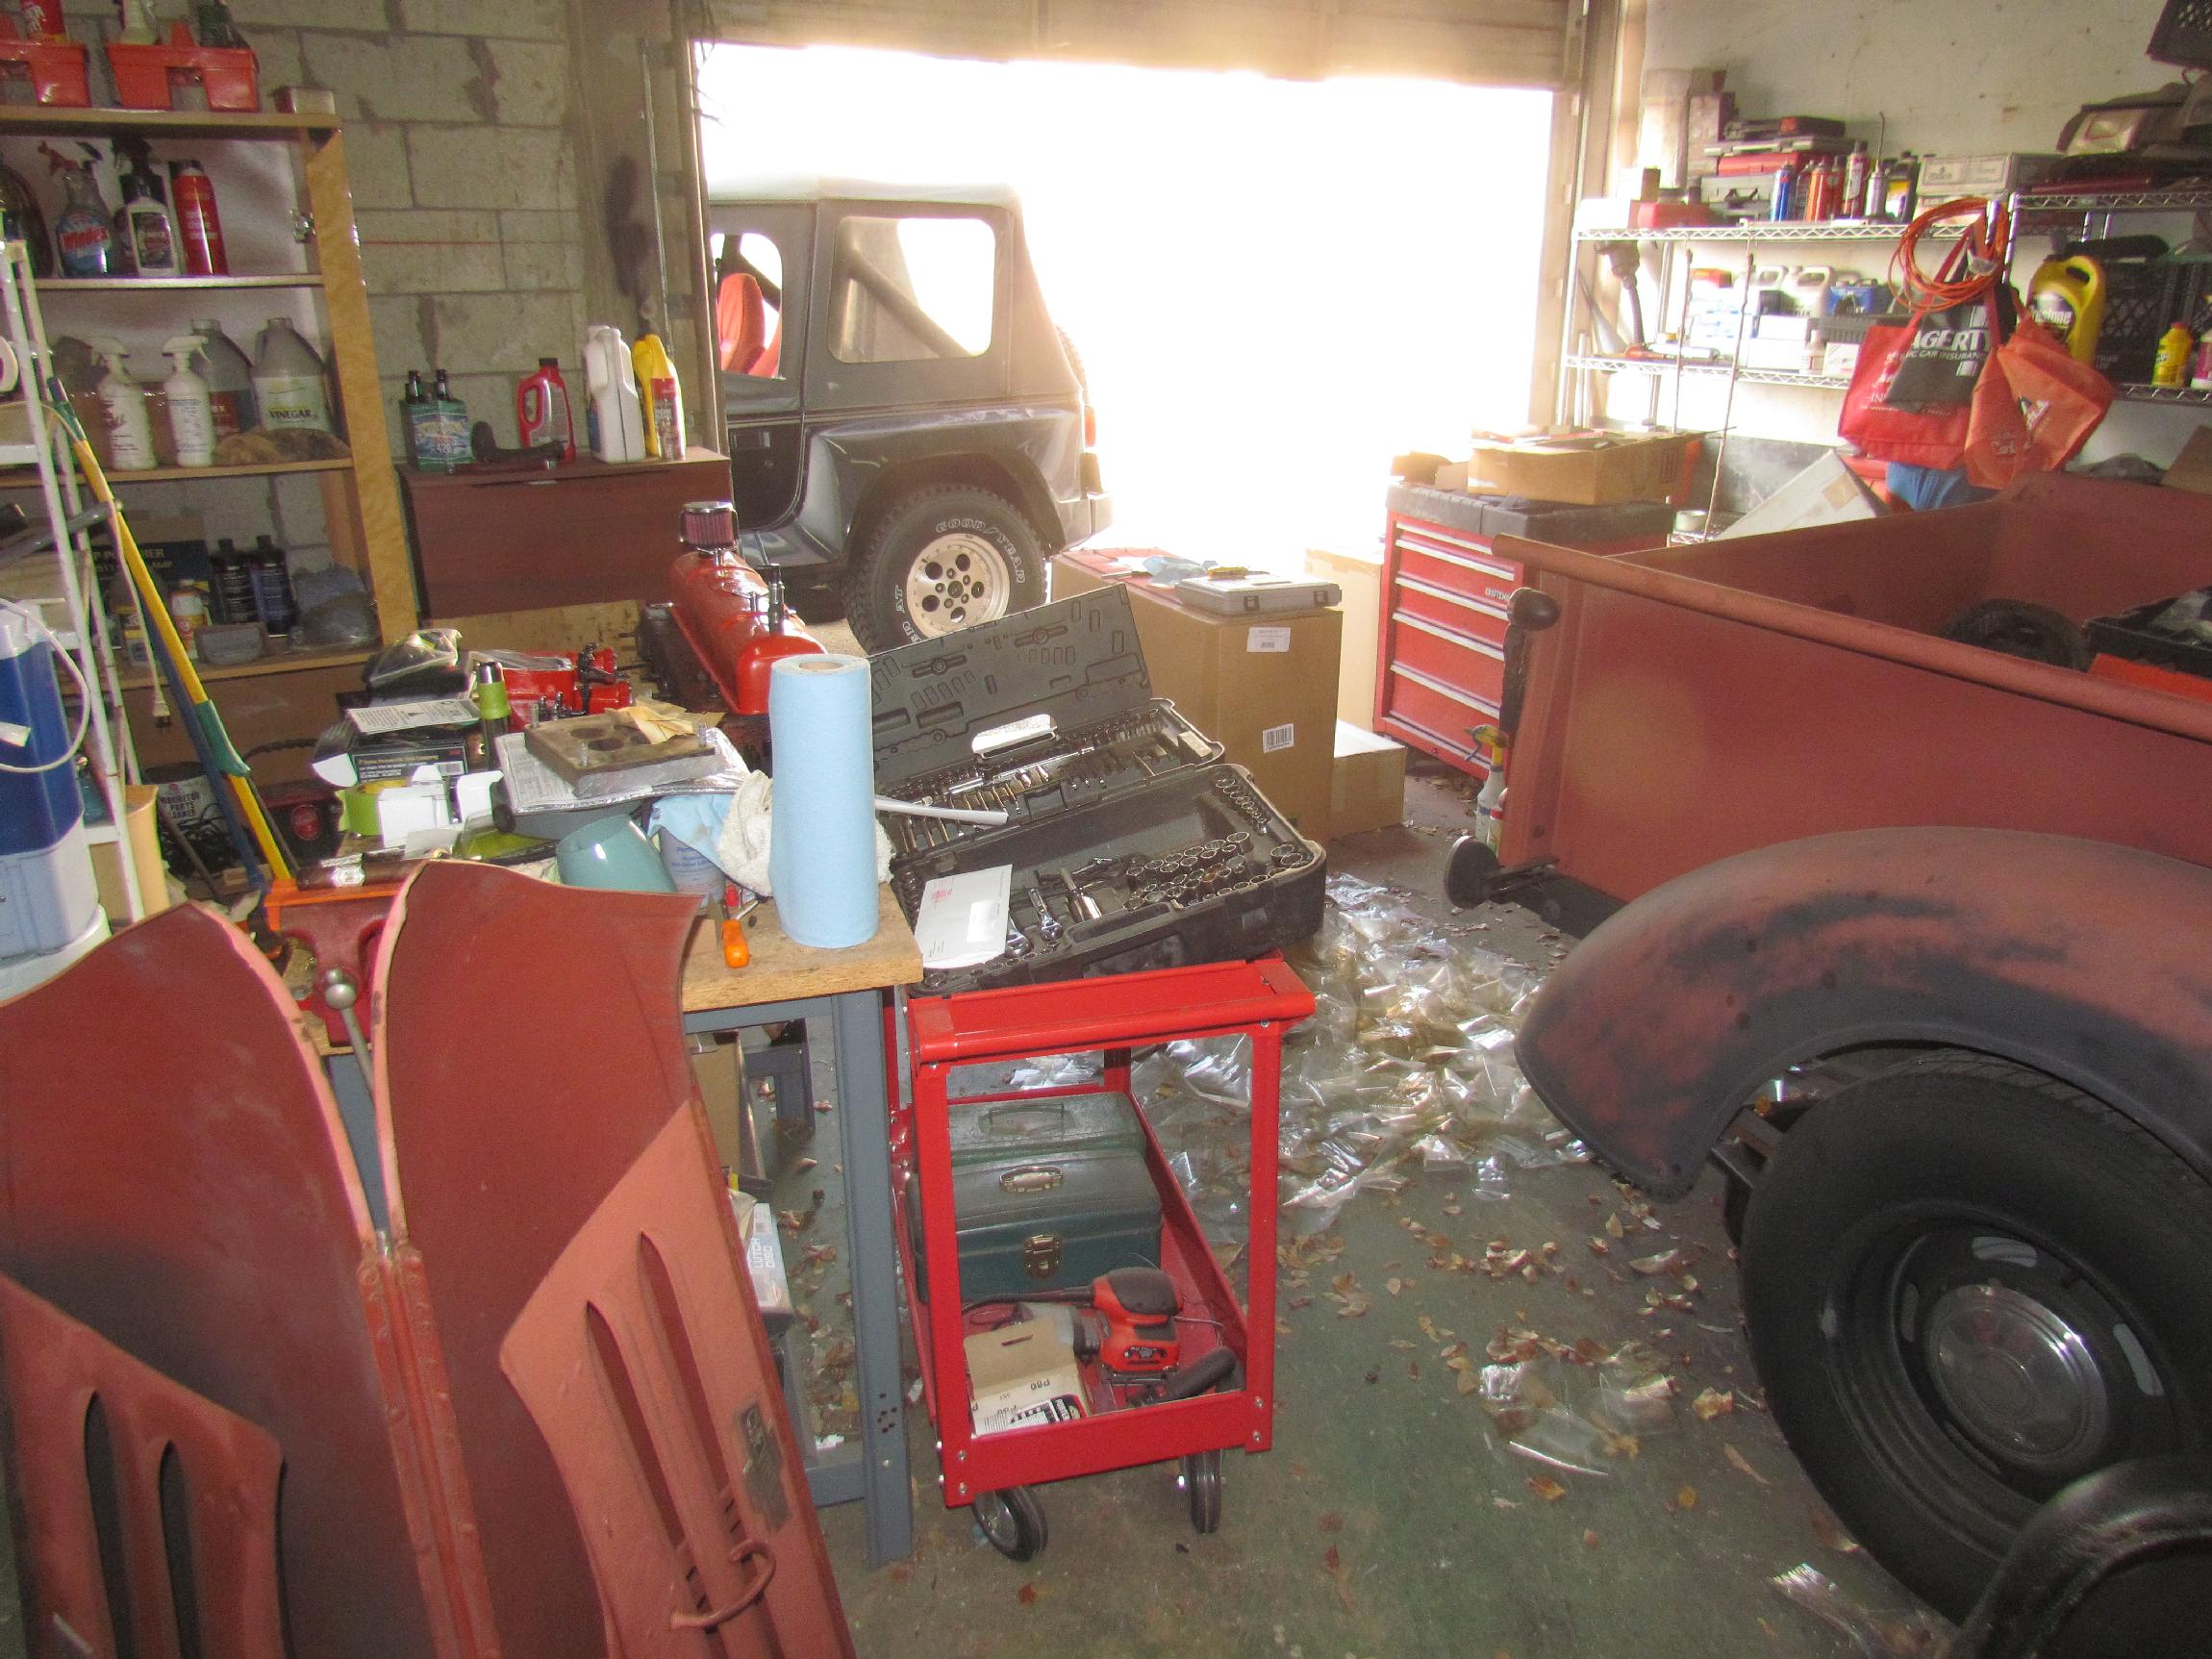 I
needed space to set up the tire changer so Wednesday became another
cleanup day. For as little actual work that I do, I can't understand
how things get so cluttered. And the leaves that blow in! All the trees
in the parking lot are palms. What's up with that?
I
needed space to set up the tire changer so Wednesday became another
cleanup day. For as little actual work that I do, I can't understand
how things get so cluttered. And the leaves that blow in! All the trees
in the parking lot are palms. What's up with that?
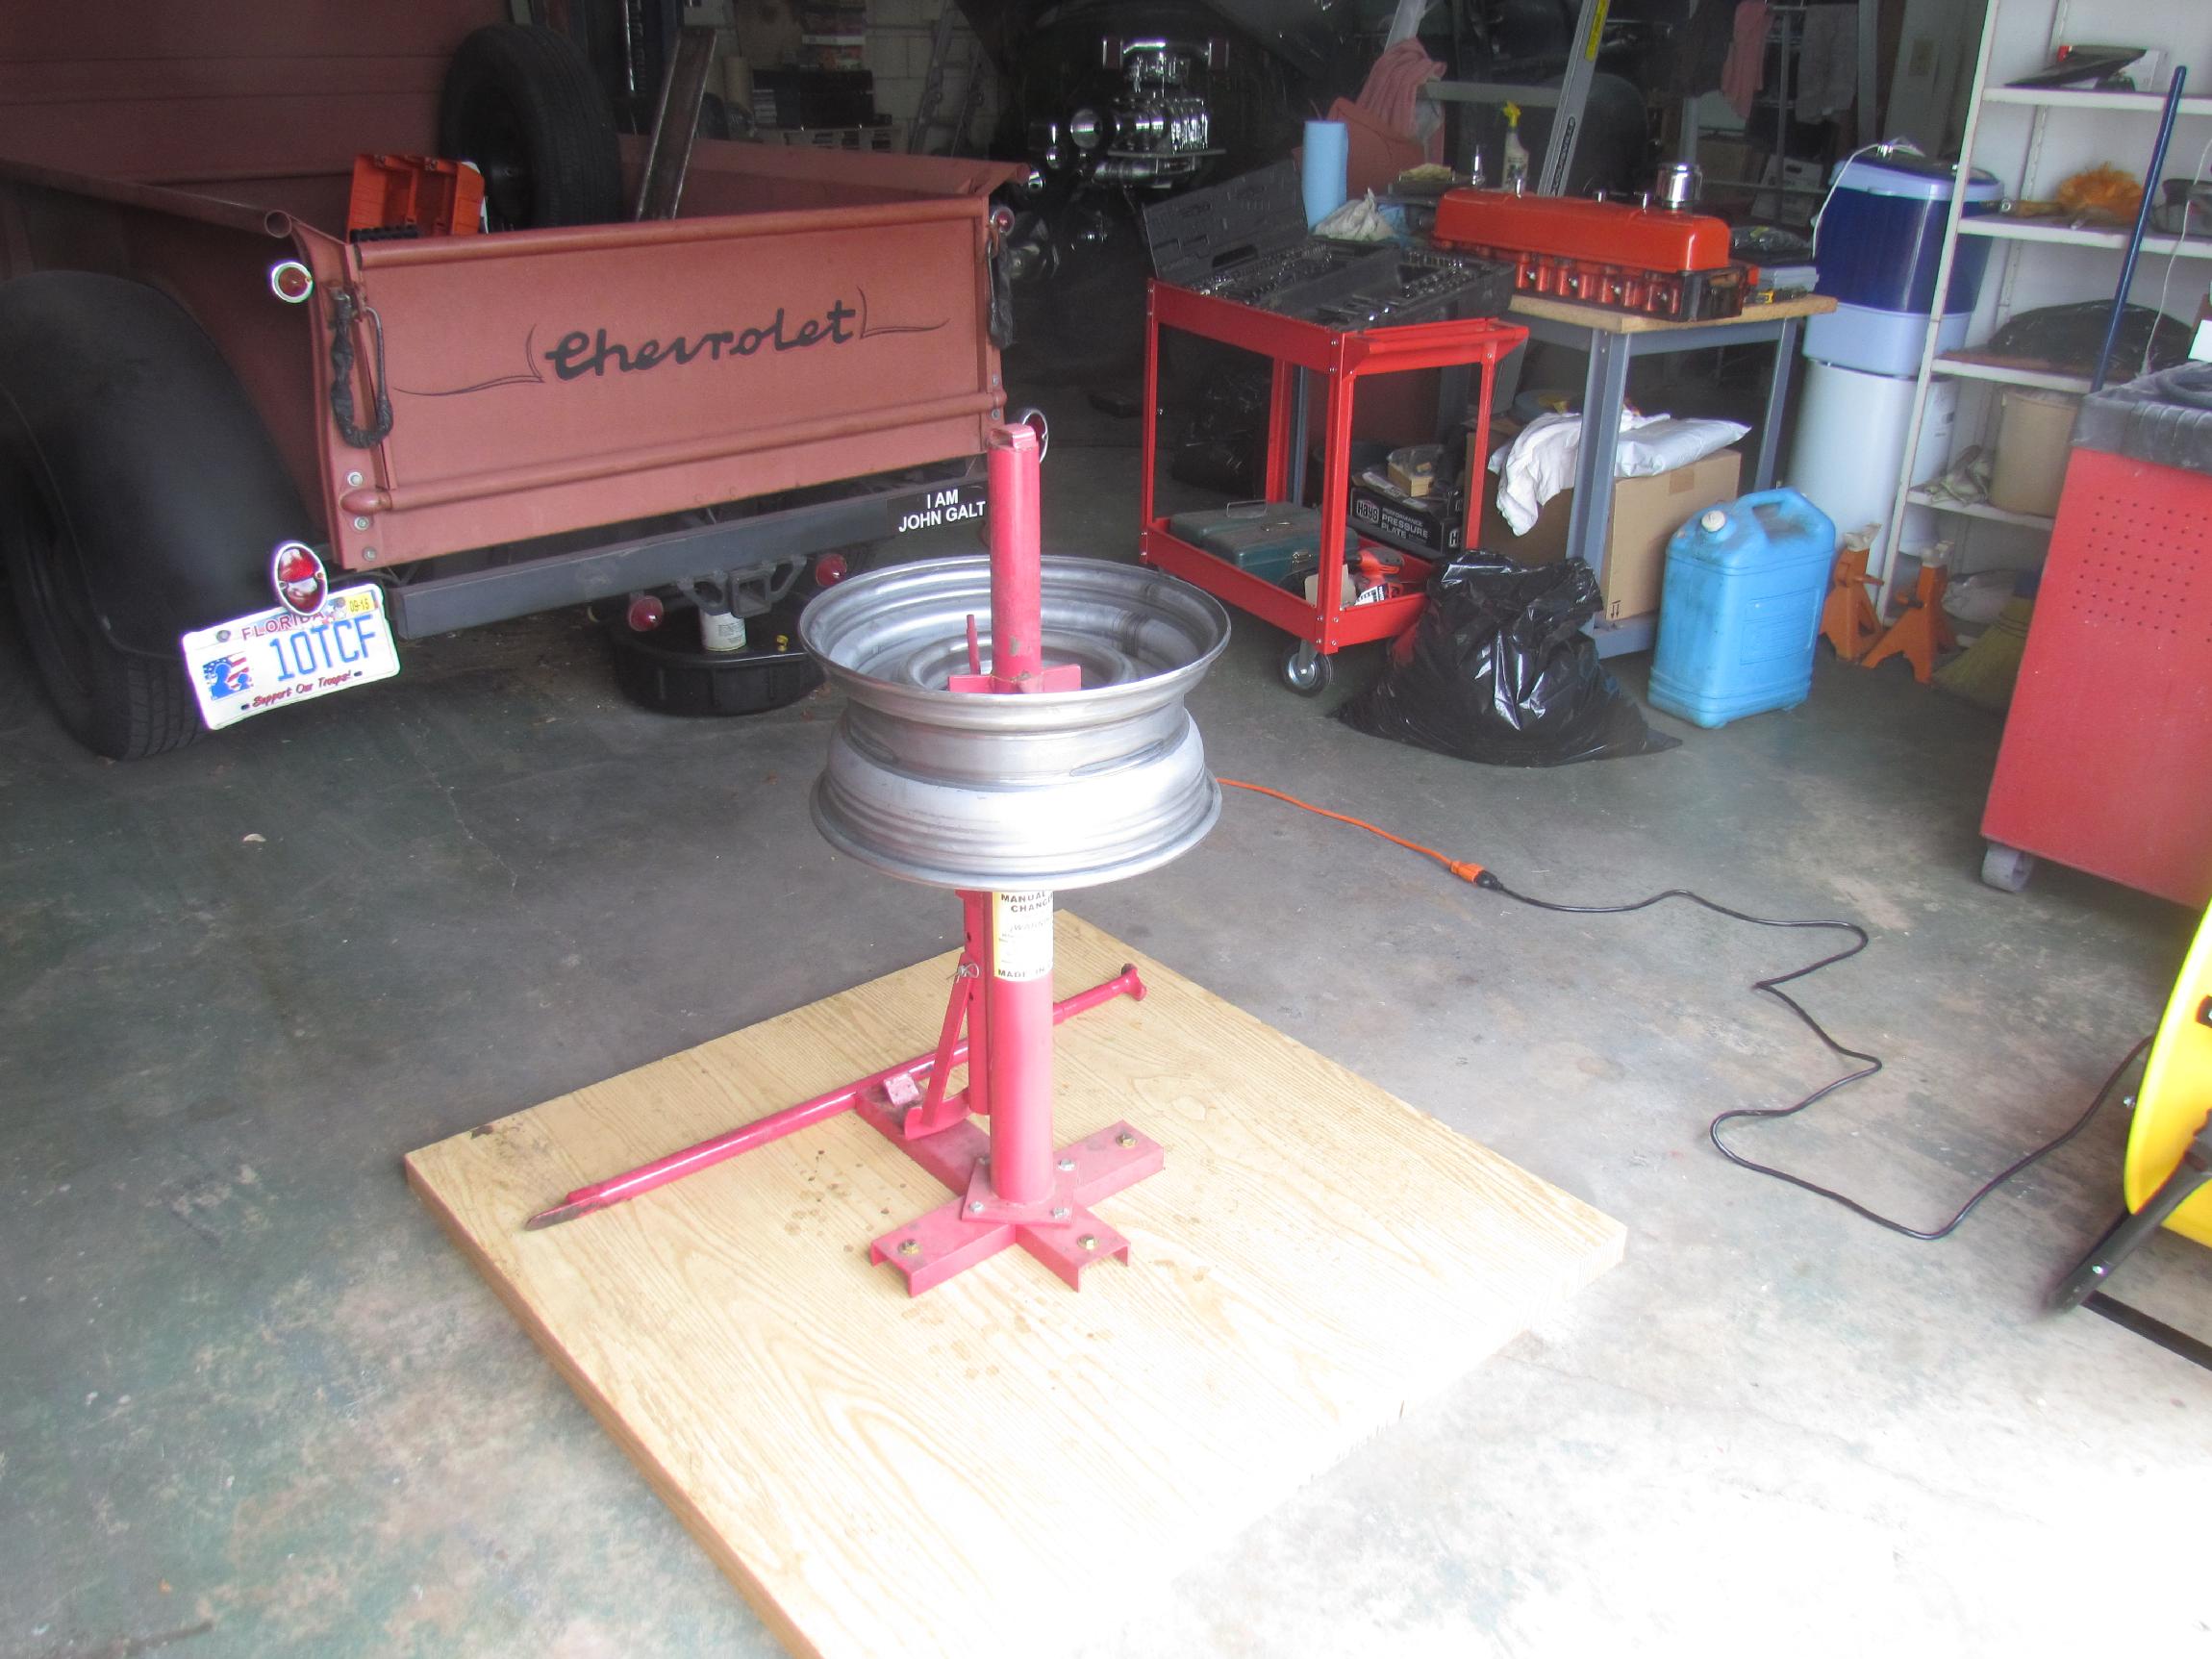 By
early afternoon, I had my tire changing rig set up. I read the specs
for the tires twice but somehow didn't pick up that I needed tubes. I
read the specs a third time while the tires were in transit and saw the
inner tube requirements, plain as day. Went back online to the Coker
site and ordered the tubes. When they get here we will be ready to
wrestle these things on. Beer of the day was Sweetwater Brewing
Company's Extra Pale Ale 420.
By
early afternoon, I had my tire changing rig set up. I read the specs
for the tires twice but somehow didn't pick up that I needed tubes. I
read the specs a third time while the tires were in transit and saw the
inner tube requirements, plain as day. Went back online to the Coker
site and ordered the tubes. When they get here we will be ready to
wrestle these things on. Beer of the day was Sweetwater Brewing
Company's Extra Pale Ale 420.
 May
6th 2016 More
goodies arrived at the Krash Lab on Wednesday while I was at the
BillyBob Shop. Corvette C2 ('63-'67) smallblock side exhaust system.
This is mufflers and pipes only. The brightwork heat shields are not
included. WTF, you say. Well, I'm gonna mount these things under the
running boards and I will only have to fabricate header pipes to the
split headers that James Larrowe gave me. I've never heard of
anyone else doing anything like this so it might not be such a great
idea. We will see.
May
6th 2016 More
goodies arrived at the Krash Lab on Wednesday while I was at the
BillyBob Shop. Corvette C2 ('63-'67) smallblock side exhaust system.
This is mufflers and pipes only. The brightwork heat shields are not
included. WTF, you say. Well, I'm gonna mount these things under the
running boards and I will only have to fabricate header pipes to the
split headers that James Larrowe gave me. I've never heard of
anyone else doing anything like this so it might not be such a great
idea. We will see.
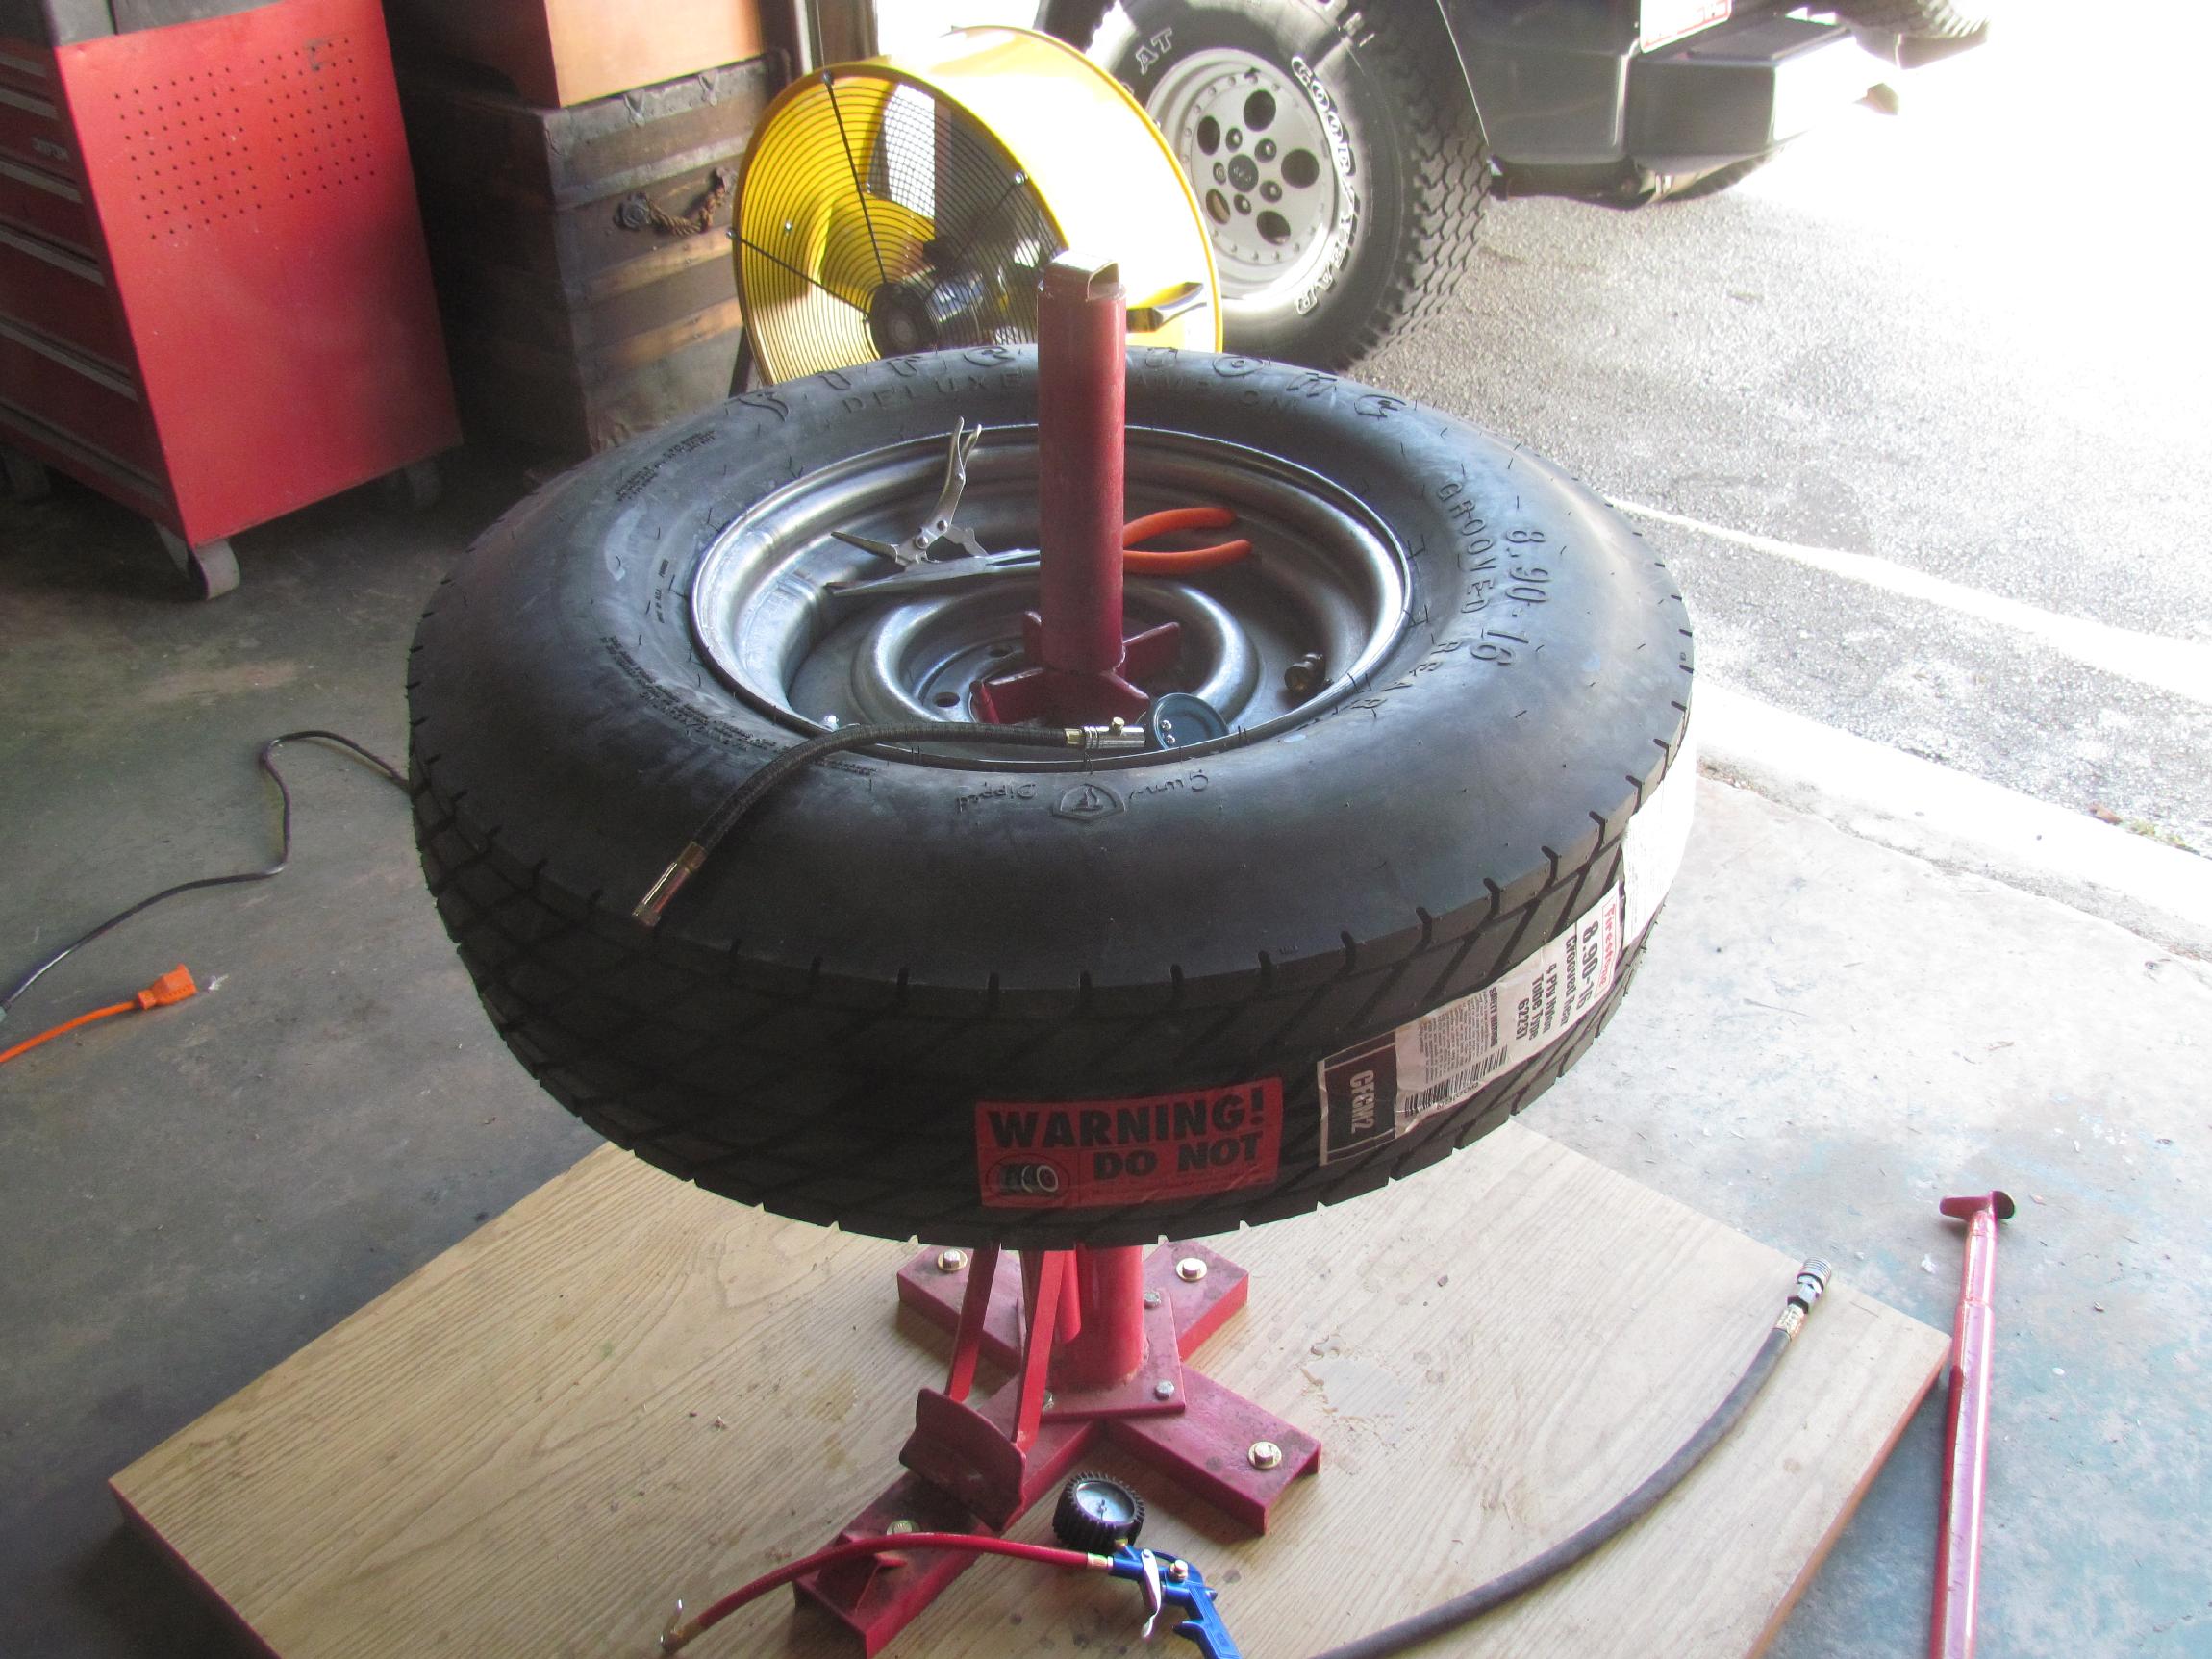 May
7th 2016 I danced one of
the 890x16 dirt track tires onto the rim. Things were going well until
I tried to fish the inner tube valve stem thru the rim hole. Tried
everything I knew of including vice grip technique. All that did was
mutilate a valve stem cap. Try as I might, I could only get about a
half inch of valve stem through the hole.
May
7th 2016 I danced one of
the 890x16 dirt track tires onto the rim. Things were going well until
I tried to fish the inner tube valve stem thru the rim hole. Tried
everything I knew of including vice grip technique. All that did was
mutilate a valve stem cap. Try as I might, I could only get about a
half inch of valve stem through the hole.
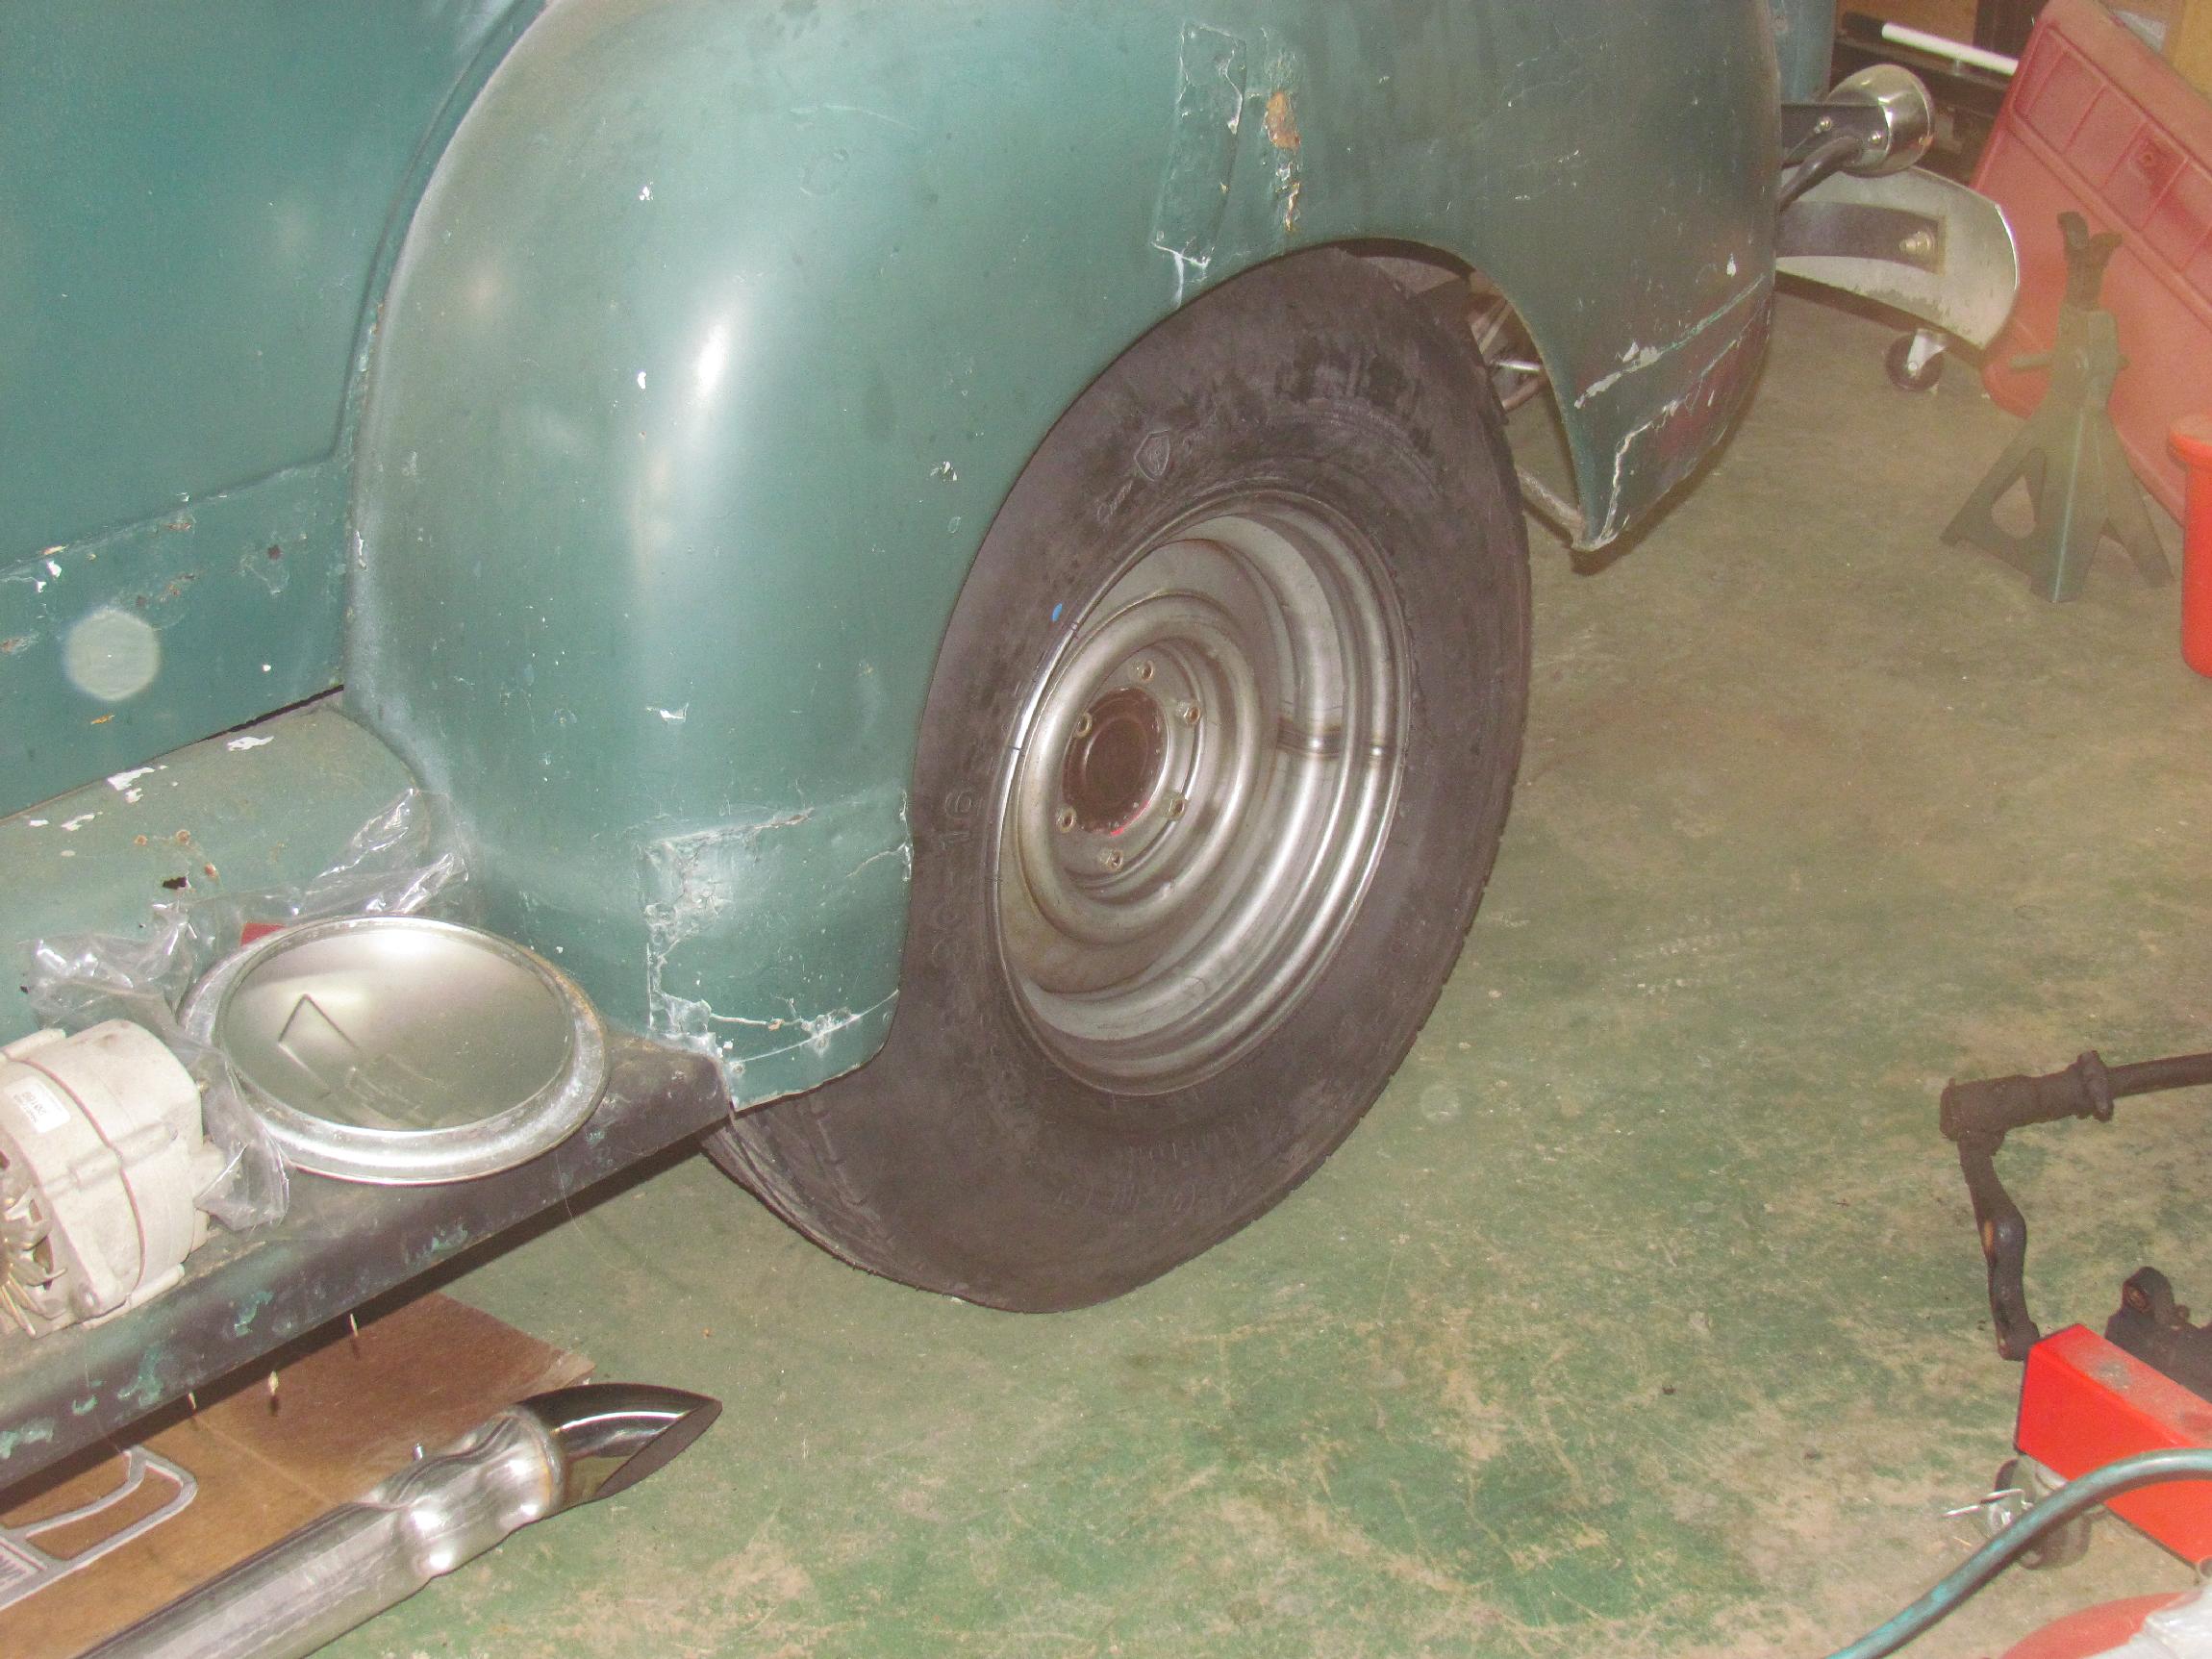 I
aired it up to 35 lbs and mounted it on BillyBob. Looks good. Fills the
wheel well better and there is still good clearance all the way around.
Then, I cracked the first beer of the day, Funky Buddha Brewing
Company's Hop Gun India Pale Ale, and went into DPM over the valve stem
issue. I checked the other new inner tube stem against the other new
wheel and found the hole to be too small for the valve stem. Damnation!
It also dawned on me that I had bought a valve stem installation tool a
few weeks ago when I thought these were tubeless tires and promptly
forgot about it. I hate these little memory lapses that come with
advancing age when finding your glasses is an epiphany. It didn't
matter tho'. The installer only got me an eighth of an inch. I will
have to drill out the holes.
I
aired it up to 35 lbs and mounted it on BillyBob. Looks good. Fills the
wheel well better and there is still good clearance all the way around.
Then, I cracked the first beer of the day, Funky Buddha Brewing
Company's Hop Gun India Pale Ale, and went into DPM over the valve stem
issue. I checked the other new inner tube stem against the other new
wheel and found the hole to be too small for the valve stem. Damnation!
It also dawned on me that I had bought a valve stem installation tool a
few weeks ago when I thought these were tubeless tires and promptly
forgot about it. I hate these little memory lapses that come with
advancing age when finding your glasses is an epiphany. It didn't
matter tho'. The installer only got me an eighth of an inch. I will
have to drill out the holes.
 May
12th 2016 Back in 1997, I had
just pulled into a parking space at a local auto parts store in
BillyBob. The parking space was on an incline. I had my feet on the
clutch and brake pedals and had just turned the engine off. The brake
pedal suddenly lost all resistance and went straight to the floor!
BillyBob began to drift backwards as I scrambled for the parking brake
pedal. I had lost all the brakes. Timing is everything. Five minutes
either way and I would have been barreling down the road. The stock
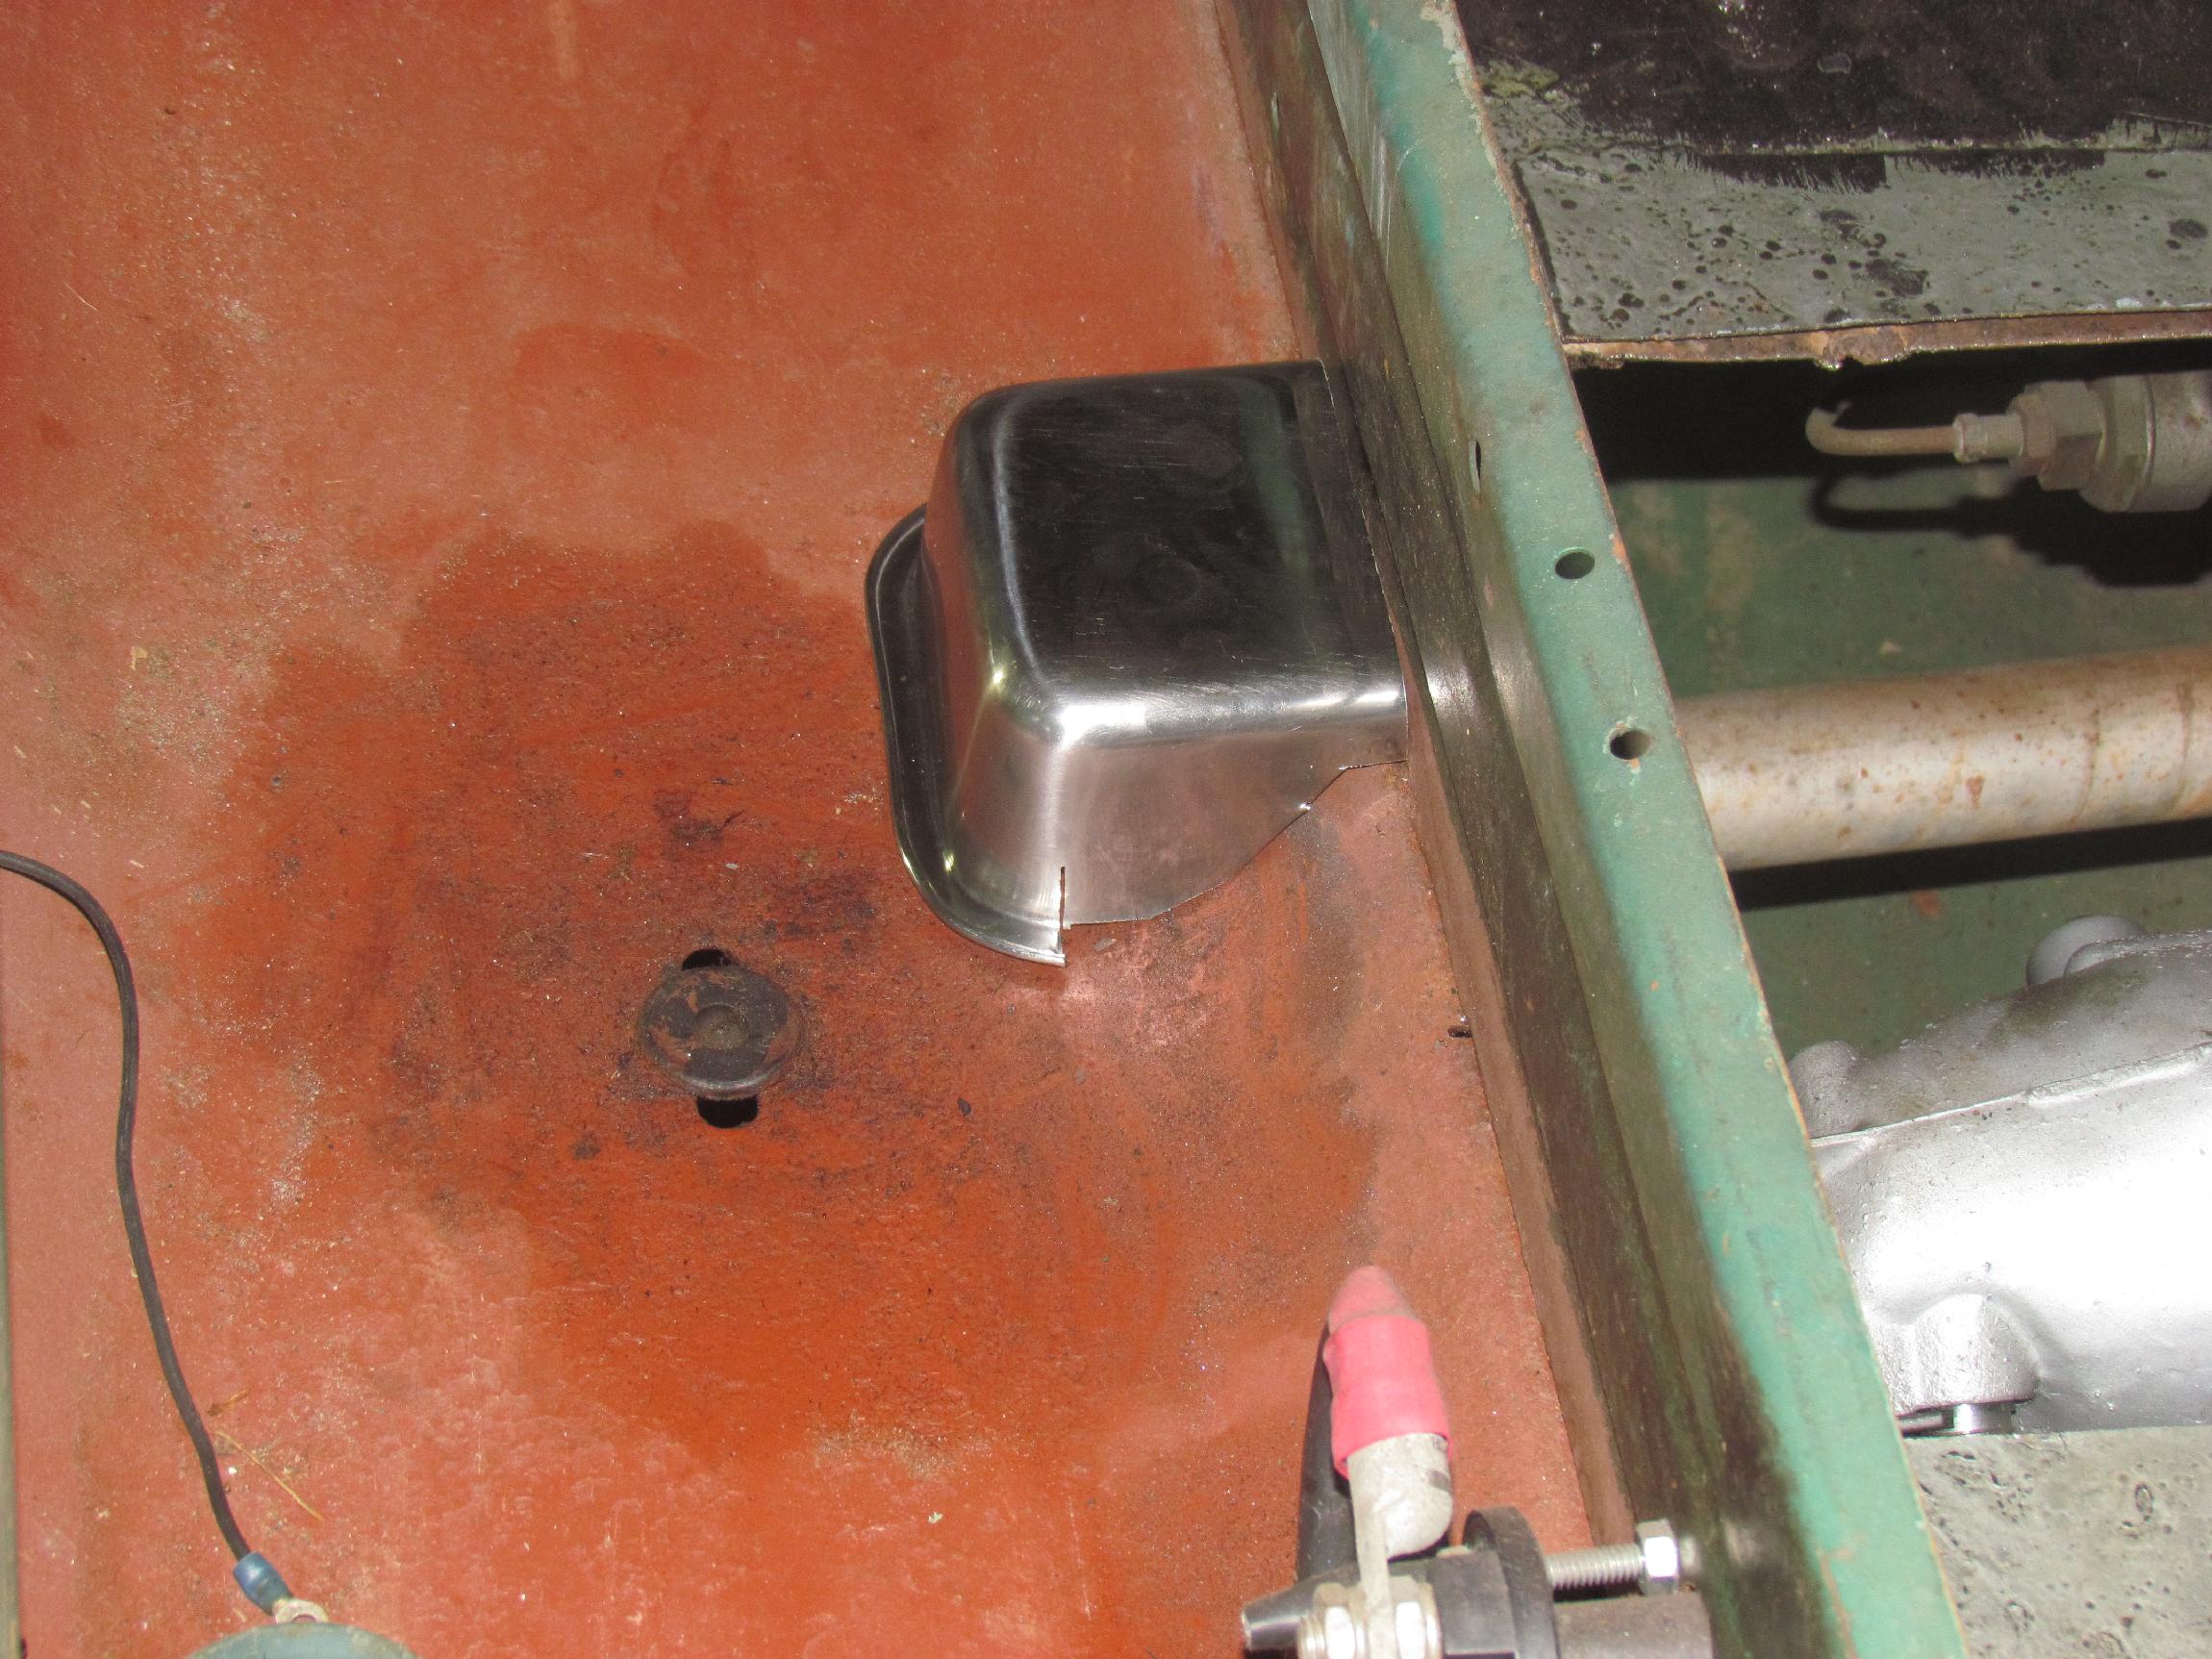
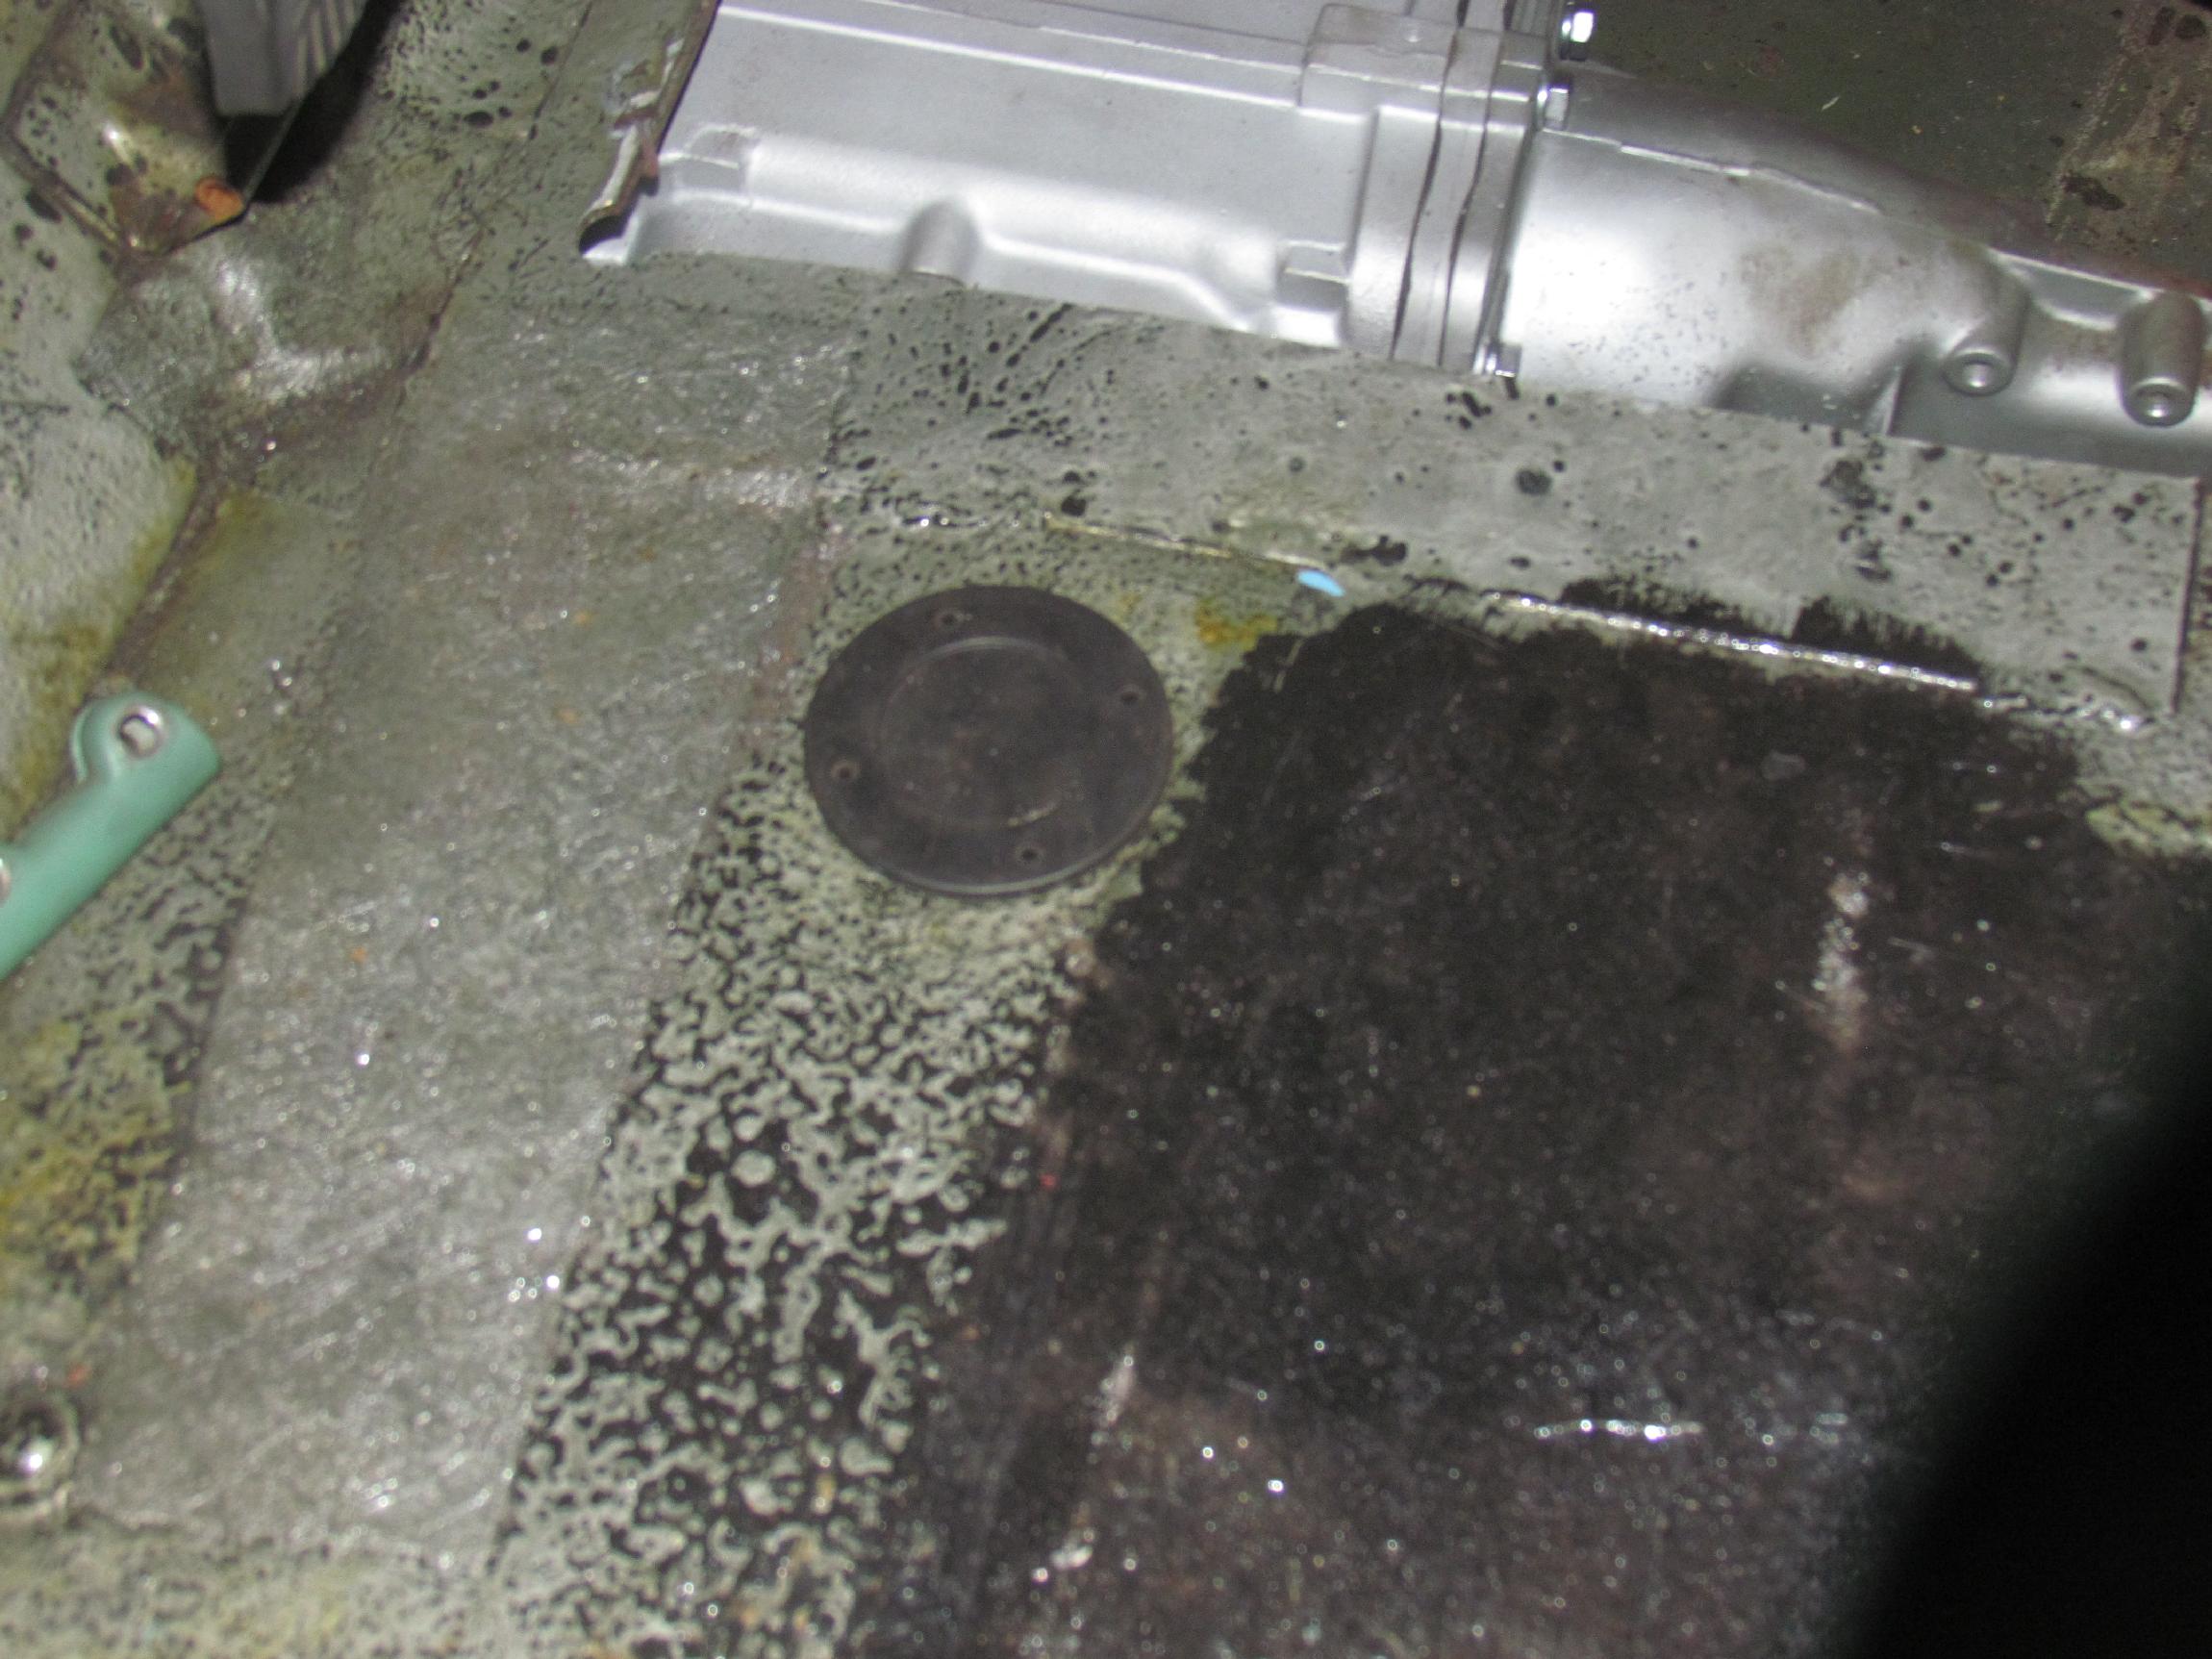
master cylinder on this truck is a single chamber design. You spring a
leak, you lose it all. The master cylinder is accessed thru a small
round hole in the floor covered by a rubber plug.
May
12th 2016 Back in 1997, I had
just pulled into a parking space at a local auto parts store in
BillyBob. The parking space was on an incline. I had my feet on the
clutch and brake pedals and had just turned the engine off. The brake
pedal suddenly lost all resistance and went straight to the floor!
BillyBob began to drift backwards as I scrambled for the parking brake
pedal. I had lost all the brakes. Timing is everything. Five minutes
either way and I would have been barreling down the road. The stock
master cylinder on this truck is a single chamber design. You spring a
leak, you lose it all. The master cylinder is accessed thru a small
round hole in the floor covered by a rubber plug.
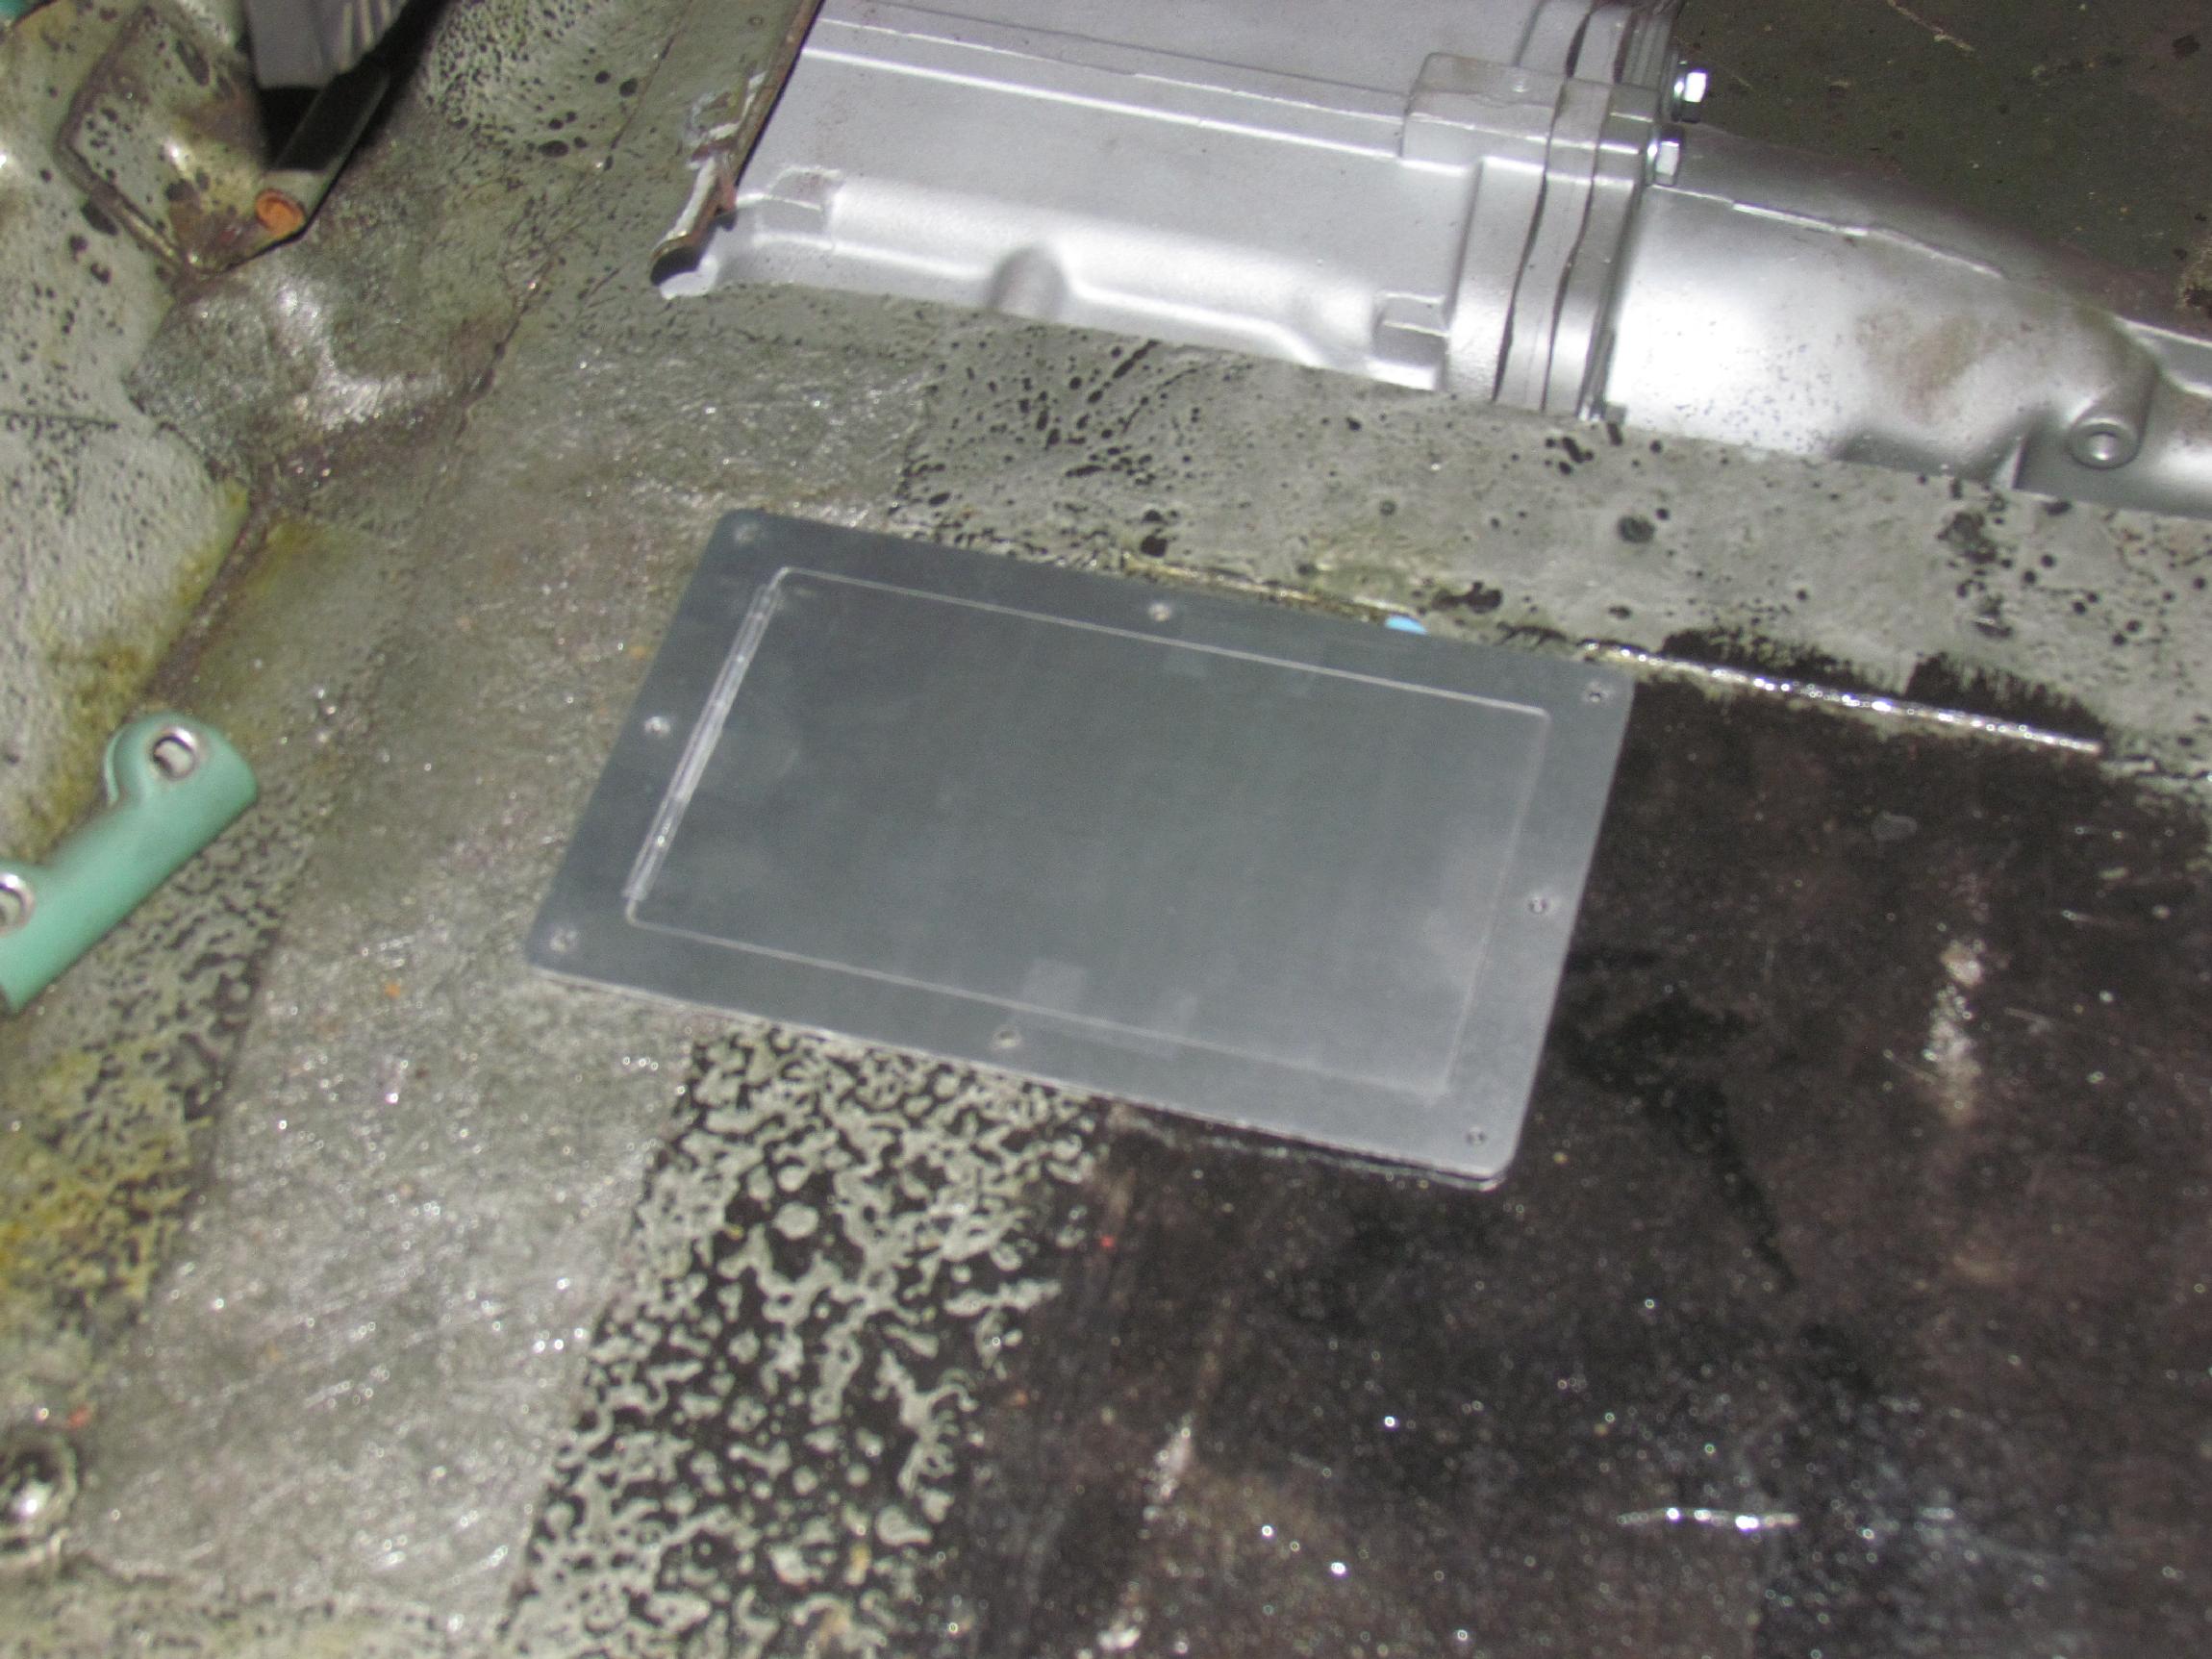 One
of the improvements of this build is to be a double chamber master
cylinder conversion to afford a higher level of safety against fluid
loss. Accessing the new master cylinder thru the original inspection
and fill hole would be a royal pain in the butt. I found a ready made
hinged access panel at Speedway Motors for reasonable cost. It looks
like it will serve my purposes well.
One
of the improvements of this build is to be a double chamber master
cylinder conversion to afford a higher level of safety against fluid
loss. Accessing the new master cylinder thru the original inspection
and fill hole would be a royal pain in the butt. I found a ready made
hinged access panel at Speedway Motors for reasonable cost. It looks
like it will serve my purposes well.
 May
14th 2016 Limited progress today.
Went to Pompano Swap-n-Sell, a monthly car guy swap meet. It was my
first time to this event. Got a long arm torque wrench (the older I
get, the more leverage I need) and a catch can for good prices. Back at
the BillyBob Shop, I glued my Dad's model airplane back together
(knocked this off a high shelf a couple of months back).
May
14th 2016 Limited progress today.
Went to Pompano Swap-n-Sell, a monthly car guy swap meet. It was my
first time to this event. Got a long arm torque wrench (the older I
get, the more leverage I need) and a catch can for good prices. Back at
the BillyBob Shop, I glued my Dad's model airplane back together
(knocked this off a high shelf a couple of months back).
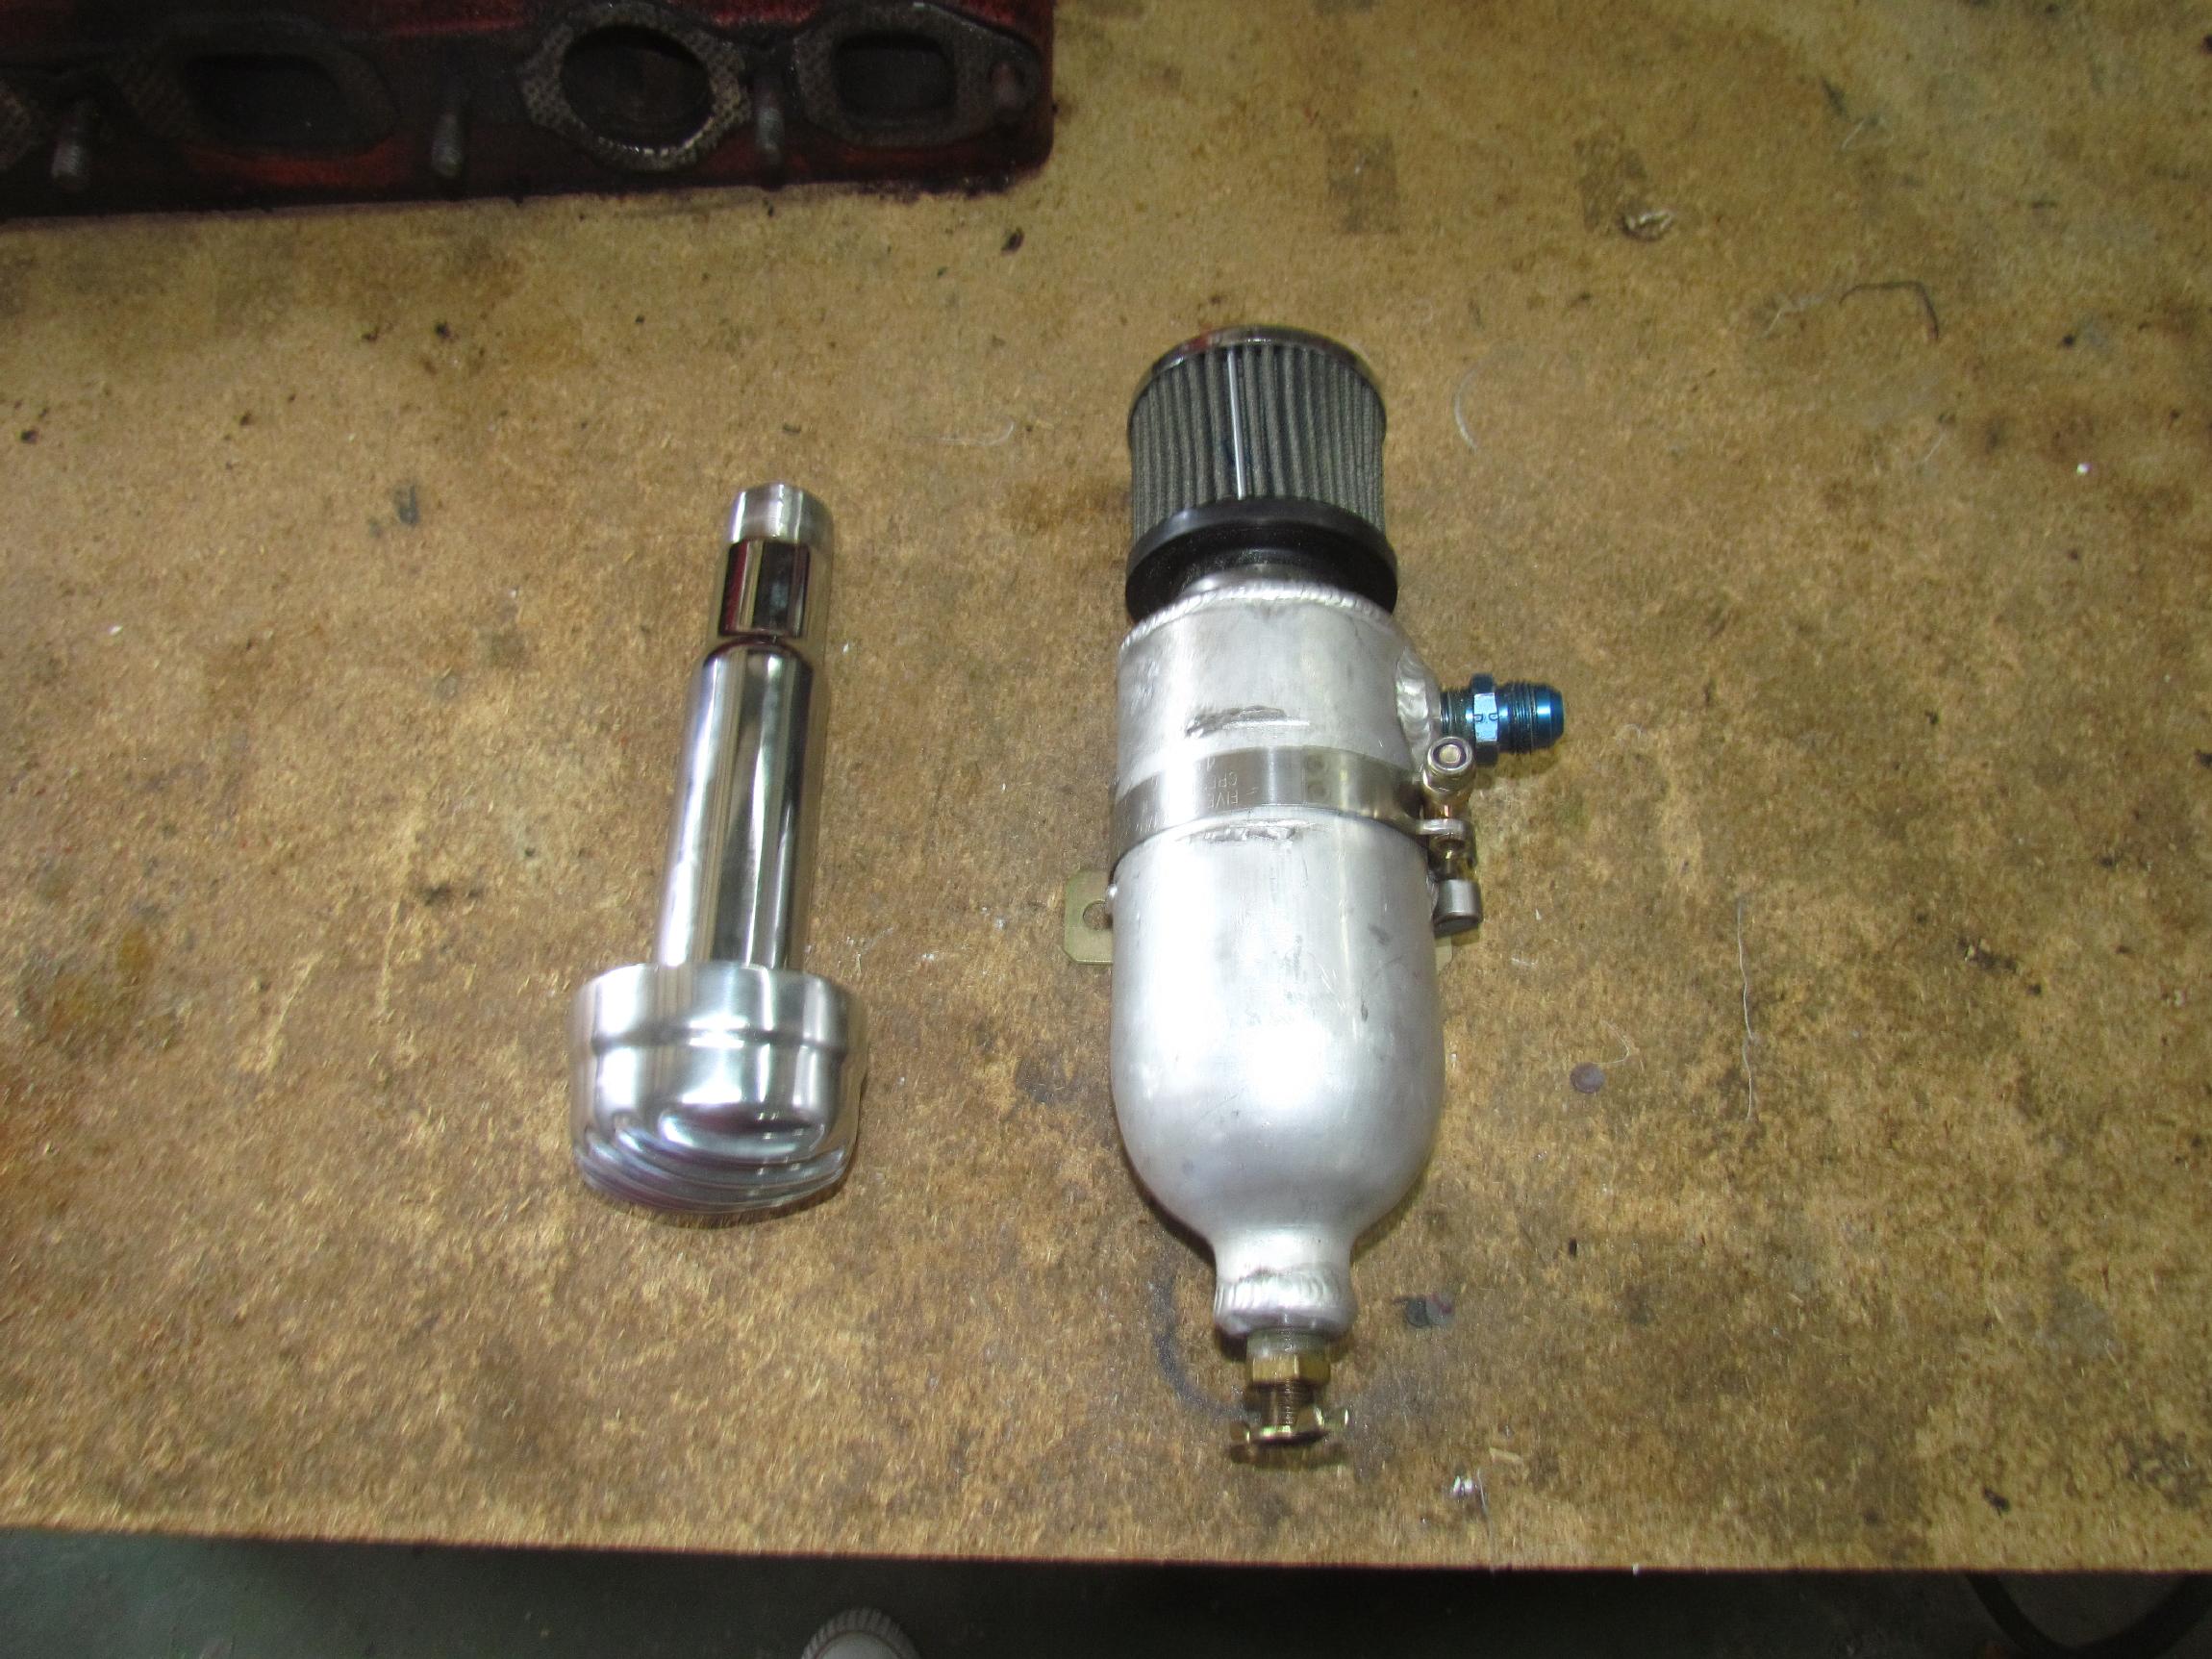
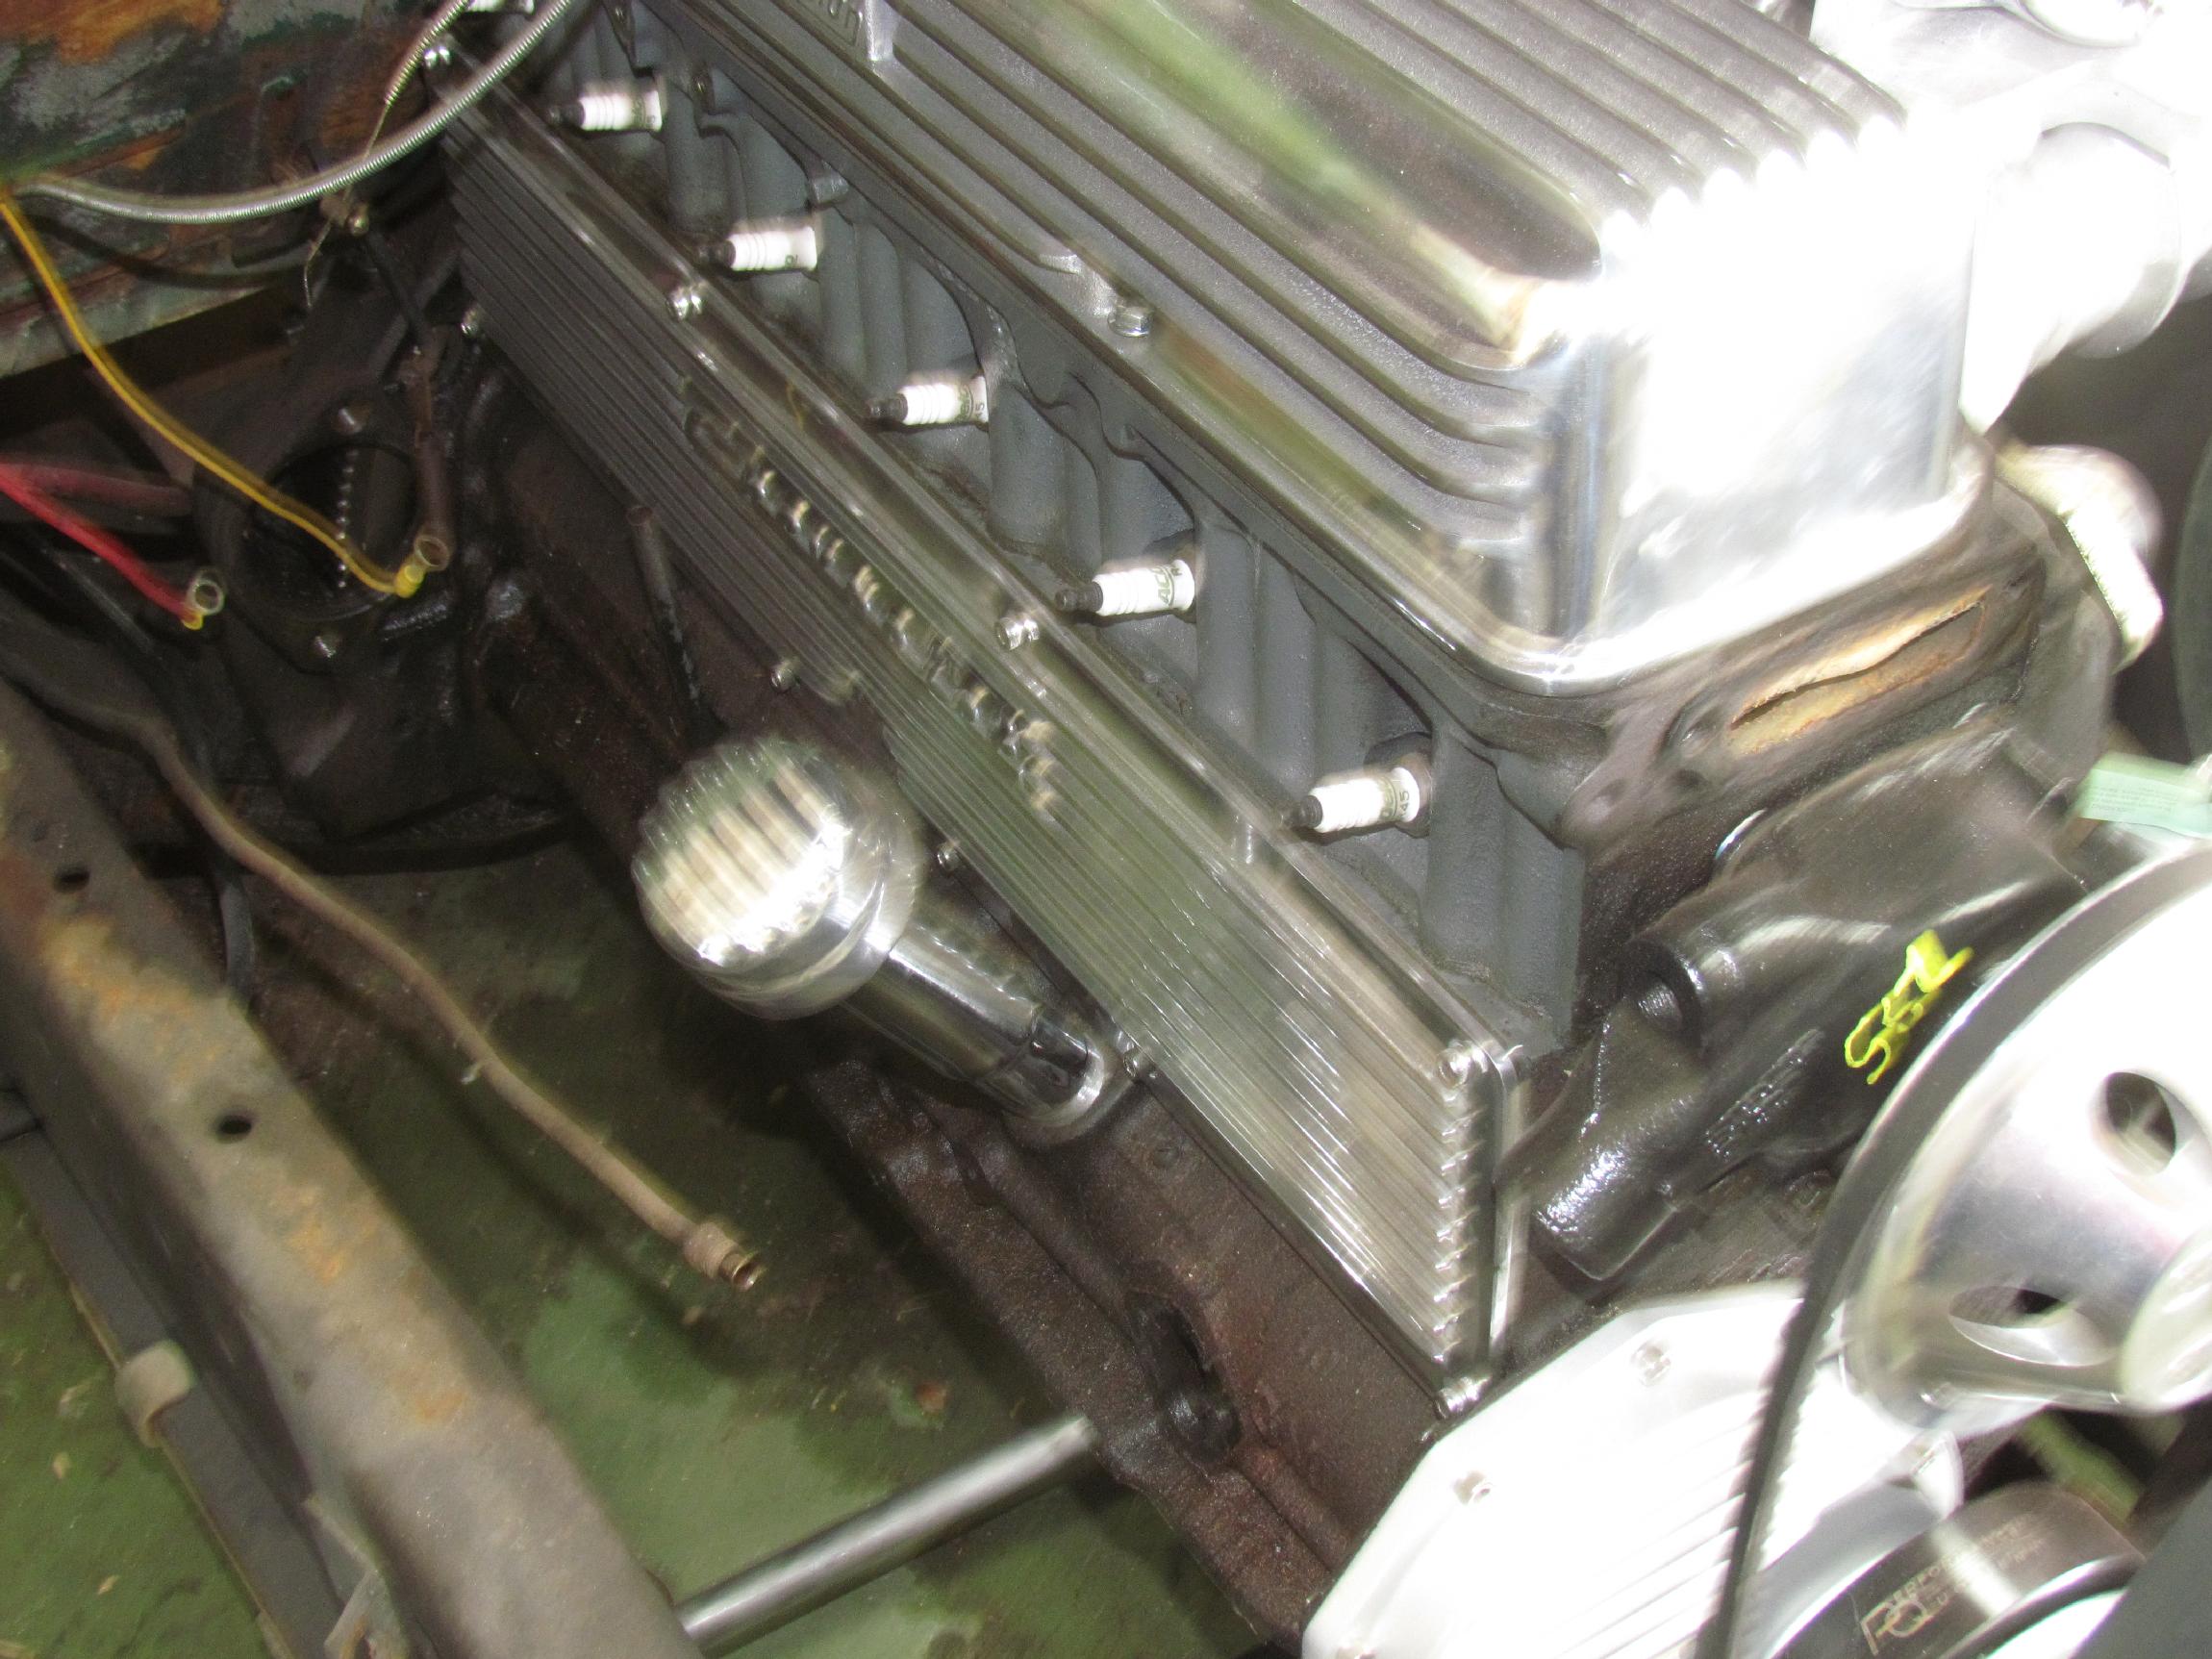 I've
been pondering crankcase ventilation on Billybob's new blower build.
Mike Cunningham doesn't think I'll have a problem as long as
I
re-ring the engine and don't run high RPM. That's a relief since I was
worrying about carving up the nice Thickstun valve cover to install
elbow breathers. For now, I'm just going to replace the road draft tube
with a breather I got from Mooneyes USA and run a PCV valve system thru
the catch can I just got. The Mooneyes breather is a little tight so, I
set up a hobby belt / disc sander I got a month or two back. It was my
best shot at reducing the size of the breather tube without grinding
any flat spots. That done, the heat of the afternoon forced my retreat
into the Flamingo Room.
I've
been pondering crankcase ventilation on Billybob's new blower build.
Mike Cunningham doesn't think I'll have a problem as long as
I
re-ring the engine and don't run high RPM. That's a relief since I was
worrying about carving up the nice Thickstun valve cover to install
elbow breathers. For now, I'm just going to replace the road draft tube
with a breather I got from Mooneyes USA and run a PCV valve system thru
the catch can I just got. The Mooneyes breather is a little tight so, I
set up a hobby belt / disc sander I got a month or two back. It was my
best shot at reducing the size of the breather tube without grinding
any flat spots. That done, the heat of the afternoon forced my retreat
into the Flamingo Room.
Okay, this log entry is getting a little long so it's time to post. Next time, we will continue with engine, and chassis mock up tasks as well as mock up some of the brake system upgrades.
| < Back
to Intro |
You can email me at ![]() webmaster@laroke.com
webmaster@laroke.com
Issued Sunday May 15, 2016
Updated Monday April 16, 2018
copyright © 1996-2018 Larry Robert Kephart all rights reserved
| | LRK Home | | Bio Info | | Krash Khronicles | | LAROKE | |
| | BettyLou | | BillyBob's Garage | | Rat Patrol | | Deerslayer | | Elvira | |
| | Land of the Free and Home of the Brave | |
| | Keppylou's Art | | WWI Soldier's Diary | |