| | LRK Home | | Bio Info | | Krash Khronicles | | LAROKE | |
| | BettyLou | | BillyBob's Garage | | Rat Patrol | | Deerslayer | | Elvira | |
| | Land of the Free and Home of the Brave | |
| | Keppylou's Art | | WWI Soldier's Diary | |
BillyBob Work-in-Progress Log
![]()
WHAT'S NEW is a chronological listing of updates to the BillyBob site.
![]()
TRUCK LINKS including vendor sites for old parts, custom parts, and tools as well as sites for classic car and truck organizations
STORE Operating in association with Amazon.com, books, recordings and tools can be purchased.
PLANNING for the restoration including project schedule and cost estimates.
![]()
TRAVELS WITH BILLYBOB With apologies to Steinbeck, this area of BillyBob's Garage will be used to log the trips BillyBob and I make together.
WORK-IN-PROGRESS is the restoration of parts of BillyBob that I can accomplish without a garage.
PRE-RESTORATION includes log entries of minor repairs and adventures between time of purchase and the time when I started restoration, a piece at a time.
JR'S KORNER JR's Korner is the history of BillyBob before I got him authored by my brother, Wm. C. Kephart.
![]()
BILLYBOB MAINTENANCE Ever changing detailing, oil change, lube, etc. maintenance routines specifically developed for BillyBob, including required tools, materials and procedures.
PARTS SHOP The Parts Shop is a repository of How-To articles. Things that I have done over and over enough times to have developed a procedure. This gives me a checklist and saves brain cells.
STEALTH SHOP Urban residence design with large integrated shop and separate living quarters for a relative or renter.
![]()
You will need the Adobe Acrobat browser plugin to view these wiring diagrams which are in the PDF file format. This format allows zooming and panning. If you don't have this plugin, it can be downloaded and installed (free) from the Adobe site. The button below will take you there.
![]()
BILLYBOB WIRING DIAGRAM Here's the wiring diagram updated with BillyBob's current state 'cepting the third-party strap-on turn-signal director.
STRAP-ON TURN-SIGNAL DIRECTOR/BRAKE LIGHT CIRCUIT This turn signal and brake light circuit diagram shows the current state of the third-party turn-signal director wiring, which will remain in place until I figure out the problems with the OEM turn-signal director. It also shows the OEM headlight switch.
55. More Cab and D-train Work
January 22nd 2008 My friend, Nate Hall, sent the following after reading the last work-in-progress log:
Hi Larry ; I finally got a moment to read your latest log , I'm concerned about your ignition timing ,you need to se the _total_ advance , not just where it seems to run well ~ this is simple if you have a dynamic timing light with advance dial on the back , I'm still using my 30 year old SEARS Craftsman one , most of my buddies have now purchased one either new or used for about $25.00 off E-Pay . Use the _triangle_ or _chevron_ that's faintly stamped into your flywheel as that's the TDC mark (you can wire brush it clean and drift some white paint into it for easy visability now the scatter pan is off) , warm up the engine and connect the timing light , I use rubber bands to hold the trigger on all the time and set the light where it'll illuminate the timing window , rev. the engine to about 2,500 ~ 3,000 RPMs and then set the dial to 35° , loosen the dizzy's pinch clamp and gently rotate it untill the triangle or chevron is aligned with the pointer and _stays_ when you release the dizzy , then snug up the pinch clamp . remember , the advance mechanism usually give you some slack so take your time to ensure the timing doesn't drift when you remove your hand . Too much ignition advance is very rough on the starter's Bendix and the ring gear too ~ it also beats up on the rod bearings..... If the starter begins to spin before the Bendix is fully engauged , loosen the two screws holding the starter switch to the starter and adjust it so the lever has to move a bit further before it makes contact and operates the motor . I'd remove the switch and _polish_ the contacts too ~ _NEVER_ sand nor scrape them ! . _YOU_ can prolly rebuild the starter better than any shop will , all it should need is : new brushes and bushings , cleaning and re- lubing . plus you won't chisel off and loose the original DELCO ID tag I see it still has . You mentioned a clunk when you release the starter , is the little retrun spring still on the pedal linkage ? it breaks often and is important to withdraw the Bendix rather than having the engine kick it out of engaugement . Before you pay over $25.00 for a good used flywheel , think about having the ring gear replaced on yours ~ there's two different ones with different tooth counts depending on 6 or 12 volt , if the machine shop cannot find a new one (doubtful) have them press it off and re-install it 1/4 turn in the direction the engine rotates , this will solve your engaugement troubles forever , an old dealer trick I still use . Billy Bob is looking good ! nice wax job . -Nate
I do think I have too much timing advance right now and that if I retard it a bit, BillyBob will start easier again. As for the flywheel, my idea is to get a spare one to fix up so BillyBob can remain mobile in the mean time. My first attempt at that failed.
I researched the flywheel in the online 1929 - 1957 Chevrolet Master Parts & Accessories Catalog at the The Old Car Manual Project website and found that I needed a part #3704631 flywheel for the '54-'55 1st series 235 engine. I've been watching eBay for weeks but nothing has come up for bidding. When I replaced the starter a couple of weeks ago, I decided to hasten the search because of the clatter of the worn ringgear when starting. I decided to try the Junkyard Dog service. I got two e-mail responses. The first one was a "form" e-mail from D&J Auto Parts in Richmond, Indiana. It said that they had the part and to call them for the quote. The other one came from Ken Freeman of East West Auto Parts of Tulsa, Oklahoma. Ken gave me a quote of $95 for the "Flywheel Part #3704831 (54=55 1st series light truck, 139 tooth 6volt ringgear)" I had requested. After a couple of days, I called him up and arranged to buy it. Ended up being $125 with shipping.
 The
flywheel arrived today. $95 is high and I was hoping that the flywheel
would be in good enough shape to install temporarily so I could get
BillyBob's original flywheel resurfaced and have the new ringgear I
purchased a few years ago installed on it. The bad news is that the one
I just received is pitted badly and may need a bit of welding as well
as a major resurfacing . . . The good news is that its a fracin' 216
flywheel from a 1953 truck! I checked my Hollander Interchange book and
there is no way it will fit so I don't have to worry about finding a
machine shop just yet.
The
flywheel arrived today. $95 is high and I was hoping that the flywheel
would be in good enough shape to install temporarily so I could get
BillyBob's original flywheel resurfaced and have the new ringgear I
purchased a few years ago installed on it. The bad news is that the one
I just received is pitted badly and may need a bit of welding as well
as a major resurfacing . . . The good news is that its a fracin' 216
flywheel from a 1953 truck! I checked my Hollander Interchange book and
there is no way it will fit so I don't have to worry about finding a
machine shop just yet.
When I had Mr. Freeman on the phone and I repeated the part number, he said he didn't need to know it. That was my cue to say "No thank you, good day" but I didn't follow my instincts and bought it anyway. The part number stamped on the back of this flywheel is #839754 and the receipt even had the VIN number H53F010345 on it which translates to "1953 Model 3100 assembled in Flint, Mi with sequential number 010345". In the 1947 - 1955 run of the Advance Design series of trucks, the biggest change was between 1953 and 1954 including grille, windshield, dashboard and new engine design. How is it that a salvage yard does not know this?
I'm marking this up to another $125 lesson in the school of hard knocks and moving on. I am not interested in repacking this and spending another $30 and an hour of my time to send it back. I'm fifty-eight years old and as Frank Anderson said in a oldtruckstuff forum thread I'm "one of those guys playin' the back nine". We're apt to be cranky and we don't have time to mess around. I won't be placing any more orders with East West Auto Parts.
January 26th 2008 When I got to the Krash Lab this morning, it was a bone chilling 67 degrees (the shadetree weather reports have been getting a little stale so I've enlisted ghost writting help from a Canadian friend "Fogducker"). It's monthly and quarterly maintenance time so I started with that on Renegade.
When I got finished with Renegade, monthly maintenance was performed on BillyBob. He needed a little bit of diffy oil and half a quart of motor oil. Played around with the ignition timing after that. Unfortunately, I don't have the timing light Nate talks about above. I've got the "timing light for dummies" model. The only control on it is the light trigger. The timing is still advanced a bit for the volatile gas but now at least the bb can be seen in the bellhousing hole ahead of the pointer 'bout half an inch. The beer of the day is Left Hand Brewing Company's Deep Cover Brown Ale. After a few of those I faded away.
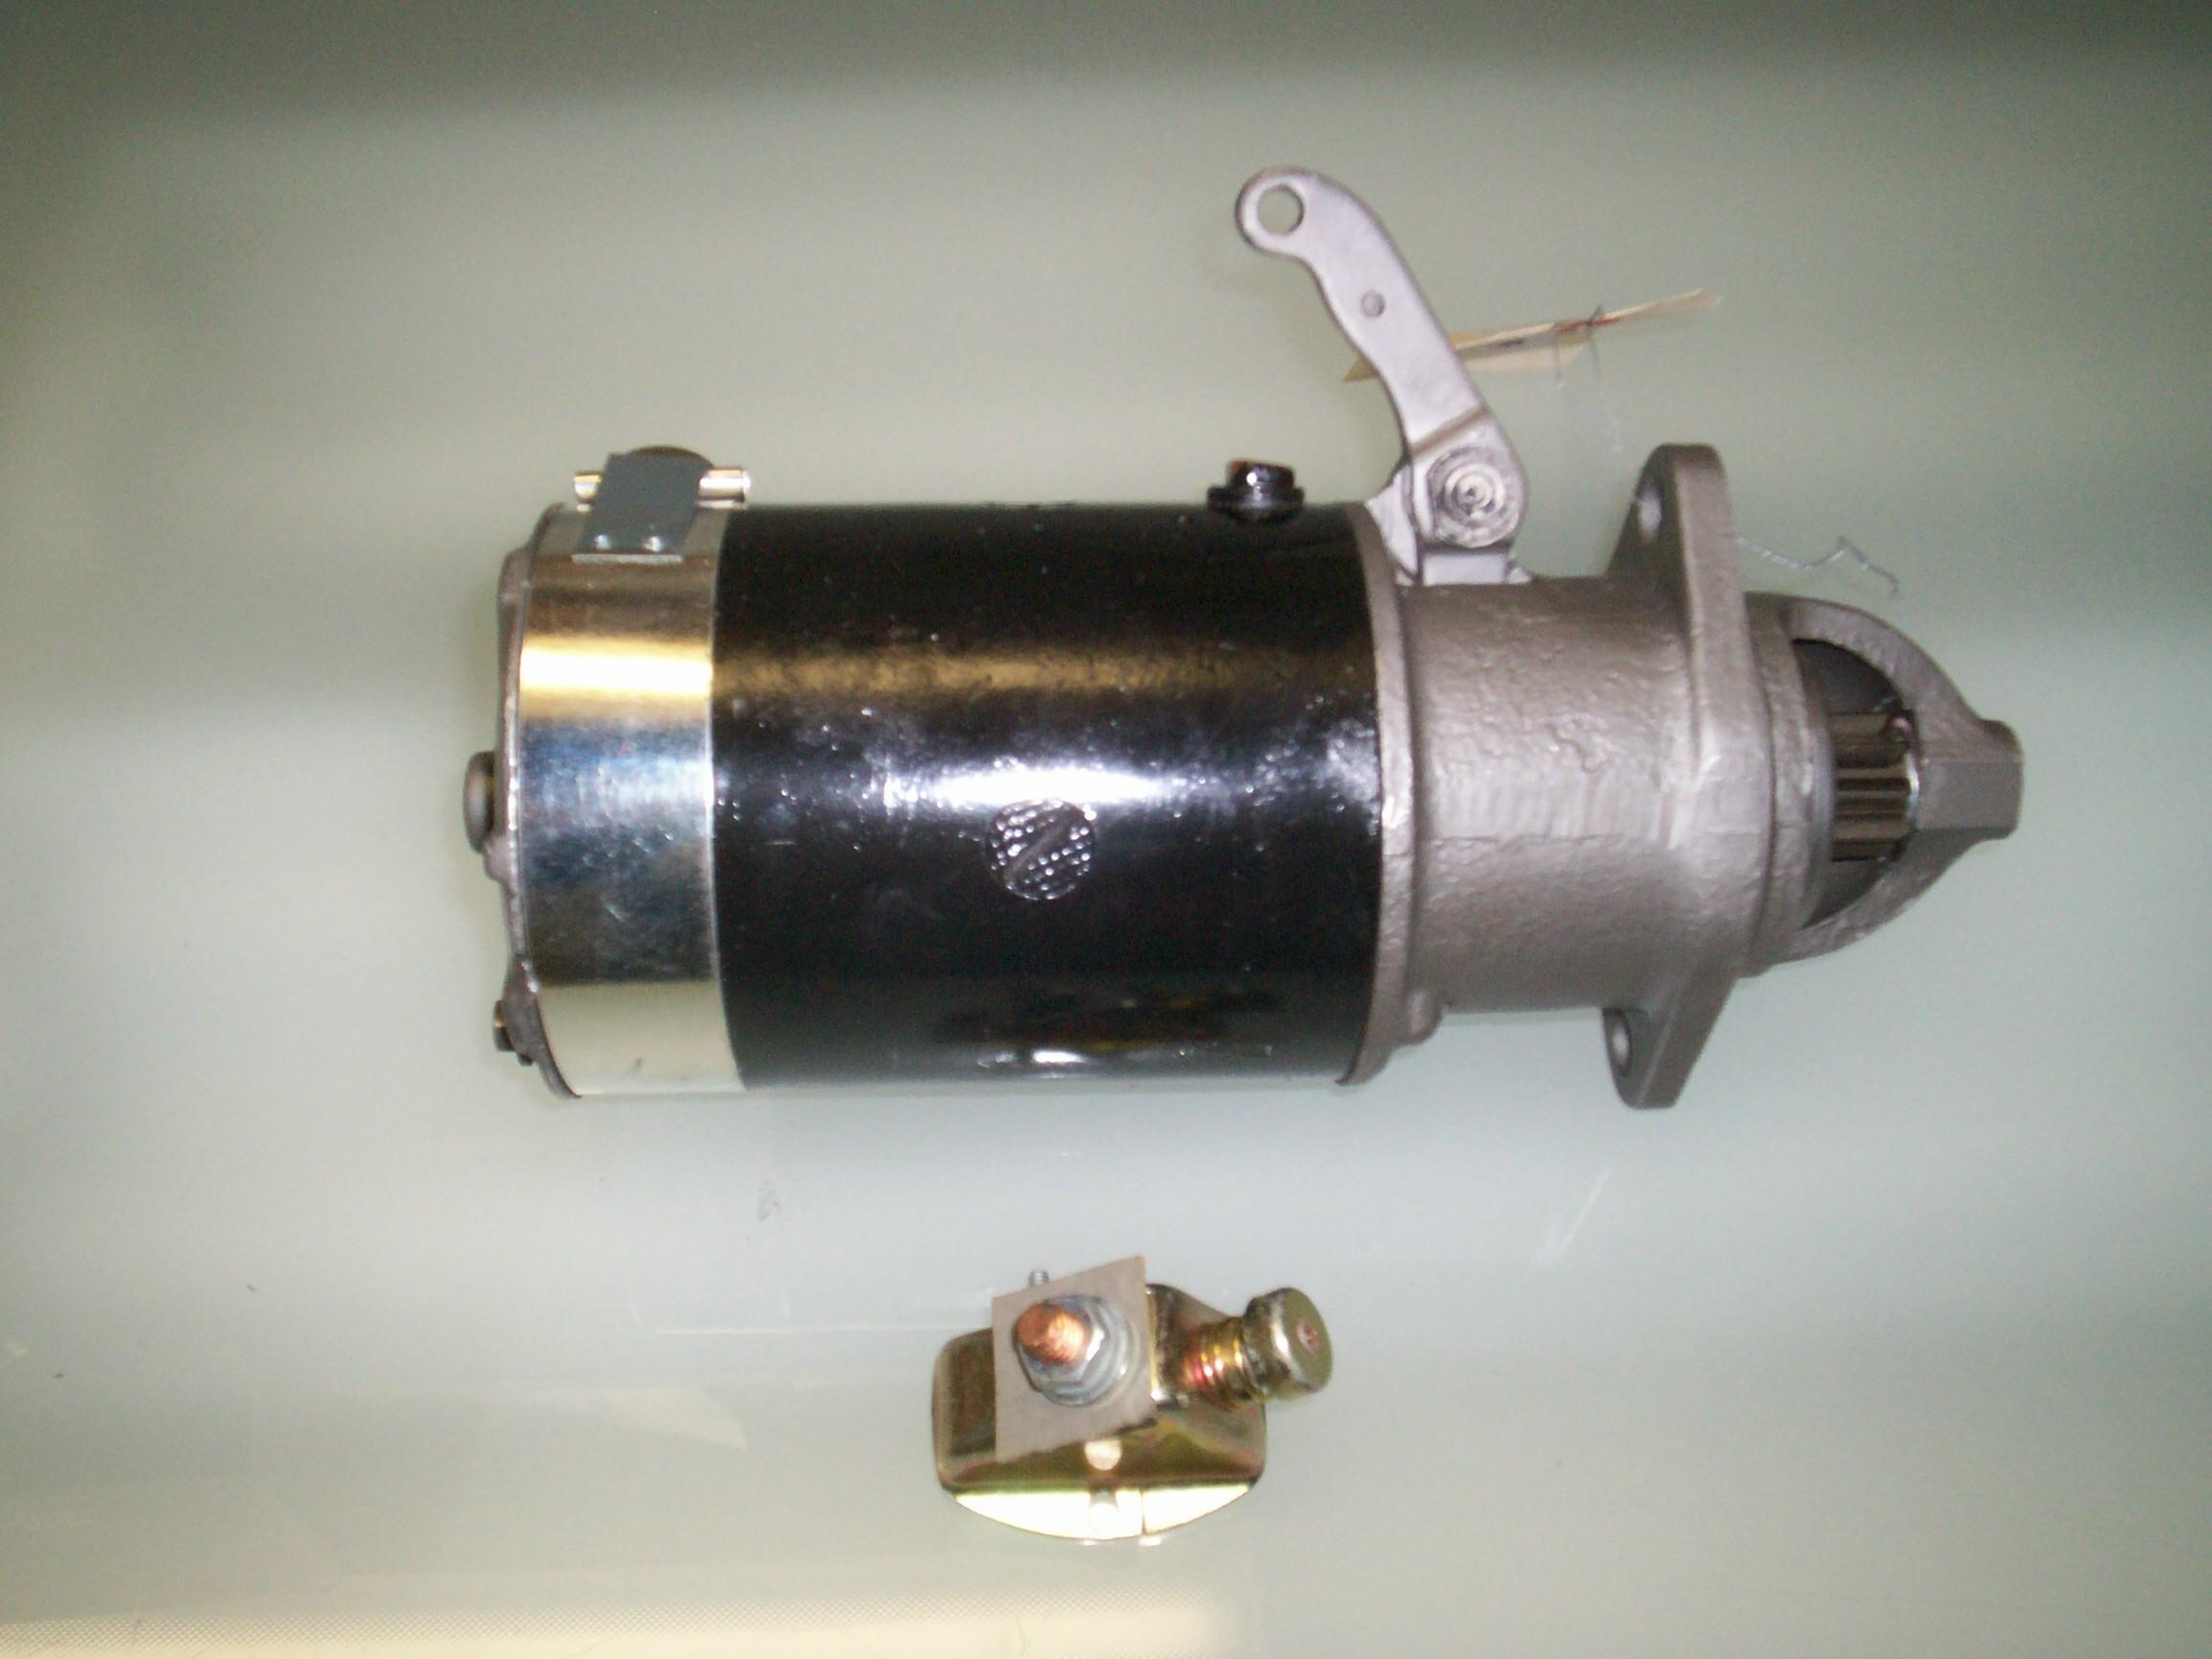 January
27th 2008 We got a cold
front rolling thru so the sky is overcast with a few sprinkles now and
then. After I installed my spare starter a couple of weeks back, I
ordered another from Chevs
of the 40's. It was more expensive than the one I got from
Jim Carter several years ago which is the one that is in BillyBob now.
The clasp on the sheet metal band that covers the access holes in the
casting was loose and I had to mess with it a bit with a pair of pliers
to tighten it up. The replacement did not come with the switch on the
top either (the Jim Carter starter did). I have a spare switch so I
decided to mount it before storing this motor away in the roadtrip
travel box. I need two #10-32 screws to mount the switch and the
shortest ones I could find among my spare parts were 3/8" which is just
a bit too long. I'll place an order to McMaster-Carr this
upcoming week.
January
27th 2008 We got a cold
front rolling thru so the sky is overcast with a few sprinkles now and
then. After I installed my spare starter a couple of weeks back, I
ordered another from Chevs
of the 40's. It was more expensive than the one I got from
Jim Carter several years ago which is the one that is in BillyBob now.
The clasp on the sheet metal band that covers the access holes in the
casting was loose and I had to mess with it a bit with a pair of pliers
to tighten it up. The replacement did not come with the switch on the
top either (the Jim Carter starter did). I have a spare switch so I
decided to mount it before storing this motor away in the roadtrip
travel box. I need two #10-32 screws to mount the switch and the
shortest ones I could find among my spare parts were 3/8" which is just
a bit too long. I'll place an order to McMaster-Carr this
upcoming week.
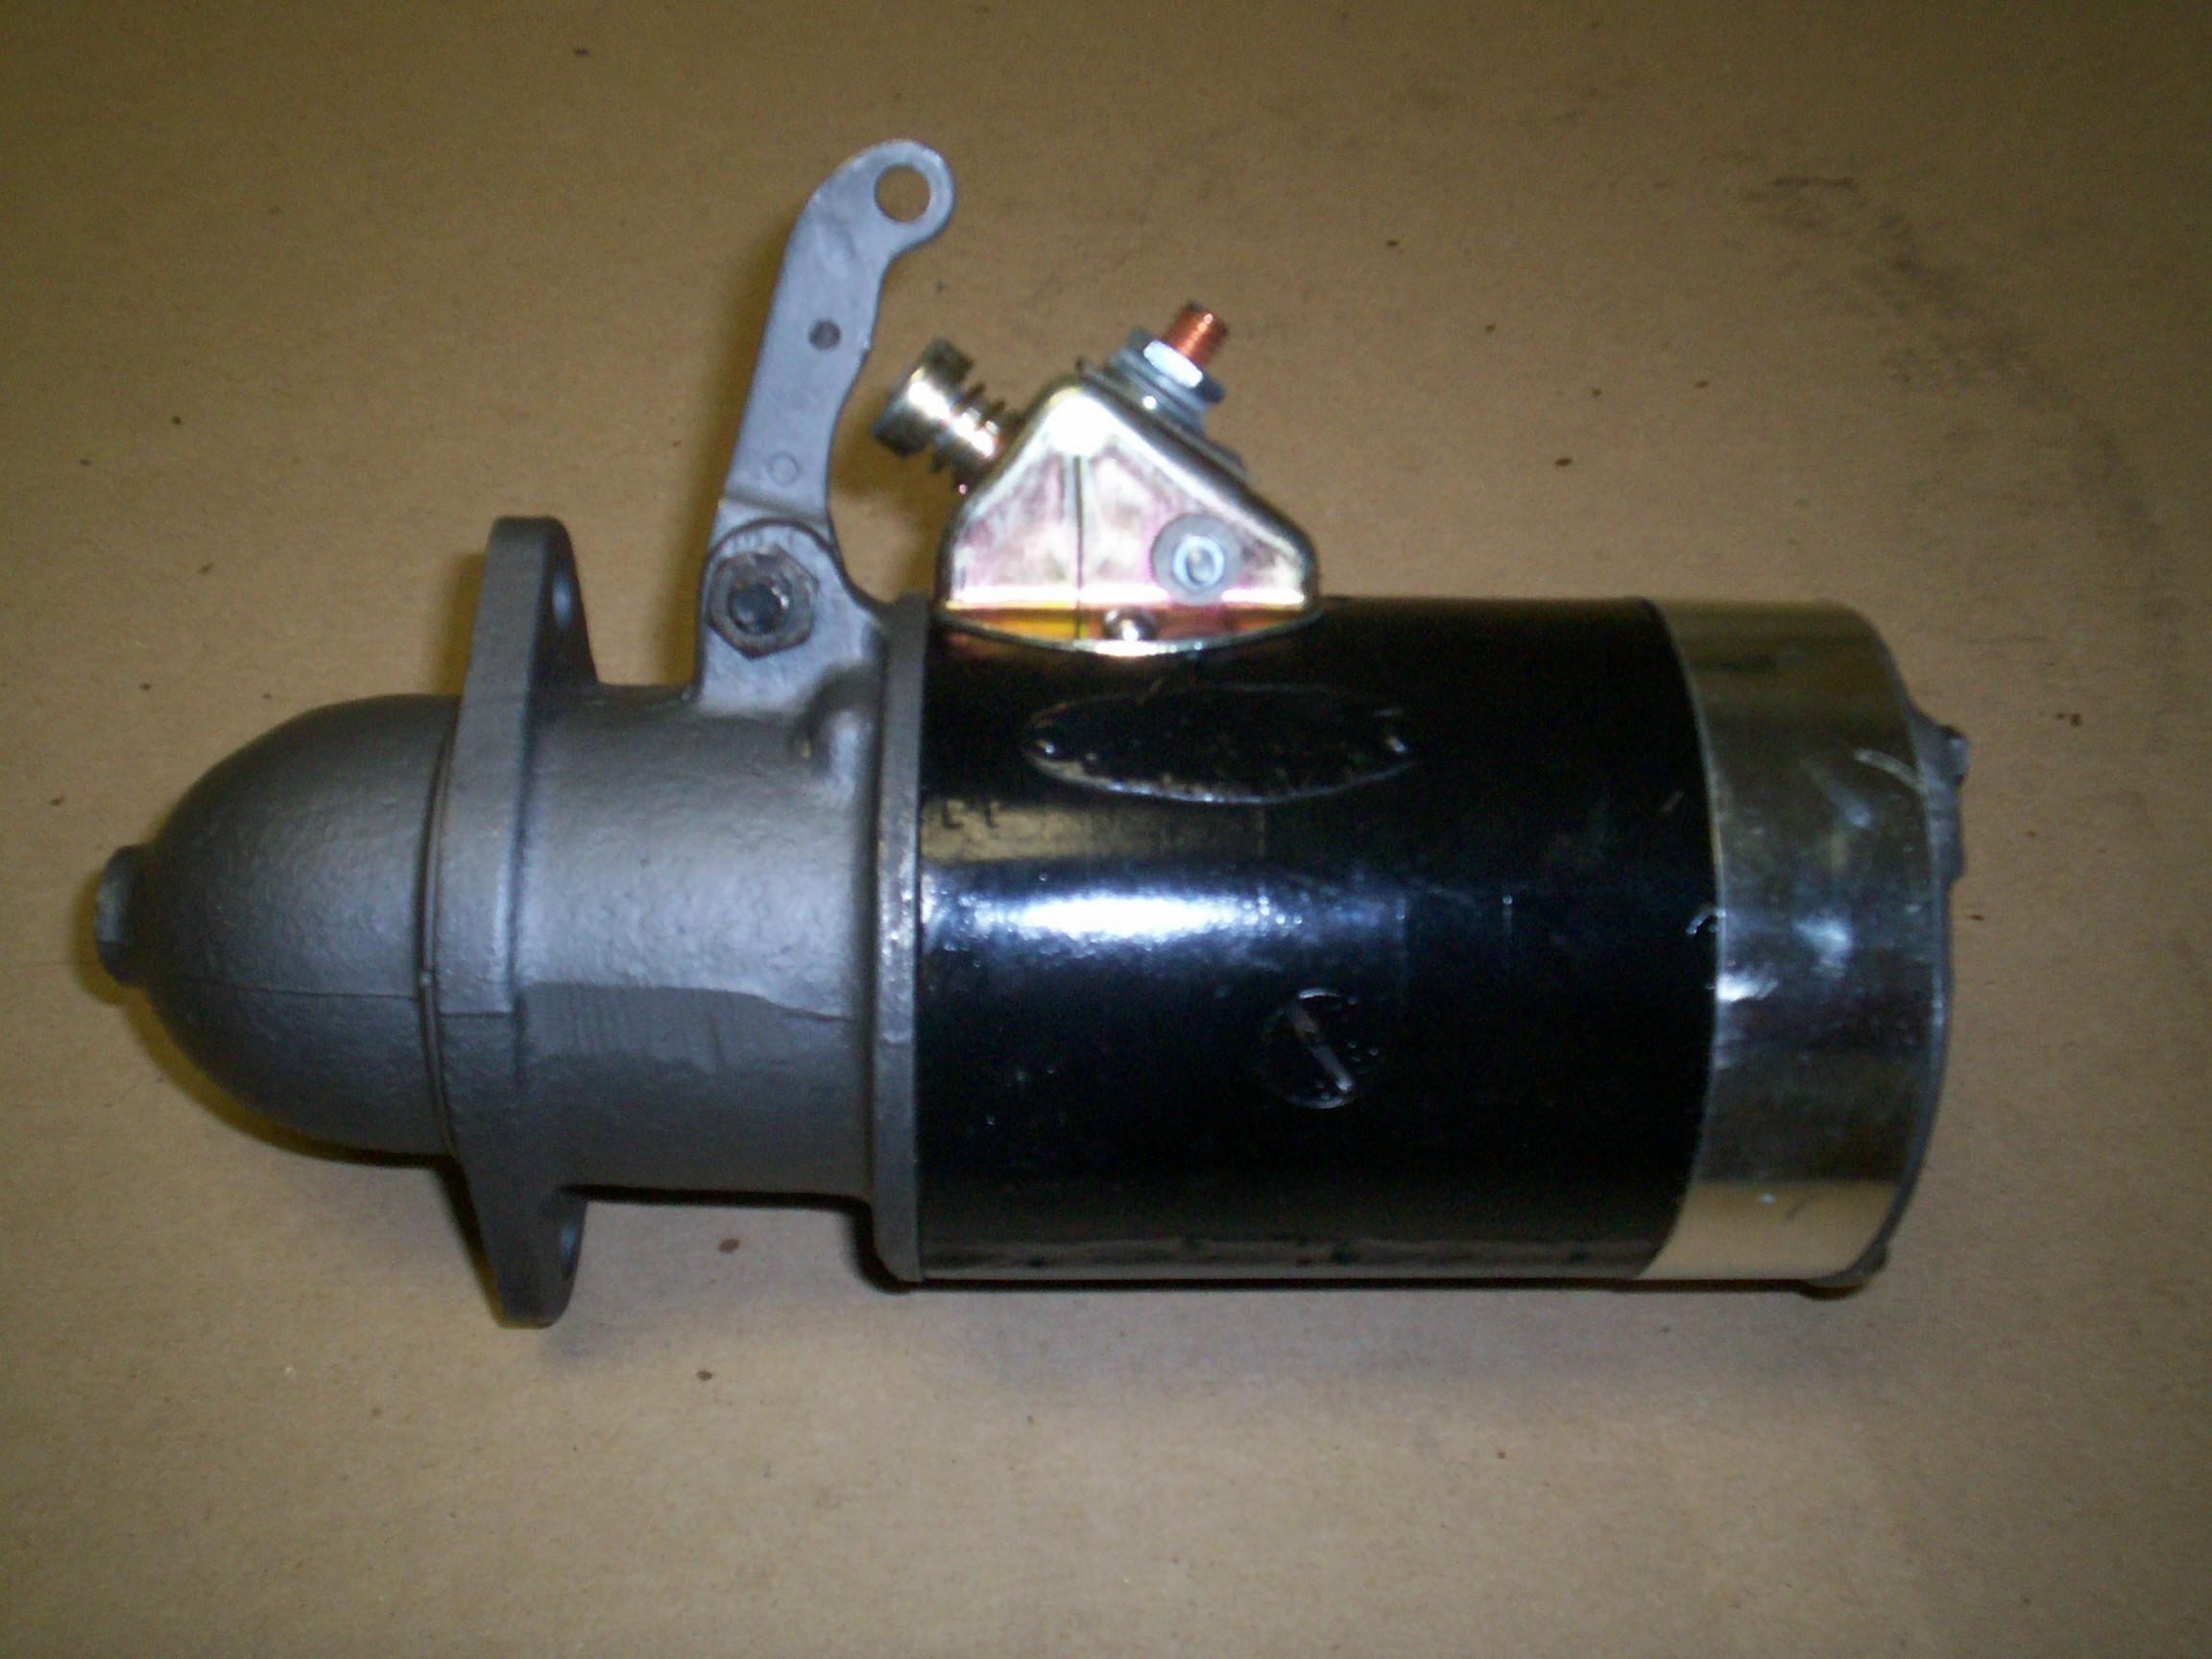 February
2nd 2008 Overcast
today, but warm. The #10-32 x 1/4" stainless steel screws arrived from
McMaster-Carr early in the week. I used two of them with Threadlocker
Blue to attach the switch to the top of the new starter. This switch
has the extra terminal on the side marking it as a later switch. You
can run a wire from this side terminal to the positive side of the coil
to bypass the ballast resistor during starting and provide a hotter
spark. The reason you don't bypass the ballast resistor all the time is
that it burns the points. This bypass can be an important option in
cold weather climates. This thing is ready for the travel box up at the
warehouse.
February
2nd 2008 Overcast
today, but warm. The #10-32 x 1/4" stainless steel screws arrived from
McMaster-Carr early in the week. I used two of them with Threadlocker
Blue to attach the switch to the top of the new starter. This switch
has the extra terminal on the side marking it as a later switch. You
can run a wire from this side terminal to the positive side of the coil
to bypass the ballast resistor during starting and provide a hotter
spark. The reason you don't bypass the ballast resistor all the time is
that it burns the points. This bypass can be an important option in
cold weather climates. This thing is ready for the travel box up at the
warehouse.
February 16th 2008 It's a good working weather day under the shadetree. I didn't get much done last week. The rear door to the Krash Lab was broken and I had to trapse back-n-forth thru the front lobby to the office. It was a festival day too and I had to stop every so often to escort a trespasser (who ignored the no parking signs) out of the lot. Before I gave up on sunday afternoon and went to a cruise-in, I did a little work on the dashboard defroster vent trim piece.
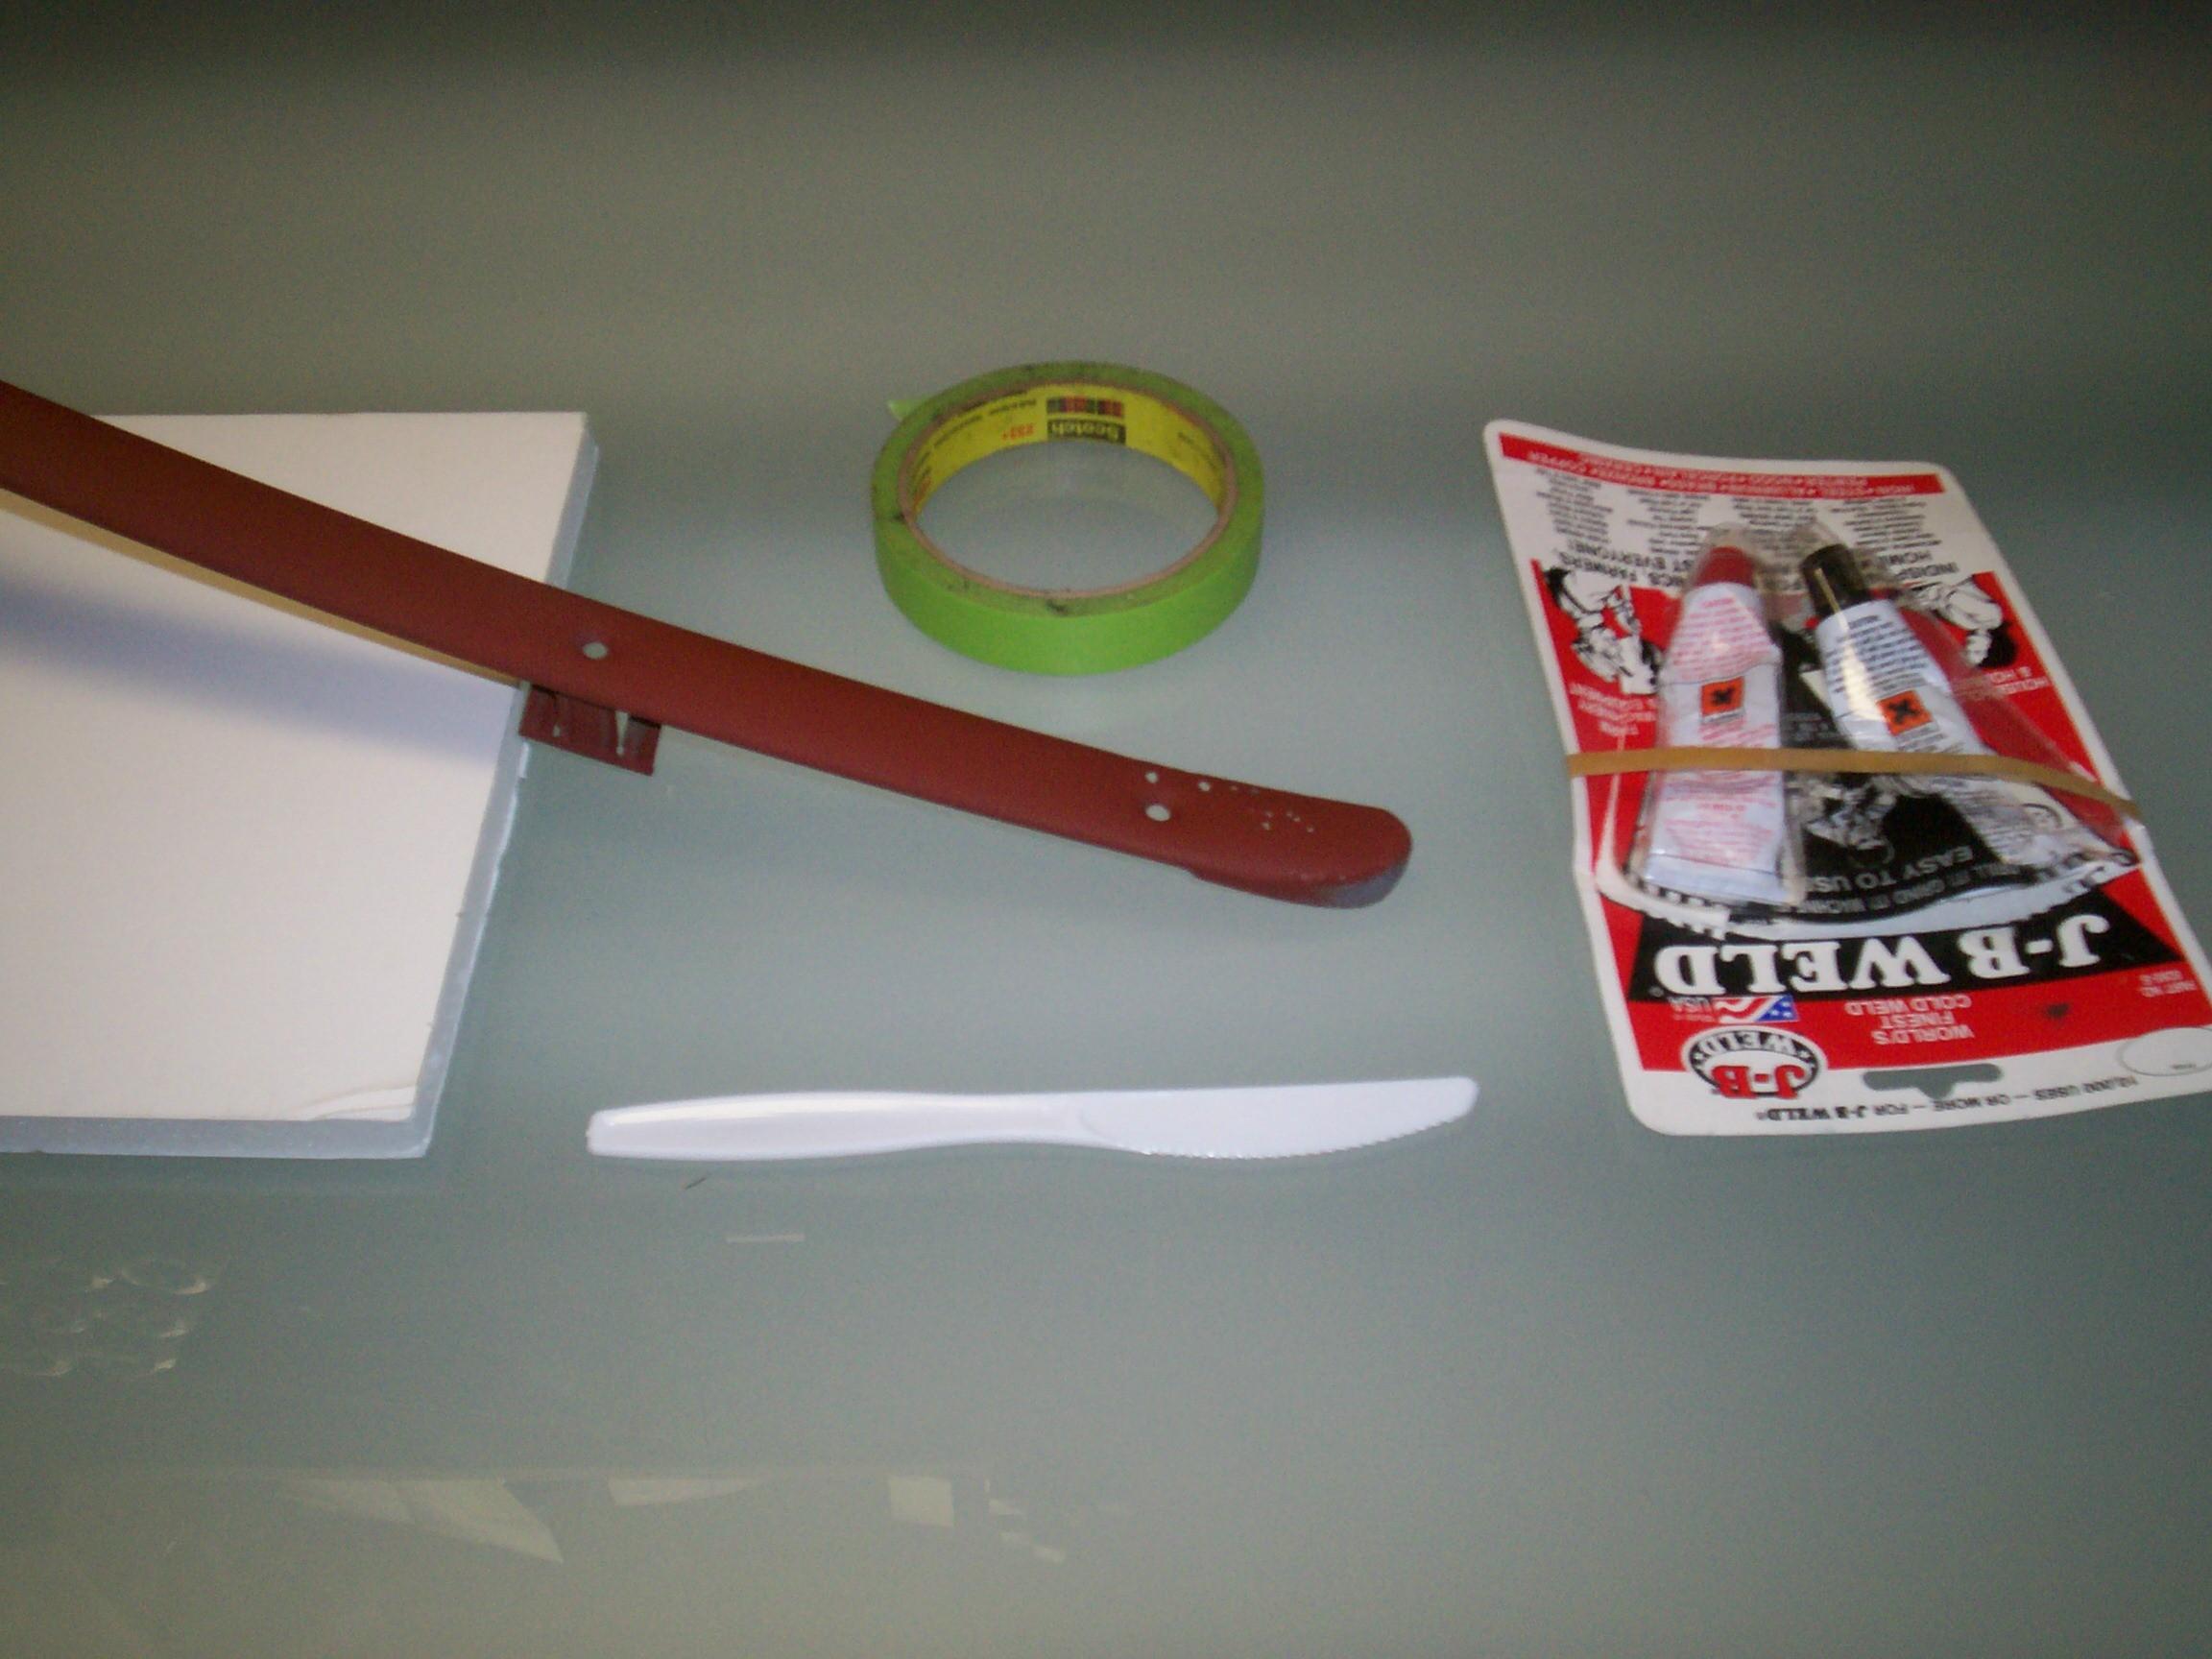 A
couple of years back, I sandblasted and primed this trim piece. It's
gathered some surface rust since then. BettyLou is sitting
in the middle of my sandblasting area awaiting new fuel and brake lines
so I can't do any blasting. I went the easy route and gave the trim a
coat of Eastwood's Rust Encapsulator last week. Both ends of this trim
piece are rusted thru with pinholes. I put masking tape on the exposed
side and filled the pinholes from behind with a batch of JB Weld.
A
couple of years back, I sandblasted and primed this trim piece. It's
gathered some surface rust since then. BettyLou is sitting
in the middle of my sandblasting area awaiting new fuel and brake lines
so I can't do any blasting. I went the easy route and gave the trim a
coat of Eastwood's Rust Encapsulator last week. Both ends of this trim
piece are rusted thru with pinholes. I put masking tape on the exposed
side and filled the pinholes from behind with a batch of JB Weld.
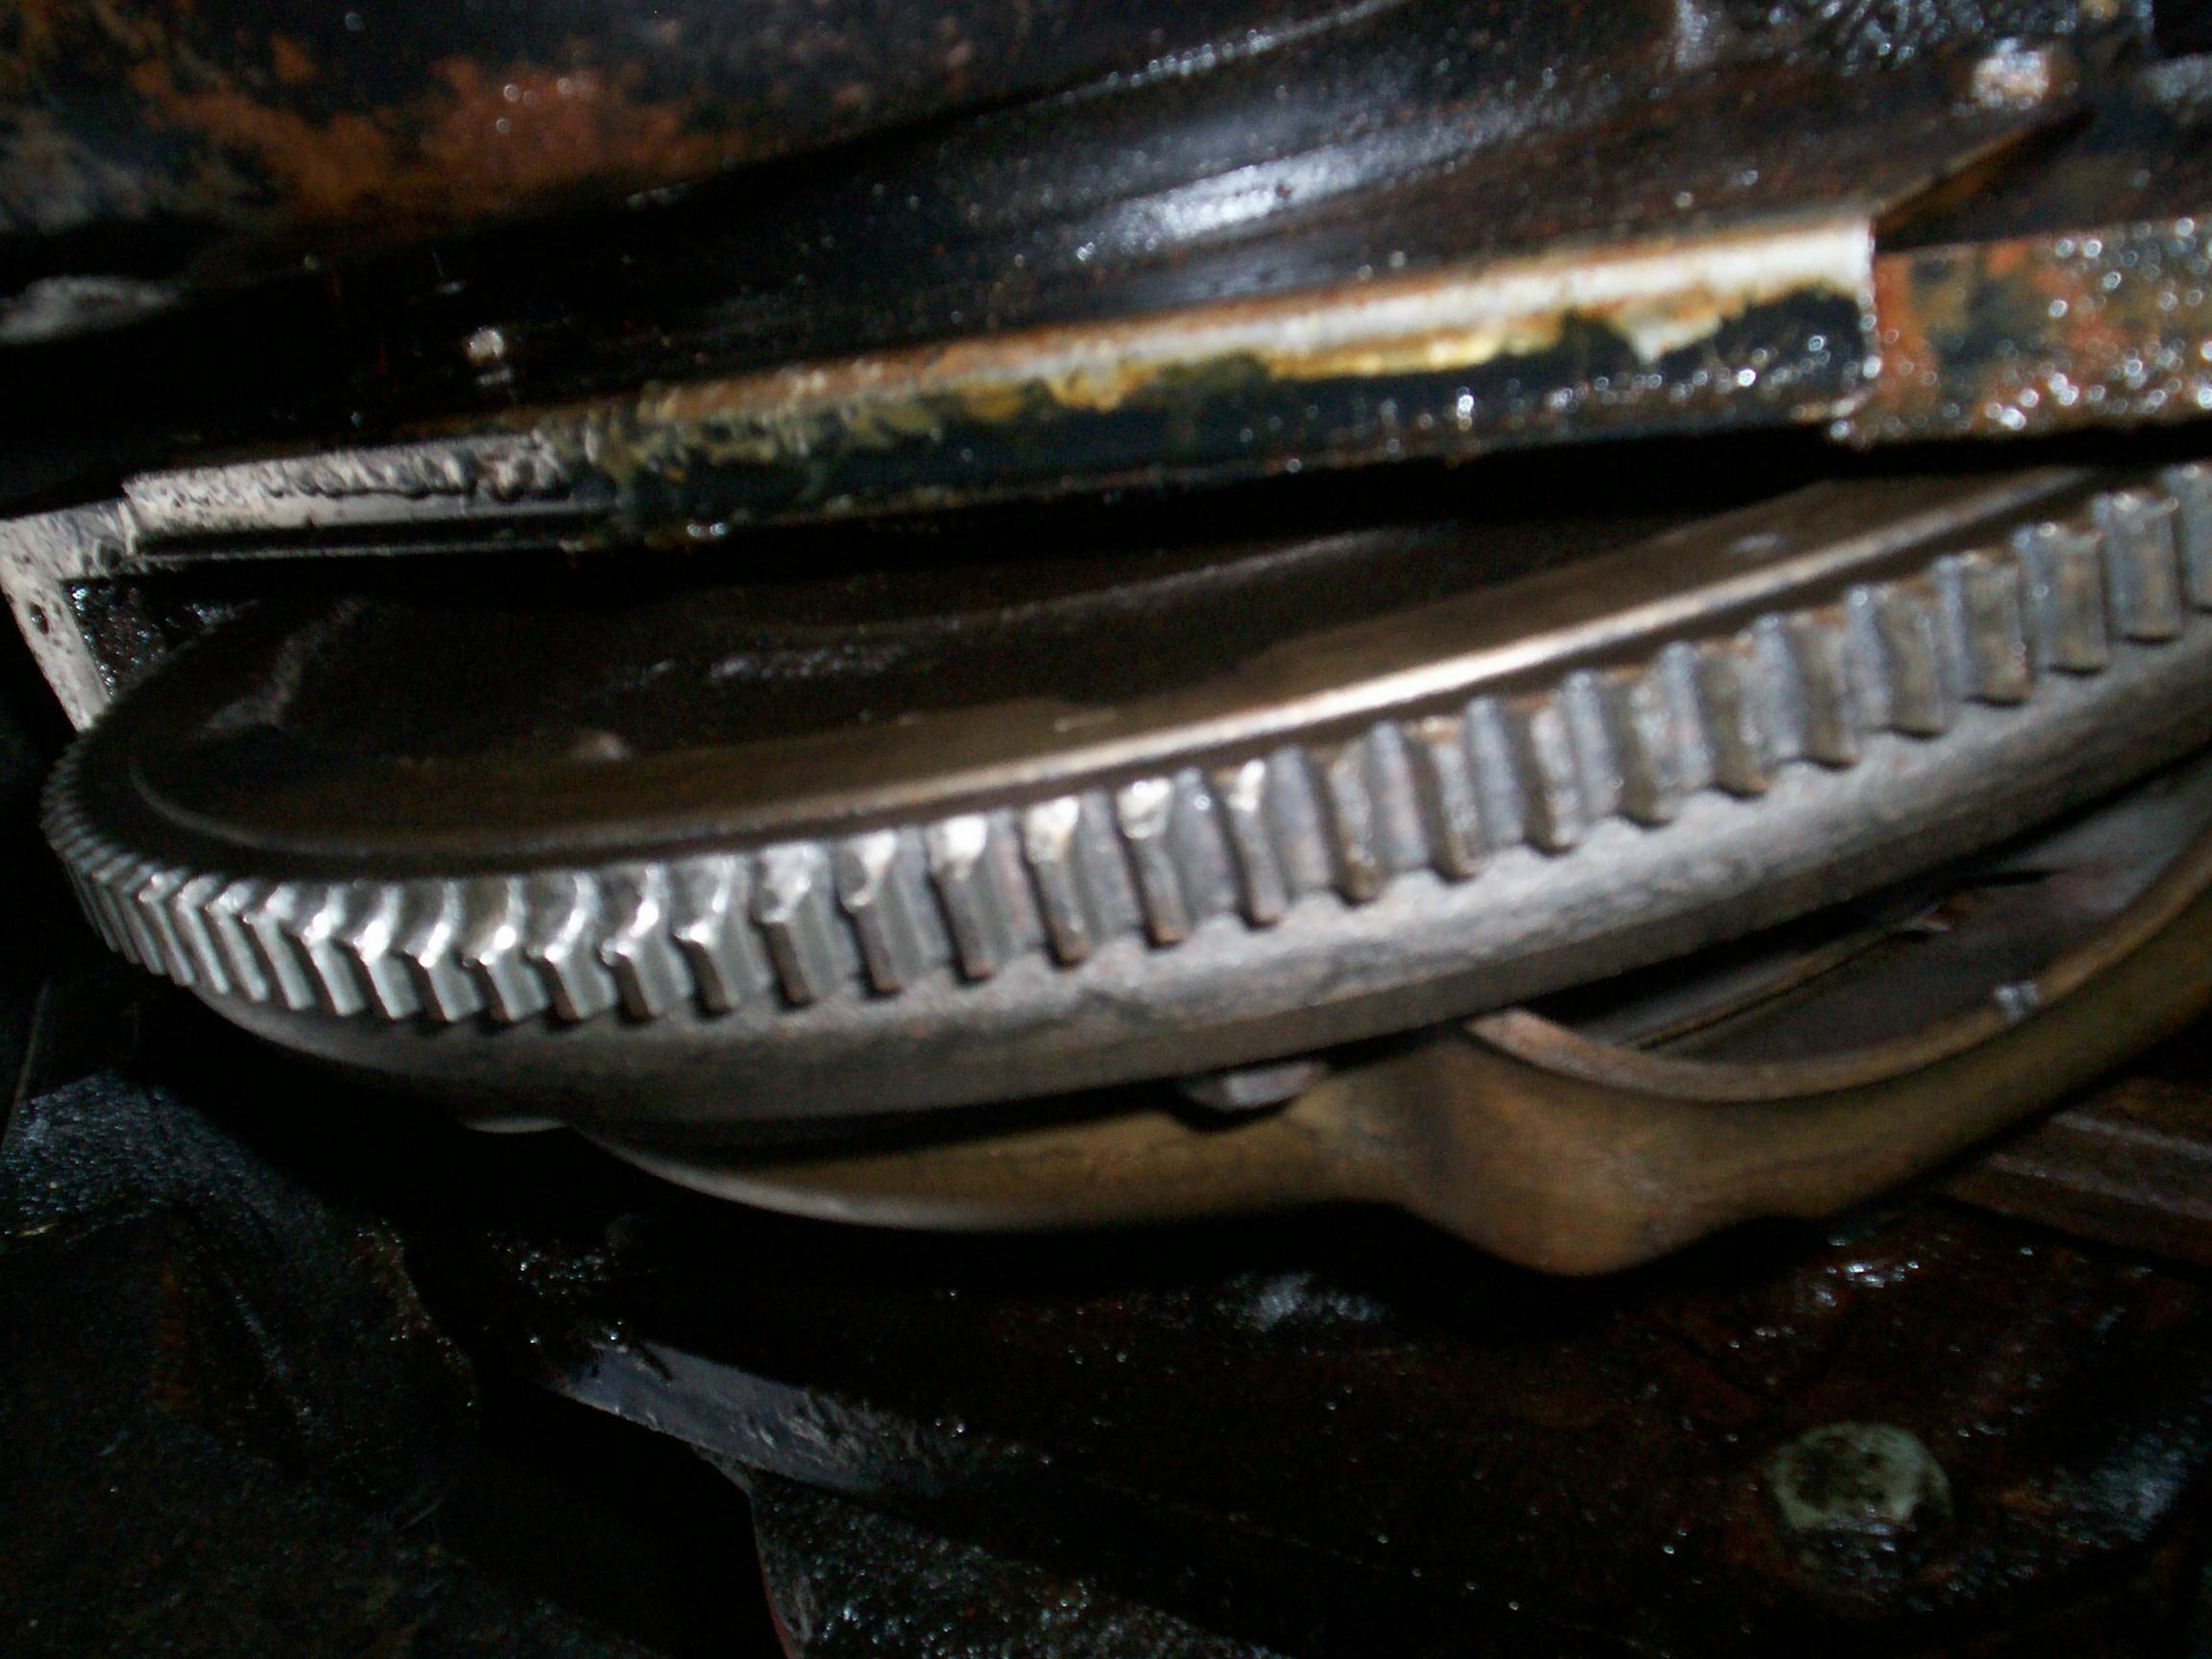 Performed
quarterly maintenance on BillyBob next. Greasing BillyBob's
twenty-three zerk fittings is a fun job on your back. The fun part is
when you're finished. While I had the front end up on jackstands, I
took the flywheel cover off again. I had it off last month to paint but
my engine paint had dried up so I just cleaned it up and primed it.
This time, the chewed up portion of the ringgear was at the bottom so I
got a chance to see the damage. No wonder the starter can't get a grip
on these teeth.
Performed
quarterly maintenance on BillyBob next. Greasing BillyBob's
twenty-three zerk fittings is a fun job on your back. The fun part is
when you're finished. While I had the front end up on jackstands, I
took the flywheel cover off again. I had it off last month to paint but
my engine paint had dried up so I just cleaned it up and primed it.
This time, the chewed up portion of the ringgear was at the bottom so I
got a chance to see the damage. No wonder the starter can't get a grip
on these teeth.
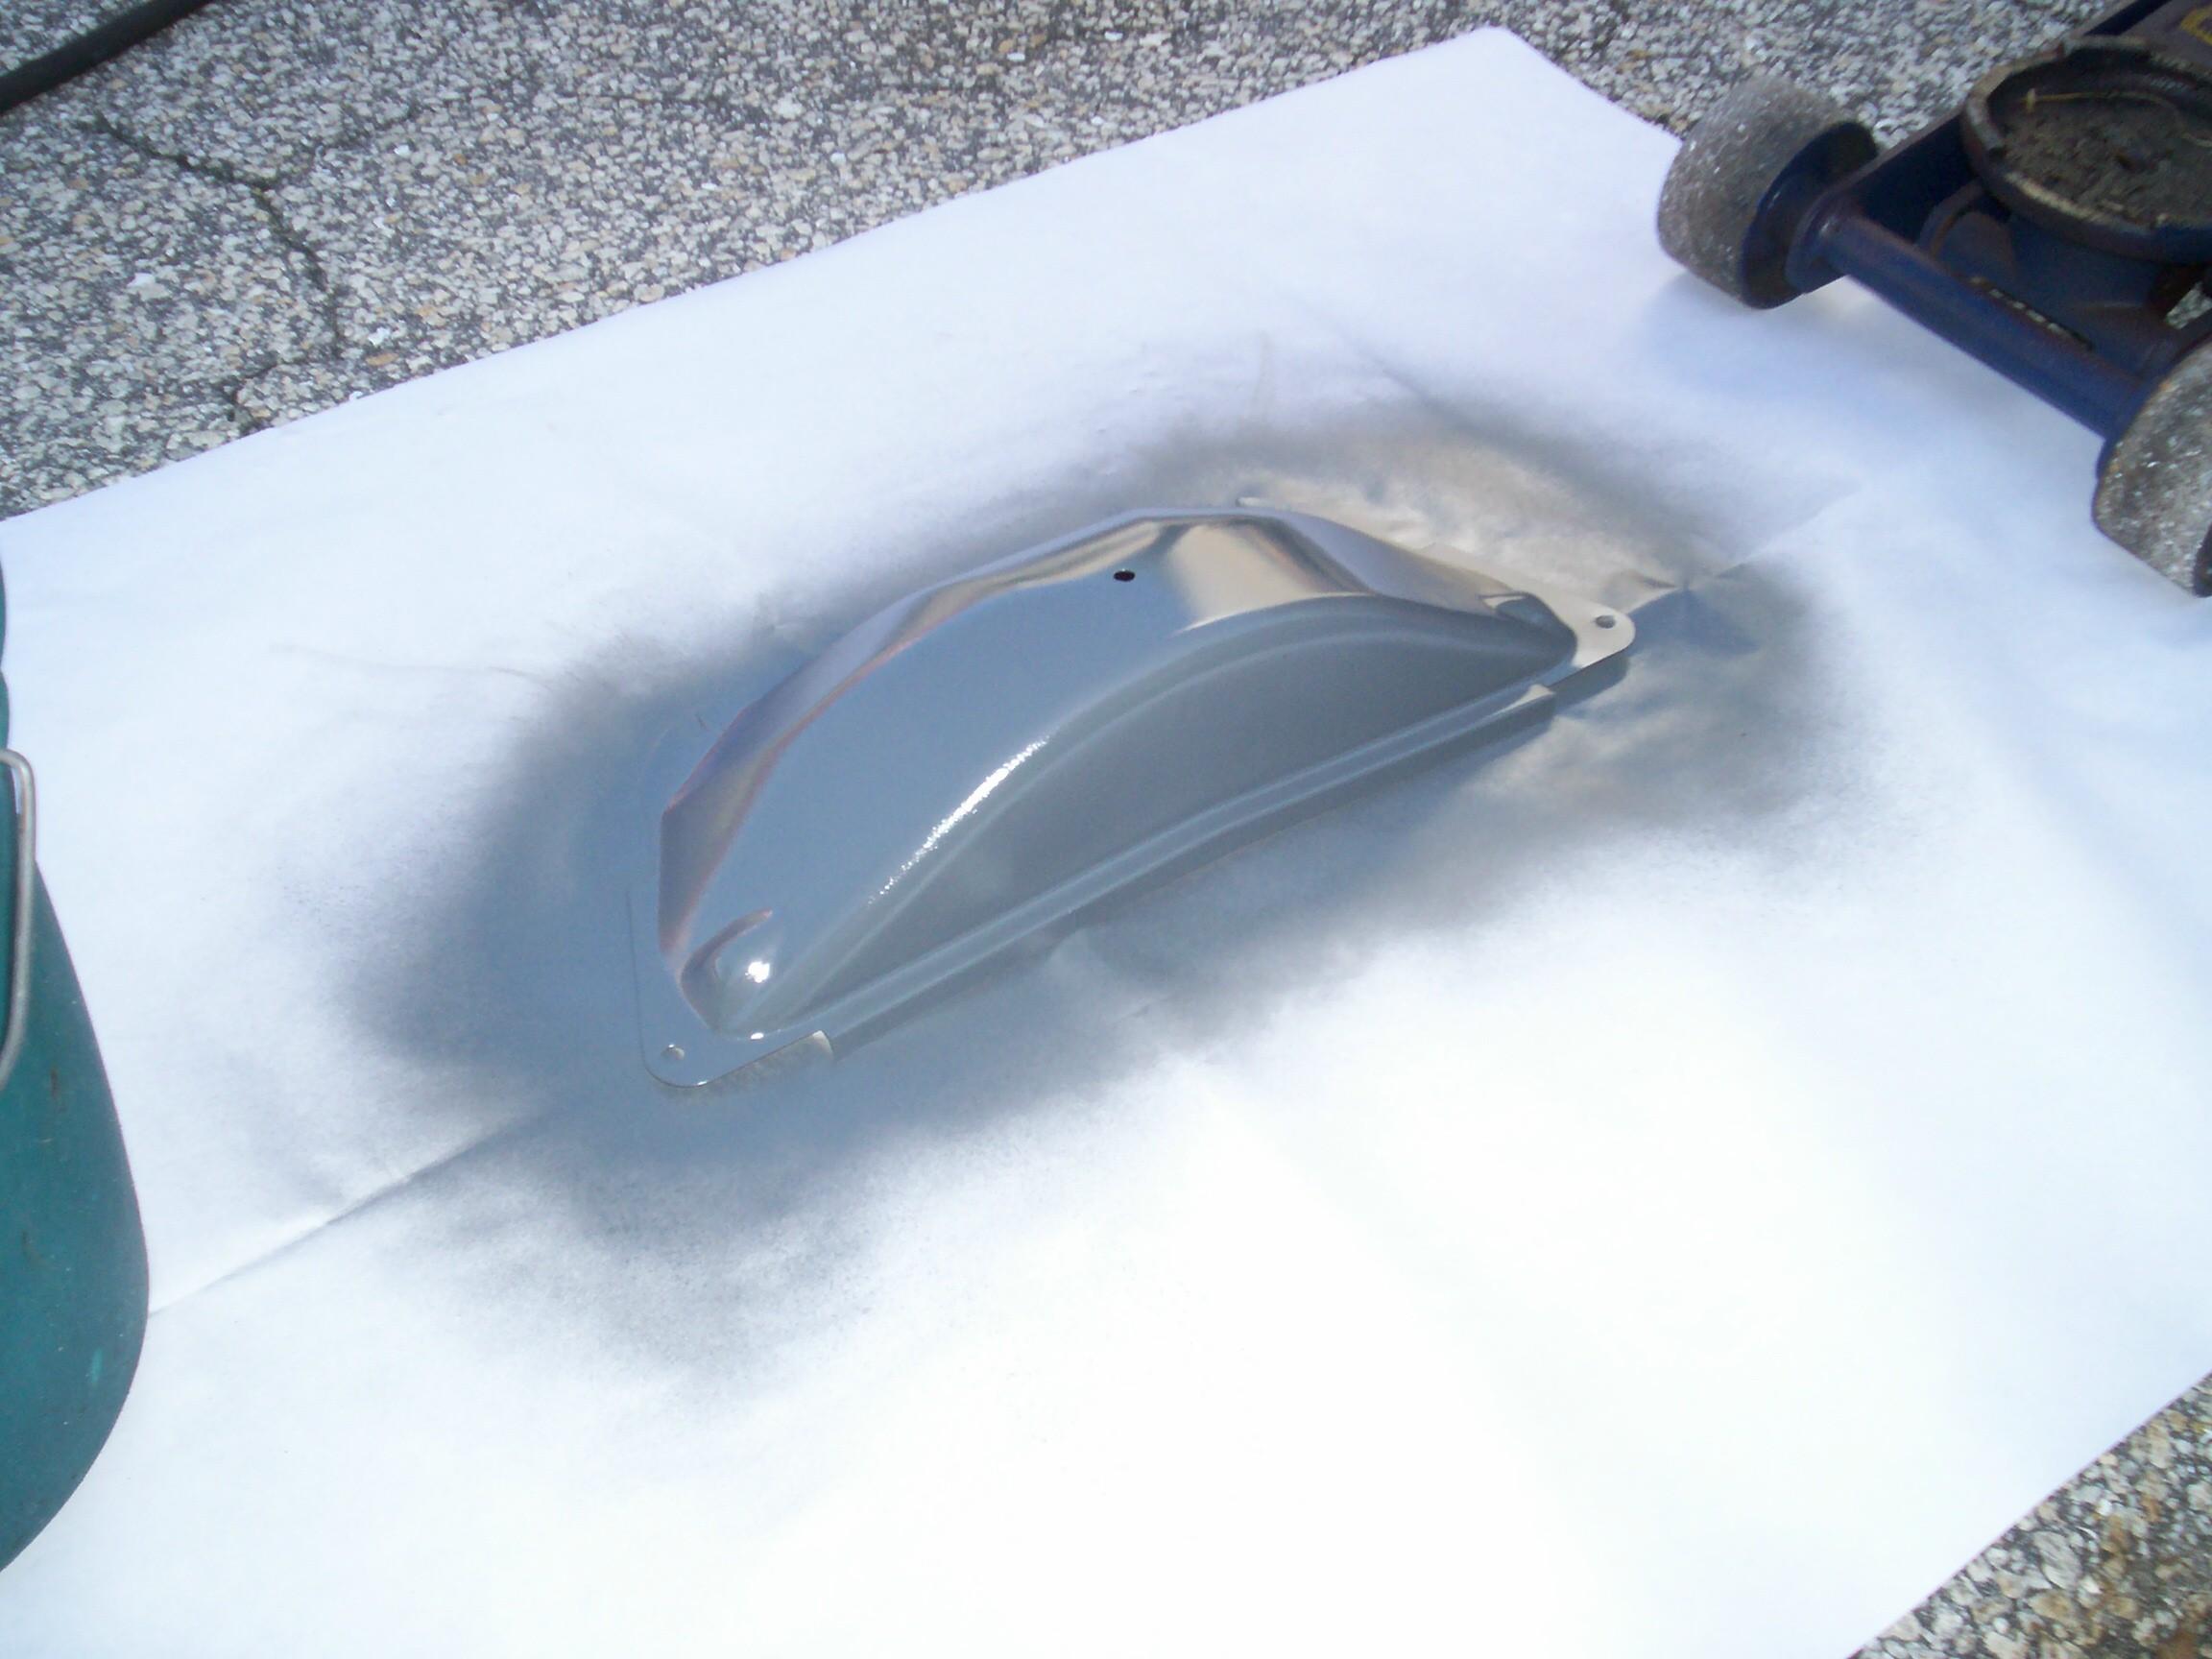 I
cleaned up the sheetmetal flywheel cover with soap and water. It was
oily again. Don't know where the oil is coming from but I suspect the
rear main bearing seal isn't doin' its job as well anymore. Dried and
PRE Paint Prepped the outside of the cover. Gave it a couple of coats
of Bill Hirsch
"Chevrolet Gray" Engine Enamel. I don't think this is the correct color
for BillyBob and there is quite a debate in the various forums about
this paint color not being right. I do know that I like this color so
none of that really matters much to me.
I
cleaned up the sheetmetal flywheel cover with soap and water. It was
oily again. Don't know where the oil is coming from but I suspect the
rear main bearing seal isn't doin' its job as well anymore. Dried and
PRE Paint Prepped the outside of the cover. Gave it a couple of coats
of Bill Hirsch
"Chevrolet Gray" Engine Enamel. I don't think this is the correct color
for BillyBob and there is quite a debate in the various forums about
this paint color not being right. I do know that I like this color so
none of that really matters much to me.
I watched the latest Powerblock TV episodes while the paint cured. Afterwards, the flywheel cover was reinstalled on BillyBob and spare flywheel cover machine screws were ordered online from McMaster-Carr. Then I moved on to do some work on Renegade.
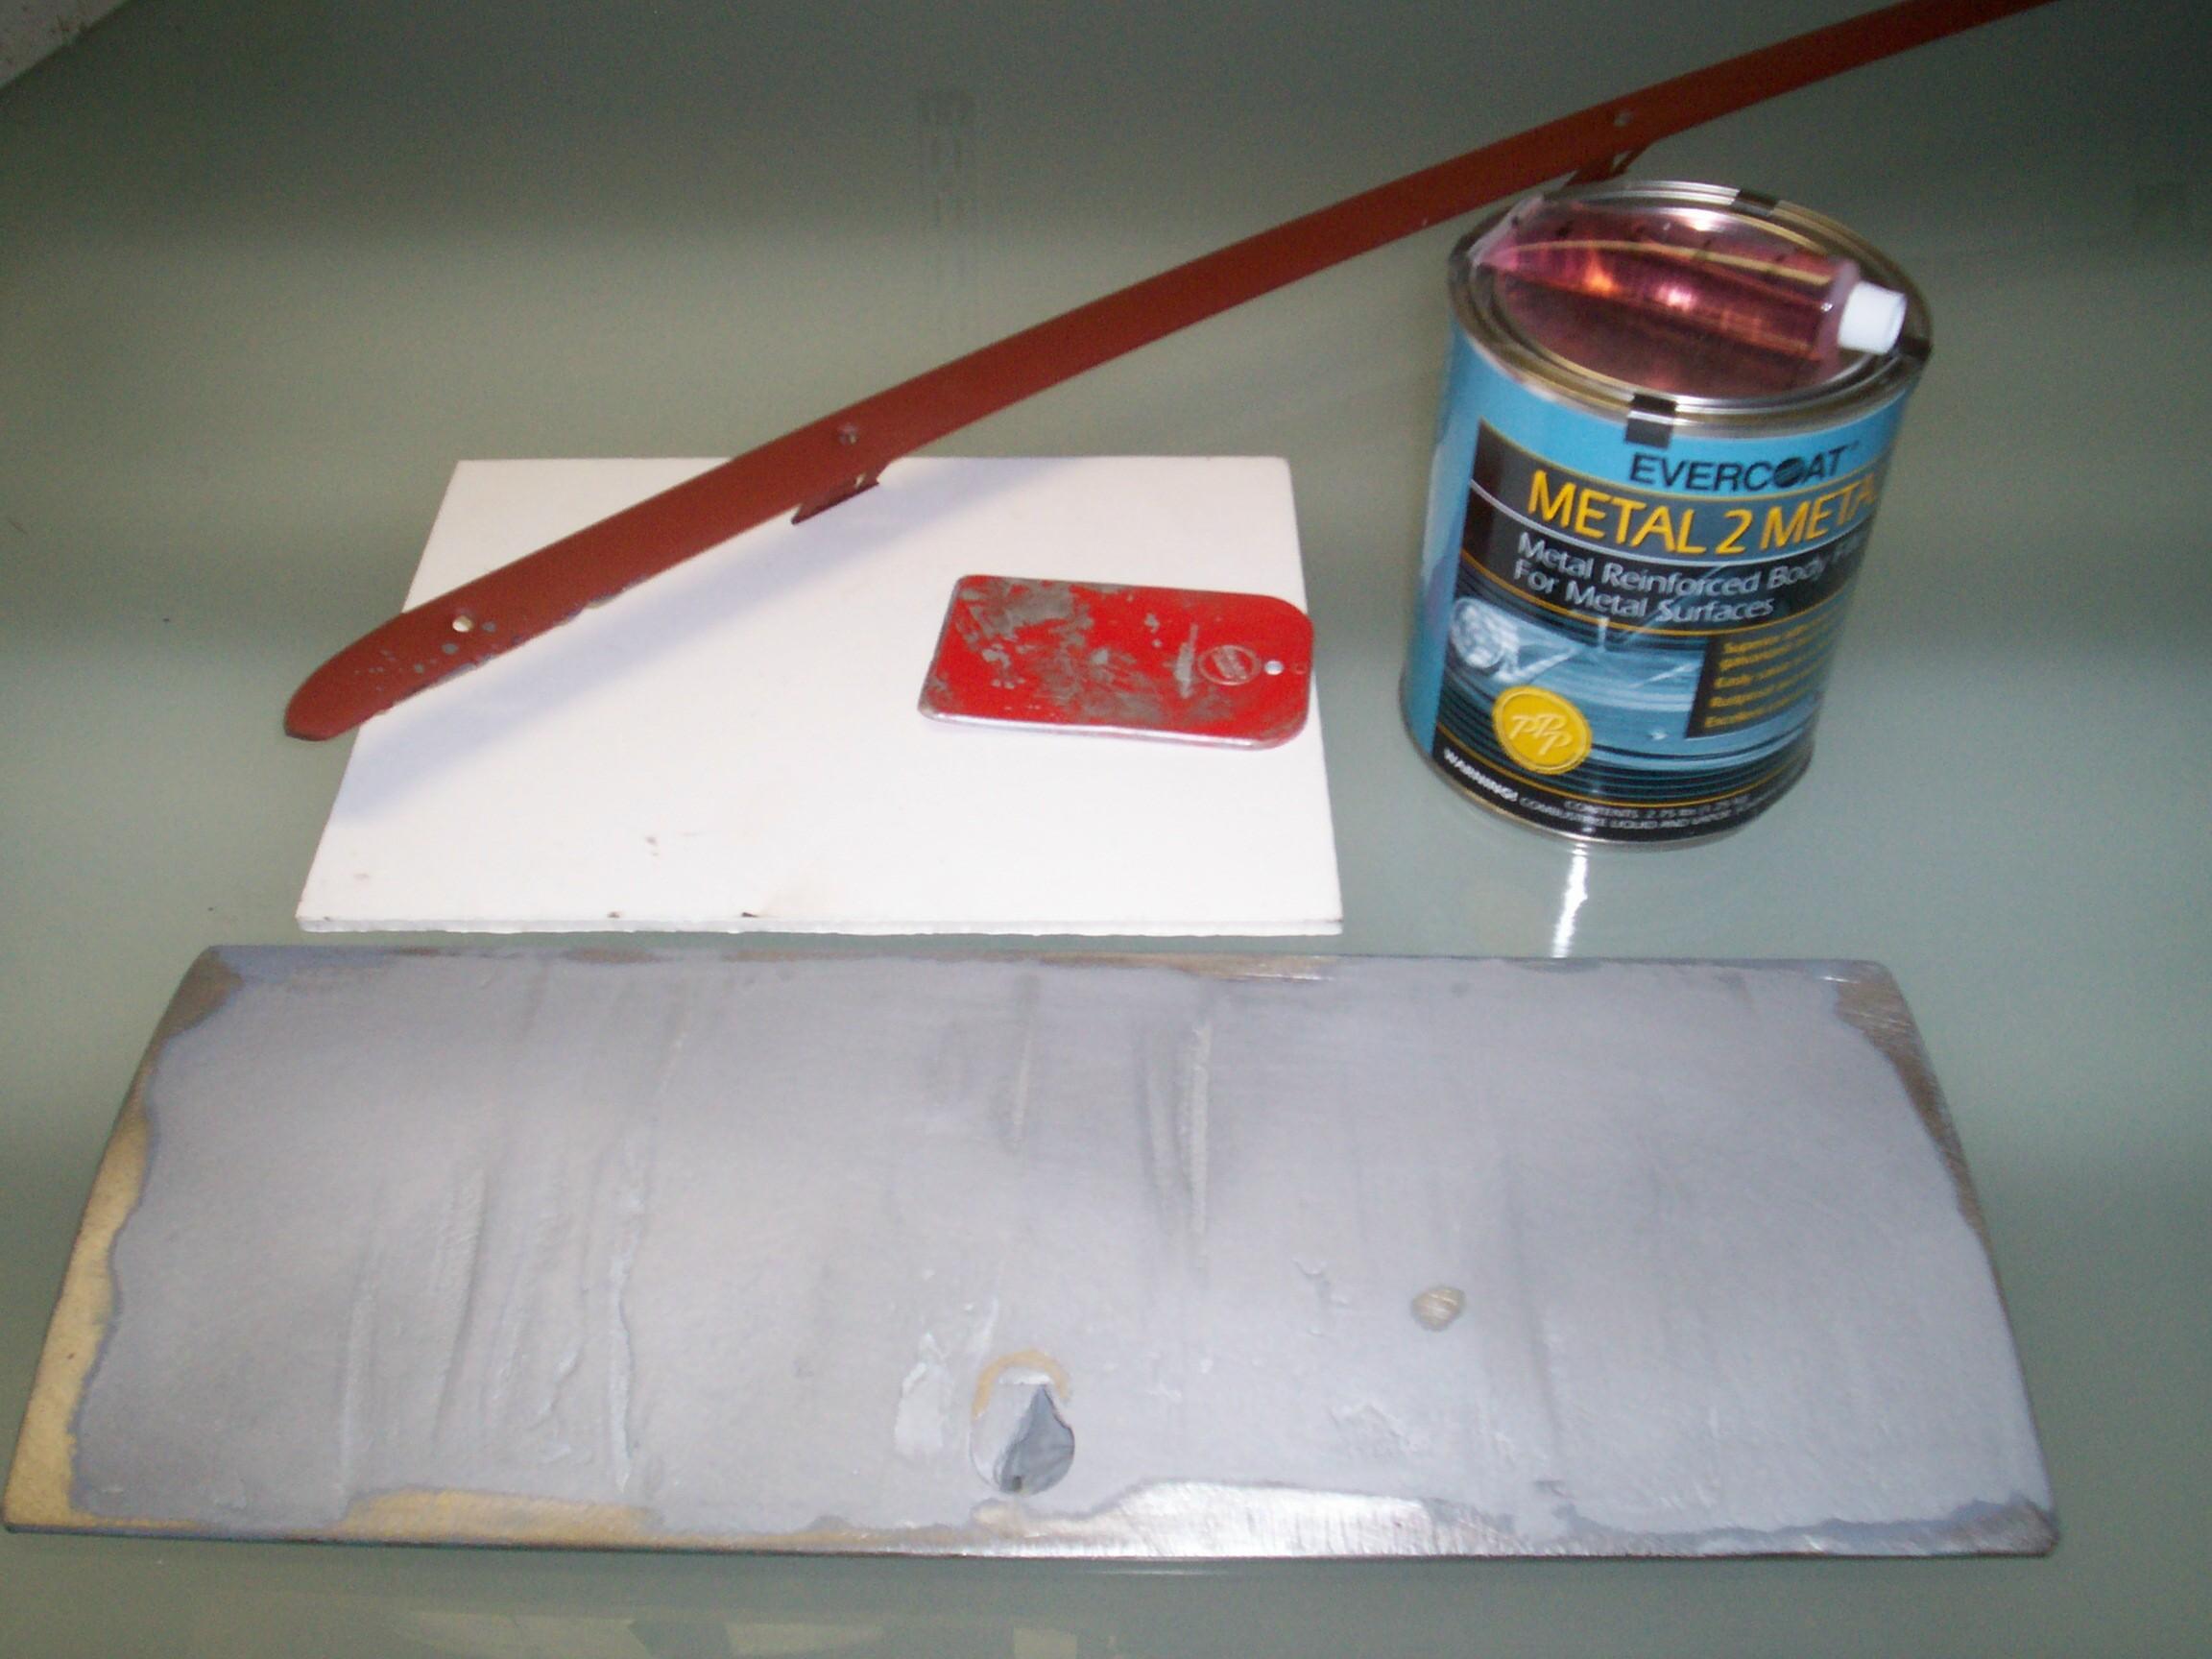 February
17th 2008 Sometime back
I got 'nother can of Evercoat Metal 2 Metal filler and the activator.
First activity this morning is to put a second coat of this stuff on
the glove compartment door as well as the ends of the defroster vent
trim piece. Damnation! I open the brand
new can to find its contents already hard as a rock. That really adds
insult to injury since the reason I ordered this can is because my last
can of the stuff dried up. I'm gonna have to go thru this drill one
more time.
February
17th 2008 Sometime back
I got 'nother can of Evercoat Metal 2 Metal filler and the activator.
First activity this morning is to put a second coat of this stuff on
the glove compartment door as well as the ends of the defroster vent
trim piece. Damnation! I open the brand
new can to find its contents already hard as a rock. That really adds
insult to injury since the reason I ordered this can is because my last
can of the stuff dried up. I'm gonna have to go thru this drill one
more time.
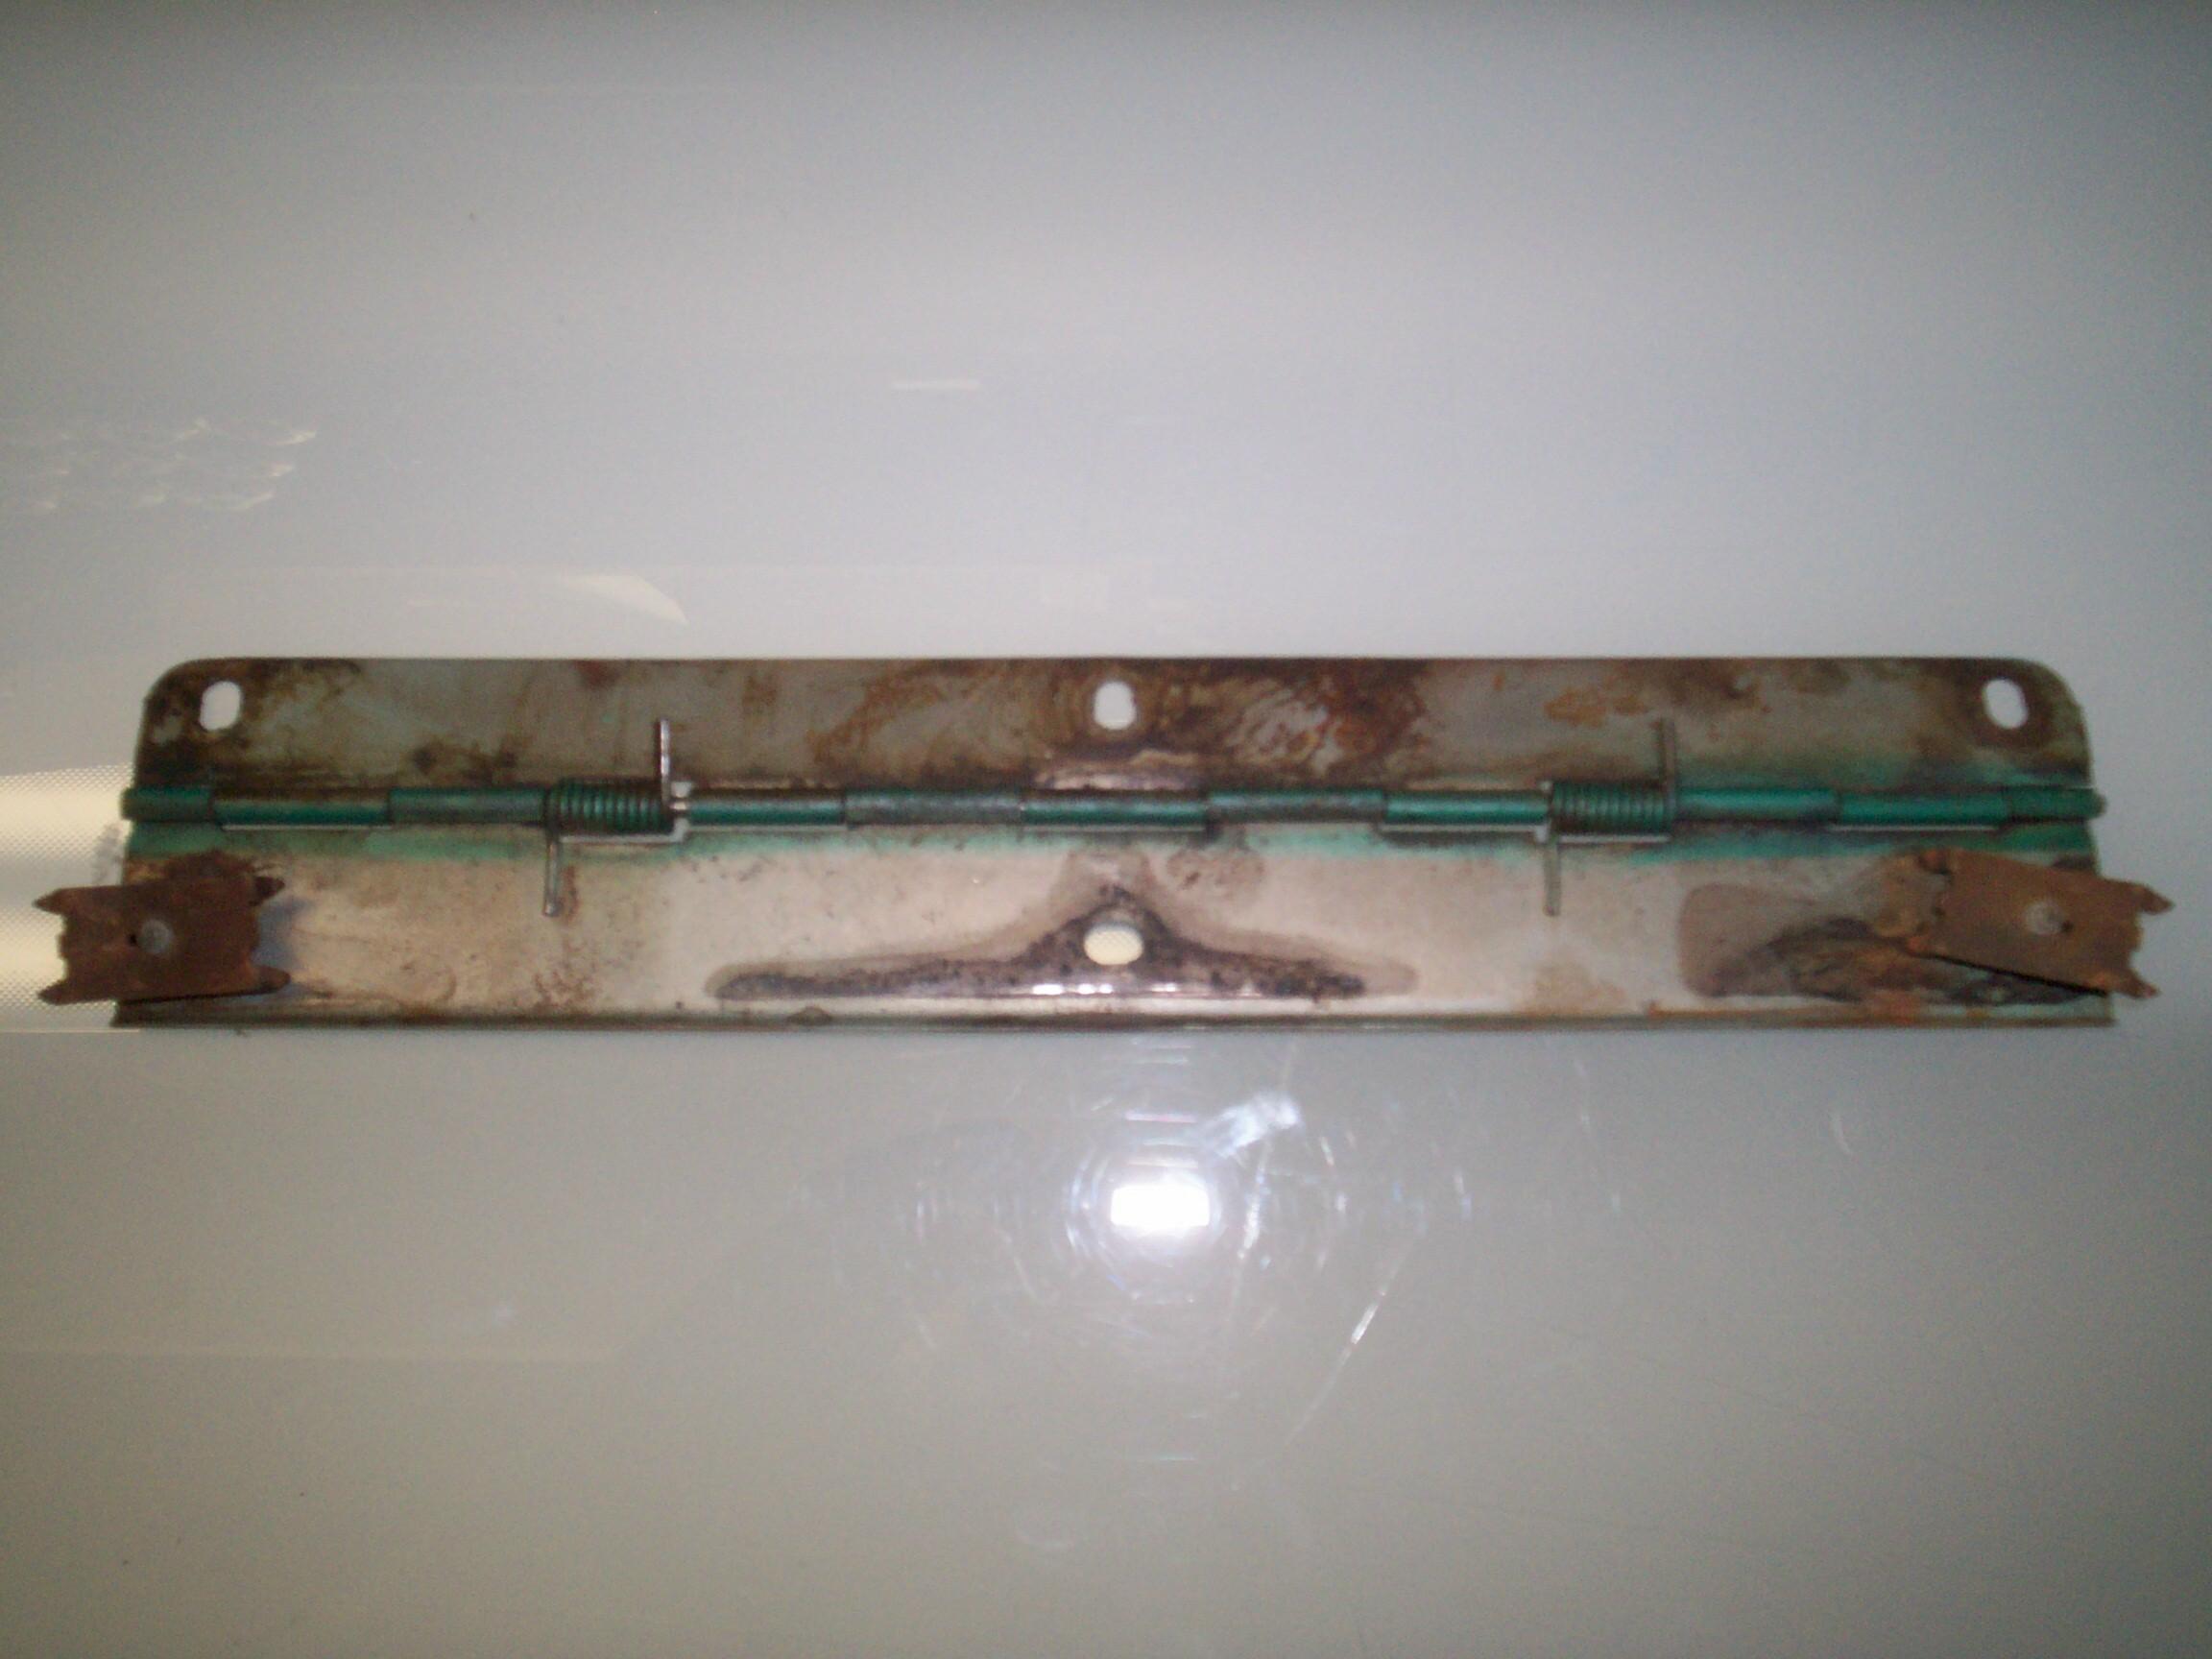 Switch
to Plan B. I haven't addressed the glove box door hinge yet and it has
fifty years worth of grime still on it. Pulled the hinge pin with
pliers and gave the hinge leaves a good scrubbin' with aerosol carb
cleaner and wire brush. The other parts were put in a baggie for later.
Cleaned the hinge stop bar too. Went over the same parts with wire cup
in electric angle grinder next. Hung them in BillyBob's shadetree and
PRE Paint Prepped them followed by a coat of self-etching primer.
Switch
to Plan B. I haven't addressed the glove box door hinge yet and it has
fifty years worth of grime still on it. Pulled the hinge pin with
pliers and gave the hinge leaves a good scrubbin' with aerosol carb
cleaner and wire brush. The other parts were put in a baggie for later.
Cleaned the hinge stop bar too. Went over the same parts with wire cup
in electric angle grinder next. Hung them in BillyBob's shadetree and
PRE Paint Prepped them followed by a coat of self-etching primer.
I went home to the Krash Pad to clean up fer cruise nite. Got rained on pretty good on the run to Fort Lauderdale only to find out that cruise nite had been canceled due to weather. Geez! Some days are good days and some days turn out to be character builders instead.
February 23rd 2008 Overcast, but otherwise a good weather day. After dragging the tools out, crawled under BillyBob and replaced the chewed up flywheel cover stovebolts with 1/4"-20 x 3/8" stainless steel pan head slotted machine screws I had gotten from McMaster-Carr during the previous week. The heads are slightly smaller in diameter than the original stovebolts but otherwise look the same. They were installed with 1/4" external tooth (star) lock washers and threadlocker blue. Updated my fastener inventory before moving on.
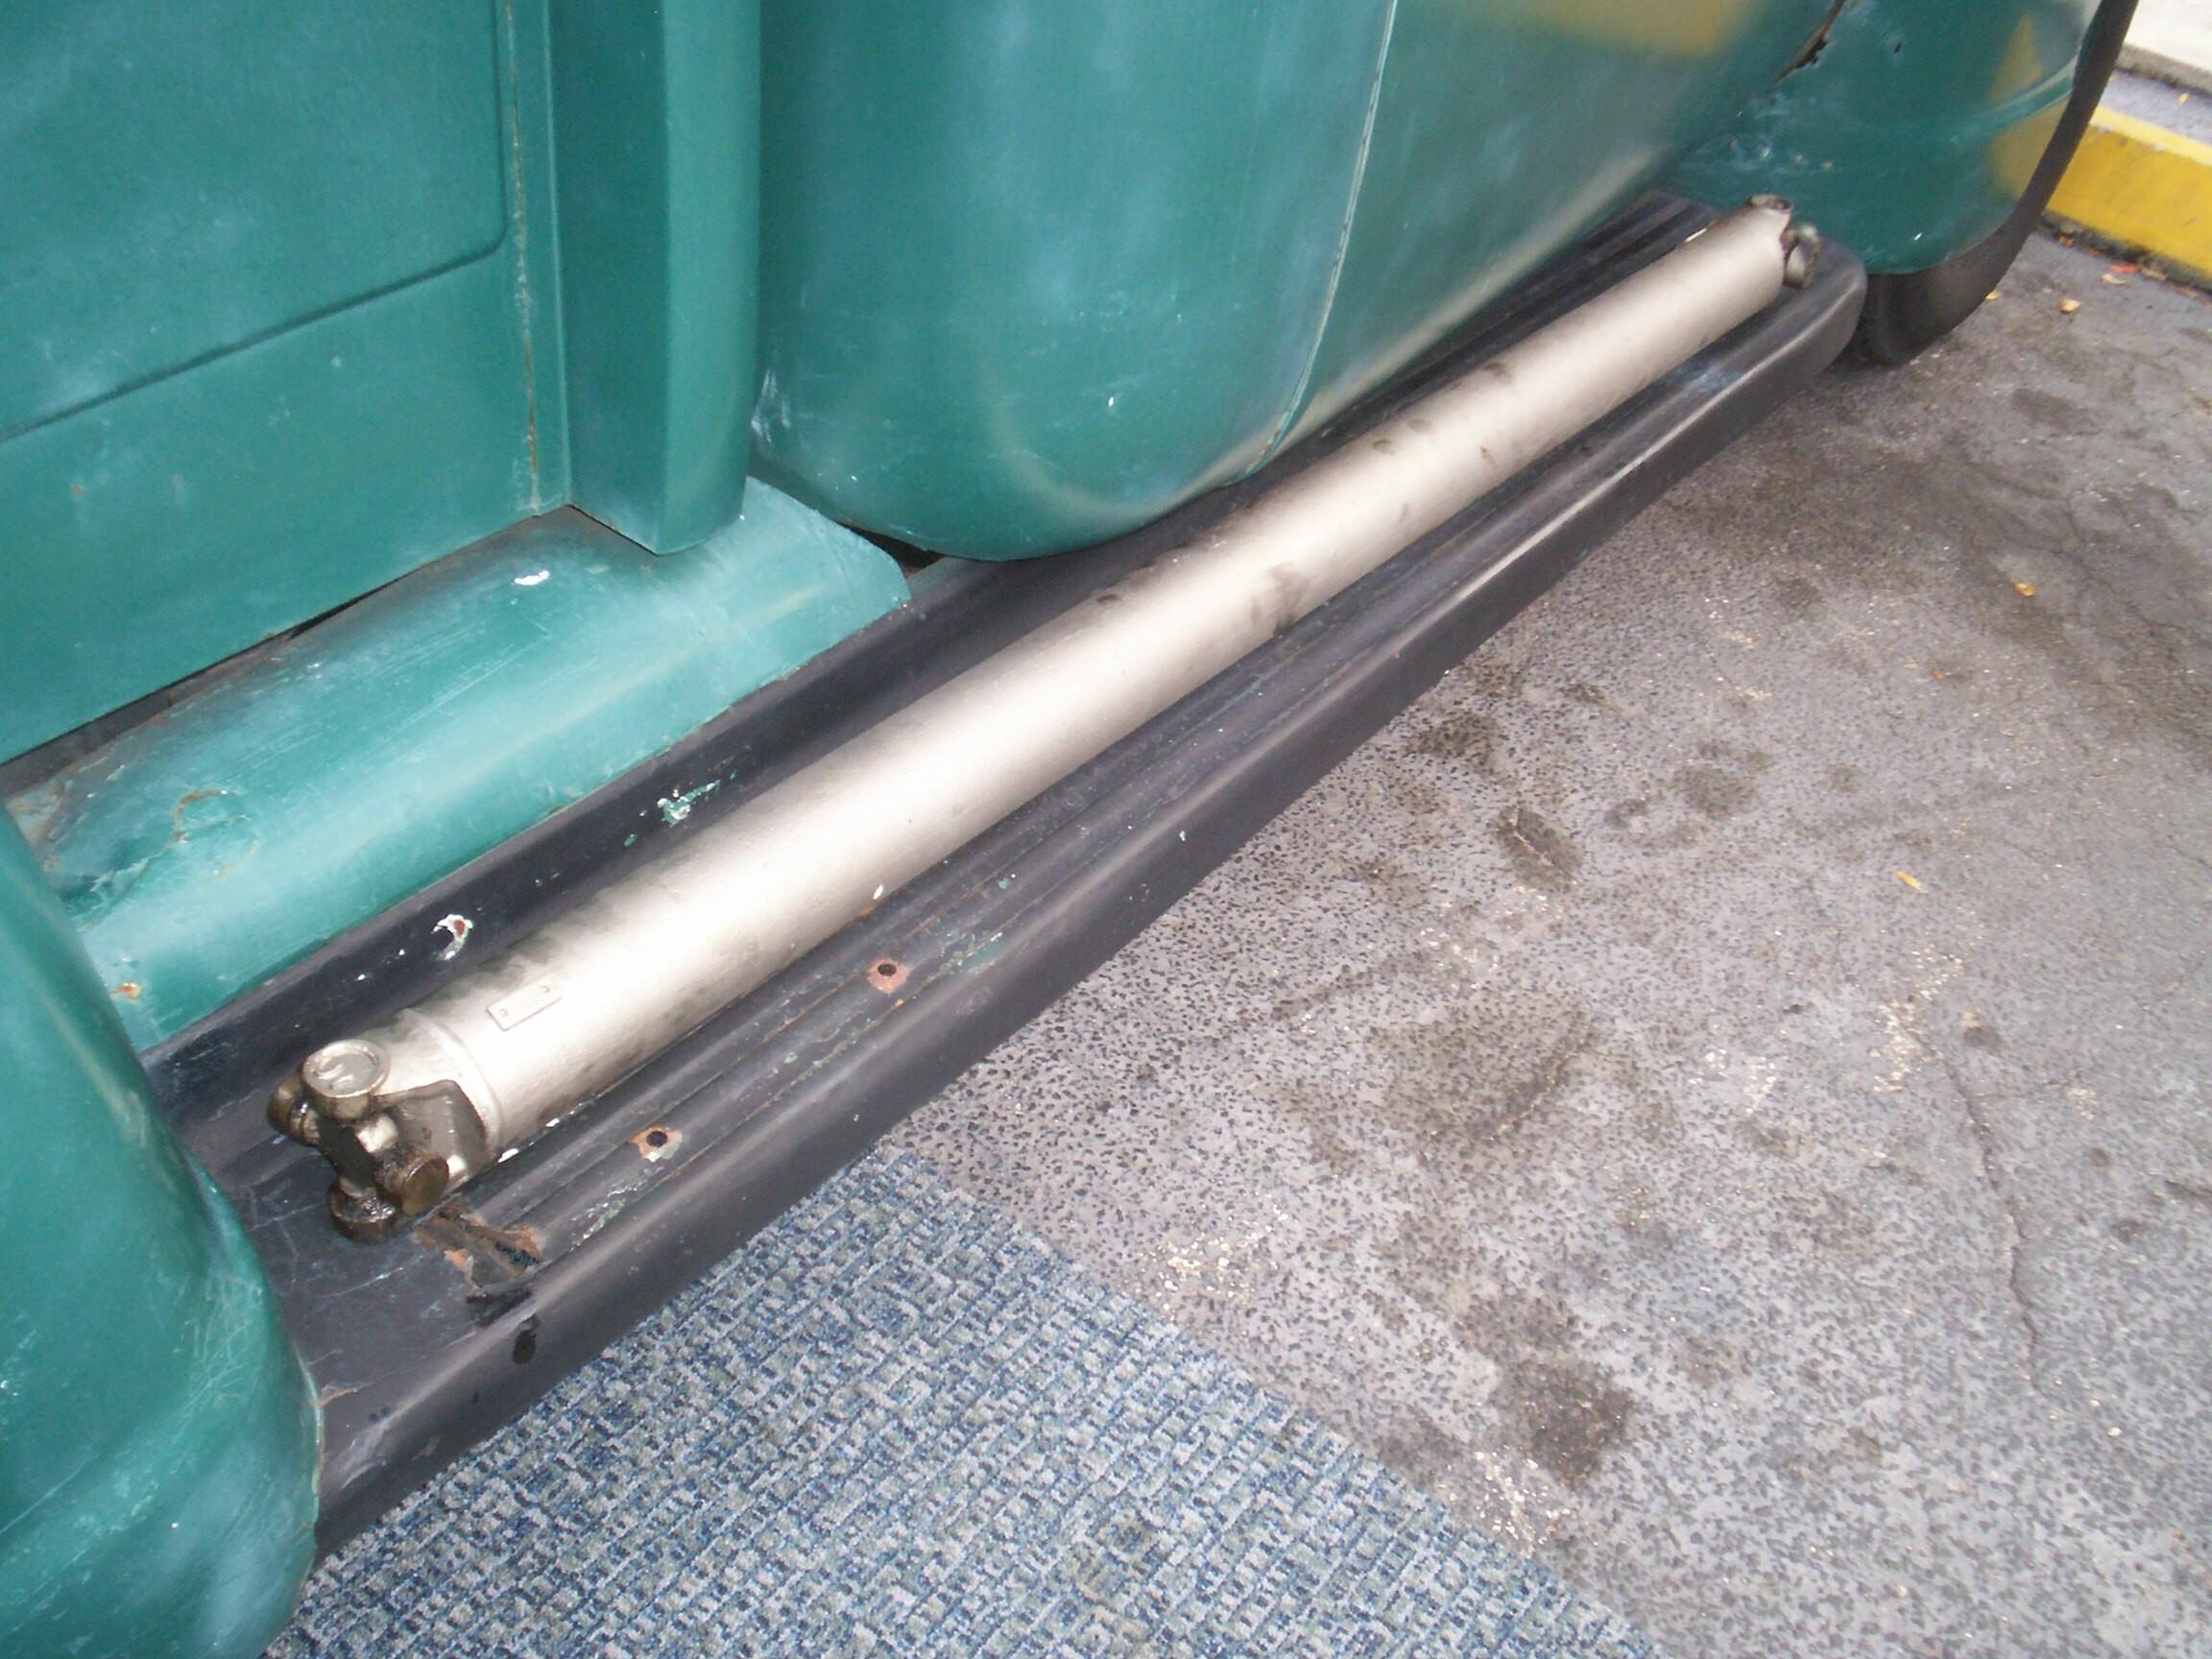 The
driveshaft was pulled next. The last time I painted the driveshaft was
six years back. It has held up well. It's got some grease on it and
spots of paint from other chassis painting ops. I'm just gonna freshen
it up a bit today. I carefully (I've had too much fun the last couple
of years dropping bearing cups and losing needle bearings) put it in
the Black & Decker Workmate and detailed it, one end at a time.
The greasy universal joints were cleaned with carb cleaner. PRE Paint
Prep was applied next followed by a couple of coats of Eastwood's
Detail Gray Lacquer. U-bolts, washers and hex nuts were put in the
tumbler for a cleaning
session followed by a polishing session.
The
driveshaft was pulled next. The last time I painted the driveshaft was
six years back. It has held up well. It's got some grease on it and
spots of paint from other chassis painting ops. I'm just gonna freshen
it up a bit today. I carefully (I've had too much fun the last couple
of years dropping bearing cups and losing needle bearings) put it in
the Black & Decker Workmate and detailed it, one end at a time.
The greasy universal joints were cleaned with carb cleaner. PRE Paint
Prep was applied next followed by a couple of coats of Eastwood's
Detail Gray Lacquer. U-bolts, washers and hex nuts were put in the
tumbler for a cleaning
session followed by a polishing session.
Time for Powerblock TV and a few beers. Today's selection is Casco Bay Riptide Red Ale. When the cleaning session was over, the fasteners were given a second session in the tumbler with dry shine media to polish them a bit. Afterwards I went to work on the glove box hinge some more. After last week's session, I thought these hinge leaves were still a bit too rough so, I sanded them and primed them again, followed by a couple of coats of the surf green paint from paintscratch.com.
March 1st 2008 Didn't work last sunday. Went to the Boca Raton Concours d' Elegance. The boss had entered the '39 Caddy and I hung out with him all day. I got a deep fry sunburn and my whole face wuz sloughing off by the time friday rolled around. Lots of nice classics including a Marmon v16, Stutz D32, '32 Chrysler LeBaron Imperial, and a couple of Duzies. There was one stovebolt, restored to the nines. It was a '48 Chebby sedan panel which had been an Arizona reservation ambulance in its previous life.
 By
the time I got out of there with my burned up face, it was time to head
down to north Lauderdale for the cruise nite. Only about eight cars
showed this time and the DJ didn't bother hauling out his equipment.
When the others retired inside for some grub, I was left alone at a
sidewalk table to watch the rods fade in the sunset while I had a pull
on my Corona alona (without the lime) from time to time. I had setup a
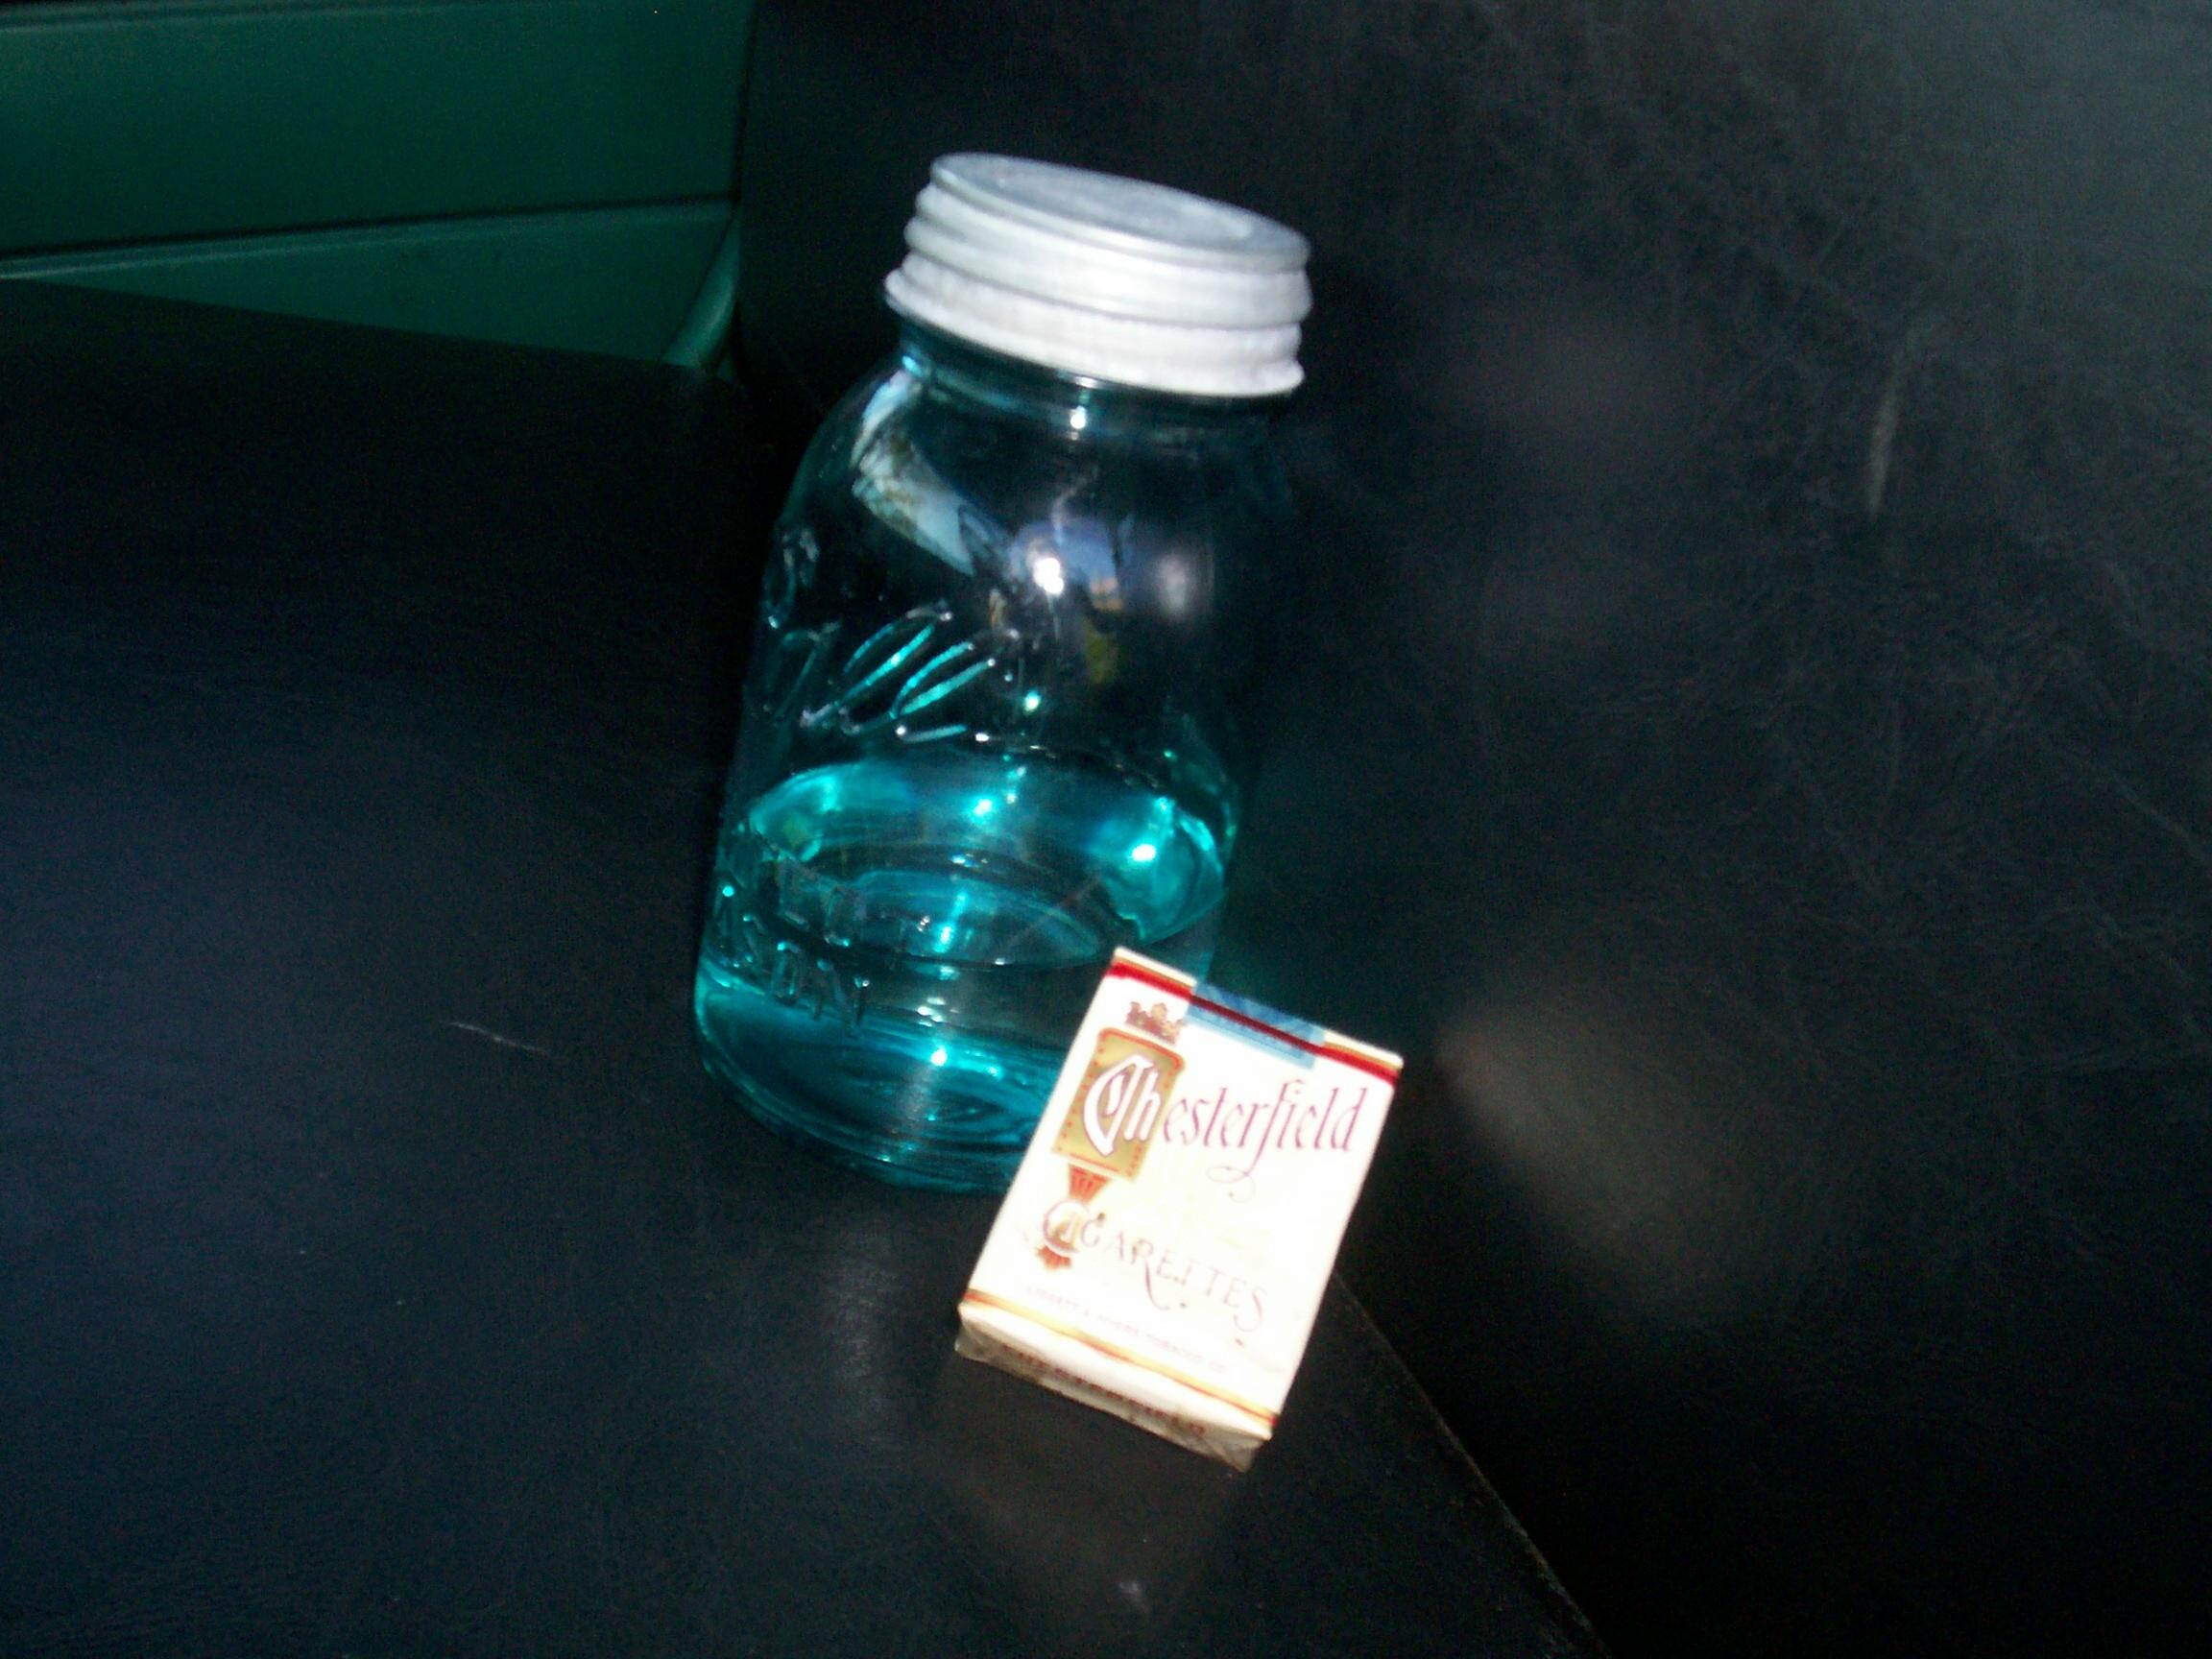
display on BillyBob's front seat and got a kick from people who saw it.
A mason jar with some hooch (water) in it and a pack of Chesterfields
from the fifties. I got this idea from one of the guys on the old chevy
trucks maillist. He uses Lucky Strikes. I got Chesterfields because
that's what Dad smoked.
By
the time I got out of there with my burned up face, it was time to head
down to north Lauderdale for the cruise nite. Only about eight cars
showed this time and the DJ didn't bother hauling out his equipment.
When the others retired inside for some grub, I was left alone at a
sidewalk table to watch the rods fade in the sunset while I had a pull
on my Corona alona (without the lime) from time to time. I had setup a
display on BillyBob's front seat and got a kick from people who saw it.
A mason jar with some hooch (water) in it and a pack of Chesterfields
from the fifties. I got this idea from one of the guys on the old chevy
trucks maillist. He uses Lucky Strikes. I got Chesterfields because
that's what Dad smoked.
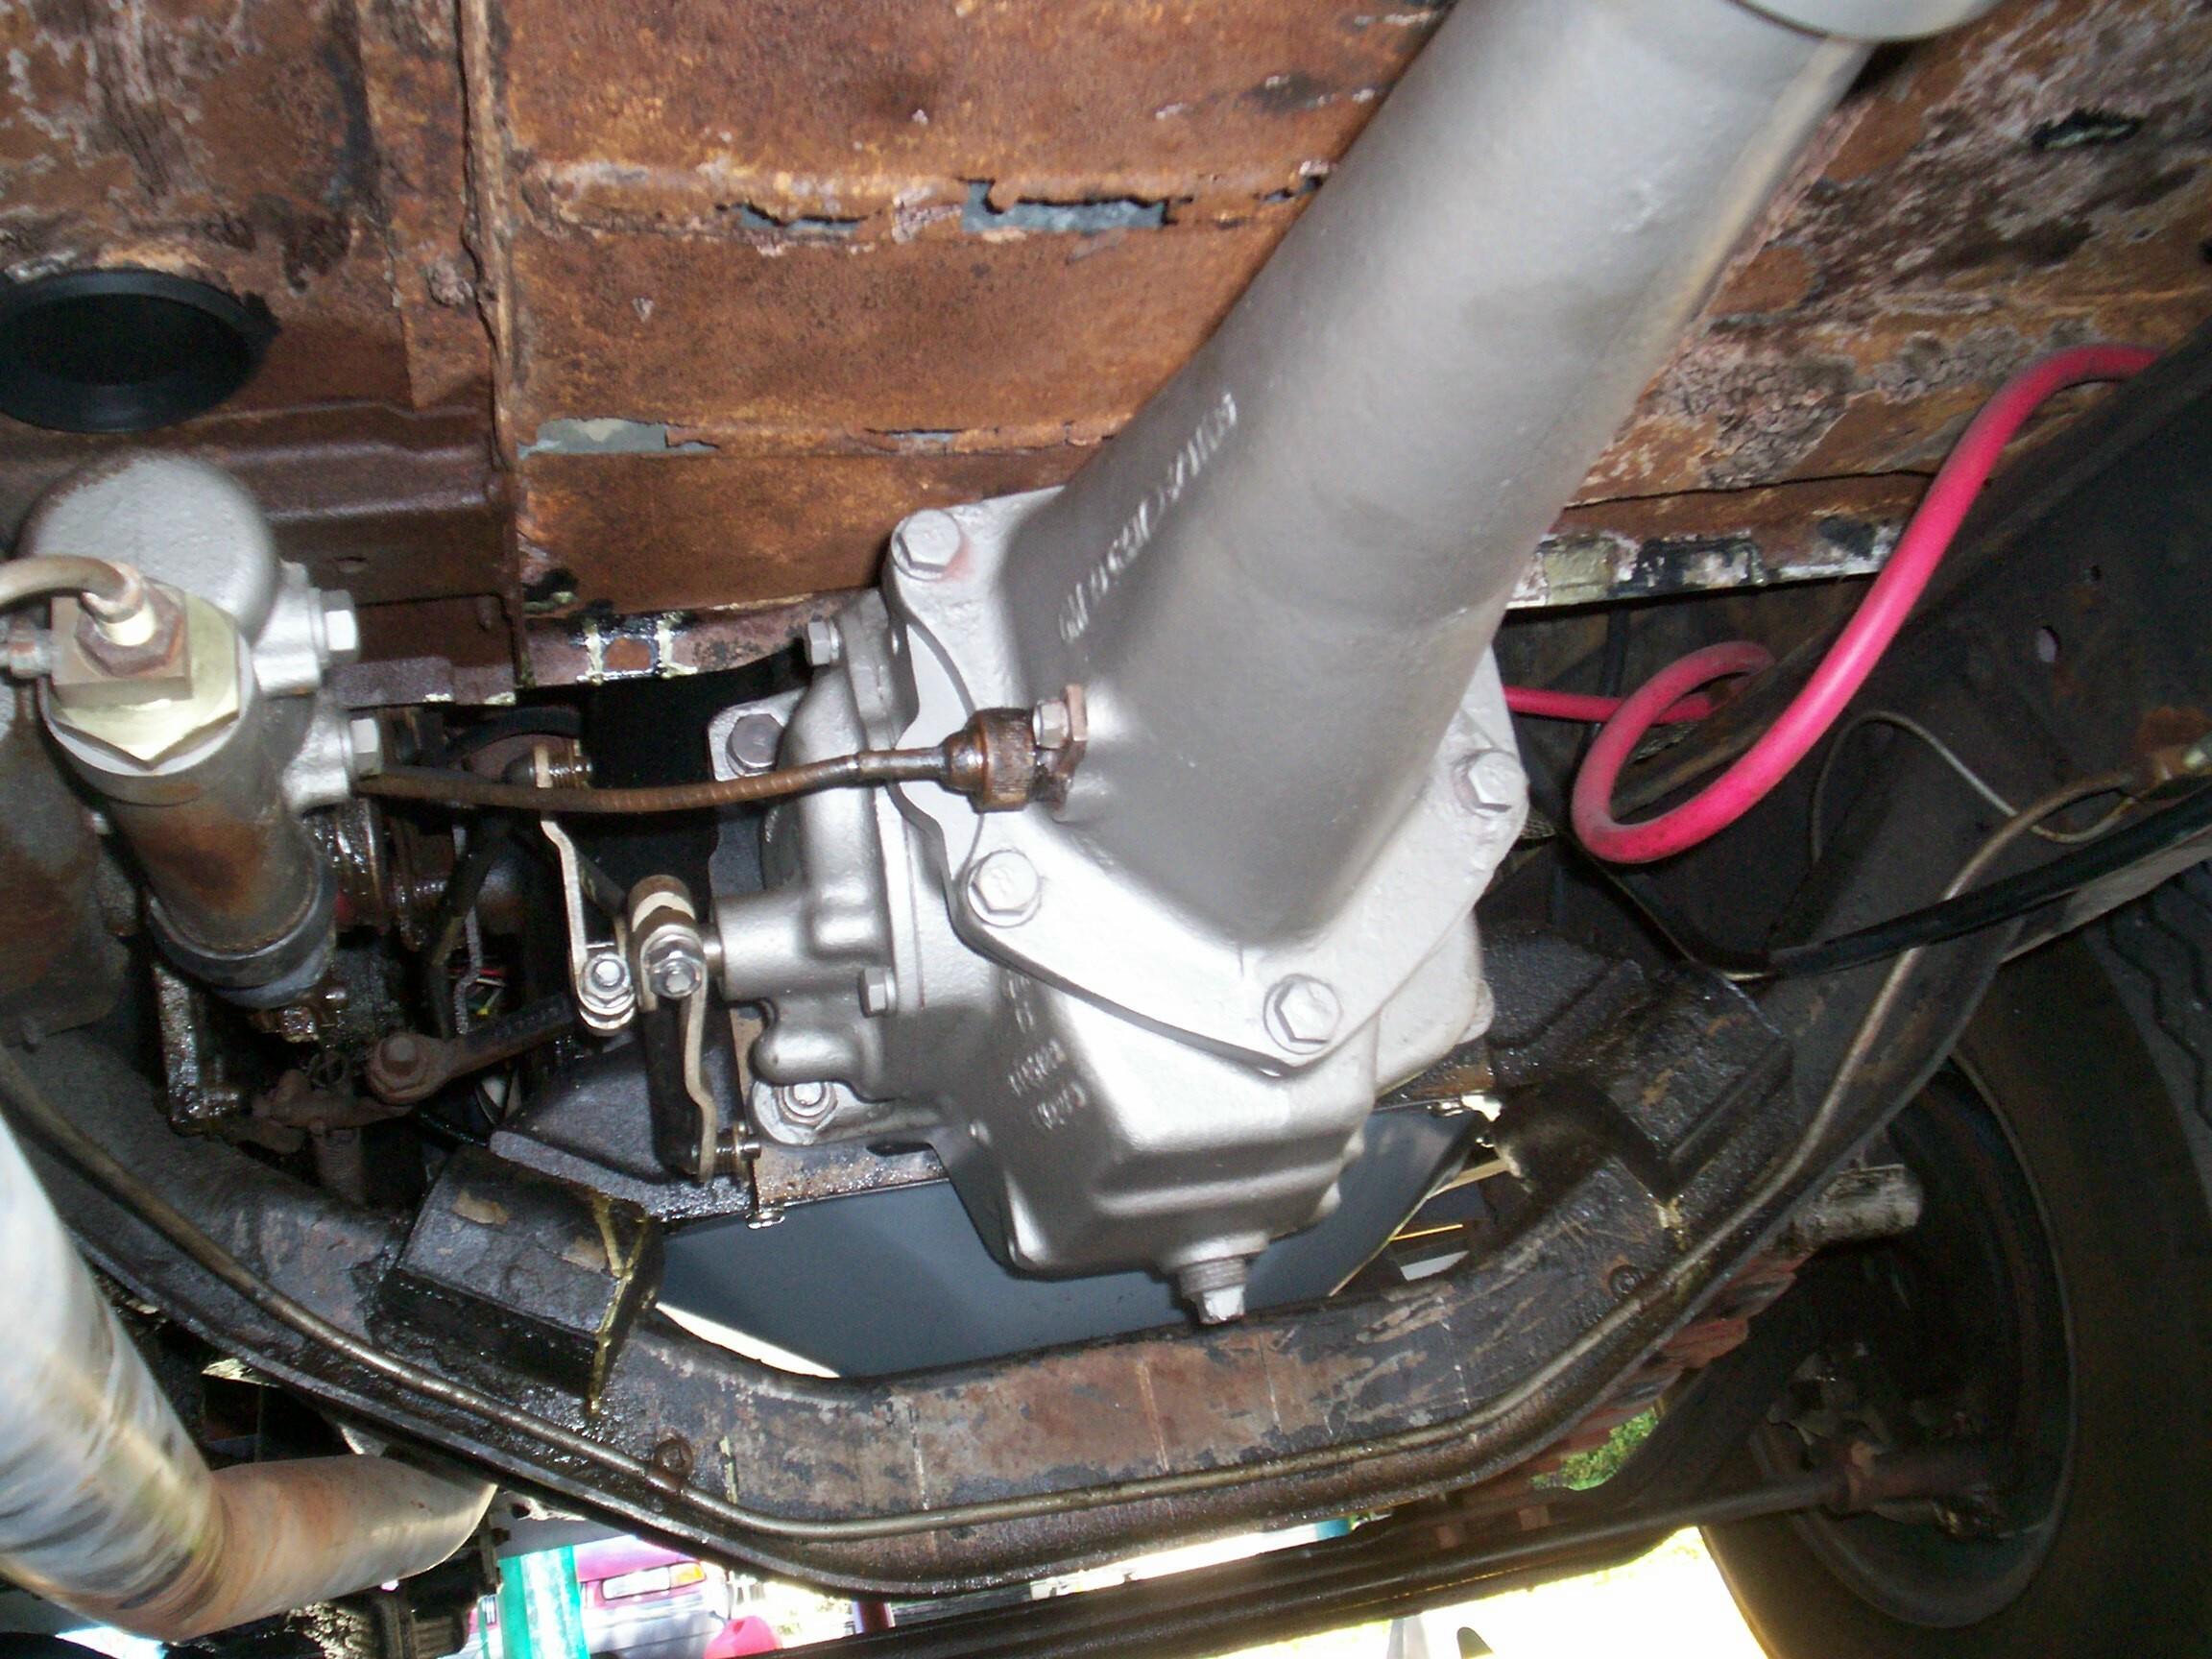
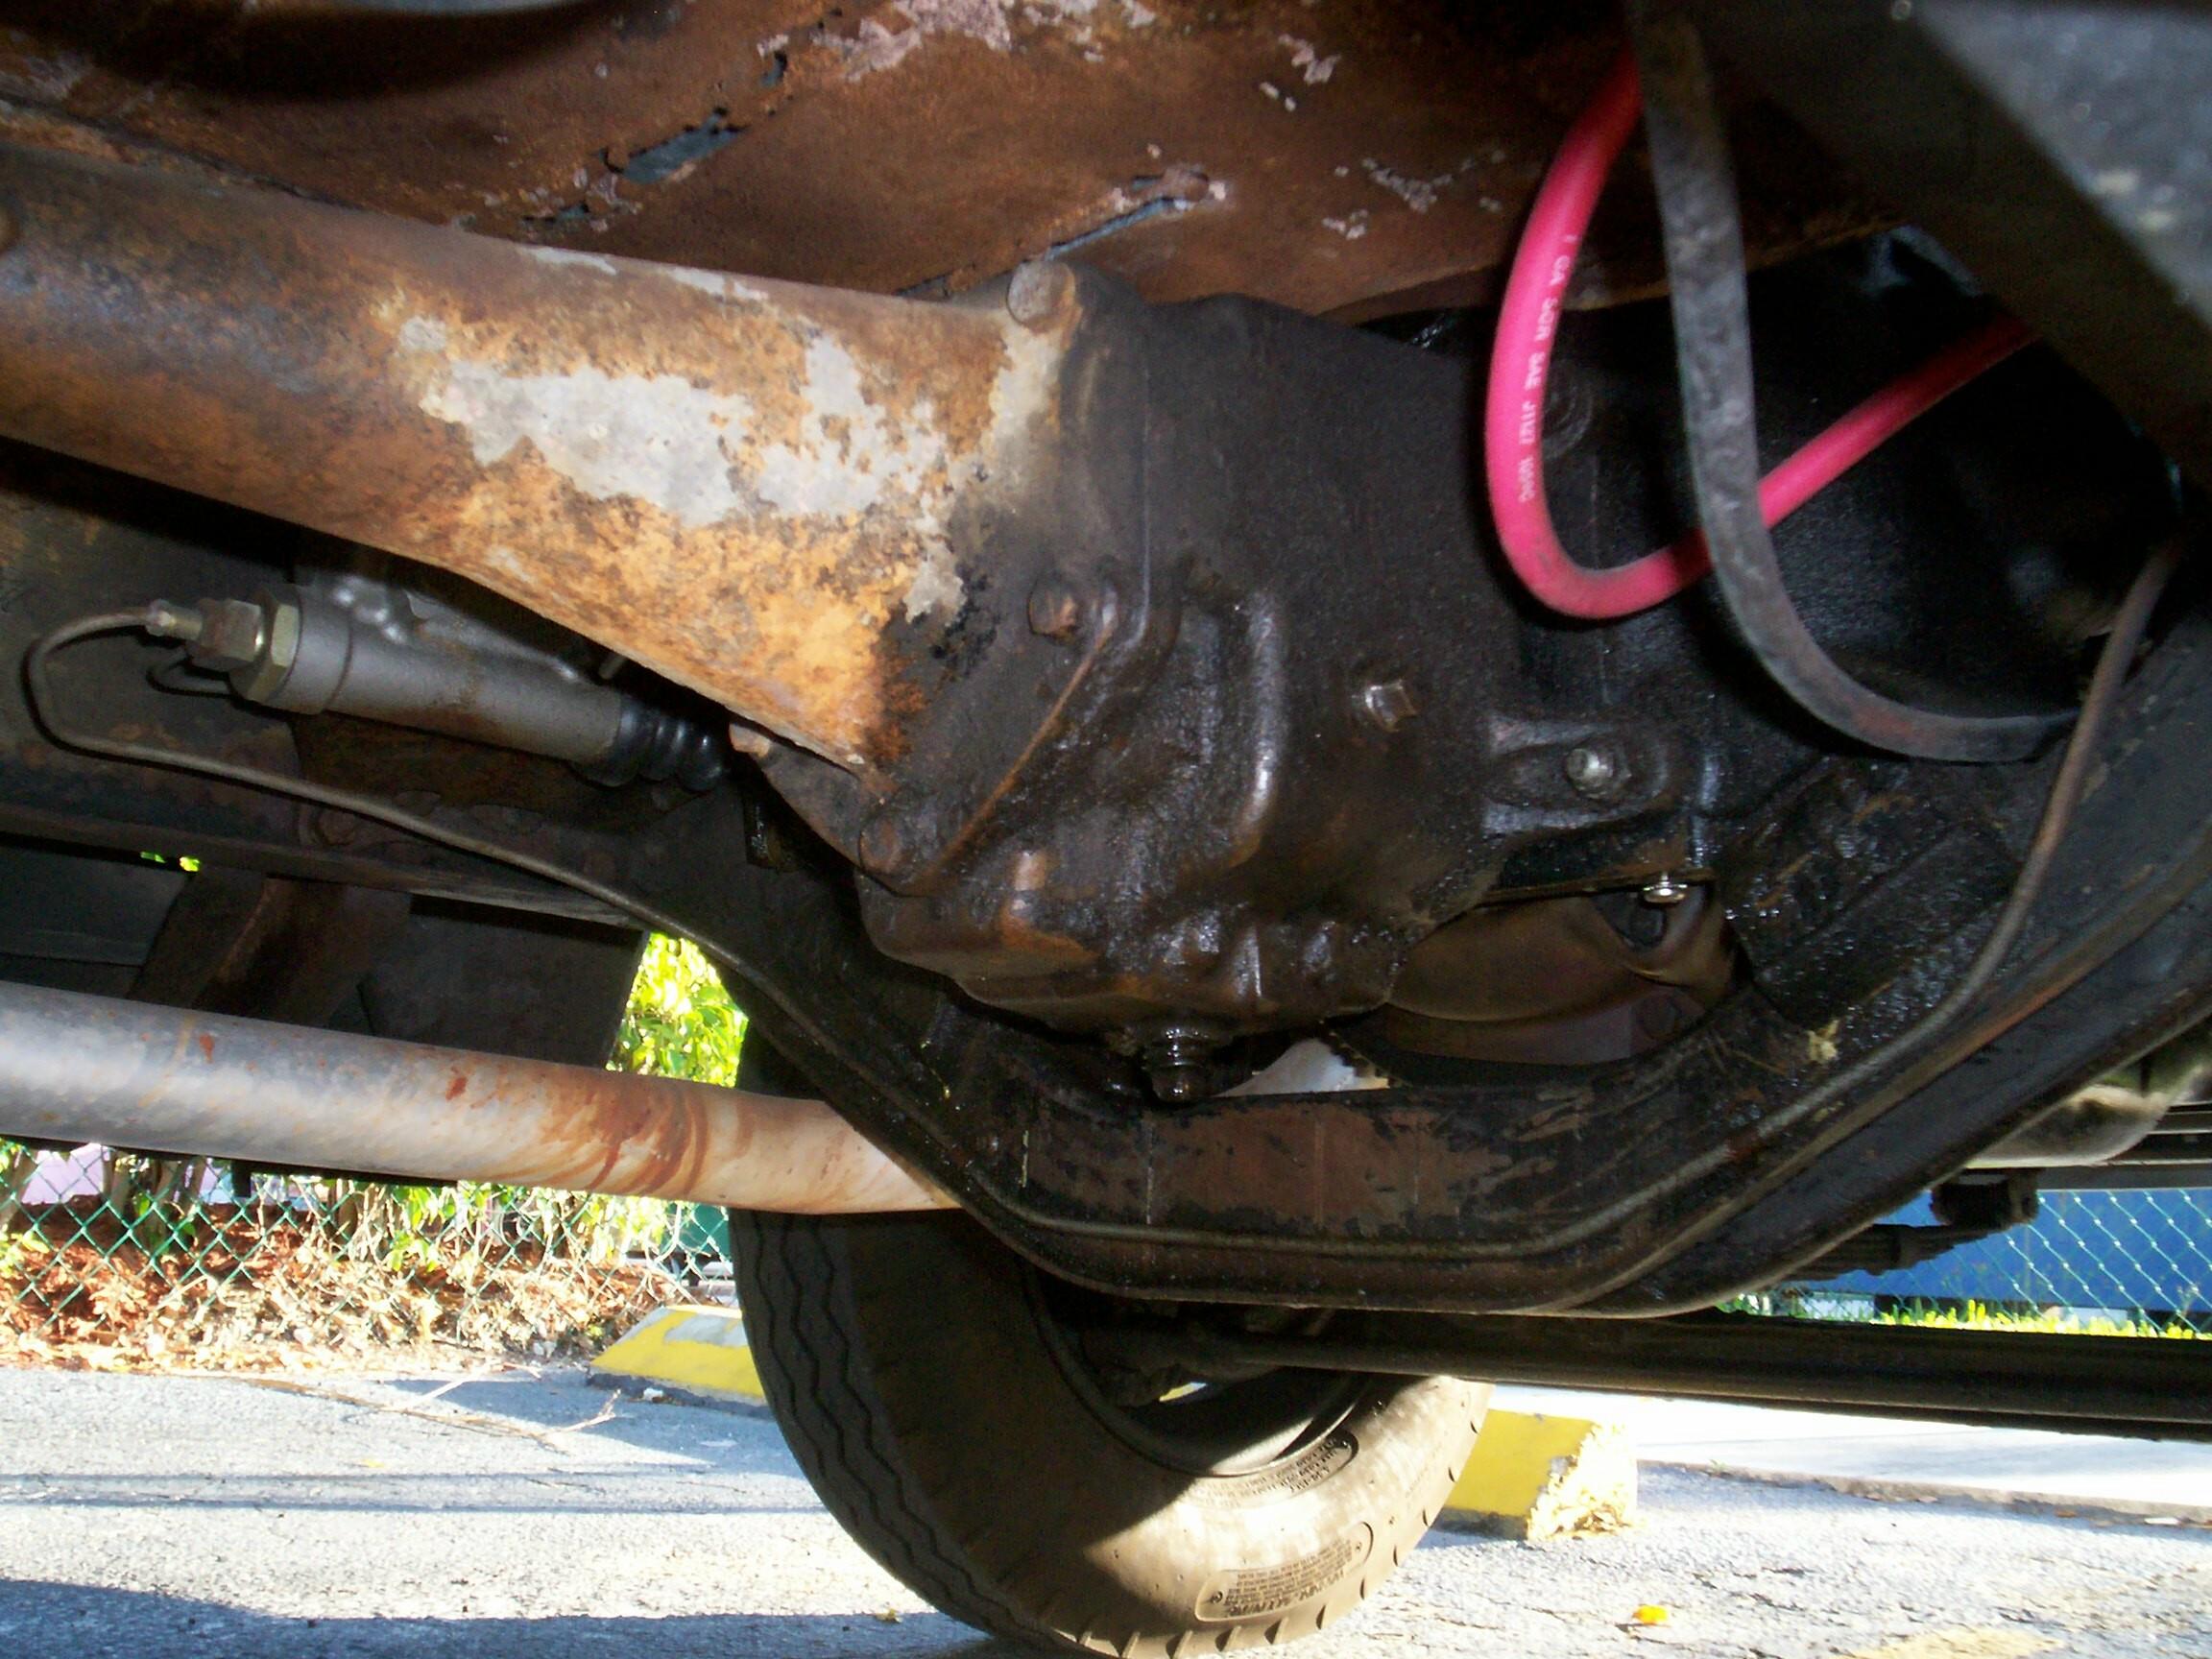 I've
been promised two good weather days by the forecasters . . . ha, ha.
Picked up my tranny jack at the warehouse yesterday. My intent is to
remove the three-speed today for cleaning and painting and also to
familiarize myself with the procedure. Set the parking brake and put
the tranny in neutral. Removed the driveshaft and flywheel cover in
short order because of my recent ops on these two items. Disconnected
the shift levers from the side plate shafts and moved them to the side.
Same for the speedo cable. Drained the tranny fluid at this point.
I've
been promised two good weather days by the forecasters . . . ha, ha.
Picked up my tranny jack at the warehouse yesterday. My intent is to
remove the three-speed today for cleaning and painting and also to
familiarize myself with the procedure. Set the parking brake and put
the tranny in neutral. Removed the driveshaft and flywheel cover in
short order because of my recent ops on these two items. Disconnected
the shift levers from the side plate shafts and moved them to the side.
Same for the speedo cable. Drained the tranny fluid at this point.
Now we hit the first difficulty. The lower tranny bolt on the driver side is impossible to get at with a decent size wrench and it is tight. After a bit of study, I realize I can get at all four bolts with the impact wrench on an extension if I can remove the tranny side cover. I luck out and managed to remove the side cover without any problems. Loosened up each tranny bolt with the impact wrench and finger tightened it again.
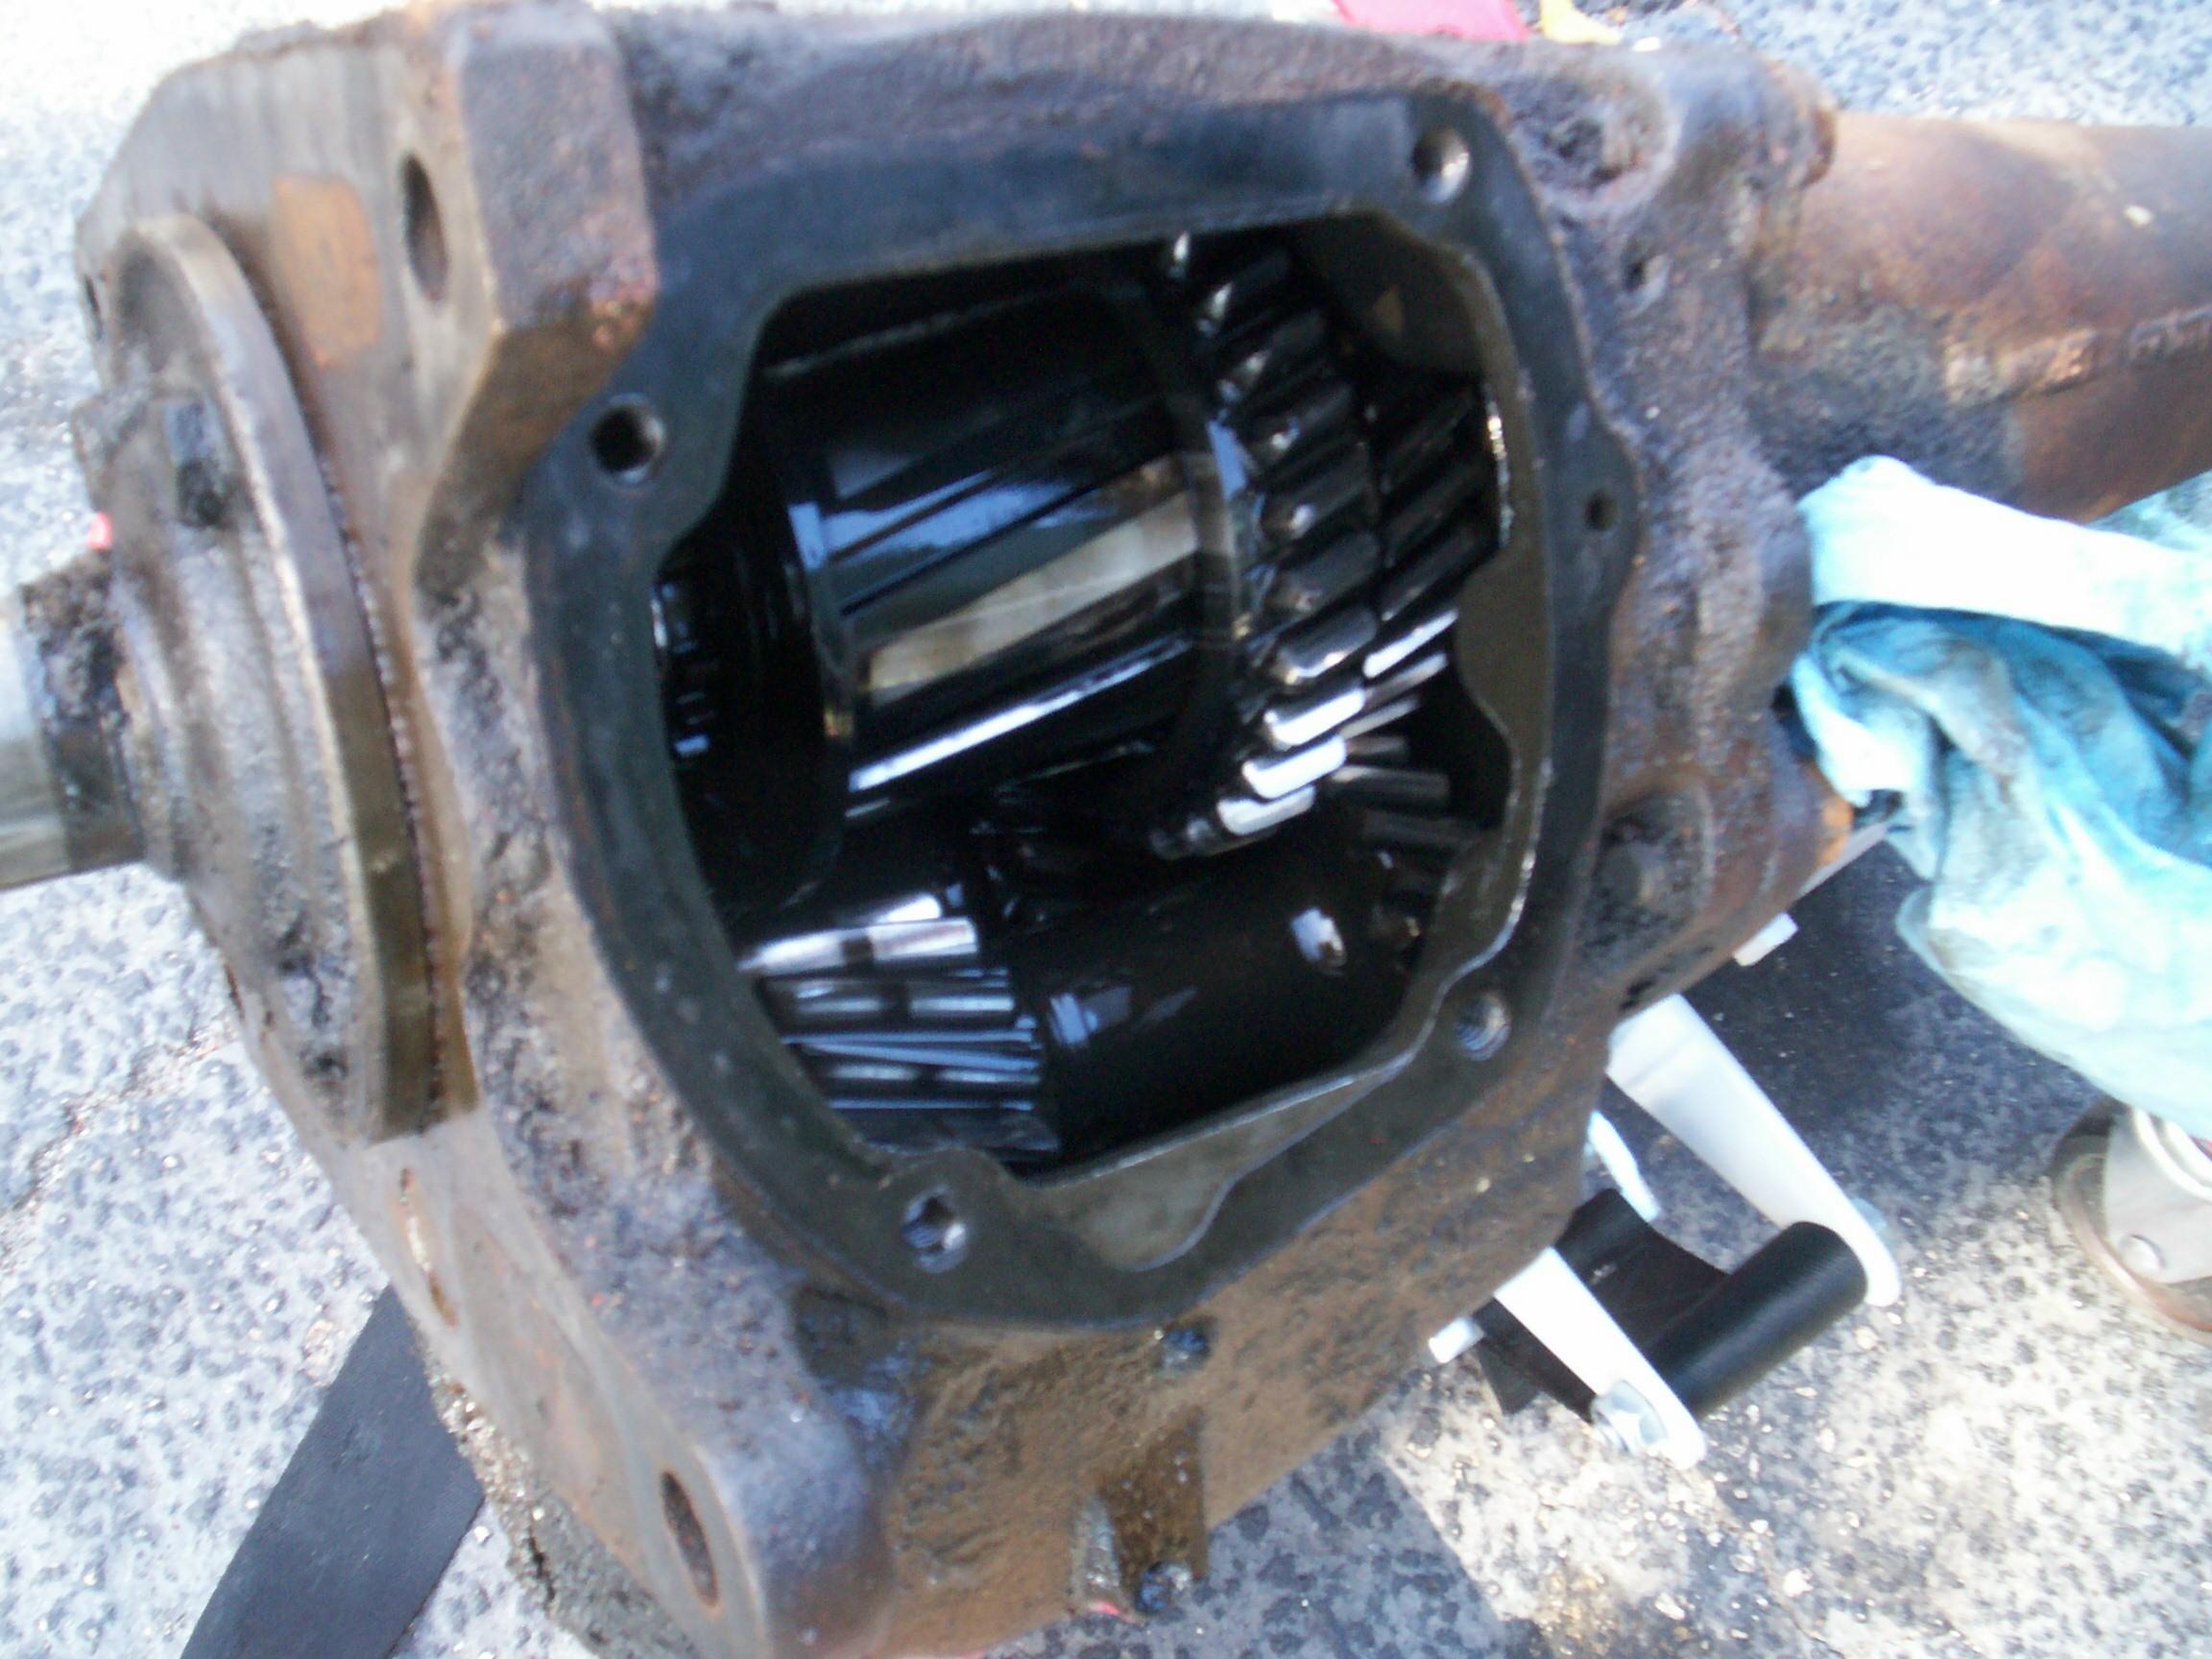 Got
the tranny jack positioned in support of the tranny and removed the
tranny bolts. Started grunting and tugging on the tranny. It didn't
want to move at first. I hope that isn't a bad omen. Got it backed out
after a few minutes and lowered the jack. Not enuf clearance to roll it
out under the frame rails and running boards and I don't want to try to
lift it off the jack while laying on my back. I played it safe and put
BillyBob's front end up on jackstands. There we go. Took a look at the
innards before replacing the side plate. The gears look pretty good,
what I can see of them.
Got
the tranny jack positioned in support of the tranny and removed the
tranny bolts. Started grunting and tugging on the tranny. It didn't
want to move at first. I hope that isn't a bad omen. Got it backed out
after a few minutes and lowered the jack. Not enuf clearance to roll it
out under the frame rails and running boards and I don't want to try to
lift it off the jack while laying on my back. I played it safe and put
BillyBob's front end up on jackstands. There we go. Took a look at the
innards before replacing the side plate. The gears look pretty good,
what I can see of them.
Laid out a plastic dropcloth and started going after the tranny with Eastwaood's Undergone Degreaser, gasket scraper, wire brush and toothbrush. My Mark I knees became irritated after awhile so I moved the tranny. Placed the Black & Decker WorkMate on the dropcloth and the tranny on the workmate so I could stand up. If I'm more comfortable, I might do a three-quarters-ass job instead of a half-assed job. I got my routine down then broke out the beer of the day - Harpoon Brewery's Munich Type Dark.
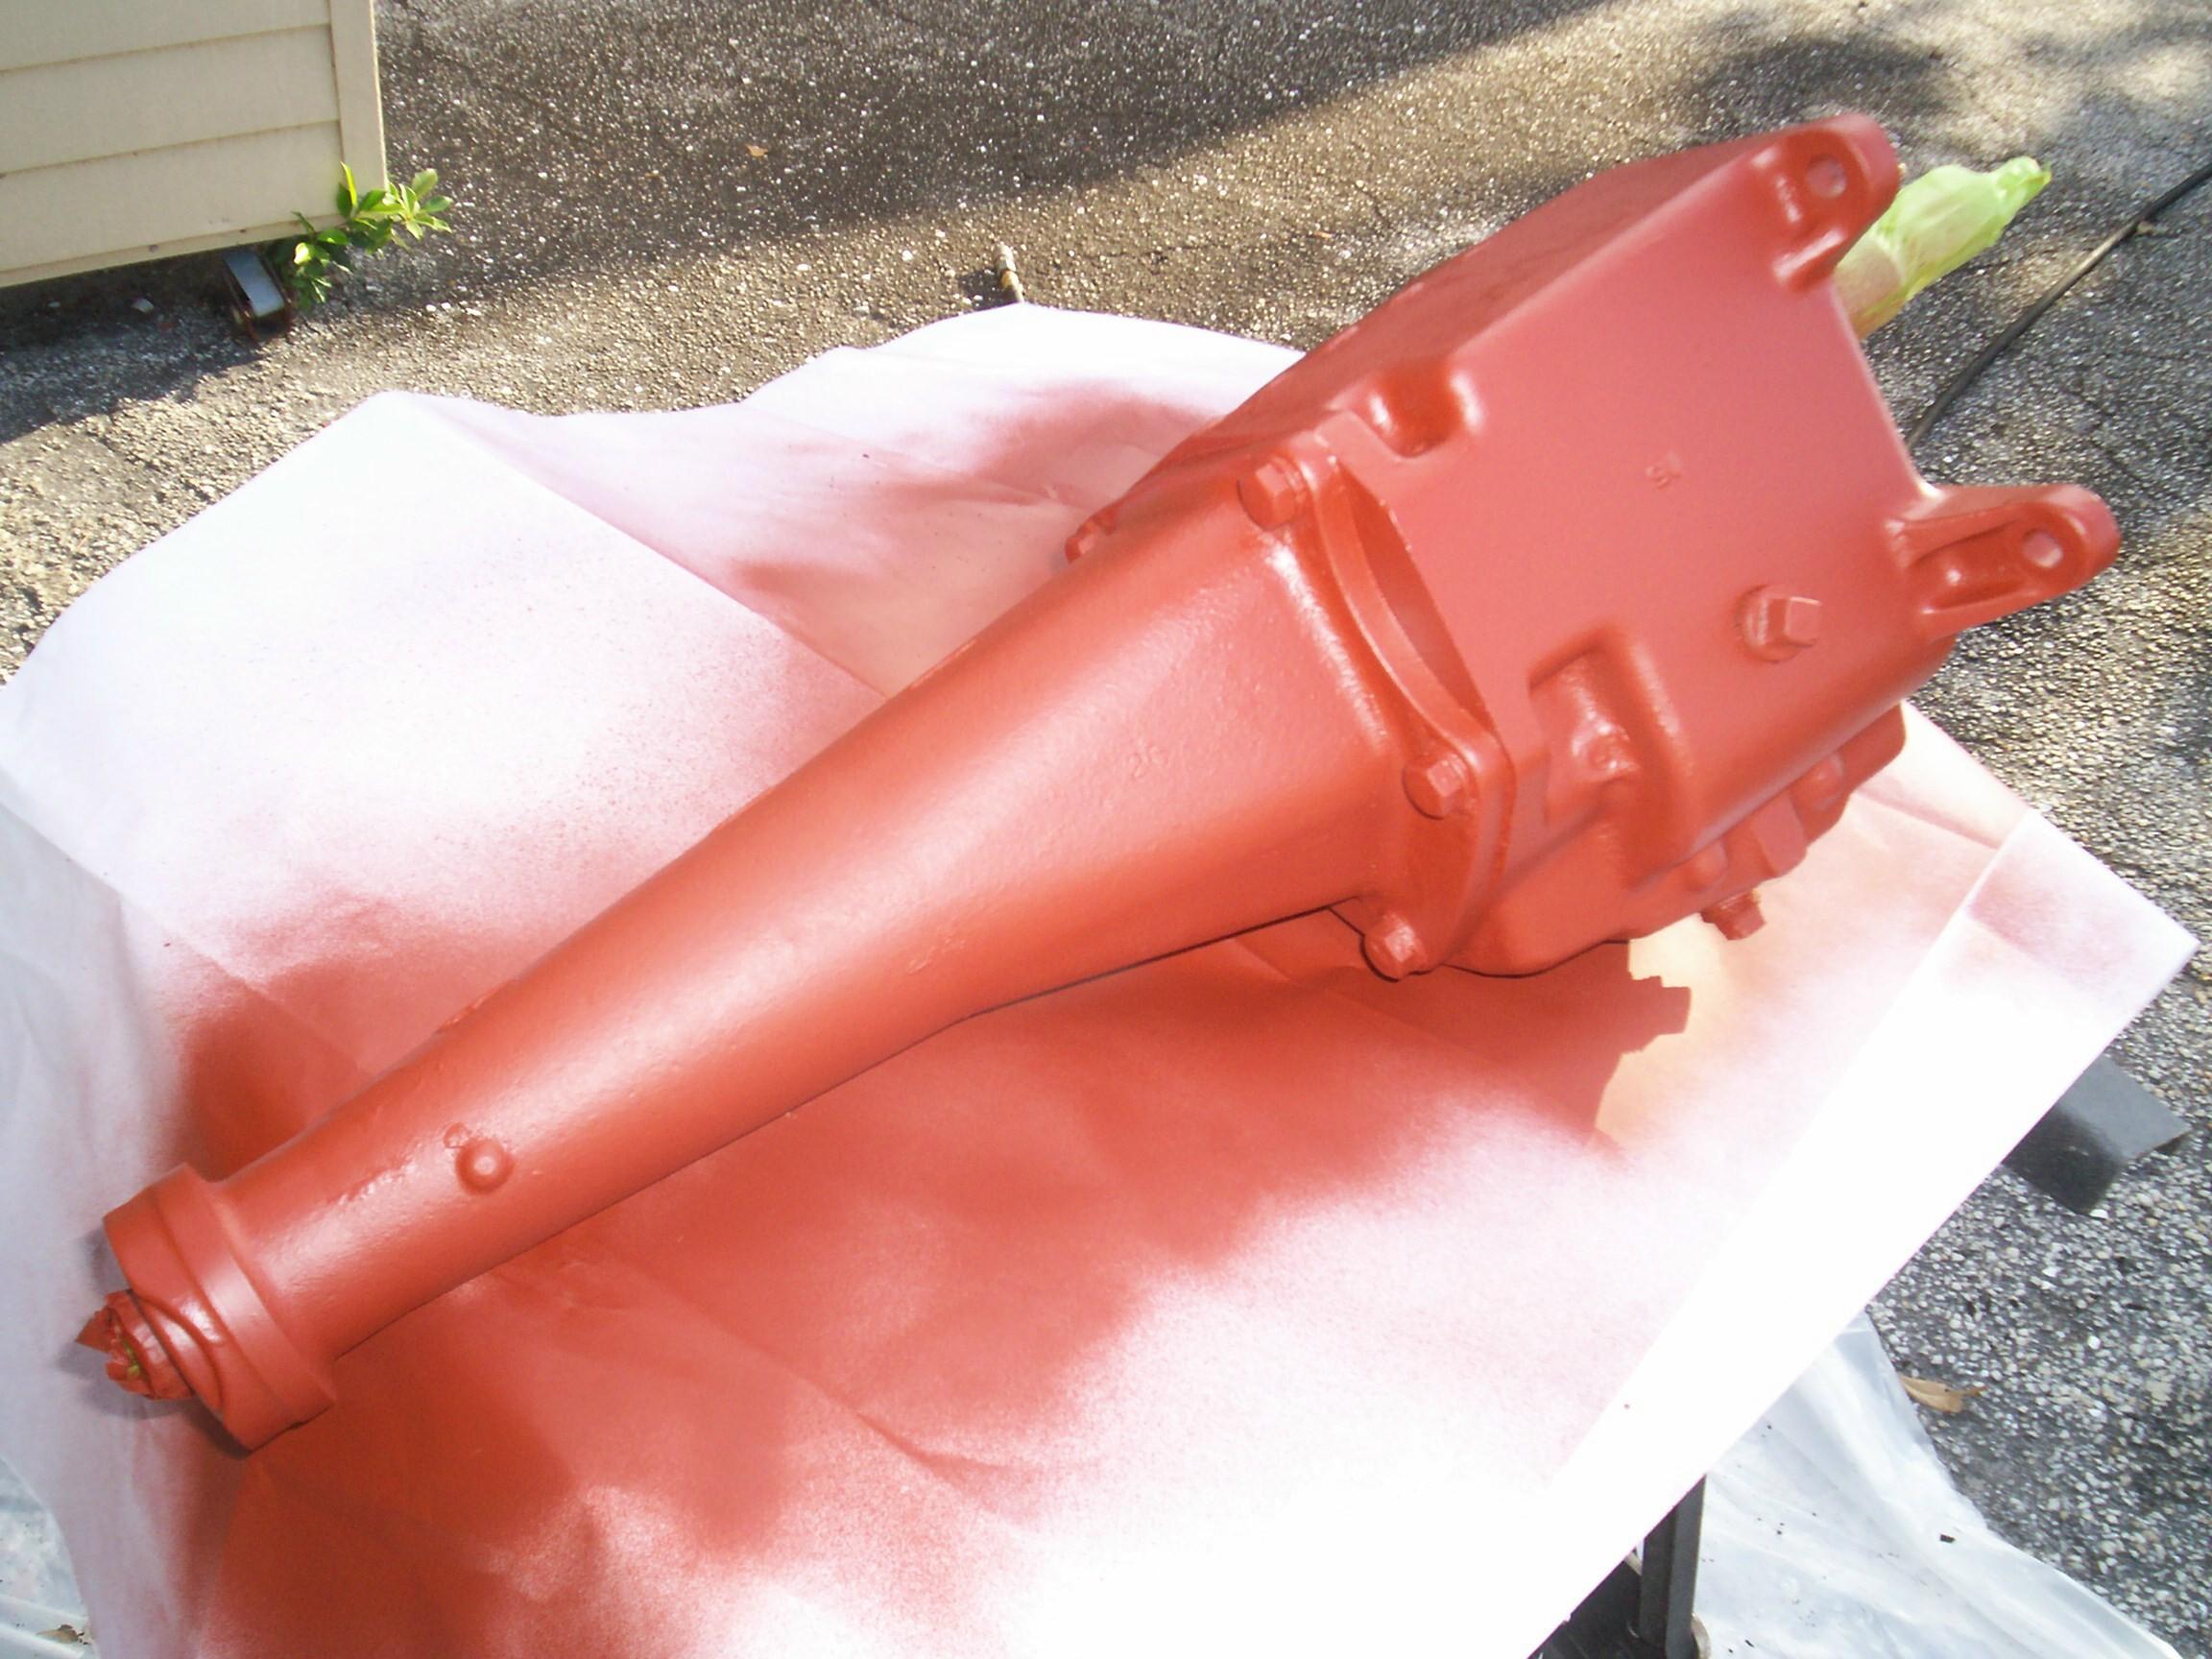 It
took me the rest of the day to degrease and prep the tranny for
painting but I got the Rust Encapsulator primer coats on it by sunset
and cleanup time. There were some local bands playing up the street at
the park. "Jumpin' Jack Flash" drifted down to me and when I was
locking up, "I know you Rider". I took my greasy self up there to
listen fer awhile.
It
took me the rest of the day to degrease and prep the tranny for
painting but I got the Rust Encapsulator primer coats on it by sunset
and cleanup time. There were some local bands playing up the street at
the park. "Jumpin' Jack Flash" drifted down to me and when I was
locking up, "I know you Rider". I took my greasy self up there to
listen fer awhile.
March 2nd 2008 When I got to the Krash Lab this morning, I setup the tranny on the workmate again and gave it a couple of coats of Eastwood's Spray Gray lacquer. The tranny bolts were treated with a cleaning session in the tumbler followed by a polishing session. After the tranny paint dried enuf, the splines at both ends were unmasked and cleaned with carb cleaner, brass brush and q-tips.
 Put
a light coating of white lithium grease on the splines and throwout
bearing sleeve before putting the tranny back on the jack and guiding
it into position. It went back in a lot easier than it did coming out.
After I got everything back together again, I took BillyBob around the
block for a test drive. At first glance, it looks like I got everything
right. Next week, I'll be working topside in the cab but when I get
back to the driveline, the clutch linkage will get my attention next. I
am slowly creeping up on the flywheel job. Time to head for the Krash
Pad and cleanup fer cruise nite.
Put
a light coating of white lithium grease on the splines and throwout
bearing sleeve before putting the tranny back on the jack and guiding
it into position. It went back in a lot easier than it did coming out.
After I got everything back together again, I took BillyBob around the
block for a test drive. At first glance, it looks like I got everything
right. Next week, I'll be working topside in the cab but when I get
back to the driveline, the clutch linkage will get my attention next. I
am slowly creeping up on the flywheel job. Time to head for the Krash
Pad and cleanup fer cruise nite.
March 8th 2008 It was rainin' at the Krash Pad when I woke up. Took a look at the Weather Channel radar and decided to smoke a cigar while I waited for the worst of the stormfront to pass out to sea. Got to the Krash Lab by eight. It was wet and windy. Did some computer work inside while I continued to wait for better conditions.
Went back to work on the glove box door and dashboard trim piece. A few weeks back when I discovered my new can of body filler to be solid as a rock, I ordered another, this time from a different vendor to lessen the chance of getting another boat anchor. It arrived a couple of weeks back. Opened it up and it was good to go so I mixed up a batch and slathered it on the glove box door and trim piece ends.
After the mud setup, I used a 80 grit disk in my Norton speed lock system mated to the air-powered angle grinder to shape the filler on the trim piece ends. This was followed with several coats of Duplicolor Filler Primer and 180 grit sandpaper cycles.
On the way home, I stopped at the warehouse to drop off some stuff. A guard was at the entrance to ask me where I wuz goin'. This is a new thing and I forgot what my bay number was. When I got to my bay, it looked different. The good news is that I have a new overhead door so I probably won't have to worry about it coming off the tracks anymore if I open it too far. The bad news is that there are two new shiny padlocks on this door that I don't have keys to and the office is closed. Damnation!
March 9th 2008 I woke up to 49 degrees in south Florida today and clear skys. Cable TV and cell phones show one time while the office computers have jumped ahead a hour. I guess it's a daylight savings time mismatch. I usually know when these time changes are coming. It caught me by surprise this time and screwed me up all day long.
Performed monthly maintenance on BillyBob and Renegade first. Hung up the dashboard defroster trim piece and PRE Paint Prepped it followed by a few coats of the Surf Green paint. Cleaned up the dashboard and established a windshield section for the interior detailing procedure.
 When
the paint was dry, the defroster trim piece was reinstalled. There were
some drips, runs and errors on it and it qualified as a stage 1 job. It
was too windy to paint. Too late to start anything new if I want to
make cruise nite so I sat in BillyBob's cab with a pale ale and a cigar
and listened to Latino AM radio fer a hour before heading home to the
Krash Pad to clean up.
When
the paint was dry, the defroster trim piece was reinstalled. There were
some drips, runs and errors on it and it qualified as a stage 1 job. It
was too windy to paint. Too late to start anything new if I want to
make cruise nite so I sat in BillyBob's cab with a pale ale and a cigar
and listened to Latino AM radio fer a hour before heading home to the
Krash Pad to clean up.
March 10th 2008 I've been preparing for the next truck show roadtrip to meet up with the usual suspects from OldGMCtrucks.com. It's the ATHS show in Hutchinson, Kansas at the end of May. I wanted to show a map of my daily routes last year for Macungie but didn't have the tech to do it easily. When I found out that Google Earth had a link in with Garvin navigators, I thought "Yea!" and I subscribed to Google Earth. Then, I found out that my Garvin c340 unit, "Mother", did not have track logging capibility. "Boo!" I found out about the "TrackStick" GPS tracker. The $170 price tag is not out of reach but the reviews put me off. Eventually, I found the i-blue 747 Bluetooth Data Logger GPS Receiver. It has more memory, stronger GPS signal, longer battery life and is programable. It also costs about a third of what the TrackStick costs. I got one and started testing. Here is a map of last nite's run to the cruise nite and back home to the Krash Pad and here is a Google Earth shot.
It's 'bout time to post this log entry. I'll sign off here with an update of the salvage yard flywheel affair that opened this episode. I emailed the four paragraphs concerning my experience with East West Auto Parts to Mr. Freeman with this preface:
I got the flywheel and it was well packed. Thanks. The bad news is that it was the wrong flywheel. Don't sell any more parts off that truck as '54-'55 1st series parts. The vin # you listed on the invoice was for a '53 truck. The following is what I wrote for my restoration webpage regarding this experience.
Ken wrote back
SIR,THE REST OF THE STORY IS: YOU STATED YOU NEEDED A FLYWHEEL WITH 139 TEETH I THINK. THE TEETH COUNT MATCHED. REGARDLESS.ALL YOU NEEDED TO DO IS LET US KNOW THERE IS A PROBLEM AND WE WILL MAKE IT RIGHT WITH YOU.SO BEFORE YOU GO TELLING A STORY ABOUT GETTING RIPPED OFF MAYBE IT WOULD BE A GOOD IDEA TO CONTACT US FIRST TO SEE IF WE ARE REPUTABLE AND STAND BEHIND OUR SERVICE. WE DO AND WILL EITHER SEND THE CORRECT PART OR GIVE YOU A REFUND. DO YOU HAVE THE GUTS TO FORWARD THIS TO YOUR WEB PAGE?THANKS,KEN
I tried to explain why the flywheel wouldn't work as best I could considering my knowledge of the subject is imperfect too.
Yes, I did ask for a 139 tooth ringgear flywheel. Specifically "Flywheel Part #3704831 (54=55 1st series light truck, 139 tooth 6volt ringgear)" as stated in the original quote. 216 engines and "early" 235 engines (which were bigger displacement 216 engine designs) used a 139 tooth flywheel too but it will not fit the new design 235 engine introduced into the trucks in 1954. When the 2nd series trucks were introduced in early 1955 these same new design 235's got twelve volt electrical systems and 168 tooth ringgears for the new starter motors. There is also the matter of different clutch diameters (some of the 216 engines had 9 inch clutches, my truck has a 10 inch clutch) That's why I was specific in my request and that (red print above) was is also in my webpage story. And, yes, I have the "guts" to post this entire exchange, upper case "shouting" and all. You and the rest of my few hundred readers will have to wait a bit though, because I only publish a work-in-progress log entry every month or two and this entry is more than a month off at this point. A refund would be ok but I would prefer the correct part.
Ken responded with -
SIR,I WILL SEE IF WE HAVE THE PART YOU NEED.IF NOT THERE WILL BE A REFUND.THANKS,KEN
Followed a couple of weeks later with -
SIR,WE DO NOT HAVE THE CORRECT FLYWHEEL.A CREDIT WILL BE ISSUED INCLUDING SHIPPING.THANKS,KEN
A couple of weeks after that, the refund was recorded in my credit card account. OK. I gotta change my opinion here of East West Auto Parts and Mr. Ken Freeman. I will welcome the chance to do business with him again should the opportunity arise. As I stated at the beginning above. I didn't care to ship the flywheel back and he didn't ask me to. I am gonna put it in the back of the truck for the Hutchinson Roadtrip. Tulsa isn't that far off my route back from Hutchinson and returning the flywheel will allow me to visit Ken and thank him personally.
| < Back
to Intro |
You can email me at ![]() webmaster@laroke.com
webmaster@laroke.com
Issued Wednesday March 12, 2008
Updated Tuesday April 3, 2018
copyright © 1996-2018 Larry Robert Kephart all rights reserved
| | LRK Home | | Bio Info | | Krash Khronicles | | LAROKE | |
| | BettyLou | | BillyBob's Garage | | Rat Patrol | | Deerslayer | | Elvira | |
| | Land of the Free and Home of the Brave | |
| | Keppylou's Art | | WWI Soldier's Diary | |