| | LRK Home | | Bio Info | | Krash Khronicles | | LAROKE | |
| | BettyLou | | BillyBob's Garage | | Rat Patrol | | Deerslayer | | Elvira | |
| | Land of the Free and Home of the Brave | |
| | Keppylou's Art | | WWI Soldier's Diary | |
BillyBob Parts Shop
![]()
WHAT'S NEW is a chronological listing of updates to the BillyBob site.
![]()
TRUCK LINKS including vendor sites for old parts, custom parts, and tools as well as sites for classic car and truck organizations
STORE Operating in association with Amazon.com, books, recordings and tools can be purchased.
PLANNING for the restoration including project schedule and cost estimates.
![]()
TRAVELS WITH BILLYBOB With apologies to Steinbeck, this area of BillyBob's Garage will be used to log the trips BillyBob and I make together.
WORK-IN-PROGRESS is the restoration of parts of BillyBob that I can accomplish without a garage.
PRE-RESTORATION includes log entries of minor repairs and and adventures between time of purchase and the time when I started restoration, a piece at a time.
JR'S KORNER JR's Korner is the history of BillyBob before I got him authored by my brother, Wm. C. Kephart.
![]()
BILLYBOB MAINTENANCE Ever changing detailing, oil change, lube, etc. maintenance routines specifically developed for BillyBob, including required tools, materials and procedures.
PARTS SHOP The Parts Shop is a repository of How-To articles. Things that I have done over and over enough times to have developed a procedure. This gives me a checklist and saves brain cells.
STEALTH SHOP Urban residence design with large integrated shop and separate living quarters for a relative or renter.
1. Nuts n Bolts: Degreasing, Derusting and Cleaning
Collection / Organization
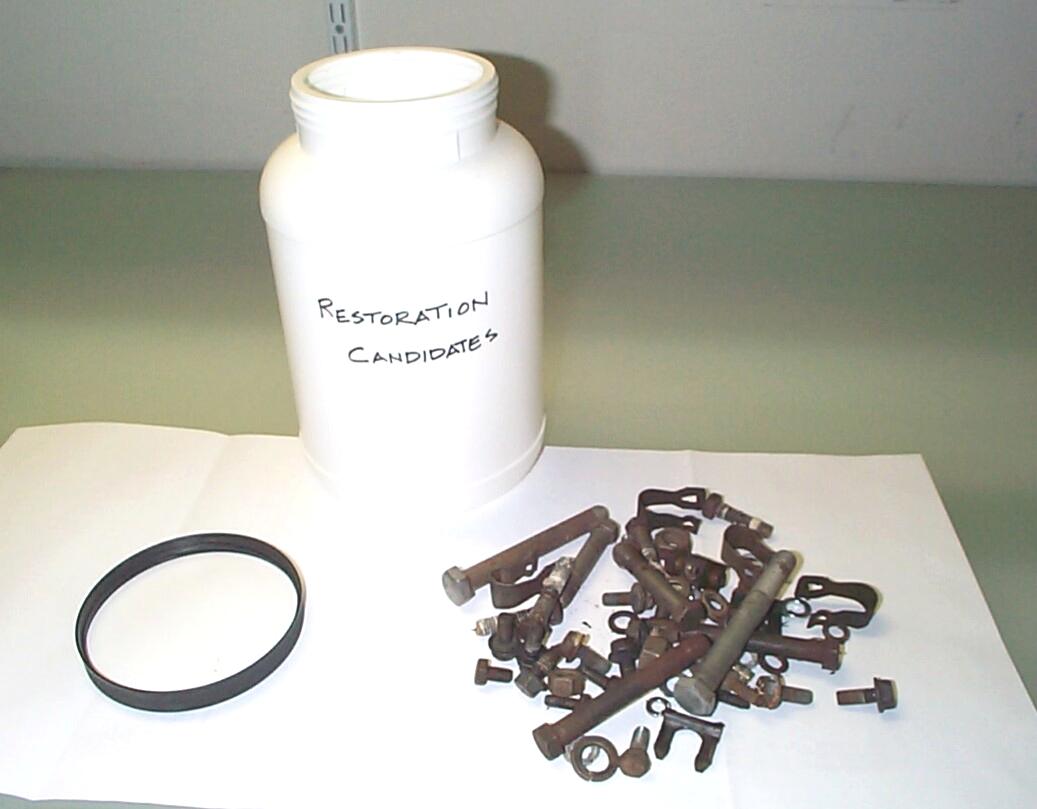 I've
taken to storing up those rusty fasteners and small parts that can be
used again. This gives me something to do on those days when weather
conditions in the shadetree garage prevent me from working on BillyBob.
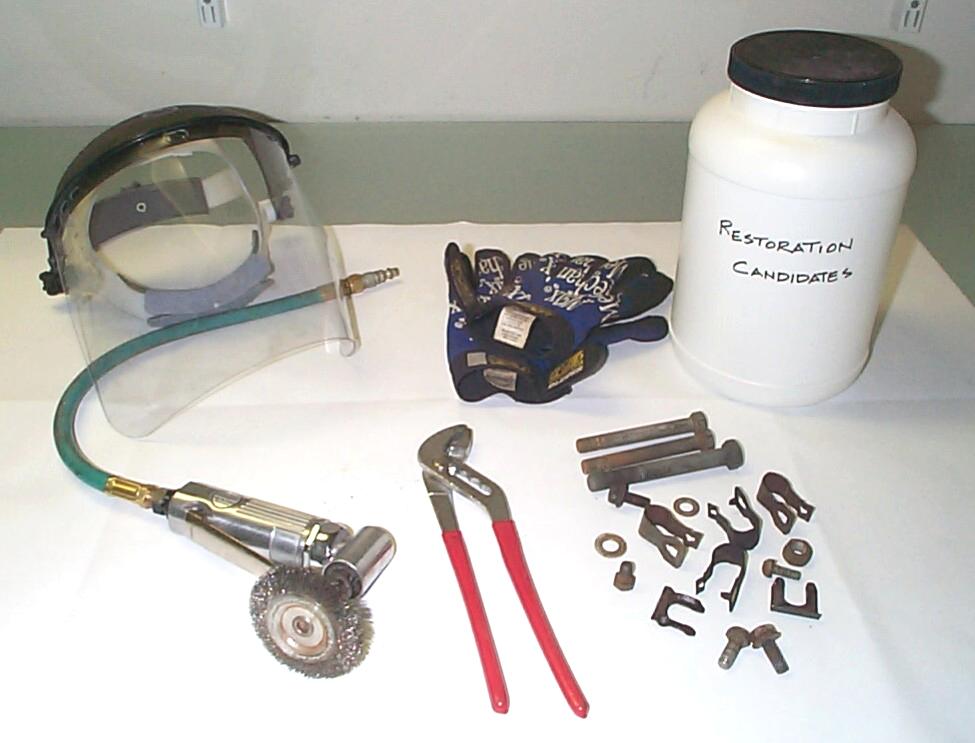
All small parts go in a "Restoration Candidates" container for future
cleaning and refinishing operations. Some of these items only need
cleaning. At the other end of the scale are items that are so far gone,
an attempt to recycle them is only being made because they are
unavailable elsewhere.
I've
taken to storing up those rusty fasteners and small parts that can be
used again. This gives me something to do on those days when weather
conditions in the shadetree garage prevent me from working on BillyBob.
All small parts go in a "Restoration Candidates" container for future
cleaning and refinishing operations. Some of these items only need
cleaning. At the other end of the scale are items that are so far gone,
an attempt to recycle them is only being made because they are
unavailable elsewhere.
Degreasing
Degreasing follows a mild to harsh methodology. In other words, mild cleaners are tried first and if that doesn't do the job, a more caustic cleaning method is tried.
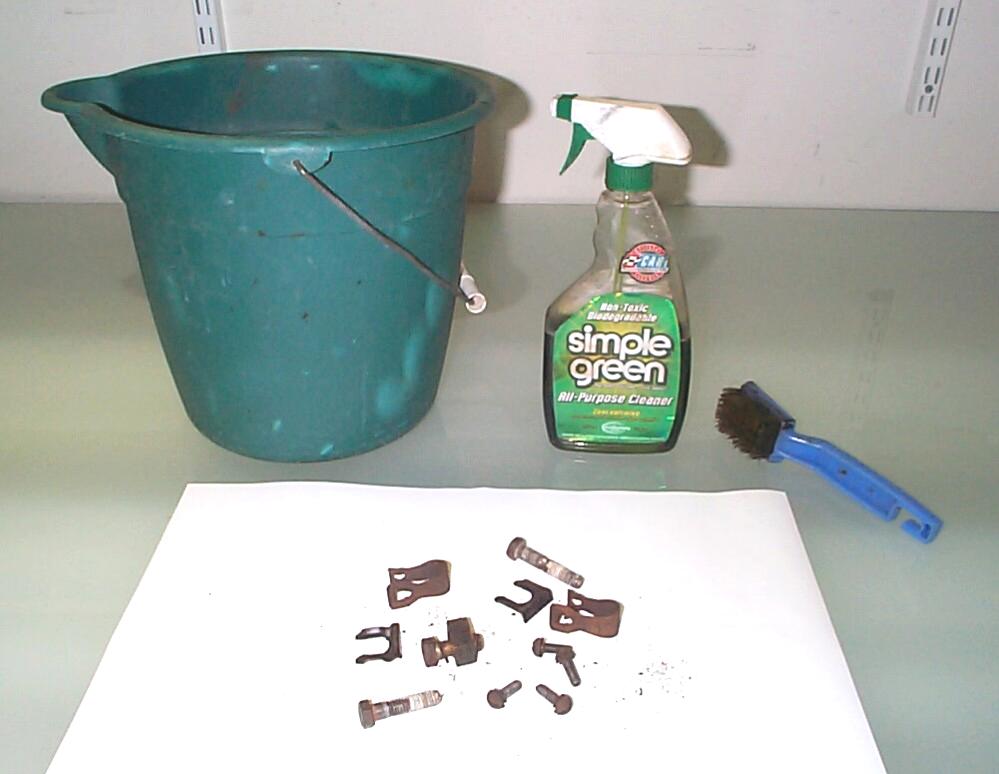 The
first degreasing method uses a bucket, Simple Green cleaner, a brass
brush and water. Greasy items are selected from the "Restoration
Candidates" container and placed in the bucket. They are sprayed with
full strength Simple Green and left to soak. Periodically, I douse them
with more Simple Green. After soaking for awhile, the parts are brushed
and water is added to the bucket to submerge the parts. Finally, after
soaking awhile longer, the parts are rinsed with clean water and dryed
with a hair dryer.
The
first degreasing method uses a bucket, Simple Green cleaner, a brass
brush and water. Greasy items are selected from the "Restoration
Candidates" container and placed in the bucket. They are sprayed with
full strength Simple Green and left to soak. Periodically, I douse them
with more Simple Green. After soaking for awhile, the parts are brushed
and water is added to the bucket to submerge the parts. Finally, after
soaking awhile longer, the parts are rinsed with clean water and dryed
with a hair dryer.
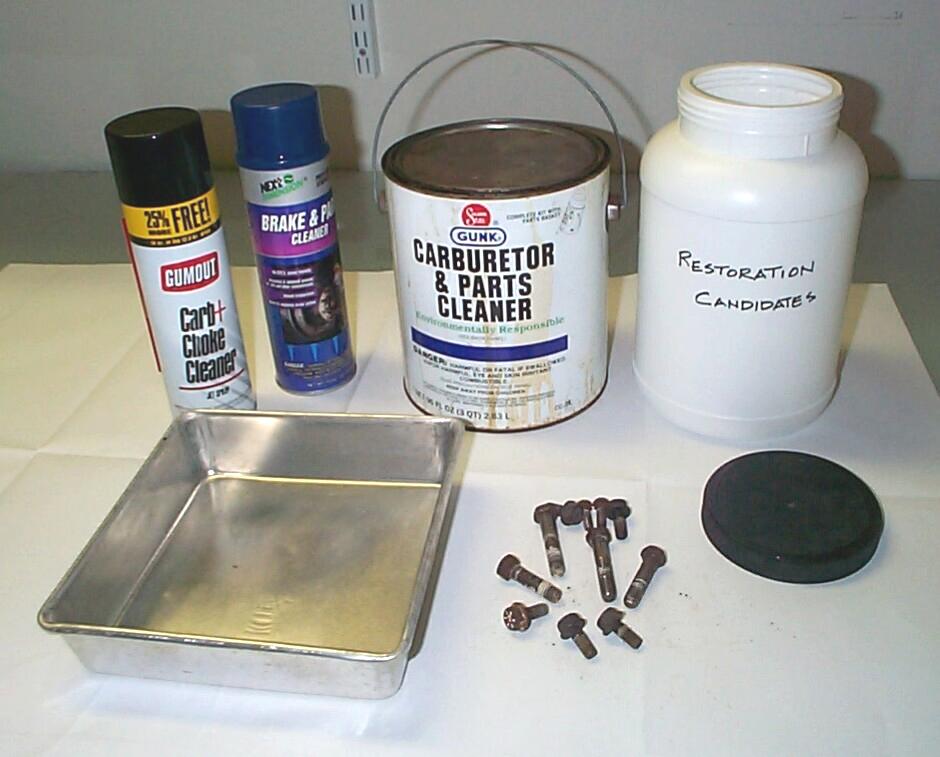 If
the parts aren't clean yet (often the case where there is still sealant
in the threads, etc.), solvents are the next step. The items are placed
in a small pan and the stubborn areas are soaked with spray on brake
cleaner or carb cleaner. Wear rubber gloves and scrub the parts with a
brass brush. Both cleaner types evaporate quickly. As a last resort,
submerge the stubborn parts in the liquid carb and parts cleaner and
seal the lid on for an hour, a day or a week. This is nasty stuff - be
careful with it. It will also remove the paint off any parts submerged
in it.
If
the parts aren't clean yet (often the case where there is still sealant
in the threads, etc.), solvents are the next step. The items are placed
in a small pan and the stubborn areas are soaked with spray on brake
cleaner or carb cleaner. Wear rubber gloves and scrub the parts with a
brass brush. Both cleaner types evaporate quickly. As a last resort,
submerge the stubborn parts in the liquid carb and parts cleaner and
seal the lid on for an hour, a day or a week. This is nasty stuff - be
careful with it. It will also remove the paint off any parts submerged
in it.
After soaking in the solvent soup, fish the parts out and submerge in a pan of clean water. Dry the parts with a clean rag and use a scribe or x-acto knife to remove any remains of sealant still left it the nooks and cranies. The degreased parts are now placed back in the "Restoration Candidates" container for more processing. Some parts can go straight to cleaning. Others may need derusting first.
Derusting
Derusting follows an easy to hard methodology. Easy methods like a vinegar soak (mild acid) is used first. At the other end of the scale is media blasting.
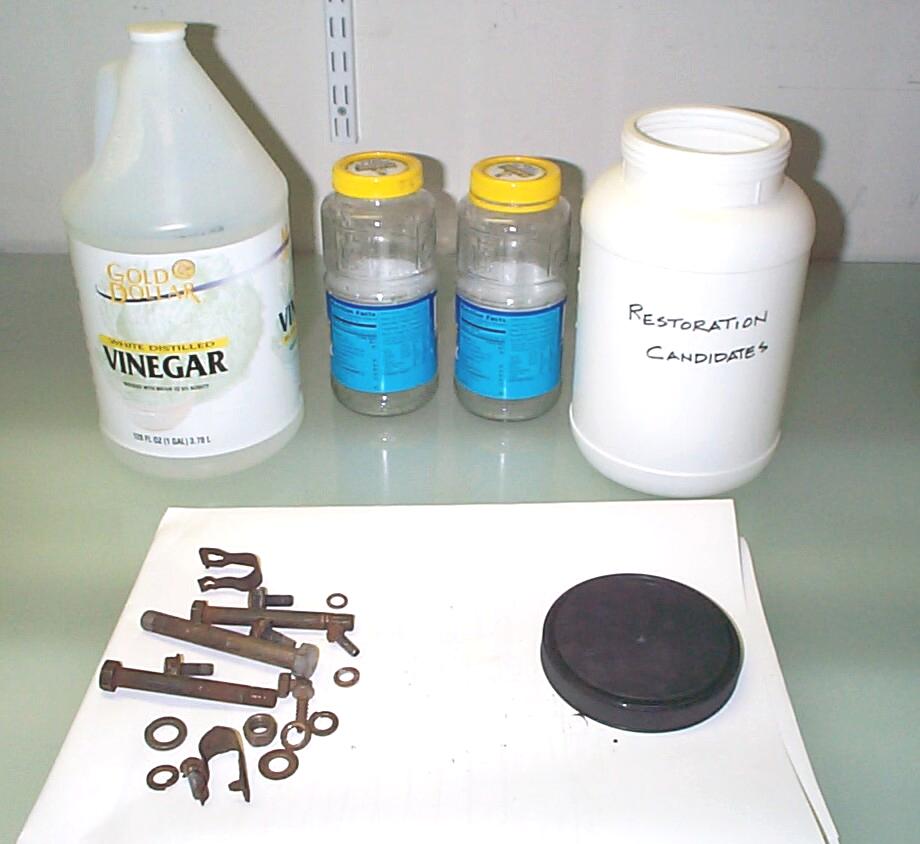 The
first derusting method uses a couple of glass jars with lids, household
white vinegar, and baking soda. Rusty items are selected from the
"Restoration Candidates" container and placed one of the jars. Vinegar
is added until all the parts are submerged. Seal the lid on for a day,
two days, three days. After the vinegar soaking, put a baking soda and
water solution in the other jar and transfer the parts to that jar to
neutralize the acid from the vinegar soaking. Finally, the parts are
rinsed with clean water and dryed with a clean cloth to remove the
black residue that results from the vinegar soak.
The
first derusting method uses a couple of glass jars with lids, household
white vinegar, and baking soda. Rusty items are selected from the
"Restoration Candidates" container and placed one of the jars. Vinegar
is added until all the parts are submerged. Seal the lid on for a day,
two days, three days. After the vinegar soaking, put a baking soda and
water solution in the other jar and transfer the parts to that jar to
neutralize the acid from the vinegar soaking. Finally, the parts are
rinsed with clean water and dryed with a clean cloth to remove the
black residue that results from the vinegar soak.
 The
second derusting method uses a wire wheel in an air-powered angle
grinder. Eye, hand and skin protection are required. The wire wheel
will also help to remove any residue left over from the vinegar
derusting method too. Use channel-lock pliers or vise-grips to hold the
small parts for this operation. Simple shapes, like hex bolts, where
the wire wheel can reach all surfaces are best suited for this method.
Select items from the "Restoration Candidates" container, wire brush
them and return to the container for future operations.
The
second derusting method uses a wire wheel in an air-powered angle
grinder. Eye, hand and skin protection are required. The wire wheel
will also help to remove any residue left over from the vinegar
derusting method too. Use channel-lock pliers or vise-grips to hold the
small parts for this operation. Simple shapes, like hex bolts, where
the wire wheel can reach all surfaces are best suited for this method.
Select items from the "Restoration Candidates" container, wire brush
them and return to the container for future operations.
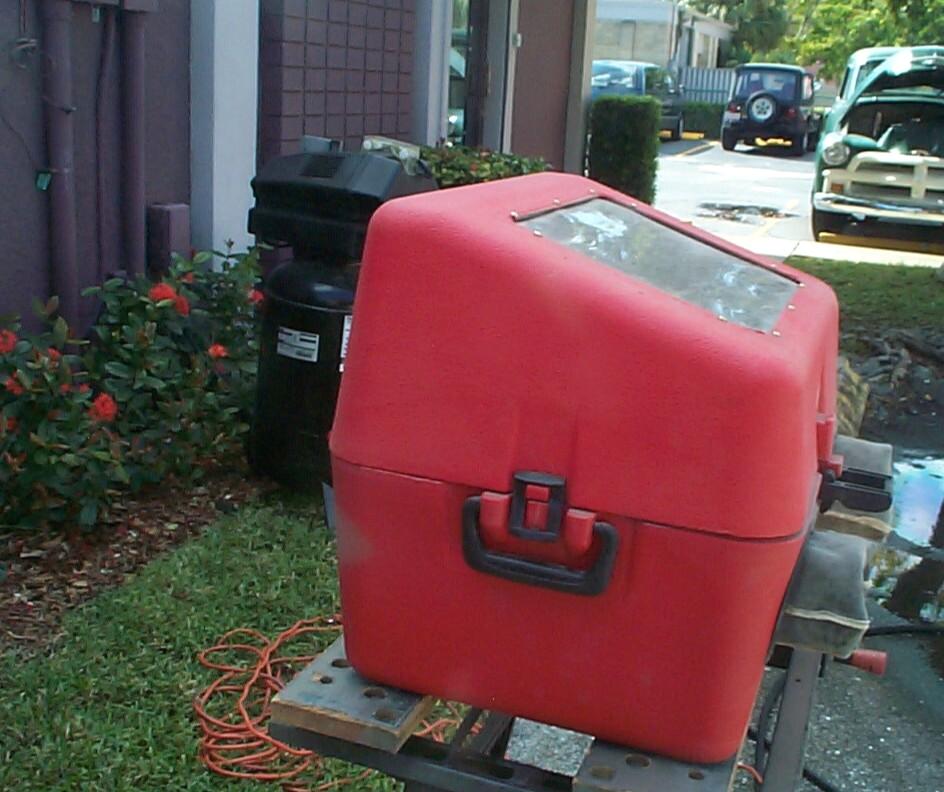 The
third derusting method is media blasting. It's the last resort method
for me 'cause all the setup and cleanup work required for this method
in the shadetree garage. If I had a real shop, I would get a quality
blast cabinet and air compressor that would make this method more
favored. This is a very small portable blast cabinet purchased thru the
Eastwood Company. It's better than my old cheapie Harbor Freight
cabinet but not much. There is not much room in this thing for anything
but your hands and the blast gun so, it is only good for small parts.
For derusting, I use aluminum oxide as the media. It is more aggressive
than sand. I get mine from McMaster-Carr in ten pound tubs. Select
items from the "Restoration Candidates" container, media blast them and
return to the container for future operations.
The
third derusting method is media blasting. It's the last resort method
for me 'cause all the setup and cleanup work required for this method
in the shadetree garage. If I had a real shop, I would get a quality
blast cabinet and air compressor that would make this method more
favored. This is a very small portable blast cabinet purchased thru the
Eastwood Company. It's better than my old cheapie Harbor Freight
cabinet but not much. There is not much room in this thing for anything
but your hands and the blast gun so, it is only good for small parts.
For derusting, I use aluminum oxide as the media. It is more aggressive
than sand. I get mine from McMaster-Carr in ten pound tubs. Select
items from the "Restoration Candidates" container, media blast them and
return to the container for future operations.
Cleaning
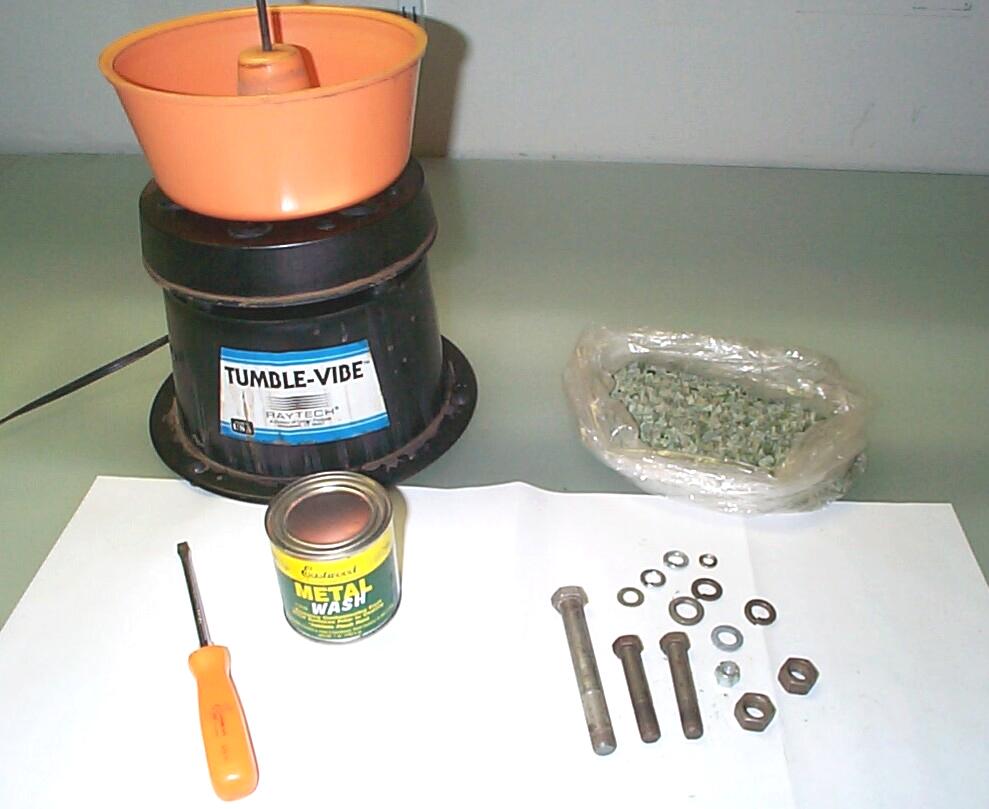 A
group of parts to be cleaned are picked out of the "Restoration
Candidates" container. The selected parts are placed in Eastwood's
"Tumble-Vibe" for a cleaning session. Eastwood now carries three sizes
of this tumbler. Mine is the middle-sized one. The parts are placed in
the small tumbler bowl and the "Green Pyramid" plastic cutting media is
added until it just covers the parts being cleaned. Water is added
until the water level is just below that of the media. A teaspoon of
Eastwood's "Metal Wash" is added to the mix and the lid is secured. The
tumbler is plugged in and allowed to run for an hour.
A
group of parts to be cleaned are picked out of the "Restoration
Candidates" container. The selected parts are placed in Eastwood's
"Tumble-Vibe" for a cleaning session. Eastwood now carries three sizes
of this tumbler. Mine is the middle-sized one. The parts are placed in
the small tumbler bowl and the "Green Pyramid" plastic cutting media is
added until it just covers the parts being cleaned. Water is added
until the water level is just below that of the media. A teaspoon of
Eastwood's "Metal Wash" is added to the mix and the lid is secured. The
tumbler is plugged in and allowed to run for an hour.
After the tumbler session, the parts are rinsed with water and dryed with a hair dryer. The "Metal Wash" will protect the parts from rust until the next finishing operation. The parts are then placed in a "Cleaned Misc Small Parts" container to await Plating, Blackening or Painting operations.
You can email me at ![]() webmaster@laroke.com
webmaster@laroke.com
Issued Monday October 25, 2004
Updated Tuesday April 24, 2018
copyright © 1996-2018 Larry Robert Kephart all rights reserved
| | LRK Home | | Bio Info | | Krash Khronicles | | LAROKE | |
| | BettyLou | | BillyBob's Garage | | Rat Patrol | | Deerslayer | | Elvira | |
| | Land of the Free and Home of the Brave | |
| | Keppylou's Art | | WWI Soldier's Diary | |