| | LRK Home | | Bio Info | | Krash Khronicles | | LAROKE | |
| | BettyLou | | BillyBob's Garage | | Rat Patrol | | Deerslayer | | Elvira | |
| | Land of the Free and Home of the Brave | |
| | Keppylou's Art | | WWI Soldier's Diary | |
BillyBob Work-in-Progress Log
![]()
WHAT'S NEW is a chronological listing of updates to the BillyBob site.
![]()
TRUCK LINKS including vendor sites for old parts, custom parts, and tools as well as sites for classic car and truck organizations
STORE Operating in association with Amazon.com, books, recordings and tools can be purchased.
PLANNING for the restoration including project schedule and cost estimates.
![]()
TRAVELS WITH BILLYBOB With apologies to Steinbeck, this area of BillyBob's Garage will be used to log the trips BillyBob and I make together.
WORK-IN-PROGRESS is the restoration of parts of BillyBob that I can accomplish without a garage.
PRE-RESTORATION includes log entries of minor repairs and adventures between time of purchase and the time when I started restoration, a piece at a time.
JR'S KORNER JR's Korner is the history of BillyBob before I got him authored by my brother, Wm. C. Kephart.
![]()
BILLYBOB MAINTENANCE Ever changing detailing, oil change, lube, etc. maintenance routines specifically developed for BillyBob, including required tools, materials and procedures.
PARTS SHOP The Parts Shop is a repository of How-To articles. Things that I have done over and over enough times to have developed a procedure. This gives me a checklist and saves brain cells.
STEALTH SHOP Urban residence design with large integrated shop and separate living quarters for a relative or renter.
![]()
You will need the Adobe Acrobat browser plugin to view these wiring diagrams which are in the PDF file format. This format allows zooming and panning. If you don't have this plugin, it can be downloaded and installed (free) from the Adobe site. The button below will take you there.
![]()
BILLYBOB WIRING DIAGRAM Here's the wiring diagram updated with BillyBob's current state 'cepting the third-party strap-on turn-signal director.
STRAP-ON TURN-SIGNAL DIRECTOR/BRAKE LIGHT CIRCUIT This turn signal and brake light circuit diagram shows the current state of the third-party turn-signal director wiring, which will remain in place until I figure out the problems with the OEM turn-signal director. It also shows the OEM headlight switch.
56. Starting with Confidence
March 13th 2008 As I related in the last log entry, I went up to the warehouse last saturday and couldn't get in. I drove up this morning to resolve the issue. Since I've gotten older, I've developed the habit of checking things twice before opening my pie hole to complain. Doesn't always work. Some things need three checks. This time it did. I drove to my bay and was surprised to see the old bent door with my rusted padlock on it! It appears when the guard asked me my bay number and I couldn't remember, it messed me up. I had gone two bays too far. It was either a senior moment or three Flying Dog Pale Ales are too many. Double Damnation.
March 15th 2008 Good weather today. My goal this weekend is to get the glove box door bodywork and paint done. We'll see how that goes. That's less than five minutes work on any of the Powerblock TV shows. I started out by sanding down the mud I applied last week with 36 grit paper in 16" long board. Dang! Still some low spots. Mixed up a new batch of Evercoat's Metal-to-Metal filler and slathered it on. I worked on Renegade while I waited for that to set up.
After the filler cured, I worked it down again with the long board and then with a 80 grit foam sanding block. We're pretty close now. Hung the glove box door up in BillyBob's tree and PRE Paint Prepped it. Gave it a coat of Duplicolor Filler Primer. Still a few pockets and deep scratches to address. Dug around in my inventory and found my can of Evercoat Polyester Glazing Putty. This stuff is like filler but more liquid. Haven't had this can open fer years (the windshield job) so I was surprised that it wasn't dried up, just separated out. Stirred it up good and it looks OK. The activator was long gone. The acitivator tubes seem to either leak out or walk away. I think it's the same activator as the filler. That's what I'm gonna try anyway.
Well, that was a misteak an' I'm no stranger to 'em. The putty would not set up so either I'm wrong about the activator or this stuff is too old. I ruined a shop rag wiping as much of the putty off as I could and now I'm pondering what to do next . . . Where did I put the cigars?
Scraped the rest of the putty off with a putty knife and lacquer thinner. Cleaned it up and spent the rest of the day applying coats of Duplicolor Primer Filler and sanding them off again. Tomorrow, the Surf Green paint goes on, hell or high water.
 March
16th 2008 Good weather
today but a little breezy. That did not bode well for the Surf Green
paint. I've nebber been a surfer but after all these years of trying to
paint outside, I think I understand the concept of wipeout. I got drips
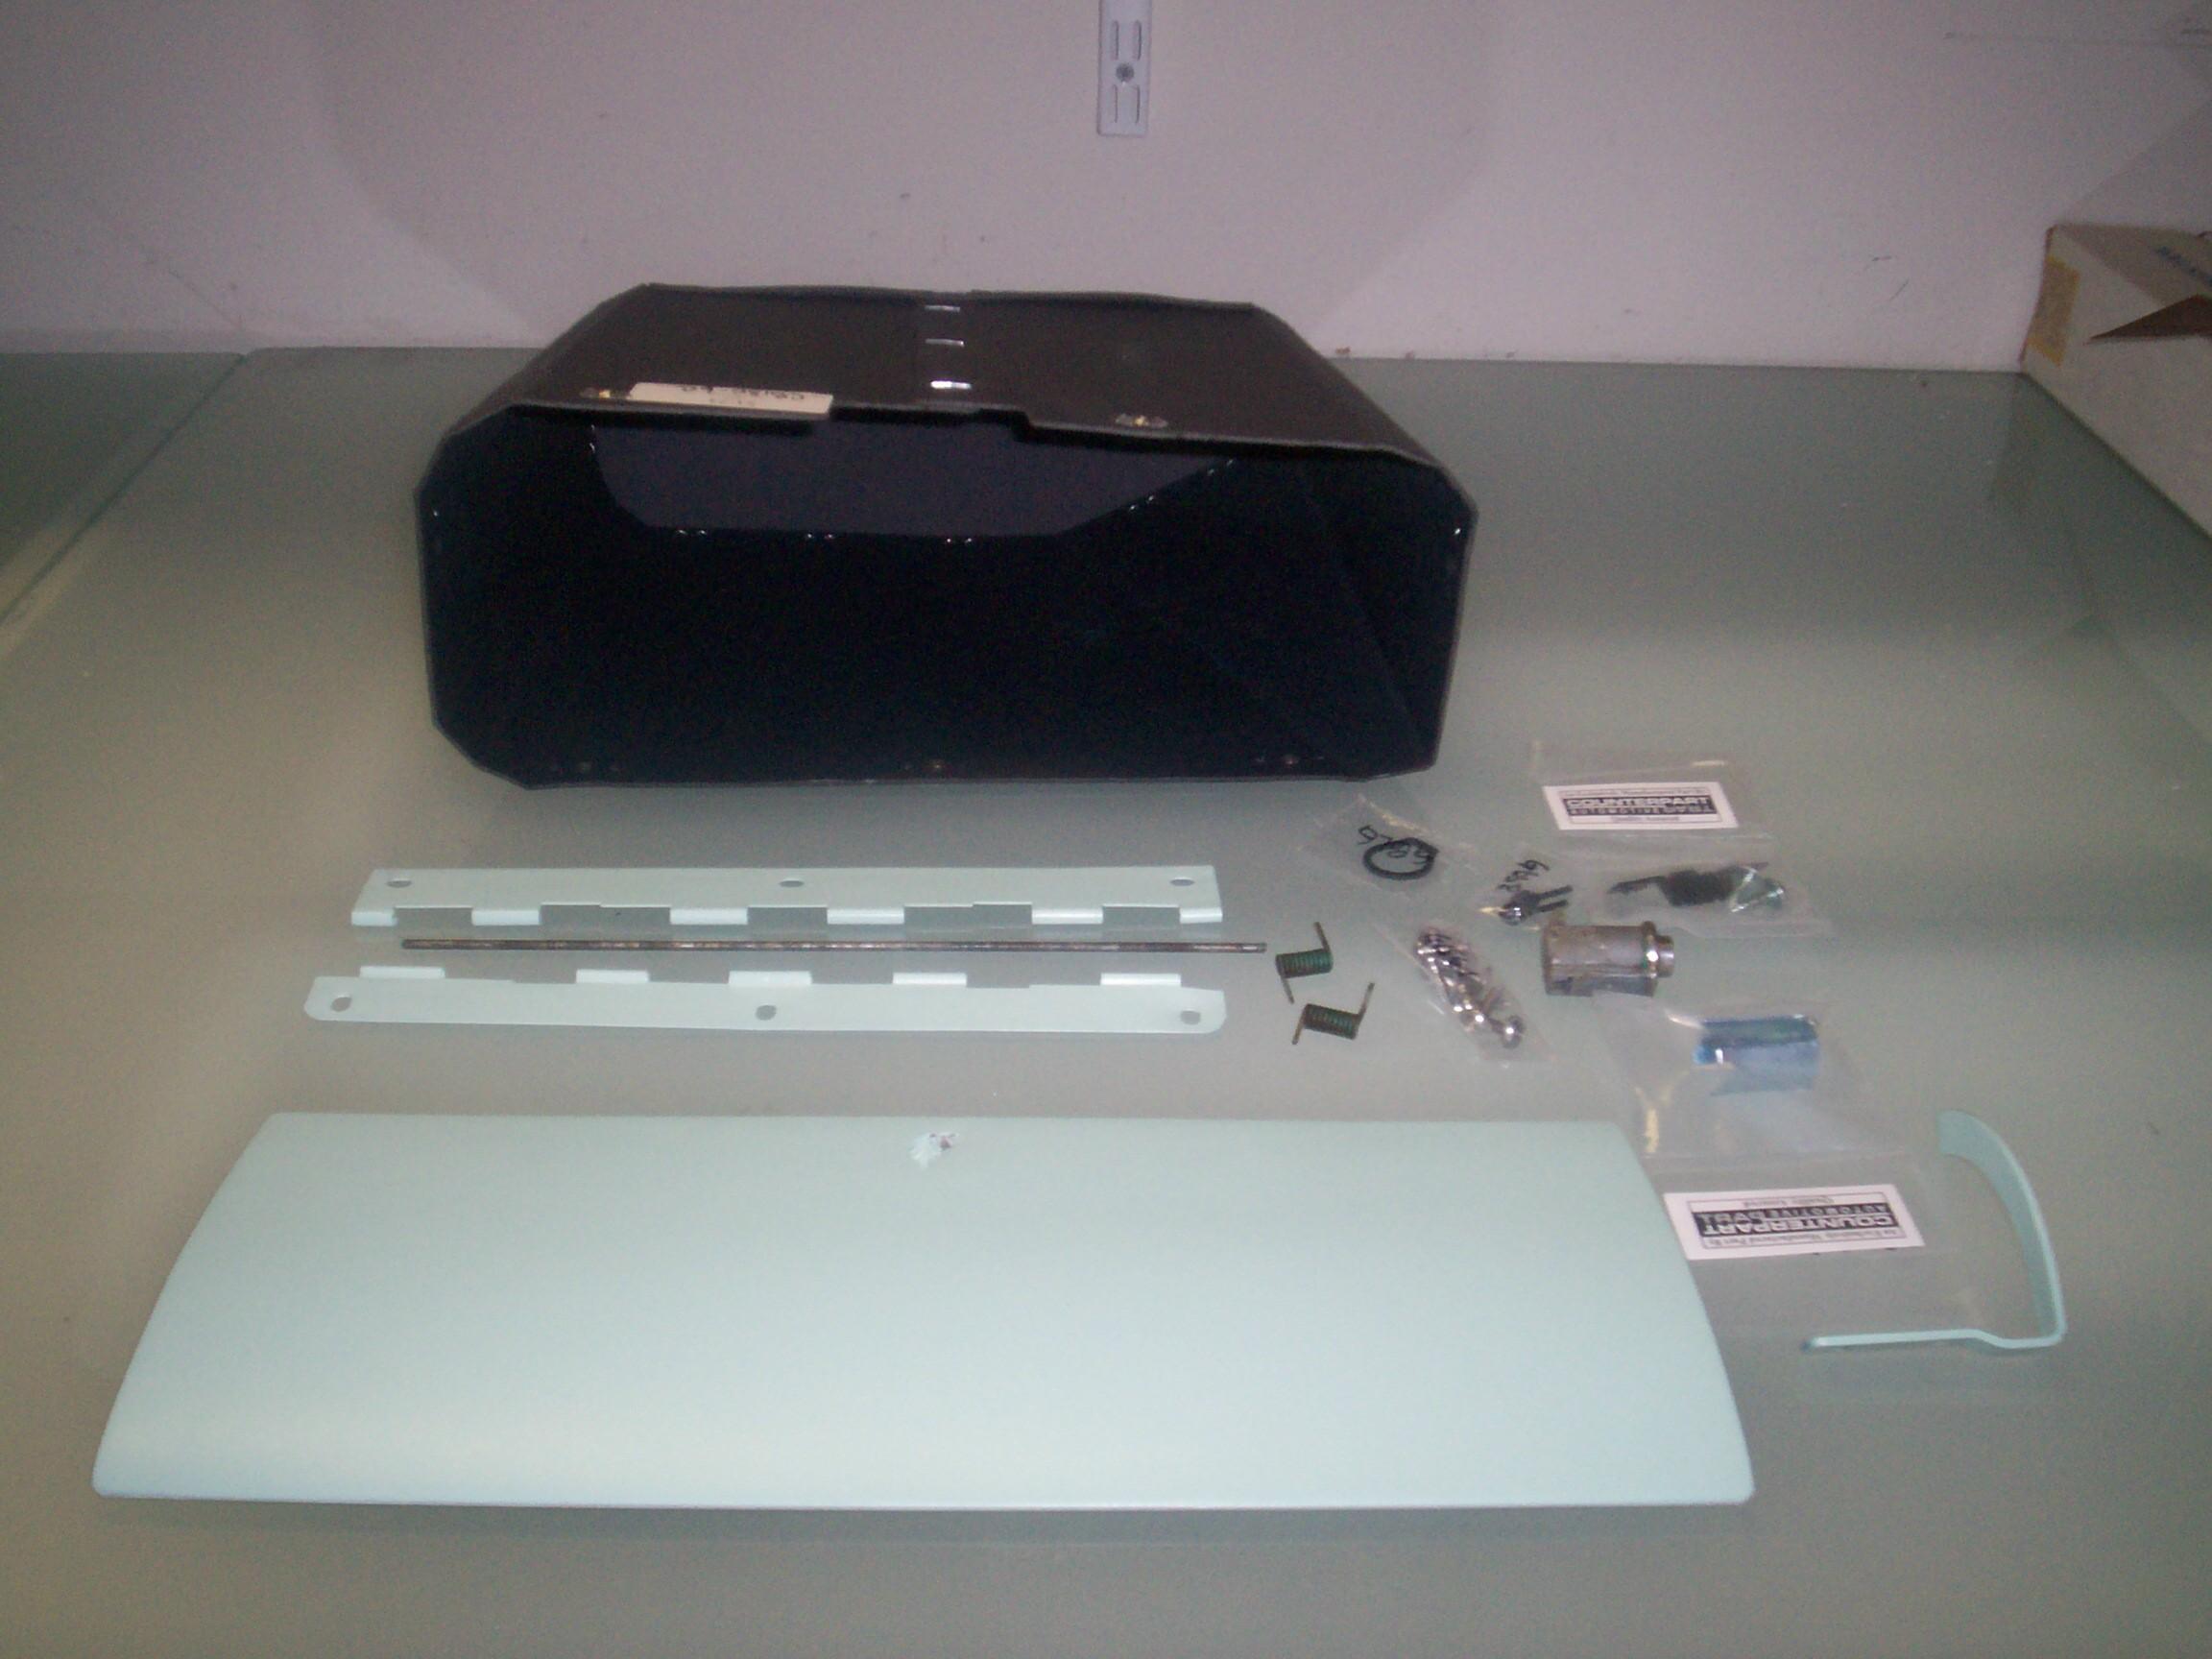
and orange peel. I went inside and ordered glove box parts from American Classic Truck Parts.
I moved on to renewing the wax on BillyBob. He's not beading up anymore
in the rain and some areas have been starting to haze up. Not gonna use
the Flitz polish this time as the paint is getting thin in some areas
that I used it on before.
March
16th 2008 Good weather
today but a little breezy. That did not bode well for the Surf Green
paint. I've nebber been a surfer but after all these years of trying to
paint outside, I think I understand the concept of wipeout. I got drips
and orange peel. I went inside and ordered glove box parts from American Classic Truck Parts.
I moved on to renewing the wax on BillyBob. He's not beading up anymore
in the rain and some areas have been starting to haze up. Not gonna use
the Flitz polish this time as the paint is getting thin in some areas
that I used it on before.
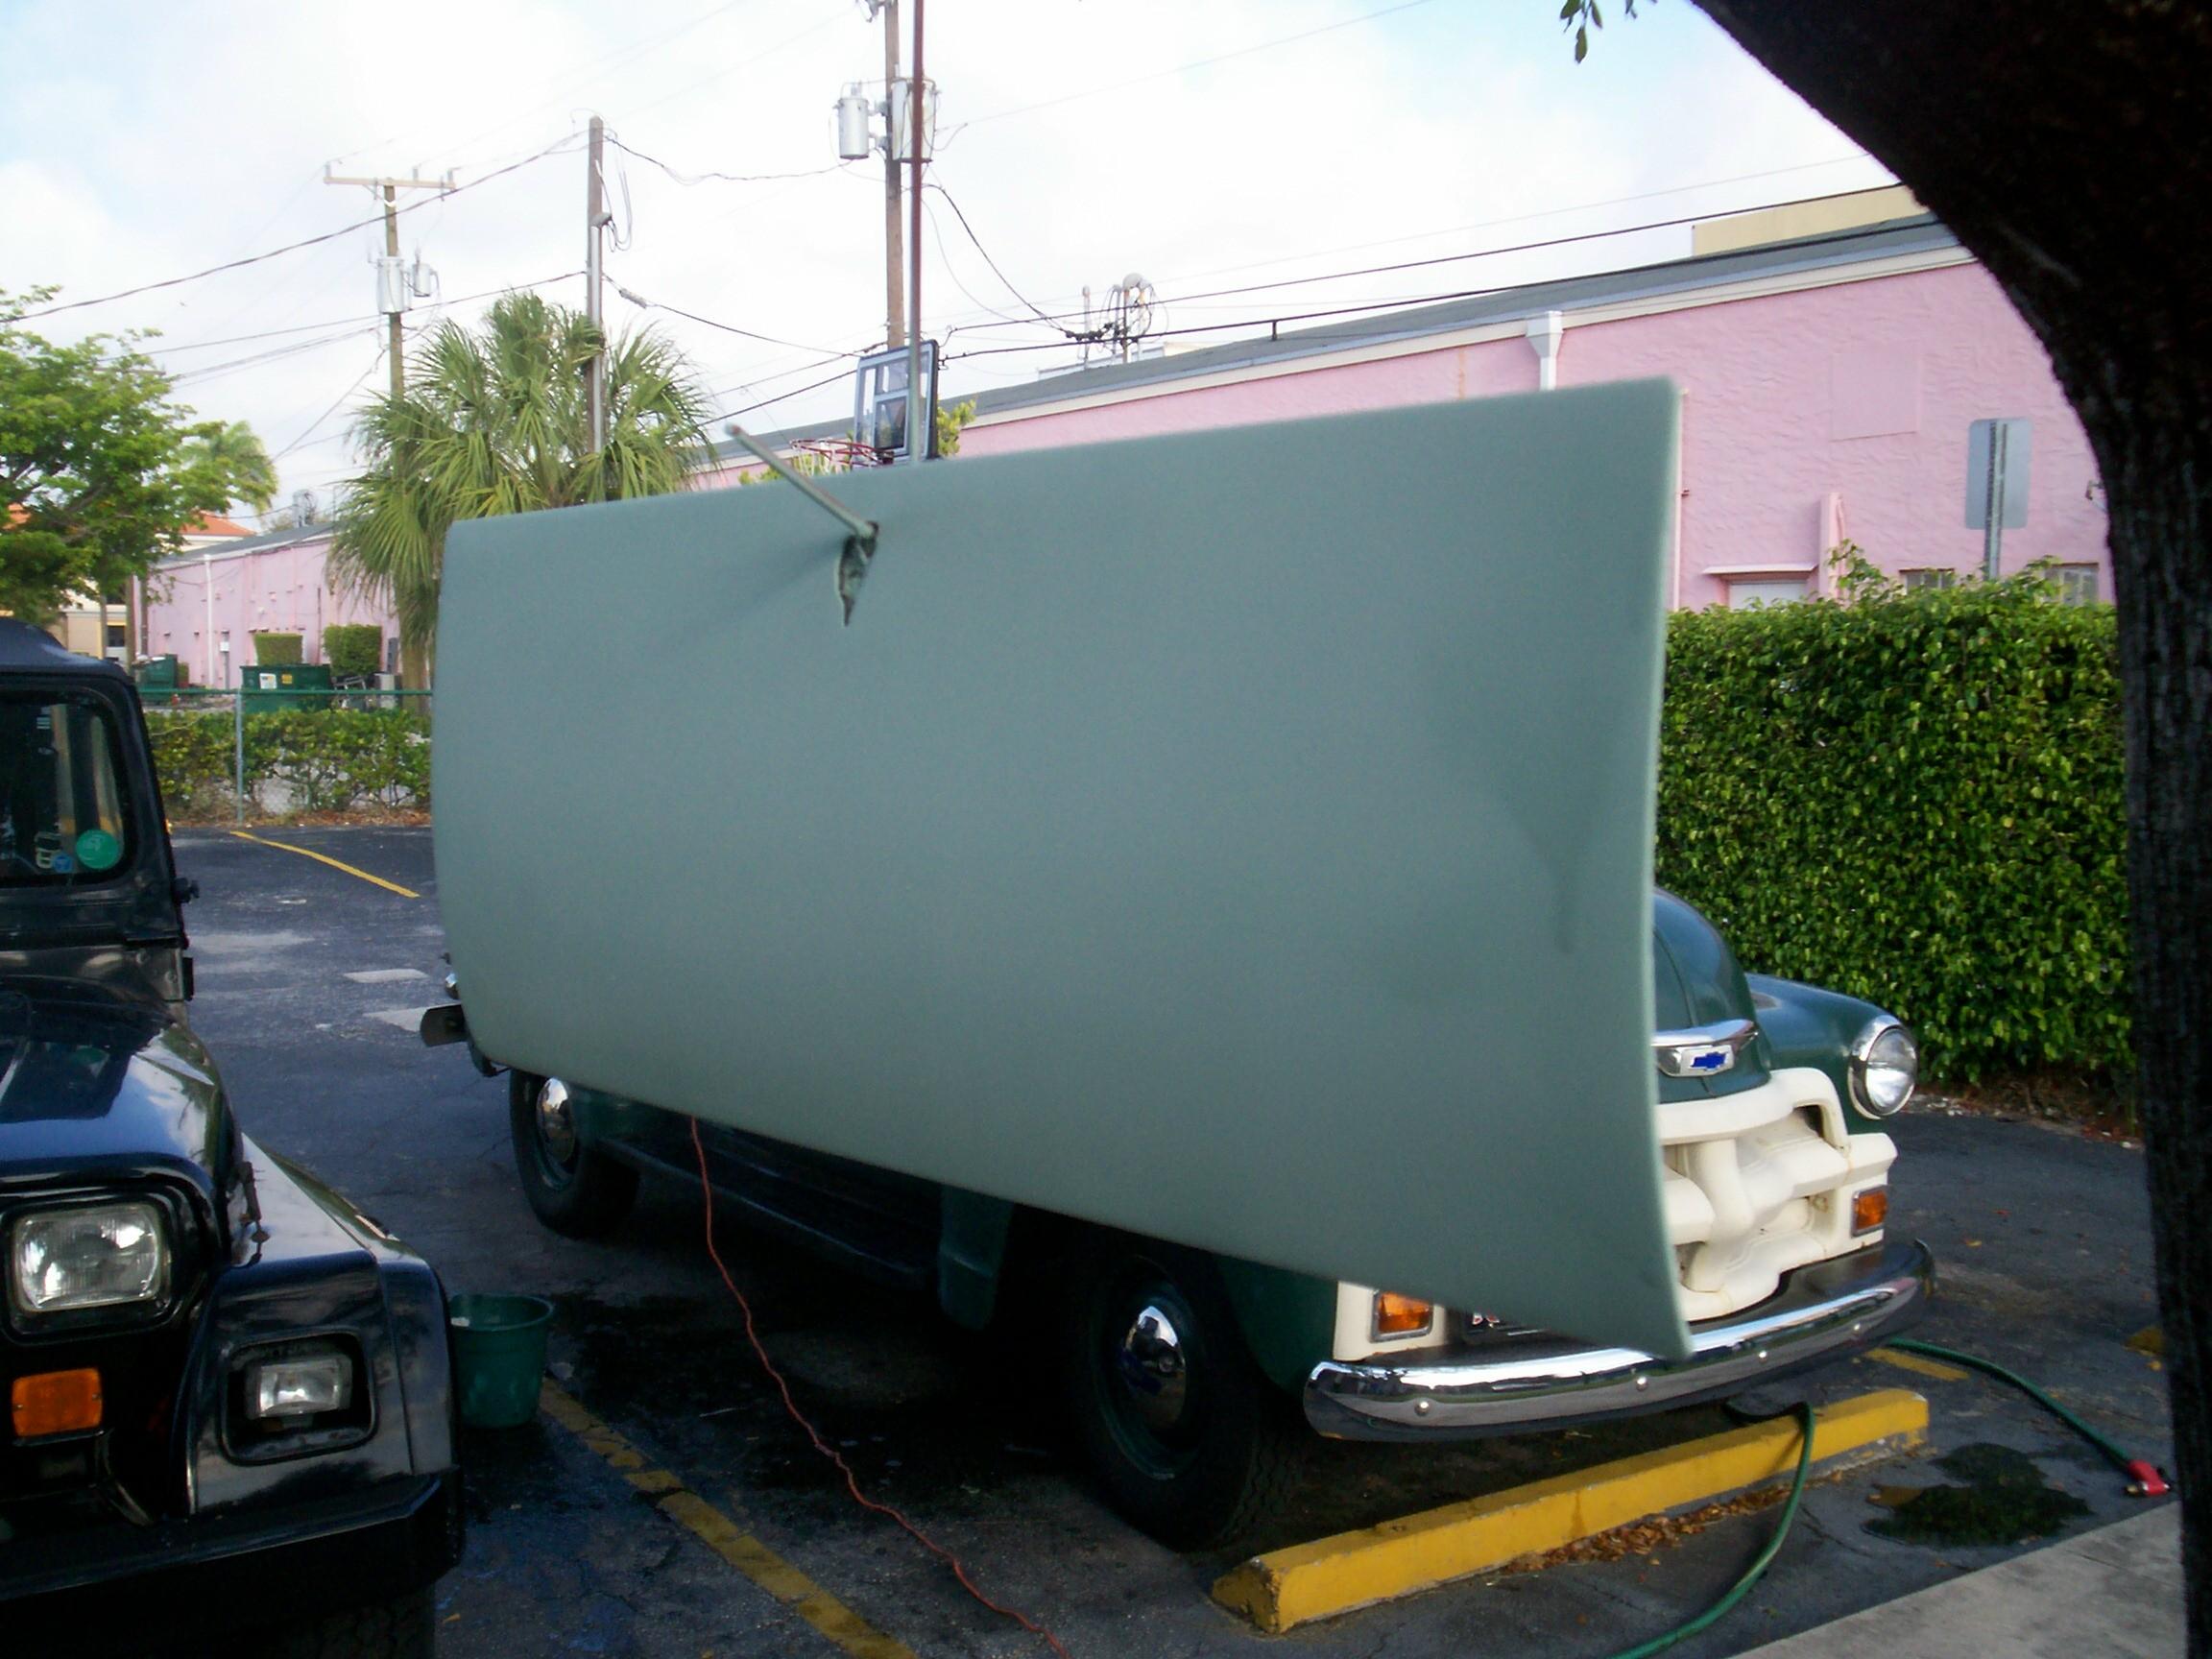
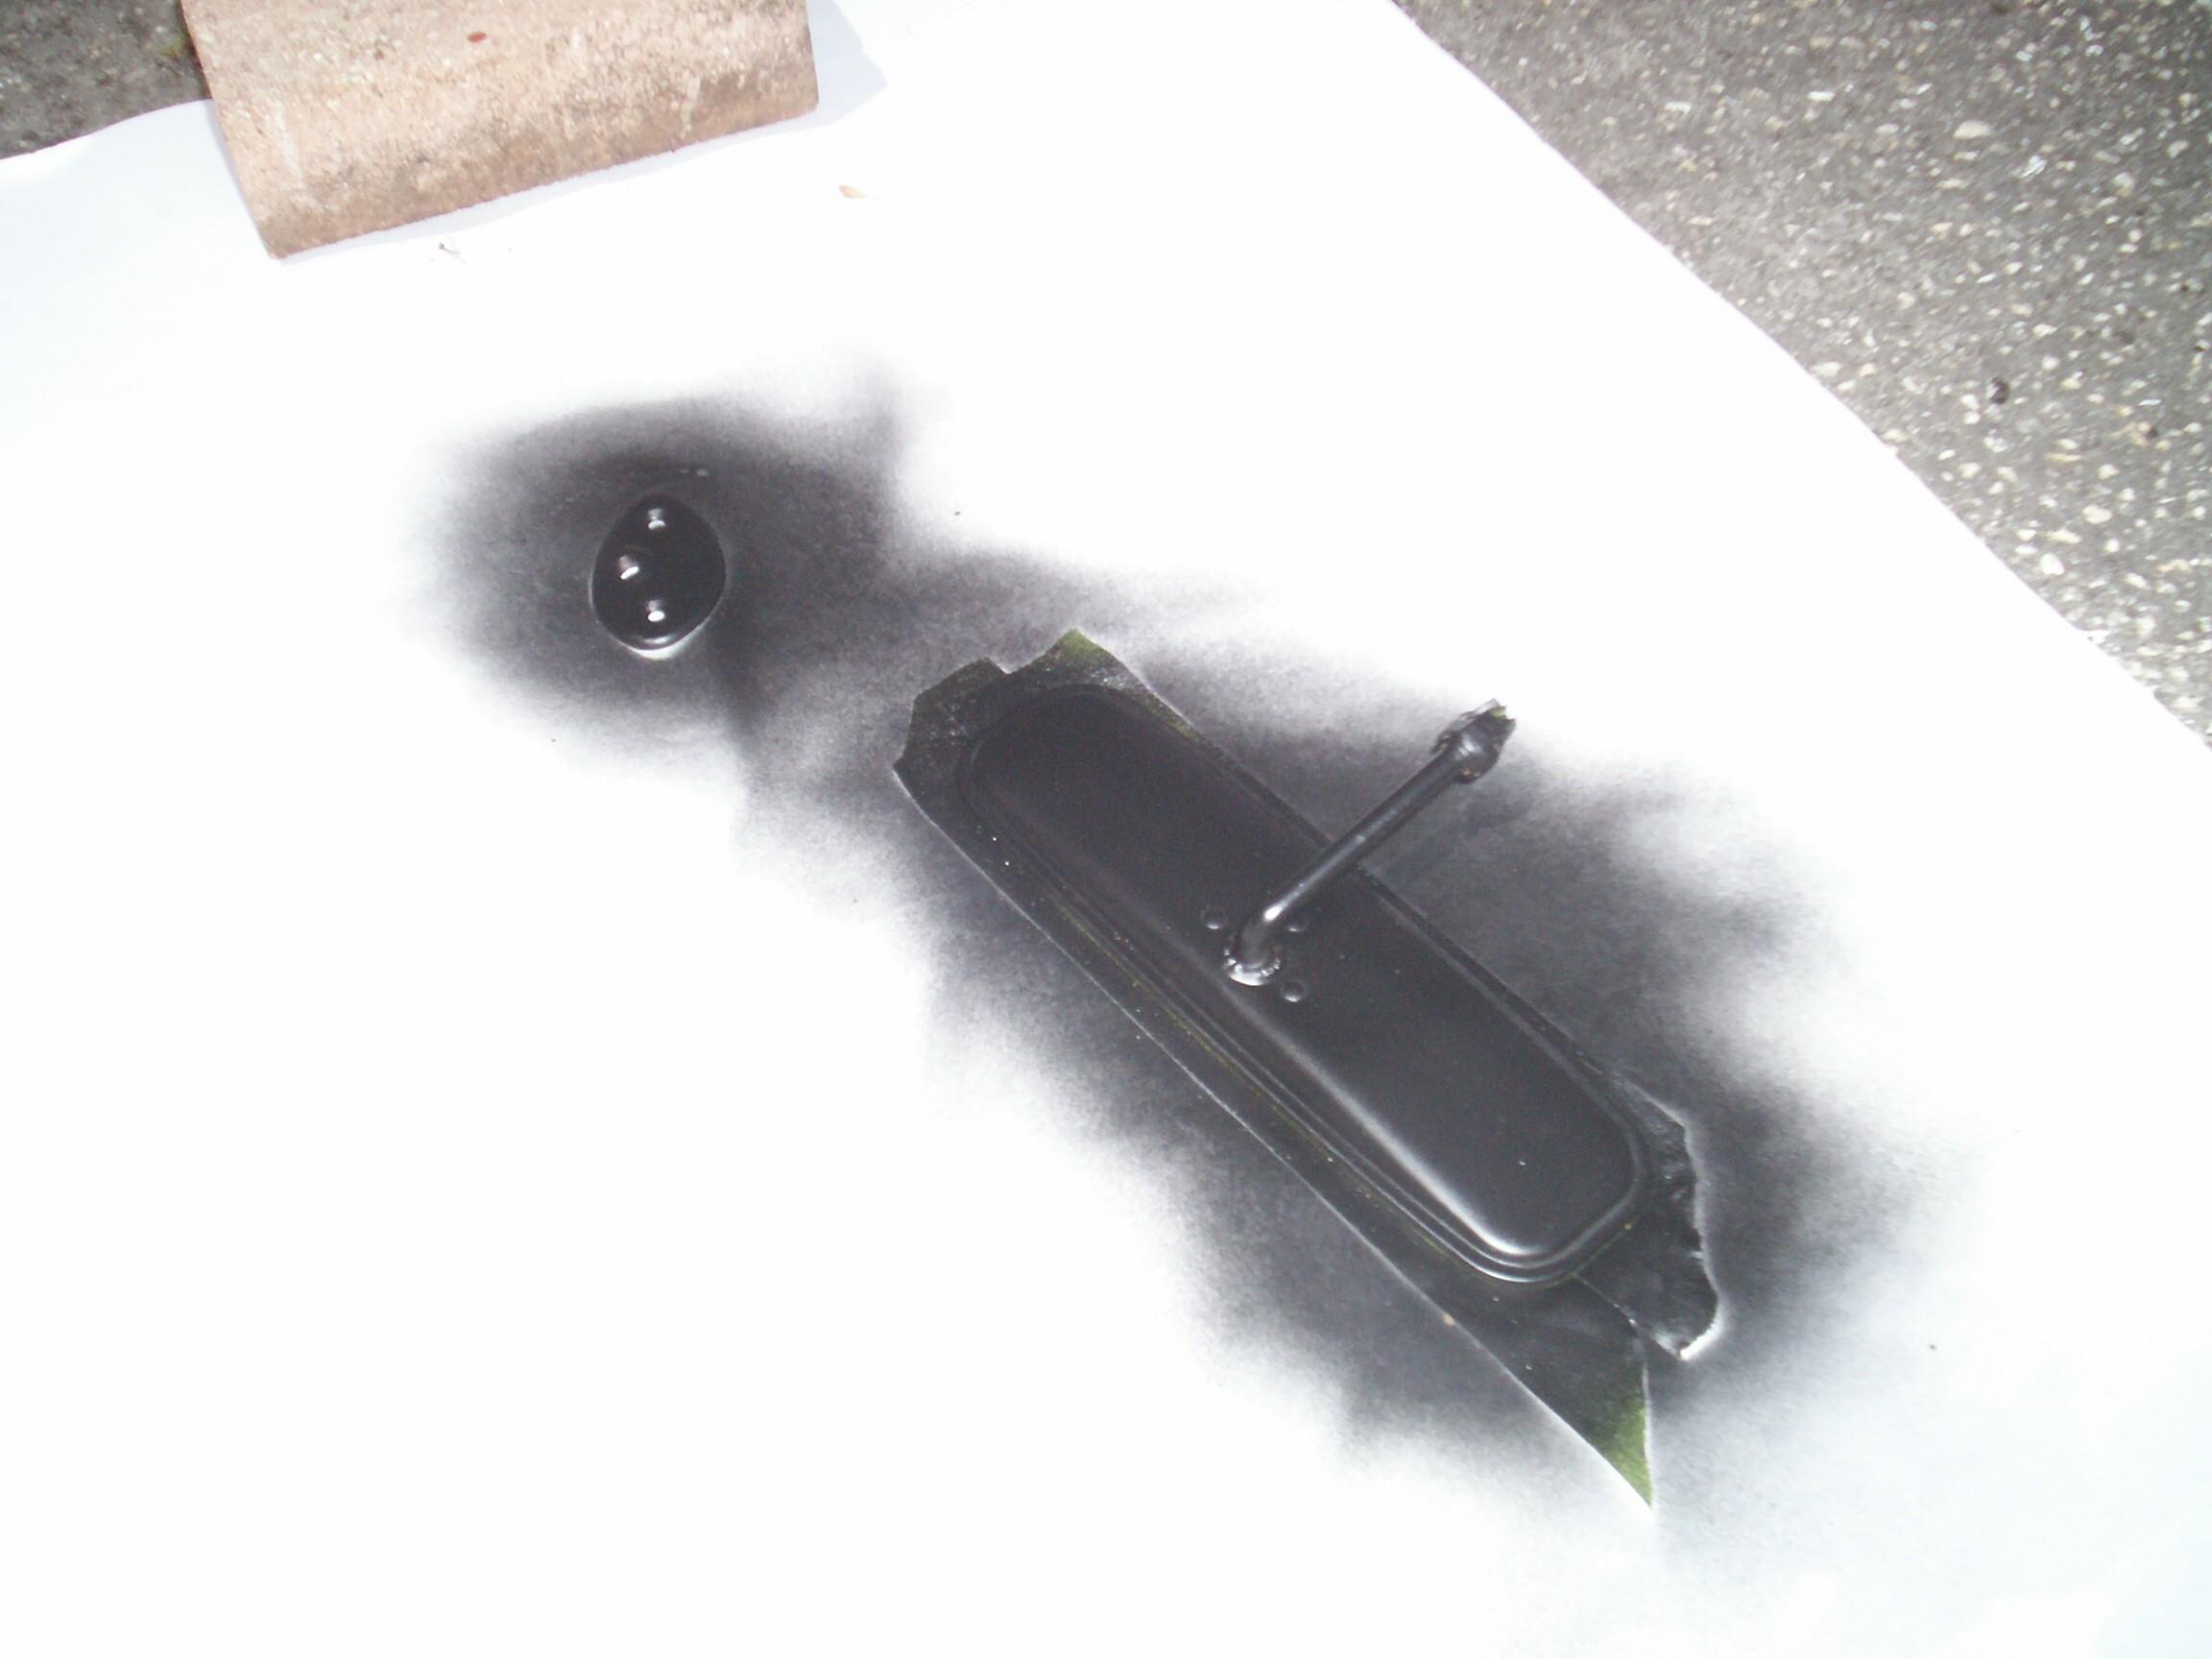 That
was less than satisfying. Mother nature is beating me on this front. I
consoled myself by removing BillyBob's rearview mirror, cleaning it up
some and painting it with Eastwood's OEM Trim Black. Continued to
struggle with small items until it was time to head to the Krash Pad to
get cleaned up for cruise nite.
That
was less than satisfying. Mother nature is beating me on this front. I
consoled myself by removing BillyBob's rearview mirror, cleaning it up
some and painting it with Eastwood's OEM Trim Black. Continued to
struggle with small items until it was time to head to the Krash Pad to
get cleaned up for cruise nite.
March 21st 2008 Good Friday The Boss is in Chicago on business but he called this morning to tell us we could take the afternoon off. I'm getting caught up on the BillyBob log and ordering some parts online for the upcoming clutch and flywheel operations.
 A
couple of days ago, Steve, a fellow OldGMCtrucks.com
member from California, dropped into the Krash Lab. After a brief
BillyBob tech review, Steve presented me with a Cohiba cigar from his
cruise vacation and he and his neice headed on up the peninsula on
their way home.
A
couple of days ago, Steve, a fellow OldGMCtrucks.com
member from California, dropped into the Krash Lab. After a brief
BillyBob tech review, Steve presented me with a Cohiba cigar from his
cruise vacation and he and his neice headed on up the peninsula on
their way home.
It's dawned on me in the last few days that there might be 'nother wrinkle to my flywheel problem. I haven't been able to acount for the fact that the old starter meshed better with the flywheel than the new reman starter. What if the previous owner who converted BillyBob to 12 volt (before JR), had updated the flywheel and starter to 168 tooth 12v? Assumption is the mother of all screwups and I've been assuming that BillyBob's starter and flywheel were original 139 tooth 6v items. I can't tell by looking at the original starter what the voltage is and it cranked fast but not as fast as the reman 6v unit. I guess I'll find out when I take the chewed up flywheel off and count teeth.
March 22nd 2008 The weather people are 80% shure of storms today so there will be no chassis work. I cleaned up the drips and orange peel on the glove box door as soon as I got to the Krash Lab. It's still calm outside and not raining yet so I got the glove box door hung up in BillyBob's tree, PRE Paint Prepped it and started laying down light coats of the Surf Green paint.
This paint is giving a flat finish for some unknown reason and I got more runs trying to lay down a wet coat. I've only got half a can of paint left so I stopped and went on to the parking brake. These are the last items I want to paint with this color in this detailing cycle. I'll refinish these brake parts and come back to the glove box door with the remaining paint.
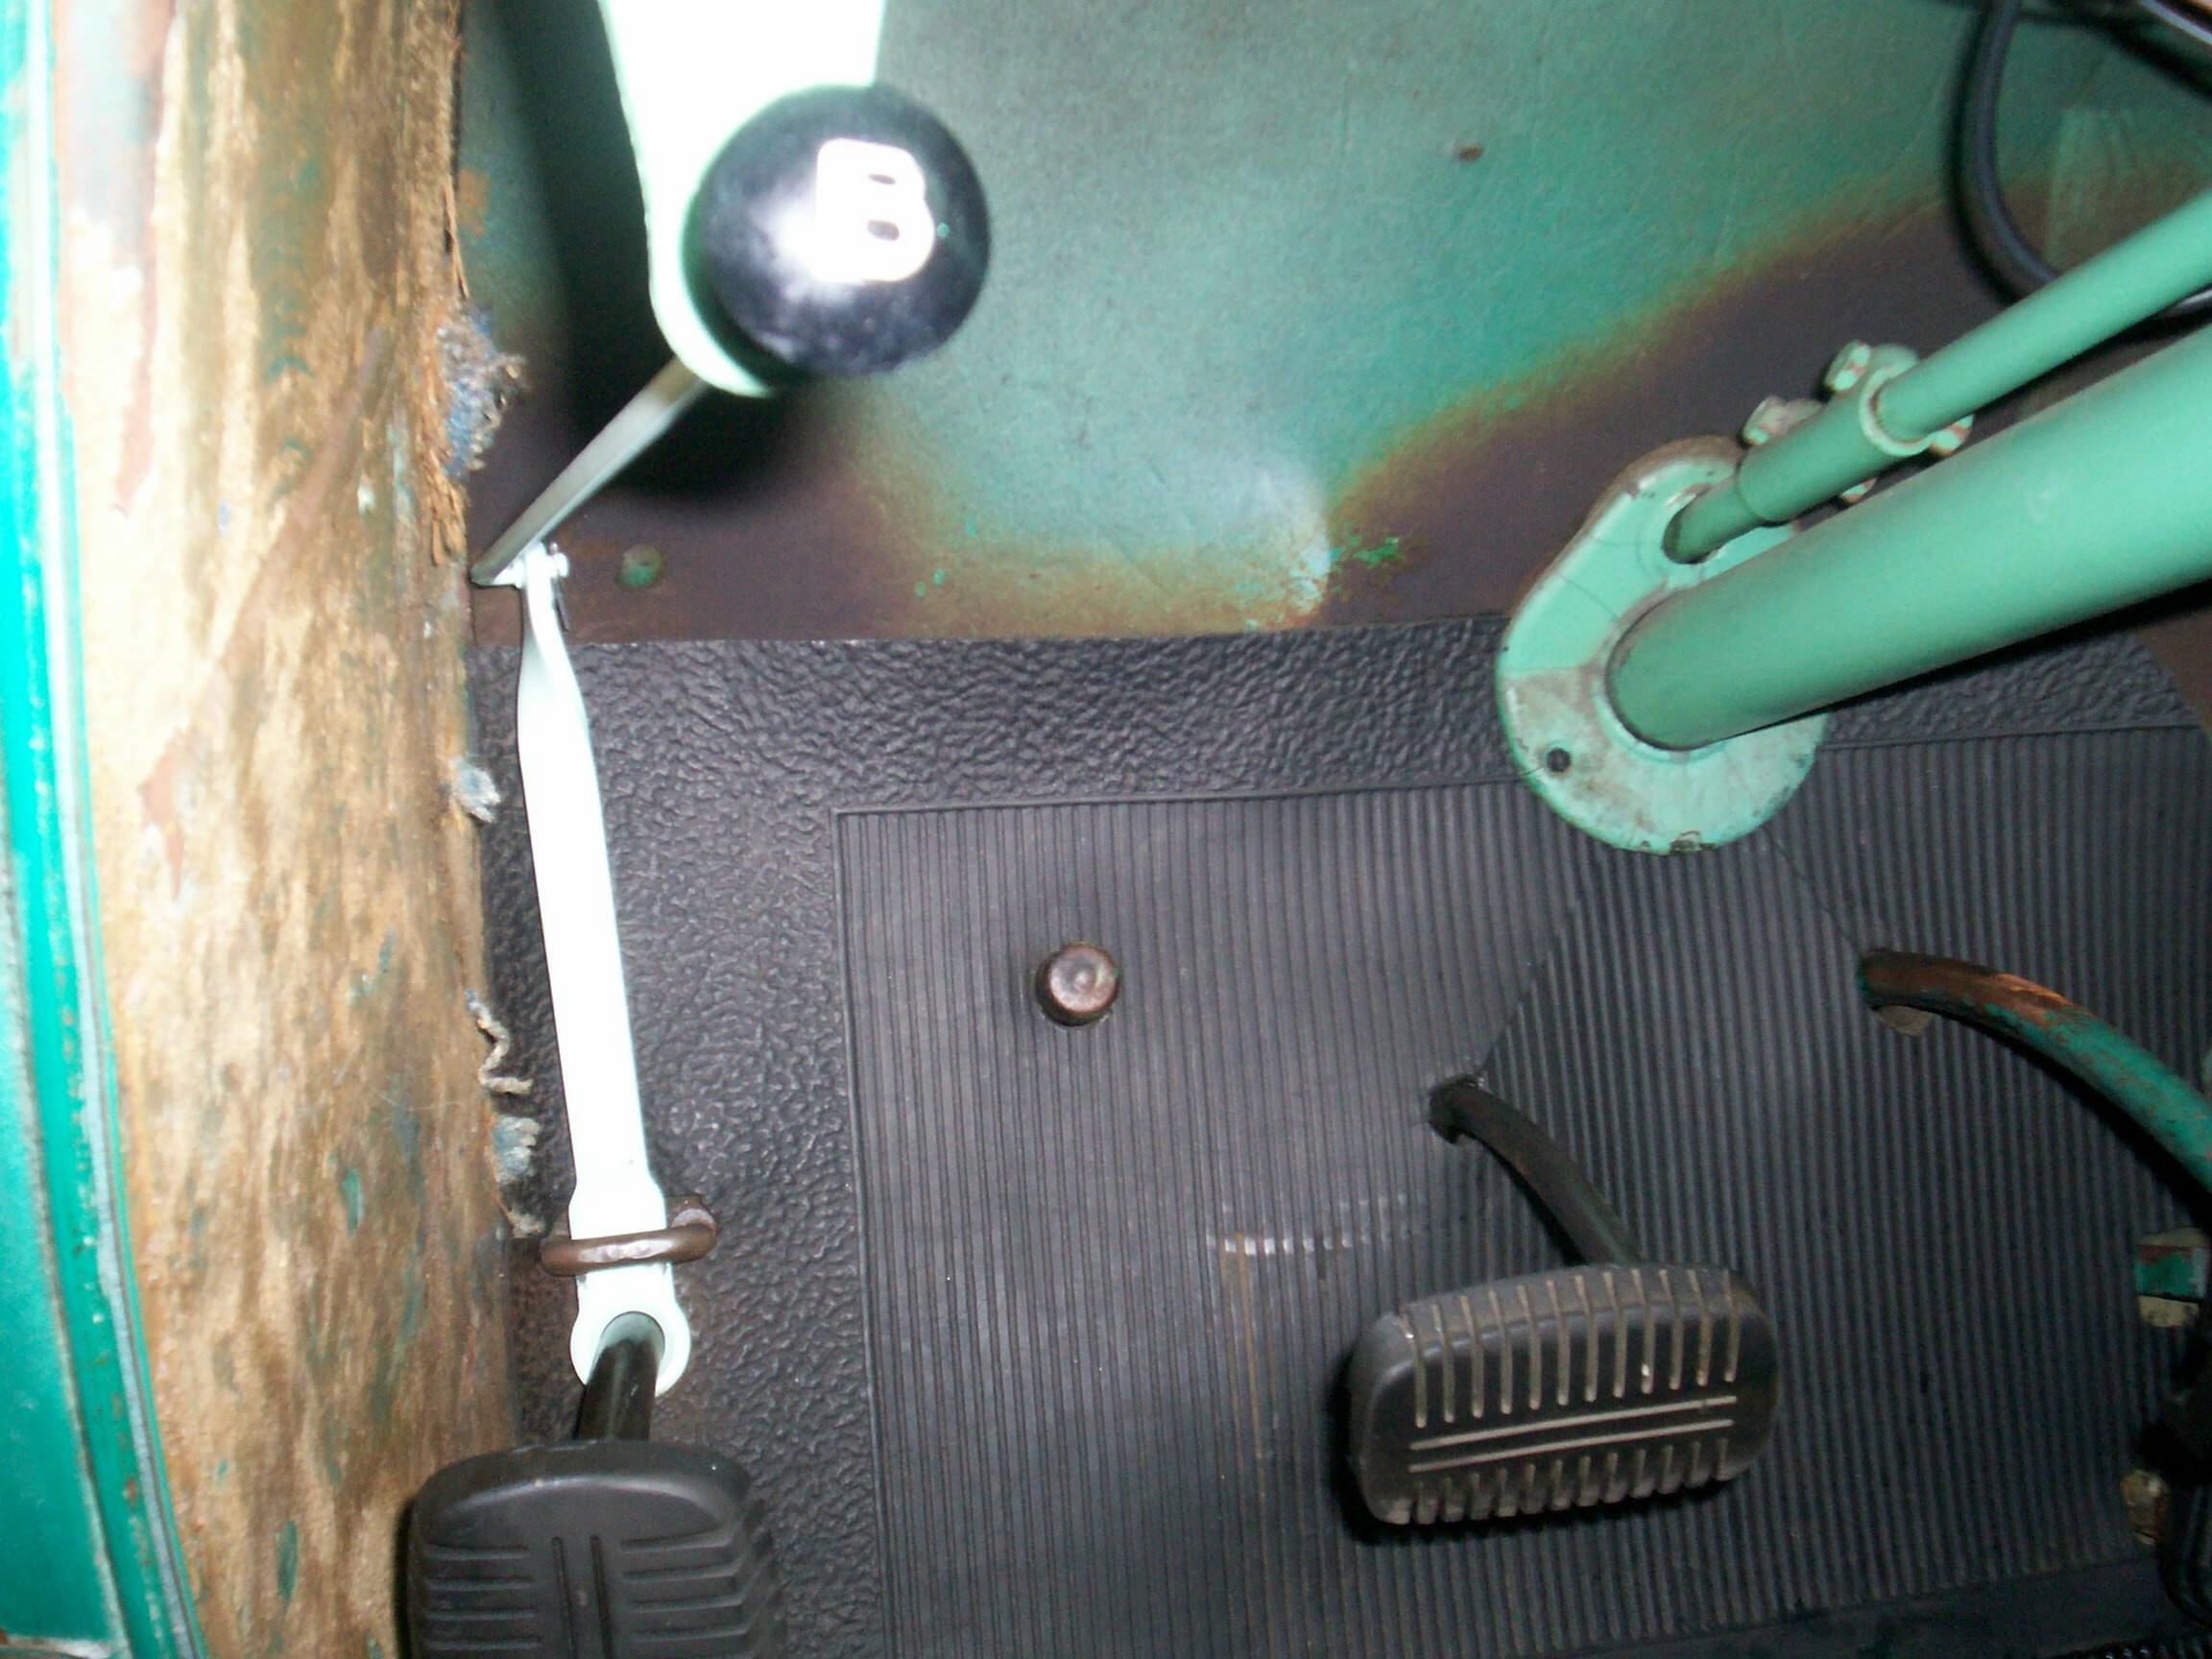 Got
the inside-the-cab portion of the parking brake apart and went after
the two items I want to paint with the wire cup in electric angle
grinder method. Hung them up in the tree and PRE Paint Prepped them.
Gave them an application of Eastwood's Self-Etching Primer and put all
the fasteners and small parts in the tumbler for a cleaning session.
That was followed up by a polishing session with the dri-shine media.
The brake parts were given a few coats of Surf Green. They were dry by
the time the polishing session was over. I was pondering how to freshen
up the parking brake knob when the rains started. The rain didn't stop.
The weather report got it right this time.
Got
the inside-the-cab portion of the parking brake apart and went after
the two items I want to paint with the wire cup in electric angle
grinder method. Hung them up in the tree and PRE Paint Prepped them.
Gave them an application of Eastwood's Self-Etching Primer and put all
the fasteners and small parts in the tumbler for a cleaning session.
That was followed up by a polishing session with the dri-shine media.
The brake parts were given a few coats of Surf Green. They were dry by
the time the polishing session was over. I was pondering how to freshen
up the parking brake knob when the rains started. The rain didn't stop.
The weather report got it right this time.
The beer of the day is Penn Dark Lager. I've actually been to this brewery. It's in Pittsburgh. Almost twenty years ago, my brother got married. I was going up for the wedding but a couple of weeks before that, JR's best man and former shipmate, Tom Trempus, called me up. He wanted me to fly up as the secret guest at the batchelor party. It meant two airline trips a week apart but he didn't have to twist my arm for very long. The look on my brother's face when he saw me among the other batchelor party participants was priceless. Anyway, our first stop was the Penn Brewery which has a restaurant and a outdoor beer garden.
March 23rd 2008 Easter Sunday Same rain forecast today and it was wet when I got to the Krash Lab. I walked around a bum sleeping on the sidewalk and went inside to prep the glove box door for its last paint session with the Surf Green. When I came out after daybreak to hang the glove box door up in the tree, he was gone.
Started laying out light coats to finish out the rattlecan. The paint is still laying down flat but I'm not gonna screw it up again by getting too wet with the coats. The brake parts I painted yesterday were glossy enuf so I think the problem lies with the filler primer or the residue of the polyester putty. I probably should have used a sealer before starting with the color coats.
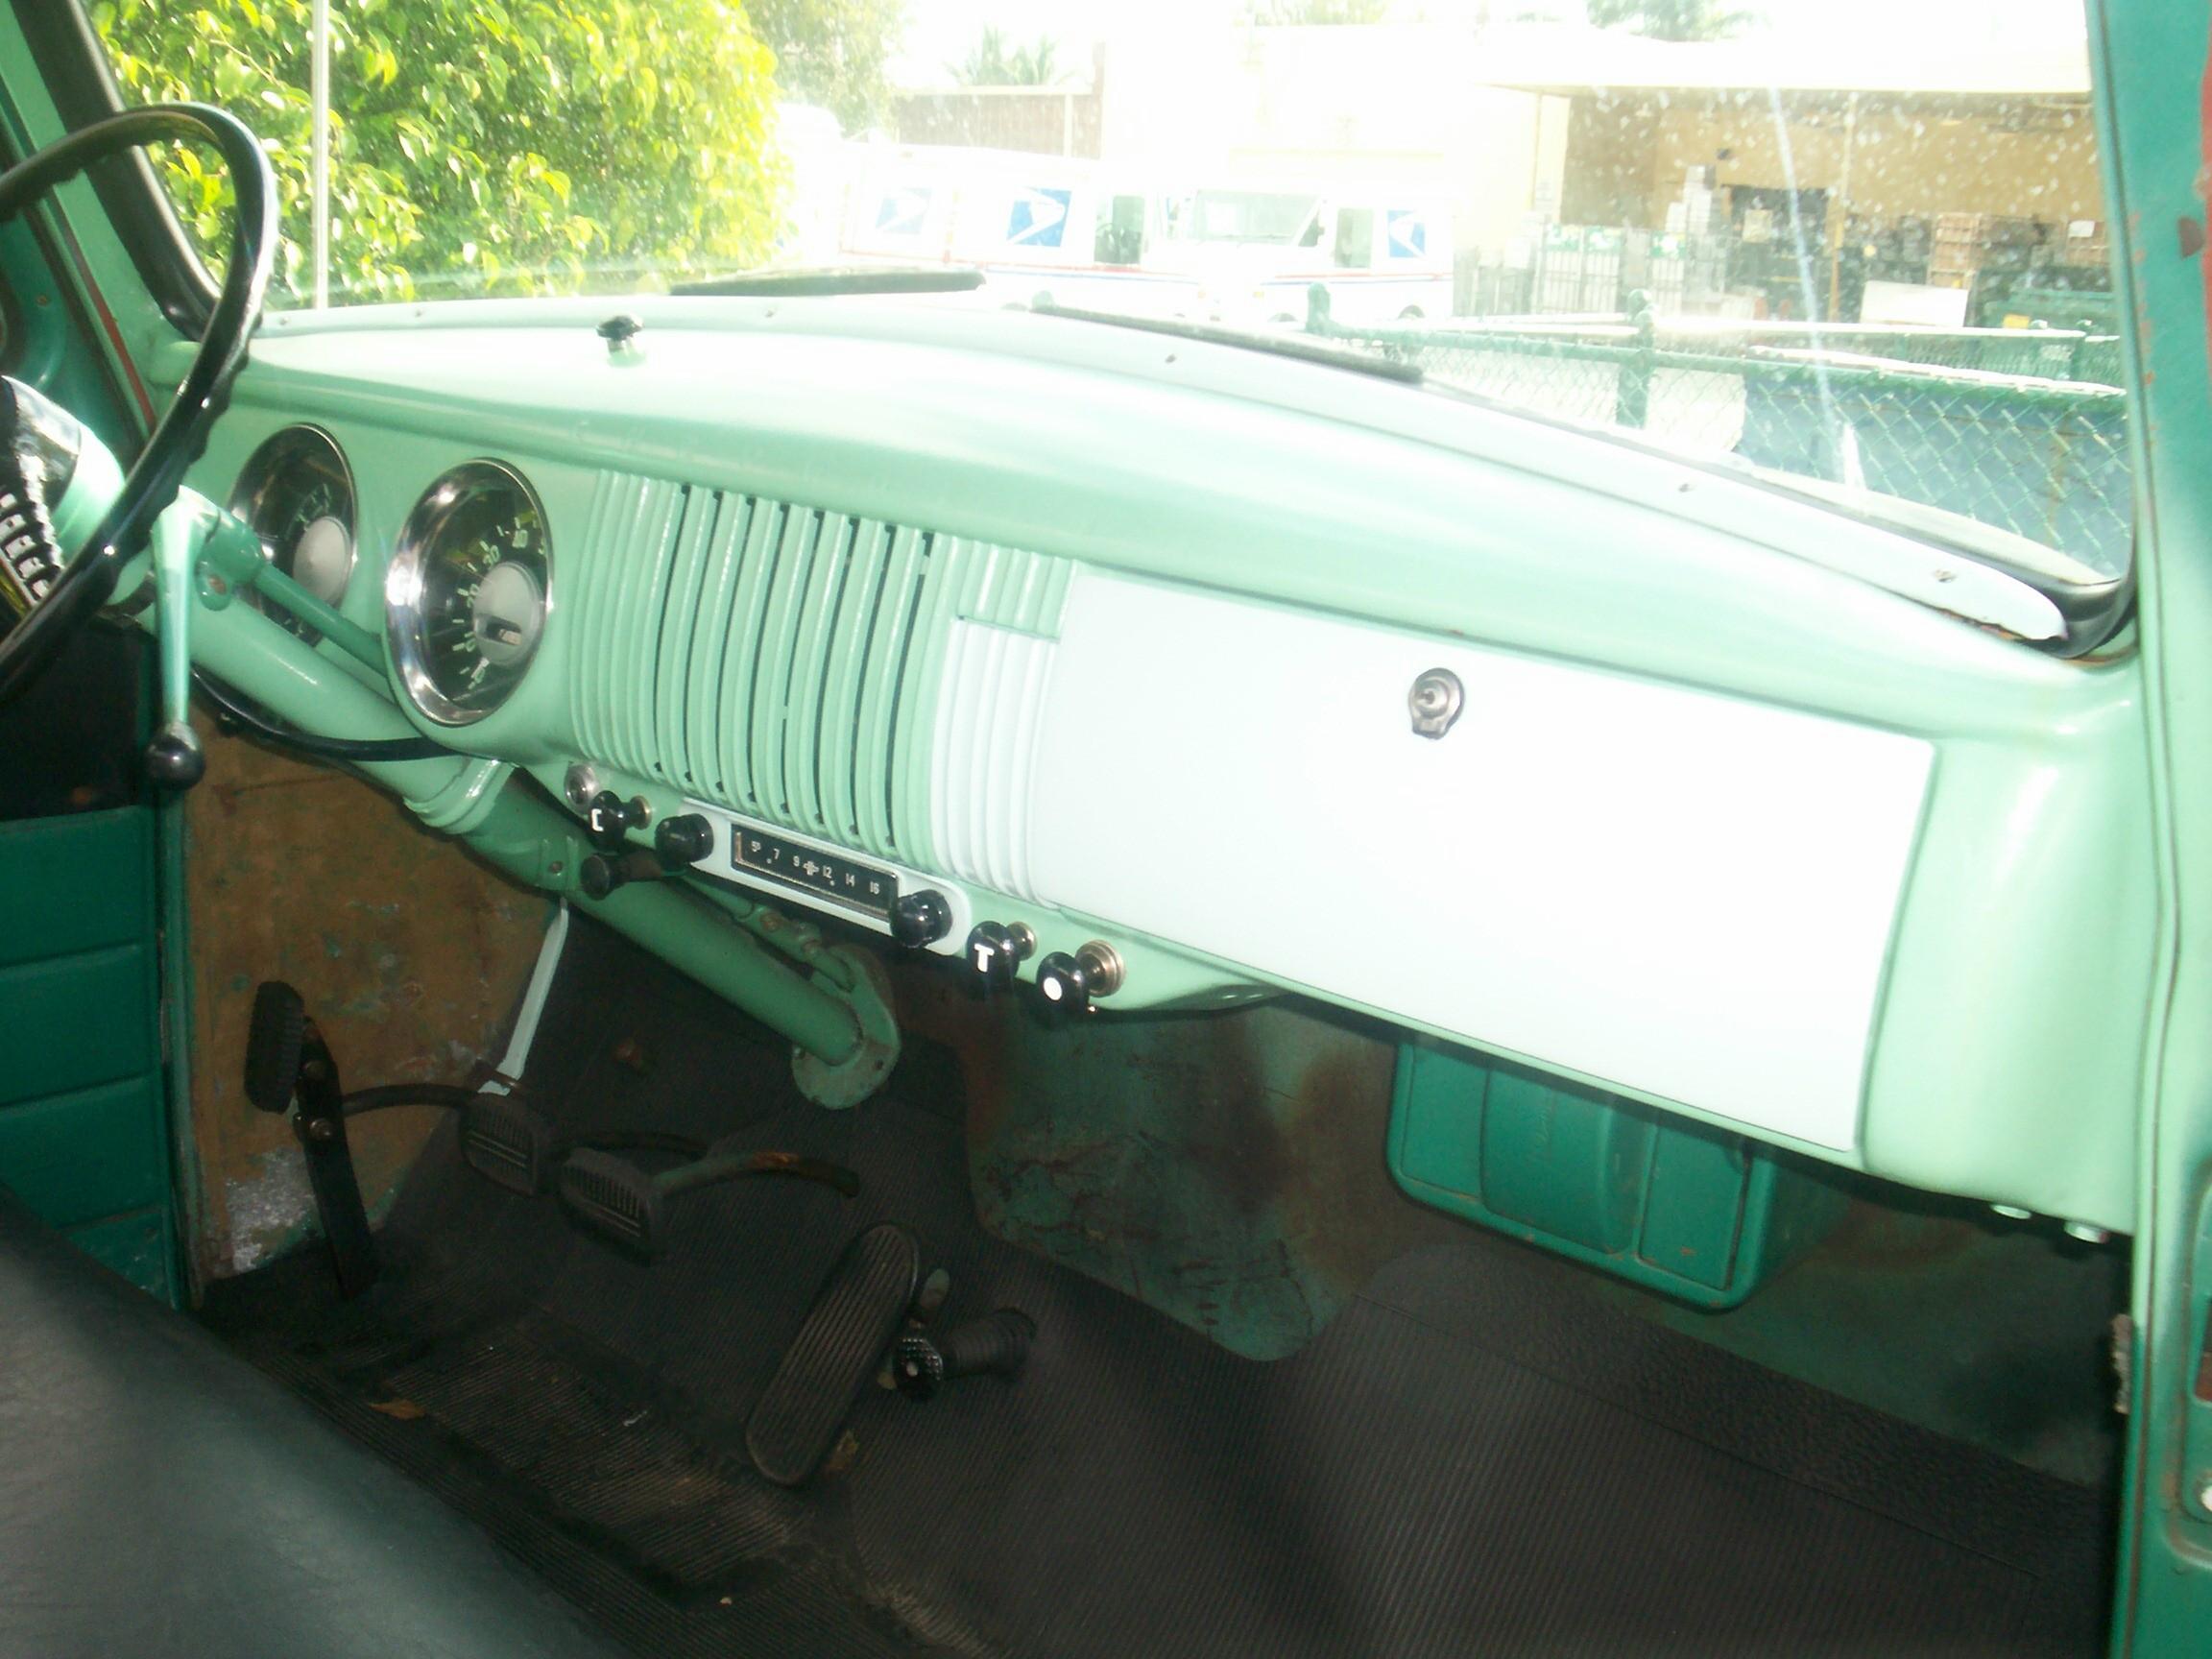
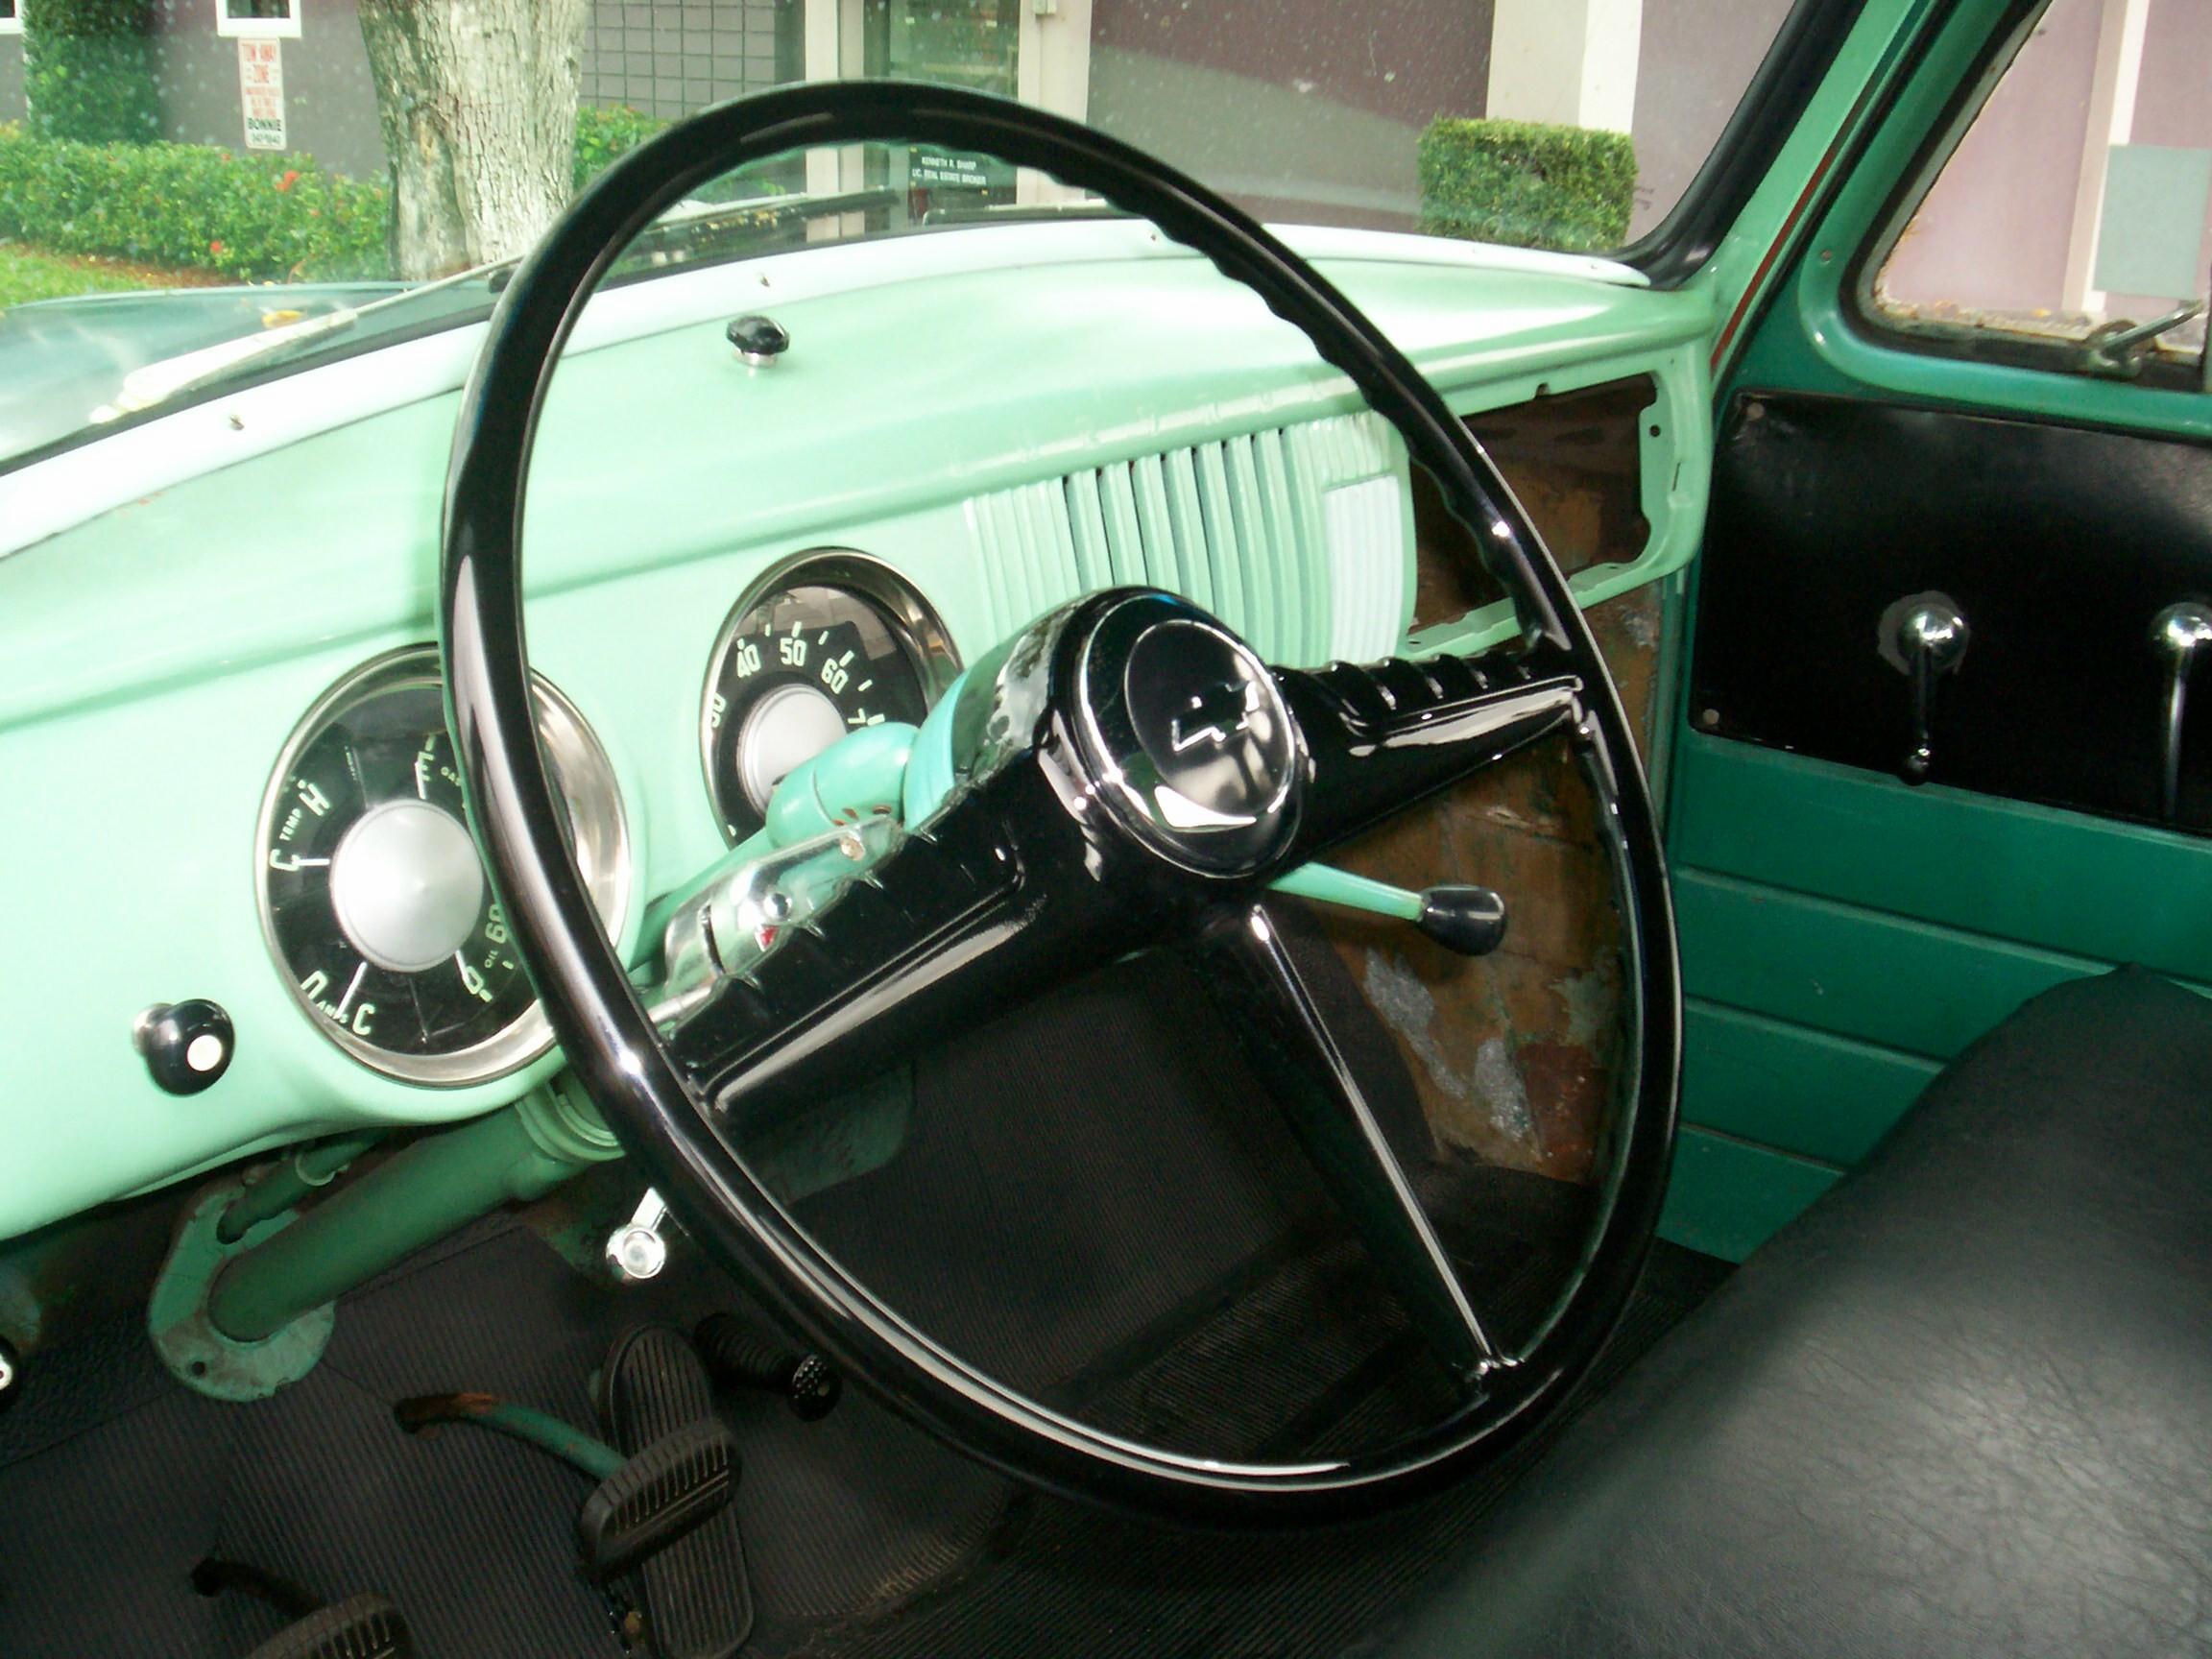 BillyBob's
steering wheel is starting to look the worst for wear so it was removed
and replaced for the time being with a repop steering wheel I got from Classic Parts of America
a month or so back. This will allow me to refresh BillyBob's wheel at
leasure. I got out the flitz ball and polish to shine up the horn
button and knobs. It did a good job in short order. It's tryin' to rain
on me but it hasn't started just yet.
BillyBob's
steering wheel is starting to look the worst for wear so it was removed
and replaced for the time being with a repop steering wheel I got from Classic Parts of America
a month or so back. This will allow me to refresh BillyBob's wheel at
leasure. I got out the flitz ball and polish to shine up the horn
button and knobs. It did a good job in short order. It's tryin' to rain
on me but it hasn't started just yet.
The monsoon rains started early afternoon. Like yesterday, they didn't stop. Closed up work for this weekend and went home to the Krash Pad. No cruise-in tonite either. The sportsbar where it takes place is closed for Easter.
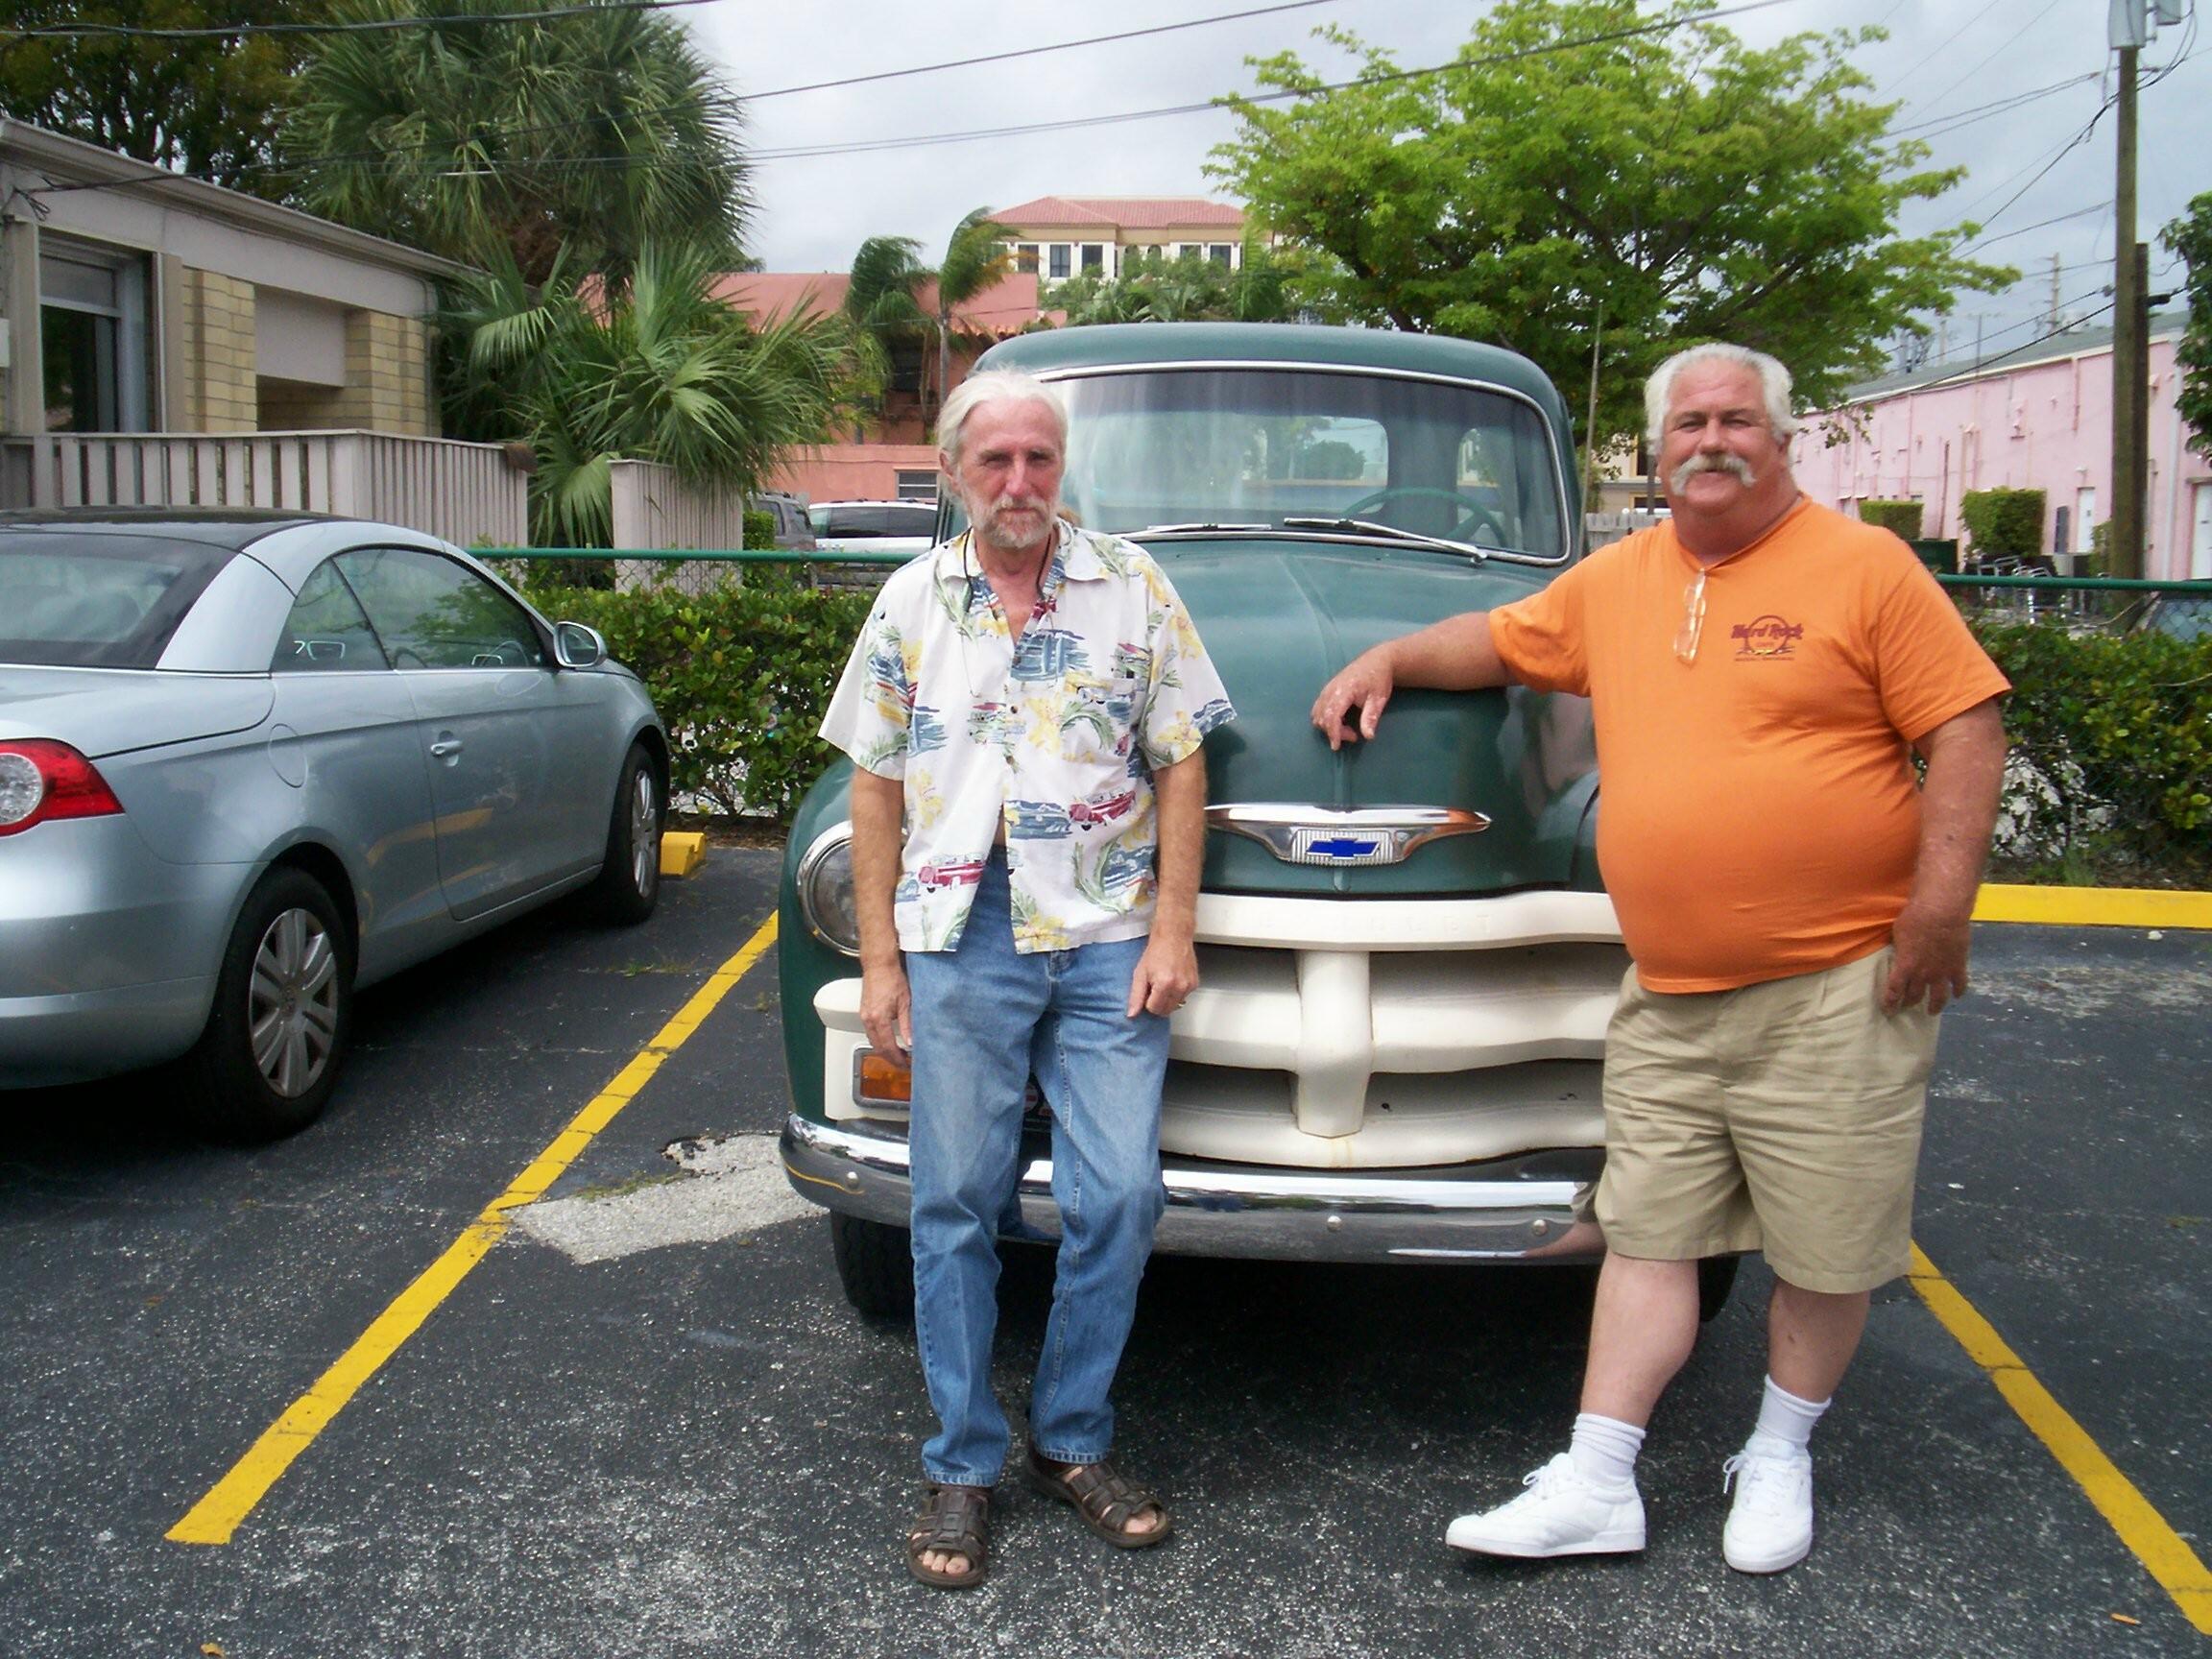
March 25th 2008 Neil Row (row_wood at OldGMCtrucks.com) is visiting in Boca this week from Calgary. He called me monday nite about a meetup. It was good timing because I've been going to a weekly tuesday cruise nite that I found out about a few weeks ago. It's held at a Longhorn Steakhouse in Delray Beach just north of Boca Raton. Neil's companions dropped him off at the Krash Lab about 6 pm and we cruised up there in BillyBob. Had a devil of a time getting BillyBob started with the worsening flywheel chatter. I think this is his last excursion before I pull that thing.
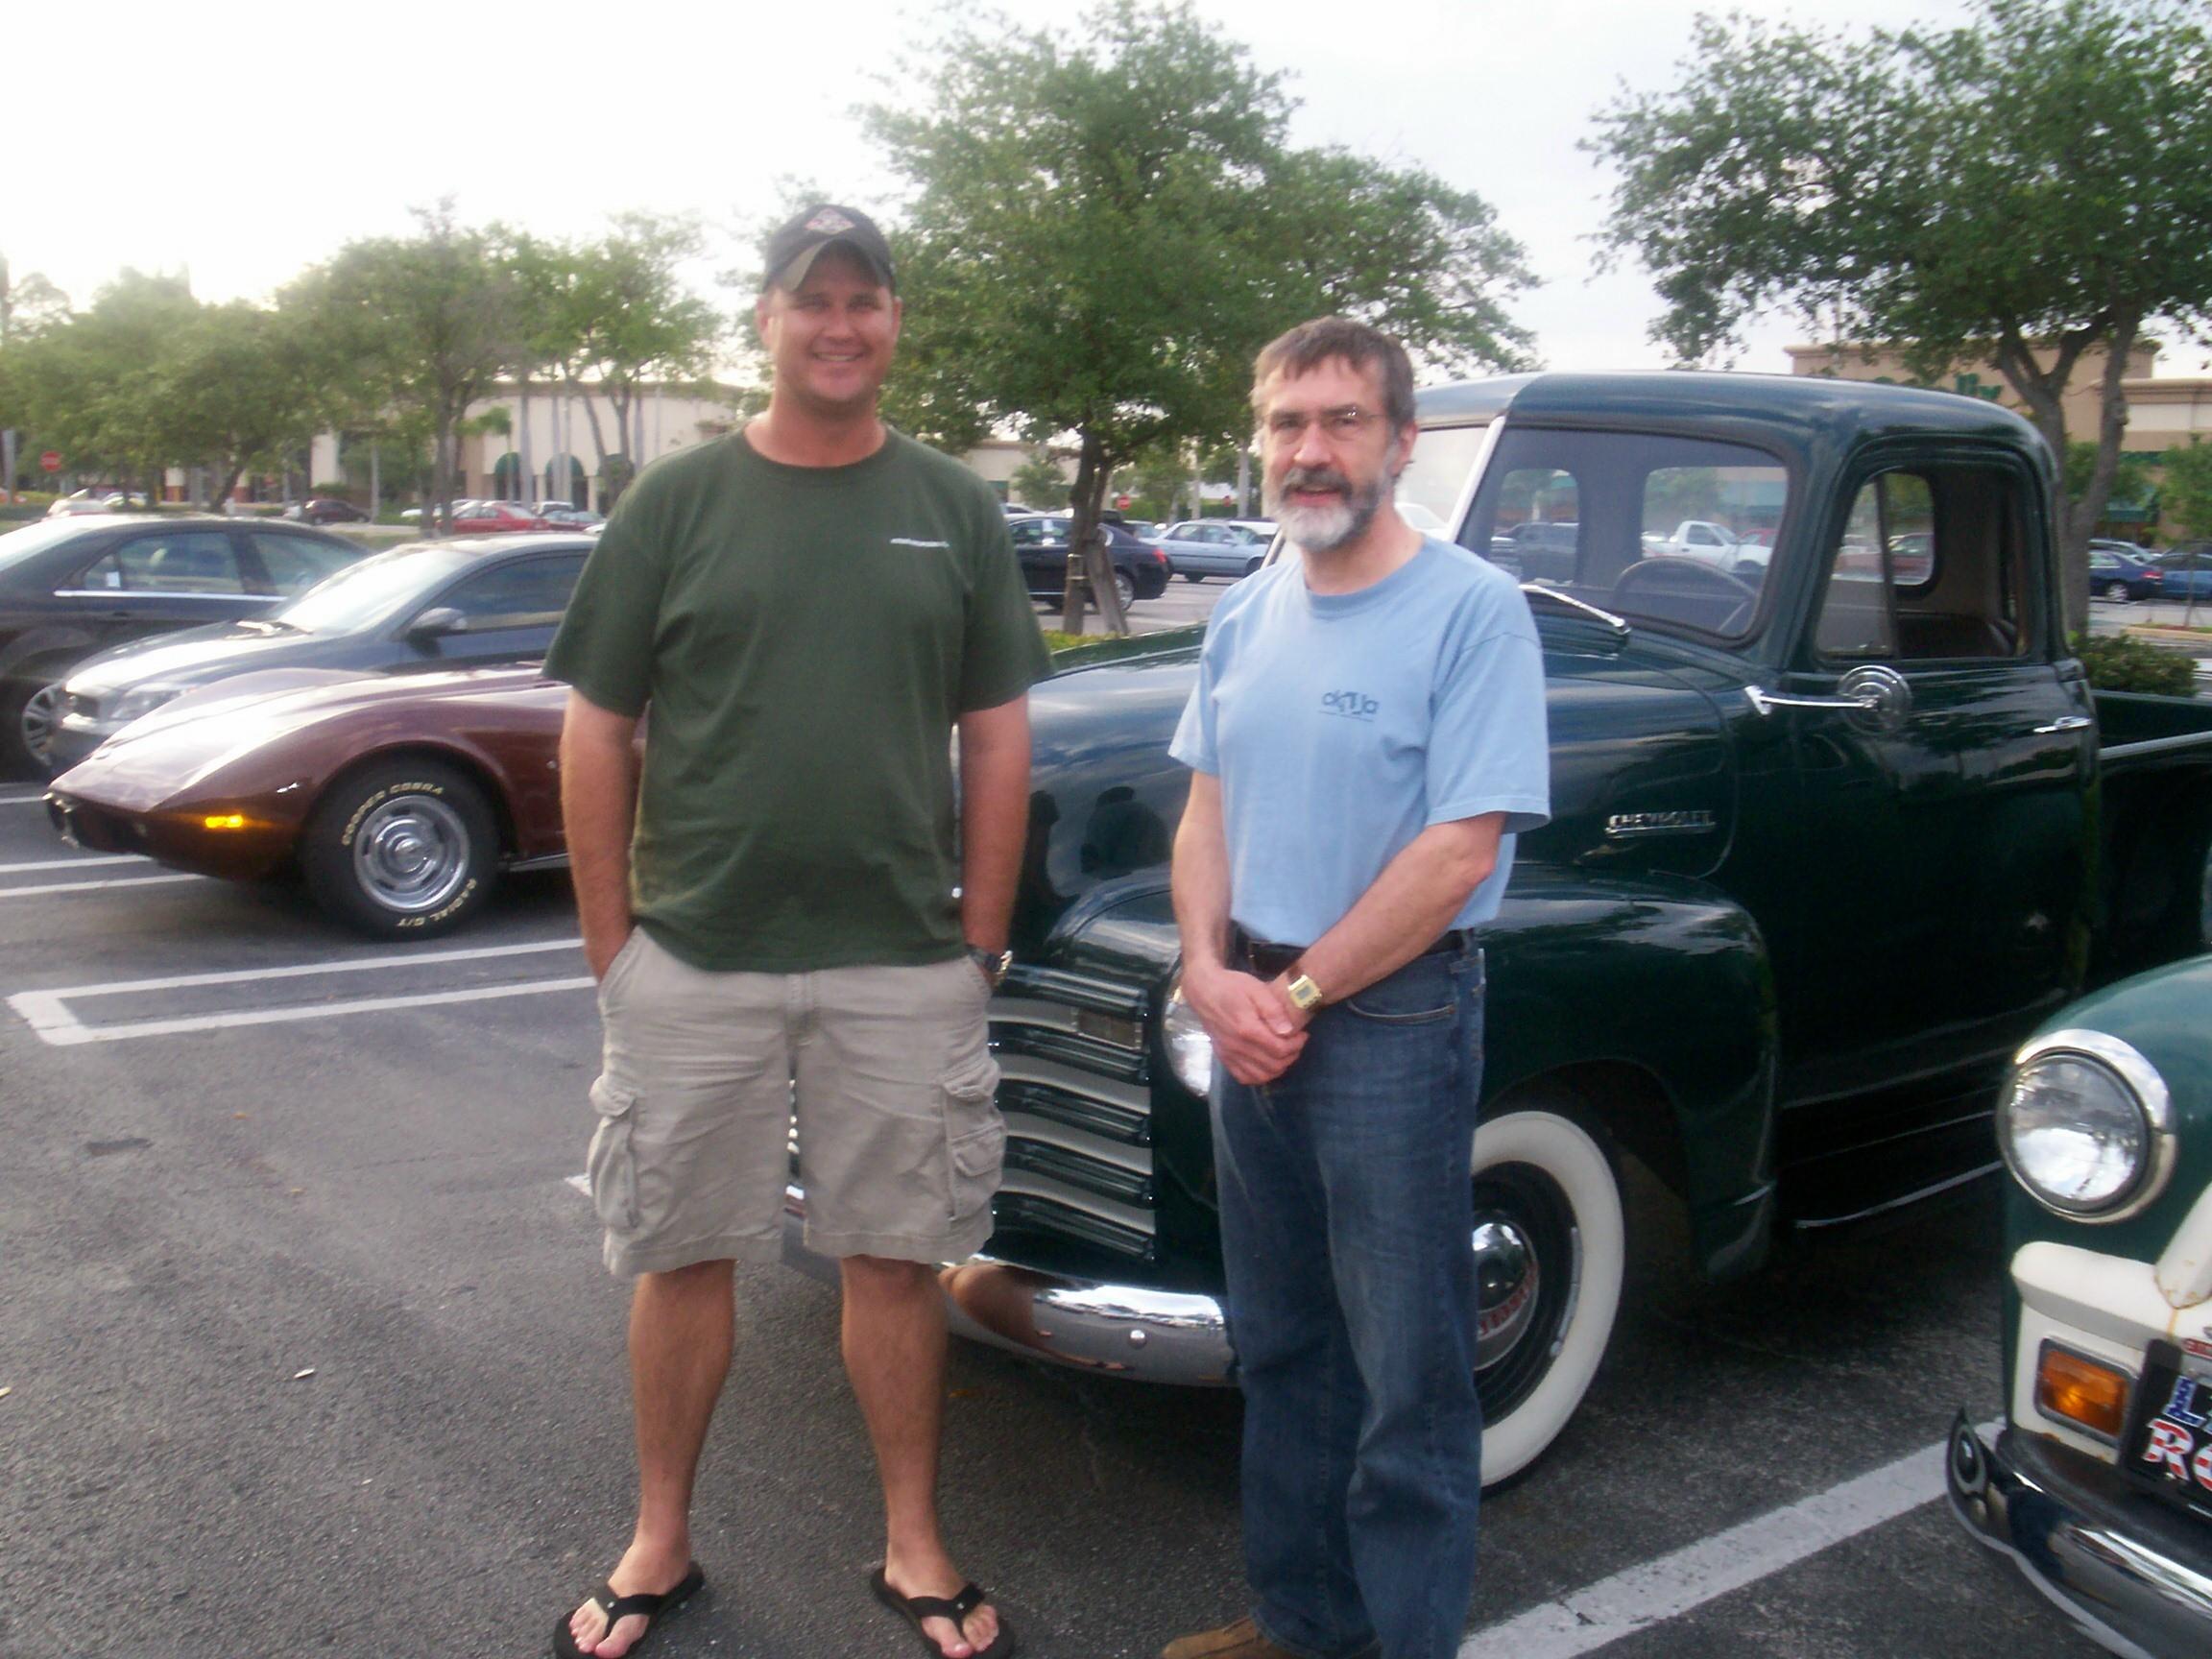 We
ran into Morgan (fla51 at Stovebolt.com)
as soon as we arrived and parked next to him. Morgan has a beaut of a
'51 Chebby. Morgan is on the left in the pic in front of his truck and
Neil is on the right. We spent a couple of happy hours learning more
about our trucks. When it was over, Neil treated me to supper and
BillyBob got him back to the timeshare unit in Boca without mishap. I
drove BillyBob back to the Krash Lab and parked him where I plan to
drop the tranny again this weekend if I don't end up at Barrett-Jackson
with the Boss.
We
ran into Morgan (fla51 at Stovebolt.com)
as soon as we arrived and parked next to him. Morgan has a beaut of a
'51 Chebby. Morgan is on the left in the pic in front of his truck and
Neil is on the right. We spent a couple of happy hours learning more
about our trucks. When it was over, Neil treated me to supper and
BillyBob got him back to the timeshare unit in Boca without mishap. I
drove BillyBob back to the Krash Lab and parked him where I plan to
drop the tranny again this weekend if I don't end up at Barrett-Jackson
with the Boss.
 March
29th 2008 The weather
was good upon arrival at the Krash lab just before dawn. I'm 'sposed to
meet up with the boss at his house between 10:30 and 11 to go up to the
Barrett-Jackson auction so there won't be any heavy work under the
shadetree today. I'm gonna start with the glove box. All the repop
parts arrived monday.
March
29th 2008 The weather
was good upon arrival at the Krash lab just before dawn. I'm 'sposed to
meet up with the boss at his house between 10:30 and 11 to go up to the
Barrett-Jackson auction so there won't be any heavy work under the
shadetree today. I'm gonna start with the glove box. All the repop
parts arrived monday.
Took a look at the hinge photo from last episode (before disassembly) and put it back together first. Cleaned up the hinge pin and lightly lubed it with white lithium grease. Got the springs positioned and worked the pin back between the leaves. I wasn't quite careful enuf and a little bit of paint chipped off one leaf. ~!@#$%^
Took the glove box out to the truck and worked it into position behind the dashboard. This thing is a heavy cardboard that is stapled together. It has sheetmetal speednuts stamped into place on the backside for easy assembly. My co-worker, George Nagy, observed that you could remove the staples and have a ready-made template for making a sheetmetal glove box if you so desired. It went into place easily with flanged sheetmetal screws which I only snugged up loosely for the moment. The last row of three screws on the bottom also secure the hinge leaf.
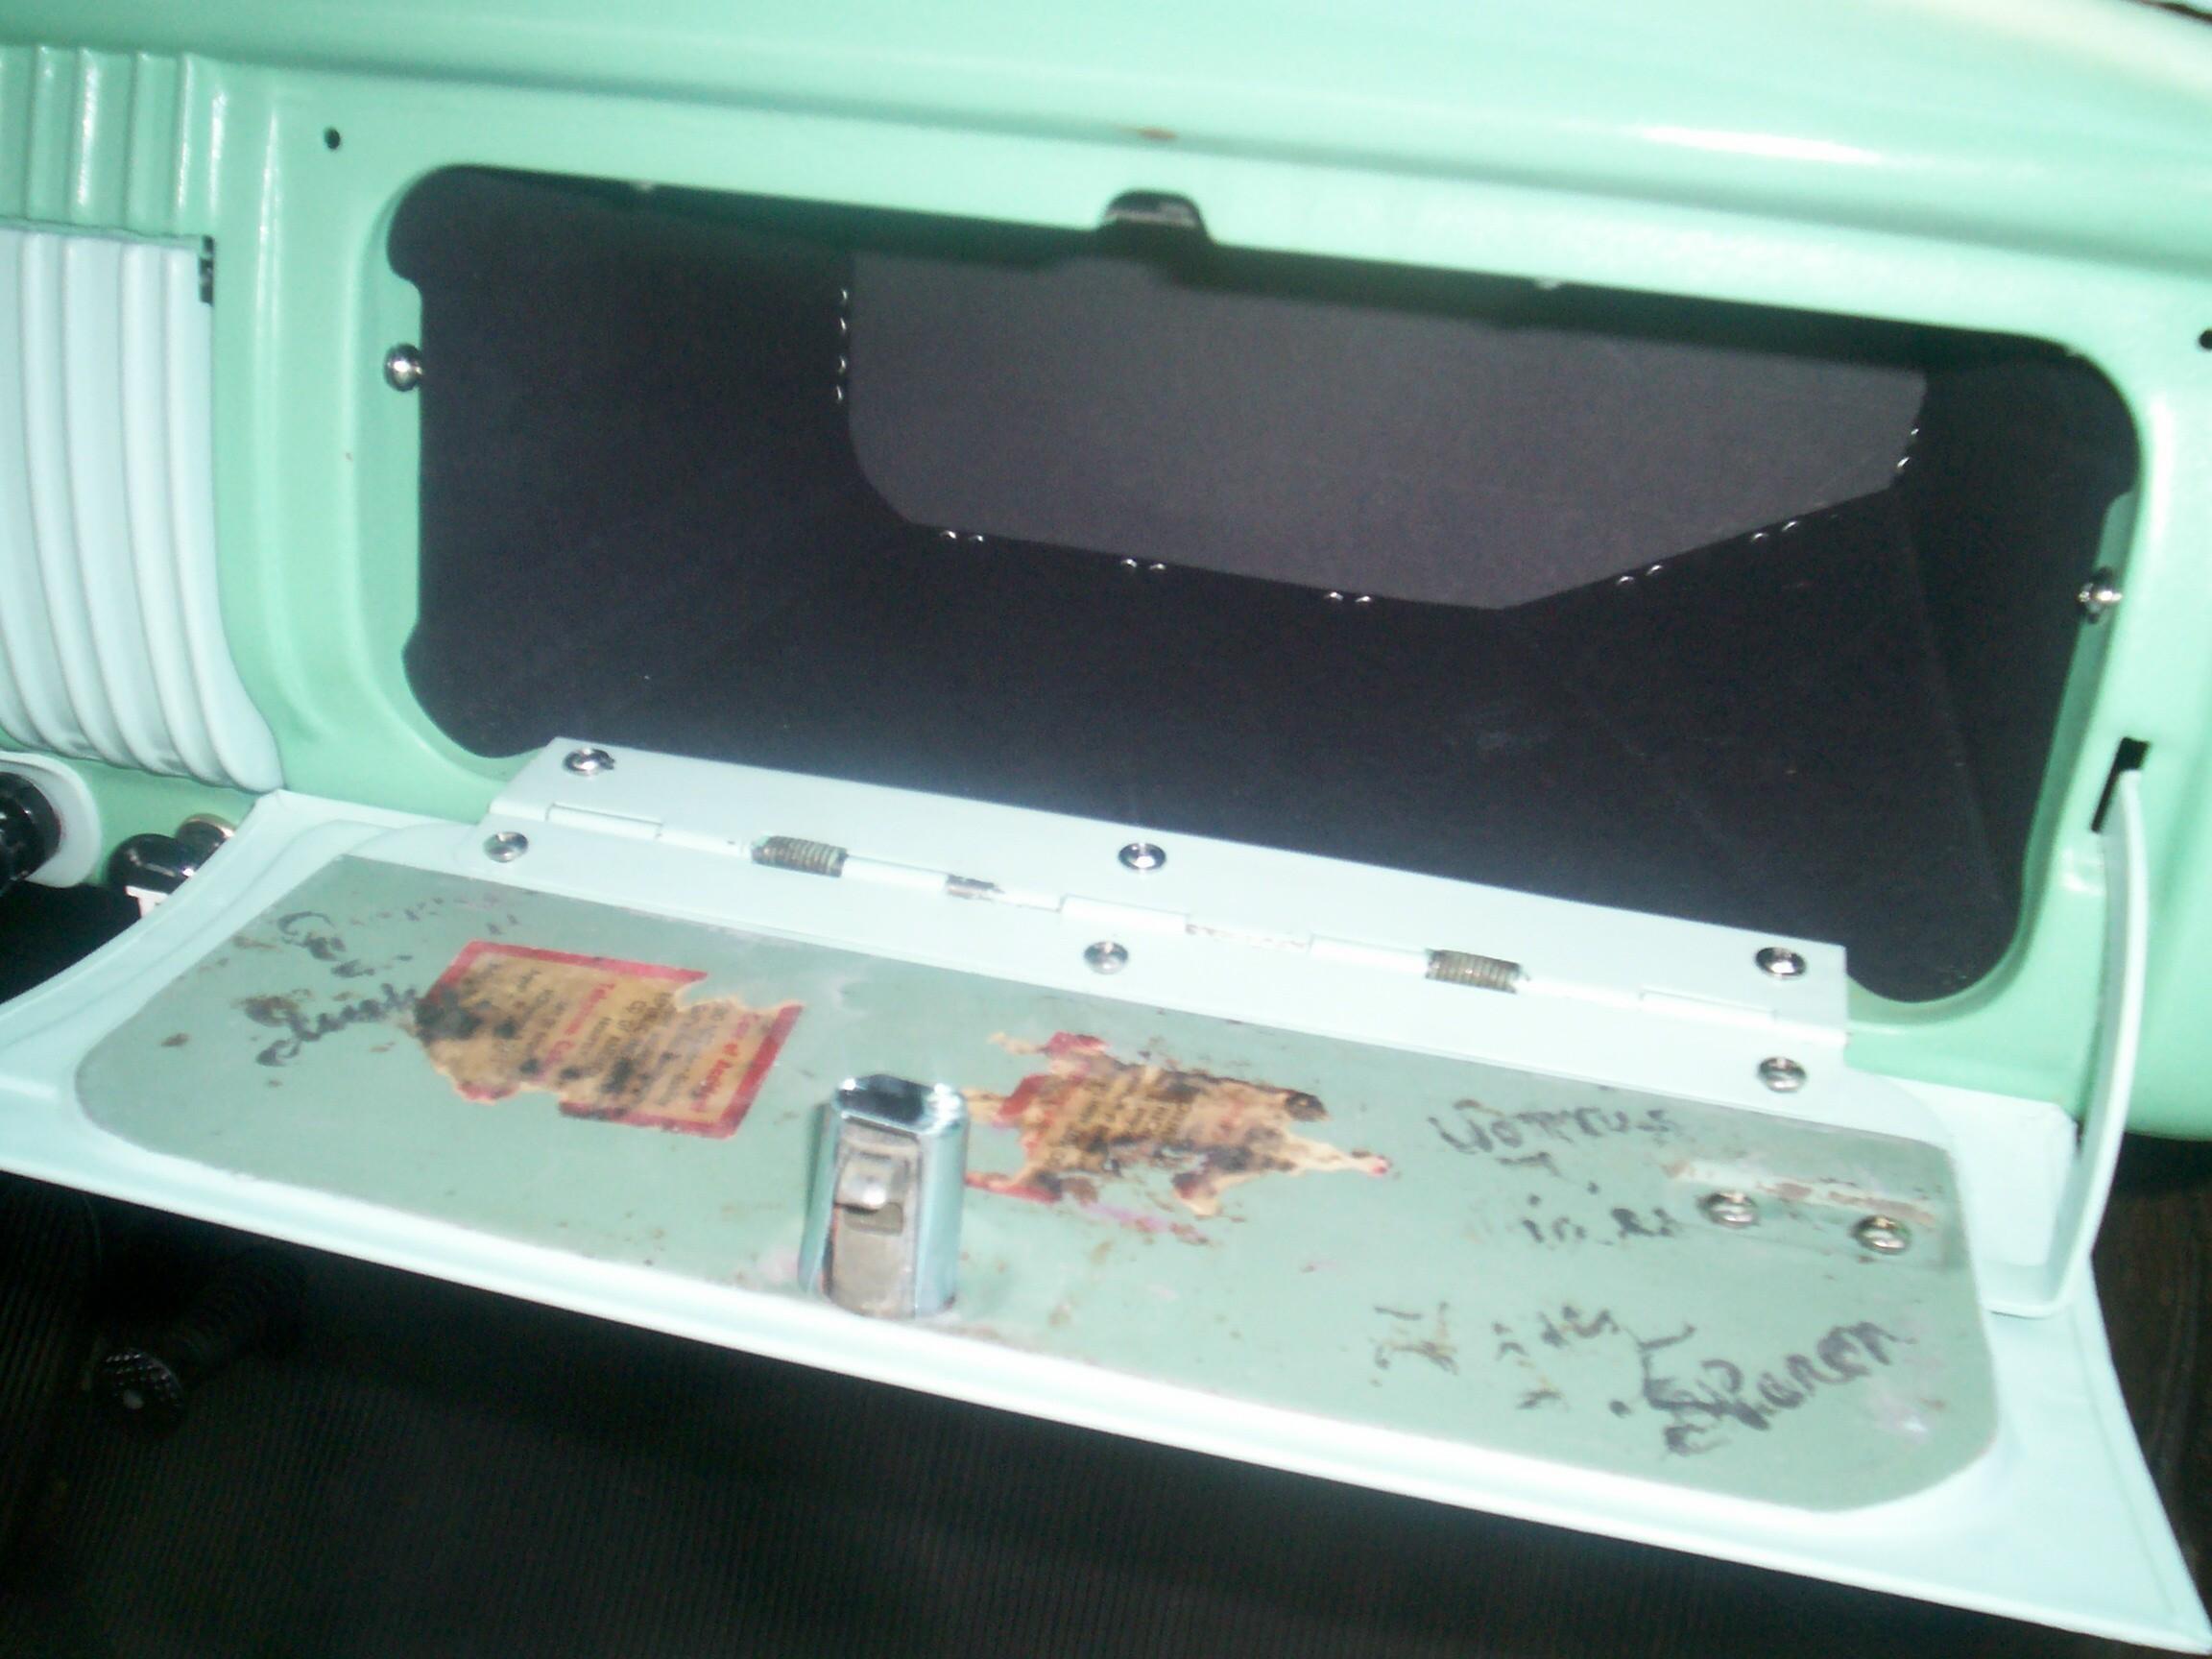 The
glove box door assembly was next. Filler remnants were removed from the
lock cylinder opening and BillyBob's original cylinder was fitted with
a new gasket and worked into place. A new retainer was fitted on the
backside with a small machine screw and threadlocker blue. The door was
fitted to the hinge and door stop next with stainless steel screws that
came with the Doc's
House of Bolts kit I got a couple of years back. After all
was aligned, the stainless screws were removed one at a time and
reinstalled with threadlocker. The back of the door had insurance
stickers from BillyBob's early life in Califorinia and and some
unreadable "apple tree" markings in black paint. I had masked off and
preserved this history rather than repainting this area.
The
glove box door assembly was next. Filler remnants were removed from the
lock cylinder opening and BillyBob's original cylinder was fitted with
a new gasket and worked into place. A new retainer was fitted on the
backside with a small machine screw and threadlocker blue. The door was
fitted to the hinge and door stop next with stainless steel screws that
came with the Doc's
House of Bolts kit I got a couple of years back. After all
was aligned, the stainless screws were removed one at a time and
reinstalled with threadlocker. The back of the door had insurance
stickers from BillyBob's early life in Califorinia and and some
unreadable "apple tree" markings in black paint. I had masked off and
preserved this history rather than repainting this area.
 A
drop of dishwashing soap was placed on each of the two rubber bumpers
and they were pulled into position from the backside. They have a long
sprue of rubber for this purpose. Much easier than trying to push them
into place. Finally, a new latch was positioned at the top and anchored
with supplied flanged sheet metal screws. Alignment was checked and the
screws were tightened up. I went inside to update the fastener
inventory with this new glove box hardware. I will probably paint the
dashboard the next time I get to the interior phase of the detailing
cycle. As it is, having done it myself, I take a little pride in
substandard work that I would not accept from a professional.
A
drop of dishwashing soap was placed on each of the two rubber bumpers
and they were pulled into position from the backside. They have a long
sprue of rubber for this purpose. Much easier than trying to push them
into place. Finally, a new latch was positioned at the top and anchored
with supplied flanged sheet metal screws. Alignment was checked and the
screws were tightened up. I went inside to update the fastener
inventory with this new glove box hardware. I will probably paint the
dashboard the next time I get to the interior phase of the detailing
cycle. As it is, having done it myself, I take a little pride in
substandard work that I would not accept from a professional.
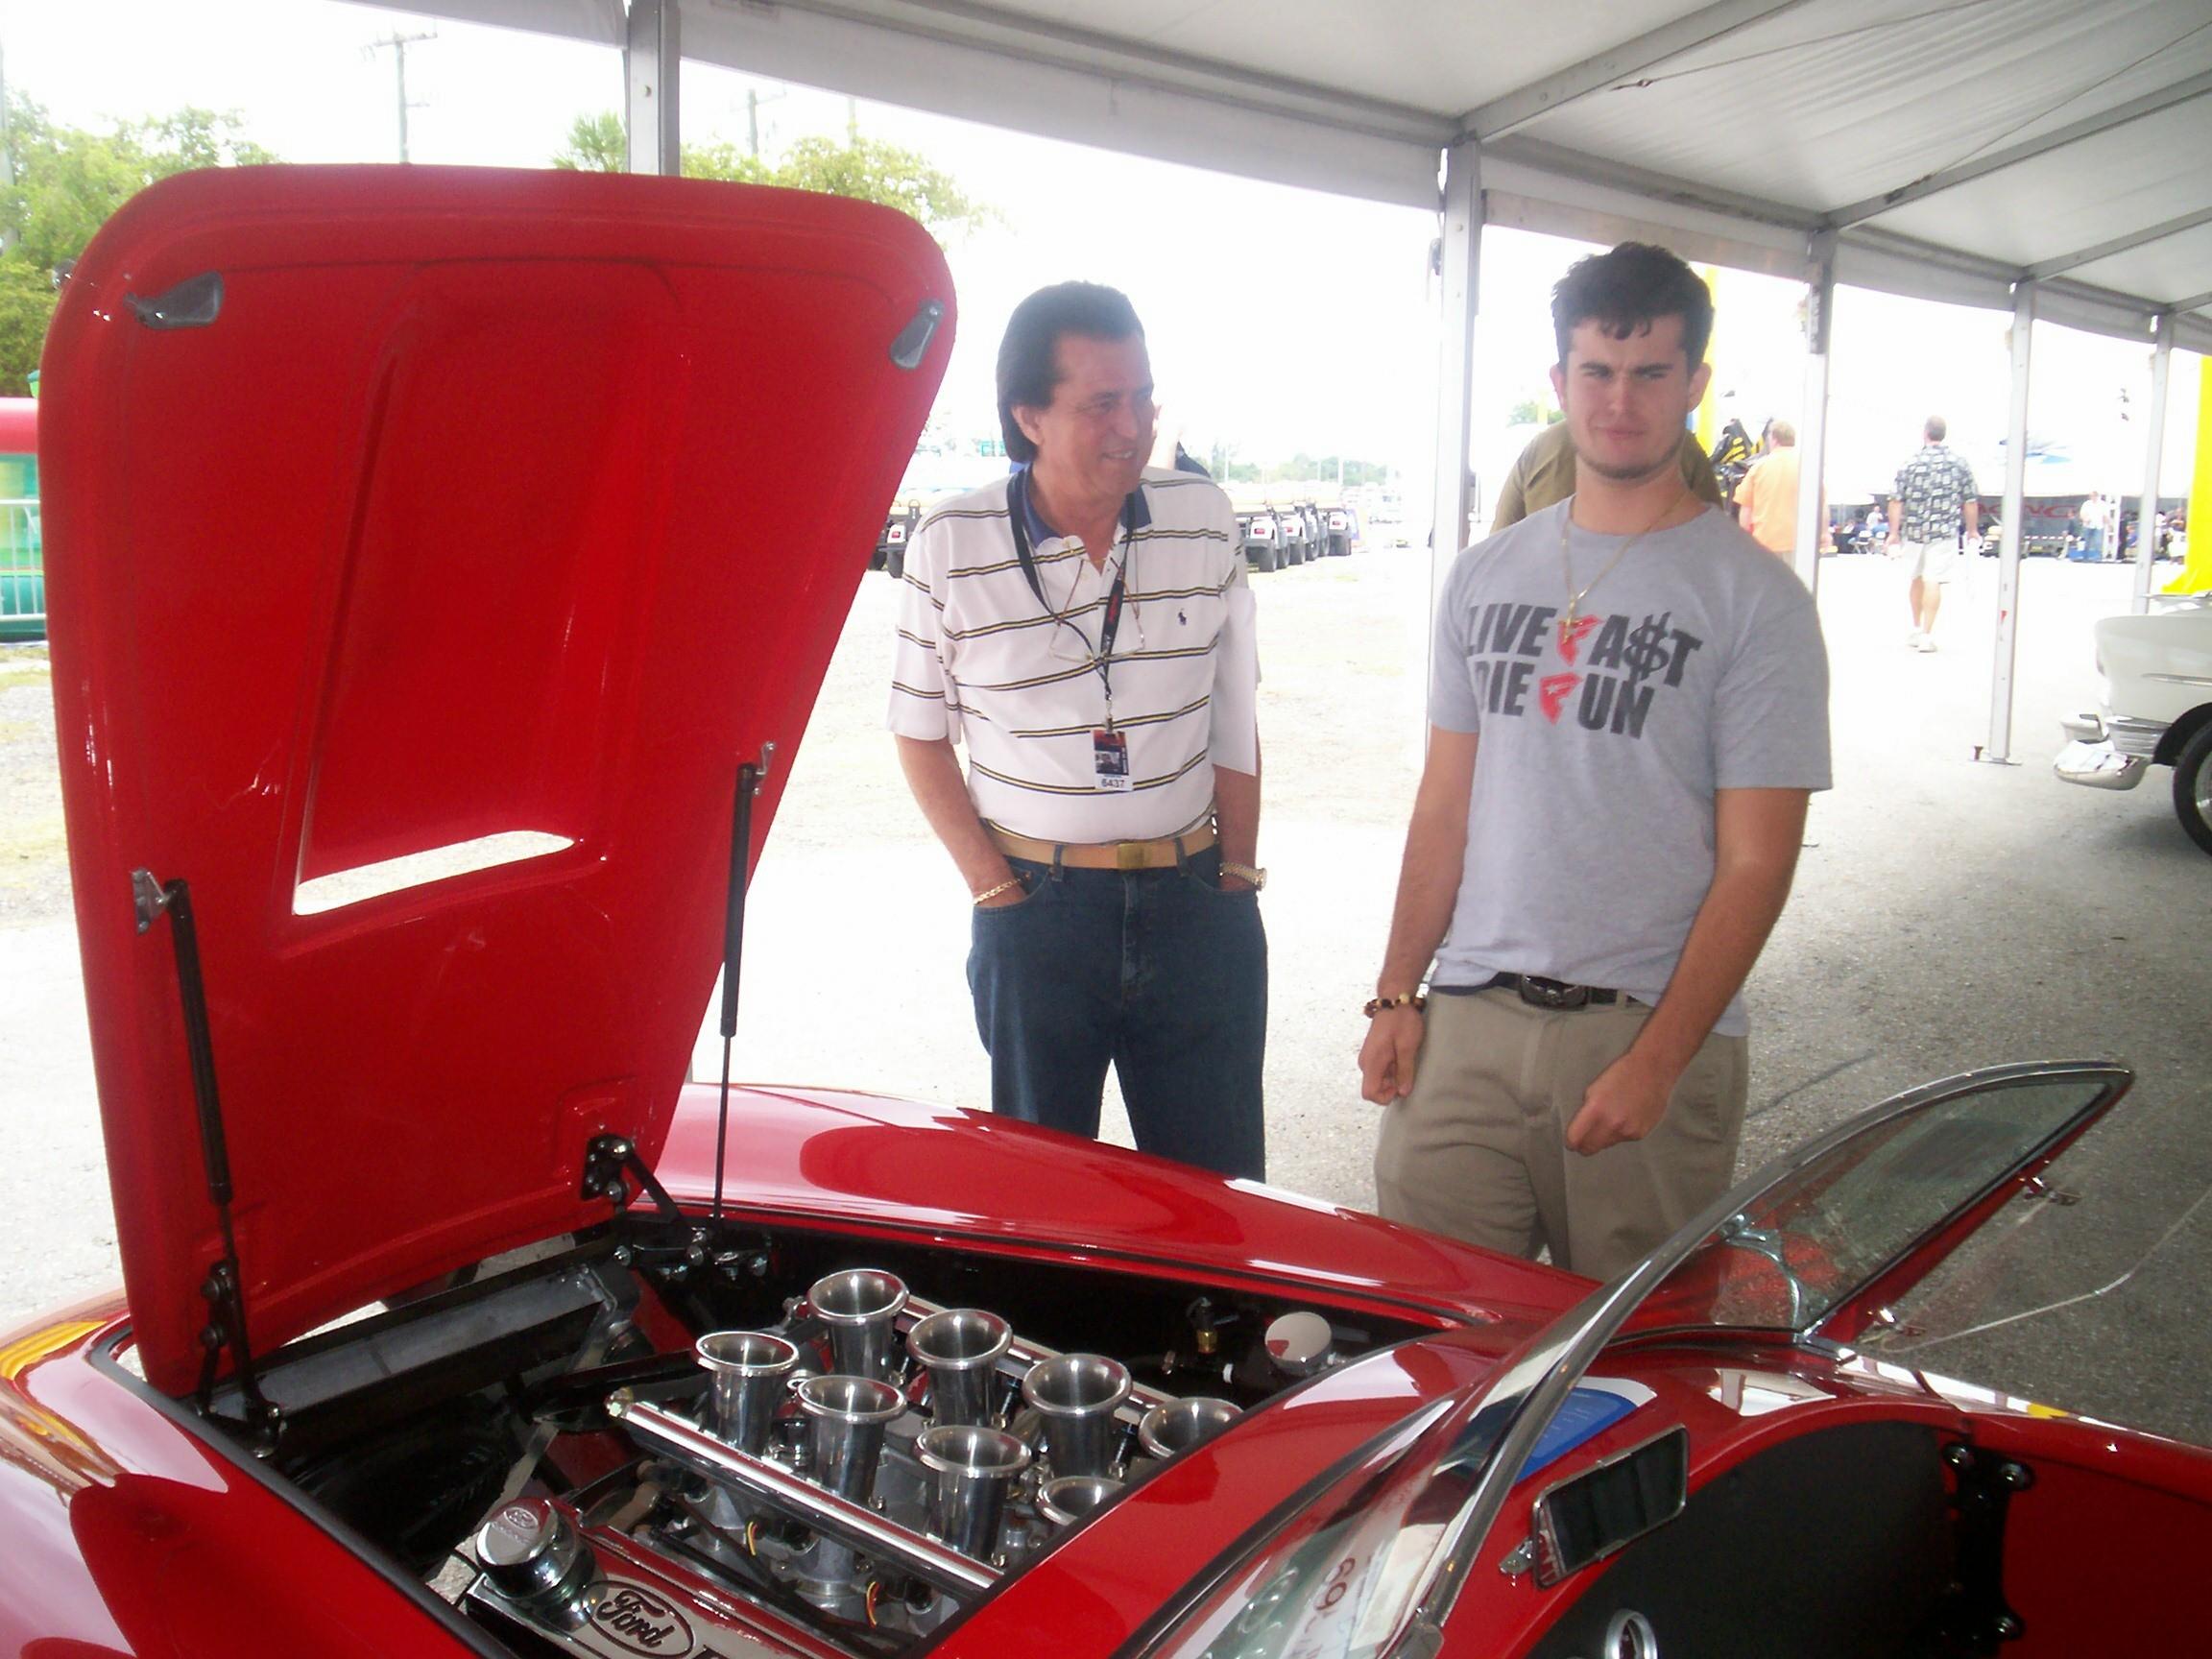 March
30th 2008 Well, I wuz
enjoyin' the free beer as the boss's guest in the bidder's pit at
Barrett-Jackson yesterday when I was surprised to see his hand shoot
skyward on Lot 695
near the end of the session. A bidder assistant magically appeared and
a few minutes later there was 'nother beauty in Derek's growing
collection. It was only me and Derek yesterday but his son Max went
with us today to retrieve "Big Red". In this
pic, Derek is amused by Max's first impressions of the beast. I drove
the chase car home while Derek and Max enjoyed one of those father and
son experiences that you can never have enough of.
March
30th 2008 Well, I wuz
enjoyin' the free beer as the boss's guest in the bidder's pit at
Barrett-Jackson yesterday when I was surprised to see his hand shoot
skyward on Lot 695
near the end of the session. A bidder assistant magically appeared and
a few minutes later there was 'nother beauty in Derek's growing
collection. It was only me and Derek yesterday but his son Max went
with us today to retrieve "Big Red". In this
pic, Derek is amused by Max's first impressions of the beast. I drove
the chase car home while Derek and Max enjoyed one of those father and
son experiences that you can never have enough of.
April 2nd 2008 All the shows, auctions and cruise-ins I've been attending lately have inspired me to work a bit harder at BillyBob's restoration as well as Renegade and BettyLou's upkeep. I didn't want the clattering hassle of trying to start BillyBob up last nite to go to the Delray cruise-in so I took Renegade instead. I'm planning to work on the cars this summer in the daylight hours after work as well as weekends. I started today. I got BillyBob's driveshaft out and u-joint taped and the tranny drained and out with all the fasteners bagged and labeled inside of two hours before the sun set on me. It's a good start.
 April
3rd 2008 Took a camera
shot before divin' into new terra incognita. As soon as I went under
the truck this evening, I noticed a little pile of ball bearings under
the clutch opening. These things are shinny and 'bout an eigth inch in
diameter. There's seven or eight of 'em. It's a real headscratcher.
Pulled out the throwout bearing and wiped the grease off it. Got some
9/16" 6 pt sockets and started on the clutch bolts. Tight enuf that the
wrench moves the flywheel assembly instead of the bolt. Rather than try
to clamp the flywheel in place and grunt some more, I opt to drag the
air compressor out of the shed and use the impact wrench.
April
3rd 2008 Took a camera
shot before divin' into new terra incognita. As soon as I went under
the truck this evening, I noticed a little pile of ball bearings under
the clutch opening. These things are shinny and 'bout an eigth inch in
diameter. There's seven or eight of 'em. It's a real headscratcher.
Pulled out the throwout bearing and wiped the grease off it. Got some
9/16" 6 pt sockets and started on the clutch bolts. Tight enuf that the
wrench moves the flywheel assembly instead of the bolt. Rather than try
to clamp the flywheel in place and grunt some more, I opt to drag the
air compressor out of the shed and use the impact wrench.
While the tank was filling up with air, I went inside and knocked over my Craftsman tool set. Spent twenty minutes cursin' and doin' the jigsaw puzzle routine putting a hundred or so sockets back in their places. Damnation! Took awhile to get the flywheel bolts out. I loosened each bolt up with the impact wrench, one at a time and retightened it with a hand wrench before moving on to the next bolt. This also required moving the flywheel with a bigass screwdriver applied against the ringgear teeth and levering off the bellhousing opening similar to a brake spoon on the adjuster. Once all the bolts were movable by hand, they were screwed out one turn at a time, move flywheel to next bolt, one turn, etc. until all the pressure had been taken off the clutch disk. Took a long time but minimized possible damage to the clutch.
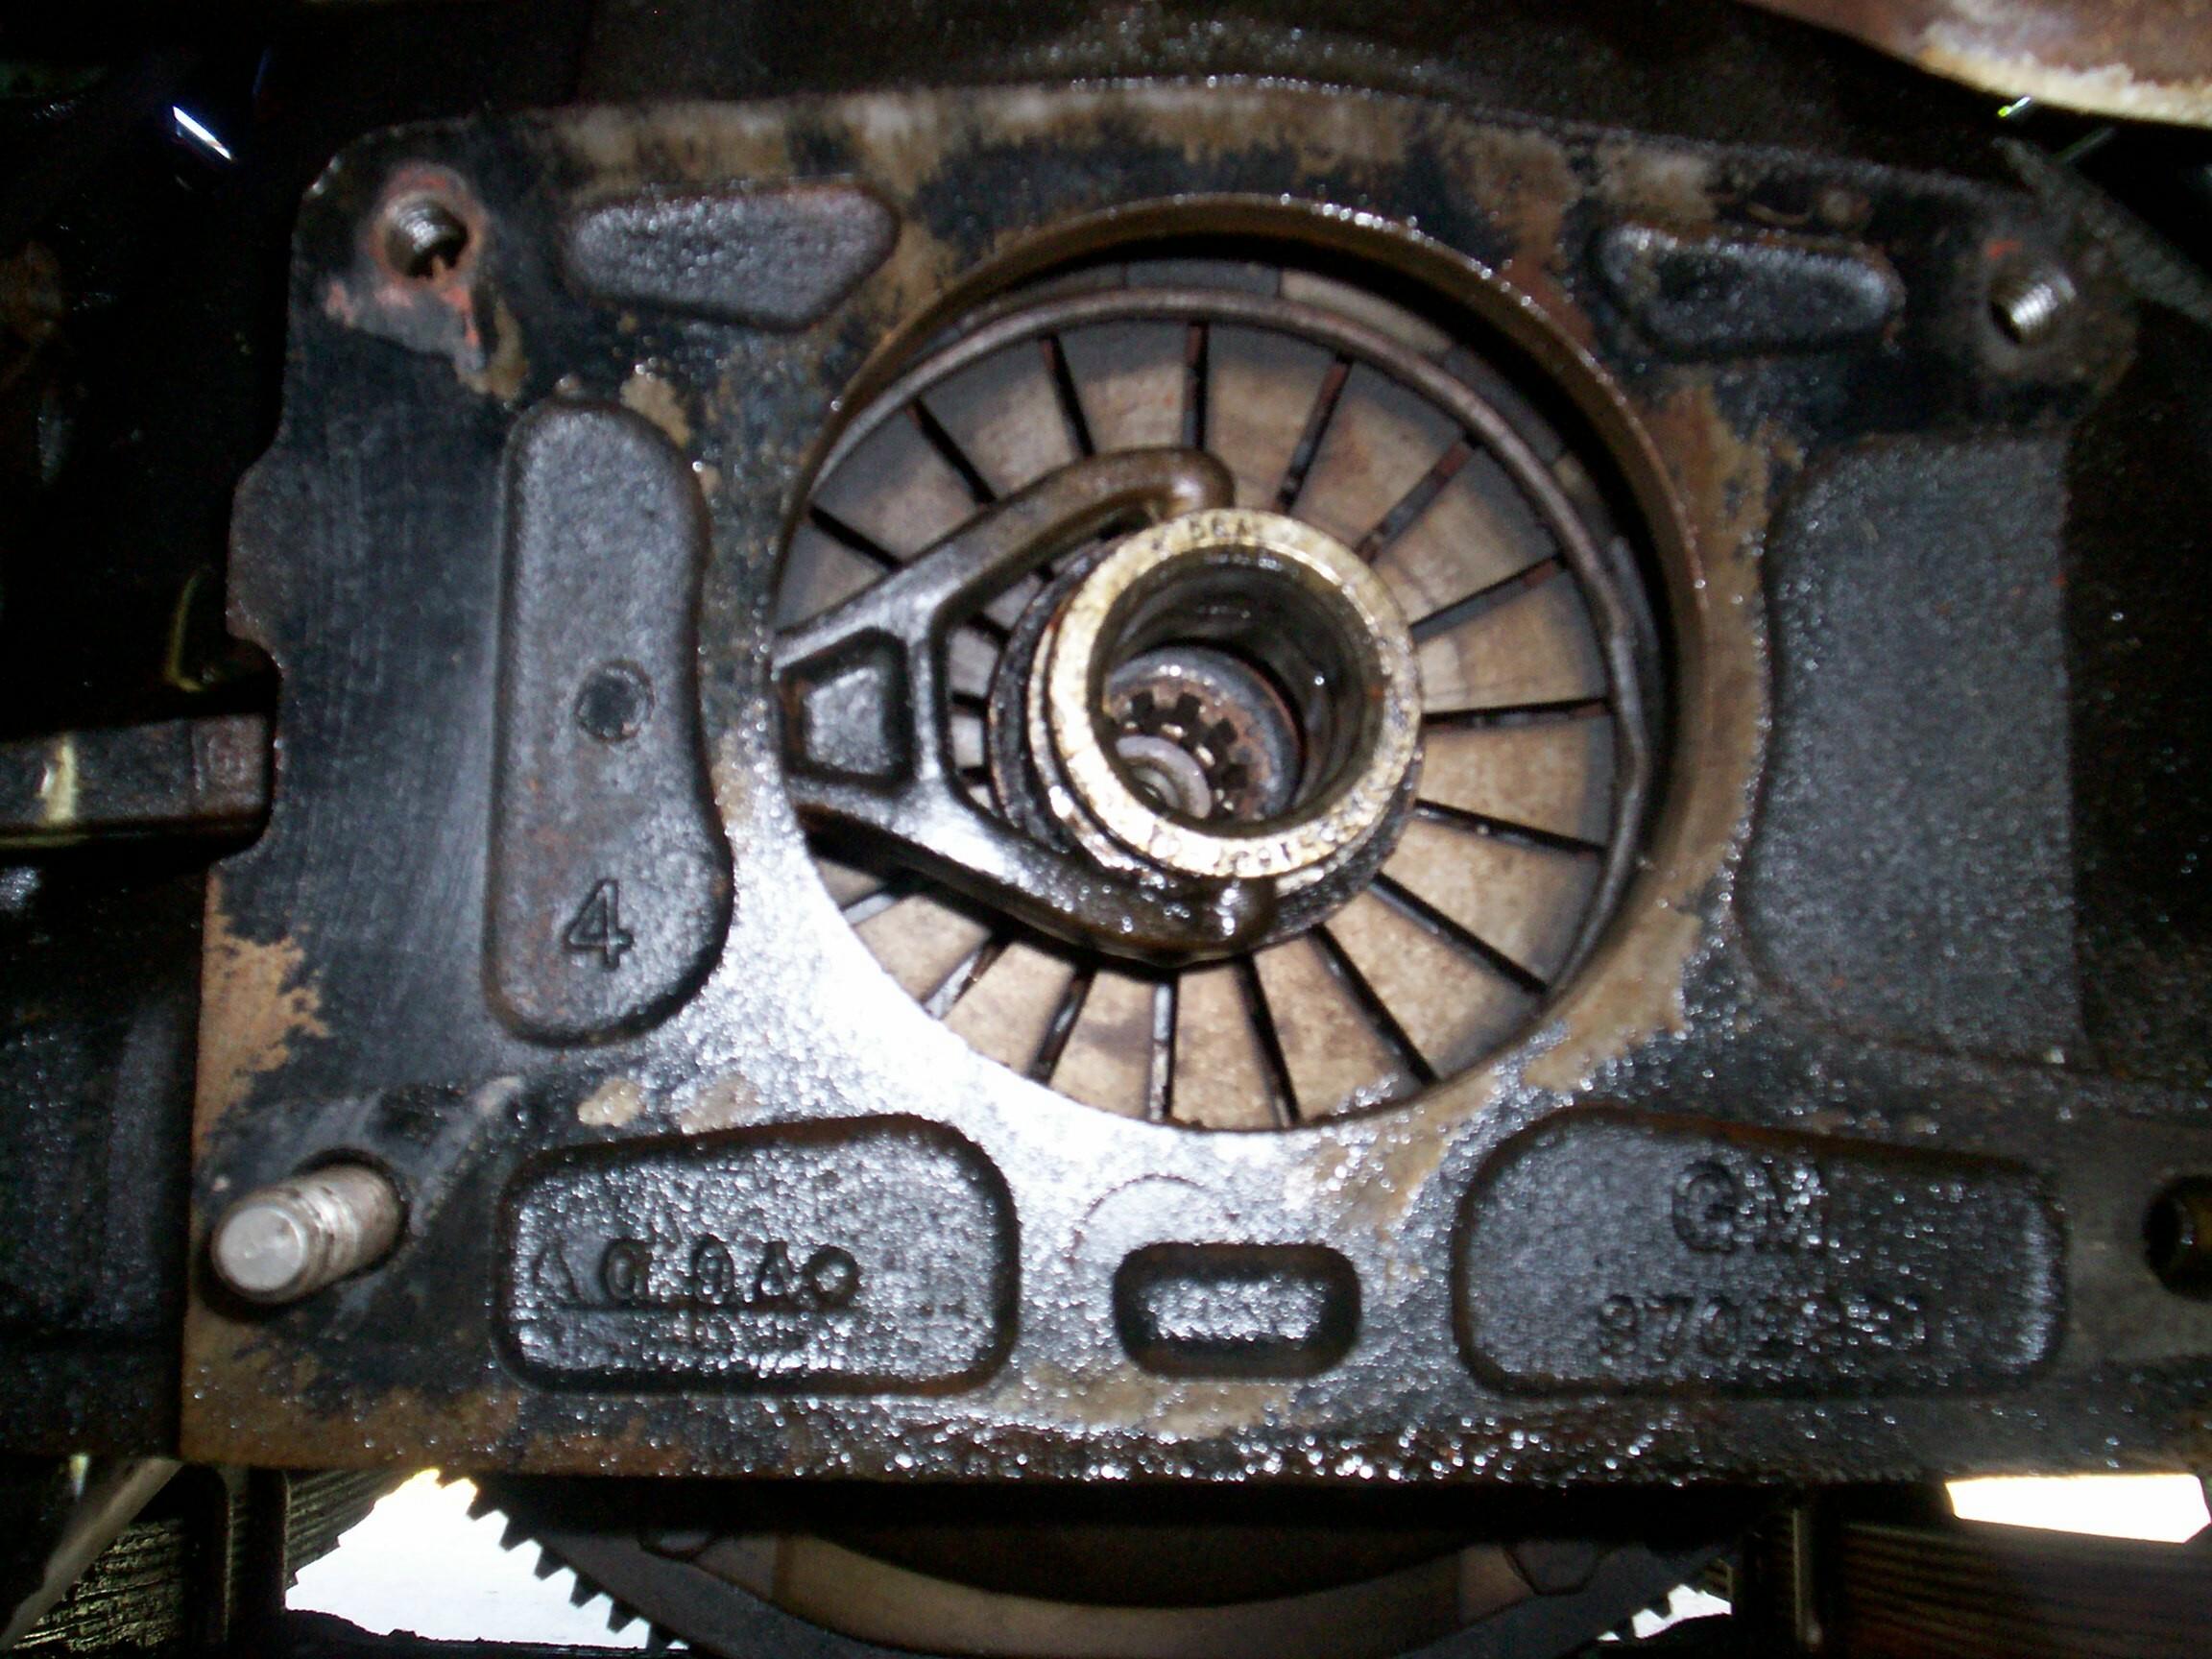
 Well,
The flywheel side of the clutch is pretty oily. I think that's where my
slipping clutch is coming from. The clutch itself looks pretty good.
I've got to try to find out where the oil is coming from and stop the
flow, if I can. That's it fer tonite. Time for a sunset cigar . . Oh
yeah, I found out that the ball bearings fell out of my tranny jack.
'Nother thing to fix now.
Well,
The flywheel side of the clutch is pretty oily. I think that's where my
slipping clutch is coming from. The clutch itself looks pretty good.
I've got to try to find out where the oil is coming from and stop the
flow, if I can. That's it fer tonite. Time for a sunset cigar . . Oh
yeah, I found out that the ball bearings fell out of my tranny jack.
'Nother thing to fix now.
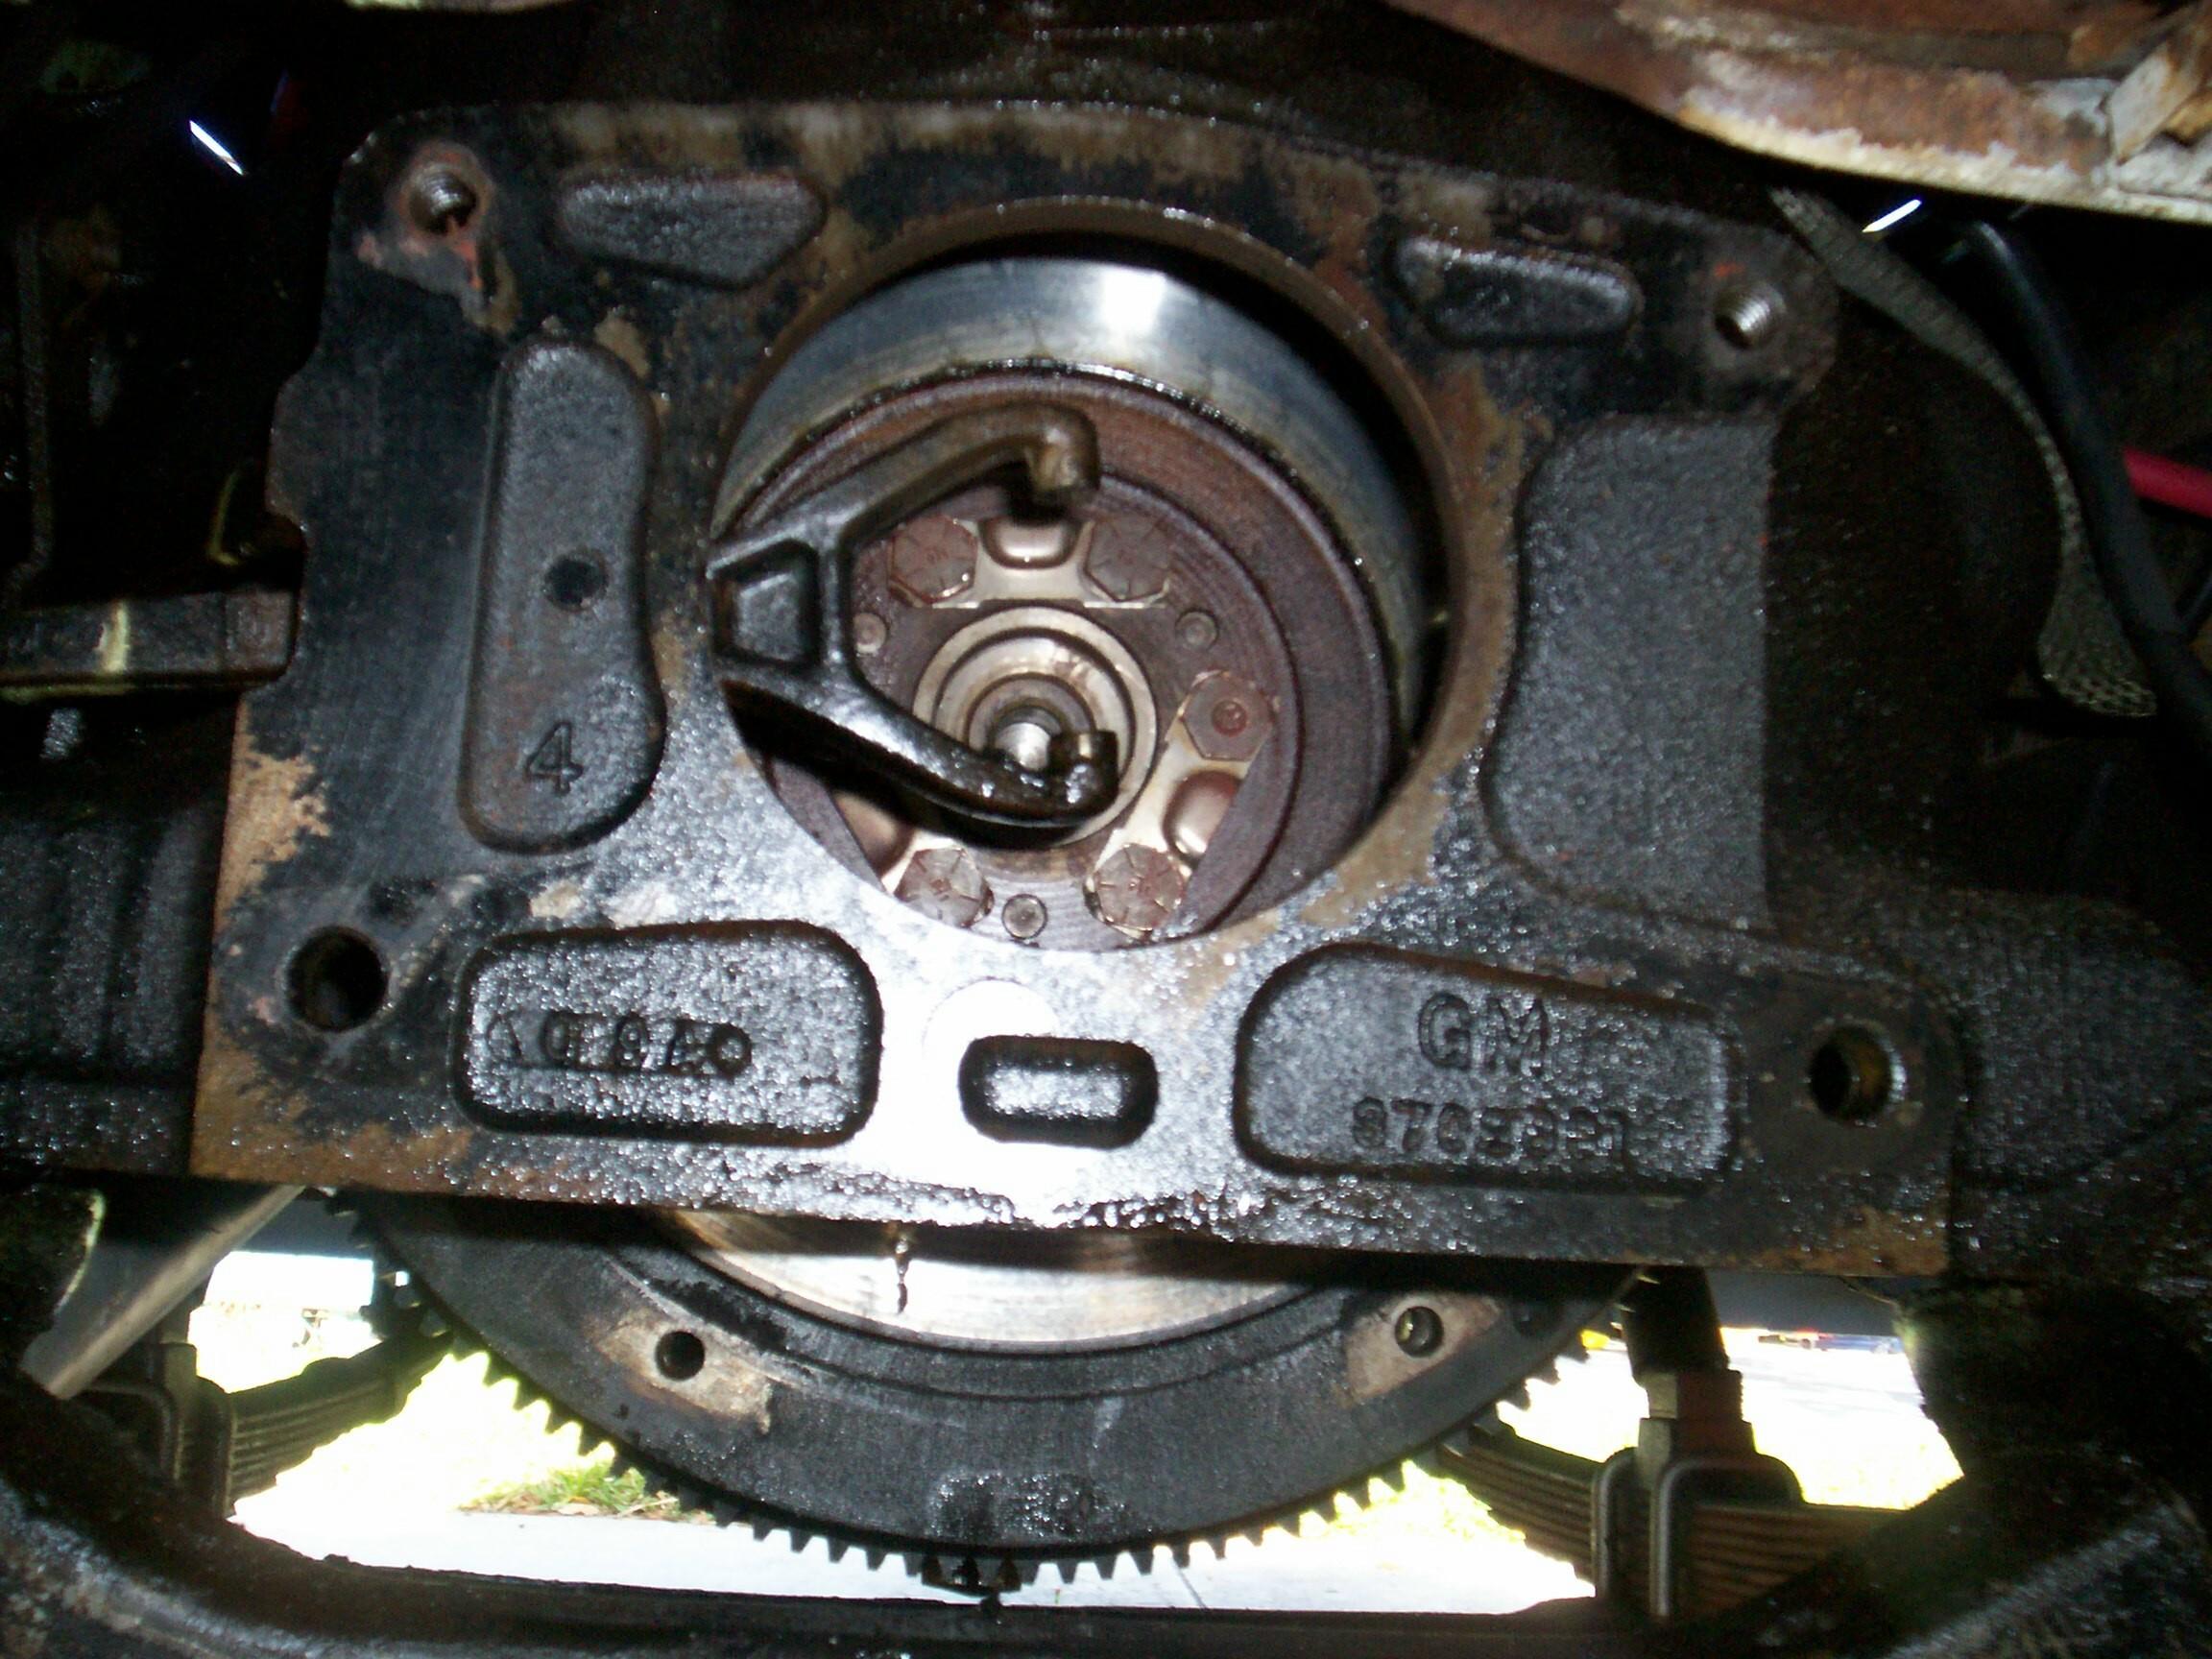 April
4th 2008 Looked the
flywheel over before trying to take it off. Pretty dry with no evidence
of oil seeping thru this area. There are retainer strips under the
bolts with corner tabs turned up to prevent the bolts from moving. I
spent some time with a bigass screwdriver and brass hammer turning the
corner tabs flat. Got the air compressor and impact wrench out again
and loosened all the flywheel bolts up. Placed the tranny jack under
the flywheel before removing the bolts the rest of the way and working
the flywheel off the alignment pegs. Lowered the jack until I got enuf
clearance to grab the flywheel and lay it on its side on the jack.
April
4th 2008 Looked the
flywheel over before trying to take it off. Pretty dry with no evidence
of oil seeping thru this area. There are retainer strips under the
bolts with corner tabs turned up to prevent the bolts from moving. I
spent some time with a bigass screwdriver and brass hammer turning the
corner tabs flat. Got the air compressor and impact wrench out again
and loosened all the flywheel bolts up. Placed the tranny jack under
the flywheel before removing the bolts the rest of the way and working
the flywheel off the alignment pegs. Lowered the jack until I got enuf
clearance to grab the flywheel and lay it on its side on the jack.
 OK.
The moment of truth. Wot flywheel do I have here? Cleaned it off with
rattlecan carb cleaner and rags. The part number cast on the back is
3704832 which is one of the two numbers listed in the Hollander
exchange manual. The other number 3704831 was the one I had been
searching for. I put the new ringgear on top of the old one. It seemed
to match up close but not perfect. Certainly not different enough to be
139 vs 168 teeth. The new ringgear has 139 teeth stamped on it. I
grabbed some typewriter whiteout and began to count teeth on the old
flywheel (dot of whiteout on every tenth tooth). I counted 139 teeth. I
can't figure why all the teeth between the two ringgears don't line up
perfectly. Optical illusion maybe. Time to light up a cigar and ponder
a bit.
OK.
The moment of truth. Wot flywheel do I have here? Cleaned it off with
rattlecan carb cleaner and rags. The part number cast on the back is
3704832 which is one of the two numbers listed in the Hollander
exchange manual. The other number 3704831 was the one I had been
searching for. I put the new ringgear on top of the old one. It seemed
to match up close but not perfect. Certainly not different enough to be
139 vs 168 teeth. The new ringgear has 139 teeth stamped on it. I
grabbed some typewriter whiteout and began to count teeth on the old
flywheel (dot of whiteout on every tenth tooth). I counted 139 teeth. I
can't figure why all the teeth between the two ringgears don't line up
perfectly. Optical illusion maybe. Time to light up a cigar and ponder
a bit.
April 5th 2008 Overcast this morning. Rain chance 30%. First order of business is to get the old ringgear off the flywheel. This is a press fit. Several fellow enthusiasts and professionals who follow BillyBob's progress offered help. One of the most common ways is to heat up the ringgear with a gas torch until it expands and falls off. I don't think my MAPP torch has enuf horsepower fer that so that option is out. On a Jeep forum, somebody said just to grind it off. After a few suggestions from others, I decided this was my last choice if others failed. Allen Synder (AllenOop at OldGMCtrucks), who does this type of thing for a living on heavy equipment, suggested heating up a portion of the ringgear red hot and using a cold chisel to break it. That was what I was going to do until I got an e-mail from Allen Jones of the Old-Chevy-Trucks maillist. He suggested tapping it off with a brass drift and hammer. I decided to try that first. Got a good drift from Snap-On tools.
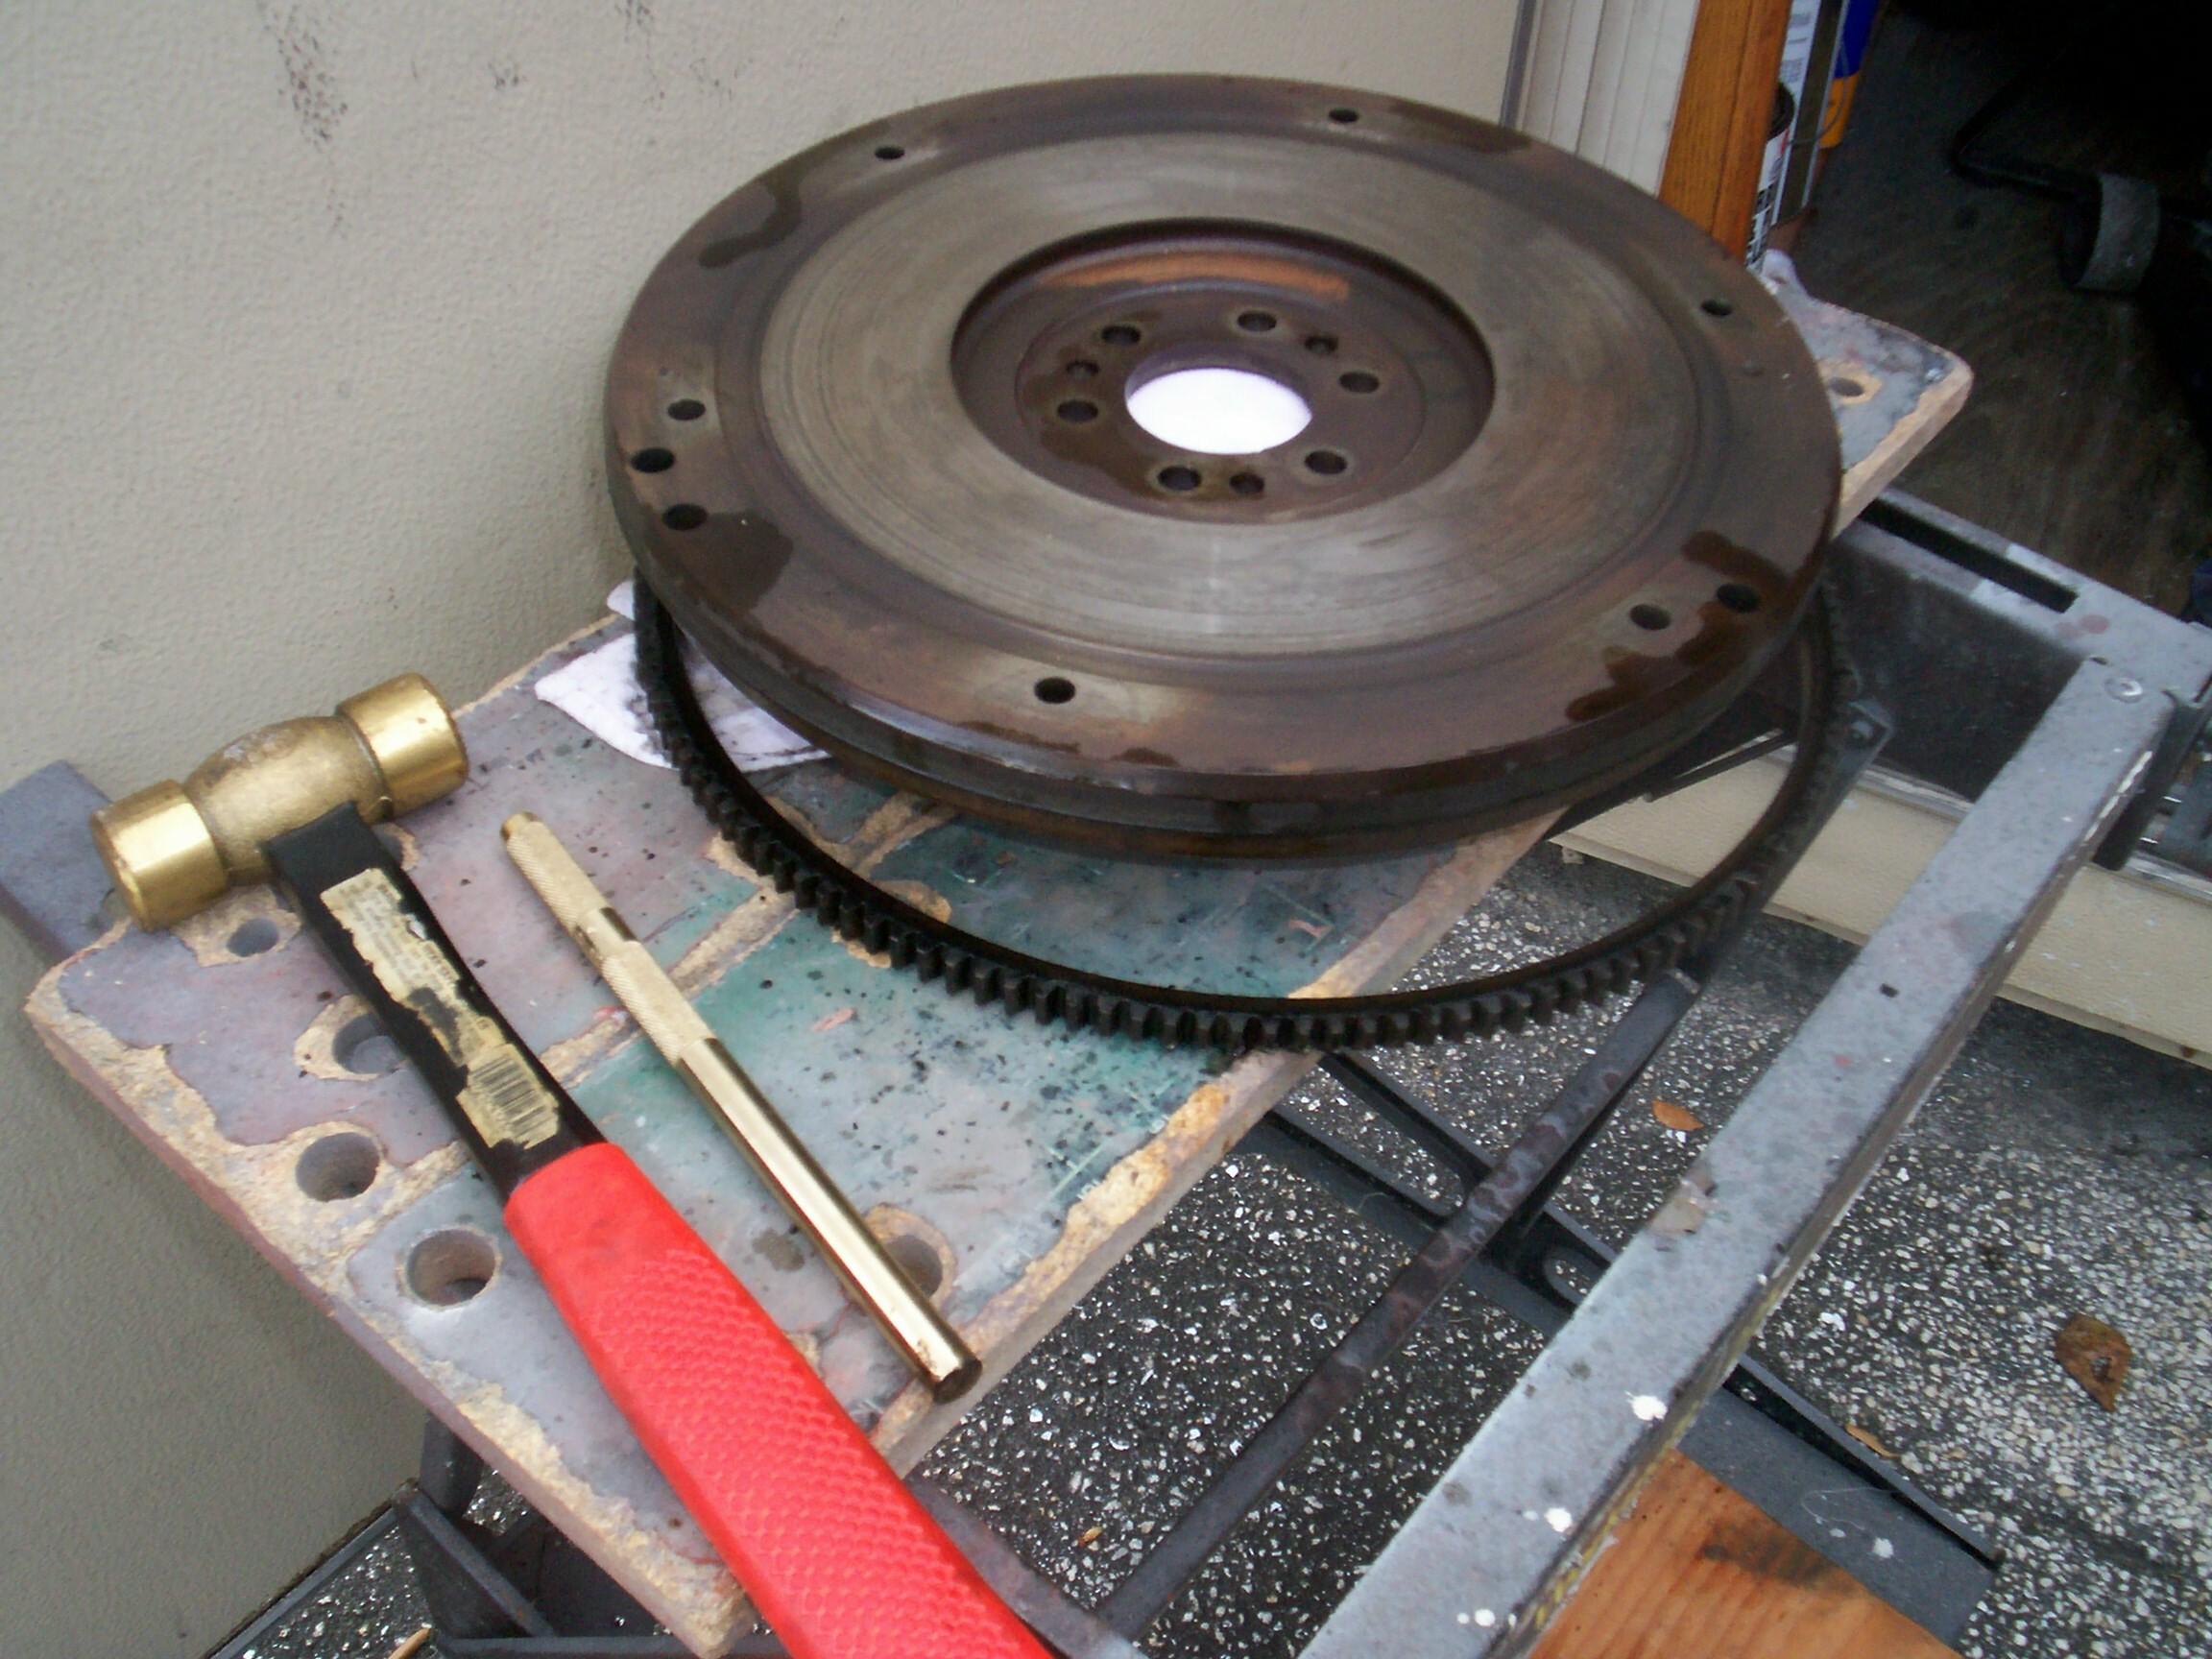 With
the flywheel back side up, I laid down a stream of Kroil penetrating
oil along the flywheel/ringgear seam and went inside the Krash Lab to
find a suitable pedestal to place the flywheel on. I found a little
4x4x2 paver sample that would work. Placed a shop rag over the paver
and centered the flywheel front side up on it. Took the brass drift and
hammer and started placing medium blows around the rim. I chose the
clutch bolt holes for spacing and hit the ringgear (one blow) opposite
each one in rotation. After two rotations, I could see that the
ringgear was starting to move. I had it off with this method in less
than ten minutes. Aces, Johnny!
With
the flywheel back side up, I laid down a stream of Kroil penetrating
oil along the flywheel/ringgear seam and went inside the Krash Lab to
find a suitable pedestal to place the flywheel on. I found a little
4x4x2 paver sample that would work. Placed a shop rag over the paver
and centered the flywheel front side up on it. Took the brass drift and
hammer and started placing medium blows around the rim. I chose the
clutch bolt holes for spacing and hit the ringgear (one blow) opposite
each one in rotation. After two rotations, I could see that the
ringgear was starting to move. I had it off with this method in less
than ten minutes. Aces, Johnny!
I'm at a crossroads of the "mission creep" kind. I probably could have things back together in time for tomorrow nite's cruise-in in Fort Lauderdale. On the other hand, you have to remove the flywheel to get the bellhousing off. This is the best opportunity I'll have to remove the bellhousing for cleanup and painting. Think I'll light up a stoggie and do the pros and cons dance.
In fer a penny, in fer a pound. I'm gonna pull the bellhousing. If fortune favors me, I may nebber have to pull the flywheel again. About this time I checked my e-mail and found that I was the successful ebay bidder for a Carter YF carby. This was a replacement carb for the leakchester back in the day. I'm havin' a good session so far. Time to break out the beer of the day which is Lake Placid Ubu Ale.
The starter and starter linkage were removed. The sheetmetal panel under the rear main bearing was taken off next. Then I studied the clutch linkage and shift linkage some more . . . Came to the conclusion that there was not enuf clearance to get the bellhousing off without moving the engine forward, lifting the cab or, dropping the frame crossmember. Curses!
April 6th 2008 The weather forecast changed for the worse overnite. I woke up to rain. I had brought the flywheel and new ringgear home with me to the Krash Pad along with a brass hammer and drift and my welding gloves. The flywheel was put in the freezer overnite. When I got up, the ringgear was put in the oven at 400 degrees for a little over a hour. The ringgear has a slight chamfer around the circumference on the back side and slight bevels on the gear teeth on the front side. The flywheel was pulled out of the freezer and placed on the kitchen floor. The ringgear was pulled out of the oven and dropped into place. It seated completely without the help of the brass drift and hammer. Done! I feel the spirit of my Dad on my shoulder this morning. I can't imagine him standing in the kitchen wit nothin' but welding gloves on tho'. There are certain advantages to living alone.
BillyBob's workarea under the shadetree was a swamp when I got to the Krash Pad. Smoked a cigar with my coffee and watched the rain on the back stoop.
Cleaned up the Jeep and took him to the Fort lauderdale cruise-in. The person in charge of corraling the cars would not let the Renegade in. I had to go down the street and feed a meter. No Jeeps allowed. Now I know.
April 7th 2008 Cleaned up the sheetmetal fascia that goes under the rear main bearing with carb cleaner, then wire-brushed it to bare metal. Hung it up in BillyBob's tree and PRE Paint Prepped it. Gave it a coat of Eastwood's Self-etching primer, followed by three coats of the Bill Hirsch "Chevrolet Gray" Engine Enamel. Put the starter hardware and the fascia bolts in the tumbler for a cleaning session. A couple of my co-workers were out in front of the building fixing some signage lighting. I assisted a bit with that too. I got home to the Krash Pad to discover a break-in and light ransacking. Now, I have to update security on the home front. Oh, the joys of city living.
April 9th 2008 Starting out to be a character builder week. Krash Pad break-in on Monday. Cell phone shut-off notice on Tuesday (My bad. Thought I paid it but my own records say otherwise). Last nite's cruise-in was a rainout too. Today, I had to go to the post office for postage due on my Hutchinson ATHS registration package. By the time I got to the head of the line, they had returned it to sender and I got to keep my 33 cents.
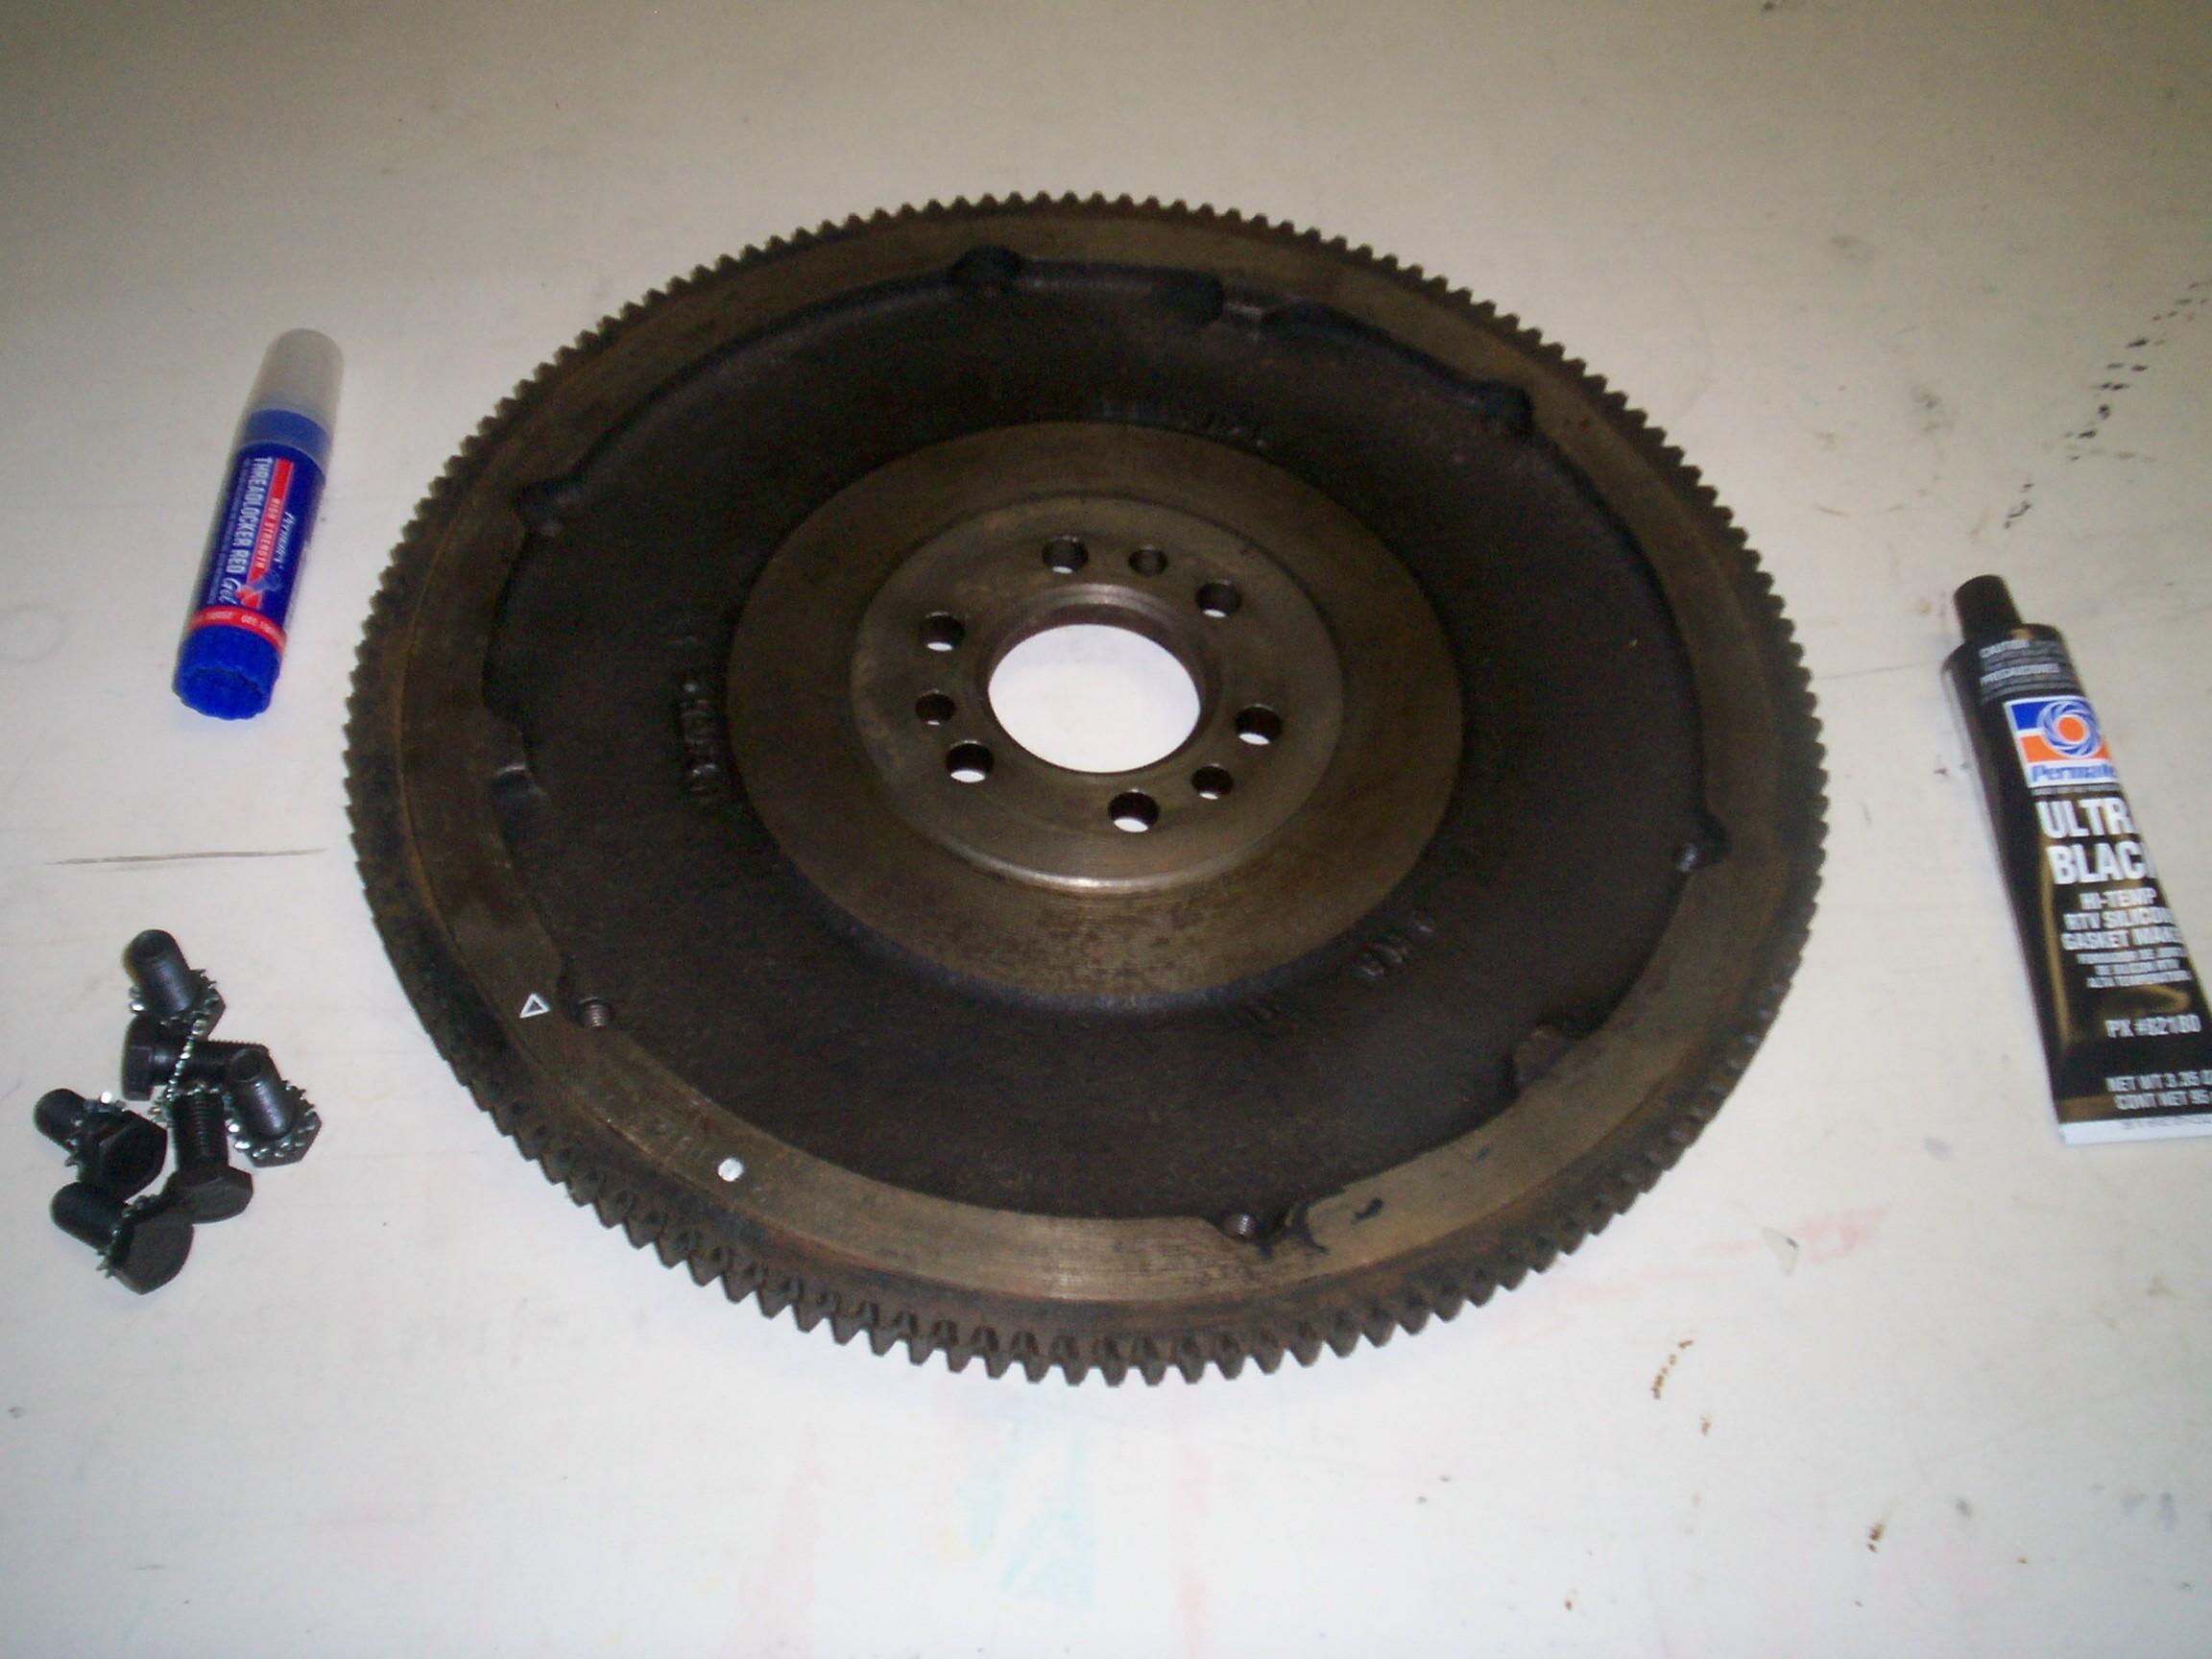 The
sky was a bit menacing by quitting time but I decided to have a go at
the flywheel anyway. Cleaned the backside of the flywheel some more
with carb cleaner and painted the timing marks (bb and triangle) with
white touch-up paint I got at a FLAPS. The next step was to lay out the
tools and plan the flywheel installation. I relied a lot on a post in
OldGMCtrucks.com "Hall of Fame" forum by Tony Pascarella (Truckedup)
for this step. I was going to use silicone sealant between the flywheel
and crank flange but the directions say it sets up fast and I
anticipated a lot of grunting and cussin' time before I got the
flywheel seated so, I used Permatex #9 Tack and Seal instead.
The
sky was a bit menacing by quitting time but I decided to have a go at
the flywheel anyway. Cleaned the backside of the flywheel some more
with carb cleaner and painted the timing marks (bb and triangle) with
white touch-up paint I got at a FLAPS. The next step was to lay out the
tools and plan the flywheel installation. I relied a lot on a post in
OldGMCtrucks.com "Hall of Fame" forum by Tony Pascarella (Truckedup)
for this step. I was going to use silicone sealant between the flywheel
and crank flange but the directions say it sets up fast and I
anticipated a lot of grunting and cussin' time before I got the
flywheel seated so, I used Permatex #9 Tack and Seal instead.
Went out and got the tranny jack into position, then laid down a thin coat of sealant on both the flywheel and crankshaft mating surfaces. Got a few rain sprinkles but kept on going. Got the jack and flywheel under the bellhousing opening but couldn't get it up high enuf because of pan and crossmember interferance. And there wasn't enough room to get my hands under the flywheel with leverage to grunt it the rest of the way into position. I tried fer awhile anyway, scuffing my hands a bit on the new ringgear teeth and rubbing black grease into the abraded flesh. Damnation. For those who don't know, the flywheel only fits on one way due to balance and timing mark issues (the alignment pins are not evenly spaced around the circumference of the crank flange) and it took me a few trys to get this right as well.
Finally abandoned the tranny jack and got out my Jeep jack which is a small sissors jack with a small 1-1/2" bearing surface on top. That gave me the clearance I needed to jack the flywheel into position opposite the alignment pins and the room to use my hands to guide it unto them. Phew! I put the new flywheel bolts on and snugged them down. Went inside the Krash Lab then to look up the torque spec. The sprinkles had stopped but daylight was going away. Torque spec is 50-65 ftlbs so I set my torque wrench to 60 and went back out to the truck with the bolts and threadlocker red. Put a C-clamp on the flywheel (not on the clutch surface or ringgear) to hold it from moving. Unscrewed the flywheel bolts, one-at-a-time, in a criss-cross pattern, put a dab of threadlocker on and torqued them down to spec. Done! Time fer a cigar.
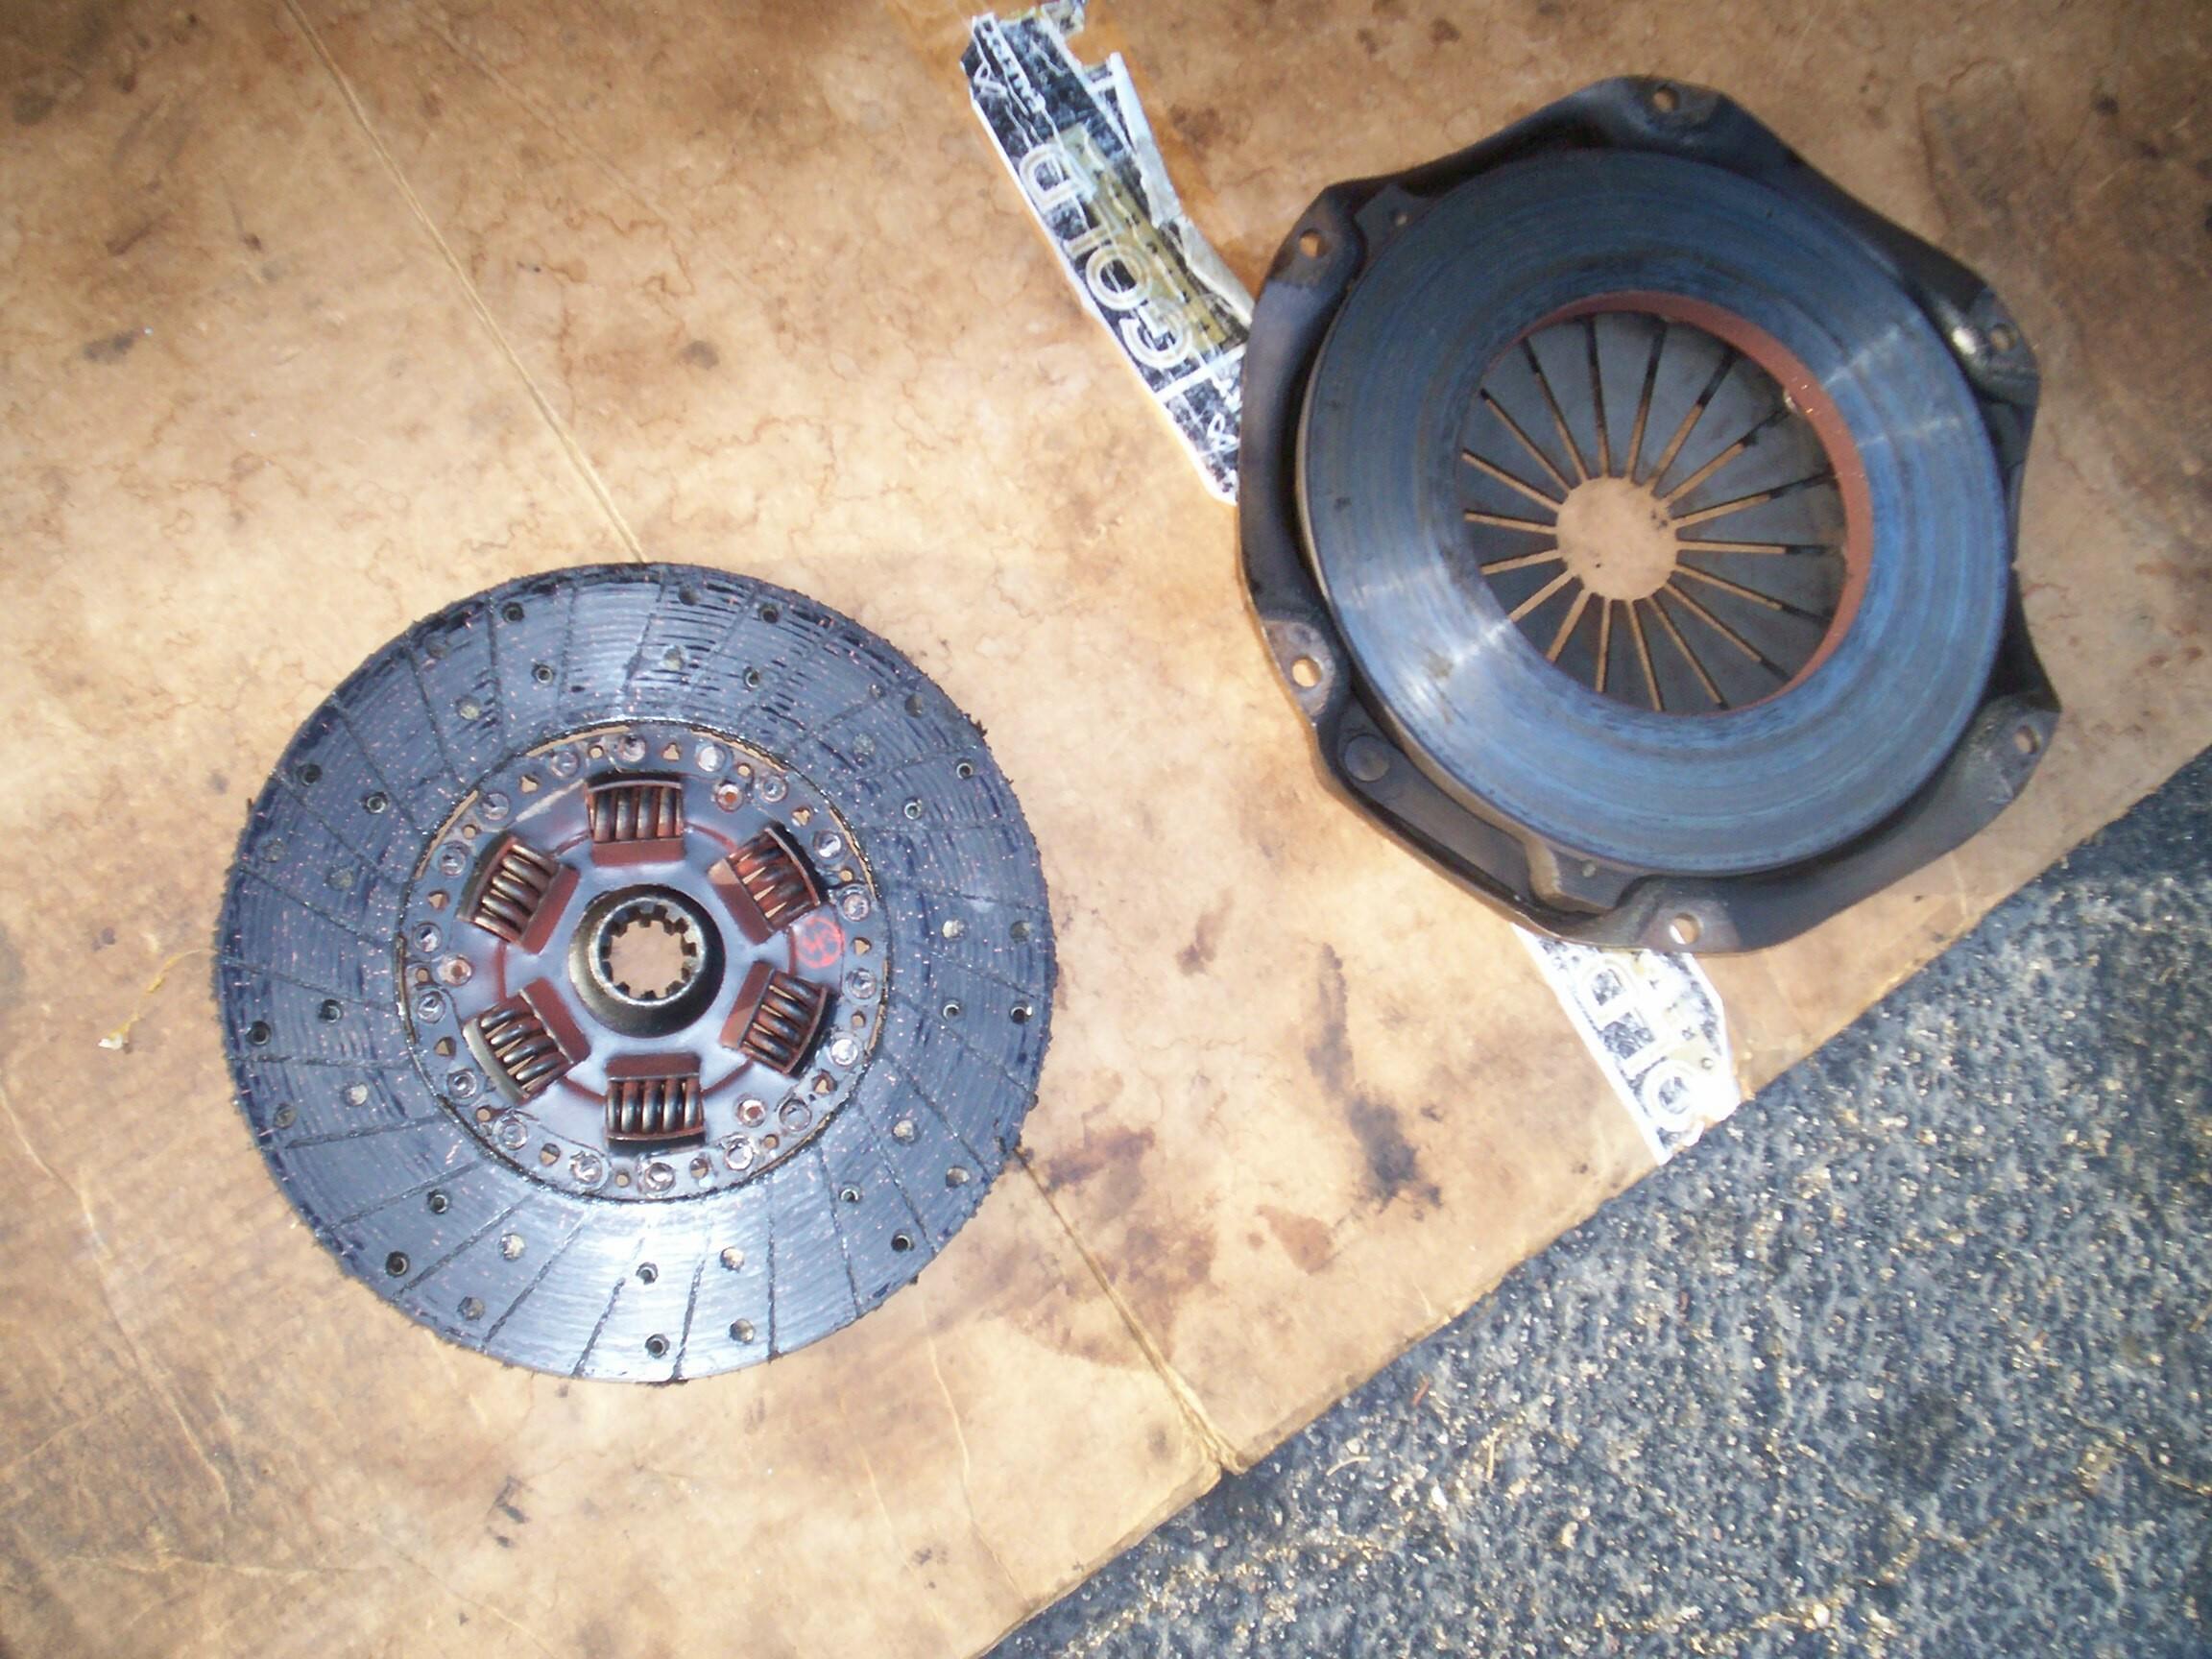
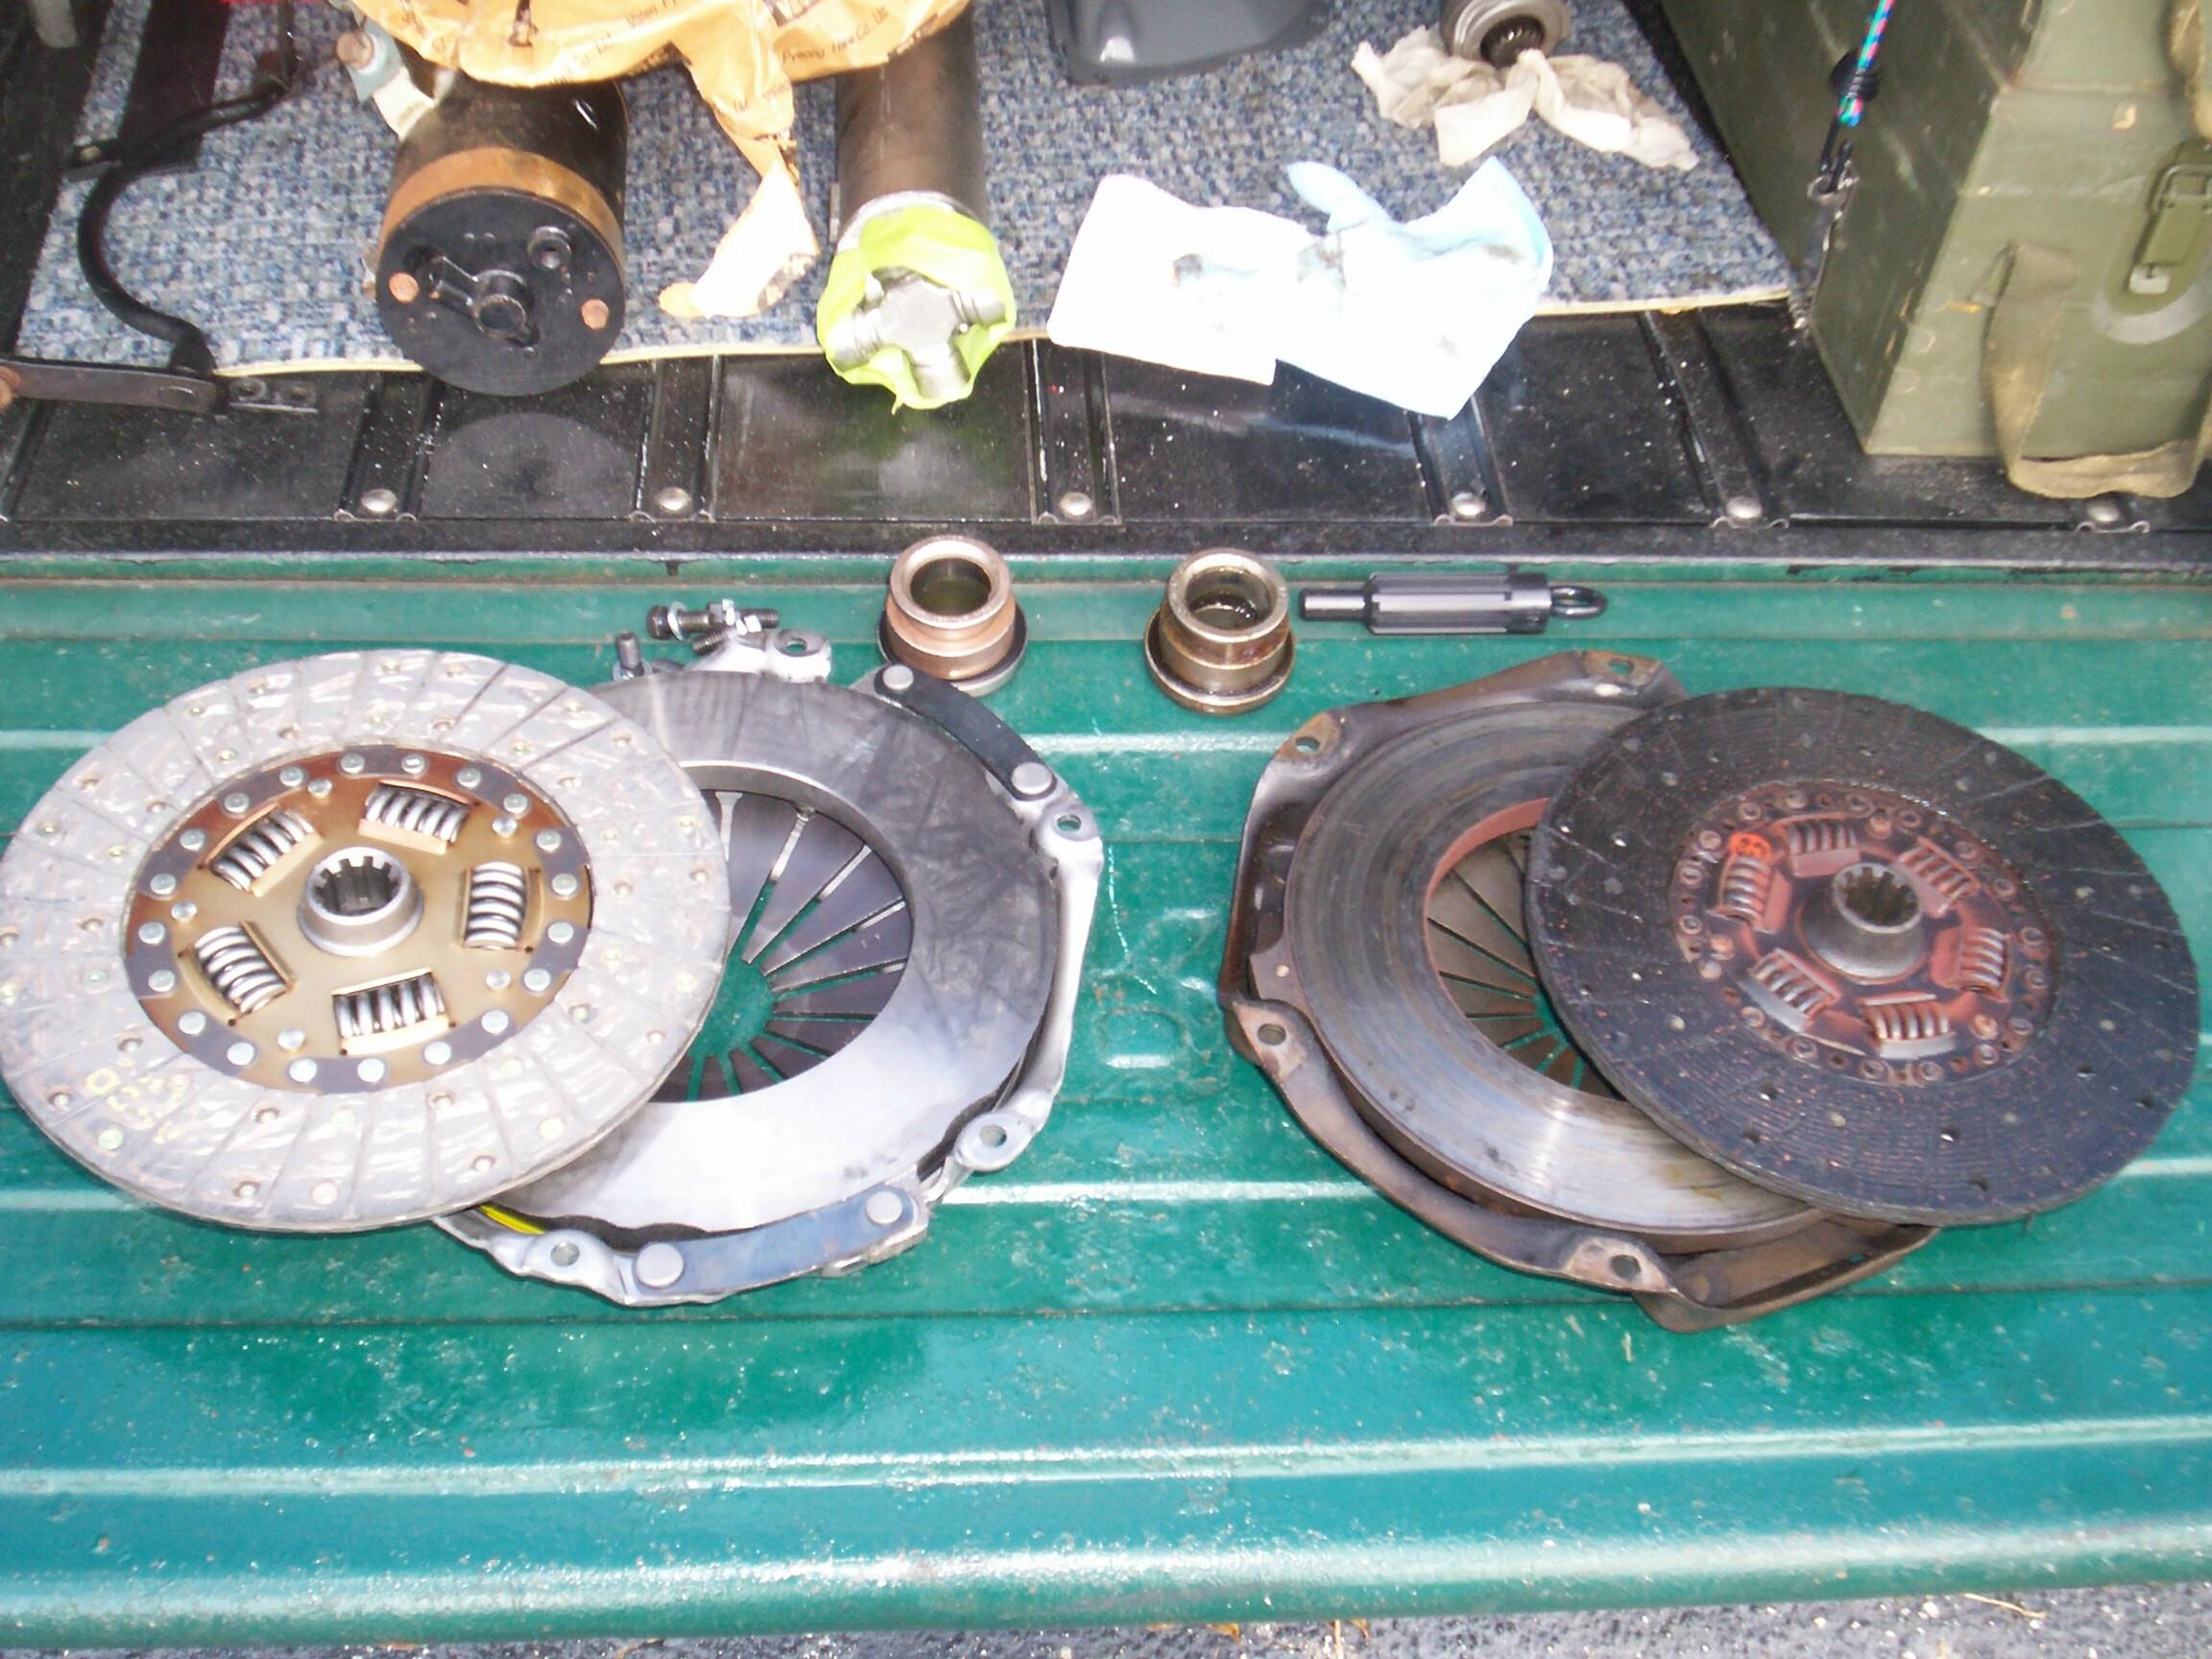 April
10th 2008 Dark sky at
five in the afternoon but I don't think it will rain. Pulled the spare
clutch kit I got last year from LMC
Truck out from under BillyBob's seat and compared it with the
old clutch. The new clutch seems just a smigeon bigger but the bolt
holes line up. The clutch surfaces and flywheel were cleaned with brake
cleaner. I checked the alignment tool against a new pilot bushing, then
against the pilot bushing in the end of the crank. I've got minimal
wear that I can see so I'm not gonna change out the bushing at this
time.
April
10th 2008 Dark sky at
five in the afternoon but I don't think it will rain. Pulled the spare
clutch kit I got last year from LMC
Truck out from under BillyBob's seat and compared it with the
old clutch. The new clutch seems just a smigeon bigger but the bolt
holes line up. The clutch surfaces and flywheel were cleaned with brake
cleaner. I checked the alignment tool against a new pilot bushing, then
against the pilot bushing in the end of the crank. I've got minimal
wear that I can see so I'm not gonna change out the bushing at this
time.
Time to install the new clutch. This should be easy . . . Wrong! I could not get the clutch and disk assembly to fit thru the opening between the flywheel and clutch fork. I could get either one alone to fit but I could not get them in together. Damnation! I dropped back to rest fer awhile and ponder the situation.
Decided to dismantle the clutch fork. Took off the clutch linkage return spring and pedal link. Used the bigass screwdriver to pop the fork off the ball pivot. This allowed me to move the fork back out of the way a bit. It was enuf. I cleaned the clutch surfaces again with brake cleaner as they had gotten greasy finger prints all over them from the previous skirmish. Got the clutch and disk in place and all the bolts started. Inserted the alignment tool. Messed around with the fork fer a minute but now there doesn't seem enough clearance to get it back on the ball pivot. Maybe there will be enuf when the pressure plate is snugged down.
I ran the new pressure plate bolts in the same way the old ones had come out, a turn at a time, then rotate to the next bolt. Sun was starting to get low by the time I wuz done. Worked with the clutch fork again. Found that if I brought it up along side the pivot ball, then rotate up and over, I could get it in position to snap back on the pivot. This may have worked before I snugged the bolts down if I had thought of it earlier instead of my frontal assault tactics. Time for a victory cigar in the twilight.
 April
11th 2008 Back to the
clutch. Finished last nite's work by removing the pressure plate bolts,
one-at-a-time, applying threadlocker red and tightening them down
again. I couldn't find a torque spec so, I tightened them until they
turned the flywheel, probably close to fifty ftlbs. Reconnected the
clutch linkage next with a new linkage rod and new return spring.
Reinstalled the starter pedal linkage on the top of the bellhousing and
cleaned up the old clutch for storage beneath BillyBob's seat as a
emergency spare before closing up shop and heading for the Krash Pad.
April
11th 2008 Back to the
clutch. Finished last nite's work by removing the pressure plate bolts,
one-at-a-time, applying threadlocker red and tightening them down
again. I couldn't find a torque spec so, I tightened them until they
turned the flywheel, probably close to fifty ftlbs. Reconnected the
clutch linkage next with a new linkage rod and new return spring.
Reinstalled the starter pedal linkage on the top of the bellhousing and
cleaned up the old clutch for storage beneath BillyBob's seat as a
emergency spare before closing up shop and heading for the Krash Pad.
April 12th 2008 Saturday is starting as a good day. 'Sposed to be clear skys all the way. Started by cleaning and painting white the timing pointer in the bellhousing hole above where the starter goes. With the starter out, this wasn't as difficult as it would have been otherwise. Reinstalled the starter next. sprayed a little white lithium grease on the starter gear and wiped it off first. Earlier in the week, I had loosened the starter switch screws on top of the starter and pushed the switch as far forward as it would go. The idea, my mechanic friend Nate Hall sez, is for the starter gear to be fully engaged with the flywheel ringgear before the juice begins to flow. After the starter wuz in, the starter button in the cab was reinstalled.
The tranny was next. I didn't think I had the correct lube for the throwout bearing groove so I was happy to see that the new one that came with the clutch kit was prelubed. One thing I fergot to do when the clutch was installed was to check that the new clutch disk slid freely on the tranny splines. Nuttin' fer it now. I'm not gonna take the clutch out again to find out. Cleaned off the tranny splines, pilot shaft and throwout bearing collar and gave them a very thin coating of motor oil. Got the tranny into position on the jack and worked it in. Had problems with the last inch. Couldn't seem to find the pilot bushing hole. One nice thing about mechanical clutch linkage compared to hydraulics is that you can have a buddy work the clutch to let the disk move around while you work the tranny. My buddy is a 24 inch 2x4 wedged between pedal and seat. Finally found the bushing hole and got the tranny bolted up with the top two bolts. Moved the tranny jack out and retired my helper buddy before putting the bottom two bolts and nuts on. Gotta put your hand inside the bellhousing for these bolts. I didn't want my buddy to slip and mangle my hand. The clutch pedal goes halfway to the floor now before the freeboard is taken up. I hope that is indicative of the new disk thickness and not a problem.
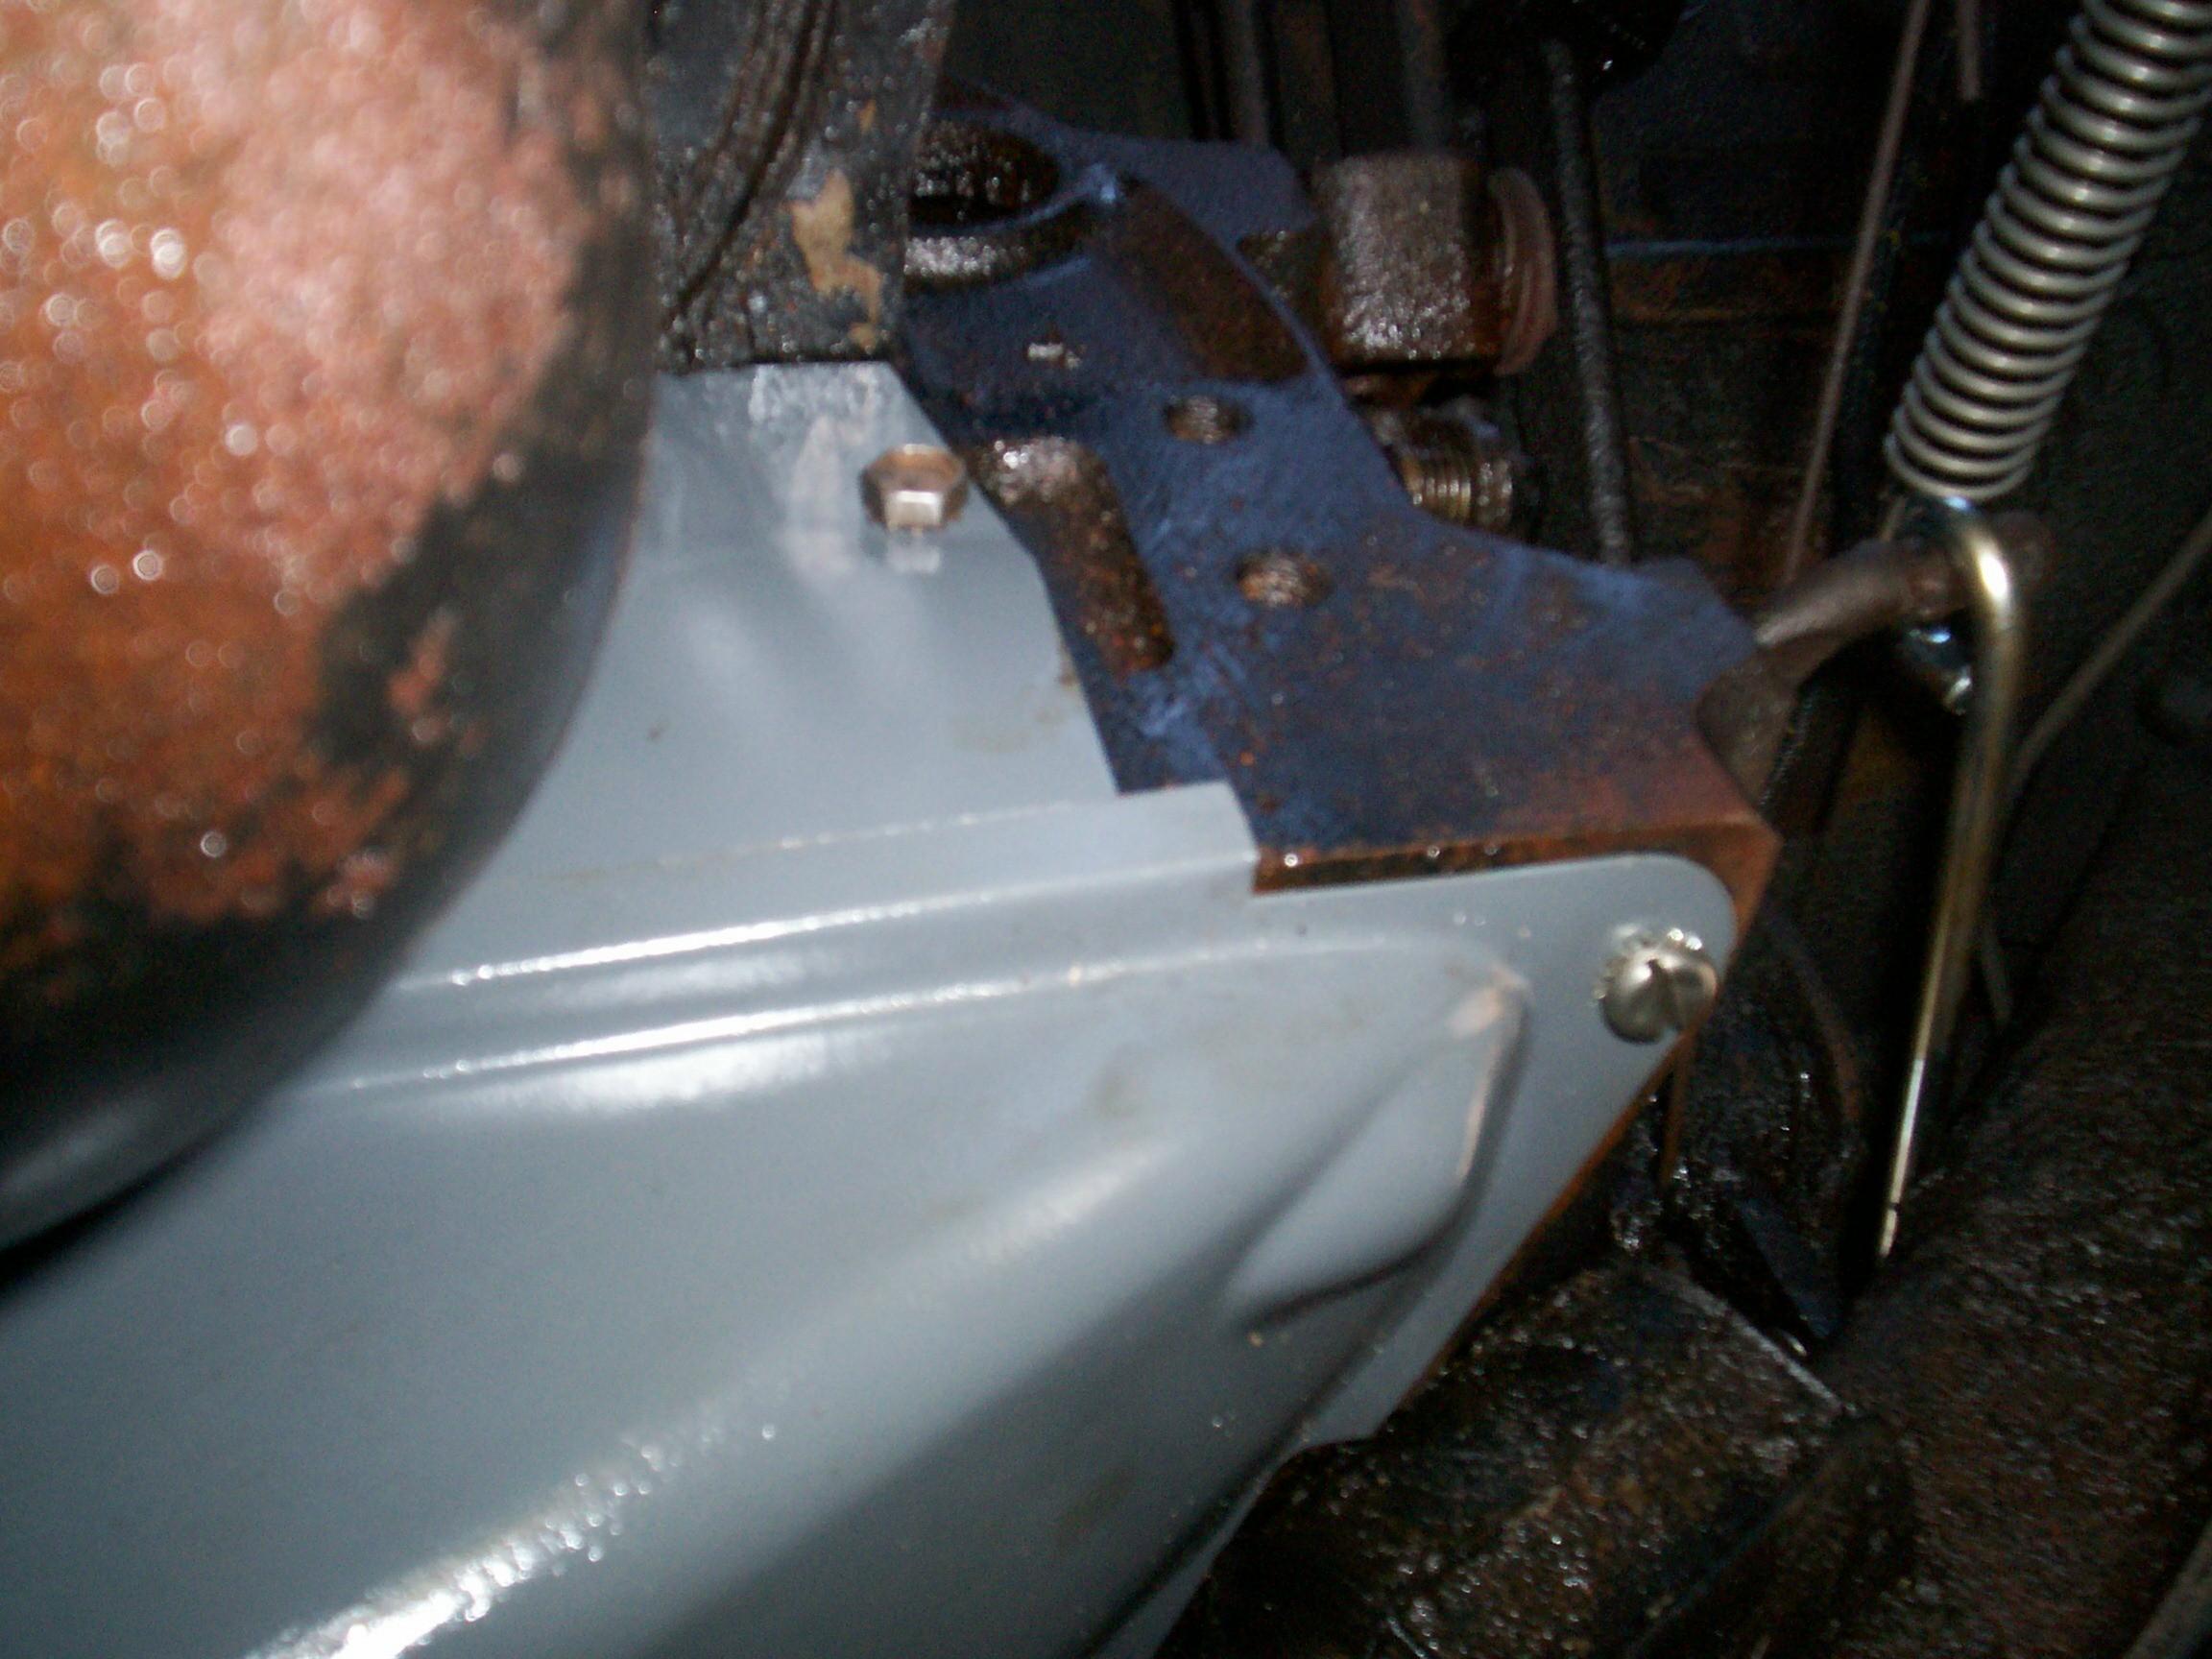 Connected
the gearshift linkage and the speedo cable next. Then the bellhousing
sheetmetal. The vertical fascia followed by the scatterpan since it
overlaps the vertical element. Finally, the driveshaft went back in. I
can see the light at the end of the tunnel.
Connected
the gearshift linkage and the speedo cable next. Then the bellhousing
sheetmetal. The vertical fascia followed by the scatterpan since it
overlaps the vertical element. Finally, the driveshaft went back in. I
can see the light at the end of the tunnel.
 A
company of parrots showed up 'bout this time to sit on the wires above
BillyBob and mock my efforts. Next was clutch adjustment. This is a
real pain. The one nut can only be reached from the engine compartment
and it's a contorted stretch. It takes a 3/4" open end wrench to do the
job and since I don't have any stubbys, the routine is turn a few
degrees, turn the wrenck over, a few more degrees, turn the wrench
over, to infinity. It's a fine thread, to boot, and I almost always go
the wrong direction out of the box. It took forever and the parrots got
bored and took off.
A
company of parrots showed up 'bout this time to sit on the wires above
BillyBob and mock my efforts. Next was clutch adjustment. This is a
real pain. The one nut can only be reached from the engine compartment
and it's a contorted stretch. It takes a 3/4" open end wrench to do the
job and since I don't have any stubbys, the routine is turn a few
degrees, turn the wrenck over, a few more degrees, turn the wrench
over, to infinity. It's a fine thread, to boot, and I almost always go
the wrong direction out of the box. It took forever and the parrots got
bored and took off.
Powerblock TV, refilling the tranny with gear oil, a few Flying Dog Pale Ales and I wuz ready fer the moment of truth. OH Baby! Contact. BillyBob started after a few trys. The great news is NO CHATTER OF GEAR TEETH!" Let the engine run and the battery to charge while I cleaned up the shadetree garage. Next was a test run around the block . . . I gotta learn to drive BillyBob again. That's not a bad thing. The clutch hooks up right away and it is solid. Pedal effort is greater. That could be the new clutch or the new return spring. Probably both. No malfunctions manifest in the cruise around the block. Victory!
That's a wrap. Gonna do light detailing work tomorrow, just clean up BillyBob a bit for cruise nite if it isn't rained out. Just five weeks before BillyBob and I take off for Hutchinson, Kansas. Gonna just do minor maintenance between now and then and get ready for the trip. The next BillyBob episode might be the roadtrip, but who's to know?
| < Back
to Intro |
You can email me at ![]() webmaster@laroke.com
webmaster@laroke.com
Issued Sunday April 13, 2008
Updated Wednesday April 4, 2018
copyright © 1996-2018 Larry Robert Kephart all rights reserved
| | LRK Home | | Bio Info | | Krash Khronicles | | LAROKE | |
| | BettyLou | | BillyBob's Garage | | Rat Patrol | | Deerslayer | | Elvira | |
| | Land of the Free and Home of the Brave | |
| | Keppylou's Art | | WWI Soldier's Diary | |