| | LRK Home | | Bio Info | | Krash Khronicles | | LAROKE | |
| | BettyLou | | BillyBob's Garage | | Rat Patrol | | Deerslayer | | Elvira | |
| | Land of the Free and Home of the Brave | |
| | Keppylou's Art | | WWI Soldier's Diary | |
BillyBob Work-in-Progress Log
![]()
WHAT'S NEW is a chronological listing of updates to the BillyBob site.
![]()
TRUCK LINKS including vendor sites for old parts, custom parts, and tools as well as sites for classic car and truck organizations
STORE Operating in association with Amazon.com, books, recordings and tools can be purchased.
PLANNING for the restoration including project schedule and cost estimates.
![]()
TRAVELS WITH BILLYBOB With apologies to Steinbeck, this area of BillyBob's Garage will be used to log the trips BillyBob and I make together.
WORK-IN-PROGRESS is the restoration of parts of BillyBob that I can accomplish without a garage.
PRE-RESTORATION includes log entries of minor repairs and adventures between time of purchase and the time when I started restoration, a piece at a time.
JR'S KORNER JR's Korner is the history of BillyBob before I got him authored by my brother, Wm. C. Kephart.
![]()
BILLYBOB MAINTENANCE Ever changing detailing, oil change, lube, etc. maintenance routines specifically developed for BillyBob, including required tools, materials and procedures.
PARTS SHOP The Parts Shop is a repository of How-To articles. Things that I have done over and over enough times to have developed a procedure. This gives me a checklist and saves brain cells.
STEALTH SHOP Urban residence design with large integrated shop and separate living quarters for a relative or renter.
![]()
You will need the Adobe Acrobat browser plugin to view these wiring diagrams which are in the PDF file format. This format allows zooming and panning. If you don't have this plugin, it can be downloaded and installed (free) from the Adobe site. The button below will take you there.
![]()
BILLYBOB WIRING DIAGRAM Here's the wiring diagram updated with BillyBob's current state 'cepting the third-party strap-on turn-signal director.
STRAP-ON TURN-SIGNAL DIRECTOR/BRAKE LIGHT CIRCUIT This turn signal and brake light circuit diagram shows the current state of the third-party turn-signal director wiring, which will remain in place until I figure out the problems with the OEM turn-signal director. It also shows the OEM headlight switch.
37. Still Maintainin'
 February
26th 2005 Looks like
rain but last weekend was good working weather under BillyBob's
shadetree and I goofed off and didn't do anything so I can't whine
about it. Picked up where I left off three weeks ago and prepared the
rear brake drums for paint touch-ups first. Wire-brushed the drums
brass wire cup in the 4" angle grinder. Then PRE Paint prepped followed
by two coats of Eastwood's
Self-Etching Primer. It's time for monthly maintenence
again and that was performed while the primer was curing. Afterwards,
the drums were finished off with rattlecan Chassis Black.
February
26th 2005 Looks like
rain but last weekend was good working weather under BillyBob's
shadetree and I goofed off and didn't do anything so I can't whine
about it. Picked up where I left off three weeks ago and prepared the
rear brake drums for paint touch-ups first. Wire-brushed the drums
brass wire cup in the 4" angle grinder. Then PRE Paint prepped followed
by two coats of Eastwood's
Self-Etching Primer. It's time for monthly maintenence
again and that was performed while the primer was curing. Afterwards,
the drums were finished off with rattlecan Chassis Black.
On to new work. Gave the ash tray I blasted a few months back a treatment with Eastwood's OxiSolve to neutralize the rust in the hidden areas that the blaster couldn't get to. I also gave the back of the glove box door a cleaning session with lacquer thinner and a toothbrush (trying to avoid destroying the history of the painted signatures and old insurance stickers found here).
 February
27th 2005 We're on the
edge of a gullywasher rain front today and it looks as if I might be
getting wet later on when I re-install BillyBob's rear wheels. When the
rain slacked off a bit, I put the Panzerwagon and BettyLou thru their
engine warm-up routines to keep the batteries charged and circulate the
engine fluids. By late morning, I had an uneasy truce with the sky fer
awhile so the glove box door and ash tray were masked, PRE Paint
prepped and hung out under the shadetree for priming. Gave both items
two coats of Eastwood's Self-Etching Primer.
February
27th 2005 We're on the
edge of a gullywasher rain front today and it looks as if I might be
getting wet later on when I re-install BillyBob's rear wheels. When the
rain slacked off a bit, I put the Panzerwagon and BettyLou thru their
engine warm-up routines to keep the batteries charged and circulate the
engine fluids. By late morning, I had an uneasy truce with the sky fer
awhile so the glove box door and ash tray were masked, PRE Paint
prepped and hung out under the shadetree for priming. Gave both items
two coats of Eastwood's Self-Etching Primer.
I cut out a pair of wax paper "spacers" to mount between the newly painted rear brake drums and the wheels to keep the paint on the drums where it belongs. Spent most of midday tin-zinc plating new lug nuts. The rear wheels were put on in late afternoon and BillyBob an' I headed for the Krash Pad.
March 5th 2005 Beautiful working weather again this weekend but, once again, I'm out-of-sync and have computer work to take care of that I can only do when my co-workers are absent and not in need of their machines. The problem is that most of us work half days (seven to seven) and it's rare that I have the system to myself. It's also festival days in downtown Boca Raton again and there are too many festival goers traipsin' thru the shadetree garage to do the nasty tasks like sandblasting.
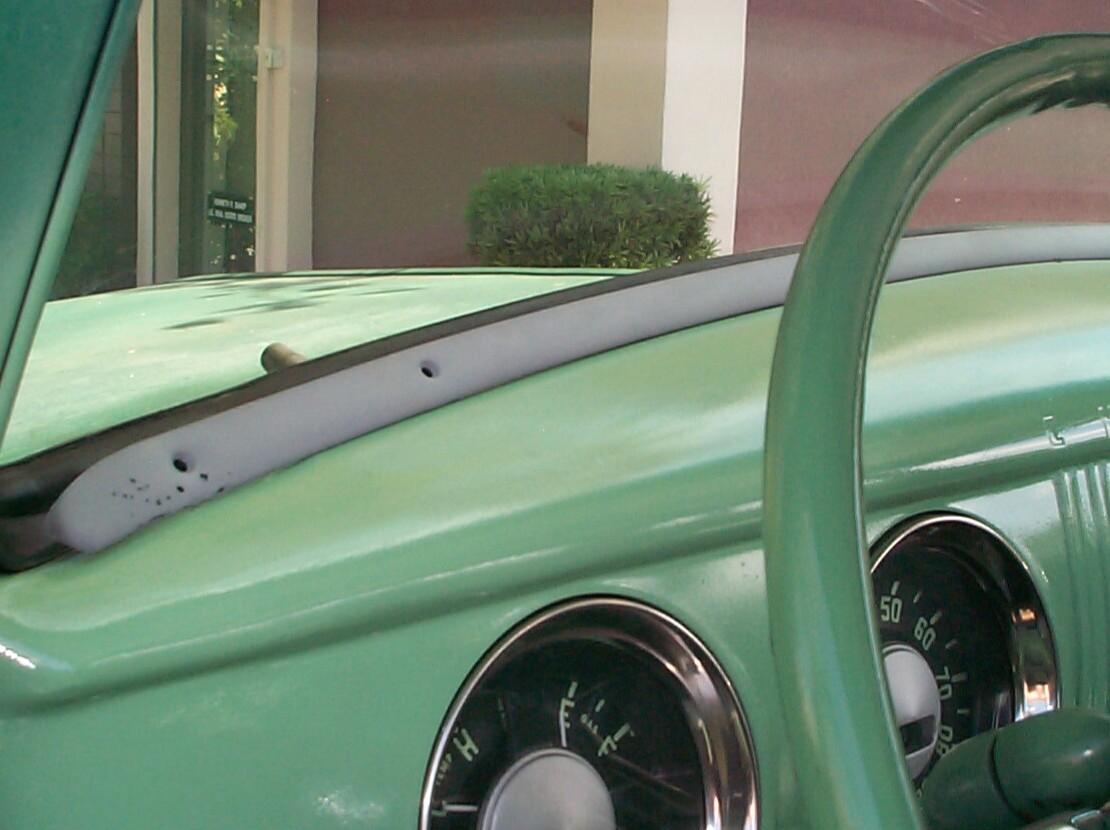
After I got the 'puter maintenance well underway, I decided to see what I could do about the terrible job I did the first time I tried to seal the windshield gasket with flowable silicone. This is the seal that is placed between the gasket and pinchweld on the outside. It was my first experience with this stuff and I got it everywhere - On top of the gasket and paint, even some on the trim. Very discouraging. I've been ignoring the problem for months now.
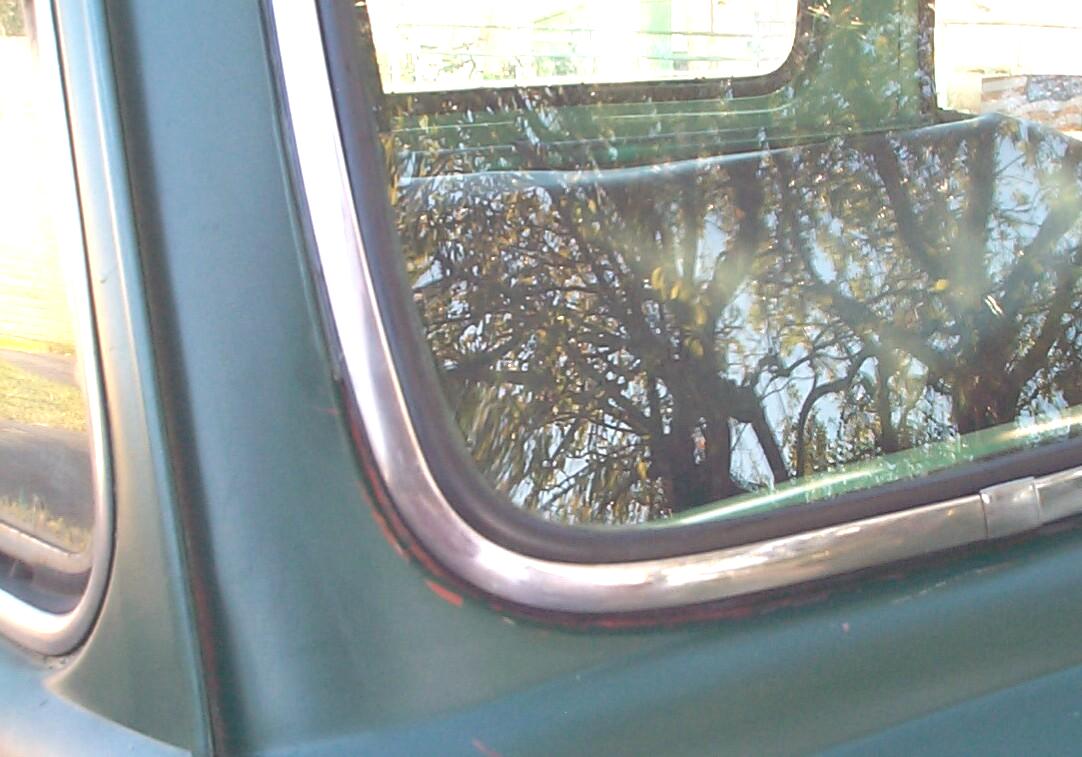 I
started with a small eight inch long section at the lower passenger
side corner of the windshield. Used X-acto knife and needle-nosed
tweezers from one of my computer tool kits to pick away pieces of the
silicone. Also used my plastic glass installer stick to pry underneath
the gasket. Took quite awhile but eventually I cleared away all the
silicone "snot balls". Next, an application of Permatex "Silicone
Stripper" was applied to the remaining silicone for ten minutes, then
wiped off. This operation was repeated for another ten minutes and all
traces of the silicone was gone in that eight inch section. The
silicone stripper is mild and has not damaged the paint or rubber
gasket as far as I can see (the paint damage in the photo is from my
clumsy knife/tweezer ops).
I
started with a small eight inch long section at the lower passenger
side corner of the windshield. Used X-acto knife and needle-nosed
tweezers from one of my computer tool kits to pick away pieces of the
silicone. Also used my plastic glass installer stick to pry underneath
the gasket. Took quite awhile but eventually I cleared away all the
silicone "snot balls". Next, an application of Permatex "Silicone
Stripper" was applied to the remaining silicone for ten minutes, then
wiped off. This operation was repeated for another ten minutes and all
traces of the silicone was gone in that eight inch section. The
silicone stripper is mild and has not damaged the paint or rubber
gasket as far as I can see (the paint damage in the photo is from my
clumsy knife/tweezer ops).
March 5th 2005 This morning I applied silicone to the eight inch section again, this time under the gasket with the help of the glass installer stick. Now, I only have the rest of the windshield to fix. This work is so much fun, like sandbasting, that I don't want to overdose on it, so I'll restrain myself and do a little bit each week.
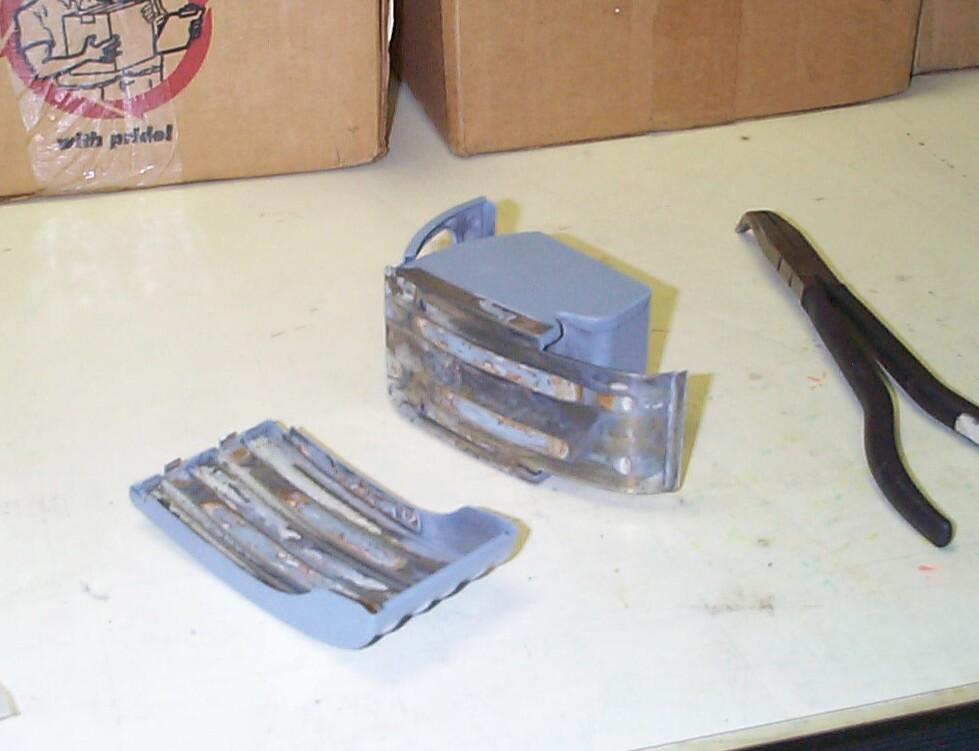 Went
back to the ash tray that I primed last week. I want to finish off the
ash receptacle with Eastwood's Detail Gray and the facing with the
light green interior paint like the rest of the dash so I started to
tape it off. While I wuz figurin' how to tape it, I realized I could
disassemble it further by unbending two tabs. Great! got some more
priming to do now but with the facing separated from the ash
receptacle, I can paint each piece it's respective color without
masking. Also managed to bend the top of the receptacle up a bit to get
better paint coverage inside.
Went
back to the ash tray that I primed last week. I want to finish off the
ash receptacle with Eastwood's Detail Gray and the facing with the
light green interior paint like the rest of the dash so I started to
tape it off. While I wuz figurin' how to tape it, I realized I could
disassemble it further by unbending two tabs. Great! got some more
priming to do now but with the facing separated from the ash
receptacle, I can paint each piece it's respective color without
masking. Also managed to bend the top of the receptacle up a bit to get
better paint coverage inside.
Wire brushed the new exposed areas of the ash tray parts, PRE Paint Prepped and sprayed with two coats of self-etching primer. Setup the tin-zinc plating tools and plated lug nuts while watching this weekend's PowerBlock segment on Spike TV. By the time I was finished with that, the primer was cured and the lug nuts were ready for a tumbler polishing session. Finished up the ash tray receptacle with three coats of Detail Gray.
 March
12th 2005 Good working
weather this weekend. Painters pressure-washed the Krash Lab building
yesterday and I wuz 'fraid I'd have to deal with them underfoot out
under the shadetree but they're not scheduled to start painting the
building 'til monday. Detailed the wheels first. I skipped touch-up
paint on the backsides since I'm gonna be sandblasting them soon (I
hope) for new tires and re-finishing.
March
12th 2005 Good working
weather this weekend. Painters pressure-washed the Krash Lab building
yesterday and I wuz 'fraid I'd have to deal with them underfoot out
under the shadetree but they're not scheduled to start painting the
building 'til monday. Detailed the wheels first. I skipped touch-up
paint on the backsides since I'm gonna be sandblasting them soon (I
hope) for new tires and re-finishing.
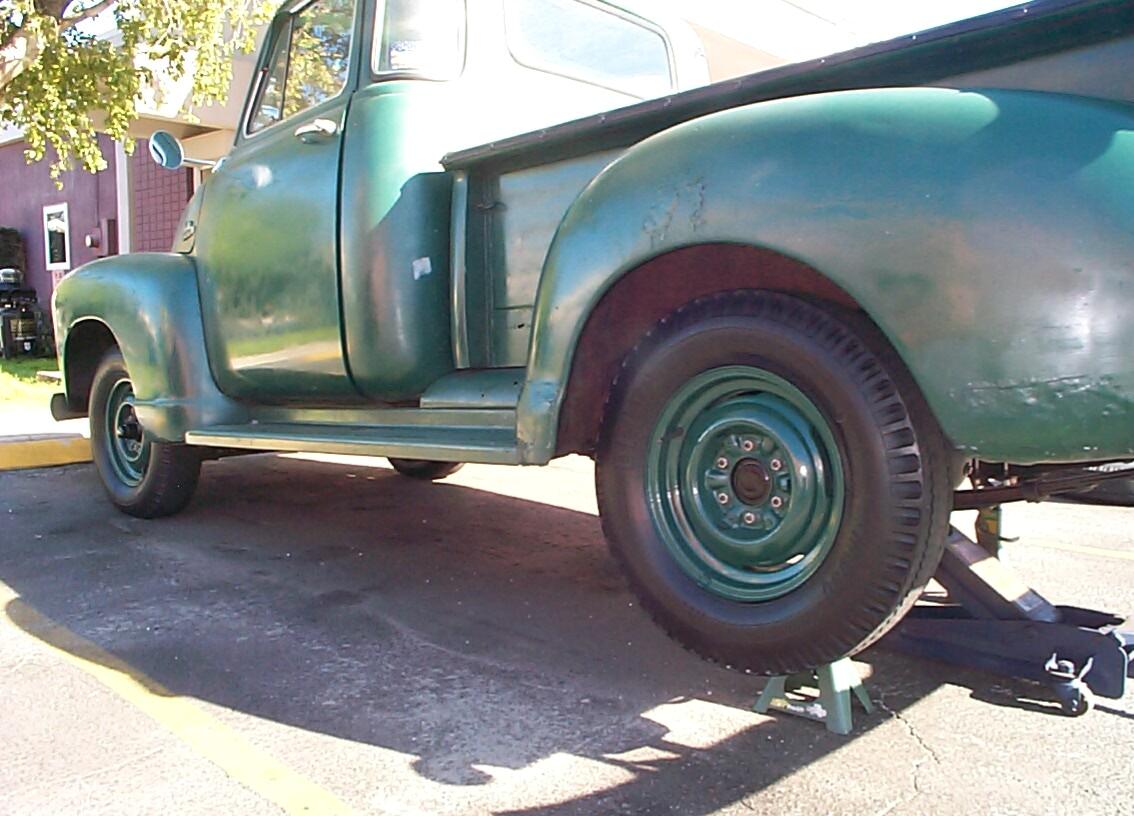
This is the first time I've had the wheels off since the drums were painted. Letting the drum paint cure overnite and the wax paper "spacers" worked after a fashion. The wax paper stuck to the paint at pressure points around the lugs but the paint stayed on the drums this time. Not perfect but better.
March 13th 2005 Good weather day again. I got to the Krash Lab early and dragged out the siphon blaster. The pressure blaster I ordered from Harbor Freight is still on backorder so I decided to blast interior sheetmetal. The windshield trim piece that covers the defroster trough was chosen. The operation was went faster than it usually does and I was finished after ninety minutes. Afterwards, the trim piece was PRE Paint Prepped and given a few coats of Self-Etching primer.
Continued by stripping and replacing another eight inch section of silicone sealant between the windshield gasket and exterior pinchweld area. Still using X-acto knife and tweezers to get things started but I found the best tool to get the snot-balls off is the good ole Mark I fingertip and nail.
 After
the primer dried, the defroster trim piece was test-fitted on the
dashboard. The original fasteners fer this thing were #8 self-tapping
screws 1-3/4" long. I could only find two of the old ones and they were
both rusted beyond use. Searched thru my Doc's House of Bolts
kit and Harbor Freight assorted stainless steel screw sets but there
weren't any replacements to be found. Looks like another McMaster-Carr order
in my future.
After
the primer dried, the defroster trim piece was test-fitted on the
dashboard. The original fasteners fer this thing were #8 self-tapping
screws 1-3/4" long. I could only find two of the old ones and they were
both rusted beyond use. Searched thru my Doc's House of Bolts
kit and Harbor Freight assorted stainless steel screw sets but there
weren't any replacements to be found. Looks like another McMaster-Carr order
in my future.
March 19th 2005 Received my #8 x 1-3/4" oval phillips stainless steel screws from McMaster-Carr during the week and test-fitted the defroster vent dashboard moulding again. Holes for three of the screws will have to be re-drilled in the areas where new metal was placed during the windshield epic. An area of the dash in front of the steering wheel needs to be sanded down a bit and the moulding needs some work before painting too. I started a "interiors group" of spare fasteners with the moulding screws and moved on to maintenance tasks. It's time for quarterly maintenance again. Finished brake maintenance after that. I adjusted each wheel a few weeks ago. Today, the old brake fluid was bled out and replaced with new DOT 3 fluid. This is time-consuming and messy but I'm getting better at it.
March 26th 2005 Hot and muggy, Summer is coming to South Florida. No complaints. It's below freezing in the Northeast today. Started out with chassis cleaning. Putty knifed and wire brushed the underside of the front crossmember which hasn't been addressed yet and therefore has years of gunk on it. Then soaped the chassis with the grimeblaster and degreaser followed by pressure water rinse. The BillyBob "garage floor" being wet now, I put off further chassis detailing until next week.
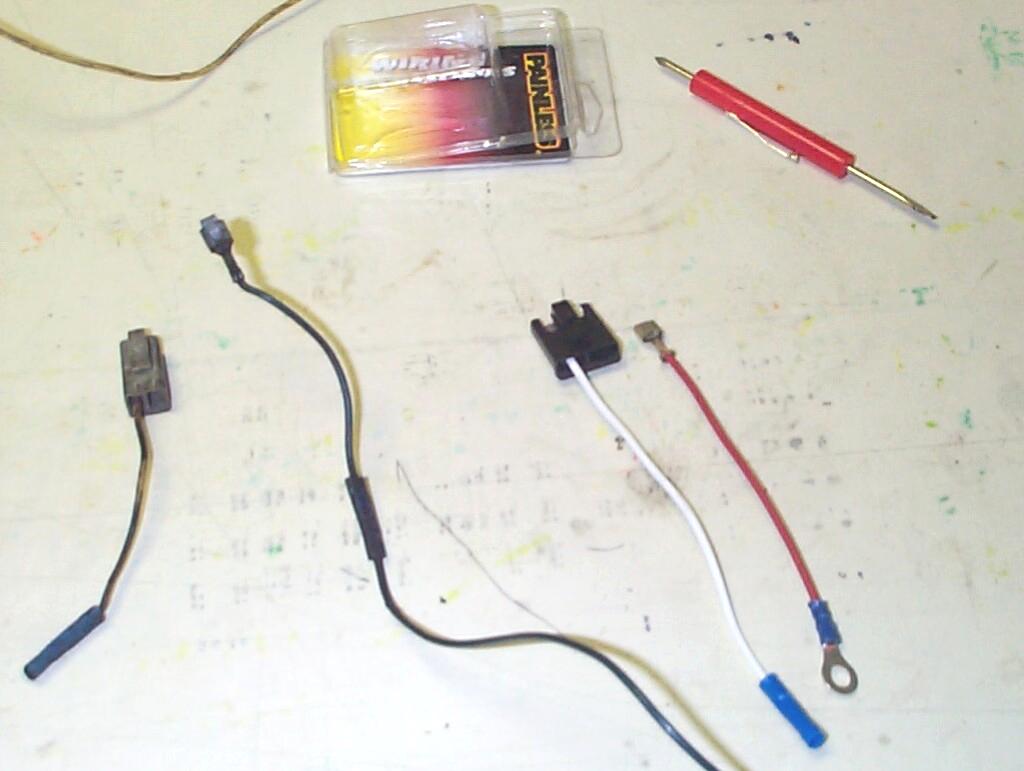 For
a long time, I've wanted to replace the ratty plug and wires that run
from the Delcotron alternator to the 12v Voltage regulator. I searched
the Internet and finally found one from Painless Wiring that I thought
would work. When it arrived, I was disappointed to see it was wider
than the plug I needed. Also, the wires coming out of it were too short
for my purposes and would need to be spliced as well. I put the little
project on the back burner again. Earlier this week I got my latest
copy of "Auto Restorer" magazine (April 2005 Vol 17 Number 4). Scanning
a how-to article "Aging Electrical Systems" by Neil Lewbel, I found out
that the terminals in the plug could be removed with some deft fiddling
with a small screwdriver. They snap in place. I thought they were
molded in. WooHoo! I can clean up the old plug and re-wire it with the
new terminals from the Painless plug. I'm glad I decided to try this
today. The old wires between the alternator plug and voltage regulator
had been spliced at some point by a previous owner and one of the
splices came apart in my hands when I tried to clean grease off the
wire. Hummm, wonder if this failing splice could have been part of the
problem I've been having with voltage regulators? The wire was dirty
because it was snaked around in under the oil filter assembly which
leaks a little.
For
a long time, I've wanted to replace the ratty plug and wires that run
from the Delcotron alternator to the 12v Voltage regulator. I searched
the Internet and finally found one from Painless Wiring that I thought
would work. When it arrived, I was disappointed to see it was wider
than the plug I needed. Also, the wires coming out of it were too short
for my purposes and would need to be spliced as well. I put the little
project on the back burner again. Earlier this week I got my latest
copy of "Auto Restorer" magazine (April 2005 Vol 17 Number 4). Scanning
a how-to article "Aging Electrical Systems" by Neil Lewbel, I found out
that the terminals in the plug could be removed with some deft fiddling
with a small screwdriver. They snap in place. I thought they were
molded in. WooHoo! I can clean up the old plug and re-wire it with the
new terminals from the Painless plug. I'm glad I decided to try this
today. The old wires between the alternator plug and voltage regulator
had been spliced at some point by a previous owner and one of the
splices came apart in my hands when I tried to clean grease off the
wire. Hummm, wonder if this failing splice could have been part of the
problem I've been having with voltage regulators? The wire was dirty
because it was snaked around in under the oil filter assembly which
leaks a little.
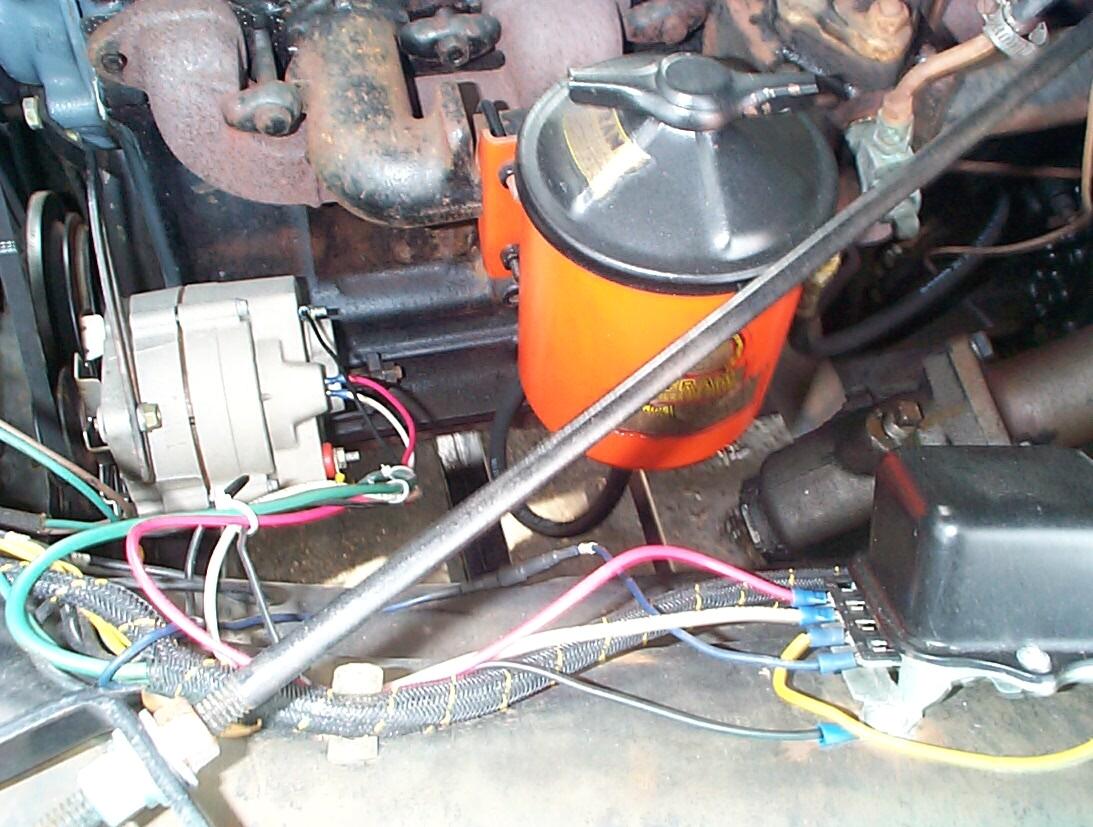 Well,
so much for good intentions. The old plug with the new terminals would
not insert into the back of the alternator. Too tight. When I did get
it in, it pushed one of the terminals out of the back of the plug. I
didn't want to force this too much as one of the spade terminals on the
alternator wobbled a bit like a loose tooth. Ended up putting spade
receptacle terminals on the loose wires and puting these on the back of
the alternator without the specalized plug for the time being. I can
take my time and mess around with one of my spare alternators and the
plug at the workbench on a rainy day. I did make progress tho' I now
have two new wires and connectors without spices and they are re-routed
away from the oil filter. Now, I have to go update my wiring diagram
colors.
Well,
so much for good intentions. The old plug with the new terminals would
not insert into the back of the alternator. Too tight. When I did get
it in, it pushed one of the terminals out of the back of the plug. I
didn't want to force this too much as one of the spade terminals on the
alternator wobbled a bit like a loose tooth. Ended up putting spade
receptacle terminals on the loose wires and puting these on the back of
the alternator without the specalized plug for the time being. I can
take my time and mess around with one of my spare alternators and the
plug at the workbench on a rainy day. I did make progress tho' I now
have two new wires and connectors without spices and they are re-routed
away from the oil filter. Now, I have to go update my wiring diagram
colors.
March 27th 2005 A good weather day here in South Florida on Easter. Dragged out the siphon blaster and cleaned the rear trim piece for the headliner. It was then PRE Paint Prepped and given a few coats of Self-Etching Primer.
I've been planning to get a rubber repair product to glue a damaged section of windshield gasket that occured when I was trying to pull the lip of the gasket over the pinchweld with a cord in the gasket channel during windshield installation. The cord was too thin and ended up cutting into the gasket lip. As I was going thru some of the boxes of my Mom's from my last trip to Pennsylvania, I found a tube of Loctite Plastic & Vinyl Repair. This looks like the stuff I need. After the Loctite set, the defroster molding was put back in place and three holes drilled with a 3/64" bit for the three mounting screws whose holes were obliterated by the windshield area bodywork.
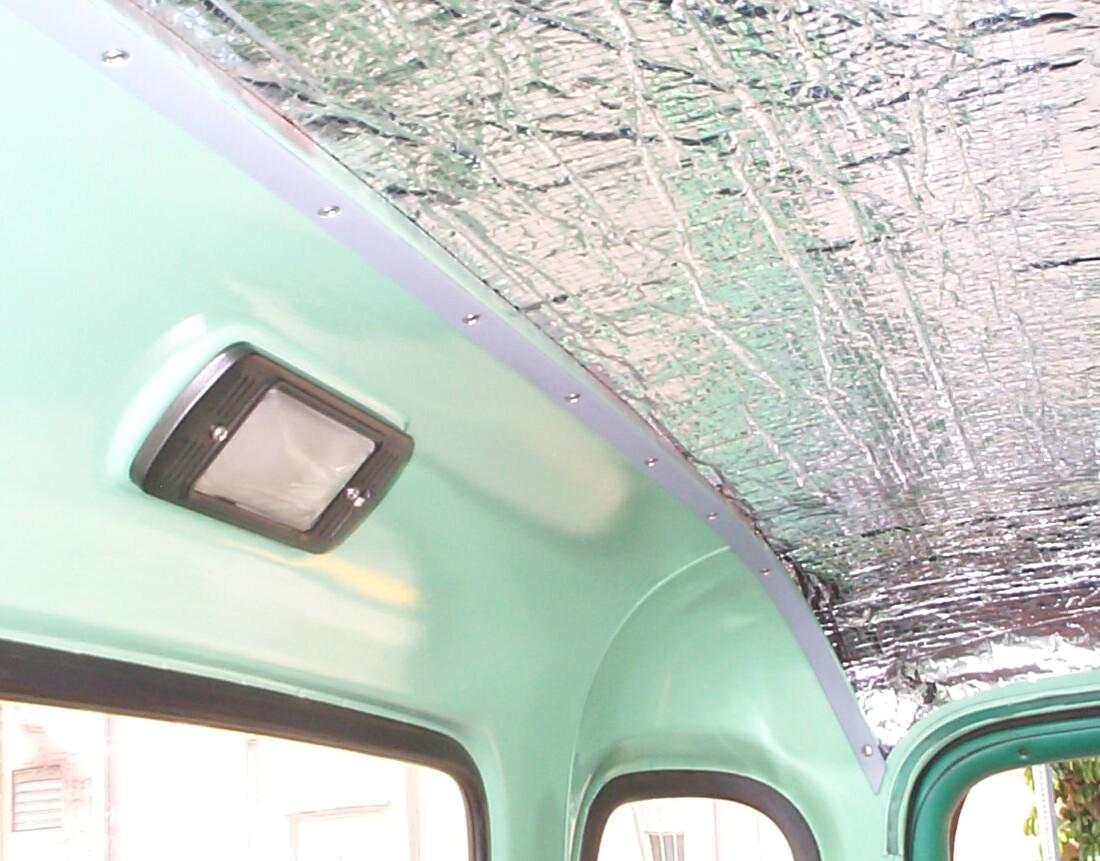 After
the primer dried, the headliner trim piece was installed with stainless
steel screws that came with the Doc's House of Bolts kit. These appear
to be oval head phillips #8 self-tapping screws 5/8" long. Eleven are
required and twelve came with the kit. Maybe the xtra screw is a spare.
Maybe it's a miscount. Maybe I have the screws in the wrong place.
There was no documentation other than that they were interior
fasteners. We'll see.
After
the primer dried, the headliner trim piece was installed with stainless
steel screws that came with the Doc's House of Bolts kit. These appear
to be oval head phillips #8 self-tapping screws 5/8" long. Eleven are
required and twelve came with the kit. Maybe the xtra screw is a spare.
Maybe it's a miscount. Maybe I have the screws in the wrong place.
There was no documentation other than that they were interior
fasteners. We'll see.
April 2nd 2005 Uneasy sky today. Don't know if I'll get doused or not. Started out with monthly maintenance. It's that time again. After maintenance, BillyBob's front end was put up in the air on jackstands. Last week during chassis degreasing, the bottom of the front crossmember was scraped down. During these detailing cycles, I've started getting into the habit of tackling another unrestored area or item every time I perform the detailing task. We're in the chassis detailing cycle now and today I plan to paint the bottom of the front crossmember. The hexnuts and washers were removed from the radiator support carriage bolts with a 9/16" socket and cleaned. the carriage bolts were left in place.
Scrapped, wire-brushed and cleaned the bottom of the crossmember some more. I tried a new technique I'd seen Stacey David on the TV show Trucks use - scotchbrite pad with solvent (in my case, lacquer thinner) on the crossmember as well. It works nicely if the part is relatively clean to begin with (otherwise, the scotchbrite pad loads up with grease). Eastwood's Undergone Undercoating/Heavy Residue Remover (#31130Z) still works best for me to get the heavy buildups off beforehand. I got the bottom of the crossmember PRE Paint Prepped and was masking off the front engine mount hex nuts when the wind and the rain hit me at around 11:30 AM. Scrambled to get the tools under cover and now I'm waiting out the storm.
Started a front chassis group of fasteners and placed a McMaster-Carr order for stainless steel hex nuts, flat washers and lock washers for the radiator support. The rain let up long enuf for me to get a coat of Eastwood's Rust Encapsulator on the crossmember bottom. Put the truck on the ground and put the tools away. Headed for the Krash Pad in Renegade.
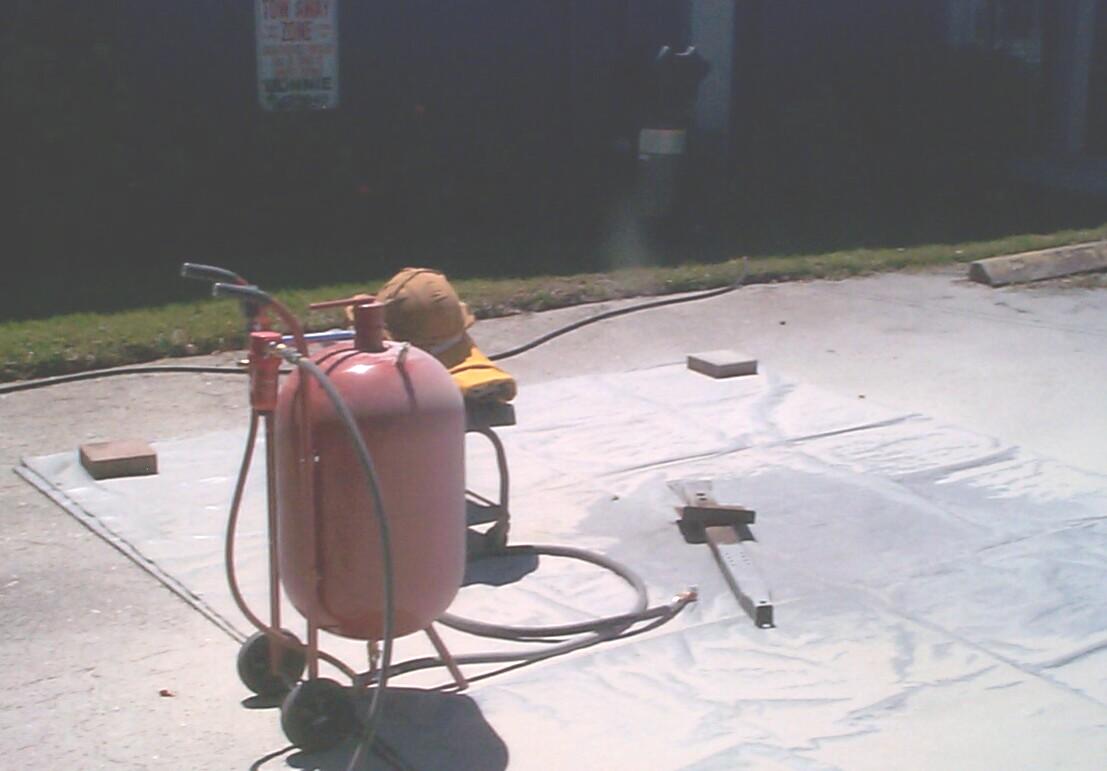 April
3rd 2005 The pressure
blaster arrived from Harbor Freight last week. First order of business
today is assembly. I didn't get far 'tho. I was disappointed in the fit
of some of the parts (female threads in the two manifolds and the
sparse, pigeon english instructions). I don't blame the Taiwanese fella
who wrote them so much as Central Pneumatic for not proofreading them.
After all, I only know two languages, English and profanity. At one
point, I had to walk away from the thing fer awhile 'til my frustration
drained off. Took about three hours but I finally had it together (I
think) by 11 AM. Not too late to set up for some blasting activity.
April
3rd 2005 The pressure
blaster arrived from Harbor Freight last week. First order of business
today is assembly. I didn't get far 'tho. I was disappointed in the fit
of some of the parts (female threads in the two manifolds and the
sparse, pigeon english instructions). I don't blame the Taiwanese fella
who wrote them so much as Central Pneumatic for not proofreading them.
After all, I only know two languages, English and profanity. At one
point, I had to walk away from the thing fer awhile 'til my frustration
drained off. Took about three hours but I finally had it together (I
think) by 11 AM. Not too late to set up for some blasting activity.
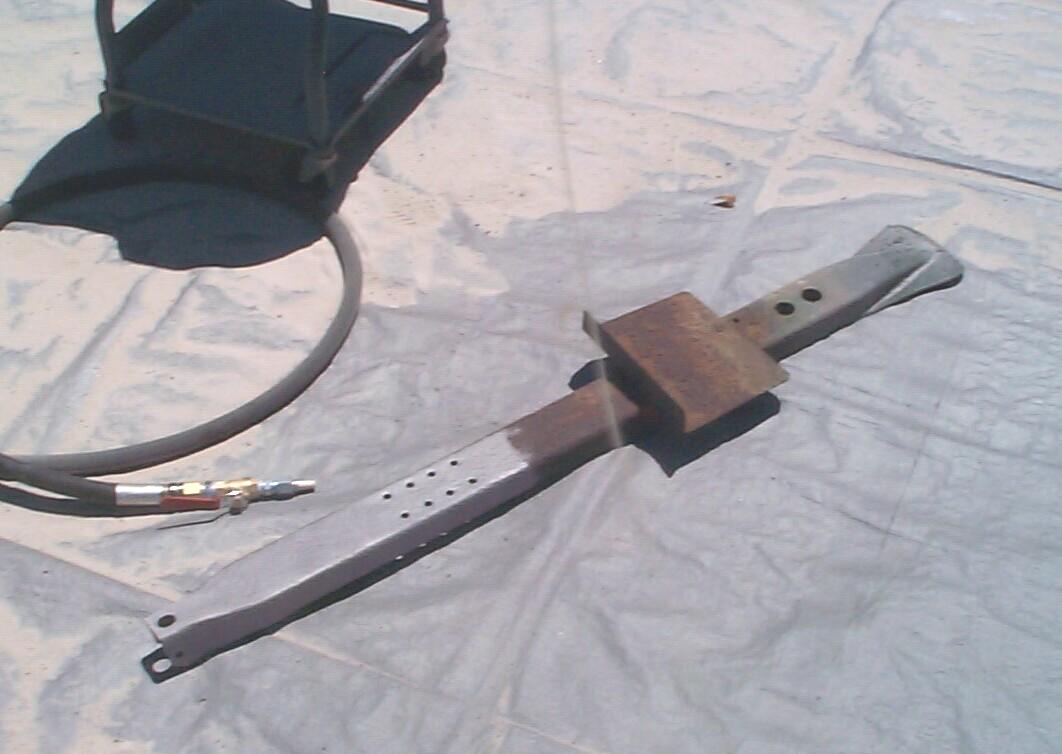 I
had some trouble with an O-ring at the filler connection at first, but
soon I was blasting away. Less than a hour later, I'd gone thru 100 lbs
of sand and gotten about forty percent of the spare tire carrer
blasted. This is about four times as fast as my efforts with the siphon
blaster. I will stick with the siphon blaster for sheet metal parts
where warpage is a factor, but this is now my blaster of choice where
it's applicable. Gonna dissemble the tire carrer into its two component
parts before going any further with it.
I
had some trouble with an O-ring at the filler connection at first, but
soon I was blasting away. Less than a hour later, I'd gone thru 100 lbs
of sand and gotten about forty percent of the spare tire carrer
blasted. This is about four times as fast as my efforts with the siphon
blaster. I will stick with the siphon blaster for sheet metal parts
where warpage is a factor, but this is now my blaster of choice where
it's applicable. Gonna dissemble the tire carrer into its two component
parts before going any further with it.
About time to post this log entry. Been a lotta putzin' around in this one but some progress has been made. I'll be starting on the wheel re-finishing project soon now that the pressure blaster has arrived. Since I'm in the chassis section of the detailing cycle, I'll be covering new work on the frame too. I also want to finish the tune-up maintenance routines. See y'all down the road.
| < Back
to Intro |
You can email me at ![]() webmaster@laroke.com
webmaster@laroke.com
Issued Friday April 8, 2005
Updated Monday March 5, 2018
copyright © 1996-2018 Larry Robert Kephart all rights reserved
| | LRK Home | | Bio Info | | Krash Khronicles | | LAROKE | |
| | BettyLou | | BillyBob's Garage | | Rat Patrol | | Deerslayer | | Elvira | |
| | Land of the Free and Home of the Brave | |
| | Keppylou's Art | | WWI Soldier's Diary | |