| | LRK Home | | Bio Info | | Krash Khronicles | | LAROKE | |
| | BettyLou | | BillyBob's Garage | | Rat Patrol | | Deerslayer | | Elvira | |
| | Land of the Free and Home of the Brave | |
| | Keppylou's Art | | WWI Soldier's Diary | |
BillyBob Parts Shop
![]()
WHAT'S NEW is a chronological listing of updates to the BillyBob site.
![]()
TRUCK LINKS including vendor sites for old parts, custom parts, and tools as well as sites for classic car and truck organizations
STORE Operating in association with Amazon.com, books, recordings and tools can be purchased.
PLANNING for the restoration including project schedule and cost estimates.
![]()
TRAVELS WITH BILLYBOB With apologies to Steinbeck, this area of BillyBob's Garage will be used to log the trips BillyBob and I make together.
WORK-IN-PROGRESS is the restoration of parts of BillyBob that I can accomplish without a garage.
PRE-RESTORATION includes log entries of minor repairs and and adventures between time of purchase and the time when I started restoration, a piece at a time.
JR'S KORNER JR's Korner is the history of BillyBob before I got him authored by my brother, Wm. C. Kephart.
![]()
BILLYBOB MAINTENANCE Ever changing detailing, oil change, lube, etc. maintenance routines specifically developed for BillyBob, including required tools, materials and procedures.
PARTS SHOP The Parts Shop is a repository of How-To articles. Things that I have done over and over enough times to have developed a procedure. This gives me a checklist and saves brain cells.
STEALTH SHOP Urban residence design with large integrated shop and separate living quarters for a relative or renter.
3. Nuts n Bolts: Re-finishing
There are several small parts re-finishing methods I use.
Tin-Zinc Plating
 I
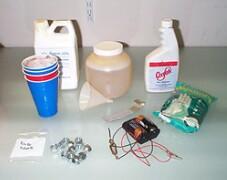
currently use the Tin-zinc plating kit from Eastwood. It consists of
Electrolyte solution, plastic plating container, tin-lead anode bar,
battery box with wires and alligator clips which takes two D cells,
goggles and latex gloves. In addition, I have copper wire for part
hooks, plastic cups to hold parts at various stages, a small funnel,
Eastwood's OxiSolve, and long bent needle-nose pliers.
 First,
the new or clean, de-rusted
items to be plated are placed in a cup and submerged in Eastwood's
OxiSolve for ten minutes. Then they are removed from the OxiSolve and
placed in a cup of clean water. They are picked out of the water, one
by one, and plated. The item is dryed off and placed on a wire hook
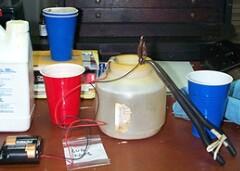
connected to the black wire alligator clip (the red wire alligator clip
is connected to the tin-lead anode which is submerged in the
electrolyte). The item is submerged in the electrolyte for three to ten
minutes depending on the size of the item being plated (I use six
minutes for lug nuts). I use the needle-nose pliers with a rubber band
to hold the item suspended in the solution.
 When
the part is retreived from the plating electrolyte, it is deposited in
a new cup of clean cold water. After all the items for the session have
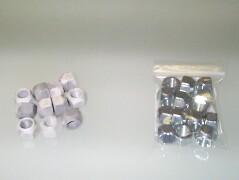
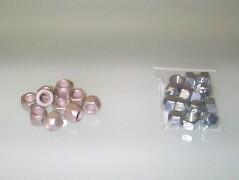
been plated, remove them from the water and dry them off. This is what
they look like at that point next to some of the ones (shiny in bag)
that haven't been plated yet.
 Then
I place them in the tumbler for an hour or so with the walnut shell
dri-shine media. This process removes excess plating residue and puts a
nice pewter satin sheen on the items. There are many different levels
of finish that can be achieved, with polish, for example, if desired,
but I like the pewter look. This finish won't hold rust back for all
that long on chassis parts but I find that plated items are easier to
de-rust once they've been plated.
You can email me at ![]() webmaster@laroke.com
webmaster@laroke.com
Issued Friday April 8, 2005
Updated Tuesday April 24, 2018
copyright © 1996-2018 Larry Robert Kephart all rights reserved
| | LRK Home | | Bio Info | | Krash Khronicles | | LAROKE | |
| | BettyLou | | BillyBob's Garage | | Rat Patrol | | Deerslayer | | Elvira | |
| | Land of the Free and Home of the Brave | |
| | Keppylou's Art | | WWI Soldier's Diary | |