| | LRK Home | | Bio Info | | Krash Khronicles | | LAROKE | |
| | BettyLou | | BillyBob's Garage | | Rat Patrol | | Deerslayer | |
| | Land of the Free and Home of the Brave | |
| | Keppylou's Art | | WWI Soldier's Diary | |
Project Puffer Log
![]()
WHAT'S NEW is a chronological listing of updates to the BillyBob site.
![]()
TRUCK LINKS including vendor sites for old parts, custom parts, and tools as well as sites for classic car and truck organizations
STORE Operating in association with Amazon.com, books, recordings and tools can be purchased.
PLANNING for the restoration including project schedule and cost estimates.
![]()
TRAVELS WITH BILLYBOB With apologies to Steinbeck, this area of BillyBob's Garage will be used to log the trips BillyBob and I make together.
WORK-IN-PROGRESS was the restoration of parts of BillyBob that I could accomplish without a garage up until the summer of 2010 when I finally got enough warehouse space to work in. Now, it also includes the continuing work on BillyBob in the shop.
PRE-RESTORATION includes log entries of minor repairs and adventures between time of purchase and the time when I started restoration, a piece at a time.
JR'S KORNER JR's Korner is the history of BillyBob before I got him authored by my brother, Wm. C. Kephart.
![]()
BILLYBOB MAINTENANCE Ever changing detailing, oil change, lube, etc. maintenance routines specifically developed for BillyBob, including required tools, materials and procedures.
PROJECT PUFFER Chronicles the rebuild of BillyBob's Stovebolt 235 including the installation of a 4-71 blower system.
PARTS SHOP The Parts Shop is a repository of How-To articles. Things that I have done over and over enough times to have developed a procedure. This gives me a checklist and saves brain cells.
STEALTH SHOP Urban residence design with large integrated shop and separate living quarters for a relative or renter.
![]()
You will need the Adobe Acrobat browser plugin to view these wiring diagrams which are in the PDF file format. This format allows zooming and panning. If you don't have this plugin, it can be downloaded and installed (free) from the Adobe site. The button below will take you there.
![]()
BILLYBOB WIRING DIAGRAM Here's the wiring diagram updated with BillyBob's current state 'cepting the third-party strap-on turn-signal director.
STRAP-ON TURN-SIGNAL DIRECTOR/BRAKE LIGHT CIRCUIT This turn signal and brake light circuit diagram shows the current state of the third-party turn-signal director wiring, which will remain in place until I figure out the problems with the OEM turn-signal director. It also shows the OEM headlight switch.
1. Mock Up
 October
26th 2015 I'd been
trying to
get a Larrowe and Sons blower manifold for the 235/261 for a few years.
It didn't become available until early this year when James Larrowe of
JJ Inlines announced plans to produce blower kits for the Stovebolt
235/261 and Jimmy 228/302 engines. I decided to go for the full
monty.
October
26th 2015 I'd been
trying to
get a Larrowe and Sons blower manifold for the 235/261 for a few years.
It didn't become available until early this year when James Larrowe of
JJ Inlines announced plans to produce blower kits for the Stovebolt
235/261 and Jimmy 228/302 engines. I decided to go for the full
monty.
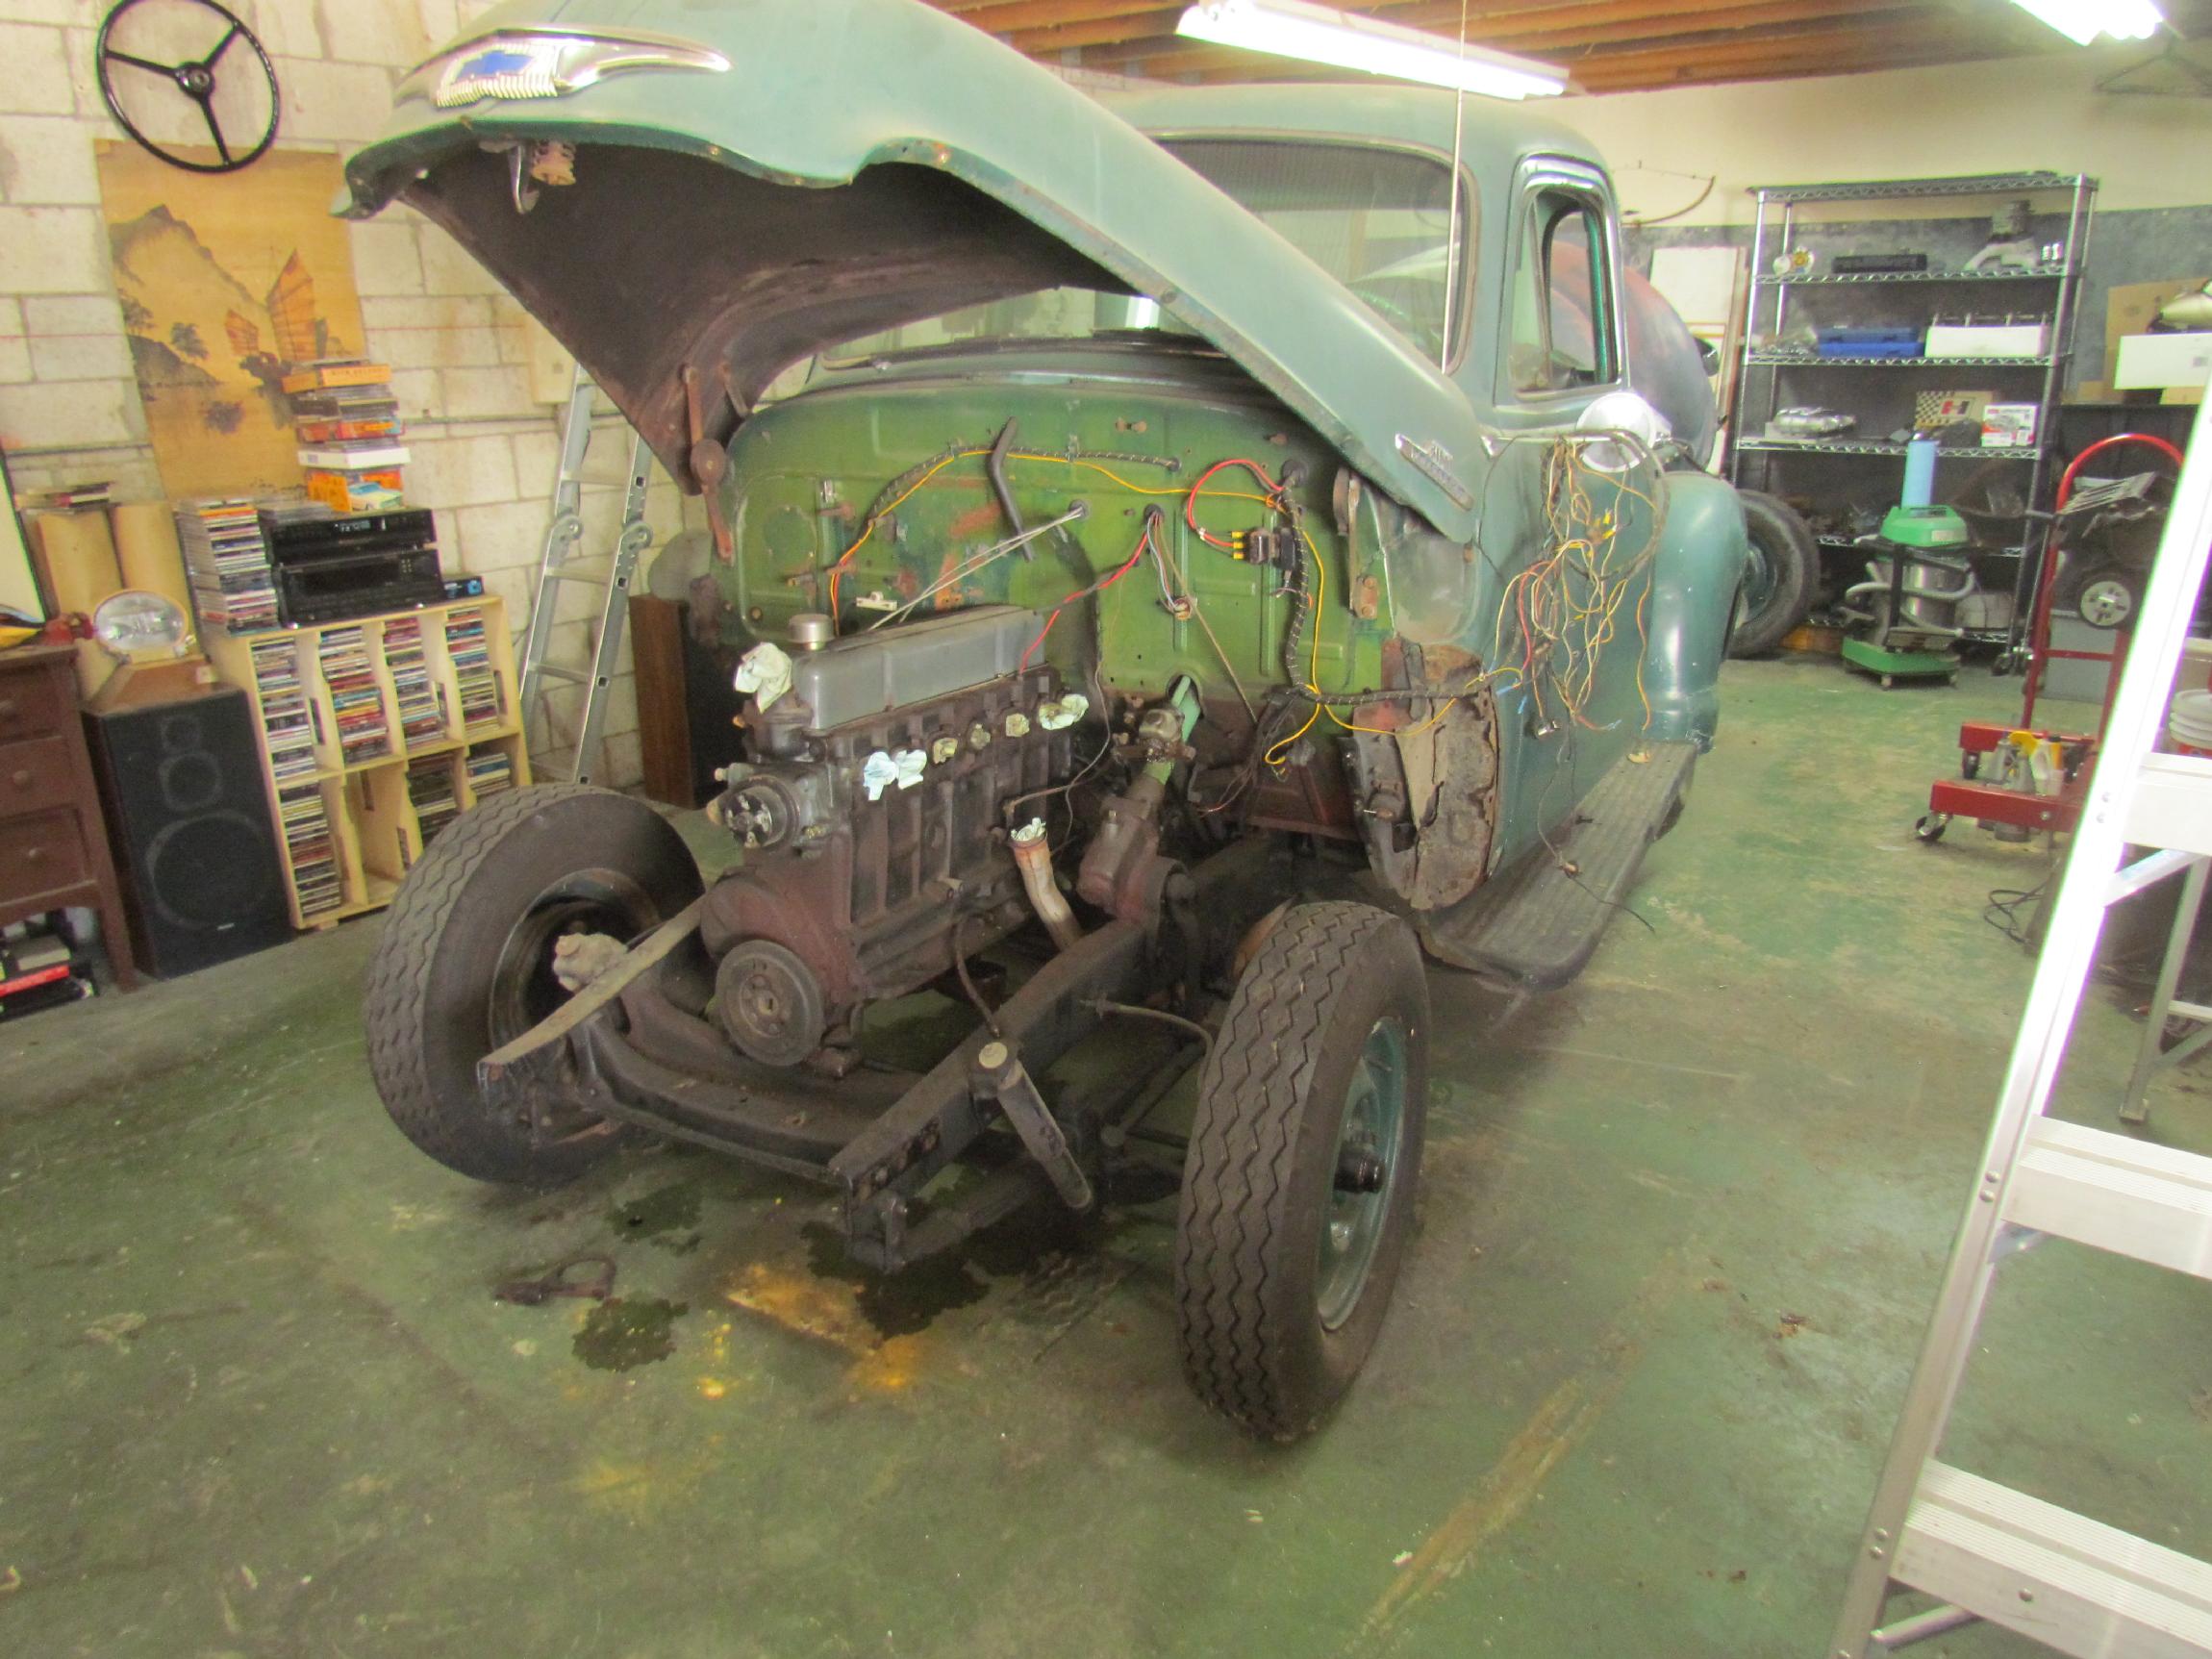
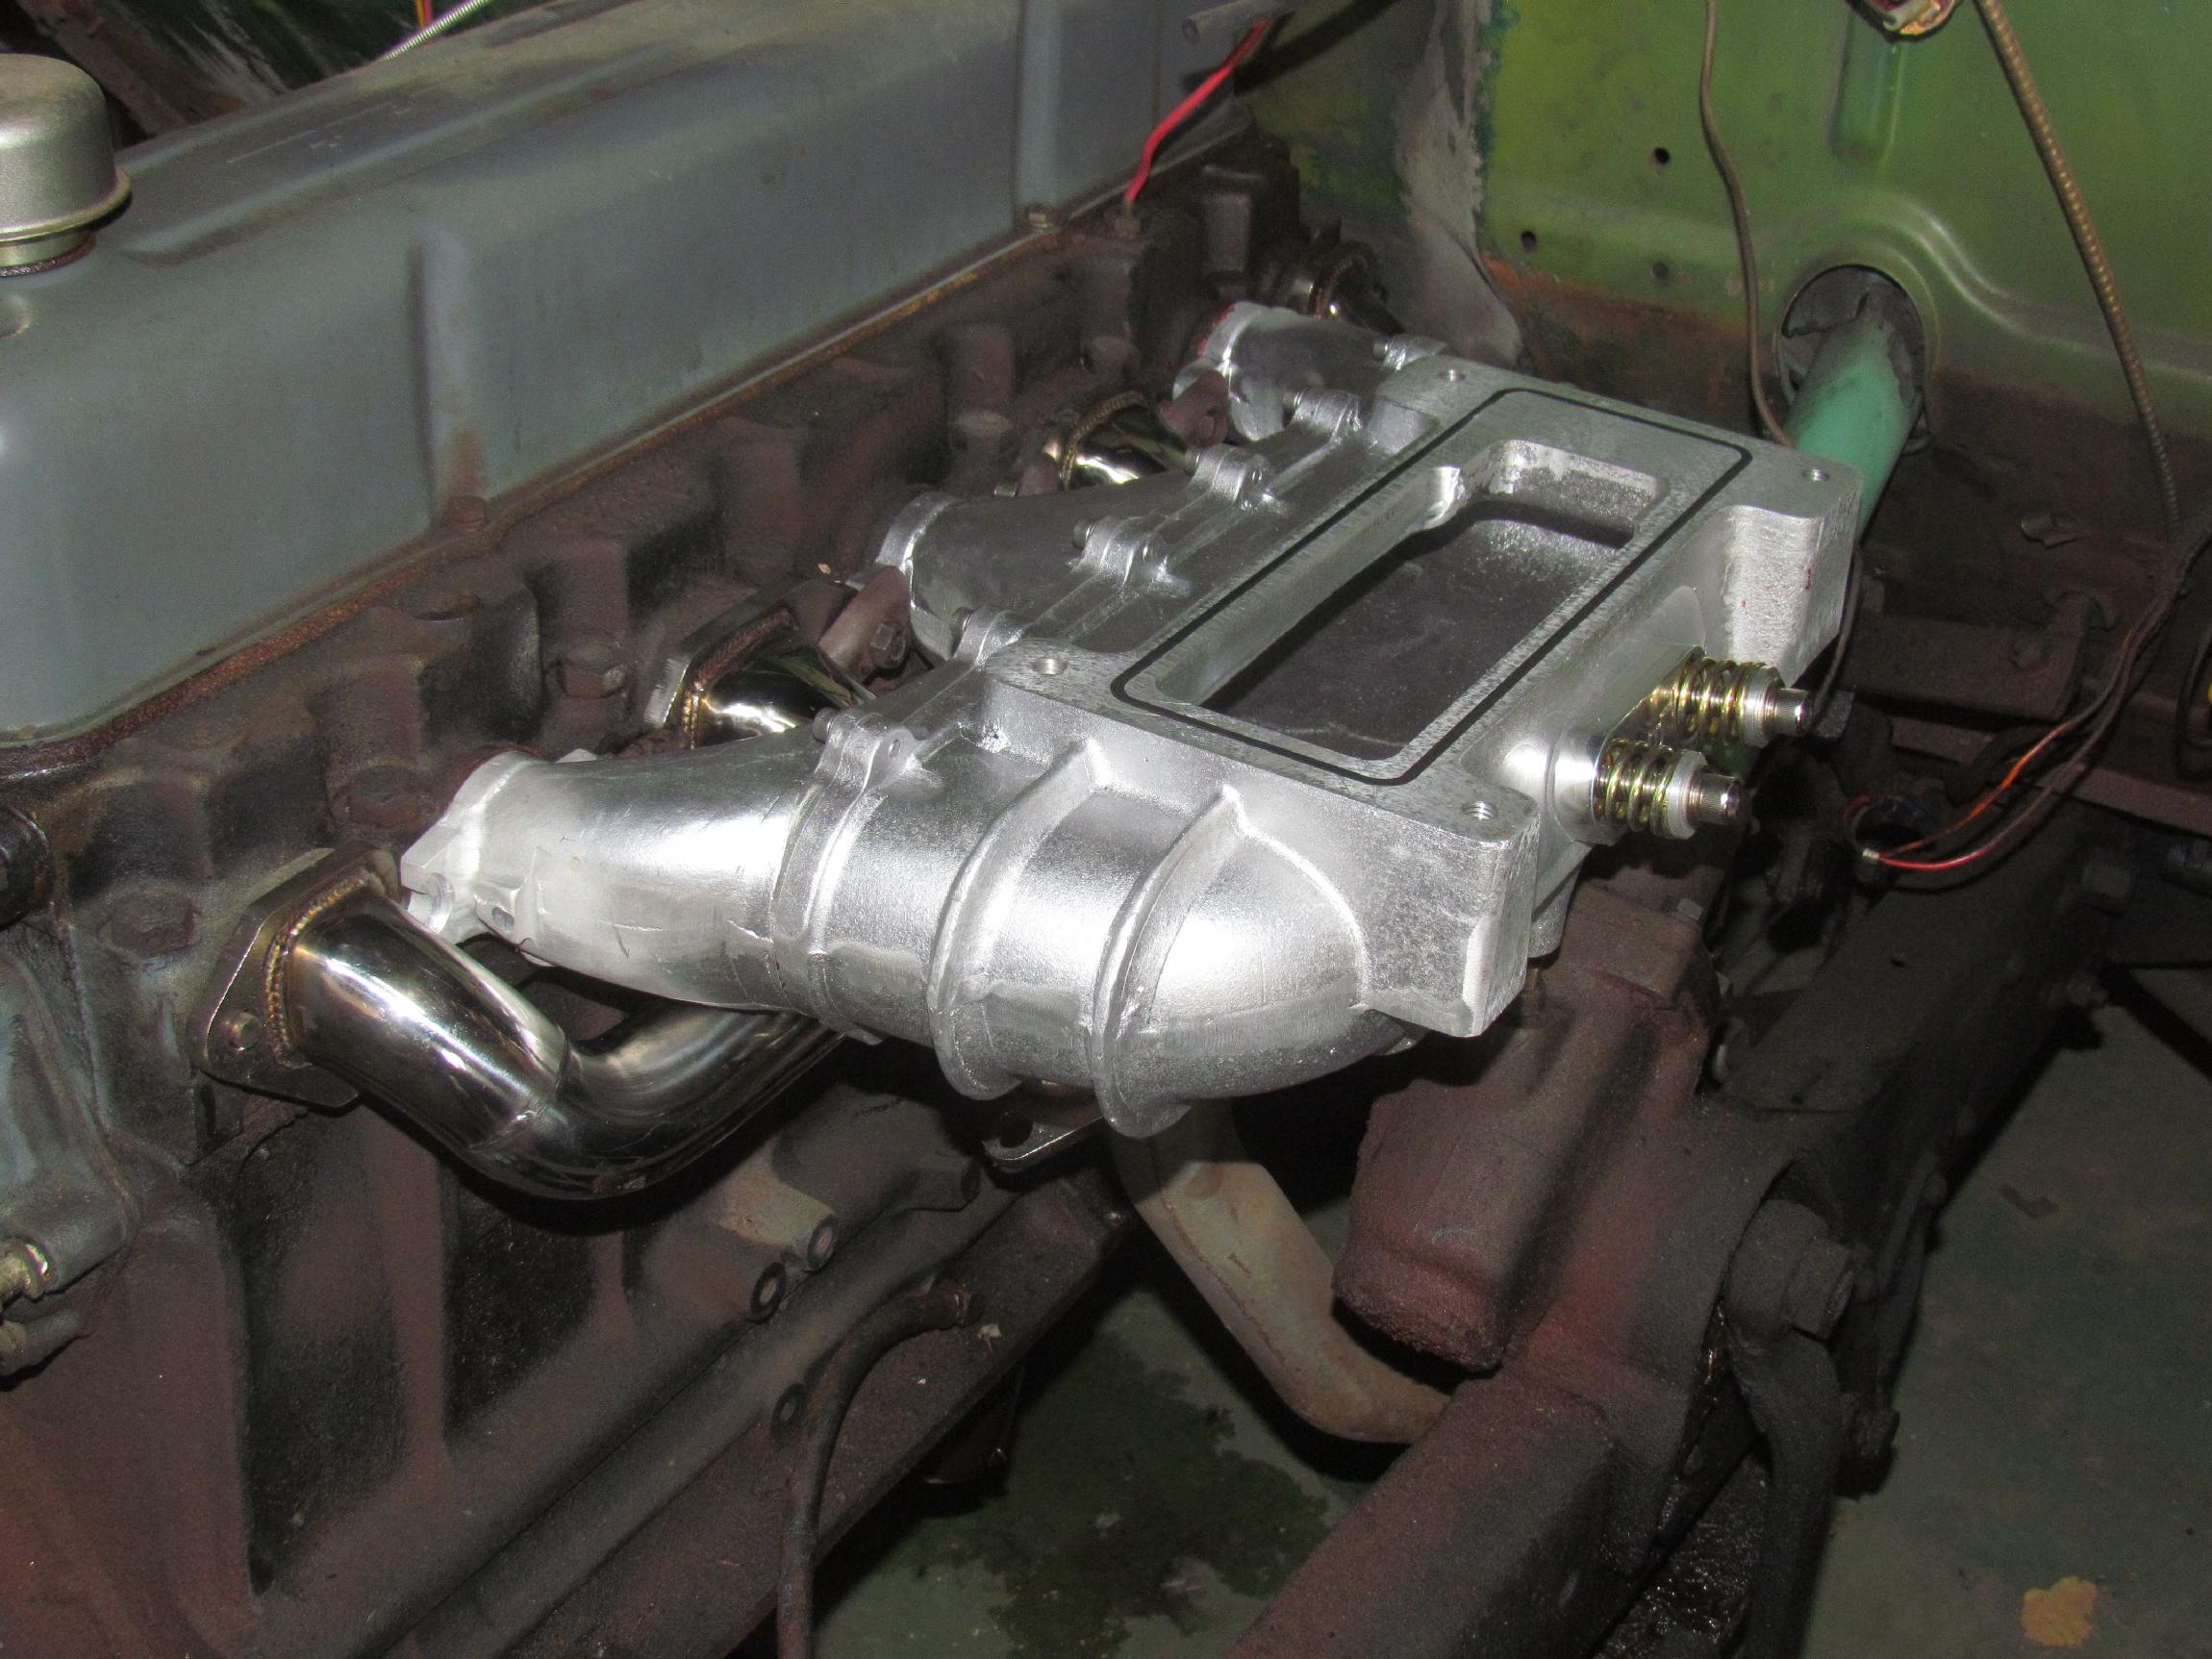 JJ Inlines started shipping parts in February and by October, James had
shipped most of the kit and I had enough of the parts to start a mock
up on BillyBob's engine. I didn't ask but I think this is his prototype
for the Stovebolt. First to go on was the two piece blower manifold and
the split exhaust headers that were not part of the package but which
James had thrown into the deal as freebies. The column mounted
three-on-the-tree shift box and linkage had to be removed to make room
for the manifold to fit.
JJ Inlines started shipping parts in February and by October, James had
shipped most of the kit and I had enough of the parts to start a mock
up on BillyBob's engine. I didn't ask but I think this is his prototype
for the Stovebolt. First to go on was the two piece blower manifold and
the split exhaust headers that were not part of the package but which
James had thrown into the deal as freebies. The column mounted
three-on-the-tree shift box and linkage had to be removed to make room
for the manifold to fit.
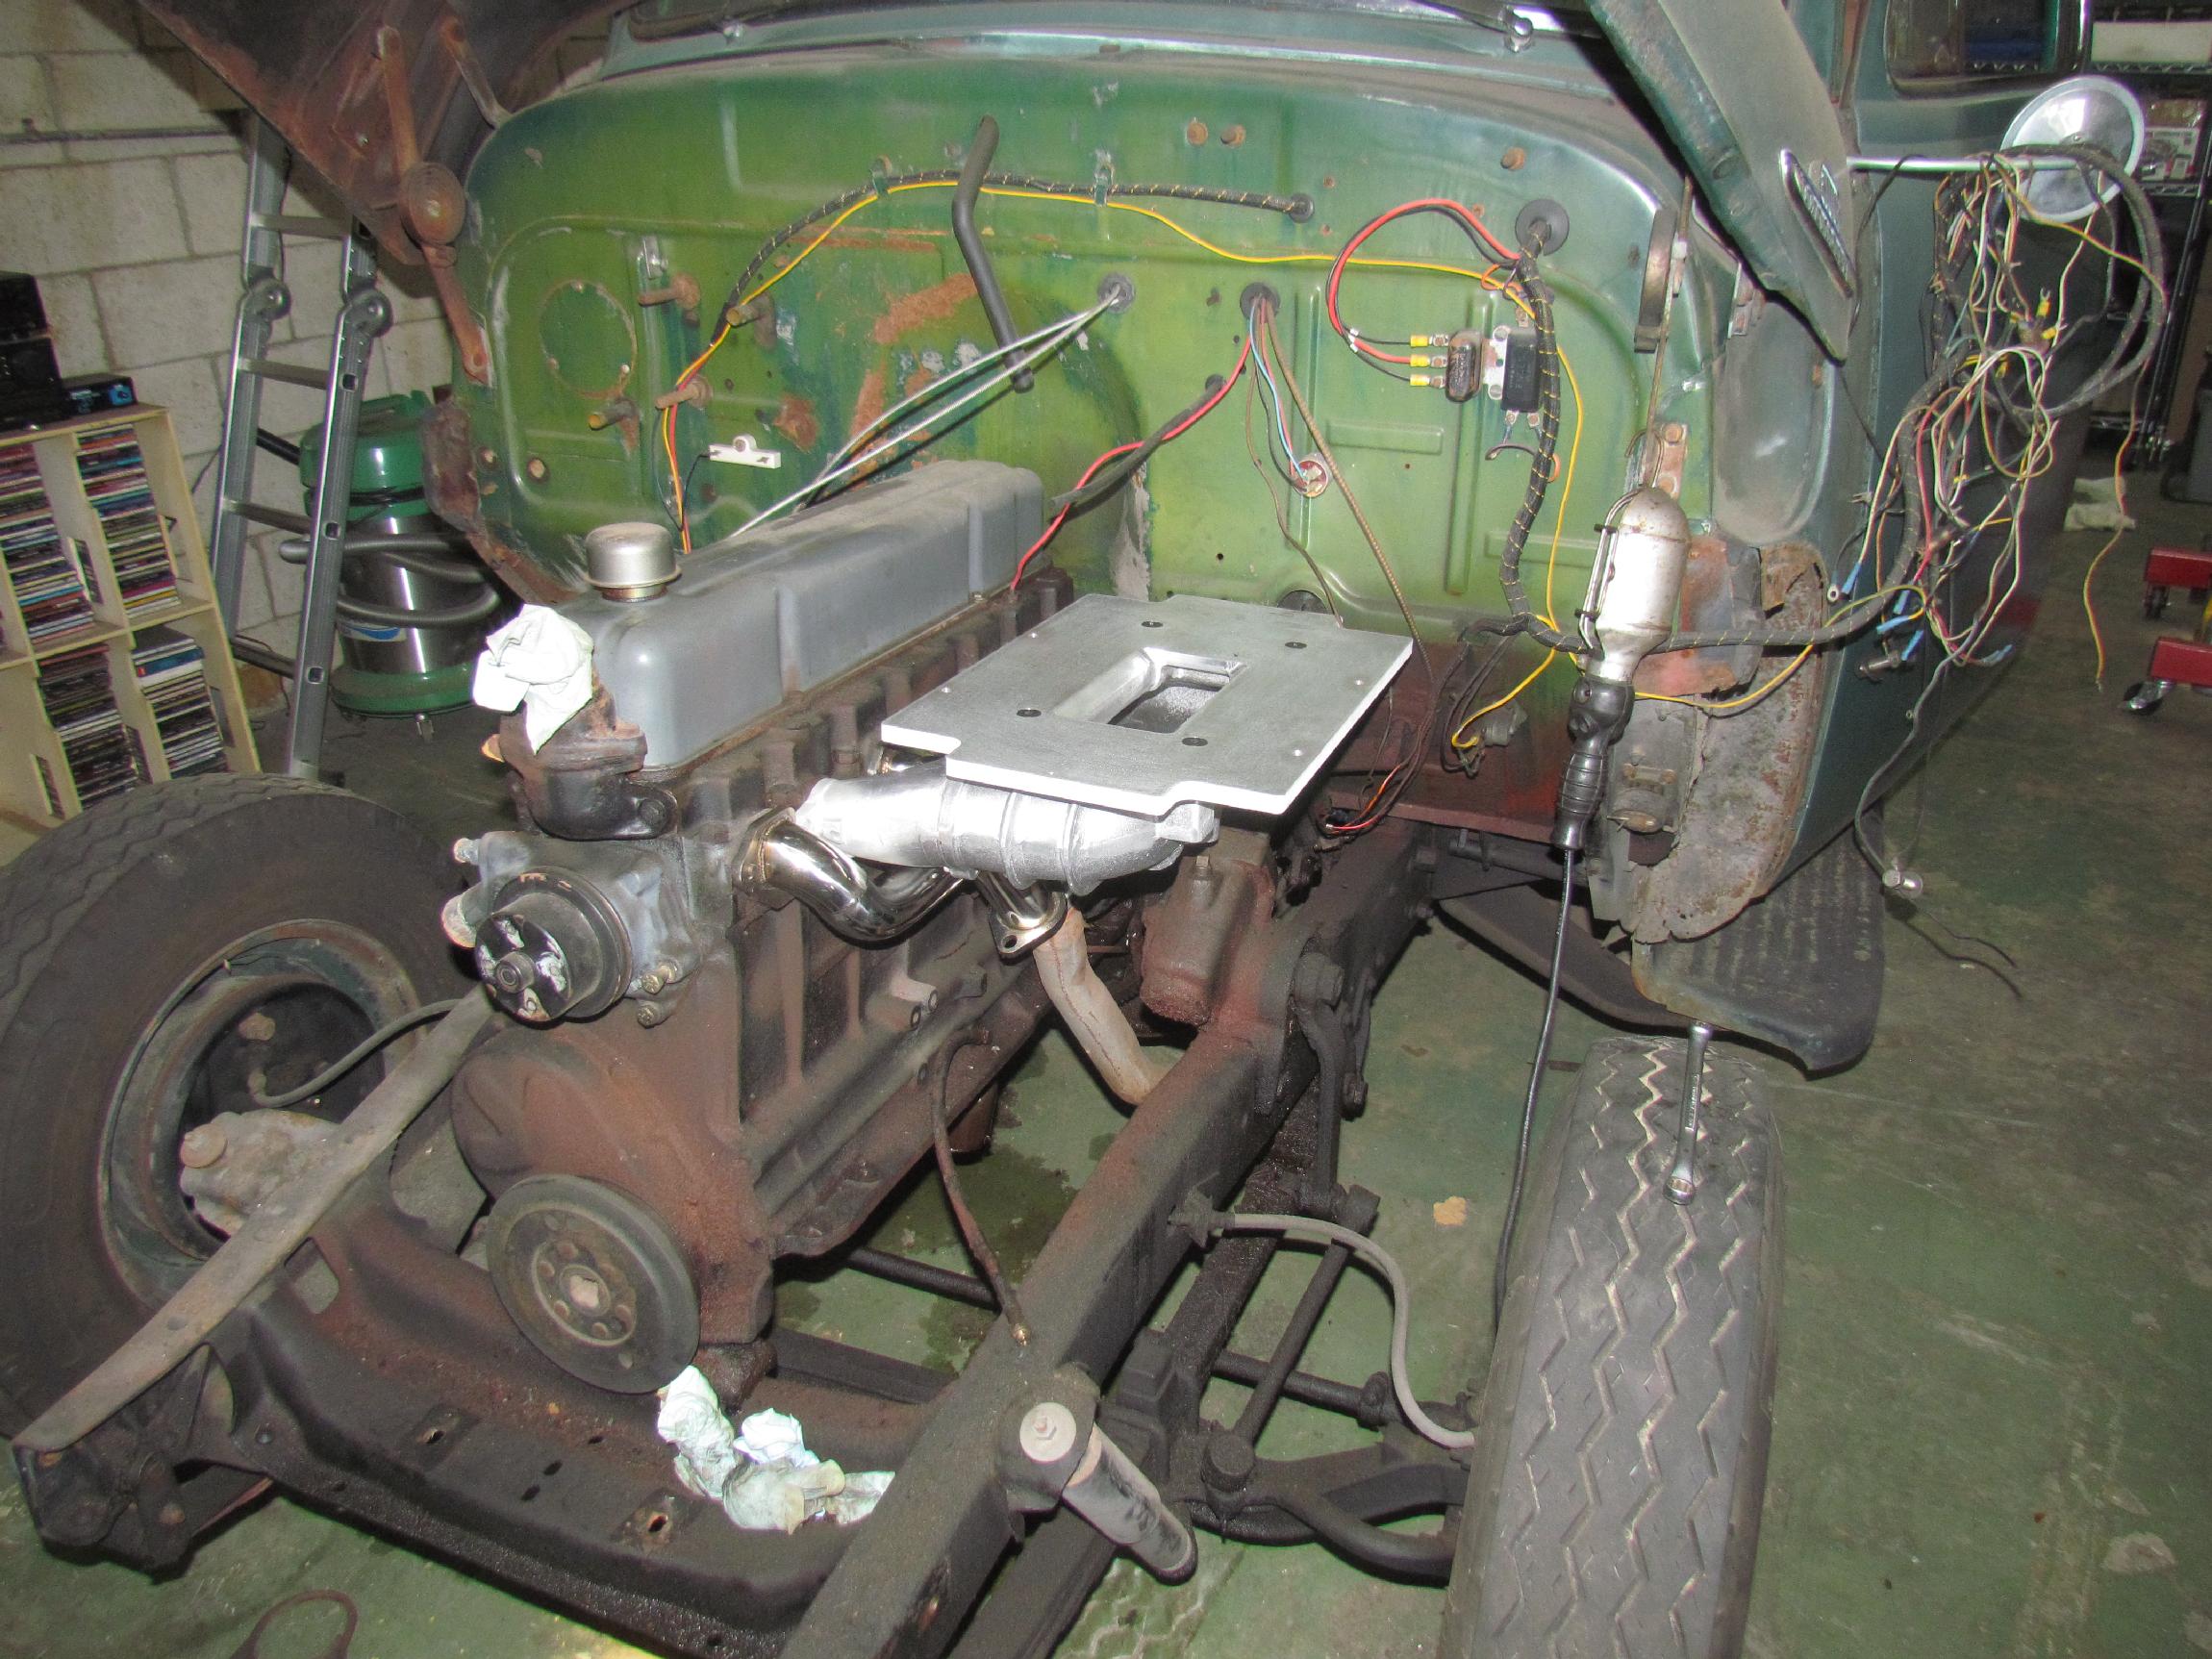 The
4-71 blower adapter plate went on next. This is a nicely machined piece
and the manifold is o-ringed to accept it. There is a support strut
that goes underneath the manifold but I don't have that item yet. The
clearance between the manifold and the steering column is only a half
inch.
The
4-71 blower adapter plate went on next. This is a nicely machined piece
and the manifold is o-ringed to accept it. There is a support strut
that goes underneath the manifold but I don't have that item yet. The
clearance between the manifold and the steering column is only a half
inch.
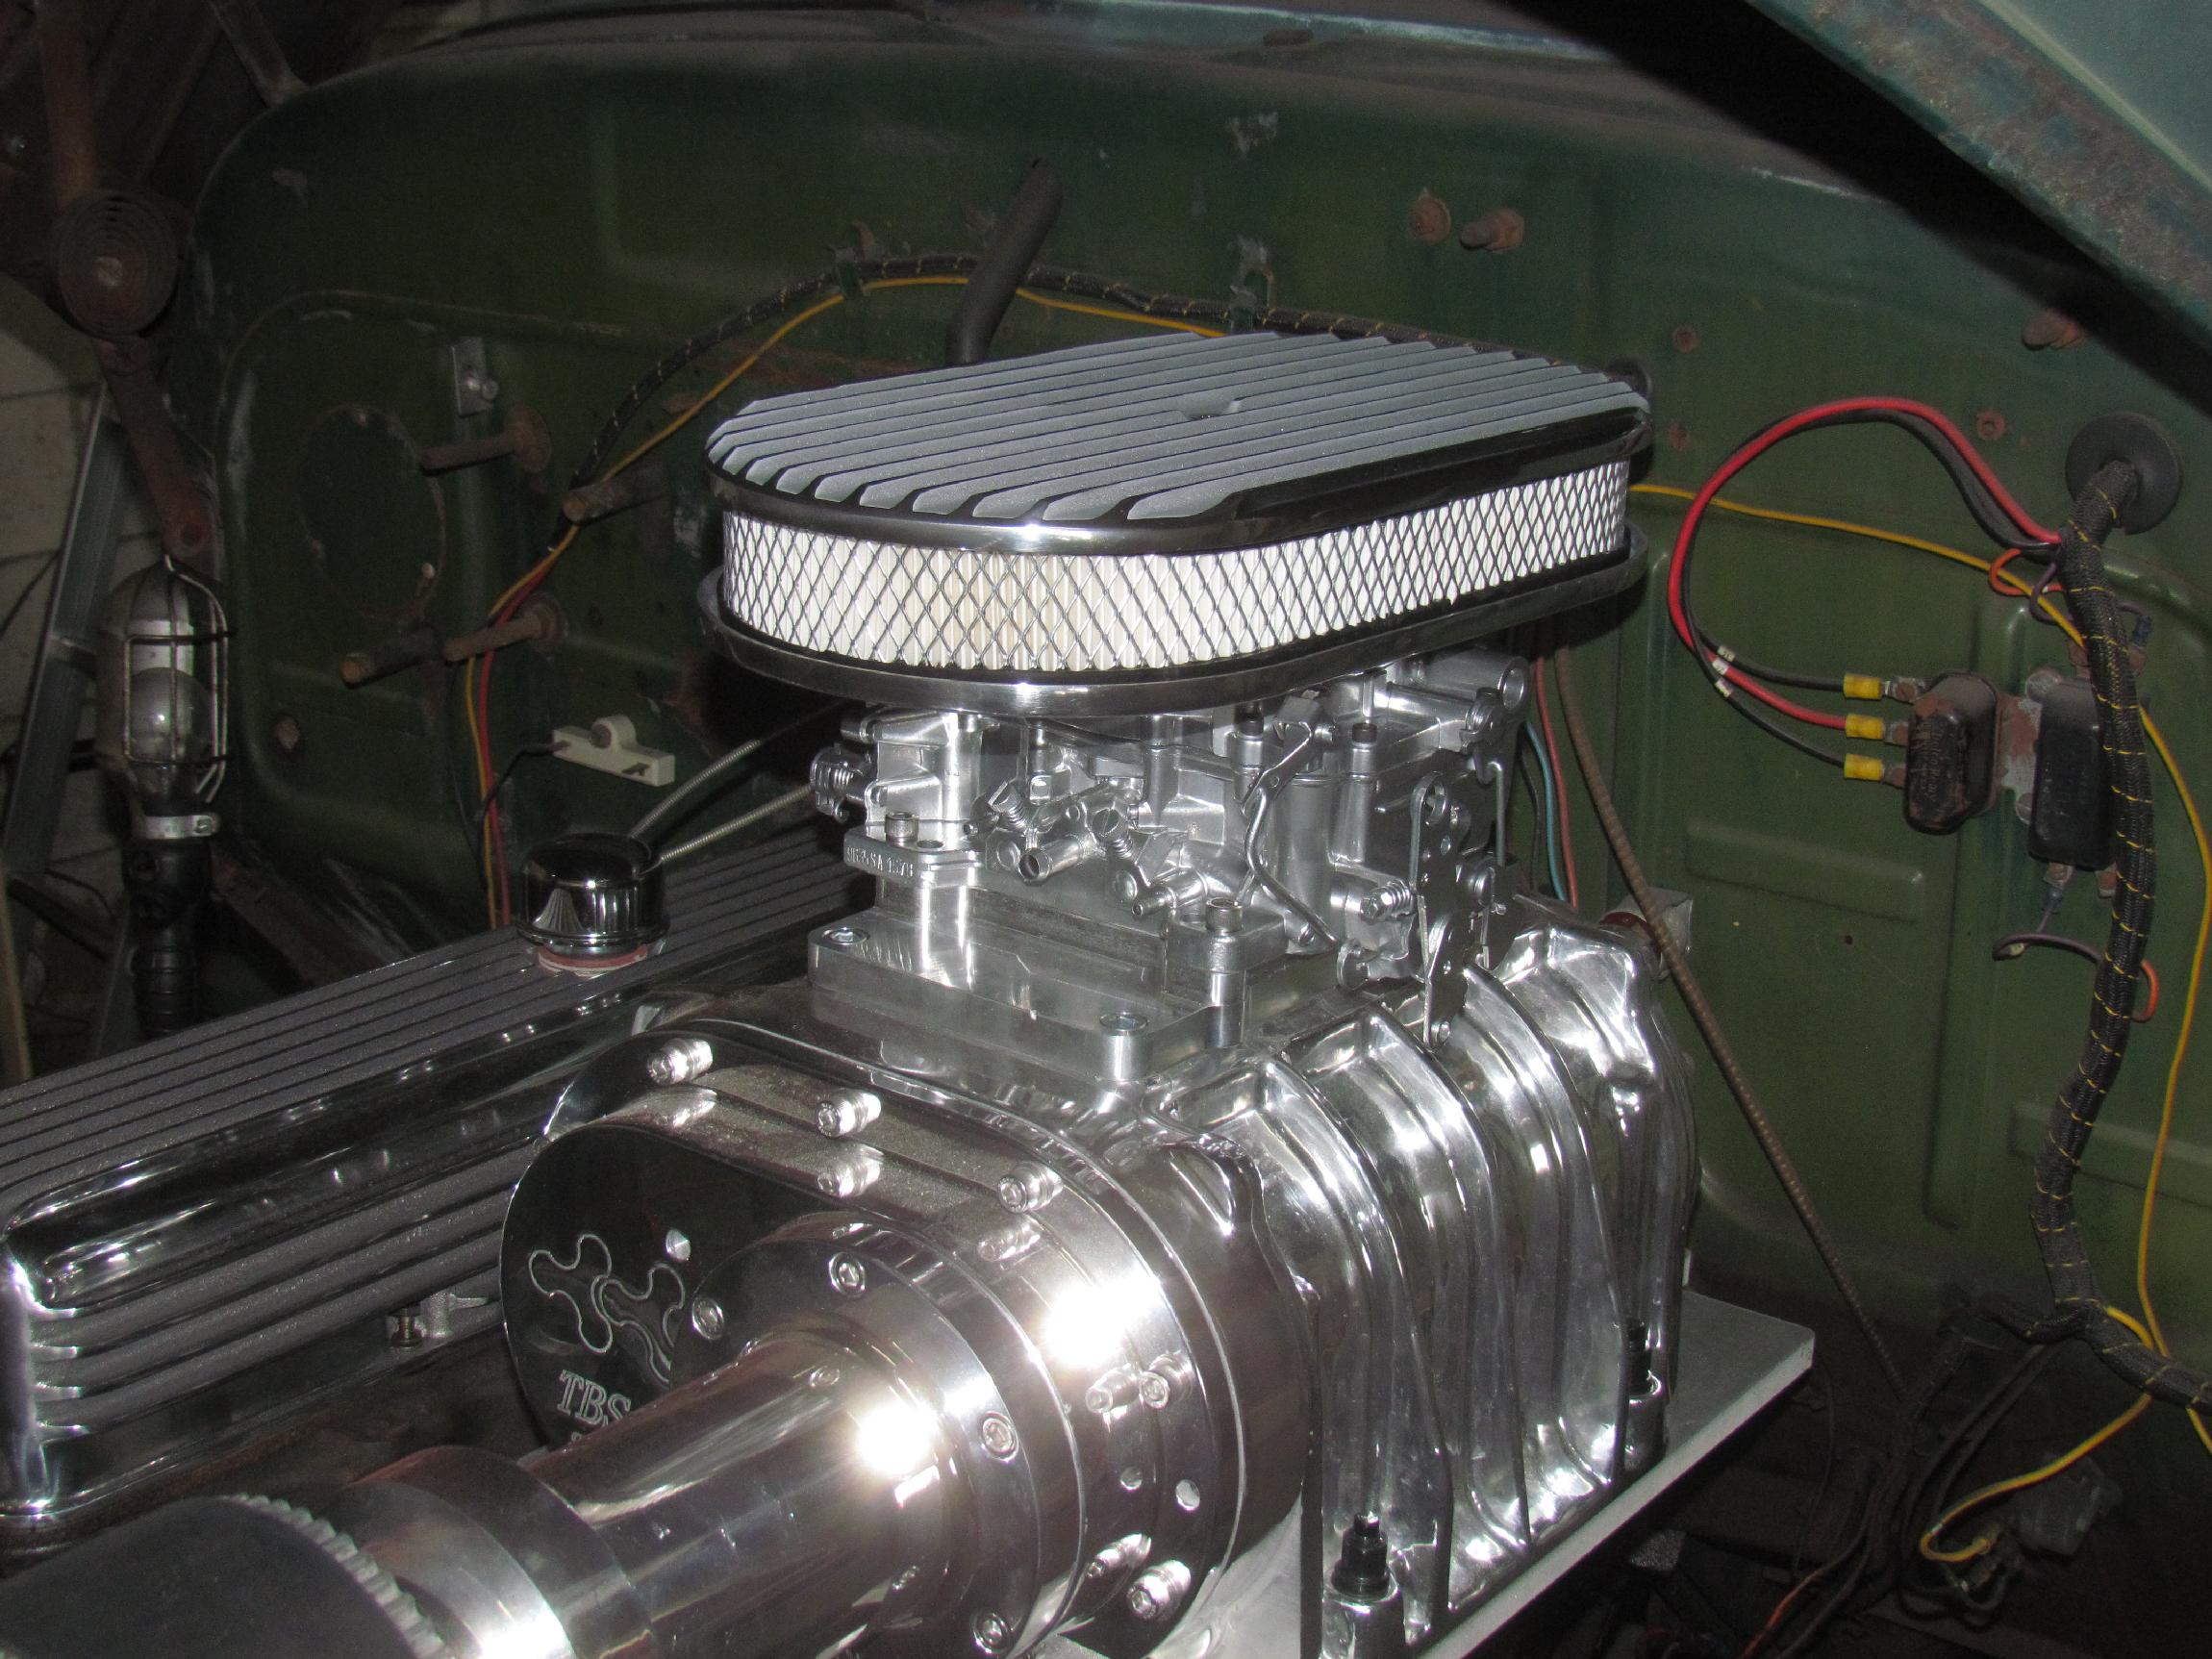
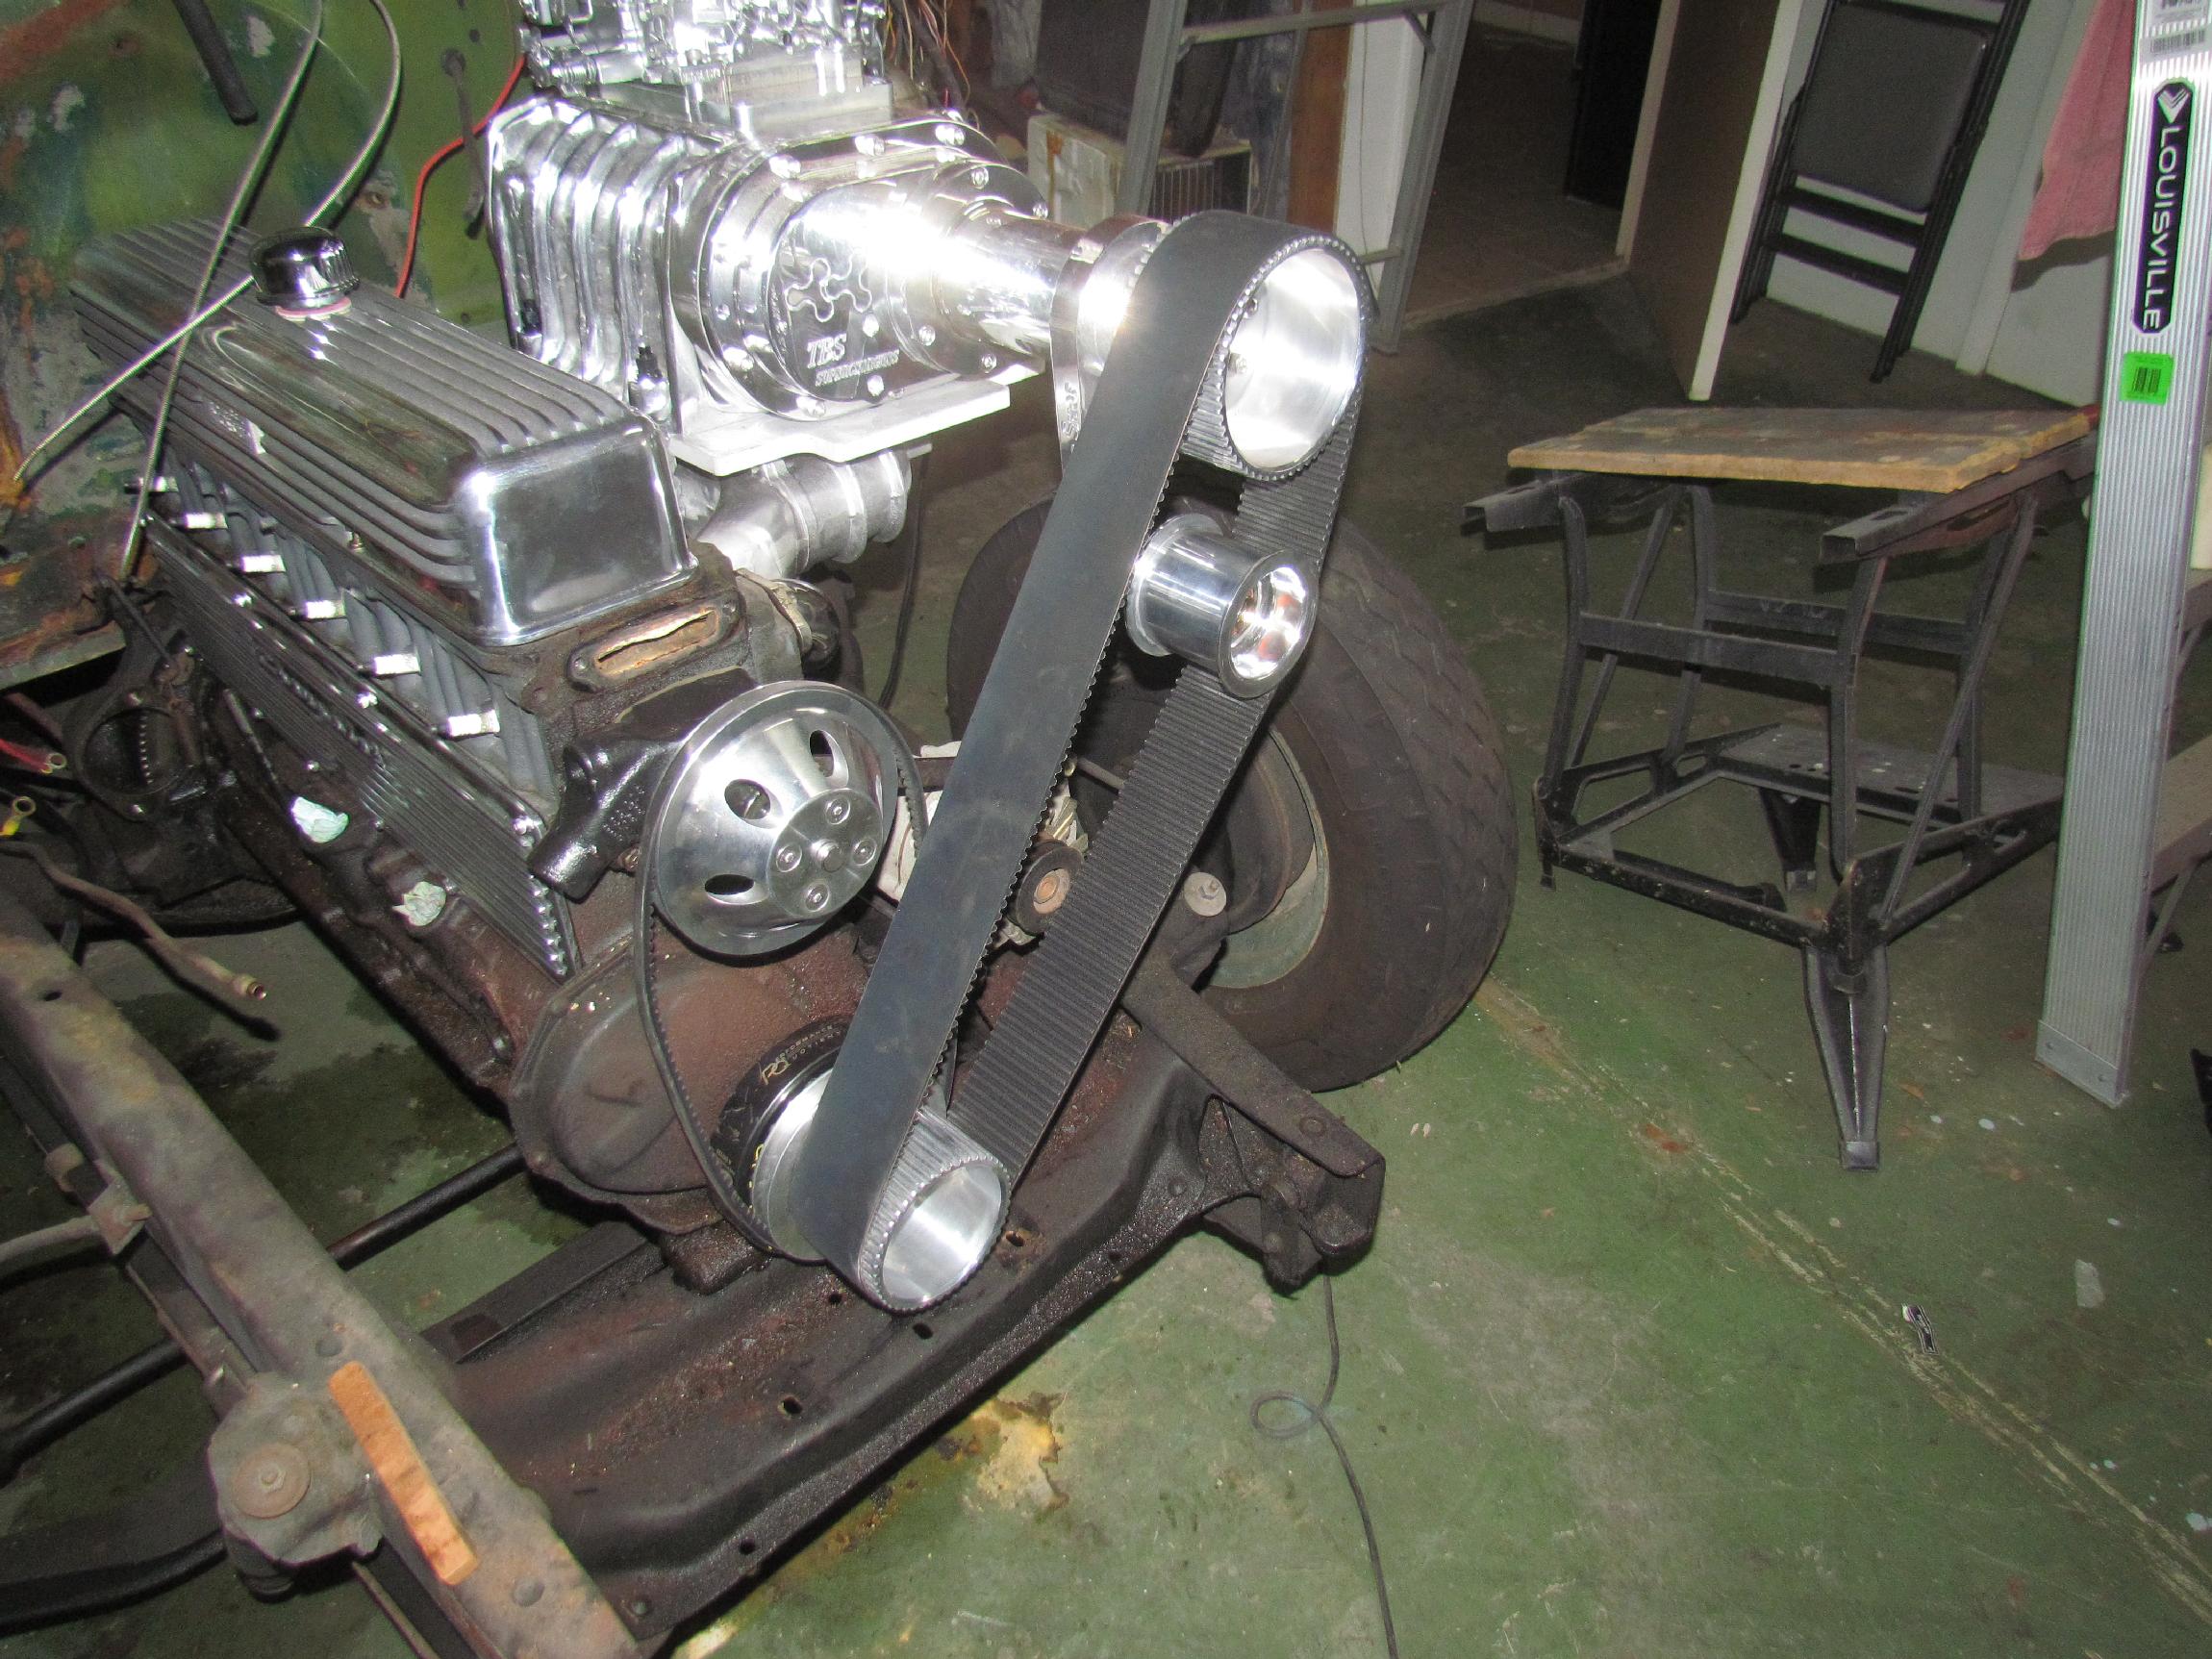
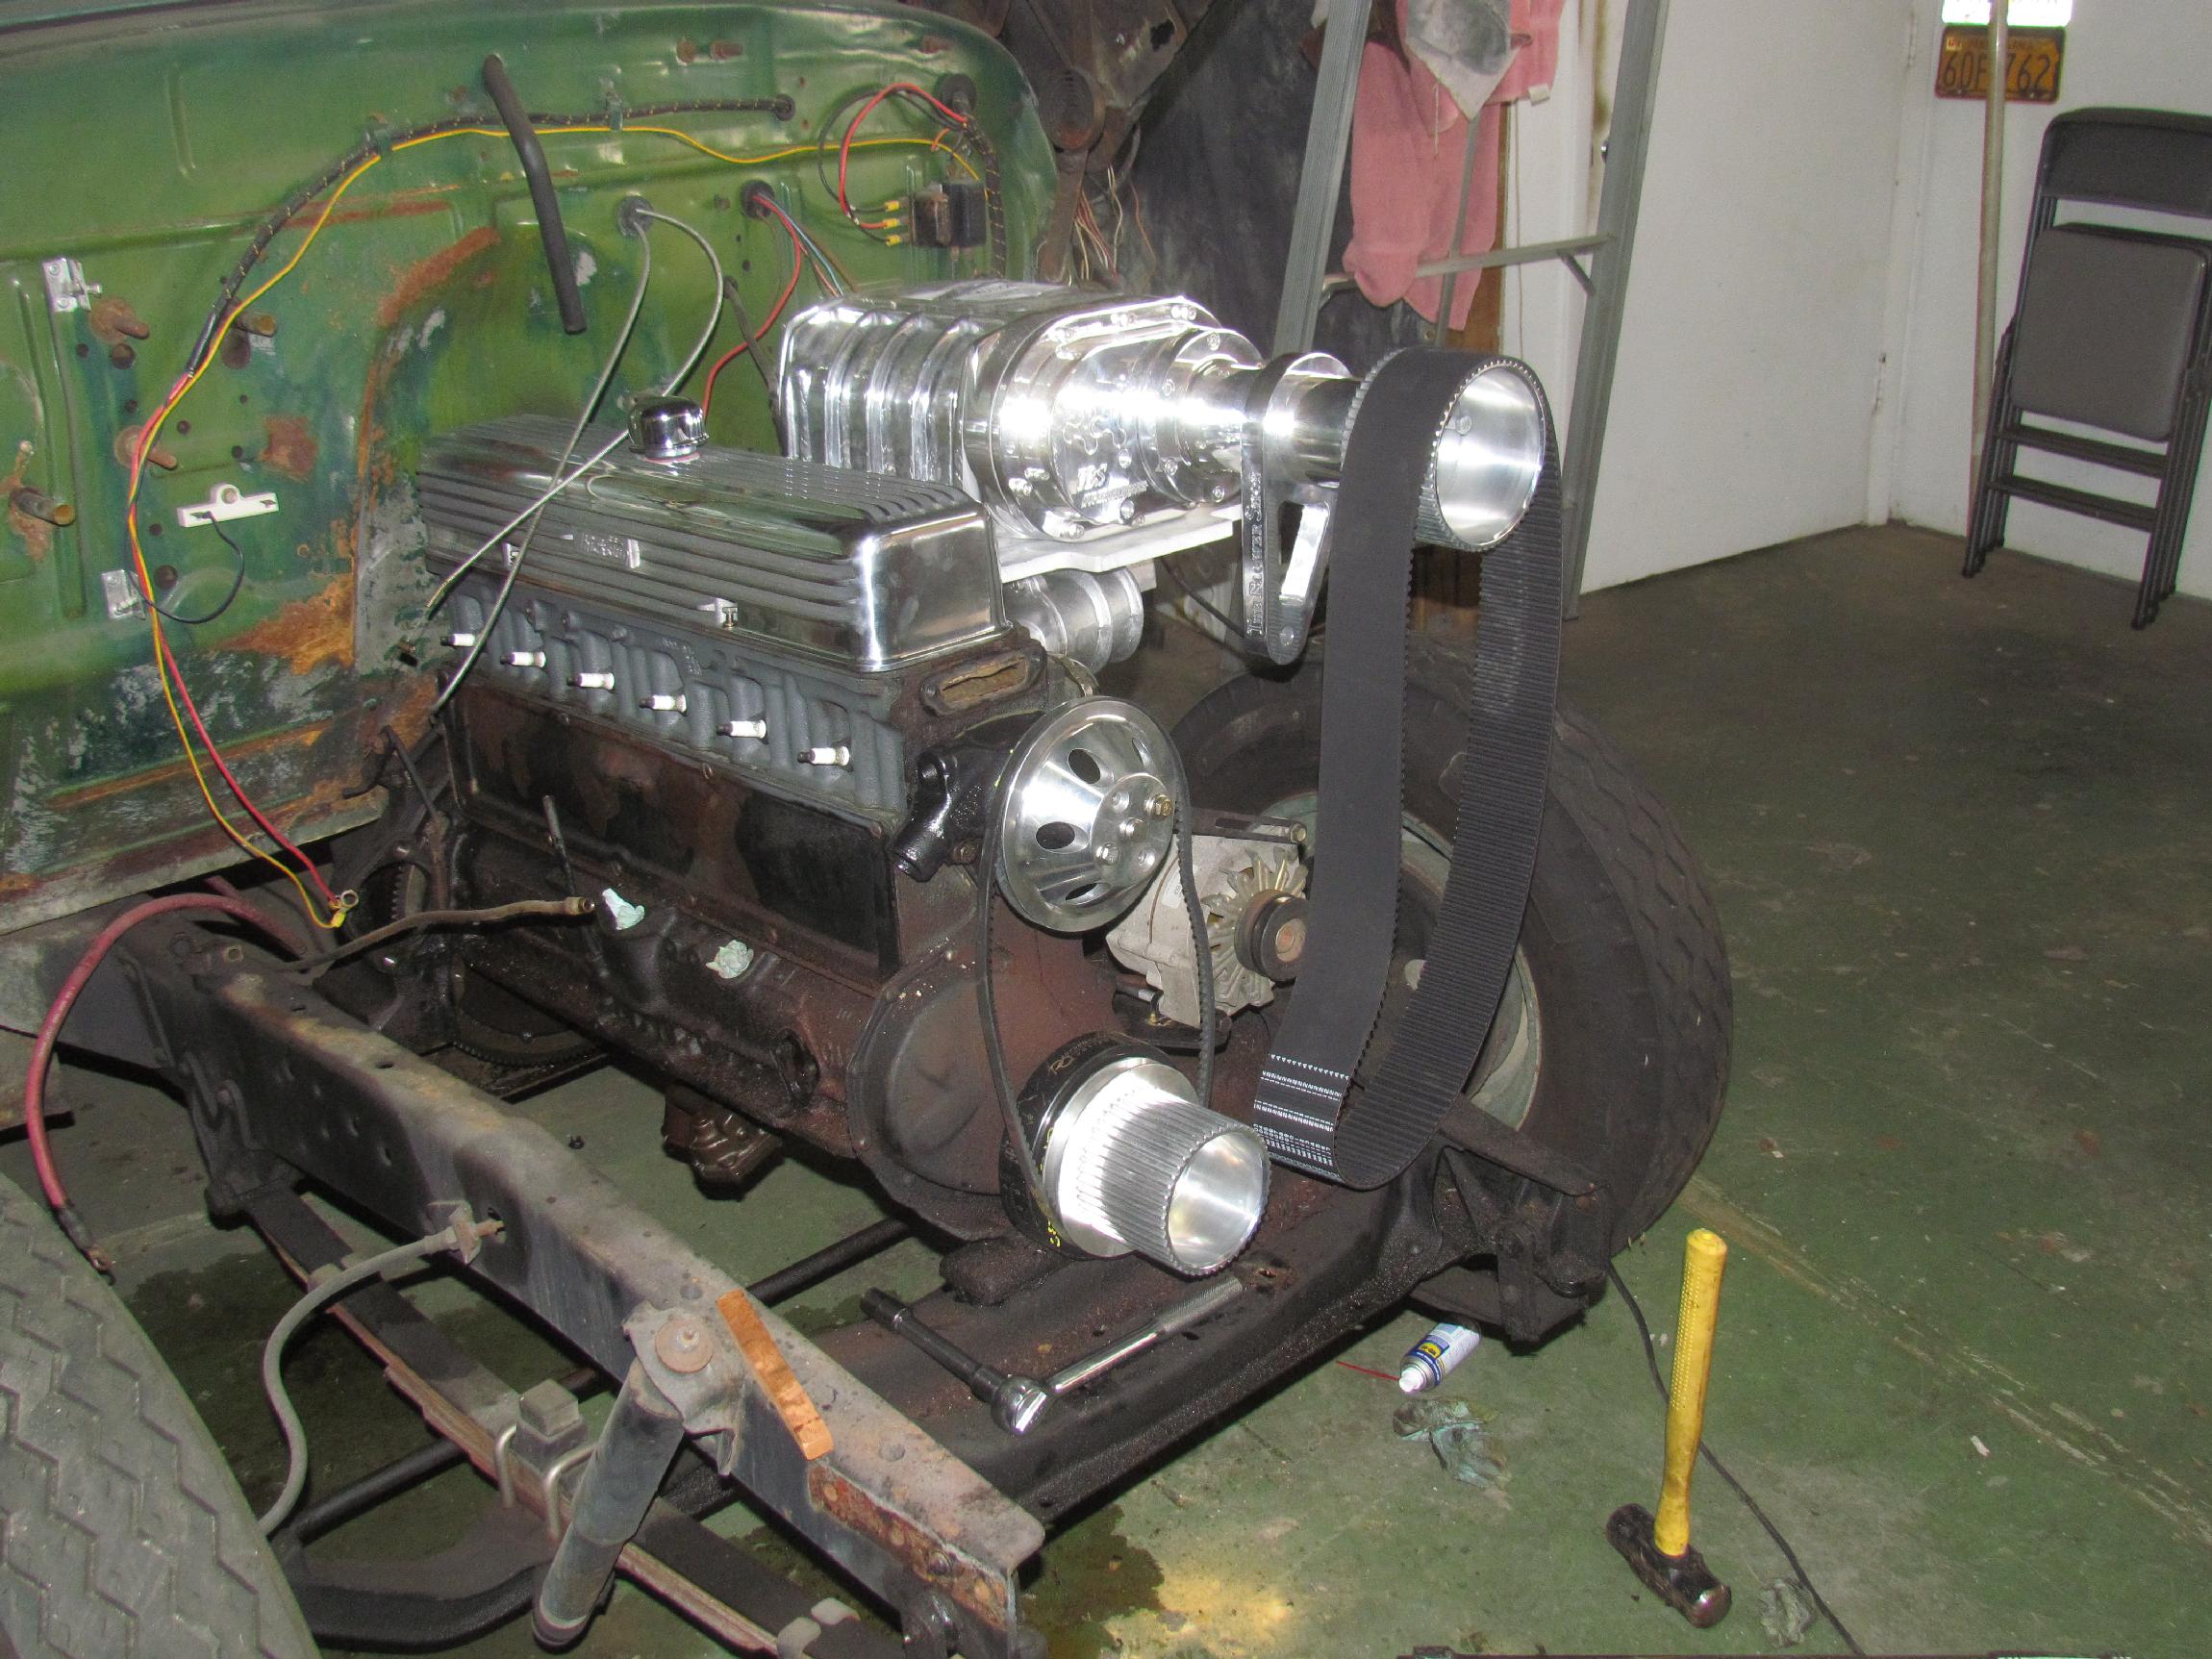 Pulled the balancer, thermostat housing and water pump. Mounted the
4-71 blower from TBS (The Blower Shop) and installed the new Harmonic
balancer. Since this is only a mock up and the balancer is a press fit,
I only installed it half way with block of wood and BFH (big frickin'
hammer). The new water pump / alternator pulley was installed next onto
the balancer with the recessed allen head cap screws provided. These
cap screws did not want to go in, even after chasing the threads. In
the end, I only put two of the three in for the mock up. The blower
snout and tensioner arm went on next. I was missing bolts for the
blower pulleys and the shaft that the tensioner pulley mounts on so I
found temporary bolts in my vast collection for the mock up.The new
modified water pump and pulley went on next along with the new
alternator bracket James sent me. The blower belt is too short by one
or two inches so it didn't go on at this time. I also installed a
Thickstun repop valve cover I got from an eBay vendor. Checking
clearances, I have about a foot left under the hood for carburetion and
air cleaner. When the hood is in the down position, the blower pulley
is about an inch from the hood edge. The bad news is that the blower
belt and pulleys sit where the radiator used to be. and, since all the
front end bodywork hangs off the radiator support, I have a engineering
and fabrication challenge ahead of me.
Pulled the balancer, thermostat housing and water pump. Mounted the
4-71 blower from TBS (The Blower Shop) and installed the new Harmonic
balancer. Since this is only a mock up and the balancer is a press fit,
I only installed it half way with block of wood and BFH (big frickin'
hammer). The new water pump / alternator pulley was installed next onto
the balancer with the recessed allen head cap screws provided. These
cap screws did not want to go in, even after chasing the threads. In
the end, I only put two of the three in for the mock up. The blower
snout and tensioner arm went on next. I was missing bolts for the
blower pulleys and the shaft that the tensioner pulley mounts on so I
found temporary bolts in my vast collection for the mock up.The new
modified water pump and pulley went on next along with the new
alternator bracket James sent me. The blower belt is too short by one
or two inches so it didn't go on at this time. I also installed a
Thickstun repop valve cover I got from an eBay vendor. Checking
clearances, I have about a foot left under the hood for carburetion and
air cleaner. When the hood is in the down position, the blower pulley
is about an inch from the hood edge. The bad news is that the blower
belt and pulleys sit where the radiator used to be. and, since all the
front end bodywork hangs off the radiator support, I have a engineering
and fabrication challenge ahead of me.
 November
7th 2015 Still mocking
up the 235 stovebolt engine. Got a 4-71 carb adapter plate for Carter
and Holley carbs from an eBay vendor. Found a 600 cfm Carter
AFB carb modified for blower use from Stahl Performance Inc. and a
finned air cleaner, also on eBay.
November
7th 2015 Still mocking
up the 235 stovebolt engine. Got a 4-71 carb adapter plate for Carter
and Holley carbs from an eBay vendor. Found a 600 cfm Carter
AFB carb modified for blower use from Stahl Performance Inc. and a
finned air cleaner, also on eBay.
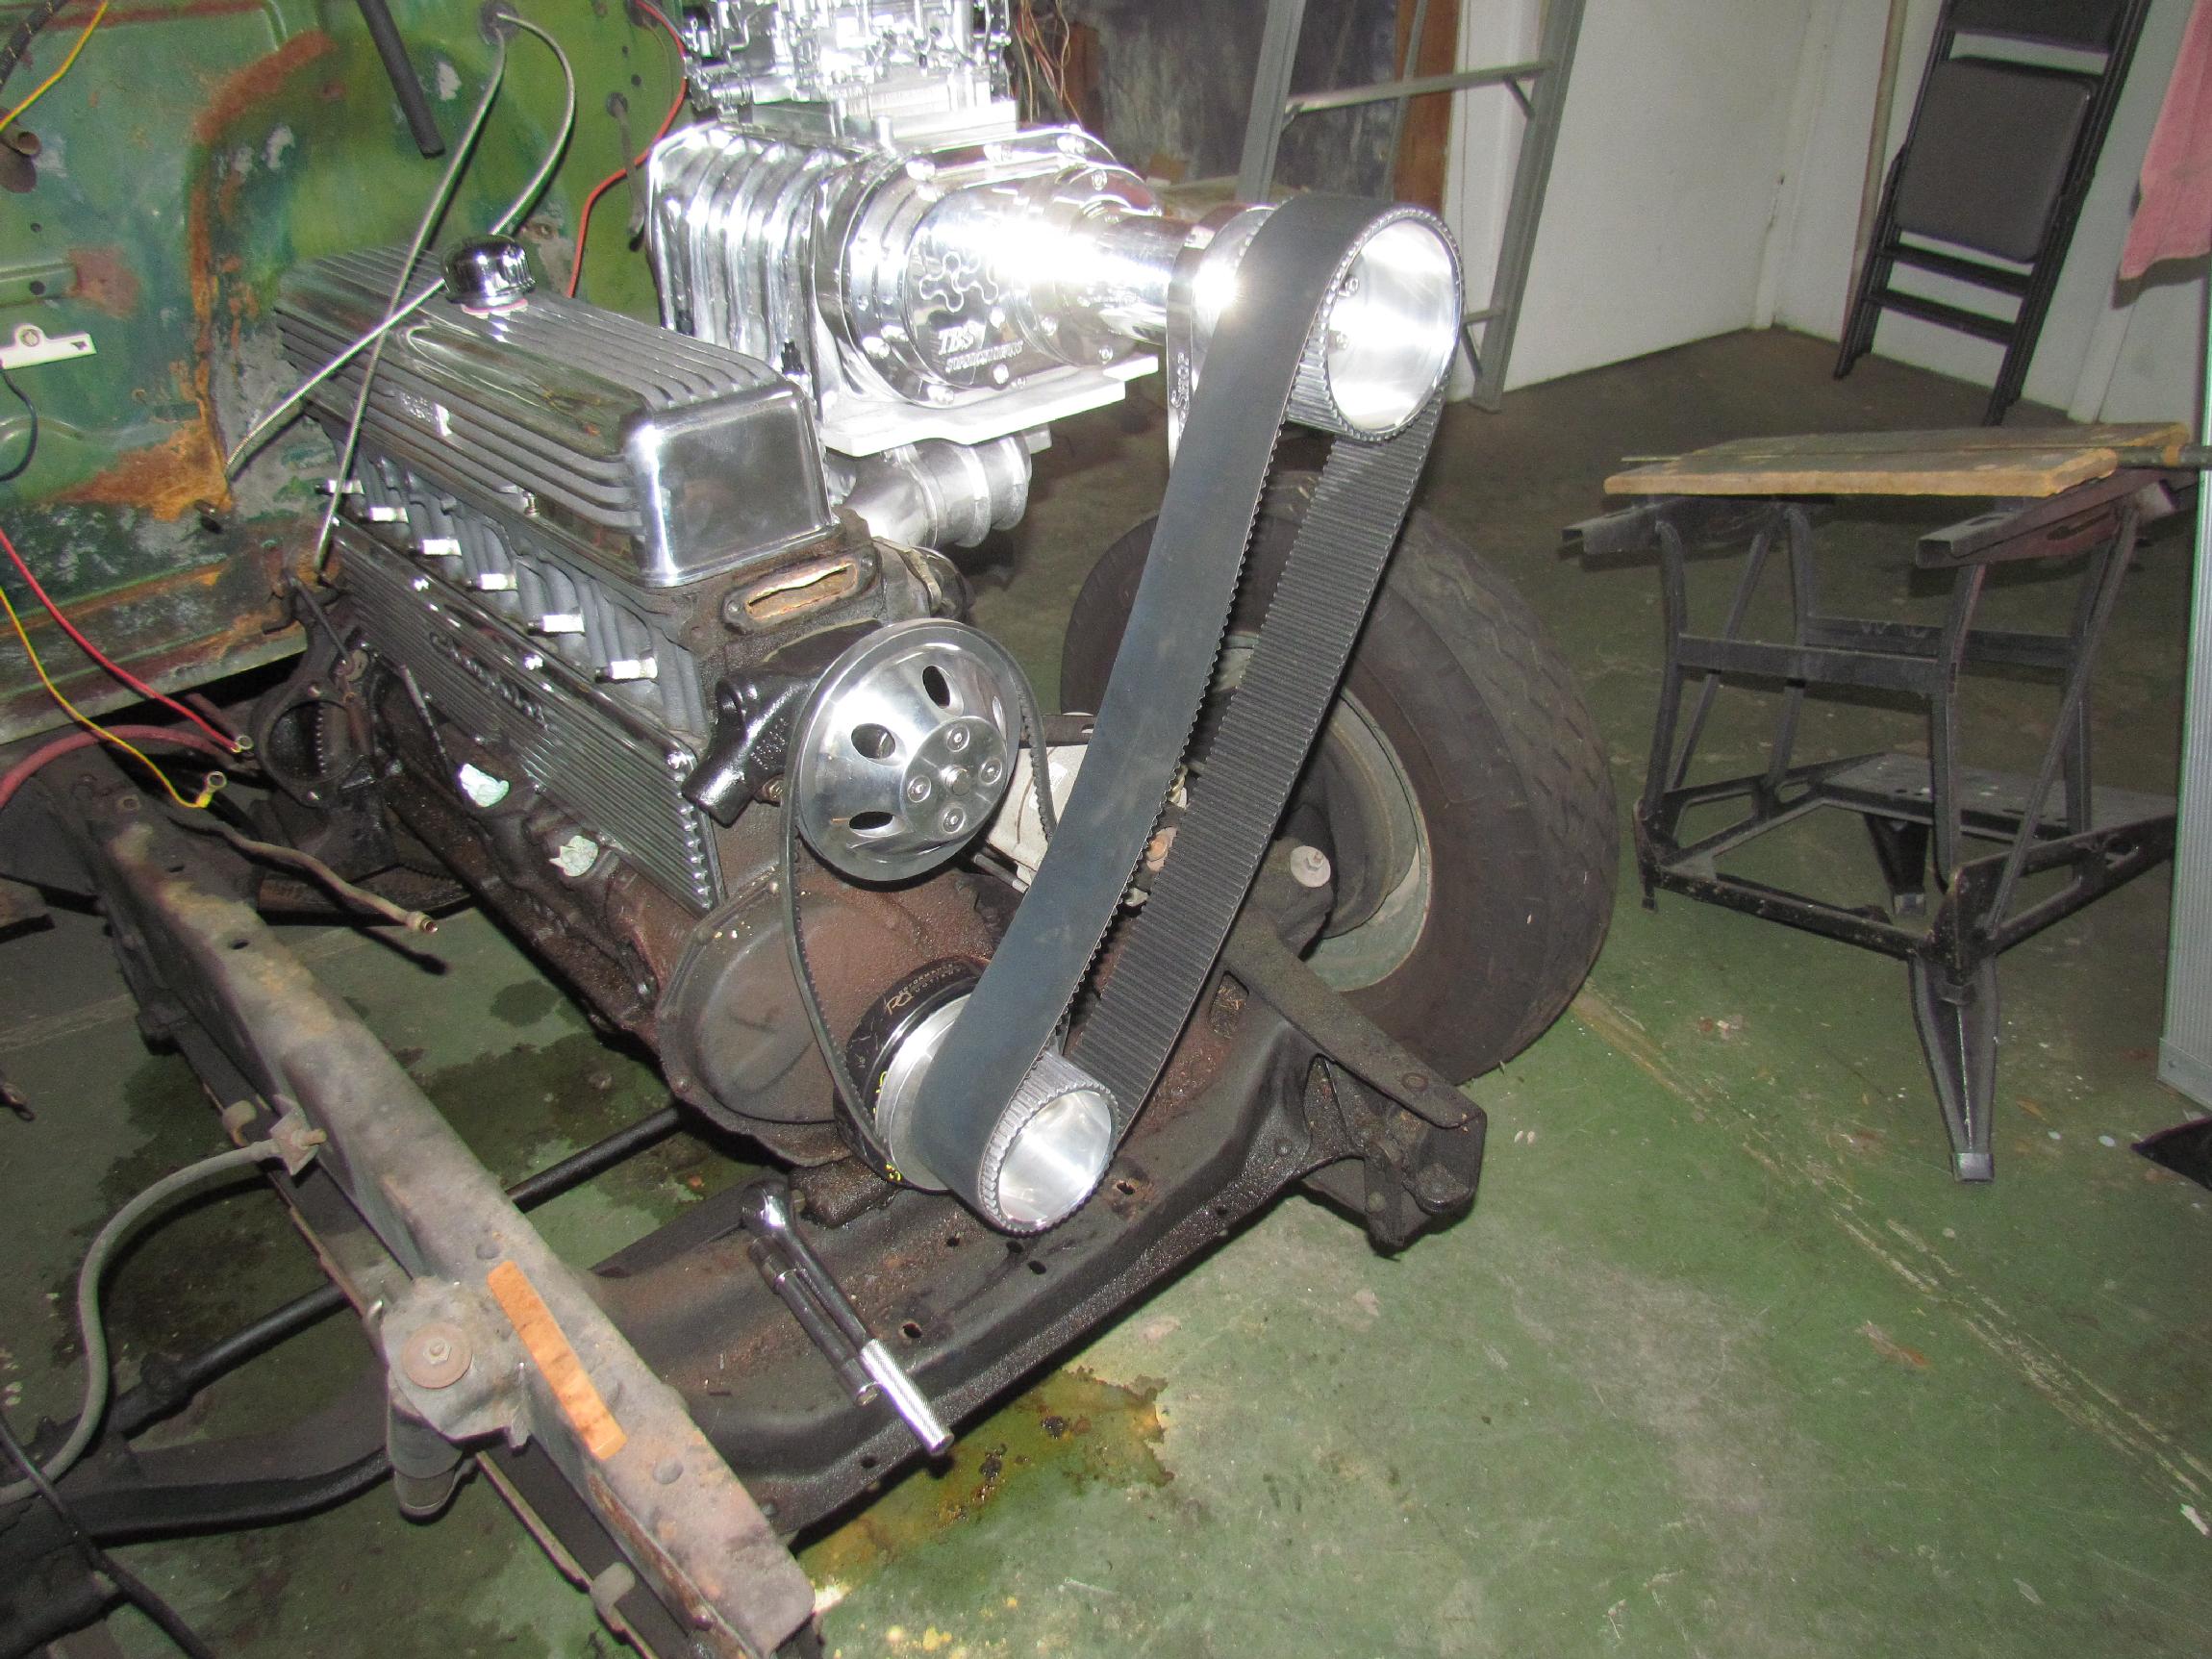 After some research, I discovered the blower belt was a 3" wide 8 mm
belt. Measured the setup several times since I tend to get my
measurements dead nuts on or light years off. I don't know why other
than I can't see worth spit with my Mark I eyes. I kept coming up with
62-1/2" around the pulleys so I ordered a 63" belt from The Blower
Shop. It fits!
After some research, I discovered the blower belt was a 3" wide 8 mm
belt. Measured the setup several times since I tend to get my
measurements dead nuts on or light years off. I don't know why other
than I can't see worth spit with my Mark I eyes. I kept coming up with
62-1/2" around the pulleys so I ordered a 63" belt from The Blower
Shop. It fits!
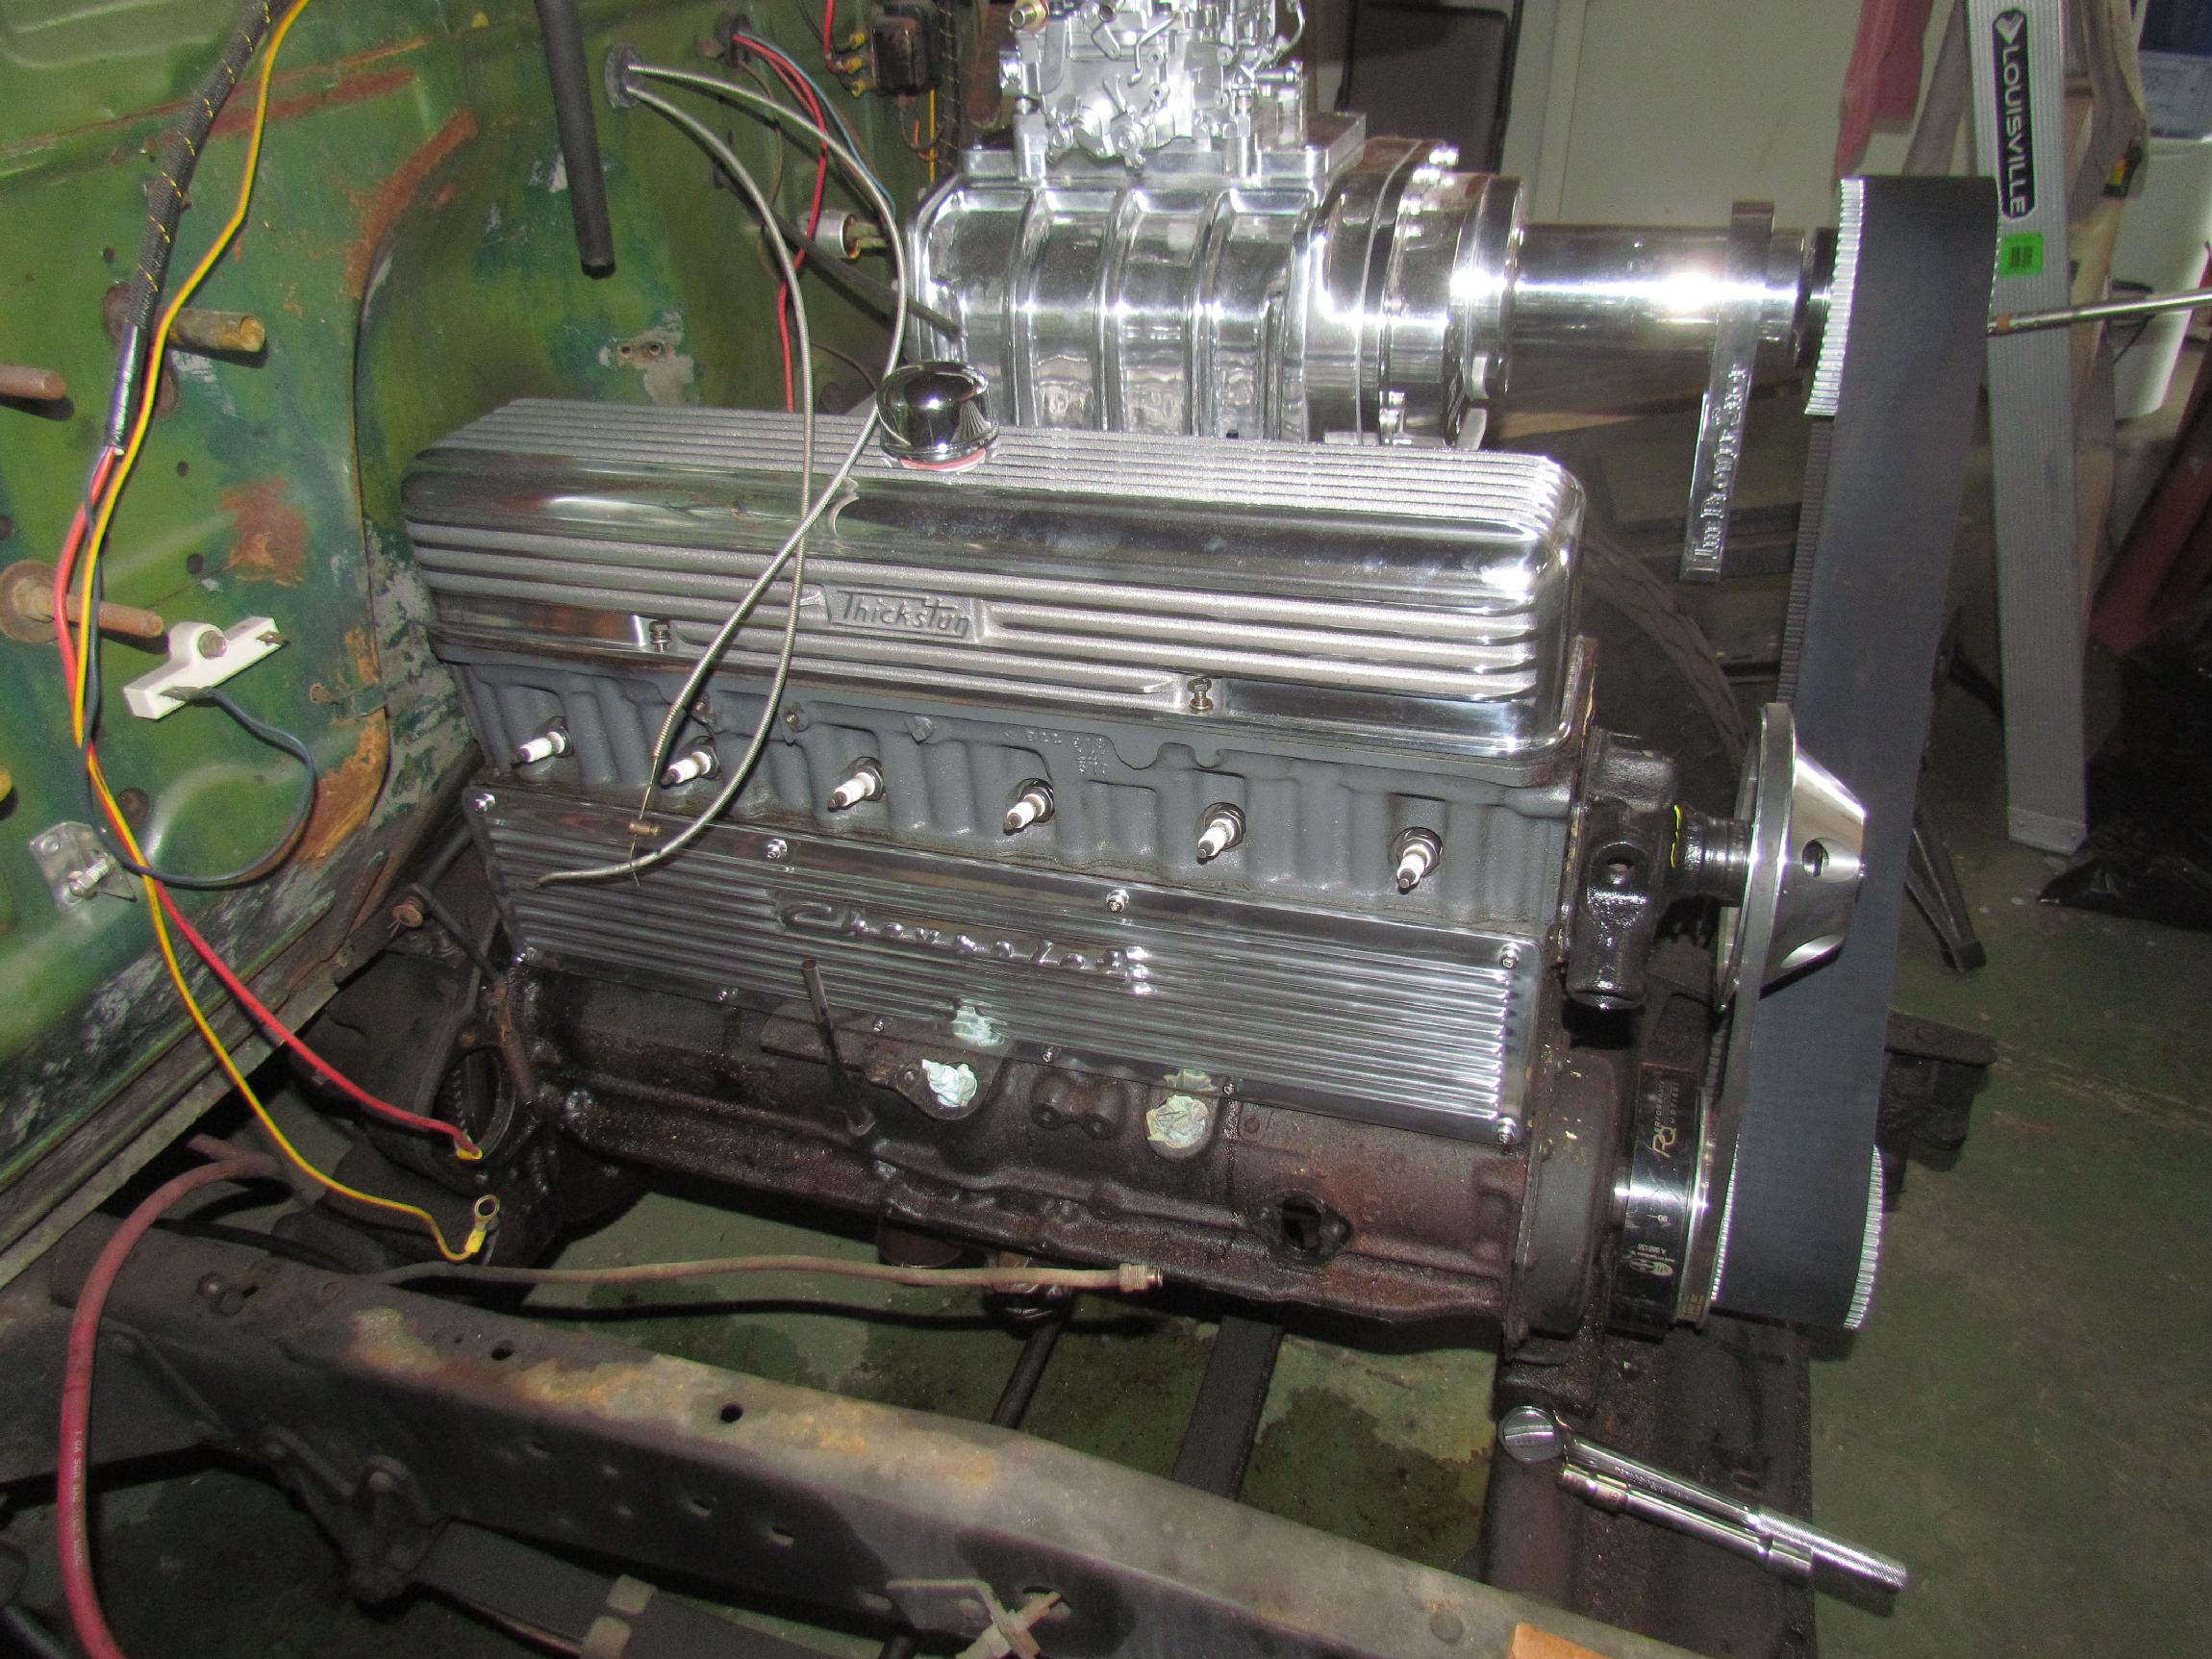 James Larrowe sent me a nice finned "Chevrolet" side cover as a freebie
and I mocked that up also with stainless steel socket bolts. I'm using
the stainless steel socket bolts everywhere I can and, even tho' it's a
mock up with finger tight fasteners, I put 'em in with anti-seize so
they are sure to come back out again.
James Larrowe sent me a nice finned "Chevrolet" side cover as a freebie
and I mocked that up also with stainless steel socket bolts. I'm using
the stainless steel socket bolts everywhere I can and, even tho' it's a
mock up with finger tight fasteners, I put 'em in with anti-seize so
they are sure to come back out again.
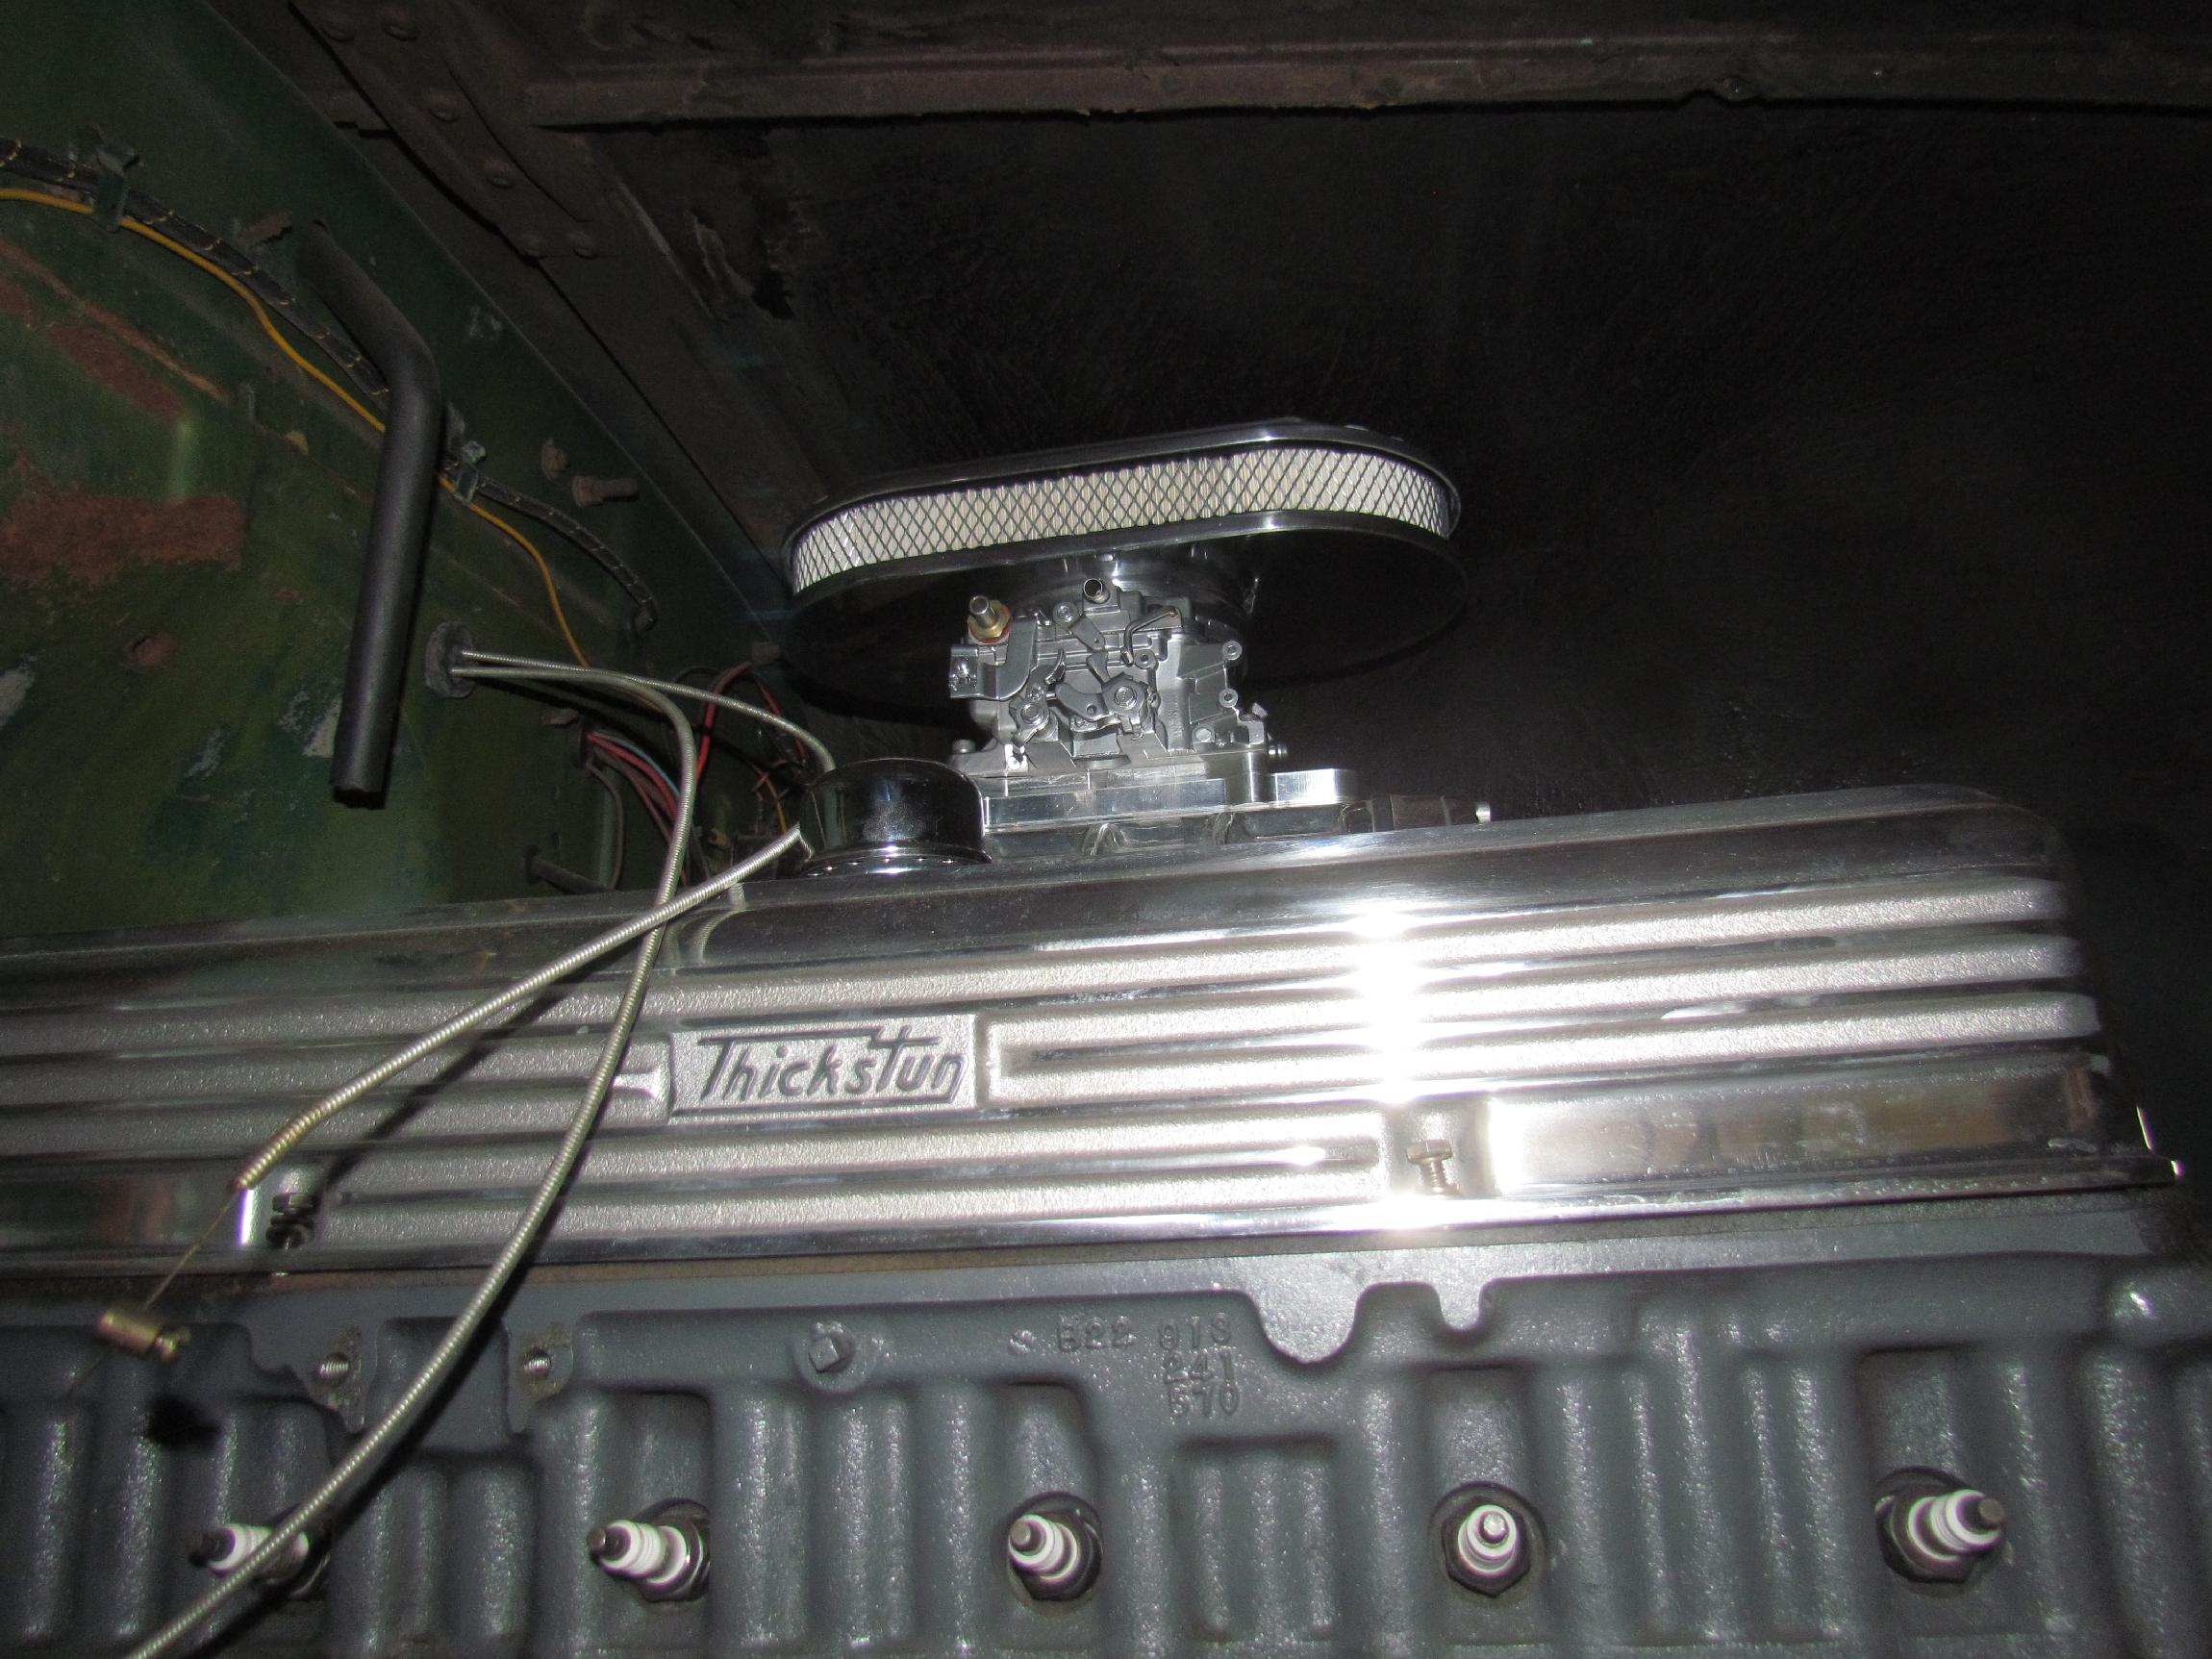 The air cleaner came with a nice stainless threaded rod, flat socket
cap but it was 3/4" too long so I had to cut the bottom off and clean
up the threads. It also was snugged up with anti-seize. With the hood
down, there is about an inch clearance left between air cleaner and
hood bottom.
The air cleaner came with a nice stainless threaded rod, flat socket
cap but it was 3/4" too long so I had to cut the bottom off and clean
up the threads. It also was snugged up with anti-seize. With the hood
down, there is about an inch clearance left between air cleaner and
hood bottom.
 November
14th 2015 Ordered a
2-3/4" Idler Pulley Stand and Tee Nut from JEGS for The Blower Shop
idler arm
and pulley. When I assembled it the idler pulley bolt was not long enuf
to fit the Tee Bolt and I'm not sure that it's even required for this
setup.
November
14th 2015 Ordered a
2-3/4" Idler Pulley Stand and Tee Nut from JEGS for The Blower Shop
idler arm
and pulley. When I assembled it the idler pulley bolt was not long enuf
to fit the Tee Bolt and I'm not sure that it's even required for this
setup.
| < Back
to Intro |
You can email me at ![]() webmaster@laroke.com
webmaster@laroke.com
Issued Monday October 26, 2015
copyright © 1996-2015 Larry Robert Kephart all rights reserved
| | LRK Home | | Bio Info | | Krash Khronicles | | LAROKE | |
| | BettyLou | | BillyBob's Garage | | Rat Patrol | | Deerslayer | |
| | Land of the Free and Home of the Brave | |
| | Keppylou's Art | | WWI Soldier's Diary | |