| | LRK Home | | Bio Info | | Krash Khronicles | | LAROKE | |
| | BettyLou | | BillyBob's Garage | | Rat Patrol | | Deerslayer | | Elvira | |
| | Land of the Free and Home of the Brave | |
| | Keppylou's Art | | WWI Soldier's Diary | |
BillyBob Work-in-Progress Log
![]()
WHAT'S NEW is a chronological listing of updates to the BillyBob site.
![]()
TRUCK LINKS including vendor sites for old parts, custom parts, and tools as well as sites for classic car and truck organizations
STORE Operating in association with Amazon.com, books, recordings and tools can be purchased.
PLANNING for the restoration including project schedule and cost estimates.
![]()
TRAVELS WITH BILLYBOB With apologies to Steinbeck, this area of BillyBob's Garage will be used to log the trips BillyBob and I make together.
WORK-IN-PROGRESS is the restoration of parts of BillyBob that I can accomplish without a garage.
PRE-RESTORATION includes log entries of minor repairs and adventures between time of purchase and the time when I started restoration, a piece at a time.
JR'S KORNER JR's Korner is the history of BillyBob before I got him authored by my brother, Wm. C. Kephart.
![]()
BILLYBOB MAINTENANCE Ever changing detailing, oil change, lube, etc. maintenance routines specifically developed for BillyBob, including required tools, materials and procedures.
PARTS SHOP The Parts Shop is a repository of How-To articles. Things that I have done over and over enough times to have developed a procedure. This gives me a checklist and saves brain cells.
STEALTH SHOP Urban residence design with large integrated shop and separate living quarters for a relative or renter.
![]()
You will need the Adobe Acrobat browser plugin to view these wiring diagrams which are in the PDF file format. This format allows zooming and panning. If you don't have this plugin, it can be downloaded and installed (free) from the Adobe site. The button below will take you there.
![]()
BILLYBOB WIRING DIAGRAM Here's the wiring diagram updated with BillyBob's current state 'cepting the third-party strap-on turn-signal director.
STRAP-ON TURN-SIGNAL DIRECTOR/BRAKE LIGHT CIRCUIT This turn signal and brake light circuit diagram shows the current state of the third-party turn-signal director wiring, which will remain in place until I figure out the problems with the OEM turn-signal director. It also shows the OEM headlight switch.
45. Paint and Diversions
February 18th 2006 Beautiful day in the shadetree garage. The rest of the country is suffering terrible weather this President's Day weekend but it didn't dip the whole way down into South Florida this time. I started by putting BillyBob's front end up on jackstands to repack the front wheel bearings. After I pulled the passenger side brake drum, I decided to replace the bearing seals too and I didn't have any spares so I put everything back together until I could get the new seals. Before I put the wheels back on, I static balanced both of them. The front end has been getting a bit wobbly the last few weeks and on two occasions, I hit a bump in the road hard enuf to induce a bone-shakin' warp core imbalance. I checked the front end when I had the wheels off and nothing is loose.
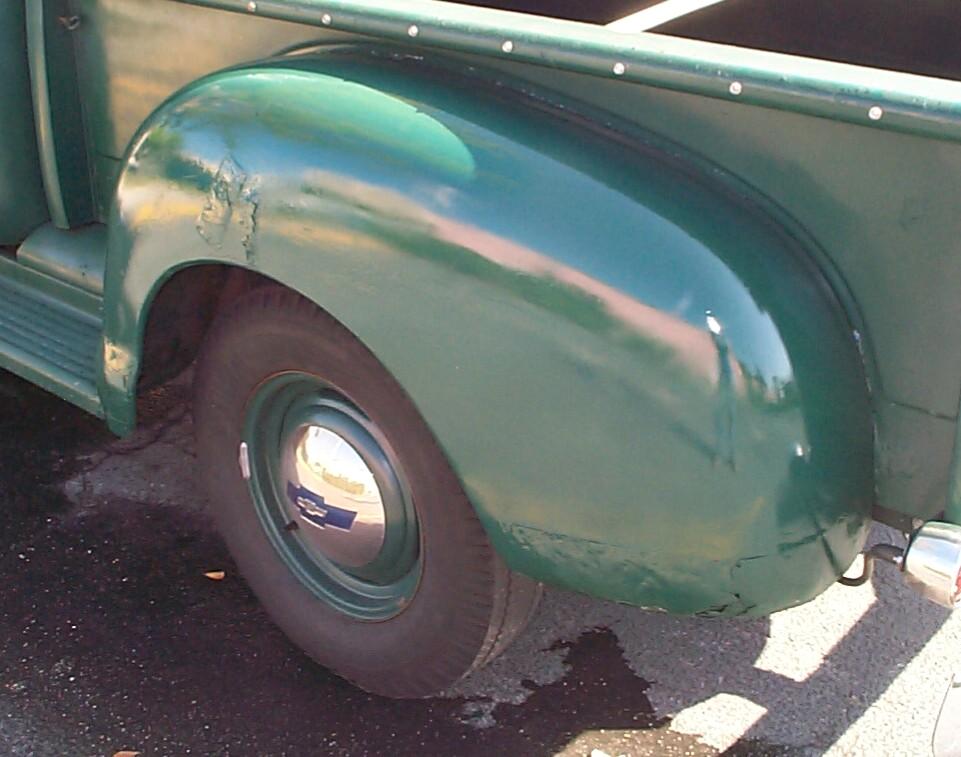
Nice weather but I'm not gettin' much done. After BillyBob was back on the ground, I started sanding the driver side rear fender with the foam block. This fender is in better shape than the passenger side but still not a keeper.
 February
19th 2006 Sixty
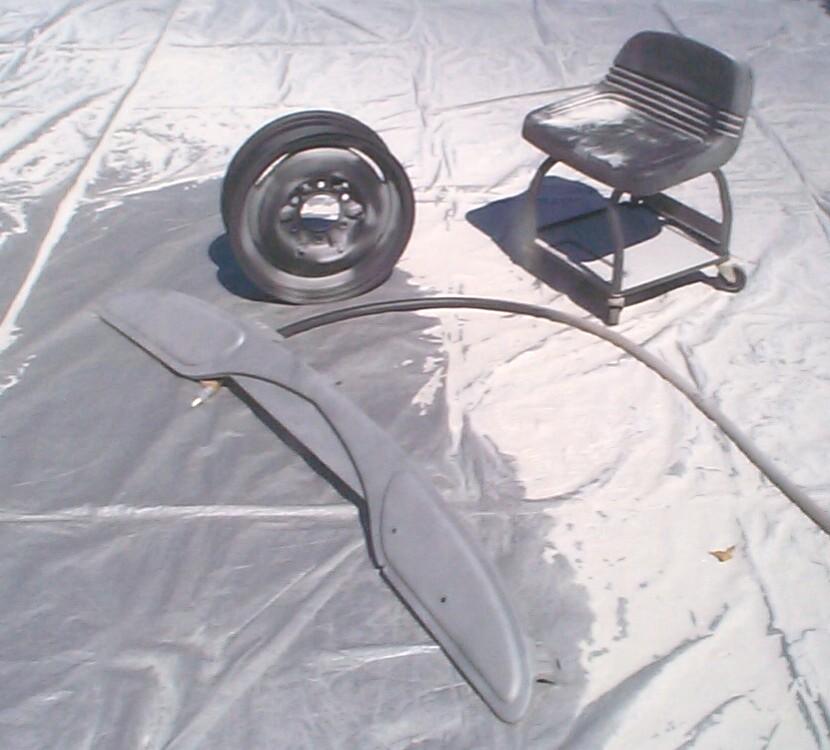
degrees, calm and sunny. Good sandblasting weather at last. By the time
I got the front splash apron clean and touched up parts of the wheel I
missed with primer, it was heating up and we were getting enuf wind to
lift the tarp. Made harvesting sand for reuse and folding the tarp a
bit of a pain. Got out the garden hose and washed sand off the
Panzerwagon, Renegade and
BillyBob before moving on to primer and paint operations.
February
19th 2006 Sixty
degrees, calm and sunny. Good sandblasting weather at last. By the time
I got the front splash apron clean and touched up parts of the wheel I
missed with primer, it was heating up and we were getting enuf wind to
lift the tarp. Made harvesting sand for reuse and folding the tarp a
bit of a pain. Got out the garden hose and washed sand off the
Panzerwagon, Renegade and
BillyBob before moving on to primer and paint operations.
 Hung
the splash apron up in the BillyBob tree (away from the dove family
trying to lay eggs and get some hatchlings), and gave it an application
of PRE Paint Prep. Did the same with BillyBob's driver side rear fender
and the wheel touchups. Gave the splash apron and exposed parts of the
wheel a coat of Eastwood's
Black Self-Etching Primer. Cut it close and ended up emptying my last
rattlecan of this stuff. Then gave the rear fender a coat of Dark
Hunter Green Rustoleum. The wind was starting to pick up a little to
frustrate my efforts but I persevered.
Hung
the splash apron up in the BillyBob tree (away from the dove family
trying to lay eggs and get some hatchlings), and gave it an application
of PRE Paint Prep. Did the same with BillyBob's driver side rear fender
and the wheel touchups. Gave the splash apron and exposed parts of the
wheel a coat of Eastwood's
Black Self-Etching Primer. Cut it close and ended up emptying my last
rattlecan of this stuff. Then gave the rear fender a coat of Dark
Hunter Green Rustoleum. The wind was starting to pick up a little to
frustrate my efforts but I persevered.
 February
25th 2006 Raining when
I went home last nite and raining when I got to the Krash Lab this
morning and the forecast is for more of the same. Looks like I'm gonna
be diverted from painting today. There's been a discussion over at the
stovebolt forum regarding the pros and cons of twenty year old tires. I
haven't added anything to the discussion but I believe the conventional
wisdom over there would put me on suicide watch. I've been trying to
make BillyBob's old tires last until I'm ready to paint each rim but
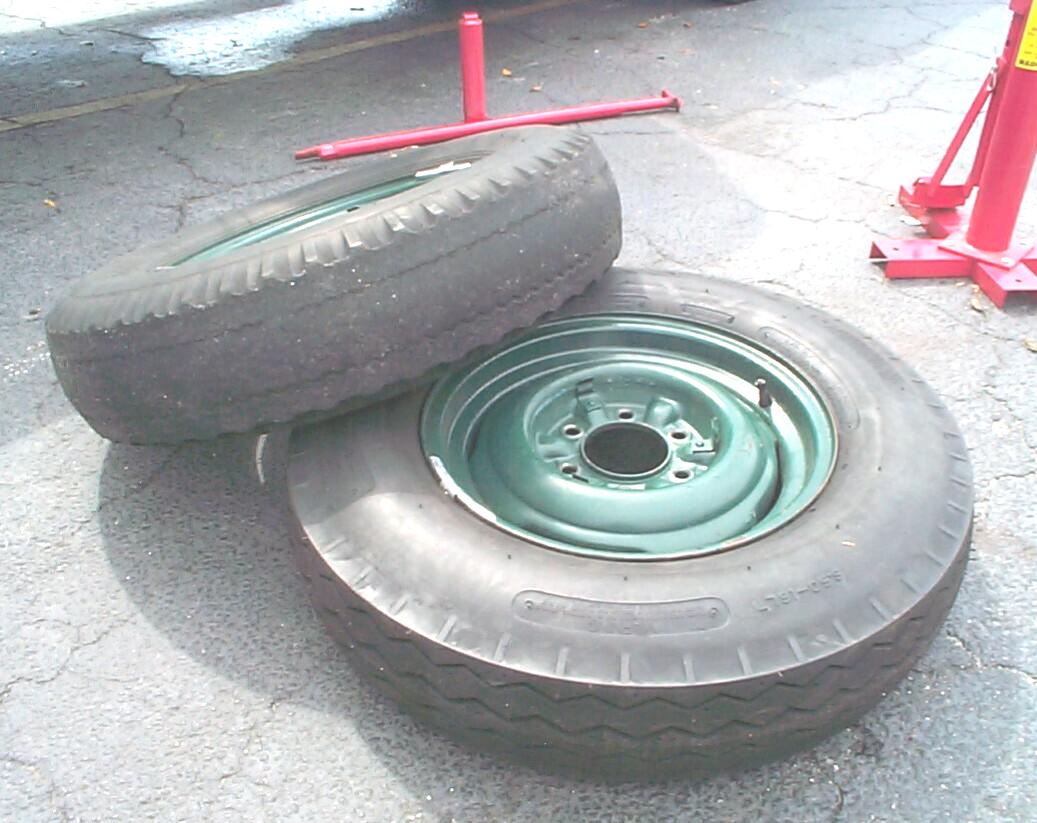
that job has really stretched out. BillyBob's front tires were old with
cracks in the sidewalls when I got him in 1995. Now, they're almost
bald too. I decided to, at least, get new rubber on the front end
today. Jacked up the front end and took off BillyBob's passenger side
wheel. Pulled the old rubber off and replaced it with one of the new
6.50x16 tires and tubes I have from M.E.Miller. Then, I
did some creative tire rotation exercises to get the two wheels I now
have new rubber on to BillyBob's front end. I put the two old tires
that have plenty of tread left on the rear and the other old bald tire
in the spare tire rack. That gives me a little more time to work on the
wheel refinishing job.
February
25th 2006 Raining when
I went home last nite and raining when I got to the Krash Lab this
morning and the forecast is for more of the same. Looks like I'm gonna
be diverted from painting today. There's been a discussion over at the
stovebolt forum regarding the pros and cons of twenty year old tires. I
haven't added anything to the discussion but I believe the conventional
wisdom over there would put me on suicide watch. I've been trying to
make BillyBob's old tires last until I'm ready to paint each rim but
that job has really stretched out. BillyBob's front tires were old with
cracks in the sidewalls when I got him in 1995. Now, they're almost
bald too. I decided to, at least, get new rubber on the front end
today. Jacked up the front end and took off BillyBob's passenger side
wheel. Pulled the old rubber off and replaced it with one of the new
6.50x16 tires and tubes I have from M.E.Miller. Then, I
did some creative tire rotation exercises to get the two wheels I now
have new rubber on to BillyBob's front end. I put the two old tires
that have plenty of tread left on the rear and the other old bald tire
in the spare tire rack. That gives me a little more time to work on the
wheel refinishing job.
February 26th 2006 Better weather this morning. The ride home last nite was an improvement. I could still use some fine-tuning with the static balancer on the front wheels but the smoother ride made the old ride with the bald, cracked tires seem like hard rubber on artillery wheels. Started monthly maintenance on all three vehicles. A B-24 flew over at 500 feet. What a beautiful sight. Three of the old warbirds are at the Boca Raton airport today and are giving rides - the last operational liberator, a flying fortress and a mitchell bomber . . . Forget what I said about the better weather. Before I was finished with monthly maintenance, the winds kicked up and the shadetree garage got hit with a deluge. Those people in the B-24 are going to get their money's worth.
March 4th 2006 Weather is good today 'cept for wind. There's another downtown festival so I had to block off the parking lot with traffic cones since towing zone signs are not enuf to deter some boneheads. Didn't do much except sand the bed exterior sides with the foam sanding block, mask off the bed cover and tailights, PRE Paint Prep the bed sides and rattlecan spray on a coat of Rustoleum Dark Hunter Green. I had some computer work do do inside the Krash Lab and I was suffering some residual discomfort from a molar extraction on Thursday so I didn't get much more than that done.
 March
5th 2006 An OK day for
painting but with festival goers trampin' thru the BillyBob garage, its
too risky to drag out the more toxic automotive paints and I'll have to
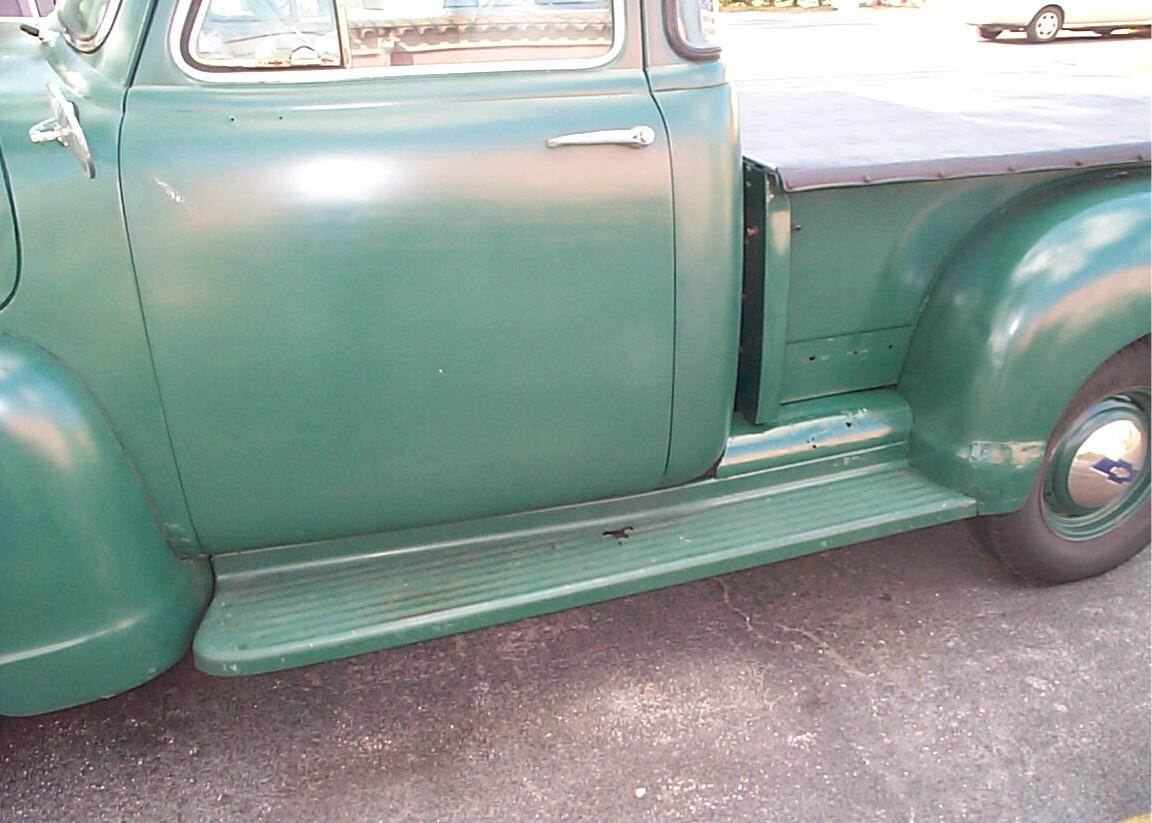
stick to rattlecan paint jobs today. Got the electric angle grinder out
and went over the running boards with the wire cup. Masked off the
running boards and PRE Paint Prepped them next.
March
5th 2006 An OK day for
painting but with festival goers trampin' thru the BillyBob garage, its
too risky to drag out the more toxic automotive paints and I'll have to
stick to rattlecan paint jobs today. Got the electric angle grinder out
and went over the running boards with the wire cup. Masked off the
running boards and PRE Paint Prepped them next.
 When
I first got BillyBob, his running boards were body color. I kept the
same color scheme the first time I spiffed him up with Rustoleum. I
suspect he left the factory, however, with black running boards and
that's what I decided to paint them today. Each running board got a
couple of rattlecan coats of Eastwood's Chassis Black.
When
I first got BillyBob, his running boards were body color. I kept the
same color scheme the first time I spiffed him up with Rustoleum. I
suspect he left the factory, however, with black running boards and
that's what I decided to paint them today. Each running board got a
couple of rattlecan coats of Eastwood's Chassis Black.
March 11th 2006 A good working morning so far. Sunny, temp in the seventies and moderate breezes. Tiki bar weather if I wuz still doin' that sorta thing. Another diversion from painting day. Gotta do some maintenance on BillyBob and change BettyLou's oil. My Boss made some indications yesterday that I may have a few tasks inside the Krash Lab for him too.
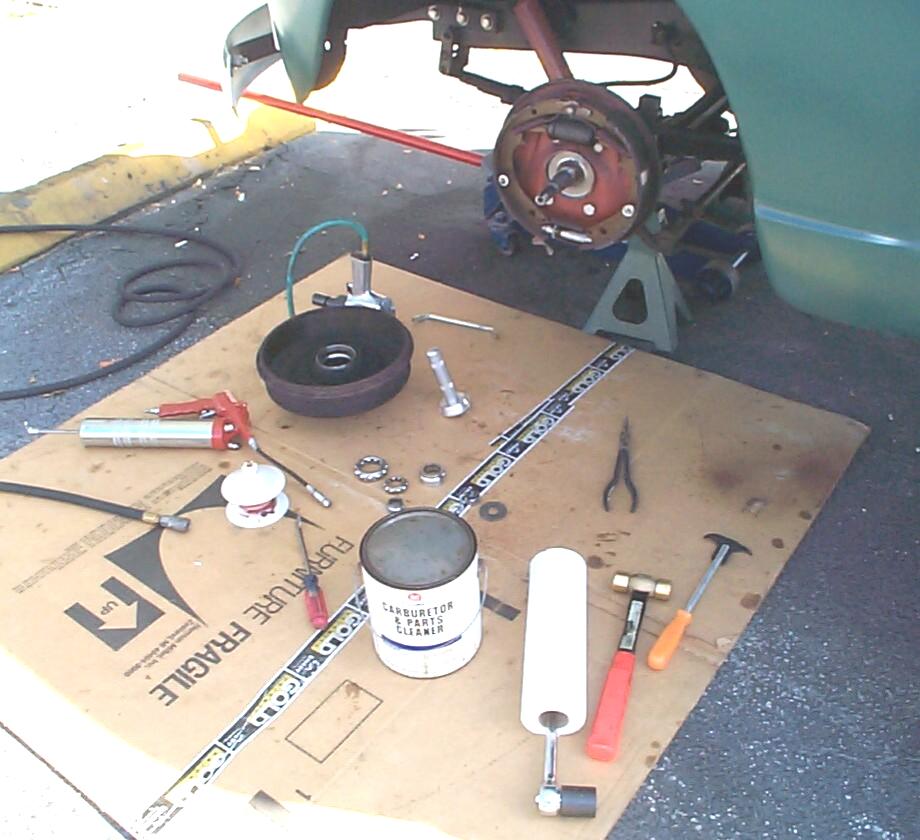
 After
BettyLou's oil change, I went back to BillyBob's wheel bearing maintenance.
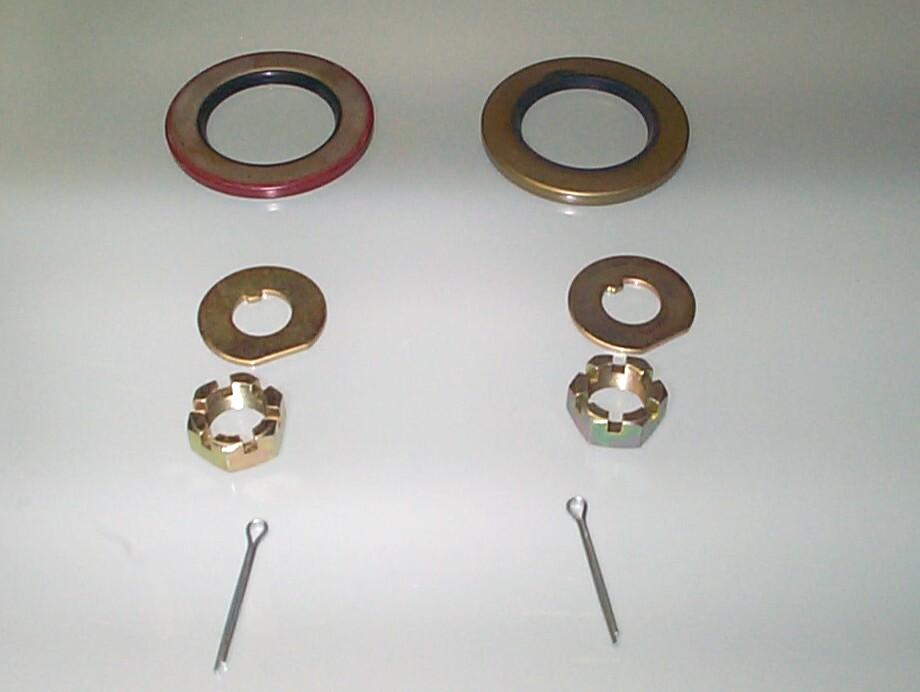
I started this a few weeks ago, then decided I needed some parts before
moving forward. Now I have new bearing seals, spindle nuts, washers and
cotter pins from Chevy Duty. I got the new spindle nuts, washers and
cotter pins because I noticed last time that the "tang" on the spindle
washer that fits in the keyway on the spindle to keep it from turning
was missing on the passenger side.
After
BettyLou's oil change, I went back to BillyBob's wheel bearing maintenance.
I started this a few weeks ago, then decided I needed some parts before
moving forward. Now I have new bearing seals, spindle nuts, washers and
cotter pins from Chevy Duty. I got the new spindle nuts, washers and
cotter pins because I noticed last time that the "tang" on the spindle
washer that fits in the keyway on the spindle to keep it from turning
was missing on the passenger side.
 Well,
the new washers turned out to be thinner and smaller in diameter than
the washers on BillyBob and I ended up keeping the original washers,
missing tang be damned. This exercise took me all day because I didn't
have a written maintenance procedure for it and decided to write one up
during the process. That meant a lotta trips to the can to wash my
greasy hands before typing.
Well,
the new washers turned out to be thinner and smaller in diameter than
the washers on BillyBob and I ended up keeping the original washers,
missing tang be damned. This exercise took me all day because I didn't
have a written maintenance procedure for it and decided to write one up
during the process. That meant a lotta trips to the can to wash my
greasy hands before typing.
When I was tightening up the spindle nut, I noticed some loosy-goosy slack in the wheel on a vertical axis (passenger side only). Investigating further caused me an Oh ~!@#$%^ epiphany - king pin problems! This may be the cause of my "warp core imbalance" vibrations that I've tried to take care of so far, and with some success, with static tire balancing and new tires on the front. Darn! Being that my goal is to keep BillyBob on the road as much as possible, my best course of action is to find another axle and spindles to rebuild. I packed up shop for the day and went home to the Krash Pad to comptemplate king pins while watching swirls of cigar smoke waft away from the sofa.
March 12th 2006 Good day 'cept it's right on the edge, wind-wise, for painting. Even dragged out my paint stand and put it back inside again. Still bummed 'bout the king pin situation from yesterday. This is one of the things that JR had had done professionally when he had the truck. I thought I wuz home free and would nebber know the joys of king pin replacement. Oh well, nuttin for it. I moped around mostly, organizing tools and doing small jobs like exercising the Boss's Panzerwagon and washing bird poop off BillyBob. I had some big problems with one of my servers in the Krash Lab and I had to fiddle around with that all day too so everything would be hunky-dory when my co-workers came back on Monday.
 March
18th 2006 Today would
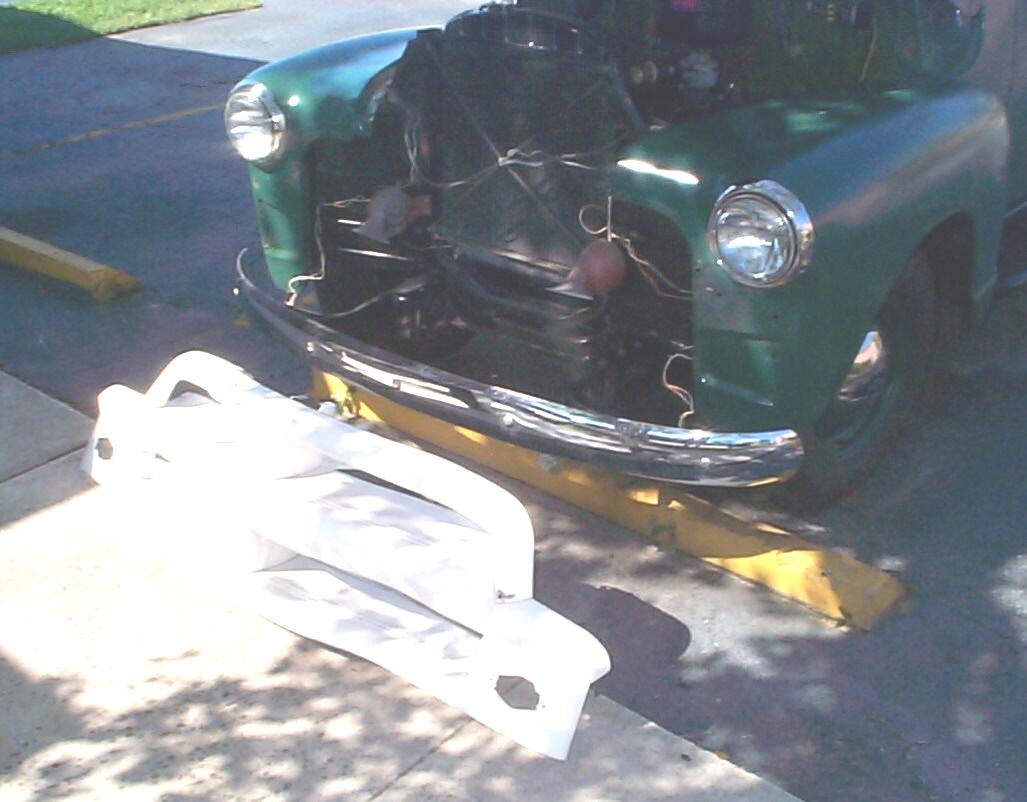
be a good day for painting. I hope tomorrow is as nice. Continued with bumper maintenance.
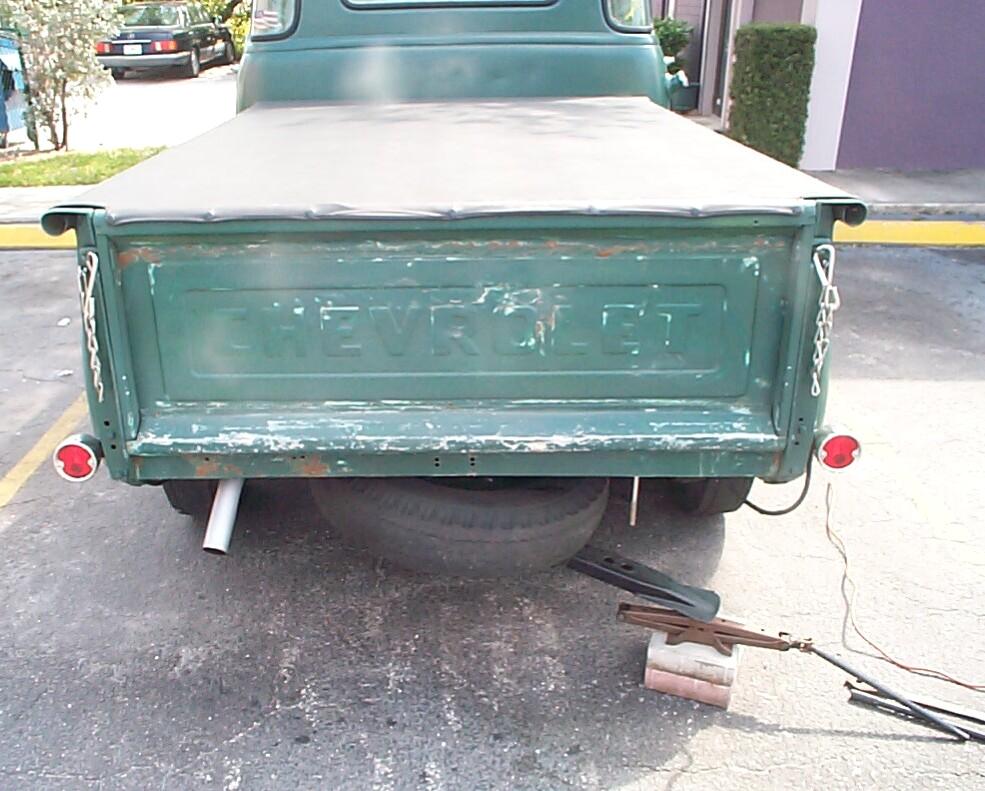
Got the front bumper a few weeks ago. Today is the rear bumper's turn.
Removed the rear bumper and brackets. The bumper is in good shape. The
silver paint on the back has held up well. Dropped the tire carrier to
get at the license plate bracket bolts. Removed the license plate
assembly and dismantled it. Several of the fasteners are rusting up and
I've gonna try to improve the situation with more stainless steel
fasteners. Used the wire cup in the electric angle grinder to get the
loose stuff off the tailgate. Bagged the taillights and unbolted the
tailgate chains. PRE Paint Prepped the tailgate and hit the exposed
areas with a coat of rattlecan Rust Encapsulator.
March
18th 2006 Today would
be a good day for painting. I hope tomorrow is as nice. Continued with bumper maintenance.
Got the front bumper a few weeks ago. Today is the rear bumper's turn.
Removed the rear bumper and brackets. The bumper is in good shape. The
silver paint on the back has held up well. Dropped the tire carrier to
get at the license plate bracket bolts. Removed the license plate
assembly and dismantled it. Several of the fasteners are rusting up and
I've gonna try to improve the situation with more stainless steel
fasteners. Used the wire cup in the electric angle grinder to get the
loose stuff off the tailgate. Bagged the taillights and unbolted the
tailgate chains. PRE Paint Prepped the tailgate and hit the exposed
areas with a coat of rattlecan Rust Encapsulator.
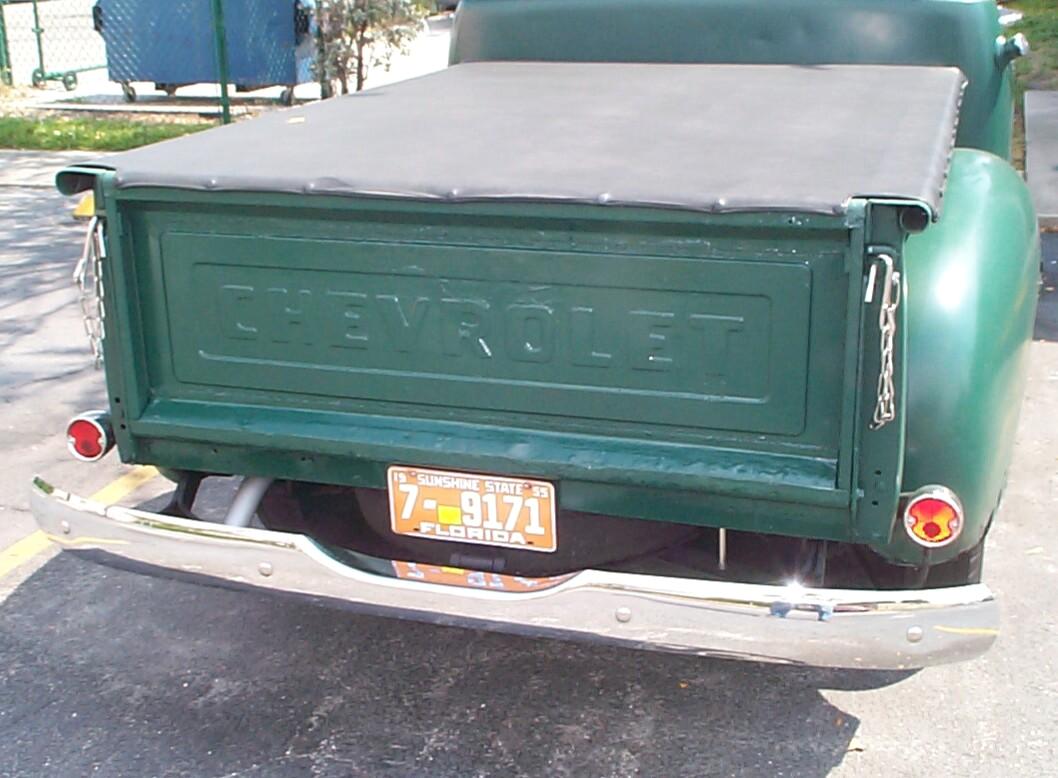
Cleaned up the license plate bracket pieces, PRE Paint Prepped them and hung them in BillyBob's tree for some Self-Etching Primer on the bare spots. Afterwards, they were shot with a coat of Eastwood's SEM Trim Black Paint when the primer cured. Washed and waxed my YOM license plate next. When the Rust Encapsulator was cured on the tailgate, it was given a coat of Dark Hunter Green Rustoleum. This is the last of the Hunter Green work for this detailing cycle.
Washed the bumper brackets and touched them up with a light coat of the SEM Trim Black Paint after PRE Paint Prepping them. Washed the bumper front and back and only used chrome polish in the few spots I could detect rust freckles. Finished off the front (chrome) side of the bumper with a coat of wax. Jacked the tire carrier back into position and secured it fer the nite. Give all the rattlecan paint some more time to dry before I put humpty-dumpty back together again tomorrow. My Boss has been drivin' BettyLou all week and he just got his Mercedes SL 5.5 AMG back out of the shop. He had the guys who usually detail the Mercedes rocket detail BettyLou before he turned her back over to me and she looks better than she has for years.
 March
19th 2006 Beautiful day
for painting but I did not set up for it yesterday. I gotta quit
listenin' to the weather forecasters. I put the license plate assembly
back together first. I replaced all the screws, nuts and washers I
could with stainless steel items from an assortment I got from Harbor Freight some
time back. The spare tire carrier was lowered again and the license
plate assembly was bolted in place with the same bolts it had before
'cause they hadn't corroded. Spare tire carrier was jacked back up and
secured. Put the rear bumper brackets and bumper back on with the new
stainless steel bolts, washers and nuts that came from the Doc's House of Bolts
kit. Cleaned bird droppings off BillyBob and started closing down. The
Boss will be along soon and we're going to the Fort Lauderdale New Car
Show.
March
19th 2006 Beautiful day
for painting but I did not set up for it yesterday. I gotta quit
listenin' to the weather forecasters. I put the license plate assembly
back together first. I replaced all the screws, nuts and washers I
could with stainless steel items from an assortment I got from Harbor Freight some
time back. The spare tire carrier was lowered again and the license
plate assembly was bolted in place with the same bolts it had before
'cause they hadn't corroded. Spare tire carrier was jacked back up and
secured. Put the rear bumper brackets and bumper back on with the new
stainless steel bolts, washers and nuts that came from the Doc's House of Bolts
kit. Cleaned bird droppings off BillyBob and started closing down. The
Boss will be along soon and we're going to the Fort Lauderdale New Car
Show.
March 25th 2006 It's cold and windy. Too cold for South Florida in March. I had a choice of working on BillyBob or Renegade today. I decided on BillyBob. Got the tools out of the shed and started taking BillyBob's grille off again. The last time I worked on it, I had three problems that needed to be cleared up: four fastener clips short, Not enuf paint coverage, and I had broken loose a captured nut in my haste to get things back together last time.
 While
I was bumping my head in the wheelwell, removing the grille sheetmetal
screws, blackbirds were filling BillyBob's tree to harass me and drop
ballast on BillyBob. One sat right above me and dropped crumbs off a
big piece of bread he got at the pizza place across the alley. Another
would swoop down next to me to retreive the crumbs.
While
I was bumping my head in the wheelwell, removing the grille sheetmetal
screws, blackbirds were filling BillyBob's tree to harass me and drop
ballast on BillyBob. One sat right above me and dropped crumbs off a
big piece of bread he got at the pizza place across the alley. Another
would swoop down next to me to retreive the crumbs.
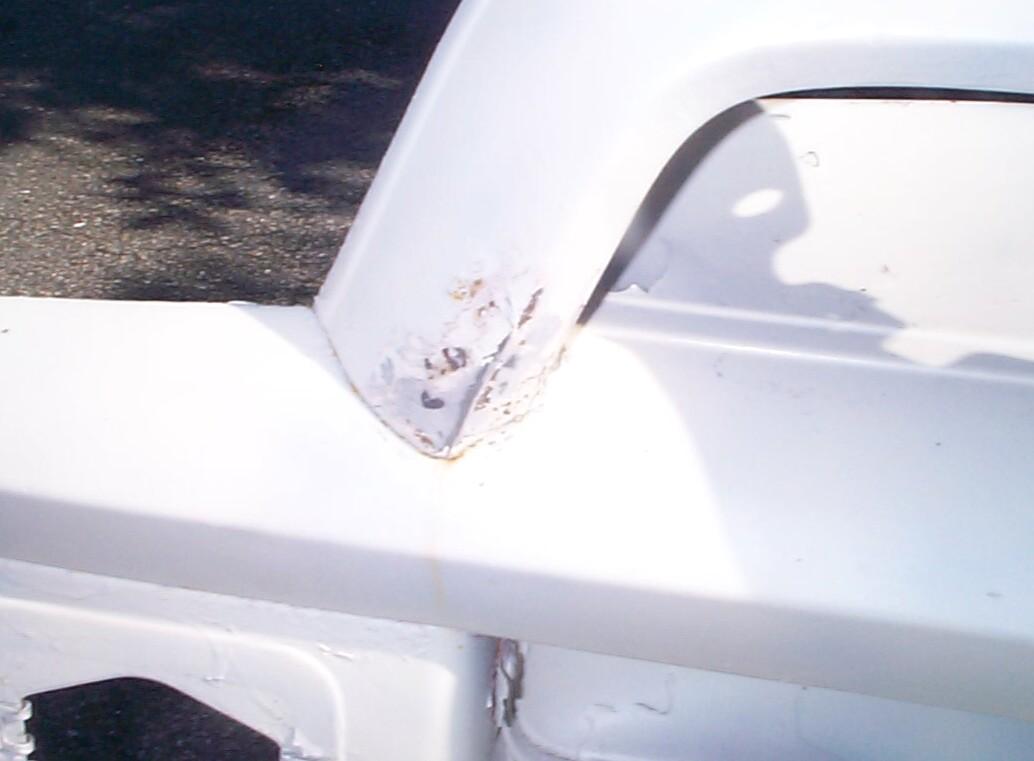
Decided to make a temporary cosmetic repair to the grille. The rust holes at both ends of the upper grille bar are getting substantial. I cut and clamped small pieces of sheetmetal behind the biggest ones and mixed up a batch of JB Weld to fill them. I forgot how "liquid" JB Weld is before it sets up . . . Had a hard time containing the drippin' Ended up slapping masking tape on the front of the grille in the plane I wanted the JB Weld to follow an' applying the stuff from the back.
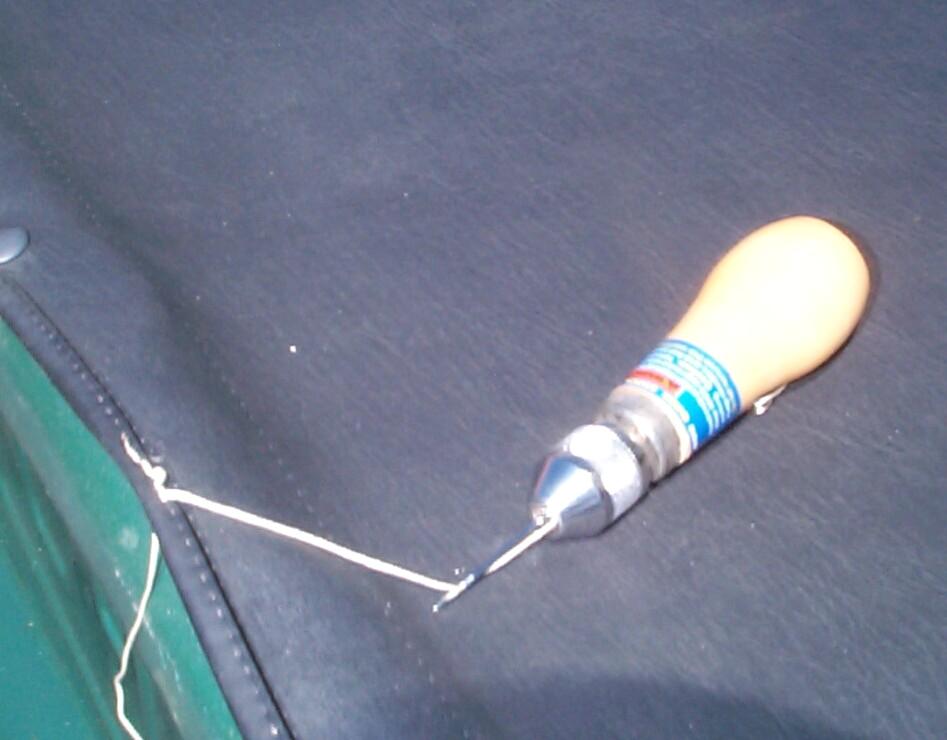 Waiting
for the JB Weld stopped me as far as grillework goes for today. My
fabric bed cover is unraveling at the edges. The elements are
destroying the stitching. The last time I ordered from Harbor Freight,
I picked up a cheap "Quick Stitch Sewing Awl" Model 91812. Decided to
try my luck with this thing on the bed cover. Took me a half hour just
to get the thing threaded - the instructions are OK if you know what
you're doing but the illustrations are too small for my old eyes and I
finally googled "how to lock stitch" on the web to get enuf info to get
started . . . I've always been single and I used to pride myself on
never learning how to sew or iron . . . until now, that is. Oh well,
the first attempt was good enough to tell me that this will work. I
just have to figure out how to control the layers of vinyl and backing
(keep them aligned where I want them) before I go for broke.
Waiting
for the JB Weld stopped me as far as grillework goes for today. My
fabric bed cover is unraveling at the edges. The elements are
destroying the stitching. The last time I ordered from Harbor Freight,
I picked up a cheap "Quick Stitch Sewing Awl" Model 91812. Decided to
try my luck with this thing on the bed cover. Took me a half hour just
to get the thing threaded - the instructions are OK if you know what
you're doing but the illustrations are too small for my old eyes and I
finally googled "how to lock stitch" on the web to get enuf info to get
started . . . I've always been single and I used to pride myself on
never learning how to sew or iron . . . until now, that is. Oh well,
the first attempt was good enough to tell me that this will work. I
just have to figure out how to control the layers of vinyl and backing
(keep them aligned where I want them) before I go for broke.
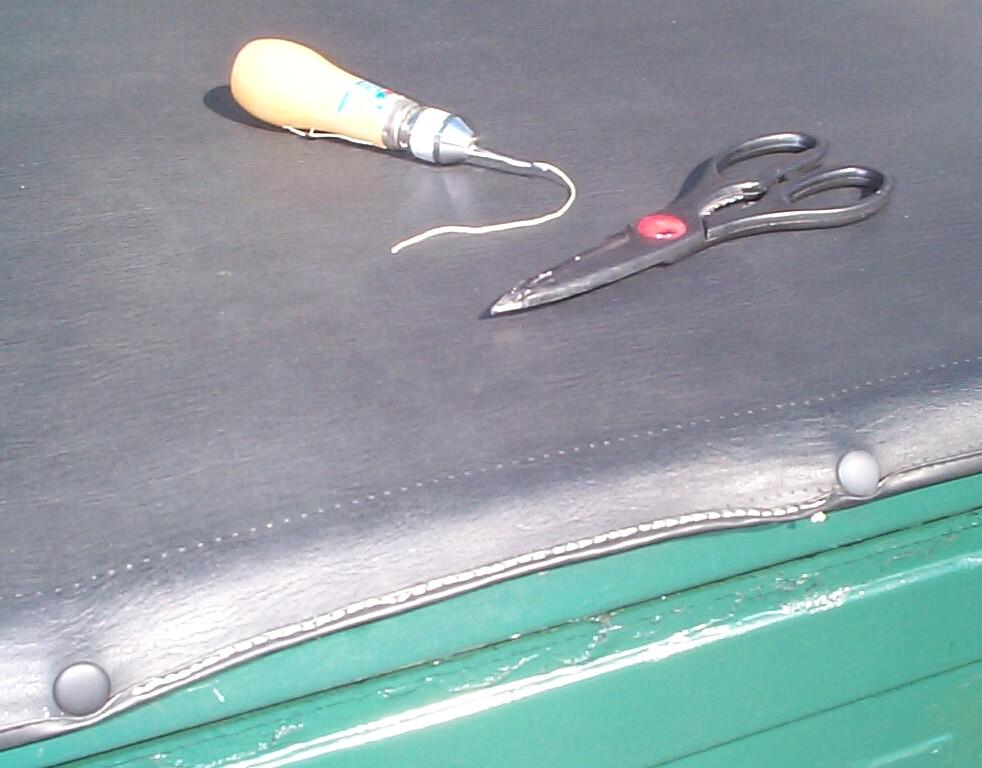 I
churned my brains fer awhile and looked at "clamps" and "workholders"
on the net. After some time, the thought seeped into my noggin that I
wuz making this too difficult. Leave the bed cover snapped in place and
the snaps would hold the layers of backing and vinyl tight enough for
me to hold the awl with one hand and apply additional pressure with the
other to get the stitch close to where I wanted it to be. I went to
task again and it worked after a fashion. I usually have my Dad's
spirit on my shoulder when I'm workin' on BillyBob. Today, I think the
spirits of Mom and my Grandmother are there, laughin' up a storm at my
antics. Both of them carried their sewing into the realm of artform
when they were alive. By the time the sun was starting to set, I had
two-thirds of the job done and had only drawn blood with the awl once.
I
churned my brains fer awhile and looked at "clamps" and "workholders"
on the net. After some time, the thought seeped into my noggin that I
wuz making this too difficult. Leave the bed cover snapped in place and
the snaps would hold the layers of backing and vinyl tight enough for
me to hold the awl with one hand and apply additional pressure with the
other to get the stitch close to where I wanted it to be. I went to
task again and it worked after a fashion. I usually have my Dad's
spirit on my shoulder when I'm workin' on BillyBob. Today, I think the
spirits of Mom and my Grandmother are there, laughin' up a storm at my
antics. Both of them carried their sewing into the realm of artform
when they were alive. By the time the sun was starting to set, I had
two-thirds of the job done and had only drawn blood with the awl once.
March 26th 2006 Record breaking cold today. Hauled the grille out of the shed and peeled the masking tape away from the JB Weld patches. Tape came off without problem and I won't have to sand much. I'll have to keep "JB Weld masking tape dam method" in my bag of tricks for future ops. There are still a couple of small holes left but I will have to leave them for now or I won't get BillyBob back together for the ride home tonite.
 Shaped
the JB Weld with a 2" speedlock 36 grit sanding disk in the electric
drill. I stopped when I had it down to the same level of deterioration
as the surrounding grille areas. Not too bad. We'll see how this goes.
I suspect to see rust around the edges of the patch in pretty short
order. I may replace the top grille bar in the next detailing cycle.
Went over the grille with a 3M Scuff Pad, PRE Paint Prepped it and
rattlecan bombed it with Rustoleum Shell White (When I visited Home
Depot on Friday, they were stocking Shell White again).
Shaped
the JB Weld with a 2" speedlock 36 grit sanding disk in the electric
drill. I stopped when I had it down to the same level of deterioration
as the surrounding grille areas. Not too bad. We'll see how this goes.
I suspect to see rust around the edges of the patch in pretty short
order. I may replace the top grille bar in the next detailing cycle.
Went over the grille with a 3M Scuff Pad, PRE Paint Prepped it and
rattlecan bombed it with Rustoleum Shell White (When I visited Home
Depot on Friday, they were stocking Shell White again).
Waiting for the paint to dry, I updated BillyBob's fastener inventory. After Powerblock aired on Spike TV, I started putting the grille back on BillyBob. Paint was still a bit tacky so I had to be careful. Installed the four additional anchor clips I got a couple of weeks ago in another grille fastener kit from American Classic Truck Parts.
Having re-installed the grille three times now (and screwing up the alignment the second time), I'm startin' to get a feel for how to do this. To avoid my alignment problem that I had last time with the upper radiator baffle, I first installed the two blind sheetmetal screws loosely on each side adjacent to the headlights. Then, the radiator baffle was placed next and the four capscrews adjacent to the latchplate were installed with Threadlocker Blue. A tap was run thru the captured nut that had broken loose last time and it was held in place with channel-locks while its capscrew was tightened (this is too small a job to drag out the welder for at this time). Next, all the sheetmetal screws accessed from the wheelwells were placed loosely. Then, the rest of the capscrews for the radiator baffle were installed with Threadlocker Blue. Finally, the remainder of the sheetmetal screws in the radiator baffle were installed and all sheetmetal screws were tightened up. BillyBob's passenger side front fender is sagging about 3/4" at the rear and the twist that this puts on the grille is probably what screwed me up last time (no fun intended). This time everything went hunky-dory.
 Finished
up the day by washing the blackbird "comments" off BillyBob and putting
the tools away. It turned out to be a great working day once it warmed
up a little. Next week is liable to be a diversion weekend because it's
Palm Beach Barrett-Jackson Auction time and I don't know what day yet
my boss wants to go.
Finished
up the day by washing the blackbird "comments" off BillyBob and putting
the tools away. It turned out to be a great working day once it warmed
up a little. Next week is liable to be a diversion weekend because it's
Palm Beach Barrett-Jackson Auction time and I don't know what day yet
my boss wants to go.
April 1st 2006 Good weather day here in the shadetree garage. I won't be able to take much advantage of it tho' since we're heading off to the auction in a couple of hours. Dragged out the tools, mostly for tomorrow's operations. I got the Harbor Freight hand awl out and finished stitching up the back edge of the tonneau cover.
OK. That's it. Except for the front splash apron, the body detailing phase of this detailing cycle is complete. During the course of giving BillyBob his second "temporary" paint job, I've edited the body detailing procedures and changed and added to my fastener inventory as well. Next is the wheelwell detailing phase and my painting experiment with the splash apron. There's the wheel re-finishing project and king pins to think about too and some of BillyBob's readers have sent e-mails regarding the last couple of log entries that I'm really late responding to. Some more on all that next time. I'm off to the Barrett-Jackson auction.
| < Back
to Intro |
You can email me at ![]() webmaster@laroke.com
webmaster@laroke.com
Issued Saturday April 1, 2006
Updated Monday March 19 2018
copyright © 1996-2018 Larry Robert Kephart all rights reserved
| | LRK Home | | Bio Info | | Krash Khronicles | | LAROKE | |
| | BettyLou | | BillyBob's Garage | | Rat Patrol | | Deerslayer | | Elvira | |
| | Land of the Free and Home of the Brave | |
| | Keppylou's Art | | WWI Soldier's Diary | |