| | LRK Home | | Bio Info | | Krash Khronicles | | LAROKE | |
| | BettyLou | | BillyBob's Garage | | Rat Patrol | | Deerslayer | | Elvira | |
| | Land of the Free and Home of the Brave | |
| | Keppylou's Art | | WWI Soldier's Diary | |
BillyBob Work-in-Progress Log
![]()
WHAT'S NEW is a chronological listing of updates to the BillyBob site.
![]()
TRUCK LINKS including vendor sites for old parts, custom parts, and tools as well as sites for classic car and truck organizations
STORE Operating in association with Amazon.com, books, recordings and tools can be purchased.
PLANNING for the restoration including project schedule and cost estimates.
![]()
TRAVELS WITH BILLYBOB With apologies to Steinbeck, this area of BillyBob's Garage will be used to log the trips BillyBob and I make together.
WORK-IN-PROGRESS is the restoration of parts of BillyBob that I can accomplish without a garage.
PRE-RESTORATION includes log entries of minor repairs and adventures between time of purchase and the time when I started restoration, a piece at a time.
JR'S KORNER JR's Korner is the history of BillyBob before I got him authored by my brother, Wm. C. Kephart.
![]()
BILLYBOB MAINTENANCE Ever changing detailing, oil change, lube, etc. maintenance routines specifically developed for BillyBob, including required tools, materials and procedures.
PARTS SHOP The Parts Shop is a repository of How-To articles. Things that I have done over and over enough times to have developed a procedure. This gives me a checklist and saves brain cells.
STEALTH SHOP Urban residence design with large integrated shop and separate living quarters for a relative or renter.
![]()
You will need the Adobe Acrobat browser plugin to view these wiring diagrams which are in the PDF file format. This format allows zooming and panning. If you don't have this plugin, it can be downloaded and installed (free) from the Adobe site. The button below will take you there.
![]()
BILLYBOB WIRING DIAGRAM Here's the wiring diagram updated with BillyBob's current state 'cepting the third-party strap-on turn-signal director.
STRAP-ON TURN-SIGNAL DIRECTOR/BRAKE LIGHT CIRCUIT This turn signal and brake light circuit diagram shows the current state of the third-party turn-signal director wiring, which will remain in place until I figure out the problems with the OEM turn-signal director. It also shows the OEM headlight switch.
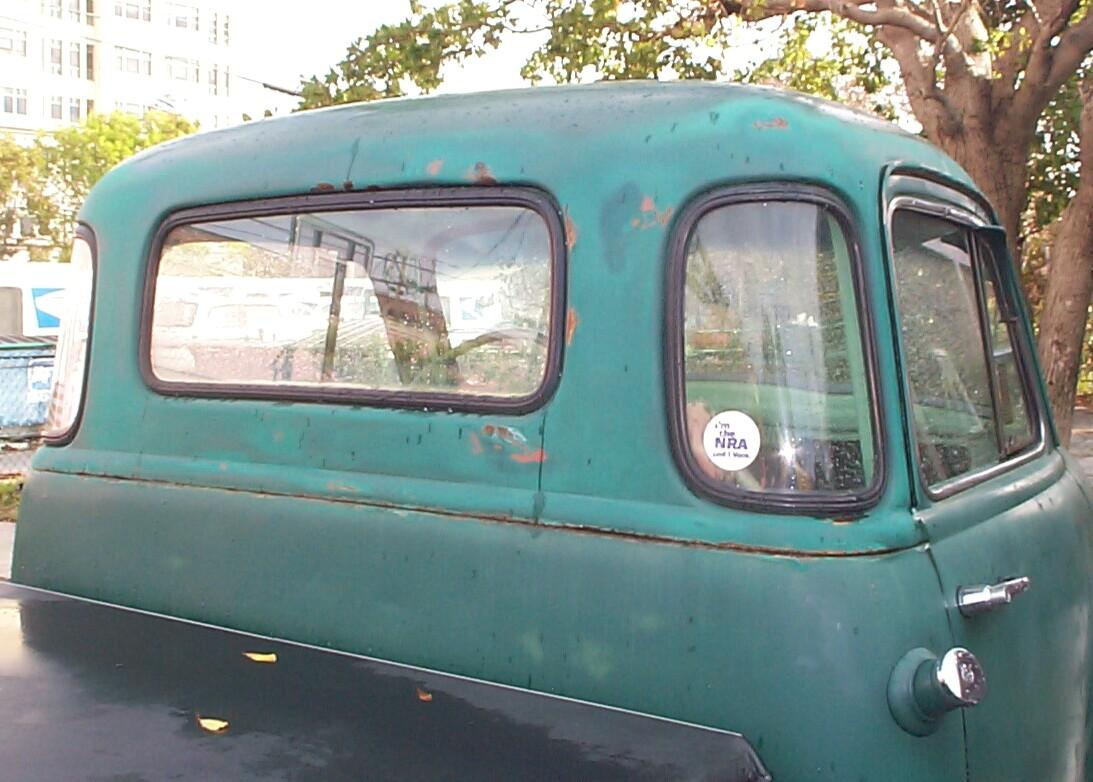
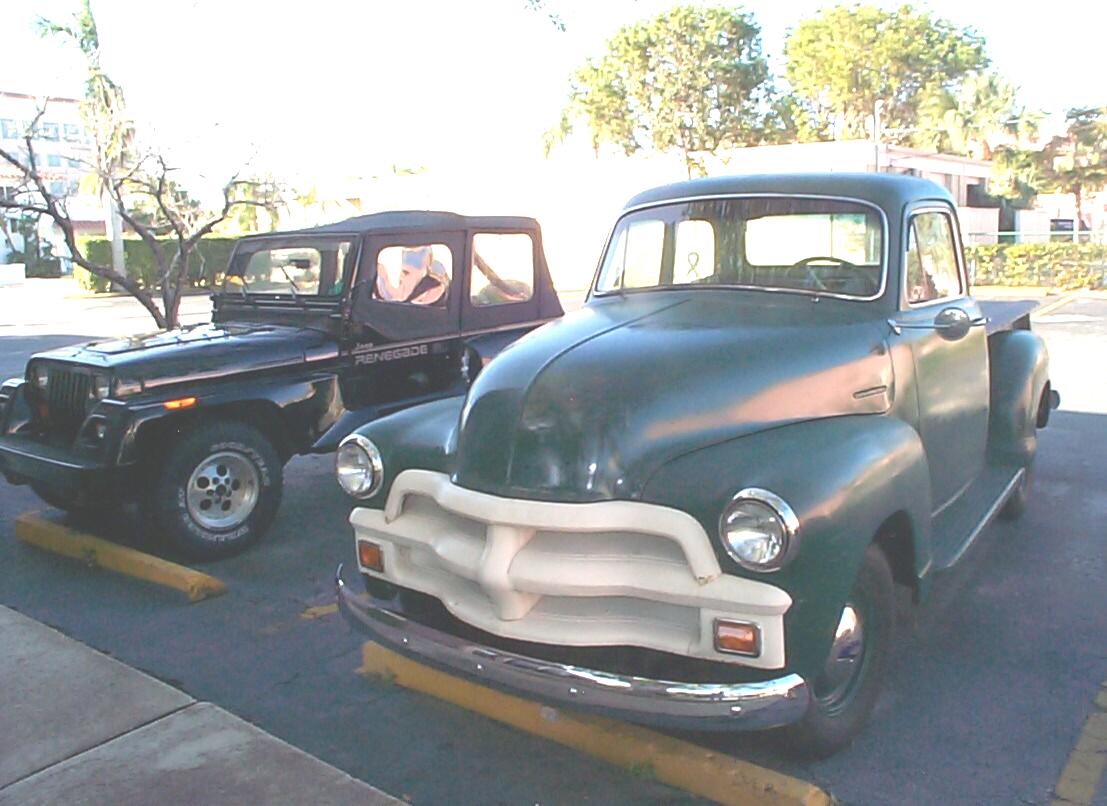
43. Makeup Makeover
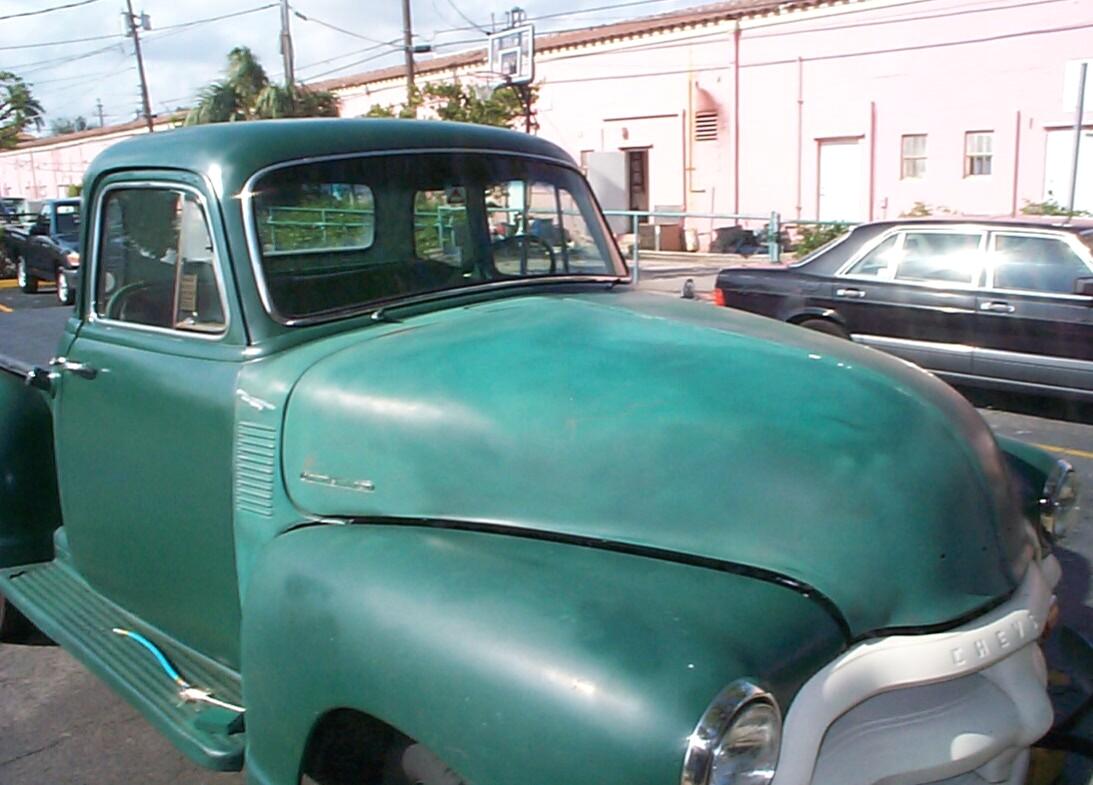
Five years ago, I started the "Work-in-Progress" log entries of BillyBob's website with a "temporary" Tammy Faye Bakker paint job. Time flies. The rattlecan Rustoleum paint job is beginning to fade quite a bit and I'm not quite ready for the automotive paint. While touching up the roof paint during the body phase of the detailing cycle, I got a bit carried away and found myself involved in adding a new coat of Rustoleum to the whole of BillyBob.
 November
12th 2005 Sunny and
breezy today. Continued on with the body
phase of the detailing cycle. Unbolted the taillights,
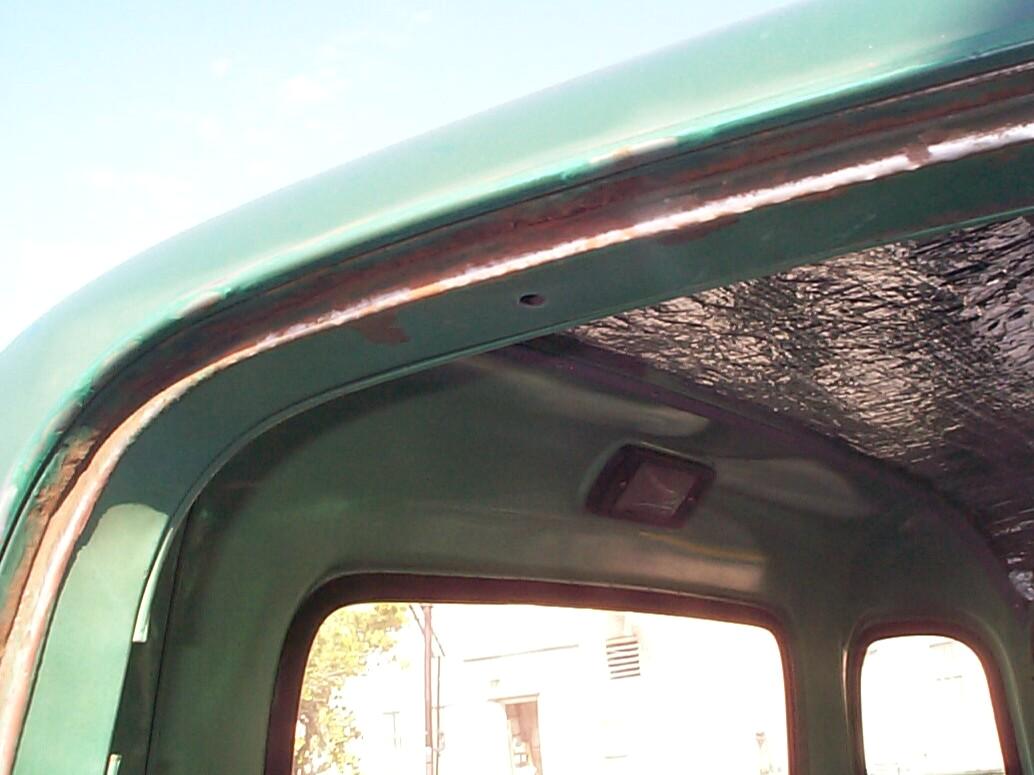
brackets and tailgate chains. Took after the rear stake pockets with a
wire cup in the electric angle grinder. Also gave the same treatment to
the upper part of the cab door openings and drip rails which were
showing signs of rust bubbling up.
November
12th 2005 Sunny and
breezy today. Continued on with the body
phase of the detailing cycle. Unbolted the taillights,
brackets and tailgate chains. Took after the rear stake pockets with a
wire cup in the electric angle grinder. Also gave the same treatment to
the upper part of the cab door openings and drip rails which were
showing signs of rust bubbling up.
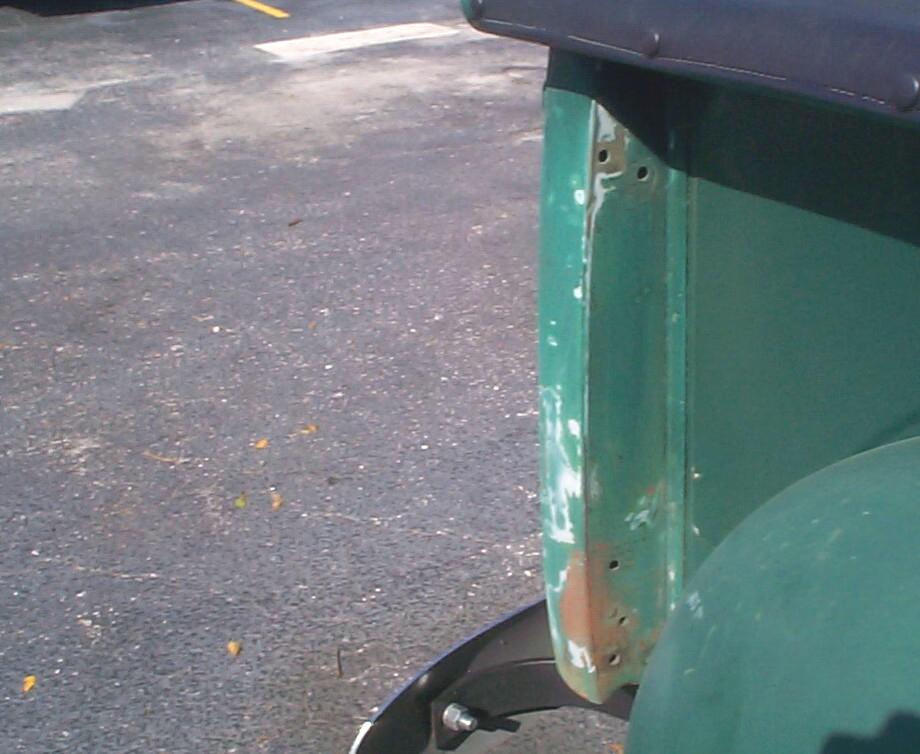 Continued
by hand sanding the stake pocket uprights with 36 grit and 80 grit
paper and sanding blocks. Just perfecting my sanding technique here.
This is still a Phase I type job finish. Gave the stake pockets an
application of Eastwood's
PRE Paint Prep, then Rust encapsulator on the bare spots.
Continued
by hand sanding the stake pocket uprights with 36 grit and 80 grit
paper and sanding blocks. Just perfecting my sanding technique here.
This is still a Phase I type job finish. Gave the stake pockets an
application of Eastwood's
PRE Paint Prep, then Rust encapsulator on the bare spots.
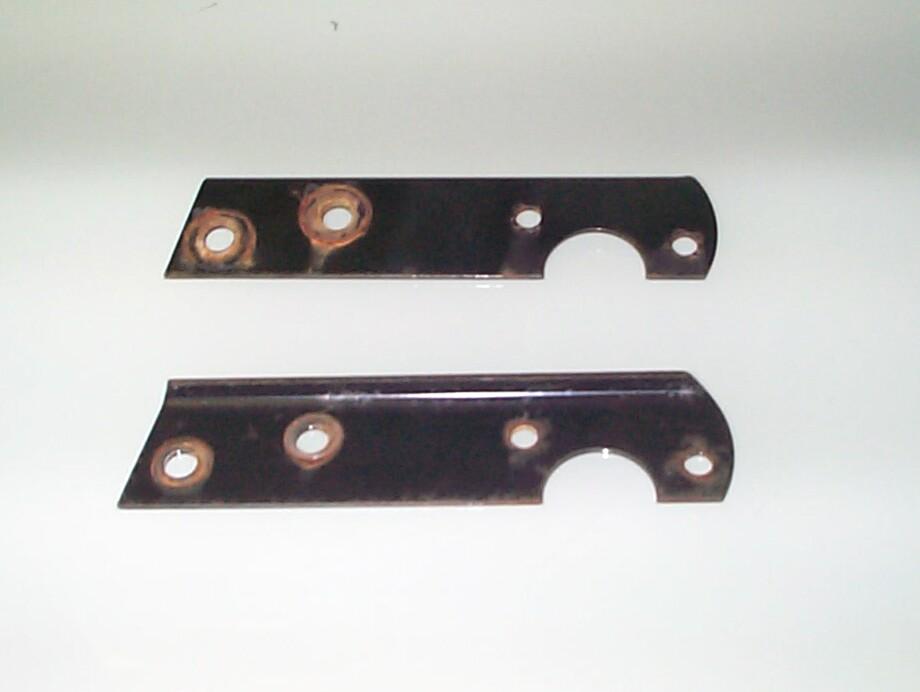 Turned
my attention to the taillight brackets next. They are a bit ratty from
when I sanded them to get a better ground. Now that I've added ground
wires for the taillights, I can paint them. I'll probably take these
down to bare metal and powdercoat them down the road but, for now,
rattlecan primer and chassis black paint is the order of the day.
Cleaned the brackets with the wire cup, followed up with a 3M scuff
pad. Hung them in BillyBob's tree and hit them with PRE Paint Prep,
followed by a coat of Eastwood's Self-Etching Primer. Then I went off
to root around for new bracket fasteners and to update the nutz-n-boltz inventory tables.
Finished up the day by spraying the taillight brackets with a coat of
Eastwood's Chassis Black and the stake pockets with Rustoleum Dark
Hunter Green.
Turned
my attention to the taillight brackets next. They are a bit ratty from
when I sanded them to get a better ground. Now that I've added ground
wires for the taillights, I can paint them. I'll probably take these
down to bare metal and powdercoat them down the road but, for now,
rattlecan primer and chassis black paint is the order of the day.
Cleaned the brackets with the wire cup, followed up with a 3M scuff
pad. Hung them in BillyBob's tree and hit them with PRE Paint Prep,
followed by a coat of Eastwood's Self-Etching Primer. Then I went off
to root around for new bracket fasteners and to update the nutz-n-boltz inventory tables.
Finished up the day by spraying the taillight brackets with a coat of
Eastwood's Chassis Black and the stake pockets with Rustoleum Dark
Hunter Green.
 November
13th 2005 Another good
day, so far, but too windy to sandblast. Re-installed the tailgate
chains and taillights and brackets first now that the paint from
yesterday was dry. I also pondered a lot yesterday and decided that the
work I was doing on the upper doorframe and gutter would be extended to
cover the cab down to the beltline. My Dad called this process of
pondering "comptemplating your navel" . . . That is, thinking too much
an' not getting any useful work done.
November
13th 2005 Another good
day, so far, but too windy to sandblast. Re-installed the tailgate
chains and taillights and brackets first now that the paint from
yesterday was dry. I also pondered a lot yesterday and decided that the
work I was doing on the upper doorframe and gutter would be extended to
cover the cab down to the beltline. My Dad called this process of
pondering "comptemplating your navel" . . . That is, thinking too much
an' not getting any useful work done.
 November
19th 2005 Looks like
I'll be fightin' the elements again this weekend. I'd just gotten to
the Krash Lab when the first storm of the day passed thru. Got a cold
front driving down from the north and Tropical Storm Gamma in the
south. Looks like they'll grind against each other over us. I looked at
the projected Gamma track
last nite and it was "Deja Vu all over again!" I wanted to continue the
cab rustoleum refresher coat today but now I'll have to wait and hope
that BillyBob and the shadetree garage drys up some first.
November
19th 2005 Looks like
I'll be fightin' the elements again this weekend. I'd just gotten to
the Krash Lab when the first storm of the day passed thru. Got a cold
front driving down from the north and Tropical Storm Gamma in the
south. Looks like they'll grind against each other over us. I looked at
the projected Gamma track
last nite and it was "Deja Vu all over again!" I wanted to continue the
cab rustoleum refresher coat today but now I'll have to wait and hope
that BillyBob and the shadetree garage drys up some first.
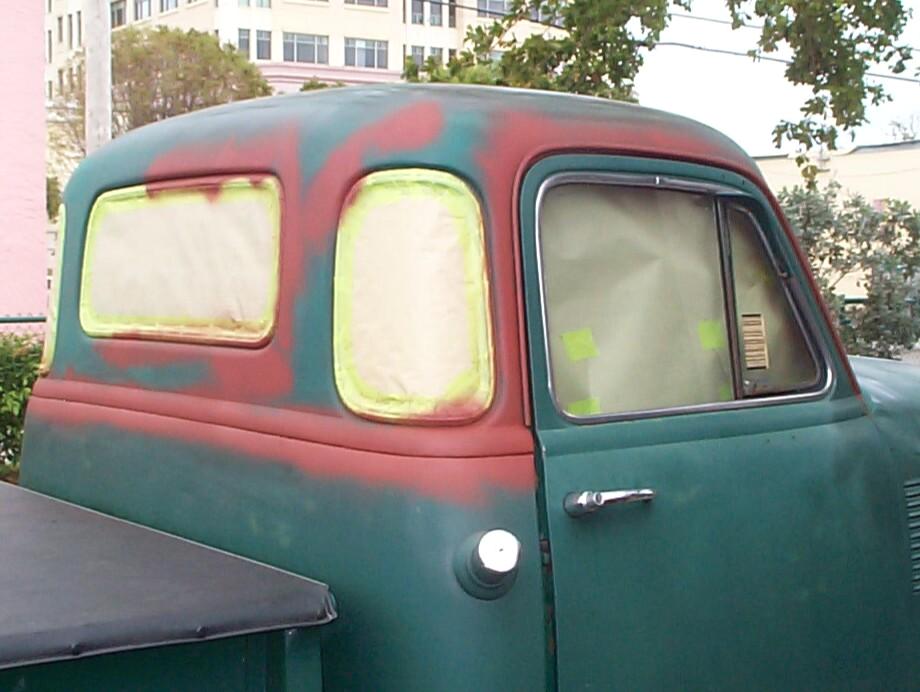 Dried
up enuf by ten-thirty that I could cross my fingers and strart draggin'
the tools out of the shed. Put the wire cup on the electric angle
grinder again and spent twenty minutes removing the surface rust that
had accumulated during the week on the areas I finished sanding last
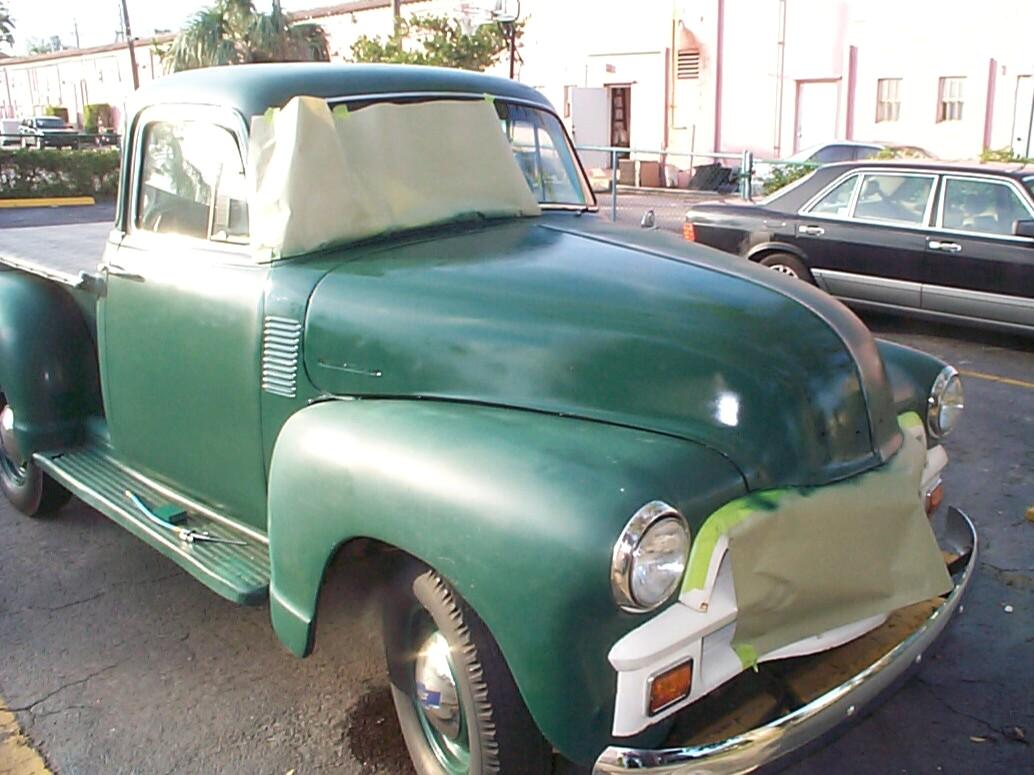
Sunday. Started taping off the glass and door openings next. I was
interrupted several times by sprinkles of rain. I had the upper cab
masked, PRE Paint Prepped and primed (bare spots only) with Rust
Encapsulator by two in the afternoon. Then came the 3-1/2 to 4 hour
wait until the Encapsulator cured. It would be dark by then so, I took
my chances on the overnite showers and packed it in for the day.
Dried
up enuf by ten-thirty that I could cross my fingers and strart draggin'
the tools out of the shed. Put the wire cup on the electric angle
grinder again and spent twenty minutes removing the surface rust that
had accumulated during the week on the areas I finished sanding last
Sunday. Started taping off the glass and door openings next. I was
interrupted several times by sprinkles of rain. I had the upper cab
masked, PRE Paint Prepped and primed (bare spots only) with Rust
Encapsulator by two in the afternoon. Then came the 3-1/2 to 4 hour
wait until the Encapsulator cured. It would be dark by then so, I took
my chances on the overnite showers and packed it in for the day.
November 20th 2005 We made the Weather Channel this morning with overnite rain stats of over four inches. Arrived at the flooded Krash Lab to find BillyBob wet but the masking still in place. I have a window of good weather - no wind and mostly blue sky and if I didn't have a 60% rain forecast and swampy parking lot, I'd be tempted to drag out the sandblaster. I'm gonna try to get the Rustoleum Dark Hunter Green paint on BillyBob's upper cab instead before it turns nasty again. The good news is that tropical storm Gamma is no longer threatening South Florida. As I came outside to make adjustments to the air compressor, a small hawk tried to take out a morning dove on the fence about thirty feet from me . . . He missed, barely, and might have been thrown off his attack by my sudden entry into the picture. It was a surprise to me as well as the dove. You don't see many hawks in downtown Boca Raton. Flocks of wild parrots but not hawks.
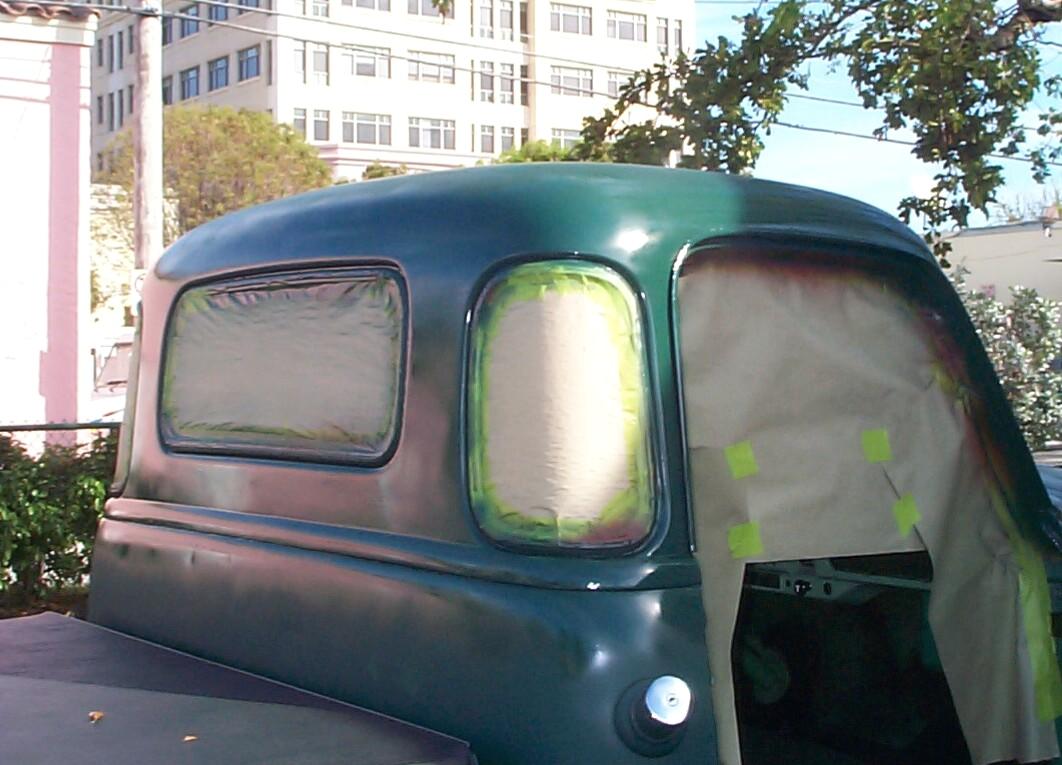 Compressed
air was blown on BillyBob to speed up the drying process. Then, I went
over the recesses and pited areas with a hair dryer. By nine-thirty,
the wind was still calm and it was dry enuf to paint. I started laying
down a medium rattlecan coat. The only mishap was a slight gust which
deposited some droplets of water on newly painted surfaces from
BillyBob's shadetree. That made the decision for me that there would
not be a second coat of paint this time.
Compressed
air was blown on BillyBob to speed up the drying process. Then, I went
over the recesses and pited areas with a hair dryer. By nine-thirty,
the wind was still calm and it was dry enuf to paint. I started laying
down a medium rattlecan coat. The only mishap was a slight gust which
deposited some droplets of water on newly painted surfaces from
BillyBob's shadetree. That made the decision for me that there would
not be a second coat of paint this time.
November 24th 2005 Thanksgiving Day I usually line up a big job for the four-day Thanksgiving weekend but this time I decided to play some catch-up instead. In the past I've done radiator/cooling system work, re-wiring, installed new springs, etc. I was half-way planning to pull the transmission, clutch, starter motor and flywheel to install a new ringgear but I chickened out on that since the starter hasn't been giving me much trouble lately.
It is Thanksgiving Day and I am thankful for cool, calm and clear weather . . . It's sandblasting time! Wuz all done blasting the second wheel, 'cept for the cleanup, by noon. Because of the optimum weather conditions, dehydration wasn't the problem it usually is. Before cleanup, I pulled BillyBob's battery and put it on the charger. I haven't solved my alternator problem yet and when the battery gets below twelve volts, I can tell by the slower cranking during starting. The charger puts it back up to almost thirteen volts and it's good for a couple of weeks. If my trips back and forth to work were longer than six miles, I probably could get by without putting it on the charger.
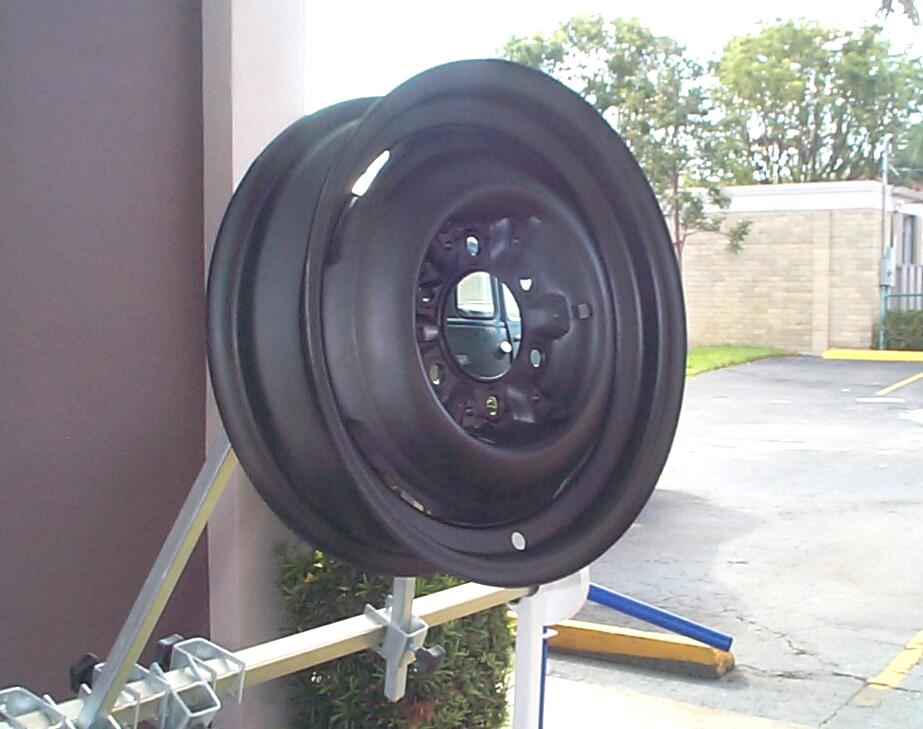 Hung
the wheel up on my paint stand and PRE Paint Prepped it for a coat of
Eastwood's Self-Etching primer. I made two refinements in my technique
since doing the first wheel. I secured the wheel at two support points
to keep it from blowing away from me during spray painting and, I used
dark primer this time to contrast with the blasted wheel finish and the
epoxy primer to follow. I won't have to worry about coverage and
missing any spots this time.
Hung
the wheel up on my paint stand and PRE Paint Prepped it for a coat of
Eastwood's Self-Etching primer. I made two refinements in my technique
since doing the first wheel. I secured the wheel at two support points
to keep it from blowing away from me during spray painting and, I used
dark primer this time to contrast with the blasted wheel finish and the
epoxy primer to follow. I won't have to worry about coverage and
missing any spots this time.
November 25th 2005 The good weather continues. Continued the body phase of the detailing cycle with the parking lights. Using the OEM lens screws (with the shoulders) has cured the lens cracking problem. The lenses look like new. The cheap chrome plating is getting more crinkles and pits. I should get another pair of these parking lamp assemblies for inventory. These will have to be restored a few years down the line. For today, I can get by with standard cleaning, polishing and waxing maintenance. I haven't figured a good way to run ground wires for the parking light assemblies yet so I'm letting that slide for the time being too.
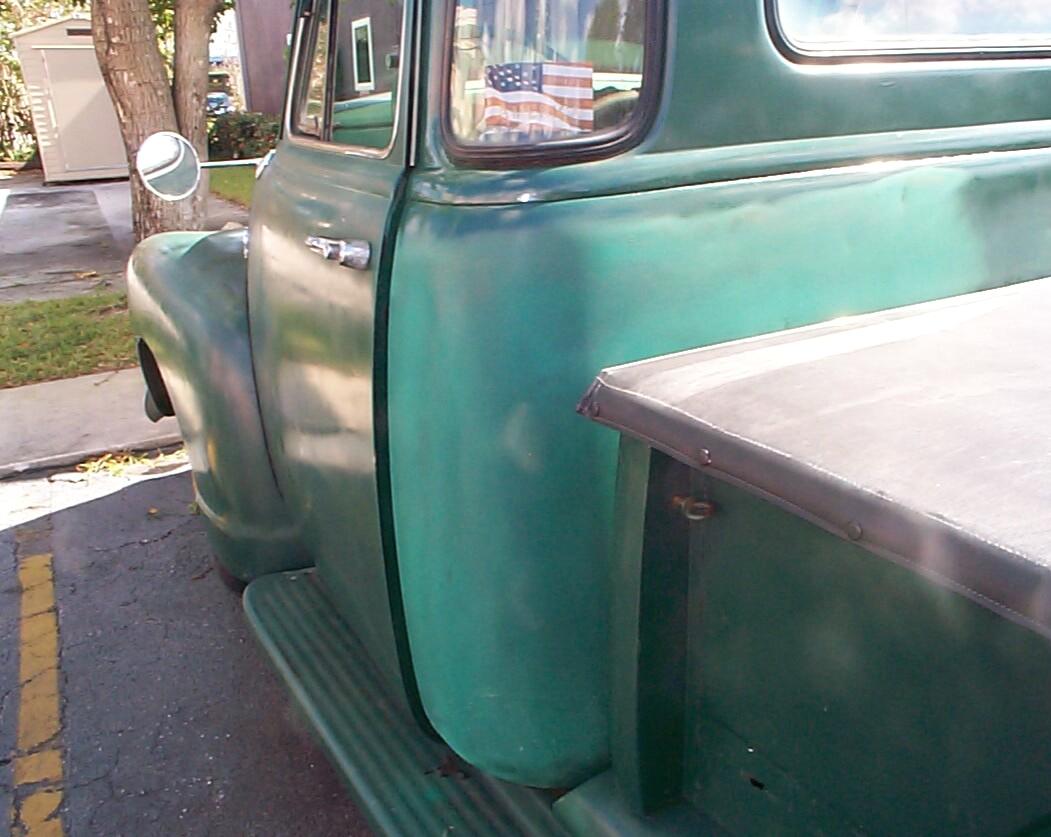 Continuing
on with the Rustoleum refresher paint job too. After the parking lights
were detailed and my nuts-n-bolts inventory spreadsheet updated with
the parking light fasteners, I started sanding the back of the lower
cab, at least where I could reach between the cab and the bed.
Continuing
on with the Rustoleum refresher paint job too. After the parking lights
were detailed and my nuts-n-bolts inventory spreadsheet updated with
the parking light fasteners, I started sanding the back of the lower
cab, at least where I could reach between the cab and the bed.
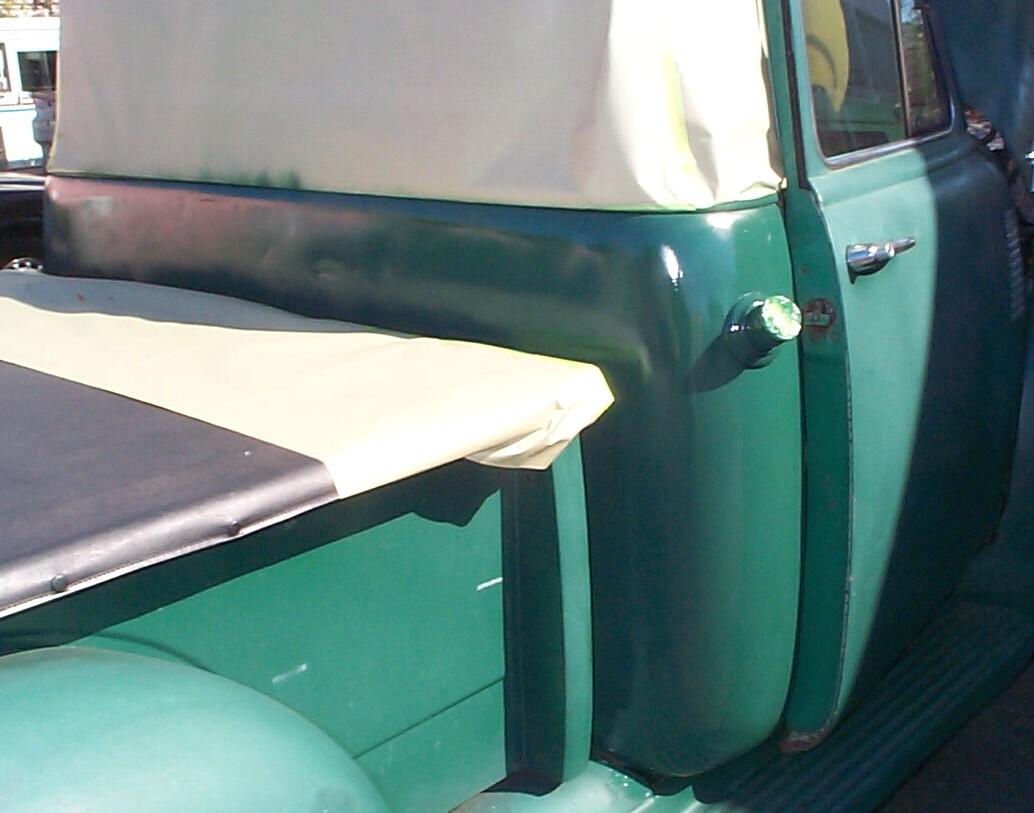 November
26th 2005 Another
sunny, low wind day. Well, sunny anyway. We're on a roll. Masked off
the lower portion at the back of the cab and PRE Paint prepped it for
rattlecan Dark Hunter Green Rustoleum. Gave it a good medium wet coat.
That'll hold it fer awhile. Dropped the front bumper to remove the
splash apron. My intentions are to put real, honest to goodness,
Juniper Green automotive paint on this item before it goes back on the
truck again.
November
26th 2005 Another
sunny, low wind day. Well, sunny anyway. We're on a roll. Masked off
the lower portion at the back of the cab and PRE Paint prepped it for
rattlecan Dark Hunter Green Rustoleum. Gave it a good medium wet coat.
That'll hold it fer awhile. Dropped the front bumper to remove the
splash apron. My intentions are to put real, honest to goodness,
Juniper Green automotive paint on this item before it goes back on the
truck again.
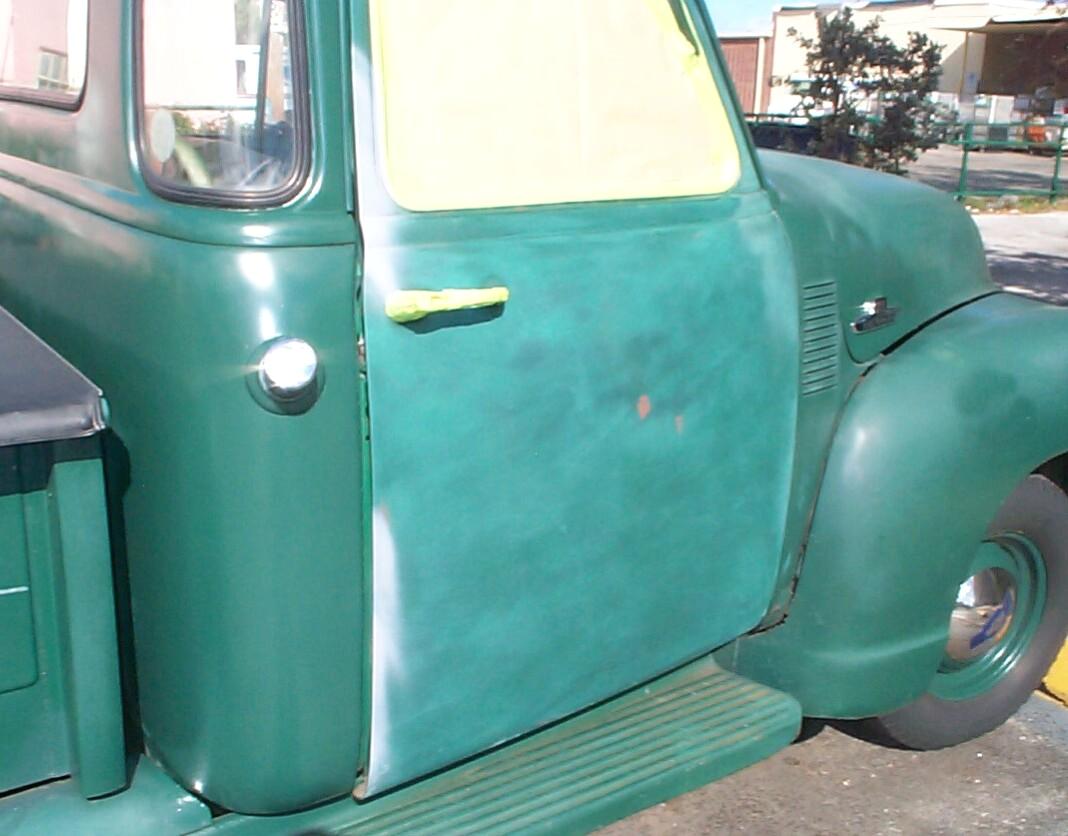 December
3rd 2005 Sunny, still
and cool this morning. If all days under the shadetree were like this
one, I'd be happy indeed. Started by sanding down the passenger side
door, taping it off for paint, Pre Paint Prepping it and touching up
the bare spots with self-etching primer. There are some areas that I
will pay more attention to when I get to the door phase of the
detailing cycle down the road. After the primer cured, the door got a
coat of rattlecan Dark Hunter Green Rustoleum.
December
3rd 2005 Sunny, still
and cool this morning. If all days under the shadetree were like this
one, I'd be happy indeed. Started by sanding down the passenger side
door, taping it off for paint, Pre Paint Prepping it and touching up
the bare spots with self-etching primer. There are some areas that I
will pay more attention to when I get to the door phase of the
detailing cycle down the road. After the primer cured, the door got a
coat of rattlecan Dark Hunter Green Rustoleum.
December 4th 2005 Sunny, cool and calm. Time to sandblast the splash apron. I got a late start and quit when I was half done 'cause it's warmer than Thanksgiving day was and signs of dehrydration were starting to show.
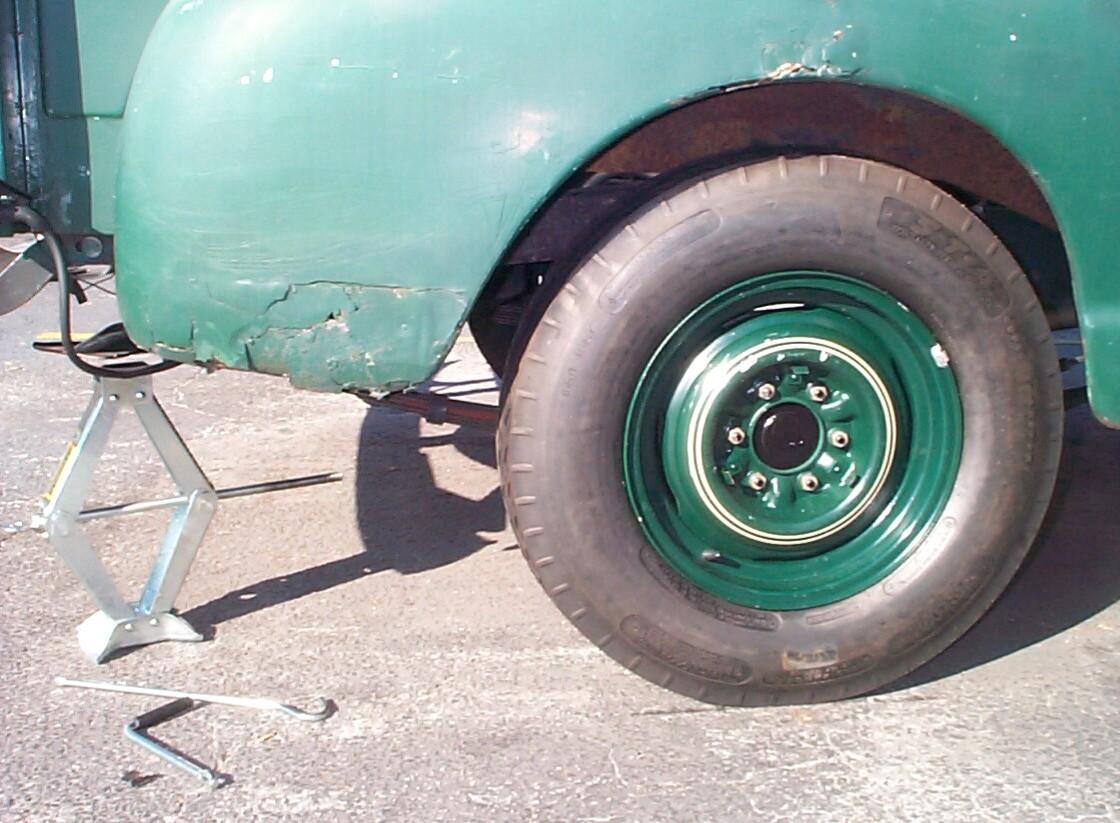 When
I got to the Krash Lab, I walked around BillyBob to examine yesterday's
paint job and heard a slight hissing from the passenger side rear tire.
It took it 'bout forty minutes to go flat. I had picked up a drywall
screw. ~!@#$%^damn! this is the same tire
I put a new inner tube in back in early June. I 'spose I have more of
this to look forward to due to hurricane damage and all the little
re-construction jobs going on. Roofers seem to be particularly
negligent in policing the areas around their sites of debris and nails.
Gave me a chance to start developing a procedure to get the spare in
and out of the wheel carrier without damage to the wheel finish. I used
the jack under the flat "shovel" end of the wheel carrier for more
control of the process. It's an improvement. The heavy sissors jack I
bought for BillyBob gave me cursing spasms throughout. You would be
hard put to design a worse handle/crank for a jack than the hook and
eye contraption that came with this one. I put the punctured tire back
in the carrier and will deal with it next week.
When
I got to the Krash Lab, I walked around BillyBob to examine yesterday's
paint job and heard a slight hissing from the passenger side rear tire.
It took it 'bout forty minutes to go flat. I had picked up a drywall
screw. ~!@#$%^damn! this is the same tire
I put a new inner tube in back in early June. I 'spose I have more of
this to look forward to due to hurricane damage and all the little
re-construction jobs going on. Roofers seem to be particularly
negligent in policing the areas around their sites of debris and nails.
Gave me a chance to start developing a procedure to get the spare in
and out of the wheel carrier without damage to the wheel finish. I used
the jack under the flat "shovel" end of the wheel carrier for more
control of the process. It's an improvement. The heavy sissors jack I
bought for BillyBob gave me cursing spasms throughout. You would be
hard put to design a worse handle/crank for a jack than the hook and
eye contraption that came with this one. I put the punctured tire back
in the carrier and will deal with it next week.
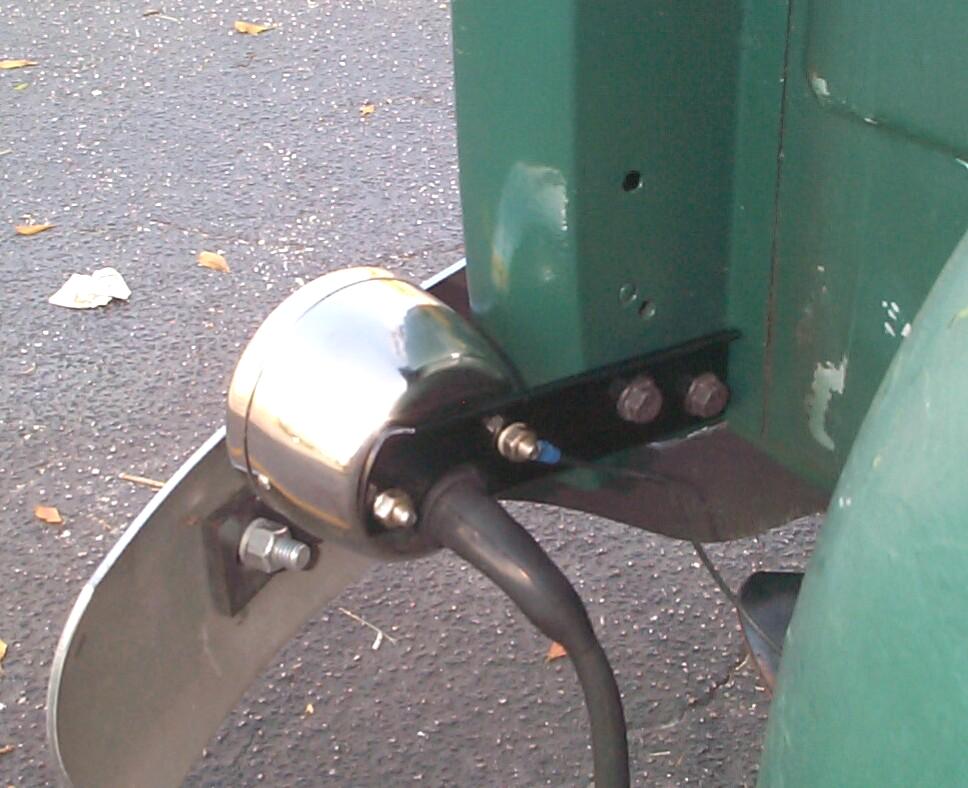
December 10th 2005 Started out this morning with overcast skies but improved as the day wore on. It was time again for monthly maintenance so that was performed first on both BillyBob and Renegade. Usually, BillyBob only needs air in the tires but today he was thirsty. Gear oil, motor oil and coolant all needed topping off. BillyBob's battery was low again too. in fact, too low to crank at the Krash Pad and I had to use my portable jumpstarter for the first time. That's one purchase I'm glad I made. I put the battery on the trickle charger when I got BillyBob to the Krash Lab.
December 11th 2005 Foggy and misty today. I had finished up yesterday by sanding down and masking off the driver side door for a new coat of Rustoleum. On the way to the Krash Lab this morning, Renegade was exchanged for BettyLou up at the warehouse. They don't have a new roof on the warehouse yet and there's more water damage inside. I don't know how extensive it is yet but I'm gonna have to start cleaning it up soon. Gave BettyLou her monthly maintenance and exercised the boss's Panzerwagon before continuing with the driver side door. It was PRE Paint Prepped and the few patches of bare metal I exposed during sanding yesterday were given the self-etching primer treatment.
Then, things went sideways and I didn't make much progress. By the time I applied the Dark Hunter Green Rustoleum, the wind had kicked up enuf to give me a splotchy finish just like the last time I painted this door. Yesterday, during BillyBob's monthly maintenance, it turned out that the passenger side parking light wasn't working. Closer examination revealed it was working but was very dim. I tried to solder a ground wire to the parking lamp socket but that didn't work either and I gave up after burning myself again with the soldering iron. Ended up rigging a temporary ground wire by stripping and looping the wire ends around the lamp socket and one of the bumper bracket bolts. That will give me a bright light for the time being.
 December
17th 2005 Starting out
as a good weather day here under BillyBob's shadetree. Pulled out the
tools and started sanding the passenger side of the hood and cowl area.
Removed the hood emblem and side badge and used a wire cup and a flap
disk in the electric angle grinder on the rough areas, followed up by a
foam sanding block over all. Got it masked off, PRE Paint Prepped and
self-etching primer applied on the bare spots by two in the afternoon.
At four, I finished up with a coat of the Dark Hunter Green Rustoleum
and shut down for the day.
December
17th 2005 Starting out
as a good weather day here under BillyBob's shadetree. Pulled out the
tools and started sanding the passenger side of the hood and cowl area.
Removed the hood emblem and side badge and used a wire cup and a flap
disk in the electric angle grinder on the rough areas, followed up by a
foam sanding block over all. Got it masked off, PRE Paint Prepped and
self-etching primer applied on the bare spots by two in the afternoon.
At four, I finished up with a coat of the Dark Hunter Green Rustoleum
and shut down for the day.
 December
18th 2005 Re-installed
the hood badge and emblem first thing. The side badge is secured with
two 3/16" steel push retainers for unthreaded shafts. These things are
similar to sheet metal speed nuts but are pressed on and depend on
friction to do their job. The trick to getting these things on if your
fingers aren't tuff enuf (mine aren't) is to push them on with a small
socket of the same diameter as the retainer.
December
18th 2005 Re-installed
the hood badge and emblem first thing. The side badge is secured with
two 3/16" steel push retainers for unthreaded shafts. These things are
similar to sheet metal speed nuts but are pressed on and depend on
friction to do their job. The trick to getting these things on if your
fingers aren't tuff enuf (mine aren't) is to push them on with a small
socket of the same diameter as the retainer.
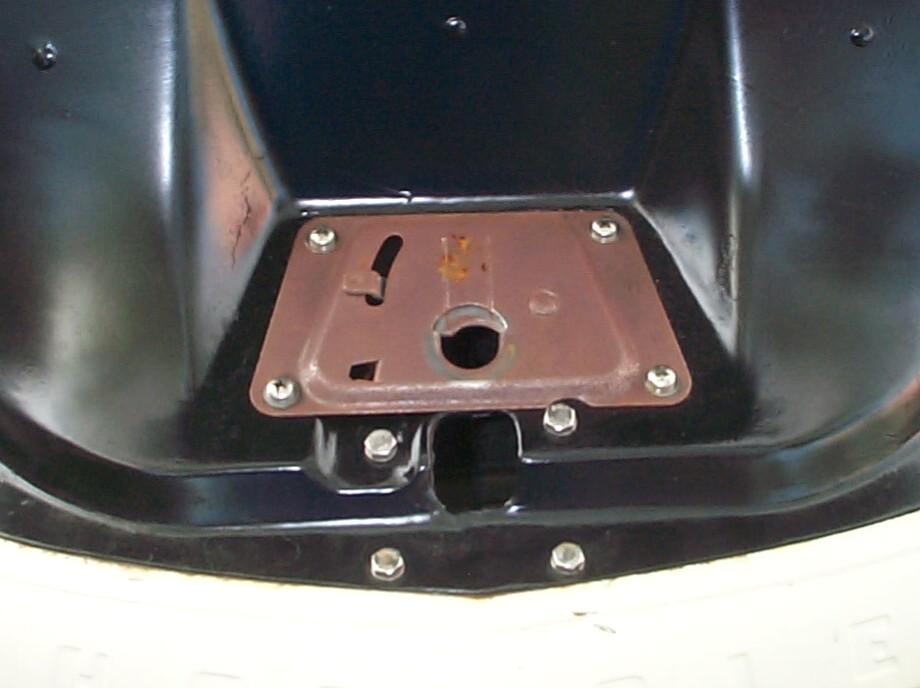 The
last time I detailed the hood latch plate, I tried something new. I'd
decided to see how just polishing the thing would work. Well, it
didn't. The plate started rusting back up almost immediately. It's been
buggin' me for a couple of weeks now and I know I won't be happy to
wait for the next engine bay phase of the detailing cycle to fix it. I
removed it and took the rust off with the wire cup in the electric
angle grinder. Then it was PRE Paint Prepped and given a couple of
coats of Eastwood's Diamond Clear paint for protection.
The
last time I detailed the hood latch plate, I tried something new. I'd
decided to see how just polishing the thing would work. Well, it
didn't. The plate started rusting back up almost immediately. It's been
buggin' me for a couple of weeks now and I know I won't be happy to
wait for the next engine bay phase of the detailing cycle to fix it. I
removed it and took the rust off with the wire cup in the electric
angle grinder. Then it was PRE Paint Prepped and given a couple of
coats of Eastwood's Diamond Clear paint for protection.
Pulled BillyBob's battery next to give it another recharging. I'm gonna get serious about fixin' this charging system problem after the first of the year as it is becoming a big nusiance to me.
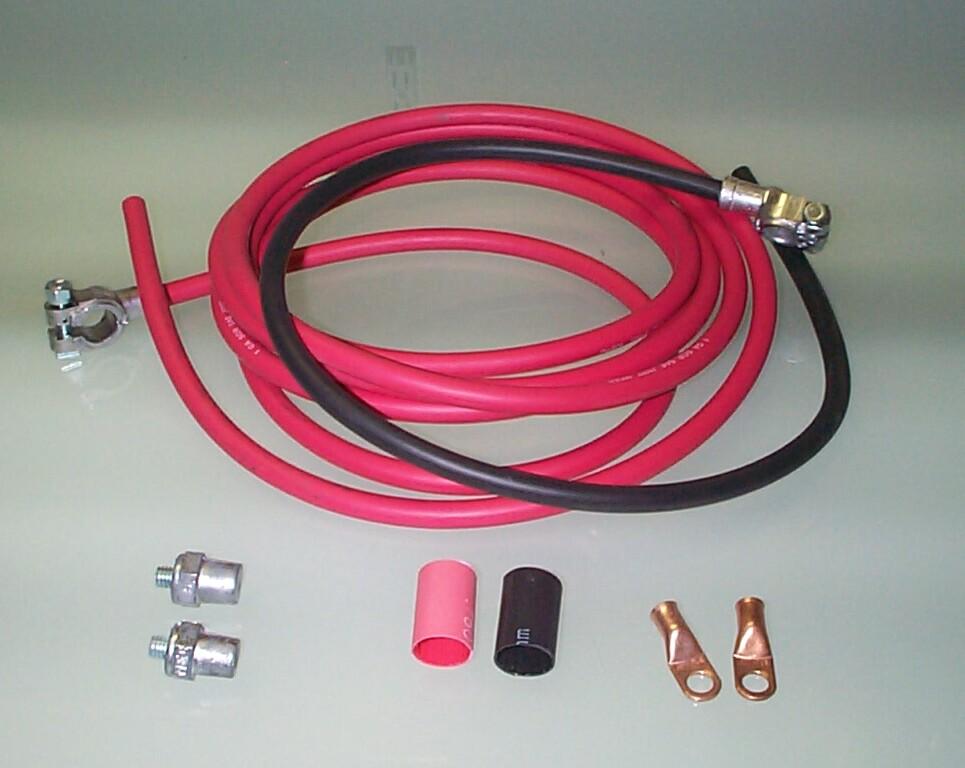 December
24th 2005 Christmas Eve
is a good weather day here under the shade tree. Last weekend when I
decided to get serious regarding my charging system problem, I
determined the first task would be to move my battery cut-off switch
from the positive battery lead to the negative (ground) lead. It is
likely a very remote possibility that it is the cause of failing diodes
in the alternators, but if I eliminate it as a possibility, I won't
have to worry about it anymore. I ordered a battery cable kit from
Eastwood. I had ordered these in the past and they were about forty
dollars. Now the price was seventy-six dollars and this was what
arrived. What a bummer! I liked the old Eastwood kit which had two four
foot lengths of wire and quality compression connectors that you
installed yourself. This kit has large, bulky connectors already on the
wires and the ground wire is only two feet long (not enuf for an
stovebolt truck if you want the ground to reach to the engine. I am
unhappy but I will make do. This is the second Painless Wiring product
that came to me thru Eastwood and I didn't like the other one either (a
Delcotron alternator connector that did not fit). This time I got a
product I liked half as much for twice the price. To be fair, the
Painless product is labeled as a Remote mount battery cable kit and, as
a result, I am directing all my irritation at Eastwood. I haven't been
this peeved since Rustoleum changed the Hunter Green paint formula.
December
24th 2005 Christmas Eve
is a good weather day here under the shade tree. Last weekend when I
decided to get serious regarding my charging system problem, I
determined the first task would be to move my battery cut-off switch
from the positive battery lead to the negative (ground) lead. It is
likely a very remote possibility that it is the cause of failing diodes
in the alternators, but if I eliminate it as a possibility, I won't
have to worry about it anymore. I ordered a battery cable kit from
Eastwood. I had ordered these in the past and they were about forty
dollars. Now the price was seventy-six dollars and this was what
arrived. What a bummer! I liked the old Eastwood kit which had two four
foot lengths of wire and quality compression connectors that you
installed yourself. This kit has large, bulky connectors already on the
wires and the ground wire is only two feet long (not enuf for an
stovebolt truck if you want the ground to reach to the engine. I am
unhappy but I will make do. This is the second Painless Wiring product
that came to me thru Eastwood and I didn't like the other one either (a
Delcotron alternator connector that did not fit). This time I got a
product I liked half as much for twice the price. To be fair, the
Painless product is labeled as a Remote mount battery cable kit and, as
a result, I am directing all my irritation at Eastwood. I haven't been
this peeved since Rustoleum changed the Hunter Green paint formula.
Took the hood emblem off again and also the driver side nameplate to prep the driver side cowl and hood for painting. Got it sanded down with foam block by noon, masked and PRE Paint Prepped for self-etching primer on the few bare spots. After two hours curing time a coat of Dark Hunter Green was applied. Got a better application than the last two efforts but that was spoiled slightly be some debris from the tree before the paint dried.
 December
26th 2005 It's a
holiday and the weather conditions are right for sandblasting but
there's just a little too much activity around the Krash Lab for it.
The Post Office next door is closed but many of the other businesses
are open. I'm a week behind on quarterly maintenance
so, after exchanging BettyLou for Renegade up at the warehouse, I
tackled that chore first. The hood emblem and driver side nameplate
were re-installed too. Then I exercised the panzerwagon and performed
quarterly maintenance on Renegade. BillyBob's battery was low again so
it was recharged.
December
26th 2005 It's a
holiday and the weather conditions are right for sandblasting but
there's just a little too much activity around the Krash Lab for it.
The Post Office next door is closed but many of the other businesses
are open. I'm a week behind on quarterly maintenance
so, after exchanging BettyLou for Renegade up at the warehouse, I
tackled that chore first. The hood emblem and driver side nameplate
were re-installed too. Then I exercised the panzerwagon and performed
quarterly maintenance on Renegade. BillyBob's battery was low again so
it was recharged.
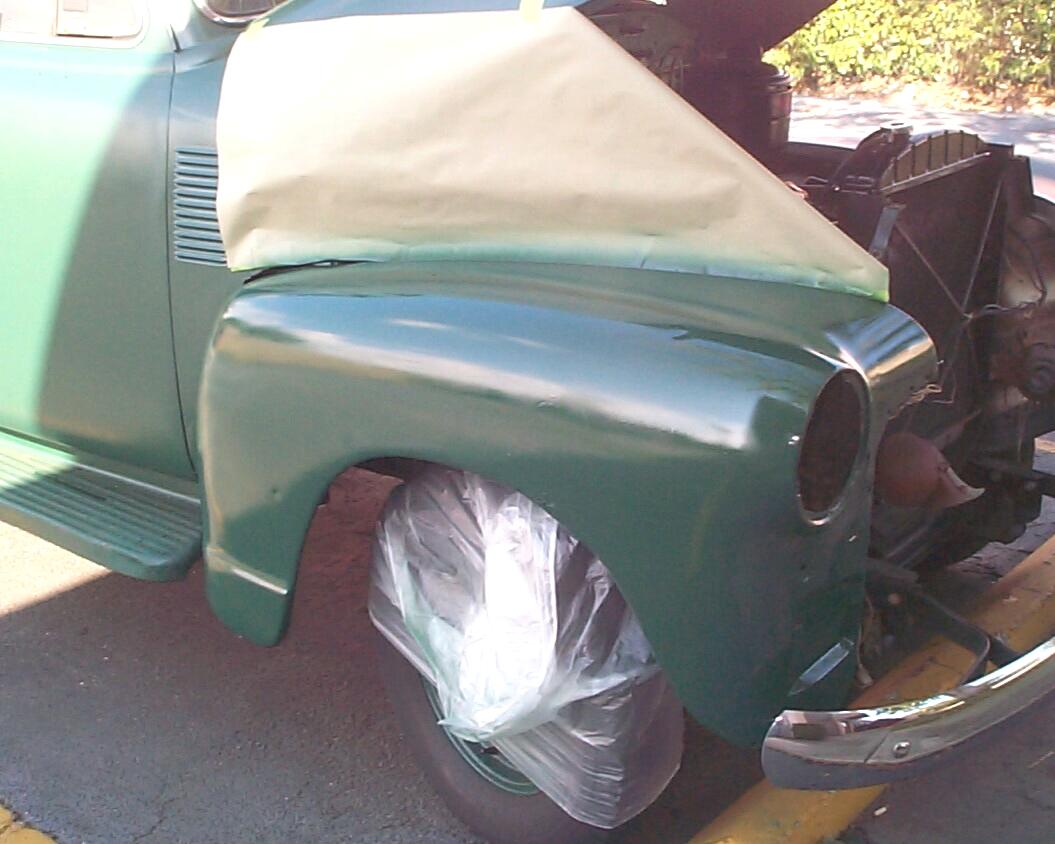
 December
31st 2005 A perfect
working day under the shadetree this New Year's Eve. Dragged the tools
out and went about removing BillyBob's grille in preparation for
painting the passenger side front fender. This refreshening of the
Rustoleum is still a Phase I type job, but my intentions are to do it a
bit better than the first time around five years ago. I've never had
the grille off before and I wanted to get at the hidden rusted areas
behind it. Took off the upper radiator baffle first. It has four hex
capscrews and six hex sheetmetal screws attaching it to the upper
grille bar. With the baffle out of the way, two additional sheetmetal
screws on each side in the space between the upper grille bar and inner
fenders were removed. At this point I removed the parking lamp
assemblies. Lastly, eight sheetmetal screws on each side were removed
from inside the wheel wells.
December
31st 2005 A perfect
working day under the shadetree this New Year's Eve. Dragged the tools
out and went about removing BillyBob's grille in preparation for
painting the passenger side front fender. This refreshening of the
Rustoleum is still a Phase I type job, but my intentions are to do it a
bit better than the first time around five years ago. I've never had
the grille off before and I wanted to get at the hidden rusted areas
behind it. Took off the upper radiator baffle first. It has four hex
capscrews and six hex sheetmetal screws attaching it to the upper
grille bar. With the baffle out of the way, two additional sheetmetal
screws on each side in the space between the upper grille bar and inner
fenders were removed. At this point I removed the parking lamp
assemblies. Lastly, eight sheetmetal screws on each side were removed
from inside the wheel wells.
 The
passenger side headlight assembly, trim and bucket were removed next.
The newly exposed rusted areas of the fender were treated to a wire cup
in the electric angle grinder and PRE Paint Prepped for a rattlecan
application of Rust Encapsulator.
The
passenger side headlight assembly, trim and bucket were removed next.
The newly exposed rusted areas of the fender were treated to a wire cup
in the electric angle grinder and PRE Paint Prepped for a rattlecan
application of Rust Encapsulator.
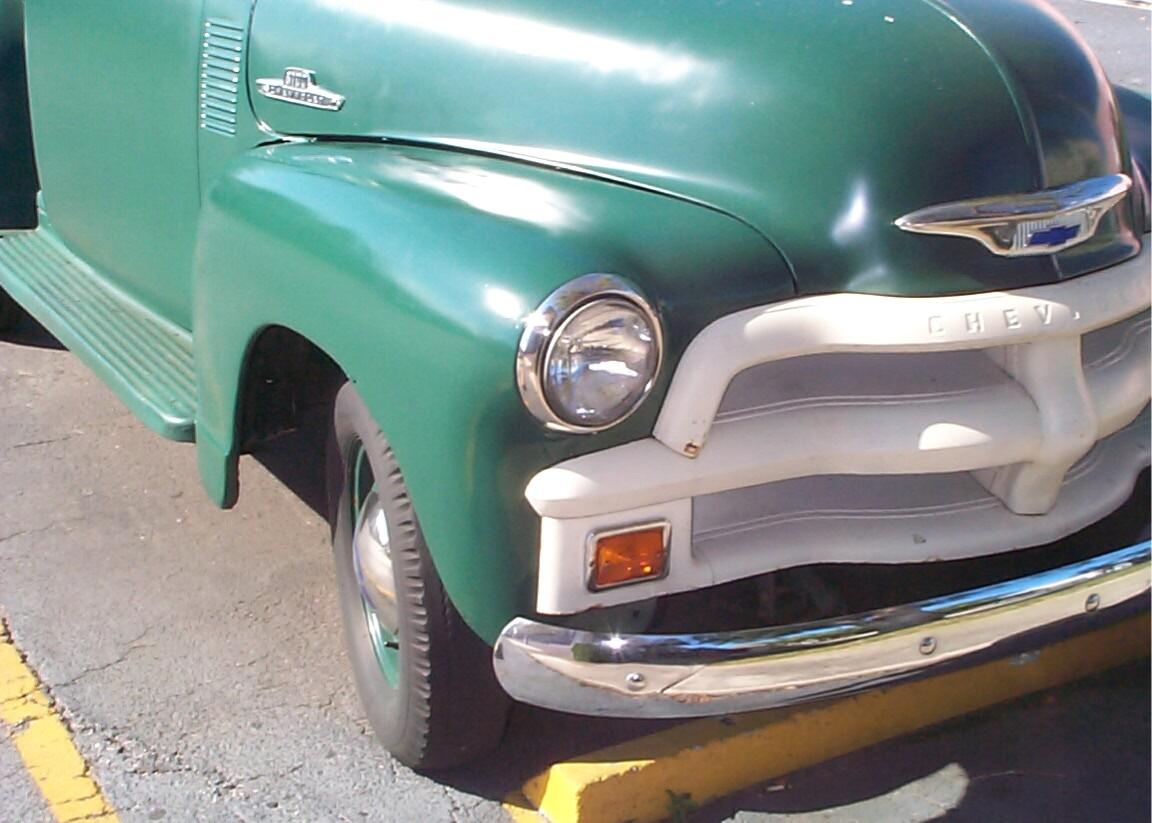
 January
1st 2006 New Year's Day
and good weather. After the morning mist burned off, the fender was
masked, PRE Paint Prepped, and given a coat of the Dark Hunter Green
Rustoleum. Last detailing cycle, I noticed how quickly the repop
headlight buckets were corroding. I ordered another headlight bucket
and trim and, wouldn't you know it, it's just a little bit different
from the other two repop buckets I have ~!@#$%^.
I am installing the new, slightly different, bucket and that will free
up the other one for cleaning and refinishing.
January
1st 2006 New Year's Day
and good weather. After the morning mist burned off, the fender was
masked, PRE Paint Prepped, and given a coat of the Dark Hunter Green
Rustoleum. Last detailing cycle, I noticed how quickly the repop
headlight buckets were corroding. I ordered another headlight bucket
and trim and, wouldn't you know it, it's just a little bit different
from the other two repop buckets I have ~!@#$%^.
I am installing the new, slightly different, bucket and that will free
up the other one for cleaning and refinishing.
 January
2nd 2006 The Krash Lab
was closed on monday and it was another good weather day under the
shadetree. Pulled BillyBob's battery for its weekly recharging first.
Then assembled the new re-pop headlight bucket with one of BillyBob's
original headlamp cradles, lamp and retainer ring (the only pieces that
were not beyond repair when I first disassembled them a few years ago).
The grille was replaced next. A few of the metal clips that the sheet
metal screws fasten to had broken during removal due to rust and these
were replaced with new clips from my grille fastener kit. All the
sheetmetal screws were placed "finger-tight" and I had to reverse
myself when I found I had pinned the parking lamp wiring between grille
and inner fenders. Parking lamp assemblies were re-installed and then
the grille fasteners were tightened. The battery was re-installed and
and all the front end lights checked. Parking lamp lens were
re-installed followed by the upper radiator baffle. BillyBob was back
together for another week.
January
2nd 2006 The Krash Lab
was closed on monday and it was another good weather day under the
shadetree. Pulled BillyBob's battery for its weekly recharging first.
Then assembled the new re-pop headlight bucket with one of BillyBob's
original headlamp cradles, lamp and retainer ring (the only pieces that
were not beyond repair when I first disassembled them a few years ago).
The grille was replaced next. A few of the metal clips that the sheet
metal screws fasten to had broken during removal due to rust and these
were replaced with new clips from my grille fastener kit. All the
sheetmetal screws were placed "finger-tight" and I had to reverse
myself when I found I had pinned the parking lamp wiring between grille
and inner fenders. Parking lamp assemblies were re-installed and then
the grille fasteners were tightened. The battery was re-installed and
and all the front end lights checked. Parking lamp lens were
re-installed followed by the upper radiator baffle. BillyBob was back
together for another week.
It's been almost two months since I posted a work-in-progress episode and this upcoming weekend I'll probably be playing catchup with maintenance and not get any painting done so this is as good a place as any to make a break. I also have to make some time to plan for a major task on Renegade - clutch slave cylinder failure. It's major because it's inside the bellhousing and the whole drivetrain on the Jeep has to be dropped to get at it. Catch ya'll down the road.
| < Back
to Intro |
You can email me at ![]() webmaster@laroke.com
webmaster@laroke.com
Issued Tuesday January 3, 2006
Updated Thursday March 15, 2018
copyright © 1996-2018 Larry Robert Kephart all rights reserved
| | LRK Home | | Bio Info | | Krash Khronicles | | LAROKE | |
| | BettyLou | | BillyBob's Garage | | Rat Patrol | | Deerslayer | | Elvira | |
| | Land of the Free and Home of the Brave | |
| | Keppylou's Art | | WWI Soldier's Diary | |