| | LRK Home | | Bio Info | | Krash Khronicles | | LAROKE | |
| | BettyLou | | BillyBob's Garage | | Rat Patrol | | Deerslayer | | Elvira | |
| | Land of the Free and Home of the Brave | |
| | Keppylou's Art | | WWI Soldier's Diary | |
BillyBob Work-in-Progress Log
![]()
TRUCK LINKS including vendor sites for old parts, custom parts, and tools as well as sites for classic car and truck organizations
STORE Operating in association with Amazon.com, books, recordings and tools can be purchased.
PLANNING for the restoration including project schedule and cost estimates.
![]()
TRAVELS WITH BILLYBOB With apologies to Steinbeck, this area of BillyBob's Garage will be used to log the trips BillyBob and I make together.
WORK-IN-PROGRESS is the restoration of parts of BillyBob that I can accomplish without a garage.
PRE-RESTORATION includes log entries of minor repairs and and adventures between time of purchase and the time when I started restoration, a piece at a time.
JR'S KORNER JR's Korner is the history of BillyBob before I got him authored by my brother, Wm. C. Kephart.
![]()
BILLYBOB MAINTENANCE Ever changing detailing, oil change, lube, etc. maintenance routines specifically developed for BillyBob, including required tools, materials and procedures.
STEALTH SHOP Urban residence design with large integrated shop and separate living quarters for a relative or renter.
30. Windshield Saga - The Ugly
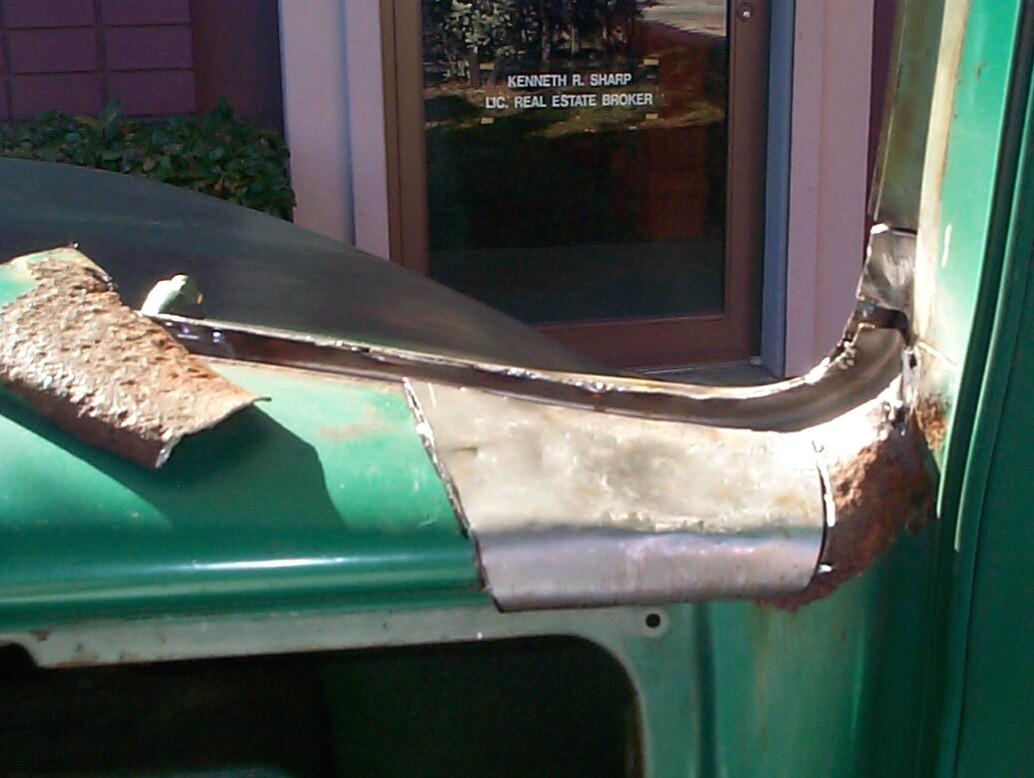
January 17th 2004 Well the weather never did clear up last weekend so I guess Murphy is stickin' it to me after all for wasting good work days over Christmas. Today is pretty nice tho' so I'll get back to the next piece of the windshield frame repair.
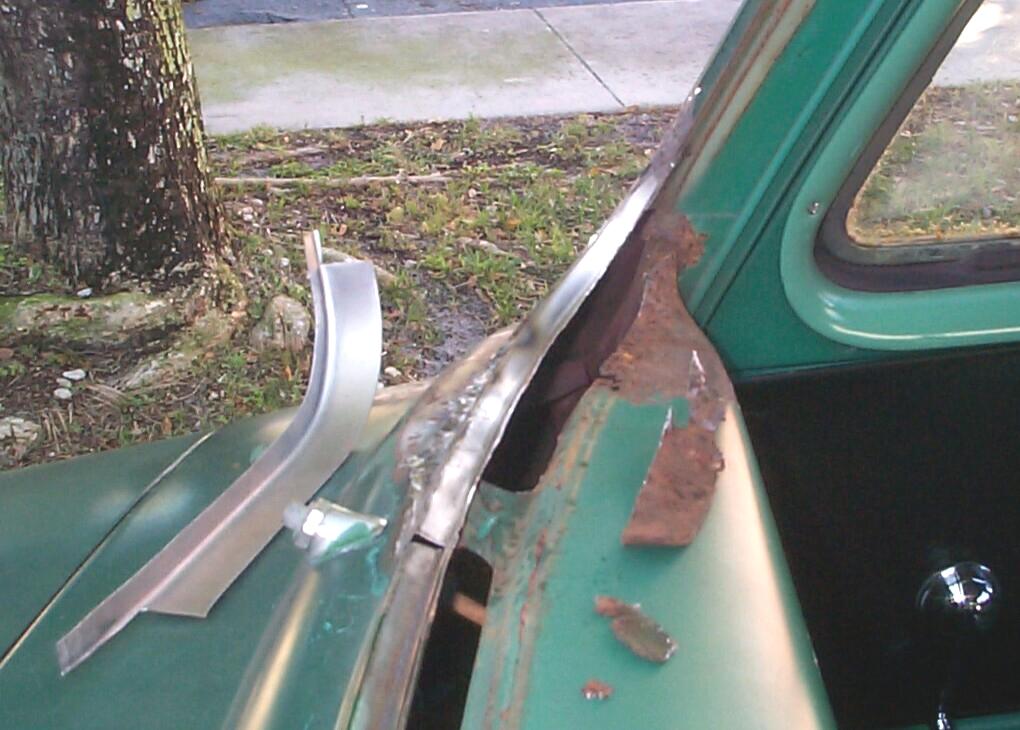 Setup
the compressor and cut out the rusted defroster channel on the
passenger side with the air powered saber saw. I cut on a curved path
where possible to avoid welding problems (hard corners are more likely
to warp the metal, I've read). Now I'll trim the new replacement piece
until it fits.
Setup
the compressor and cut out the rusted defroster channel on the
passenger side with the air powered saber saw. I cut on a curved path
where possible to avoid welding problems (hard corners are more likely
to warp the metal, I've read). Now I'll trim the new replacement piece
until it fits.
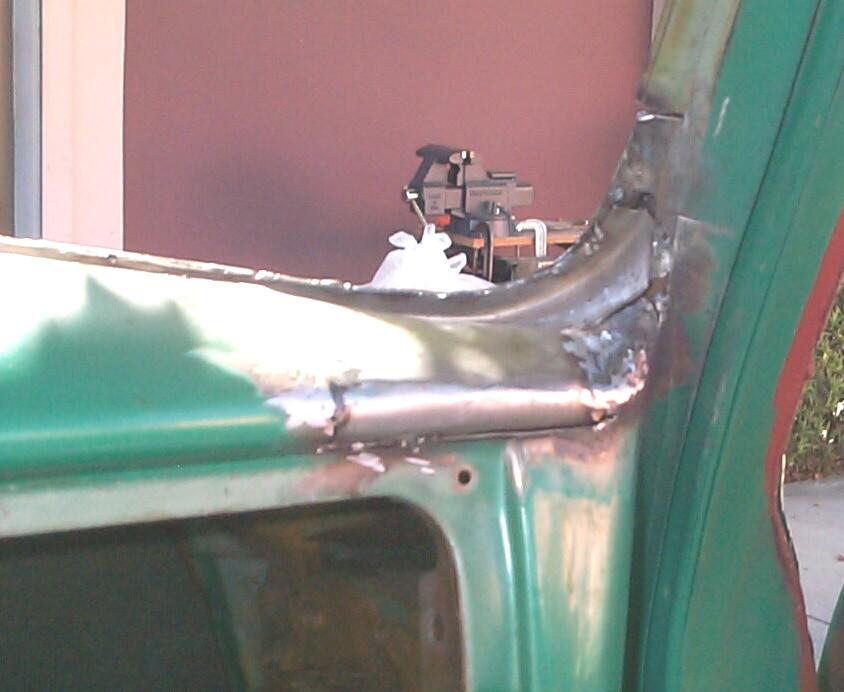
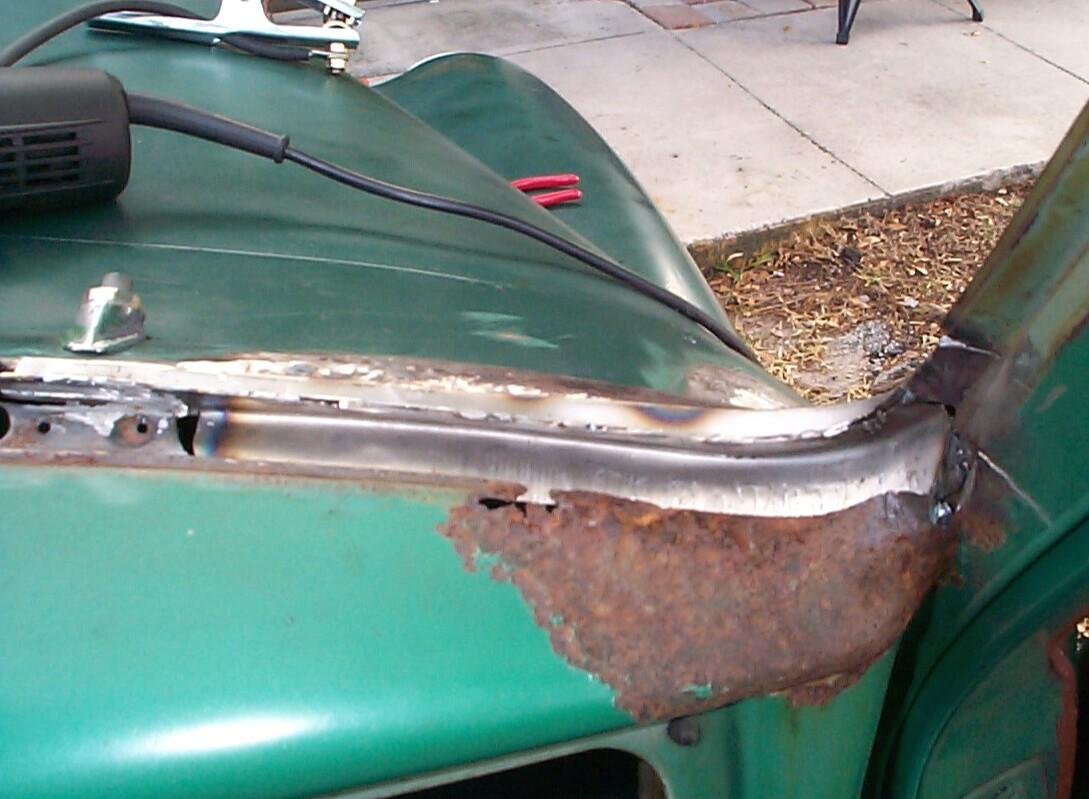 By
mid-afternoon, I had the second patch panel segment trimed, formed and
welded in place. I still have to fill in some gaps and bend (shrink)
the rearward lip of the piece up to come more in line with the
dashboard contour but, all-in-all, I'm happy with my progress today.
I'm not, by any stretch of the imagination, proficient with the MIG yet
but, welding was easier 'cause I had good metal to work with.
By
mid-afternoon, I had the second patch panel segment trimed, formed and
welded in place. I still have to fill in some gaps and bend (shrink)
the rearward lip of the piece up to come more in line with the
dashboard contour but, all-in-all, I'm happy with my progress today.
I'm not, by any stretch of the imagination, proficient with the MIG yet
but, welding was easier 'cause I had good metal to work with.
January 18th 2004 Started out with some monthly BillyBob maintenance. Ran the engine for a half hour to move fluids and charge the battery (like the tiger tanks in Kelly's Heroes) and moved him to another spot in the lot to keep flat spots off the tires and remind the local police patrols that he isn't a derelict.
 BillyBob's
new spot in the Krash Lab parking lot is too far away from the
electrical outlet to do any welding today. A cold front is 'sposed to
roll thru this afternoon so I have an eye on the sky searching for rain
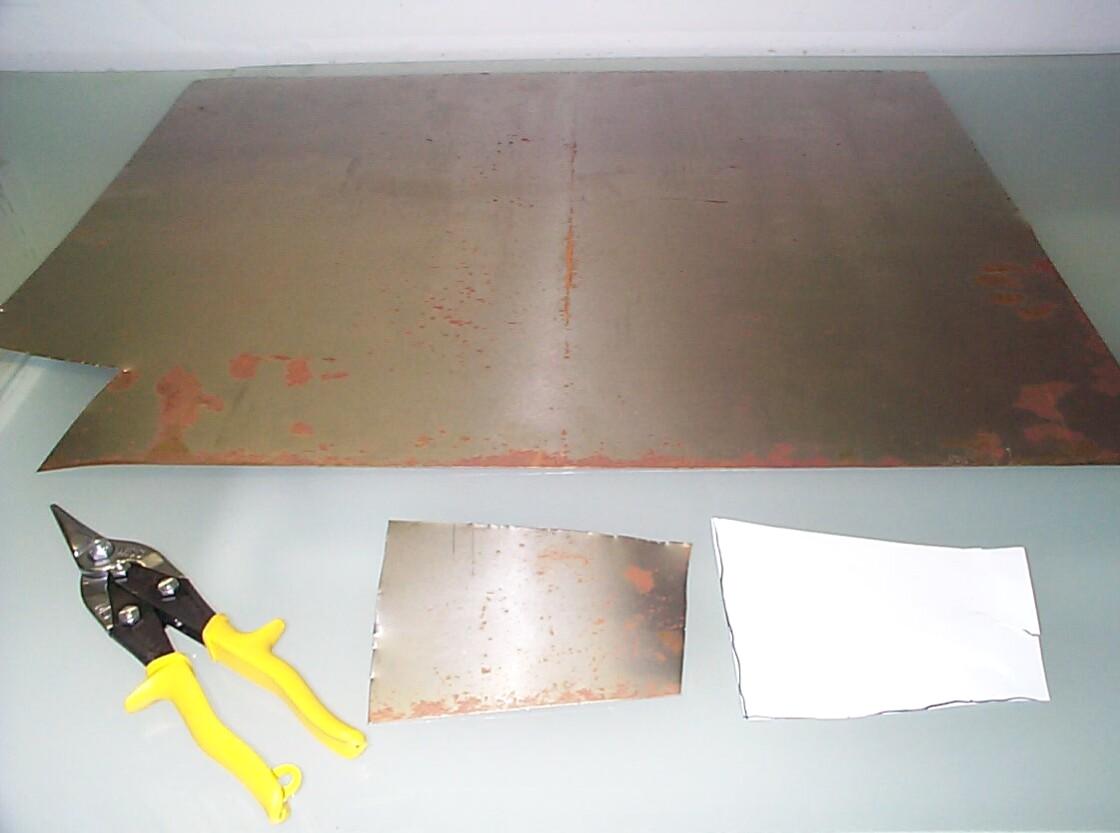
as I work too. I decided to start on the third patch panel for the
passenger side - the dashboard end. Made a rough cardboard template,
then cut out a matching piece of sheet steel with the aviation snips.
Messed around with the hammer and dolly for a bit without makin' much
progress. The forward edge of this thing must curve up to meet the
windshield post. At the same time the middle part of it must match the
gentle curve of the dashboard top and the lower edge must radius
sharply to match the dashboard lip ('54 and '55 1st Series trucks
only). A further complication is that the dashboard lip dies out when
it meets the door post. I haven't quite figured how to do all that yet.
looks like I need to bring some cigars with me again next week to help
with the pondering.
BillyBob's
new spot in the Krash Lab parking lot is too far away from the
electrical outlet to do any welding today. A cold front is 'sposed to
roll thru this afternoon so I have an eye on the sky searching for rain
as I work too. I decided to start on the third patch panel for the
passenger side - the dashboard end. Made a rough cardboard template,
then cut out a matching piece of sheet steel with the aviation snips.
Messed around with the hammer and dolly for a bit without makin' much
progress. The forward edge of this thing must curve up to meet the
windshield post. At the same time the middle part of it must match the
gentle curve of the dashboard top and the lower edge must radius
sharply to match the dashboard lip ('54 and '55 1st Series trucks
only). A further complication is that the dashboard lip dies out when
it meets the door post. I haven't quite figured how to do all that yet.
looks like I need to bring some cigars with me again next week to help
with the pondering.
 January
23rd 2004 Picked up a
3/4" EMT conduit ninety degree bend at Home Depot during the week so I
could clamp it in the bench vise to act as a form to bend the patch
panel over and form the dashboard lip. Hammer and trim operations got
me to this point but we're not in cigar territory yet. I used the
shrinker and stretcher some too but they are of limited help with this
piece. I don't have an intuitive feel for the metal yet either and
sometimes I stretch when I should'uv shrinked and visa versa.
January
23rd 2004 Picked up a
3/4" EMT conduit ninety degree bend at Home Depot during the week so I
could clamp it in the bench vise to act as a form to bend the patch
panel over and form the dashboard lip. Hammer and trim operations got
me to this point but we're not in cigar territory yet. I used the
shrinker and stretcher some too but they are of limited help with this
piece. I don't have an intuitive feel for the metal yet either and
sometimes I stretch when I should'uv shrinked and visa versa.
A fellow restorer, Matt Haas, e-mailed me with some tips. He has been thru some of the same leaky windshield and cowling sheet metal repair work with his '68 Rambler American and he has documented the job on his website. Here's the link to matt's windshield job. I kept trimmin' and poundin' the patch panel until I got to the point I thought it was time to cut out some more of the old rusted metal on BillyBob to fit it in place. Middle of the afternoon now and I don't feel like dragging the compressor out of the shed today. I'll save that for tomorrow.
 January
24th 2004 Beautiful
weather today - blue sky, low breeze, no clouds, not too cold and not
too hot. Got the air compressor out and cut out a chunk of the
passenger side dashboard end with the 3" cut-off wheel. Dropped the new
patch panel piece into the hole to check the fit . . . It's close,
mostly by accident, tho'. I still don't know what I'm doin' most of the
time in my metal-shaping activities. It's about 15% thoughtful action
and 85% gut feelings. I hope to improve on that ratio with more
experience 'cause right now it's a bit unsettling.
January
24th 2004 Beautiful
weather today - blue sky, low breeze, no clouds, not too cold and not
too hot. Got the air compressor out and cut out a chunk of the
passenger side dashboard end with the 3" cut-off wheel. Dropped the new
patch panel piece into the hole to check the fit . . . It's close,
mostly by accident, tho'. I still don't know what I'm doin' most of the
time in my metal-shaping activities. It's about 15% thoughtful action
and 85% gut feelings. I hope to improve on that ratio with more
experience 'cause right now it's a bit unsettling.
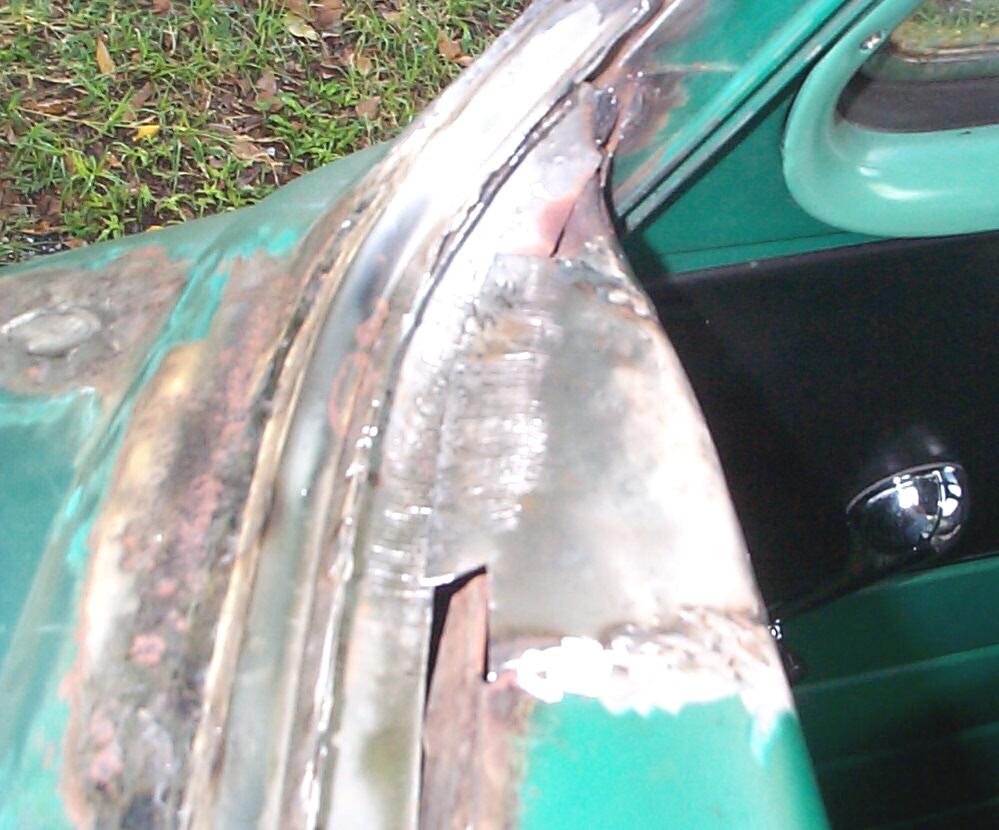
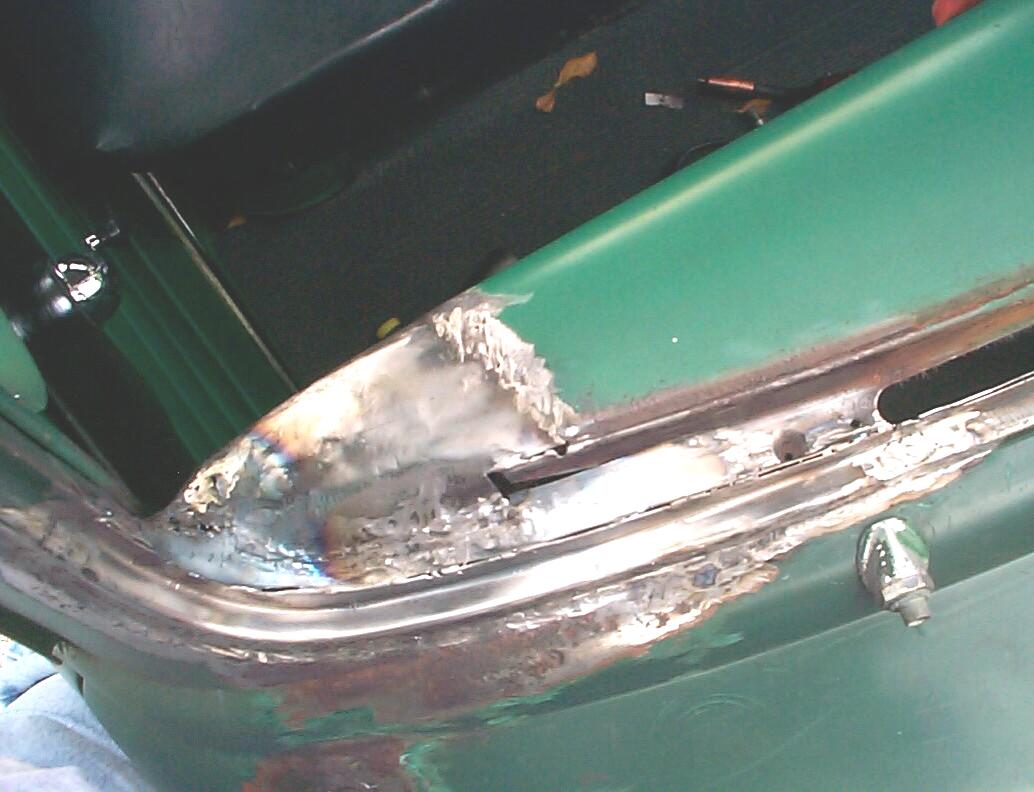
After some grinding to prep for welding, I determined that there might be enuf solid metal to the right of the new patch to keep based on the shiny edge where the 3" cutoff wheel passed thru. Held the new patch in place with welding magnets and fixed it in place with some spot welds. Bent a piece of copper and put it behind the right side gap to draw heat and help create a backing to fill up any holes I might burn.
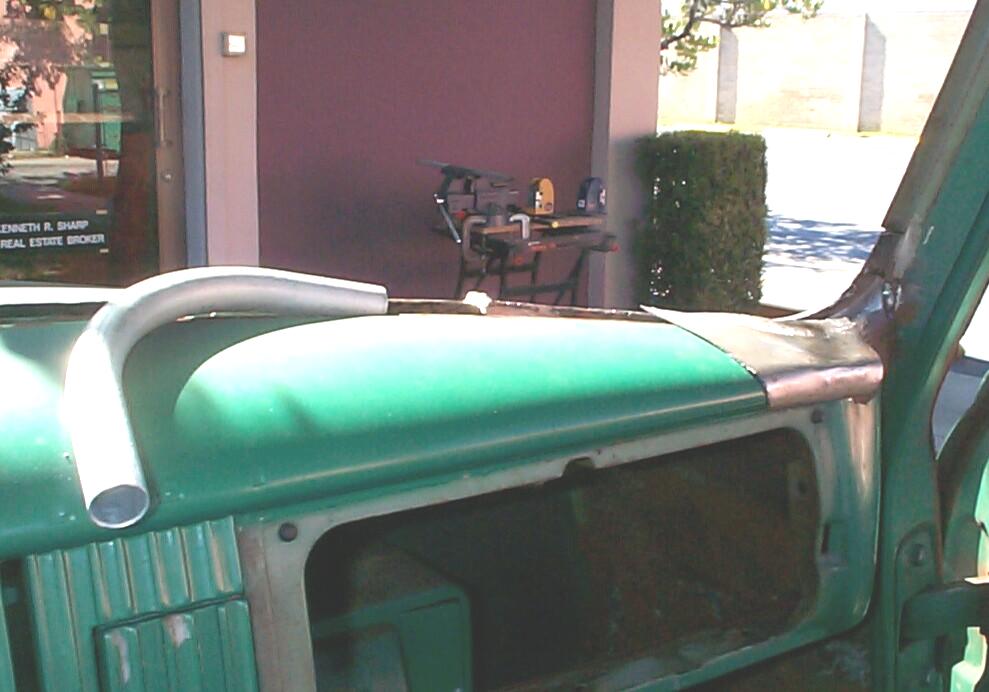
 The
copper helped a lot. With a few spot welds fixing the patch panel in
place, some more hammer and dolly work brought the shape a little
closer to the original contour of the dashboard. Then some more welding
and grinding on the sides. I think I'm over the hump on this side and
feeling a bit less apprehensive about the end result. Still got some
little pieces to weld in and more shaping to do but that's not as
difficult as what I've done getting the big pieces in place.
The
copper helped a lot. With a few spot welds fixing the patch panel in
place, some more hammer and dolly work brought the shape a little
closer to the original contour of the dashboard. Then some more welding
and grinding on the sides. I think I'm over the hump on this side and
feeling a bit less apprehensive about the end result. Still got some
little pieces to weld in and more shaping to do but that's not as
difficult as what I've done getting the big pieces in place.
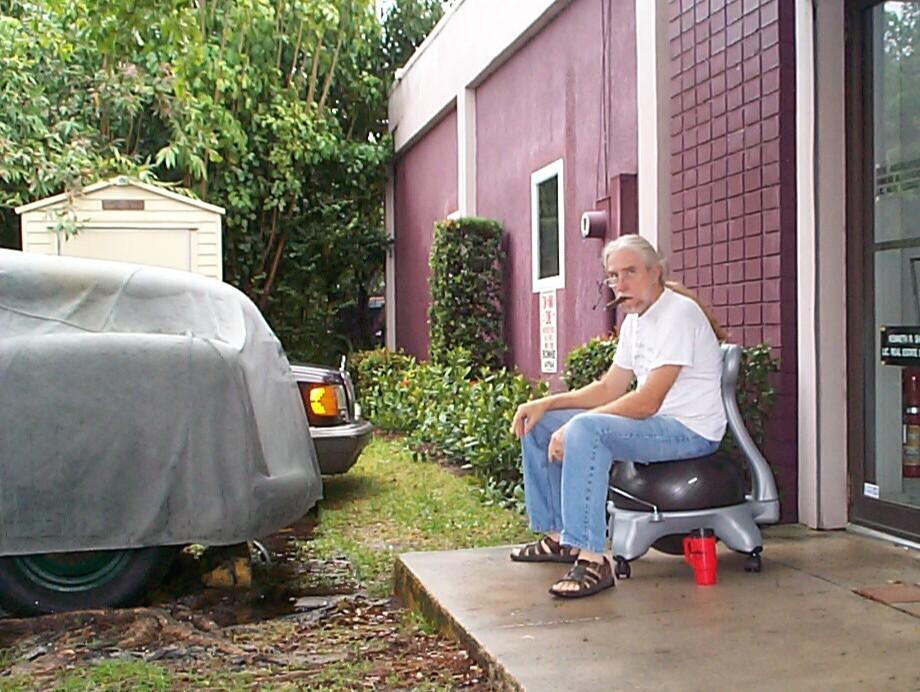 January
31st 2004 Wet today.
Doppler radar shows waves of rain blanketing the South Florida
peninsula. The weather "experts" are talking about a "Pineapple
Express" and "Wave" convergence. Some things ya can't do in the rain
like MIG welding and sand blasting. It's not raining at the present
moment over the shadetree garage but the threat is continuous and there
is already water everywhere on the ground. Decided to sit on the Krash
Lab porch stoop and have a cigar and coffee while I decide what to do
today. The interiors department here gets some weird furnishings like
the "rubber ball seat" butt-to-ground adapter I'm roostin' on. Good for
folks with sore butts.
January
31st 2004 Wet today.
Doppler radar shows waves of rain blanketing the South Florida
peninsula. The weather "experts" are talking about a "Pineapple
Express" and "Wave" convergence. Some things ya can't do in the rain
like MIG welding and sand blasting. It's not raining at the present
moment over the shadetree garage but the threat is continuous and there
is already water everywhere on the ground. Decided to sit on the Krash
Lab porch stoop and have a cigar and coffee while I decide what to do
today. The interiors department here gets some weird furnishings like
the "rubber ball seat" butt-to-ground adapter I'm roostin' on. Good for
folks with sore butts.
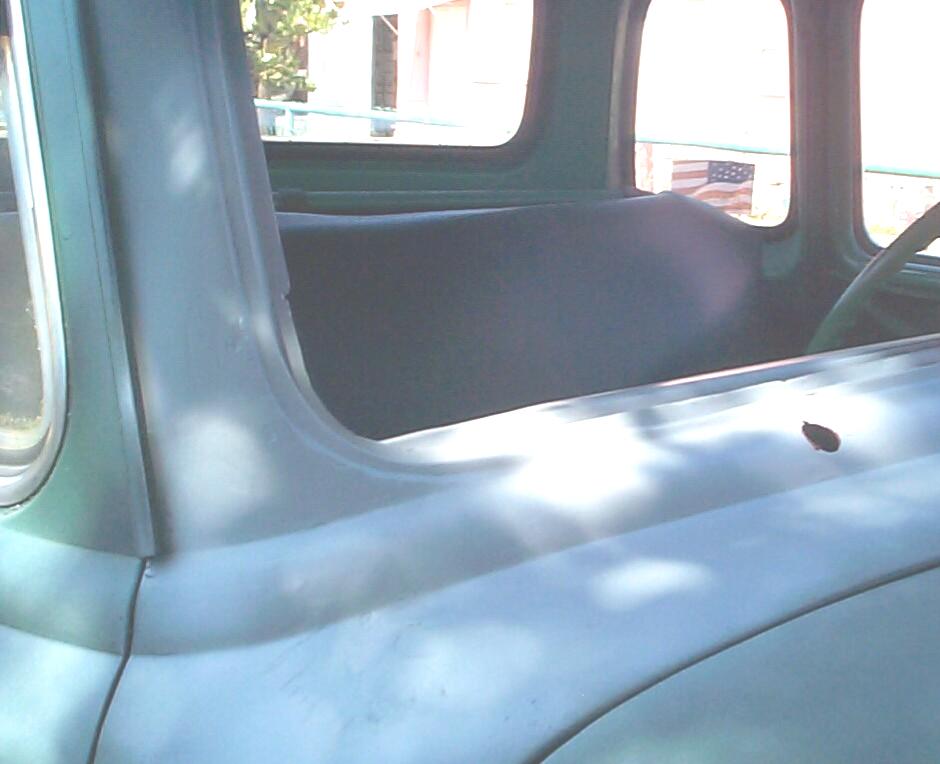
 February
7th 2004 The weather
never cleared up last week until Sunday afternoon, too late to drag out
the tools. It was sunny all week but were back to another rain forecast
today. Rain is not 'sposed to get here 'til this afternoon. I'm gonna
risk it and go for this window of opportunity. Gonna try to fill in the
gaps and finish welding in the dashboard patch panels on the passenger
side of the windshield opening today.
February
7th 2004 The weather
never cleared up last week until Sunday afternoon, too late to drag out
the tools. It was sunny all week but were back to another rain forecast
today. Rain is not 'sposed to get here 'til this afternoon. I'm gonna
risk it and go for this window of opportunity. Gonna try to fill in the
gaps and finish welding in the dashboard patch panels on the passenger
side of the windshield opening today.
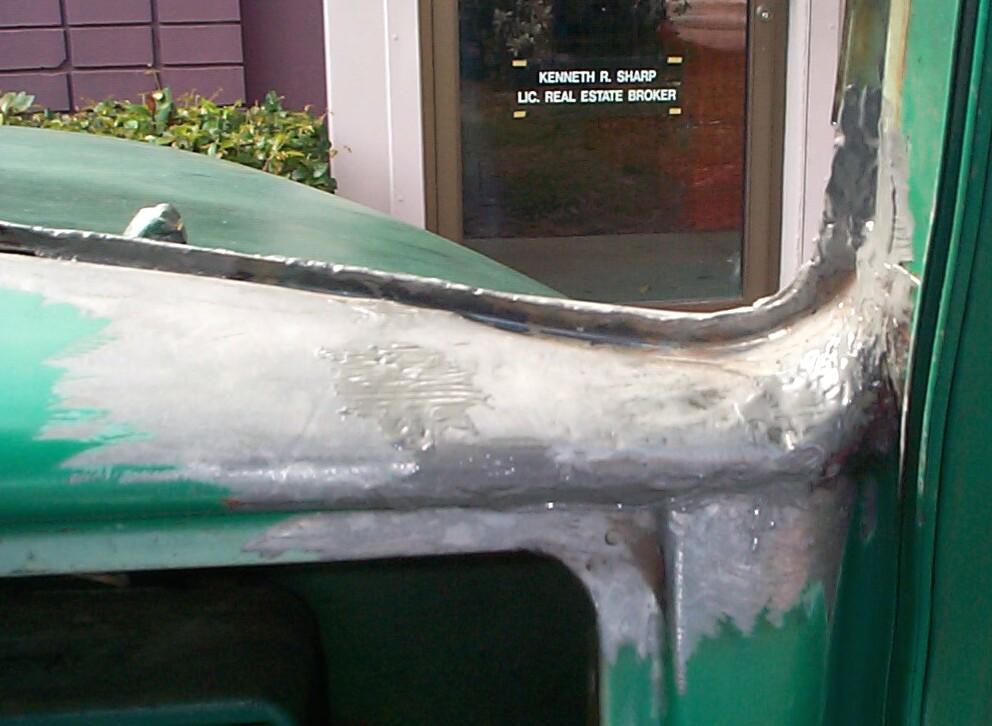
 By
the end of the day, I had made progress but wasn't as far along as I'd
hoped to be. There was more of the burning holes in marginal metal (and
a few holes in good metal too). The trailing edge of the inside pinch
weld patch panel had to curve up to meet the forward edge of the
dashboard patch panel which had to curve down some to meet it. I used
my MAPP torch to heat the portions of the panels cherry red, then
tapped them into place with the pick hammer. Worked good and when I had
them in place they were lap welded. I got good welds here but I'm
starting to get sloppy and it's time to quit.
By
the end of the day, I had made progress but wasn't as far along as I'd
hoped to be. There was more of the burning holes in marginal metal (and
a few holes in good metal too). The trailing edge of the inside pinch
weld patch panel had to curve up to meet the forward edge of the
dashboard patch panel which had to curve down some to meet it. I used
my MAPP torch to heat the portions of the panels cherry red, then
tapped them into place with the pick hammer. Worked good and when I had
them in place they were lap welded. I got good welds here but I'm
starting to get sloppy and it's time to quit.
February 10th 2004 Nick Kowalchuk posted a link on the old-chevy-truck maillist to the Autobody101.com website and I went to check it out during a work break. WOW! A lotta good stuff on bodywork and painting over there, including how-to articles and tips from Martin Seńor, a fella well known to any ole truckers who hang out at Stovebolt.com. In a few minutes, I'd picked up some MIG welding tips to try out the next time I have BillyBob's cover off. If you've read any of the primers "Martinsr" has posted at Stovebolt.com, you'll know what I mean when I say they're like the "Cliff Notes" of bodywork and painting - meaty and novice-friendly articles without any fluff. Good stuff!
February 14th 2004 A good weather day. Lets roll! With my new-found knowledge, I did better today from the git-go. As is usually the case with me, I wuz fallin' short on preparation (clip off the end of the welding wire EVERY time, wire brush the welding area EVERY time, etc). Good prep habits need to become second nature an' I'm not there yet.
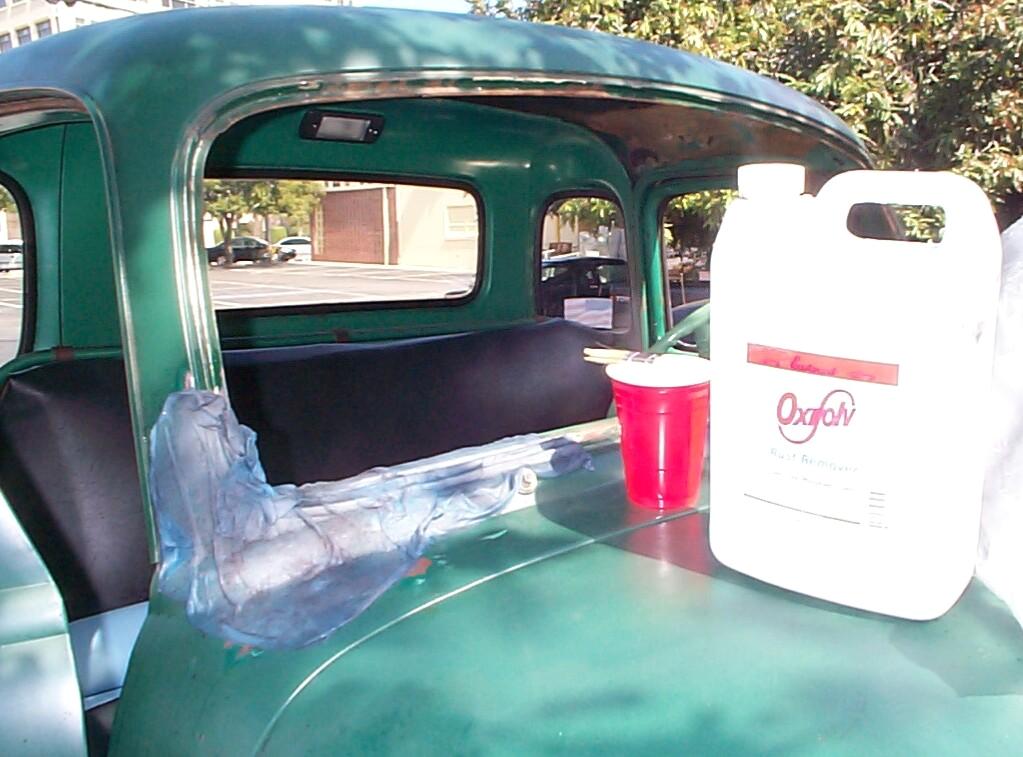 By
noon, I finished welding. I could continue on indefinitely, welding up
holes and burning thru new ones in marginal metal but, I have all the
structural integrity I need so I'm gonna fill the remaing gaps with JB
Weld epoxy. Used the Norton Speed Lock Sanding System I got from AutoBodyStore.com
in the air-powered angle-grinder to remove paint and loose rust from
all around the new metal and to provide "tooth" for the JB Weld.
Eastwood's OxiSolve was applied next for a hour and a half session to
convert any remaining rust in pitted areas of the old metal. I applied
wet rags saturated with OxiSolve with a plastic garbage bag over the
rags to keep the OxiSolve from evaporating. I took time out to watch Powerblock
on Spike TV and basted the rags with a brush and more OxiSolve every
commercial break like I was worrying over a Thanksgiving turkey.
By
noon, I finished welding. I could continue on indefinitely, welding up
holes and burning thru new ones in marginal metal but, I have all the
structural integrity I need so I'm gonna fill the remaing gaps with JB
Weld epoxy. Used the Norton Speed Lock Sanding System I got from AutoBodyStore.com
in the air-powered angle-grinder to remove paint and loose rust from
all around the new metal and to provide "tooth" for the JB Weld.
Eastwood's OxiSolve was applied next for a hour and a half session to
convert any remaining rust in pitted areas of the old metal. I applied
wet rags saturated with OxiSolve with a plastic garbage bag over the
rags to keep the OxiSolve from evaporating. I took time out to watch Powerblock
on Spike TV and basted the rags with a brush and more OxiSolve every
commercial break like I was worrying over a Thanksgiving turkey.
 Enuf
for today. I'll let the OxiSolve dry over night and apply the JB Weld
therapy tomorrow while I attend to weekly maintenance on BillyBob,
Renegade and the panzerwagon. The boss doesn't drive the big Mercedes
420 SEL often enough and I offered to do minor maintenance on it when I
work on mine. Least I can do since he provides the shadetree,
electricity, water and storage area to do this work.
Enuf
for today. I'll let the OxiSolve dry over night and apply the JB Weld
therapy tomorrow while I attend to weekly maintenance on BillyBob,
Renegade and the panzerwagon. The boss doesn't drive the big Mercedes
420 SEL often enough and I offered to do minor maintenance on it when I
work on mine. Least I can do since he provides the shadetree,
electricity, water and storage area to do this work.
 February
21st 2004 Good weather
forecast this weekend. Started out with some minor shaping of the
inside pinchweld with MAPP torch and pick hammer. After that cooled
down, the metal was PRE Paint prepped and masking tape was used to
backup the remaining holes. A batch of JB Weld was mixed up and applied
to the remaining holes and gaps. A little bit of JB Weld was saved for
a pinhole in the panzerwagon's plastic radiator tank.
February
21st 2004 Good weather
forecast this weekend. Started out with some minor shaping of the
inside pinchweld with MAPP torch and pick hammer. After that cooled
down, the metal was PRE Paint prepped and masking tape was used to
backup the remaining holes. A batch of JB Weld was mixed up and applied
to the remaining holes and gaps. A little bit of JB Weld was saved for
a pinhole in the panzerwagon's plastic radiator tank.
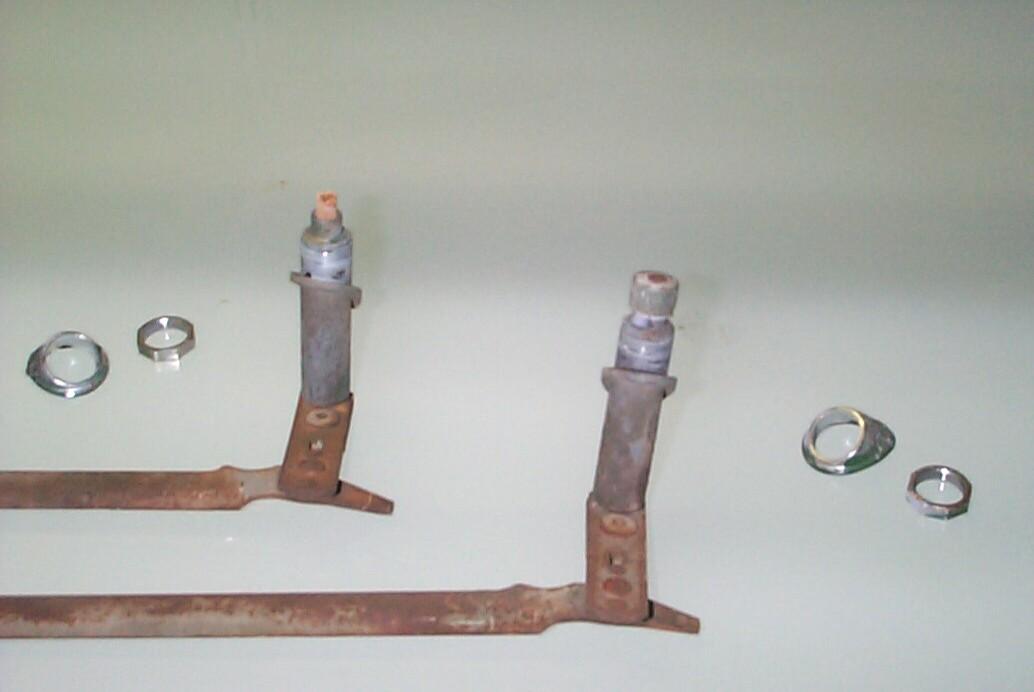 The
panzerwagon's battery waz showing 1.76 volts so, I took it out an' put
it on the battery charger. I don't think this thing is ganna hold a
charge but it doesn't hurt to try to revive it. Took BillyBob's
windshield wiper pivots out where they run thru the cowl (another
source of leaks). These can be cleaned up and the vendors carry new
bezels, hold down nuts and gaskets. There is a cap shaped pot metal
"bushing" between the wiper arm and the shaft that goes thru the cowl.
The one on BillyBob's passenger side broke up on removal and I haven't
found a source of these. Could probably make one with silicon mold
casting technology as a last resort.
The
panzerwagon's battery waz showing 1.76 volts so, I took it out an' put
it on the battery charger. I don't think this thing is ganna hold a
charge but it doesn't hurt to try to revive it. Took BillyBob's
windshield wiper pivots out where they run thru the cowl (another
source of leaks). These can be cleaned up and the vendors carry new
bezels, hold down nuts and gaskets. There is a cap shaped pot metal
"bushing" between the wiper arm and the shaft that goes thru the cowl.
The one on BillyBob's passenger side broke up on removal and I haven't
found a source of these. Could probably make one with silicon mold
casting technology as a last resort.
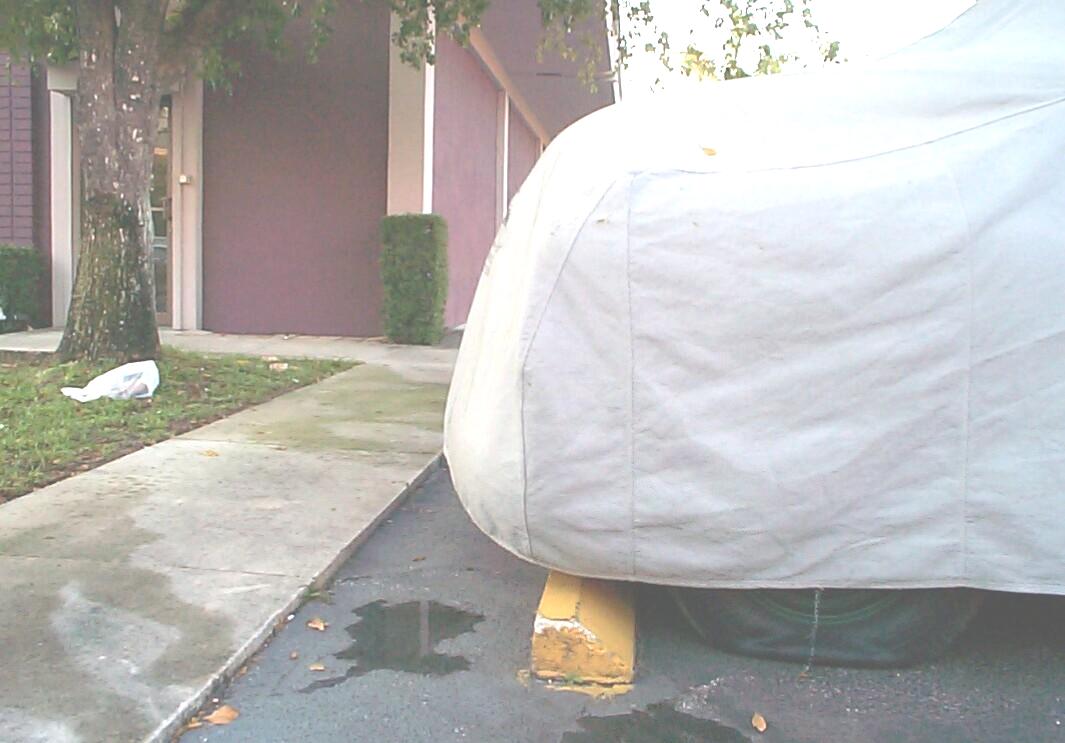 February
22nd 2004 Moved
BillyBob to another area of the lot last night when I went home to the
Krash Pad. Arrived this morning to find BillyBob's driver side front
tire almost flat and a six pack of "Newcastle Brown Ale" bottles
scattered under the shadetree. Whether these two incidents are related,
I don't know. Well, I'll pull out the compressor and find out how bad
the tire leak is first. Took the panzerwagon's battery off the charger
and checked the voltage while the air compressor was filing the tank.
12.88 volts.
February
22nd 2004 Moved
BillyBob to another area of the lot last night when I went home to the
Krash Pad. Arrived this morning to find BillyBob's driver side front
tire almost flat and a six pack of "Newcastle Brown Ale" bottles
scattered under the shadetree. Whether these two incidents are related,
I don't know. Well, I'll pull out the compressor and find out how bad
the tire leak is first. Took the panzerwagon's battery off the charger
and checked the voltage while the air compressor was filing the tank.
12.88 volts.
Well, there's a air leak at the inner tube valve stem. re-shoeing BillyBob was next on the list after the windshield job but now I guess they'll have to run concurrent. I'll bring the old spare, new inner tube, and tire changing machine down from the warehouse next week.
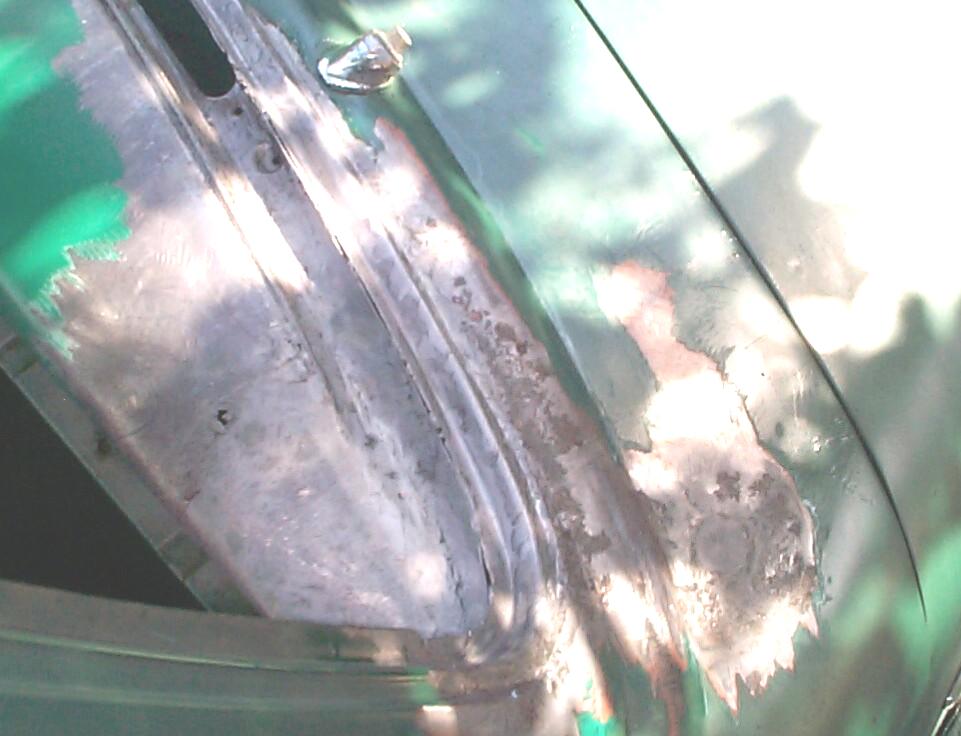
 Back
to the windshield. I sanded down and shaped the JB Weld I applied
yesterday with Norton's Speedlock kit. The areas I couldn't reach I
took care of with the Tight Spot Grinding Kit (sandpaper cylinders and
cones) I got from Eastwood a few years ago. Both these tools were used
in the air angle grinder for the high speed it provides. Then, the dust
was blown away and the area was PRE Paint prepped again. Three coats of
Eastwood's Self-Etching Primer was applied by rattlecan and the
underside was treated with a brush coat of Eastwood's red Rust
Encapsulator. As long as I had the Rust Encapsulator can open, I
decided to give the panzerwagon's rusty battery tray a coat too.
Back
to the windshield. I sanded down and shaped the JB Weld I applied
yesterday with Norton's Speedlock kit. The areas I couldn't reach I
took care of with the Tight Spot Grinding Kit (sandpaper cylinders and
cones) I got from Eastwood a few years ago. Both these tools were used
in the air angle grinder for the high speed it provides. Then, the dust
was blown away and the area was PRE Paint prepped again. Three coats of
Eastwood's Self-Etching Primer was applied by rattlecan and the
underside was treated with a brush coat of Eastwood's red Rust
Encapsulator. As long as I had the Rust Encapsulator can open, I
decided to give the panzerwagon's rusty battery tray a coat too.
February 28th 2004 Well, the weather experts were off a bit today in their predictions (again!). When I woke at 5:30, it was 48 degrees. I smoked a cigar and waited 'til 7:30 to leave the Krash Pad. The temperature by that time had dropped to 47 degrees. 20-30 mph winds are also predicted. These conditions don't bode well for the filler and primer ops I had planned. I'm gonna edit and post this log entry. By then, it may be warm enuf to drag the tools out and try to fix BillyBob's flat tire.
| < Back
to Intro |
You can email me at ![]() webmaster@laroke.com
webmaster@laroke.com
Issued Saturday February 28, 2004
Updated Thursday February 22, 2018
copyright © 1996-2018 Larry Robert Kephart all rights reserved
| | LRK Home | | Bio Info | | Krash Khronicles | | LAROKE | |
| | BettyLou | | BillyBob's Garage | | Rat Patrol | | Deerslayer | | Elvira | |
| | Land of the Free and Home of the Brave | |
| | Keppylou's Art | | WWI Soldier's Diary | |