| | LRK Home | | Bio Info | | Krash Khronicles | | LAROKE | |
| | BettyLou | | BillyBob's Garage | | Rat Patrol | | Deerslayer | | Elvira | |
| | Land of the Free and Home of the Brave | |
| | Keppylou's Art | | WWI Soldier's Diary | |
BillyBob Work-in-Progress Log
![]()
TRUCK LINKS including vendor sites for old parts, custom parts, and tools as well as sites for classic car and truck organizations
STORE Operating in association with Amazon.com, books, recordings and tools can be purchased.
PLANNING for the restoration including project schedule and cost estimates.
![]()
WORK-IN-PROGRESS is the restoration of parts of BillyBob that I can accomplish without a garage.
PRE-RESTORATION includes log entries of minor repairs and and adventures between time of purchase and the time when I started restoration, a piece at a time.
JR'S KORNER JR's Korner is the history of BillyBob before I got him authored by my brother, Wm. C. Kephart.
![]()
BILLYBOB MAINTENANCE Ever changing detailing, oil change, lube, etc. maintenance routines specifically developed for BillyBob, including required tools, materials and procedures.
14. Frame Job: Reshocking
 December
8th 2001 Not doin' much
today. I can't work on BillyBob tomorrow and I don't feel like dragin'
out the tools for only one day's worth of activity. I'm just messing
around and preparing for the next phase of the frame work. I picked up
a good book on this phase of the work a month or so back: "Engine and Chassis Detailing" by
Jim Richardson. It's simple, to the point, and an easy read. A good
primer for a non-expert like myself. Jim uses a lot of stuff from Eastwood
Company, but that's OK with me since I do too.
December
8th 2001 Not doin' much
today. I can't work on BillyBob tomorrow and I don't feel like dragin'
out the tools for only one day's worth of activity. I'm just messing
around and preparing for the next phase of the frame work. I picked up
a good book on this phase of the work a month or so back: "Engine and Chassis Detailing" by
Jim Richardson. It's simple, to the point, and an easy read. A good
primer for a non-expert like myself. Jim uses a lot of stuff from Eastwood
Company, but that's OK with me since I do too.
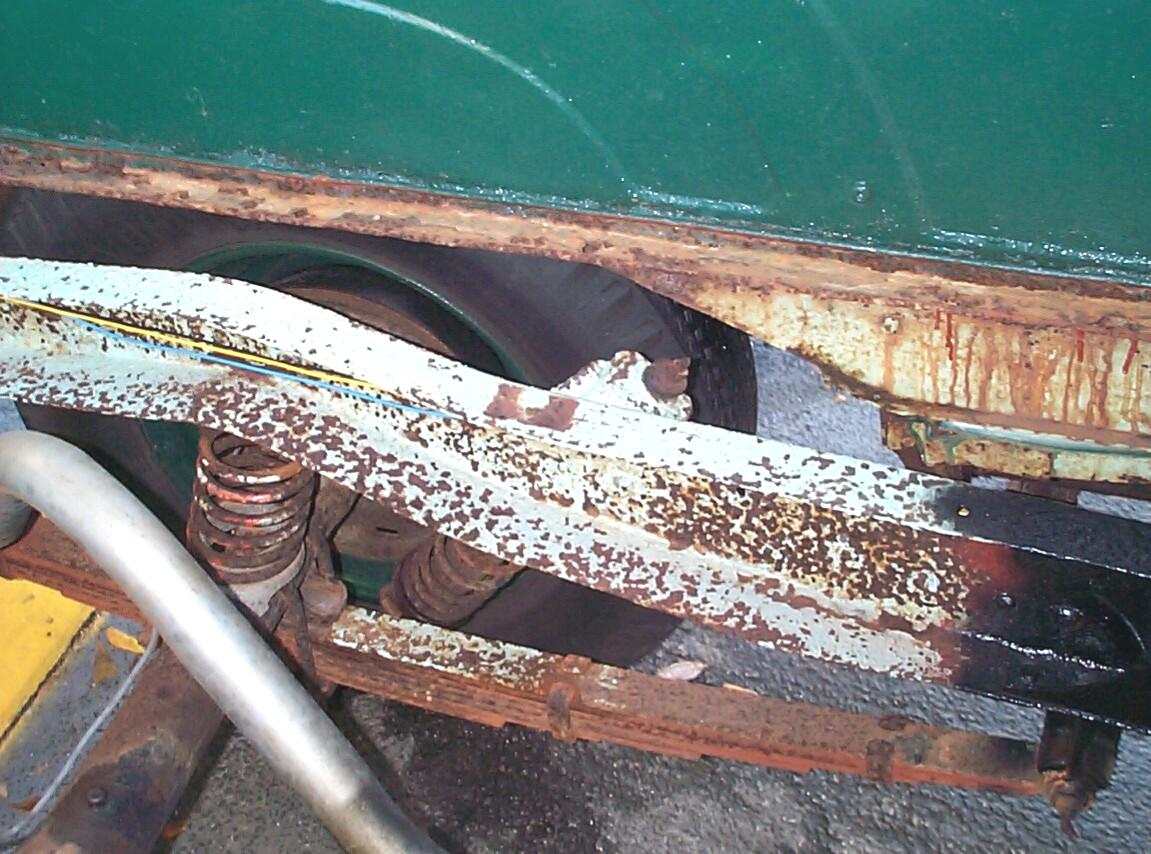
 The
next phase will continue from the just finished parking brake
cross-shaft area backwards along the frame to the rear axle centerline.
This area includes the rear running board supports and the rear shock
mounts. Existing third-party helper spring remains will be removed and
the drive shaft will be cleaned and painted. I've got new shocks from Chevy
Duty for all four corners so, some front end work will also
be involved.
The
next phase will continue from the just finished parking brake
cross-shaft area backwards along the frame to the rear axle centerline.
This area includes the rear running board supports and the rear shock
mounts. Existing third-party helper spring remains will be removed and
the drive shaft will be cleaned and painted. I've got new shocks from Chevy
Duty for all four corners so, some front end work will also
be involved.
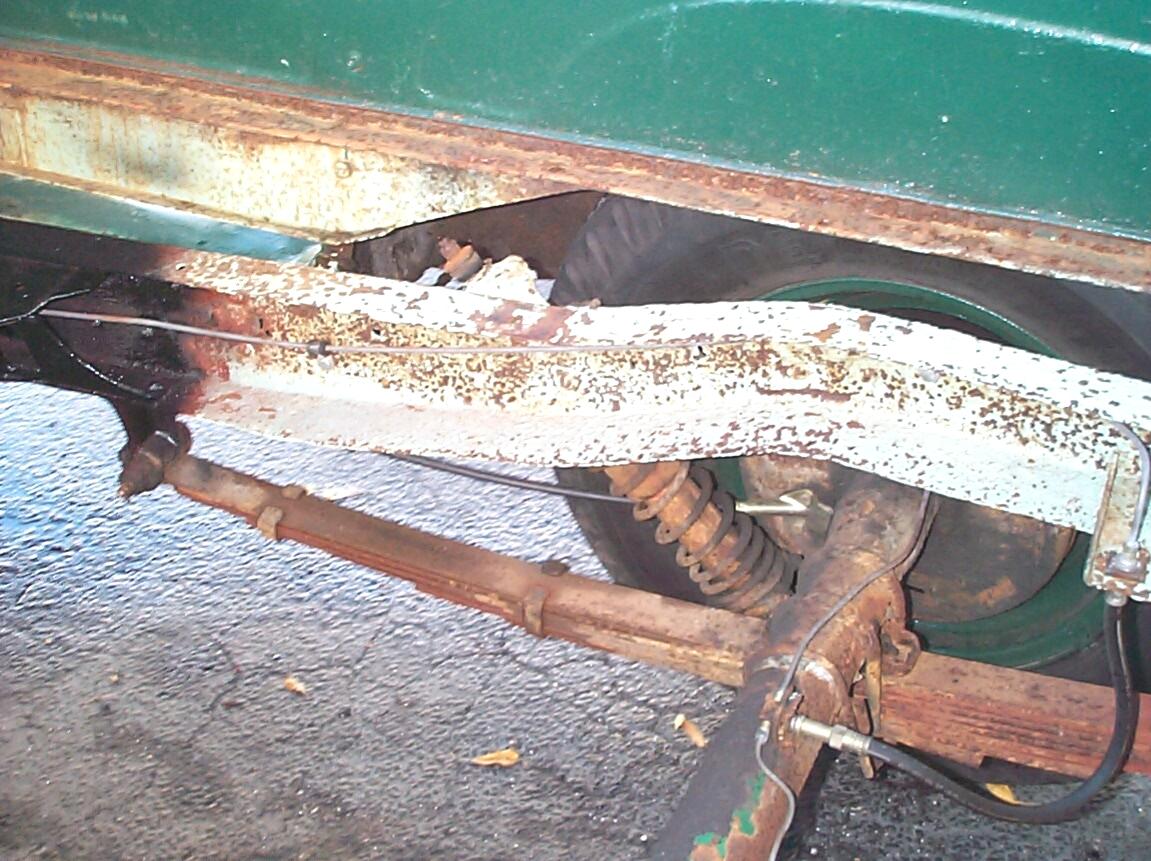
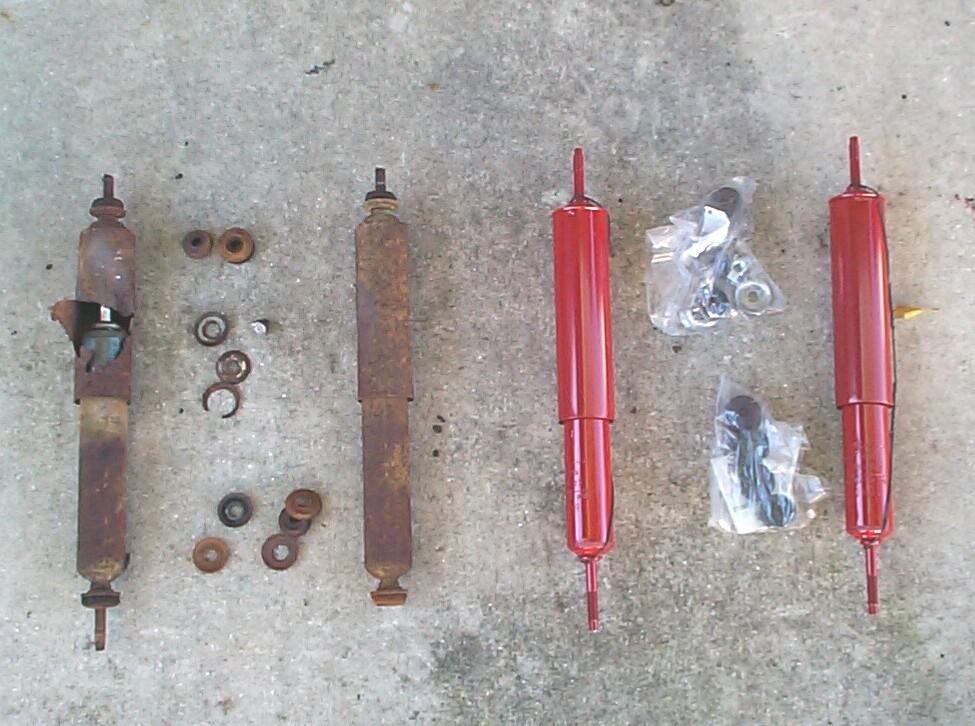
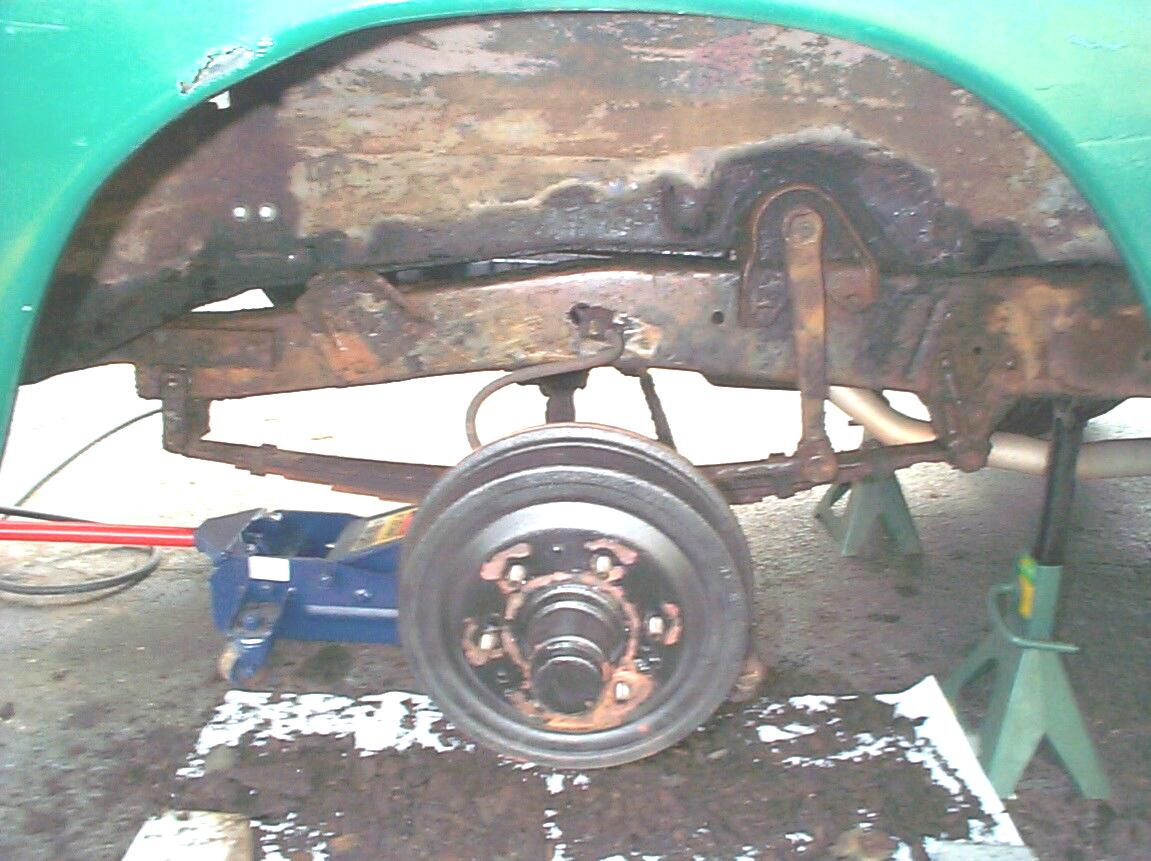
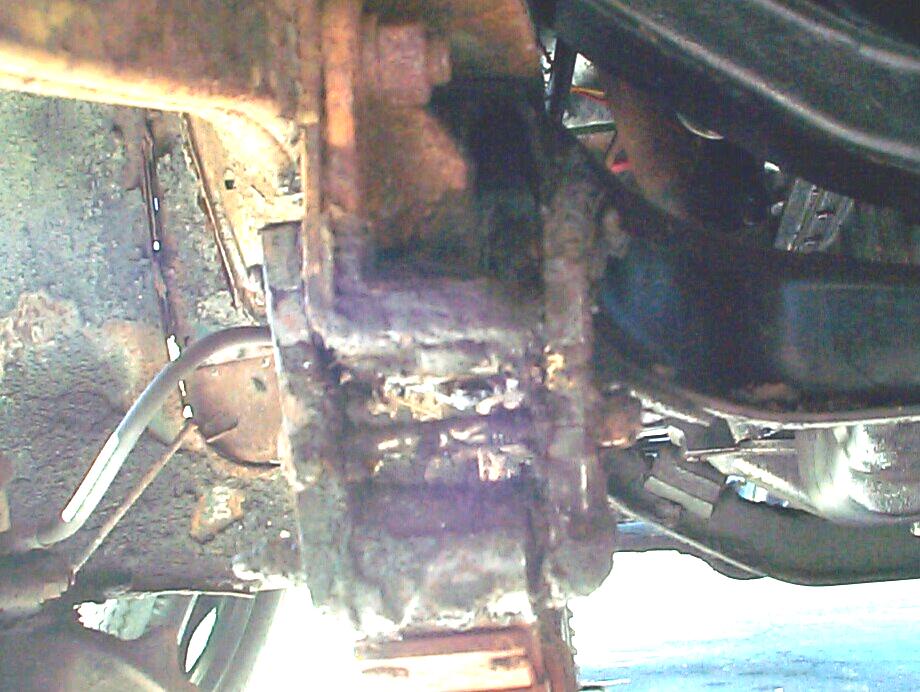
December 15th 2001 Got ready to replace the rear shocks. By the looks of the rusted connections, I suspected I was in for an Octagon Deathmatch. The shock hex nuts were treated with penetrating oil and tapped with the ball-peen hammer and treated again. BillyBob's rear end was jacked up with the floor jack under the pumpkin and the jack stands were placed under the frame just forward of the rear spring front pivots. This way the rear suspension could be raised or lowered to it's limits with the floor jack. The rear wheels were removed.
 Then
I attacked the rear shocks . . . I had both of them out in twenty
minutes! I couldn't believe my good luck. All the hex nuts came off
without much trouble and By lowering the axle, I was able to get the
old shocks out as a unit without removing the helper springs that were
rusted to them. Next, I used the air-powered three-inch cut off wheel
to cut the U-bolts holding the remainder of another set of helper
springs to the rear axle.
Then
I attacked the rear shocks . . . I had both of them out in twenty
minutes! I couldn't believe my good luck. All the hex nuts came off
without much trouble and By lowering the axle, I was able to get the
old shocks out as a unit without removing the helper springs that were
rusted to them. Next, I used the air-powered three-inch cut off wheel
to cut the U-bolts holding the remainder of another set of helper
springs to the rear axle.
 The
frame in the shock area was worked with wire brush for awhile 'til I
ran down both batteries for the cordless drill, then the rear shocks
were mounted. The shocks that came from Chevy-duty have replacement
pivot pins for the lower shock mounting which thread into the spring
mounting brackets. I decided to save these until I replace the spring
hardware which will be a future phase of the frame work. I found out
that the new hex nuts and pivots had a slightly different thread than
the existing ones . . . I had to go dumpster diving to get the old hex
nuts back. Finished up the day by cleaning the wheels and tires.
The
frame in the shock area was worked with wire brush for awhile 'til I
ran down both batteries for the cordless drill, then the rear shocks
were mounted. The shocks that came from Chevy-duty have replacement
pivot pins for the lower shock mounting which thread into the spring
mounting brackets. I decided to save these until I replace the spring
hardware which will be a future phase of the frame work. I found out
that the new hex nuts and pivots had a slightly different thread than
the existing ones . . . I had to go dumpster diving to get the old hex
nuts back. Finished up the day by cleaning the wheels and tires.
 December
16th 2001 Things went
so well yesterday, I jumped right back into it today. I ended up having
that fight I expected yesterday . . . The front shocks weren't as
accommodating as the rear shocks had been. I used the same methods with
the front shocks but, when that didn't work, I got out the MAPP gas
torch. OOPS! The gunk on the frame and
the rubber shock bushings tended to catch fire so I gave up that
approach. OK, no more Mr. nice guy. Time to end this nonsense with the
cut-off wheel.
December
16th 2001 Things went
so well yesterday, I jumped right back into it today. I ended up having
that fight I expected yesterday . . . The front shocks weren't as
accommodating as the rear shocks had been. I used the same methods with
the front shocks but, when that didn't work, I got out the MAPP gas
torch. OOPS! The gunk on the frame and
the rubber shock bushings tended to catch fire so I gave up that
approach. OK, no more Mr. nice guy. Time to end this nonsense with the
cut-off wheel.
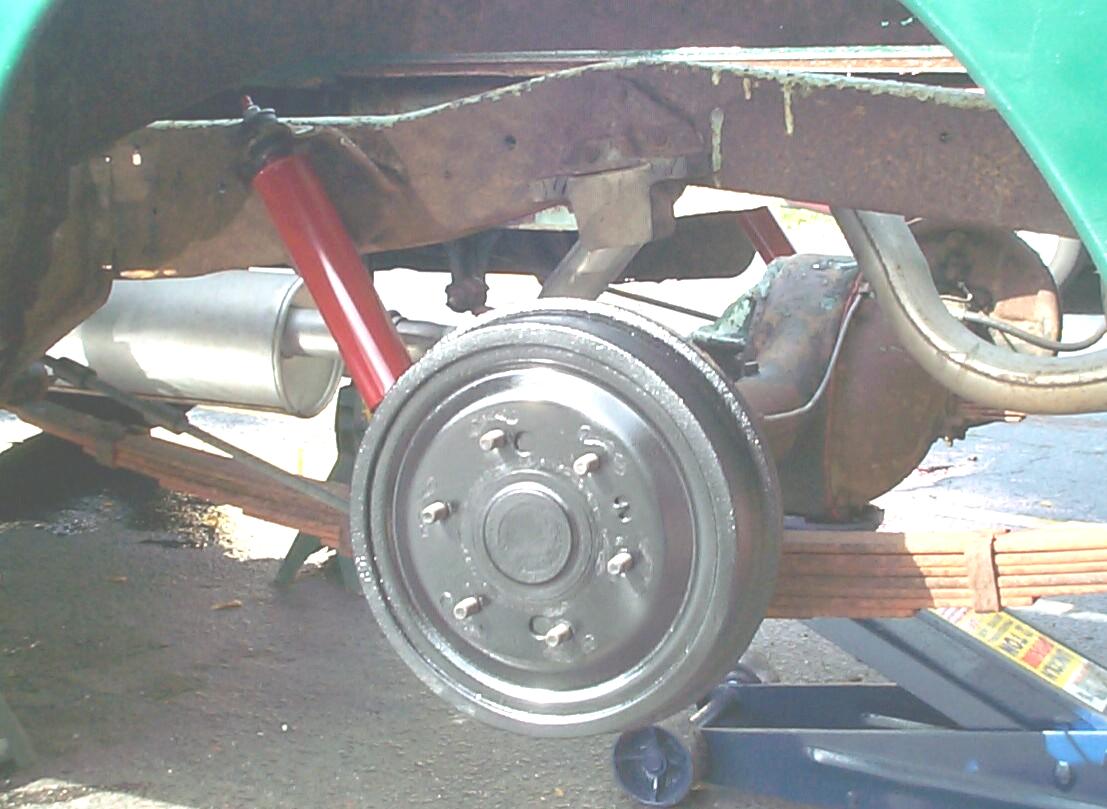
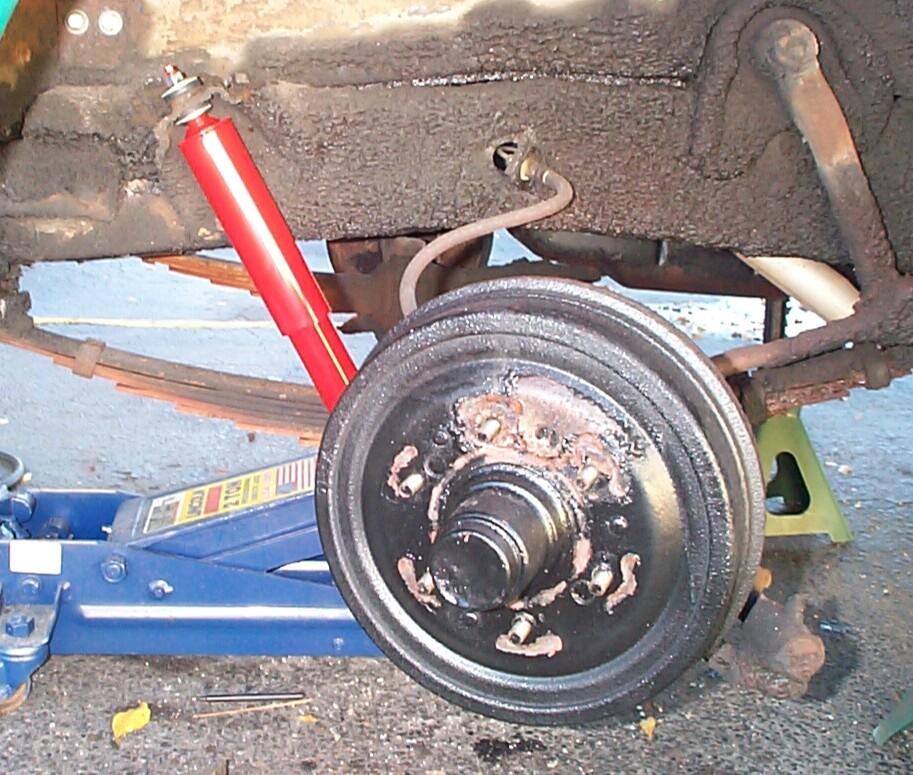 The
new shocks went in easy. You don't want to overtighten the hex nuts, so
I used a dab of threadlocker blue to keep the fasteners secure. Again I
cleaned the wheels and tires. When the driver's side wheel had been
removed earlier, I found the paint on the drum to be bubbled and
lifting off around a hole in the drum. Uh Uh, darn. Signs of a leaking
wheel cylinder. Looks like a brake job in my near future.
The
new shocks went in easy. You don't want to overtighten the hex nuts, so
I used a dab of threadlocker blue to keep the fasteners secure. Again I
cleaned the wheels and tires. When the driver's side wheel had been
removed earlier, I found the paint on the drum to be bubbled and
lifting off around a hole in the drum. Uh Uh, darn. Signs of a leaking
wheel cylinder. Looks like a brake job in my near future.
 December
29th 2001 An indian
summer day here in South Florida. Took a break (no fun intended) last
week from this work to replace a wheel cylinder on the driver side
front wheel. That story will be logged in another episode. Jacked up
the rearend and placed jack stands under the frame again. The shocks
were disconnected from the upper shock mounts and the shocks were
dropped down. The frame on both sides was wire brushed and sanded from
the rear running board brackets to the rear axle center line. I made
the decision today to bypass the running board brackets. I will have
better access to work on them later on when I remove the running boards.
December
29th 2001 An indian
summer day here in South Florida. Took a break (no fun intended) last
week from this work to replace a wheel cylinder on the driver side
front wheel. That story will be logged in another episode. Jacked up
the rearend and placed jack stands under the frame again. The shocks
were disconnected from the upper shock mounts and the shocks were
dropped down. The frame on both sides was wire brushed and sanded from
the rear running board brackets to the rear axle center line. I made
the decision today to bypass the running board brackets. I will have
better access to work on them later on when I remove the running boards.
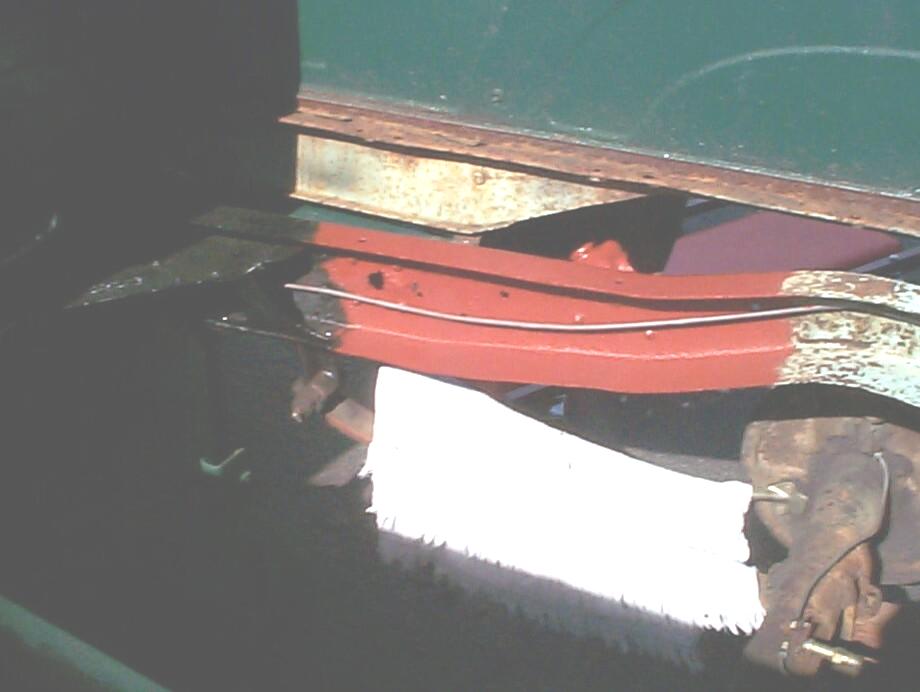
 Prepped
the frame rails with Eastwood's PRE and protected the brake line from
painting with plastic drinking straws. Brush painted the prepped frame
rails with Corroless rust stabilizer. After the Corroless had dried
about ninety minutes, I finished up with a rattlecan coat of Eastwood's
Chassis Black paint. After a couple hours more, the shocks and wheels
were bolted back in place and we were finished for this week.
Prepped
the frame rails with Eastwood's PRE and protected the brake line from
painting with plastic drinking straws. Brush painted the prepped frame
rails with Corroless rust stabilizer. After the Corroless had dried
about ninety minutes, I finished up with a rattlecan coat of Eastwood's
Chassis Black paint. After a couple hours more, the shocks and wheels
were bolted back in place and we were finished for this week.
 January
5th 2002 Cold for South
Florida - 42 degrees when I left for the Krash Lab this morning.
Doesn't seem to bother BillyBob. He started up on the first revolution.
I waited 'til nine to drag out the air compressor and jacks. After
jacking BillyBob's front end up, I pulled the wheels and shocks. The
fittings on the shocks were rusting already so, I threw them in the
tumbler for cleaning. Then I went after the frame and suspension in the
driver side wheel well with putty knifes and gasket scraper. There was
more than an inch of gunk buildup in this area. The good news is that
it had preserved the frame from rust a lot better than in the rear of
the truck.
January
5th 2002 Cold for South
Florida - 42 degrees when I left for the Krash Lab this morning.
Doesn't seem to bother BillyBob. He started up on the first revolution.
I waited 'til nine to drag out the air compressor and jacks. After
jacking BillyBob's front end up, I pulled the wheels and shocks. The
fittings on the shocks were rusting already so, I threw them in the
tumbler for cleaning. Then I went after the frame and suspension in the
driver side wheel well with putty knifes and gasket scraper. There was
more than an inch of gunk buildup in this area. The good news is that
it had preserved the frame from rust a lot better than in the rear of
the truck.
Knocked the dirt off until noon, then started putting things back together for the day. Put the shocks back on and sprayed the connections with silicone to temporarily keep the rust at bay. Later, I will employ a more permanent solution.
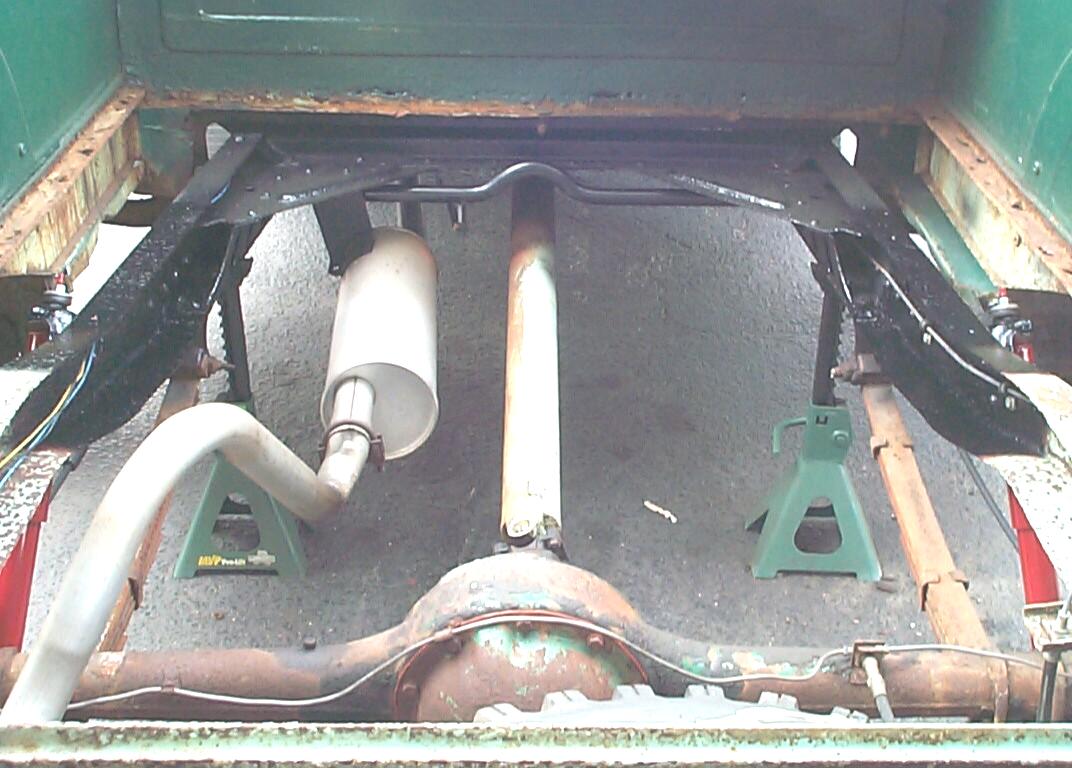
 January
12th 2002 Chilly but
not as cold as last week. Set the parking brake and put the tranny in
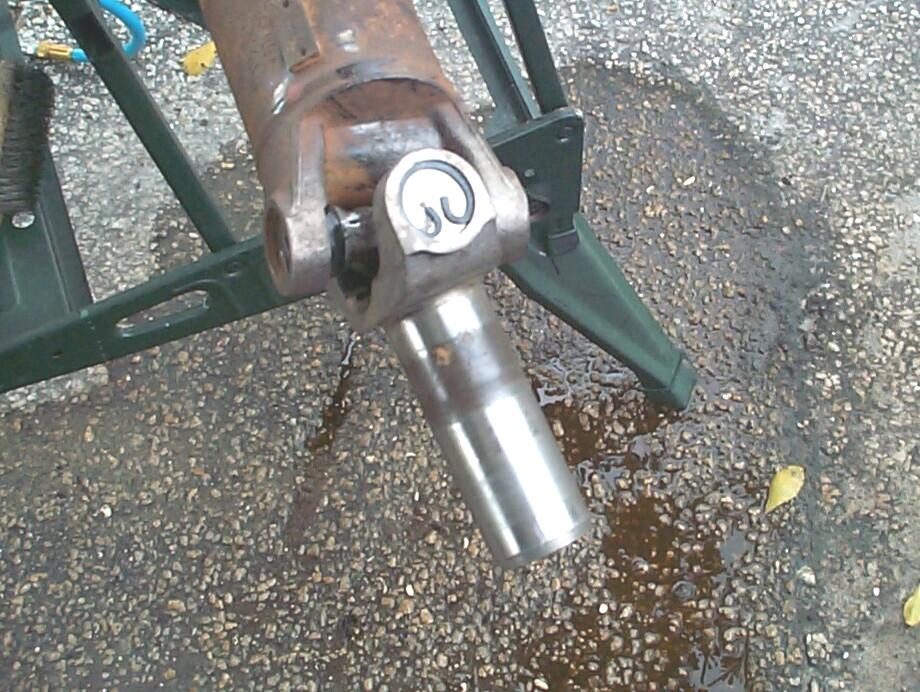
neutral. Removed the driveshaft and taped the rear universal joint to
keep the bearing cups in place (don't wanna lose any of those tiny
roller bearings). I messed around with the idea of taking apart the
front universal joint for a good cleaning but I don't have a place
currently to mount my bench vise and trying to press out the bearing
cups with two sockets and the vise just doesn't work very well with a
free-floating vise. Instead, I dipped the whole front end of the
driveshaft in carb/parts cleaning chemicals for an hour, then continued
to clean it with several applications of "Purple" concentrate degreaser
using the Eastwood Grime Blaster. This universal joint appears to be
fairly new (the rubber seals are black and shiny without cracks or
deformation.
January
12th 2002 Chilly but
not as cold as last week. Set the parking brake and put the tranny in
neutral. Removed the driveshaft and taped the rear universal joint to
keep the bearing cups in place (don't wanna lose any of those tiny
roller bearings). I messed around with the idea of taking apart the
front universal joint for a good cleaning but I don't have a place
currently to mount my bench vise and trying to press out the bearing
cups with two sockets and the vise just doesn't work very well with a
free-floating vise. Instead, I dipped the whole front end of the
driveshaft in carb/parts cleaning chemicals for an hour, then continued
to clean it with several applications of "Purple" concentrate degreaser
using the Eastwood Grime Blaster. This universal joint appears to be
fairly new (the rubber seals are black and shiny without cracks or
deformation.
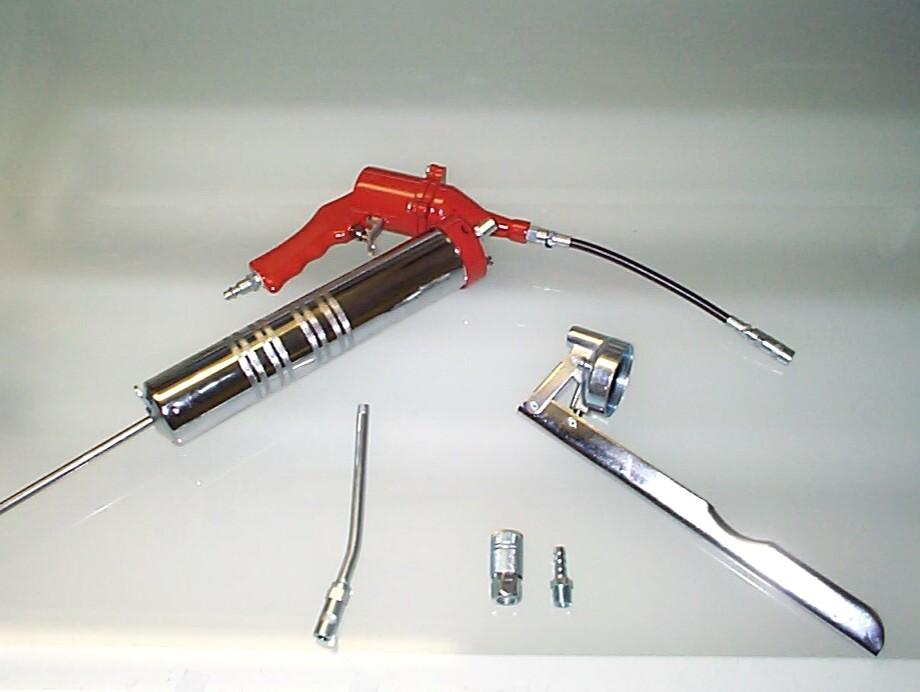 The
cleaning took a long time. I lubed the front universal joint with a new
"Wel-Bilt" Air & Hand Operated Grease Gun purchased from Northern
Tool a couple of weeks ago. I set the air pressure at the
lowest setting of 30 psi. I'm not familiar with air powered guns and I
am fearful of blowing seals. I re-installed the driveshaft and buttoned
things up for the day. If I clean the rear joint the same way I'll have
to get a C-clamp to keep the bearing cups in place since tape will not
stand up to the solvents and would cover areas that need cleaning.
The
cleaning took a long time. I lubed the front universal joint with a new
"Wel-Bilt" Air & Hand Operated Grease Gun purchased from Northern
Tool a couple of weeks ago. I set the air pressure at the
lowest setting of 30 psi. I'm not familiar with air powered guns and I
am fearful of blowing seals. I re-installed the driveshaft and buttoned
things up for the day. If I clean the rear joint the same way I'll have
to get a C-clamp to keep the bearing cups in place since tape will not
stand up to the solvents and would cover areas that need cleaning.
 January
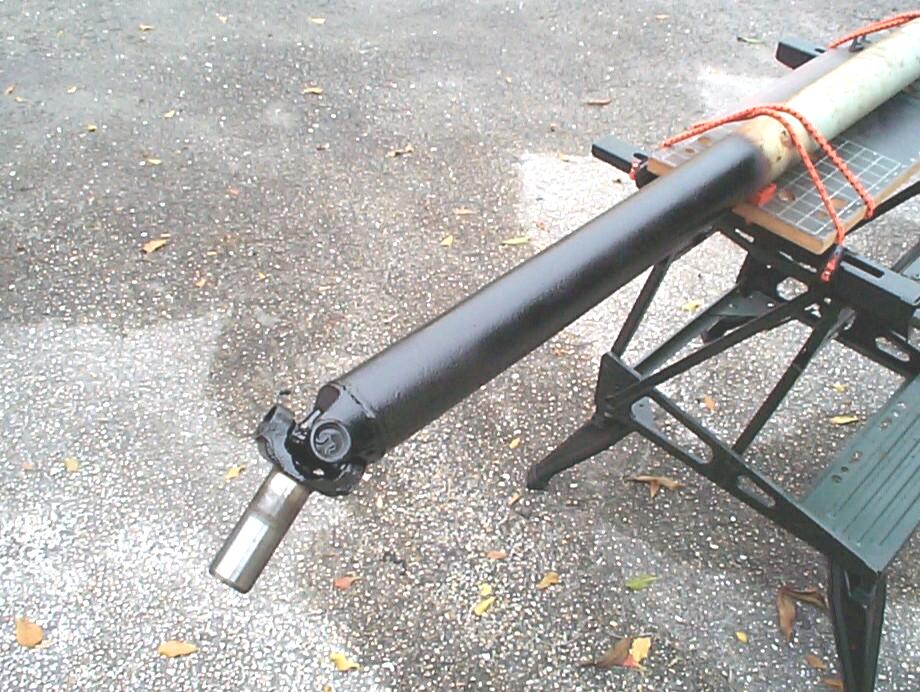
13th 2002 Pulled the
driveshaft again and secured it to the Black & Decker Workmate
with bungee cords. Wire brushed the front half of the driveshaft and
prepped it with Eastwood's PRE. Masked off the front yoke and grease
fitting and applied a coat of Corroless rust stabilizer from a
rattlecan. Started getting some sprinkles from the overcast sky while
the Corroless was setting up so the Workmate and driveshaft were
manhandled into the shed for protection. After an hour, finished up
with a rattlecan coat of Eastwood's Chassis Black.
January
13th 2002 Pulled the
driveshaft again and secured it to the Black & Decker Workmate
with bungee cords. Wire brushed the front half of the driveshaft and
prepped it with Eastwood's PRE. Masked off the front yoke and grease
fitting and applied a coat of Corroless rust stabilizer from a
rattlecan. Started getting some sprinkles from the overcast sky while
the Corroless was setting up so the Workmate and driveshaft were
manhandled into the shed for protection. After an hour, finished up
with a rattlecan coat of Eastwood's Chassis Black.
January 19th 2001 During the week I picked up a C-clamp assortment at Home Depot. The first thing I found out today is that a 3" C-clamp is just a shade shy of being big enuf to hold the universal joint bearing cups in place. ~!@#$%^ Have to pick up a larger C-clamp next week and do something else today. For you folks reading this, I do these stupid things and report them so you will be spared the ignominy of my misteaks if you have to do the same job someday.
 I
jacked up the front end again and removed the shocks. The shock
fittings were thrown in the tumbler for another cleaning session.
Started scraping the gunk buildup off the frame and suspension in the
passenger side front wheelwell area. After I got the worst of the dirt
off it, I saw that the front spring hanger was in pretty bad shape . .
. starting to come apart. I sorta suspected this since there is
sometimes a "Boinnngg" sound coming from this area when I make a left
turn. I want to replace the hangers when I install new springs but I'm
not sure this will wait until then. I'll have to keep a close watch on
this hanger.
I
jacked up the front end again and removed the shocks. The shock
fittings were thrown in the tumbler for another cleaning session.
Started scraping the gunk buildup off the frame and suspension in the
passenger side front wheelwell area. After I got the worst of the dirt
off it, I saw that the front spring hanger was in pretty bad shape . .
. starting to come apart. I sorta suspected this since there is
sometimes a "Boinnngg" sound coming from this area when I make a left
turn. I want to replace the hangers when I install new springs but I'm
not sure this will wait until then. I'll have to keep a close watch on
this hanger.
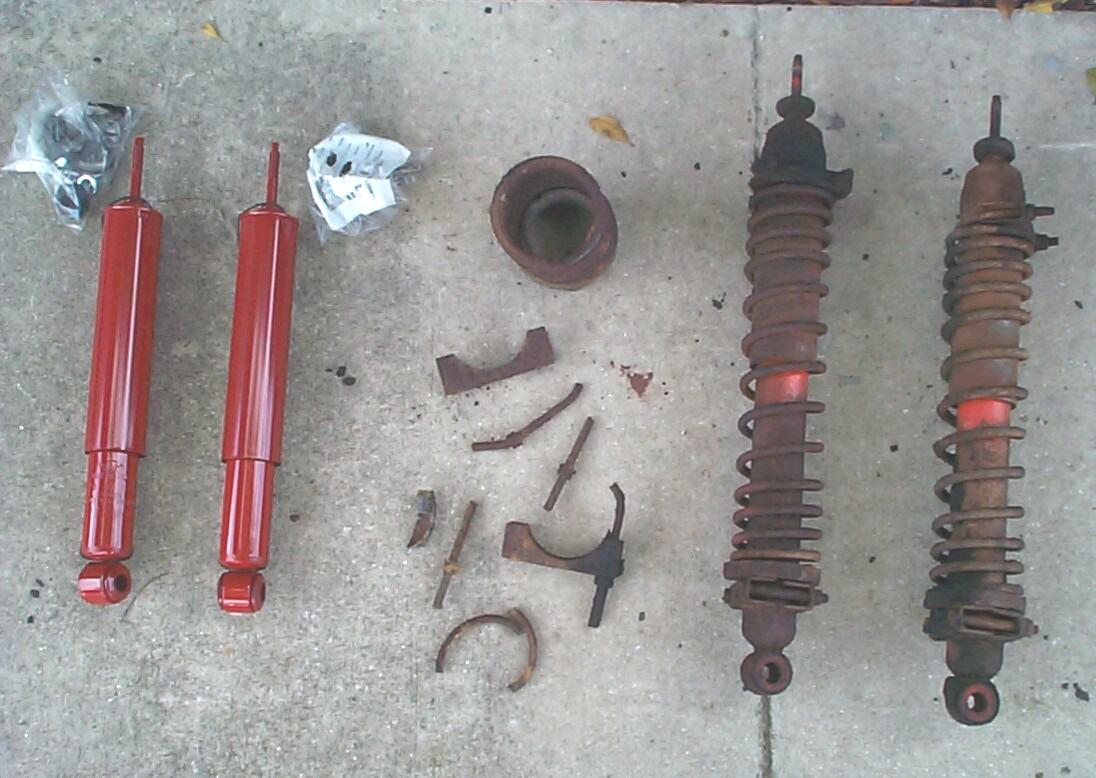
The shock fittings (hex nuts and large washers to contain the rubber bushings) were removed from the tumbler and tin-zinc plated with Eastwood's kit. Then back to the tumbler they went for a polishing session with the dri-shine media. The rubber bushings were cleaned with soap and water, then treated with protectant. The shocks were cleaned with spray cleaner and waxed.
January 26th 2002 Got a late start today . . . Too many people stopped to talk about BillyBob and the world in general. Internally, I gave in and accepted that it was going to be a day of interruptions. Removed the driveshaft again. Discovered one flaw in my C-clamp plan - the C-clamp on the end of the drive shaft was too big to fit into the chemical bucket. I carefully removed the bearing caps with the roller bearings intact and set them out of harm's way. The rear end of the driveshaft with remainder of the universal joint was submerged in the chemical bucket for a couple of hours. Afterwards, I put the bearing caps back on and clamped them in place. Continued to degrease and clean the universal joint and then lubed it and put the driveshaft back in the truck for the ride home.
 January
27th 2002 Finished what
I started yesterday. Jacked up BillyBob and removed the driveshaft and
rear shocks. Prepped and painted the rear half of the driveshaft with
Corroless and about ninety minutes after that with Chassis Black. The
Corroless rattlecan started clogging up. ~!@#$%^
This stuff costs a lot, I hate when a can goes bad with paint still in
it. Cleaned and detailed the shocks the same way as the front shocks
last week. My friend and co-worker, Moe, dropped by to drag me out from
under BillyBob to an open house. It's Moe's mission in life to get
people out of rental apartments and into homes. This was too much house
for me, but it did have a nice air-conditioned two-car garage and a
back yard screened by a 10-foot hedge on all sides. It was located in
one of the few areas of Boca Raton without deed restrictions too. Moe
is still on the hunt but what I really need is what Janeyiv of the
Stovebolt forums calls "the perfect garage with shack attached".
January
27th 2002 Finished what
I started yesterday. Jacked up BillyBob and removed the driveshaft and
rear shocks. Prepped and painted the rear half of the driveshaft with
Corroless and about ninety minutes after that with Chassis Black. The
Corroless rattlecan started clogging up. ~!@#$%^
This stuff costs a lot, I hate when a can goes bad with paint still in
it. Cleaned and detailed the shocks the same way as the front shocks
last week. My friend and co-worker, Moe, dropped by to drag me out from
under BillyBob to an open house. It's Moe's mission in life to get
people out of rental apartments and into homes. This was too much house
for me, but it did have a nice air-conditioned two-car garage and a
back yard screened by a 10-foot hedge on all sides. It was located in
one of the few areas of Boca Raton without deed restrictions too. Moe
is still on the hunt but what I really need is what Janeyiv of the
Stovebolt forums calls "the perfect garage with shack attached".
Time to bring this log entry to a close. The next episode in this series will concern itself with refurbishing the brakes, backing plates and master cylinder along with continued frame scraping, cleaning and painting.
| < Back
to Intro |
You can email me at ![]() webmaster@laroke.com
webmaster@laroke.com
Issued Monday January 28, 2002
Updated Tuesday May 23, 2017
copyright © 1996-2017 Larry Robert Kephart all rights reserved
| | LRK Home | | Bio Info | | Krash Khronicles | | LAROKE | |
| | BettyLou | | BillyBob's Garage | | Rat Patrol | | Deerslayer | | Elvira | |
| | Land of the Free and Home of the Brave | |
| | Keppylou's Art | | WWI Soldier's Diary | |