| | LRK Home | | Bio Info | | Krash Khronicles | | LAROKE | |
| | BettyLou | | BillyBob's Garage | | Rat Patrol | | Deerslayer | | Elvira | |
| | Land of the Free and Home of the Brave | |
| | Keppylou's Art | | WWI Soldier's Diary | |
BillyBob Work-in-Progress Log
![]()
TRUCK LINKS including vendor sites for old parts, custom parts, and tools as well as sites for classic car and truck organizations
STORE Operating in association with Amazon.com, books, recordings and tools can be purchased.
PLANNING for the restoration including project schedule and cost estimates.
![]()
WORK-IN-PROGRESS is the restoration of parts of BillyBob that I can accomplish without a garage.
PRE-RESTORATION includes log entries of minor repairs and and adventures between time of purchase and the time when I started restoration, a piece at a time.
JR'S KORNER JR's Korner is the history of BillyBob before I got him authored by my brother, Wm. C. Kephart.
![]()
BILLYBOB MAINTENANCE Ever changing detailing, oil change, lube, etc. maintenance routines specifically developed for BillyBob, including required tools, materials and procedures.
12. Undercover Frame Job
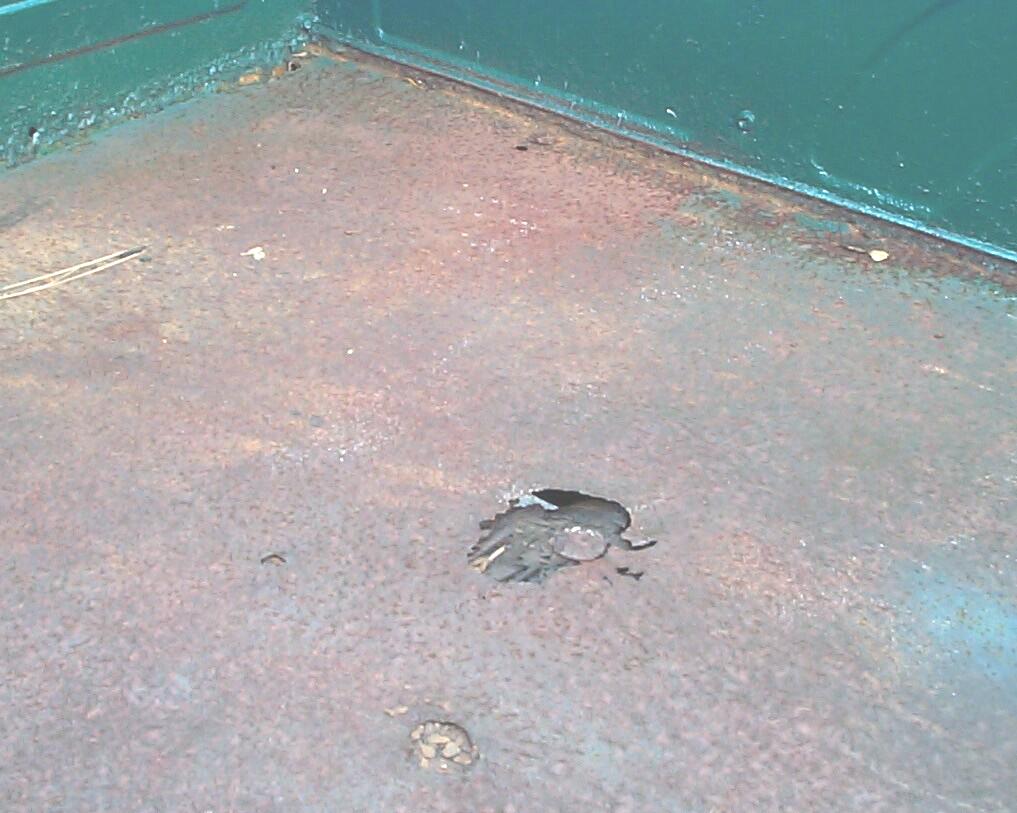
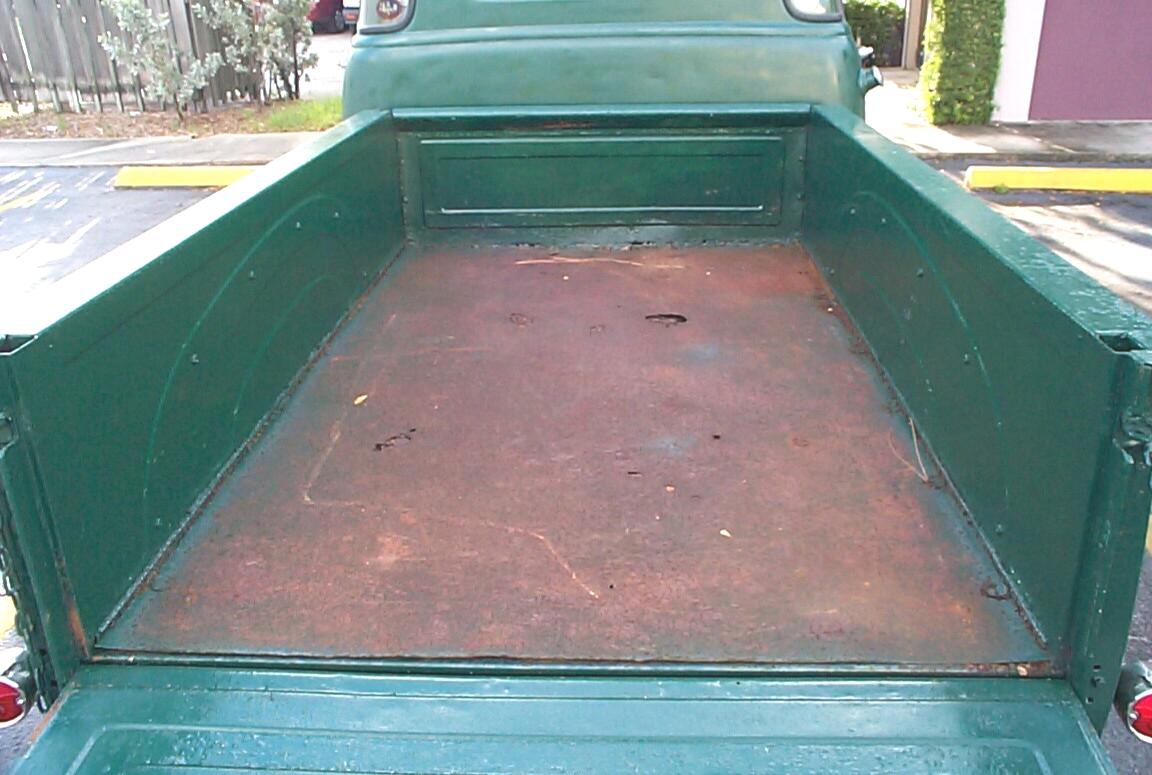 June
30th 2001 BillyBob's
pickup bed is slowly returning to the elements. It consists of rusty
sheet metal on a dryrotted plywood substrate. Big chunks of the plywood
fall off the bottom from time to time and holes are developing in the
sheet metal.
June
30th 2001 BillyBob's
pickup bed is slowly returning to the elements. It consists of rusty
sheet metal on a dryrotted plywood substrate. Big chunks of the plywood
fall off the bottom from time to time and holes are developing in the
sheet metal.
 This
situation can't be ignored much longer. I came up with the idea of
installing a tonneau cover, tearing out the old rotted bed, then
cleaning and refinishing the frame, at leasure, before installing a new
bed. With the tonneau cover in place, the frame will be protected from
above and nobody will be the wiser regarding the missing bed while I do
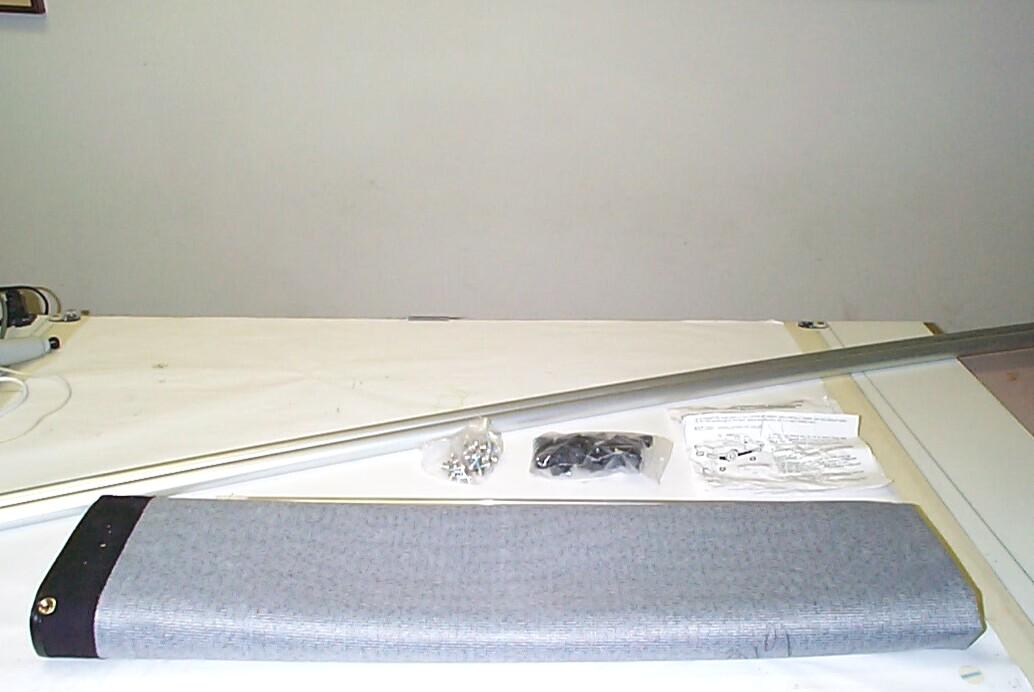
this work. With this in mind I ordered a Tonneau Cover-Black, 54-87
(#15-301); Tonneau Cover Support Brackets, 54-87 (#15-911); and Bed
Installation Book, 47-87 (#16-001) from Chevy
Duty Online. The tonneau cover is currently backordered.
This
situation can't be ignored much longer. I came up with the idea of
installing a tonneau cover, tearing out the old rotted bed, then
cleaning and refinishing the frame, at leasure, before installing a new
bed. With the tonneau cover in place, the frame will be protected from
above and nobody will be the wiser regarding the missing bed while I do
this work. With this in mind I ordered a Tonneau Cover-Black, 54-87
(#15-301); Tonneau Cover Support Brackets, 54-87 (#15-911); and Bed
Installation Book, 47-87 (#16-001) from Chevy
Duty Online. The tonneau cover is currently backordered.
 While
waiting on the tonneau cover delivery, I continued to clean and detail
parts of BillyBob that I've rebuilt and are beginning to look shoddy
again. This week I worked on the gearshift linkage between the tranny
and shiftbox. Now that I've got a cutting wheel, I renewed my attack on
the spare grille JR got at Carlisle a few years ago. This
time I was successful removing the bolts holding the top grille bar
which is in better shape than BillyBob's. I did receive some goodies
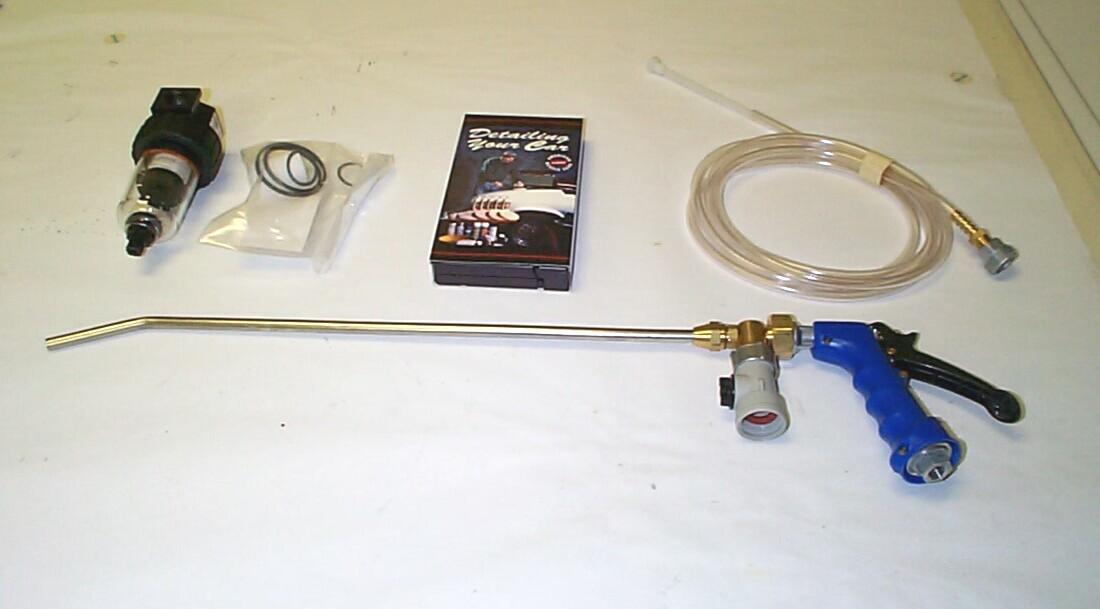
from Eastwood
this week that helped me in my cleaning efforts: A Grime Blaster Wash
Nozzle (#52044) and a Detailing Your Car video (#52092). I also got a
Moisture Separator (#34103) and spare filter (#34103A) for my future
sand blasting efforts.
While
waiting on the tonneau cover delivery, I continued to clean and detail
parts of BillyBob that I've rebuilt and are beginning to look shoddy
again. This week I worked on the gearshift linkage between the tranny
and shiftbox. Now that I've got a cutting wheel, I renewed my attack on
the spare grille JR got at Carlisle a few years ago. This
time I was successful removing the bolts holding the top grille bar
which is in better shape than BillyBob's. I did receive some goodies
from Eastwood
this week that helped me in my cleaning efforts: A Grime Blaster Wash
Nozzle (#52044) and a Detailing Your Car video (#52092). I also got a
Moisture Separator (#34103) and spare filter (#34103A) for my future
sand blasting efforts.
 July
14th 2001 The
backordered cover and brackets arrived earlier in the week. The
instructions mentioned the need to drill 1/8" and 9/64" holes so, I
picked up some titanium drill bits from home depot on Thursday. This
cover is a simple snap-down affair. A conestoga wagon is more
technically advanced. It fits my purposes nicely.
July
14th 2001 The
backordered cover and brackets arrived earlier in the week. The
instructions mentioned the need to drill 1/8" and 9/64" holes so, I
picked up some titanium drill bits from home depot on Thursday. This
cover is a simple snap-down affair. A conestoga wagon is more
technically advanced. It fits my purposes nicely.
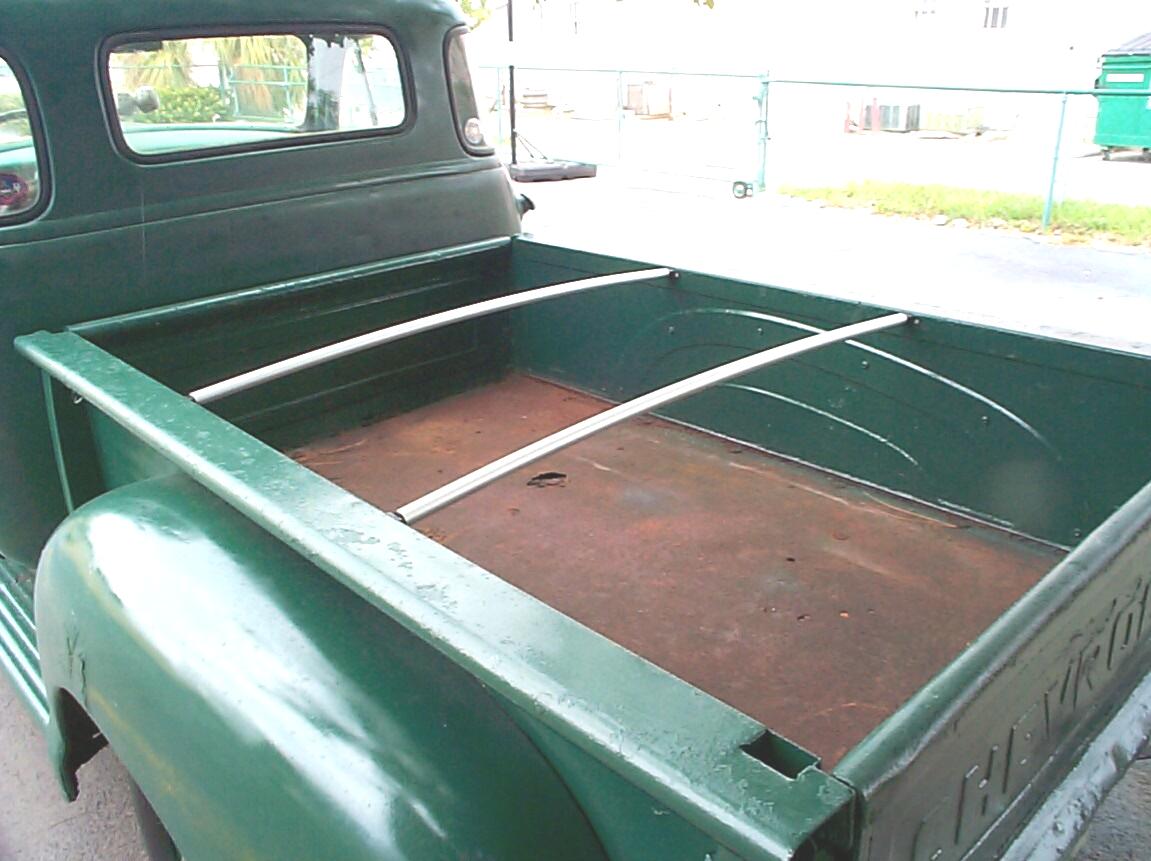 Summertime
in the tropics. I'm workin' under threat of rain. We need rain but
unfortunately we've only been getting a bit here and there . . . just
enough to be a nuisance. The first job was to install the support bows.
They had to be cut off to the proper length so, I had to drag out the
air compressor and set it up to run the cut-off tool. I just got the
bows installed when rain broke out all over. I did manage to get the
tools back in the shed before they got wet. I'm writing this while I
wait out the shower.
Summertime
in the tropics. I'm workin' under threat of rain. We need rain but
unfortunately we've only been getting a bit here and there . . . just
enough to be a nuisance. The first job was to install the support bows.
They had to be cut off to the proper length so, I had to drag out the
air compressor and set it up to run the cut-off tool. I just got the
bows installed when rain broke out all over. I did manage to get the
tools back in the shed before they got wet. I'm writing this while I
wait out the shower.
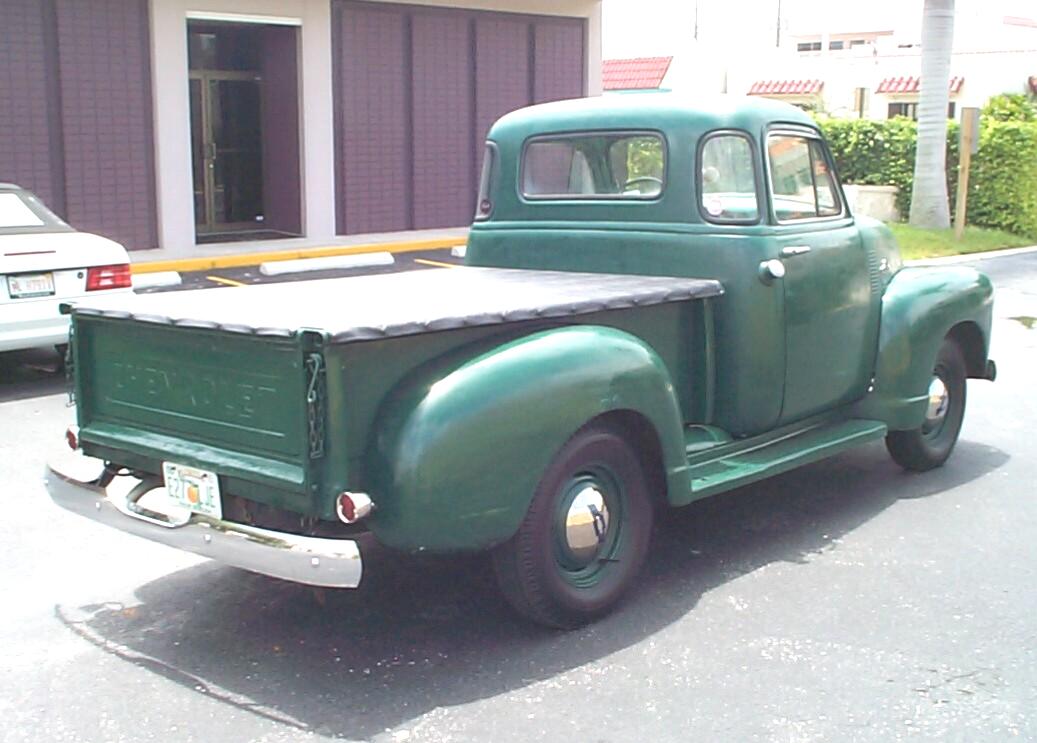 The
rain didn't last long. The application of the cover was
straightforward. Just careful alignment and a lot of drillin' and
screwin' for the snaps. I've owned Renegade,
my Jeep Wrangler, for ten years and I've grown quite familar with
snaps. In fact, I've developed a great loathing for them. I managed to
get the cover snug and taut but it's not real hot out and it's still
overcast . . . I'm hopin' the cover doesn't sag too much when it heats
up. We'll just have to wait and see.
The
rain didn't last long. The application of the cover was
straightforward. Just careful alignment and a lot of drillin' and
screwin' for the snaps. I've owned Renegade,
my Jeep Wrangler, for ten years and I've grown quite familar with
snaps. In fact, I've developed a great loathing for them. I managed to
get the cover snug and taut but it's not real hot out and it's still
overcast . . . I'm hopin' the cover doesn't sag too much when it heats
up. We'll just have to wait and see.
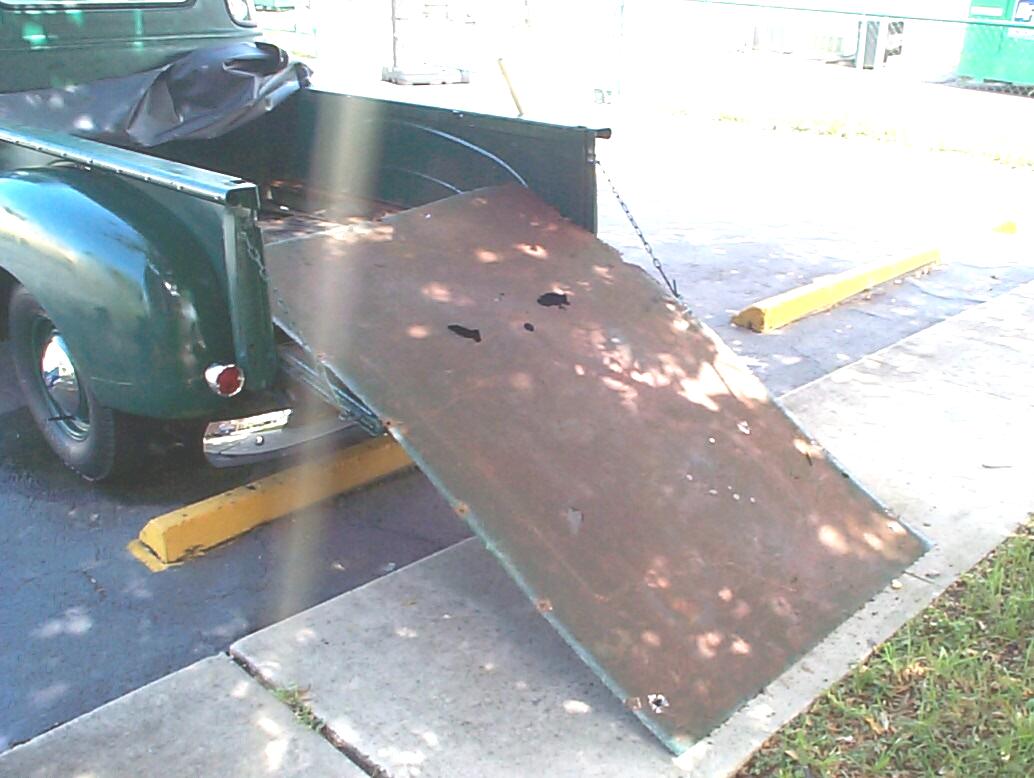 July
21st 2001 'Sposed to be
eighty percent chance of multiple thunderboomers today. It's almost
noon 'an, so far, the weather has been better than last week. For me,
the local weather report is more like the joke of the day, than a
useful tool for making plans. The tonneau cover has not sagged at all
during the last week, even after an afternoon of direct Florida
sunshine. I'm happy. Today, I peeled it back and rolled up my sleeves
to remove the old rotted bed floor. The sheet metal top is pinned in
place with bolts that have 1" diameter sheet metal caps. These darn
things run about a foot apart down both sides of the bed and the bed
front. In addition, there are four more spaced at third points both
ways in the interior of the bed surface area. Finally, there are two
round-headed carriage bolts at the tailgate area.
July
21st 2001 'Sposed to be
eighty percent chance of multiple thunderboomers today. It's almost
noon 'an, so far, the weather has been better than last week. For me,
the local weather report is more like the joke of the day, than a
useful tool for making plans. The tonneau cover has not sagged at all
during the last week, even after an afternoon of direct Florida
sunshine. I'm happy. Today, I peeled it back and rolled up my sleeves
to remove the old rotted bed floor. The sheet metal top is pinned in
place with bolts that have 1" diameter sheet metal caps. These darn
things run about a foot apart down both sides of the bed and the bed
front. In addition, there are four more spaced at third points both
ways in the interior of the bed surface area. Finally, there are two
round-headed carriage bolts at the tailgate area.
 It
took about three hours of brute force air chisel, 3" cut-off tool, and
vise-grip hand-to-hand combat technique to come to terms with all these
fasteners. I haven't been using a cut-off wheel long and I don't know
when to change the wheel, but when I saw I wuz bluing the metal more
than cutting it, I took that as a sign. After all those fasteners were
out, I put on my leather trooper gauntlets and manhandled the rusty bed
sheetmetal to the back of our dumpster enclosure. I'll cut it up for
disposal on another day.
It
took about three hours of brute force air chisel, 3" cut-off tool, and
vise-grip hand-to-hand combat technique to come to terms with all these
fasteners. I haven't been using a cut-off wheel long and I don't know
when to change the wheel, but when I saw I wuz bluing the metal more
than cutting it, I took that as a sign. After all those fasteners were
out, I put on my leather trooper gauntlets and manhandled the rusty bed
sheetmetal to the back of our dumpster enclosure. I'll cut it up for
disposal on another day.
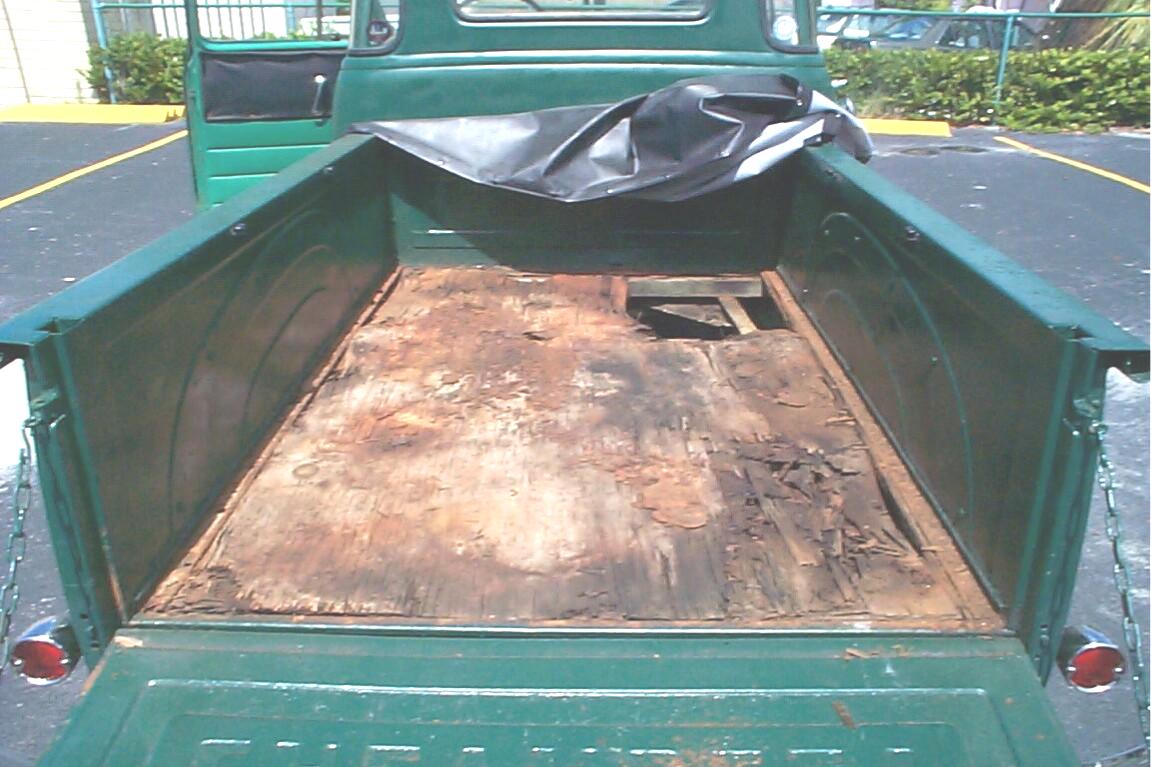
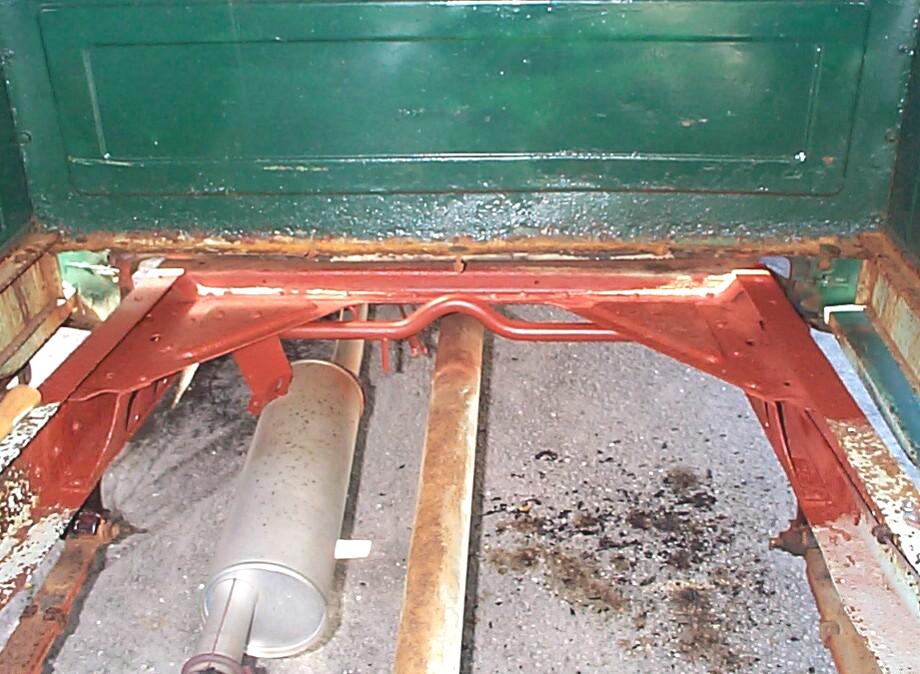
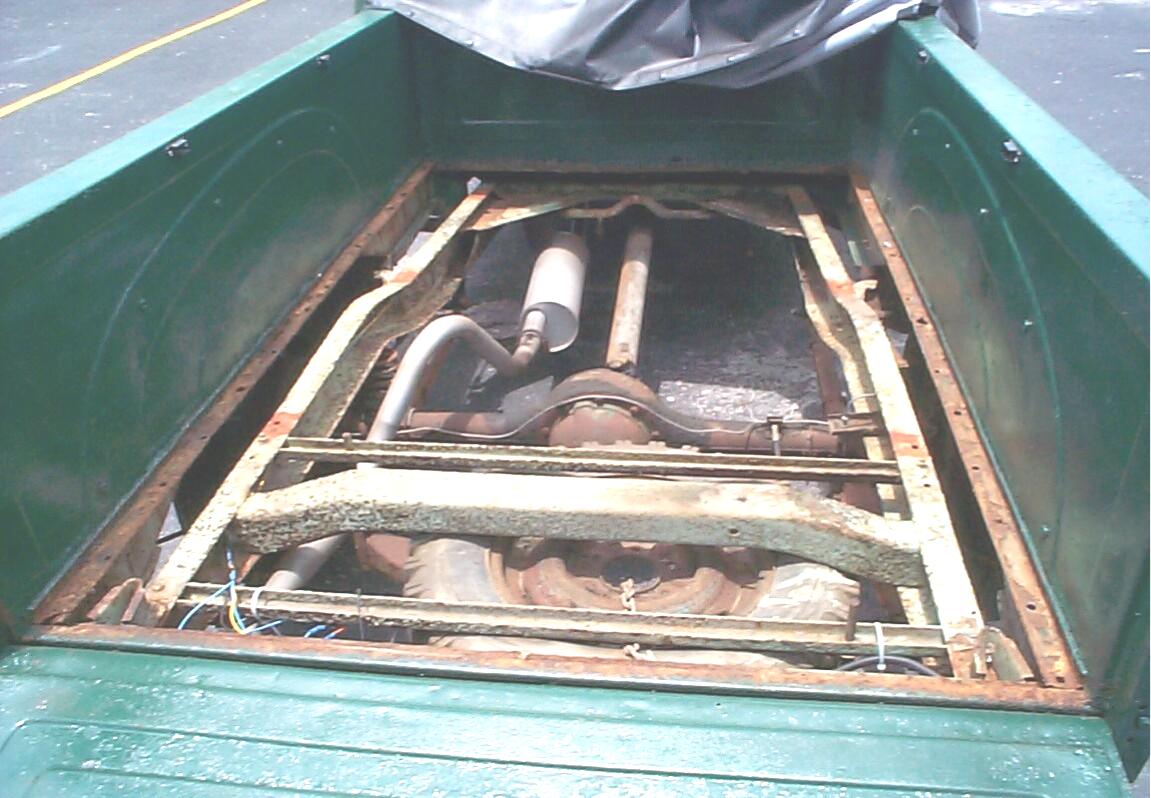 The
plywood underlayment was so dry-rotted, I was able to break it up by
hand. Most of it crumbled at the touch and more time was spent with
shovel, broom and shop vac, than throwin' big chunks in the dumpster. I
got a lotta chassis refurbishing ahead of me here. Looks like I'll
finally be able to get at the spare tire too. All except the rear
cross-sills were loose so they were lifted out and stored in the shed.
The
plywood underlayment was so dry-rotted, I was able to break it up by
hand. Most of it crumbled at the touch and more time was spent with
shovel, broom and shop vac, than throwin' big chunks in the dumpster. I
got a lotta chassis refurbishing ahead of me here. Looks like I'll
finally be able to get at the spare tire too. All except the rear
cross-sills were loose so they were lifted out and stored in the shed.
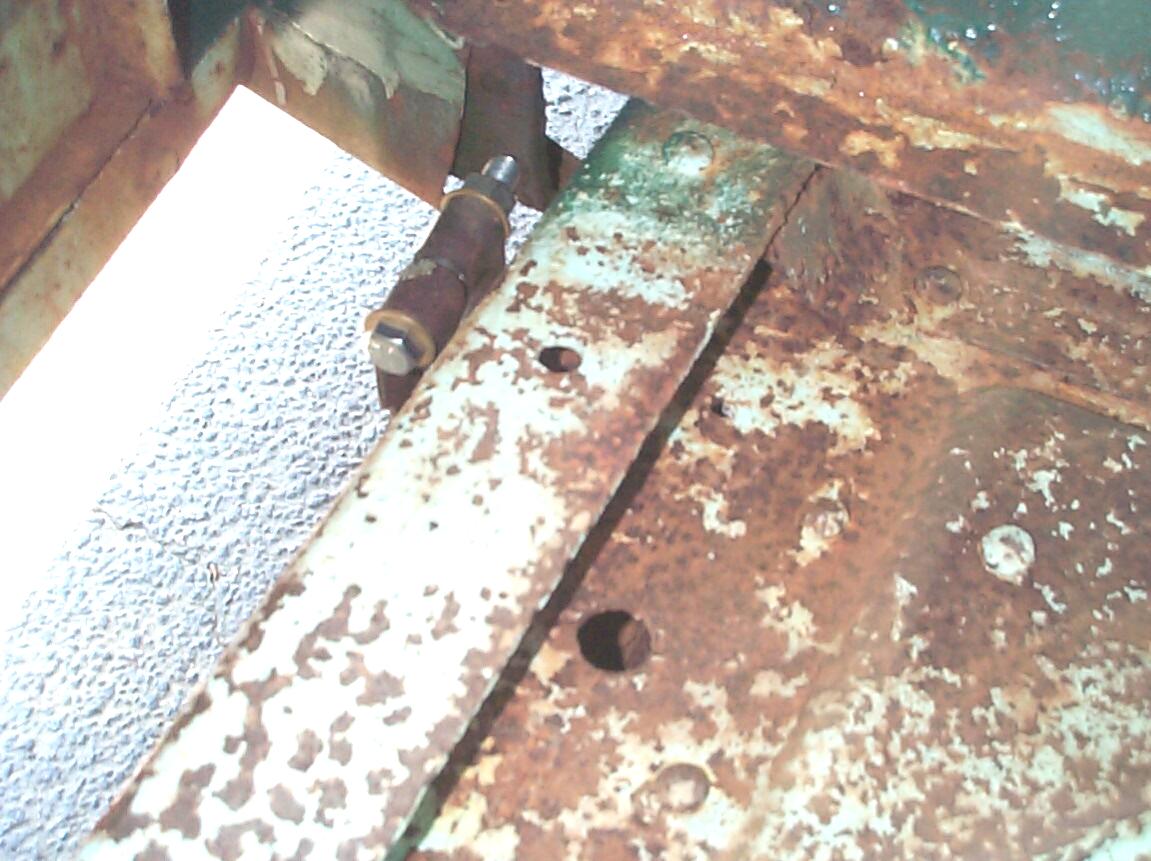
July 28th 2001 Back to the next phase of the parking brake assembly today since the parking brake cross shaft resides in the frame at the front of the bed. Managed to get the passenger side lever assembly and spacer off the cross shaft assembly with a bit of penetrating oil, MAPP gas torch and pickle fork. Then managed to get one of the cross shaft support bolts out to take with me to the FLAPS (Friendly Local Auto Parts Store) to look for replacements. Cleaned all the other parts in the tumbler, put everything back together and sprayed with silicone lubricant.
August 11th 2001 Didn't get much done last week. The threat of tropical storm Barry dumpin' buckets of water on the shade tree garage faked me out. Today, I did the same thing with the driver side parking brake lever assembly that I did two weeks ago with the passenger side. Between then and today, I picked up 3/8"-24 x 1-1/4" Grade 5 replacement cap screws, hex nuts and lock washers for the cross-shaft support brackets. Looks like I'm also gonna need replacement bolts for the levers themselves. These appear to be 7/16" x 3" bolts.
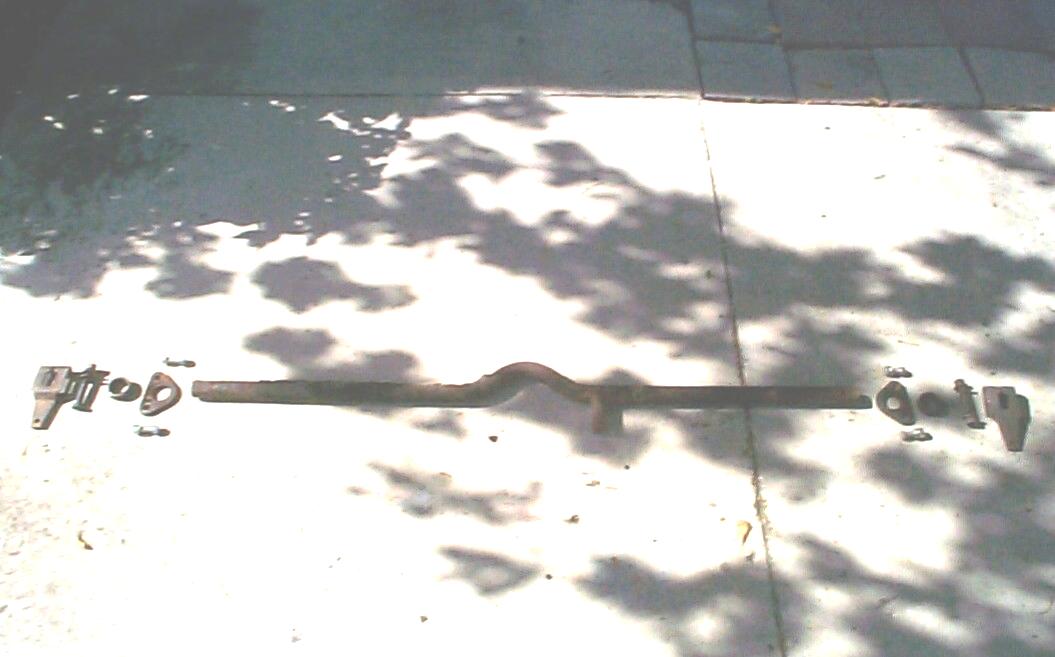 August
18th 2001 Some banging
with the ball-peen, some torch heat, some penetrating oil and a smidgen
of calm reasoning and I had the parking brake cross-shaft out. Went to
a FLAPS and a mom'n pop hardware store during the week but was
unsuccessful locating the lever bolt replacements, so I went online and
ordered them from McMaster-Carr along with some
blasting media. I should have them before next weekend. Put all the
small parts in the tumbler for a cleaning session and went after the
cross-shaft with putty knife and wire brush.
August
18th 2001 Some banging
with the ball-peen, some torch heat, some penetrating oil and a smidgen
of calm reasoning and I had the parking brake cross-shaft out. Went to
a FLAPS and a mom'n pop hardware store during the week but was
unsuccessful locating the lever bolt replacements, so I went online and
ordered them from McMaster-Carr along with some
blasting media. I should have them before next weekend. Put all the
small parts in the tumbler for a cleaning session and went after the
cross-shaft with putty knife and wire brush.
Then I went over the cross-shaft with a couple of sheets of wet 80 grit sandpaper. After the tumbler session, the boxed sections of the frame that the cross-shaft passes through were cleaned out with the shop vac. Things were then put back together for the day.
August 25th 2001 My maternal grandmother's birthday. If still alive, she would be 106 today. She's been gone almost thirty years and I still miss her. She paid for my first car, a 1959 Ford sedan, the car I learned to wrench on and the car oft cursed by my Dad for all the efforts he had to put into it to keep it running.
 The
bolts, washers and hex nuts I ordered from McMaster-Carr on Friday
afternoon a week ago arrived the following Monday morning. I installed
them today. They fit but were a bit too long. The washers were thin and
the full hex-nuts a bit big. The next time I do this I'll get it a
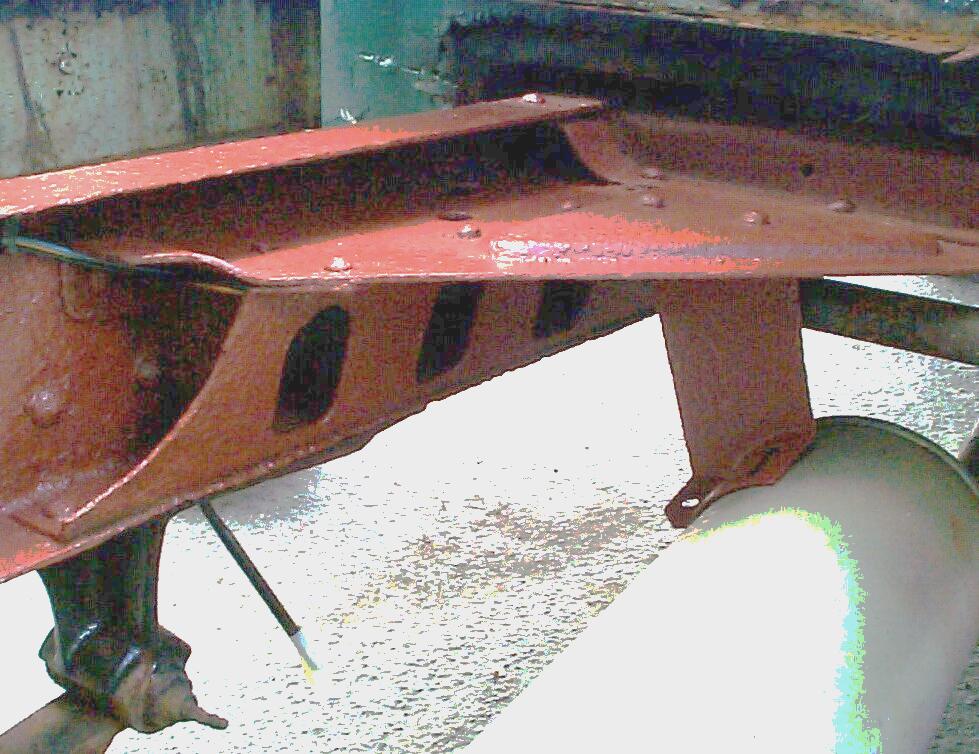
little closer. I worked on the rusty trianglar gussets at the boxed
area of the frame with 3M paint remover wheel, sanding cones and wire
brush. I'm not gettin' much done . . . Kinda at an impasse. Not really
happy with my results at this point. Do I simply finish with Corroless
rust stabilizer and Chassis Black, or do I wait until I get my siphon
blaster running and get a hopefully better job done? Yogi Berra said "When
you come to a fork in the road, take it!"
The
bolts, washers and hex nuts I ordered from McMaster-Carr on Friday
afternoon a week ago arrived the following Monday morning. I installed
them today. They fit but were a bit too long. The washers were thin and
the full hex-nuts a bit big. The next time I do this I'll get it a
little closer. I worked on the rusty trianglar gussets at the boxed
area of the frame with 3M paint remover wheel, sanding cones and wire
brush. I'm not gettin' much done . . . Kinda at an impasse. Not really
happy with my results at this point. Do I simply finish with Corroless
rust stabilizer and Chassis Black, or do I wait until I get my siphon
blaster running and get a hopefully better job done? Yogi Berra said "When
you come to a fork in the road, take it!"
October 6th 2001 It's been well over a month since I've seriously worked on BillyBob. I took a two-week vacation up north that straddled Labor Day. None of my co-workers were considerate enuf to do my work while I was gone so I was really Preoccupied with the backlog when I returned . . . Then 9-11 and the Black September War started. It took awhile for shock to turn to anger to be replaced in turn with resolute determiniation to fight this assault on my country and my way of life.
I didn't feel like doin' much of anything for a bit. Then, last night, I watched "Hatari" the 1962 John Wayne movie directed by Howard Hawks about catching animals for zoos in Africa. The main star of the show is an early stovebolt AD chase truck. Nothin' can perk up an ole trucker more than watchin' (and listenin' to) that older brother of BillyBob running hellbent for leather across the savanna with the Duke perched on the front fender. The other vehicles were interesting too - a pair of long-bed jeep CJ types, a Jeep forward control truck, a Dodge Power Wagon and even an old WWII era Mercedes 1-1/2 or 2 ton truck. The AD even forded a river, then pulled out one of the Jeeps that stalled half-way across . . . Doesn't get any better than that. After that movie I was ready for work again.
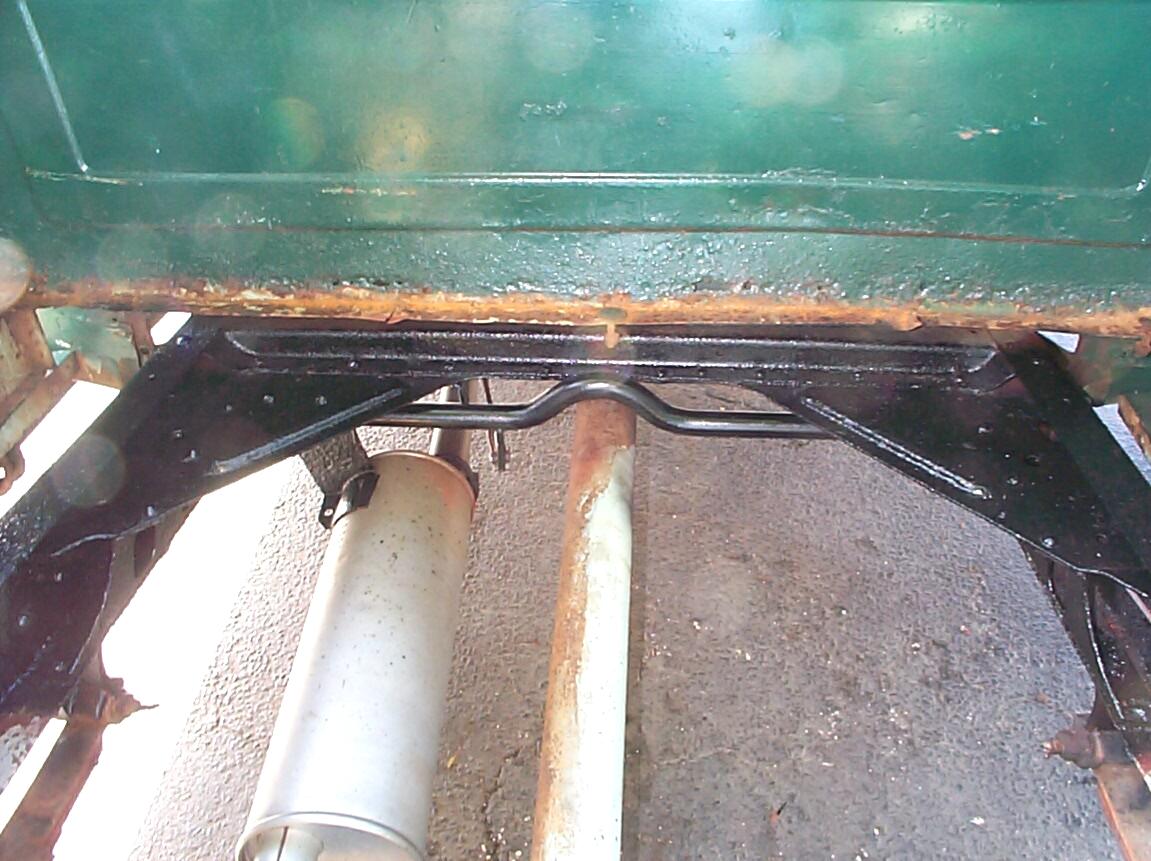
 I
had gotten over my dithering regarding the level of finish to pursue .
. . I'm sticking with the Stage I repair methods rather than pursue
perfection. With that in mind, the parking brake cross shaft assembly
was again dismantled and small parts were thrown in the tumbler for a
cleaning session. The taillight wiring was disconnected from the bullet
connectors installed earlier in this area and the wiring was moved out
of the way. A combination of Corroless rattlecan and brush applied
coats were placed in the boxed frame portion and gusset area on the
driver's side. I did my best, but it's difficult to get full coverage
in this area.
I
had gotten over my dithering regarding the level of finish to pursue .
. . I'm sticking with the Stage I repair methods rather than pursue
perfection. With that in mind, the parking brake cross shaft assembly
was again dismantled and small parts were thrown in the tumbler for a
cleaning session. The taillight wiring was disconnected from the bullet
connectors installed earlier in this area and the wiring was moved out
of the way. A combination of Corroless rattlecan and brush applied
coats were placed in the boxed frame portion and gusset area on the
driver's side. I did my best, but it's difficult to get full coverage
in this area.
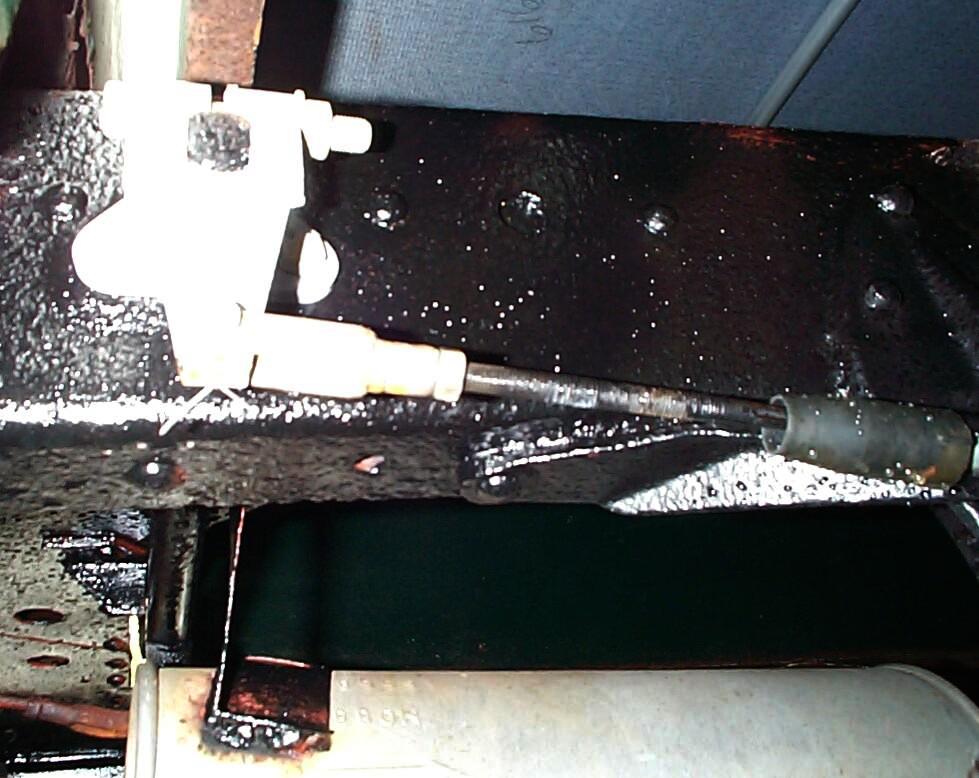
October 13th 2001 Couple of setbacks today so far. A crew showed up to resurface the parking lot without notice, so I had to relocate BillyBob to the other side of the shadetree (the side without shade). Then, we had an hour long power outage which messed up all the computers I was trying to backup inside the Krash Lab. Despite these interruptions, I'm makin' some progress. This week, I've got the passenger side boxed frame portion and gusset area to treat with Corroless. The brake line runs down this side of the frame and I can't just move it out of the way like the wiring on the driver's side. I don't want to paint the brake lines.
 Been
pondering the brake line problem for some time . . . thought 'bout
using various kinds of rubber or plastic tubing to mask it off. Went
out to Home Depot on Thursday and, out of desperation, grabbed a length
of 3/4" foam pipe insulation to use. On the way back to the Krash Lab I
knew this wasn't going to work. The insulation was too big in diameter
and the Corroless would probably melt it. I had a flash of inspiration!
Once again, something from the kitchen would provide the perfect
solution: 7-1/4" plastic drinking straws! These things could be slit
easily down one side with sissors and slipped over the brake line for a
snug fit. I love it when I figure out one of these little tips by
myself. The cross shaft was taken out again and both ends treated with
Corroless at the same time the passenger side of the frame was. After a
couple of hours, the cross shaft was reinstalled and the remaining
center section of the shaft painted in place with Corroless.
Been
pondering the brake line problem for some time . . . thought 'bout
using various kinds of rubber or plastic tubing to mask it off. Went
out to Home Depot on Thursday and, out of desperation, grabbed a length
of 3/4" foam pipe insulation to use. On the way back to the Krash Lab I
knew this wasn't going to work. The insulation was too big in diameter
and the Corroless would probably melt it. I had a flash of inspiration!
Once again, something from the kitchen would provide the perfect
solution: 7-1/4" plastic drinking straws! These things could be slit
easily down one side with sissors and slipped over the brake line for a
snug fit. I love it when I figure out one of these little tips by
myself. The cross shaft was taken out again and both ends treated with
Corroless at the same time the passenger side of the frame was. After a
couple of hours, the cross shaft was reinstalled and the remaining
center section of the shaft painted in place with Corroless.
October 20th 2001 Got a good start today. The cross shaft assembly was disassembled again and the small parts tossed in the tumbler. The corroless treated areas of the frame were prepped and painted with Eastwood's Chassis Black. I wanted to treat the small parts with Eastwood's OxiSolve after the tumbler session, so after drying the parts and removing the tumbler medium, I poured OxiSolv into the tumbler bowl over the parts . . . ~!@#$% That's not OxiSolv, that's brake fluid!! Damn, there goes a gallon of DOT 3 brake fluid to the hazardous waste dump. After cursing and cleanup, I started over with the right container.
 After
thirty minutes in the OxiSolv, all the small parts except the fasteners
were treated with PRE Paint Prep and given a coat of Plastikote primer.
The fasteners were tin-zinc plated with Eastwood's kit. At this point,
my luck ran out and it started raining hard with no sign of letup. I
got the tools and painted parts undercover in time, but I had to put
BillyBob's parking brake back together in the rain. And to top the day
off, I noticed a slow leak in the passenger side rear tire, so I'm
gonna have to stop work on the chassis to address that problem. Oh joy!
After
thirty minutes in the OxiSolv, all the small parts except the fasteners
were treated with PRE Paint Prep and given a coat of Plastikote primer.
The fasteners were tin-zinc plated with Eastwood's kit. At this point,
my luck ran out and it started raining hard with no sign of letup. I
got the tools and painted parts undercover in time, but I had to put
BillyBob's parking brake back together in the rain. And to top the day
off, I noticed a slow leak in the passenger side rear tire, so I'm
gonna have to stop work on the chassis to address that problem. Oh joy!
October 24th 2001 The rains have stopped, so I took a box of tools and a jack stand up to the warehouse to get BillyBob's wheel off to take to the local Goodyear Tire store a couple of blocks from the Krash Lab. Havin' a couple of days to think about the problem saved me some backache and dollars. At first, my plan was to take the floor jack up to the warehouse, but gettin' it in and out of the Renegade would have been a bear. My maternal Grandfather, a nominal Methodist, would have said the jack was "heavier than a dead Baptist Preacher!" If you dropped it, it wouldn't stop 'til it reached Hell. Then I thought I'd pick up a little hydraulic jack at the FLAPS. A little more time passed and before I wasted my money, the heal of my palm smacked into my forehead (this happens often) as I realized I could use Renegade's sissors jack, and that's what I did at lunch time.
November 3rd 2001 Well, I didn't have BillyBob's tire back by last weekend so I had to do somethin' else. The guy at the tire place told me on the previous Friday that "the old guy who works on this old stuff" hadn't come into the shop til that day and they decided I needed a new inner tube which would take a few days to get there. I hadn't heard anything all week so I stopped by yesterday only to find out they were still waiting on the inner tube. Drat! My only consolation is that it will probably be a lousy weekend in the shade tree garage, weather-wise . . . Hurricane Michele is heading for Cuba and, at the very least, will rub South Florida's bottom the wrong way for the next few days.
November 11th 2001 Armistice Day. I give a citizen's salute to all who protect me, past, present and future. I'm reminded of my favorite George Orwell quote "We sleep safe in our beds because rough men stand ready in the night to visit violence on those who would do us harm." We may not feel quite as safe since 9-11, but it would be much worse without the young service men and women who serve at the bleeding edge of this conflict. It's time for us ordinary citizens to be "minutemen" and take more responsibility for our own defense too. It's OK to be fearful. Courageous people are usually scared but what makes them courageous is that they carry on anyway. In the words of Hero Todd Beamer, Let's Roll.
I have time to be philosophical 'cause BillyBob isn't rolling yet. I'm starting to get a little disapointed in my local friendly Goodyear tire store. They've had BillyBob's wheel for 2-1/2 weeks now. They say they're waiting on an inner tube. On Thursday, I ordered an inner tube from the Coker website to speed things up. I should have had the foresight to do this earlier, I suppose. In the mean time, Murphy's taunting me with good weekend weather. Even last weekend during Hurricane Michele it only rained for about two hours on Saturday in the shadetree garage.
 November
17th 2001 four weeks
and BillyBob is on the road again and back under the shadetree. Started
out today by removing the parking brake cross shaft levers and supports
again. four weeks of surface rust (on the wearing edges) were sanded
away, the parts were treated with PRE paint prep and sprayed with
Eastwood's Underhood Black paint. The bolts, nuts, clevis and other
tin-zinc plated hardware were tossed in the tumbler for a cleaning
session. I also gave the exposed portions of the parking brake cable
threads a coat of Underhood Black. After the cleaning session the parts
in the tumbler were treated to another session in the tumbler with the
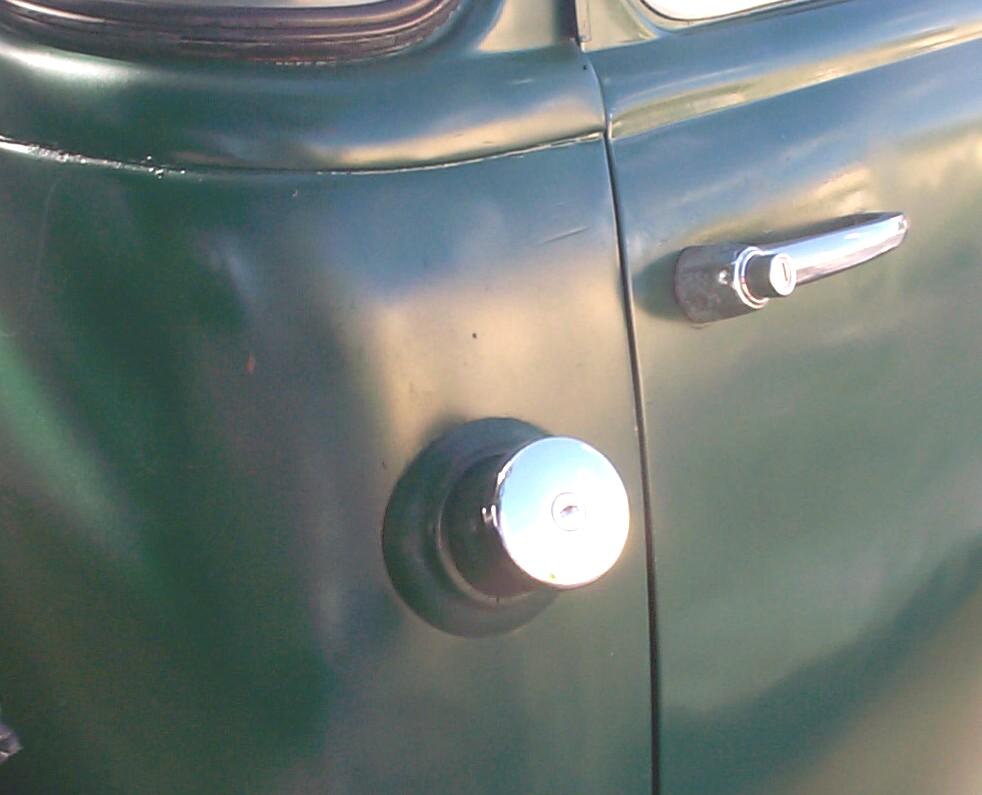
dry polishing media. while paint dried and hardware was polished, I
replaced the gas cap with a locking gas cap orig type A (#23-155)
received from Chevy Duty last week. A nice touch
is that the keys have the word "GAS" imprinted on them. It's a vented
cap (very important if you don't want to collapse the gas tank).
November
17th 2001 four weeks
and BillyBob is on the road again and back under the shadetree. Started
out today by removing the parking brake cross shaft levers and supports
again. four weeks of surface rust (on the wearing edges) were sanded
away, the parts were treated with PRE paint prep and sprayed with
Eastwood's Underhood Black paint. The bolts, nuts, clevis and other
tin-zinc plated hardware were tossed in the tumbler for a cleaning
session. I also gave the exposed portions of the parking brake cable
threads a coat of Underhood Black. After the cleaning session the parts
in the tumbler were treated to another session in the tumbler with the
dry polishing media. while paint dried and hardware was polished, I
replaced the gas cap with a locking gas cap orig type A (#23-155)
received from Chevy Duty last week. A nice touch
is that the keys have the word "GAS" imprinted on them. It's a vented
cap (very important if you don't want to collapse the gas tank).
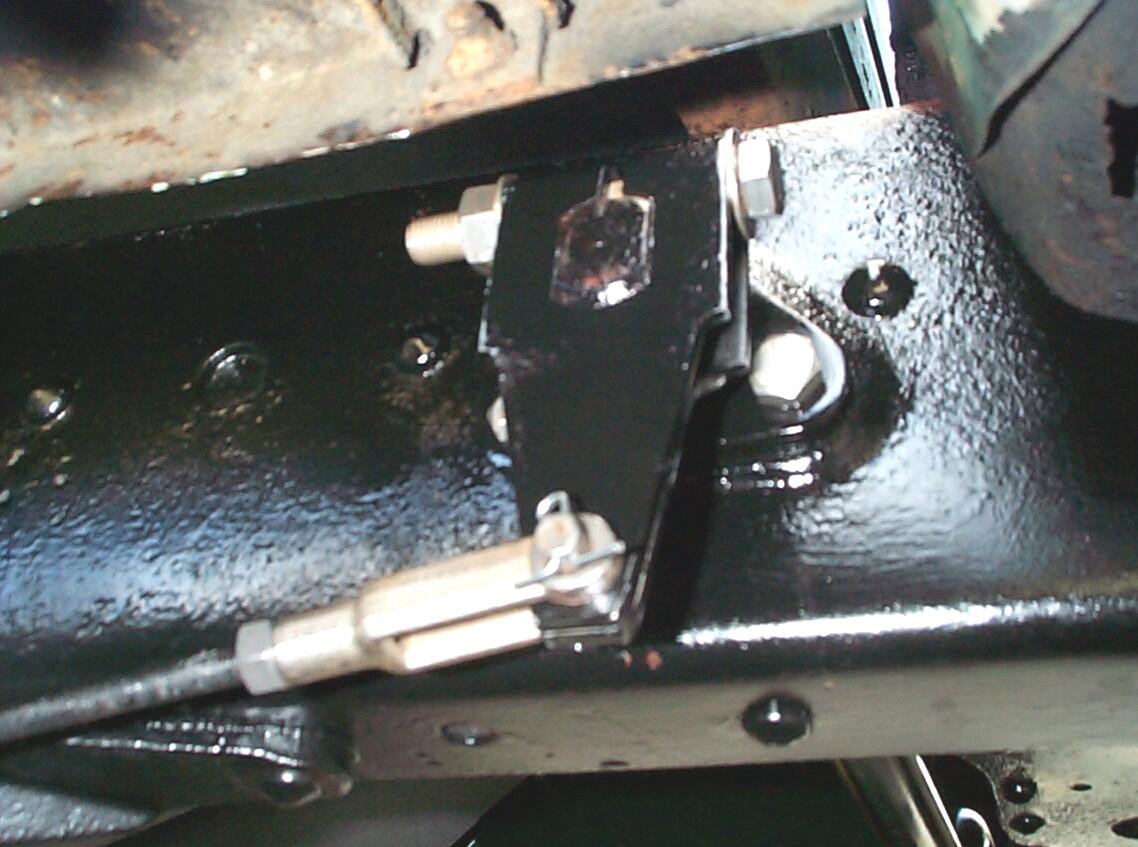 After
the polishing session, the cross shaft lever assembly was carefully
re-assembled marring as few new finishes as possible. New parking cable
boots were also ordered from Chevy Duty a couple of weeks back to
replace the ones I butchered on the first try. The fronts of these
boots have a 1/4" long nipple that has a hole the size of a pencil lead
in it to "slip" over the threaded cable ends. Last time I didn't know
how to make this work so, I cut the nipples off. This time I used a tip
from a fellow ole trucker, Billy "Hoot" Gibson, from the forums. Hoot
uses needle nose pliers to spread grommets during installation to make
them fit over whatever they protect. I put a drop of liquid soap on my
long bent needle nose pliers and made the nipple opening big enuf to
slip over the cable ends. After finishing the clevis installation, the
parking brake was applied and the boots were slid back as far as they
would go to their final position. Finally, the parking brake lever
assemblies were wiped down with PRE paint prep and painted with
Eastwood's Clear Coat Barrier (#13095Z).
After
the polishing session, the cross shaft lever assembly was carefully
re-assembled marring as few new finishes as possible. New parking cable
boots were also ordered from Chevy Duty a couple of weeks back to
replace the ones I butchered on the first try. The fronts of these
boots have a 1/4" long nipple that has a hole the size of a pencil lead
in it to "slip" over the threaded cable ends. Last time I didn't know
how to make this work so, I cut the nipples off. This time I used a tip
from a fellow ole trucker, Billy "Hoot" Gibson, from the forums. Hoot
uses needle nose pliers to spread grommets during installation to make
them fit over whatever they protect. I put a drop of liquid soap on my
long bent needle nose pliers and made the nipple opening big enuf to
slip over the cable ends. After finishing the clevis installation, the
parking brake was applied and the boots were slid back as far as they
would go to their final position. Finally, the parking brake lever
assemblies were wiped down with PRE paint prep and painted with
Eastwood's Clear Coat Barrier (#13095Z).
 OK.
We're finished with the first phase of the Undercover Frame Job. Next
step in this series will be removing the old shocks and aftermarket
helper springs, refinishing the frame in that area, refinishing the
drive shaft, and installing new shocks. But before I do that is the
Thanksgiving four day weekend. That's four days straight to work on
BillyBob an' I'm usin' them to install the main wiring harness I bought
almost eighteen months ago. My electrical adventures will be the next
log entry posted. See Ya then.
OK.
We're finished with the first phase of the Undercover Frame Job. Next
step in this series will be removing the old shocks and aftermarket
helper springs, refinishing the frame in that area, refinishing the
drive shaft, and installing new shocks. But before I do that is the
Thanksgiving four day weekend. That's four days straight to work on
BillyBob an' I'm usin' them to install the main wiring harness I bought
almost eighteen months ago. My electrical adventures will be the next
log entry posted. See Ya then.
| < Back
to Intro |
You can email me at ![]() webmaster@laroke.com
webmaster@laroke.com
Issued Sunday November 18, 2001
Updated Friday May 19, 2017
copyright © 1996-2017 Larry Robert Kephart all rights reserved
| | LRK Home | | Bio Info | | Krash Khronicles | | LAROKE | |
| | BettyLou | | BillyBob's Garage | | Rat Patrol | | Deerslayer | | Elvira | |
| | Land of the Free and Home of the Brave | |
| | Keppylou's Art | | WWI Soldier's Diary | |