| | LRK Home | | Bio Info | | Krash Khronicles | | LAROKE | |
| | BettyLou | | BillyBob's Garage | | Rat Patrol | | Deerslayer | | Elvira | |
| | Land of the Free and Home of the Brave | |
| | Keppylou's Art | | WWI Soldier's Diary | |
BillyBob Work-in-Progress Log
![]()
TRUCK LINKS including vendor sites for old parts, custom parts, and tools as well as sites for classic car and truck organizations
STORE Operating in association with Amazon.com, books, recordings and tools can be purchased.
PLANNING for the restoration including project schedule and cost estimates.
![]()
WORK-IN-PROGRESS is the restoration of parts of BillyBob that I can accomplish without a garage.
PRE-RESTORATION includes log entries of minor repairs and and adventures between time of purchase and the time when I started restoration, a piece at a time.
JR'S KORNER JR's Korner is the history of BillyBob before I got him authored by my brother, Wm. C. Kephart.
4. Spifin' up the Steering Wheel Page 1
 June
24th 2000 I'm gonna
have to pull the steering wheel, I think, to get at the horn wiring,
and it would also help me with my shift lever repairs with the wheel
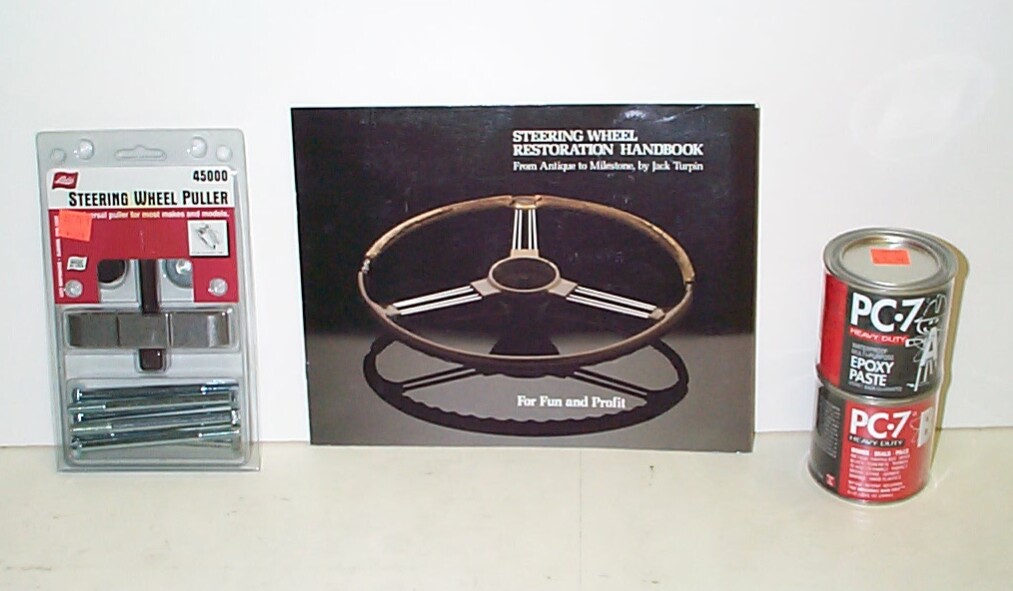
out of the way, so I ordered The Eastwood Company's Steering
Wheel Restoration Kit (catalog #52061) since that job has to be done
sooner or later and the kit includes a wheel puller.
June
24th 2000 I'm gonna
have to pull the steering wheel, I think, to get at the horn wiring,
and it would also help me with my shift lever repairs with the wheel
out of the way, so I ordered The Eastwood Company's Steering
Wheel Restoration Kit (catalog #52061) since that job has to be done
sooner or later and the kit includes a wheel puller.
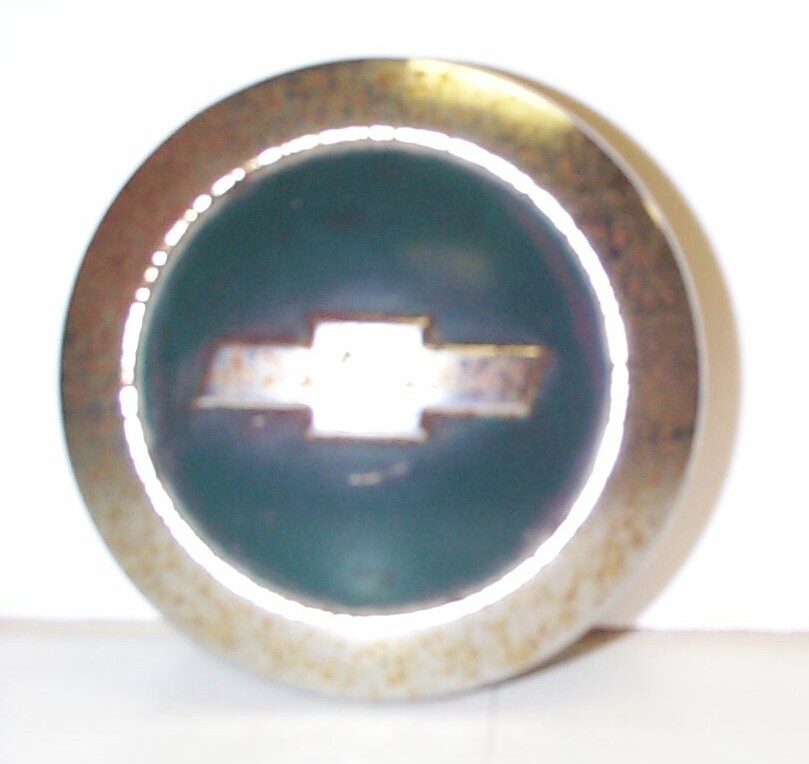
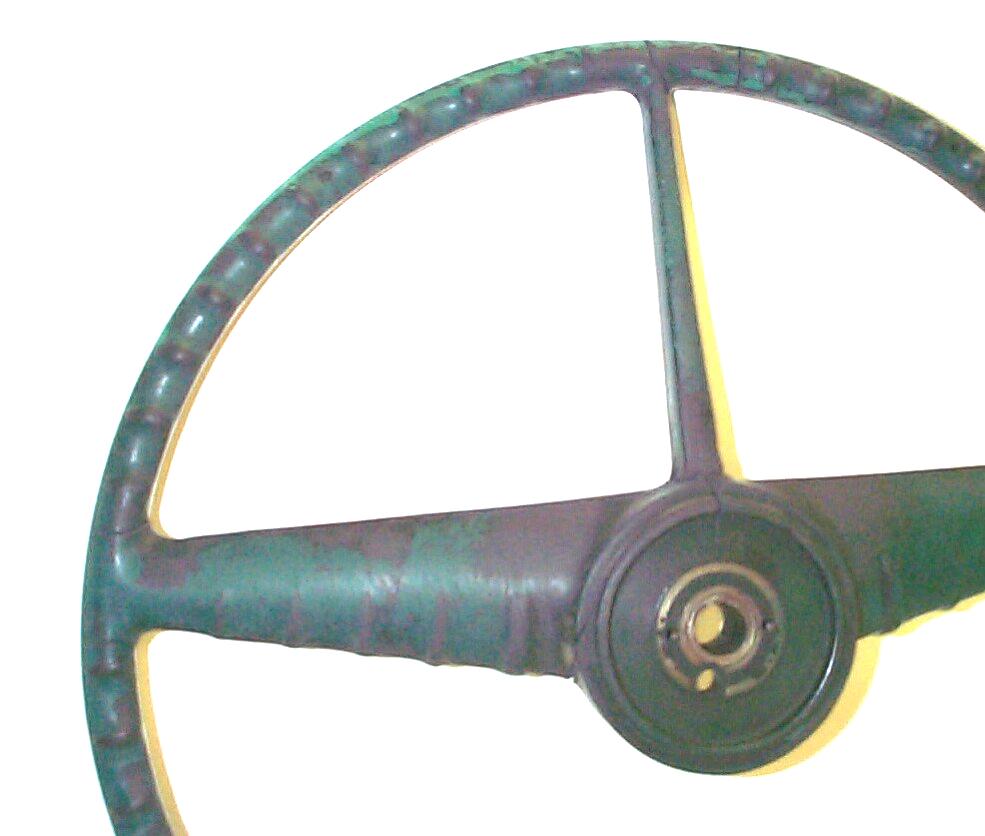
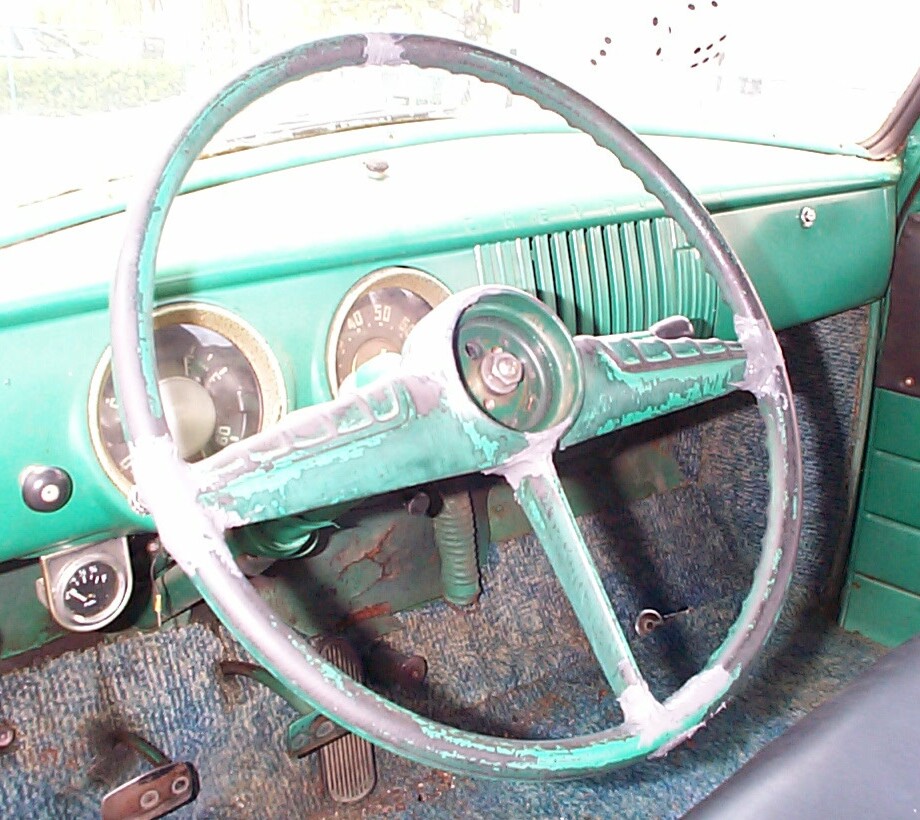
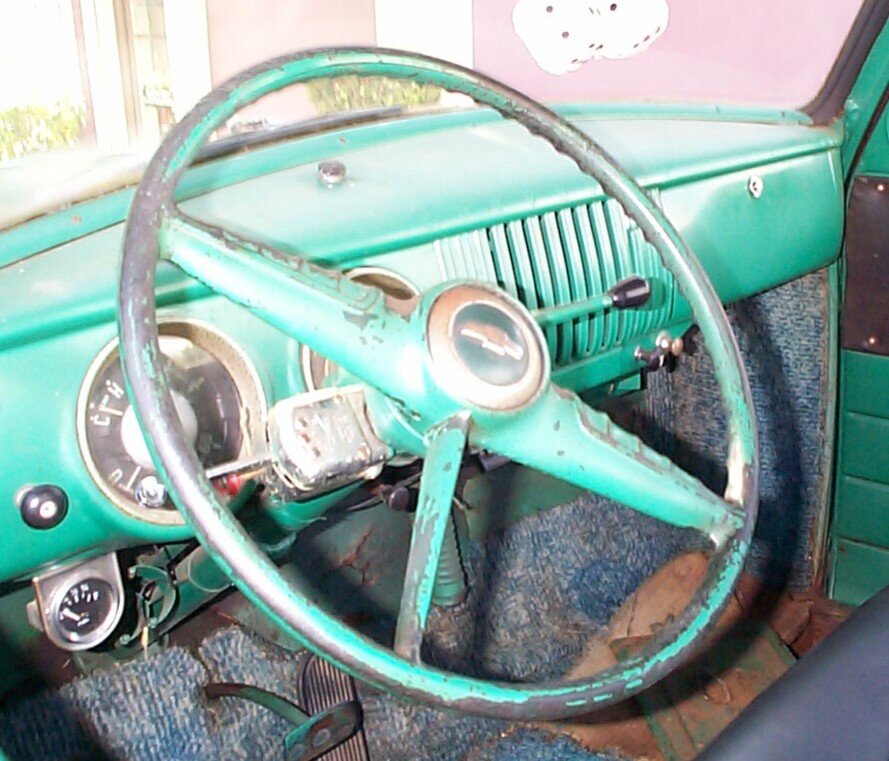 Here's
what the steering wheel looks like after forty-five years of bad roads.
Lots of the ole truck vendors have a replacement horn button for the
previous AD years but it changed for 1954 and 1955 1st
Series and I haven't found a replacement for BillyBob yet. I may have
to do my best to clean up his existing button.
Here's
what the steering wheel looks like after forty-five years of bad roads.
Lots of the ole truck vendors have a replacement horn button for the
previous AD years but it changed for 1954 and 1955 1st
Series and I haven't found a replacement for BillyBob yet. I may have
to do my best to clean up his existing button.
I pulled the steering wheel for the first time in many years, I suspect. The Factory Assembly Manual Steering Wheel Instruction Page was checked first for reference. It's nice having a battery cut-off switch in times like this. Power was cut and the horn button pried off with a flat-bladed screwdriver. Steering wheel nut and flat washer removed with a 3/4" socket, then the horn button contact assembly lifted out. Contact and spring assembly lifted out of its "well", then Kroil/AeroKroil applied to the shaft below the nut. A squirt of WD40 went into each of the puller holes as the threads were slightly rusty.
 I
made sure the front wheels were straight ahead and took note of the
wheel position at this point in case the shaft isn't keyed for the
standard position. The puller is a universal tool with bolts for three
different steering wheel threads. It goes together pretty
straightforward (no instructions) and worked nicely in BillyBob's case.
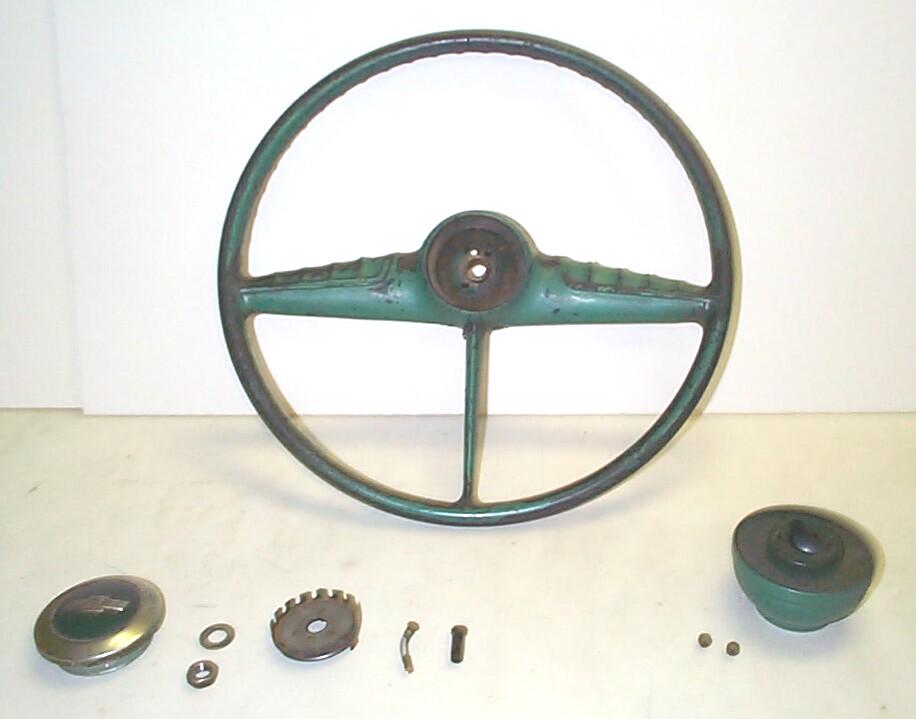
Turned the wheel over and removed the Hub Cover Assembly from the back.
Here are all the steering wheel parts in the unrestored state.
I
made sure the front wheels were straight ahead and took note of the
wheel position at this point in case the shaft isn't keyed for the
standard position. The puller is a universal tool with bolts for three
different steering wheel threads. It goes together pretty
straightforward (no instructions) and worked nicely in BillyBob's case.
Turned the wheel over and removed the Hub Cover Assembly from the back.
Here are all the steering wheel parts in the unrestored state.
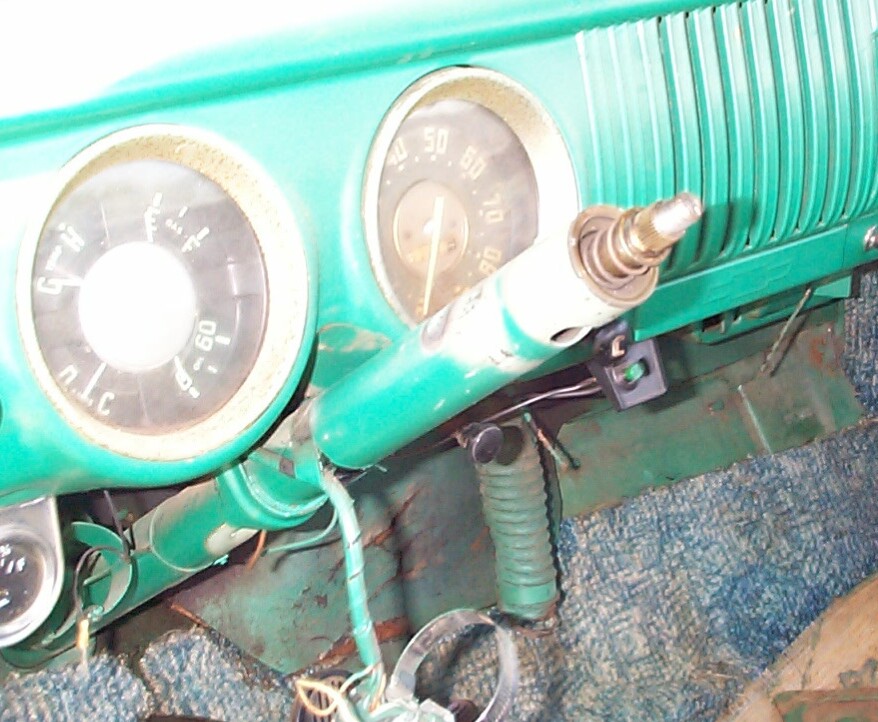 Cleaned
up the steering column a little after removing the gearshift lever
assembly for other work and the aftermarket turn signal assembly. Looks
like some previous owner painted BillyBob's interior a darker green
than original some time after installing the turn signals.
Cleaned
up the steering column a little after removing the gearshift lever
assembly for other work and the aftermarket turn signal assembly. Looks
like some previous owner painted BillyBob's interior a darker green
than original some time after installing the turn signals.
 July
1st 2000 We've got a
storm front stalled over us on the Gold Coast this Independence Day
weekend. I'm not getting much done on BillyBob. I ordered AutoSol metal
polish (catalog #13170) from Eastwood early in the week to clean up the
horn button. I washed the the button with soap and water, then applied
Goo-Off to get some of the more stubborn dirt out of the painted area.
I had only limited success. I tried an application of the AutoSol by
hand. It did pretty well, but there's still a lot of rust and I think
some kind of machine buffing is called for.
July
1st 2000 We've got a
storm front stalled over us on the Gold Coast this Independence Day
weekend. I'm not getting much done on BillyBob. I ordered AutoSol metal
polish (catalog #13170) from Eastwood early in the week to clean up the
horn button. I washed the the button with soap and water, then applied
Goo-Off to get some of the more stubborn dirt out of the painted area.
I had only limited success. I tried an application of the AutoSol by
hand. It did pretty well, but there's still a lot of rust and I think
some kind of machine buffing is called for.
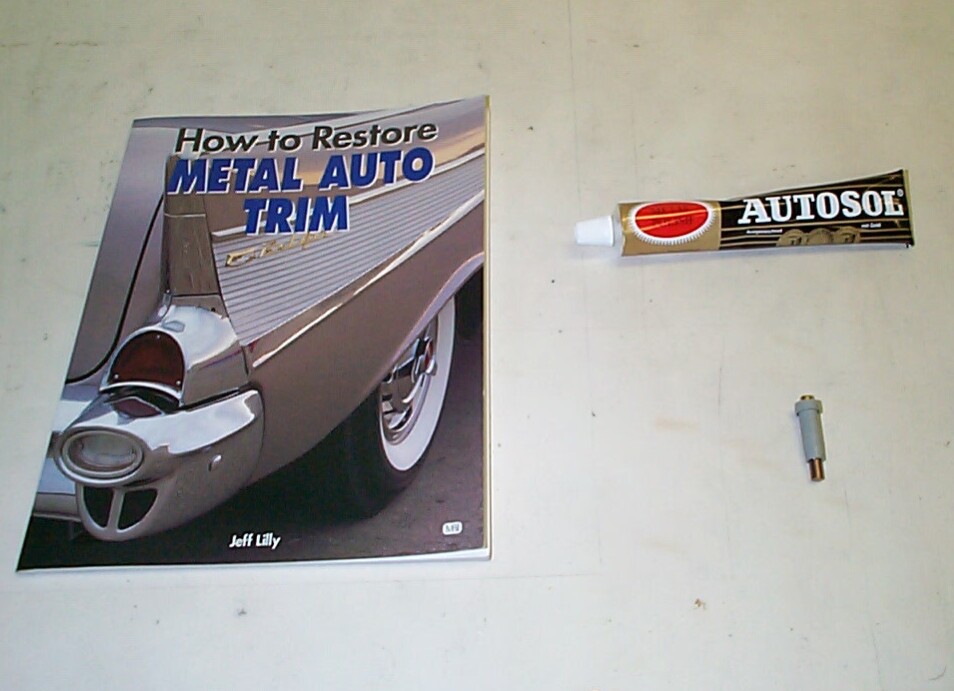 Some
research is called for. A few months back I ordered How to Restore Metal Automotive Trim
by Jeff Lilly. from Amazon.com. Guess it's time to dig into it some.
This last week I ordered a new Horn Contact Spring and Bushing assembly
(catalog #27-225) from Chevy Duty. When I had the
steering wheel dis-assembled last week, I noticed the old contact was
well-worn where it where it rode the top of the steering column. This
is as good a time as any to replace it. Pulled the steering wheel again
and went over it with the Cleaning Wheel (#31095) I got from Eastwood
back when I was doing the wheels refurb.
I quit when I ran down one of the cordless drill batteries. I've found
I tend to start getting sloppy when I do the same tedious task too
long. The interval it takes to run down a battery is a good timer for
me. I washed the steering wheel with soap and water and re-installed it.
Some
research is called for. A few months back I ordered How to Restore Metal Automotive Trim
by Jeff Lilly. from Amazon.com. Guess it's time to dig into it some.
This last week I ordered a new Horn Contact Spring and Bushing assembly
(catalog #27-225) from Chevy Duty. When I had the
steering wheel dis-assembled last week, I noticed the old contact was
well-worn where it where it rode the top of the steering column. This
is as good a time as any to replace it. Pulled the steering wheel again
and went over it with the Cleaning Wheel (#31095) I got from Eastwood
back when I was doing the wheels refurb.
I quit when I ran down one of the cordless drill batteries. I've found
I tend to start getting sloppy when I do the same tedious task too
long. The interval it takes to run down a battery is a good timer for
me. I washed the steering wheel with soap and water and re-installed it.
July 6th 2000 Last Saturday, the constant threat of downpour kept my BillyBob activity to a minimum. The overcast sky had a dampening effect on my mood. So what can we boys do when we can't do anything else? Pop a top on a brewski would be my first choice, but since I'm saving drinking for my rockin' chair retirement, that option is currently closed to me, so I did the next best thing . . . I went online and ordered a shiny new tool. At Amazon.com I ordered a Dremel "Professional" high speed rotary tool.
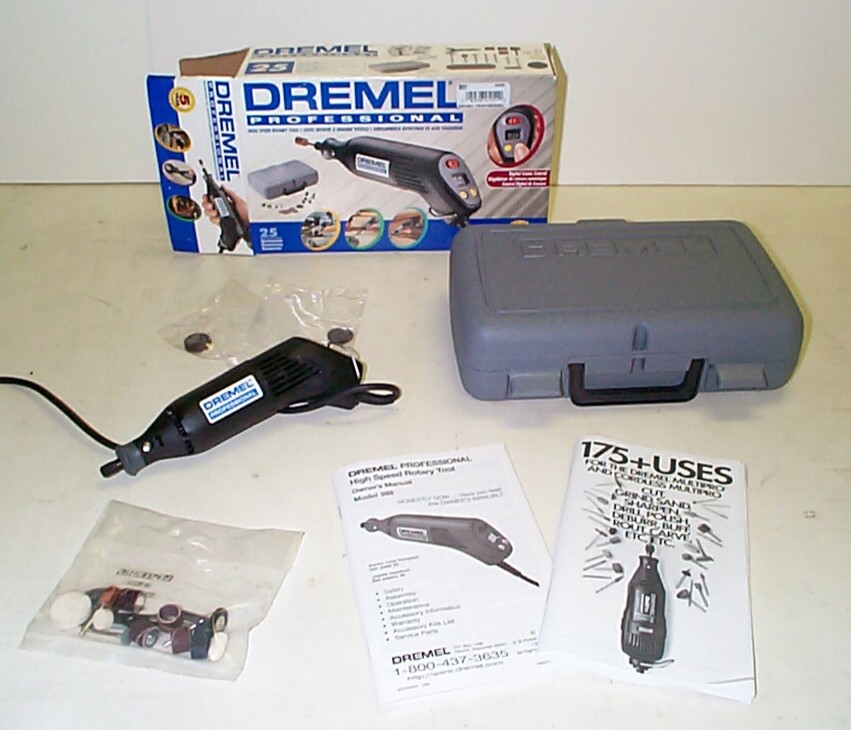 I've
wanted a Dremel moto-tool for over two-thirds of my life. When JR and I
were growing up in the early sixties, we used to stand in front of the
Dremel display at the local hobby shop for hours slobbering. With our
meager allowances of the time, we couldn't afford drool cups to keep
the spittle off our shirts, let alone this ultimate of hobby tools. But
we could dream, and dream, we did. The dreaming is over. I received my
first Dremel today courtesy UPS delivery.
I've
wanted a Dremel moto-tool for over two-thirds of my life. When JR and I
were growing up in the early sixties, we used to stand in front of the
Dremel display at the local hobby shop for hours slobbering. With our
meager allowances of the time, we couldn't afford drool cups to keep
the spittle off our shirts, let alone this ultimate of hobby tools. But
we could dream, and dream, we did. The dreaming is over. I received my
first Dremel today courtesy UPS delivery.
 July
8th 2000 Seventy
percent chance of rain in our neck of the woods again today so I'm
workin' on the steering wheel again. Pulled the wheel and went after
the horn button with the new Dremel tool and the AutoSol polish. Much
better! Afterwards, I had another session with the cleaning wheel and
the steering wheel. Then used the Dremel again to sawcut all the cracks
in the steering wheel plastic down to the steel substrate beneath. The
sawcuts don't show very well in the pic, but they're there if you look
close (an' use your imagination).
July
8th 2000 Seventy
percent chance of rain in our neck of the woods again today so I'm
workin' on the steering wheel again. Pulled the wheel and went after
the horn button with the new Dremel tool and the AutoSol polish. Much
better! Afterwards, I had another session with the cleaning wheel and
the steering wheel. Then used the Dremel again to sawcut all the cracks
in the steering wheel plastic down to the steel substrate beneath. The
sawcuts don't show very well in the pic, but they're there if you look
close (an' use your imagination).
 July
15th 2000 Struck out in
my efforts to get any more of the gearshift linkage project done today
so I'm back to the steering wheel where I can make a little progress
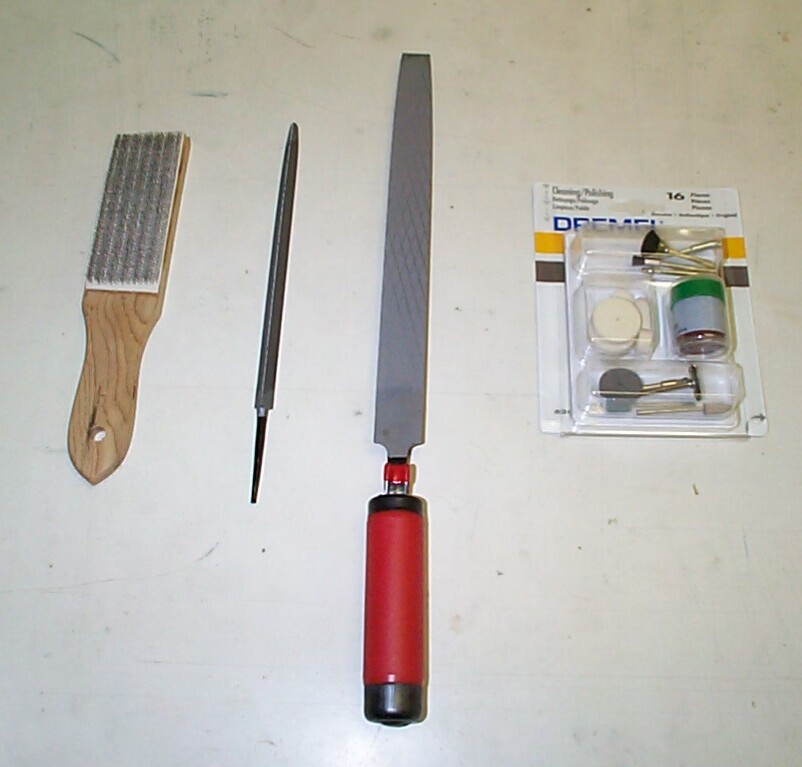
and save face. I picked up a Craftsman 10" Multi-kut Flat File, 7"
Triangular Taper File, Tool Handle, and File Cleaner at Sears early in
the week. The Dremel 16-piece Cleaning/Polishing kit
also arrived from Amazon.com.
July
15th 2000 Struck out in
my efforts to get any more of the gearshift linkage project done today
so I'm back to the steering wheel where I can make a little progress
and save face. I picked up a Craftsman 10" Multi-kut Flat File, 7"
Triangular Taper File, Tool Handle, and File Cleaner at Sears early in
the week. The Dremel 16-piece Cleaning/Polishing kit
also arrived from Amazon.com.
I pulled the steering wheel and beveled last week's sawcuts with the triangular file. The steering wheel was cleaned with canned air then I mixed up a small batch of the epoxy that came with the Eastwood steering wheel repair kit. Warning lights were coming on in the dark reaches of my brain but I didn't know why yet. I was half-way thru applying epoxy to the steering wheel when I realized I'd had a doozie of a brain-fart.
 I
always have logistics problems to hammer out for my "Stage I" projects.
They primarily deal with the fact that I have to drive BillyBob back
and forth to his warehouse bay at the beginning and end of the work
sessions. I had planned to take BillyBob's steering wheel off at the
warehouse and bring it to my workplace in my Jeep for the epoxy and
painting process, but here I am putting epoxy on the wheel and BillyBob
sits out in the parking lot! I had gotten ahead of my plan and now I'll
suffer for it. I finished applying the epoxy and remounted the wheel on
BillyBob. The epoxy build-ups were shaped a bit at this point by the
"finger dipped in Lacquer thinner" method. I'll just have to manage the
drive back to the barn without touching the epoxy. At least the streets
along the route are fairly quiet.
I
always have logistics problems to hammer out for my "Stage I" projects.
They primarily deal with the fact that I have to drive BillyBob back
and forth to his warehouse bay at the beginning and end of the work
sessions. I had planned to take BillyBob's steering wheel off at the
warehouse and bring it to my workplace in my Jeep for the epoxy and
painting process, but here I am putting epoxy on the wheel and BillyBob
sits out in the parking lot! I had gotten ahead of my plan and now I'll
suffer for it. I finished applying the epoxy and remounted the wheel on
BillyBob. The epoxy build-ups were shaped a bit at this point by the
"finger dipped in Lacquer thinner" method. I'll just have to manage the
drive back to the barn without touching the epoxy. At least the streets
along the route are fairly quiet.
| < Back to Intro |
You can email me at ![]() webmaster@laroke.com
webmaster@laroke.com
Issued Saturday December 2, 2000
Updated Tuesday April 25, 2017
copyright © 1996-2017 Larry Robert Kephart all rights reserved
| | LRK Home | | Bio Info | | Krash Khronicles | | LAROKE | |
| | BettyLou | | BillyBob's Garage | | Rat Patrol | | Deerslayer | | Elvira | |
| | Land of the Free and Home of the Brave | |
| | Keppylou's Art | | WWI Soldier's Diary | |