| | LRK Home | | Bio Info | | Krash Khronicles | | LAROKE | |
| | BettyLou | | BillyBob's Garage | | Rat Patrol | | Deerslayer | | Elvira | |
| | Land of the Free and Home of the Brave | |
| | Keppylou's Art | | WWI Soldier's Diary | |
BillyBob Work-in-Progress Log
![]()
TRUCK LINKS including vendor sites for old parts, custom parts, and tools as well as sites for classic car and truck organizations
STORE Operating in association with Amazon.com, books, recordings and tools can be purchased.
PLANNING for the restoration including project schedule and cost estimates.
![]()
WORK-IN-PROGRESS is the restoration of parts of BillyBob that I can accomplish without a garage.
PRE-RESTORATION includes log entries of minor repairs and and adventures between time of purchase and the time when I started restoration, a piece at a time.
JR'S KORNER JR's Korner is the history of BillyBob before I got him authored by my brother, Wm. C. Kephart.
2. Wheels Refurb
February 24th 2000 When BillyBob was being painted (see Slight Facelift), refurbishing the wheels appeared to be the next project in a natural progression. In the meantime, the malfunctioning gearshift linkage moved restoration of the gearshift mechanicals to the top of the project list. I was getting tired of crawling under the truck every few miles to tap the linkage with a rubber mallet. I decided to work on the wheels and the shift linkage at the same time.
 I
started to prepare for the wheels refurbishing project while still
working on the "facelift" job. A week or so back, I ordered "Wheel Tire
Masks" and "Painted Wheel Clear" from the Eastwood
Company. The items arrived this week. Yeh, yeh, I hear what
yer sayin'. Why not mask the wheels with cardboard? (or "pasteboard" as
my grandparents used to call it) The reason is that I'm over fifty and
time is more important than money in this case. I
put every decision I make through the "time vs money" calculator in my
head and quality time allways wins. It's a simple fact, given the
current limits of science, that you have a finite quantity of time to
pass through in a lifetime. I spend it doing things I like as much as
possible. Time is one of those things like "honor" and "integrity" that
you can lose or waste, but are impossible to get back. Enuf, I've
careened off on a tangent again.
I
started to prepare for the wheels refurbishing project while still
working on the "facelift" job. A week or so back, I ordered "Wheel Tire
Masks" and "Painted Wheel Clear" from the Eastwood
Company. The items arrived this week. Yeh, yeh, I hear what
yer sayin'. Why not mask the wheels with cardboard? (or "pasteboard" as
my grandparents used to call it) The reason is that I'm over fifty and
time is more important than money in this case. I
put every decision I make through the "time vs money" calculator in my
head and quality time allways wins. It's a simple fact, given the
current limits of science, that you have a finite quantity of time to
pass through in a lifetime. I spend it doing things I like as much as
possible. Time is one of those things like "honor" and "integrity" that
you can lose or waste, but are impossible to get back. Enuf, I've
careened off on a tangent again.
 March
11th 2000 About two
weeks ago, I ordered some tools for undercarriage work on both BillyBob
and my Jeep, Renegade.
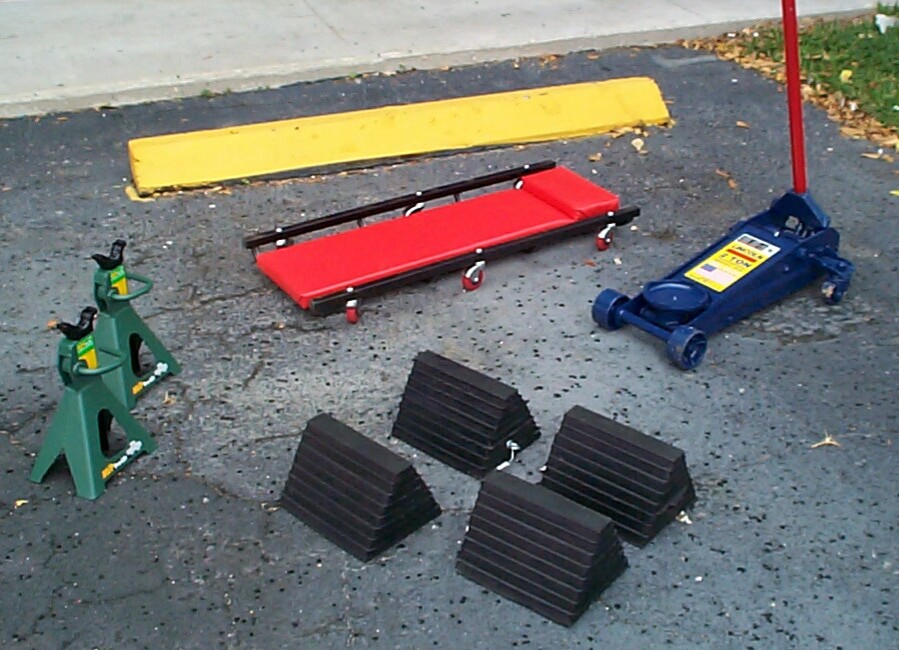
The first shipment arrived from Northern
Tool and Equipment Company on Tuesday. It included the floor
jack, jack stands, and wheel chocks. The remaining part of the
shipment, a creeper, arrived yesterday. The UPS delivery guy has been
good-naturedly complaining about all my recent purchases to the front
desk girl. I'm just gonna have to buy some UPS stock in the near future
and give him a red-butt chewing out over his attitude.
March
11th 2000 About two
weeks ago, I ordered some tools for undercarriage work on both BillyBob
and my Jeep, Renegade.
The first shipment arrived from Northern
Tool and Equipment Company on Tuesday. It included the floor
jack, jack stands, and wheel chocks. The remaining part of the
shipment, a creeper, arrived yesterday. The UPS delivery guy has been
good-naturedly complaining about all my recent purchases to the front
desk girl. I'm just gonna have to buy some UPS stock in the near future
and give him a red-butt chewing out over his attitude.
There's a cold front comin' thru, so I'm dodging raindrops today off and on. I suspect the wheels have not been off BillyBob in several years so yesterday I removed the new hubcaps up at the warehouse and sprayed each rusty lug nut with WD-40. This morning when I got to the Krash Lab, I tried the lugs on the front wheels with the small cross-shaped lug wrench that came with BillyBob . . . No joy. Over the next half-hour I tried two applications of Liquid Wrench on each lug nut. Earlier in the week I picked up a 3/4", 6-sided, deep socket for 1/2" drive and a short extension at the local Discount Auto Parts store. This was purchased for Renegade, the Jeep, because his stock lug wrench is not a good fit for the custom aluminium wheels that came with the renegade package. Also, lug nuts should be properly torqued on vehicles with disk brakes to avoid warping the rotors. My good luck here is that Billybob's lug nuts are the same size as the renegade, so I abandoned the small lug wrench and tackled the lugs with the new socket, extension, and an eighteen inch breaker bar (one of the few tools I moved to Florida with twenty-eight years ago).
 All
the lugs broke loose at this point without too much effort. I breathed
a sigh of relief at having gotten this far without breaking off one of
BillyBob's wheel studs or initiating a cardiac arrest. After placing
wheel chocks, jacking BillyBob's front end up and putting jack stands
in place, I pulled the front wheels. I was right about the wheels not
having been off in a long time. There were several insect cocoons from
Pennslyvania between each wheel and its brake drum. I gave each wheel a
light wire-brushing for this session and washed them with soap and
water before re-mounting. The lug nuts were snugged tight before
lowering BillyBob off the jack stands. Finally all lug nuts were
torgued to eighty footpounds in a criss-cross pattern. I didn't look up
the torgue settings for the lugs before coming to the Krash Lab today
so I guessed by using the settings for Renegade which I had memorized
earlier in the week. I'll look up BillyBob's settings before the next
session.
All
the lugs broke loose at this point without too much effort. I breathed
a sigh of relief at having gotten this far without breaking off one of
BillyBob's wheel studs or initiating a cardiac arrest. After placing
wheel chocks, jacking BillyBob's front end up and putting jack stands
in place, I pulled the front wheels. I was right about the wheels not
having been off in a long time. There were several insect cocoons from
Pennslyvania between each wheel and its brake drum. I gave each wheel a
light wire-brushing for this session and washed them with soap and
water before re-mounting. The lug nuts were snugged tight before
lowering BillyBob off the jack stands. Finally all lug nuts were
torgued to eighty footpounds in a criss-cross pattern. I didn't look up
the torgue settings for the lugs before coming to the Krash Lab today
so I guessed by using the settings for Renegade which I had memorized
earlier in the week. I'll look up BillyBob's settings before the next
session.
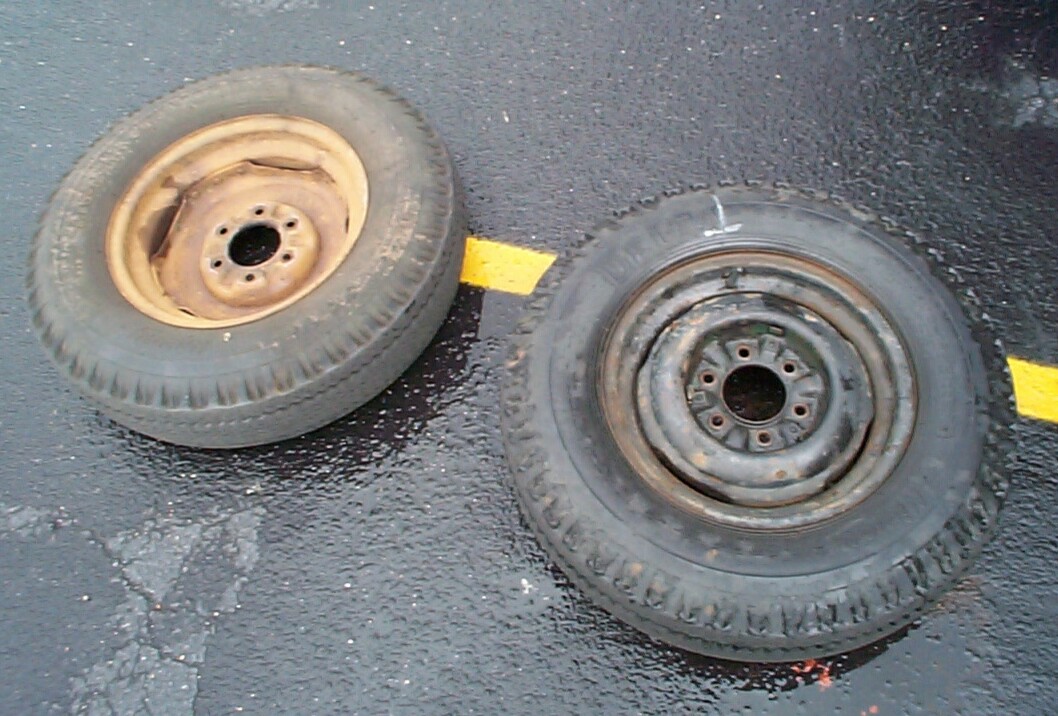
 The
same process was performed with the back wheels. I just ordered some
metal wash / metal prep products from The Eastwood Company this week.
The wheels will have to be wire-brushed in greater detail and cleaned
to remove the last of the penetrating oil residue. before the Corroless
Rust Stabilizer treatment. The brake drums will also get the Corroless
treatment before being finished with "Chassis Black" paint also from
Eastwood. I also think a tap and die set are in my future to clean up
the lugs and lug nuts.
The
same process was performed with the back wheels. I just ordered some
metal wash / metal prep products from The Eastwood Company this week.
The wheels will have to be wire-brushed in greater detail and cleaned
to remove the last of the penetrating oil residue. before the Corroless
Rust Stabilizer treatment. The brake drums will also get the Corroless
treatment before being finished with "Chassis Black" paint also from
Eastwood. I also think a tap and die set are in my future to clean up
the lugs and lug nuts.
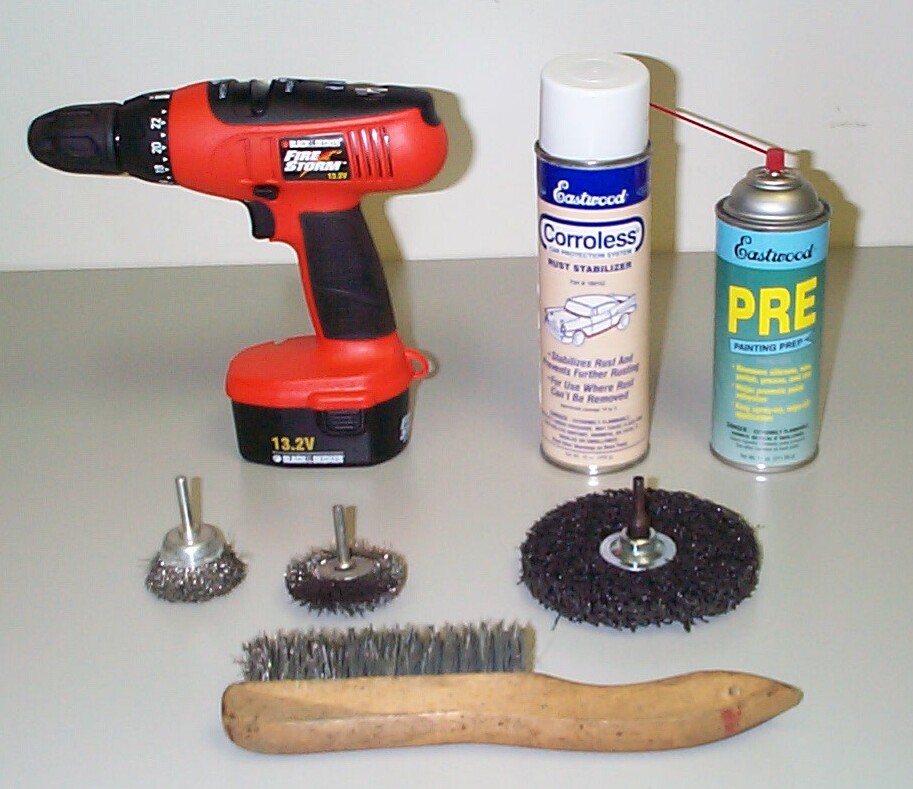 March
18th 2000 There was
supposed to be rain but, so far, it's a great day to work outside. I
don't have all the tools I need to get the wheels prepped for painting
yet, so today I'm working on the front brake drums. I had recently
received shipments from Eastwood of Corroless Rust Stabilizer in
aerosol form (catalog #16015Z), PRE Painting Prep Cleaner (#10041Z),
Cleaning Wheel (#31095) and Drill Mandrel (#13064) to add to my
existing cordless drill and wire brushes.
March
18th 2000 There was
supposed to be rain but, so far, it's a great day to work outside. I
don't have all the tools I need to get the wheels prepped for painting
yet, so today I'm working on the front brake drums. I had recently
received shipments from Eastwood of Corroless Rust Stabilizer in
aerosol form (catalog #16015Z), PRE Painting Prep Cleaner (#10041Z),
Cleaning Wheel (#31095) and Drill Mandrel (#13064) to add to my
existing cordless drill and wire brushes.
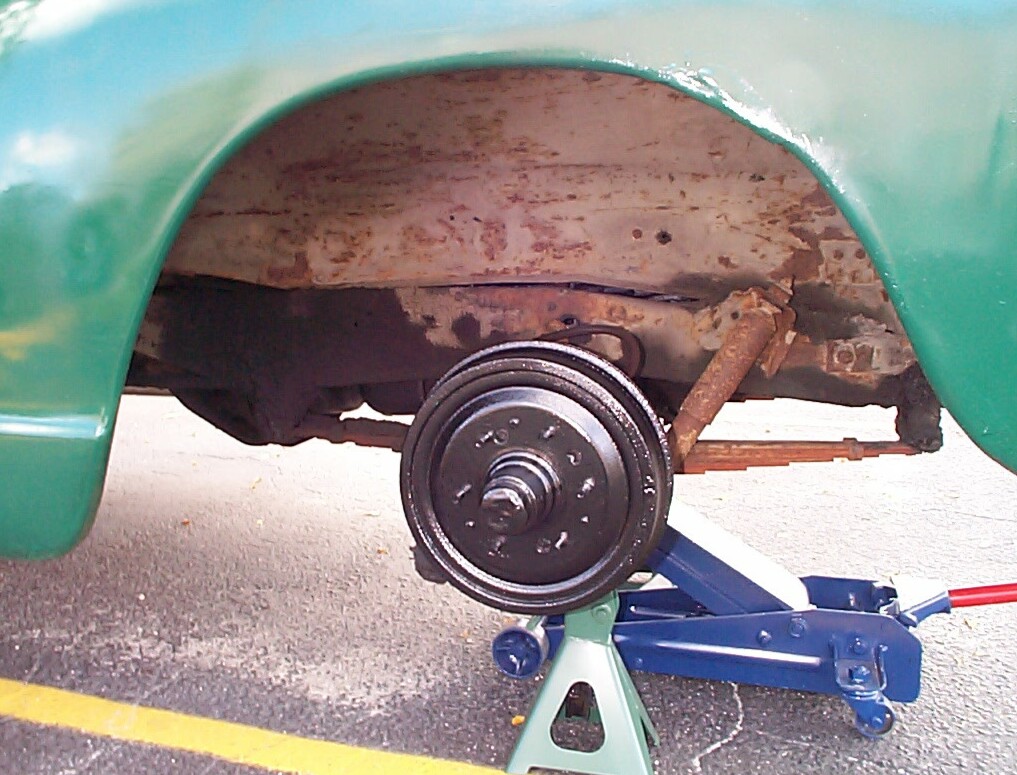
 The
front drums were wire-brushed by hand and drill. The cleaning wheel was
also used on the passenger side drum to remove some hardened grease the
wire brushes couldn't get off. These tools were also used on the front
wheels until the drill batteries ran down and I got tired of the hand
brush. The Eastwood PRE Painting Prep Cleaner was applied to the drums,
wiped off and allowed to dry. Two applications of this stuff were used
for good measure. This photo was taken before the wire-brush and
cleaning operations.
The
front drums were wire-brushed by hand and drill. The cleaning wheel was
also used on the passenger side drum to remove some hardened grease the
wire brushes couldn't get off. These tools were also used on the front
wheels until the drill batteries ran down and I got tired of the hand
brush. The Eastwood PRE Painting Prep Cleaner was applied to the drums,
wiped off and allowed to dry. Two applications of this stuff were used
for good measure. This photo was taken before the wire-brush and
cleaning operations.
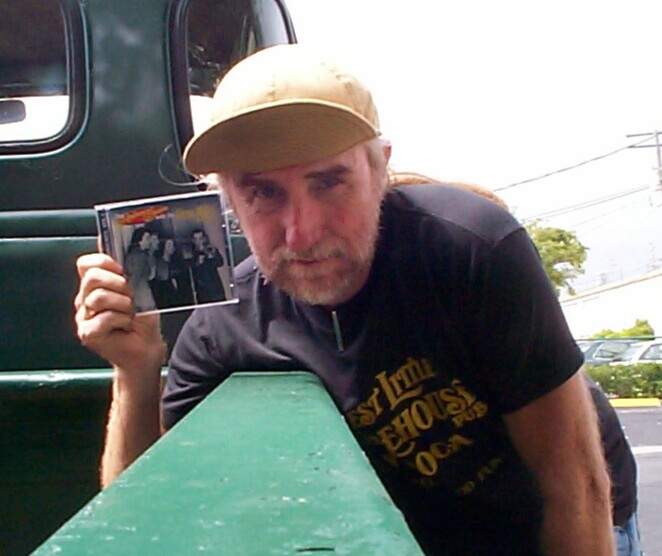 I'm
"In the mood" for this work, literally. I've got a CD of The Andrews
Sisters with the Glenn Miller Orchestra playin' and I'm wearing my WWII
Army Air Corps Mechanics Cap. In case none of you have ever seen one,
this is what a retired architect looks like. Another reason I'm happy
is that I've obtained new insurance for BillyBob this week. I was
arrested for DUI at the end of May 1992. It was my second one and I
haven't had a drink since that night. You can imagine what that did to
my insurance. For three years I was charged $4,200 a year for the Jeep
alone. After that, my insurance company for the Renegade (Progressive)
dropped it down to $2,100 a year. At seven years, you're supposed to be
clear. My new quote from Progressive for renewal was still at $2,100
and they won't touch BillyBob. BillyBob's insurance (Dairyland
Insurance Company) is the minimum PIP only and that costs me about $500
a year so I'm paying almost $2,600! This week my Renter's insurance
agent, Trisha Tenbroeck of Allstate, called me and asked if she could
quote me auto insurance. I said sure and she came back with a little
over $1,300 a year for both vehicles with the same full coverage on
both . . . Allstate wins!
I'm
"In the mood" for this work, literally. I've got a CD of The Andrews
Sisters with the Glenn Miller Orchestra playin' and I'm wearing my WWII
Army Air Corps Mechanics Cap. In case none of you have ever seen one,
this is what a retired architect looks like. Another reason I'm happy
is that I've obtained new insurance for BillyBob this week. I was
arrested for DUI at the end of May 1992. It was my second one and I
haven't had a drink since that night. You can imagine what that did to
my insurance. For three years I was charged $4,200 a year for the Jeep
alone. After that, my insurance company for the Renegade (Progressive)
dropped it down to $2,100 a year. At seven years, you're supposed to be
clear. My new quote from Progressive for renewal was still at $2,100
and they won't touch BillyBob. BillyBob's insurance (Dairyland
Insurance Company) is the minimum PIP only and that costs me about $500
a year so I'm paying almost $2,600! This week my Renter's insurance
agent, Trisha Tenbroeck of Allstate, called me and asked if she could
quote me auto insurance. I said sure and she came back with a little
over $1,300 a year for both vehicles with the same full coverage on
both . . . Allstate wins!
 The
drums were sprayed with compressed air from a can for good measure and
masking tape was applied to the lug threads to keep the Corroless away
from them. The Corroless is "thick" and I found out the hard way that I
wasn't shaking the can long enuf before trying to spray. I eventually
got it right tho' and the drums were finished with an even coat of the
stuff. Rain threatened after all while I waited for the Corroless to
dry. I didn't want to put the wheels back on until just before
BillyBob's trip back home to his "barn".
The
drums were sprayed with compressed air from a can for good measure and
masking tape was applied to the lug threads to keep the Corroless away
from them. The Corroless is "thick" and I found out the hard way that I
wasn't shaking the can long enuf before trying to spray. I eventually
got it right tho' and the drums were finished with an even coat of the
stuff. Rain threatened after all while I waited for the Corroless to
dry. I didn't want to put the wheels back on until just before
BillyBob's trip back home to his "barn".
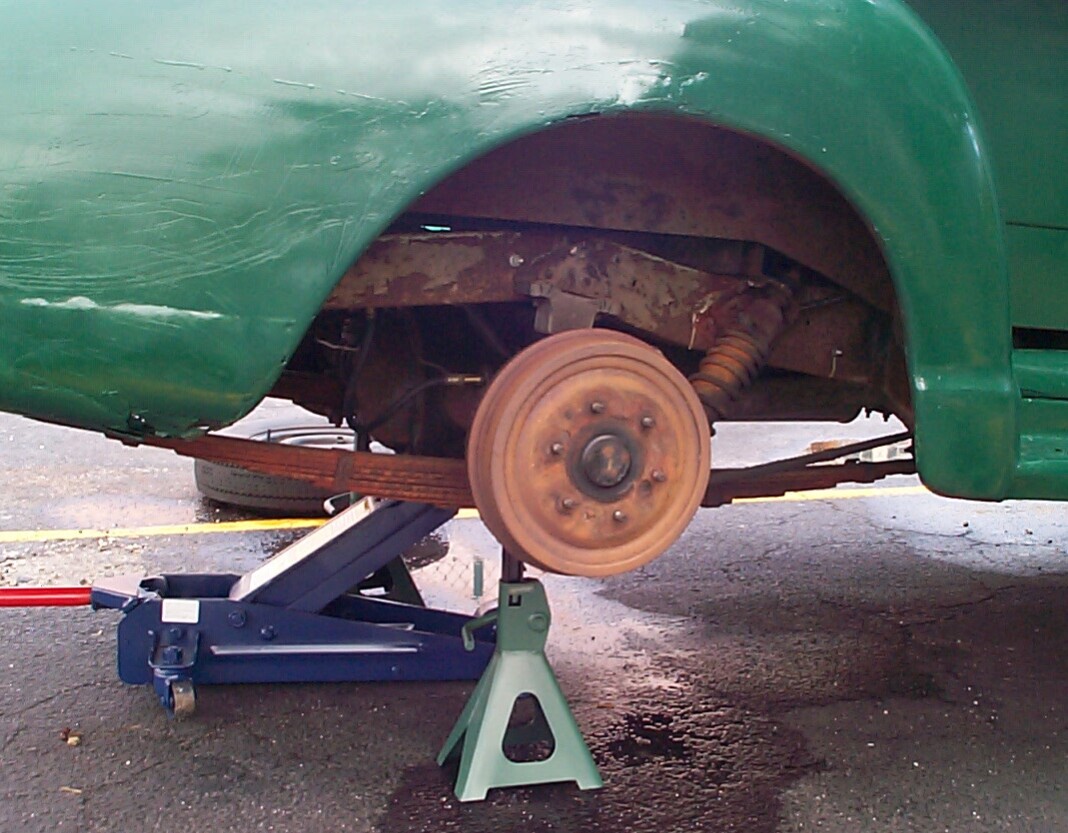
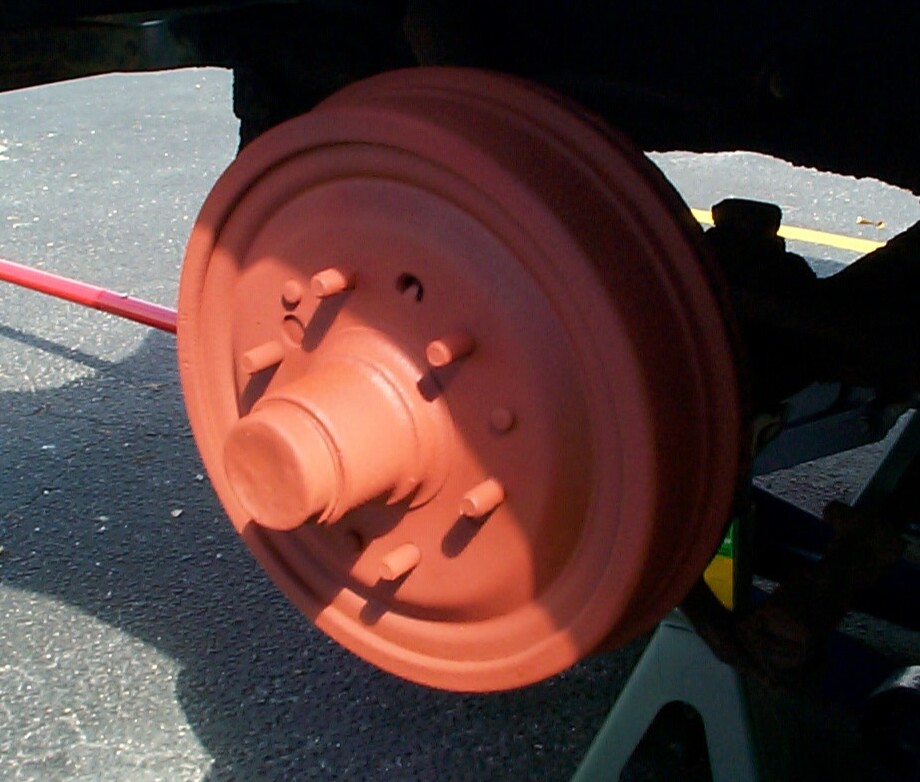
 March
25th 2000 Started today
by finishing BillyBob's front brake drums with Eastwood's "Chassis
Black" (catalog #10025Z) after masking off the lug threads. The extreme
rust alternating with heavy road muck buildup you see in this photo is
pretty much typical for BillyBob's whole undercarriage . . .
depressing, to say the least.
March
25th 2000 Started today
by finishing BillyBob's front brake drums with Eastwood's "Chassis
Black" (catalog #10025Z) after masking off the lug threads. The extreme
rust alternating with heavy road muck buildup you see in this photo is
pretty much typical for BillyBob's whole undercarriage . . .
depressing, to say the least.
 Next,
I went over the "front" sides of each front wheel with coarse 60 grit
sand paper. I kept at this until I was sure my fingerprints were
eradicated but short of bleeding. I can see I'm gonna need a dremel or
some other type of motorized tool to get in the tight areas. The back
sides of the wheels being solid rust, the same level of finish is not
even being attempted. They were both wire-brushed again thoroughly and
prepped with Eastwood's PRE Painting Prep Cleaner. After drying, I got
my first chance to use the Eastwood Wheel Tire Masks. These things work
just dandy. The back sides were sprayed with the Corroless Rust
Stabilizer.
Next,
I went over the "front" sides of each front wheel with coarse 60 grit
sand paper. I kept at this until I was sure my fingerprints were
eradicated but short of bleeding. I can see I'm gonna need a dremel or
some other type of motorized tool to get in the tight areas. The back
sides of the wheels being solid rust, the same level of finish is not
even being attempted. They were both wire-brushed again thoroughly and
prepped with Eastwood's PRE Painting Prep Cleaner. After drying, I got
my first chance to use the Eastwood Wheel Tire Masks. These things work
just dandy. The back sides were sprayed with the Corroless Rust
Stabilizer.
 April
1st 2000 I ordered
Eastwood's "Tight Spot Grinding kit, 80 assorted rolls with two
mandrels" (catalog #13098) early in the week and it arrived yesterday
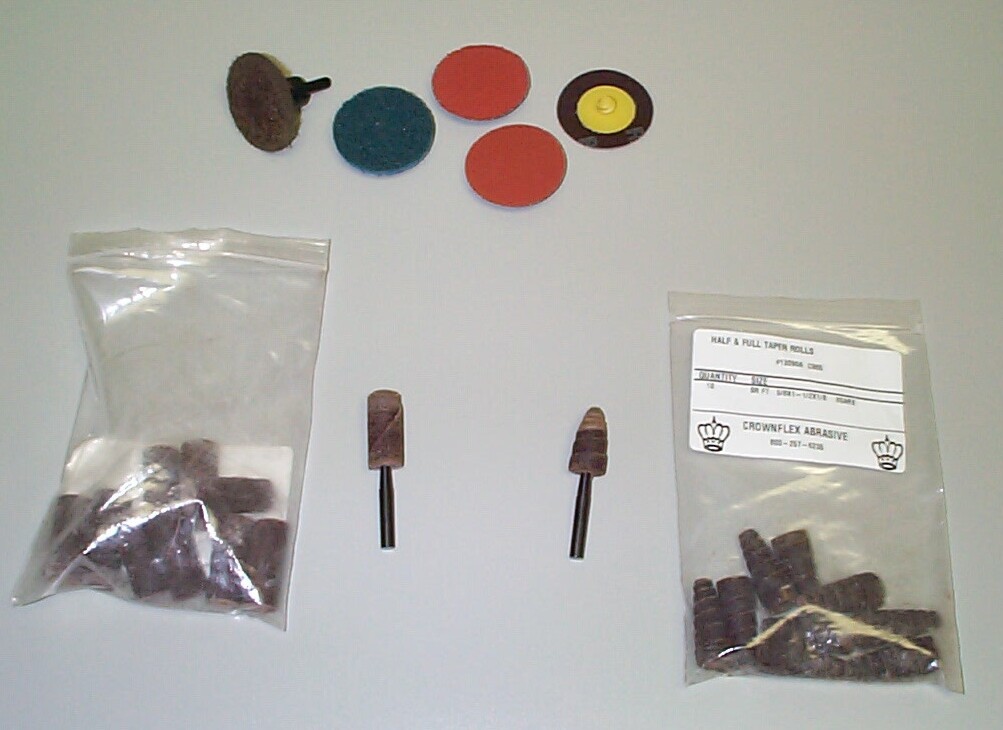
(at bottom in photo). I also picked up 3M's "2" Grinding/ Sanding/
Finishing Kit" at the local Discount Auto Parts store (at top in
photo). These two items helped get the major flotsam and jetsam out of
the front wheels' nooks and crannies.
April
1st 2000 I ordered
Eastwood's "Tight Spot Grinding kit, 80 assorted rolls with two
mandrels" (catalog #13098) early in the week and it arrived yesterday
(at bottom in photo). I also picked up 3M's "2" Grinding/ Sanding/
Finishing Kit" at the local Discount Auto Parts store (at top in
photo). These two items helped get the major flotsam and jetsam out of
the front wheels' nooks and crannies.
 After
another round of sanding with the above items and by hand, and two
applications of Eastwood's PRE Painting Prep Cleaner, the front sides
of the wheels were ready for the Corroless. The Corroless aerosol was
nearly out of propellant and I was barely able to coax enough out of
the can to finish the job. It's a shame 'cause this stuff is fairly
expensive and by the feel of the can I judged it to be only about
two-thirds empty.
After
another round of sanding with the above items and by hand, and two
applications of Eastwood's PRE Painting Prep Cleaner, the front sides
of the wheels were ready for the Corroless. The Corroless aerosol was
nearly out of propellant and I was barely able to coax enough out of
the can to finish the job. It's a shame 'cause this stuff is fairly
expensive and by the feel of the can I judged it to be only about
two-thirds empty.
April 8th 2000 Another beautiful Florida day. Re-ordered another aerosol can of Corroless early in the week and had it in my hot little hands by Friday. Jacked up the rear end this week and wire-brushed the rear brake drums and back sides of the rear wheels. The wire-brushing was both by hand and drill and by the time I was done I was singing an old Frank Zappa song to myself . . . "I stroked and I stroked 'til my wrist got numb, but I still couldn't make that dynamo hum". The back sides of the rear wheels and brake drums were sprayed with Corroless.
April 15th 2000 It rained cats and dogs in South Florida yesterday and the predictions are for more of the same today. I went and got BillyBob from his warehouse bay under overcast skies. Roughed-up and painted the rear brake drums with Eastwood's "Chassis Black" first. Hand and drill-sanded the front sides of the rear wheels next. partly due to the weather conditions, I decided the wheels could use another sanding session next week before the Corroless treatment.
April 22nd 2000 Back to sunny skies on this Easter weekend. After some additional sanding and wire-brushing, the front sides of the rear wheels were treated with Corroless. I finished off the second aerosol can. This time, however, there was still propellant after the paint had run out. I doubt if I'll buy many more of these spray cans 'cause they're pretty expensive and, except for the smallest jobs, not very cost-effective.
May 13th 2000 I stopped working on the wheels to find a local source for the Dupont 8093S Acrylic Enamel Reducer required to mix with the "Juniper Green" paint I got from Jim Carter's. I haven't found it yet, but, in the mean time, I decided to finish the wheels with the same Rustoleum "Hunter Green" I used on the rest of BillyBob. I'll save the good paint 'til I get an air compressor and proper spray equipment. After the Rustoleum cures, I'll finish with the "Painted Wheel Clear" I got from Eastwood.
This week the front wheels were removed and painted, both sides, while I had BillyBob jacked up to lay underneath and cuss and fuss with the binding shift linkage (I'm making limited progress with that project too).
 May
20th 2000 Summertime
and the livin' is easy. Ya gotta take it slow if you're a shadetree
mechanic in Florida and the shadetree isn't big enuf to cover the
truck. After roughing up the Corroless coat on both sides of the rear
wheels and an application of Eastwood's PRE Painting Prep Cleaner, both
sides of each wheel were painted with Hunter Green Rustoleum. The lug
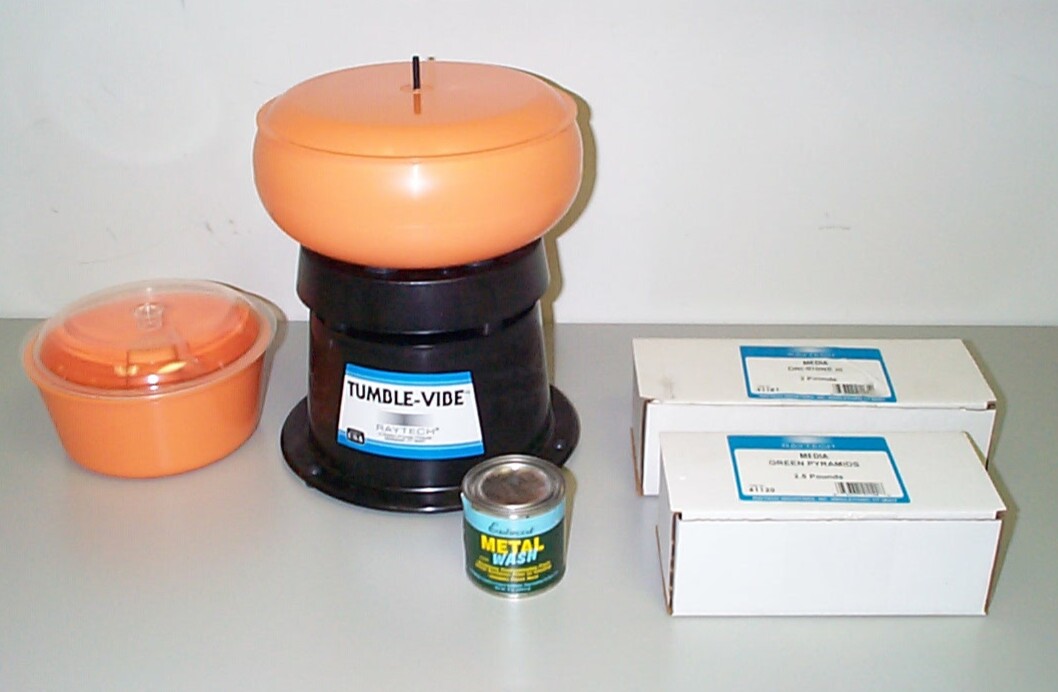
nuts (along with some transmission shift linkage parts I was also
working on) were treated to a cleaning session in Eastwood's "Vibratory
Tumbler System" (catalog #43204) for cleaning small parts.
May
20th 2000 Summertime
and the livin' is easy. Ya gotta take it slow if you're a shadetree
mechanic in Florida and the shadetree isn't big enuf to cover the
truck. After roughing up the Corroless coat on both sides of the rear
wheels and an application of Eastwood's PRE Painting Prep Cleaner, both
sides of each wheel were painted with Hunter Green Rustoleum. The lug
nuts (along with some transmission shift linkage parts I was also
working on) were treated to a cleaning session in Eastwood's "Vibratory
Tumbler System" (catalog #43204) for cleaning small parts.
May 27th 2000 Memorial Day Weekend. As I work on BillyBob, I'm thinkin' of my Uncle "Dutch", a man I never got the chance to meet as he was KIA in the Battle of Leyte Gulf, WWII. I'm reminded of all americans who gave up their lives protecting our liberties from outside forces. Too damn bad the same liberties are being eroded from the inside and most Americans don't even know or care . . . but, I digress.
 I've
picked up a a bit of a tickle in my chest, hardly noticable except on a
worry-wort basis. It could be just some low-level jungle-rot that
plagues us here in paradise on Florida's Gold Coast. We catch things
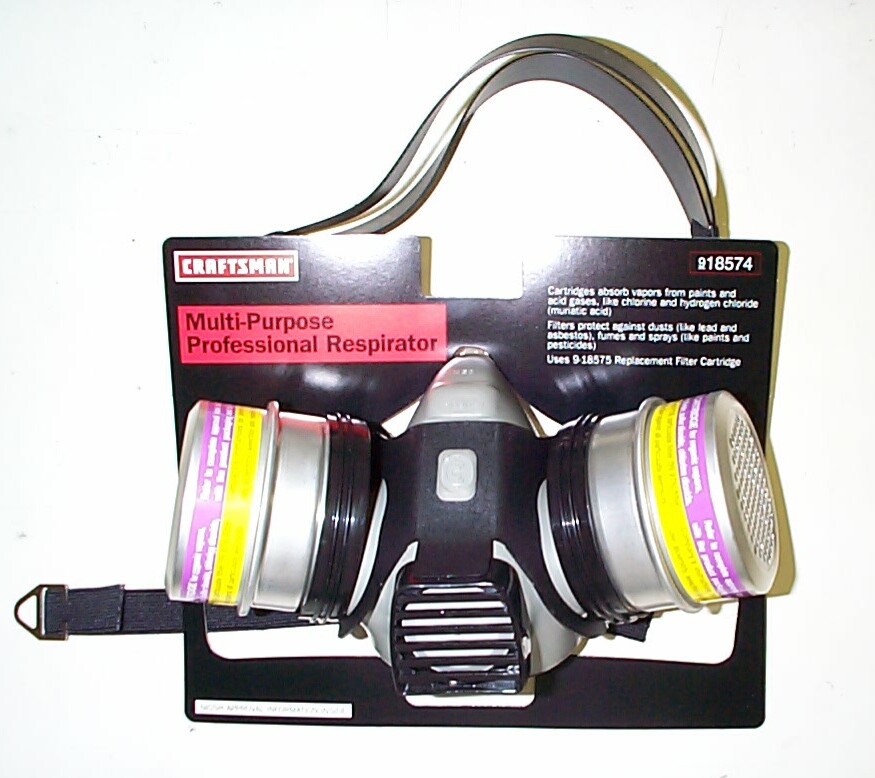
that Eskimos don't have to be concerned with. But, just to be on the
safe side, I purchased a Craftsman Multi-Purpose Professional
Respirator at Sears this week on the off-chance all these nasty
chemicals and paint products I mess around with on the weekends are
starting to have some kinda effect. I have a lot to learn about
protection from toxic chemicals but I got a good start from a Chemical
Hazards article in the June 2000 Issue of "AutoRestorer" Magazine.
I've
picked up a a bit of a tickle in my chest, hardly noticable except on a
worry-wort basis. It could be just some low-level jungle-rot that
plagues us here in paradise on Florida's Gold Coast. We catch things
that Eskimos don't have to be concerned with. But, just to be on the
safe side, I purchased a Craftsman Multi-Purpose Professional
Respirator at Sears this week on the off-chance all these nasty
chemicals and paint products I mess around with on the weekends are
starting to have some kinda effect. I have a lot to learn about
protection from toxic chemicals but I got a good start from a Chemical
Hazards article in the June 2000 Issue of "AutoRestorer" Magazine.
With respirator and goggles in place I proceded to treat both sides of the front wheels with one coat of Eastwood's "Painted Wheel Clear". The directions indicated it was compatible with most enamels, so I gambled that it would be OK with the Rustoleum. Time will tell. The front wheel lug nuts were given the tumbler cleaning treatment during the painting process.
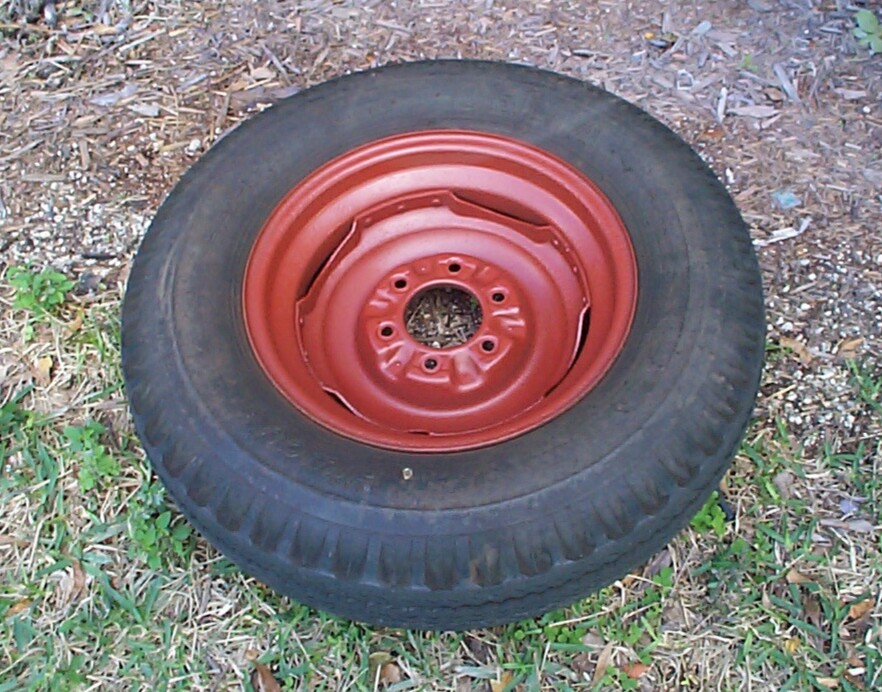
 June
3rd 2000 Treated both
sides of the rear wheels with one coat of Eastwood's "Painted Wheel
Clear". The aerosol can was almost empty and I finished it off. I must
have been too hasty because I got wrinkling of the paint on the front
sides of both wheels in some places . . . One of the causes of
wrinkling is coats that are too heavy. You can barely see the wrinkling
in the large pic (lower right of rim). I love these Kodak digital
cameras 'cause they mask all my
June
3rd 2000 Treated both
sides of the rear wheels with one coat of Eastwood's "Painted Wheel
Clear". The aerosol can was almost empty and I finished it off. I must
have been too hasty because I got wrinkling of the paint on the front
sides of both wheels in some places . . . One of the causes of
wrinkling is coats that are too heavy. You can barely see the wrinkling
in the large pic (lower right of rim). I love these Kodak digital
cameras 'cause they mask all my misteaks
mistakes so well!
June 10th 2000 Hot today, but I'll get this project finished. I've started to think of these mini-projects like the "slight facelift" and the "wheels refurb" as "Stage I" projects. When I get the shop, tools, and more expertise, I can proced to "Stage II".
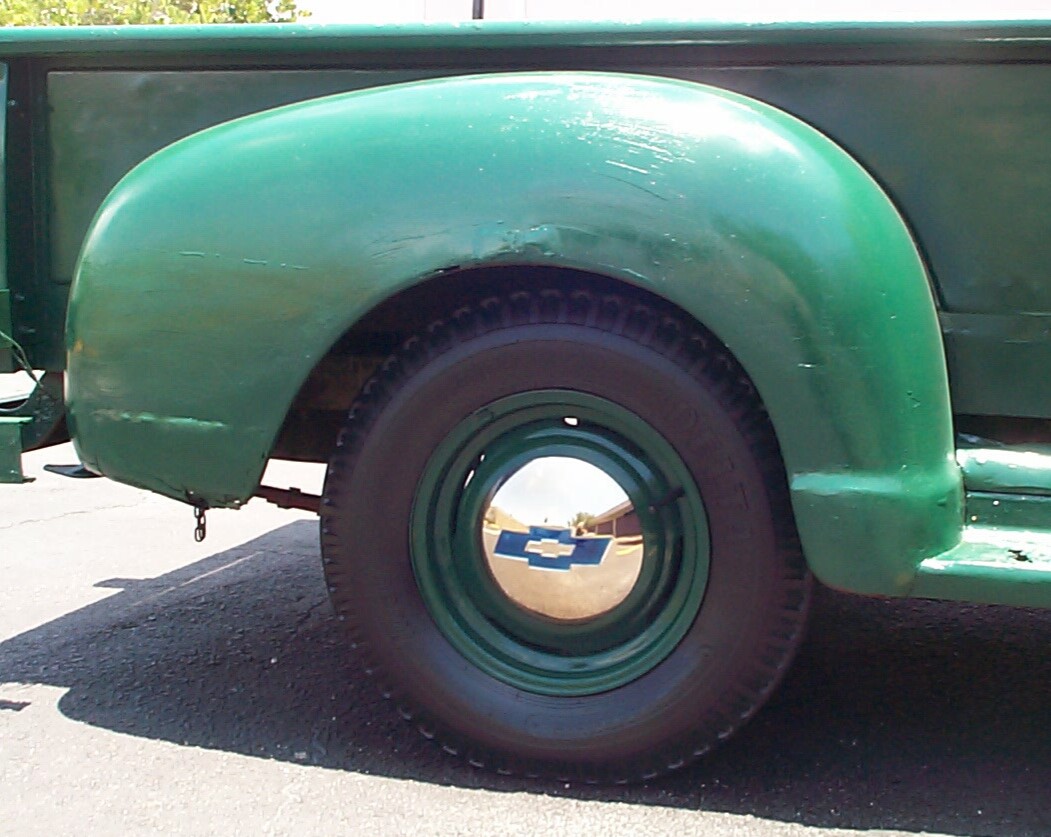
 Jacked
up and pulled first the front wheels, then the back wheels for the last
time (I'm actually listening to the early Rolling Stones tune "The Last
Time" as I write this). I'm cleaning the back sides of the tires with
Westley's Bleche-Wite whitewall/blackwall tire cleaner (nasty caustic
stuff). Then treating them with Black Magic Tire Wet tire dressing. The
wheels are then remounted to clean and treat the front sides. These are
products I've been using to detail my Jeep "Renegade"
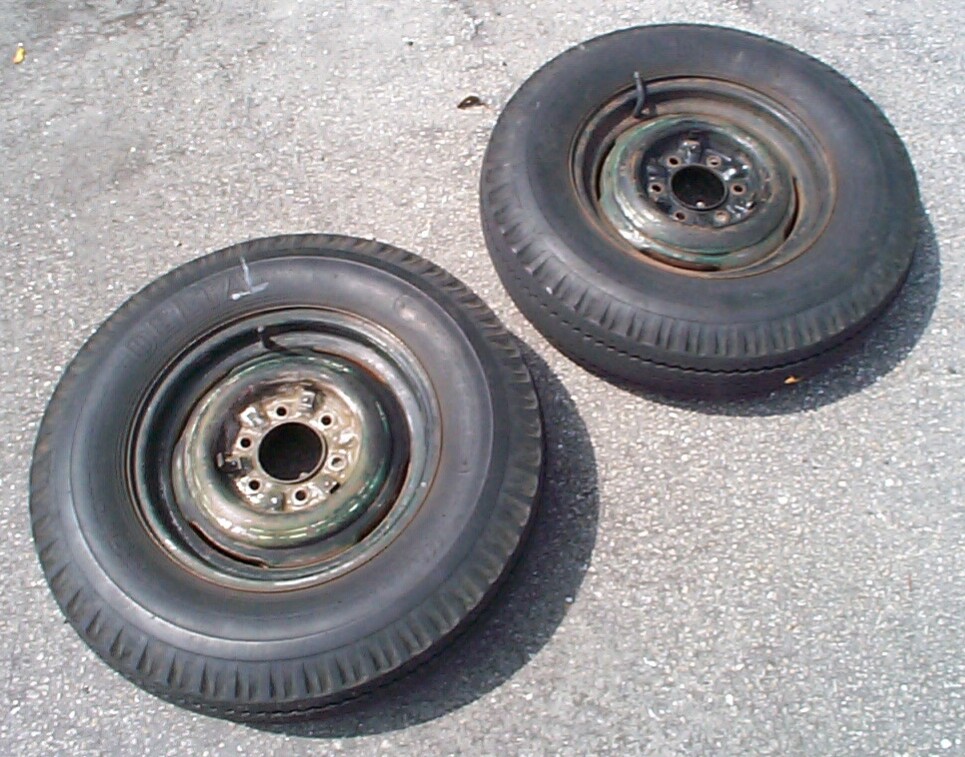
and I'm happy with the results. These old Delta Hiway 6.50-16 LT tires
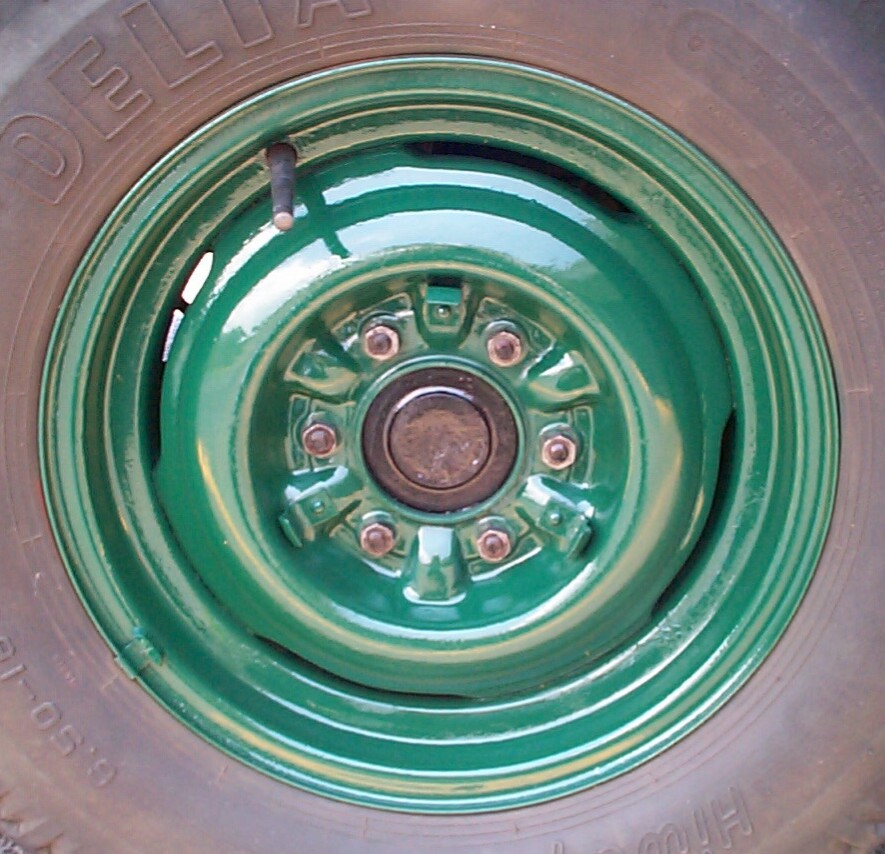
shine like new. Lotsa tread still left on the old hard rubber tires.
The sharp coral shell aggregate they use in the asphalt pavement here
doesn't tear them up like it does soft compound tires . . . Just don't
try to stop in a hurry!
Jacked
up and pulled first the front wheels, then the back wheels for the last
time (I'm actually listening to the early Rolling Stones tune "The Last
Time" as I write this). I'm cleaning the back sides of the tires with
Westley's Bleche-Wite whitewall/blackwall tire cleaner (nasty caustic
stuff). Then treating them with Black Magic Tire Wet tire dressing. The
wheels are then remounted to clean and treat the front sides. These are
products I've been using to detail my Jeep "Renegade"
and I'm happy with the results. These old Delta Hiway 6.50-16 LT tires
shine like new. Lotsa tread still left on the old hard rubber tires.
The sharp coral shell aggregate they use in the asphalt pavement here
doesn't tear them up like it does soft compound tires . . . Just don't
try to stop in a hurry!
 Gave
each of the lug nuts a good dose of WD-40 before tightening them down
and wiped off the excess. Treated all the inner tube valve stems with
Armor All Protectant and installed the hub caps. Time to move on to the
next Stage I project. The shift linkage restoration is about two-thirds
complete but I need two projects going at the same time so I still have
something to work on if I run into a brick wall on any given project.
It's time to start the re-wiring job I promised the spirit of my Dad
some months ago. I ordered a wiring harness and turn signal kit from
Jim Carter Antique Truck Parts this week and I should be knee-deep in
confusion before long.
Gave
each of the lug nuts a good dose of WD-40 before tightening them down
and wiped off the excess. Treated all the inner tube valve stems with
Armor All Protectant and installed the hub caps. Time to move on to the
next Stage I project. The shift linkage restoration is about two-thirds
complete but I need two projects going at the same time so I still have
something to work on if I run into a brick wall on any given project.
It's time to start the re-wiring job I promised the spirit of my Dad
some months ago. I ordered a wiring harness and turn signal kit from
Jim Carter Antique Truck Parts this week and I should be knee-deep in
confusion before long.
| < Back to Intro |
You can email me at ![]() webmaster@laroke.com
webmaster@laroke.com
Issued Saturday June 10, 2000
Updated Monday April 17, 2017
copyright © 1996-2017 Larry Robert Kephart all rights reserved
| | LRK Home | | Bio Info | | Krash Khronicles | | LAROKE | |
| | BettyLou | | BillyBob's Garage | | Rat Patrol | | Deerslayer | | Elvira | |
| | Land of the Free and Home of the Brave | |
| | Keppylou's Art | | WWI Soldier's Diary | |