| | LRK Home | | Bio Info | | Krash Khronicles | | LAROKE | |
| | BettyLou | | BillyBob's Garage | | Rat Patrol | | Deerslayer | | Elvira | |
| | Land of the Free and Home of the Brave | |
| | Keppylou's Art | | WWI Soldier's Diary | |
BillyBob Work-in-Progress Log
![]()
TRUCK LINKS including vendor sites for old parts, custom parts, and tools as well as sites for classic car and truck organizations
STORE Operating in association with Amazon.com, books, recordings and tools can be purchased.
PLANNING for the restoration including project schedule and cost estimates.
![]()
WORK-IN-PROGRESS is the restoration of parts of BillyBob that I can accomplish without a garage.
PRE-RESTORATION includes log entries of minor repairs and and adventures between time of purchase and the time when I started restoration, a piece at a time.
JR'S KORNER JR's Korner is the history of BillyBob before I got him authored by my brother, Wm. C. Kephart.
3. Shifty Behavior
February 21th 2000 I've been having more frequent problems with the tired three-on-the tree shift linkage locking up on me between 1st and 2nd gears. When this happens the solution is to drift to a stop (clutch still disengaged), off the road, if possible. Set the parking brake and turn the engine off. Retrieve a rubber mallet "I keep for just such occasions" from under the seat. Crawl under BillyBob and lightly tap the linkage arms at the transmission. Get back in BillyBob, check gearshift lever movement, start up, and continue on. This is getting tiresome and I dread it happening in four or more lanes of traffic and the abuse I'll get from some of my fellow citizens who inhabit these South Florida city streets (especially the ones with cell phones permanently attached to their ears who don't understand old metal).
I started the shift linkage restoration in motion by calling Jim Carter's a while ago and ordering one of each of the shift linkage parts they have for BillyBob's vintage from a fella named Bill. These include the following:
- REME404 Shift Box
- ME108 Shift Bellows
- ME102 Shift Lever Bushings
- ME266 Shift Knuckle or Joint
- ME300 Shift Lever Spring plus two Pins
February 24th 2000 The Fedex guy arrived this morning with all of the above parts except the shift box which is on backorder.
February 26th 2000 While comparing the parts I got from Jim Carter with the existing ones on BillyBob, I noticed what Jim Carter calls the "ME266 Shift Knuckle or Joint" and the Factory Assembly Manual calls the "3698234 Support" was loose. It attaches to the steering column with two phillips head screws. I tightened the screws for the time being, hopin' that BillyBob won't lock up between shifts quite so much. Every rusted or painted bolt on the linkage between hand lever and transmission was also treated to a few drops of liquid wrench.
February 28th 2000 Started weeding thru my library materials to get an idea how the linkage assembly goes together. In the "1954 Chevrolet Truck Shop Manual" I found an illustration which I think depicts the various levers in the neutral position, and in the "1947-1954 Truck Factory Assembly Manual" there was a more detailed drawing of the entire assembly. With these two diagrams and the procedure instructions in the shop manual, I think I can stay out of trouble.
March 4th 2000 Started off by taking photos of the existing linkage, 'cause it's always a good idea to leave as many "breadcrumb trails" as you can so you can get back out of the woods when the situation turns dark. BillyBob is in 1st gear position in all the camera shots today.
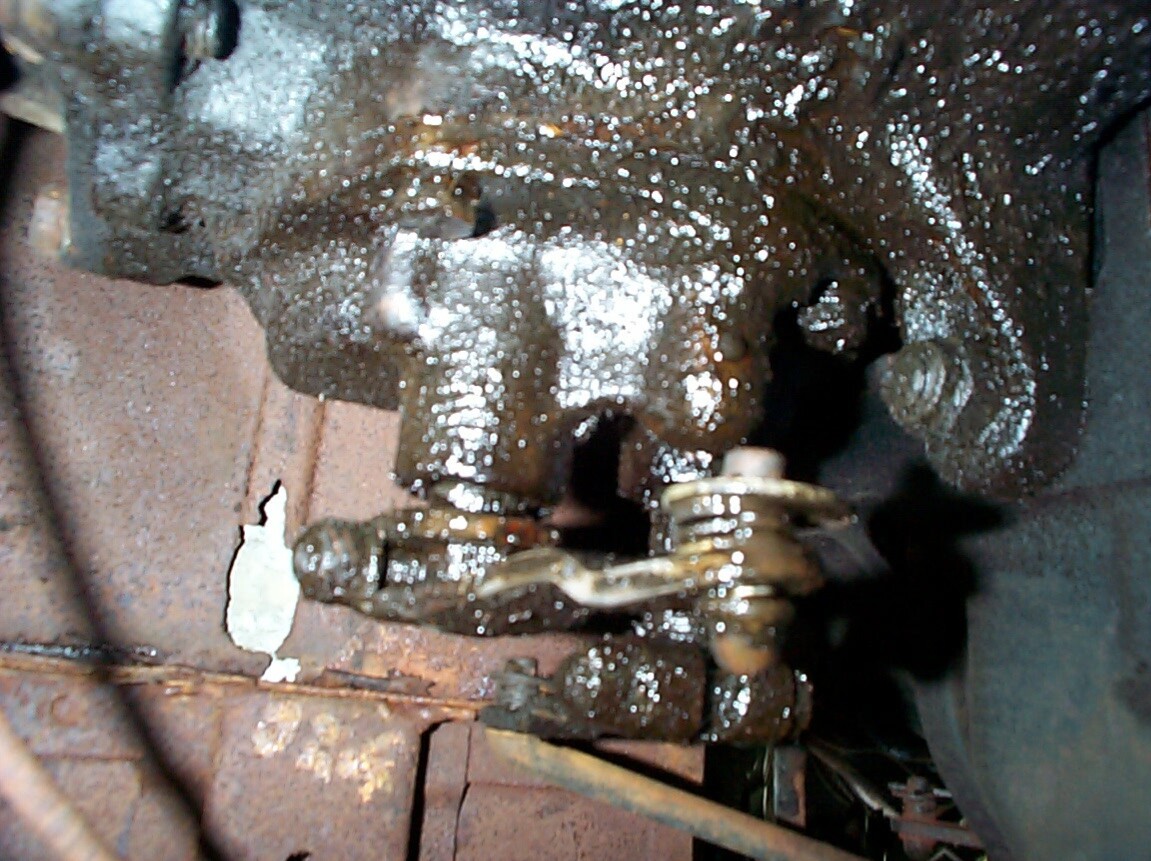 This
is a difficult view from the bottom of the tranny (I don't have
jackstands or ramps yet). The tranny tailshaft is to the left and the
bellhousing to the right. The white object is a rusted out portion of
the cab floor. The 1st/Reverse shift lever is in
the foreground (sticking down toward the camera) while the 2nd/3rd
shift lever is mostly obscured in the backgroung (sticking up away from
the camera).
This
is a difficult view from the bottom of the tranny (I don't have
jackstands or ramps yet). The tranny tailshaft is to the left and the
bellhousing to the right. The white object is a rusted out portion of
the cab floor. The 1st/Reverse shift lever is in
the foreground (sticking down toward the camera) while the 2nd/3rd
shift lever is mostly obscured in the backgroung (sticking up away from
the camera).
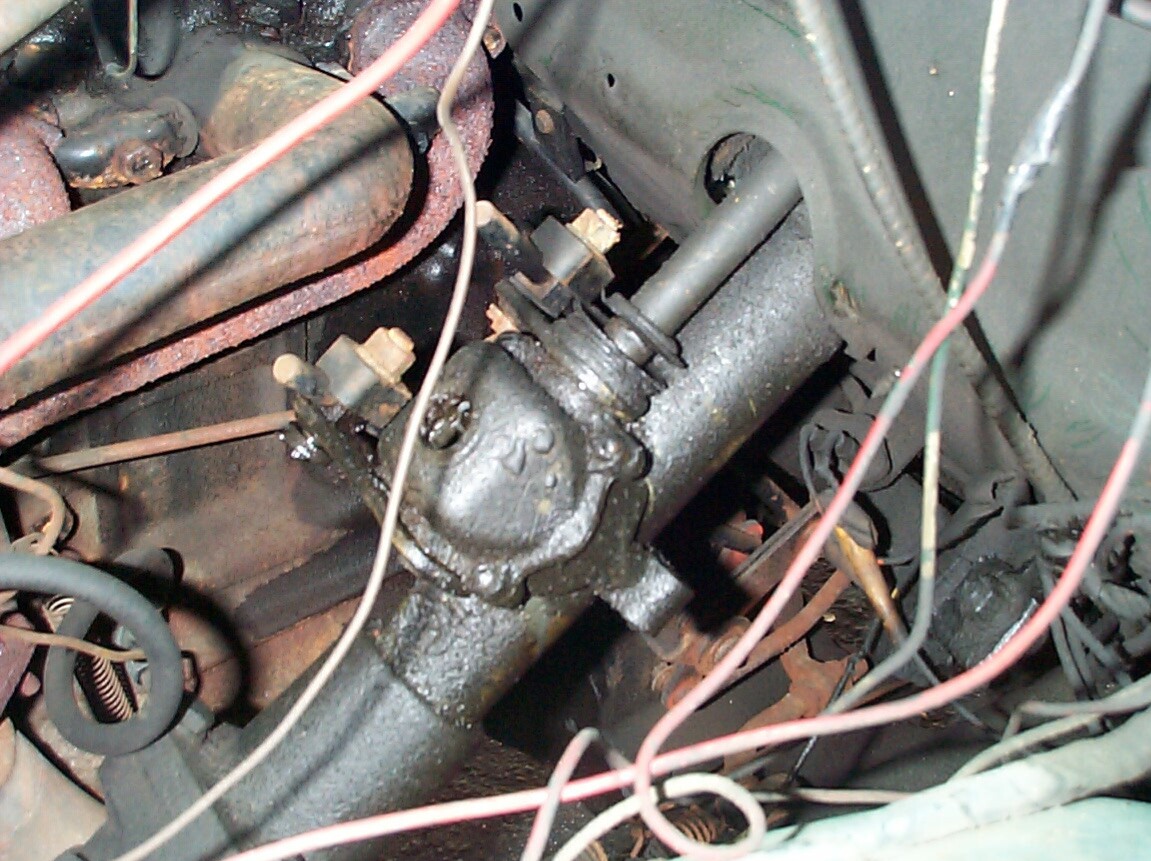 This
is a view of the shift box at the bottom of the steering column. It is
the only part that is still on backorder from Jim Carter. It has been
missing a fitting on the top ever since I've had BillyBob and who knows
how long before that. This leaves a 1/2" diameter opening exposing the
interior to the open air, dirt, water, etc. The shift bellows at the
bottom of the gearshift shaft has also rotted away. This situation
can't be good for BillyBob. You can also see the bad wiring here which
is high on my list of priorities to fix.
This
is a view of the shift box at the bottom of the steering column. It is
the only part that is still on backorder from Jim Carter. It has been
missing a fitting on the top ever since I've had BillyBob and who knows
how long before that. This leaves a 1/2" diameter opening exposing the
interior to the open air, dirt, water, etc. The shift bellows at the
bottom of the gearshift shaft has also rotted away. This situation
can't be good for BillyBob. You can also see the bad wiring here which
is high on my list of priorities to fix.
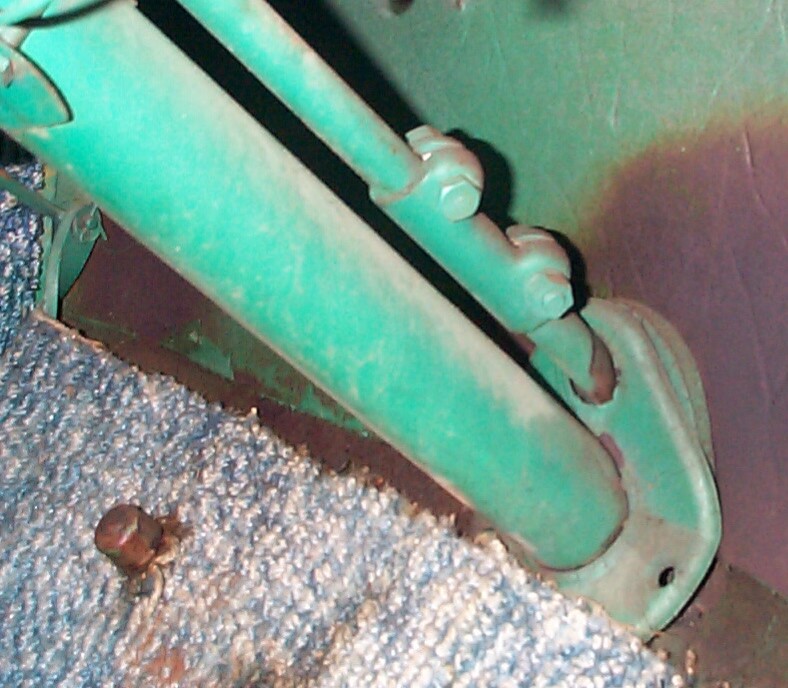 Here
is the clamp connecting the two portions of the gearshift shaft
together at the junction of the steering column and firewall. It's also
a good shot of a previous owner's retro seventies blue shag carpeting
which clashes nicely with BillyBob's original green interior paint.
Here
is the clamp connecting the two portions of the gearshift shaft
together at the junction of the steering column and firewall. It's also
a good shot of a previous owner's retro seventies blue shag carpeting
which clashes nicely with BillyBob's original green interior paint.
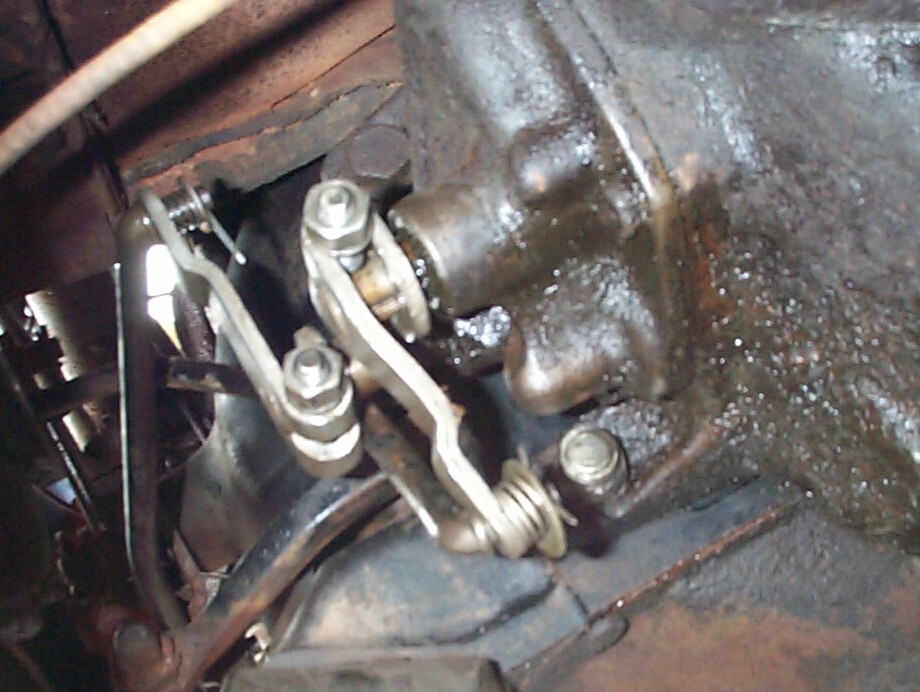
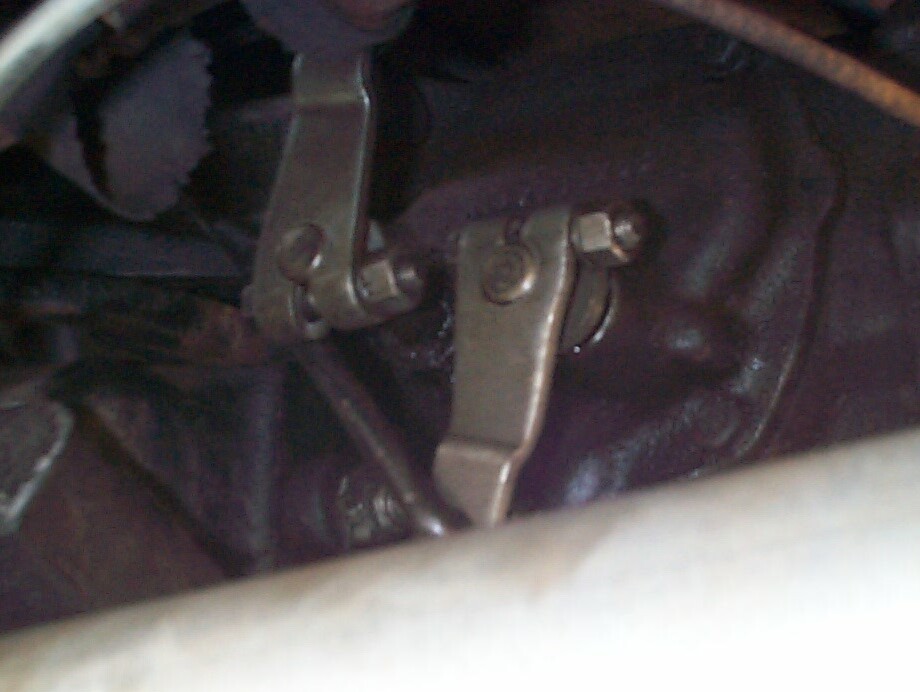
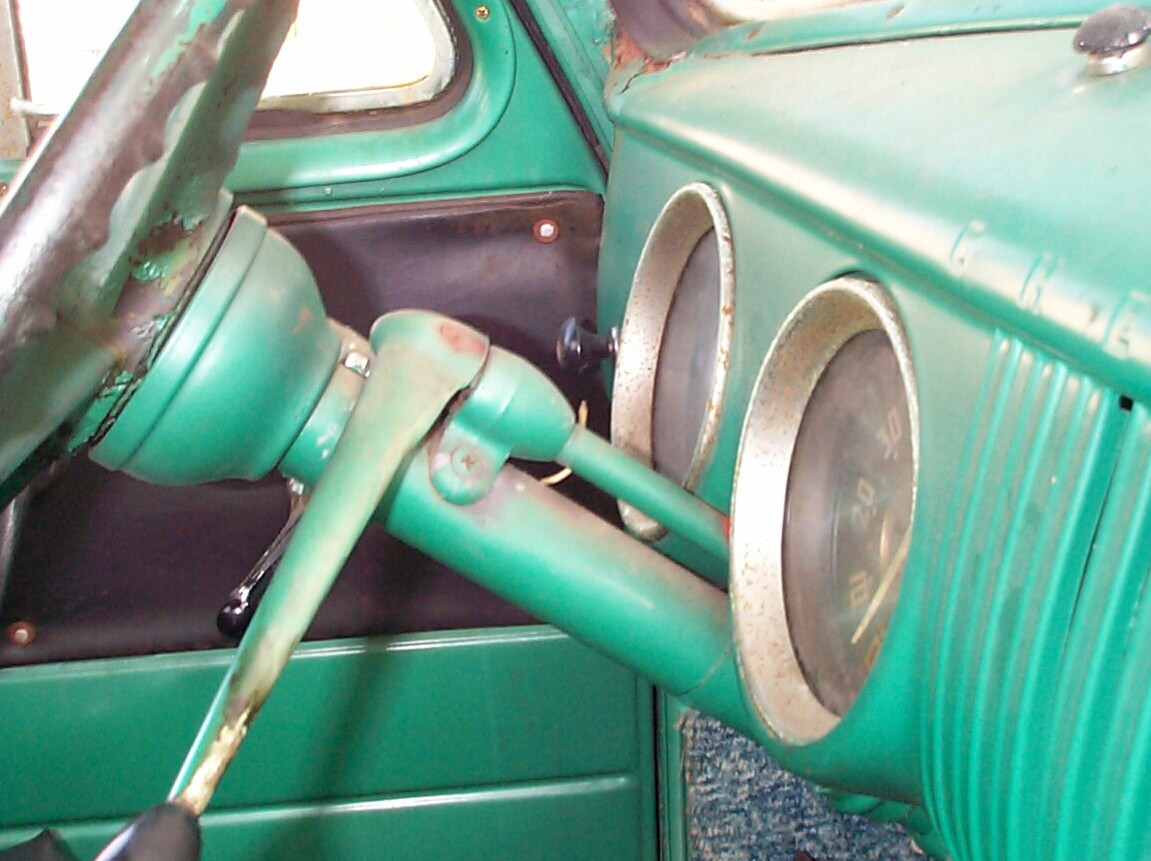 And
lastly, here is the knuckle joint/support just below the shift lever
that I tightened up last week. BillyBob's shifting is not as loose now
and he hasn't locked up between gears since. I'm keeping my fingers
crossed but it's too early to tell how much good that action did.
And
lastly, here is the knuckle joint/support just below the shift lever
that I tightened up last week. BillyBob's shifting is not as loose now
and he hasn't locked up between gears since. I'm keeping my fingers
crossed but it's too early to tell how much good that action did.
After the photos I spread cardboard under BillyBob with plastic trash bags over the cardboard. I stuffed a rag into the shift box hole and treated that area and the transmission linkage area to a light coating of "Gunk" Engine Degreaser. It took some of the buildup away but even with the cardboard and plastic, the operation was too messy to repeat in my company's parking lot. I'll have to think of another cleaning solution. (After I wrote this, Grant Simmons on the OleTrucks maillist shared the neat idea of placing old carpet under the area you are degreasing "so that afterwards, all the gunk can be rolled up and tossed out".) I also picked up cotter pins during the week and web-ordered a 2-1/4 ton, 20" lift Lincoln floor jack, two 3 ton heavy-duty jack stands, two ramps, four wheel chocks and a creeper from Northern Tool and Equipment Company.
March 6th 2000 Ordered a spray can each of "Corroless Rust Stabilizer" and "Chassis Black" paint from The Eastwood Company. I'm planning on removing and re-finishing the various linkage parts outside the cab with Corroless, then the Chassis Black. I also intend to refurbish the diamond plate skid plates on Renegade, my jeep, the same way.
March 8th 2000 The first shipment arrived from Northern Tool and Equipment Company today. It included the floor jack, jack stands, and wheel chocks. I'll be able to get started underneath BillyBob this weekend.
 April
1st 2000 Earlier in the
week, the back-ordered Shift box arrived from Jim Carter. Looks great.
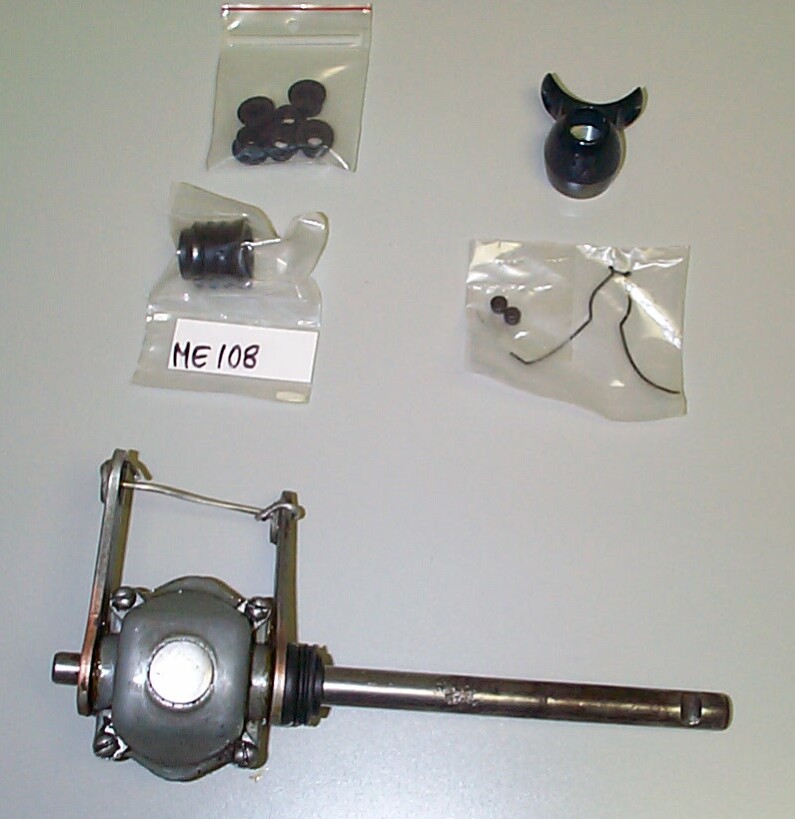
This photo shows all the shift linkage items ordered from Jim Carter.
Top left are the six ME102 Shift Lever Bushings; top right is the ME266
Shift Knuckle or Joint (manufactured in China); middle left is a spare
ME108 Shift Bellows (one is already provided on the rebuilt shift box);
middle right is the ME300 Shift Lever Spring plus two Pins; and at the
bottom is the refurbished REME404 Shift Box. The existing linkage has
not jammed since I tightened up the loose shift knuckle mounting screws
back in February. It's by no means smooth but working well enuf for the
time being. If it keeps behaving, I'll wait until the wheel painting
project is finished before tearing too deeply into this project.
April
1st 2000 Earlier in the
week, the back-ordered Shift box arrived from Jim Carter. Looks great.
This photo shows all the shift linkage items ordered from Jim Carter.
Top left are the six ME102 Shift Lever Bushings; top right is the ME266
Shift Knuckle or Joint (manufactured in China); middle left is a spare
ME108 Shift Bellows (one is already provided on the rebuilt shift box);
middle right is the ME300 Shift Lever Spring plus two Pins; and at the
bottom is the refurbished REME404 Shift Box. The existing linkage has
not jammed since I tightened up the loose shift knuckle mounting screws
back in February. It's by no means smooth but working well enuf for the
time being. If it keeps behaving, I'll wait until the wheel painting
project is finished before tearing too deeply into this project.
 April
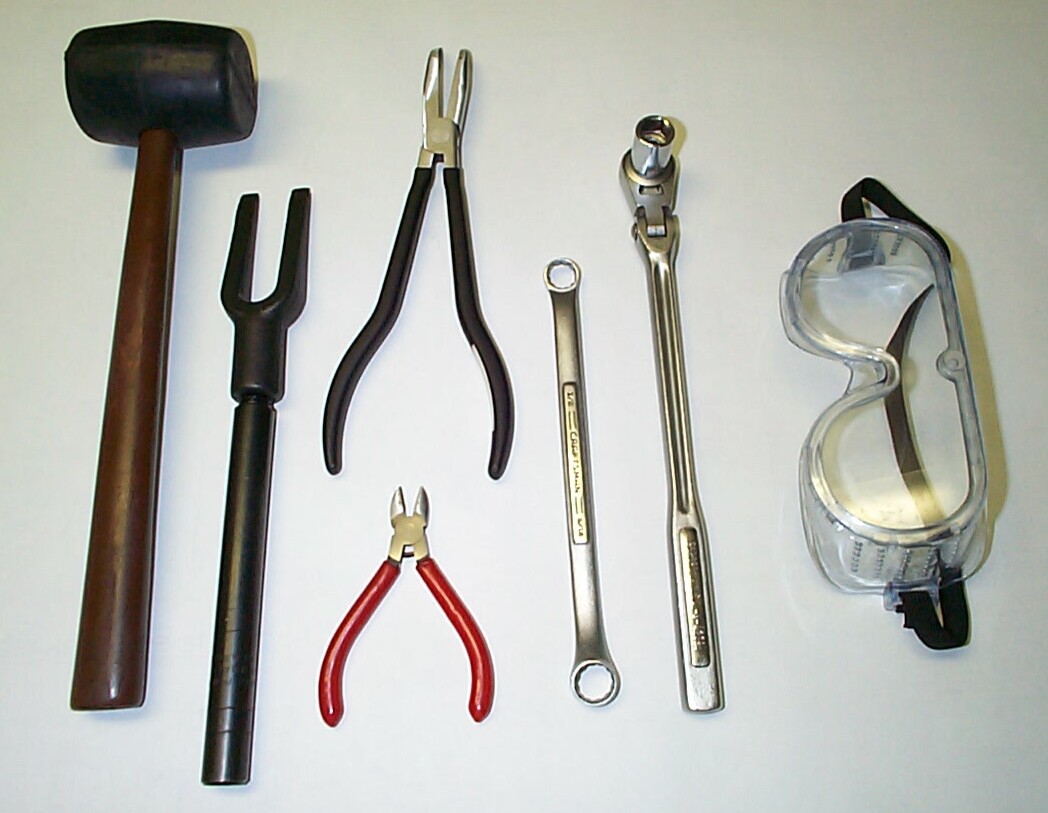
29th 2000 Started on
the shift-linkage fix this Saturday by removing the shift lever
assemblies off the side of the transmission and cleaning them. I also
managed to remove one of the rods (3686819 rod in the detailed assembly
drawing). I had assembled all the tools I thought I would need in the
past several weeks in a trial and error process. Besides the tools you
see here, I purchased a small gear puller to remove the levers from
their shafts but it was too big to fit in the restricted space under
BillyBob. I'm sure I'll have need of it sometime down the road. The
rubber mallet, goggles, 9/16" box-end and socket wrenches were already
in my inventory. The pickle fork is from a Lisle kit from Sears
(the kit includes two handles for manual or impact wrench, and three
forks, the smallest fork and manual handle is shown). The long handled
bent needle-nose pliers (also from sears) and small side cutters (from
one of my computer repair kits) were used, with varying degrees of
success, to destroy several pesky cotter pins.
April
29th 2000 Started on
the shift-linkage fix this Saturday by removing the shift lever
assemblies off the side of the transmission and cleaning them. I also
managed to remove one of the rods (3686819 rod in the detailed assembly
drawing). I had assembled all the tools I thought I would need in the
past several weeks in a trial and error process. Besides the tools you
see here, I purchased a small gear puller to remove the levers from
their shafts but it was too big to fit in the restricted space under
BillyBob. I'm sure I'll have need of it sometime down the road. The
rubber mallet, goggles, 9/16" box-end and socket wrenches were already
in my inventory. The pickle fork is from a Lisle kit from Sears
(the kit includes two handles for manual or impact wrench, and three
forks, the smallest fork and manual handle is shown). The long handled
bent needle-nose pliers (also from sears) and small side cutters (from
one of my computer repair kits) were used, with varying degrees of
success, to destroy several pesky cotter pins.
 It
didn't take long to get things apart (except for the cotter pins). I'd
forgotten how much fun is was to lie in a confined space with dirt
droppin' in your eyes (I didn't hunt up the goggles at first), and the
tangy smell of soft arm flesh as it sizzles in contact with the trouble
light every five minutes or so. After removal, the shift levers, bolts,
springs and washers were immersed in a gallon of Gunk Carburetor and
Parts Cleaner until they were clean. Then they were dumped from the
strainer basket into a bucket of water. The parts were pulled out of
the bucket one at a time, wiped off, and dried with a hair dryer. The
cotter pins I bought some time back are too small, but good for a
work-in-progress since you can bend them with your fingers. I also plan
to replace the springs and their retaining washers with new parts now
that I've got a feeling for their size (the big spring and washer in
the photo is an improvization by a previous owner, maybe even JR). I originally
thought the Shift Lever Bushings from Jim Carter (shown at top) fit
between the rod ends and levers since there are six of them . . . I was
wrong.
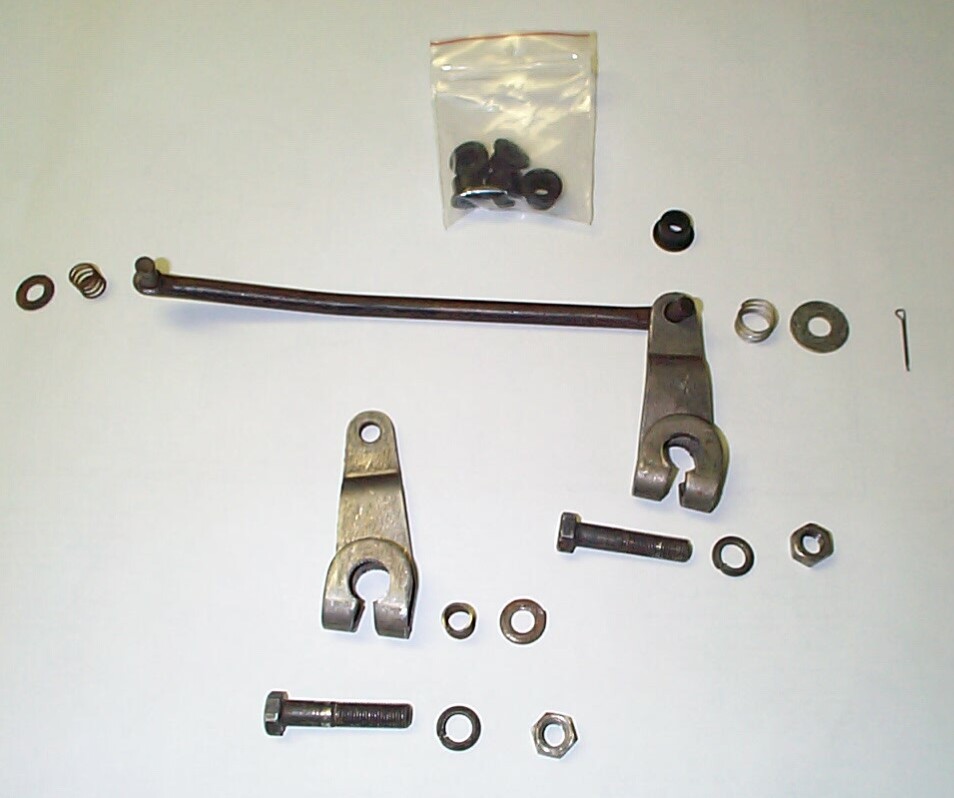
It
didn't take long to get things apart (except for the cotter pins). I'd
forgotten how much fun is was to lie in a confined space with dirt
droppin' in your eyes (I didn't hunt up the goggles at first), and the
tangy smell of soft arm flesh as it sizzles in contact with the trouble
light every five minutes or so. After removal, the shift levers, bolts,
springs and washers were immersed in a gallon of Gunk Carburetor and
Parts Cleaner until they were clean. Then they were dumped from the
strainer basket into a bucket of water. The parts were pulled out of
the bucket one at a time, wiped off, and dried with a hair dryer. The
cotter pins I bought some time back are too small, but good for a
work-in-progress since you can bend them with your fingers. I also plan
to replace the springs and their retaining washers with new parts now
that I've got a feeling for their size (the big spring and washer in
the photo is an improvization by a previous owner, maybe even JR). I originally
thought the Shift Lever Bushings from Jim Carter (shown at top) fit
between the rod ends and levers since there are six of them . . . I was
wrong.
 Reassembly
went well . . . too well! The only problem was that now the shift
linkage would hang between 1st and 2nd
gear shifts again, only worse! I went back and studied my "bread crumb
trail" pic from March 4th. Everything seemed in
order. In the pic you can see the rod connected to the lever in the
foreground passing closely behind the lever in the background. Well,
it's more than close . . . It's in contact with the rear lever's bolt
head at times! I took things apart again and first checked to see if I
had the shift rod in backwards. Finally, I moved the lock washers on
the shift lever thru-bolts from the bolt head side to the nut side and
this provided enuf clearance for the rod. This operation took twice as
long second time around . . . I was running out of time for the day and
it looked like Murphy was making an appearance to help me out.
Reassembly
went well . . . too well! The only problem was that now the shift
linkage would hang between 1st and 2nd
gear shifts again, only worse! I went back and studied my "bread crumb
trail" pic from March 4th. Everything seemed in
order. In the pic you can see the rod connected to the lever in the
foreground passing closely behind the lever in the background. Well,
it's more than close . . . It's in contact with the rear lever's bolt
head at times! I took things apart again and first checked to see if I
had the shift rod in backwards. Finally, I moved the lock washers on
the shift lever thru-bolts from the bolt head side to the nut side and
this provided enuf clearance for the rod. This operation took twice as
long second time around . . . I was running out of time for the day and
it looked like Murphy was making an appearance to help me out.
 This
is a side view over the top of the exhaust pipe. After I got BillyBob
down off the jack stands, I took a run thru the parking lot. Reverse, 1st
and 2nd gear shifts seemed to be OK, but I ran
out of parking lot before I got to try 3rd gear.
I got cleaned up and took BillyBob back to his warehouse bay. I made it
two blocks before locking up on the 1st to 2nd
gear shift. I drifted to a stop in front of an outdoor Mexican
restaurant. How !@#$%^ embarrassing! By
the time I crawled out from under BillyBob, rubber mallet in hand, I
had a Boca Raton Police cruiser behind me, lightbar flashing,
restaurant patrons looking on. The Police Officer was one of the good
guys, there to offer help, not to hassle a retired hippie. He came out
of the cruiser with day-glow vest and traffic cones to direct cars
around BillyBob while I fixed him. I was already finished, but I felt
like crawling under BillyBob again for a few minutes so this guy's good
efforts on my behalf didn't go to waste. Darn! One step forward, two
steps back. At least I didn't get get grease on the mallet tapping the
now clean shift linkage.
This
is a side view over the top of the exhaust pipe. After I got BillyBob
down off the jack stands, I took a run thru the parking lot. Reverse, 1st
and 2nd gear shifts seemed to be OK, but I ran
out of parking lot before I got to try 3rd gear.
I got cleaned up and took BillyBob back to his warehouse bay. I made it
two blocks before locking up on the 1st to 2nd
gear shift. I drifted to a stop in front of an outdoor Mexican
restaurant. How !@#$%^ embarrassing! By
the time I crawled out from under BillyBob, rubber mallet in hand, I
had a Boca Raton Police cruiser behind me, lightbar flashing,
restaurant patrons looking on. The Police Officer was one of the good
guys, there to offer help, not to hassle a retired hippie. He came out
of the cruiser with day-glow vest and traffic cones to direct cars
around BillyBob while I fixed him. I was already finished, but I felt
like crawling under BillyBob again for a few minutes so this guy's good
efforts on my behalf didn't go to waste. Darn! One step forward, two
steps back. At least I didn't get get grease on the mallet tapping the
now clean shift linkage.
| < Back to Intro |
You can email me at ![]() webmaster@laroke.com
webmaster@laroke.com
Issued Saturday September 23, 2000
Updated Tuesday April 18, 2017
copyright © 1996-2017 Larry Robert Kephart all rights reserved
| | LRK Home | | Bio Info | | Krash Khronicles | | LAROKE | |
| | BettyLou | | BillyBob's Garage | | Rat Patrol | | Deerslayer | | Elvira | |
| | Land of the Free and Home of the Brave | |
| | Keppylou's Art | | WWI Soldier's Diary | |