| | LRK Home | | Bio Info | | Krash Khronicles | | LAROKE | |
| | BettyLou | | BillyBob's Garage | | Rat Patrol | | Deerslayer | | Elvira | |
| | Land of the Free and Home of the Brave | |
| | Keppylou's Art | | WWI Soldier's Diary | |
BillyBob Work-in-Progress Log
![]()
TRUCK LINKS including vendor sites for old parts, custom parts, and tools as well as sites for classic car and truck organizations
STORE Operating in association with Amazon.com, books, recordings and tools can be purchased.
PLANNING for the restoration including project schedule and cost estimates.
![]()
WORK-IN-PROGRESS is the restoration of parts of BillyBob that I can accomplish without a garage.
PRE-RESTORATION includes log entries of minor repairs and and adventures between time of purchase and the time when I started restoration, a piece at a time.
JR'S KORNER JR's Korner is the history of BillyBob before I got him authored by my brother, Wm. C. Kephart.
Slight Facelift Page 3
 January
16th 2000 Yesterday the weather
was miserable but today turned out to be nice enough to paint
BillyBob's doors - cloudy and cool (for Florida) with a bit of a
breeze. I started by again masking off all the glass, door handles, and
other chrome and rubber close to the doors. ~!@#$%
I missed one of the rear quarter windows somehow, and incredible to
believe, did not notice my error until the door next to it was sprayed.
My un-aided aging eyes can't detect overspray on the quarter window,
but I'm sure it's there.
January
16th 2000 Yesterday the weather
was miserable but today turned out to be nice enough to paint
BillyBob's doors - cloudy and cool (for Florida) with a bit of a
breeze. I started by again masking off all the glass, door handles, and
other chrome and rubber close to the doors. ~!@#$%
I missed one of the rear quarter windows somehow, and incredible to
believe, did not notice my error until the door next to it was sprayed.
My un-aided aging eyes can't detect overspray on the quarter window,
but I'm sure it's there.
I'm still getting glossy areas alternating with splotchy areas. The passenger side door turned out better today than the driver's side, probably due to prevailing wind conditions for lack of a better guess.
 January
23rd 2000 Today, another
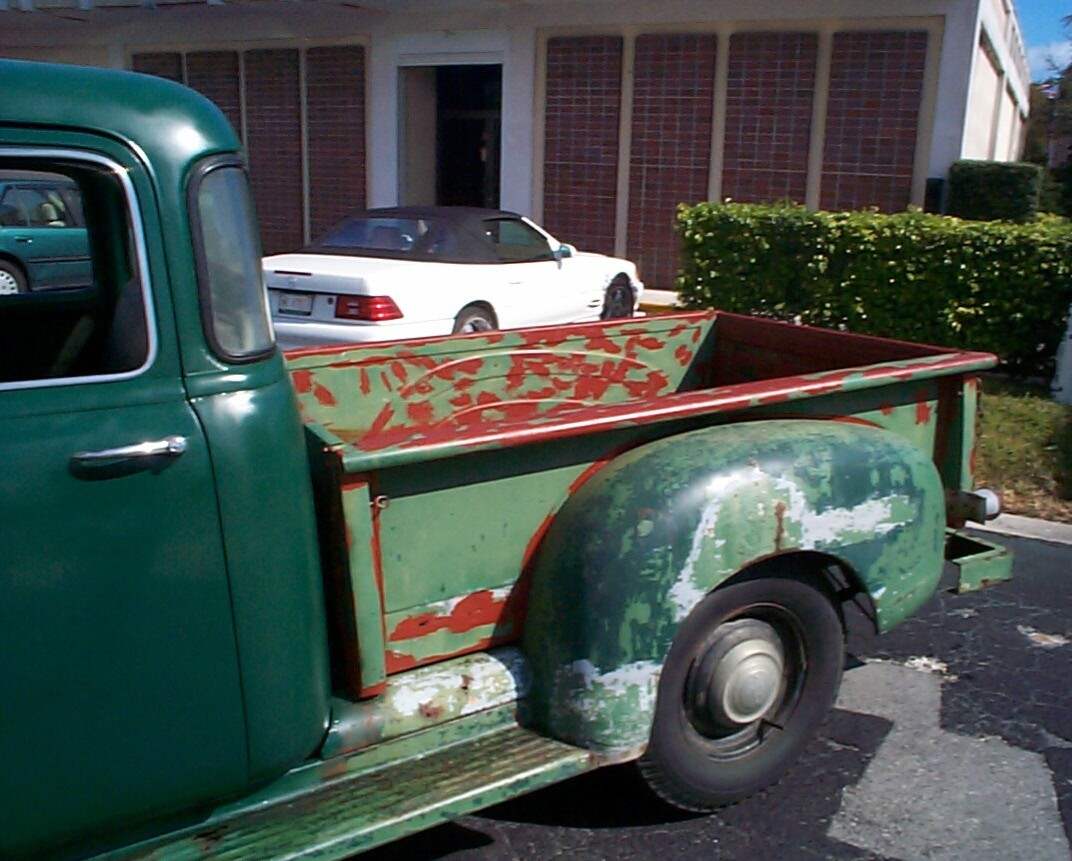
beautiful Sunday, the pickup bed sides were wire-brushed and treated
with Corolless stabilizer. I'm pretty sure now that the single quart of
this stuff is going to be enuf for this project. I might even have
enough for the wheels which is the next project. Finished up by
roughing what's left of the paint on the tailgate, front bed panel and
front apron, then washing for next week's painting.
January
23rd 2000 Today, another
beautiful Sunday, the pickup bed sides were wire-brushed and treated
with Corolless stabilizer. I'm pretty sure now that the single quart of
this stuff is going to be enuf for this project. I might even have
enough for the wheels which is the next project. Finished up by
roughing what's left of the paint on the tailgate, front bed panel and
front apron, then washing for next week's painting.
 January
29th 2000 I'm back to Saturday
sessions with BillyBob and reserving the shorter Sunday work sessions
for Renegade, my Jeep. Today, the Front splash apron, front bed panel
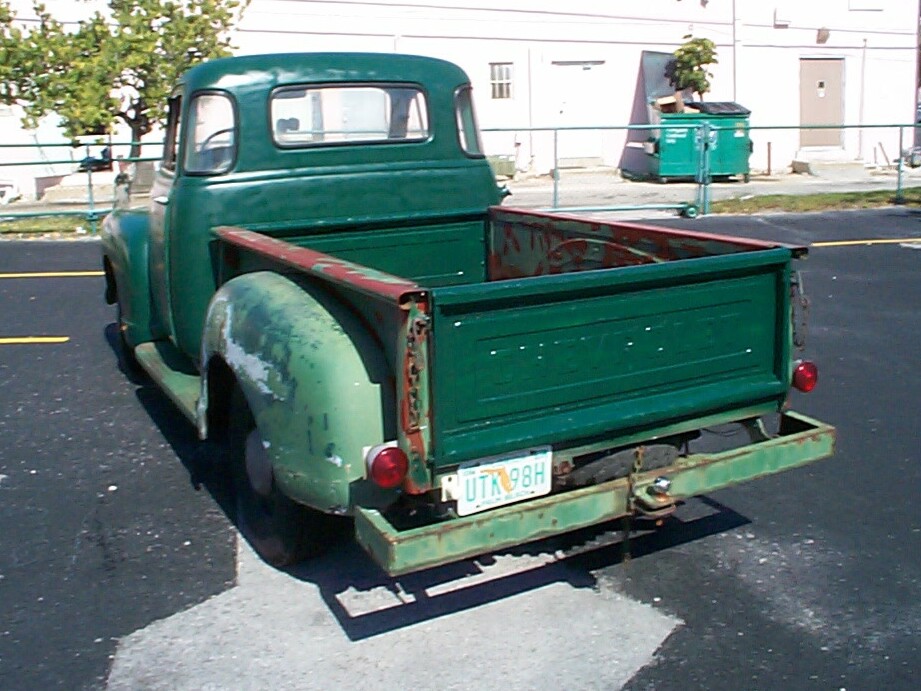
and tailgate were masked and painted. I ran out of masking paper and
had to improvise with plastic trash bags. For the first time today I
warmed up the spray can with hot tap water before spraying. It made the
paint much more manageable and I don't know why I didn't remember the
technique. I always followed this process as a kid when painting model
cars. The forward edge of the splash apron was too difficult to get at
with the spray can so I will have to do some touchup later by hand.
Next week, the rear fenders will receive preparation attention.
January
29th 2000 I'm back to Saturday
sessions with BillyBob and reserving the shorter Sunday work sessions
for Renegade, my Jeep. Today, the Front splash apron, front bed panel
and tailgate were masked and painted. I ran out of masking paper and
had to improvise with plastic trash bags. For the first time today I
warmed up the spray can with hot tap water before spraying. It made the
paint much more manageable and I don't know why I didn't remember the
technique. I always followed this process as a kid when painting model
cars. The forward edge of the splash apron was too difficult to get at
with the spray can so I will have to do some touchup later by hand.
Next week, the rear fenders will receive preparation attention.
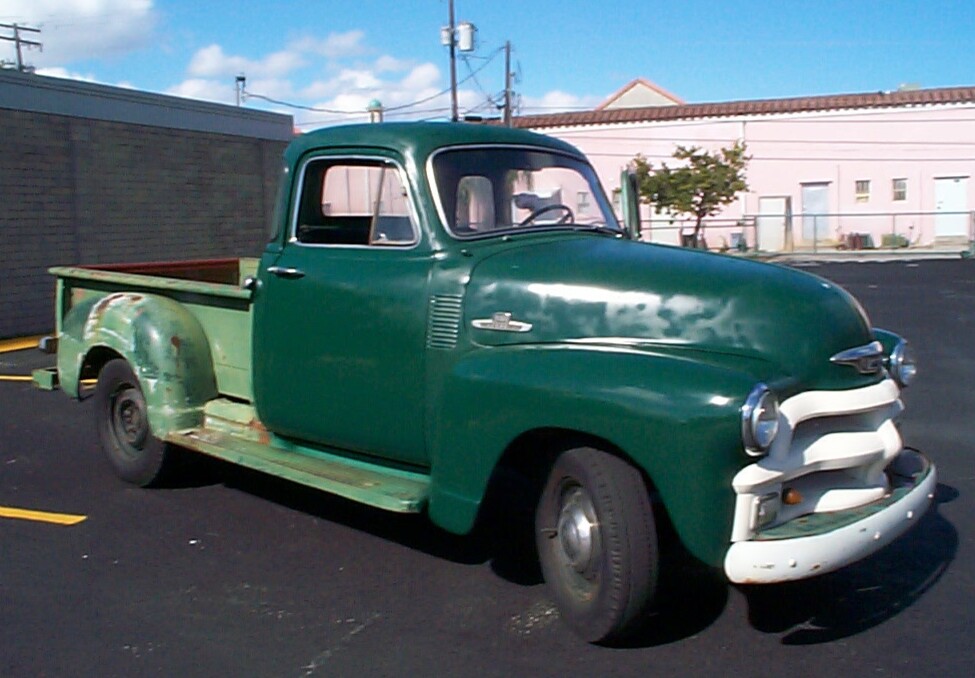
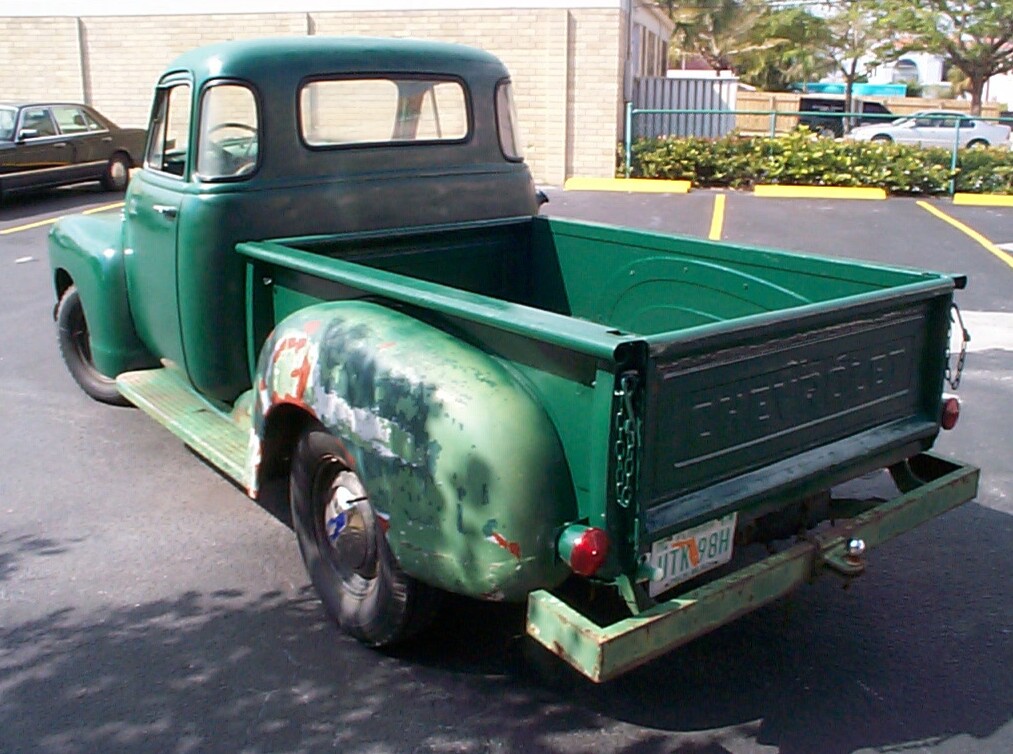
February 5th 2000 When I purchased BillyBob from my brother, JR, in 1995, he arrived in Florida with three hub caps. When I found the fourth hub cap among the extra parts in the pickup bed, I saw it was rusted out too badly to be mounted. Two of the other three hub caps on the truck were pretty corroded. Only one hub cap had any of its original shine. I checked out the Golden State Pickup Parts catalog I had and found they wanted over $70 each for these hub caps. That was too rich for me at the time.
Over the years I've checked other suppliers and the average price for 54/55 hub caps is in the $45 range. Last Sunday I visited the Jim Carter Truck Parts Website to check out hub caps again for the next BillyBob project which will be cleaning and painting the wheels. They were selling reproduction deluxe hub caps for about $30 each. When I visited their specials page, these hub caps were one of the five or so items listed and they were on sale for $20! As my boss likes to say "timing is everything". I ordered online and the hub caps arrived yesterday.
 I
installed the hub caps first thing. I was as excited as a kid at
Christmas. These hub caps are different than the ones that came with
BillyBob but they look good to me and, in Old English terms, I am well
pleased. I can feel the spirit of my dad lookin' over my shoulder tho'.
When I was a teenager, he never ceased giving me a hard time for
purchasing chrome lug nuts, chrome foot-shaped gas pedal, and chrome
piston-shaped shifter knob for my '59 Ford sedan with my limited funds
instead of paying attention to the car's leaky wheel cylinders. He was
right . . . Adding brake fluid every week was not the solution to that
problem as I was to learn in a rather intense incident down the road.
I'm fixin' the shift linkage next and then the wiring Dad, I promise.
The rest of today's session was spent rust-treating the rear fenders
and getting the pickup bed sides prepped for painting next week.
I
installed the hub caps first thing. I was as excited as a kid at
Christmas. These hub caps are different than the ones that came with
BillyBob but they look good to me and, in Old English terms, I am well
pleased. I can feel the spirit of my dad lookin' over my shoulder tho'.
When I was a teenager, he never ceased giving me a hard time for
purchasing chrome lug nuts, chrome foot-shaped gas pedal, and chrome
piston-shaped shifter knob for my '59 Ford sedan with my limited funds
instead of paying attention to the car's leaky wheel cylinders. He was
right . . . Adding brake fluid every week was not the solution to that
problem as I was to learn in a rather intense incident down the road.
I'm fixin' the shift linkage next and then the wiring Dad, I promise.
The rest of today's session was spent rust-treating the rear fenders
and getting the pickup bed sides prepped for painting next week.
 February
12th 2000 You couldn't
ask for a day much nicer. If my weather luck holds, I'll be finished
with this project in another three or four weeks. During the week I
picked up some more cans of "Hunter Green" Rustoleum and it's a good
thing 'cause the bed sides took two cans, about twice as much as I'd
estimated. When I was at Home Depot, I grabbed a Rustoleum sprayer
handle attachment as an impulse purchase. This little plastic gizmo
attaches to spray cans with a little collar and provides better control
of the spraying process. The jury is still out for that claim in my
case. I gotta get accustomed to the device. It's like when I specified
an art pen and digitizer tablet for my Mom's computer. Her art work suffered
at first because she had gotten quite skillful drawing with the mouse,
an instrument totally unsuited to computer art. Now, after she has
struggled thru the learning period, you'd be in for a helluva fight if
you tried to take the art pen away from her.
February
12th 2000 You couldn't
ask for a day much nicer. If my weather luck holds, I'll be finished
with this project in another three or four weeks. During the week I
picked up some more cans of "Hunter Green" Rustoleum and it's a good
thing 'cause the bed sides took two cans, about twice as much as I'd
estimated. When I was at Home Depot, I grabbed a Rustoleum sprayer
handle attachment as an impulse purchase. This little plastic gizmo
attaches to spray cans with a little collar and provides better control
of the spraying process. The jury is still out for that claim in my
case. I gotta get accustomed to the device. It's like when I specified
an art pen and digitizer tablet for my Mom's computer. Her art work suffered
at first because she had gotten quite skillful drawing with the mouse,
an instrument totally unsuited to computer art. Now, after she has
struggled thru the learning period, you'd be in for a helluva fight if
you tried to take the art pen away from her.
February 19th 2000 I can see the light at the end of the tunnel on this project. Today the bumpers and running boards were wire-brushed and prepped with Corolless. Those are the last parts that need to receive the treatment. The paint was roughened on the rear fenders and they were washed for next week's paint application. Three more good weekends and I can move on to the wheels.
I had to run for parts and BillyBob's three-on-the-tree gear shift mechanism locked up solid between first and second gears. This happened twice. The solution is simple - Drift to a stop (clutch still disengaged), off the road, if possible. Set the parking brake and turn the engine off. Retrieve a rubber mallet "I keep for just such occasions" from under the seat. Crawl under BillyBob and lightly tap the linkage arms at the transmission. Get back in BillyBob, check gearshift lever movement, start up, and continue on. The second time this happened today, I didn't realize there was a mud puddle under BillyBob until I felt it seeping through my jeans. I guess Murphy is sending me a message. I'm ajusting my plans to restore the shift linkage at the same time I do the wheels, or maybe sooner.
 February
26th 2000 Painting
conditions are marginal today . . . more wind than I feel comfortable
with and scattered showers. Got some clouds and sprinkles after I
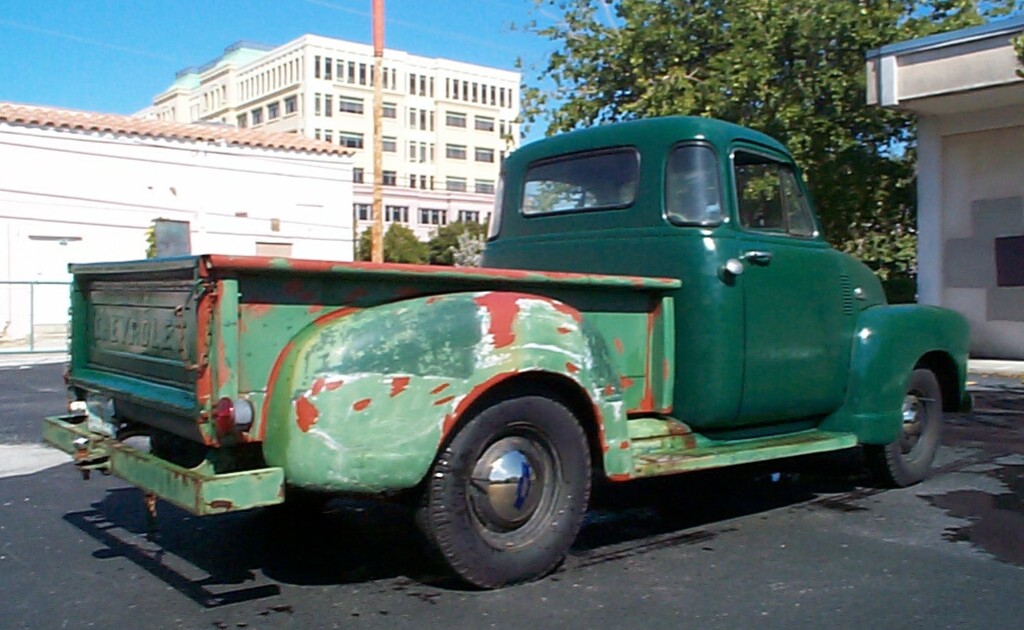
sprayed the first light coat of Hunter green on the rear fenders. After
awhile, the sun came out and allowed me to apply a second coat. This
project is about two weeks from being finished.
February
26th 2000 Painting
conditions are marginal today . . . more wind than I feel comfortable
with and scattered showers. Got some clouds and sprinkles after I
sprayed the first light coat of Hunter green on the rear fenders. After
awhile, the sun came out and allowed me to apply a second coat. This
project is about two weeks from being finished.
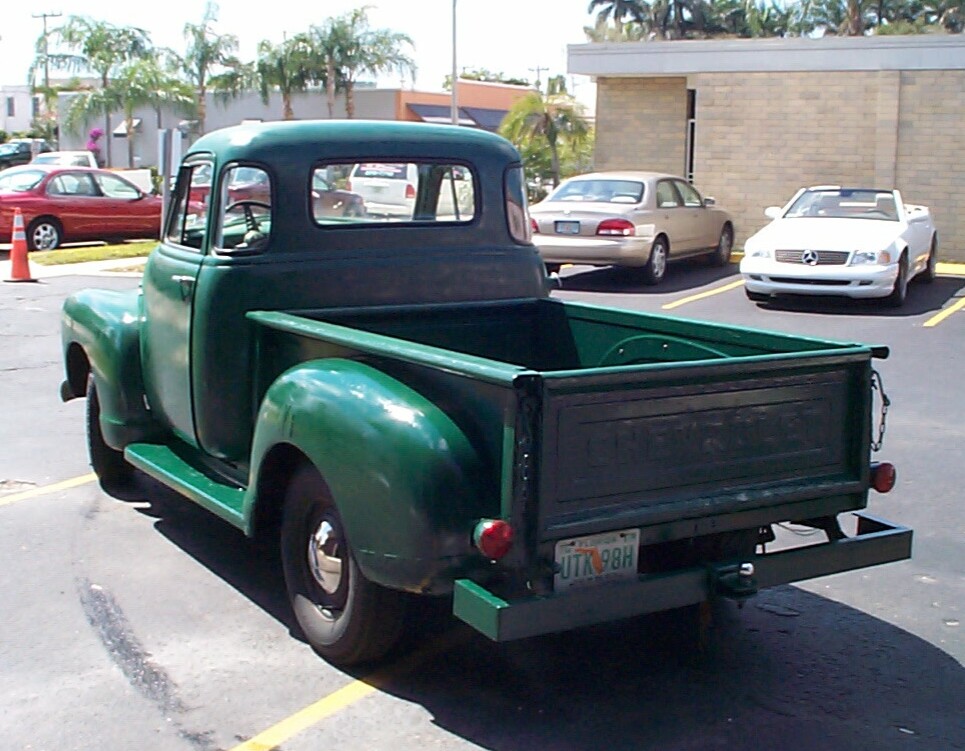
 March
4th 2000 It is a little
windy but otherwise wonderful today so I decided to finish this project
up. The running boards and bumpers were roughed-up and washed. After
the sun dried everything, only a small amount of masking off was
required. The running boards and rear bumper were finished with Hunter
Green and the front bumper with Satin White. I couldn't find the "Shell
White" that the grille had been finished with when I visited Home Depot
last time so I settled for the "Satin White". There is a slight
variation in the two colors, so I will re-spray the front bumper when I
finally locate another can of "Shell White".
March
4th 2000 It is a little
windy but otherwise wonderful today so I decided to finish this project
up. The running boards and bumpers were roughed-up and washed. After
the sun dried everything, only a small amount of masking off was
required. The running boards and rear bumper were finished with Hunter
Green and the front bumper with Satin White. I couldn't find the "Shell
White" that the grille had been finished with when I visited Home Depot
last time so I settled for the "Satin White". There is a slight
variation in the two colors, so I will re-spray the front bumper when I
finally locate another can of "Shell White".
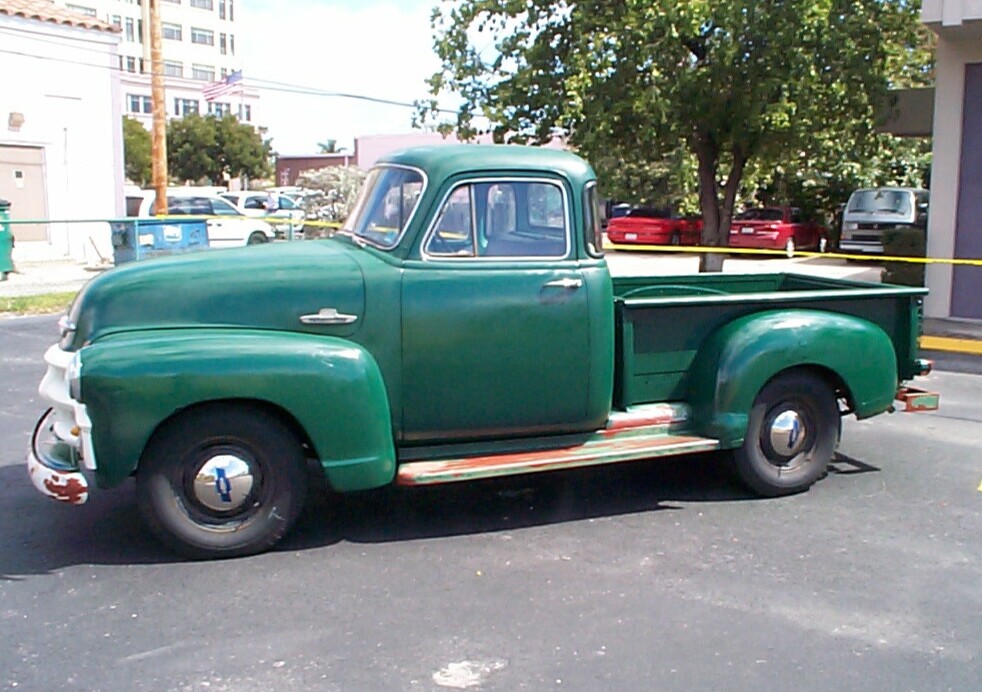
 Well,
that's it. BillyBob looks great compared to what he looked like at the
end of October when I started this slight facelift. My knowledge has
grown too during the process and I performed the work at a relaxed
enough pace that it was fun and not a chore. My next two projects are
painting the wheels and restoring the three-on-the-tree gearshift
linkage which has been giving me some trouble.
Well,
that's it. BillyBob looks great compared to what he looked like at the
end of October when I started this slight facelift. My knowledge has
grown too during the process and I performed the work at a relaxed
enough pace that it was fun and not a chore. My next two projects are
painting the wheels and restoring the three-on-the-tree gearshift
linkage which has been giving me some trouble.
| < Back to Intro |
You can email me at ![]() webmaster@laroke.com
webmaster@laroke.com
Issued Saturday March 4, 2000
Updated Friday April 14, 2017
copyright © 1996-2017 Larry Robert Kephart all rights reserved
| | LRK Home | | Bio Info | | Krash Khronicles | | LAROKE | |
| | BettyLou | | BillyBob's Garage | | Rat Patrol | | Deerslayer | | Elvira | |
| | Land of the Free and Home of the Brave | |
| | Keppylou's Art | | WWI Soldier's Diary | |