| | LRK Home | | Bio Info | | Krash Khronicles | | LAROKE | |
| | BettyLou | | BillyBob's Garage | | Rat Patrol | | Deerslayer | | Elvira | |
| | Land of the Free and Home of the Brave | |
| | Keppylou's Art | | WWI Soldier's Diary | |
Tinkering with Deerslayer
![]()
DEERSLAYER LINKS including vendor sites for parts and tools as well as sites for old truck and hot rod organizations
![]()
TINKERING WITH DEERSLAYER chronicles the day-by-day maintenance and improvements episodes for Deerslayer, a '37 Chevy farm truck hot rod.
CRUISIN' WITH DEERSLAYER Roadtrips, cruise-in's and truck show stories and tall tales.
TONY'S DUNGEON Tony Pascarella's forum entries at OldGMCtrucks.com regarding Deerslayer, particularly the 302 GMC engine build in his farmhouse basement.
![]()
DEERSLAYER MAINTENANCE Ever changing detailing, oil change, lube, etc. maintenance routines specifically developed for Deerslayer, including required tools, materials and procedures.
PROJECT NAILHEAD Chronicles the rebuild of a 1954 Buick Roadmaster 322 nailhead engine as a future replacement for Deerslayer's Jimmy 302.
38. Headache - Mission Creep
 October
10th 2015 Ever since I
removed the starter a week or so back and did a preliminary pass at
area cleanup, I've been pondering the state of the engine paint. I came
to the conclusion that I will not be happy putting the engine back
together without refurbishing the paint. This is known as mission creep
and will require taking more parts off the engine, including the nose
and radiator which I had decided against at the beginning of this job.
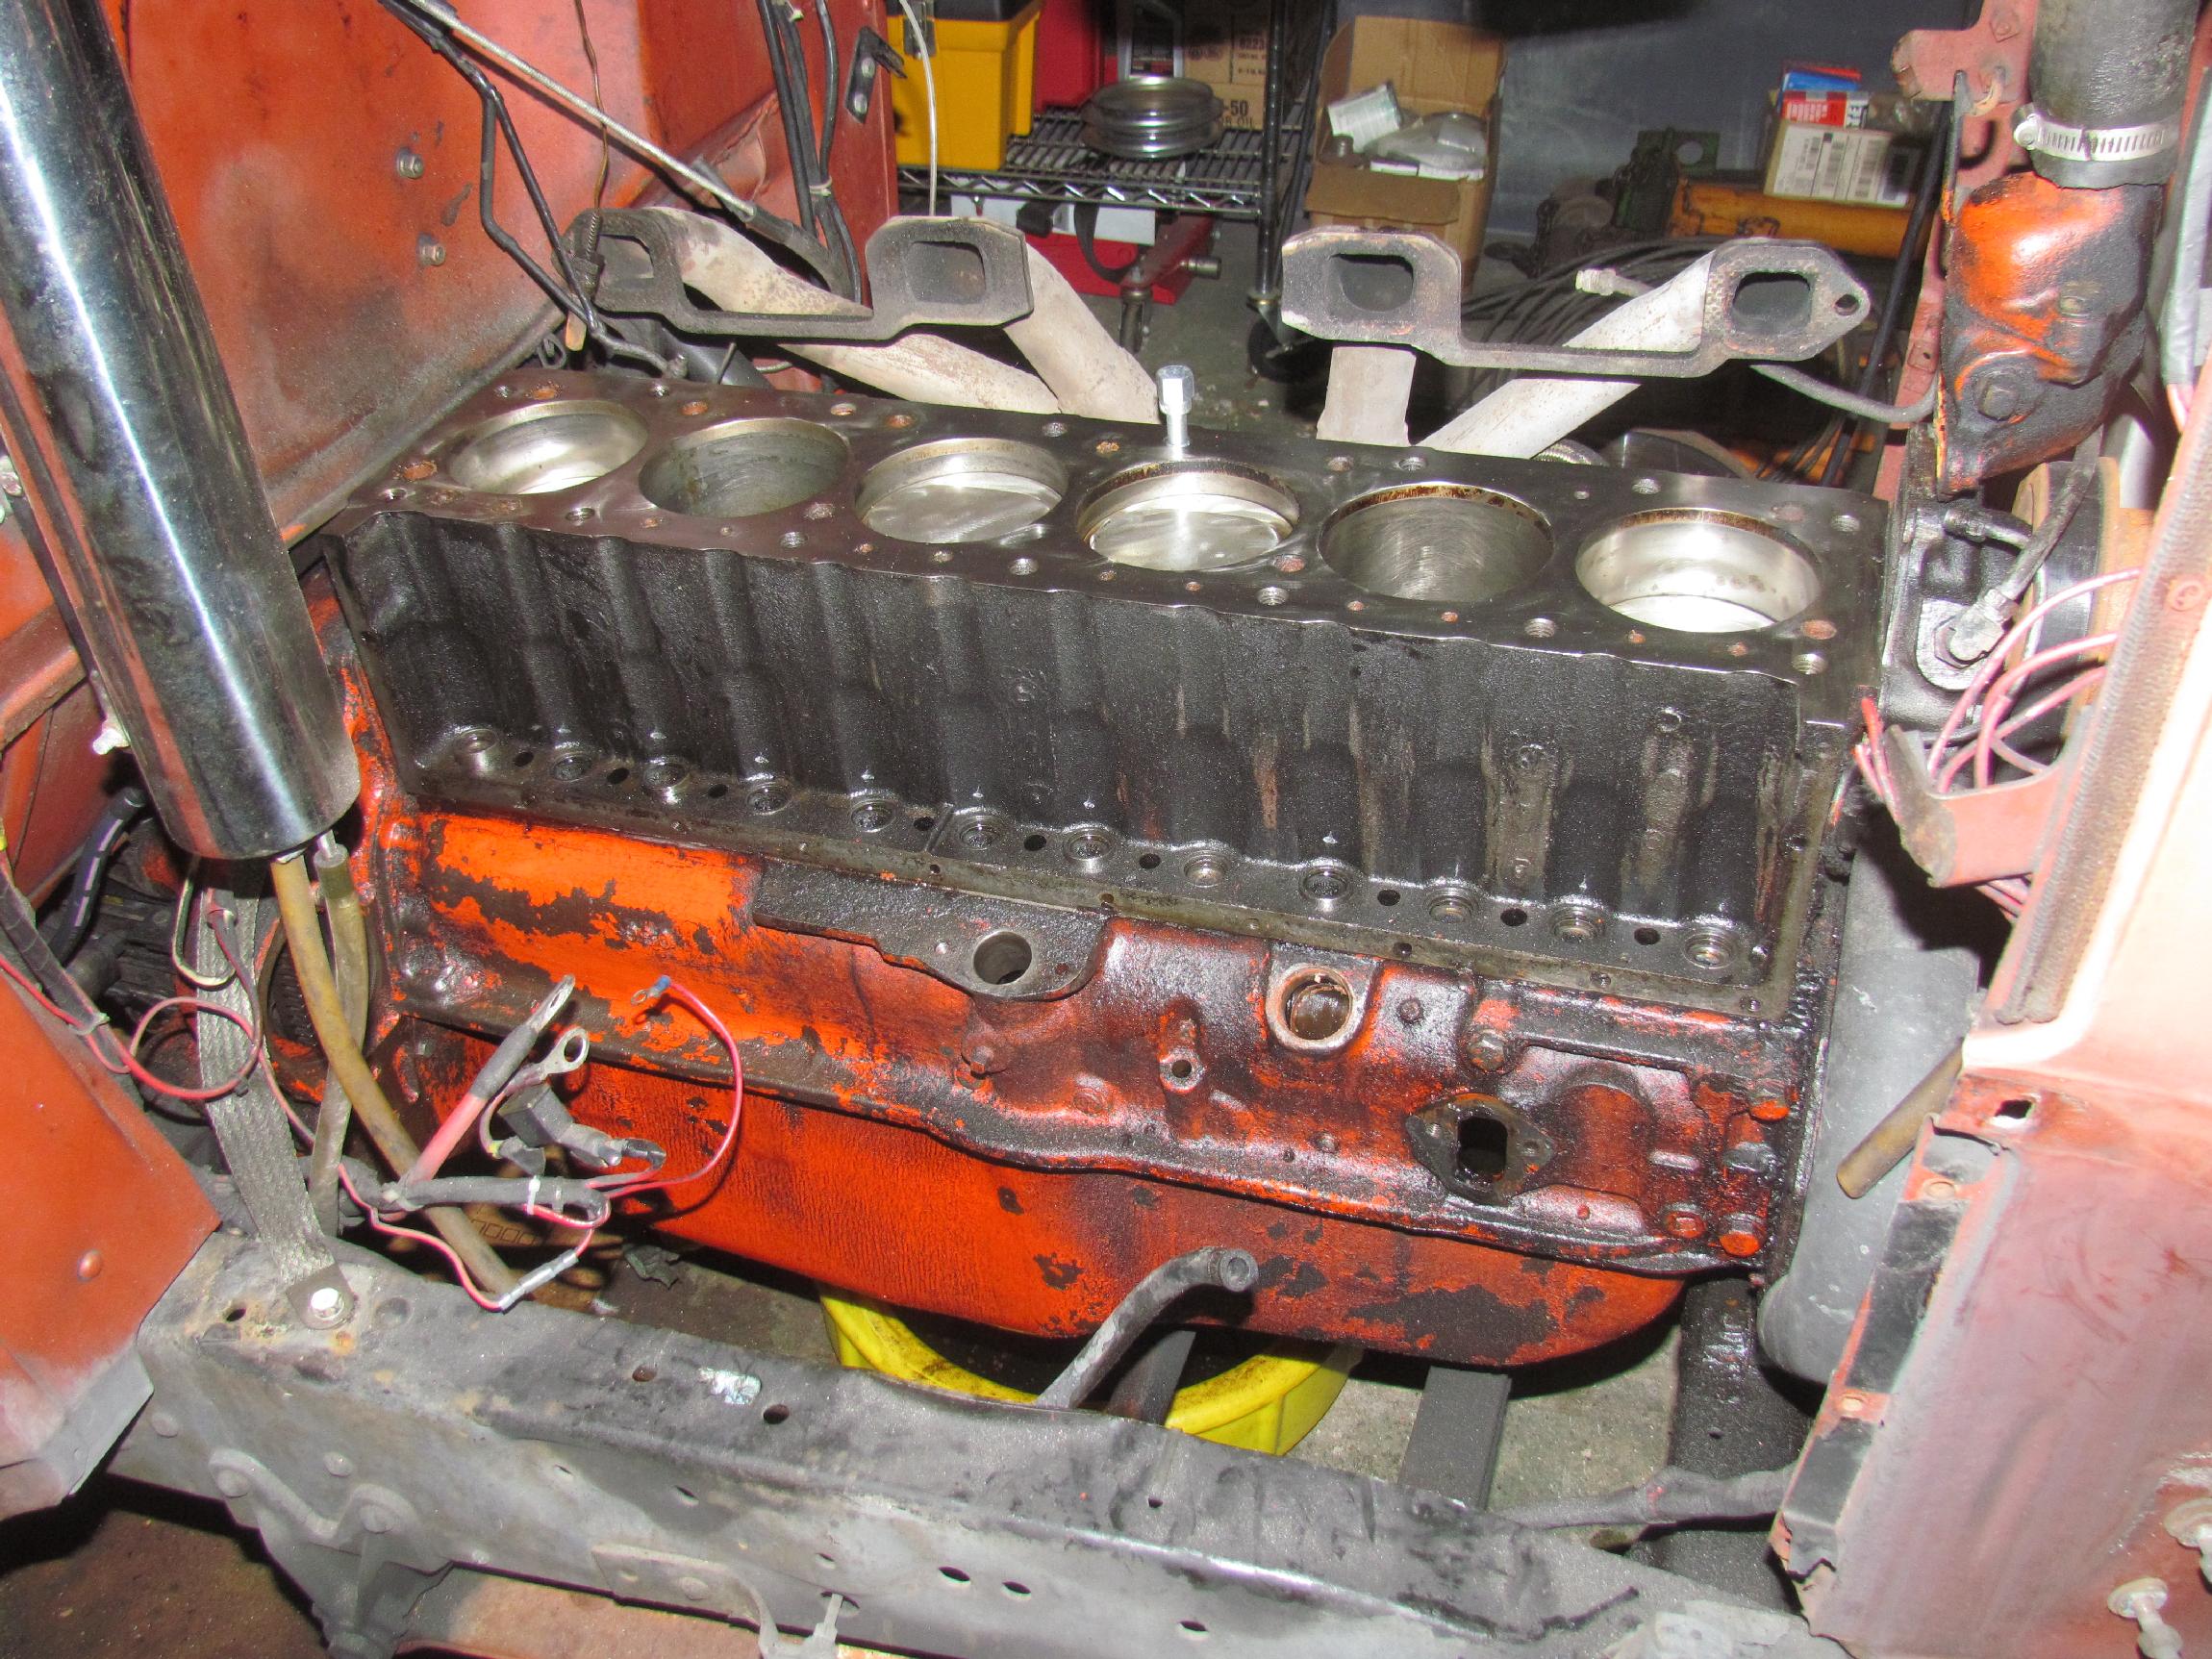
I started taking everything off the right side of the engine. The oil
dipstick tube, a press fit, came out easily. The road draft tube turned
out to be a different case.
October
10th 2015 Ever since I
removed the starter a week or so back and did a preliminary pass at
area cleanup, I've been pondering the state of the engine paint. I came
to the conclusion that I will not be happy putting the engine back
together without refurbishing the paint. This is known as mission creep
and will require taking more parts off the engine, including the nose
and radiator which I had decided against at the beginning of this job.
I started taking everything off the right side of the engine. The oil
dipstick tube, a press fit, came out easily. The road draft tube turned
out to be a different case.
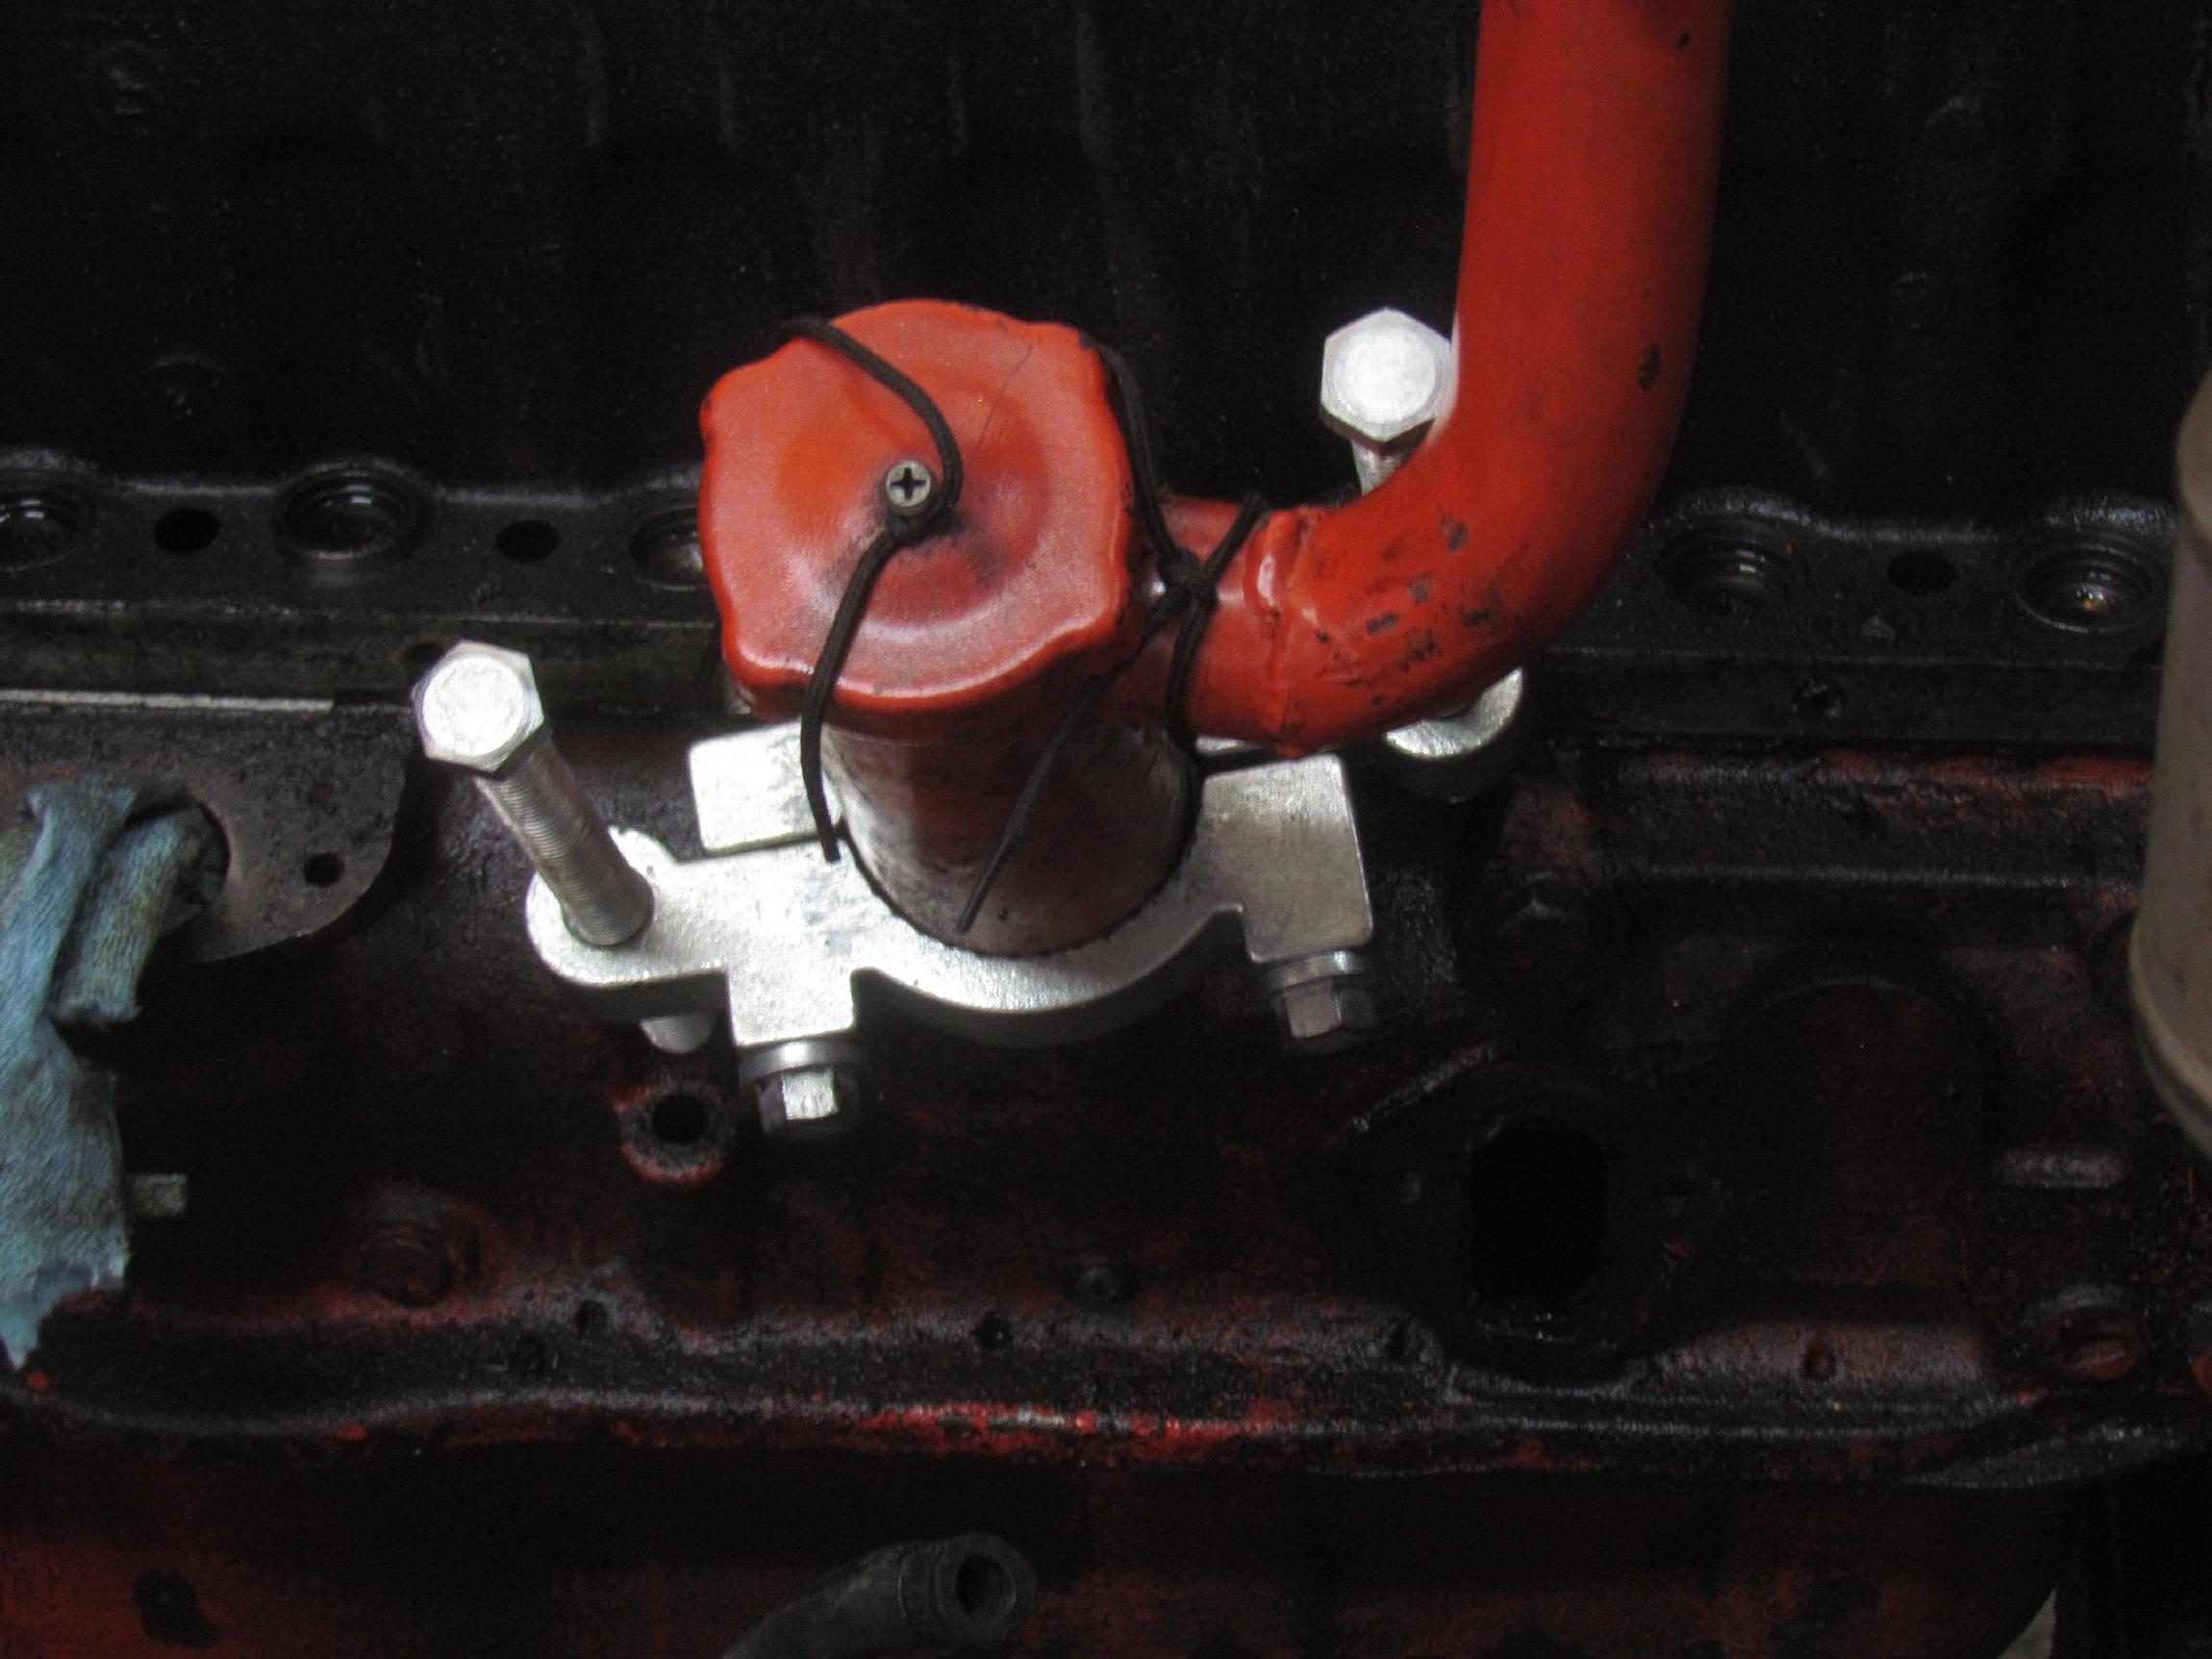
First, I rigged up a ratchet strap to put tension on the road draft tube as I tapped it on all sides with a brass hammer. No joy with that so I took off the mechanical fuel pump which is right next to the road draft tube and hit the base of the tube with MAPP gas torch, then quenching with Kroil penetrating oil. I ran three cycles of this process, tapping with the hammer and rocking the tube until I wore myself out. Only a little progress with this method and I'm not quite sure whether I loosened the tube a bit or I need a new front engine mount.
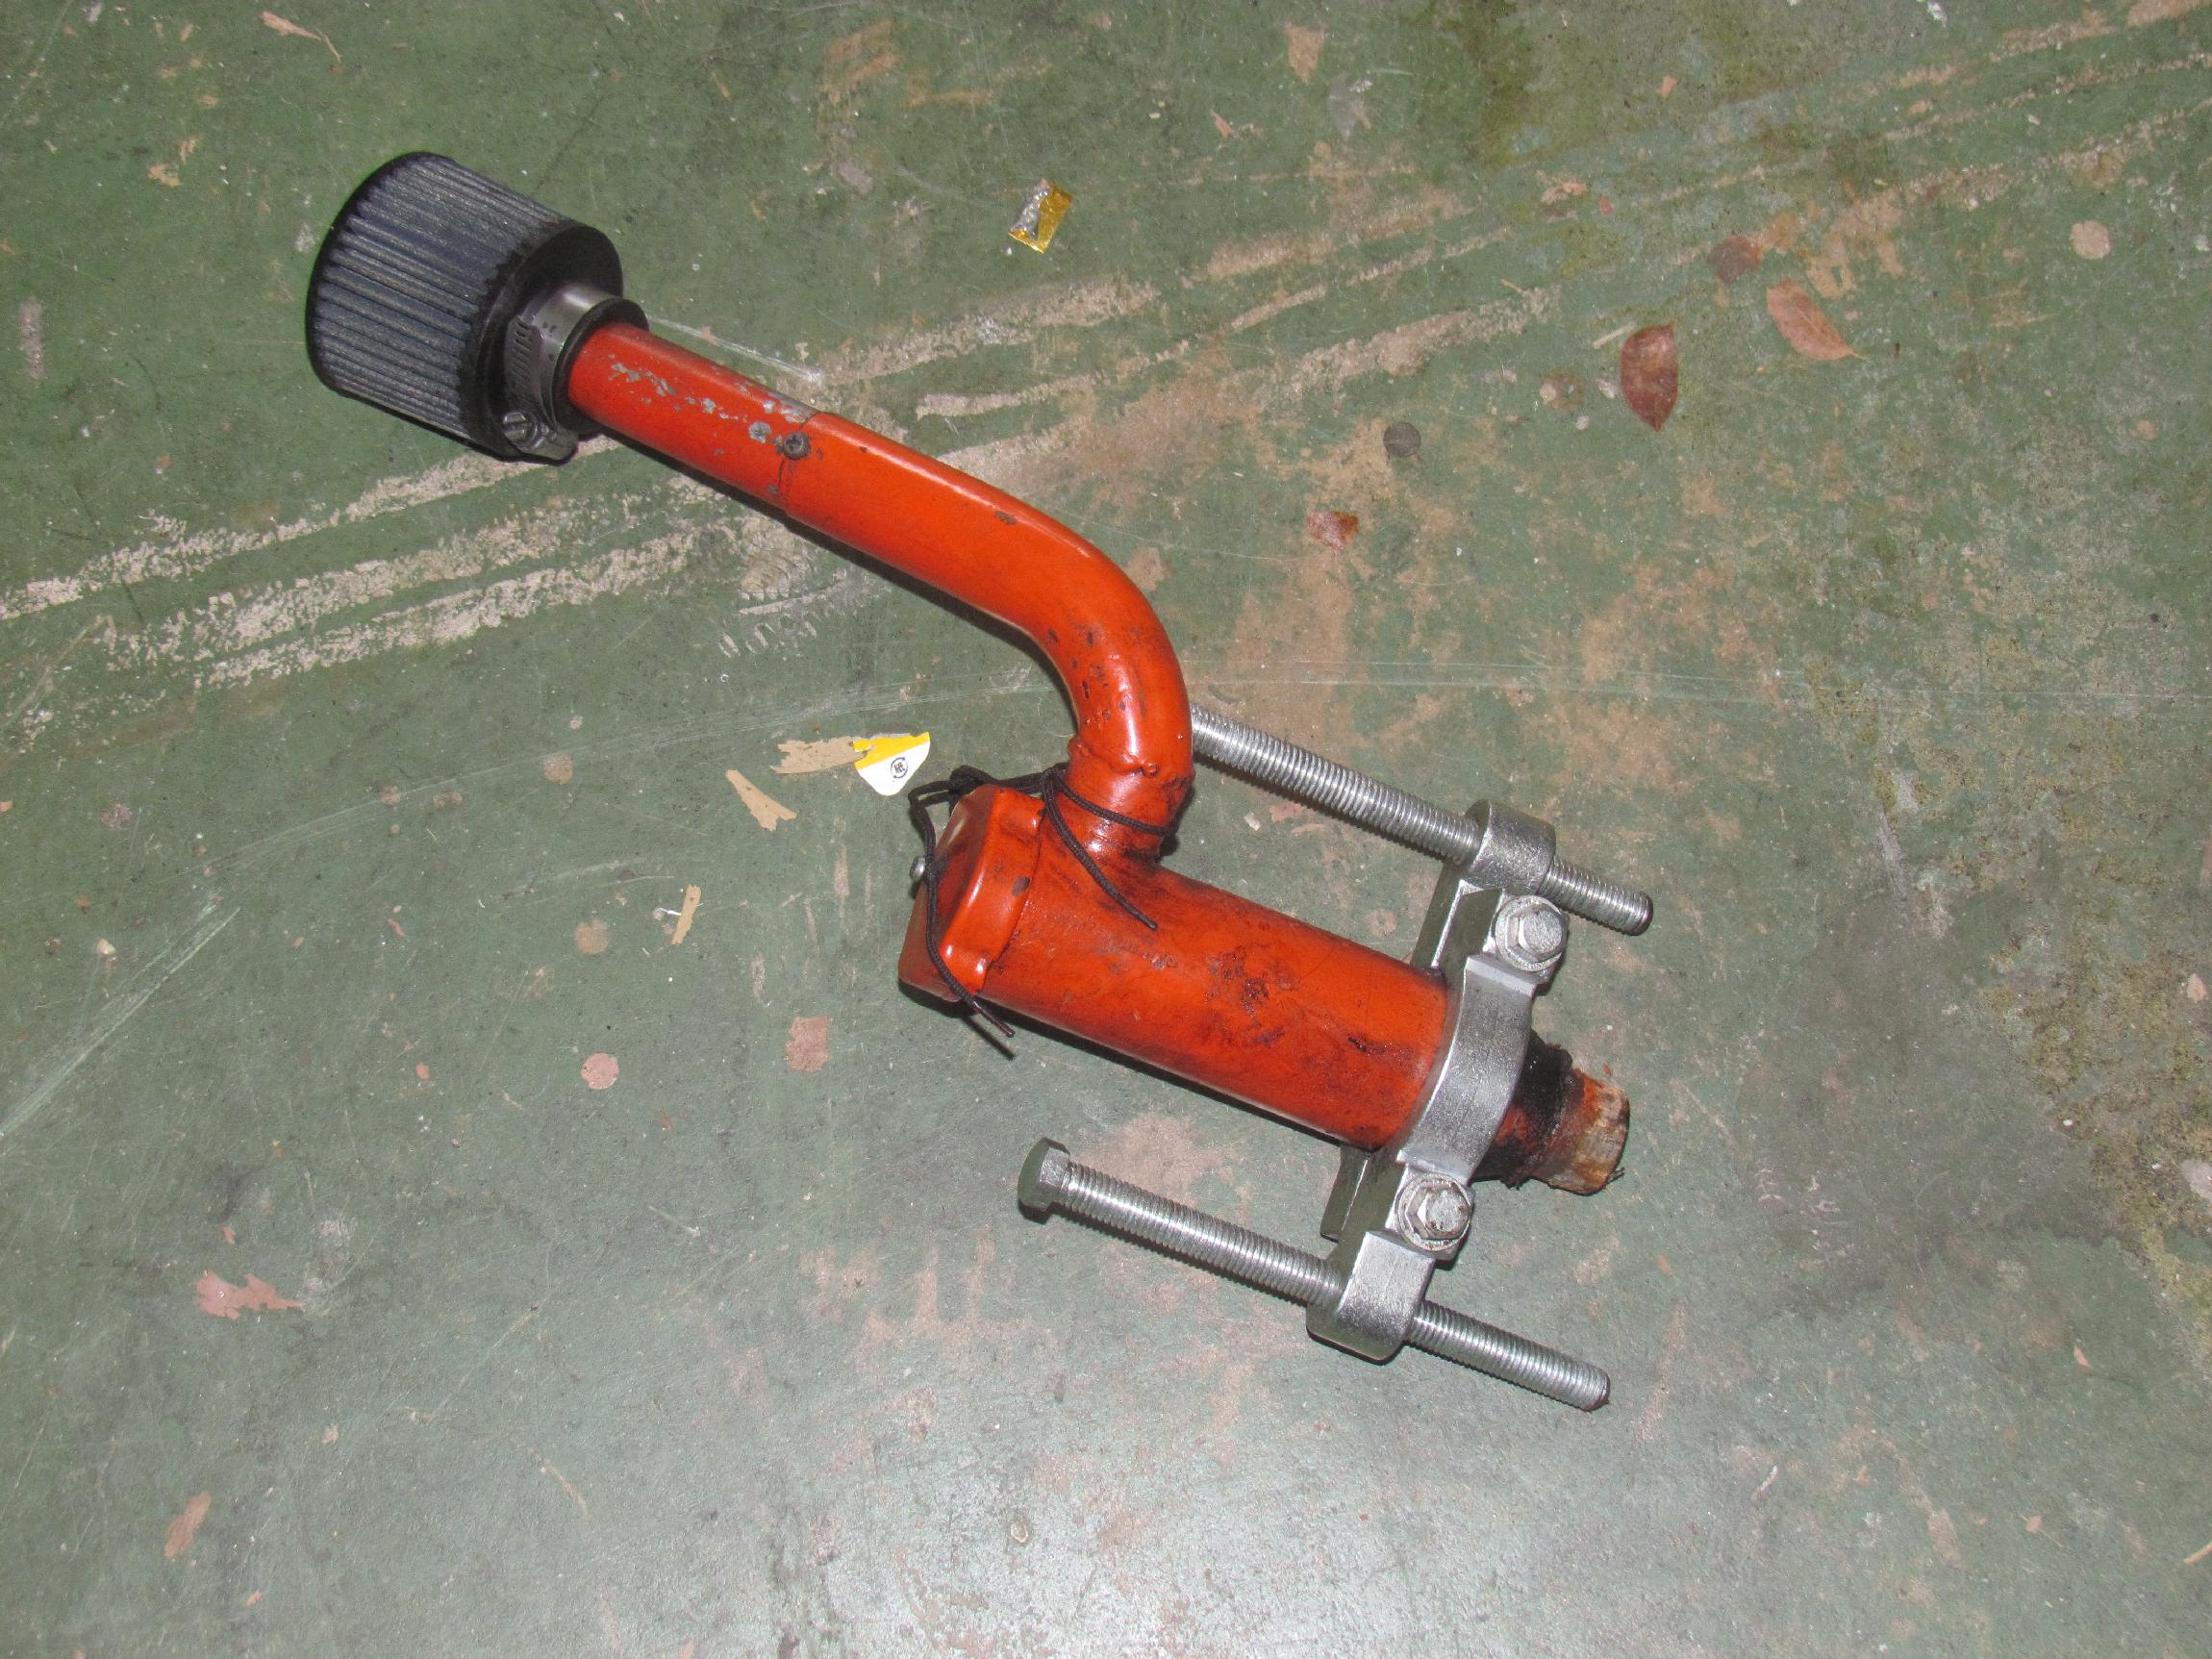 While
sitting in front of a fan resting up with a beer, I remembered a
specialty tool I got years ago from Eastwood Company, a tubing
separator. I got it for taking apart the tailpipe system on BillyBob.
The bad news is that it only works with 2-1/4" tubing. I rooted around
until I found it and the good news is that it would work with the road
draft tube. I put the threaded clamp on the road draft tube and ran the
separating bolts down against the block (normally they run against a
similar clamp on the opposing tube you are trying to separate). After a
few rounds of tightening bolts and rocking the road draft tube, it came
out.
While
sitting in front of a fan resting up with a beer, I remembered a
specialty tool I got years ago from Eastwood Company, a tubing
separator. I got it for taking apart the tailpipe system on BillyBob.
The bad news is that it only works with 2-1/4" tubing. I rooted around
until I found it and the good news is that it would work with the road
draft tube. I put the threaded clamp on the road draft tube and ran the
separating bolts down against the block (normally they run against a
similar clamp on the opposing tube you are trying to separate). After a
few rounds of tightening bolts and rocking the road draft tube, it came
out.
 I
also cleaned some more engine parts and bagged them for reassembly down
the line. I primed and painted the coil bracket too. This
operation did not go well because I picked an old can of Eastwood's
Detail Silver paint and it came out like lumpy gravy. It will have to
be stripped and done over. Why mess with an old coil bracket? Because
the replacement coils come with a bracket that is too small in diameter
for the coil they ship with. You can make it work but it squeezes the
coil into a hourglass shape. That can't be good. Go figure.
I
also cleaned some more engine parts and bagged them for reassembly down
the line. I primed and painted the coil bracket too. This
operation did not go well because I picked an old can of Eastwood's
Detail Silver paint and it came out like lumpy gravy. It will have to
be stripped and done over. Why mess with an old coil bracket? Because
the replacement coils come with a bracket that is too small in diameter
for the coil they ship with. You can make it work but it squeezes the
coil into a hourglass shape. That can't be good. Go figure.
When I posted this to Facebook, Tony remarked that he might have used JB Weld when he installed the road draft tube . . . Greg Macha laughed and laughed.
 February
25th 2016 Activity
in the BillyBob Shop pretty much flatlined after the first of the year.
I haven't been doing much except cleanup. Yesterday was more
of
the same with the addition of some unproductive tinkering with my
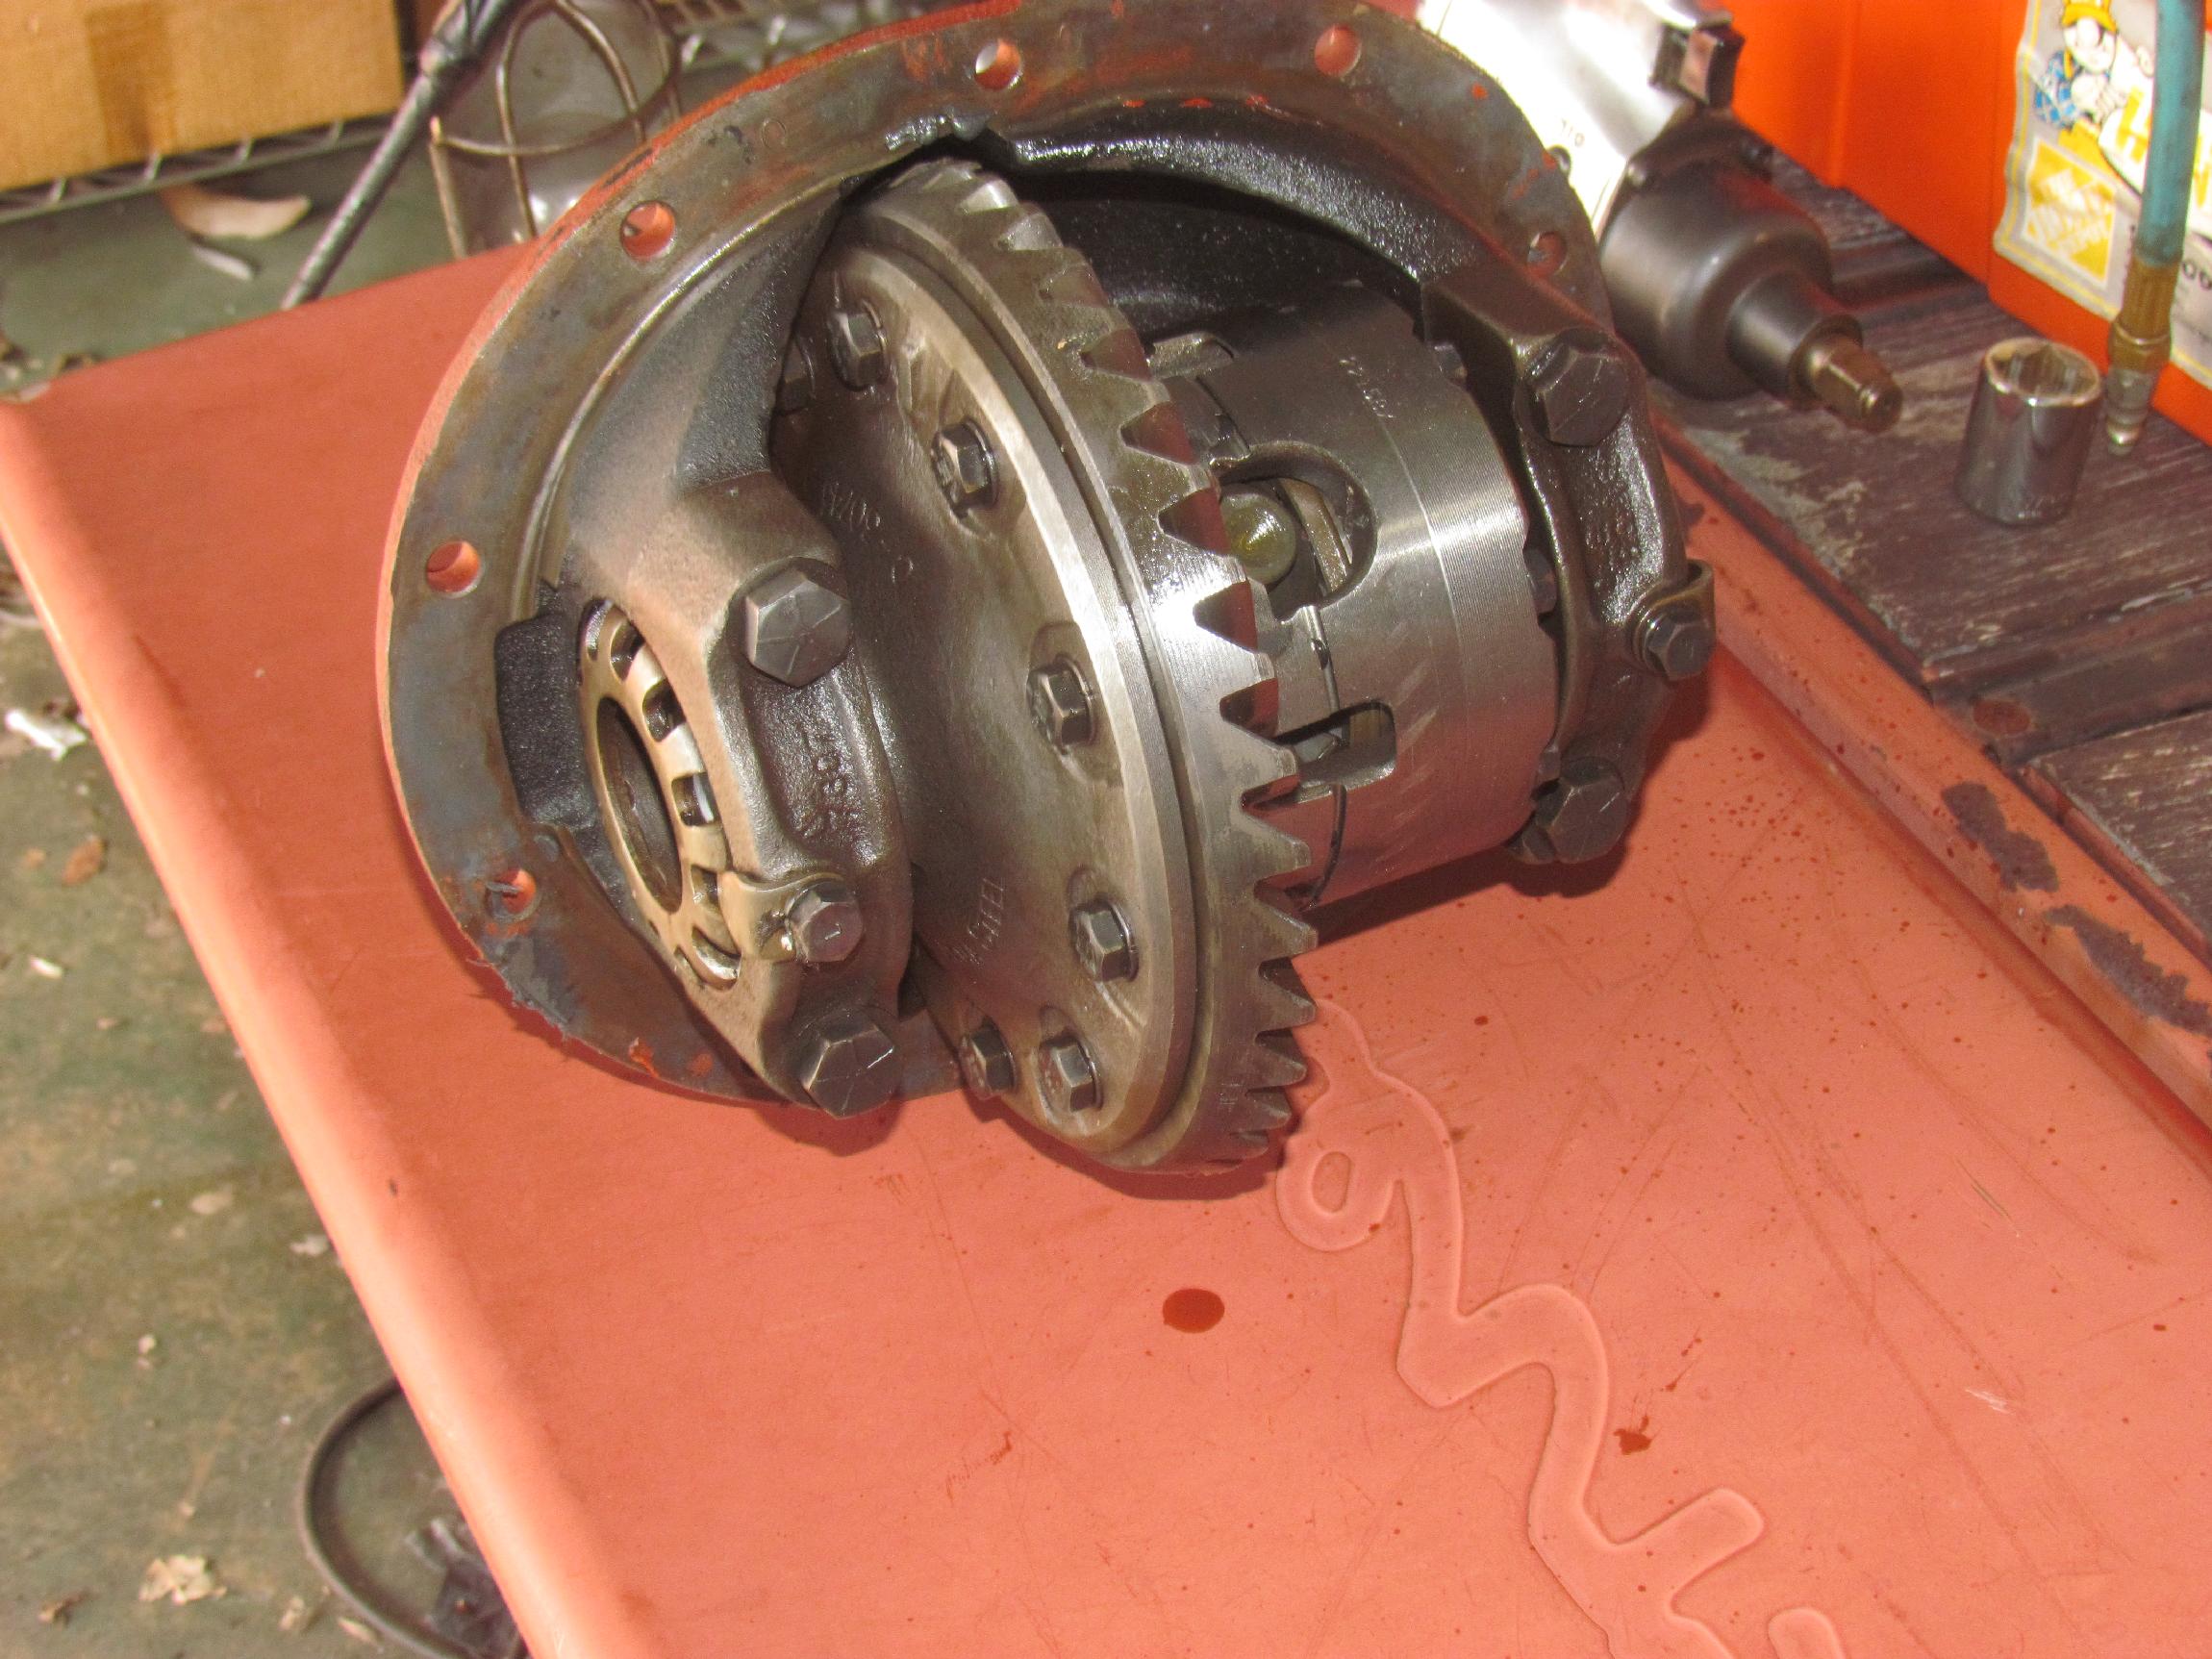
broken Jeep door. The one item of note was the unpacking and inspection
of a newly obtained treasure., a positraction center chunk for the
Deerslayer's rear axle. The axle is a conventional differential from a
1957 Chevy car with 3.36 gearing. I don't romp-n-stomp much but, when I
do, the Deerslayer goes smartly down the road with one tire on fire.
This 1957 positraction center section has been fitted with a 3.08 ring
and pinion, too high for the owner's taste in the '62 Chevy
409
car it was built for. It is well suited, however, for Deerslayer.
February
25th 2016 Activity
in the BillyBob Shop pretty much flatlined after the first of the year.
I haven't been doing much except cleanup. Yesterday was more
of
the same with the addition of some unproductive tinkering with my
broken Jeep door. The one item of note was the unpacking and inspection
of a newly obtained treasure., a positraction center chunk for the
Deerslayer's rear axle. The axle is a conventional differential from a
1957 Chevy car with 3.36 gearing. I don't romp-n-stomp much but, when I
do, the Deerslayer goes smartly down the road with one tire on fire.
This 1957 positraction center section has been fitted with a 3.08 ring
and pinion, too high for the owner's taste in the '62 Chevy
409
car it was built for. It is well suited, however, for Deerslayer.
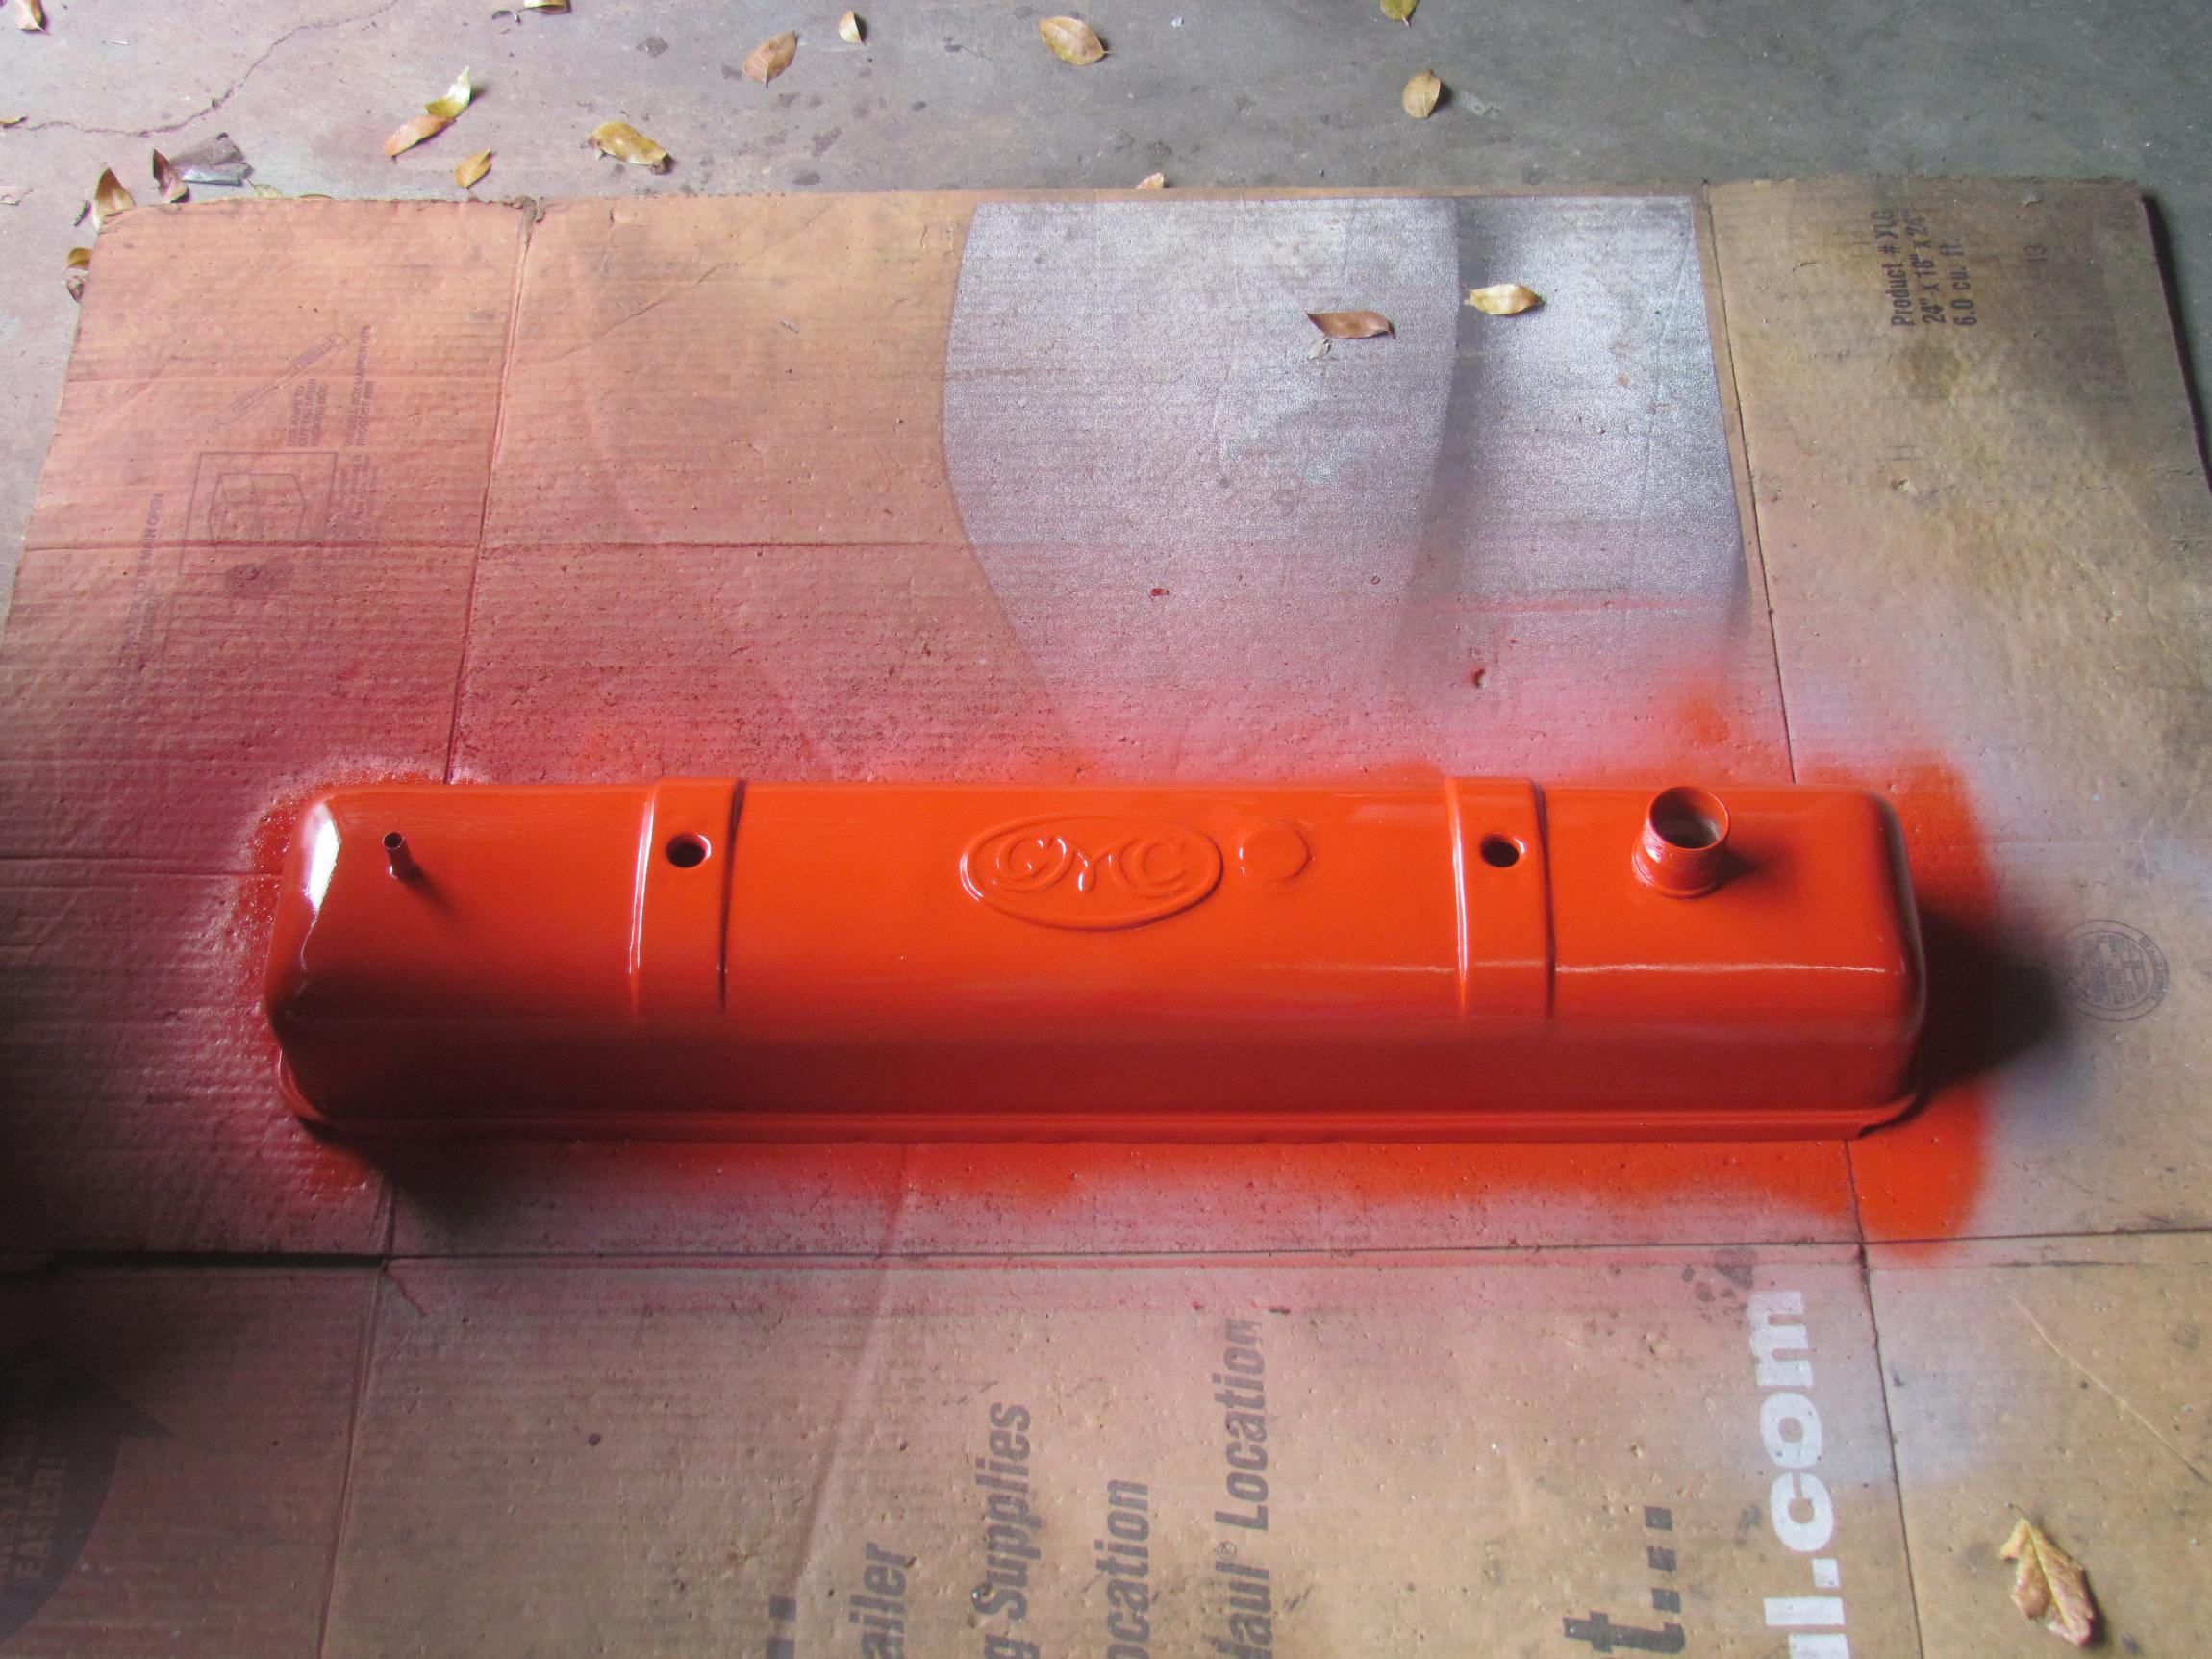 April
6th 2016 Spent
the day refinishing the Jimmy 302 valve cover. It looked pretty nasty
after spending weeks submerged in the parts washer goop. Took it down
to bare metal with scotchbrite roloc disks in the air angle
die
grinder. It's tedjus work with my low capacity air compressor with lots
of wait periods, which I filled up with the beer of the day, 16 Mile
Brewing Company's Tiller Brown Ale. Afterwards, the valve cover got two
coats of self-etching primer and two coats of Chevy Orange Dupicolor
Engine Paint before I ceased ops for the day.
April
6th 2016 Spent
the day refinishing the Jimmy 302 valve cover. It looked pretty nasty
after spending weeks submerged in the parts washer goop. Took it down
to bare metal with scotchbrite roloc disks in the air angle
die
grinder. It's tedjus work with my low capacity air compressor with lots
of wait periods, which I filled up with the beer of the day, 16 Mile
Brewing Company's Tiller Brown Ale. Afterwards, the valve cover got two
coats of self-etching primer and two coats of Chevy Orange Dupicolor
Engine Paint before I ceased ops for the day.
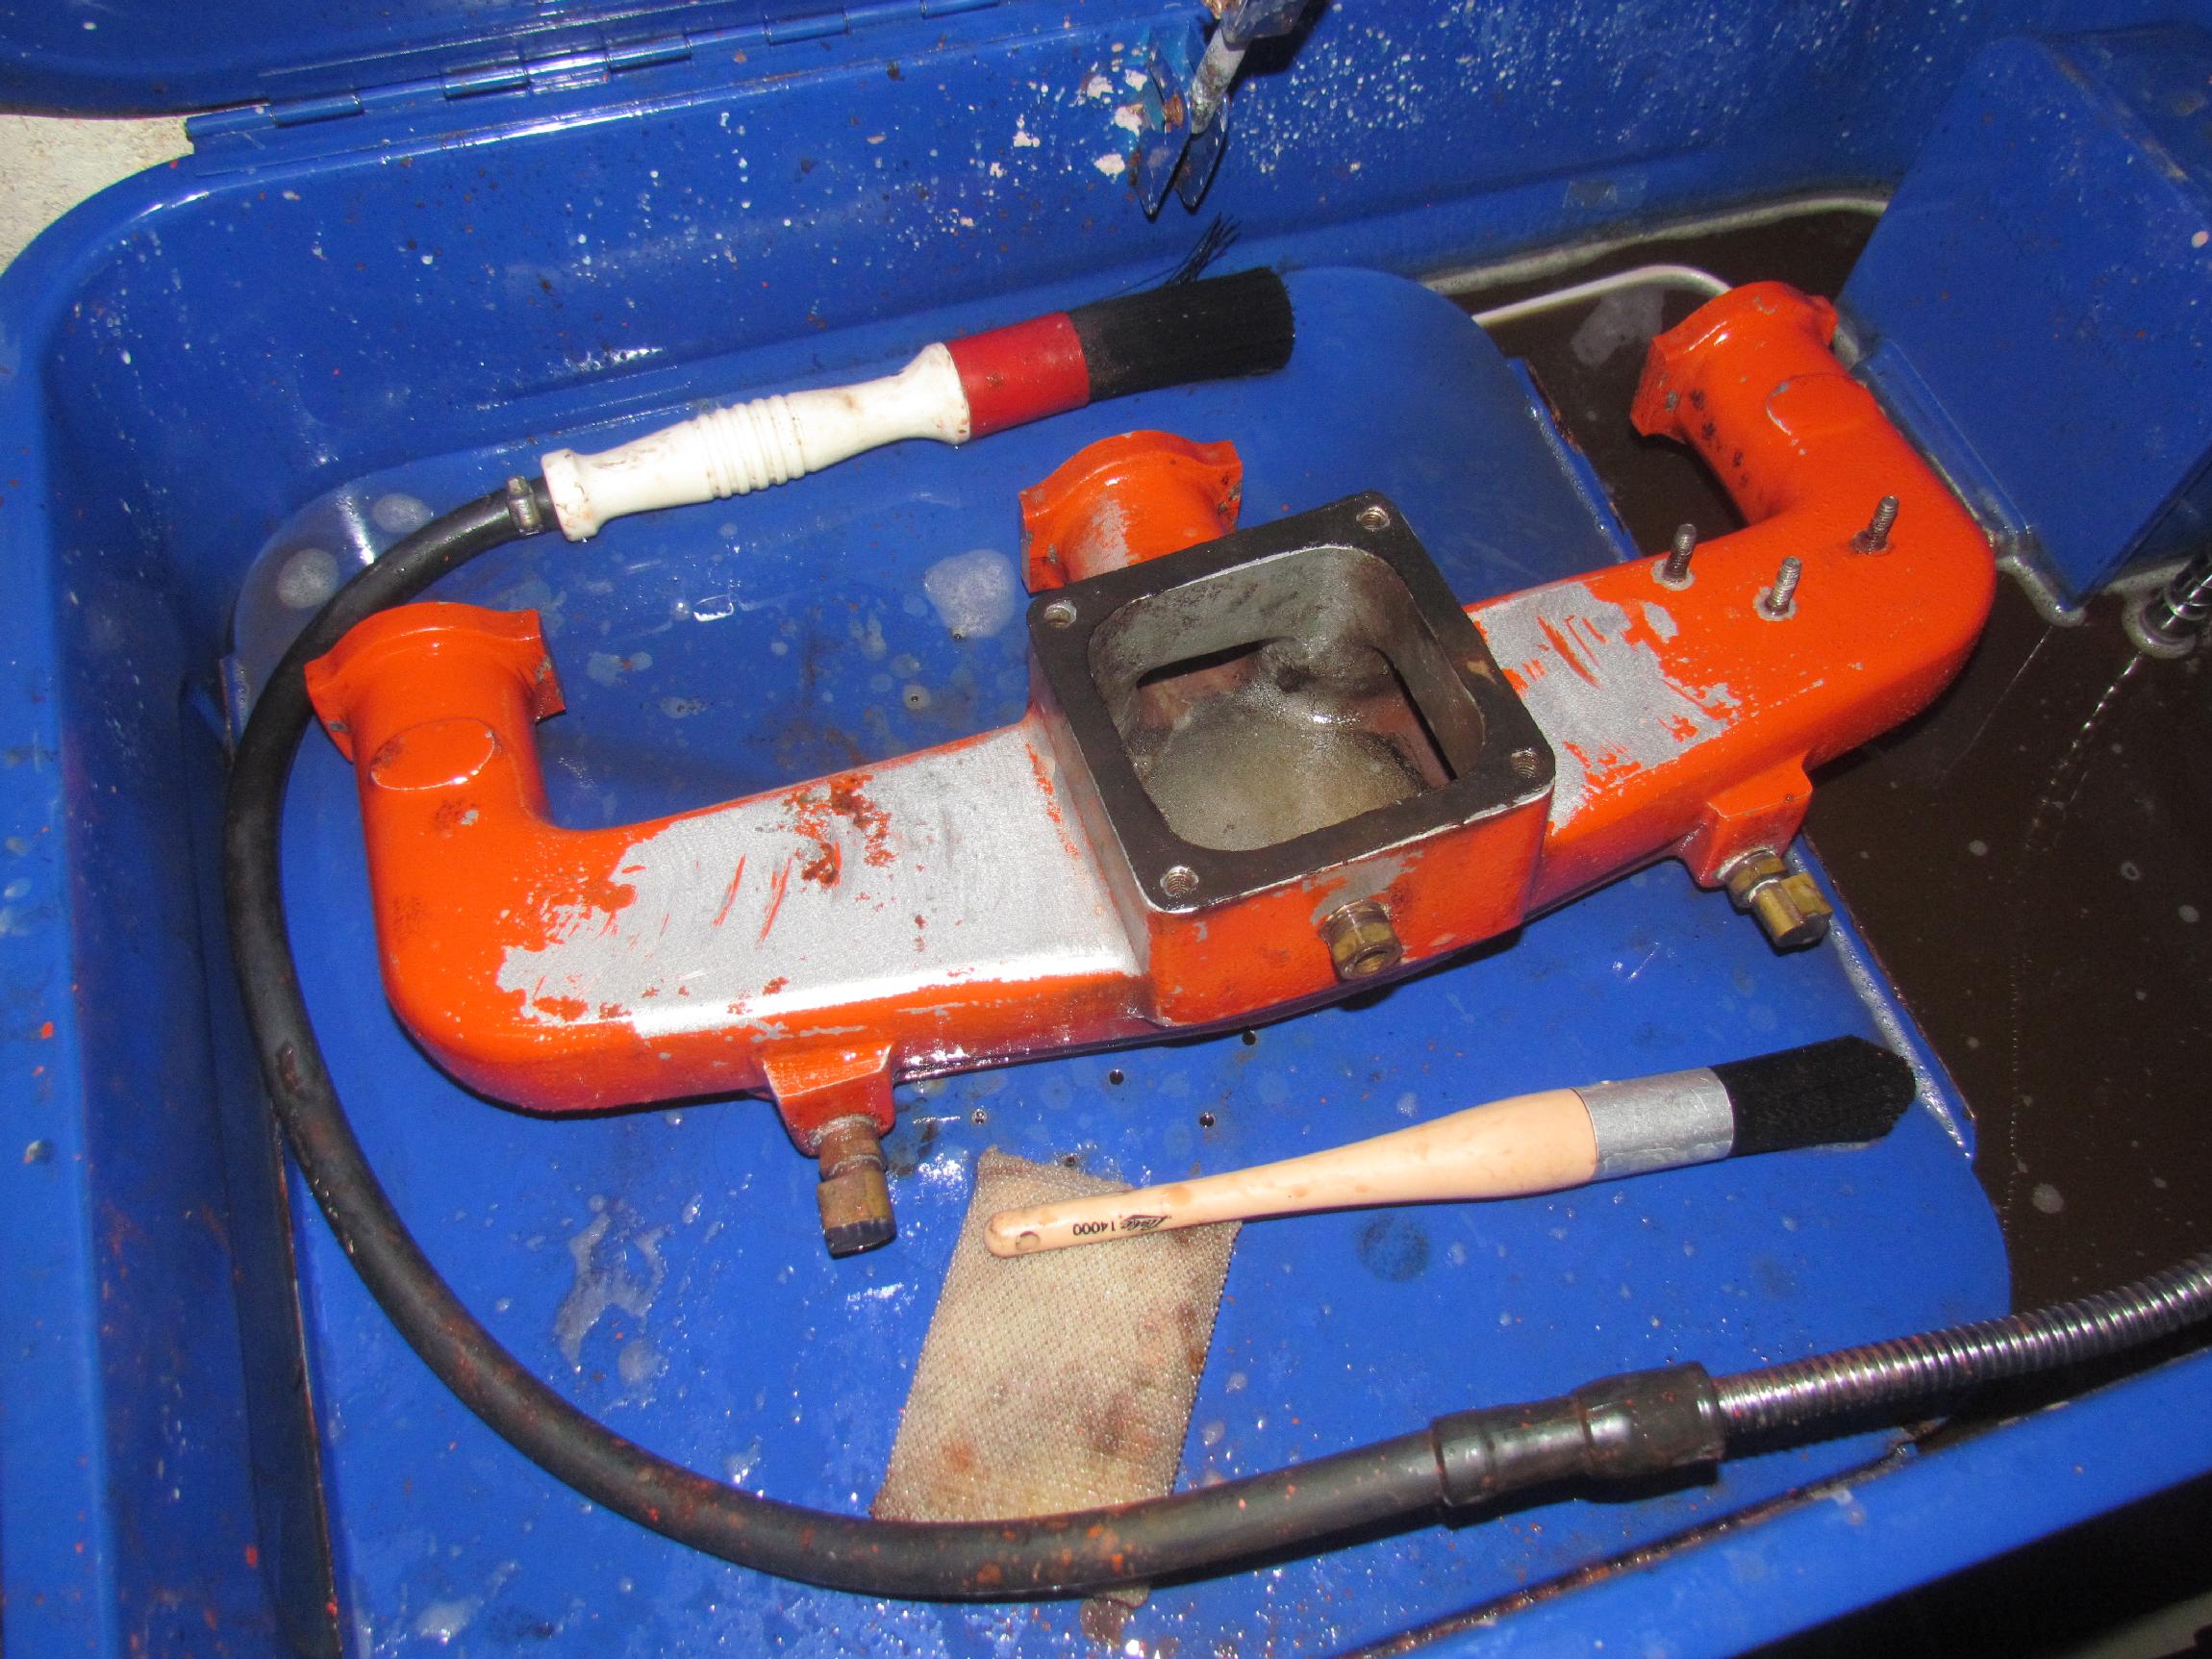 April
13th 2016 It was another
day with the Scotchbrite Roloc disks in the air angle
die grinder, this time with the Clifford Research, water heated, four
barrel carb manifold for the Jimmy 302. Today I filled up the wait
periods with another offering
from 16 Mile Brewing Company. Beer of the day was their Amber Sun Ale.
Recommended. It crept up on me slowly and knocked my johnson into my
watch pocket.
April
13th 2016 It was another
day with the Scotchbrite Roloc disks in the air angle
die grinder, this time with the Clifford Research, water heated, four
barrel carb manifold for the Jimmy 302. Today I filled up the wait
periods with another offering
from 16 Mile Brewing Company. Beer of the day was their Amber Sun Ale.
Recommended. It crept up on me slowly and knocked my johnson into my
watch pocket.
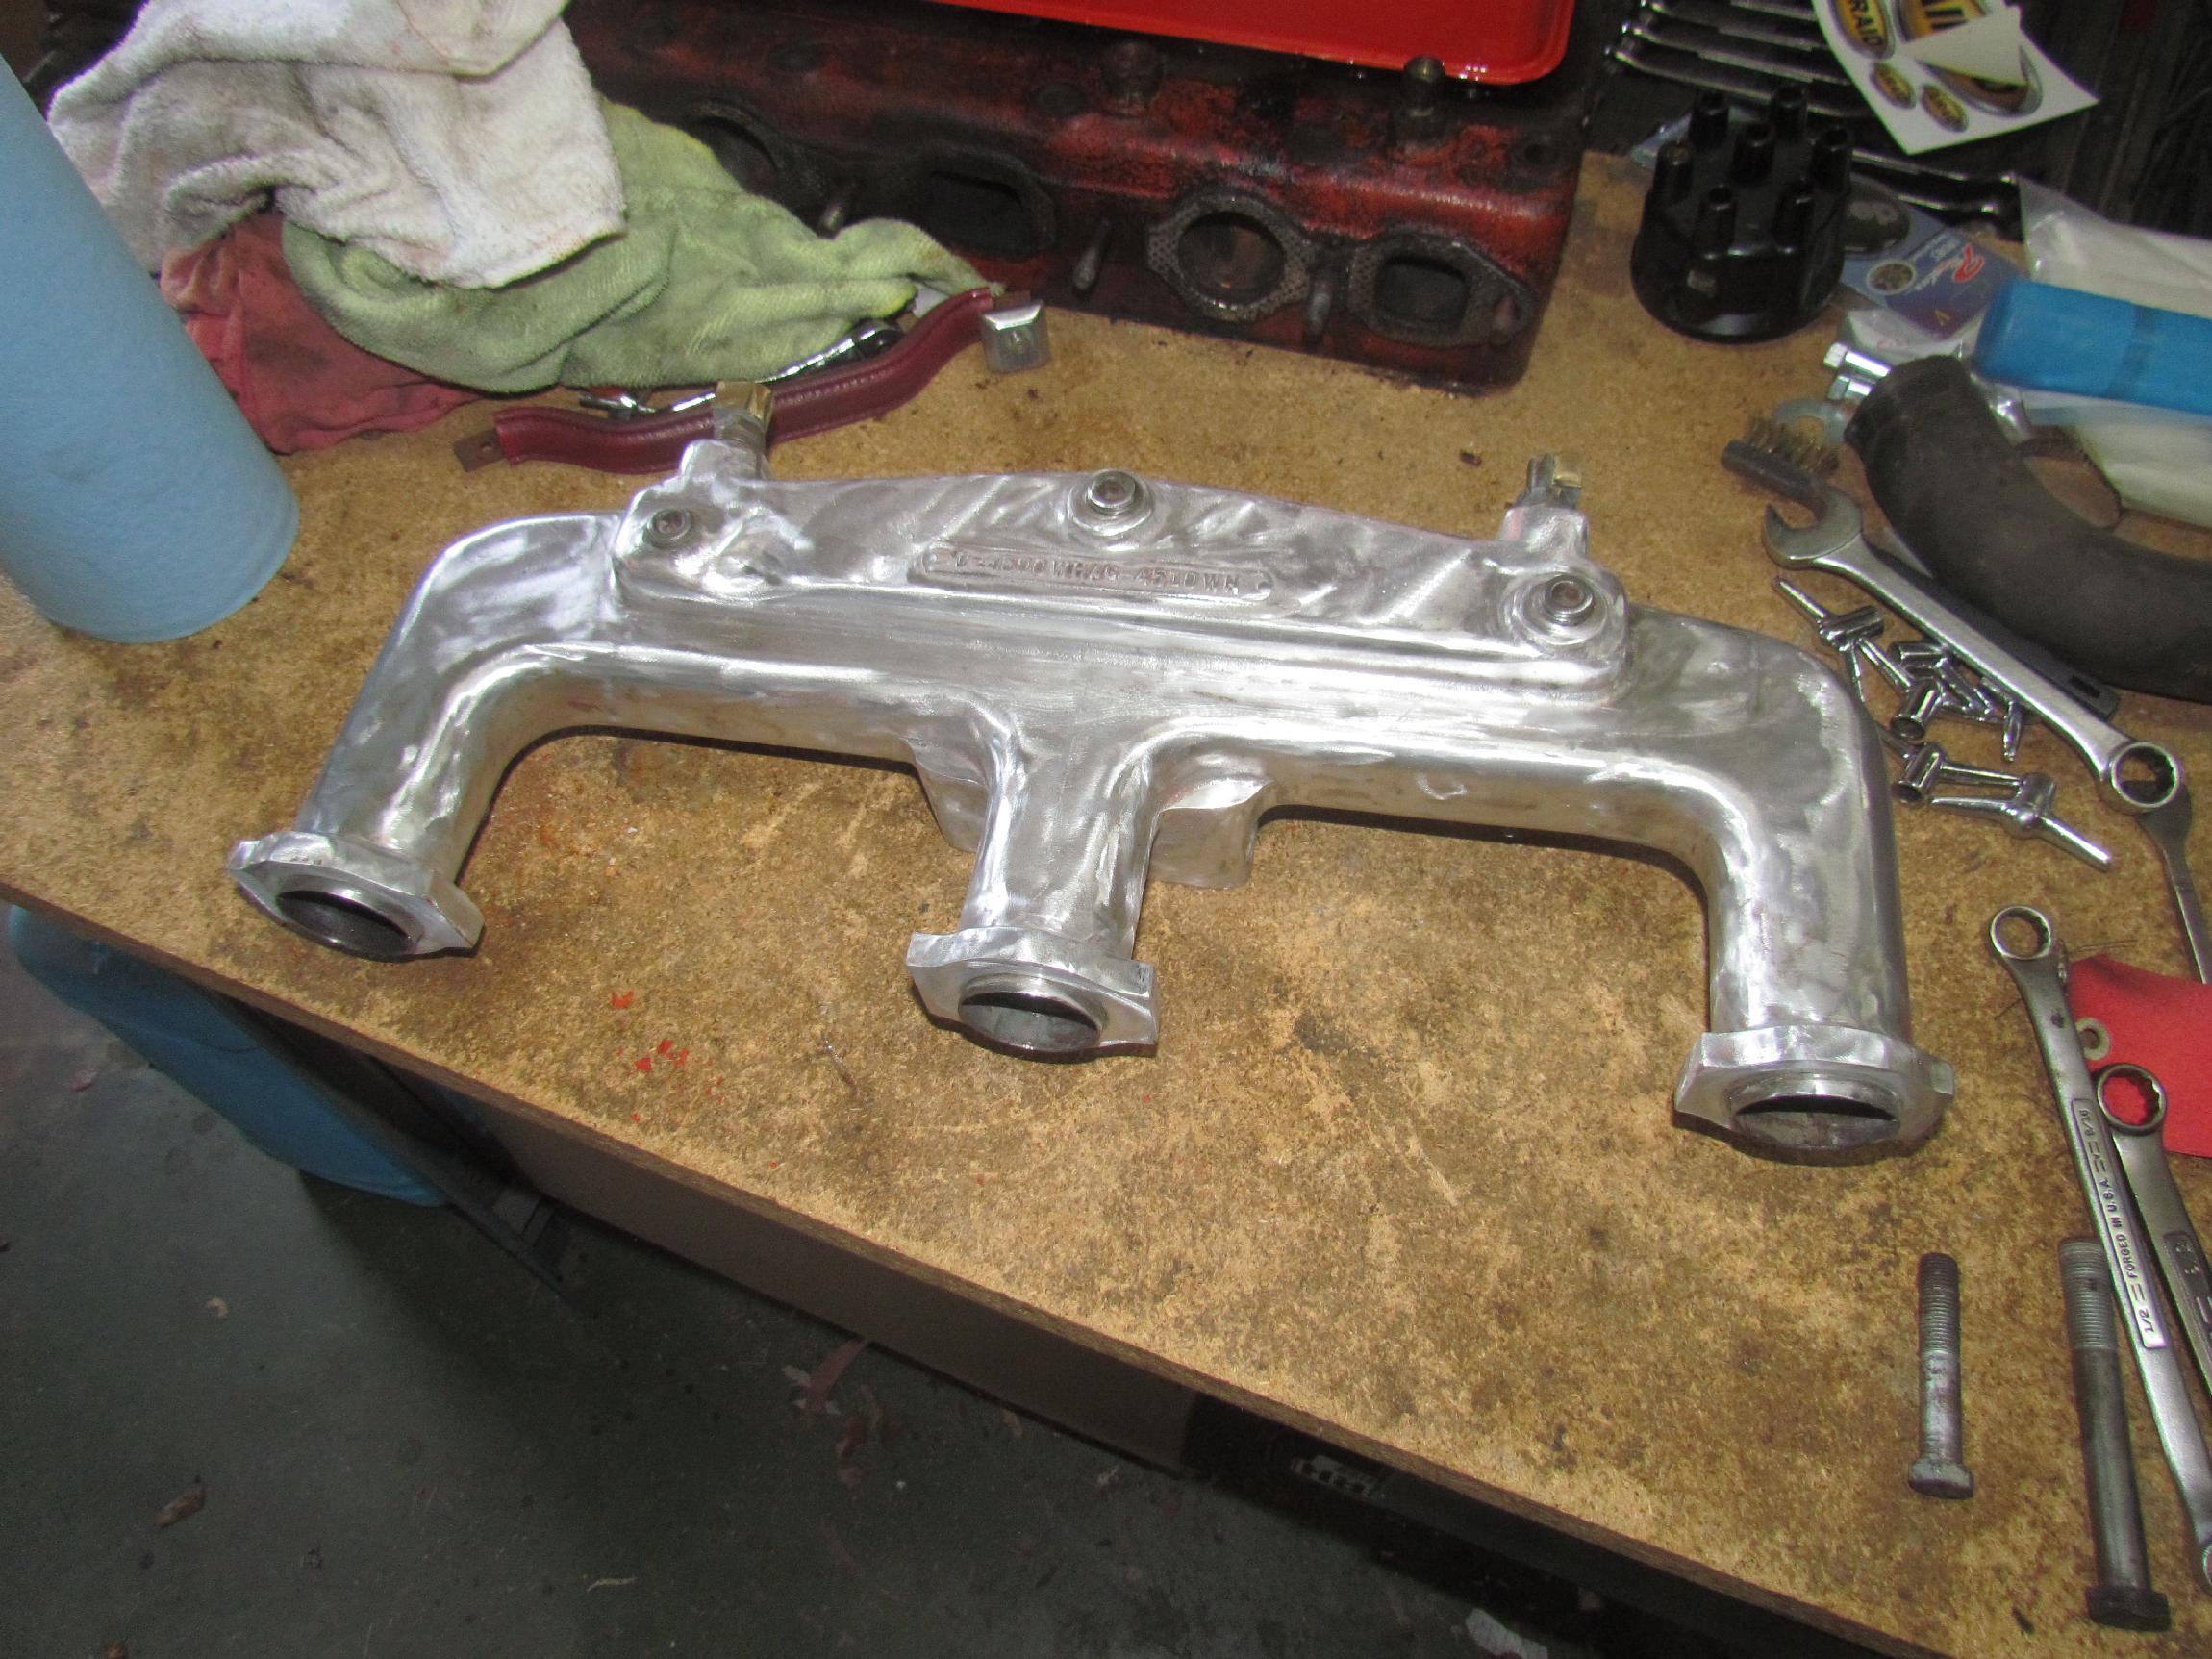 Looked out the door at my Jeep and saw bees swarming it. I had cleaned
the plastic windows earlier with Lemon Pledge. The bees eventually went
away when they didn't find any lemon blossoms. Got the manifold down to
bare metal before I called it a day. I was
going to remove the intake port alignment rings for the cleaning but
they were uncharacteristically tight. Now, that I know of Tony's
fondness for JB Weld, I had my suspicions and decided to leave them be.
I also left the throttle linkage studs and the water jacket fittings in
place.
Looked out the door at my Jeep and saw bees swarming it. I had cleaned
the plastic windows earlier with Lemon Pledge. The bees eventually went
away when they didn't find any lemon blossoms. Got the manifold down to
bare metal before I called it a day. I was
going to remove the intake port alignment rings for the cleaning but
they were uncharacteristically tight. Now, that I know of Tony's
fondness for JB Weld, I had my suspicions and decided to leave them be.
I also left the throttle linkage studs and the water jacket fittings in
place.
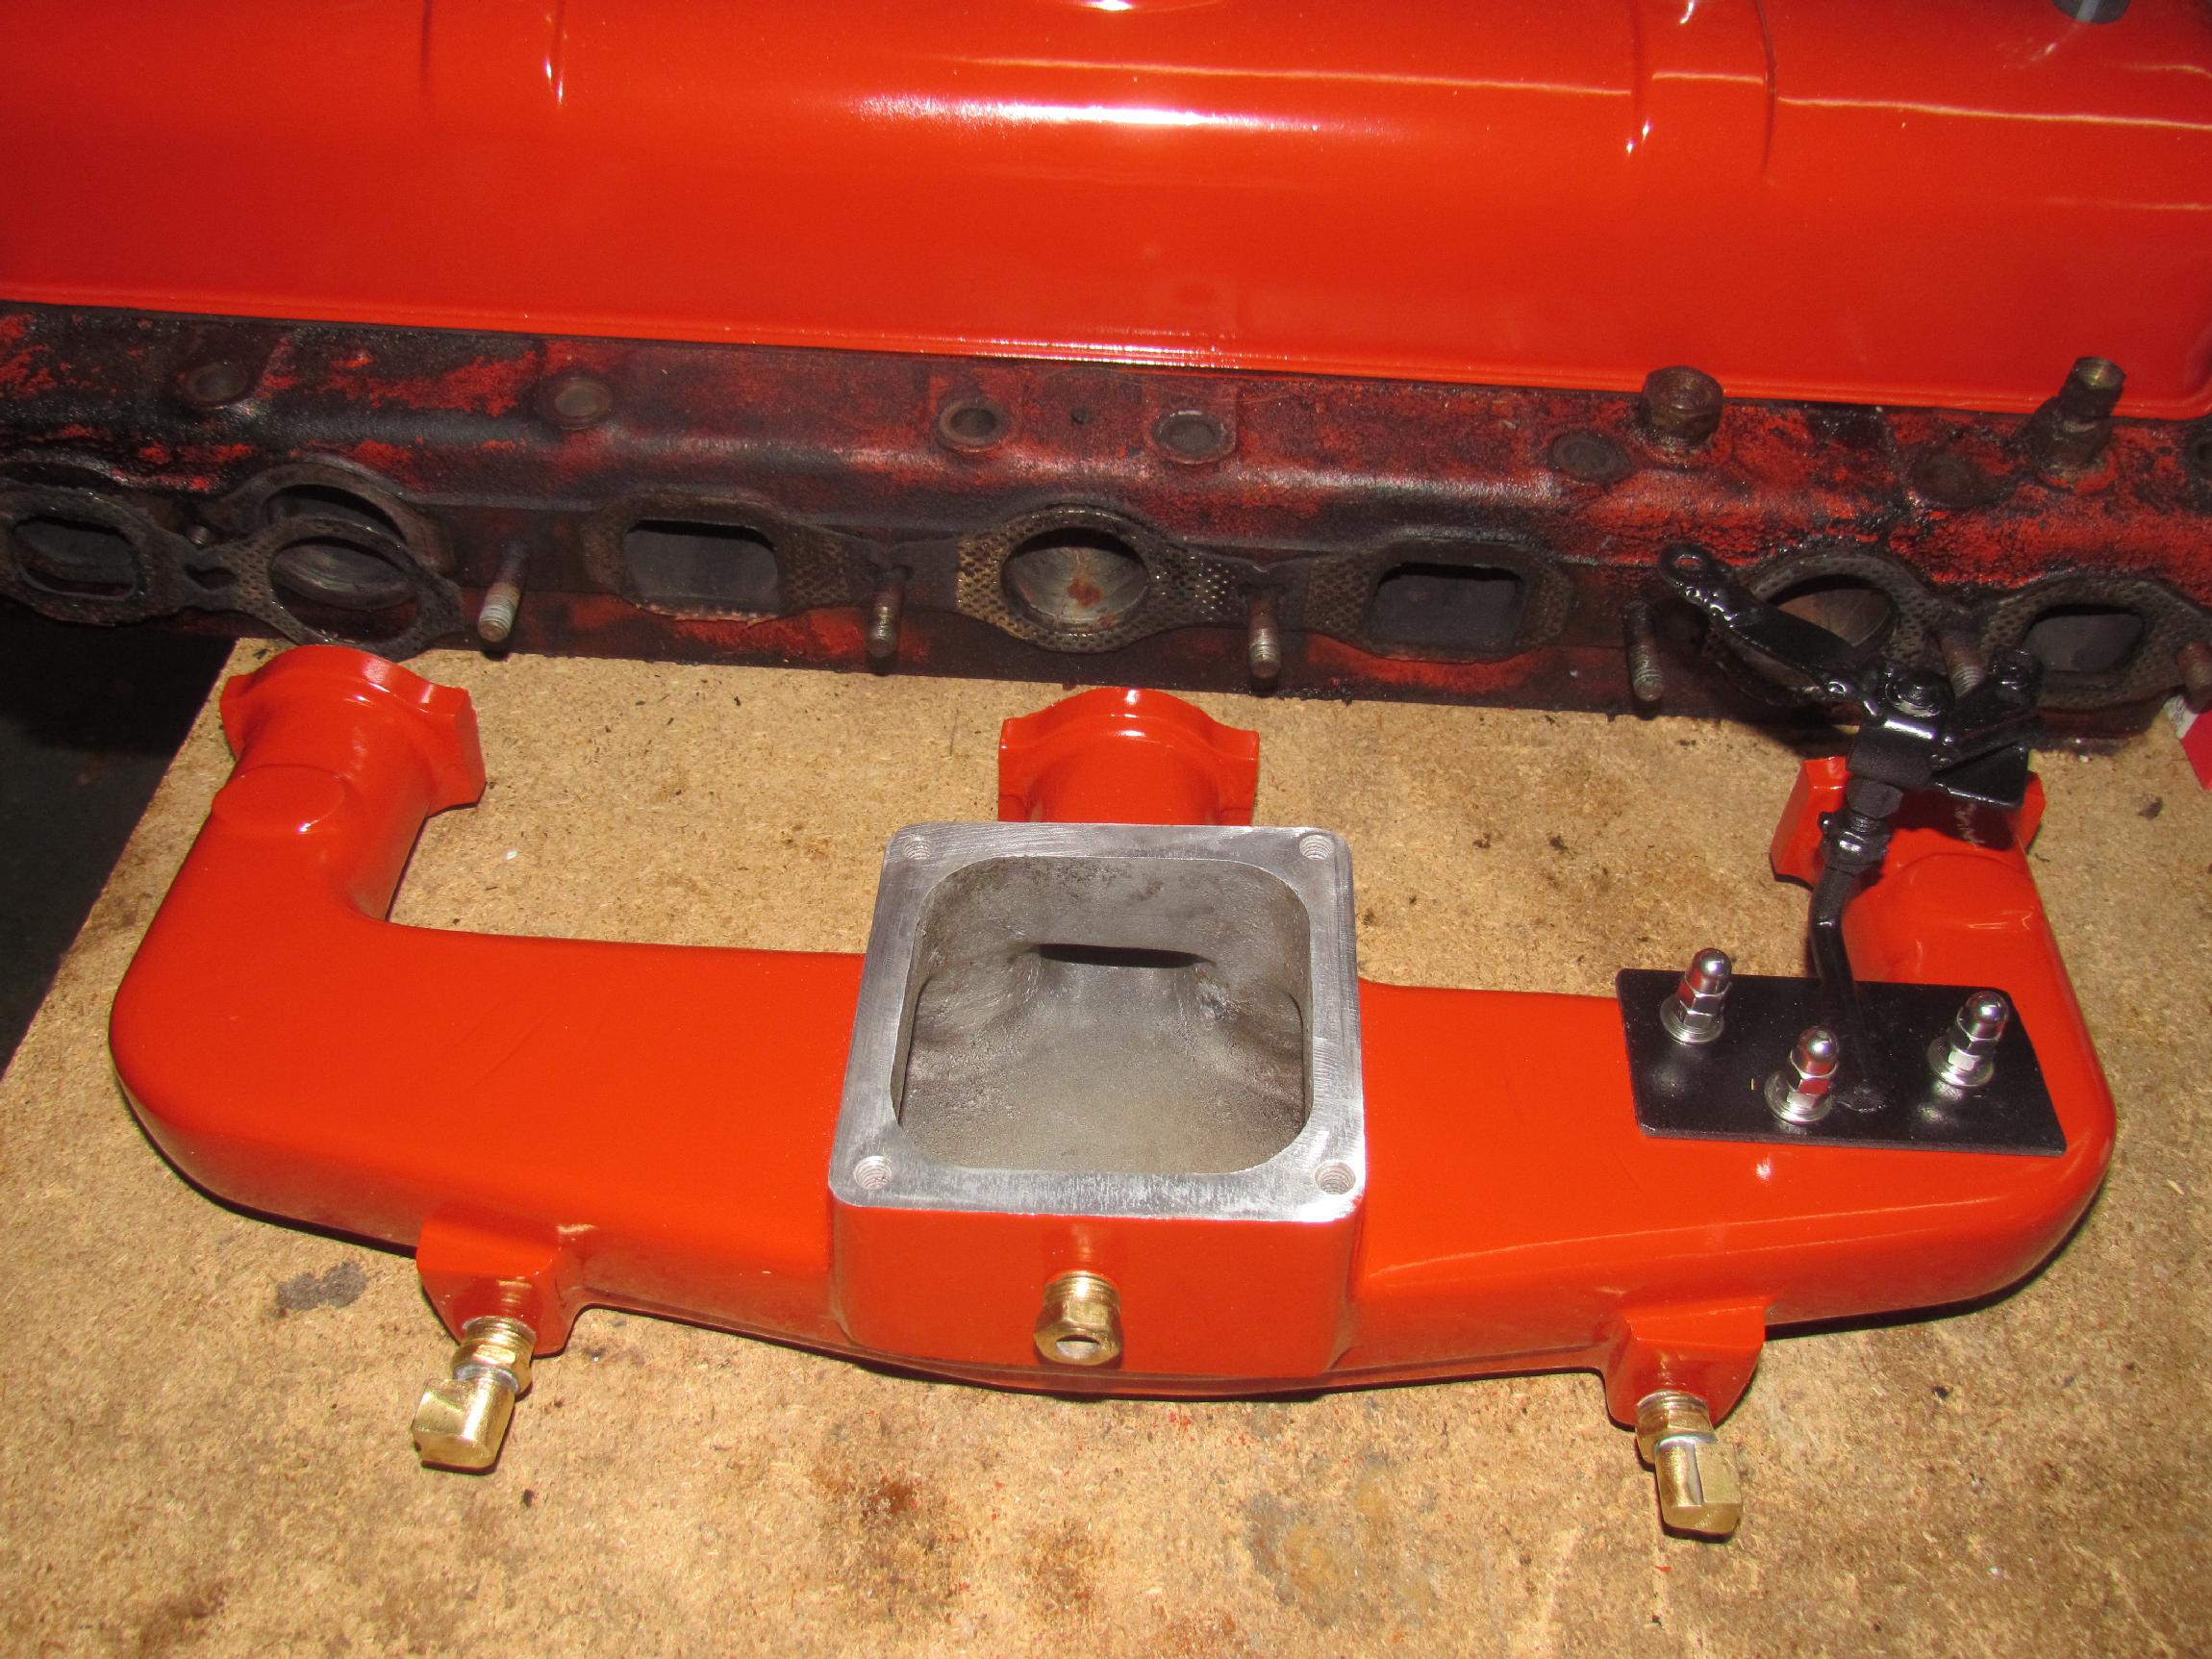
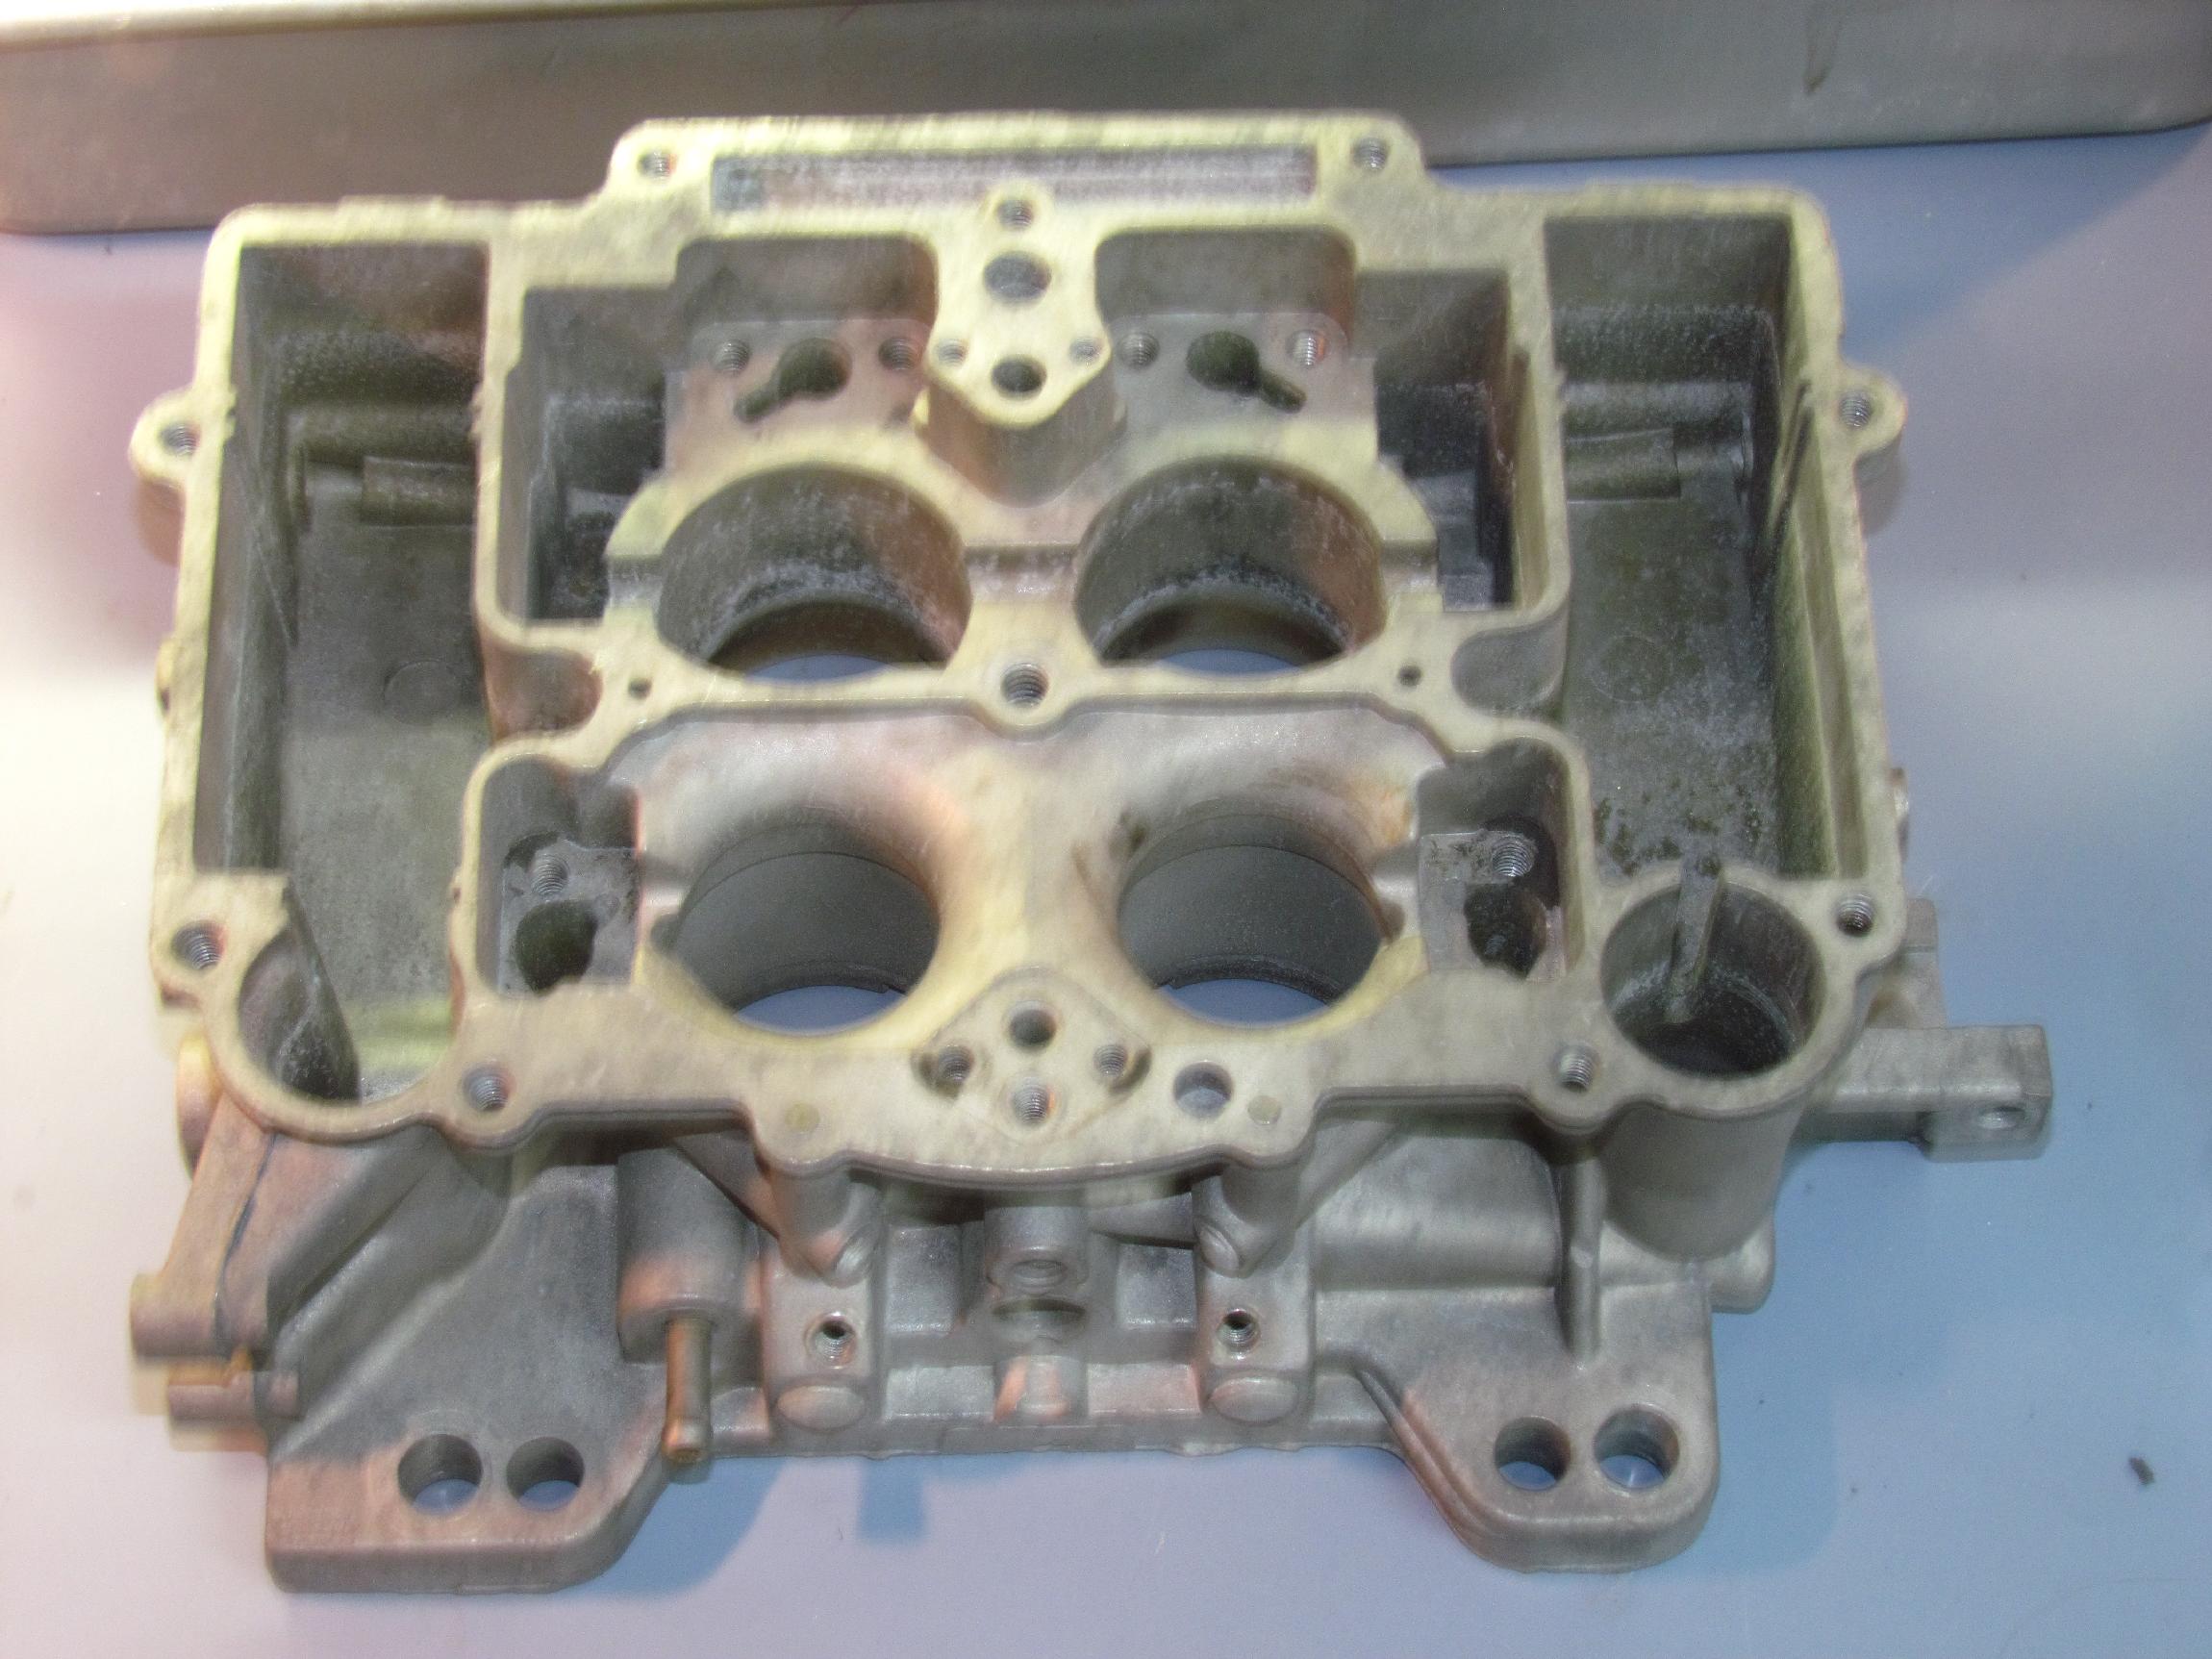
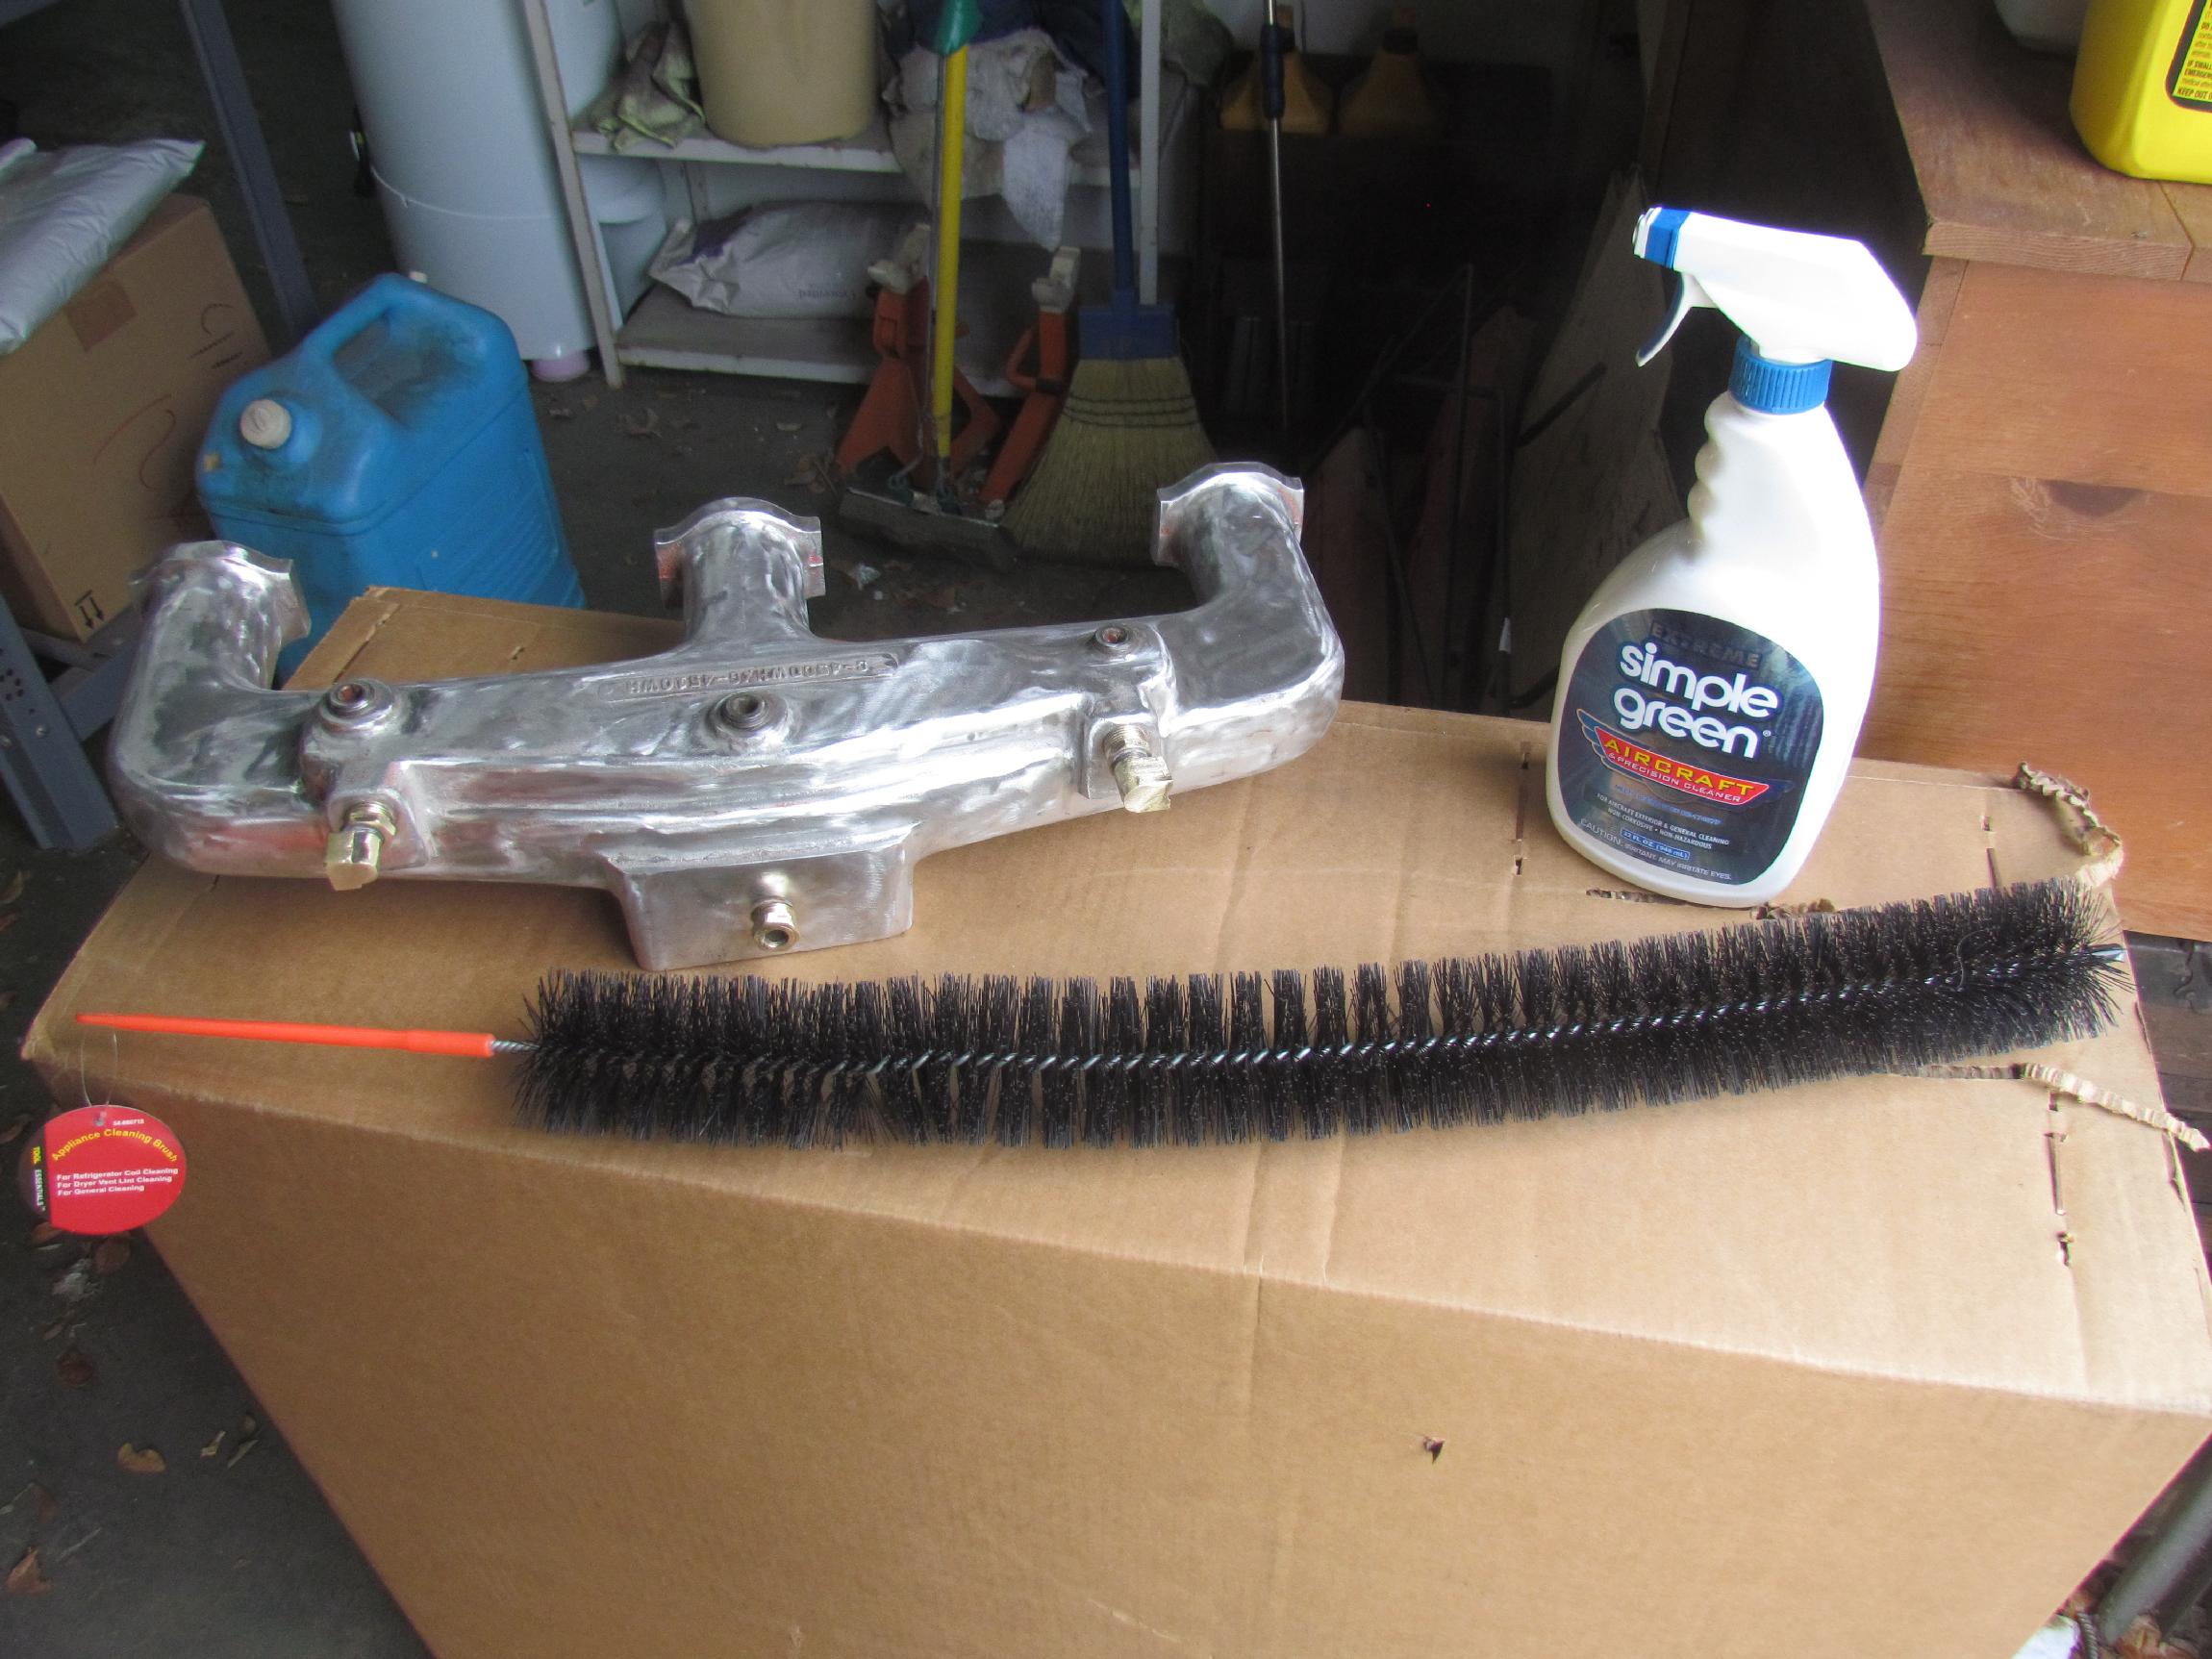 April
20th 2016 Wanted to do
some more cleaning of the intake manifold before painting so, I ordered
this
April
20th 2016 Wanted to do
some more cleaning of the intake manifold before painting so, I ordered
this big French tickler
appliance brush and a bottle of Extreme Simple Green Aircraft and
Precision cleaner to get at the intake runners. Also wanted to go over
the water fittings and some tight spots with a brass wire wheel that
the Roloc disks couldn't get at before getting the masking tape out.
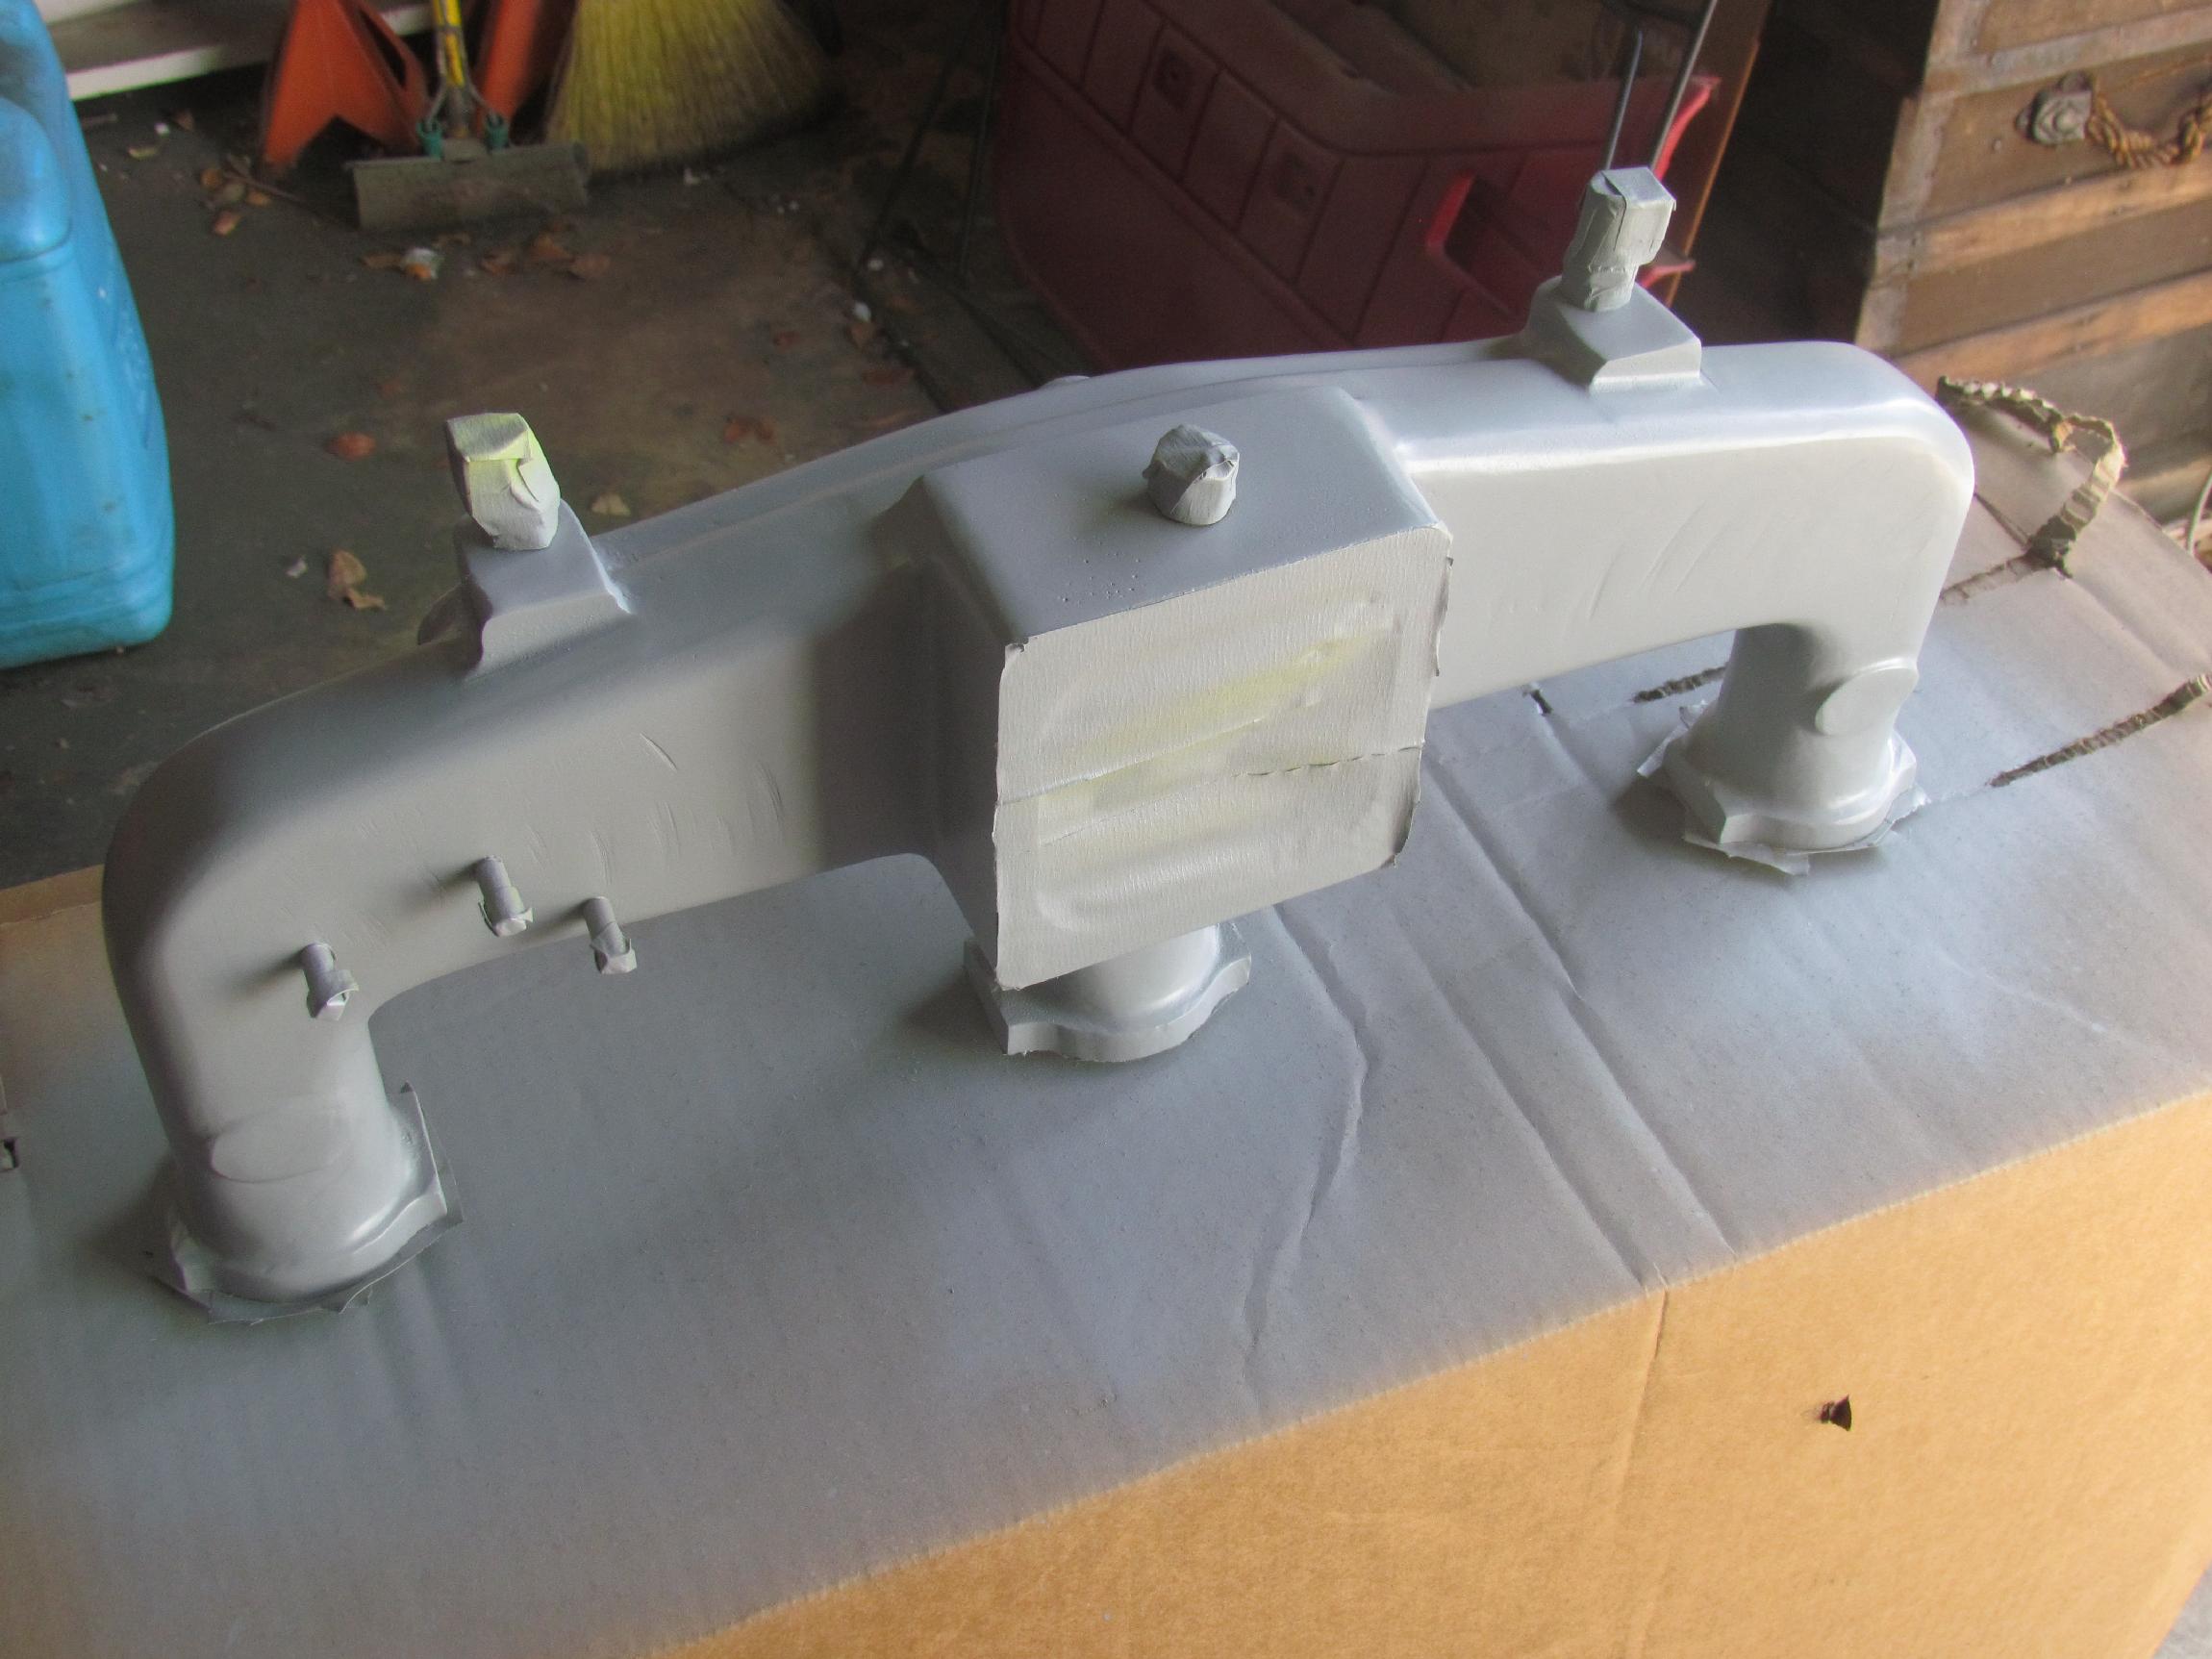 Taped it up next and put on the latex gloves to clean it with
Eastwood's PRE Paint Prep. Then gave it two coats of self-etching
primer. Settled down to wait a couple of hours with the beer of the
day, Boulder Brewing Company's Shake Chocolate Porter. An acquired
taste for sure and the three beer sample wasn't enuf for me to make the
acquisition.
Taped it up next and put on the latex gloves to clean it with
Eastwood's PRE Paint Prep. Then gave it two coats of self-etching
primer. Settled down to wait a couple of hours with the beer of the
day, Boulder Brewing Company's Shake Chocolate Porter. An acquired
taste for sure and the three beer sample wasn't enuf for me to make the
acquisition.
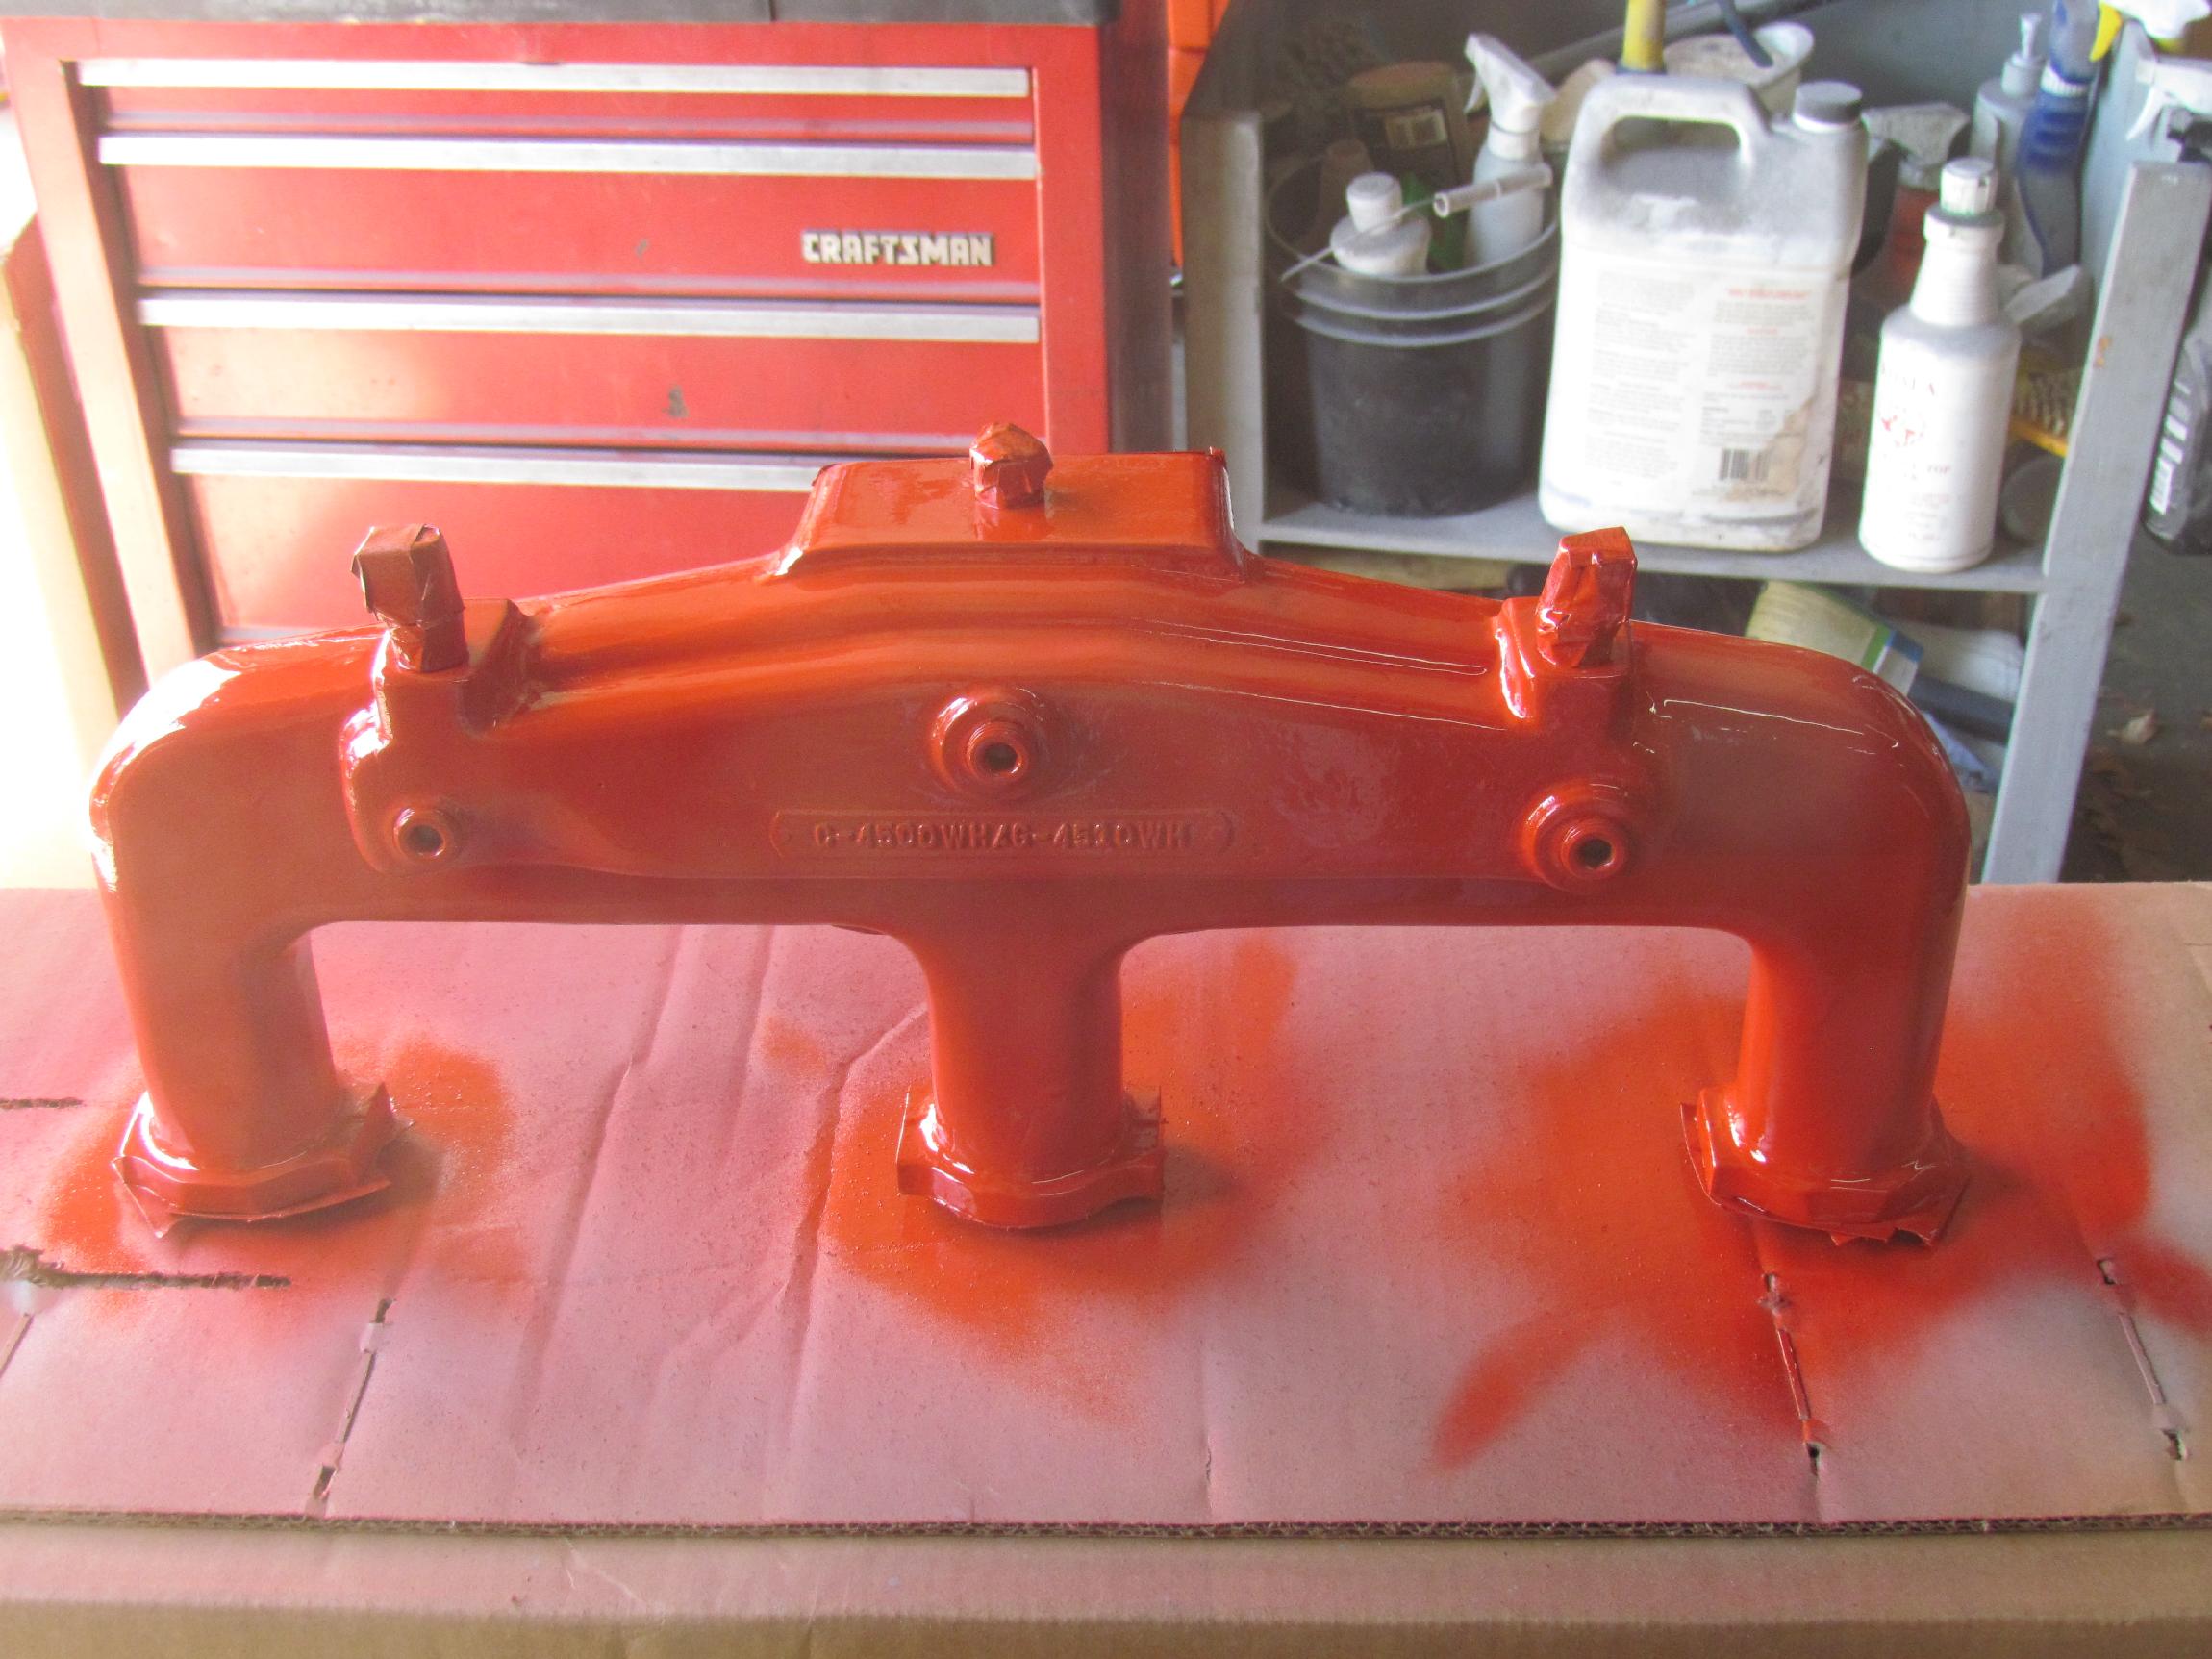 Hit it with two coats of Dupicolor's Chevy Orange engine paint. Then
the Krash Lab called. The Internet connection was out and I had to jump
in the Renegade and run up to the office to set things right again.
This is happening way too often. I better take it as a sign and get a
new proxy server in place before the damn thing shuts down entirely and
puts my ass in a sling with my co-workers.
Hit it with two coats of Dupicolor's Chevy Orange engine paint. Then
the Krash Lab called. The Internet connection was out and I had to jump
in the Renegade and run up to the office to set things right again.
This is happening way too often. I better take it as a sign and get a
new proxy server in place before the damn thing shuts down entirely and
puts my ass in a sling with my co-workers.
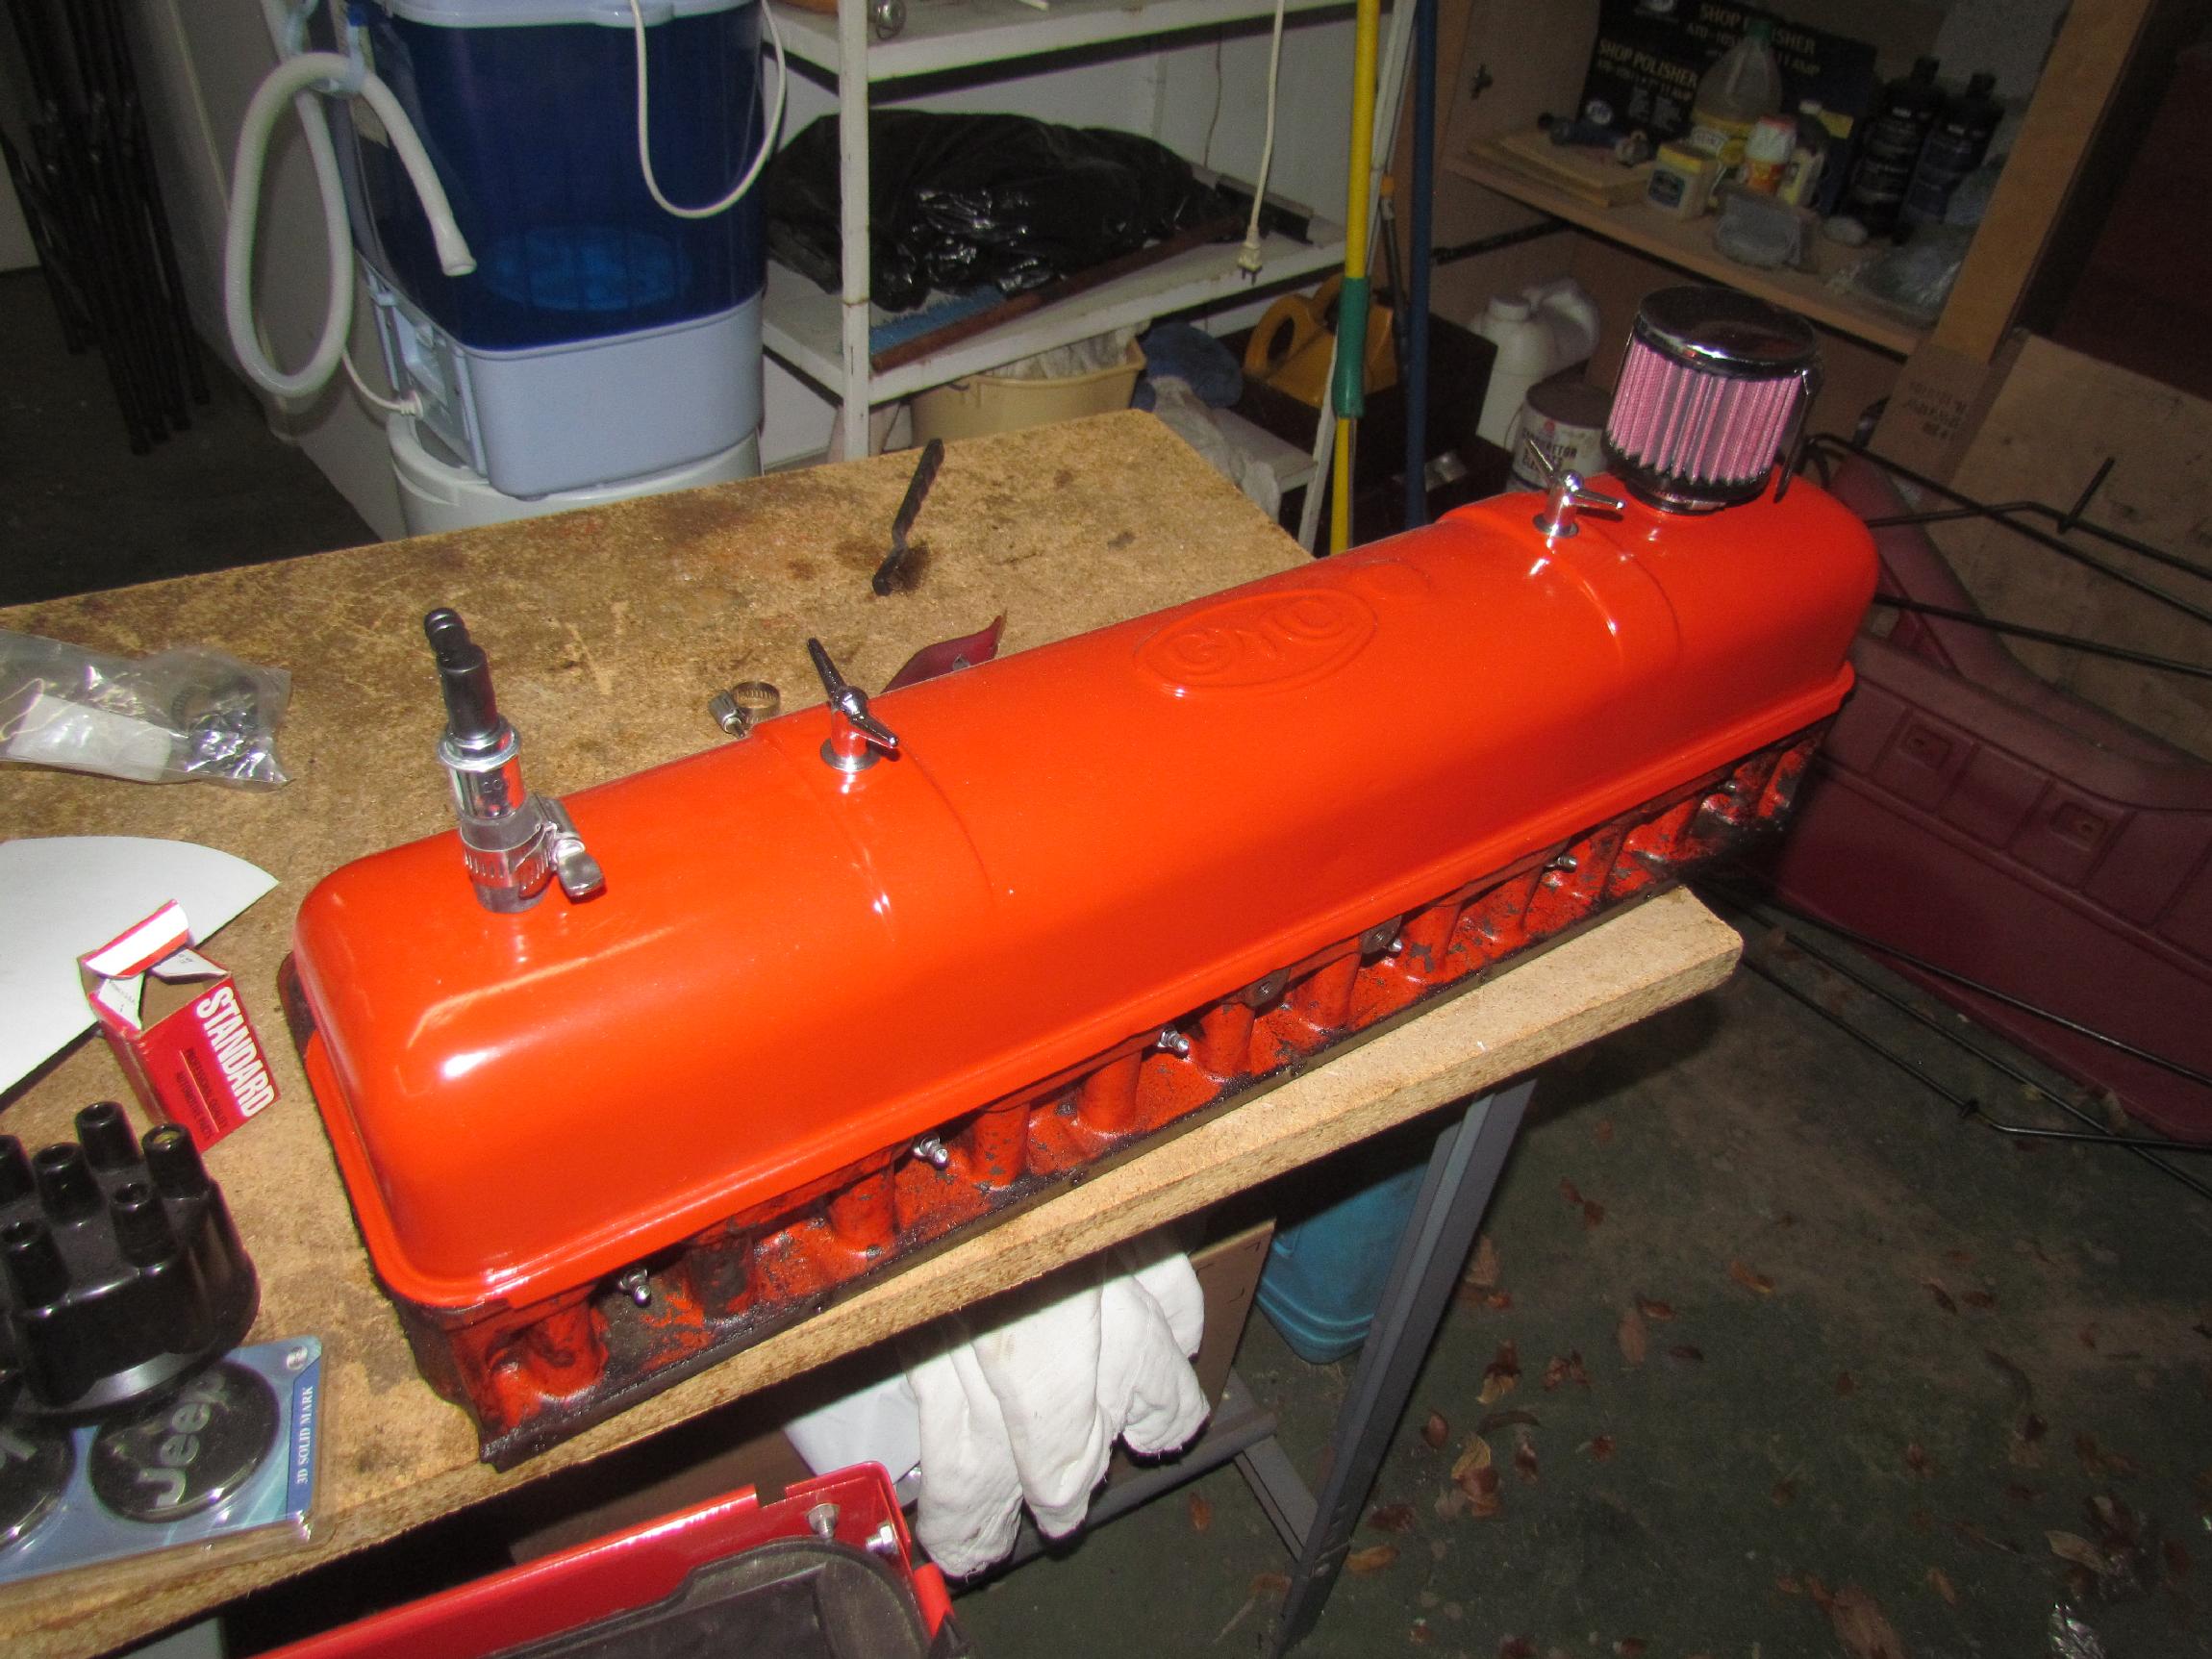 April
21st 2016 One
bright spot when I had to go to the office yesterday was that the last
bit of hardware to finish tricking out the valve cover had arrived from
McMaster-Carr.
Stainless steel hose clamps with thumbscrews for securing the PCV
valve. I had already gotten a new shielded breather vent from JEGS. A
month or so back I made about my best eBay purchase yet: 7 vintage
chrome valve cover wing nuts for less than eight dollars total,
including
shipping. These things are a press on beauty item but are just a RCH
smaller in diameter than the 3/8"- 24 stud I'm mounting them on. They
are perfect for tapping out and becoming functional valve cover nuts
with the addition of 3/8" stainless steel flat washers.
April
21st 2016 One
bright spot when I had to go to the office yesterday was that the last
bit of hardware to finish tricking out the valve cover had arrived from
McMaster-Carr.
Stainless steel hose clamps with thumbscrews for securing the PCV
valve. I had already gotten a new shielded breather vent from JEGS. A
month or so back I made about my best eBay purchase yet: 7 vintage
chrome valve cover wing nuts for less than eight dollars total,
including
shipping. These things are a press on beauty item but are just a RCH
smaller in diameter than the 3/8"- 24 stud I'm mounting them on. They
are perfect for tapping out and becoming functional valve cover nuts
with the addition of 3/8" stainless steel flat washers.
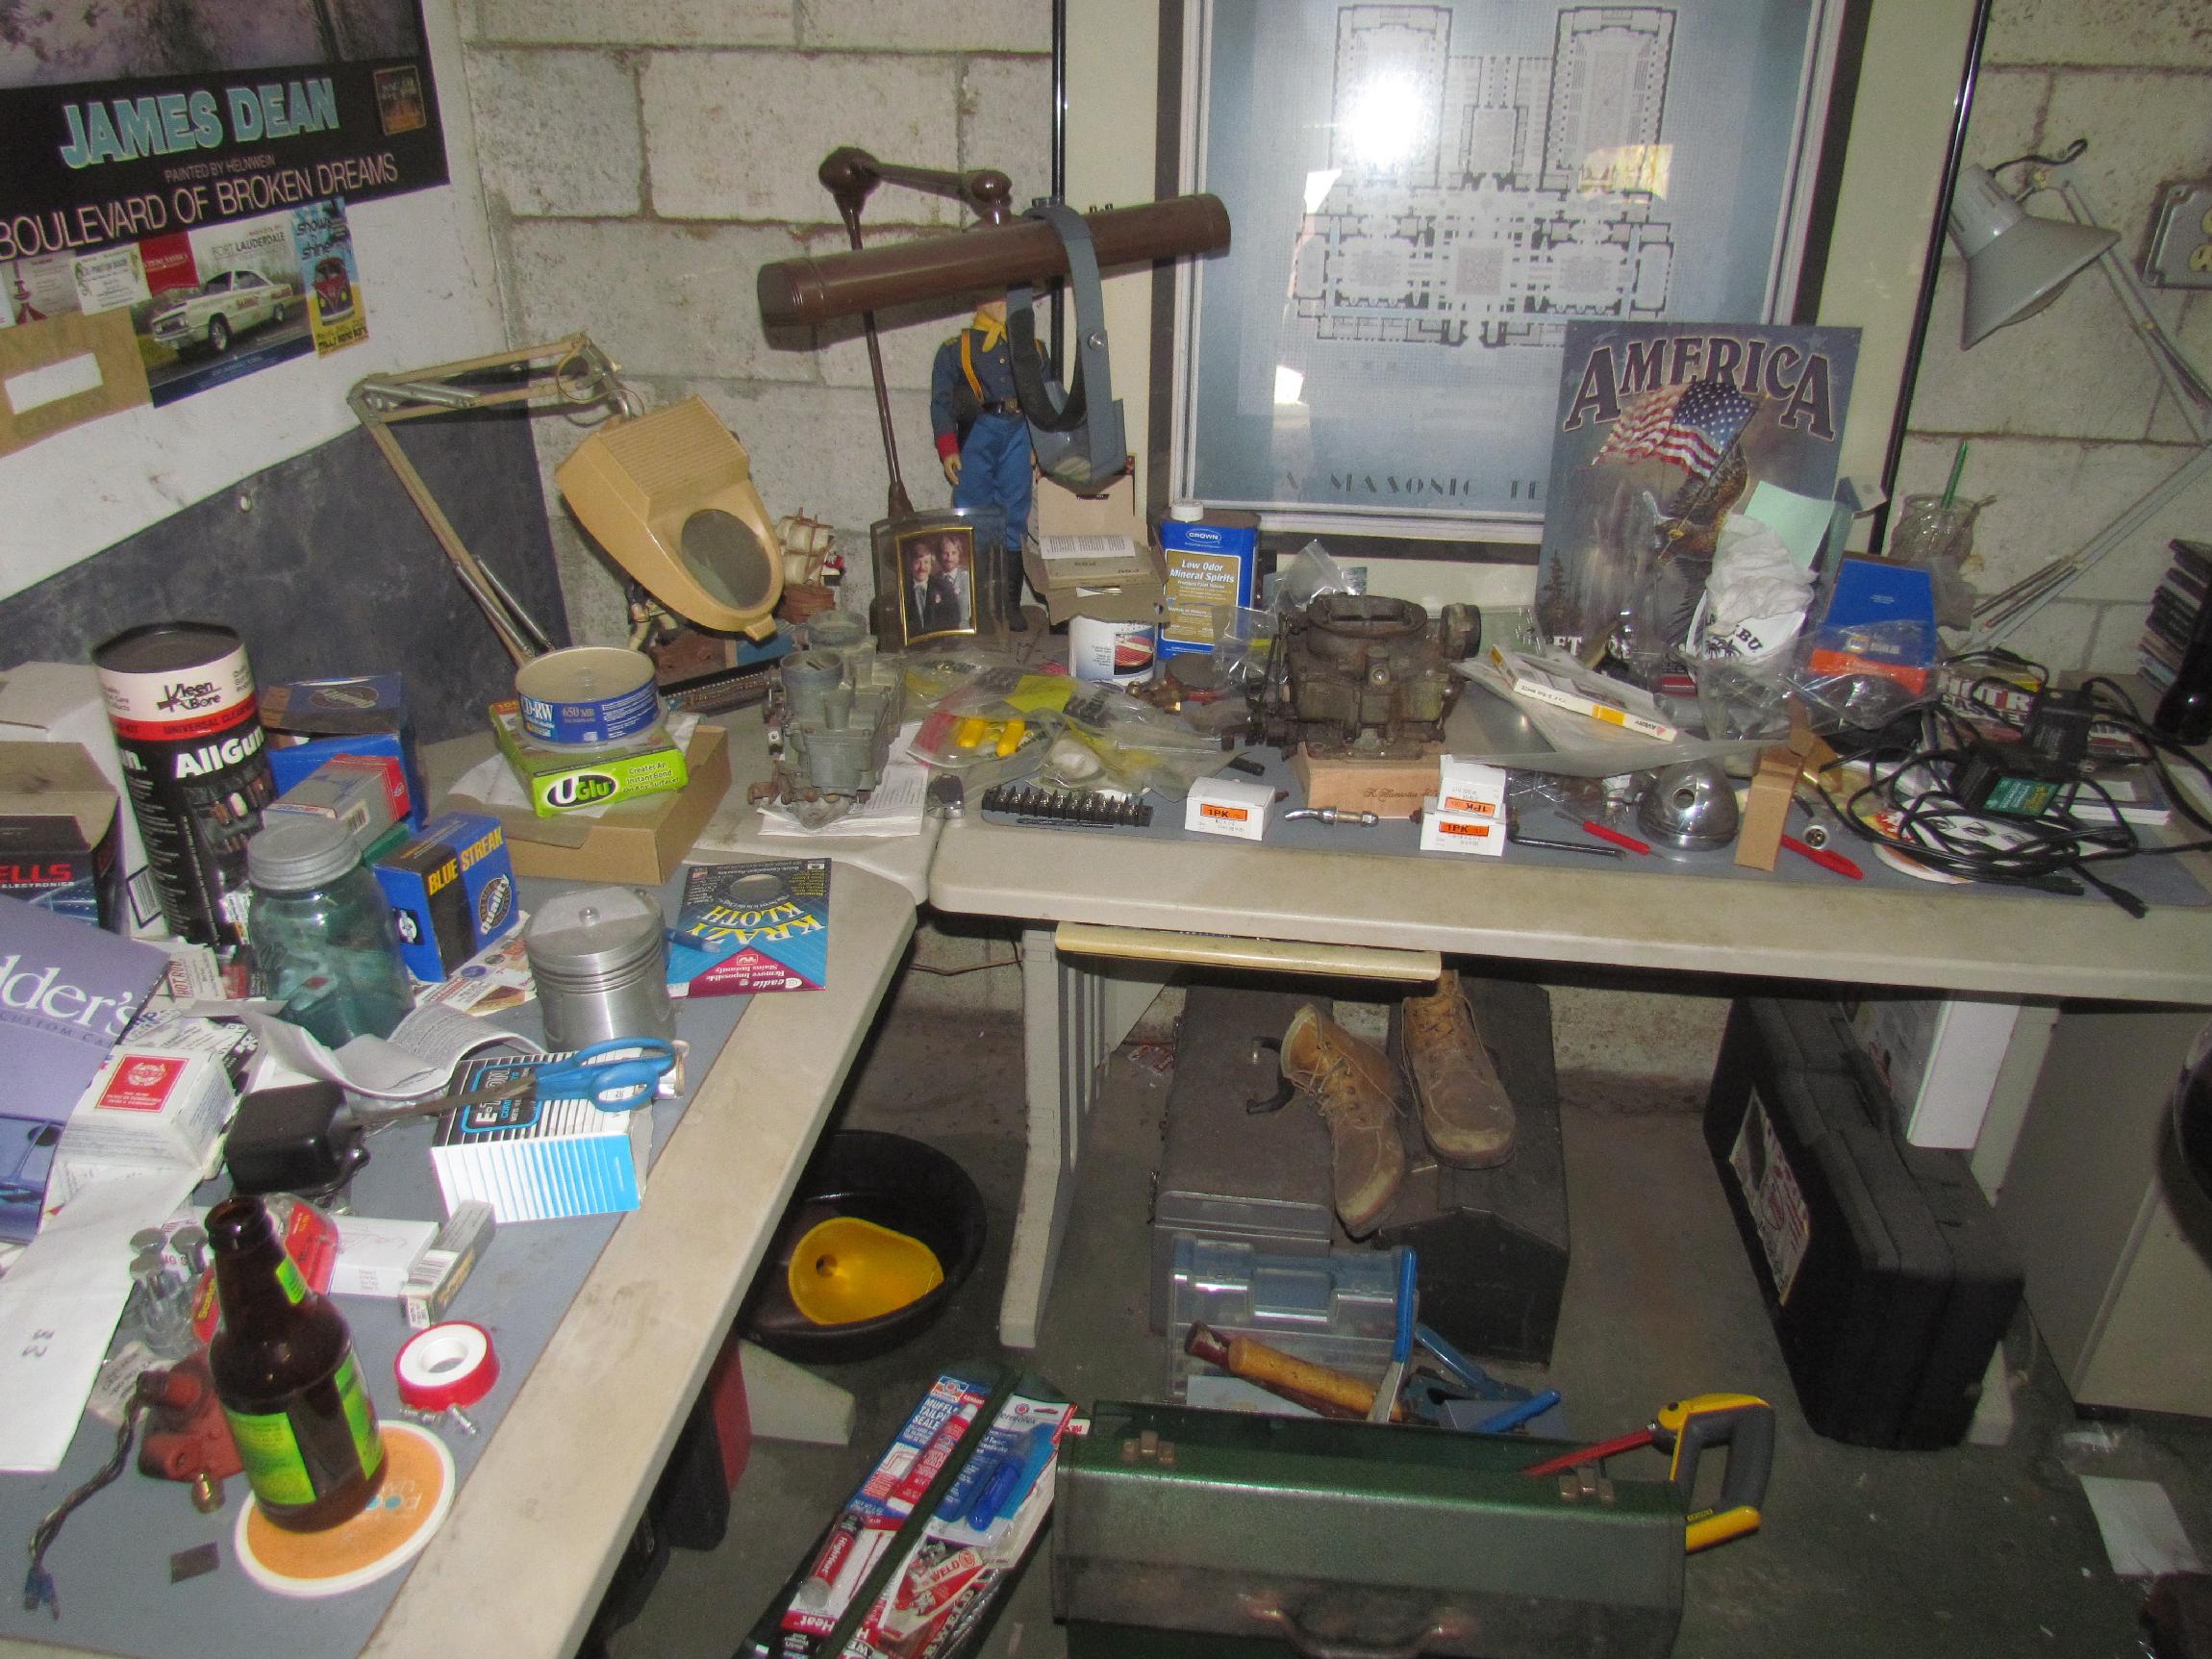 April
23rd 2016 I've let the
BillyBob Shop get so cluttered that I'm trippin' over stuff so today
was a cleanup day. I didn't get finished but I put a dent in it. It's
getting close to the time for rebuilding Deerslayer's carb and I want
to use the shop desk for that. Problem is, I've been piling stuff on
the desk since I moved in. I got it done but it was painful. Cleaning
means throwin' stuff away and that is alien to me. I found stuff I
forgot about as well as stuff I've been looking for and stuff that made
me say to myself "What the hell is this?"
April
23rd 2016 I've let the
BillyBob Shop get so cluttered that I'm trippin' over stuff so today
was a cleanup day. I didn't get finished but I put a dent in it. It's
getting close to the time for rebuilding Deerslayer's carb and I want
to use the shop desk for that. Problem is, I've been piling stuff on
the desk since I moved in. I got it done but it was painful. Cleaning
means throwin' stuff away and that is alien to me. I found stuff I
forgot about as well as stuff I've been looking for and stuff that made
me say to myself "What the hell is this?"
 By
mid-afternoon, I called it a day. I had the desk clean and little piles
of stuff around the shop. Nothing puts a burr under my saddle like
dragging out a storage box from the bottom of a pile, putting an item
in and re stacking the boxes, only to find another item for that box
five minutes later. Now I make little piles and put them in the box at
one time. An old dog can learn new tricks as long as they're simple.
Beer of the day was Sand Creek Brewing Company's English Style Special
Ale.
By
mid-afternoon, I called it a day. I had the desk clean and little piles
of stuff around the shop. Nothing puts a burr under my saddle like
dragging out a storage box from the bottom of a pile, putting an item
in and re stacking the boxes, only to find another item for that box
five minutes later. Now I make little piles and put them in the box at
one time. An old dog can learn new tricks as long as they're simple.
Beer of the day was Sand Creek Brewing Company's English Style Special
Ale.
 April
28th 2016 Goodies were
delivered to the Krash Lab on Wednesday while I was at the BillyBob
Shop. Stainless steel 1/4"-20 hex nuts, acorn nuts, flat and lock
washers for the Jimmy 302 intake manifold. I can now store this thing
in Deerslayer's pickup bed for reassembly down the line. I may cut down
the throttle linkage bracket mounting studs so I can get away with just
the acorn nuts and make things a little less busy.
April
28th 2016 Goodies were
delivered to the Krash Lab on Wednesday while I was at the BillyBob
Shop. Stainless steel 1/4"-20 hex nuts, acorn nuts, flat and lock
washers for the Jimmy 302 intake manifold. I can now store this thing
in Deerslayer's pickup bed for reassembly down the line. I may cut down
the throttle linkage bracket mounting studs so I can get away with just
the acorn nuts and make things a little less busy.
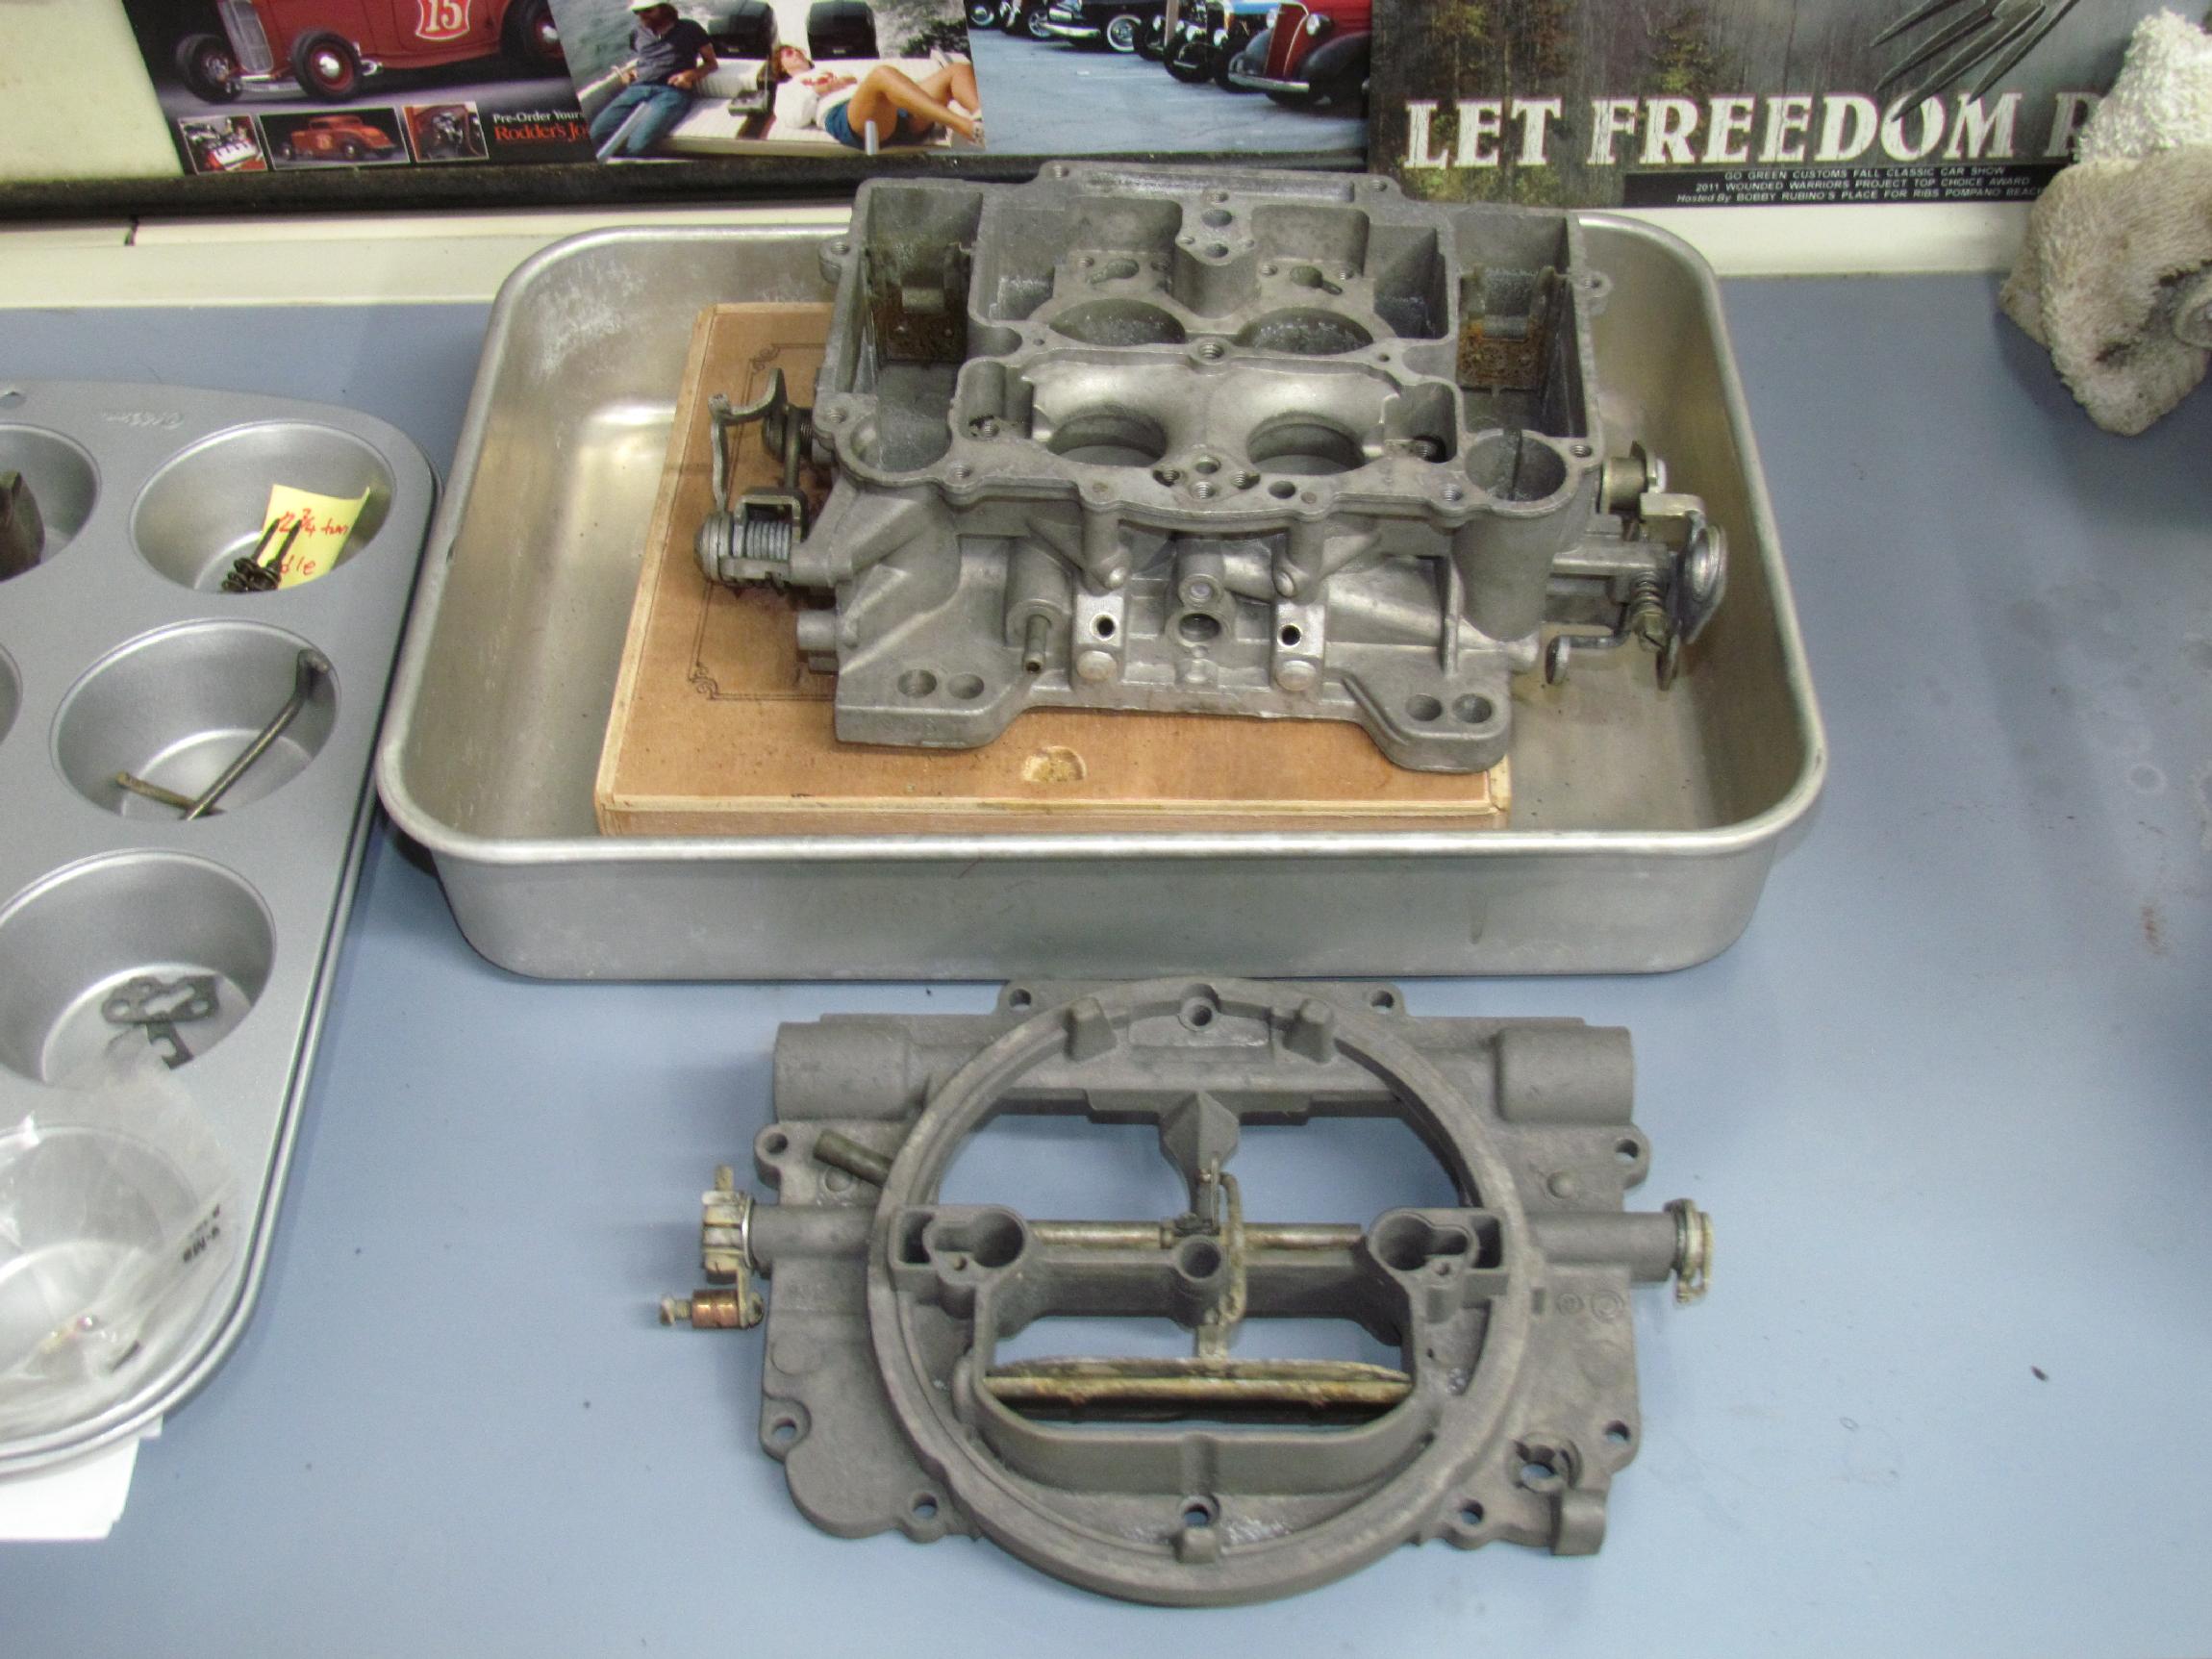
 Also
in the plunder that arrived on Wednesday, was a nine liter, heated
ultrasonic cleaner and a muffin tin for carb cleaning operations. I
guessed at the size I needed and got lucky this time. Nine liters is
just big enuf for four barrel carbs. I'm ready for dis-assembly and
cleaning now. Once clean, I can get the number for this 400 CFM Carter
AFB off the left front flange to order the carb kit.
Also
in the plunder that arrived on Wednesday, was a nine liter, heated
ultrasonic cleaner and a muffin tin for carb cleaning operations. I
guessed at the size I needed and got lucky this time. Nine liters is
just big enuf for four barrel carbs. I'm ready for dis-assembly and
cleaning now. Once clean, I can get the number for this 400 CFM Carter
AFB off the left front flange to order the carb kit.
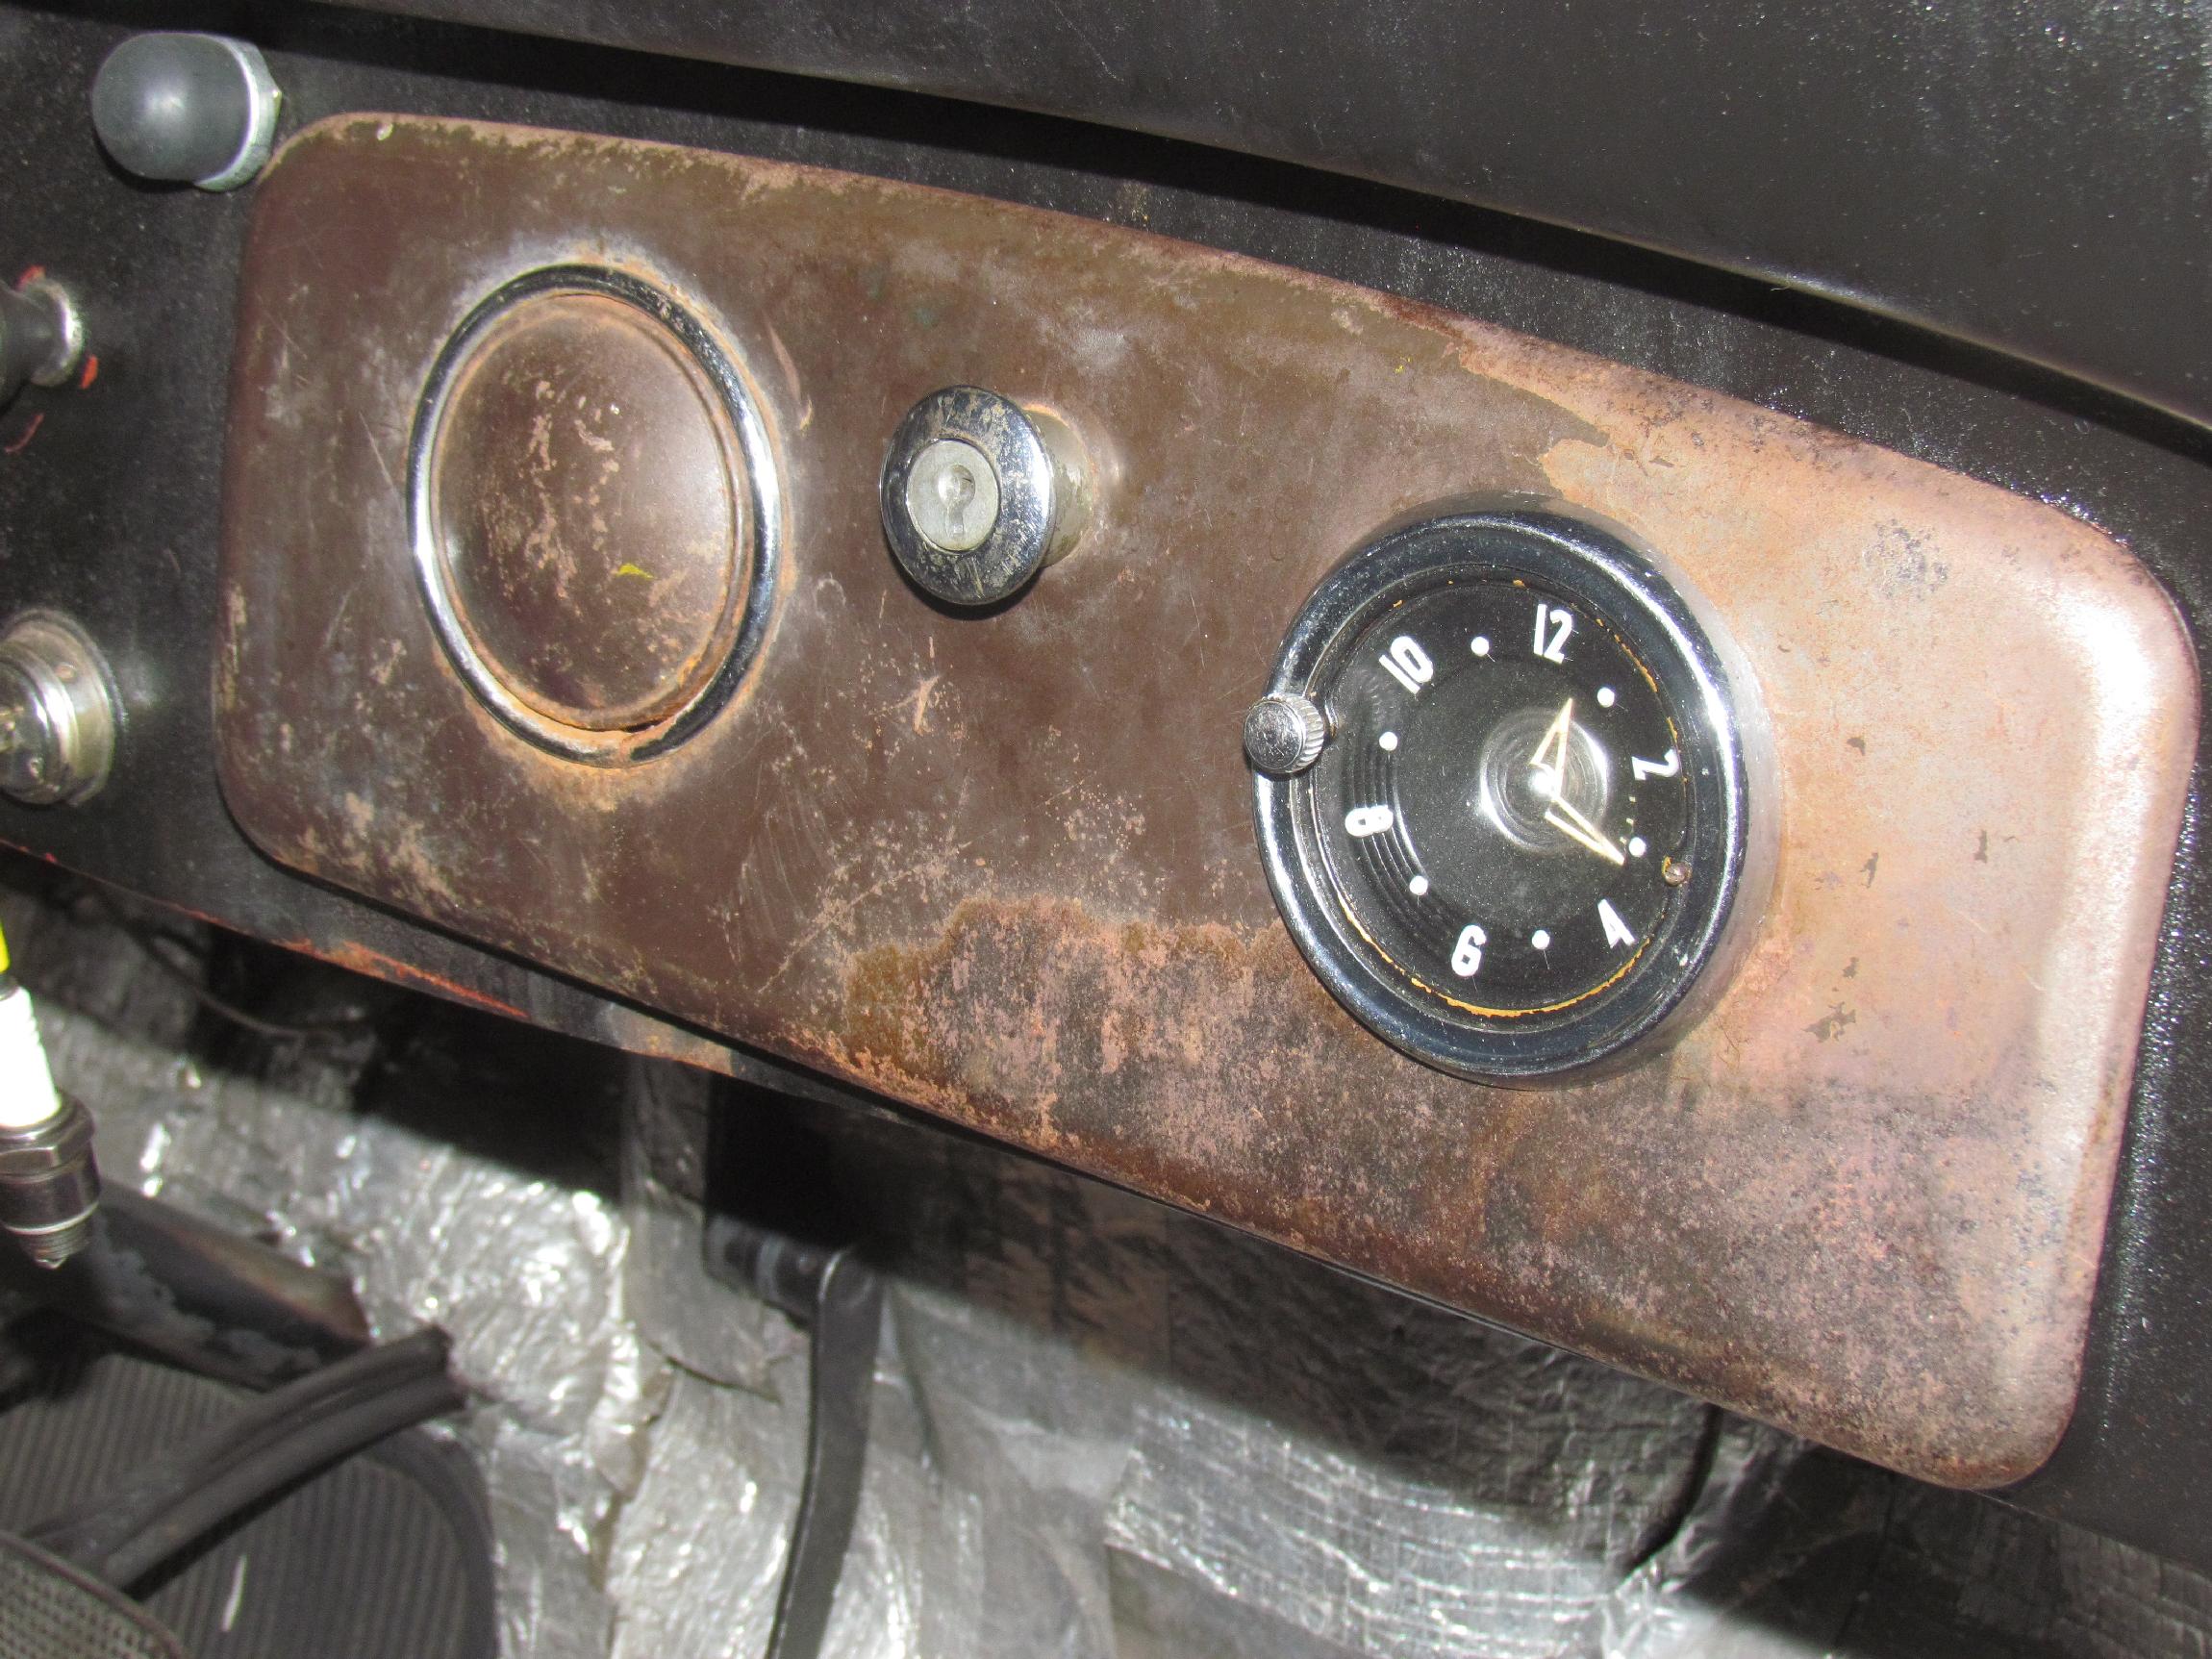 April
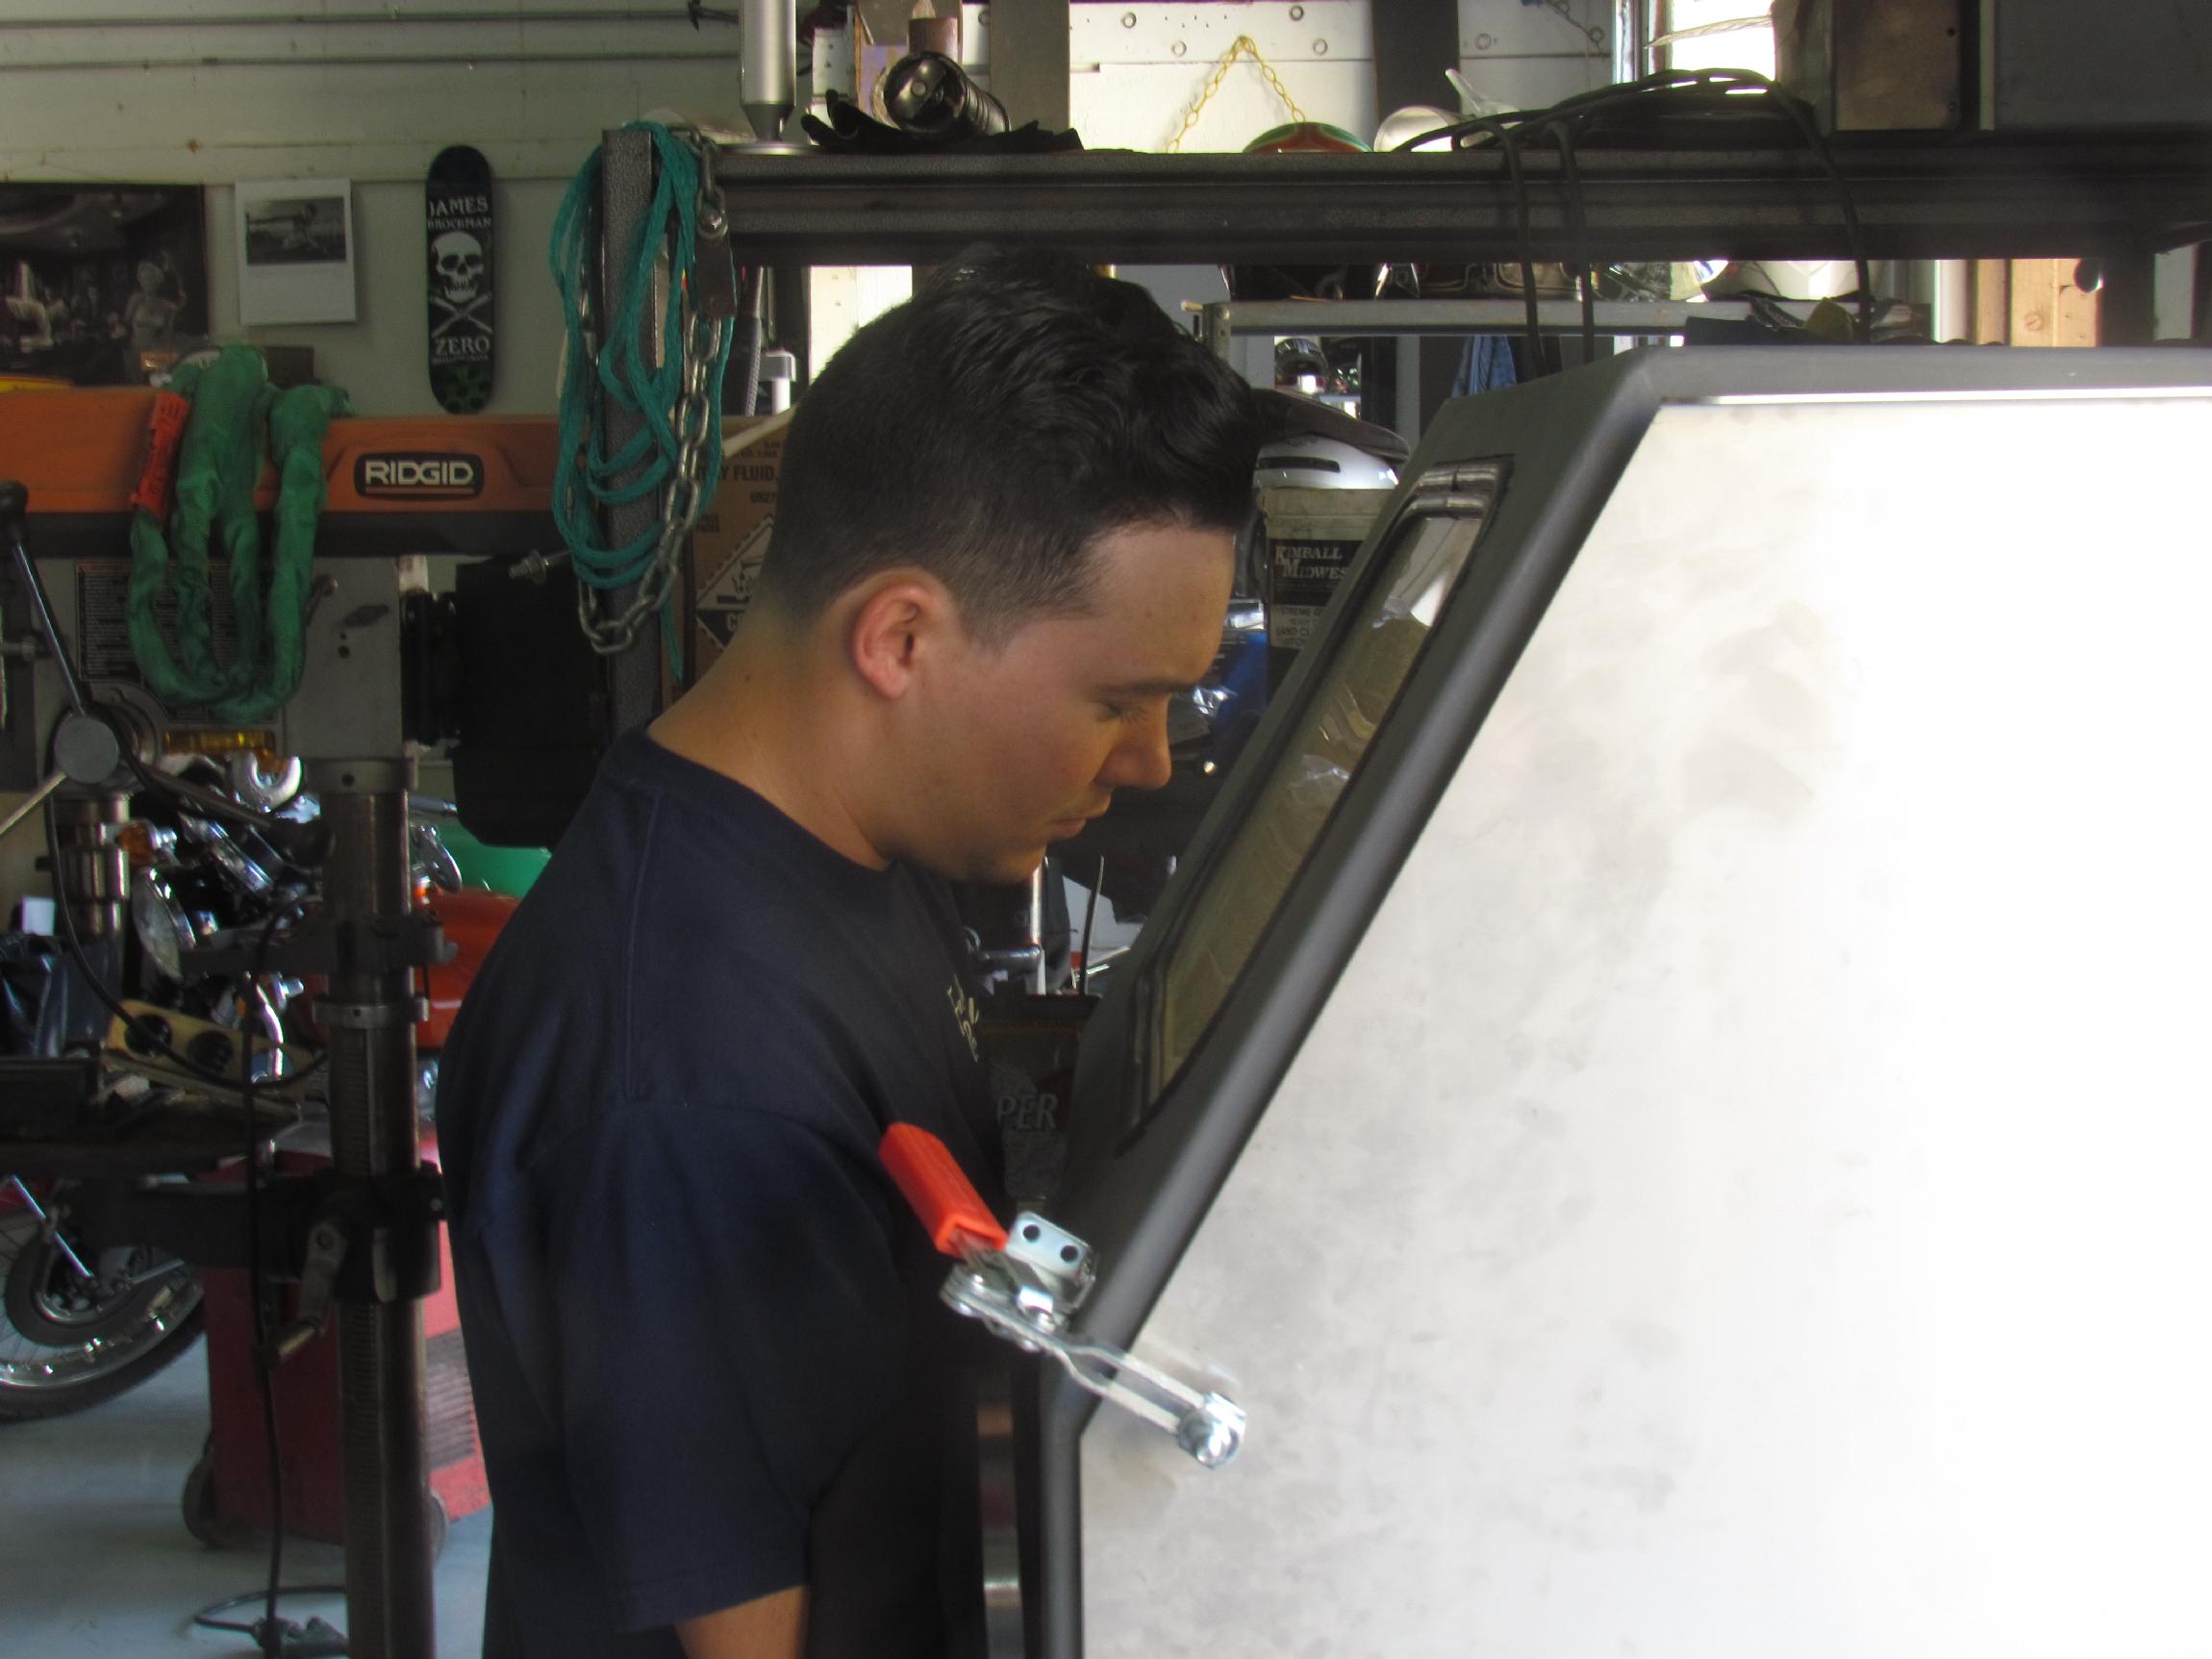
30th 2016 A
few weeks ago, I scored a '54 Chevy truck clock for BillyBob's build. I
wanted the housing to mount a tach in. The clock was extra as far as I
was concerned. At Sunday morning coffee, John Carey discovered that the
clock worked. He suggested I use it to fill the hole in the Deluxe '35
Chevy glove box door I have mounted in Deerslayer. The hole was the
right size but the mounting notches for the spring metal mounting
clips were in the wrong places. I bought a tool on impulse a month or
so back that proved perfect for the job of cutting new notches. It's an
air-powered "pencil" die grinder with 1/8" shank. This thing is like a
Dremal Motor Tool on steroids. It runs up to 56,000 rpm and is only
about seven inches long and 5/8", or so, in diameter. I had the clock
in and wound up in under an hour.
April
30th 2016 A
few weeks ago, I scored a '54 Chevy truck clock for BillyBob's build. I
wanted the housing to mount a tach in. The clock was extra as far as I
was concerned. At Sunday morning coffee, John Carey discovered that the
clock worked. He suggested I use it to fill the hole in the Deluxe '35
Chevy glove box door I have mounted in Deerslayer. The hole was the
right size but the mounting notches for the spring metal mounting
clips were in the wrong places. I bought a tool on impulse a month or
so back that proved perfect for the job of cutting new notches. It's an
air-powered "pencil" die grinder with 1/8" shank. This thing is like a
Dremal Motor Tool on steroids. It runs up to 56,000 rpm and is only
about seven inches long and 5/8", or so, in diameter. I had the clock
in and wound up in under an hour.
 May
11th 2016 Not much
progress today. Started out to rebuild Deerslayer's Carter 400 AFB
carburetor. Things went okay until I had the air horn ready for
cleaning. The ultrasonic cleaner turned out to be defective, right out
of the box. We had heat but no shake, rattle or roll. Let the piece
percolate in the heated Water Pine Sol solution I was trying out for a
couple of hours, hoping that the ultrasonic would kick on but it never
did. That brings the carb rebuild to a stop for now.
May
11th 2016 Not much
progress today. Started out to rebuild Deerslayer's Carter 400 AFB
carburetor. Things went okay until I had the air horn ready for
cleaning. The ultrasonic cleaner turned out to be defective, right out
of the box. We had heat but no shake, rattle or roll. Let the piece
percolate in the heated Water Pine Sol solution I was trying out for a
couple of hours, hoping that the ultrasonic would kick on but it never
did. That brings the carb rebuild to a stop for now.
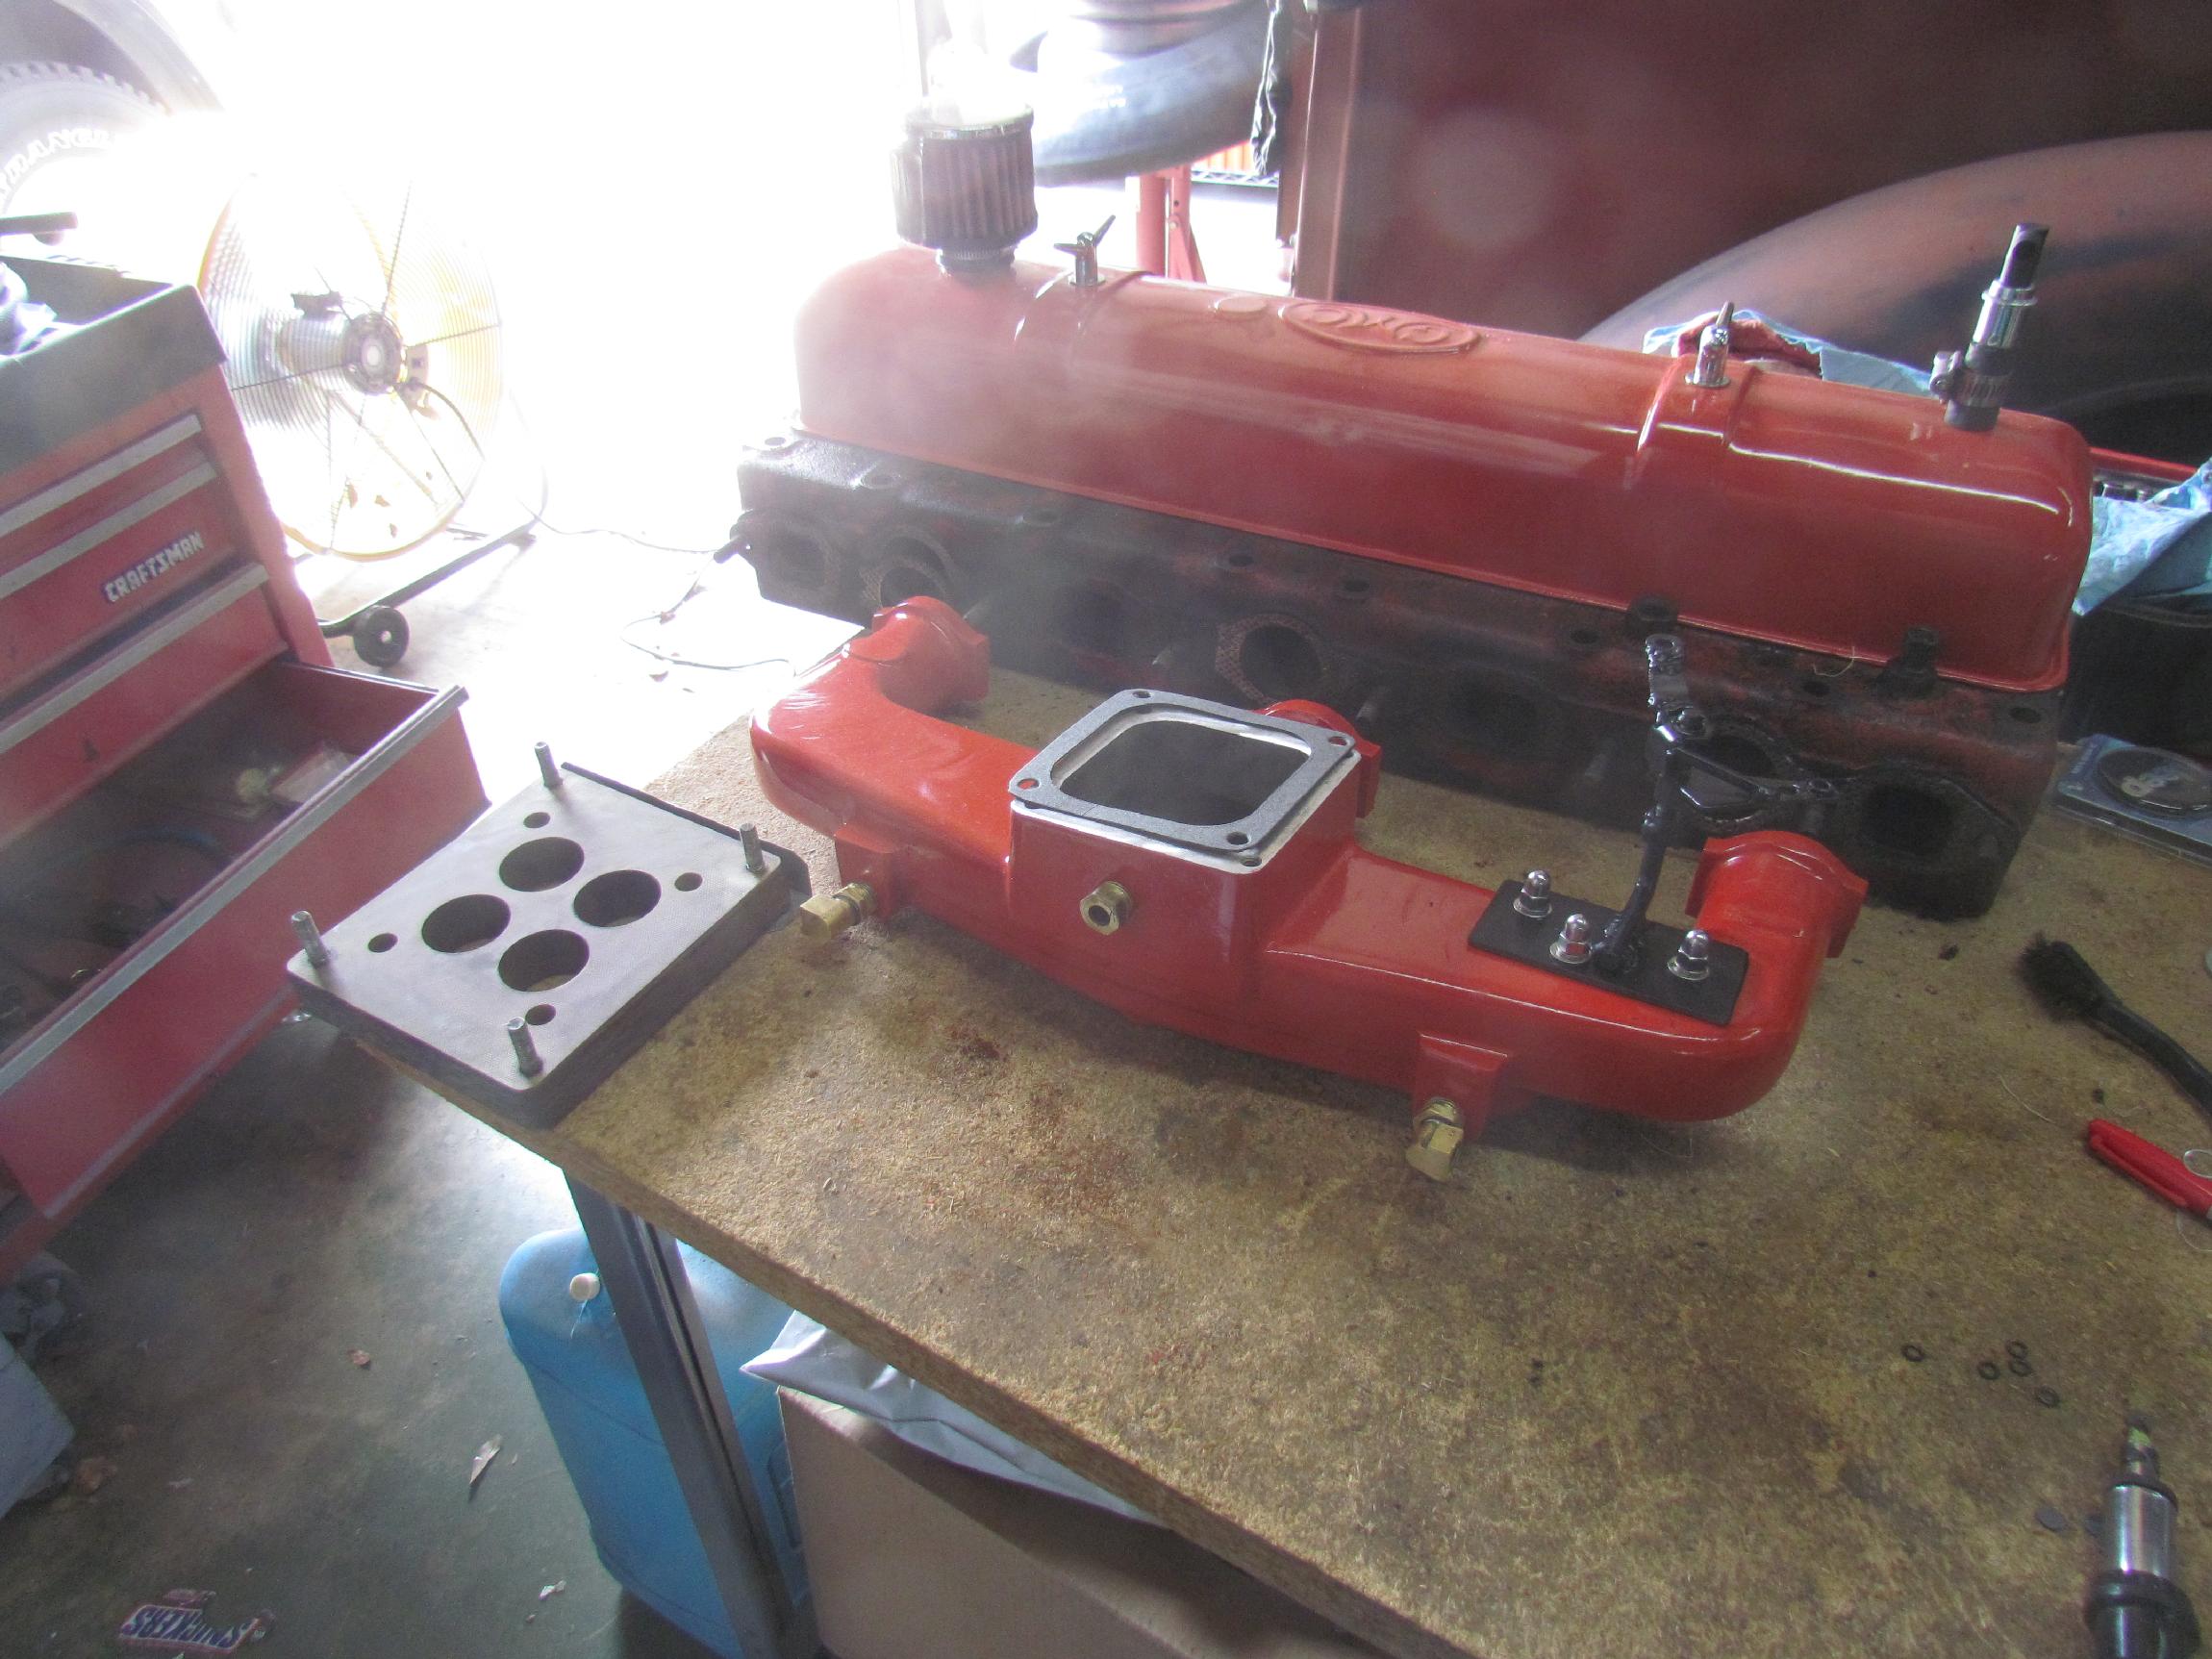 Finished
cleaning the phenolic resin spacer / adapter that Tony made. Also made
a gasket for the Clifford manifold. I cut down the throttle bracket
studs for the acorn nuts and somehow chipped the manifold paint in the
process. Sprayed a blast of engine paint on a throw away artist's brush
and fixed it. Maybe next time, I'll be smart enuf to use a Q-Tip
instead. Beer of the Day was Red Hook's Long Hammer IPA.
Finished
cleaning the phenolic resin spacer / adapter that Tony made. Also made
a gasket for the Clifford manifold. I cut down the throttle bracket
studs for the acorn nuts and somehow chipped the manifold paint in the
process. Sprayed a blast of engine paint on a throw away artist's brush
and fixed it. Maybe next time, I'll be smart enuf to use a Q-Tip
instead. Beer of the Day was Red Hook's Long Hammer IPA.
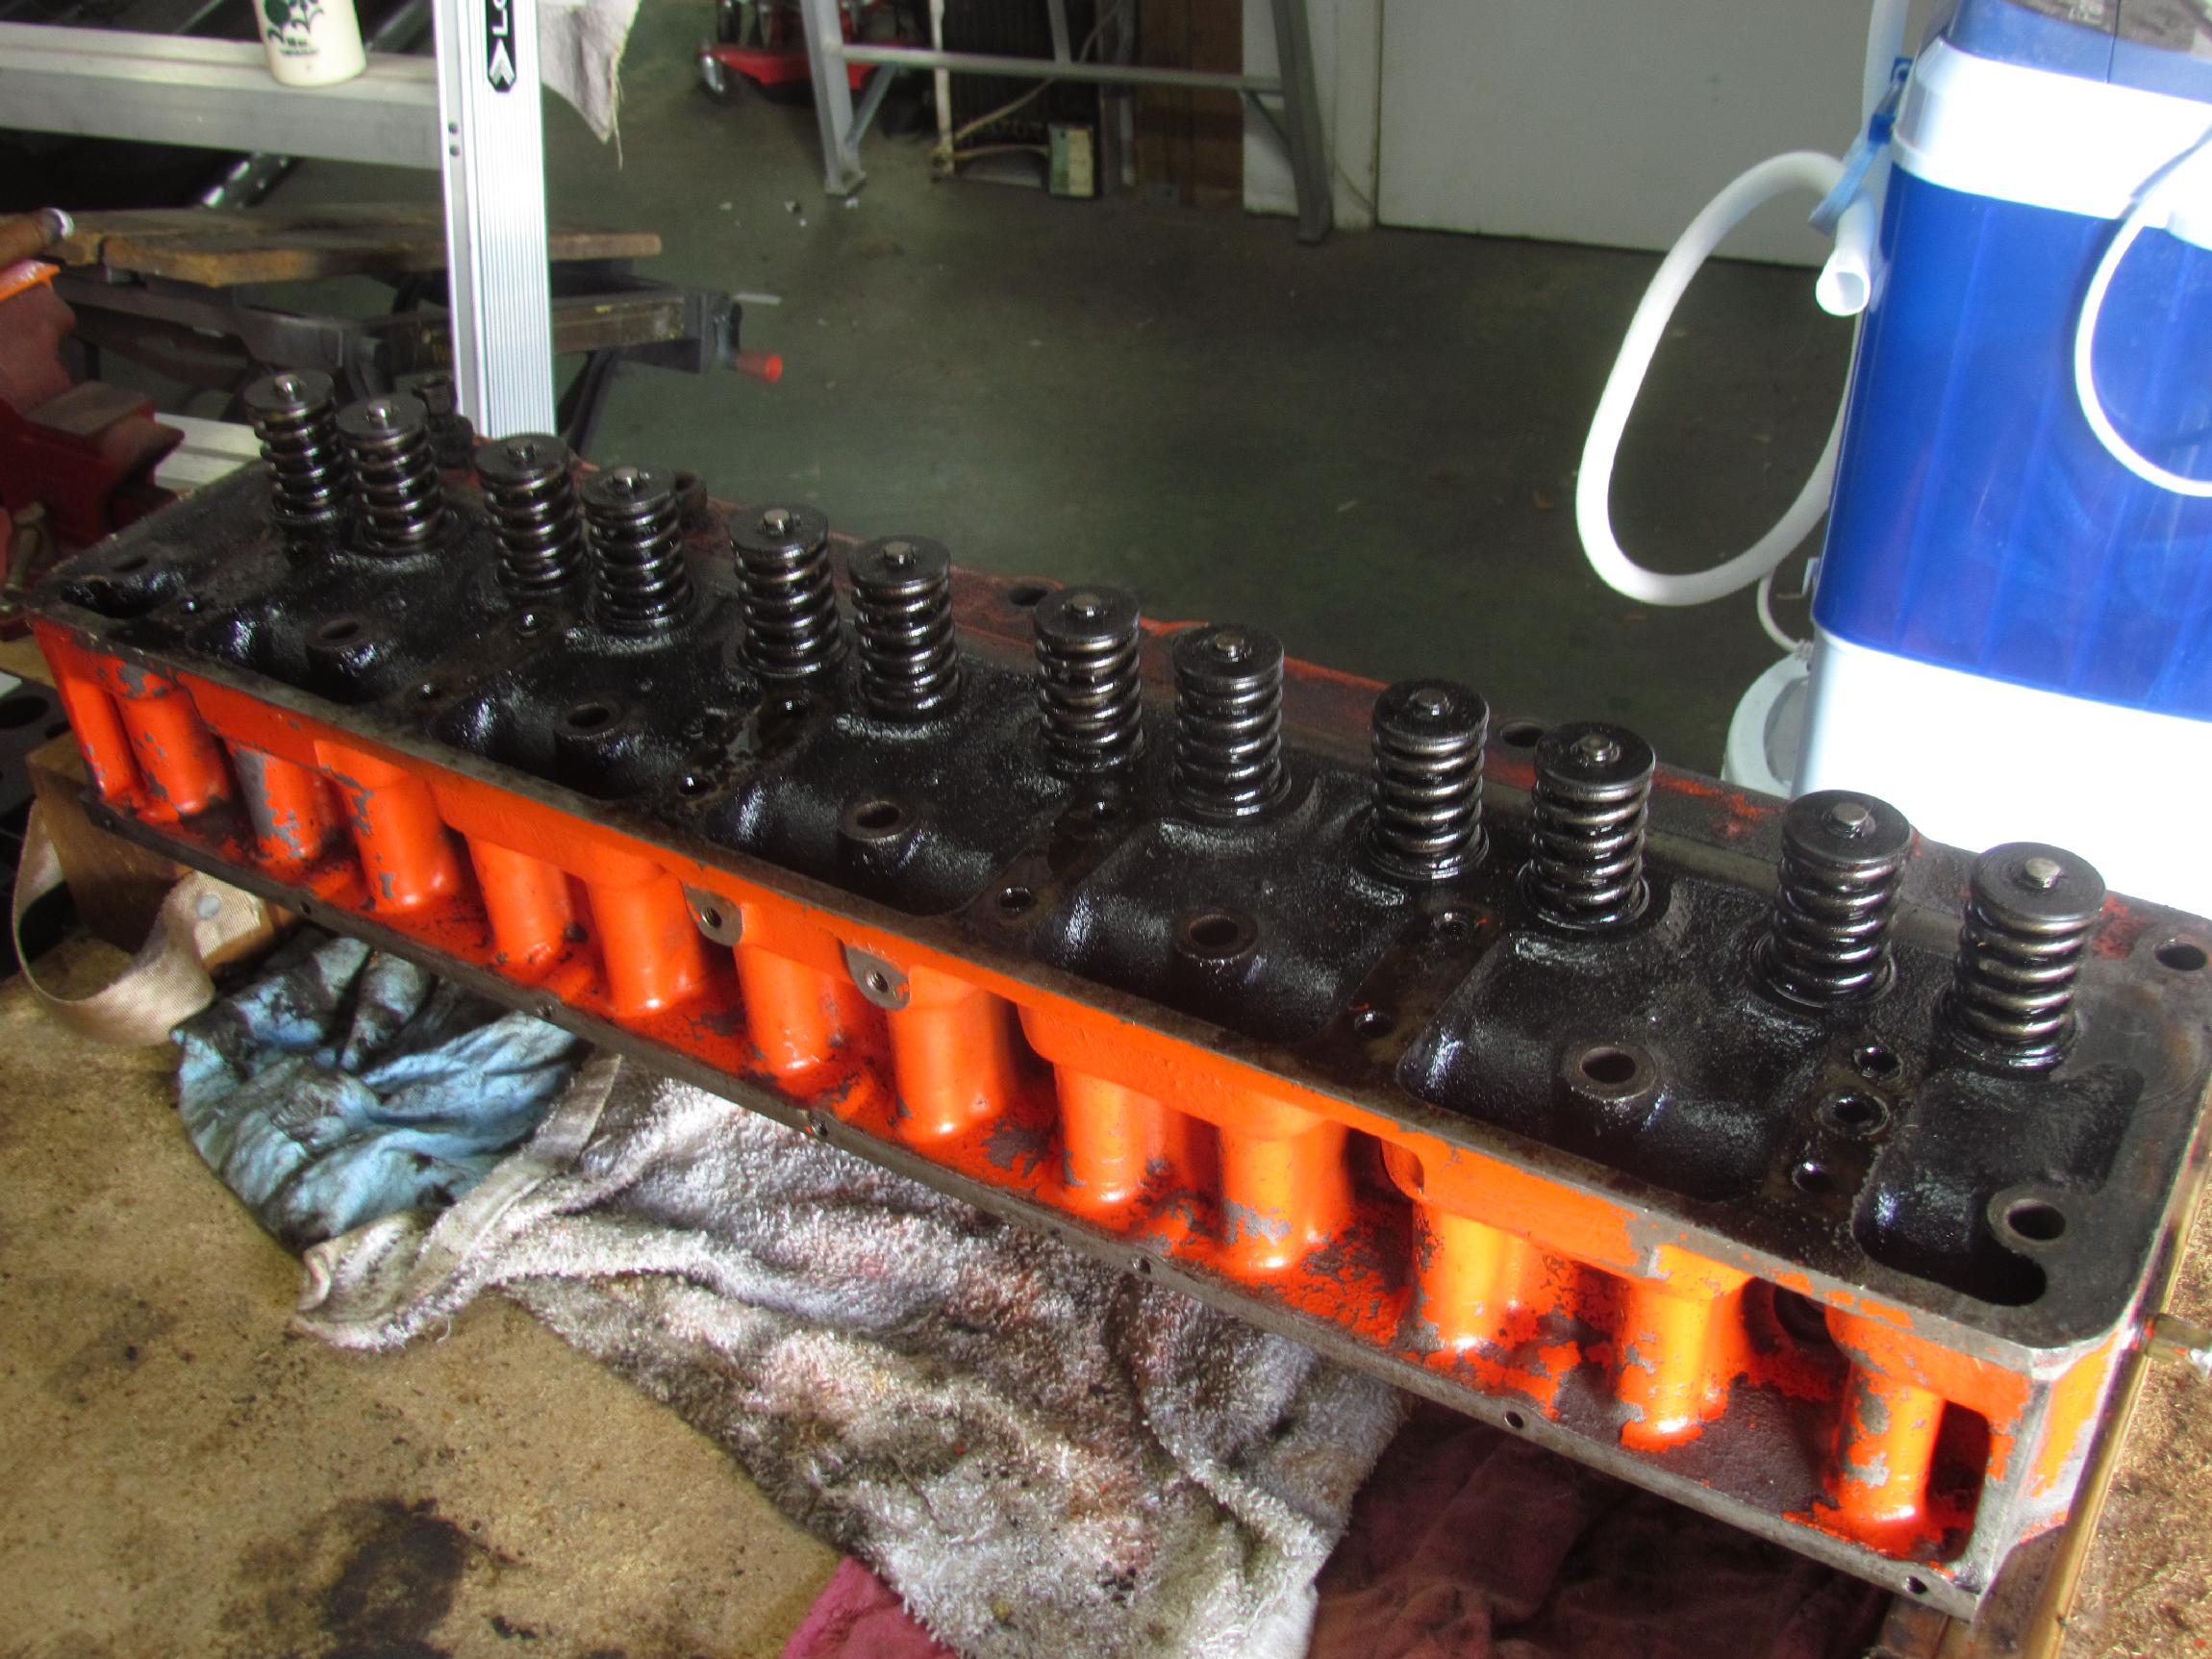
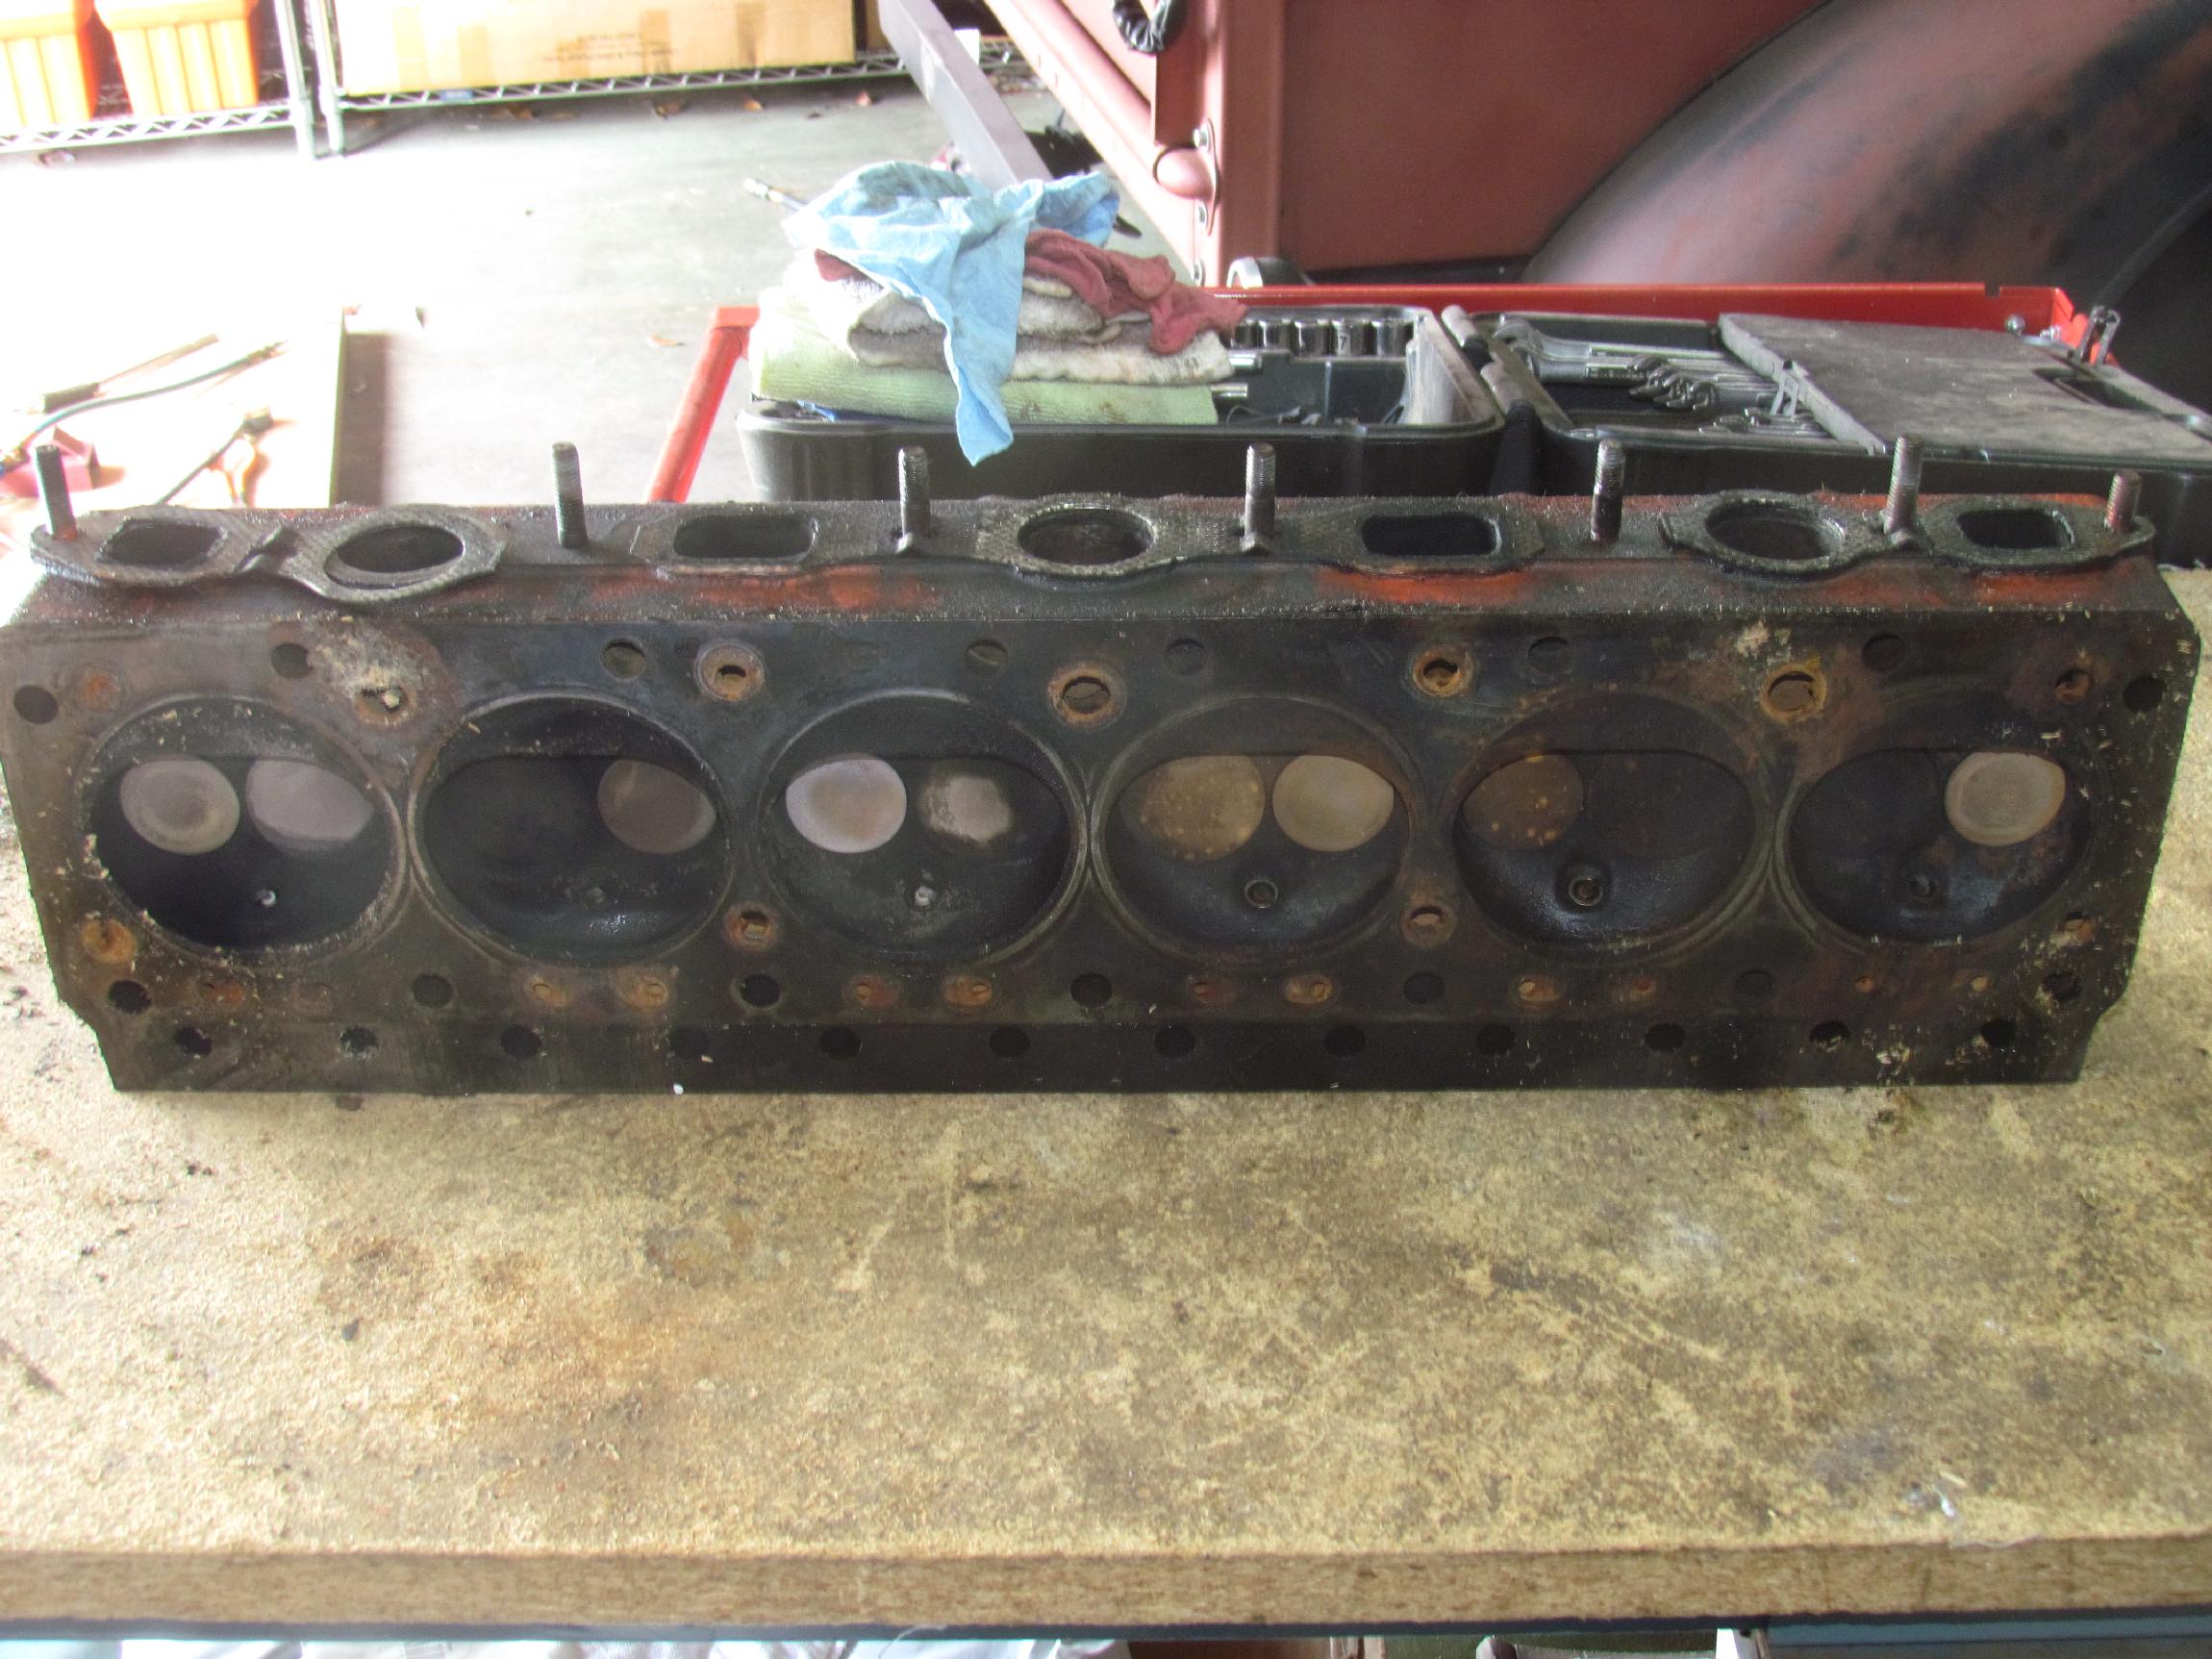 May
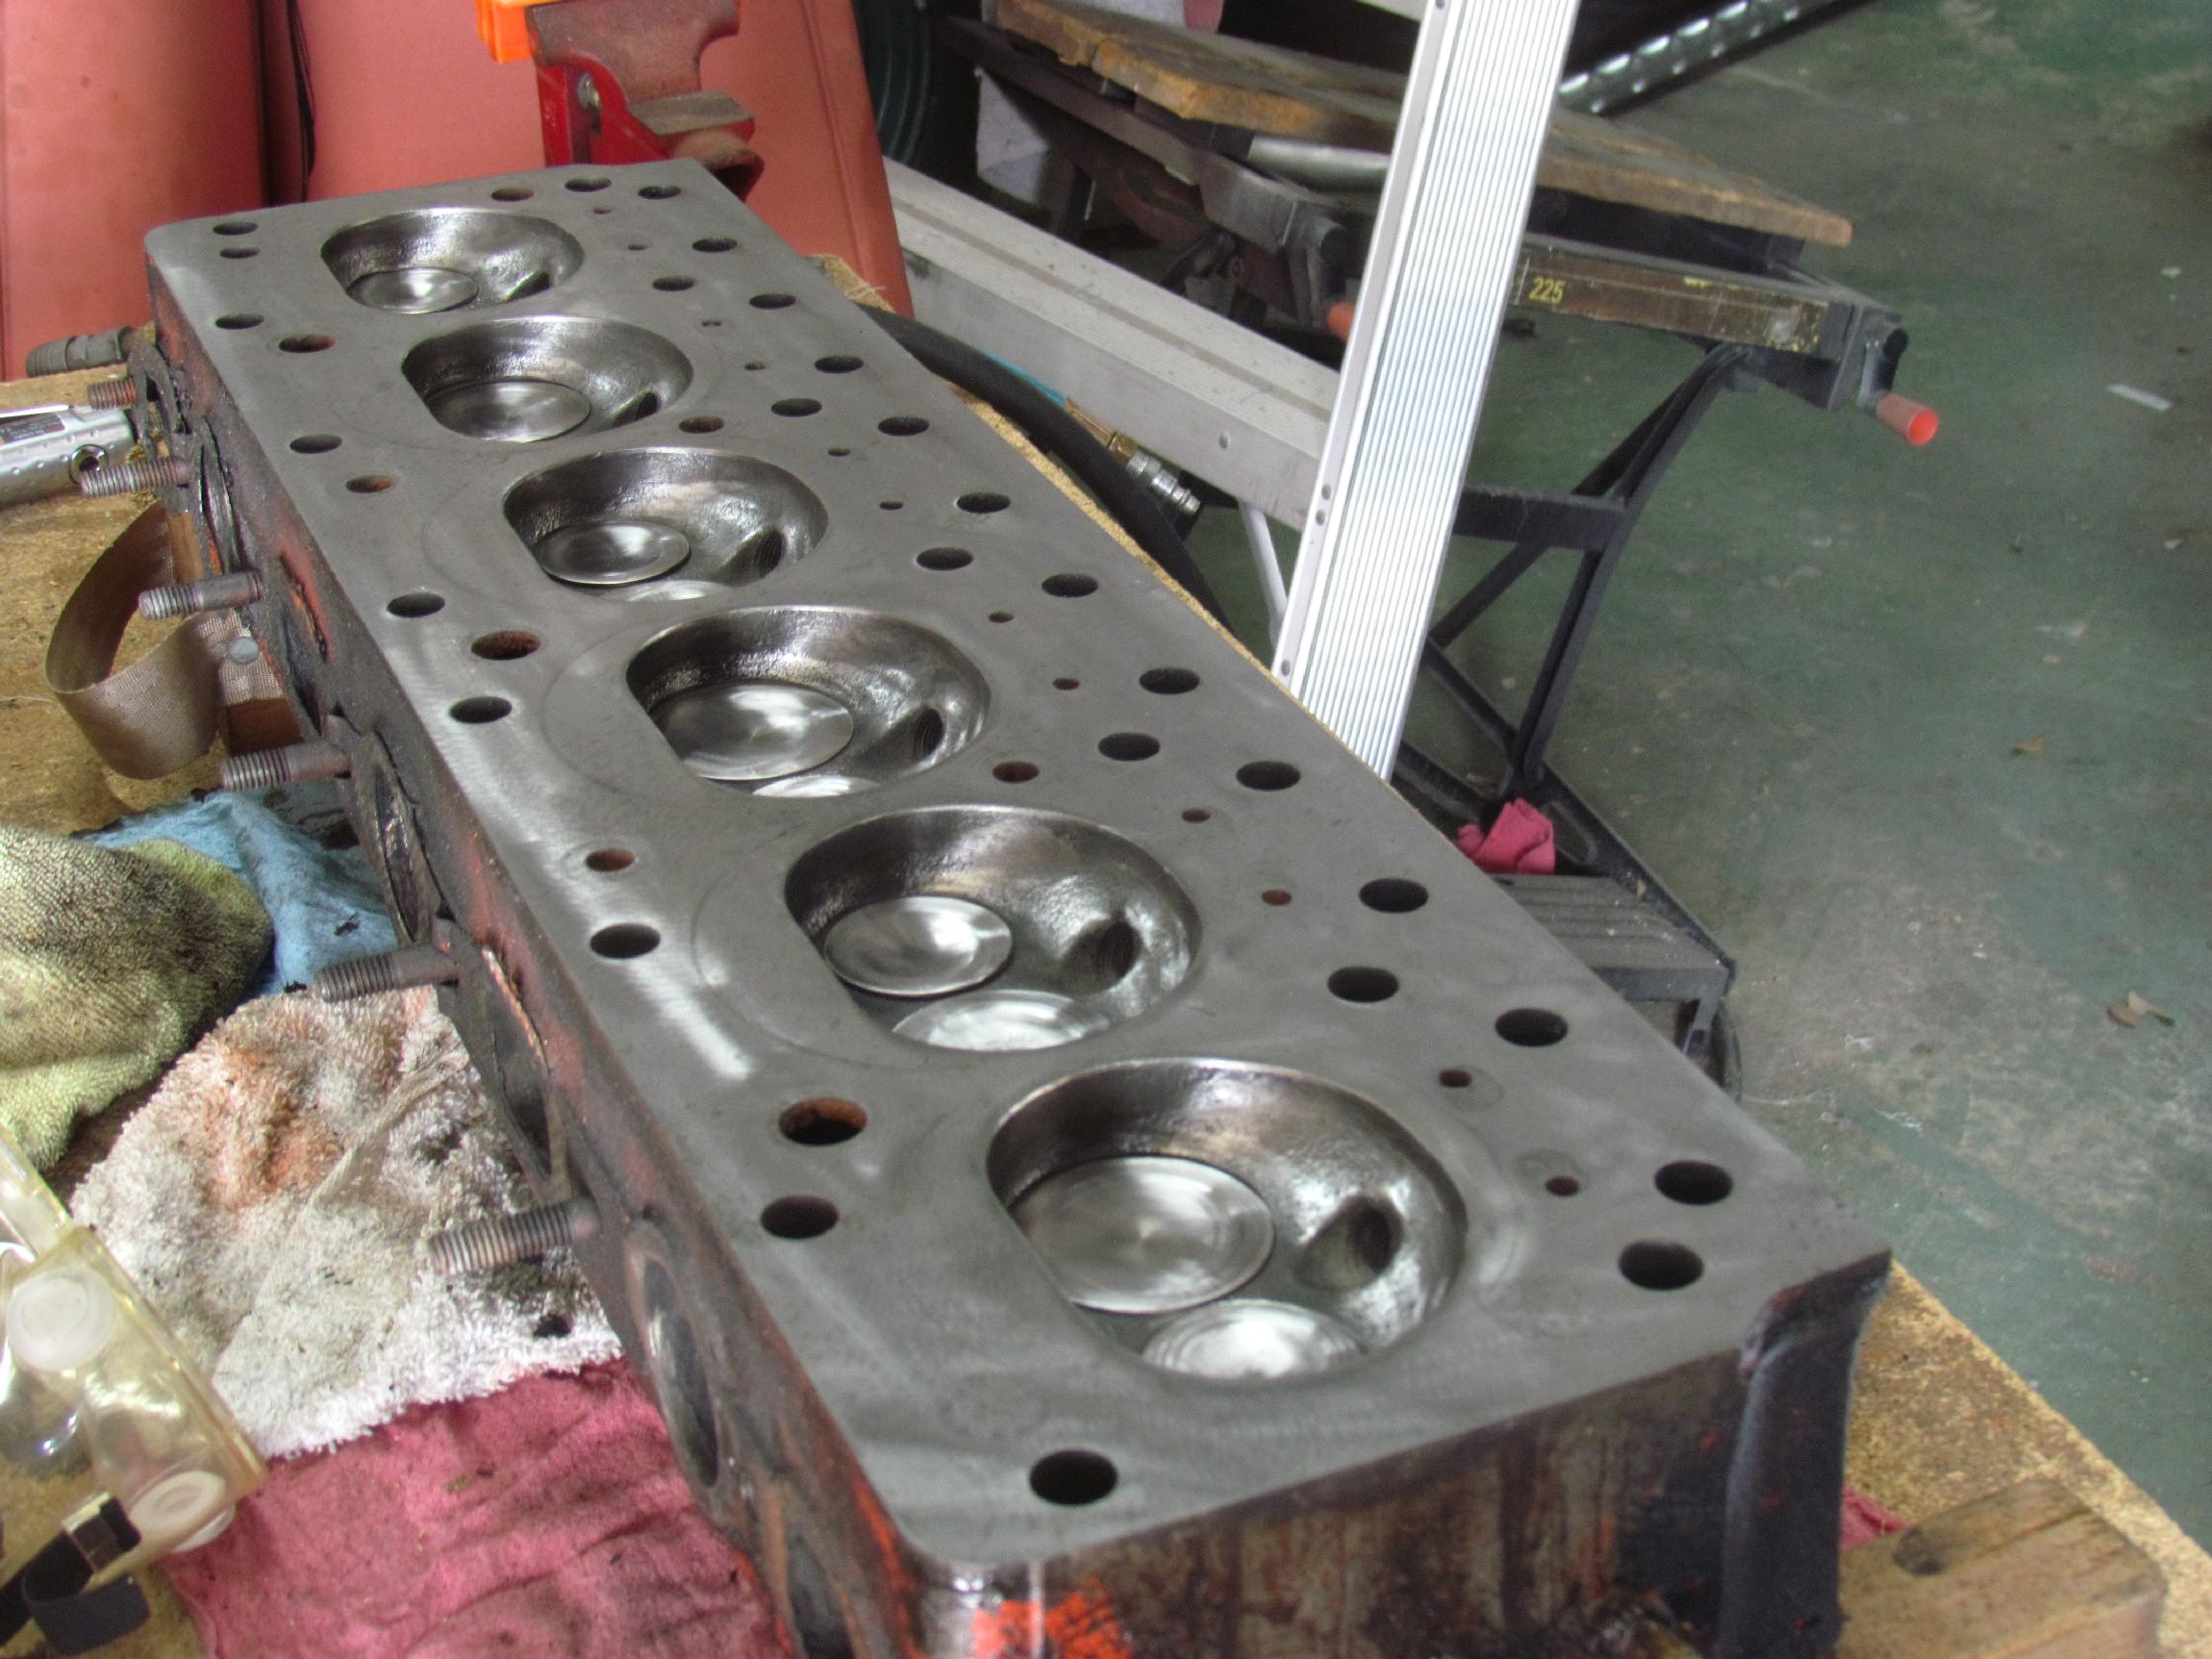
18th 2016 Ongoing
cleaning and organization ops of the past few weeks have left the main
workbench free for useful work again. The Jimmy head had been laying on
the corner of the workbench ever since Wayne and I dropped it there
back in July. I dragged it to the center and turned it on its side for
a first look at it.
May
18th 2016 Ongoing
cleaning and organization ops of the past few weeks have left the main
workbench free for useful work again. The Jimmy head had been laying on
the corner of the workbench ever since Wayne and I dropped it there
back in July. I dragged it to the center and turned it on its side for
a first look at it.
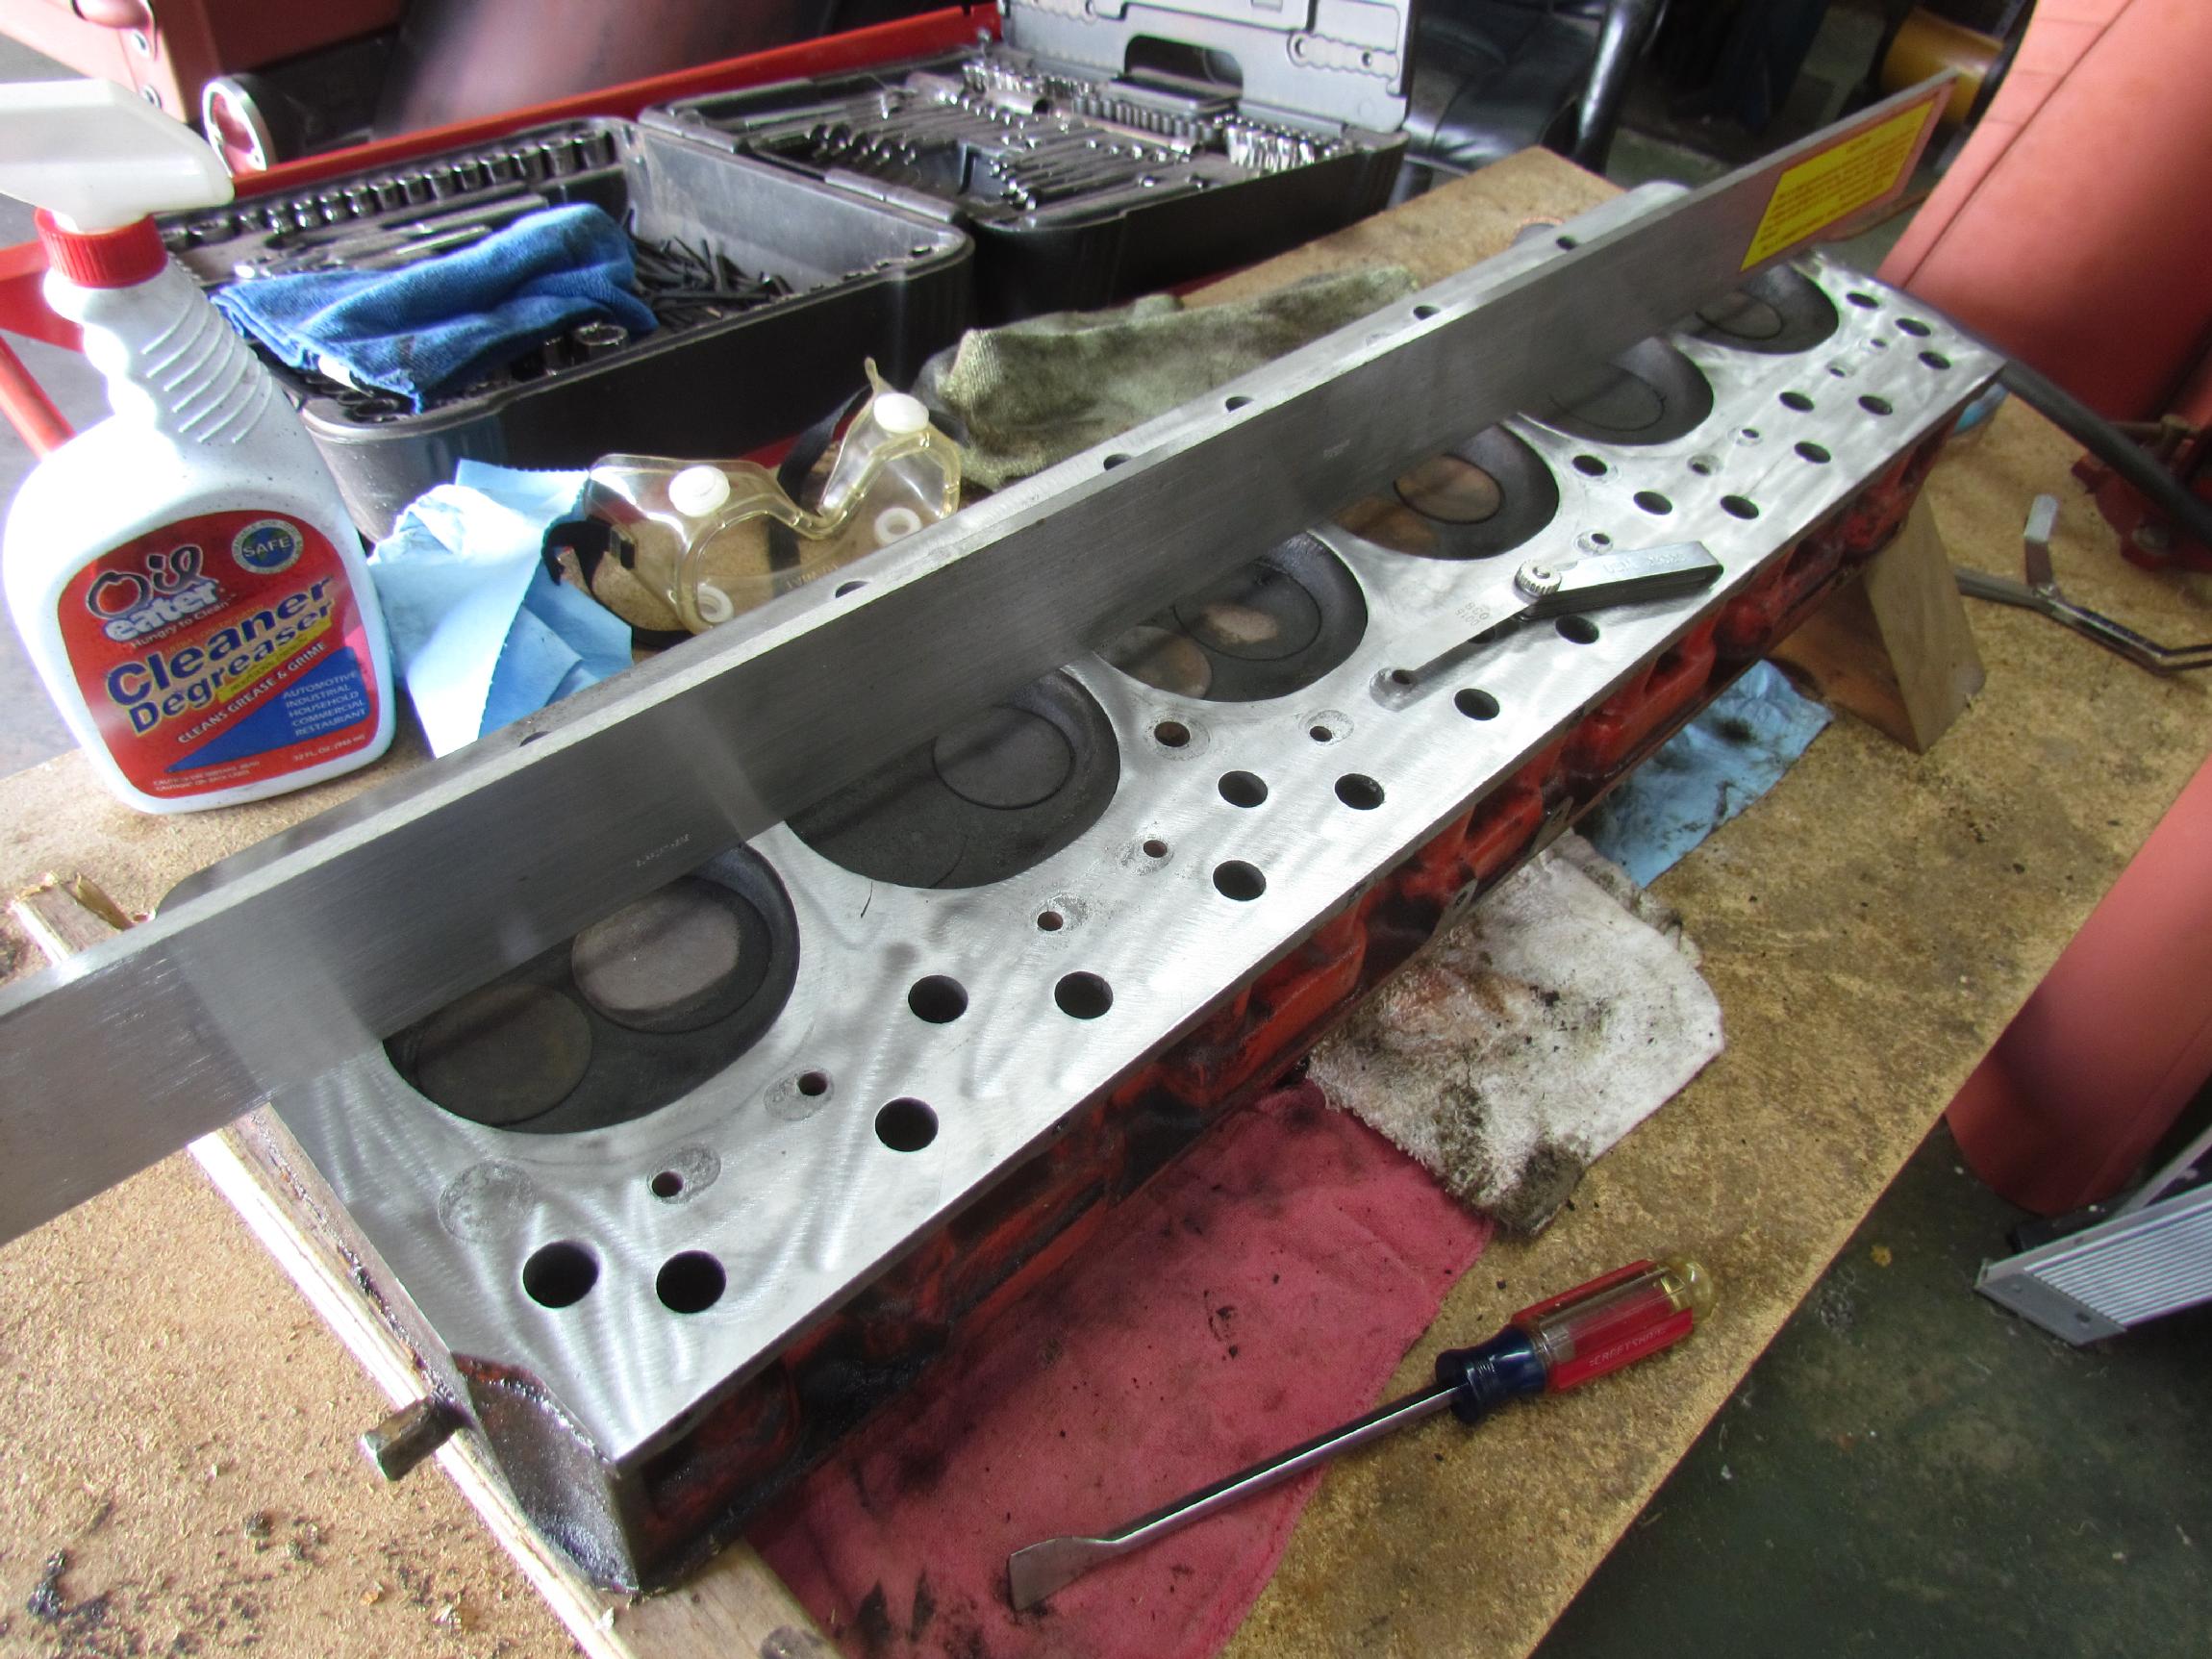 I
removed the valve cover studs and set the head upside down on wood
blocks to work the surface and combustion chambers. Tony made me aware
of the grit contamination inherent in using Scotchbrite Roloc disks
but I haven't found a better way to clean the machined surfaces yet.
After the head surface was cleaned, I checked it with a Starlett
machinists straightedge. This is the most expensive piece of bar stock
I own.
I laid it down the center, on both sides and criss-cross,
corner-to-corner. My smallest feeler gauge is fifteen ten-thousandths
of an inch (0.0015") and I could not get it under the edge of the
straightedge
at any location. That's good, I think. This measurement will get my
friend, Wayne Harlow, off my back for awhile. He's been bustin' my
chops about this measurement ever since we grunted this thing off the
engine.
I
removed the valve cover studs and set the head upside down on wood
blocks to work the surface and combustion chambers. Tony made me aware
of the grit contamination inherent in using Scotchbrite Roloc disks
but I haven't found a better way to clean the machined surfaces yet.
After the head surface was cleaned, I checked it with a Starlett
machinists straightedge. This is the most expensive piece of bar stock
I own.
I laid it down the center, on both sides and criss-cross,
corner-to-corner. My smallest feeler gauge is fifteen ten-thousandths
of an inch (0.0015") and I could not get it under the edge of the
straightedge
at any location. That's good, I think. This measurement will get my
friend, Wayne Harlow, off my back for awhile. He's been bustin' my
chops about this measurement ever since we grunted this thing off the
engine.
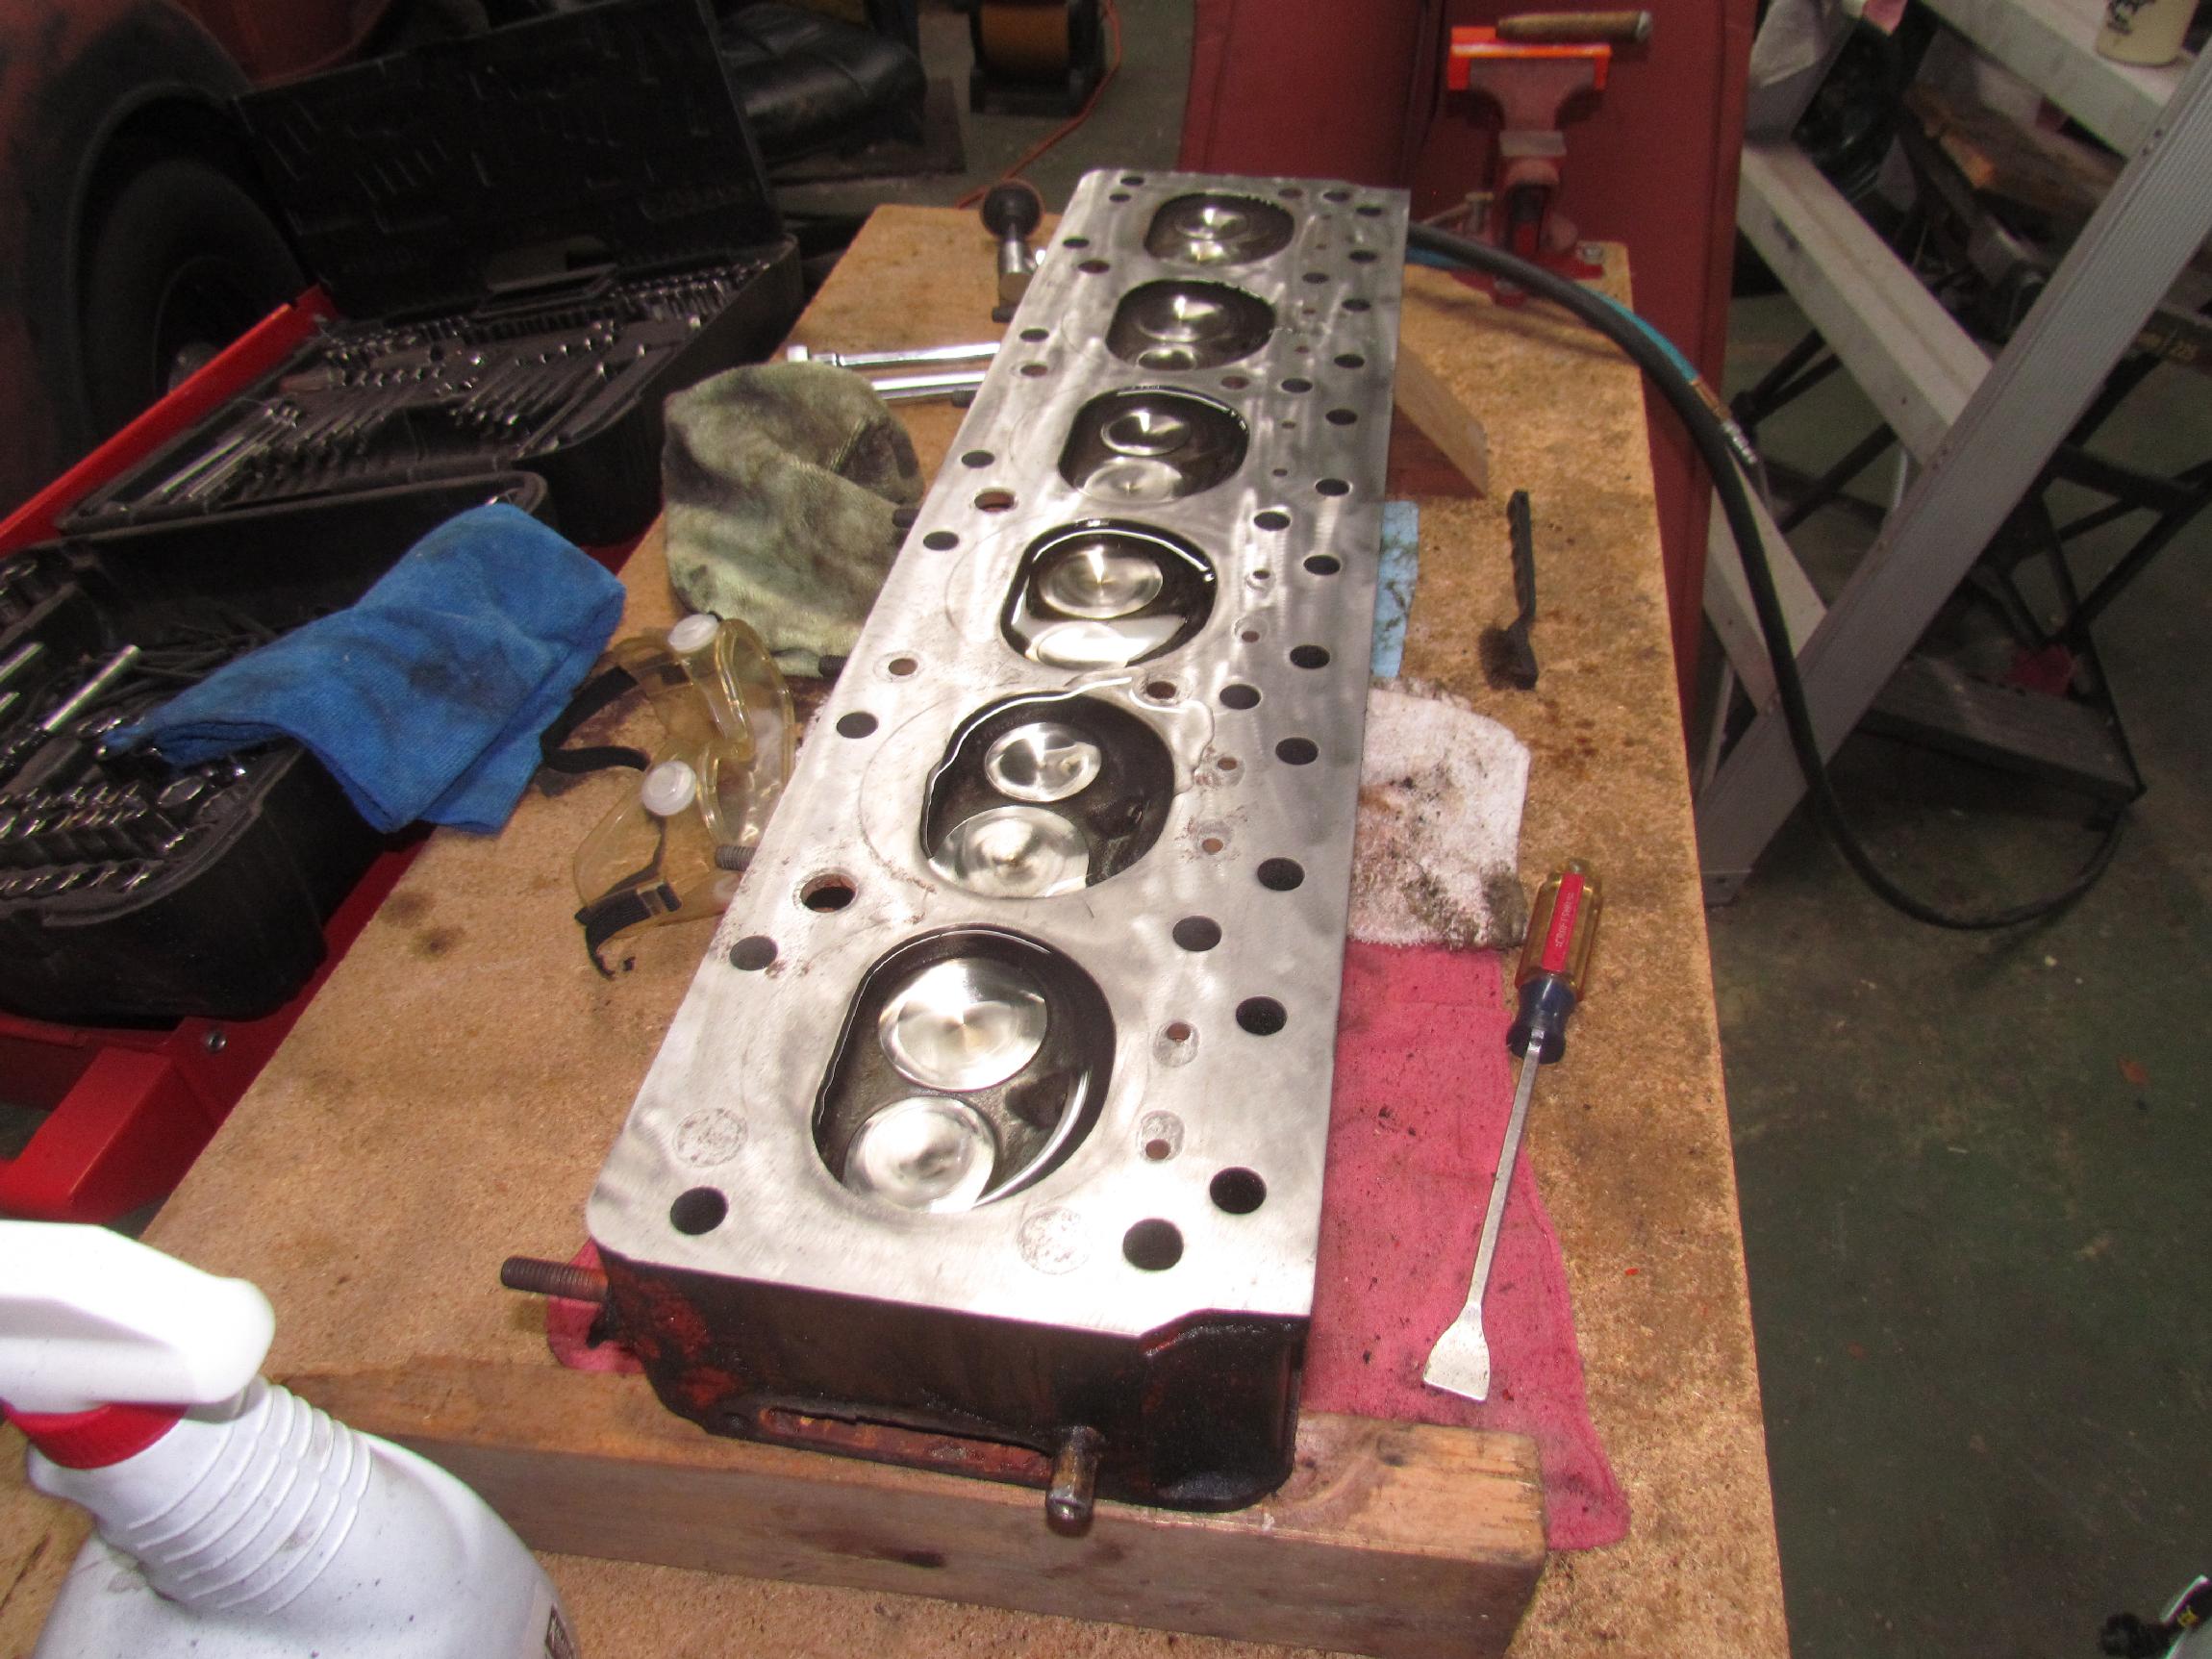
 I
continued to clean the combustion chambers with the help of the beer of
the day, Full Sail pale ale. The Scotchbrite disks were not much good
here except on the faces of the stainless steel small block Chevy
valves Tony installed in this head. I did the best I could with brass
wire wheels and cups for the rest of the combustion chambers. About
three in the afternoon, it started raining hard enuf that I had to
close the overhead door. That made it too stuffy to work any longer and
I closed down operations.
I
continued to clean the combustion chambers with the help of the beer of
the day, Full Sail pale ale. The Scotchbrite disks were not much good
here except on the faces of the stainless steel small block Chevy
valves Tony installed in this head. I did the best I could with brass
wire wheels and cups for the rest of the combustion chambers. About
three in the afternoon, it started raining hard enuf that I had to
close the overhead door. That made it too stuffy to work any longer and
I closed down operations.
 May
19th 2016 After
posting to FB yesterday, my brother, JR, and Wayne Switzer questioned
the health of the valves. Wayne outlined how easy it was to check, so I
did when I arrived at the BillyBob Shop. Put the plugs back in and
filled the combustion chambers with water. Turned on the air compressor
and, in the five minutes it took to cycle up, there were no noticeable
leaks in any of the chambers. Blew compressed air thru the ports at
the back sides of all the valves, twice. I had heavy bubbling at
cylinder 1
and 4 intake valves, cylinder 4 and 5 exhaust valves and some bubbling
on number two intake. All the rest were tight. Damnation! Mission creep
again. Removed the plugs again and drained the chambers. Blew the water
off and gave the chambers and head surface a good dose of WD40. Lit a
cigar and went into deep ponder mode.
May
19th 2016 After
posting to FB yesterday, my brother, JR, and Wayne Switzer questioned
the health of the valves. Wayne outlined how easy it was to check, so I
did when I arrived at the BillyBob Shop. Put the plugs back in and
filled the combustion chambers with water. Turned on the air compressor
and, in the five minutes it took to cycle up, there were no noticeable
leaks in any of the chambers. Blew compressed air thru the ports at
the back sides of all the valves, twice. I had heavy bubbling at
cylinder 1
and 4 intake valves, cylinder 4 and 5 exhaust valves and some bubbling
on number two intake. All the rest were tight. Damnation! Mission creep
again. Removed the plugs again and drained the chambers. Blew the water
off and gave the chambers and head surface a good dose of WD40. Lit a
cigar and went into deep ponder mode.
 May
21st 2016 Spent
most of the day degreasing the painted areas of the Jimmy head and
cleaning the Carter AFB carb. The replacement ultrasonic cleaner
arrived on Wednesday and, when I set it up, this one worked. I was a
bit underwhelmed. It cleaned the carb but I was expecting a little more
shiny. Also, the main body cleaned up better than the airhorn but that
may have come from literally cooking the thing in the old ultrasonic
cleaner last week. I thoroughly explored the process with several
thirty minute cycles with each piece but there wasn't much improvement
after the first one. I used a half liter Pine Sol, eight liter water
solution and will work with a different solution next time. In
addition, there was some residue on the choke plate after all the
iterations that will still have to be cleaned off. Closed down ops at
seven in the evening and retreated to the Flamingo Room.
May
21st 2016 Spent
most of the day degreasing the painted areas of the Jimmy head and
cleaning the Carter AFB carb. The replacement ultrasonic cleaner
arrived on Wednesday and, when I set it up, this one worked. I was a
bit underwhelmed. It cleaned the carb but I was expecting a little more
shiny. Also, the main body cleaned up better than the airhorn but that
may have come from literally cooking the thing in the old ultrasonic
cleaner last week. I thoroughly explored the process with several
thirty minute cycles with each piece but there wasn't much improvement
after the first one. I used a half liter Pine Sol, eight liter water
solution and will work with a different solution next time. In
addition, there was some residue on the choke plate after all the
iterations that will still have to be cleaned off. Closed down ops at
seven in the evening and retreated to the Flamingo Room.
 May
23rd 2016 My
friend
Johan read my last FB post and messaged me to bring the carb body over
to his shop for vapor blasting. I wasn't aware of the process and had
to look it up. Required that the carb had to be torn down the rest of
the way. There's that mission creep again. Glad I did tho'. I was
surprised at the amount of grime still on the plates and shafts. Went
okay until near the end when I broke a throttle plate screw. Might have
been staked. I can't see worth spit. The others came out easy enough.
I'm ready now to visit Johan sometime Wednesday.
May
23rd 2016 My
friend
Johan read my last FB post and messaged me to bring the carb body over
to his shop for vapor blasting. I wasn't aware of the process and had
to look it up. Required that the carb had to be torn down the rest of
the way. There's that mission creep again. Glad I did tho'. I was
surprised at the amount of grime still on the plates and shafts. Went
okay until near the end when I broke a throttle plate screw. Might have
been staked. I can't see worth spit. The others came out easy enough.
I'm ready now to visit Johan sometime Wednesday.
 May
25th 2016 I visited my
friend, Johan Amy, at his shop, Iron Alley Fabrication, twice. He
wasn't there the first time. I had forgotten he is a nightcrawler. He
went to work on the carburetor body while I wandered around the shop,
taking in the changes since the last time I was here. The process
didn't
take very long but it takes a lot of air and Johan's compressor had to
recycle a few times. I doubt if my dinky compressor would run this
thing for more than a few seconds.
May
25th 2016 I visited my
friend, Johan Amy, at his shop, Iron Alley Fabrication, twice. He
wasn't there the first time. I had forgotten he is a nightcrawler. He
went to work on the carburetor body while I wandered around the shop,
taking in the changes since the last time I was here. The process
didn't
take very long but it takes a lot of air and Johan's compressor had to
recycle a few times. I doubt if my dinky compressor would run this
thing for more than a few seconds.
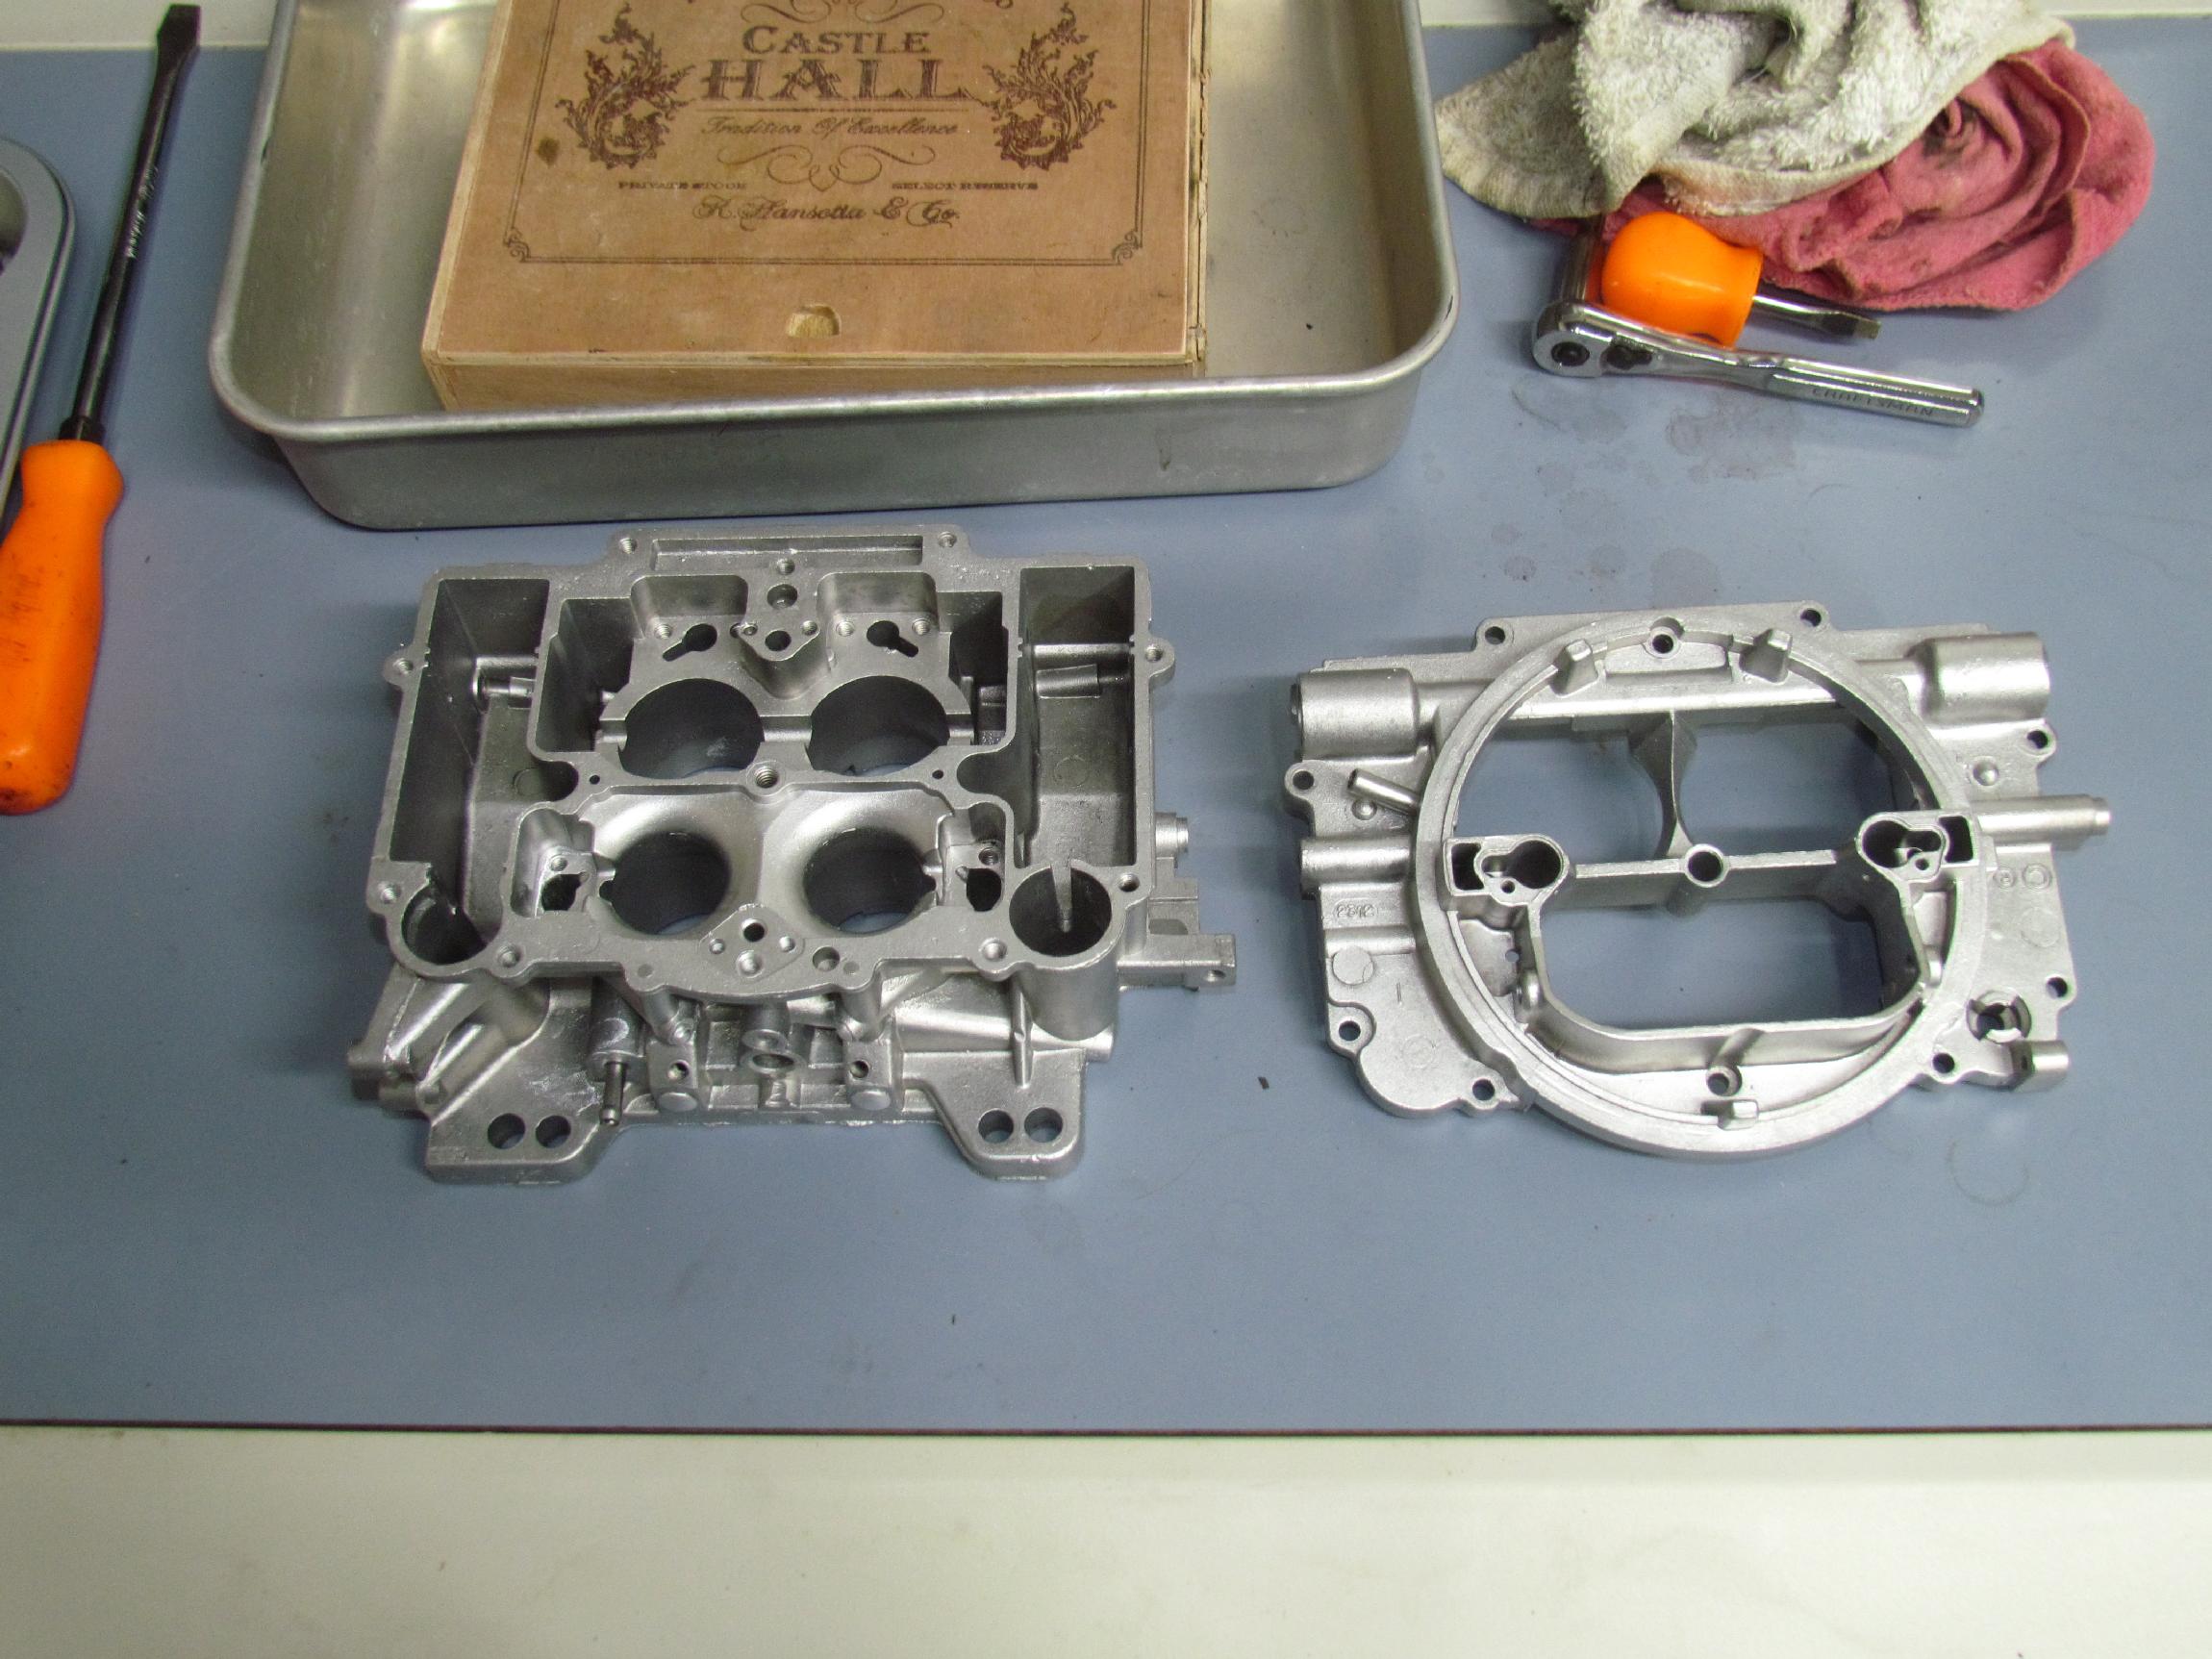 The
results are nothing short of amazing! The blasting medium is a mixture
of air, water and microscopic beads. For future reference, Johan told
me I didn't have to break down the carb as far as I did. It won't hurt
to leave the throttle plates and shafts in for blasting. Oh well. I
asked Johan what the damage was and he gave me a very good price . . .
Then, I stiffed him because I had forgotten my billfold. Damnation!
I'll get back to him in a week or two.
The
results are nothing short of amazing! The blasting medium is a mixture
of air, water and microscopic beads. For future reference, Johan told
me I didn't have to break down the carb as far as I did. It won't hurt
to leave the throttle plates and shafts in for blasting. Oh well. I
asked Johan what the damage was and he gave me a very good price . . .
Then, I stiffed him because I had forgotten my billfold. Damnation!
I'll get back to him in a week or two.
 Between
trips to Johan's, I took the valves out of the Jimmy head. The valve
spring tool I used for this operation was the little jaws type with the
star wheel of pain on top. This thing has its place, on engines when
you don't remove the head from the block but, I've had enuf fun with
it. I'm getting the big C-clamp type valve spring compressor tool like
my Dad used for reassembly.
Between
trips to Johan's, I took the valves out of the Jimmy head. The valve
spring tool I used for this operation was the little jaws type with the
star wheel of pain on top. This thing has its place, on engines when
you don't remove the head from the block but, I've had enuf fun with
it. I'm getting the big C-clamp type valve spring compressor tool like
my Dad used for reassembly.
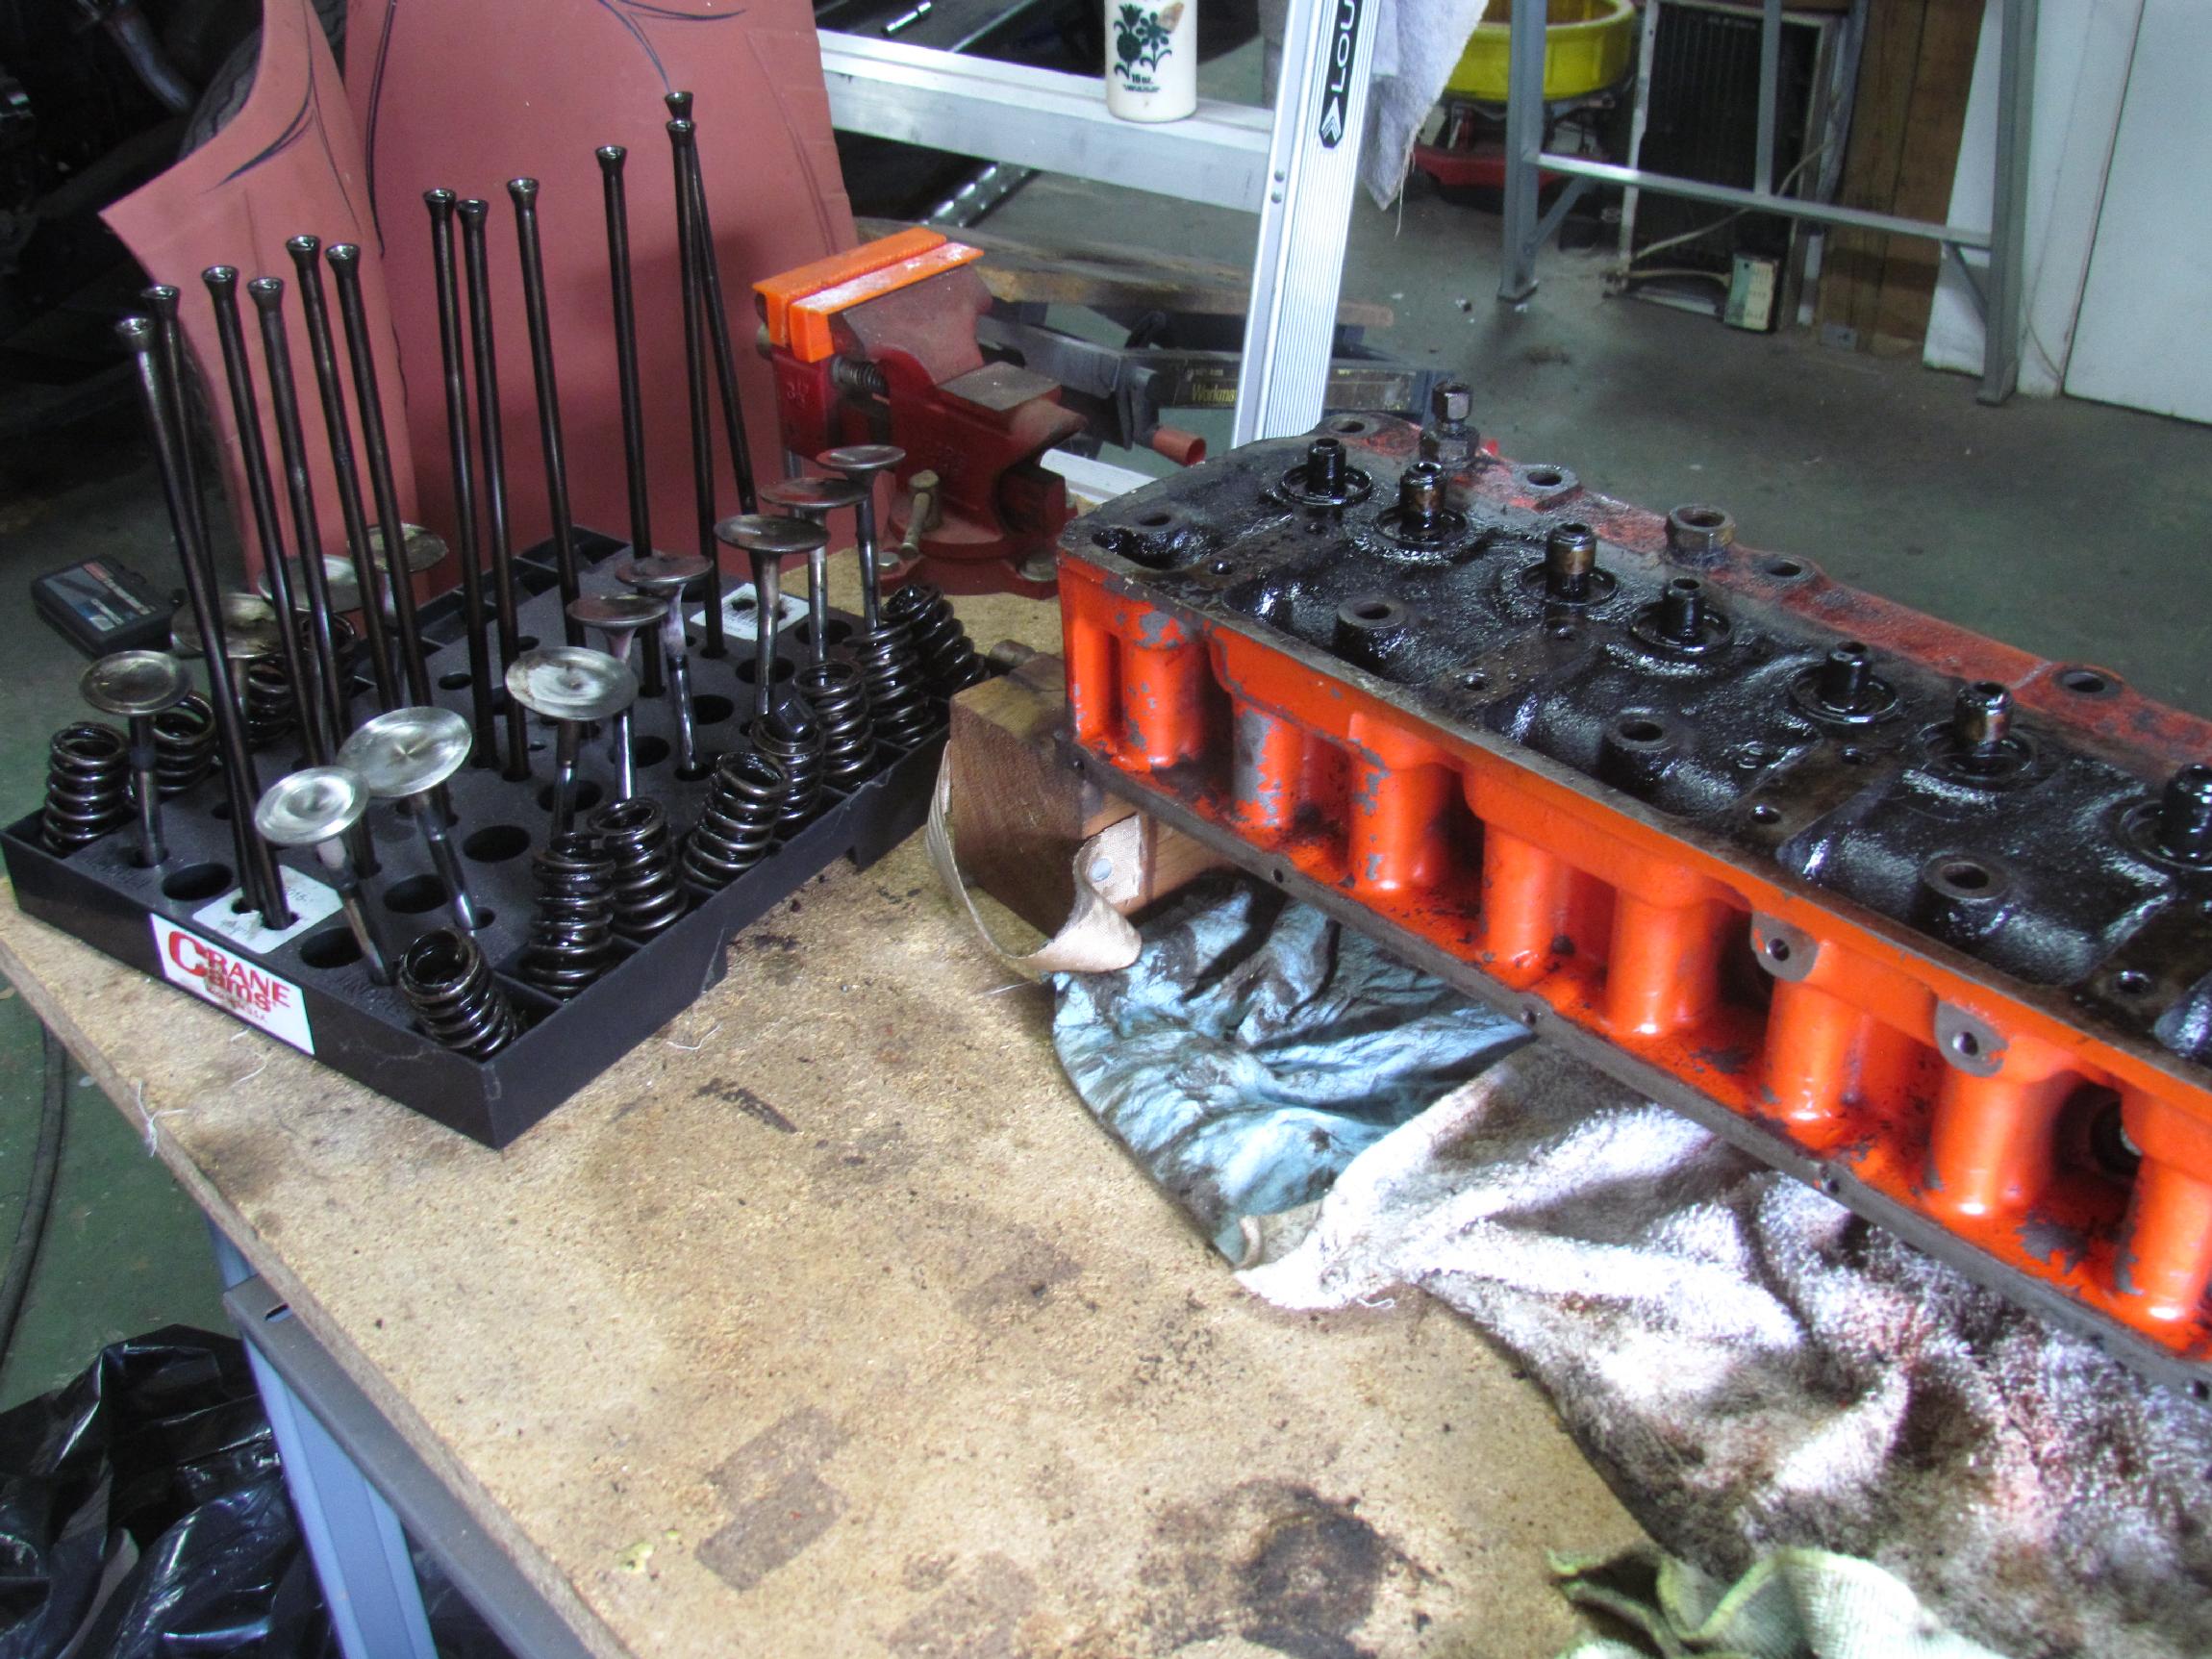 Since
I'm a virgin regarding valve work, having not paid attention when my
Dad was doing this stuff, research is in order and a few conversations
with my machinist buddy, John Carey. I need to learn about seals for
one thing and, two of the valves were tight in their guides beyond the
1/2" of travel they make under normal operations. These are small block
Chevy valves. Do I need to buy Chevy seals or Jimmy seals. All will be
revealed in time.
Since
I'm a virgin regarding valve work, having not paid attention when my
Dad was doing this stuff, research is in order and a few conversations
with my machinist buddy, John Carey. I need to learn about seals for
one thing and, two of the valves were tight in their guides beyond the
1/2" of travel they make under normal operations. These are small block
Chevy valves. Do I need to buy Chevy seals or Jimmy seals. All will be
revealed in time.
It's been a long time since I've posted a Deerslayer log entry, mostly because I've been a lazy slug. The realization that the truck has been laid up for over a year now hit me like a bucket of cold water the other day. Still need to pick up the pace.
| < Back
to Intro |
You can email me at ![]() webmaster@laroke.com
webmaster@laroke.com
Issued Friday May 27, 2016
Updated Wednesday June 20, 2018
copyright © 2008-2018 Larry R. Kephart all rights reserved
| | LRK Home | | Bio Info | | Krash Khronicles | | LAROKE | |
| | BettyLou | | BillyBob's Garage | | Rat Patrol | | Deerslayer | | Elvira | |
| | Land of the Free and Home of the Brave | |
| | Keppylou's Art | | WWI Soldier's Diary | |