| | LRK Home | | Bio Info | | Krash Khronicles | | LAROKE | |
| | BettyLou | | BillyBob's Garage | | Rat Patrol | | Deerslayer | | Elvira | |
| | Land of the Free and Home of the Brave | |
| | Keppylou's Art | | WWI Soldier's Diary | |
Tinkering with Deerslayer
![]()
DEERSLAYER LINKS including vendor sites for parts and tools as well as sites for old truck and hot rod organizations
![]()
TINKERING WITH DEERSLAYER chronicles the day-by-day maintenance and improvements episodes for Deerslayer, a '37 Chevy farm truck hot rod.
CRUISIN' WITH DEERSLAYER Roadtrips, cruise-in's and truck show stories and tall tales.
TONY'S DUNGEON Tony Pascarella's forum entries at OldGMCtrucks.com regarding Deerslayer, particularly the 302 GMC engine build in his farmhouse basement.
![]()
DEERSLAYER MAINTENANCE Ever changing detailing, oil change, lube, etc. maintenance routines specifically developed for Deerslayer, including required tools, materials and procedures.
PROJECT NAILHEAD Chronicles the rebuild of a 1954 Buick Roadmaster 322 nailhead engine as a future replacement for Deerslayer's Jimmy 302.
39. Summer Slump
 June
1st 2016 It was a hot
day in the BillyBob Shop. Didn't get much done 'cept Jeep maintenance
and Deerslayer parts cleaning. Cleaned small carburetor parts in chem
dip and, when I wasn't happy with the results, I followed up with green
cutting media, water and metal wash in the Eastwood tumbler. Also took
the first cleaning pass at the top of the Jimmy head.
June
1st 2016 It was a hot
day in the BillyBob Shop. Didn't get much done 'cept Jeep maintenance
and Deerslayer parts cleaning. Cleaned small carburetor parts in chem
dip and, when I wasn't happy with the results, I followed up with green
cutting media, water and metal wash in the Eastwood tumbler. Also took
the first cleaning pass at the top of the Jimmy head.
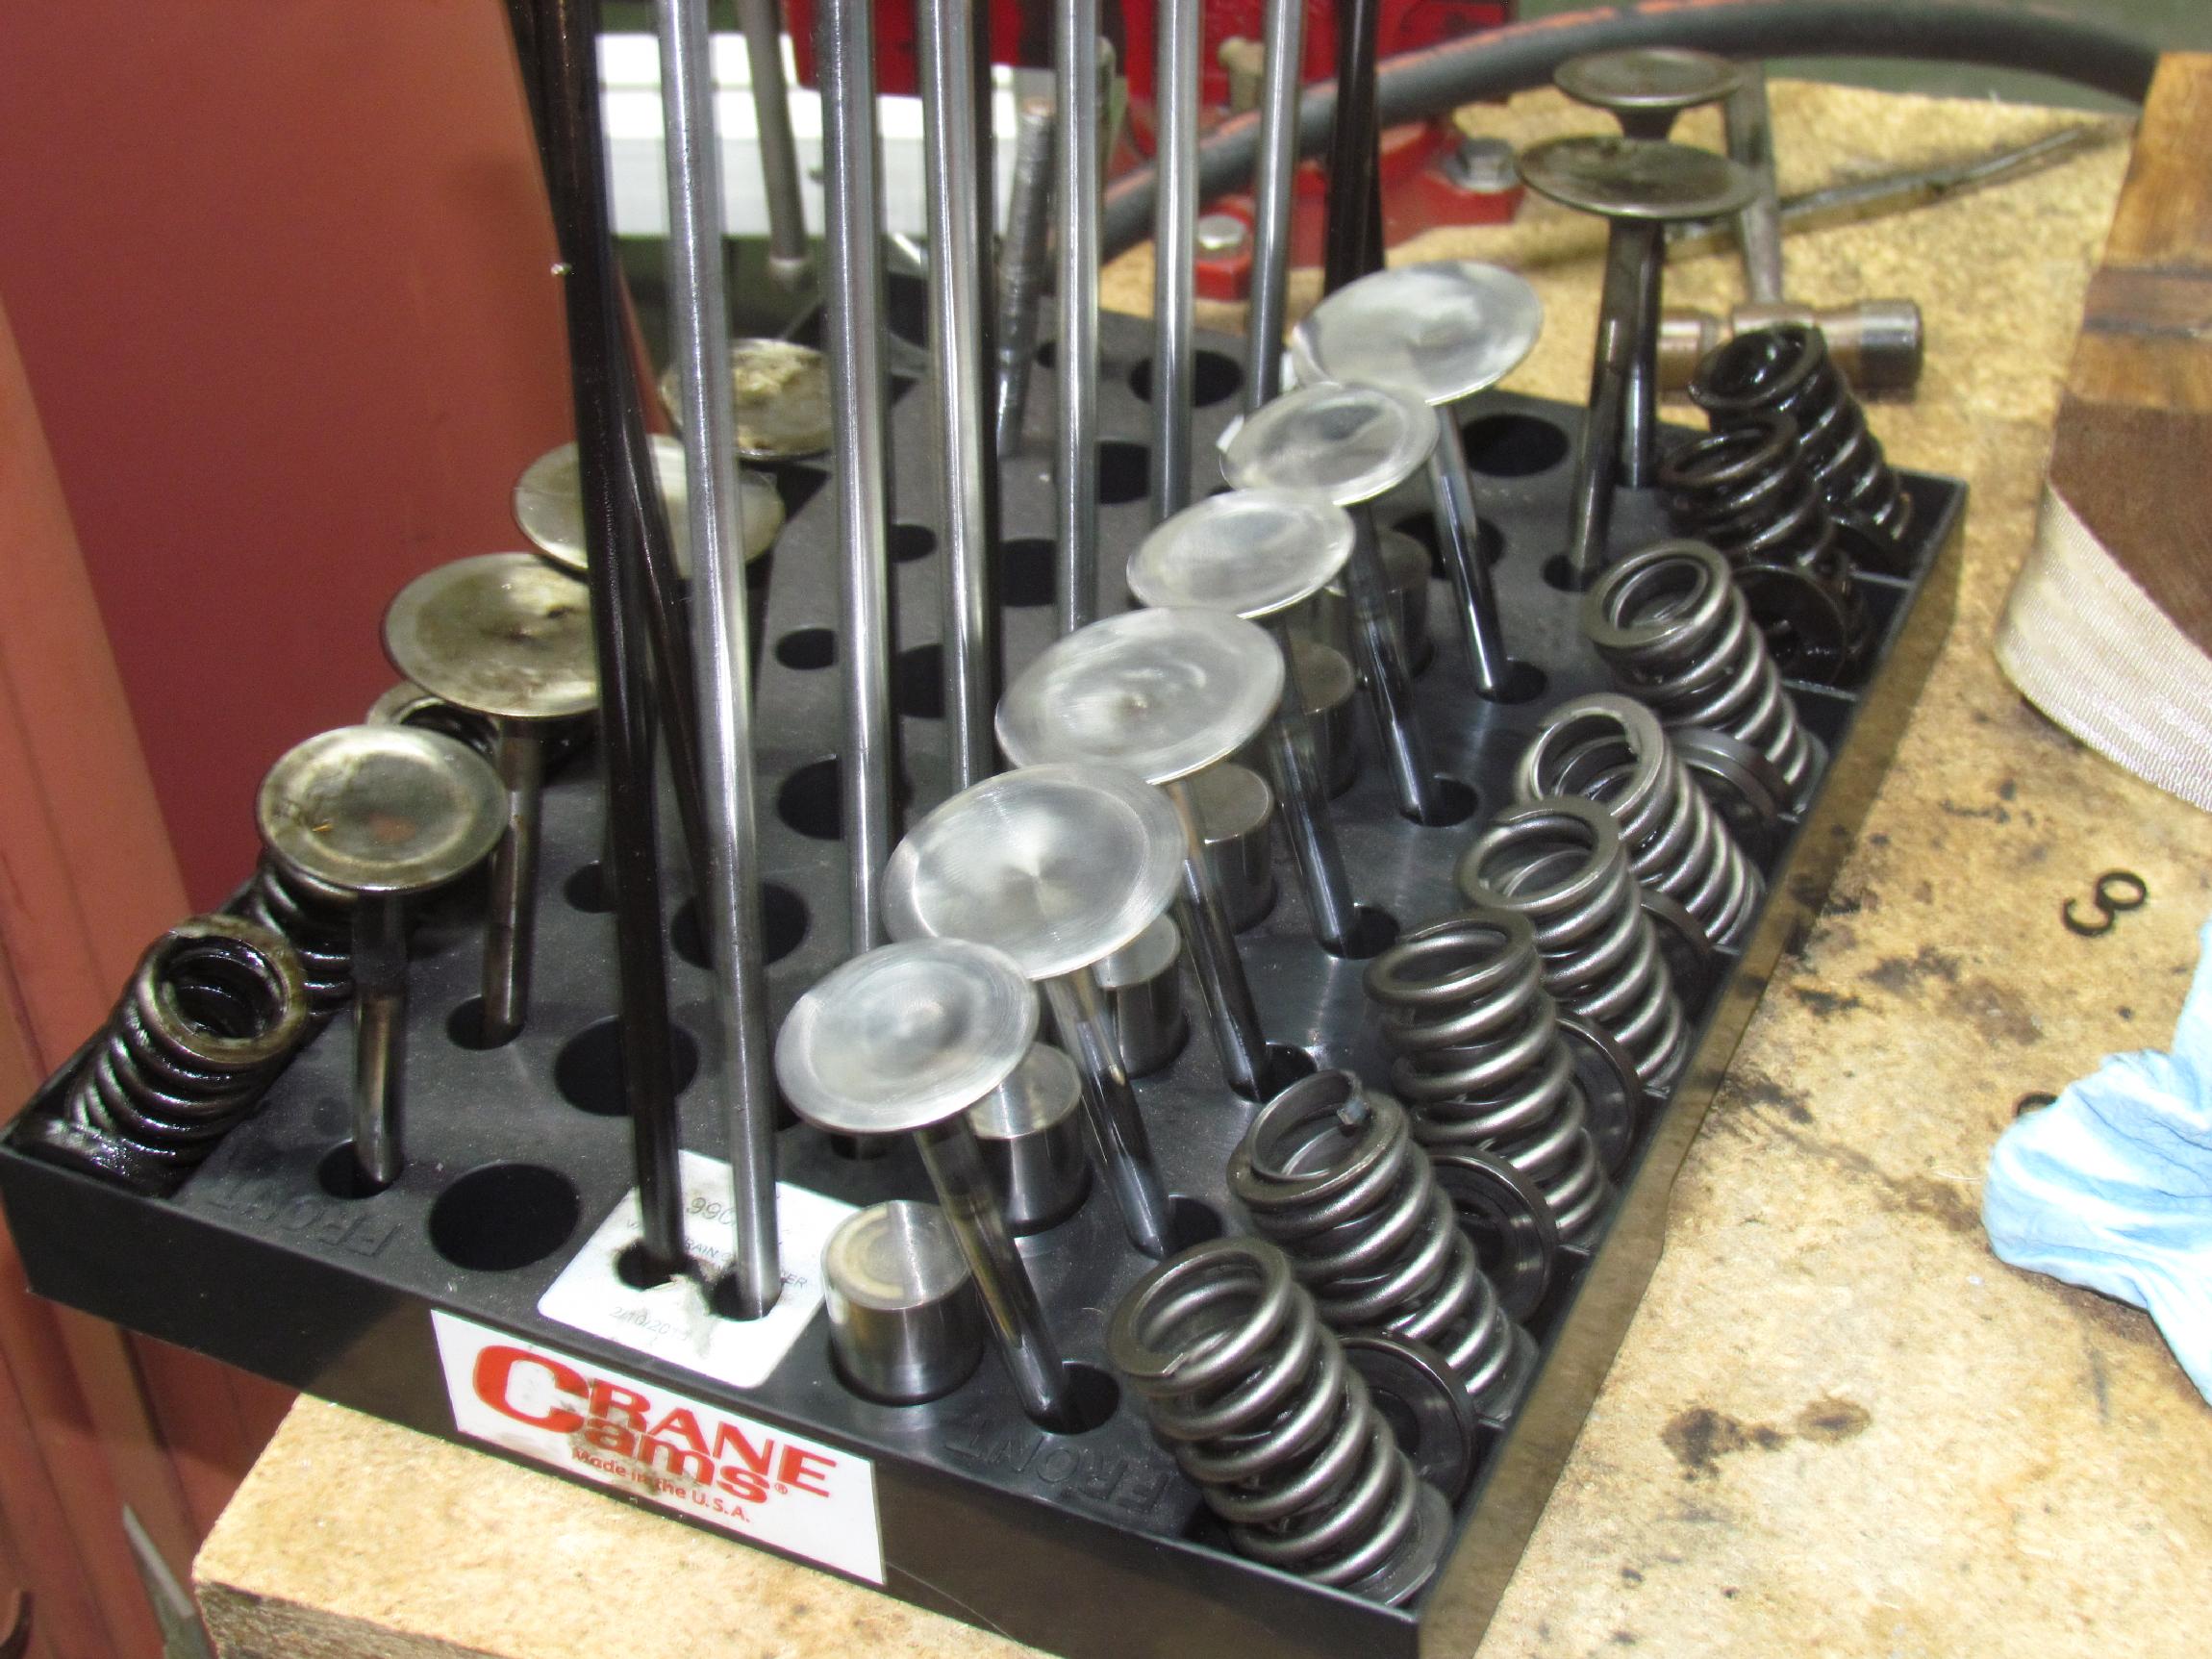
Deerslayer's builder, Tony, checked in with some much welcomed information he remembered about the build. It's been years since the build and I won't hold Tony to it but he remembers universal Chevy V8 type seals, garter spring type on the intake and umbrella type on the exhaust. Valves are Manley Street Flow with so-called Z-28 valve springs. There are also valve spring seats so the V8 springs fit properly.
Valve seals and seats were as Tony recalled. Seals were tossed and seats were removed for cleaning. Beer of the day was Old Dominion Brewing Company's Hop Lips India Pale Ale.
 June
8th 2016 Started
late. I go to the supermarket, first thing, on my off days and, while
sitting in the parking lot with my cigar waiting for it to open, the
office called. The intarweb was down due to an overnight power outage.
After that detour, I got started cleaning up the Jimmy's valve
assemblies. To make sure things didn't get messed up, I did them one at
a time. All assemblies stayed together, in order, that way. Valves were
cleaned with wire cup in air angle grinder. Valves, springs, caps,
pedestals, keepers, pushrods and lifters then spent a half hour in the
parts washer soup. Finally, the same items 'cept pushrods (too big to
fit) had a half hour in the Eastwood vibratory tumbler with green
cutting media, water and Metal Wash. By the end of the day and the end
of the three Old Dominion Oak Barrel Stouts. I was half done.
June
8th 2016 Started
late. I go to the supermarket, first thing, on my off days and, while
sitting in the parking lot with my cigar waiting for it to open, the
office called. The intarweb was down due to an overnight power outage.
After that detour, I got started cleaning up the Jimmy's valve
assemblies. To make sure things didn't get messed up, I did them one at
a time. All assemblies stayed together, in order, that way. Valves were
cleaned with wire cup in air angle grinder. Valves, springs, caps,
pedestals, keepers, pushrods and lifters then spent a half hour in the
parts washer soup. Finally, the same items 'cept pushrods (too big to
fit) had a half hour in the Eastwood vibratory tumbler with green
cutting media, water and Metal Wash. By the end of the day and the end
of the three Old Dominion Oak Barrel Stouts. I was half done.
 June
15th 2016 When
I removed the primary throttle shaft from Deerslayer's Carter AFB
carburetor, I buggered it pretty good. Twisted a throttle plate screw
head off, then drilled it out and skewed the drill. My machinist friend
"tow truck" john Carey offered to fix it and I went out to his house
after the supermarket run this morning. He has quite a machine shop in
his one-car garage. It took him about twenty minutes to weld the
throttle shaft up, drill and tap a new #6-32 hole for me.
June
15th 2016 When
I removed the primary throttle shaft from Deerslayer's Carter AFB
carburetor, I buggered it pretty good. Twisted a throttle plate screw
head off, then drilled it out and skewed the drill. My machinist friend
"tow truck" john Carey offered to fix it and I went out to his house
after the supermarket run this morning. He has quite a machine shop in
his one-car garage. It took him about twenty minutes to weld the
throttle shaft up, drill and tap a new #6-32 hole for me.
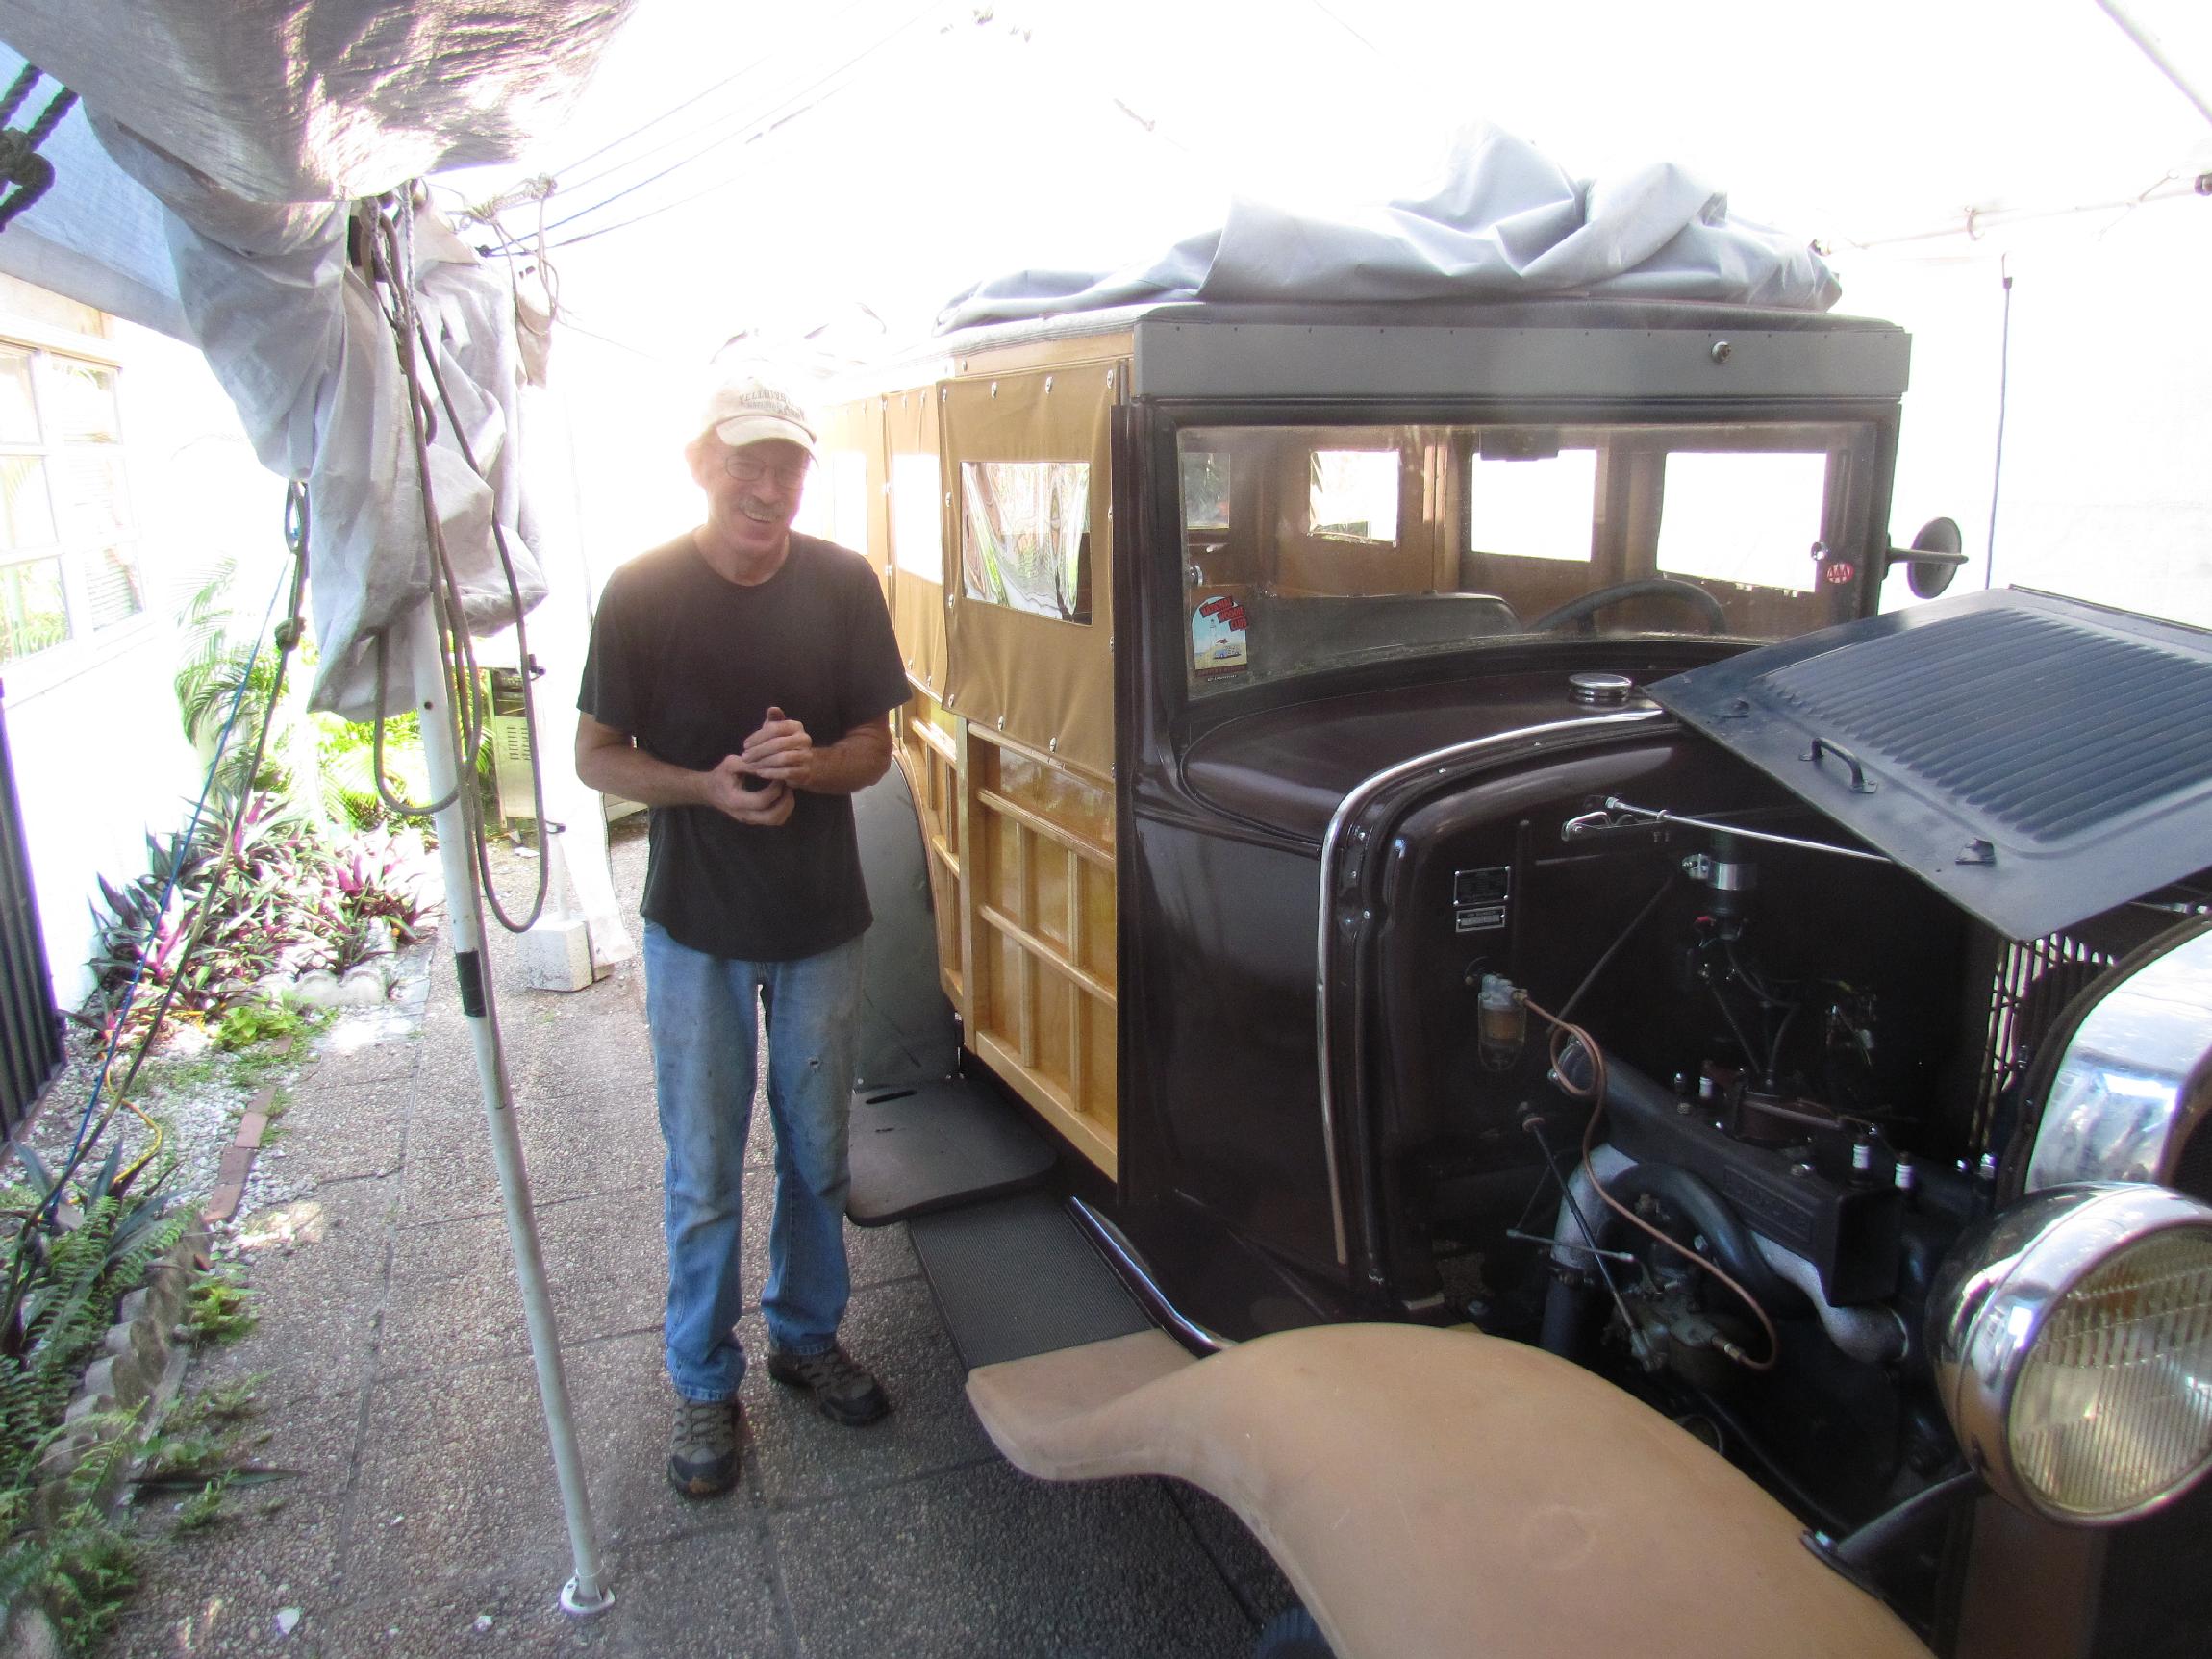
The real treat was seeing his '31 Model A woodie project for the first time. John isn't restoring a Model A. He's building it from the ground up. He didn't have a Model A to begin with. He hasn't farmed out any of the work. The engine had been converted for use as an air compressor in a cemetery and hadn't run for fifty years. It's running now. John is getting close to being on the road with this thing. It might even be on the road before Deerslayer.
 June
27th 2016 Off
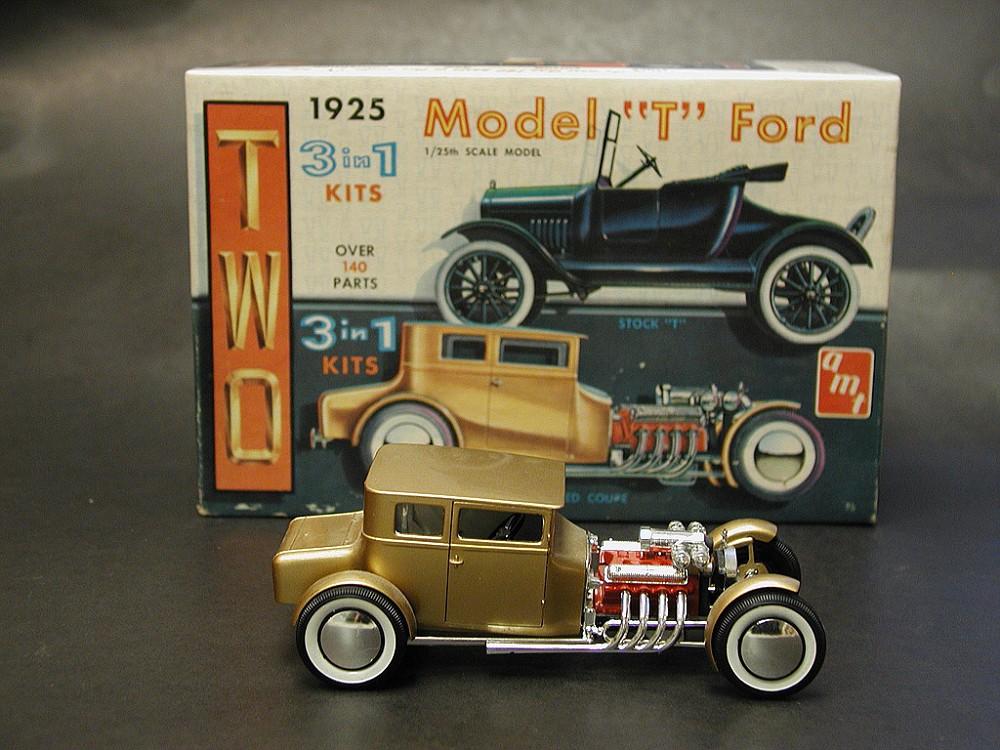
on a momentary tangent. In the early sixties, building a copy of this
model kit, I was fascinated by the Latham Supercharger and its four
side draft Carter carbs on the Lincoln 430 engine. It wasn't
long before the more compelling fascinations of beer and girls pushed
this interest into the background. Now, almost sixty years later, while
I'm playin' the back nine of life, the Latham Supercharger interest has
pushed itself to the forefront again. This is like the Holy Grail of
performance parts for me, similar to Ardun heads for Ferd flattie fans.
June
27th 2016 Off
on a momentary tangent. In the early sixties, building a copy of this
model kit, I was fascinated by the Latham Supercharger and its four
side draft Carter carbs on the Lincoln 430 engine. It wasn't
long before the more compelling fascinations of beer and girls pushed
this interest into the background. Now, almost sixty years later, while
I'm playin' the back nine of life, the Latham Supercharger interest has
pushed itself to the forefront again. This is like the Holy Grail of
performance parts for me, similar to Ardun heads for Ferd flattie fans.
 First
time I saw a set up for sale was when I was hunting down vintage
nailhead parts in 2012. I found a complete set up including carbs,
belt,
pulleys and manifold for a nailhead application. The price was high and
I was underfunded at the time. I've been searching for a Latham ever
since. Last week, I found one on eBay and grabbed it for the "Buy it
now" price. The ID tag is missing and it comes with an early Chevy
smallblock marine manifold. The idler pulley is on the right when
looking
at it from the front which, I understand, indicates a reverse rotation
application such as a marine engine or even a Corvair. It will not work
on the nailhead as is and will require a lot of Deep Ponder Mode time
with beer and cigars. For now, it is a conversation piece. To
paraphrase Jeremiah Johnson "But damn, it was a genuine Latham, and you
couldn't go no better."
First
time I saw a set up for sale was when I was hunting down vintage
nailhead parts in 2012. I found a complete set up including carbs,
belt,
pulleys and manifold for a nailhead application. The price was high and
I was underfunded at the time. I've been searching for a Latham ever
since. Last week, I found one on eBay and grabbed it for the "Buy it
now" price. The ID tag is missing and it comes with an early Chevy
smallblock marine manifold. The idler pulley is on the right when
looking
at it from the front which, I understand, indicates a reverse rotation
application such as a marine engine or even a Corvair. It will not work
on the nailhead as is and will require a lot of Deep Ponder Mode time
with beer and cigars. For now, it is a conversation piece. To
paraphrase Jeremiah Johnson "But damn, it was a genuine Latham, and you
couldn't go no better."
 August
21st 2016 Still hot in
South Florida. Eighty degree nights, ninety degree days with one
hundred ten degree plus heat indexes. Too uncomfortable in the BillyBob
Shop to spend much time out there. Don't even spend enuf time in the
short shop sessions to justify opening up the beer of the day.
Yesterday, I spent a couple of hours with the Latham supercharger.
The identity tag is missing but I did find "0084" stamped at
the front mount bracket under the pulley.
August
21st 2016 Still hot in
South Florida. Eighty degree nights, ninety degree days with one
hundred ten degree plus heat indexes. Too uncomfortable in the BillyBob
Shop to spend much time out there. Don't even spend enuf time in the
short shop sessions to justify opening up the beer of the day.
Yesterday, I spent a couple of hours with the Latham supercharger.
The identity tag is missing but I did find "0084" stamped at
the front mount bracket under the pulley.
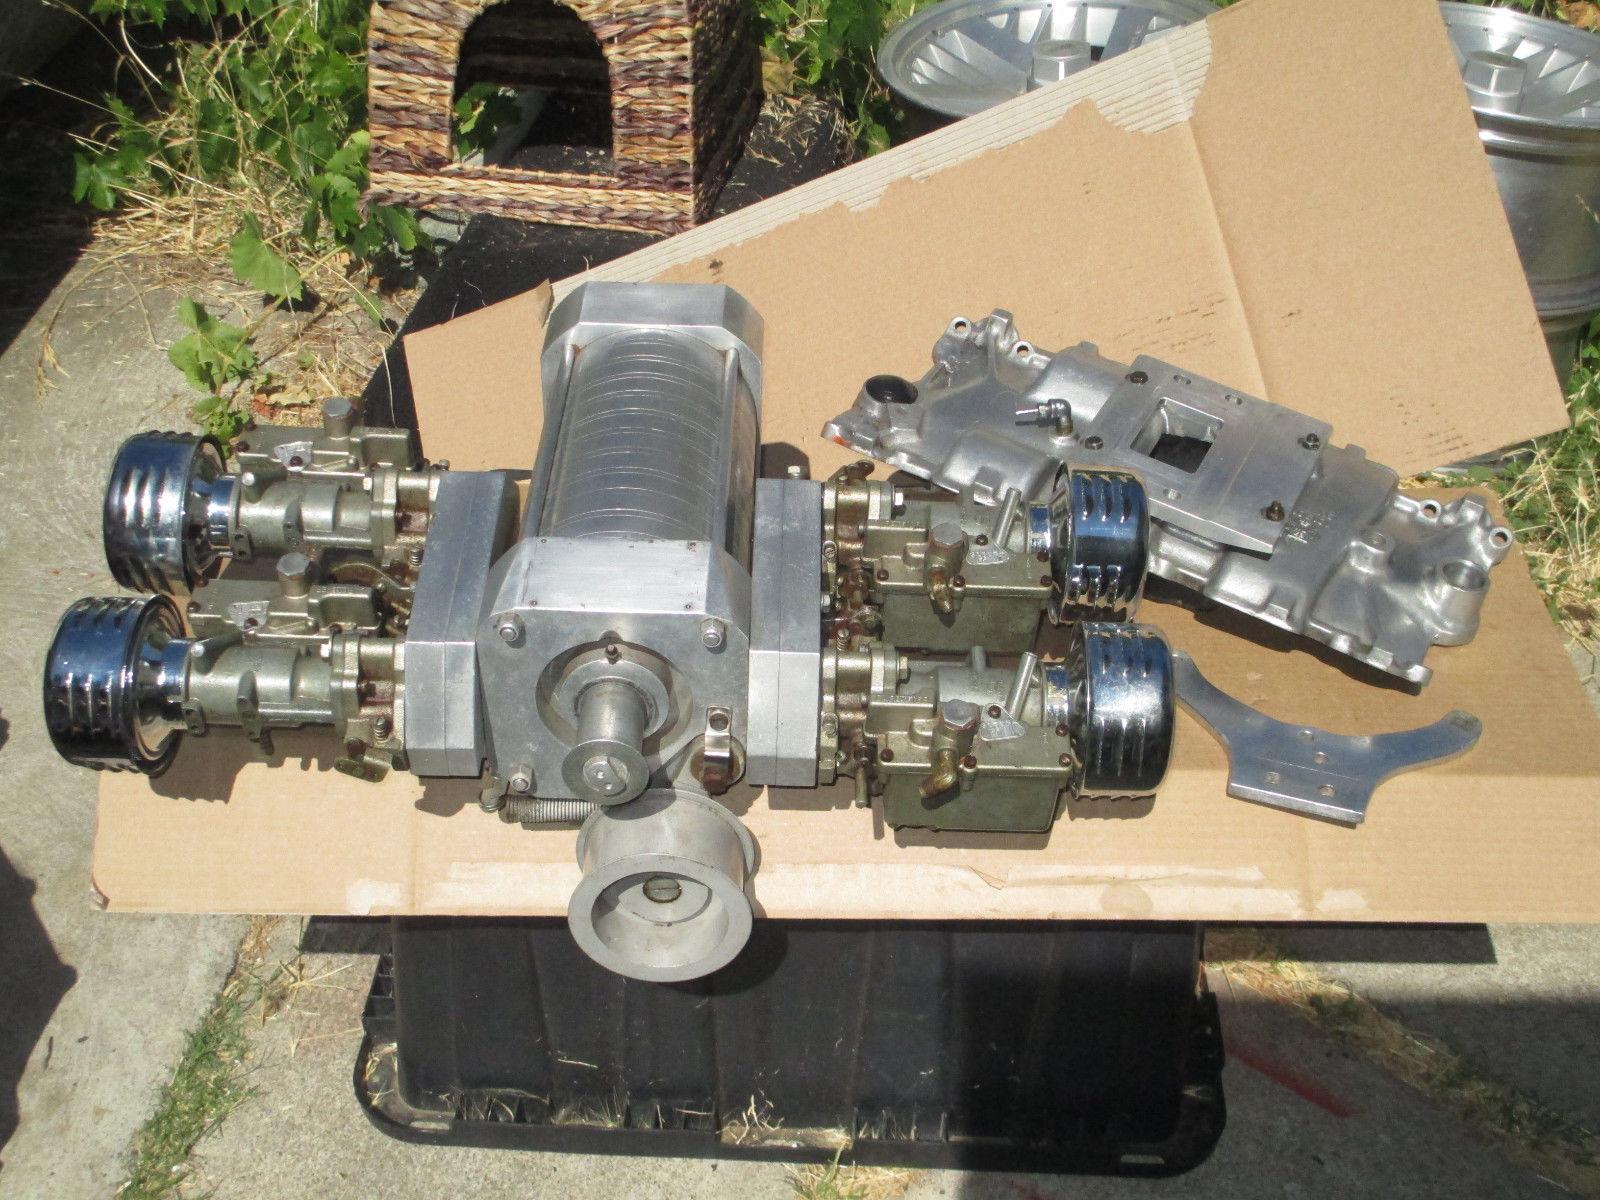
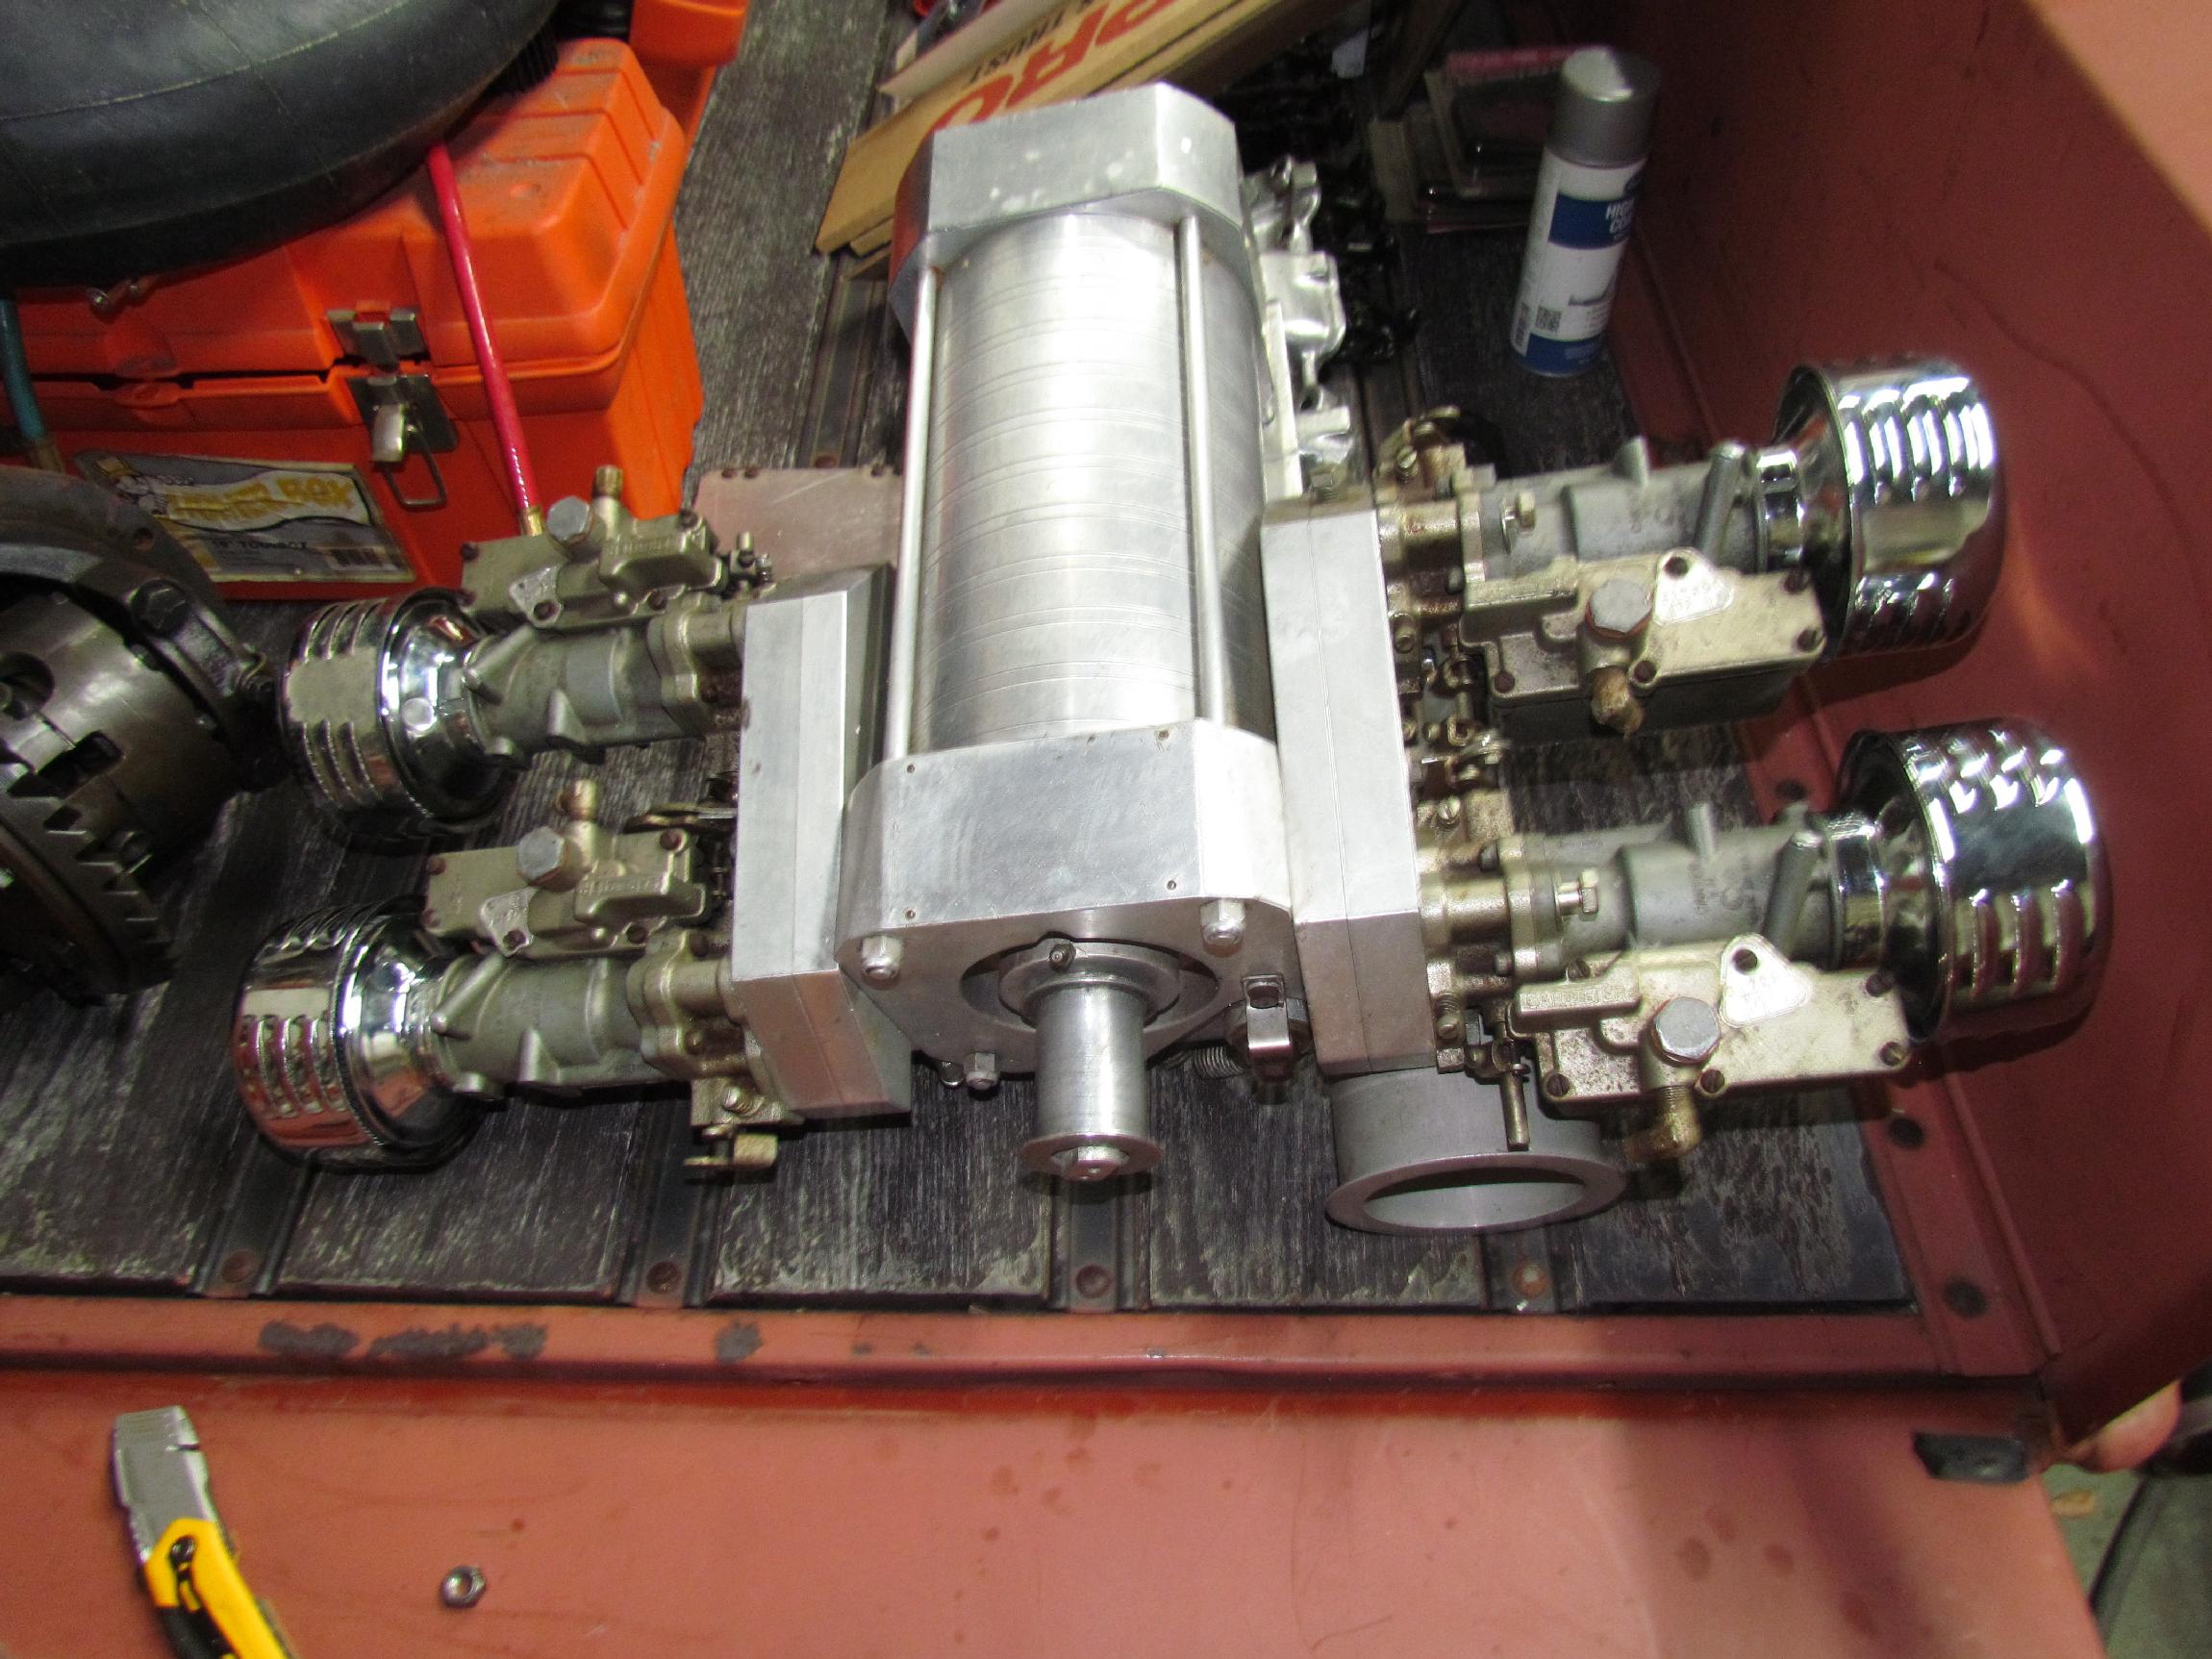 When
this arrived at the Krash Lab, It was broken down in two packages.
Carburetors and manifold were not bolted up. On Saturday, I assembled
the Latham assembly in Deerslayer's bed, the only uncluttered space I
still have in the shop. Took a bit of pondering but I eventfully
got it together. I was only short two hex nuts for the manifold.
Everything else was there tho' I don't think there were two carb bolts
alike.
When
this arrived at the Krash Lab, It was broken down in two packages.
Carburetors and manifold were not bolted up. On Saturday, I assembled
the Latham assembly in Deerslayer's bed, the only uncluttered space I
still have in the shop. Took a bit of pondering but I eventfully
got it together. I was only short two hex nuts for the manifold.
Everything else was there tho' I don't think there were two carb bolts
alike.
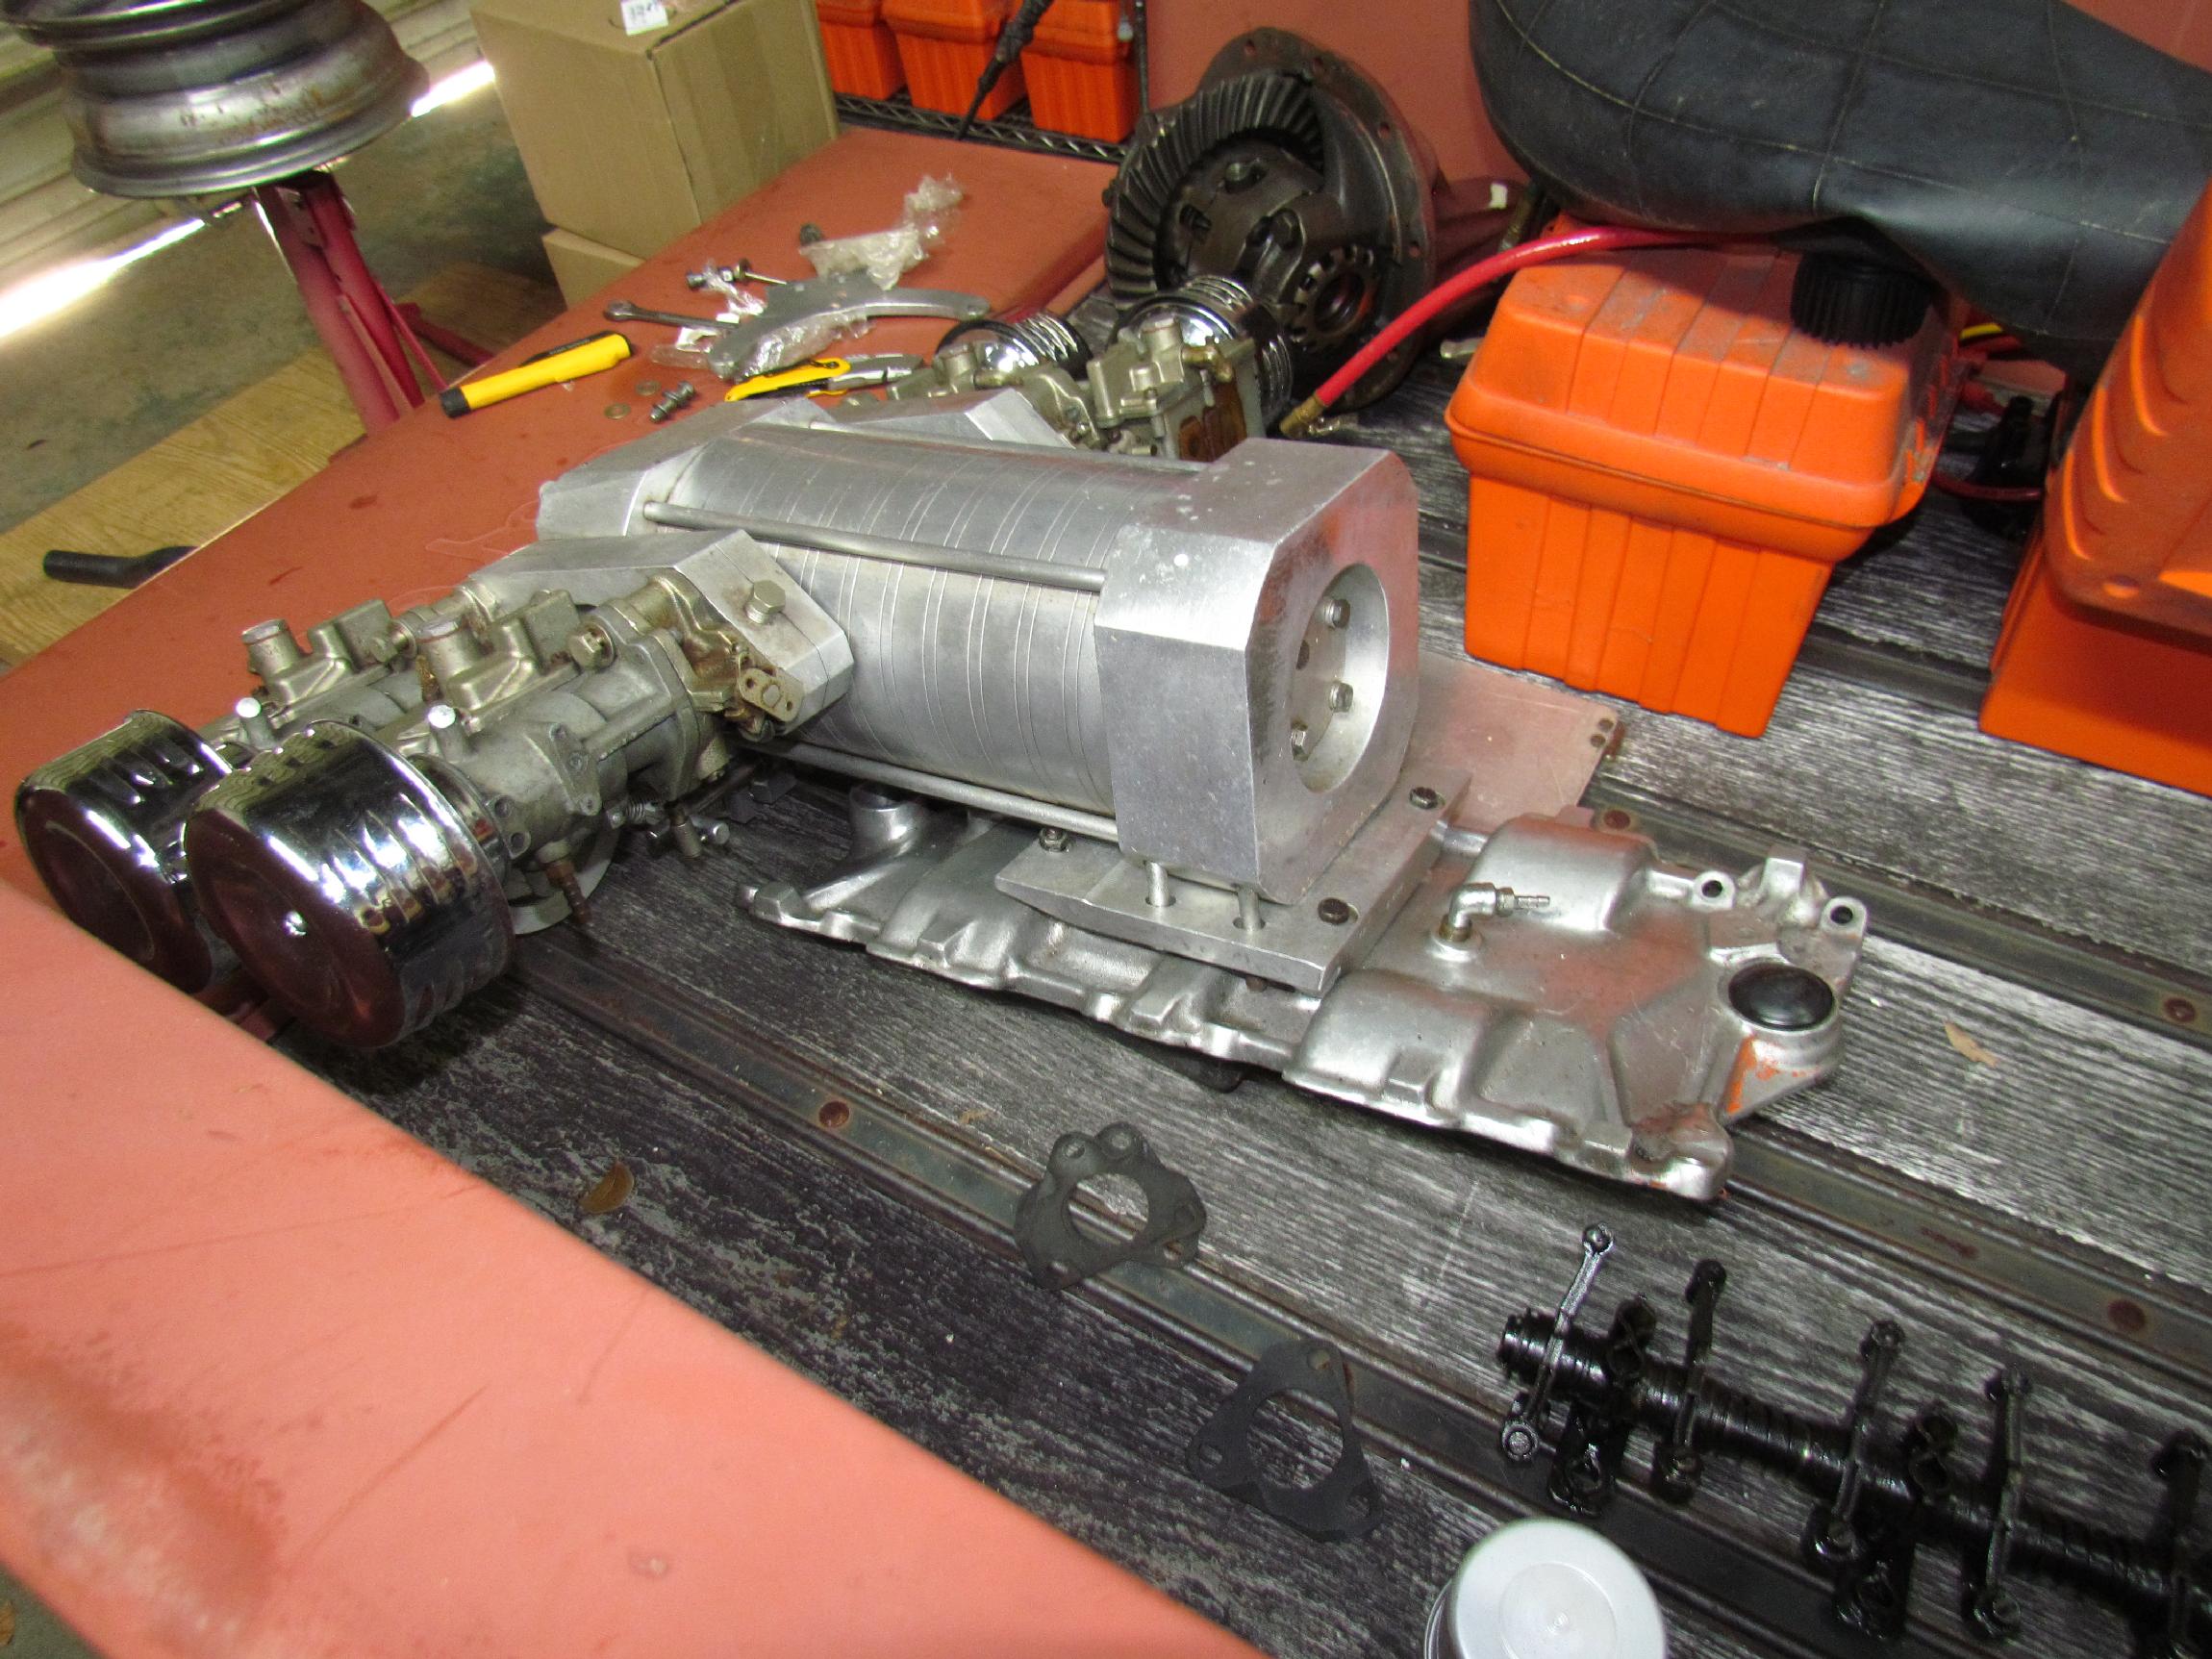 It
was nice to see all the complicated carb linkage was in place and
workable. The carbs on each side are ganged together. From there, a
vertical rod goes down to a bell crank on each side which is connected
to a shaft running under the supercharger. I wouldn't want to figure
out something like this on my own. The carbs all have their sheet metal
tags, something that usually goes missing with the first carb rebuild.
These carbs are Carter YH 3172S carbs. The manifold is a two piece
thing and I will be able to take the top portion and adapt it to a
nailhead four-barrel manifold without too much trouble.
It
was nice to see all the complicated carb linkage was in place and
workable. The carbs on each side are ganged together. From there, a
vertical rod goes down to a bell crank on each side which is connected
to a shaft running under the supercharger. I wouldn't want to figure
out something like this on my own. The carbs all have their sheet metal
tags, something that usually goes missing with the first carb rebuild.
These carbs are Carter YH 3172S carbs. The manifold is a two piece
thing and I will be able to take the top portion and adapt it to a
nailhead four-barrel manifold without too much trouble.
 November
19th 2016 Been
strugglin' to get back out in the BillyBob Shop to get some work done
but my weak efforts have been uneventful. It was mid-afternoon,
Saturday, and I still had not made the move from the office to the
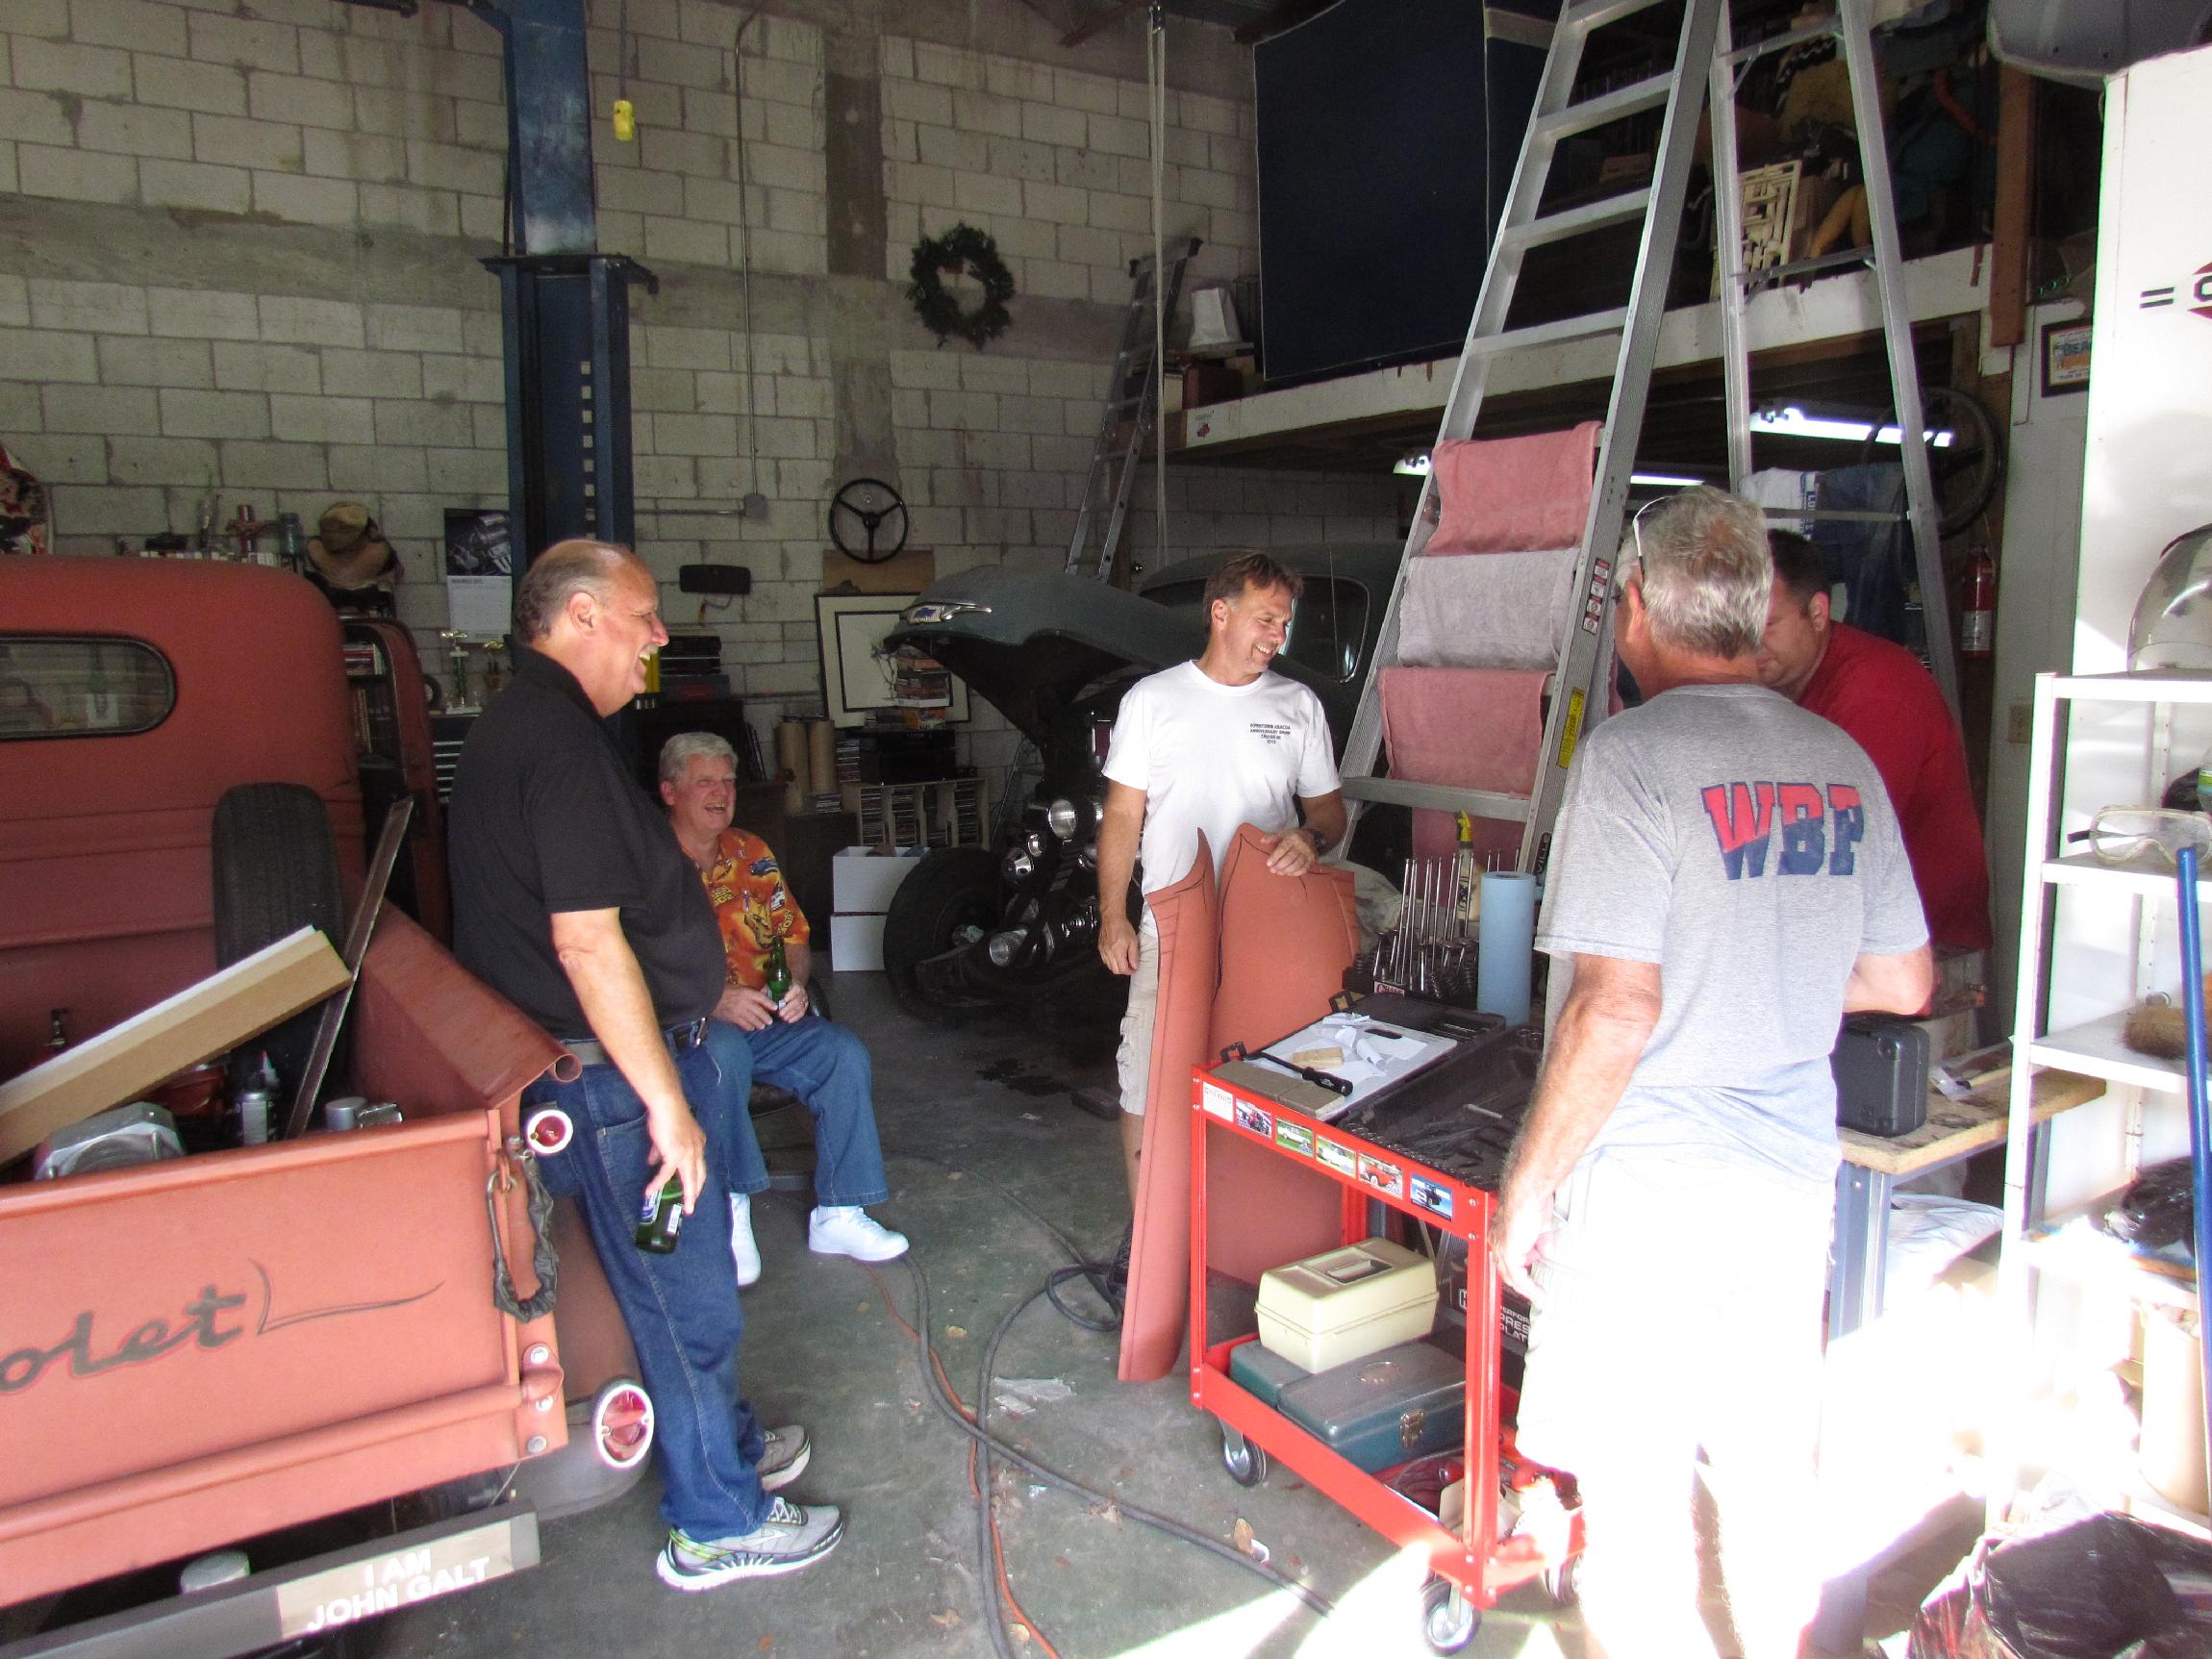
shop. I opened a loud rude knock at the door to find Euge Reidy with an
intervention team consisting of Wayne Harlow, Blake, Robert
Martin and Yanni. Euge has been anxious to put the head back on the
Jimmy
ever since we took it off sixteen months ago. The guy has no patience.
It is still not ready to go back on so they looked for something else
to do.
November
19th 2016 Been
strugglin' to get back out in the BillyBob Shop to get some work done
but my weak efforts have been uneventful. It was mid-afternoon,
Saturday, and I still had not made the move from the office to the
shop. I opened a loud rude knock at the door to find Euge Reidy with an
intervention team consisting of Wayne Harlow, Blake, Robert
Martin and Yanni. Euge has been anxious to put the head back on the
Jimmy
ever since we took it off sixteen months ago. The guy has no patience.
It is still not ready to go back on so they looked for something else
to do.
 Yanni
said he could lap the valves so he and Robert proceeded with that while
the rest of us supervised with beer in hand. Most of the time, however,
was taken up with cleaning carbon out of the valve guides so the valves
would move freely. Several methods were tried with the limited tools I
had at hand, including paper towels and Seafoam additive but, we ended
up with the best method being Hoppe's No. 9 solvent and a gun cleaning
kit bottle brush. By the time these guys took off for the next show,
nine valves of the twelve were lapped, and perhaps the visit
was enuf of a kick in the butt to get me movin' again
Yanni
said he could lap the valves so he and Robert proceeded with that while
the rest of us supervised with beer in hand. Most of the time, however,
was taken up with cleaning carbon out of the valve guides so the valves
would move freely. Several methods were tried with the limited tools I
had at hand, including paper towels and Seafoam additive but, we ended
up with the best method being Hoppe's No. 9 solvent and a gun cleaning
kit bottle brush. By the time these guys took off for the next show,
nine valves of the twelve were lapped, and perhaps the visit
was enuf of a kick in the butt to get me movin' again
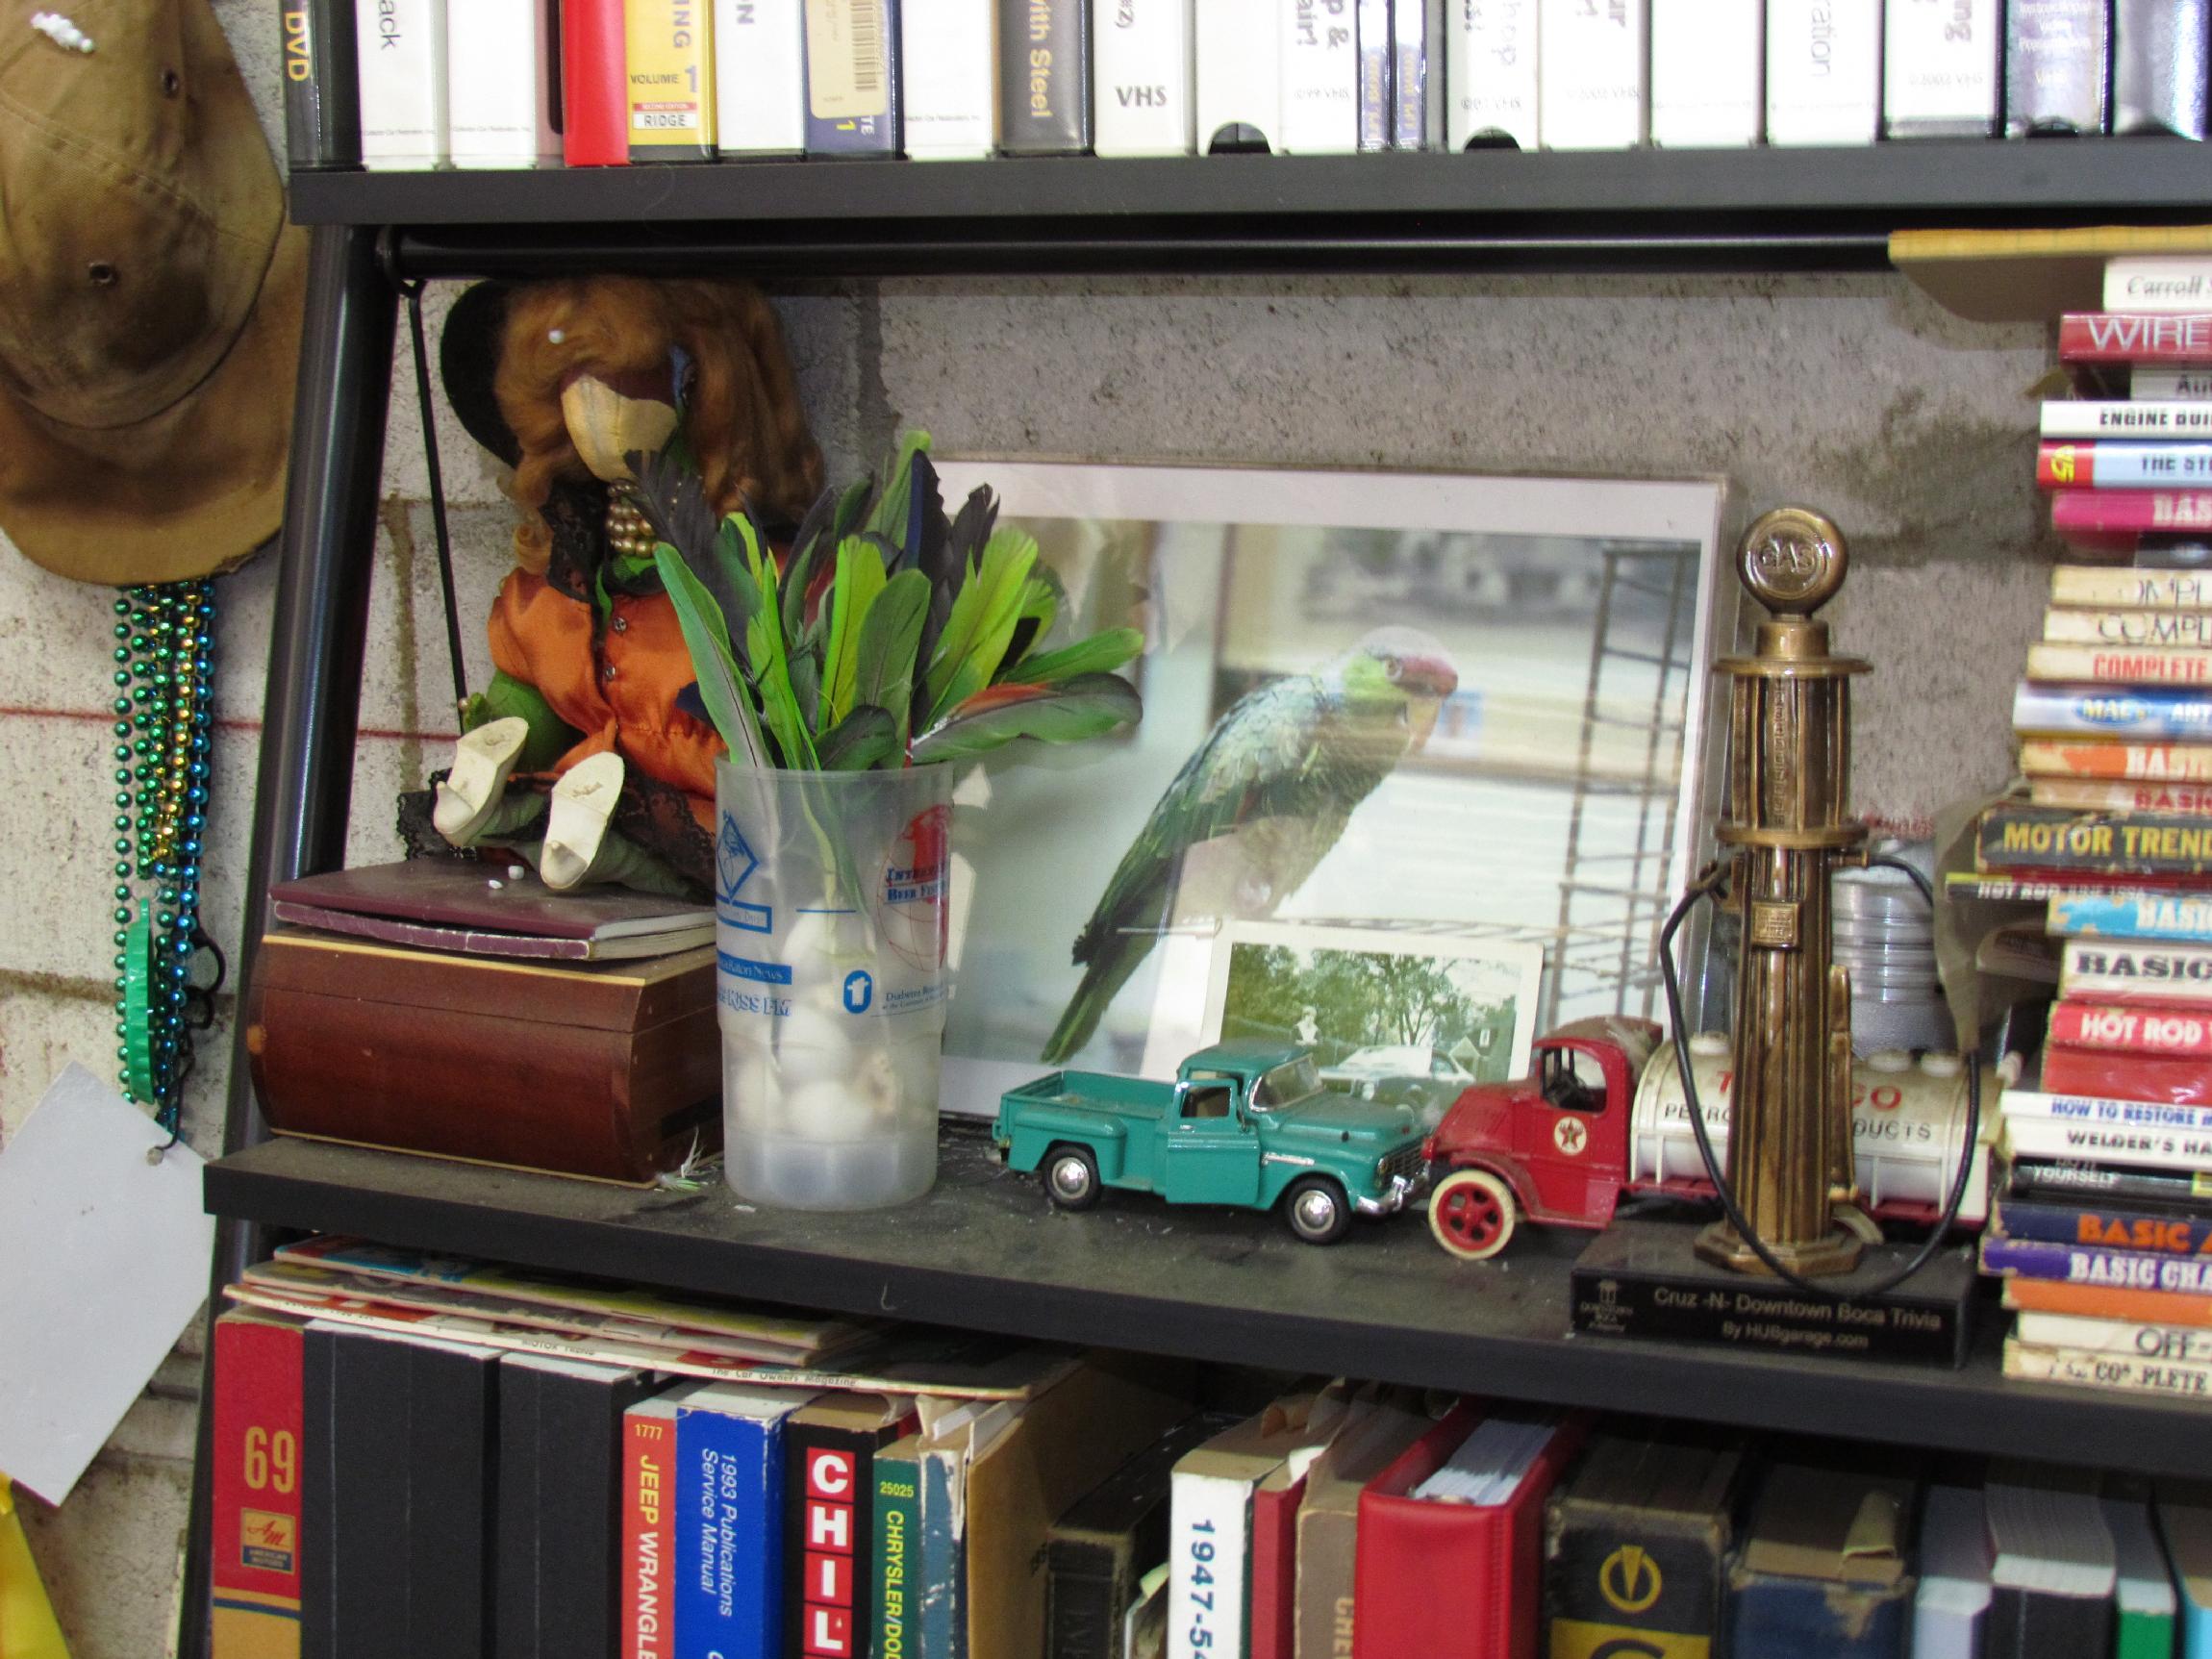 March
11th 2017 Slowly getting
back to it. A few weeks ago, I walked into the shop and when I turned
the light switch on, something ran across the floor in a streak so fast
I couldn't get focus on it. Too fast for a lizard or rat about the size
of a mouse so I named it Speedy Gonzales. I didn't see Speedy again but
a few days later I noticed disarray on the shelving unit that
Deerslayer was pushed up against. During the years Wingnut the parrot
was with me, he would lose a flight feather on occasion. I collected
these in a plastic mug. The mug was on this shelf but the feathers were
no longer in it. They were scattered. Today, I pushed Deerslayer out of
the way and retrieved the feathers. Speedy had removed them all and
chewed the quills to get at the organic oils I guess. I put the ones I
could find back in the cup and pushed Deerslayer back into place.
March
11th 2017 Slowly getting
back to it. A few weeks ago, I walked into the shop and when I turned
the light switch on, something ran across the floor in a streak so fast
I couldn't get focus on it. Too fast for a lizard or rat about the size
of a mouse so I named it Speedy Gonzales. I didn't see Speedy again but
a few days later I noticed disarray on the shelving unit that
Deerslayer was pushed up against. During the years Wingnut the parrot
was with me, he would lose a flight feather on occasion. I collected
these in a plastic mug. The mug was on this shelf but the feathers were
no longer in it. They were scattered. Today, I pushed Deerslayer out of
the way and retrieved the feathers. Speedy had removed them all and
chewed the quills to get at the organic oils I guess. I put the ones I
could find back in the cup and pushed Deerslayer back into place.
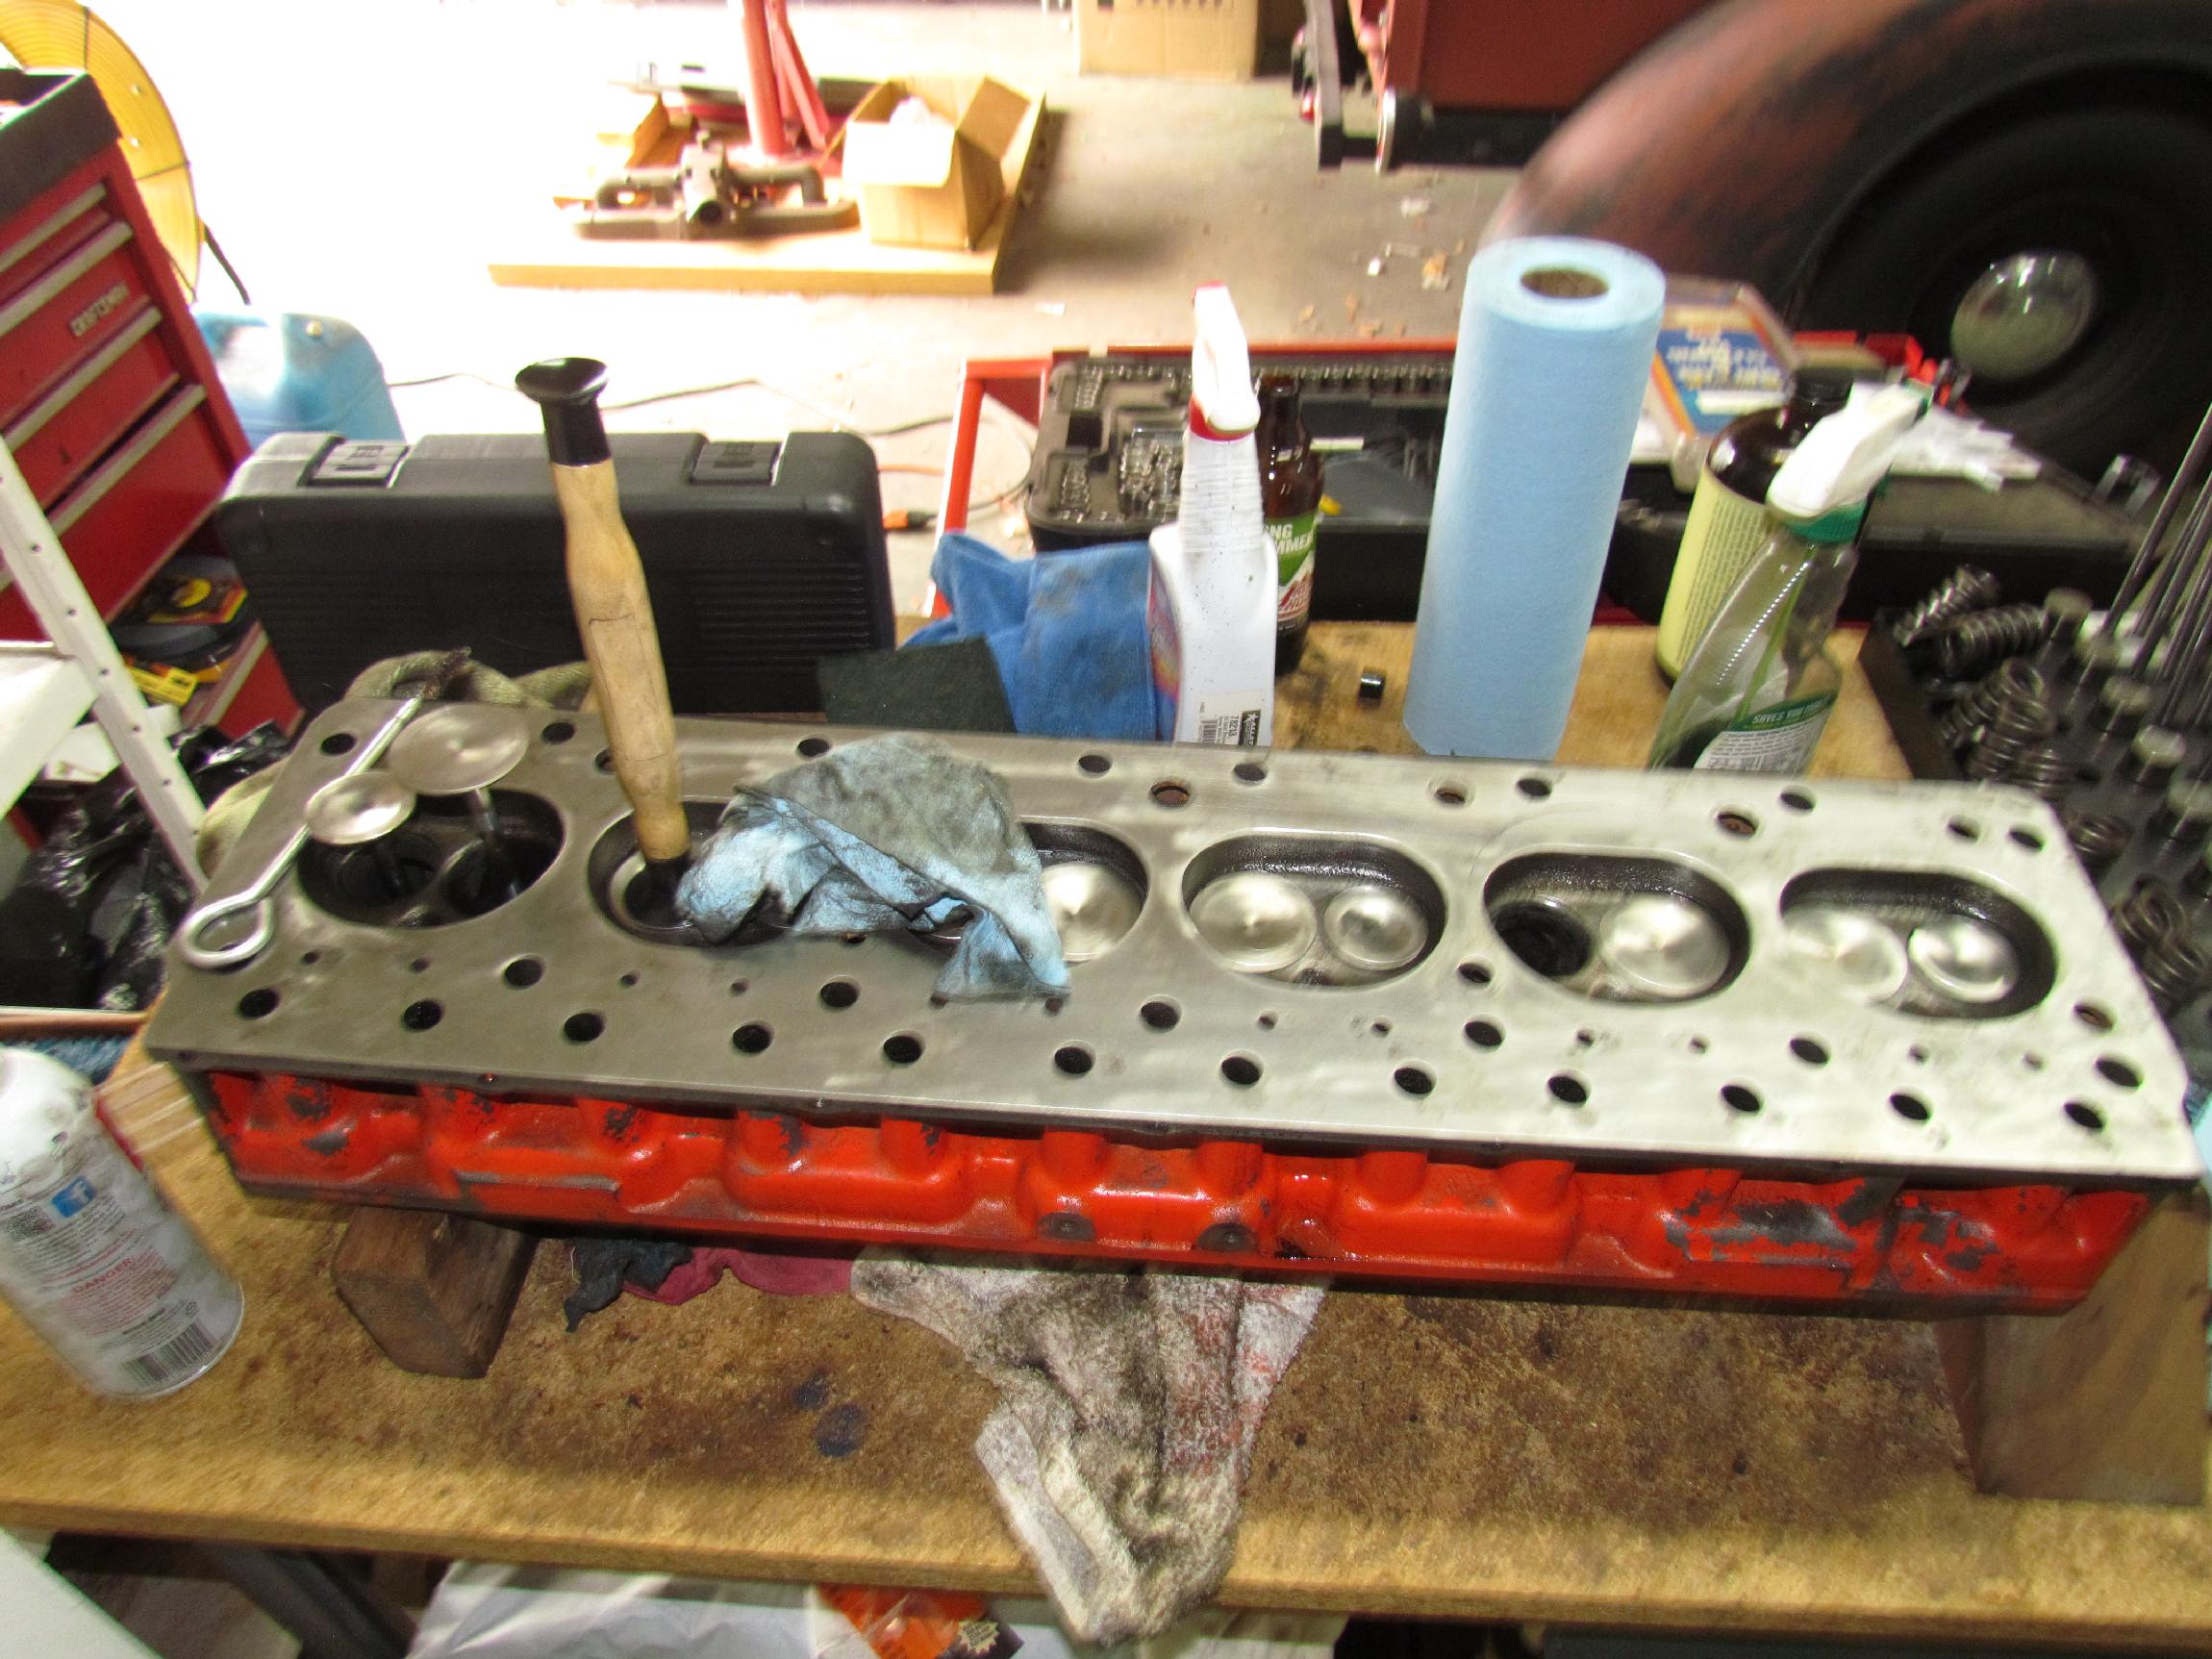
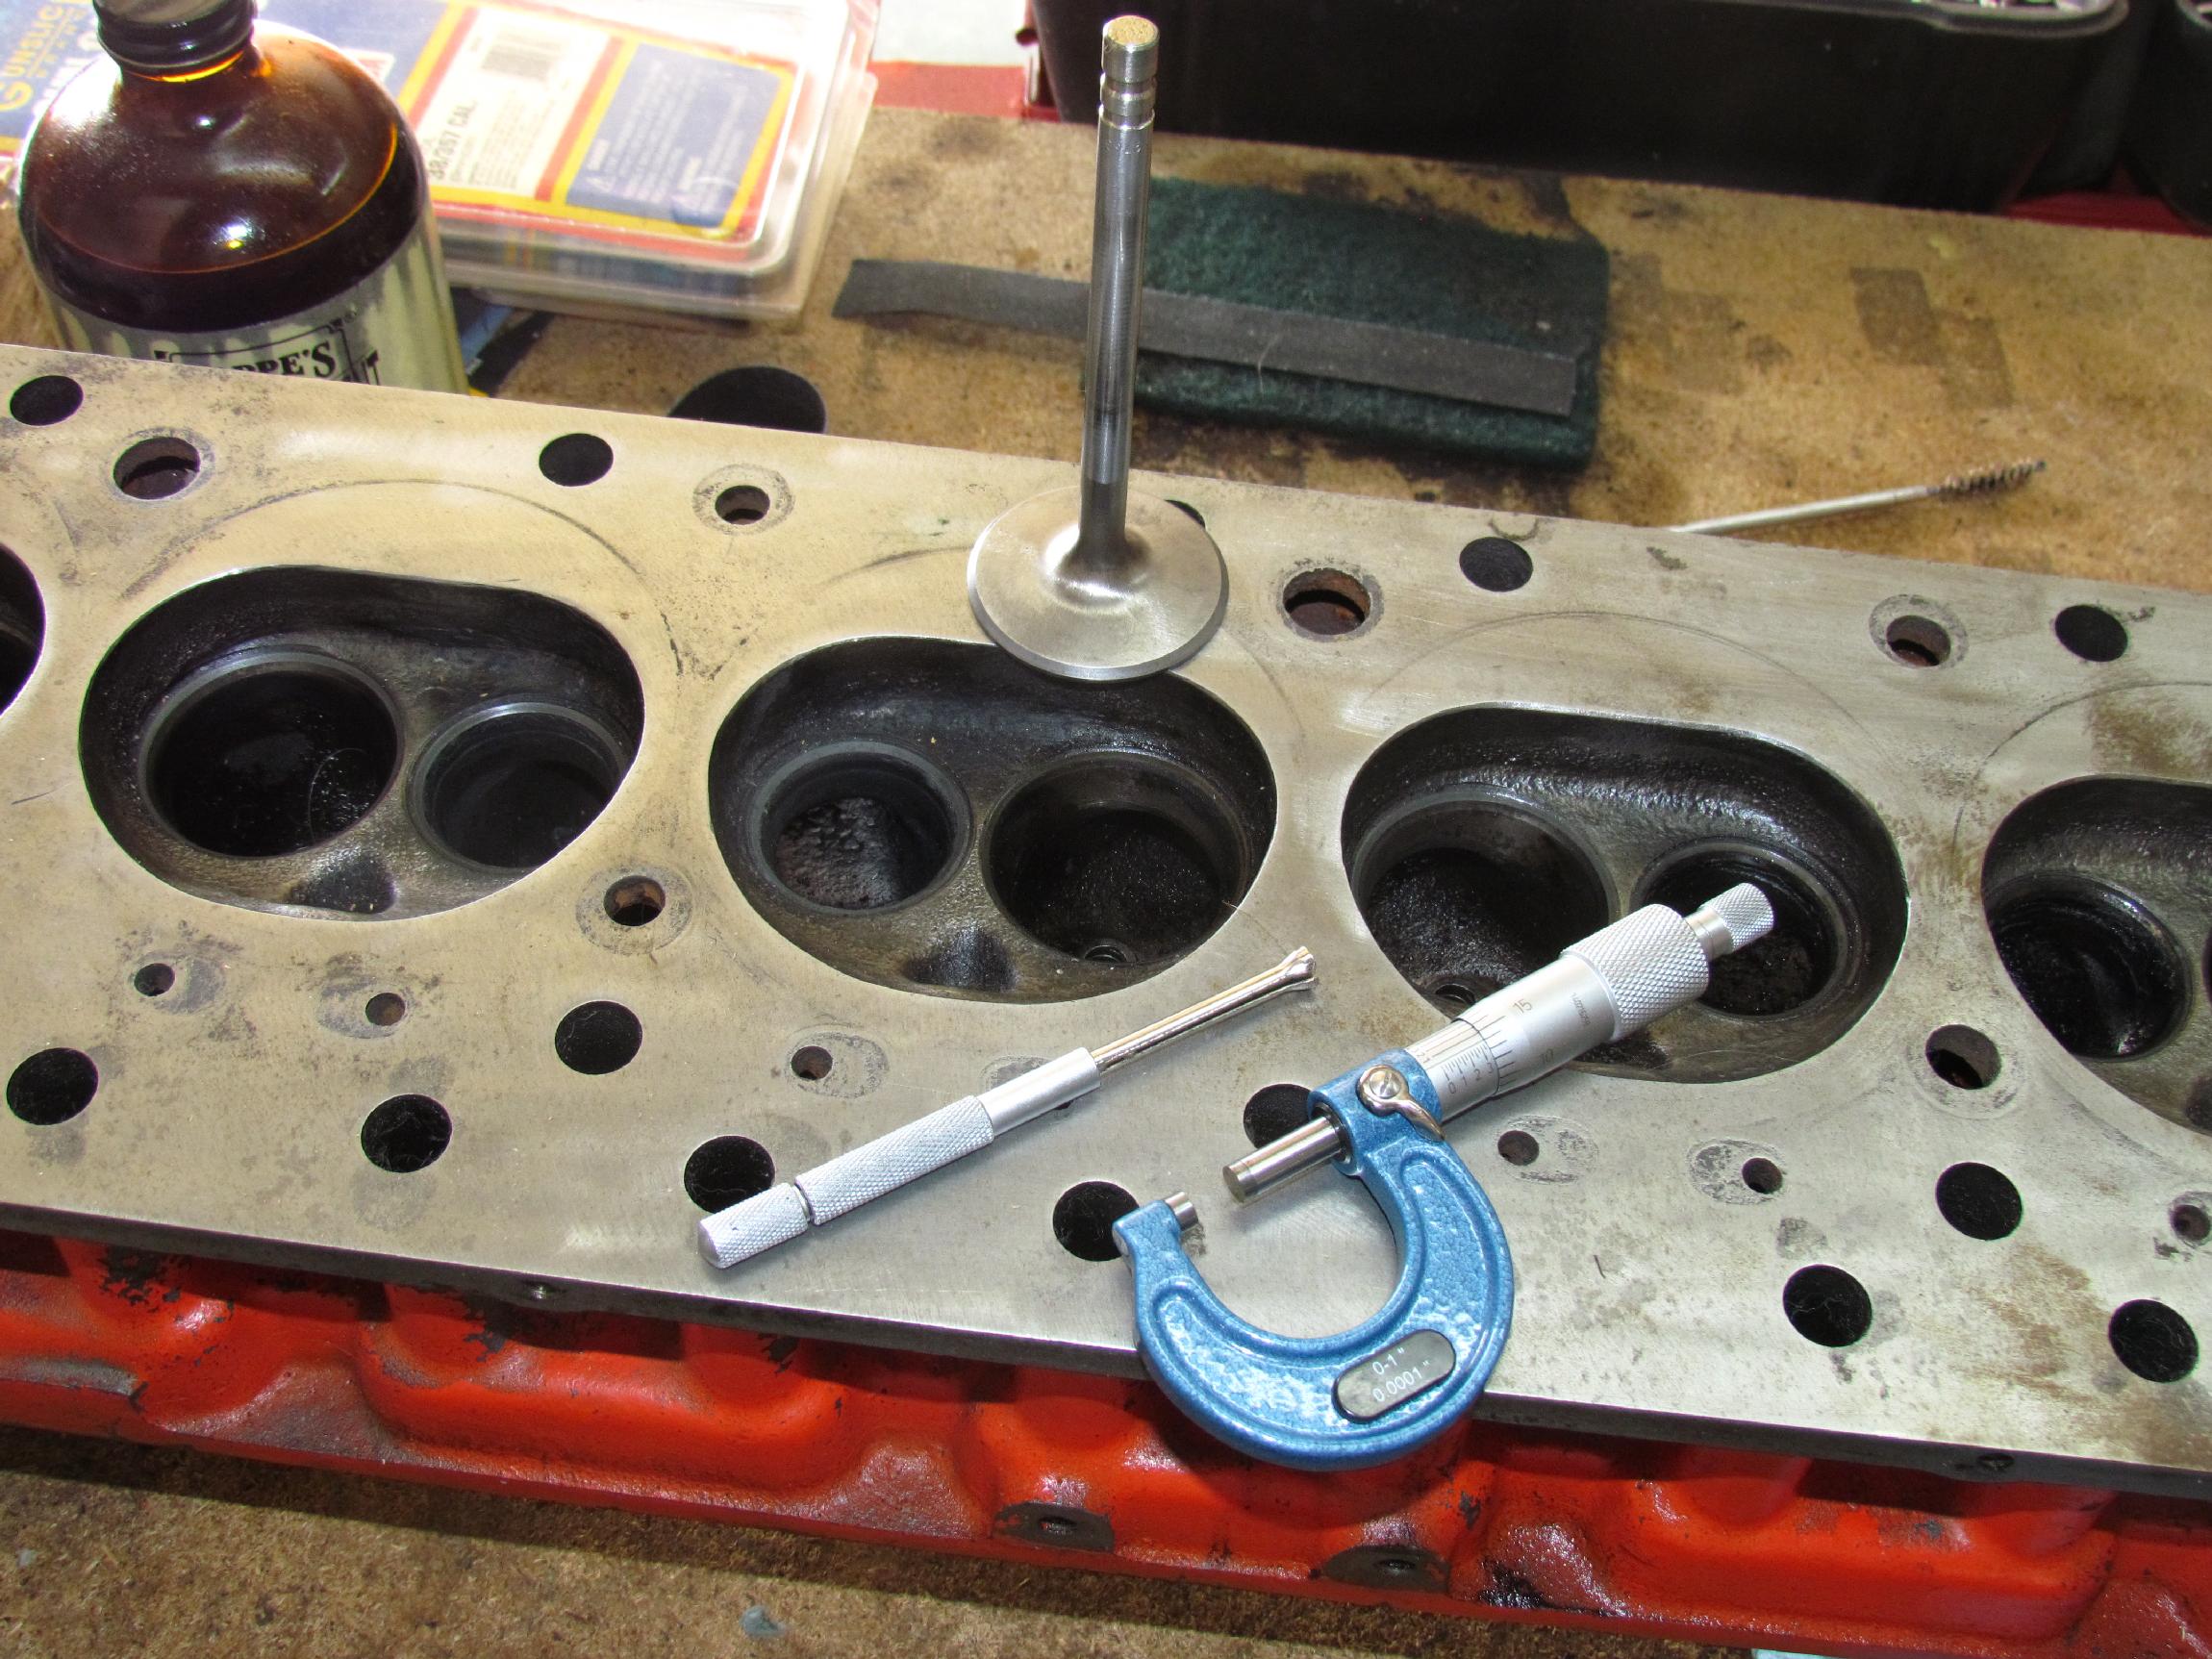 I
also got back to work on the Jimmy head. Cleaned out the valve guides
more with Hoppes #9 solvent and a gun cleaning brush. Then I "miked"
the valves and the valve guides to determine what valve seals I have to
get. Tho' I grew up with my Dad's micrometers around me, I never
learned to use them so that took awhile, especially with my Mark I
eyesight. The other tool in the pic is a small hole gauge. Once you
adjust it to the hole you're measuring, you remove it and measure it
with the micrometer. The readings I got were pretty consistent with
0.342" for the valves and 0.344" for the valve guides.
I
also got back to work on the Jimmy head. Cleaned out the valve guides
more with Hoppes #9 solvent and a gun cleaning brush. Then I "miked"
the valves and the valve guides to determine what valve seals I have to
get. Tho' I grew up with my Dad's micrometers around me, I never
learned to use them so that took awhile, especially with my Mark I
eyesight. The other tool in the pic is a small hole gauge. Once you
adjust it to the hole you're measuring, you remove it and measure it
with the micrometer. The readings I got were pretty consistent with
0.342" for the valves and 0.344" for the valve guides.
It's been eight months since I've posted a Deerslayer log entry. Too long but I think I'm movin' on the project again and, so it's time to post despite the fact that I haven't accomplished much in that eight months.
| < Back
to Intro |
You can email me at ![]() webmaster@laroke.com
webmaster@laroke.com
Issued Sunday March 12, 2017
Updated Thursday June 21, 2018
copyright © 2008-2018 Larry R. Kephart all rights reserved
| | LRK Home | | Bio Info | | Krash Khronicles | | LAROKE | |
| | BettyLou | | BillyBob's Garage | | Rat Patrol | | Deerslayer | | Elvira | |
| | Land of the Free and Home of the Brave | |
| | Keppylou's Art | | WWI Soldier's Diary | |