| | LRK Home | | Bio Info | | Krash Khronicles | | LAROKE | |
| | BettyLou | | BillyBob's Garage | | Rat Patrol | | Deerslayer | | Elvira | |
| | Land of the Free and Home of the Brave | |
| | Keppylou's Art | | WWI Soldier's Diary | |
Tinkering with Deerslayer
![]()
DEERSLAYER LINKS including vendor sites for parts and tools as well as sites for old truck and hot rod organizations
![]()
TINKERING WITH DEERSLAYER chronicles the day-by-day maintenance and improvements episodes for Deerslayer, a '37 Chevy farm truck hot rod.
CRUISIN' WITH DEERSLAYER Roadtrips, cruise-in's and truck show stories and tall tales.
TONY'S DUNGEON Tony Pascarella's forum entries at OldGMCtrucks.com regarding Deerslayer, particularly the 302 GMC engine build in his farmhouse basement.
![]()
DEERSLAYER MAINTENANCE Ever changing detailing, oil change, lube, etc. maintenance routines specifically developed for Deerslayer, including required tools, materials and procedures.
PROJECT NAILHEAD Chronicles the rebuild of a 1954 Buick Roadmaster 322 nailhead engine as a future replacement for Deerslayer's Jimmy 302.
37. Headache - Teardown
 May
11th 2015 On
Saturday, my plan was to adjust the Jimmy's valve lash and check the
valve train for sticking valves, bent pushrods and the like. Decided to
do a compression check first and pulled all the plugs. Cylinder 1 was
190 psi. 2 was 195, 3 was 185, 4 was 30. 5 was 35 and 6 measured 125.
In addition, air pulsed out of spark plug hole 5 when I did 4 and air
with a touch of water pulsed out of 4 when I did 5. Damnation! The head
is going to have to come off and I will have to rent a car again for my
daily commute. Double damnation!
May
11th 2015 On
Saturday, my plan was to adjust the Jimmy's valve lash and check the
valve train for sticking valves, bent pushrods and the like. Decided to
do a compression check first and pulled all the plugs. Cylinder 1 was
190 psi. 2 was 195, 3 was 185, 4 was 30. 5 was 35 and 6 measured 125.
In addition, air pulsed out of spark plug hole 5 when I did 4 and air
with a touch of water pulsed out of 4 when I did 5. Damnation! The head
is going to have to come off and I will have to rent a car again for my
daily commute. Double damnation!
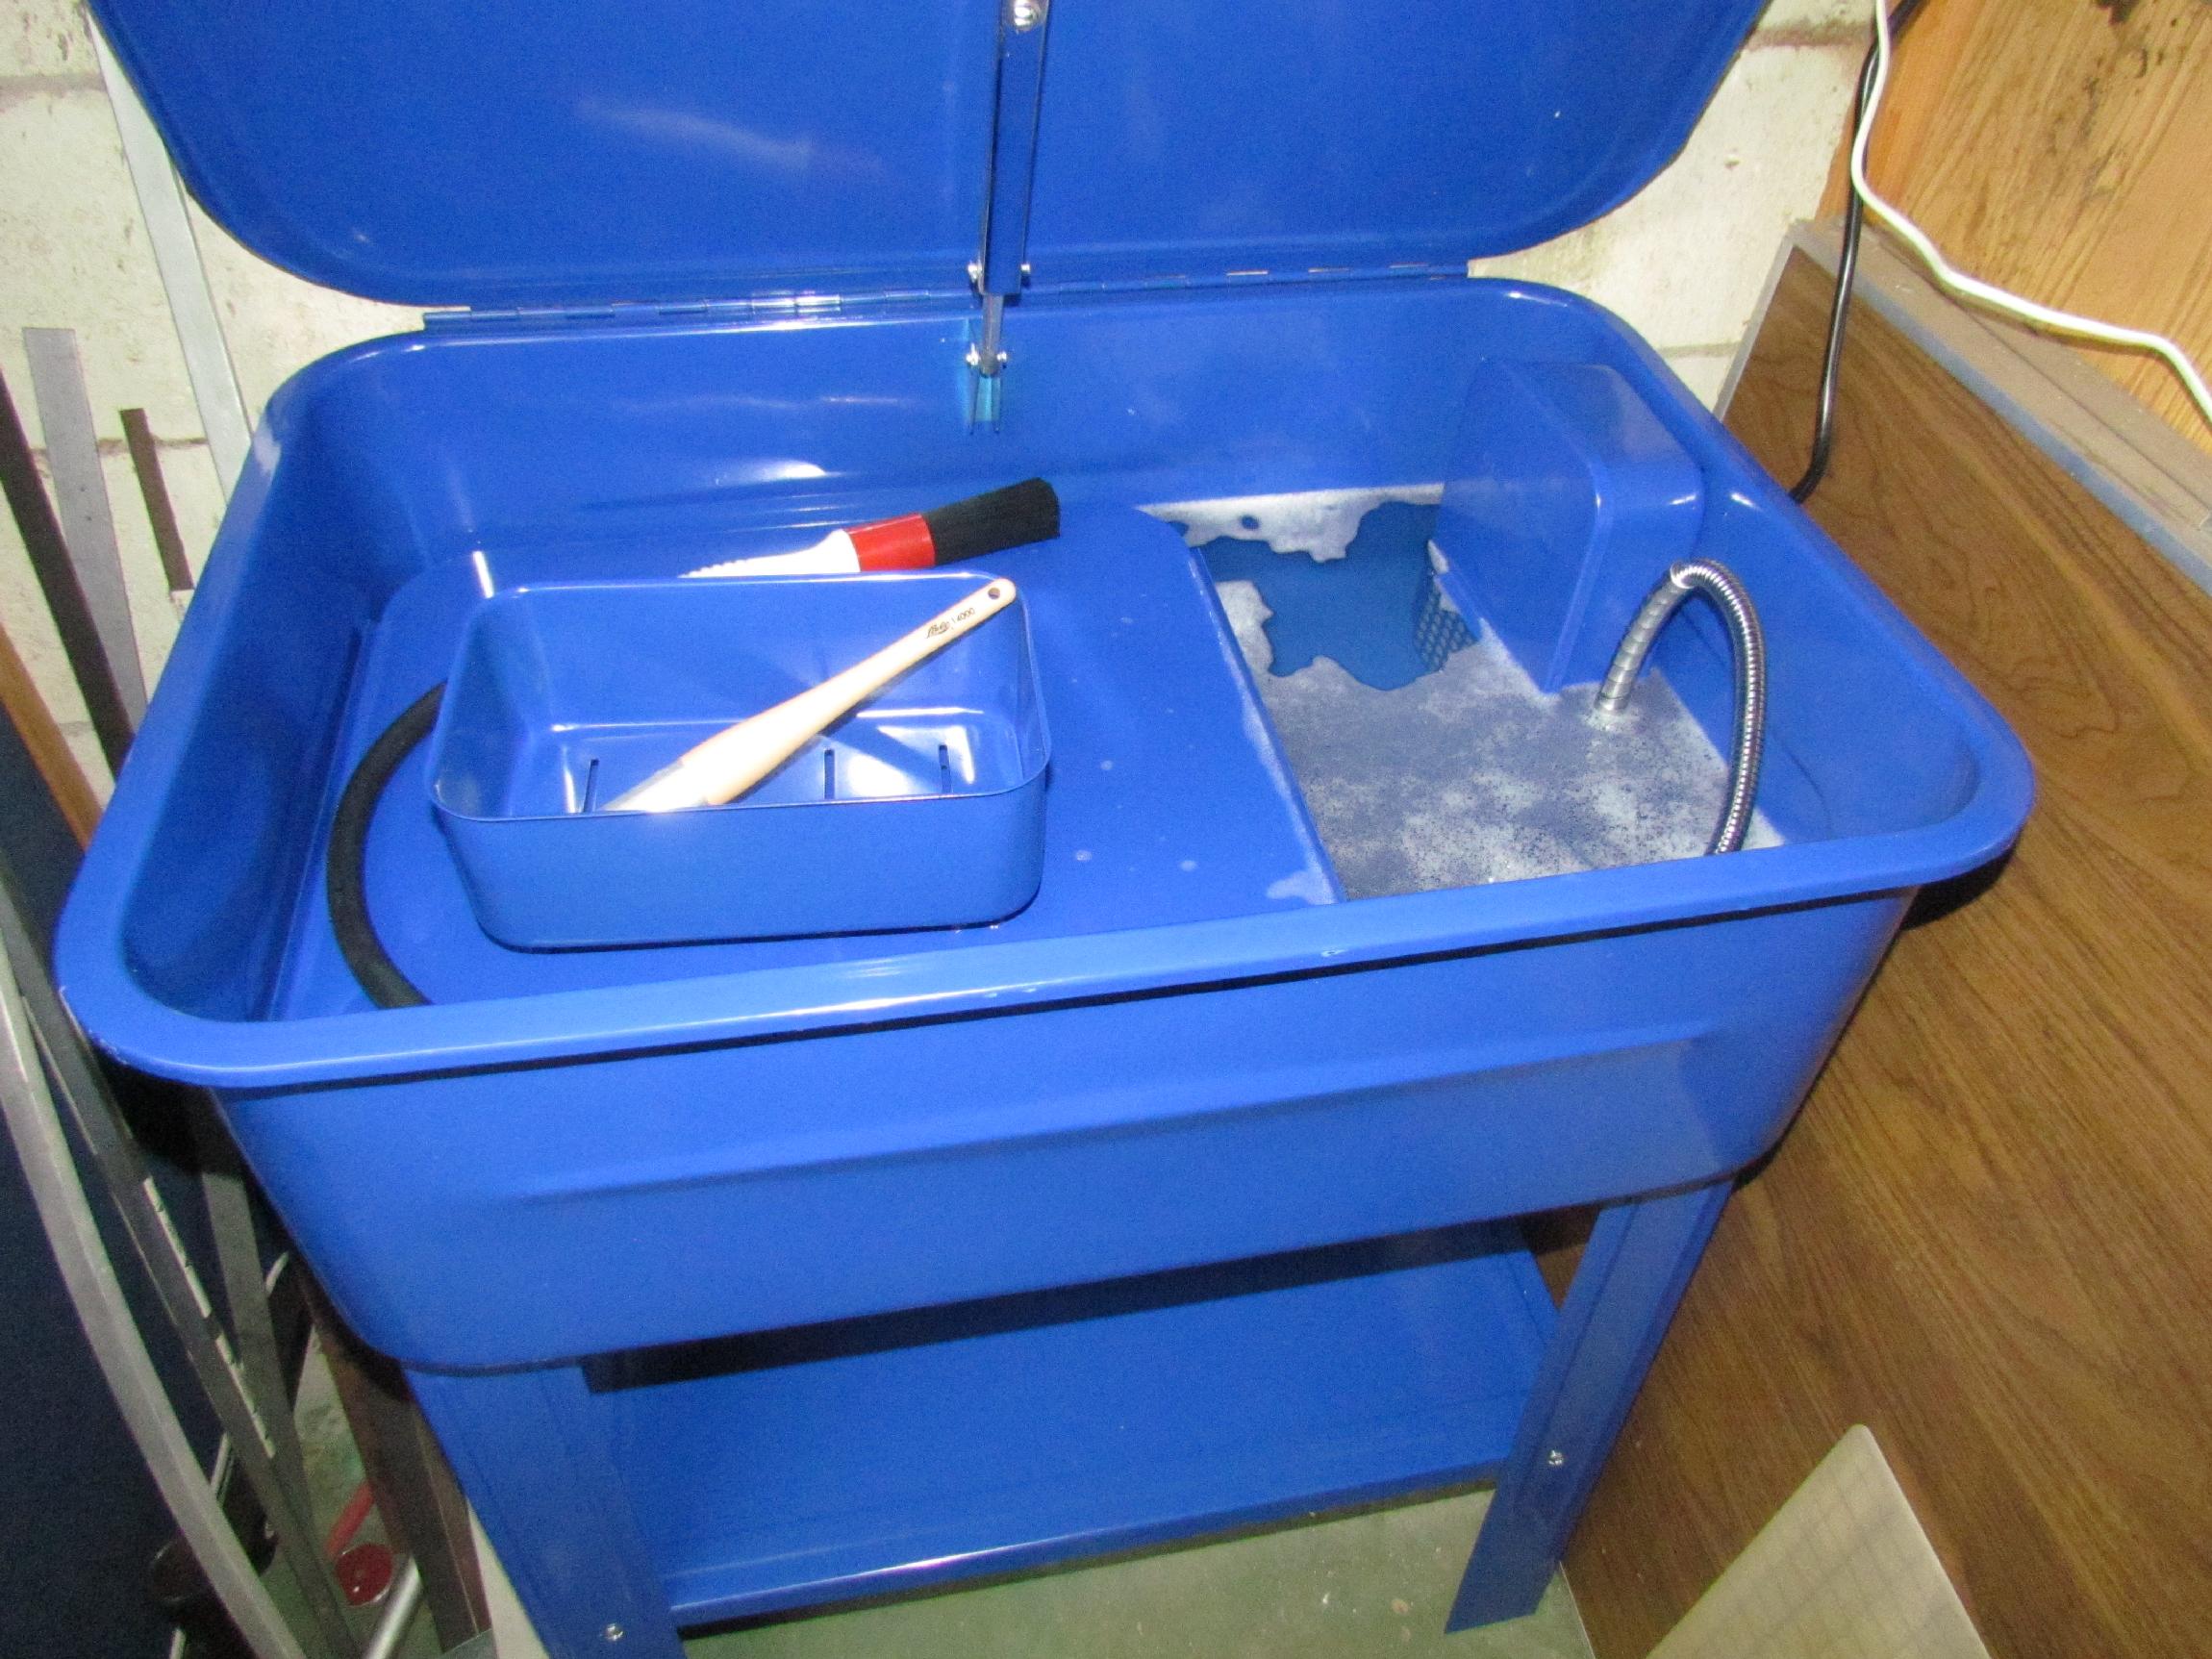
I soothed my depression by busying myself with the assembly of a shiny new tool, an Eastwood 20 gallon parts washer. I filled it up with 5 gallons of "oil Eater" and 7 gallons of water.
May 13th 2015 Changed the oil Monday nite. Could not detect much water, if any, in the oil, either when I first pulled the drain plug or in the drain pan when I pulled it out from under the truck. A few pin bubbles, less than ten, were on the surface but they soon disappeared. I am adding coolant to the radiator a bit more often and there is a trace of brown sludge in the radiator. The white smoke I saw on startup at the gas station last week was probably coolant but I haven't had any smoke on startup since.
May 14th 2015 Tony (Deerslayer's builder) has been giving me some help over on the OldGMCtrucks forum regarding the current Jimmy engine woes. He recommended I quit driving the truck and get the Jeep fired up. I took his advice and put the Deerslayer in drydock when I got back to the shop last nite. Renegade, however, is still in no condition to drive as he still sits in my Boca warehouse bay and hasn't been started up in years. Instead, I made the fifteen minute walk from the shop to the Enterprise rental place this morning and picked up a Kia Rio scrubbing bubble commodity shuttle for the interim. Parts and tools are also on on the way.
 June
8th 2015 Haven't
been getting
spit done in the shop other than cleaning up enuf for the
head gasket job. Now, I can write an entire log entry on an oil change
but it's beyond the scope of my ability to find much to say about shop
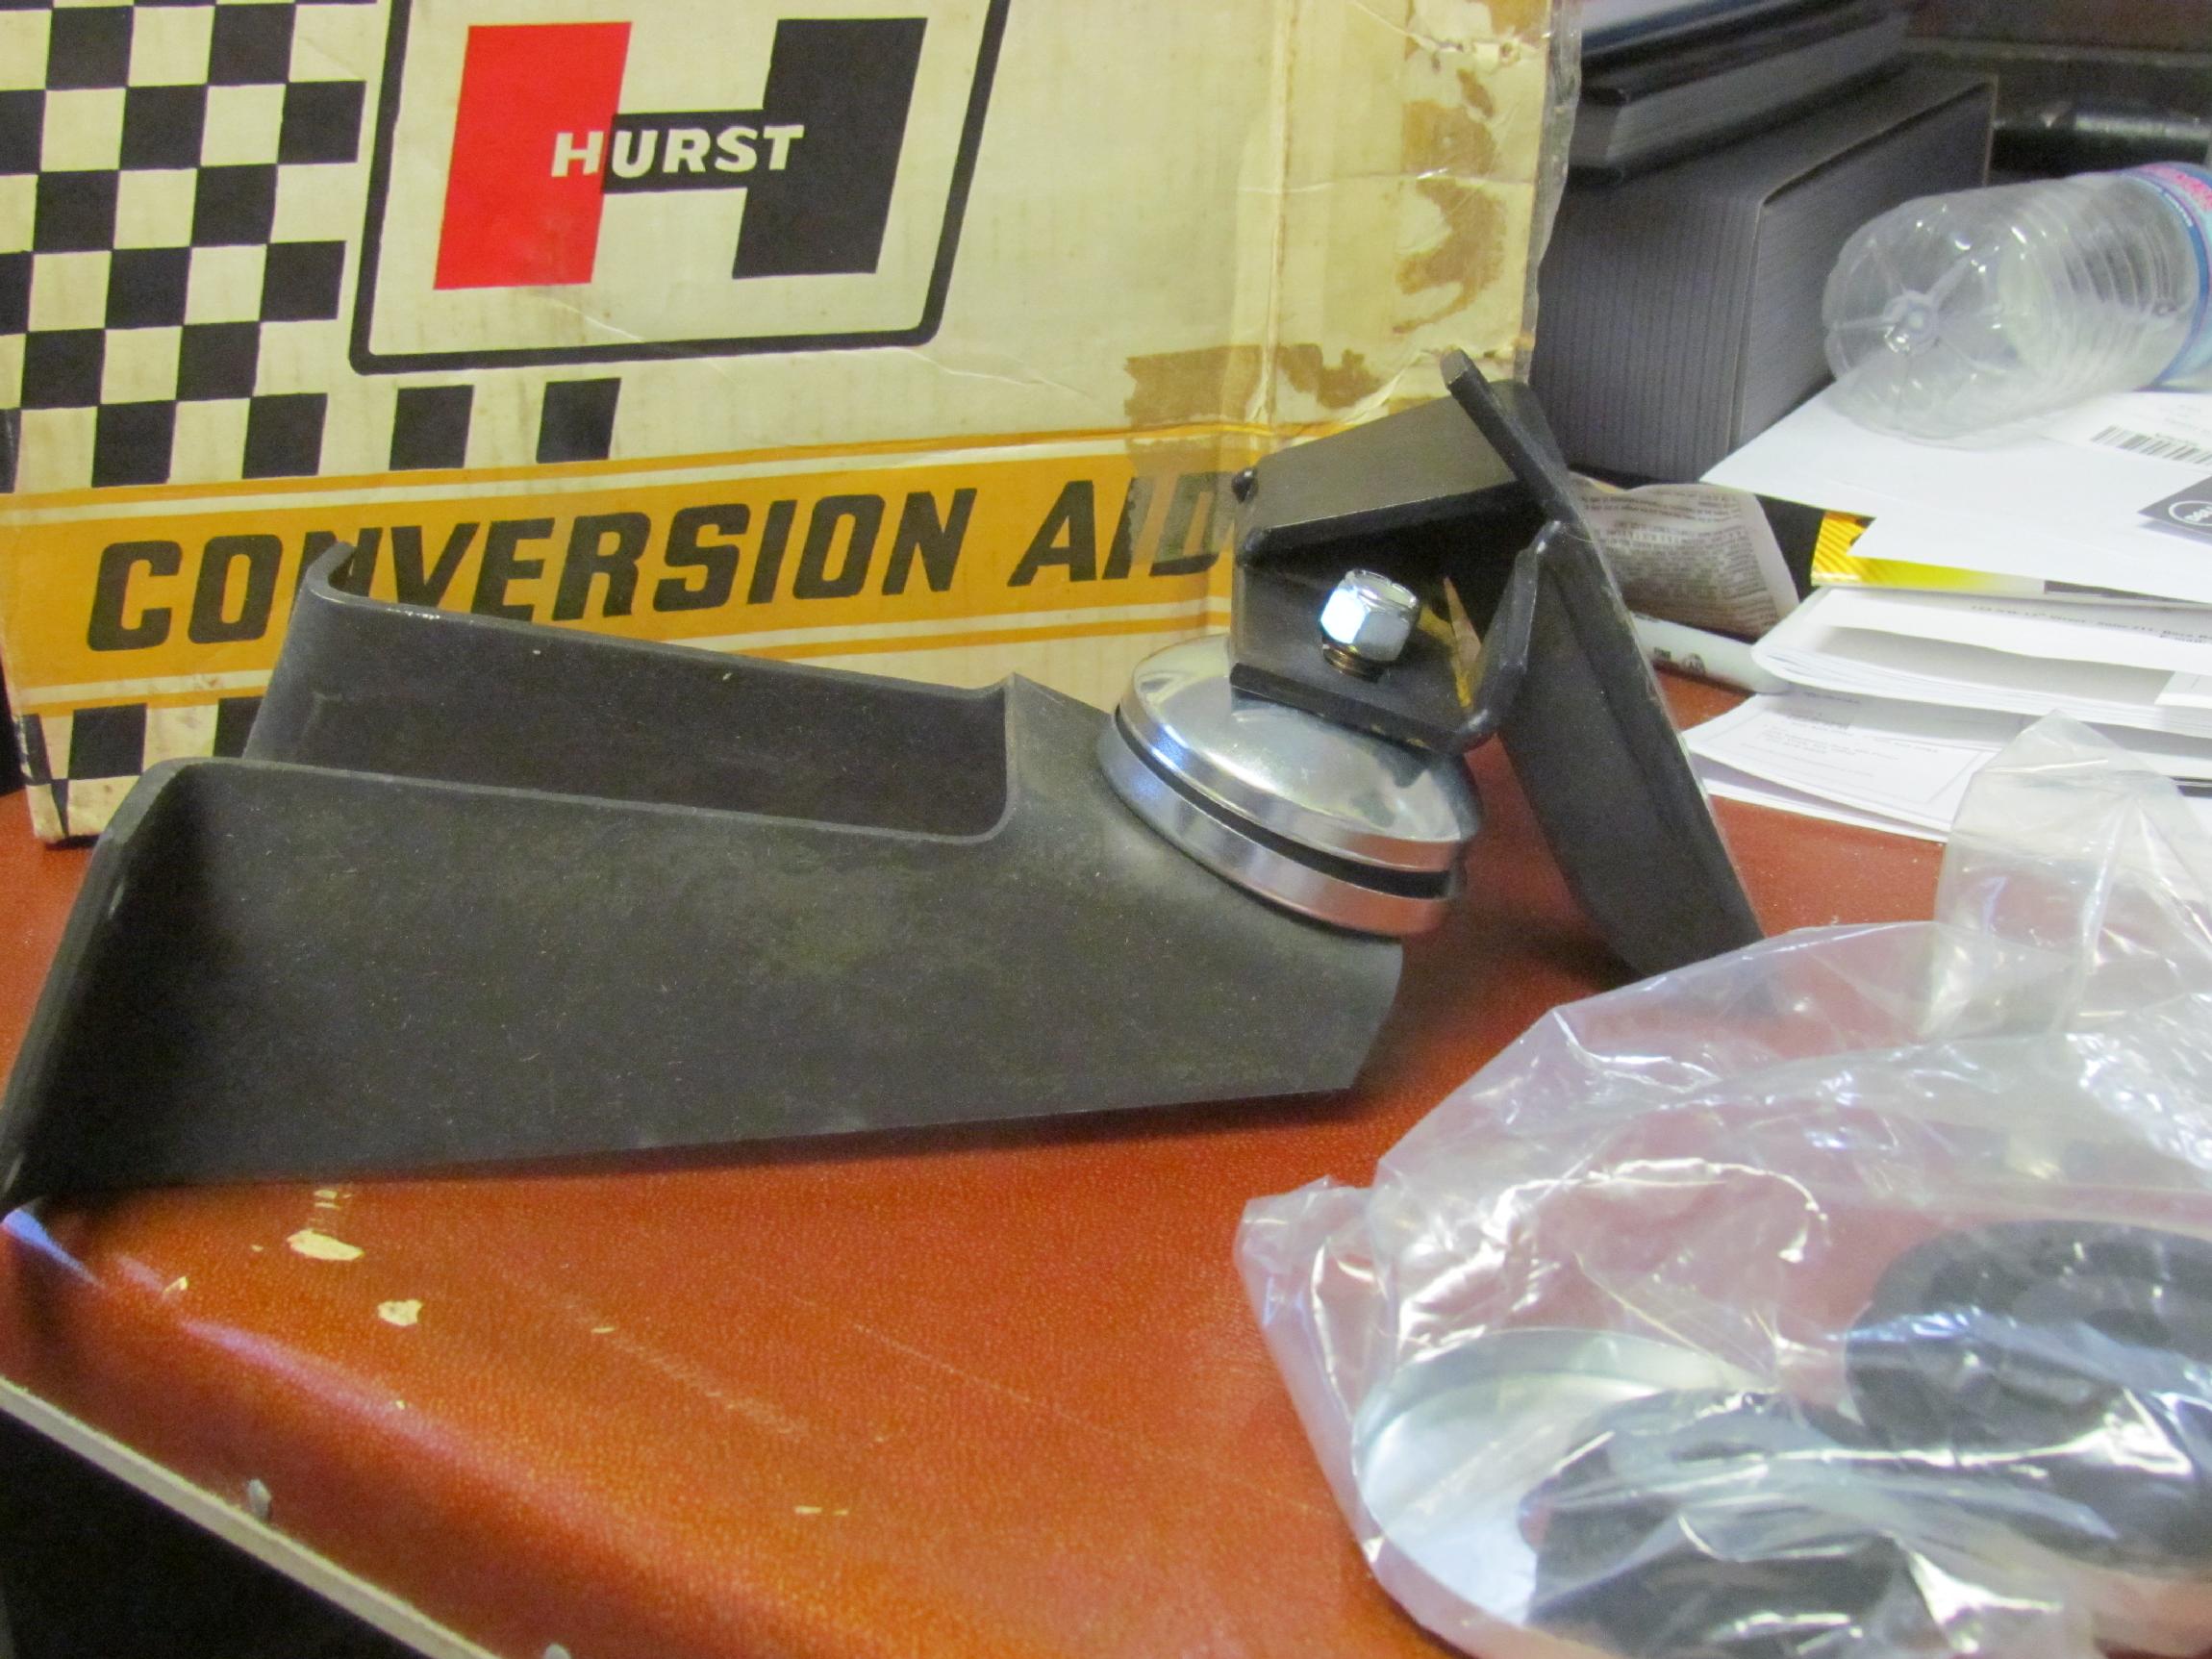
cleanup. Some new (to me) goodies arrived for the Nailhead Project
however and I can report on that. Sometime back I snagged a set of
vintage Hurst motor mounts for the nailhead engine. I then went looking
for frame mounts to match and found a set of vintage Hurst
Frame Adapters 1954-1964 Ford Pickup Truck. These are long enuf that
they can be cut down to fit the '37 Chevy truck frame when the time
comes. Today, a Hurst
V8 saddle motor mount rubber biscuit set complete with washers
& bolts arrived, completing the hardware needed for the front
motor
mounts. This plunder will now take its place on the shelf until needed.
June
8th 2015 Haven't
been getting
spit done in the shop other than cleaning up enuf for the
head gasket job. Now, I can write an entire log entry on an oil change
but it's beyond the scope of my ability to find much to say about shop
cleanup. Some new (to me) goodies arrived for the Nailhead Project
however and I can report on that. Sometime back I snagged a set of
vintage Hurst motor mounts for the nailhead engine. I then went looking
for frame mounts to match and found a set of vintage Hurst
Frame Adapters 1954-1964 Ford Pickup Truck. These are long enuf that
they can be cut down to fit the '37 Chevy truck frame when the time
comes. Today, a Hurst
V8 saddle motor mount rubber biscuit set complete with washers
& bolts arrived, completing the hardware needed for the front
motor
mounts. This plunder will now take its place on the shelf until needed.
 June
11th 2015 I've traded Wednesdays
for Sundays as a day off. Yesterday, I finally started work on the
Deerslayer's head gasket job after cleaning up the toilet room a bit.
Did some pondering while resting from that task. That hazmat suit was
hot! I decided to pull the fenders for more access to the engine,
especially the manifolds.
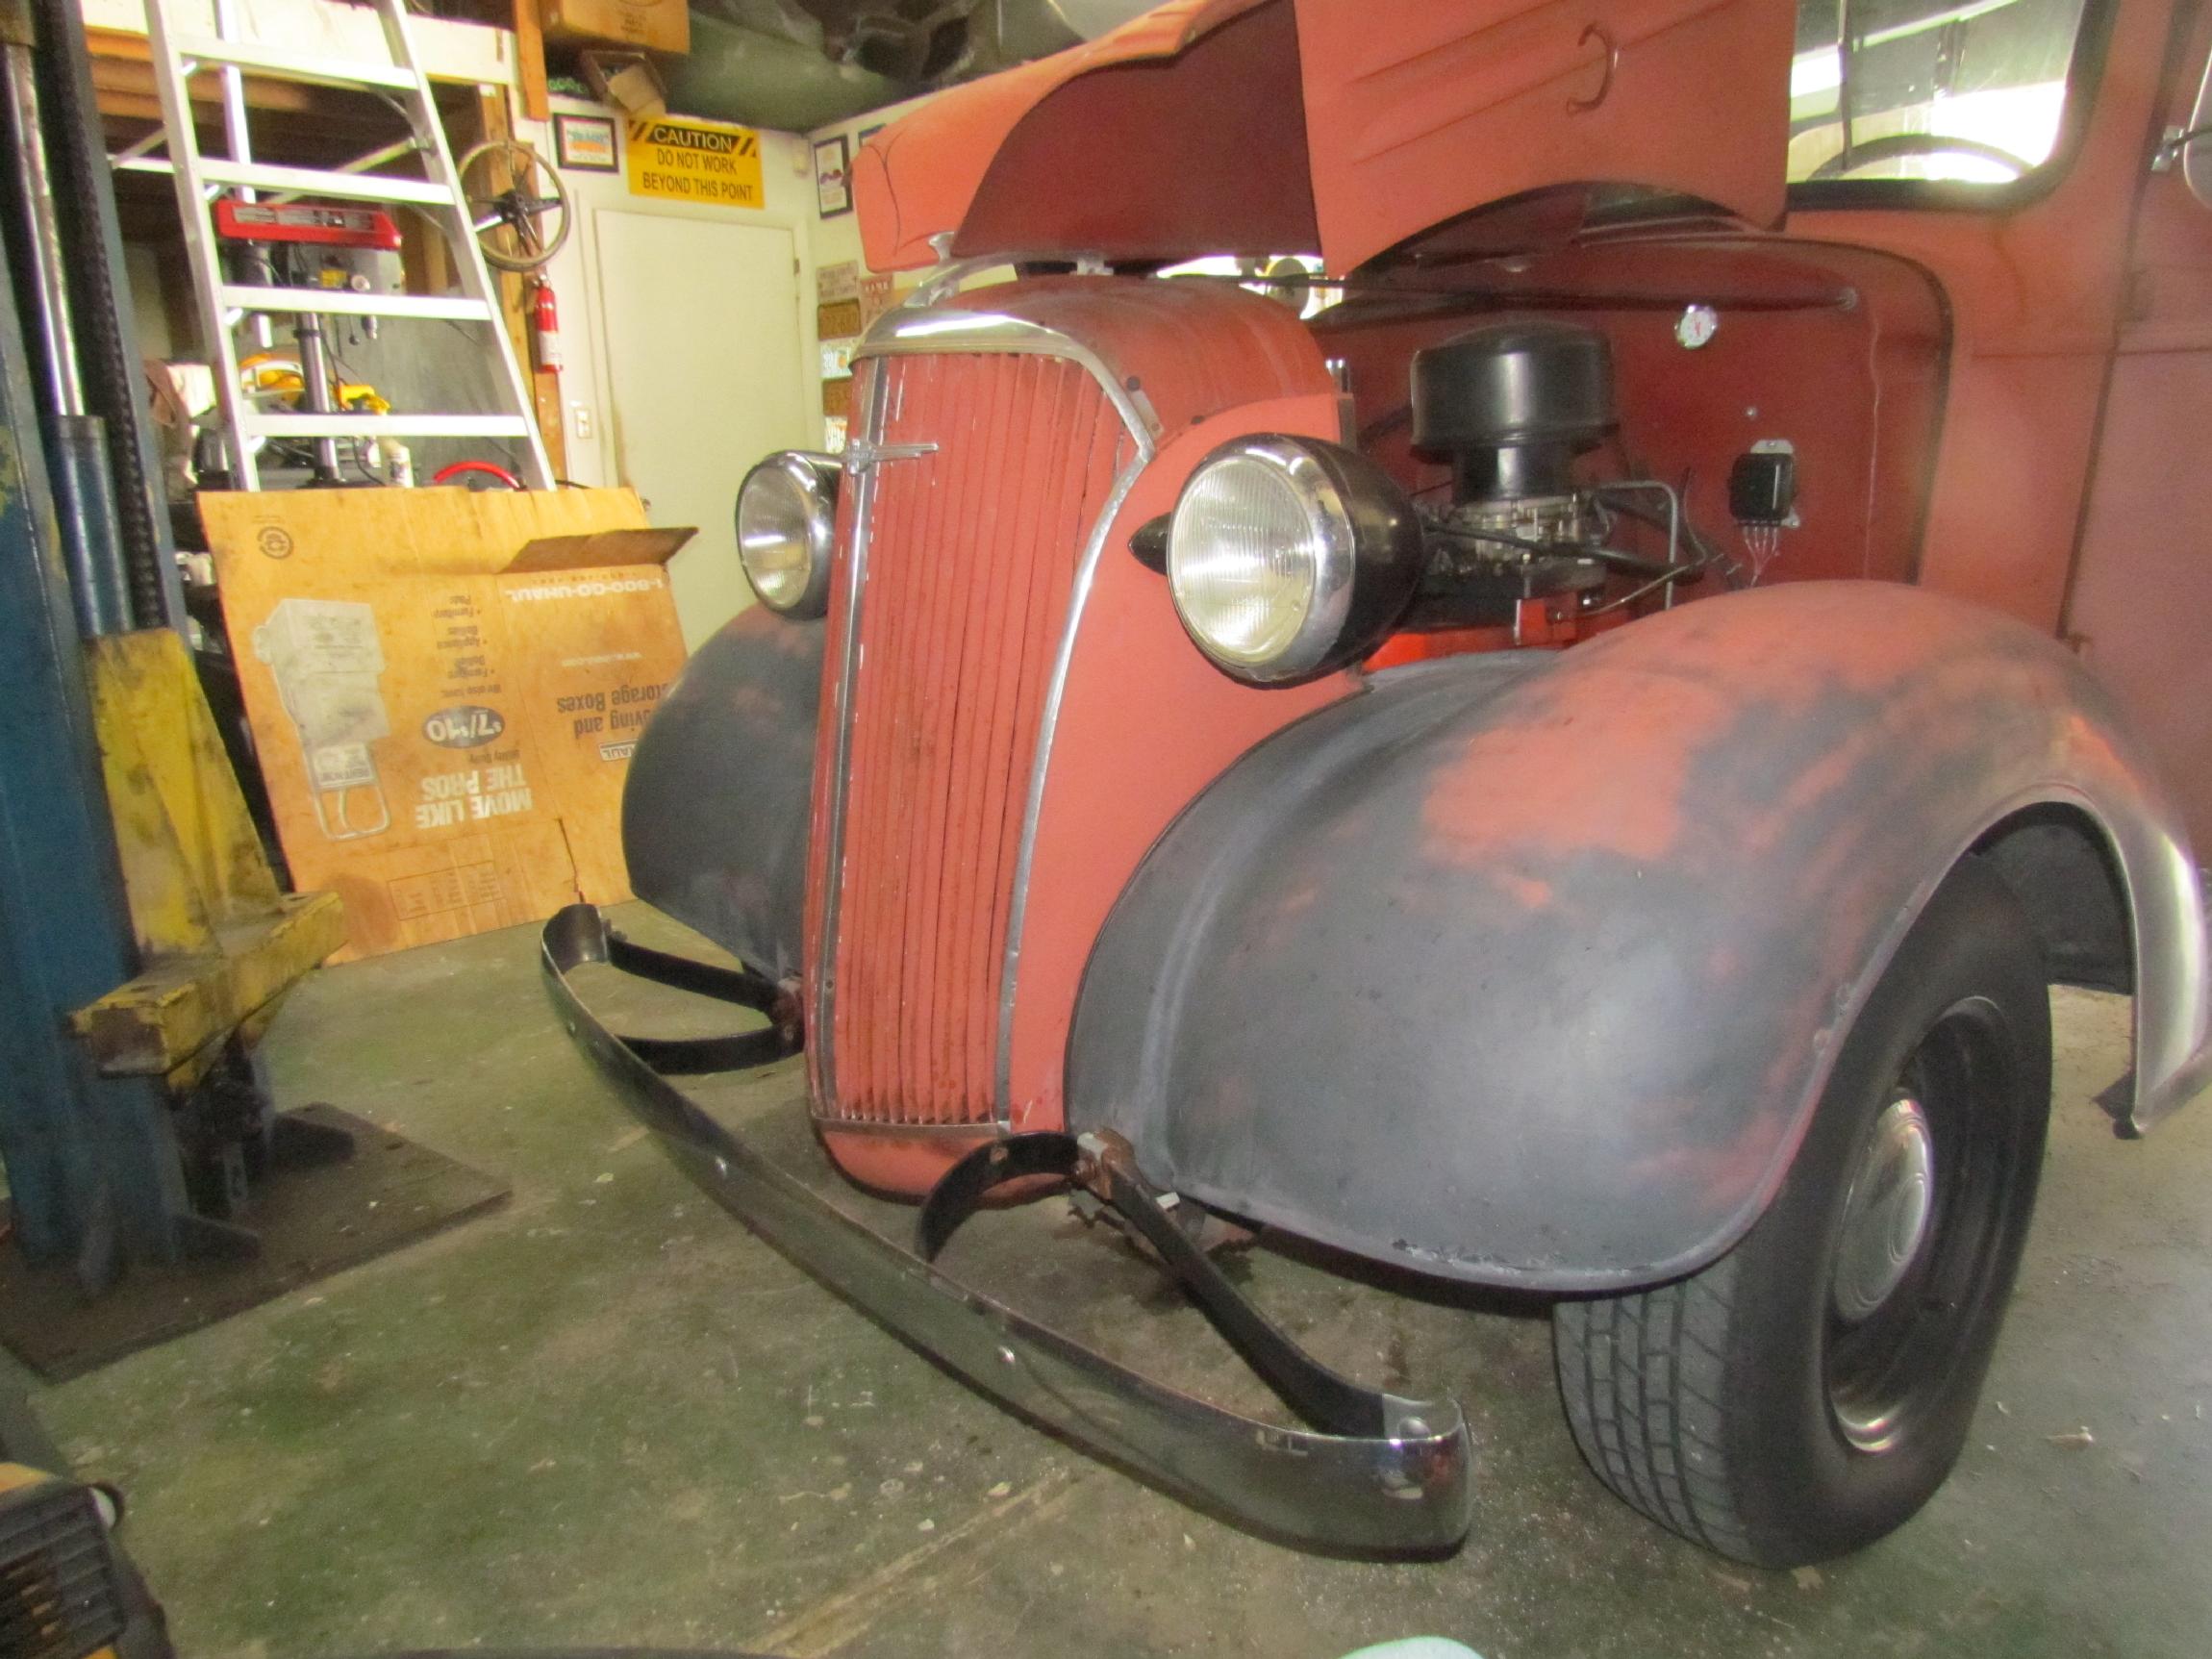
June
11th 2015 I've traded Wednesdays
for Sundays as a day off. Yesterday, I finally started work on the
Deerslayer's head gasket job after cleaning up the toilet room a bit.
Did some pondering while resting from that task. That hazmat suit was
hot! I decided to pull the fenders for more access to the engine,
especially the manifolds.
 Took
the front wheels off to get at the fender fasteners and while I had the
right front tire handy, took time out to plug a slow leak I've had for
a long time. That done, got myself contorted up in the
wheelwells
to get all the bolts undone. There are several different sizes and a
few that need wrenches from both sides, real nut busters. I had to keep
reminding myself that I do this because I like it. The fenders were off
by early afternoon and during my cigar break, I weighed the pros and
cons of removing Deerslayer's nose. I drained the radiator at this
point and the coolant looked good. The cons won it. The nose stays put.
Removed the hood and driver side inner fender and called it a day. I
lost a
machine screw and hex nut, broke two others and only drew blood once. A
good day.
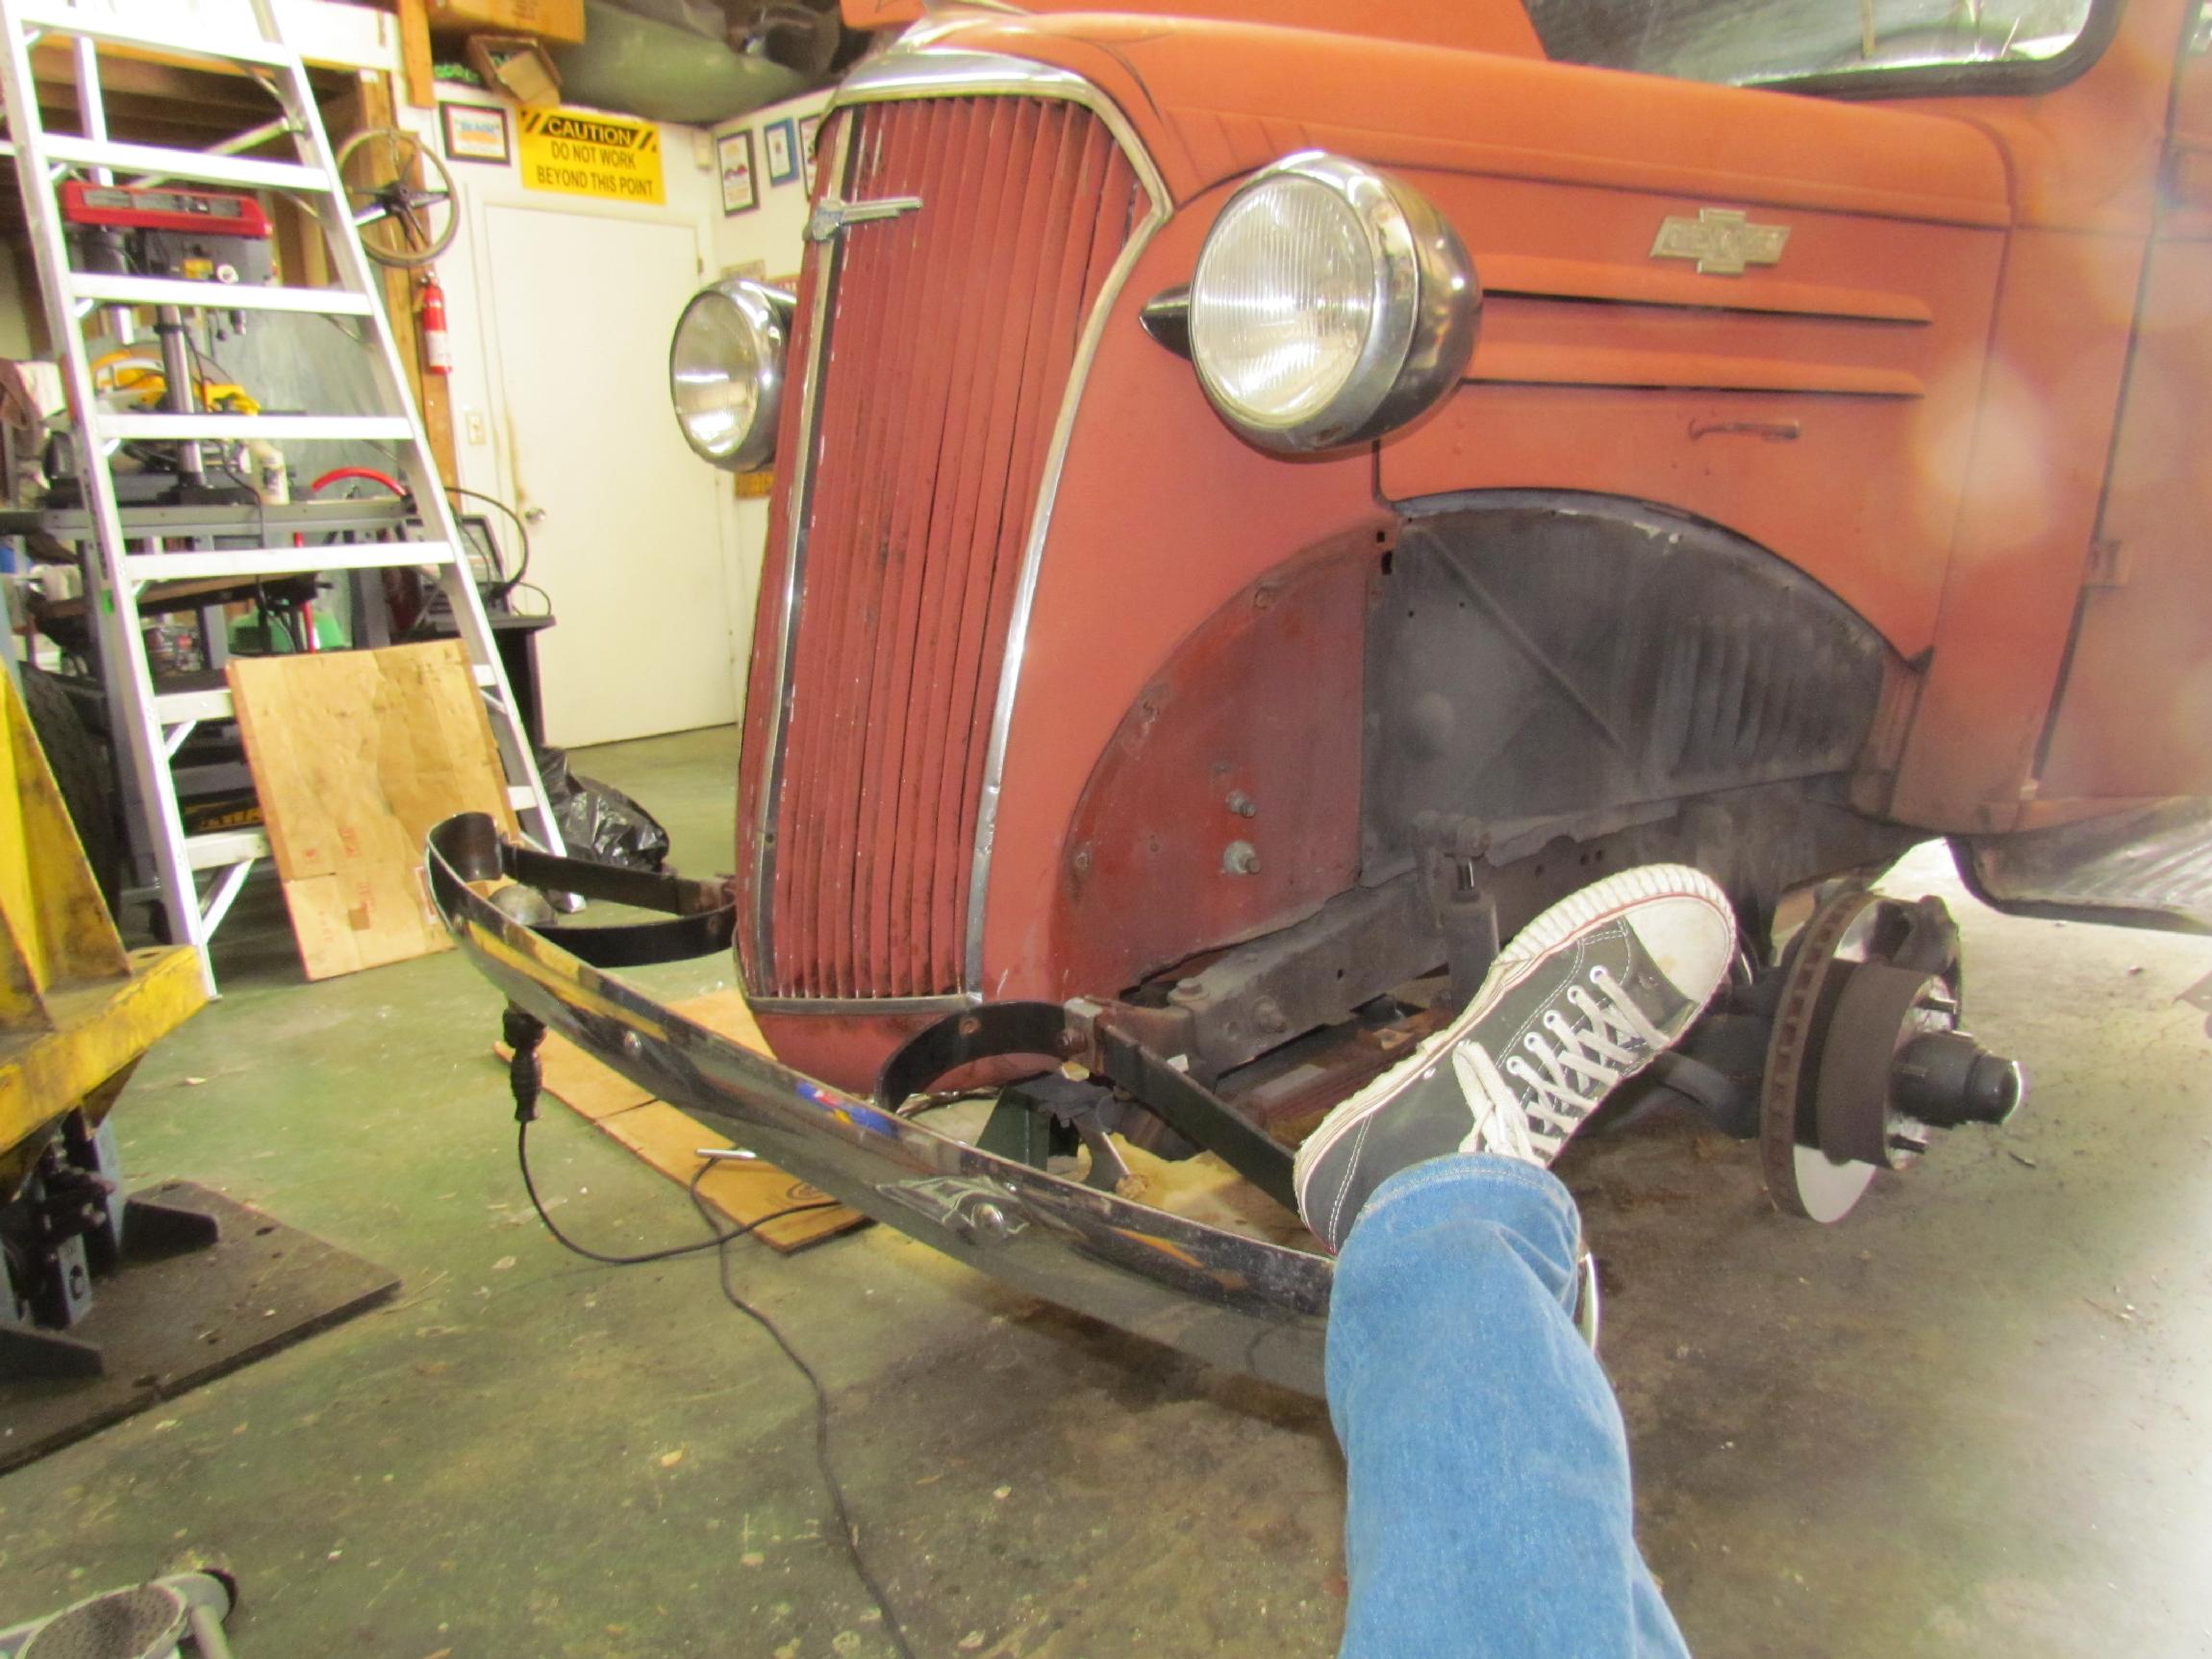
Took
the front wheels off to get at the fender fasteners and while I had the
right front tire handy, took time out to plug a slow leak I've had for
a long time. That done, got myself contorted up in the
wheelwells
to get all the bolts undone. There are several different sizes and a
few that need wrenches from both sides, real nut busters. I had to keep
reminding myself that I do this because I like it. The fenders were off
by early afternoon and during my cigar break, I weighed the pros and
cons of removing Deerslayer's nose. I drained the radiator at this
point and the coolant looked good. The cons won it. The nose stays put.
Removed the hood and driver side inner fender and called it a day. I
lost a
machine screw and hex nut, broke two others and only drew blood once. A
good day.
June 18th 2015 Spent most of the day with Renegade's resurrection but found time to get Deerslayer's front bumper off. It's only two bolts but the bolt head was turning inside the frame rail and I couldn't get a wrench on it because Deerslayer's nose was in the way. Got a 3/4" open end wrench with angled head last week to get around this problem. The wrench head was too big to get in the frame rail. I gave up on getting the bolt out intact and uncased the sawsall. Done.
 July
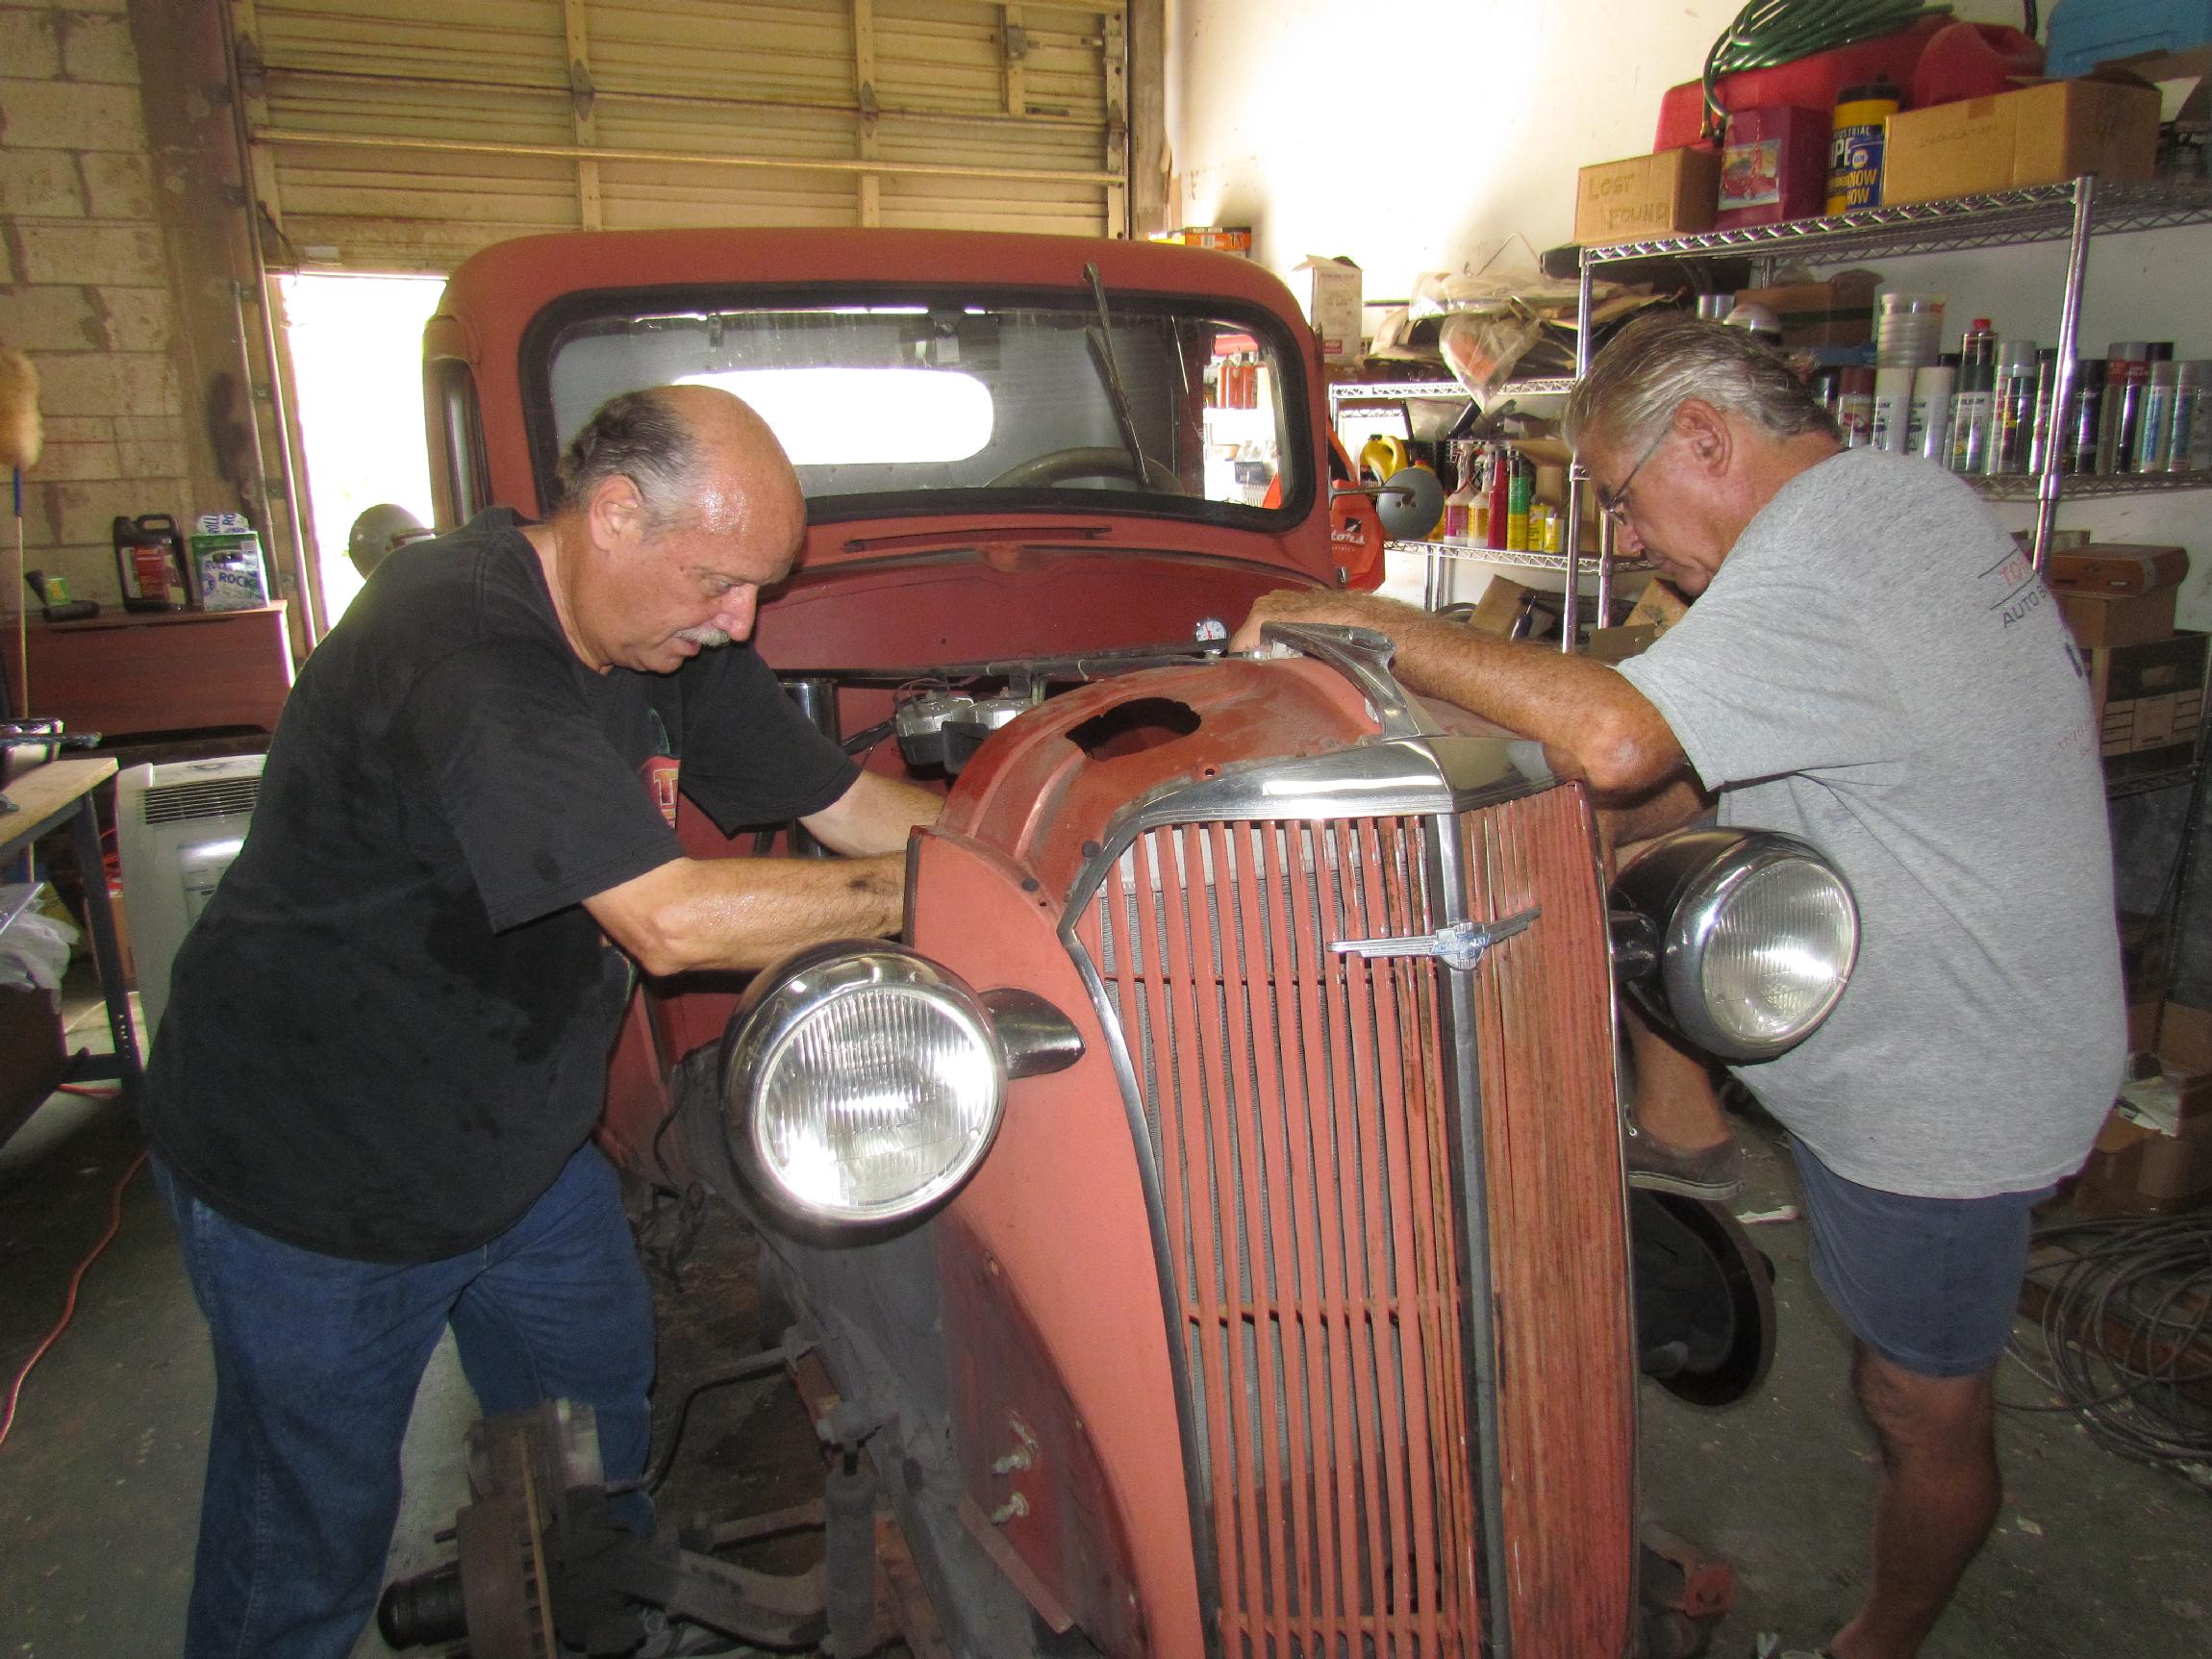
2nd 2015 Some of my car buddies
think I'm movin' too slow on the Deerslayer engine job so Euge Reidy
and Wayne Harlow came over to the BillyBob Shop yesterday to kickstart
me. I took the carb off before they arrived and tidied up the shop a
bit so three guys could move around at the same time. Wayne retired as
a professional mechanic and I looked to him for advice as we moved thru
the process. When he worked for VW, they flew him over the globe
regarding VW, Audi and Bentley problems.
July
2nd 2015 Some of my car buddies
think I'm movin' too slow on the Deerslayer engine job so Euge Reidy
and Wayne Harlow came over to the BillyBob Shop yesterday to kickstart
me. I took the carb off before they arrived and tidied up the shop a
bit so three guys could move around at the same time. Wayne retired as
a professional mechanic and I looked to him for advice as we moved thru
the process. When he worked for VW, they flew him over the globe
regarding VW, Audi and Bentley problems.
 When Wayne got the valve cover off, I checked on valve
lash so I could set it up cold as a starting point during the assembly
phase. I settled on 0.008" (both intake and exhaust for this cam are to
be set to 0.005" hot). Wayne took the rocker assembly off then
concentrated on the manifolds while Euge unbolted the head. I tried,
unsuccessfully, to get the header separated from the exhaust pipe.
When Wayne got the valve cover off, I checked on valve
lash so I could set it up cold as a starting point during the assembly
phase. I settled on 0.008" (both intake and exhaust for this cam are to
be set to 0.005" hot). Wayne took the rocker assembly off then
concentrated on the manifolds while Euge unbolted the head. I tried,
unsuccessfully, to get the header separated from the exhaust pipe.
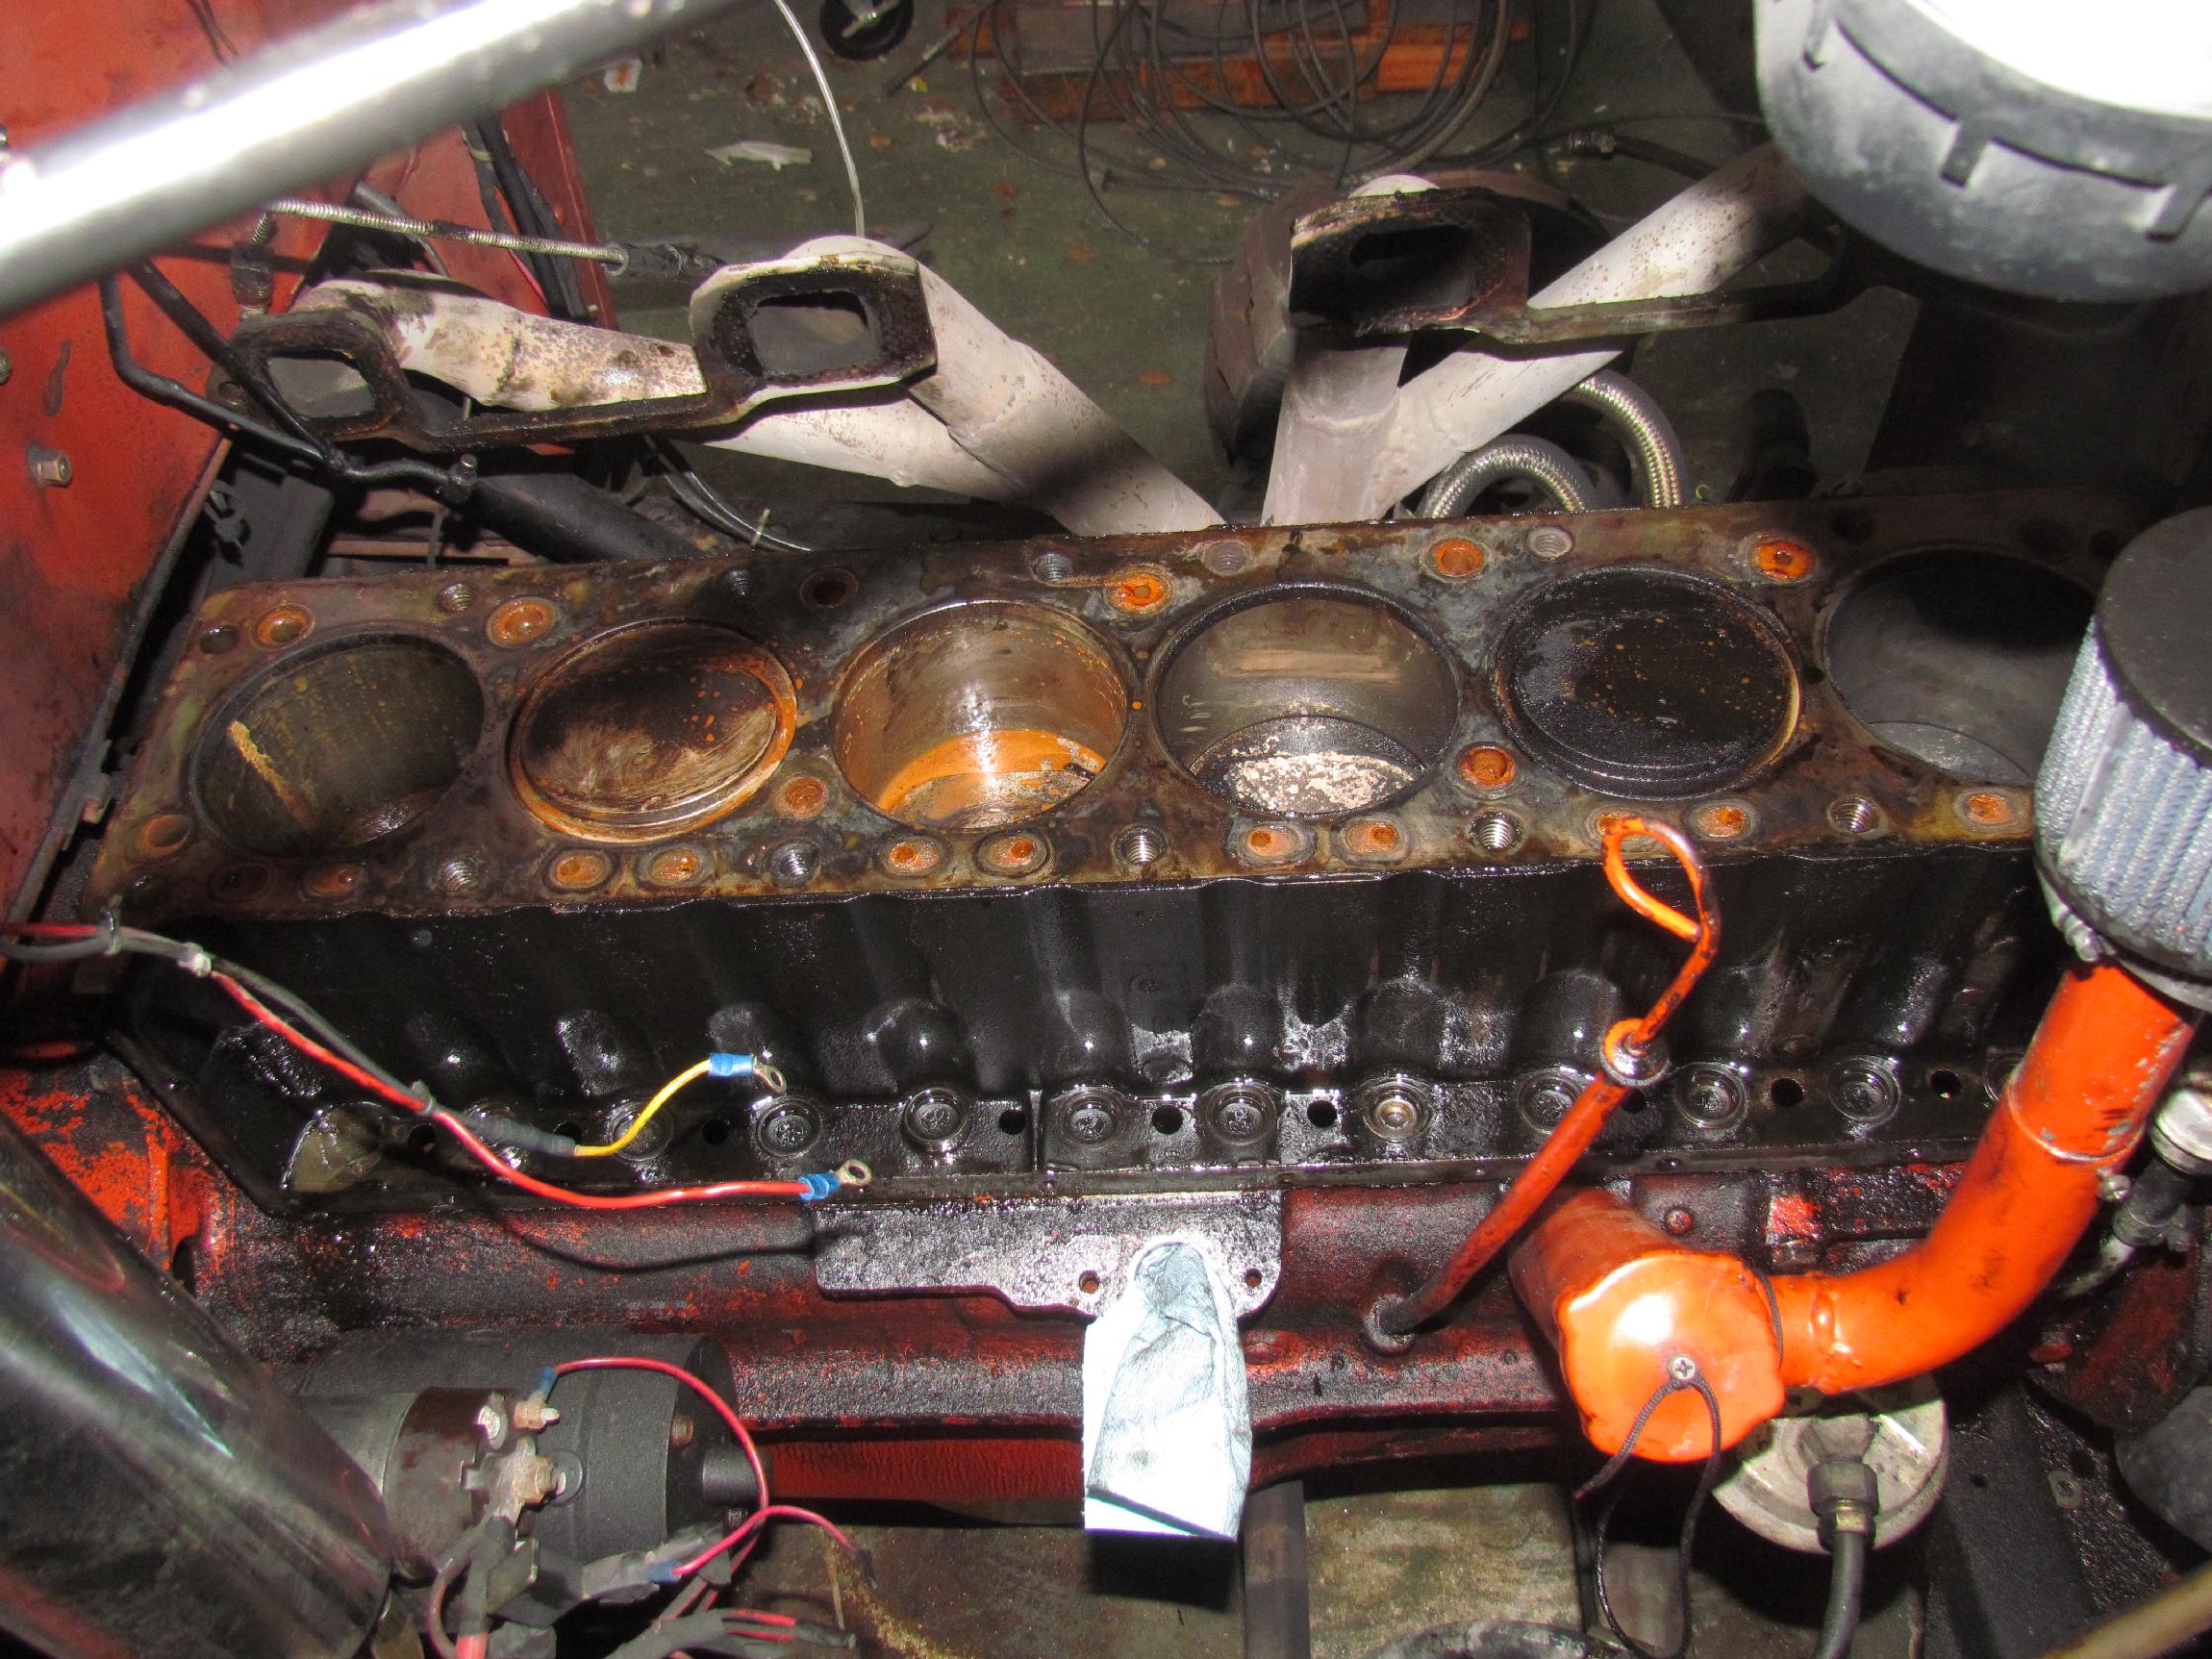
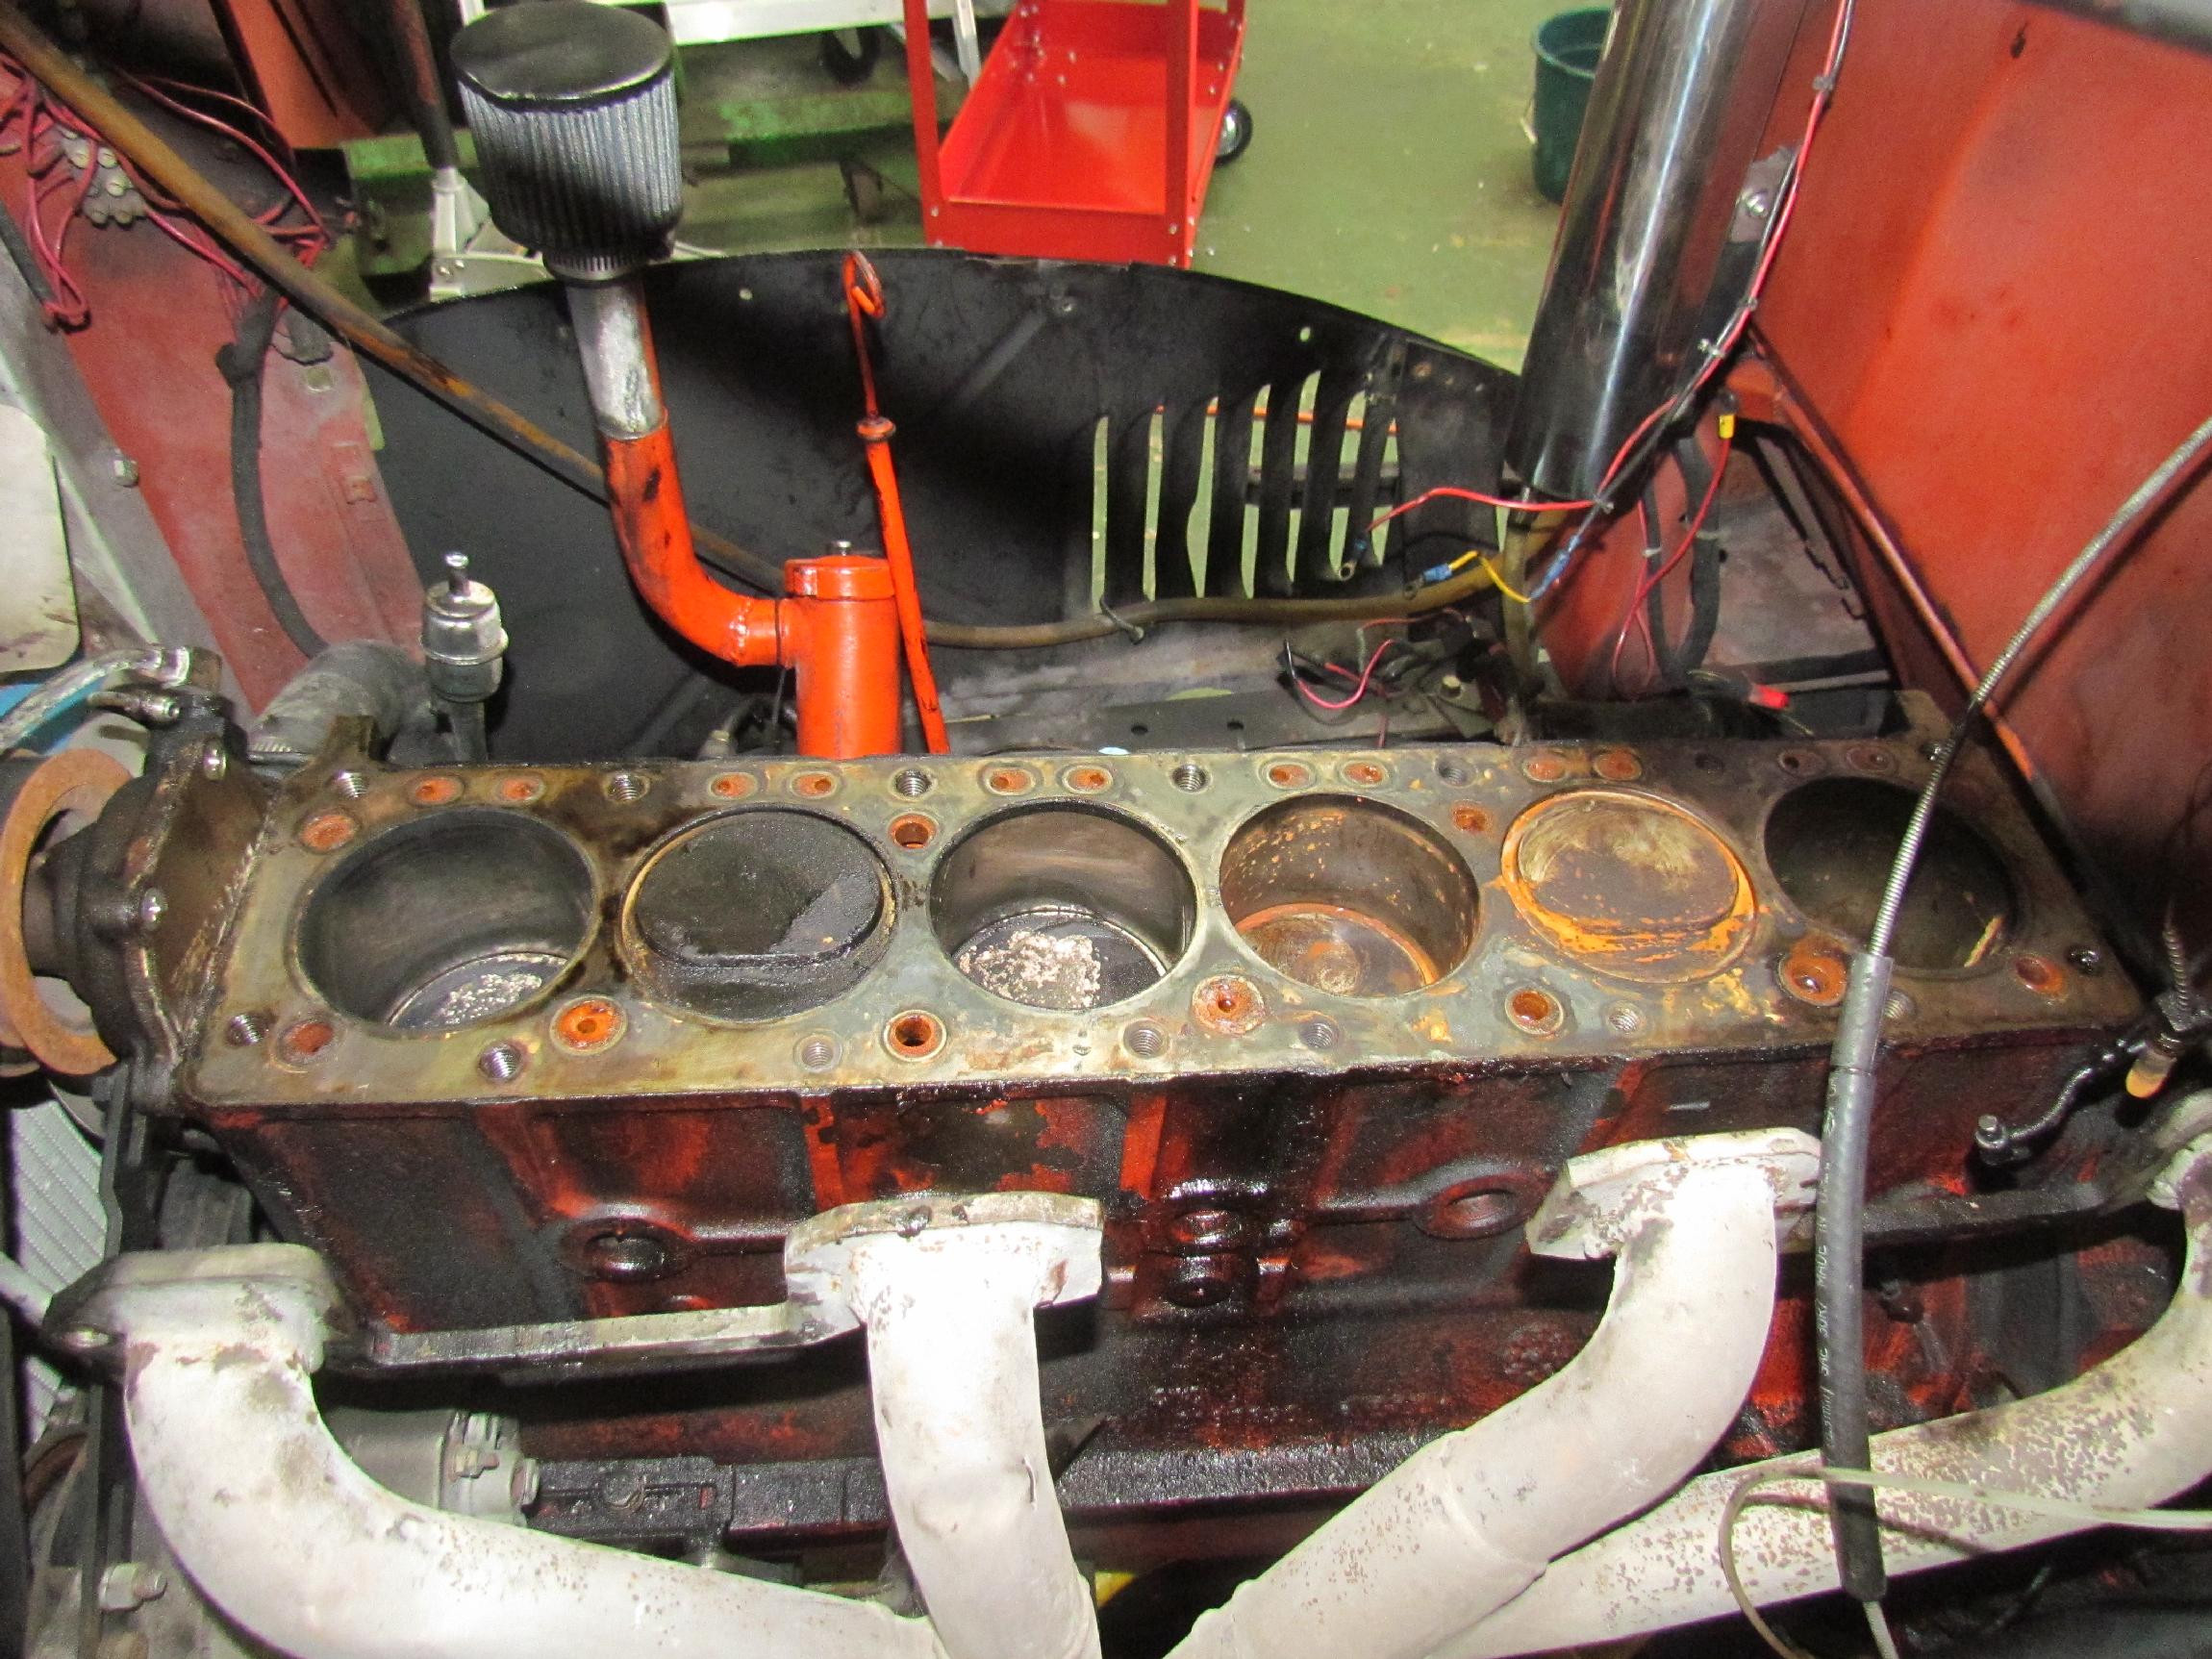
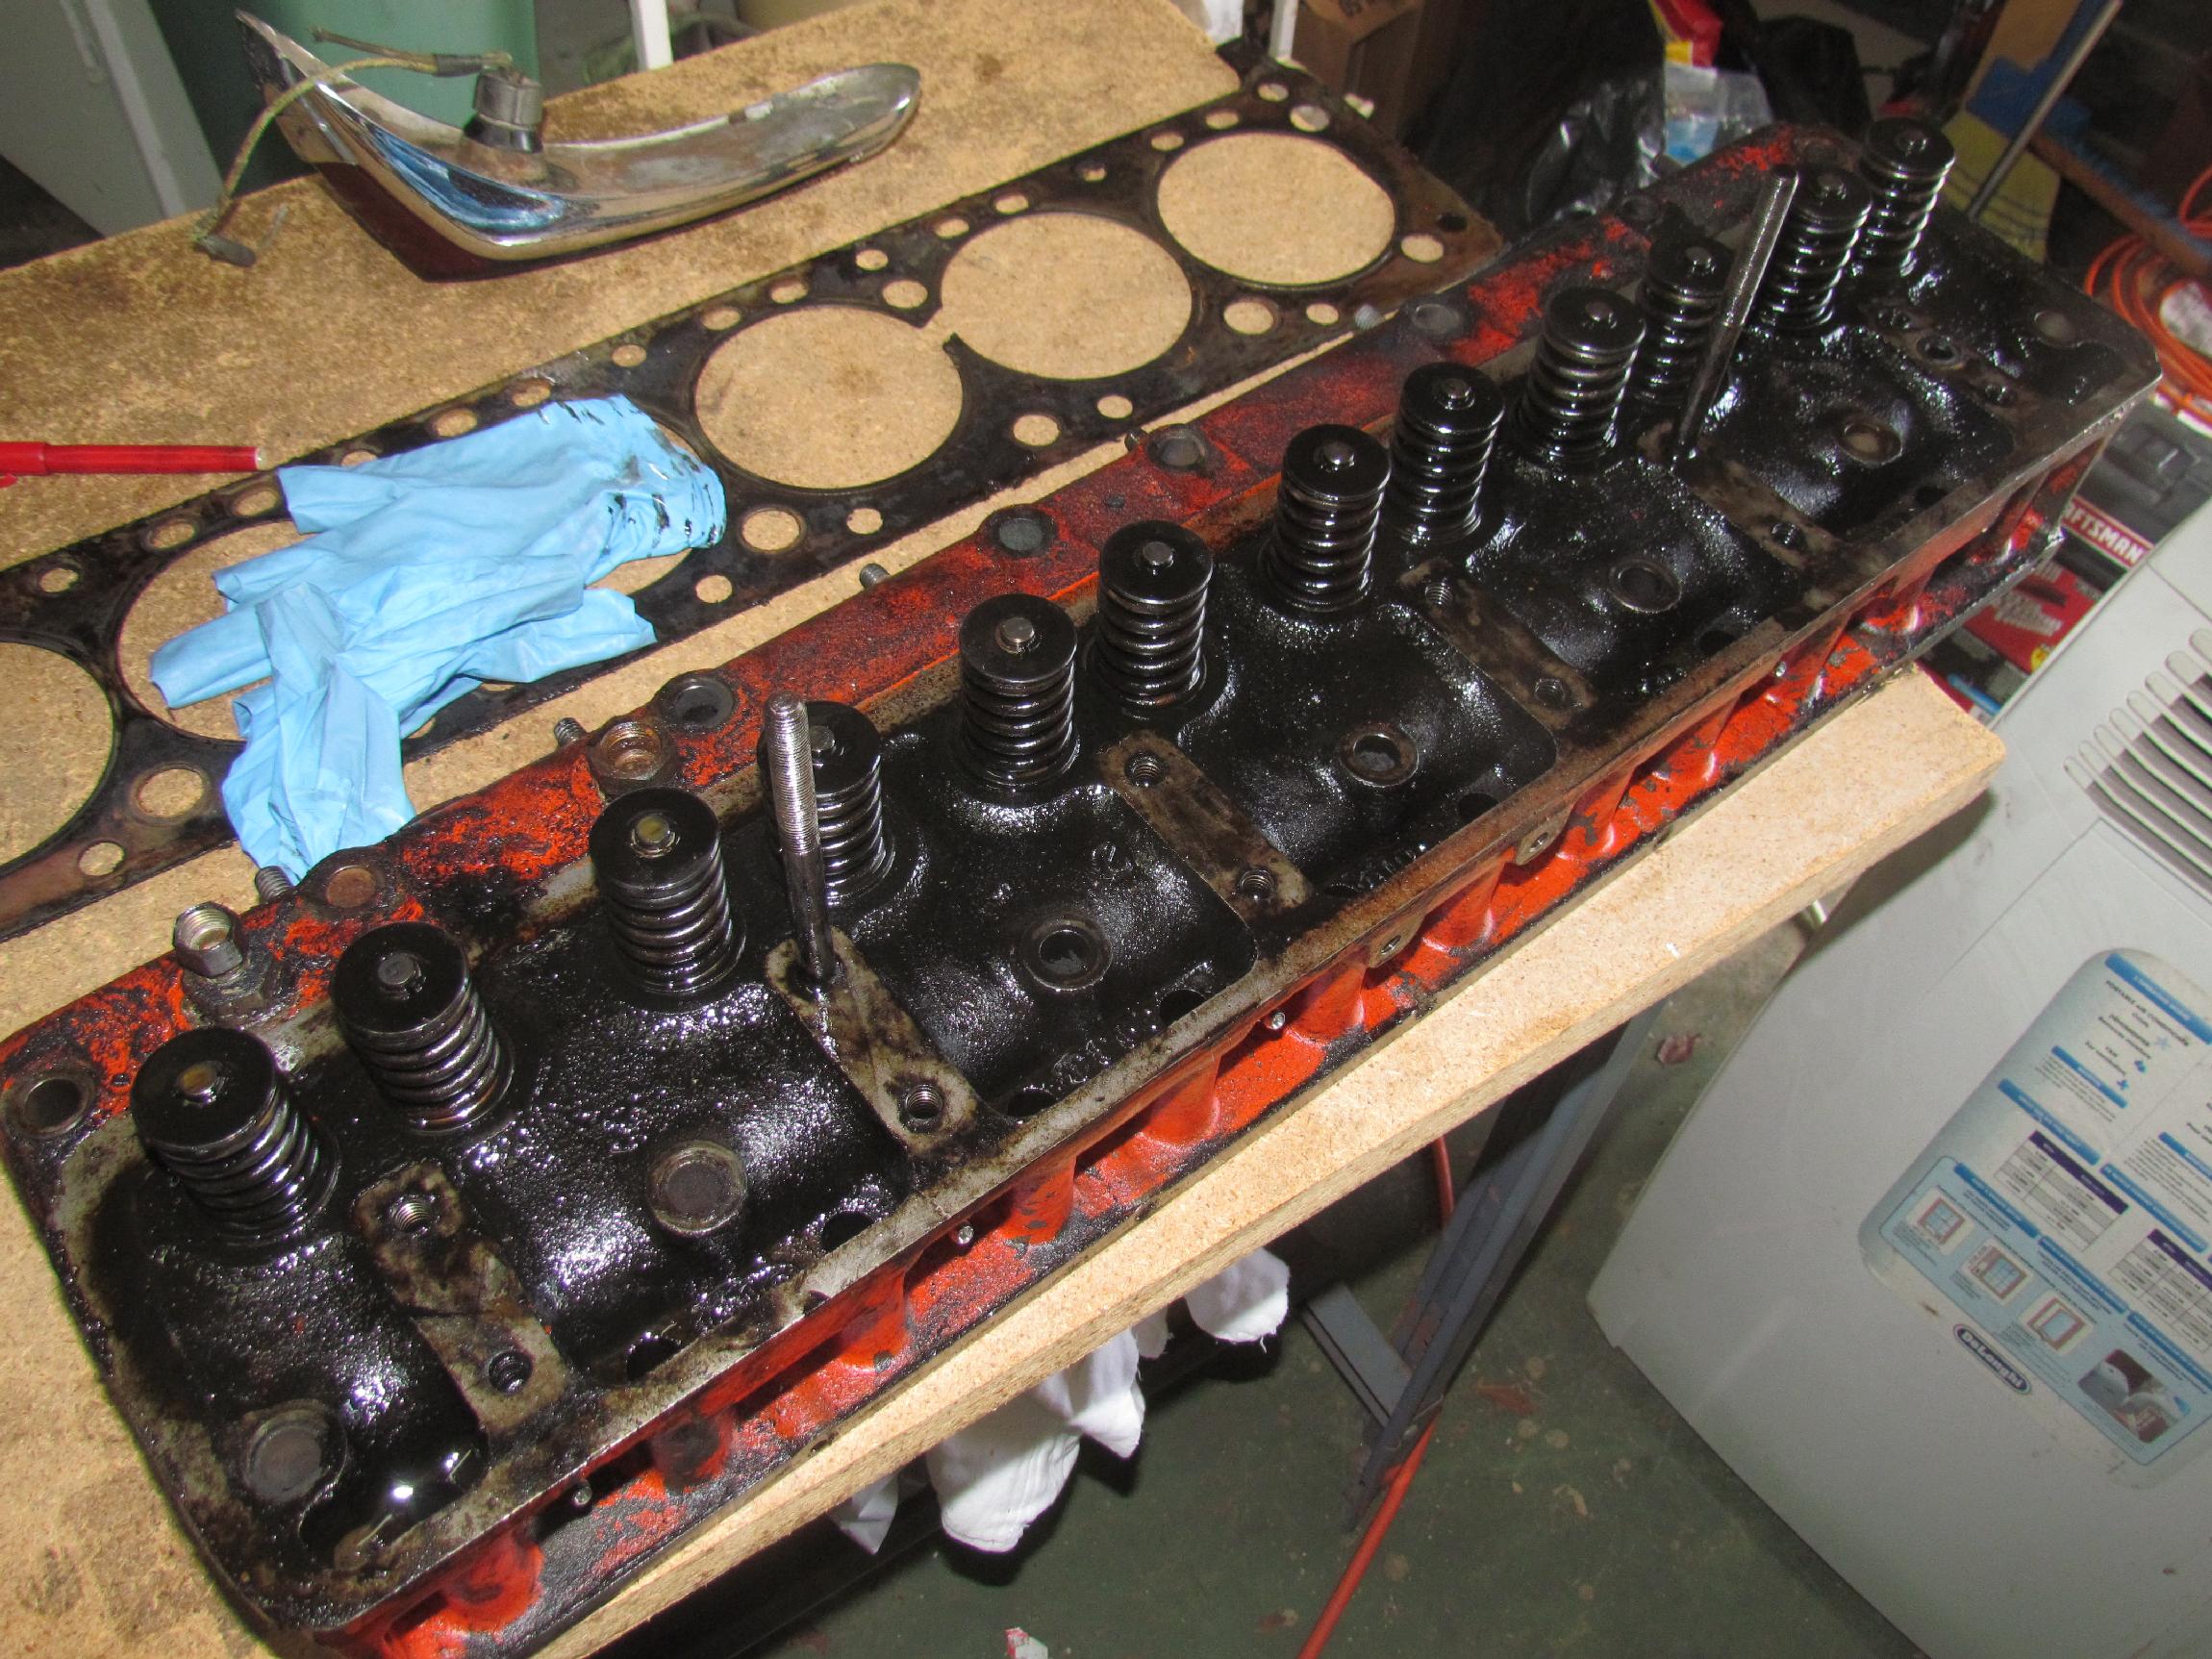 By mid-afternoon, we had the head off. I should have
gotten the hoist set up for this job sooner because the boys didn't
want to
wait for me to set it up now. The three of us lifted the head off the
engine from both sides and turned it. Then, Wayne and I carried it to
the workbench. Damn thing is heavy and we were both starting to flag by
the time we got there. I almost got Wayne's fingers when I set my end
down too fast. We do have a blown head gasket. A whole chunk of it was
missing between cylinders 4 and 5. Euge and Wayne took off and I shut
down shop. I was dehydrated and asleep before sunset.
By mid-afternoon, we had the head off. I should have
gotten the hoist set up for this job sooner because the boys didn't
want to
wait for me to set it up now. The three of us lifted the head off the
engine from both sides and turned it. Then, Wayne and I carried it to
the workbench. Damn thing is heavy and we were both starting to flag by
the time we got there. I almost got Wayne's fingers when I set my end
down too fast. We do have a blown head gasket. A whole chunk of it was
missing between cylinders 4 and 5. Euge and Wayne took off and I shut
down shop. I was dehydrated and asleep before sunset.
 July
12th 2015
After some minor maintenance on the Renegade yesterday morning, I
pulled Deerslayer's air cleaner out of the parts cleaner soup to wipe
it off and set it aside for the reassembly process down the road.
That's when I found out that the environment friendly Oil Eater
solution was also a paint eater. Oh well, two steps forward and one
step back.
July
12th 2015
After some minor maintenance on the Renegade yesterday morning, I
pulled Deerslayer's air cleaner out of the parts cleaner soup to wipe
it off and set it aside for the reassembly process down the road.
That's when I found out that the environment friendly Oil Eater
solution was also a paint eater. Oh well, two steps forward and one
step back.
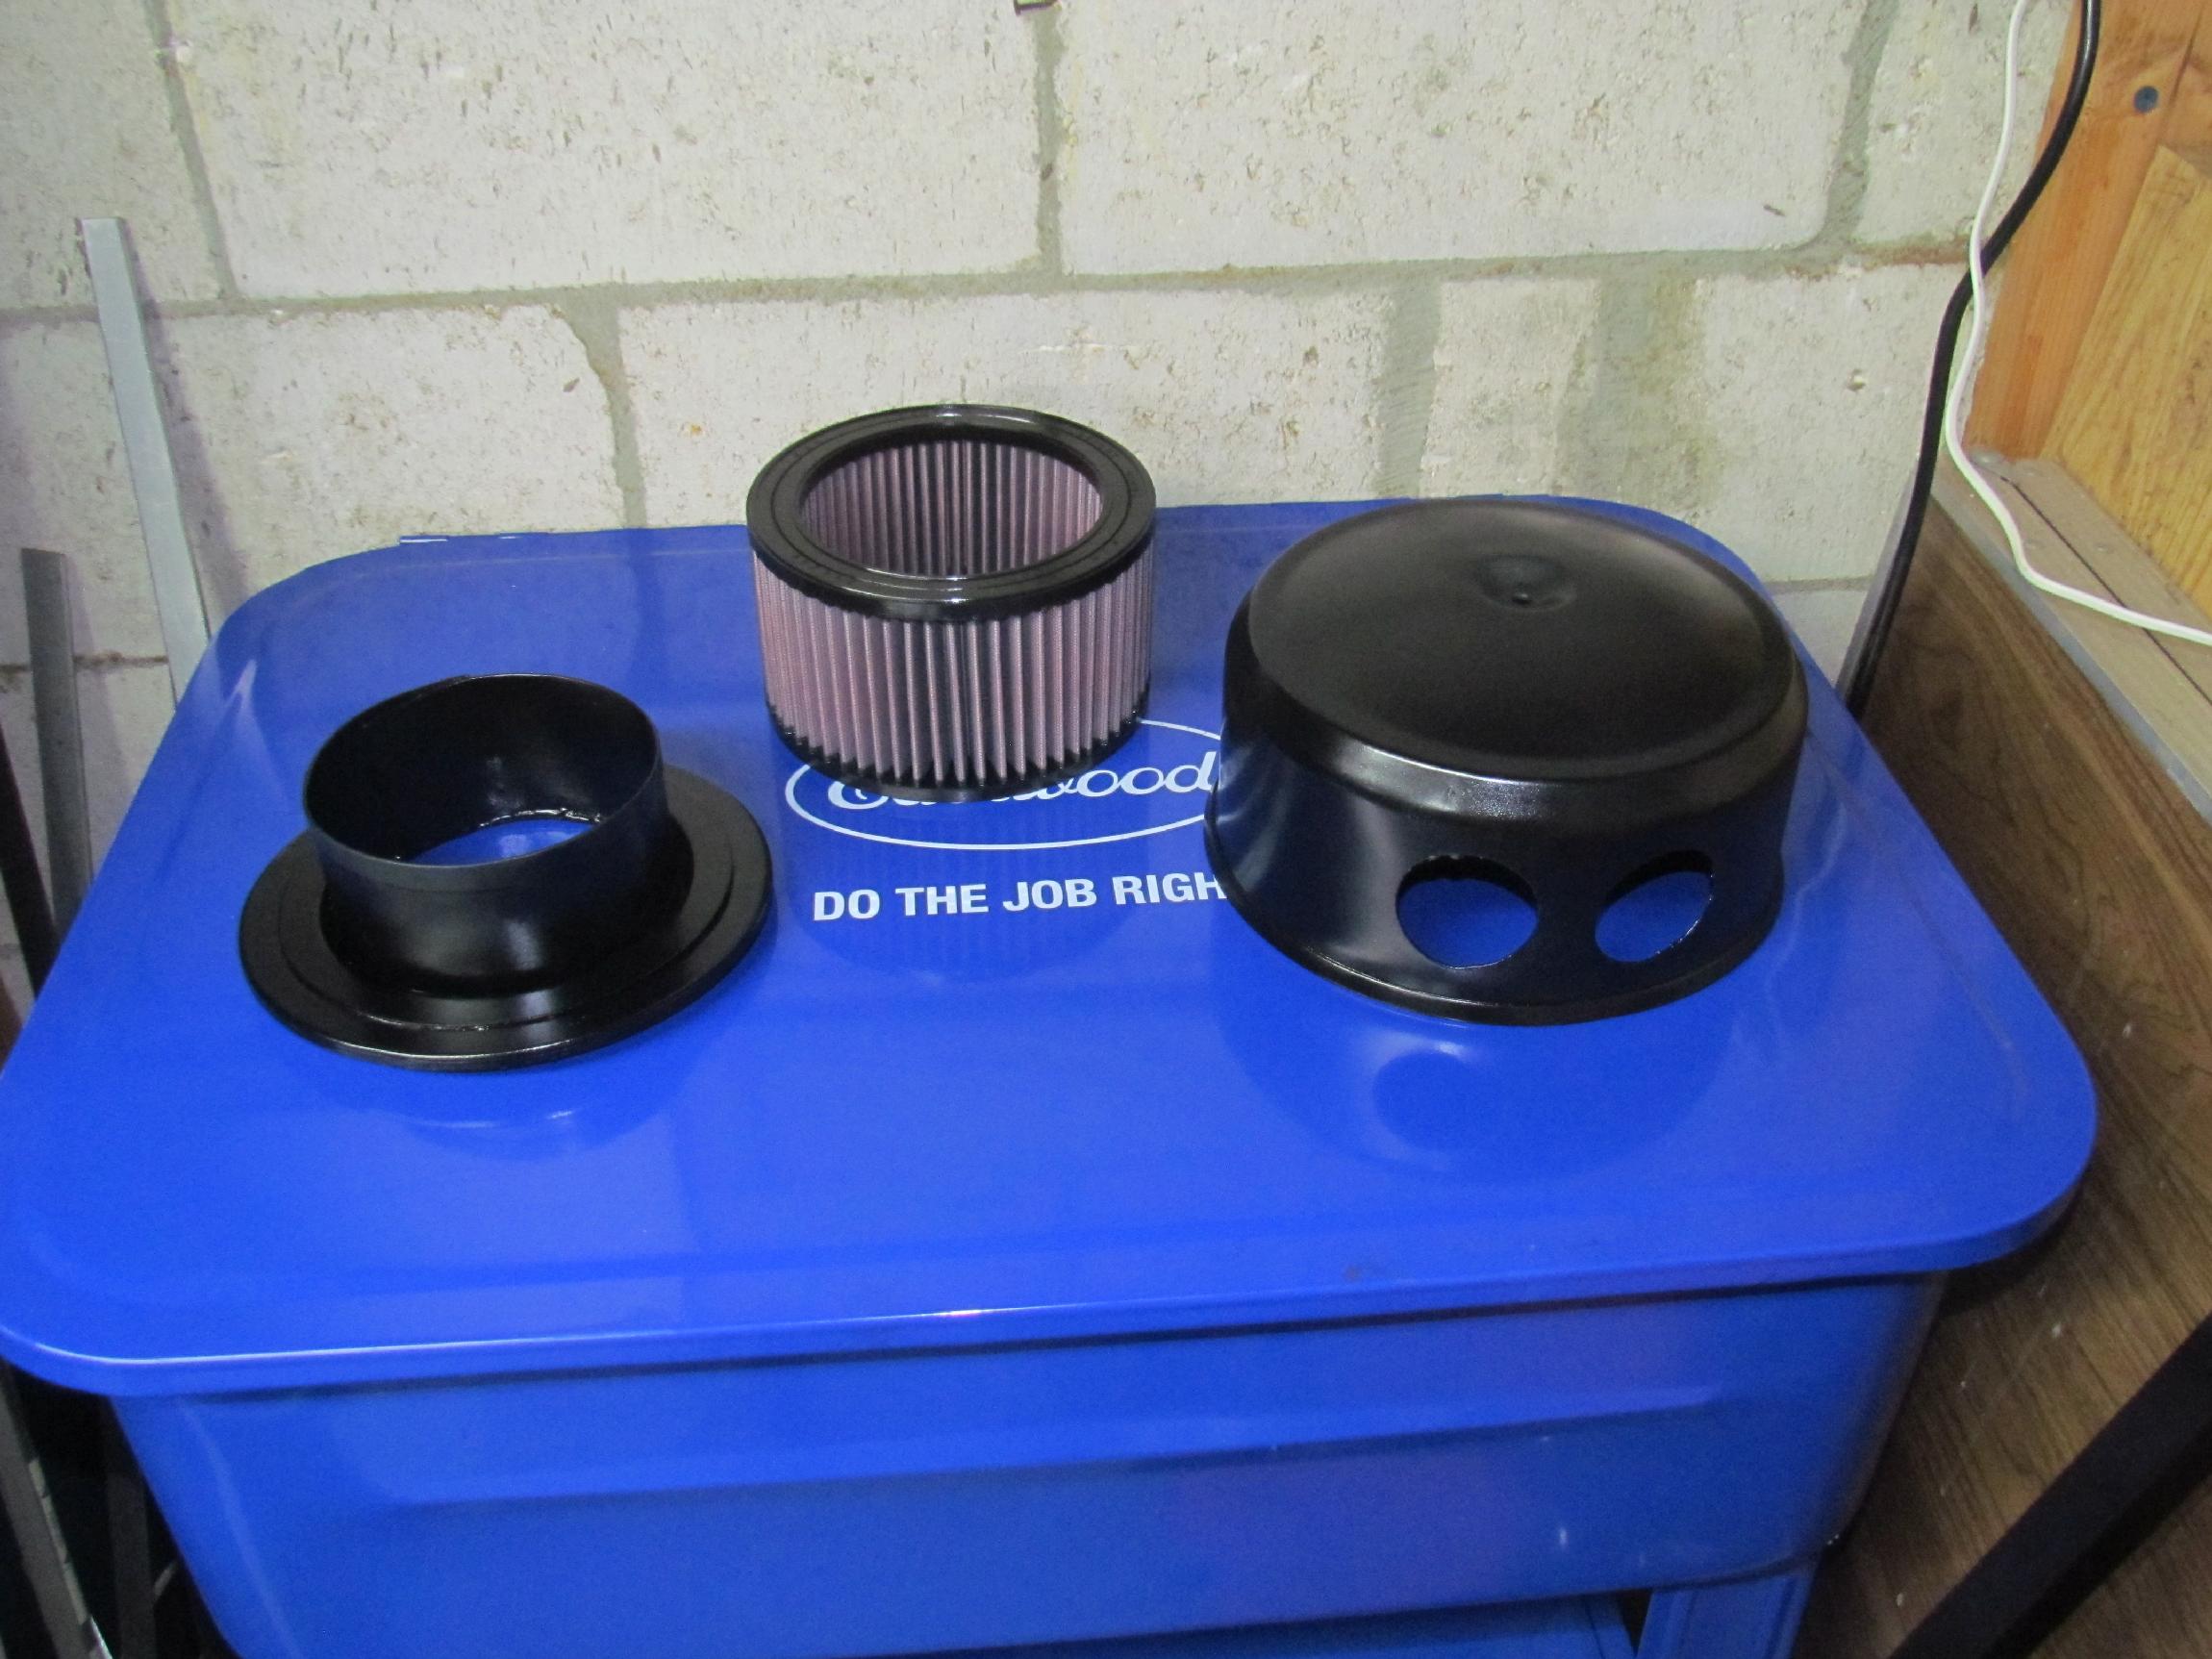 I sprayed a coat of Eastwood's Rust Encapsulator on the bottom piece
which had some surface rust and a coat of self-etching primer on the
top piece. Bounced around, reorganizing the shop for a couple of hours
and finished off both parts with a top coat of gloss black
Duplicolor engine paint. By mid-afternoon, the shop heat was sauna like
so I retreated to the comfort of the Flamingo Room.
I sprayed a coat of Eastwood's Rust Encapsulator on the bottom piece
which had some surface rust and a coat of self-etching primer on the
top piece. Bounced around, reorganizing the shop for a couple of hours
and finished off both parts with a top coat of gloss black
Duplicolor engine paint. By mid-afternoon, the shop heat was sauna like
so I retreated to the comfort of the Flamingo Room.
 July
16th 2015 My plan was to clean
the Jimmy block and pistons with Seafoam additive, Scotchbrite pads and
hand-to-hand combat technique. I was not looking forward to it. Gato
stopped in the shop for a few minutes and suggested "cookies". I had
not heard this term before and followed him down to his shop to see
what he was talking about. Turned out to be 2" Scotchbrite disks
with Rolok backing pad on a angle grinder air tool. Gato
wanted to lend me all this stuff but I knew I already had it. Went back
to my shop to hunt it down. Found the 3M 2" Grinding/Sanding/Finishing
Kit with the Rolok pad I had picked up years ago when I was still
working on BillyBob under the shadetree. I searched for my angle
grinder for some time until the realization that it had broke years ago
bubbled up to my memory surface. Ordered all this stuff at Amazon the
next day at work.
July
16th 2015 My plan was to clean
the Jimmy block and pistons with Seafoam additive, Scotchbrite pads and
hand-to-hand combat technique. I was not looking forward to it. Gato
stopped in the shop for a few minutes and suggested "cookies". I had
not heard this term before and followed him down to his shop to see
what he was talking about. Turned out to be 2" Scotchbrite disks
with Rolok backing pad on a angle grinder air tool. Gato
wanted to lend me all this stuff but I knew I already had it. Went back
to my shop to hunt it down. Found the 3M 2" Grinding/Sanding/Finishing
Kit with the Rolok pad I had picked up years ago when I was still
working on BillyBob under the shadetree. I searched for my angle
grinder for some time until the realization that it had broke years ago
bubbled up to my memory surface. Ordered all this stuff at Amazon the
next day at work.
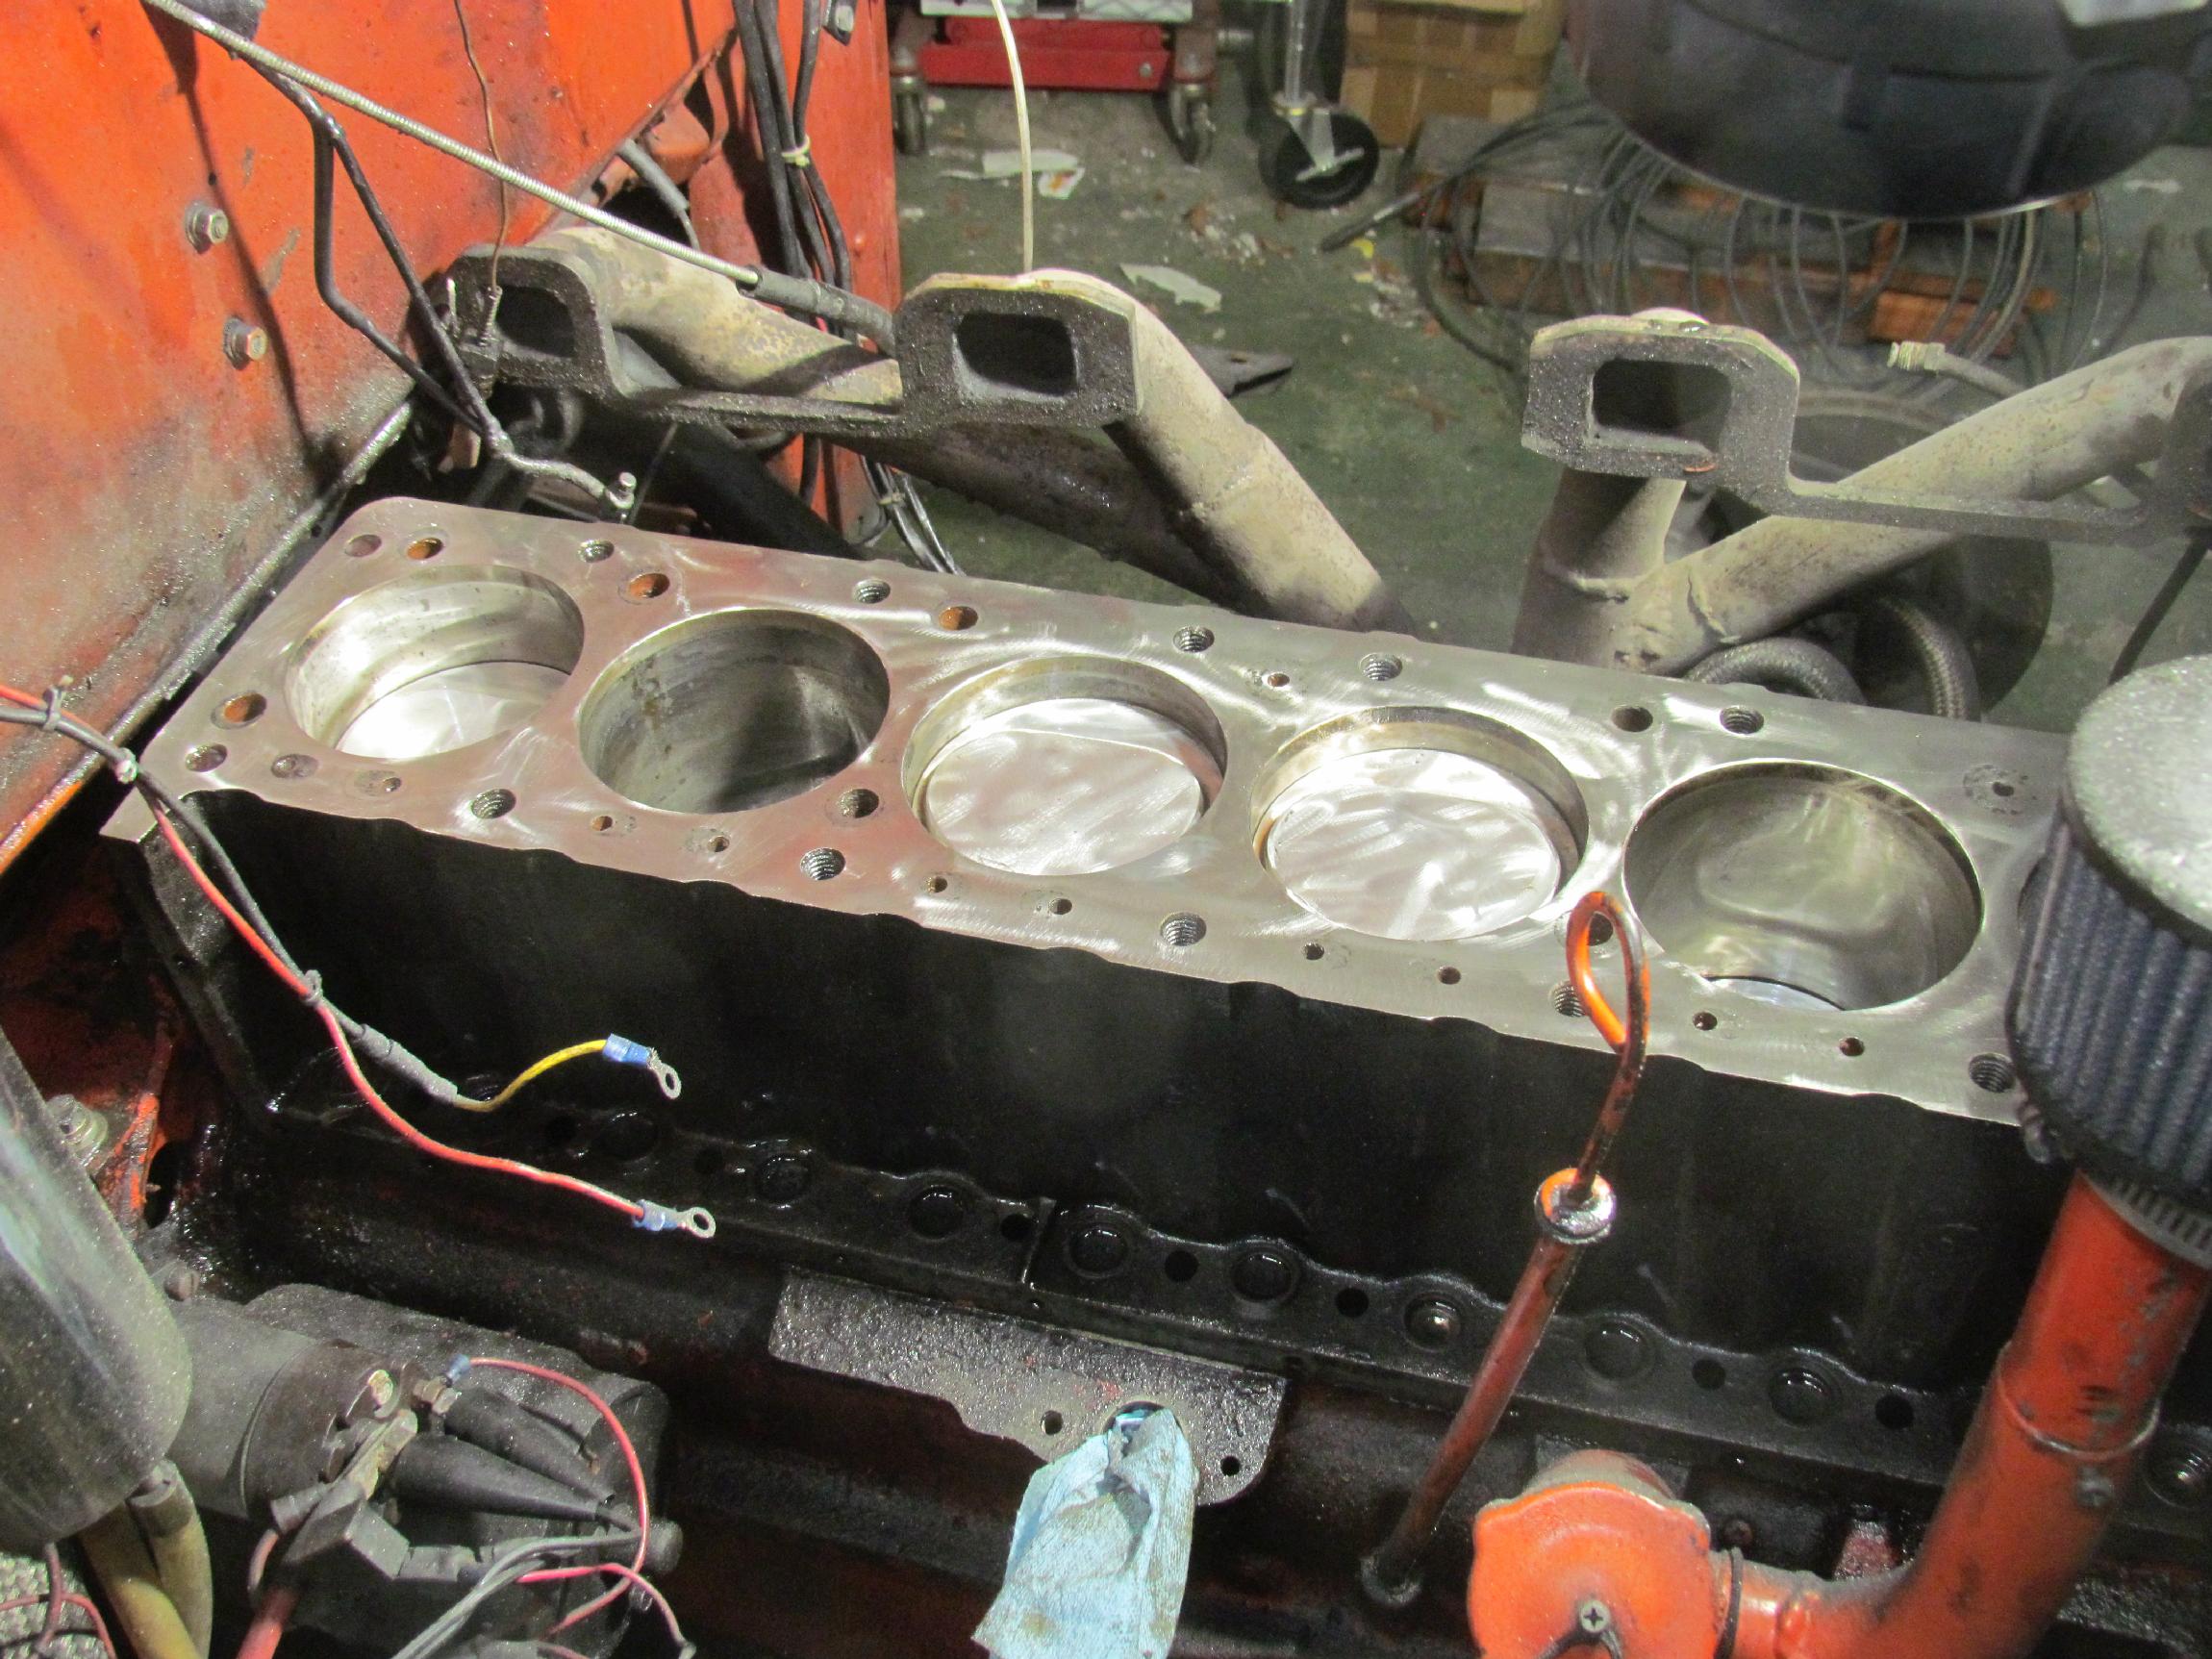 Yesterday, I made the first pass over the block and pistons with my new
cookie toy. Used the Seafoam additive to cut the carbon some too and
Marvel Mystery oil on the cylinder walls. Took a half day and Gato's
help saved me a lot of elbow grease and time. I take his borrowed tool
offers from time to time. But I don't like to use up his consumables .
. . Leave him without cookies, in this case.
Yesterday, I made the first pass over the block and pistons with my new
cookie toy. Used the Seafoam additive to cut the carbon some too and
Marvel Mystery oil on the cylinder walls. Took a half day and Gato's
help saved me a lot of elbow grease and time. I take his borrowed tool
offers from time to time. But I don't like to use up his consumables .
. . Leave him without cookies, in this case.
July 27th 2015 Over two weeks have gone by without any shop activity. In the past couple of years, I've turned "Manana" into an art form. Whenever anyone asks about the truck, my stanard answer is "Any day now". Nothing new to report yet but I thought to add some info regarding the cleaning of the piston tops and block surface. After Tony (Deerslayer's builder) read the above cleaning account, he emailed me.
Just damn! I suspected there might be a gotcha. Too late now but I'm posting this caution in the log entry and on FaceBook for the others following my tales. I guess we'll see how much I've shortened the Jimmy's life down the road. Tony also suggested that I try to vacuum out the cylinders around the pistons. Then rotate the engine a bit and wipe off any shit left by the rings . . . I did do lots of wiping, with Marvel Mystery oil during the cleaning process but it never hurts to do more and I will.
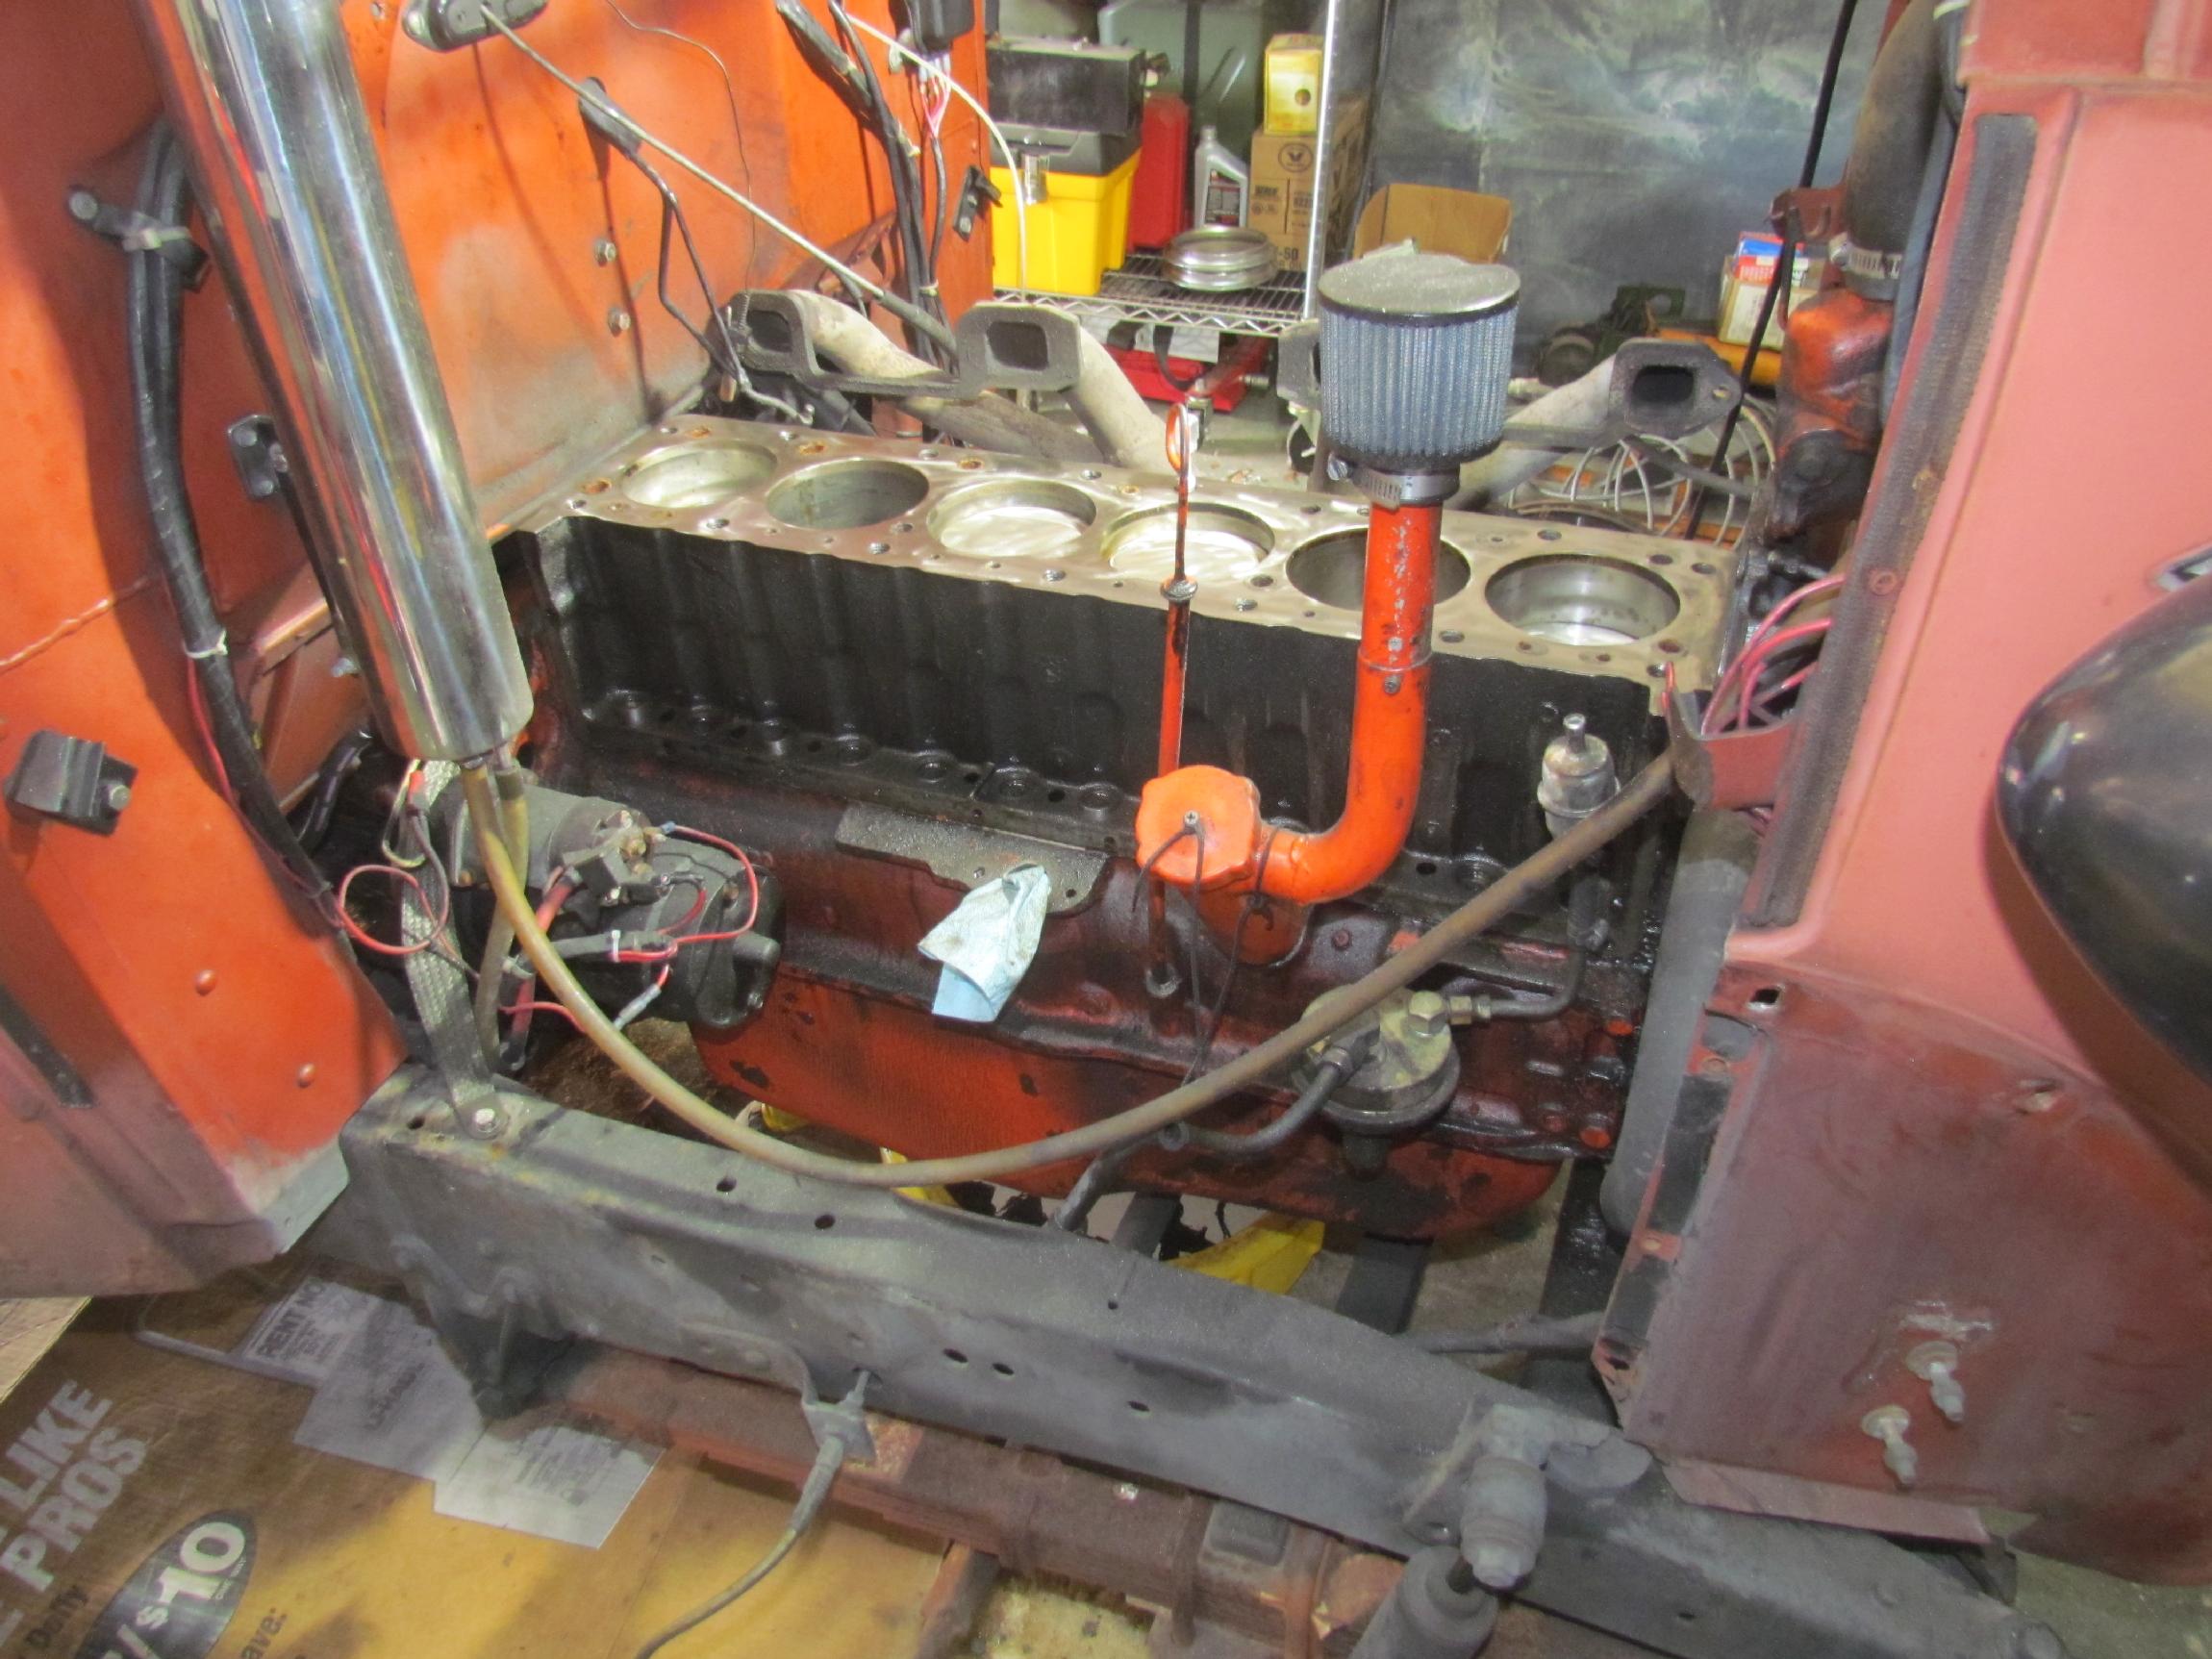 September
30th 2015 Finally got back to the
Deerslayer on my day off yesterday. Nothing exciting, just more
cleanup. My intention is to give each side of the engine and most of
the parts a cleaning before reassembly. Went to work on the passenger
side by removing the inner fender and putting it aside, out of the way,
in BillyBob's pickup bed with the other big parts from this
job.
September
30th 2015 Finally got back to the
Deerslayer on my day off yesterday. Nothing exciting, just more
cleanup. My intention is to give each side of the engine and most of
the parts a cleaning before reassembly. Went to work on the passenger
side by removing the inner fender and putting it aside, out of the way,
in BillyBob's pickup bed with the other big parts from this
job.
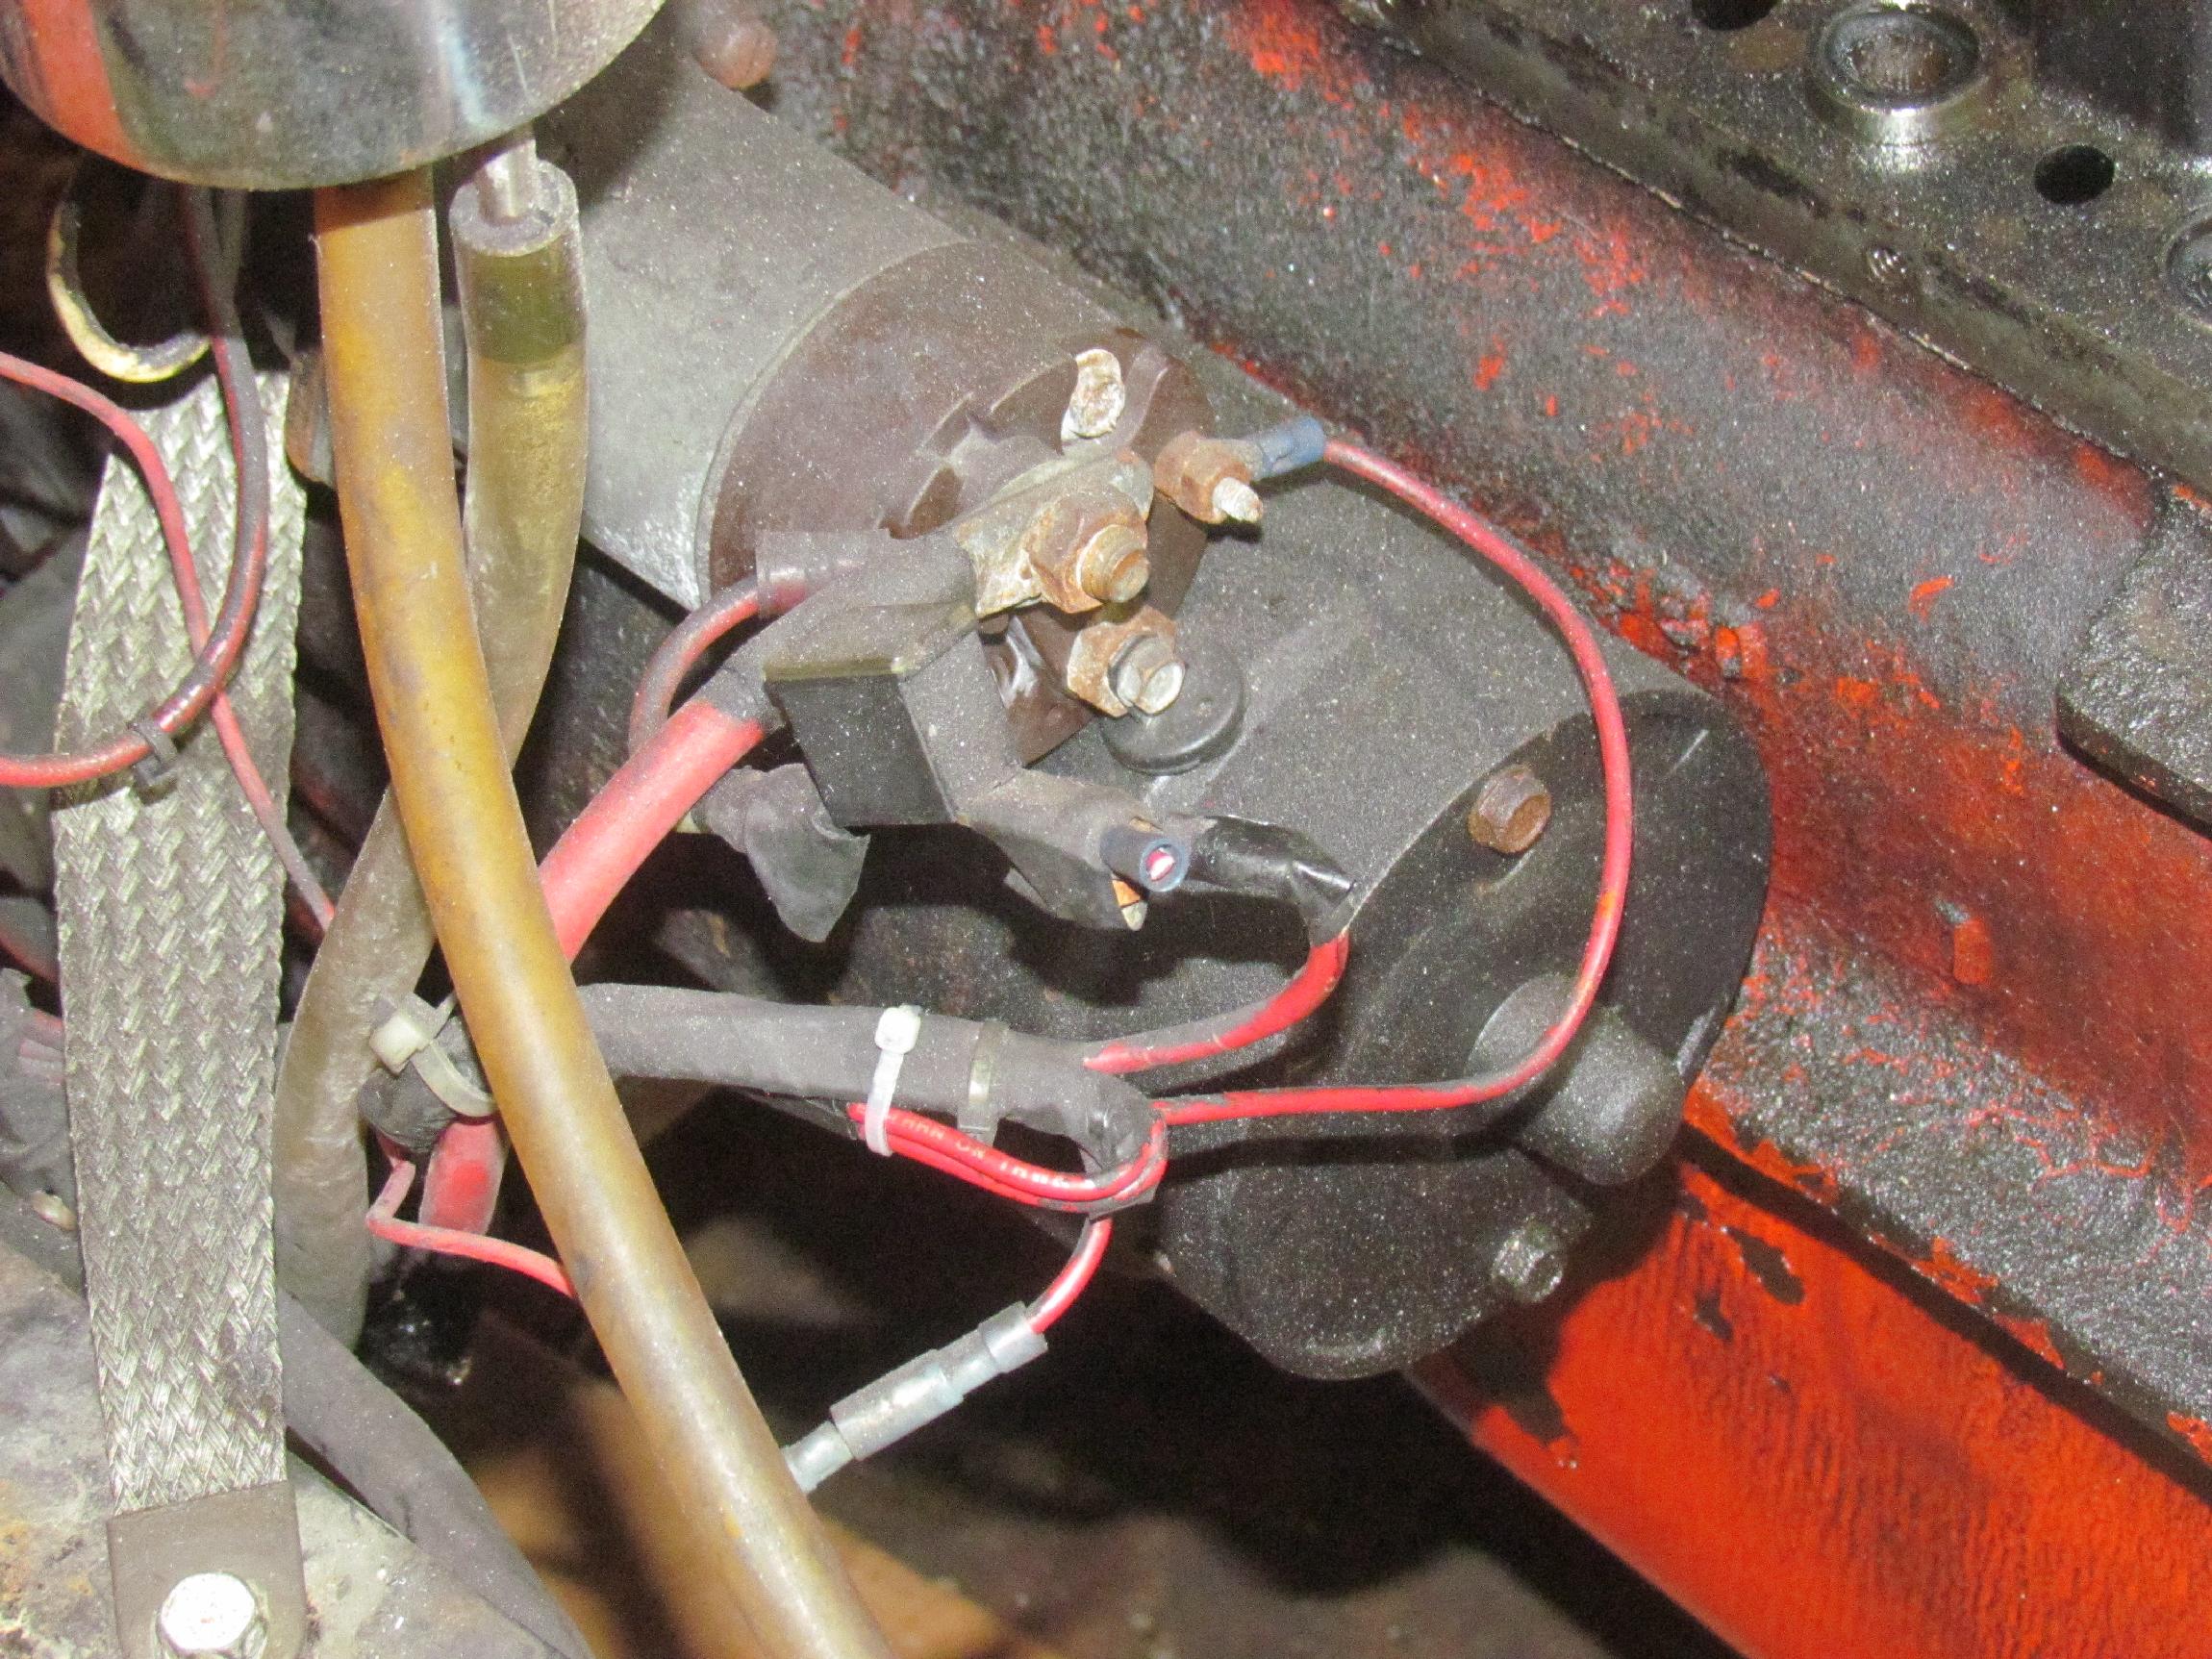 I tidied the starter wiring a bit but you can't tell that from the pic.
Tony experimented with this truck a lot before he sold it to me. At
least two engines, three transmissions and a variety of engine
accessory combinations. Tony, being an electrician by trade, wired
everything in red and taped off connections that were no longer useful.
Knowing little about 'tricity that will stick to my brain for long, I
am fearful of disturbing these connections that I cannot fathom. I
content myself with pruning them and organizing them into a tighter
bundle with wire ties.
I tidied the starter wiring a bit but you can't tell that from the pic.
Tony experimented with this truck a lot before he sold it to me. At
least two engines, three transmissions and a variety of engine
accessory combinations. Tony, being an electrician by trade, wired
everything in red and taped off connections that were no longer useful.
Knowing little about 'tricity that will stick to my brain for long, I
am fearful of disturbing these connections that I cannot fathom. I
content myself with pruning them and organizing them into a tighter
bundle with wire ties.
 Next, the starter was removed. While under the truck, taking out the
lower starter bolt, I discovered a ground strap from that bolt to the
frame. The ground strap I installed earlier in the year is, therefore,
redundant. I don't know why I didn't remember this. It isn't the first
time I've had the starter out of Deerslayer and probably won't be the
last.
Next, the starter was removed. While under the truck, taking out the
lower starter bolt, I discovered a ground strap from that bolt to the
frame. The ground strap I installed earlier in the year is, therefore,
redundant. I don't know why I didn't remember this. It isn't the first
time I've had the starter out of Deerslayer and probably won't be the
last.
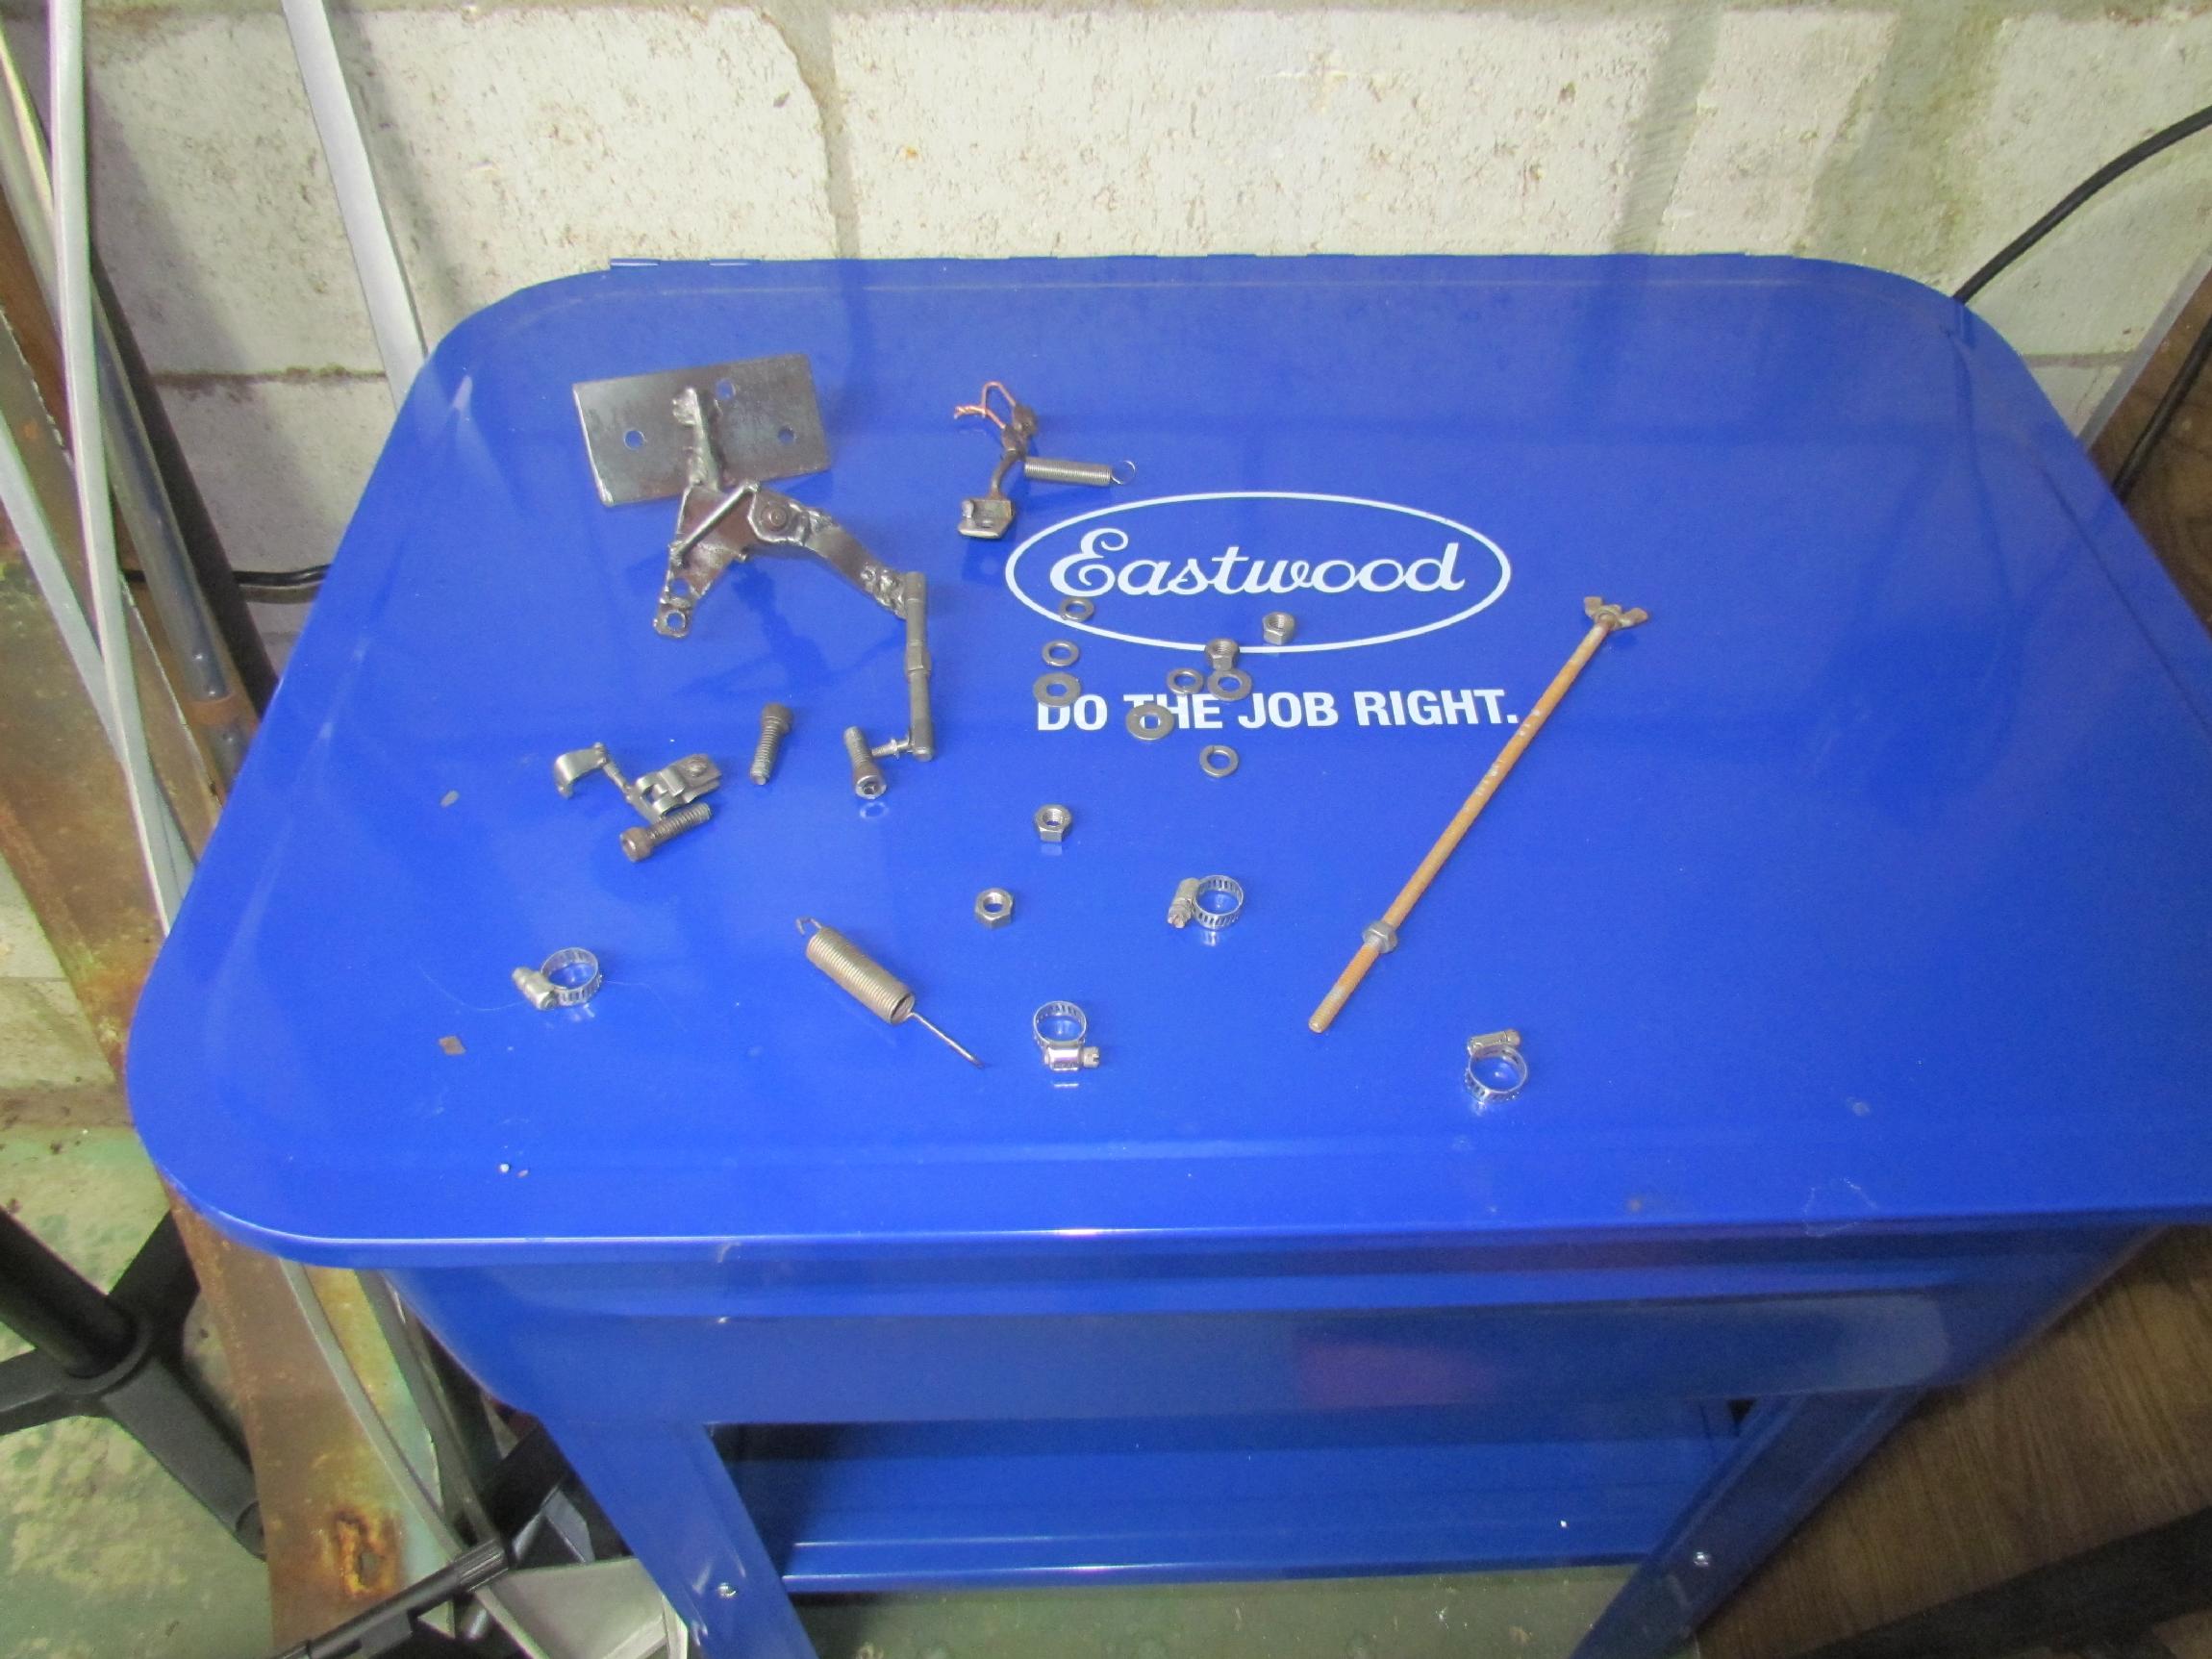 Before
retreating into the air conditioning of the Flamingo Room for the
day, I finished up by fishing items out of the parts washer soup that
had been there since Euge and Wayne had been over to take the head off.
These are the home-fabricated carb linkage parts that Tony fabbed up to
make the Carter AFB carburetor work with the Jimmy engine. I washed
them
off and threw them into the Eastwood Vibratory Tumbler with green
cutting media and metalwash solution for a couple of hours.
Before
retreating into the air conditioning of the Flamingo Room for the
day, I finished up by fishing items out of the parts washer soup that
had been there since Euge and Wayne had been over to take the head off.
These are the home-fabricated carb linkage parts that Tony fabbed up to
make the Carter AFB carburetor work with the Jimmy engine. I washed
them
off and threw them into the Eastwood Vibratory Tumbler with green
cutting media and metalwash solution for a couple of hours.
Okay, this log entry is long enuf to post and at a convenient junction. The next log entry will primarily cover cleaning for reassembly. Hopefully, my new found ambition is not just flash in the pan and I'll be able to pick up the pace.
| < Back
to Intro |
You can email me at ![]() webmaster@laroke.com
webmaster@laroke.com
Issued Friday October 2, 2015
Updated Tuesday June 19, 2018
copyright © 2008-2018 Larry R. Kephart all rights reserved
| | LRK Home | | Bio Info | | Krash Khronicles | | LAROKE | |
| | BettyLou | | BillyBob's Garage | | Rat Patrol | | Deerslayer | | Elvira | |
| | Land of the Free and Home of the Brave | |
| | Keppylou's Art | | WWI Soldier's Diary | |