| | LRK Home | | Bio Info | | Krash Khronicles | | LAROKE | |
| | BettyLou | | BillyBob's Garage | | Rat Patrol | | Deerslayer | | Elvira | |
| | Land of the Free and Home of the Brave | |
| | Keppylou's Art | | WWI Soldier's Diary | |
Tinkering with Deerslayer
![]()
DEERSLAYER LINKS including vendor sites for parts and tools as well as sites for old truck and hot rod organizations
![]()
TINKERING WITH DEERSLAYER chronicles the day-by-day maintenance and improvements episodes for Deerslayer, a '37 Chevy farm truck hot rod.
CRUISIN' WITH DEERSLAYER Roadtrips, cruise-in's and truck show stories and tall tales.
TONY'S DUNGEON Tony Pascarella's forum entries at OldGMCtrucks.com regarding Deerslayer, particularly the 302 GMC engine build in his farmhouse basement.
![]()
DEERSLAYER MAINTENANCE Ever changing detailing, oil change, lube, etc. maintenance routines specifically developed for Deerslayer, including required tools, materials and procedures.
PROJECT NAILHEAD Chronicles the rebuild of a 1954 Buick Roadmaster 322 nailhead engine as a future replacement for Deerslayer's Jimmy 302.
36. Headscratchin'
 January
19th 2015 There has
been an epic struggle going on between my weak will and my lazy ass.
For the last several months, my lazy ass has been winning. Murphy
stepped into the fray on Sunday to kick me in that lazy ass. I got up
early Sunday morning and cleaned up the engine a bit for the Cool
Wheels car show. Then I went to the coffee cruise-in at Einstein's in
Fort Lauderdale. Deerslayer's engine stumbled and cut out four times on
the way to coffee. Decided to go back to the shop instead of the show.
I lit a cigar as the last of my buddies left the coffee cruise-in
parking lot. Then Deerslayer's starter wouldn't work. Damnation! Couple
of taps with the ball peen I keep on the seat for just such occasions
and Deerslayer and I were on our way back to the shop.
January
19th 2015 There has
been an epic struggle going on between my weak will and my lazy ass.
For the last several months, my lazy ass has been winning. Murphy
stepped into the fray on Sunday to kick me in that lazy ass. I got up
early Sunday morning and cleaned up the engine a bit for the Cool
Wheels car show. Then I went to the coffee cruise-in at Einstein's in
Fort Lauderdale. Deerslayer's engine stumbled and cut out four times on
the way to coffee. Decided to go back to the shop instead of the show.
I lit a cigar as the last of my buddies left the coffee cruise-in
parking lot. Then Deerslayer's starter wouldn't work. Damnation! Couple
of taps with the ball peen I keep on the seat for just such occasions
and Deerslayer and I were on our way back to the shop.
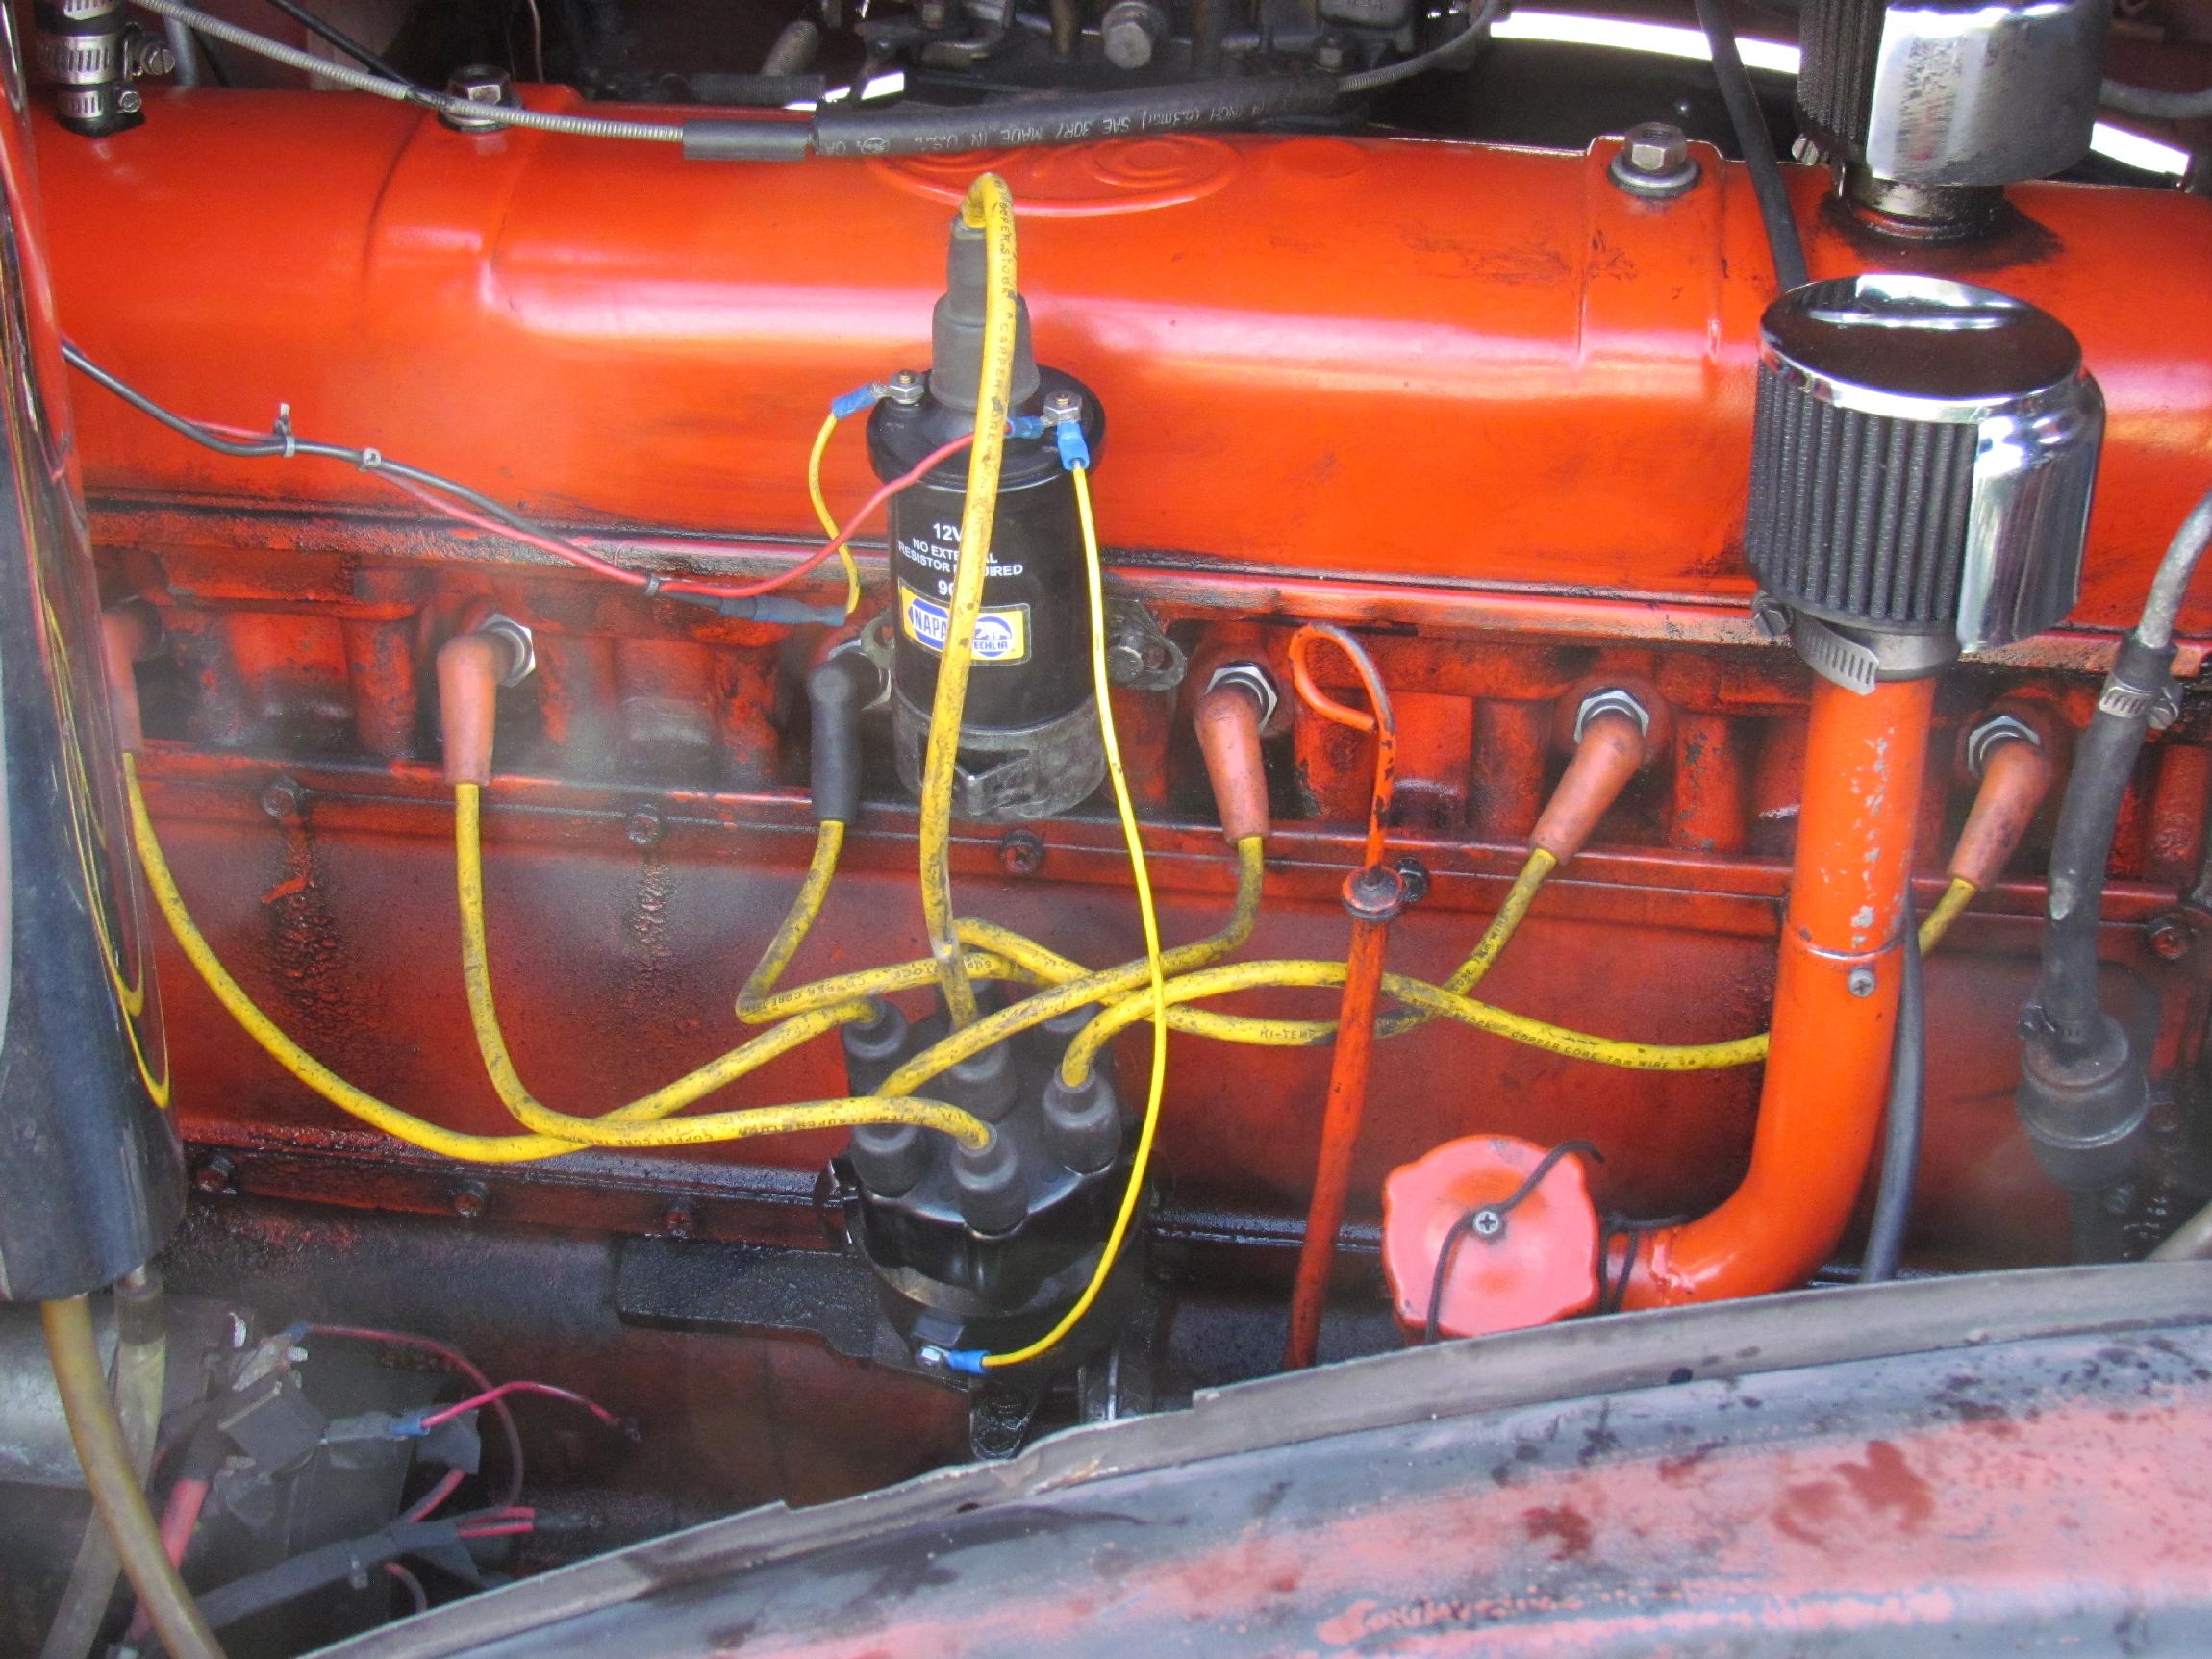
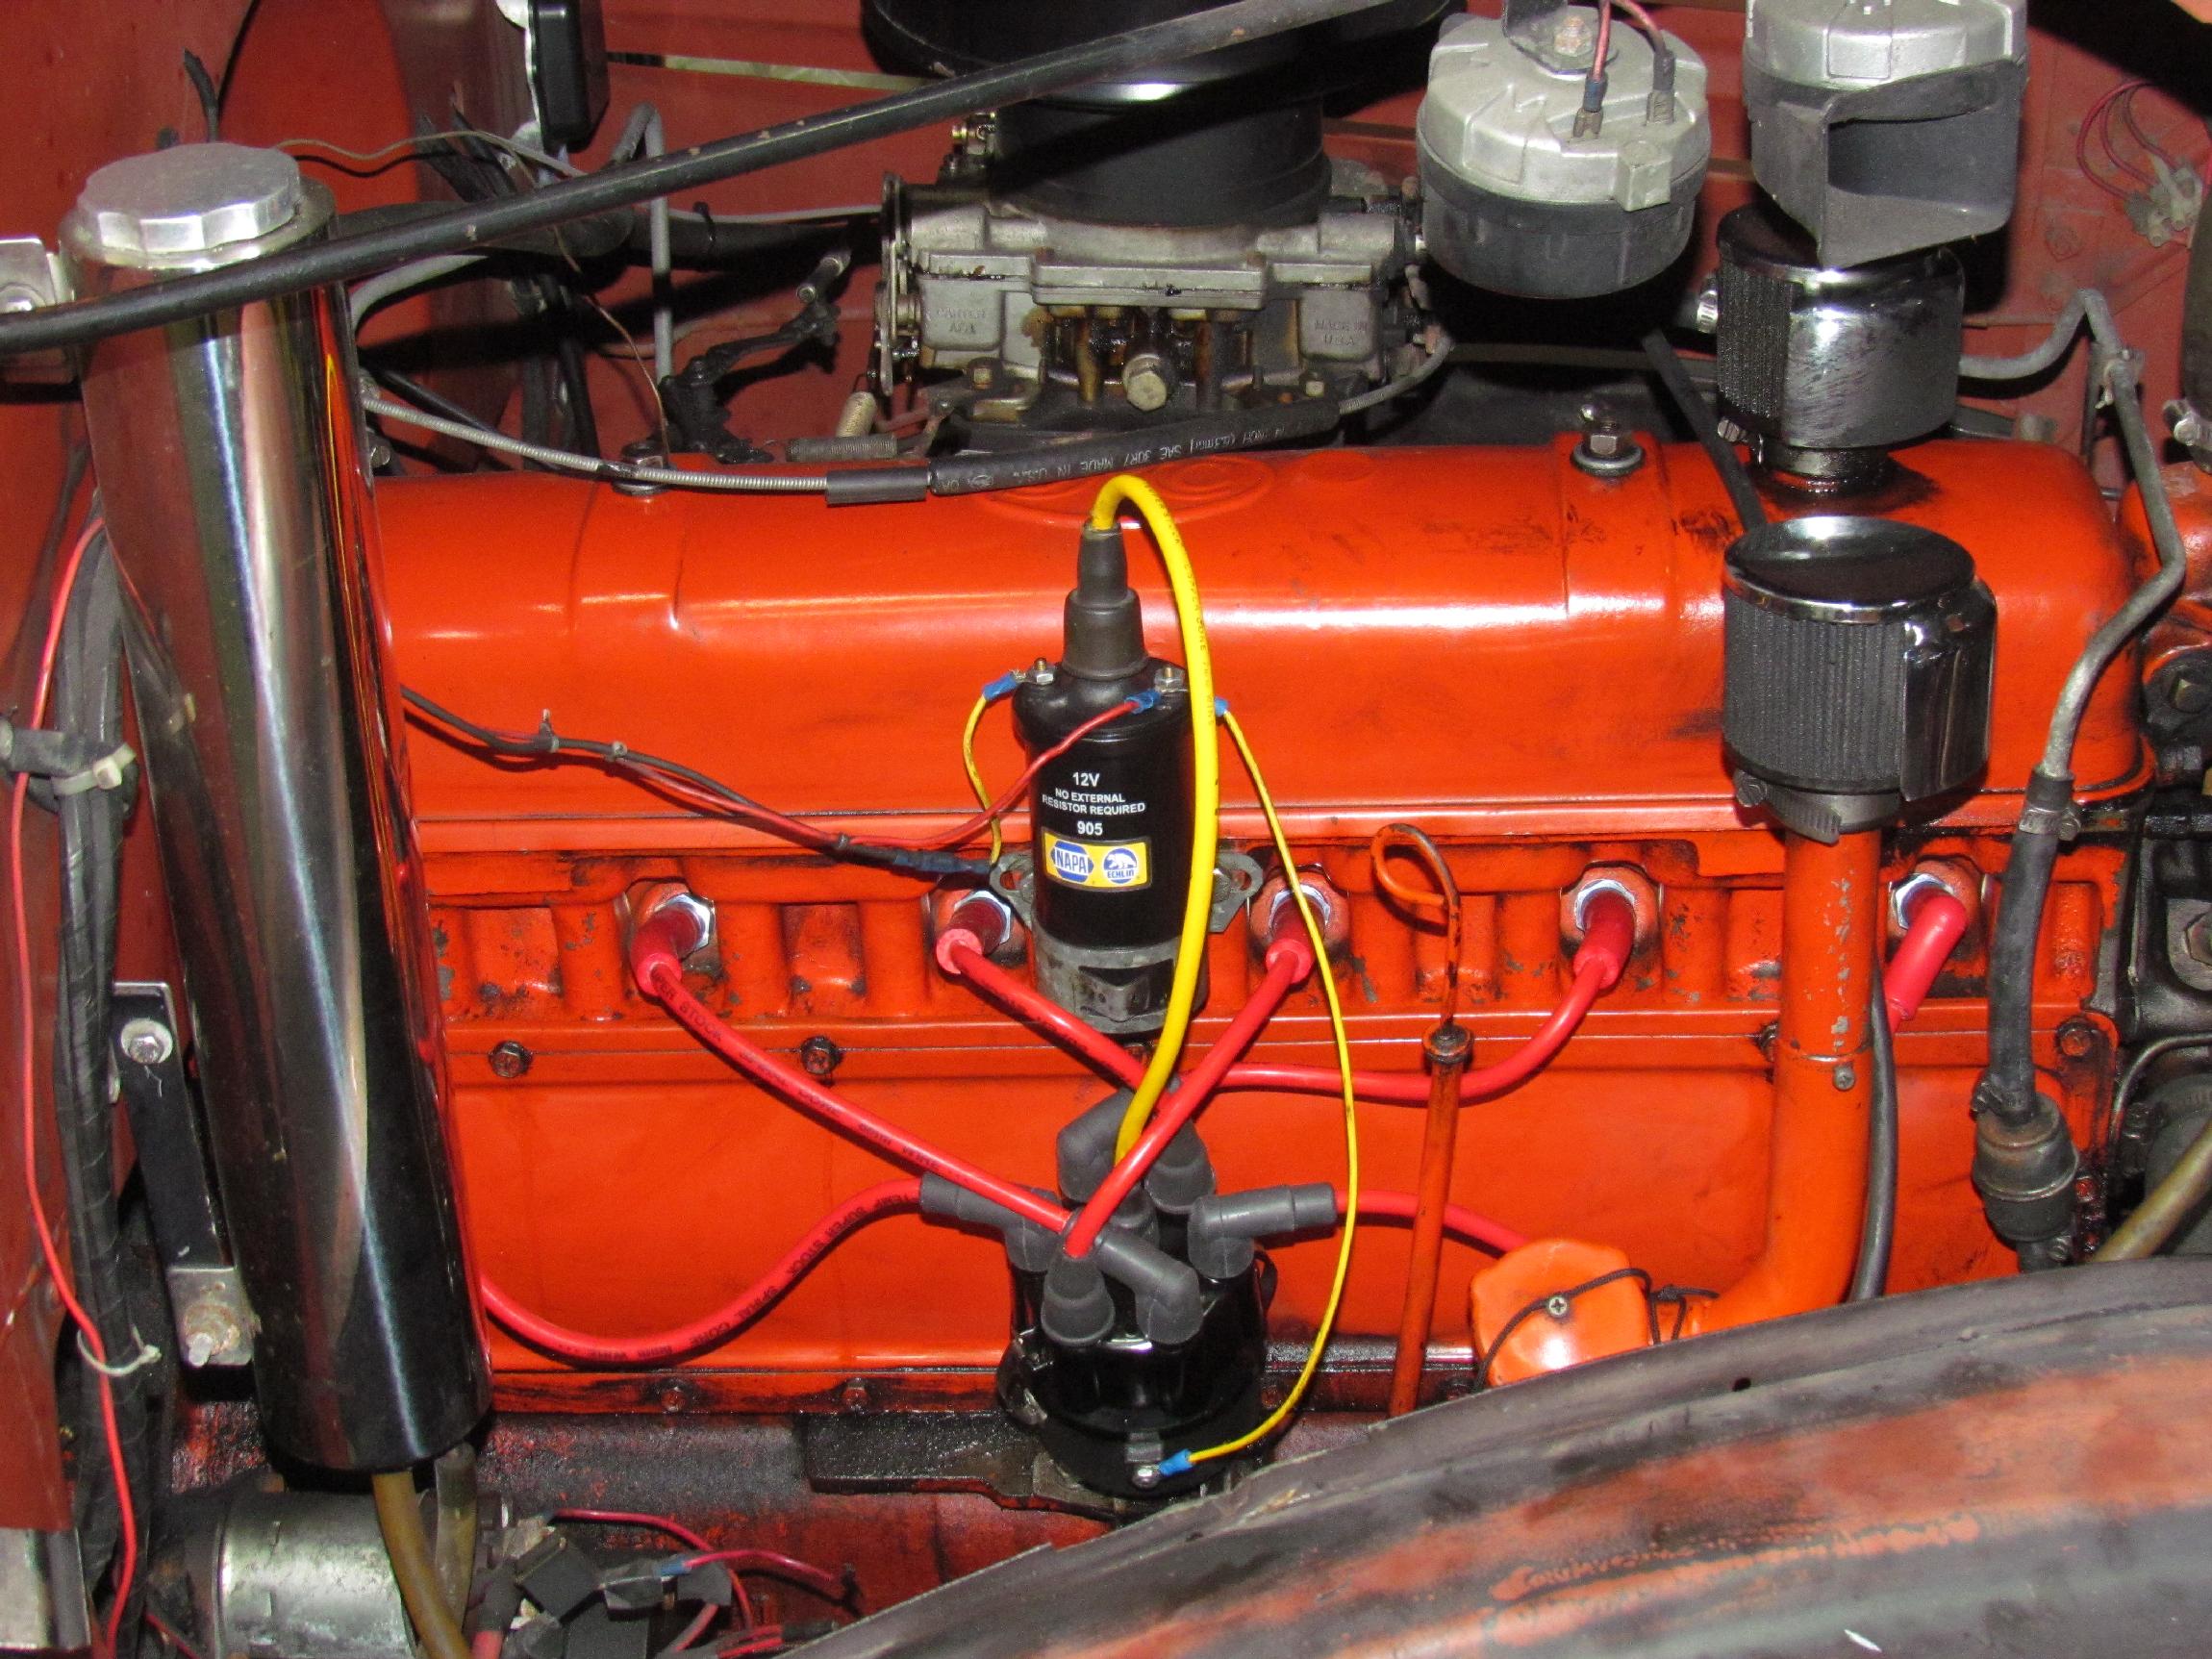
Made it back to the shop without further incident and set about putting a new condenser in Deerslayer's distributor. The wire between the coil negative terminal and the distributor broke during this process and I had to make a new one but the terminal on the distributor would not tighten up (I consider this to be a weak part of the Stovebolt six dizzy design. It can happen any time you change the points or condenser). I did get the engine started and it seemed okay.
That brings us up to this morning. Headed to work early, about five-thirty. Got about three-quarters of a mile and determined it would not be long before Deerslayer left me stranded in the middle of the highway. Limped back to the shop with the engine stumbling even worse than Sunday. Noticed that the tach needle was jumping when engine speed was constant. The tach connects to the negative coil terminal. At this point, I swapped in a new coil. No joy. Okay. I pulled a remanufactured stovebolt distributor out of the BillyBob roadtrip supplies and installed it after putting the vacuum advance gadget from the old dizzy on it. Positioned it by eyeball and after some pain in getting the oil pump slot aligned, It slipped in and the engine started right up. I made it to work by seven-thirty but I have some aftermath work to attend to tonite, including dwell and timing adjustments.
January 20th 2015 Got out the timing light and set the timing as soon as I got back to the shop last nite. Timing was off quite a bit and the ride was loud and without any power. Deerslayer was acting like his old self on the ride to the Krash Lab this morning. Couldn't find my dwell/tach instructions so, I downloaded a new set from the intarweb when I got in.
January 23rd 2015 I wandered into a Jimmy distributor discussion on OldGMCTrucks.com and it set off an anxiety attack. SlimSix wrote "Any distributor you get, you will want to be sure you get one with a cast gear on it to go with the cast iron camshaft in the engine. A steel gear will wear out the cam drive gear." After I expressed concern, Truckedup jumped in with "Larry,the cam is a reground cast iron." I asked "How can you determine whether the gear on the distributor is steel or iron?" Bill Hanlon pointed me to tclederman's post where he provided a link to http://chev235guy.blogspot.com/ and this pic.
Ordered a remanufactured Jimmy distributor from RockAuto and when I get back to the BillyBob Shop, I'll be eyeballin' my pile of distributors to try to determine if I'm in any trouble.
 February
3rd 2015 Sunday,
Deerslayer and I met up with a bunch of rodders and bikers at the 430
Boardroom to cruise (set up by Johan Amy) over to the Fort Lauderdale
Executive Airport for a WWII Warbirds display. Even tho' the bikes
tried to keep us together by blocking other traffic breaking up the
line of cruisers, Deerslayer and I got separated from the group when
too many mundane drivers in mundane cars got between us. I
eventually
caught up at the airport.
February
3rd 2015 Sunday,
Deerslayer and I met up with a bunch of rodders and bikers at the 430
Boardroom to cruise (set up by Johan Amy) over to the Fort Lauderdale
Executive Airport for a WWII Warbirds display. Even tho' the bikes
tried to keep us together by blocking other traffic breaking up the
line of cruisers, Deerslayer and I got separated from the group when
too many mundane drivers in mundane cars got between us. I
eventually
caught up at the airport.
Got to crawl thru a B24 Liberator and a B17 Fortress for the first time. Afterwards, headed back to the shop. For about the fifth time in a week, Deerslayer's starter motor would not crank at first. Got him started and I lost one cylinder five miles out from the shop. Nursed Deerslayer the rest of the way and checked plug wires after we got into the shop. They were all secure. Damnation!.
Called into the Krash Lab Monday morning and took the day off. Gapped and installed new plugs. Cleaned up the side of the engine a bit more before removing the old plugs with a product, new to me, called "Oil Eater". Spray on, wipe off and works pretty well. While removing the old plugs, found number six to be finger loose. This is probably why we limped home on five cylinders. Installed new plug wires and a new distributor cap for good measure. Too lazy to make my own performance plug wires so I bought a set from Quatratec intended for a 75-90 inline six Jeep. Plug wires three, four and five are shorter than I like and both coil wires provided in the kit are too short but it will do for now.
Took a test run to Pep Boys for a new battery. The battery in Deerslayer came out of my Jeep Renegade at least four years ago. It is an Optima red top. I put a battery tender on it every nite but, lately, the tender has been indicating "in the green" way too soon after connecting the tender. This, combined with the starter issues and the age of the battery led me to pop for a new one. Got another Optima red top. Back at the shop, The battery tender was put on the new battery after installation. Even tho' battery voltage read 12.39v, the tender took several hours to top it off. This morning the starter cranked better than it has in months and Deerslayer started sooner than he has for awhile. Lights were brighter on the drive to the Krash Lab.
 March
6th 2015
News on the Project Nailhead Front: Last week, I found a vintage set of
Hurst motor mounts for the nailhead (circa 1968). They arrived at the
Krash Lab today along with the original instruction sheet. I still have
to find, or fabricate, frame mounts when the time comes to install the
engine in the Deerslayer but that's quite a ways down the road yet.
March
6th 2015
News on the Project Nailhead Front: Last week, I found a vintage set of
Hurst motor mounts for the nailhead (circa 1968). They arrived at the
Krash Lab today along with the original instruction sheet. I still have
to find, or fabricate, frame mounts when the time comes to install the
engine in the Deerslayer but that's quite a ways down the road yet.
March 25th 2015 Still got a current drain in the electrical system, I think. I put the battery tender on Deerslayer every time I return to the shop and, if I miss a day, battery charge gets low enough to slow the starter performance. Last nite, the starter didn't want to turn over. After three tries, I switched the ignition off and tried again, starter turned and I switched the ignition back on and off we went. I've taken to disconnecting the the battery cut-off switch during the day at the Krash Lab to see what effect that has.
April 2nd 2015 Deerslayer was cranky on the way to the shop from the Krash Lab Tuesday night. Took Wednesday off to cipher it out. He was running a bit rough at idle and on acceleration. Don't know how to describe it. It's like a five pack a day smoker's rattle. Didn't get much done on the day off other than fill the Flamingo Room with ceegar smoke as I pondered the riddle. Gapped and installed a new set of plugs even 'tho the last time I installed new plugs was only two months ago. Those "new" plugs were all sooty when they came out. The ride to the Krash Lab this morning was slightly better but the rattle is still there. Now, I'm thinking exhaust leak.
April 7th 2015 No solutions yet. When cold, Deerslayer does not want to stay running. Am limiting myself to work commute and one or two cruise-ins a week until things improve. Starting is still problematic and starter cranking is slow. I switched battery tenders last nite just in case the charger might have gone bad but there was no noticeable improvement this morning. I adjusted the idle speed up to 700 rpm from 500 rpm to improve cold engine driving. The tradeoff is that the Jimmy may diesel on shutdown. We will see.
April 22nd 2015 The Jimmy 302's degraded performance has degraded a bit further so, I got up at four this morning and gapped a new set of plugs for it. The old ones, except for number one, were sooty but not as sooty as the ones I took out earlier this month. The ride to the Krash Lab was marginally better. Still lots of headscratchin' to do over the Jimmy's various issues.
April 23rd 2015 The ride to the shop last nite wasn't as pleasant as the ride up in the morning had been so, this morning, I got up early and swapped coils on the off-chance the new one I had installed a few months ago was going bad. The ride to work this morning seemed somewhat better but that may have been due to atmospherics as carbureted engines like cooler temperatures.. The stutter and roughness is still there, just muted a bit.
 April
24th 2015
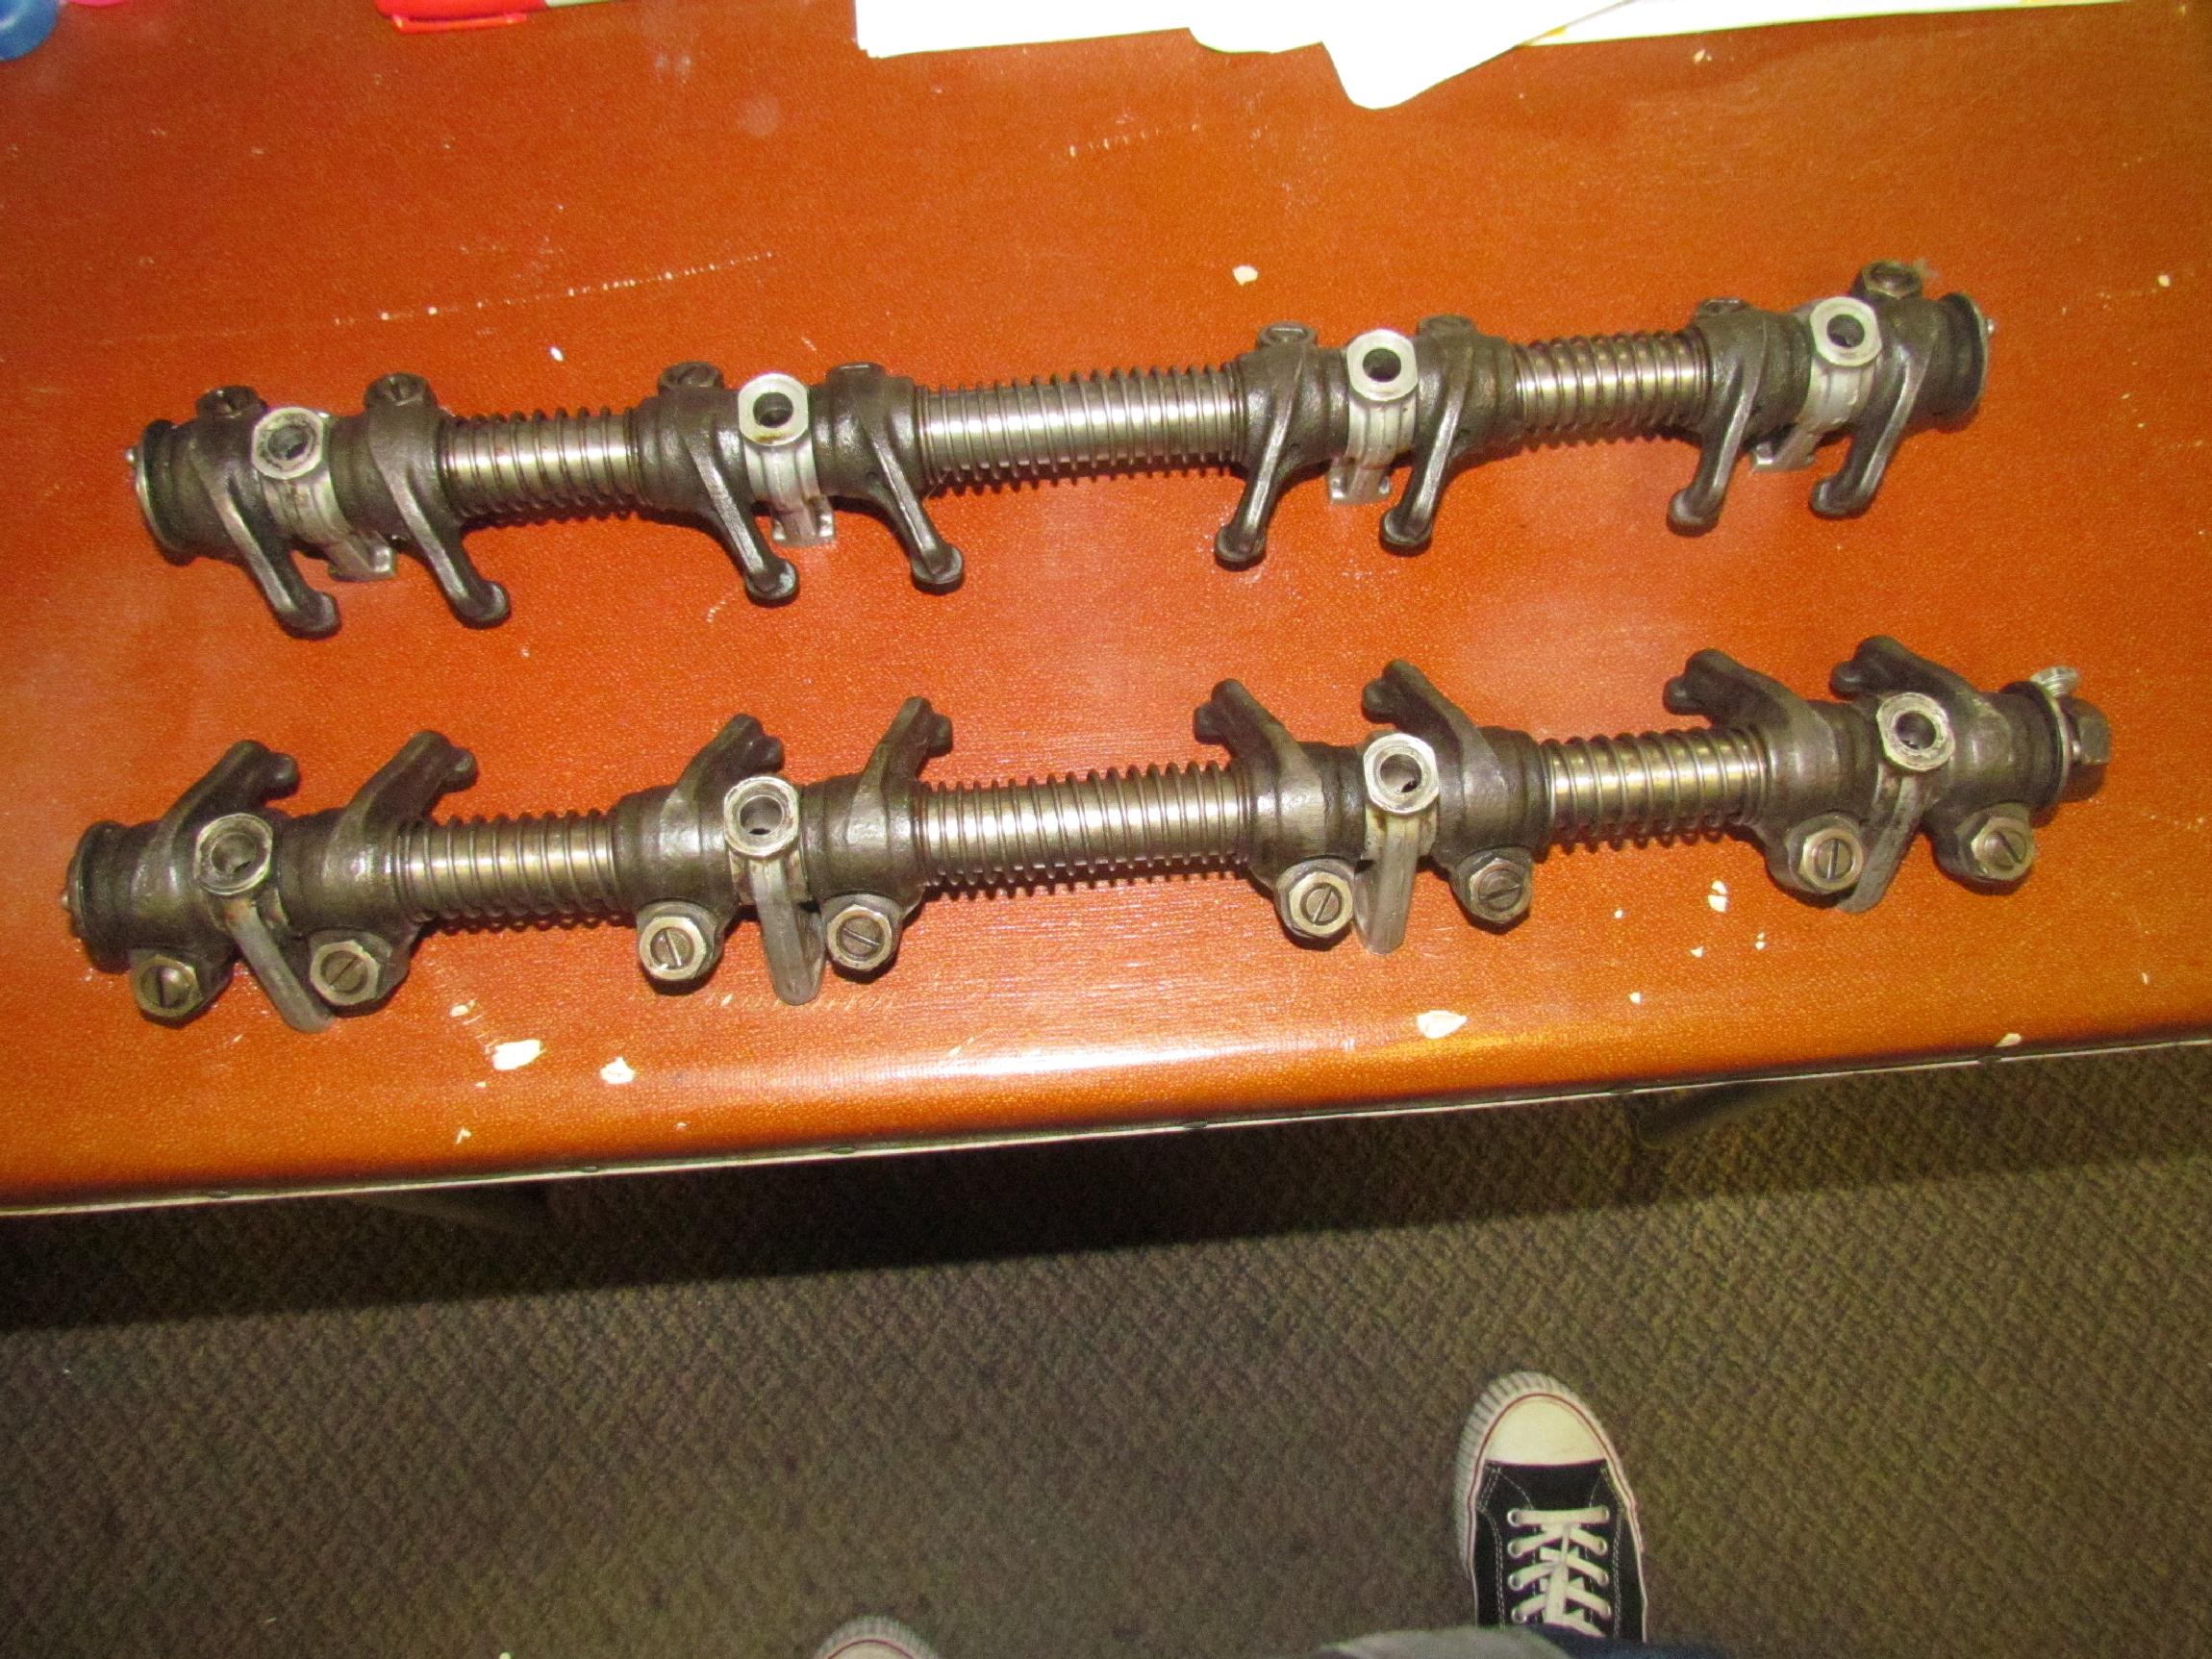
I've been running our UPS brownshirt at the Krash Lab ragged today.
He's not a young guy and he's had to deliver an Optima redtop battery
for the Deerslayer, a double-keyed crankshaft and bearings for the
BillyBob 4-71 blower project and these rocker arm assemblies for the
Deerslayer Buick Nailhead project. I got a Isky solid lifter cam for
the nailhead sometime back. If you don't go for juice lifters, you have
to use adjustable rockers or adjustable pushrods. Back in the day,
Gotha made adjustable rockers and several cam kits, including those
from Crane and Isky could be purchased with adjustable rockers. I got
these used adjustable rocker assemblies from Russ Martin of Centerville
Auto Repair, the number one guru of the nailhead world. These are Buick
Export rocker assemblies. "Export" was Buick's performance parts
program at the time. I am a happy guy today.
April
24th 2015
I've been running our UPS brownshirt at the Krash Lab ragged today.
He's not a young guy and he's had to deliver an Optima redtop battery
for the Deerslayer, a double-keyed crankshaft and bearings for the
BillyBob 4-71 blower project and these rocker arm assemblies for the
Deerslayer Buick Nailhead project. I got a Isky solid lifter cam for
the nailhead sometime back. If you don't go for juice lifters, you have
to use adjustable rockers or adjustable pushrods. Back in the day,
Gotha made adjustable rockers and several cam kits, including those
from Crane and Isky could be purchased with adjustable rockers. I got
these used adjustable rocker assemblies from Russ Martin of Centerville
Auto Repair, the number one guru of the nailhead world. These are Buick
Export rocker assemblies. "Export" was Buick's performance parts
program at the time. I am a happy guy today.
 April 28th 2015 At
the Hog BBQ
cruise-in Thursday nite my friend, Tommy Comet, found the probable
source of the exhaust leak, a crack in one of the header welds. Another
friend, Euge Reidy, suggested JB Weld as a fix. I rejected the idea at
first. Then I thought about it and searched the intarweb to
see how many had tried this. At the JB Weld website I found
the following FAQ "can
withstand a constant temperature of 500ş F. The
maximum temperature threshold is approximately 600ş F for a
short term (10 minutes)."
April 28th 2015 At
the Hog BBQ
cruise-in Thursday nite my friend, Tommy Comet, found the probable
source of the exhaust leak, a crack in one of the header welds. Another
friend, Euge Reidy, suggested JB Weld as a fix. I rejected the idea at
first. Then I thought about it and searched the intarweb to
see how many had tried this. At the JB Weld website I found
the following FAQ "can
withstand a constant temperature of 500ş F. The
maximum temperature threshold is approximately 600ş F for a
short term (10 minutes)."
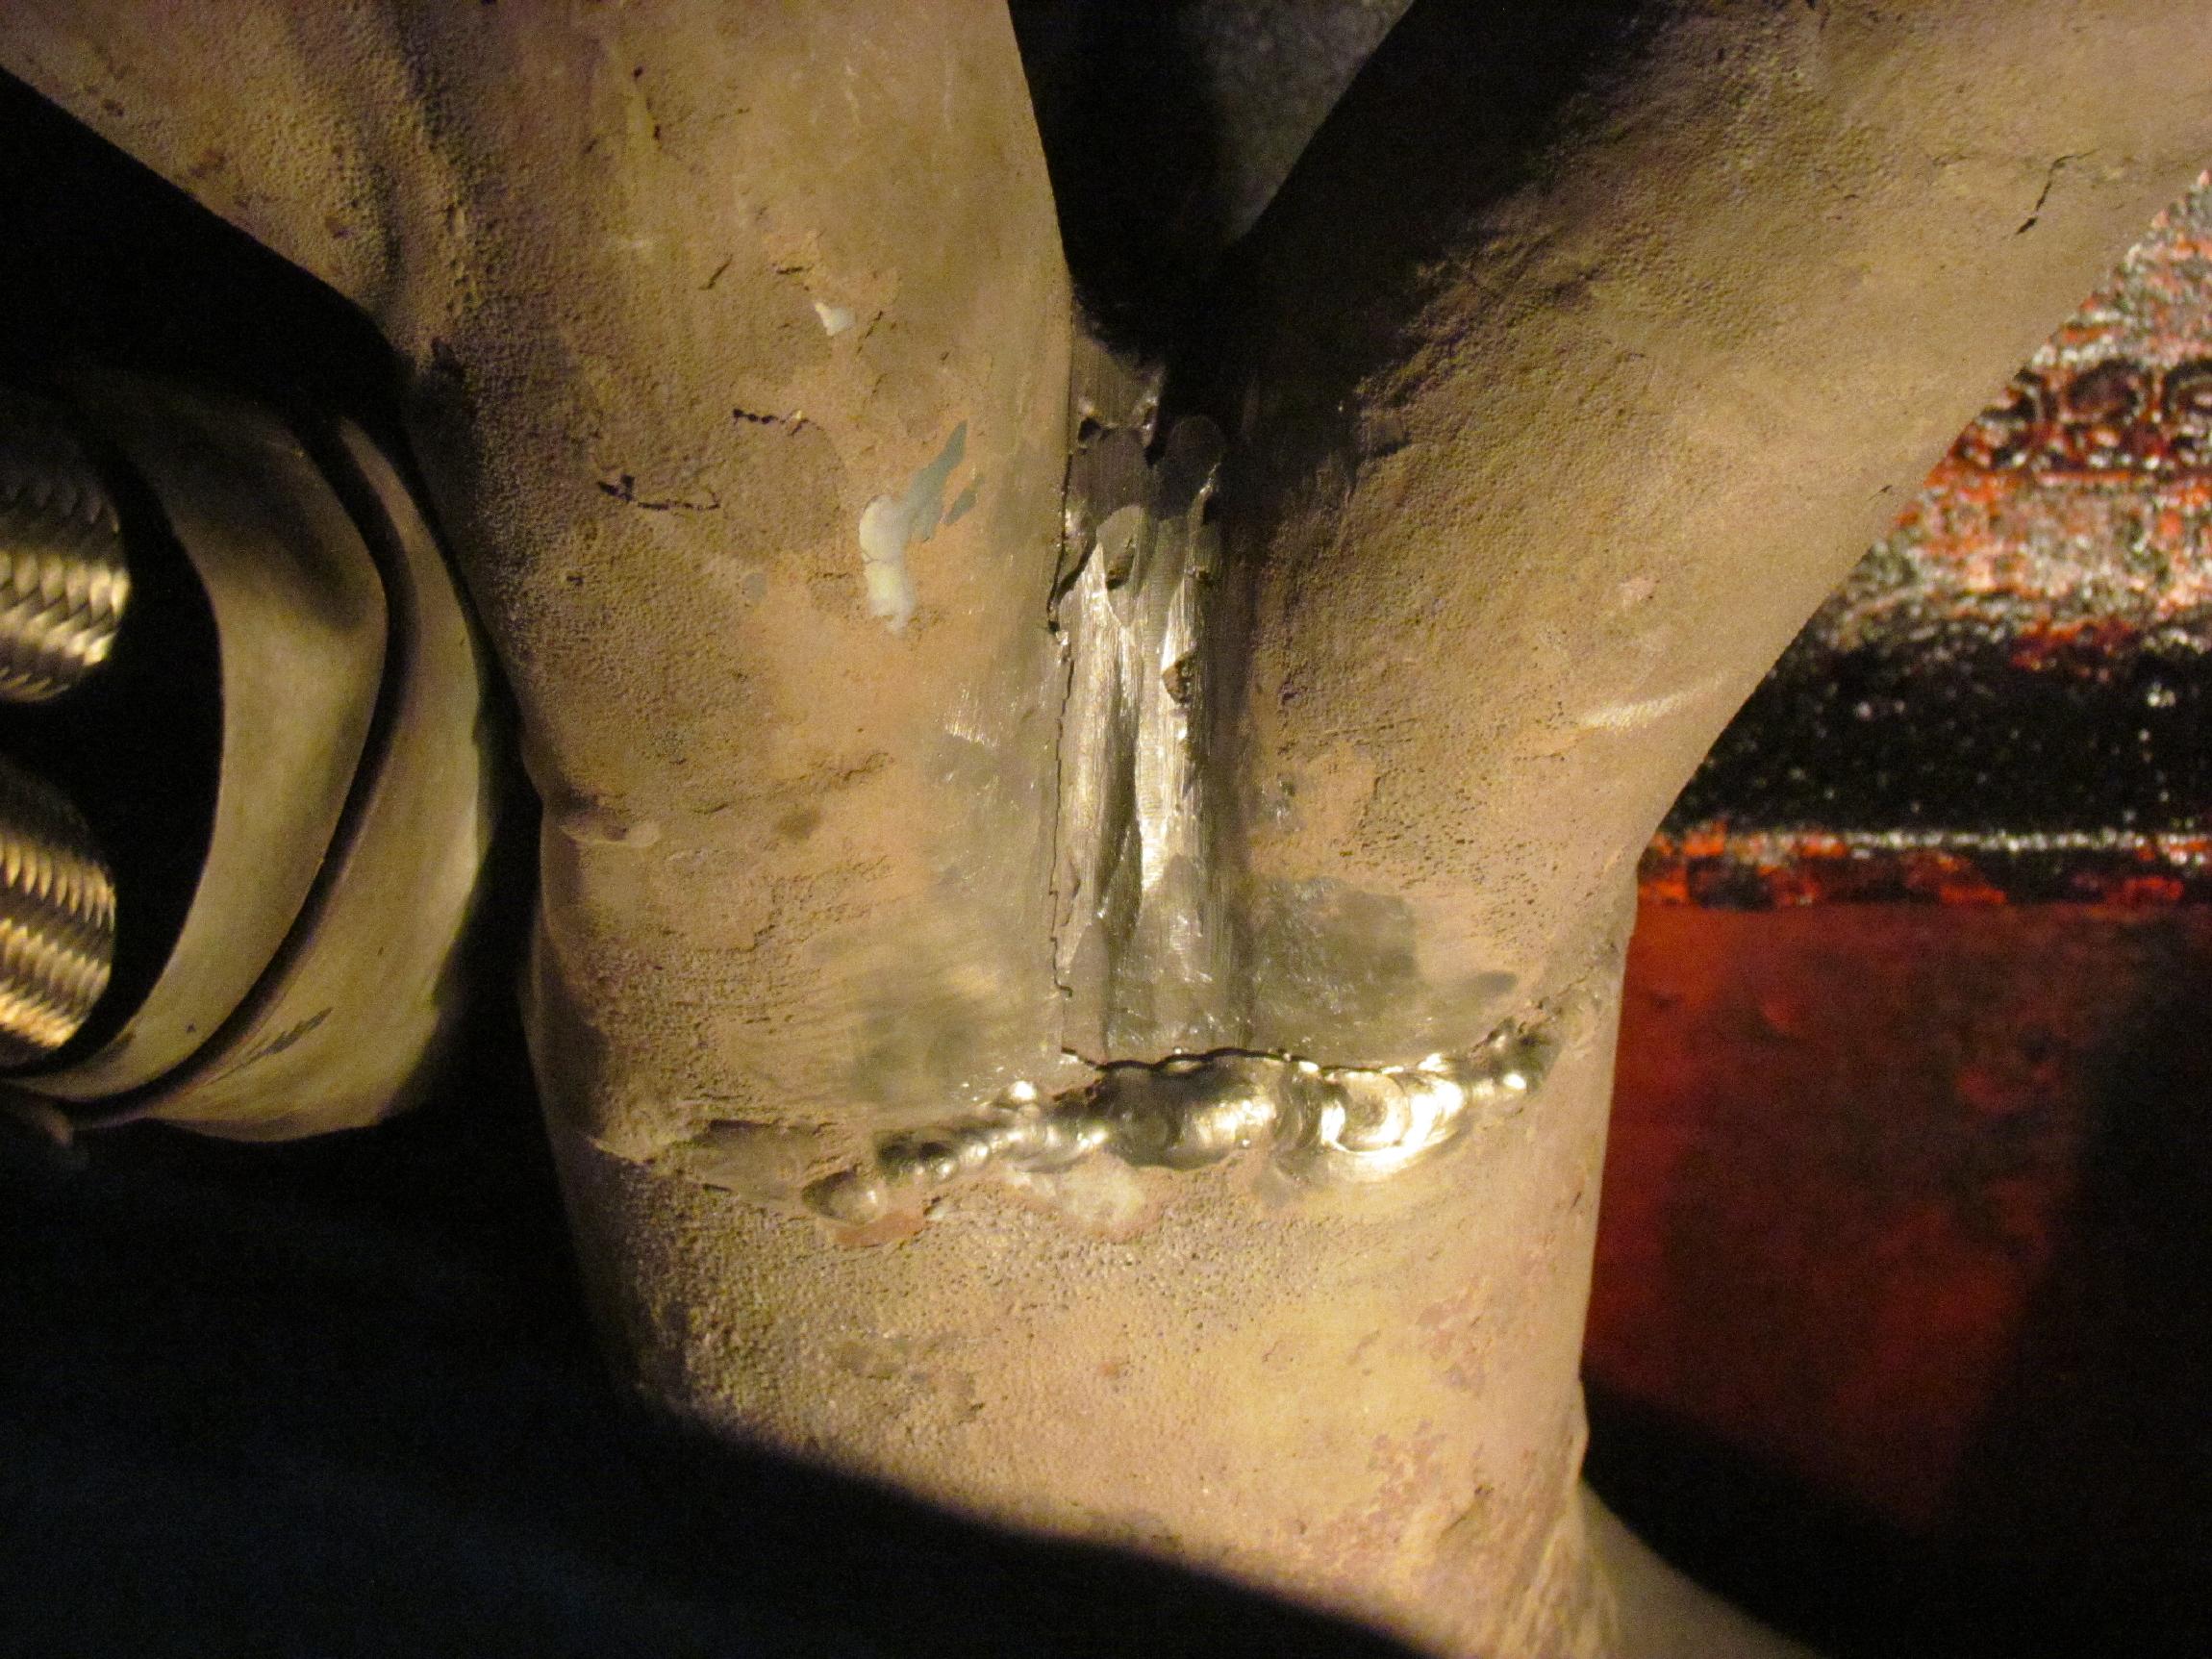 When I got to the BillyBob Shop, Friday nite, I pointed
my powdercoating laser thermometer at the crack in the header and it
read 464 degrees. I had JB weld at hand so I decided to go for a
temporary
shadetree mechanic repair on Saturday. The homemade tube header has
gotten crusty over the years and it took me some time to clean up the
metal around the crack good enuf for JB Weld application. No matter how
many tools I acquire, I always find the need for more. On Saturday, I
found the need for a small die grinder which I do not have yet.
When I got to the BillyBob Shop, Friday nite, I pointed
my powdercoating laser thermometer at the crack in the header and it
read 464 degrees. I had JB weld at hand so I decided to go for a
temporary
shadetree mechanic repair on Saturday. The homemade tube header has
gotten crusty over the years and it took me some time to clean up the
metal around the crack good enuf for JB Weld application. No matter how
many tools I acquire, I always find the need for more. On Saturday, I
found the need for a small die grinder which I do not have yet.
 Mixed up and applied a batch of JB Weld and let it cure
overnight. If you apply JB Weld to a vertical surface and you don't
build a "dam" to constrain it, it will head south. I didn't build a dam
and it did just that but enough remained in place to get the job done.
On Sunday morning, I went to Fort Lauderdale for coffee, then to the
Krash Lab to check the mail before heading back to the BillyBob Shop,
about a thirty mile run.
The Sunday morning coffee cruise was at the Dandy Donut Factory in
Hollywood this week but due to Deerslayer's other engine issues, I
didn't want to take him that far. Deerslayer sounds a bit better and,
as of this morning's ride up the the Krash Lab, the JB Weld is
holding.
Mixed up and applied a batch of JB Weld and let it cure
overnight. If you apply JB Weld to a vertical surface and you don't
build a "dam" to constrain it, it will head south. I didn't build a dam
and it did just that but enough remained in place to get the job done.
On Sunday morning, I went to Fort Lauderdale for coffee, then to the
Krash Lab to check the mail before heading back to the BillyBob Shop,
about a thirty mile run.
The Sunday morning coffee cruise was at the Dandy Donut Factory in
Hollywood this week but due to Deerslayer's other engine issues, I
didn't want to take him that far. Deerslayer sounds a bit better and,
as of this morning's ride up the the Krash Lab, the JB Weld is
holding.
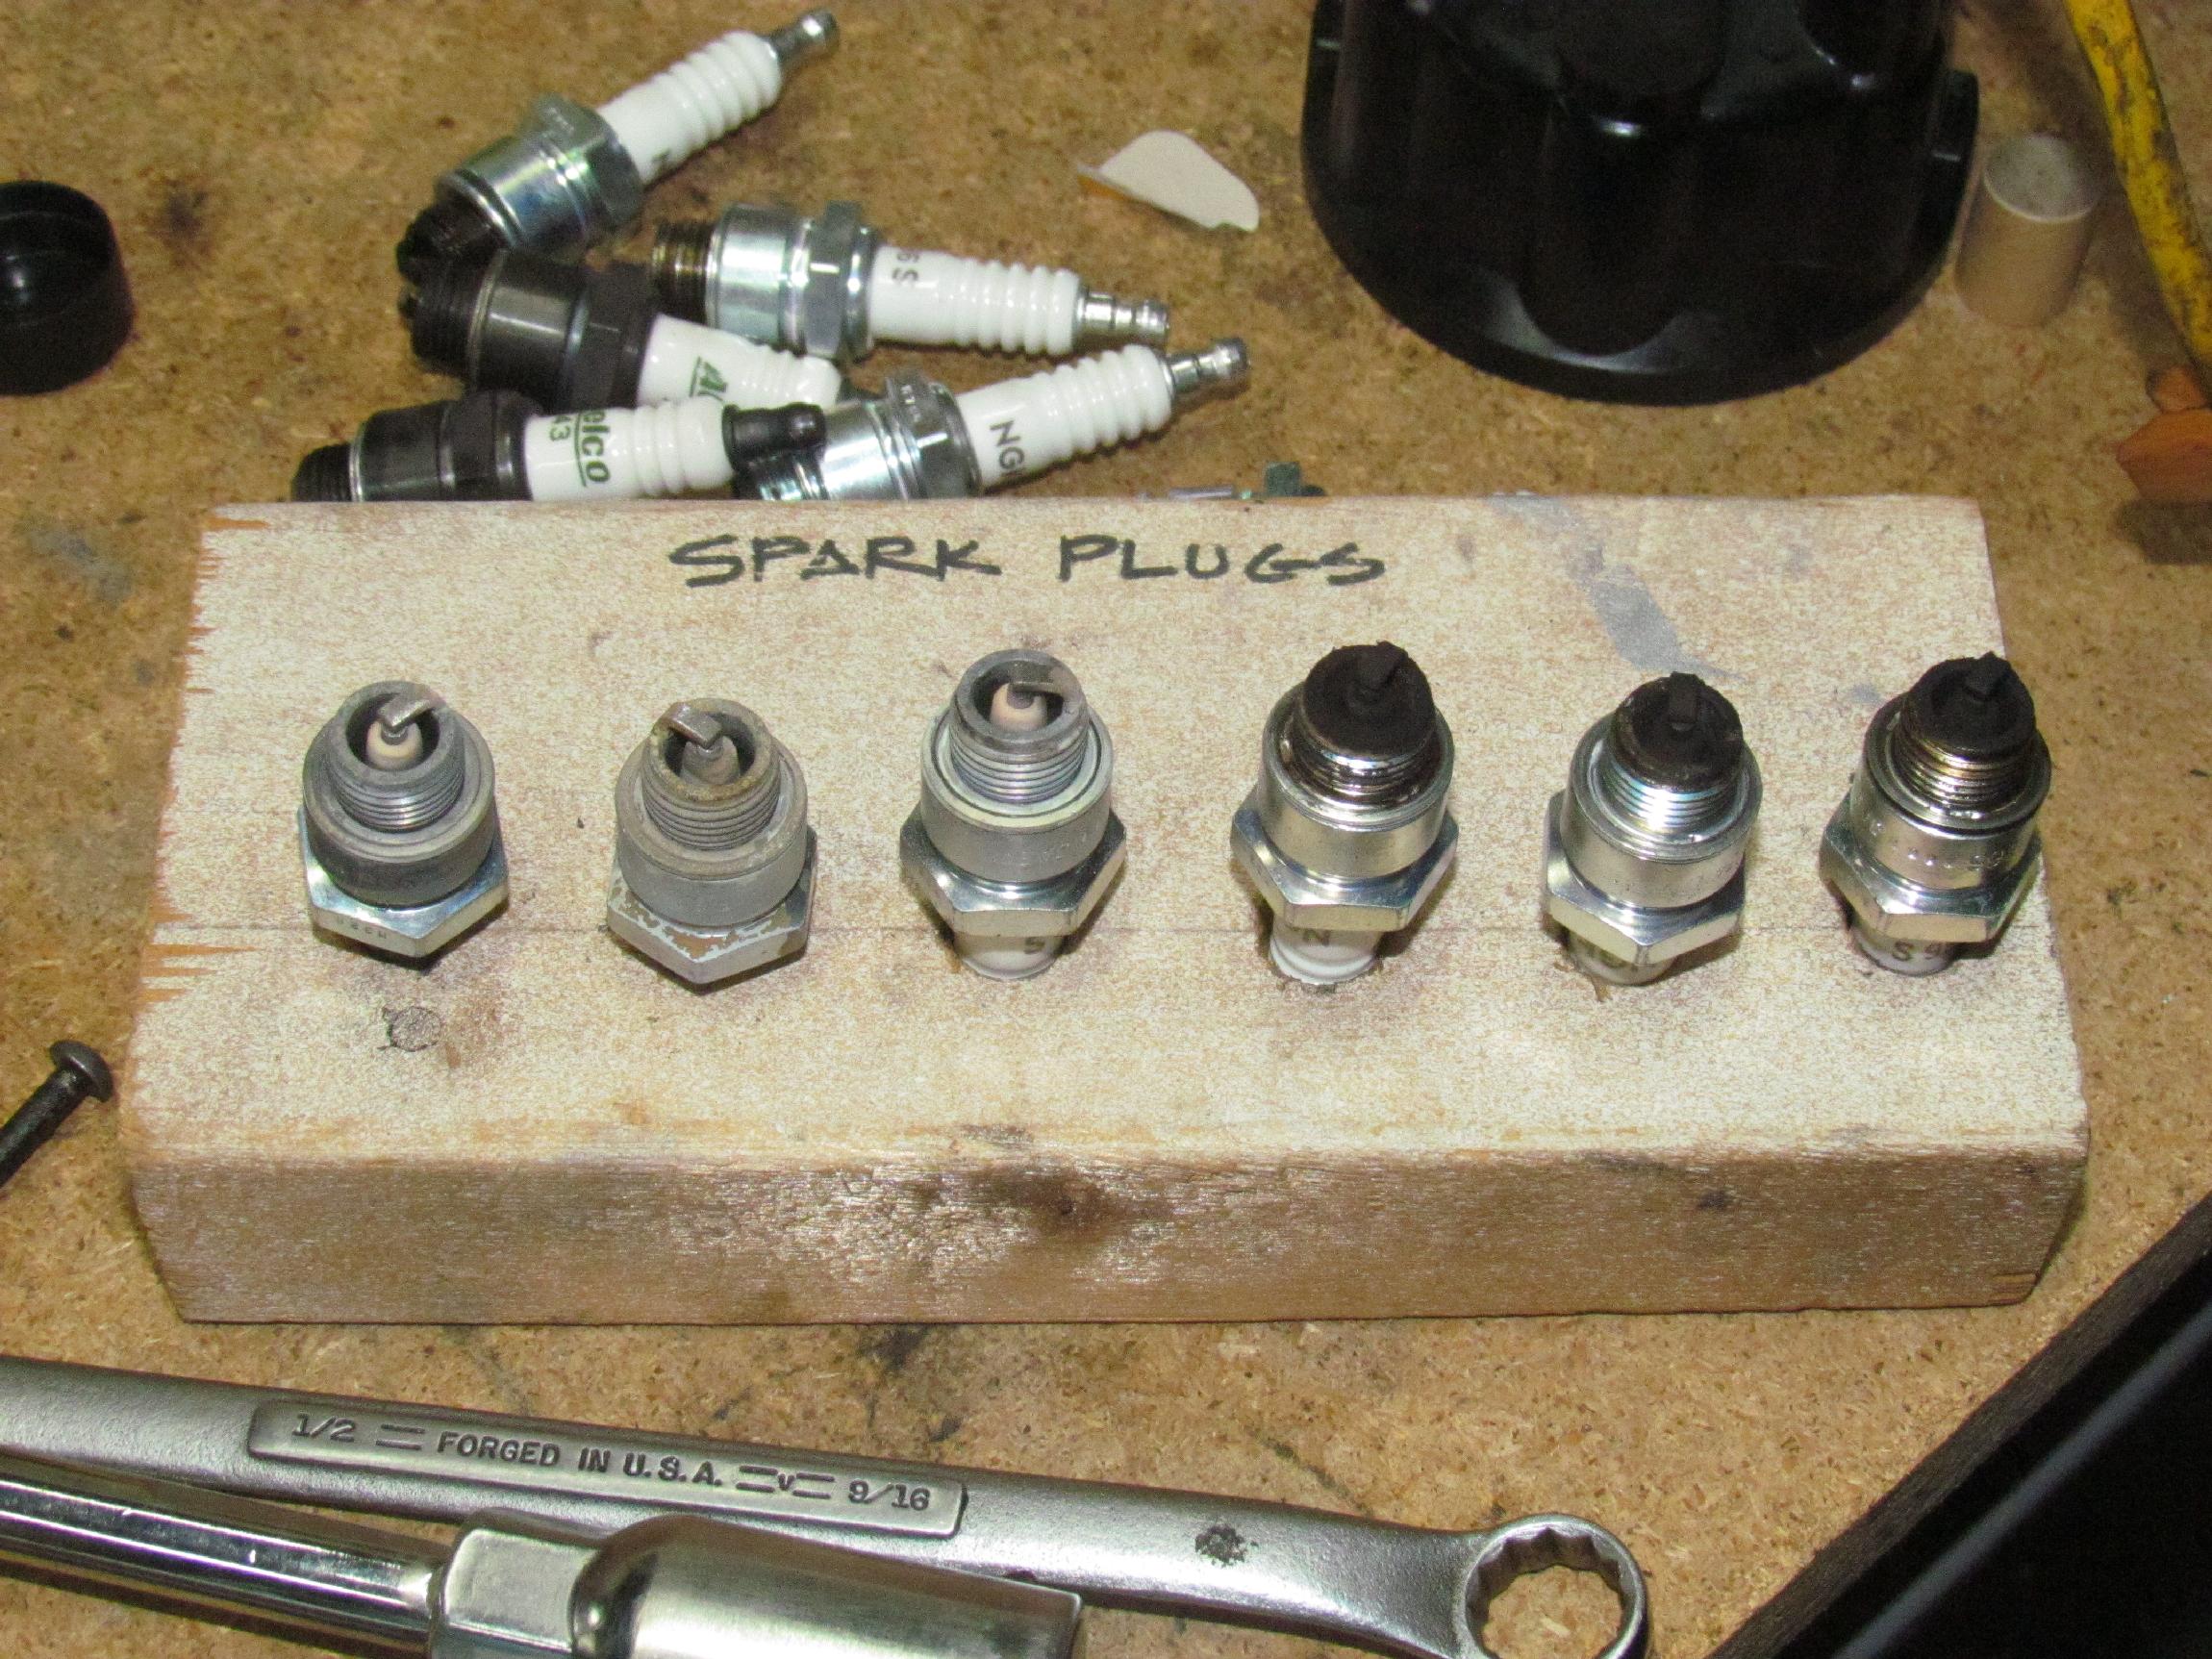 May
5th 2015 The
Deerslayer is still running rich and I'm building up a collection of
fouled spark plugs. On Saturday, I decided to clear some space on my
workbench by cleaning some of these plugs for re-use. Slapped them in a
vise, one by one, and burned the carbon off with a MAP Pro gas torch,
hit them with a blast of compressed air and ran some emery cloth over
the electrodes before re-gapping them and storing them away.
May
5th 2015 The
Deerslayer is still running rich and I'm building up a collection of
fouled spark plugs. On Saturday, I decided to clear some space on my
workbench by cleaning some of these plugs for re-use. Slapped them in a
vise, one by one, and burned the carbon off with a MAP Pro gas torch,
hit them with a blast of compressed air and ran some emery cloth over
the electrodes before re-gapping them and storing them away.
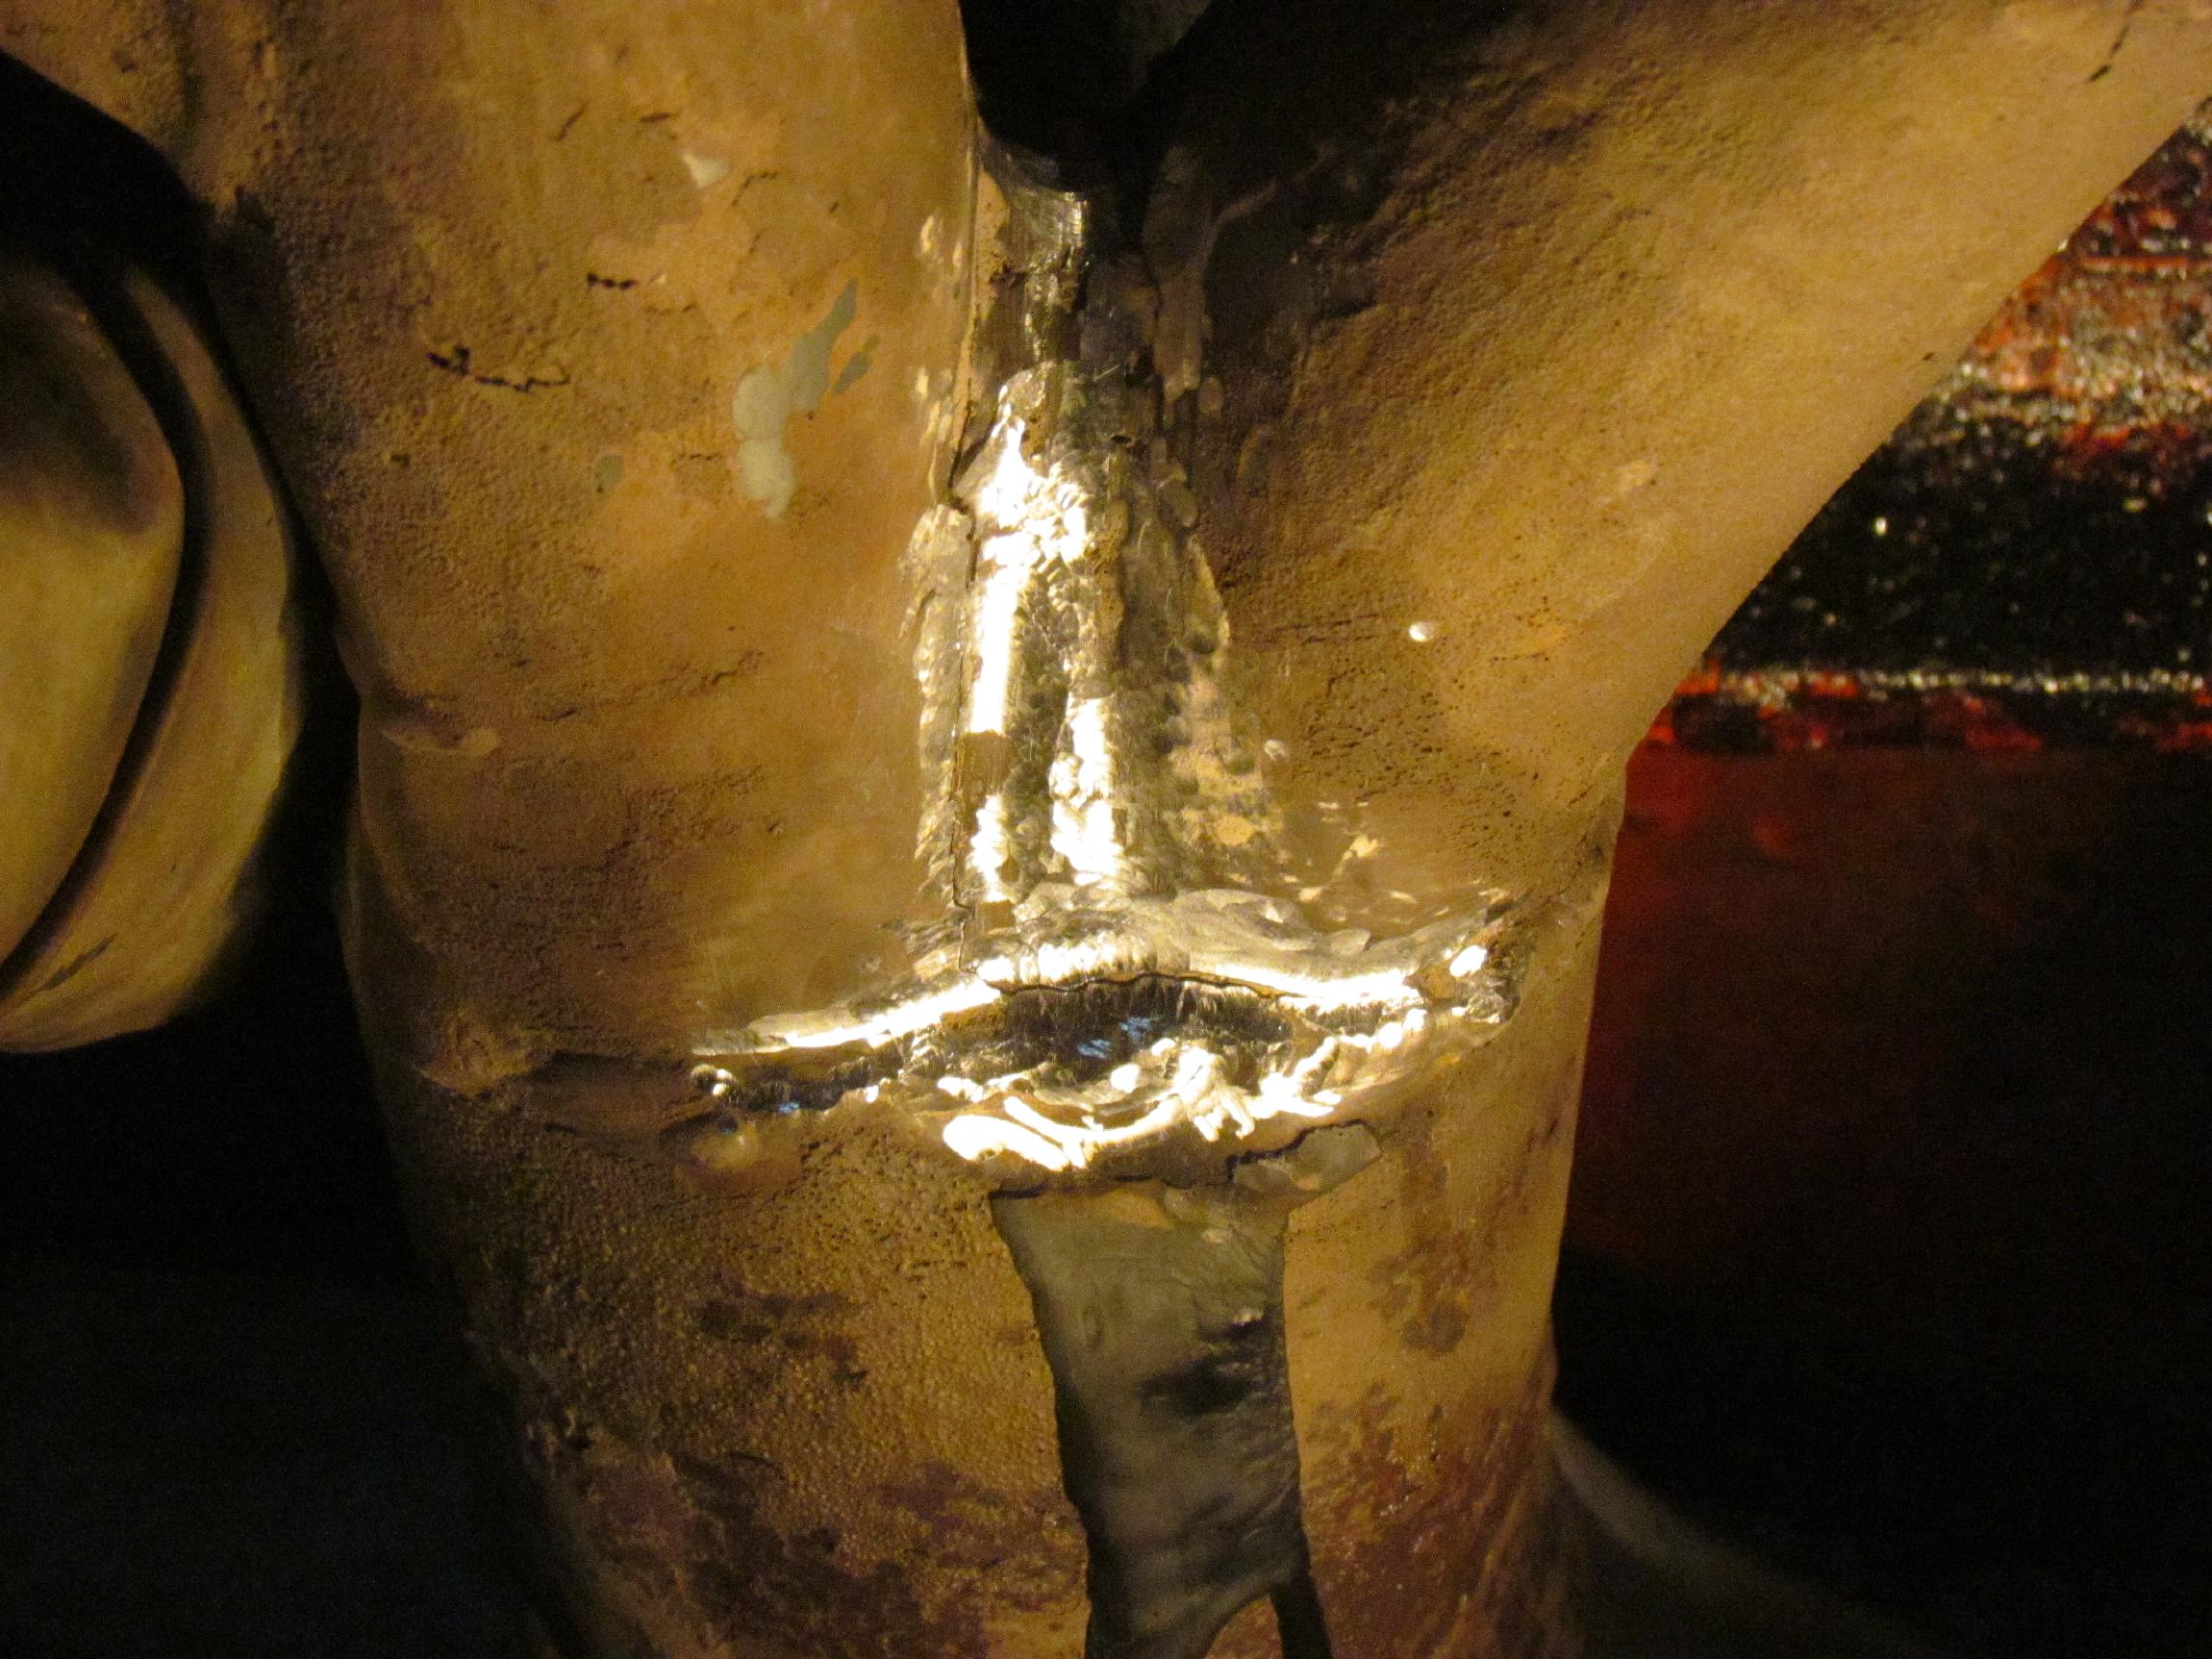 May 6th 2015 The
JB Weld temporary fix turned out to be too temporary. It lasted four
days before the JB Weld formed cracks and started to flake off. The
playing card in the bicycle spokes noise was back too. In the meantime,
I had
picked up a heavy duty Makita electric die grinder and some burr bits.
I was able to make short work of the cleanup for the next attempt.
May 6th 2015 The
JB Weld temporary fix turned out to be too temporary. It lasted four
days before the JB Weld formed cracks and started to flake off. The
playing card in the bicycle spokes noise was back too. In the meantime,
I had
picked up a heavy duty Makita electric die grinder and some burr bits.
I was able to make short work of the cleanup for the next attempt.
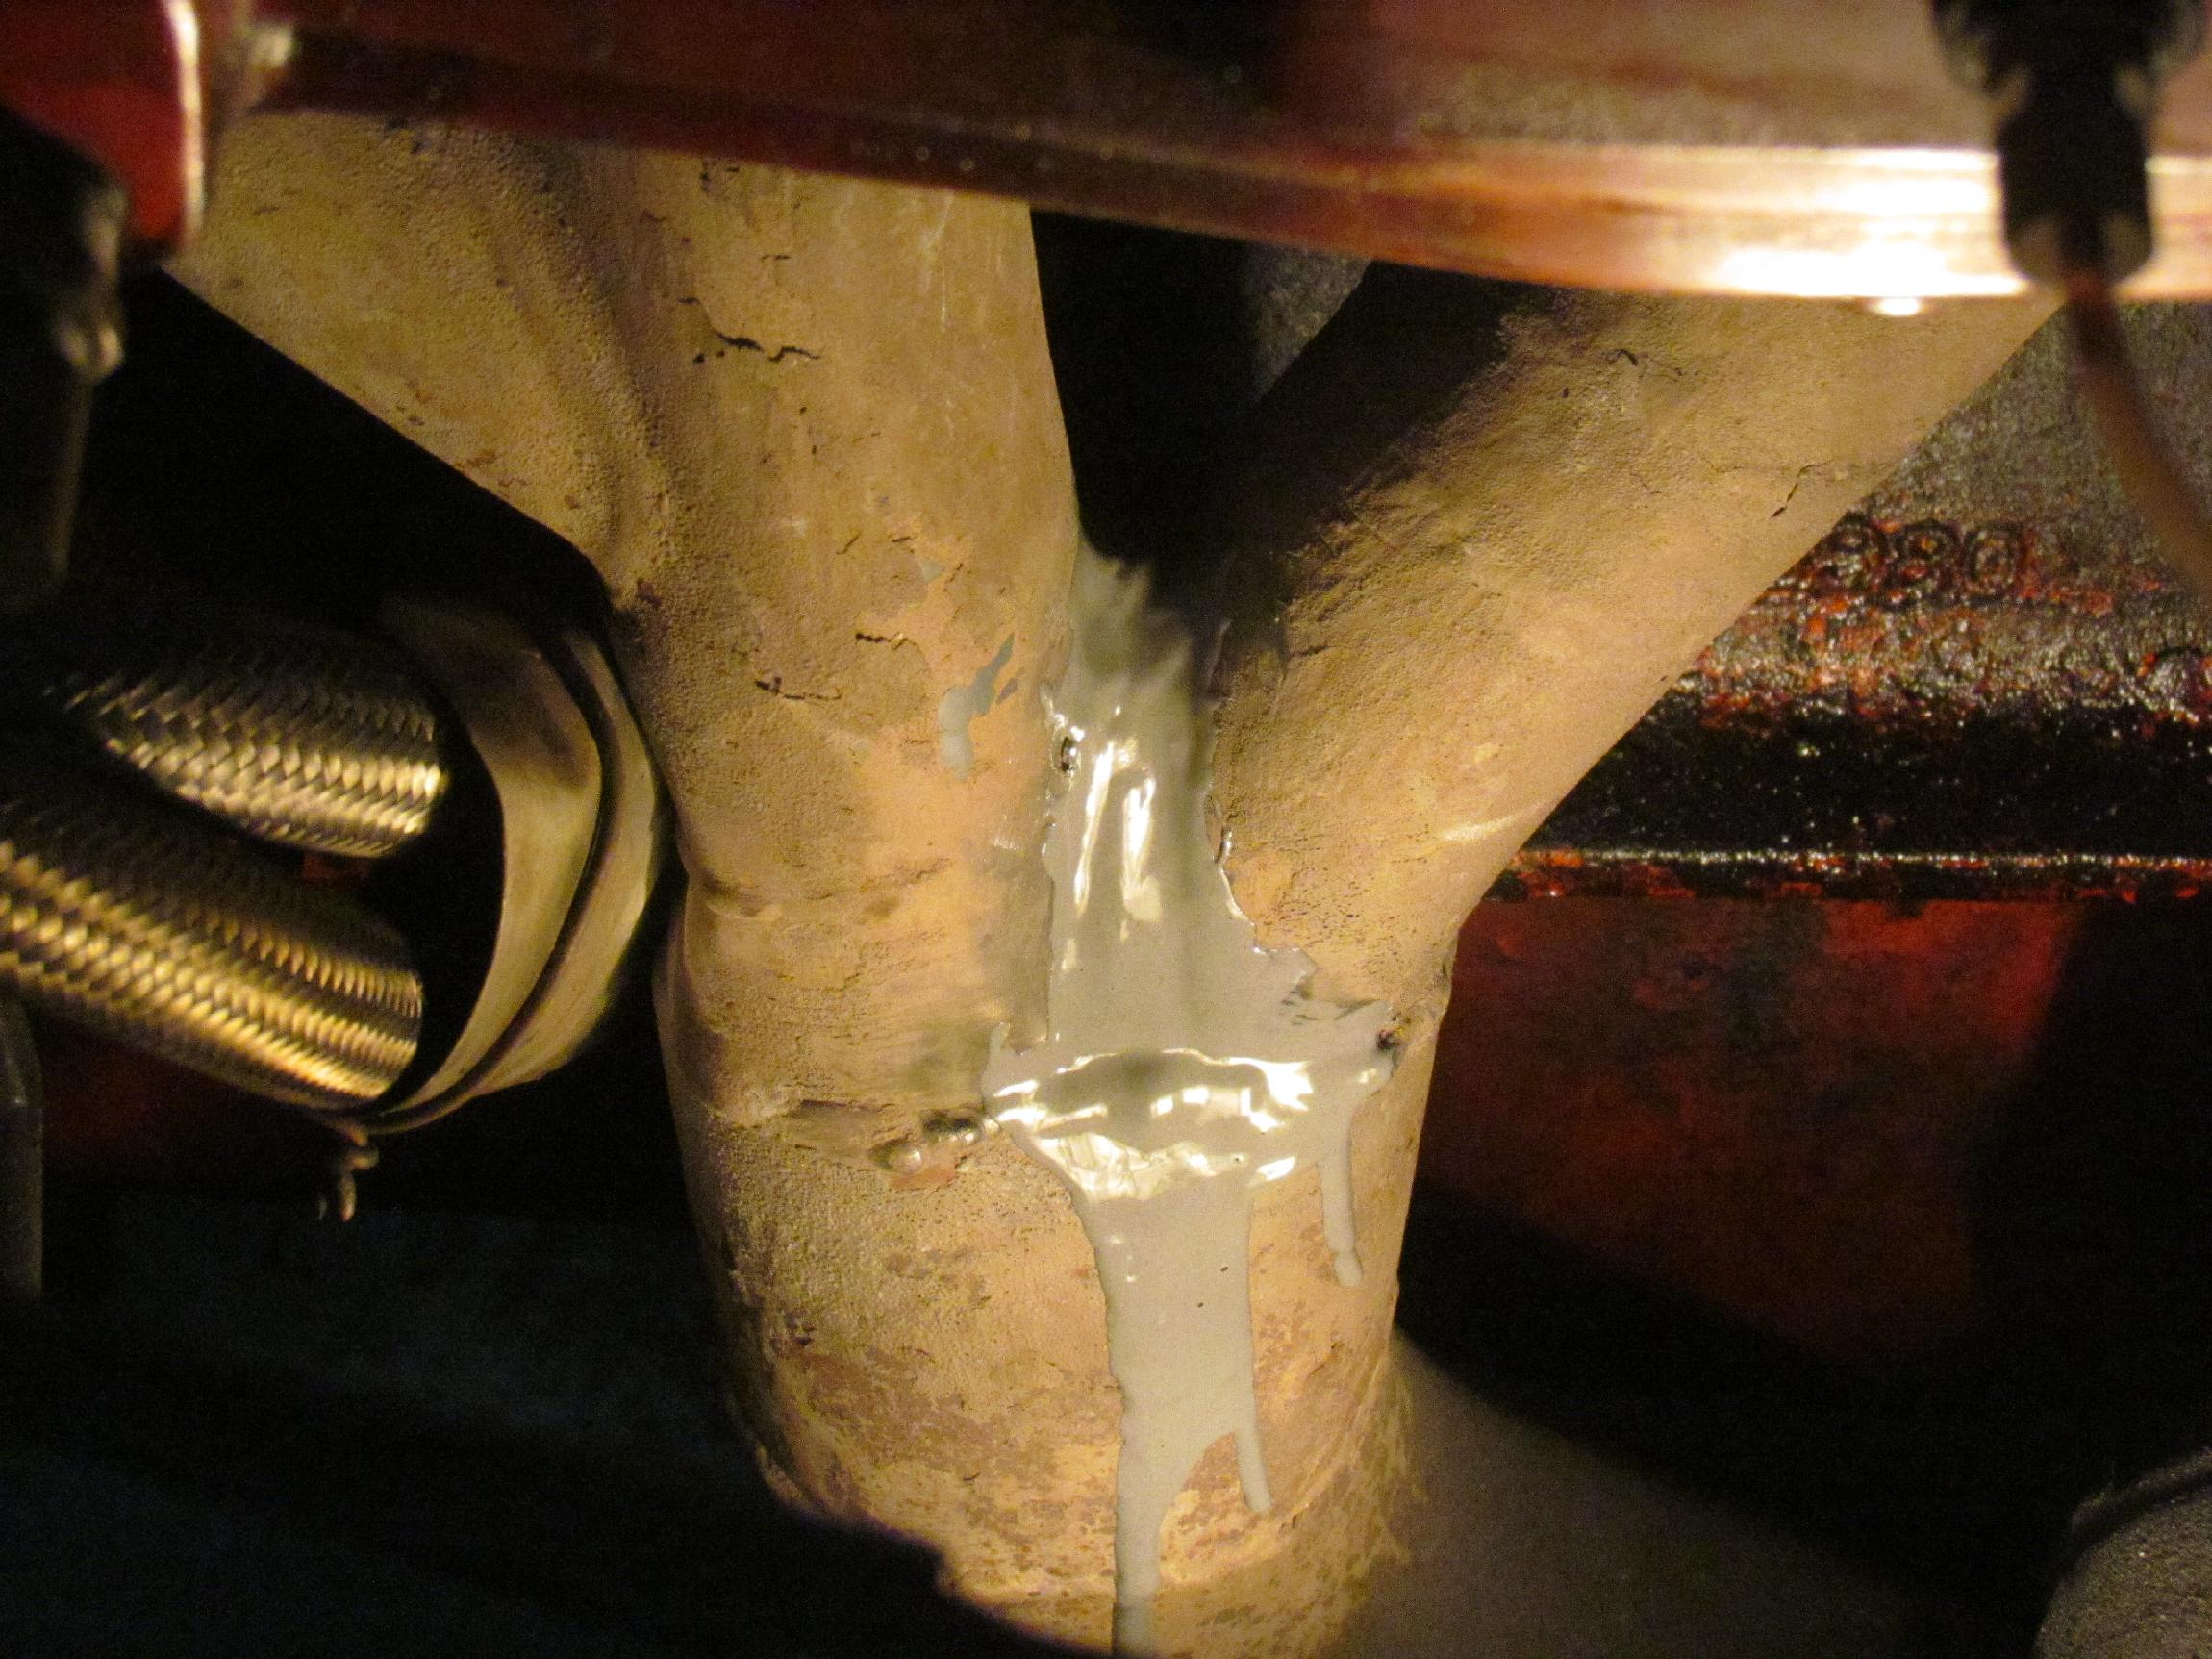
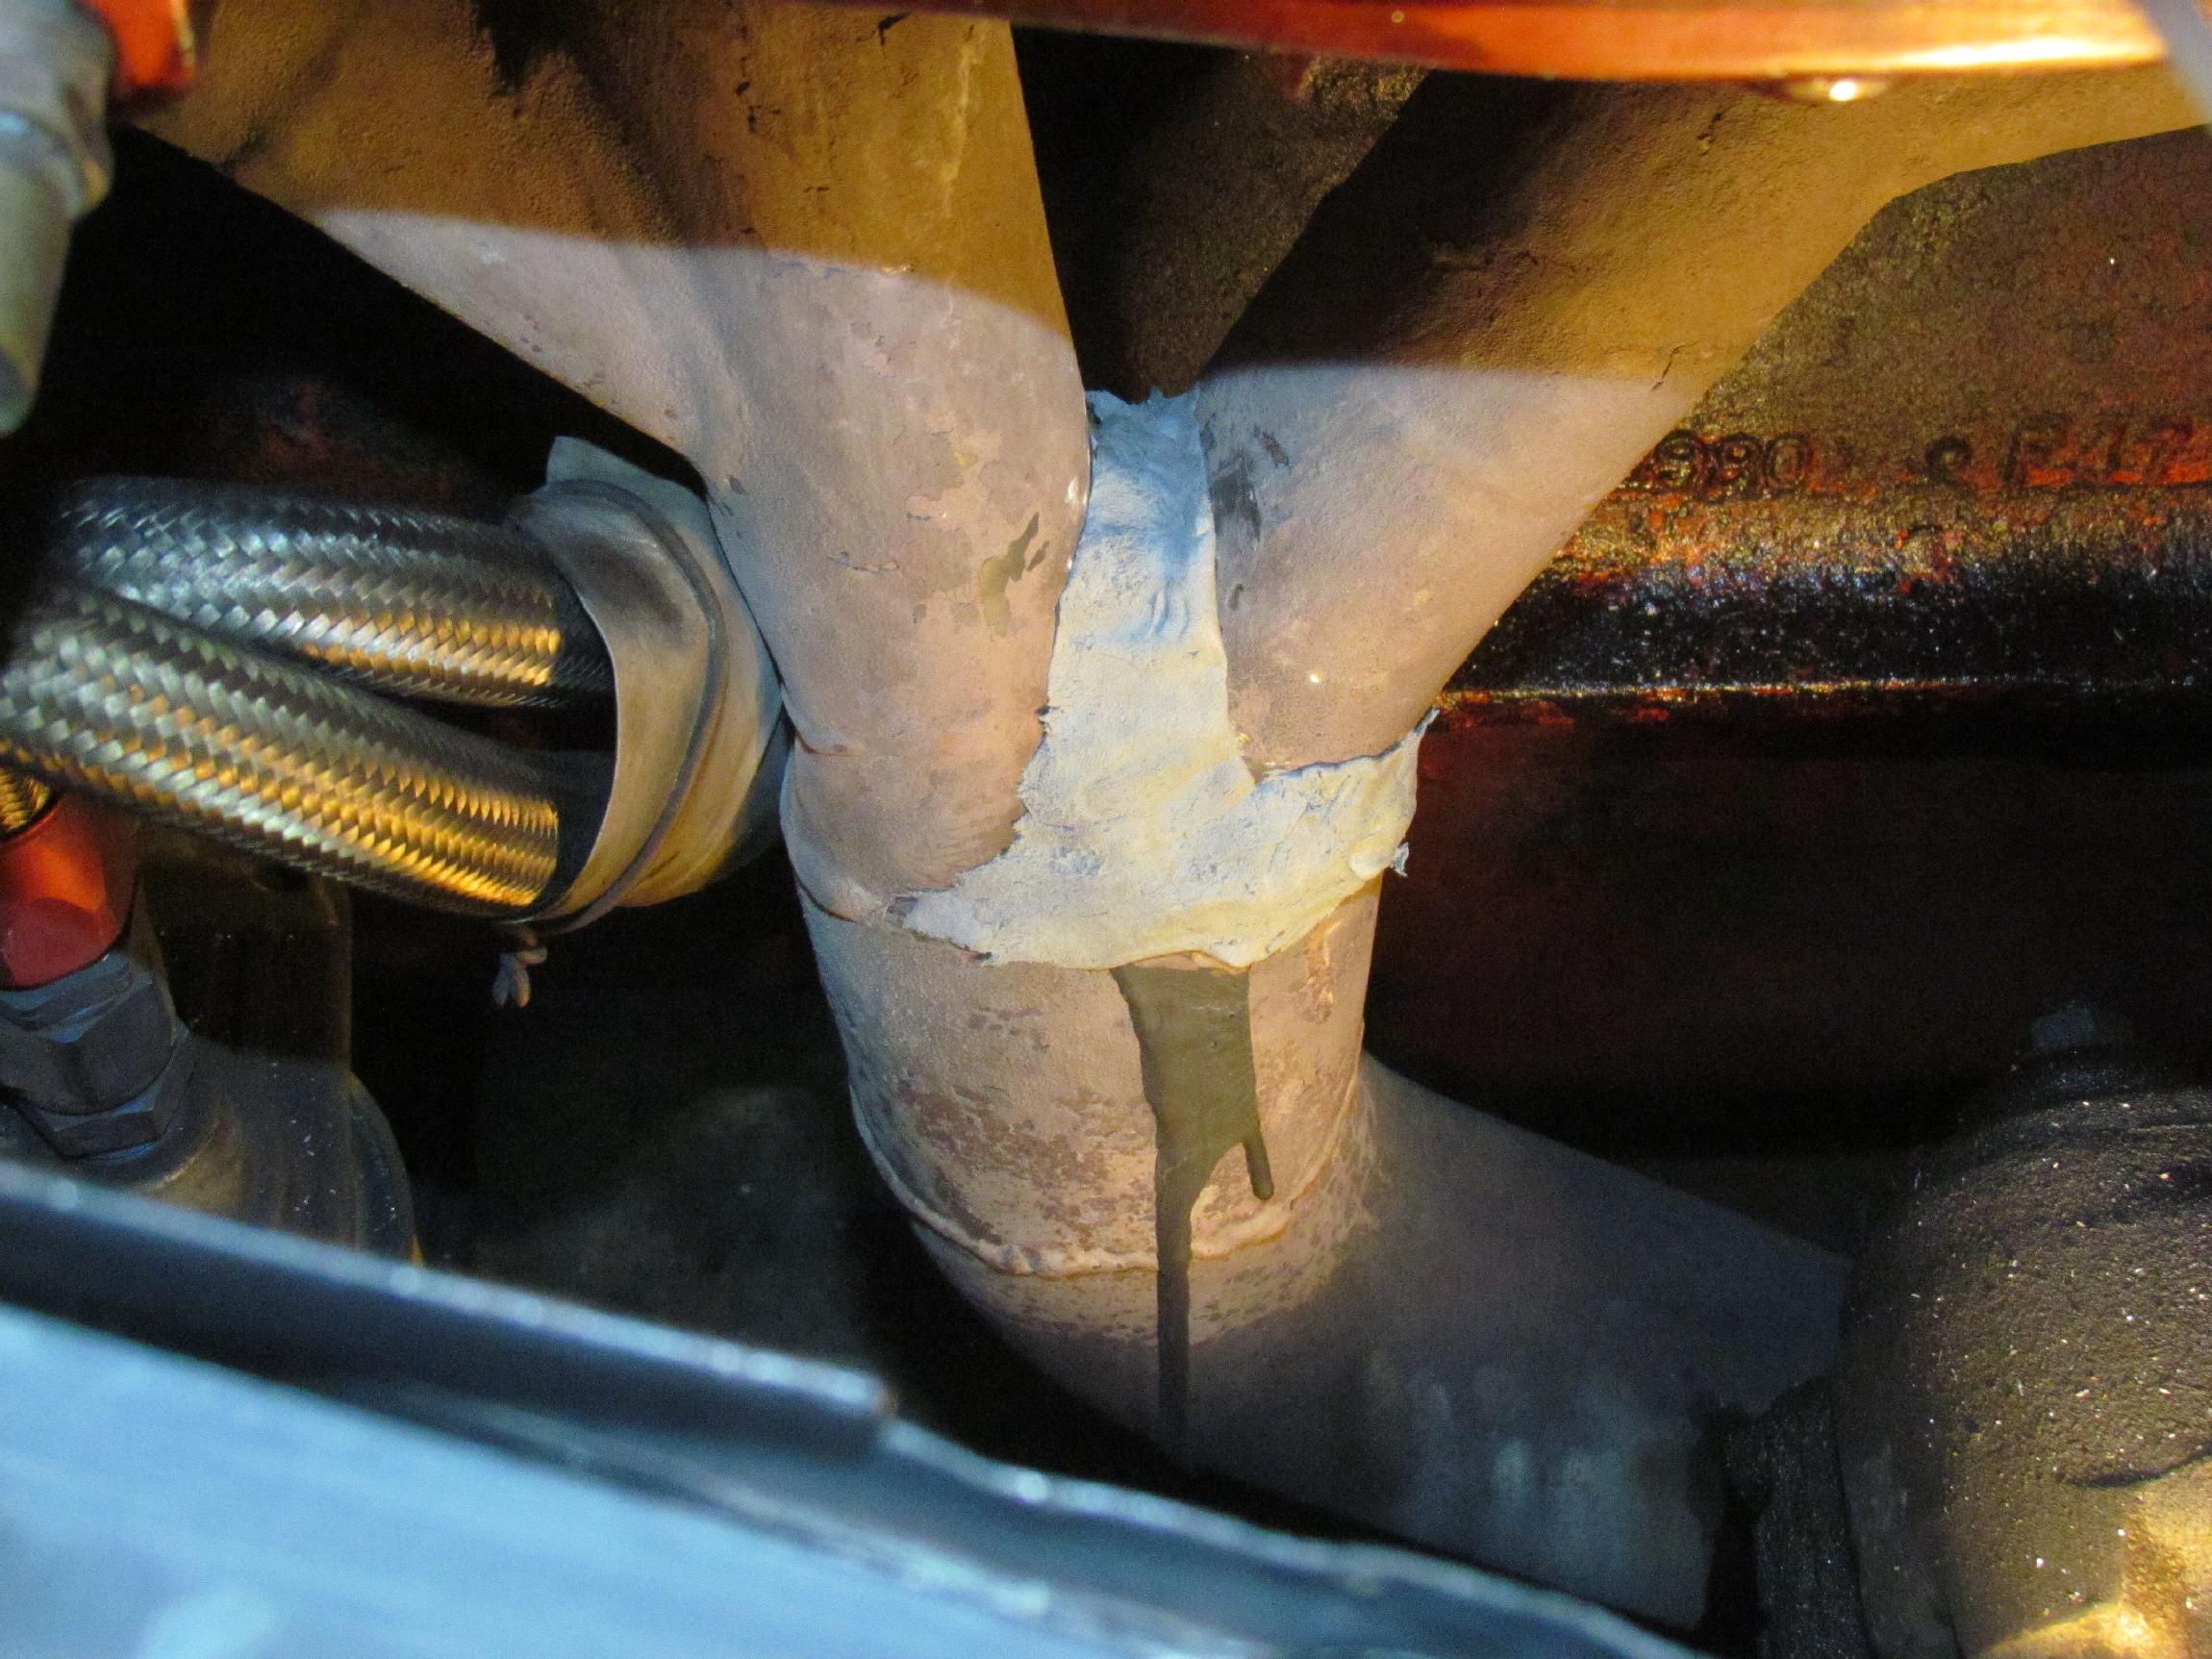 During my research last week, I found that JB Weld also makes a high
temp epoxy putty product. I picked up a roll of that. It comes
in
a "Tootsie roll". You cut off a chunk and knead it until you get a
uniform color, then apply it. I did that on Saturday and it is still
holding at this point. Fingers are crossed. The engine is still running
rough but more quiet. The other nite I found another new distributor
cap in
my roadtrip
supplies. I put that on yesterday morning before driving up to the
Krash lab
and there was a noticeable improvement even tho' the "old"
cap
has been
in service only a couple of months. I've got my fingers crossed on that
too. The ride to work this morning was the most pleasant in a month.
When I stopped for gas, I got a substantial amount of white smoke on
startup. I can't explain that. The best I can come up with is that
there is still some Seafoam in the tank and the process of
fueling stirred it up but I'm doubtful.
During my research last week, I found that JB Weld also makes a high
temp epoxy putty product. I picked up a roll of that. It comes
in
a "Tootsie roll". You cut off a chunk and knead it until you get a
uniform color, then apply it. I did that on Saturday and it is still
holding at this point. Fingers are crossed. The engine is still running
rough but more quiet. The other nite I found another new distributor
cap in
my roadtrip
supplies. I put that on yesterday morning before driving up to the
Krash lab
and there was a noticeable improvement even tho' the "old"
cap
has been
in service only a couple of months. I've got my fingers crossed on that
too. The ride to work this morning was the most pleasant in a month.
When I stopped for gas, I got a substantial amount of white smoke on
startup. I can't explain that. The best I can come up with is that
there is still some Seafoam in the tank and the process of
fueling stirred it up but I'm doubtful.
 May 7th 2015 Decided
to tackle the
malfunctioning starter problem from the ground up. When I examined the
existing ground wire at the bellhousing, I saw that Deerslayer didn't
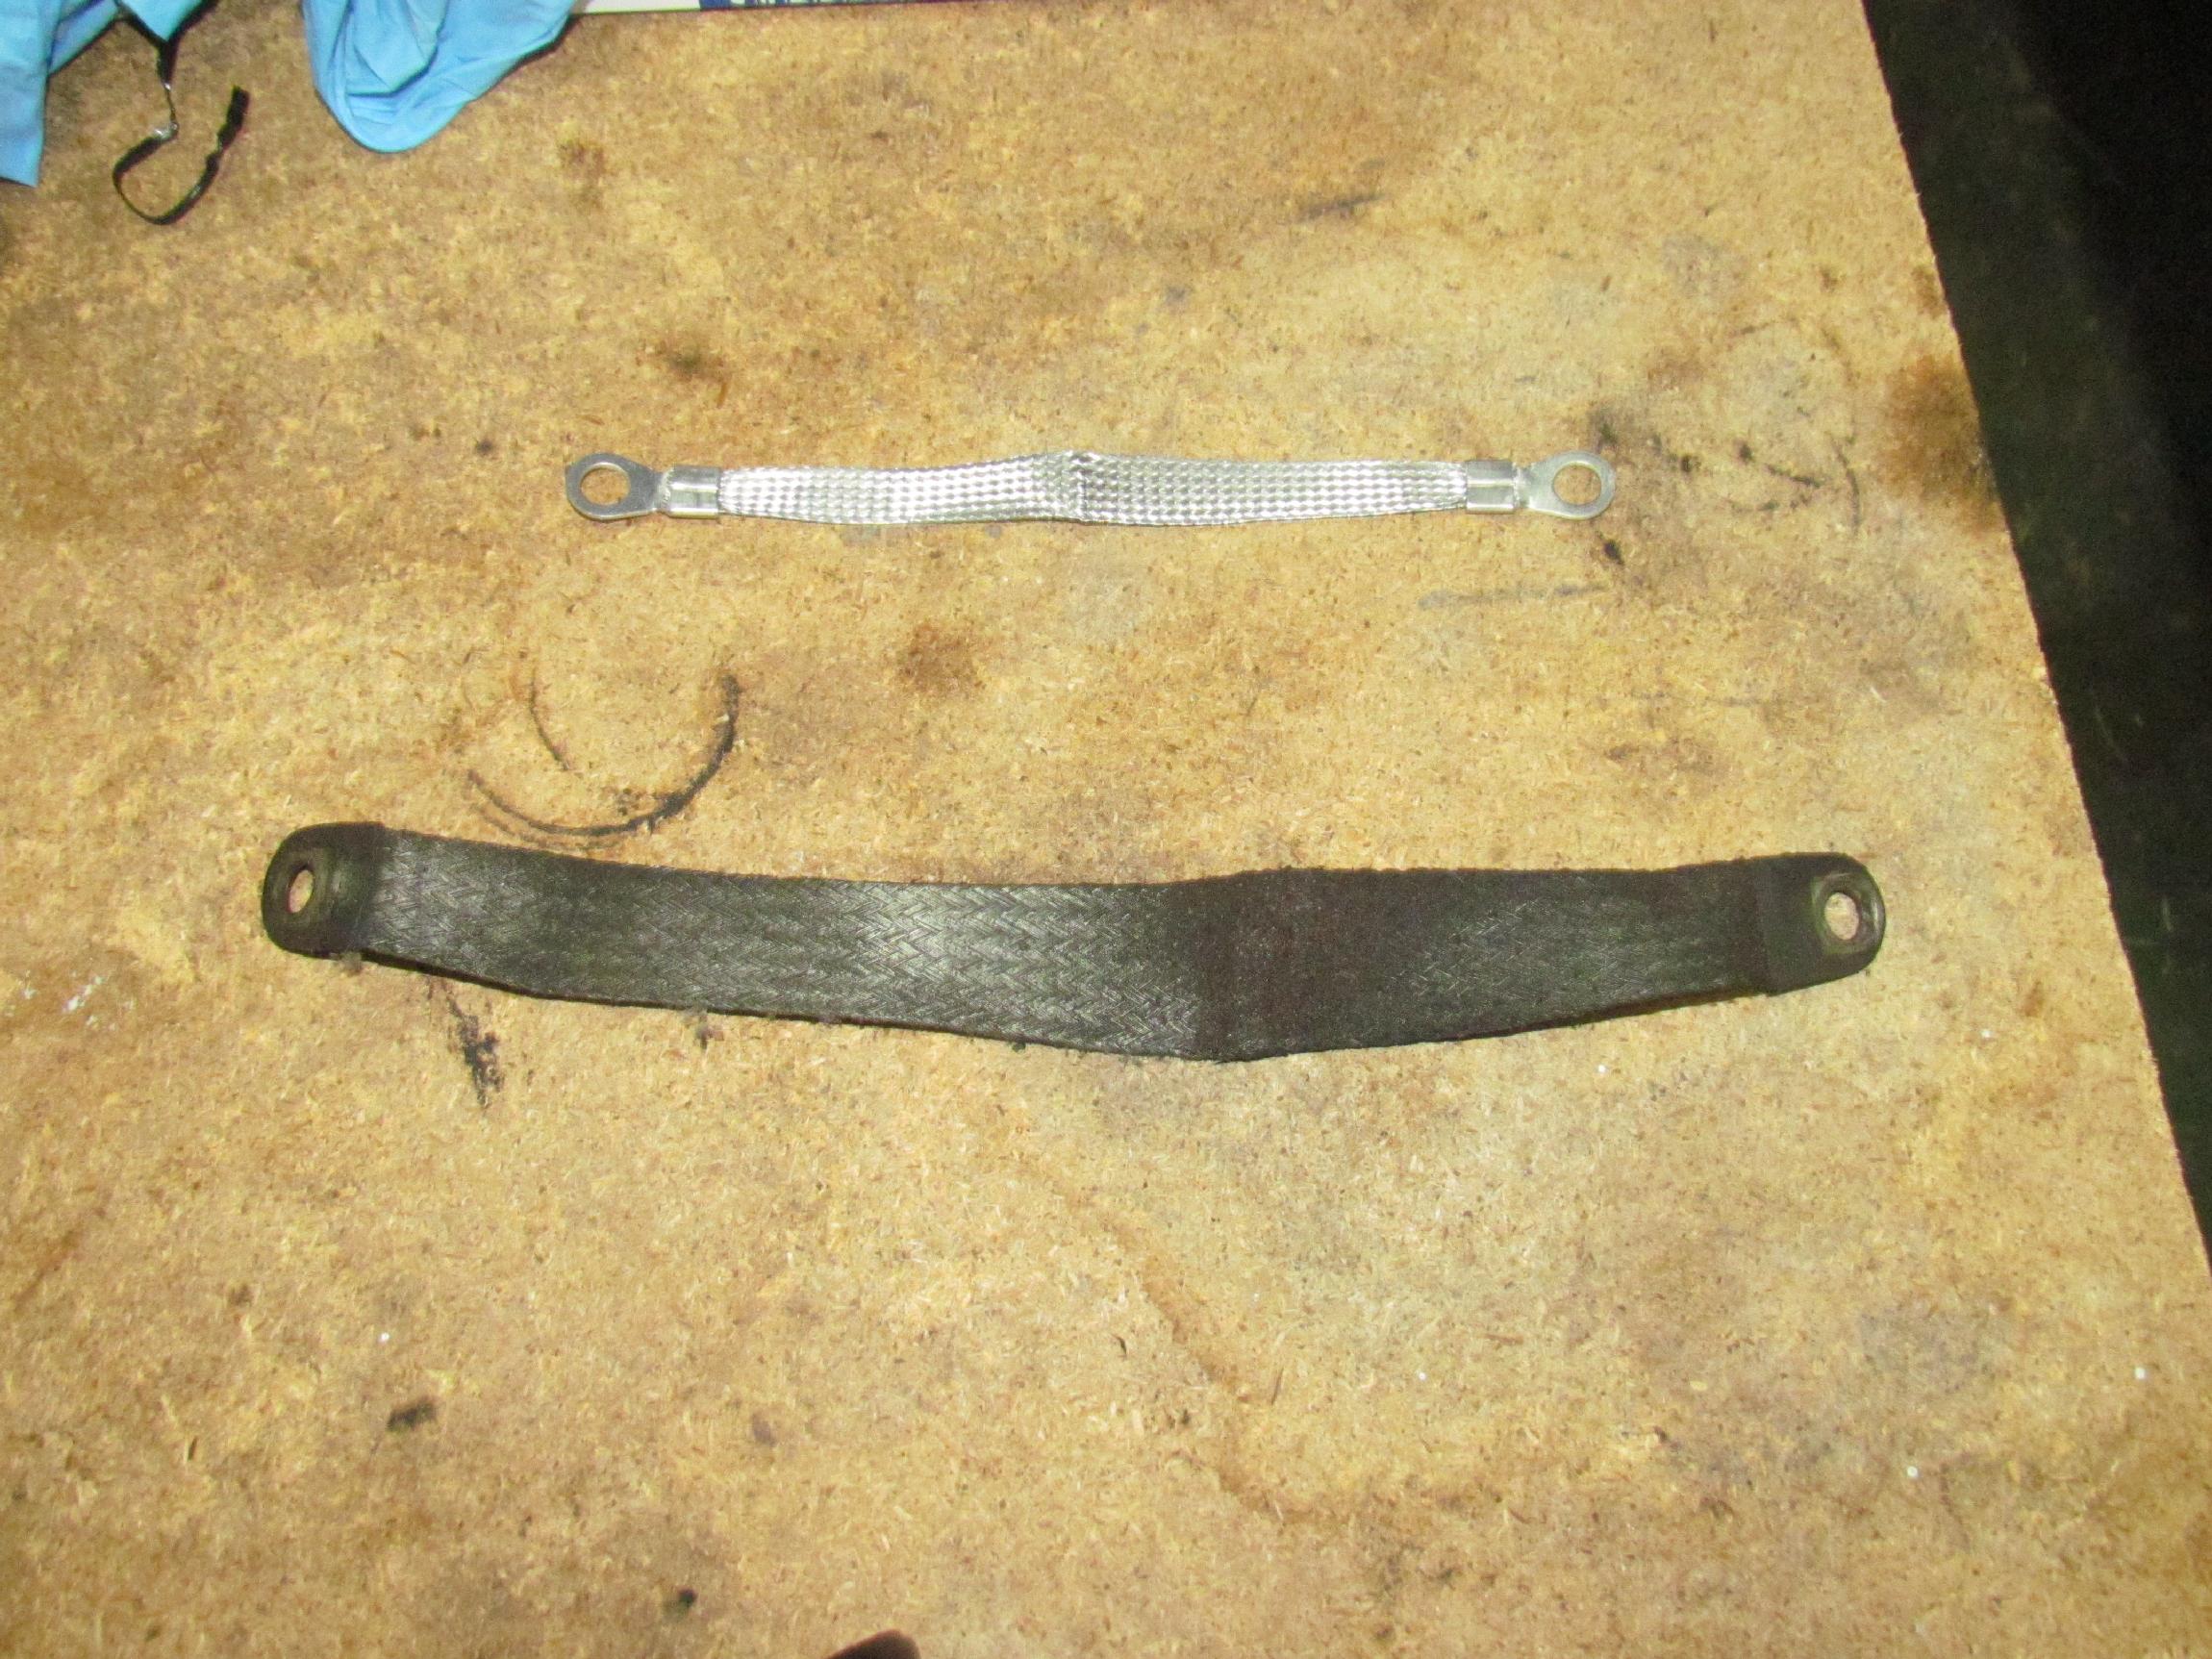
have a ground strap. As long as I was going to disturb the connection
to clean it up, I decided to add a ground strap at the same time. With
this in mind, I searched the intarweb and ordered the first "braided
ground strap" I came to at Amazon. It was from AC Delco and arrived
last week. Whiskey Tango Foxtrot! This wimpy little thing will never
reach from the bellhousing to the frame. 'Nother lesson from the school
of hard knocks. I'm just gonna tag this thing "smart car ground strap"
and hang it up on my shop wall.
May 7th 2015 Decided
to tackle the
malfunctioning starter problem from the ground up. When I examined the
existing ground wire at the bellhousing, I saw that Deerslayer didn't
have a ground strap. As long as I was going to disturb the connection
to clean it up, I decided to add a ground strap at the same time. With
this in mind, I searched the intarweb and ordered the first "braided
ground strap" I came to at Amazon. It was from AC Delco and arrived
last week. Whiskey Tango Foxtrot! This wimpy little thing will never
reach from the bellhousing to the frame. 'Nother lesson from the school
of hard knocks. I'm just gonna tag this thing "smart car ground strap"
and hang it up on my shop wall.
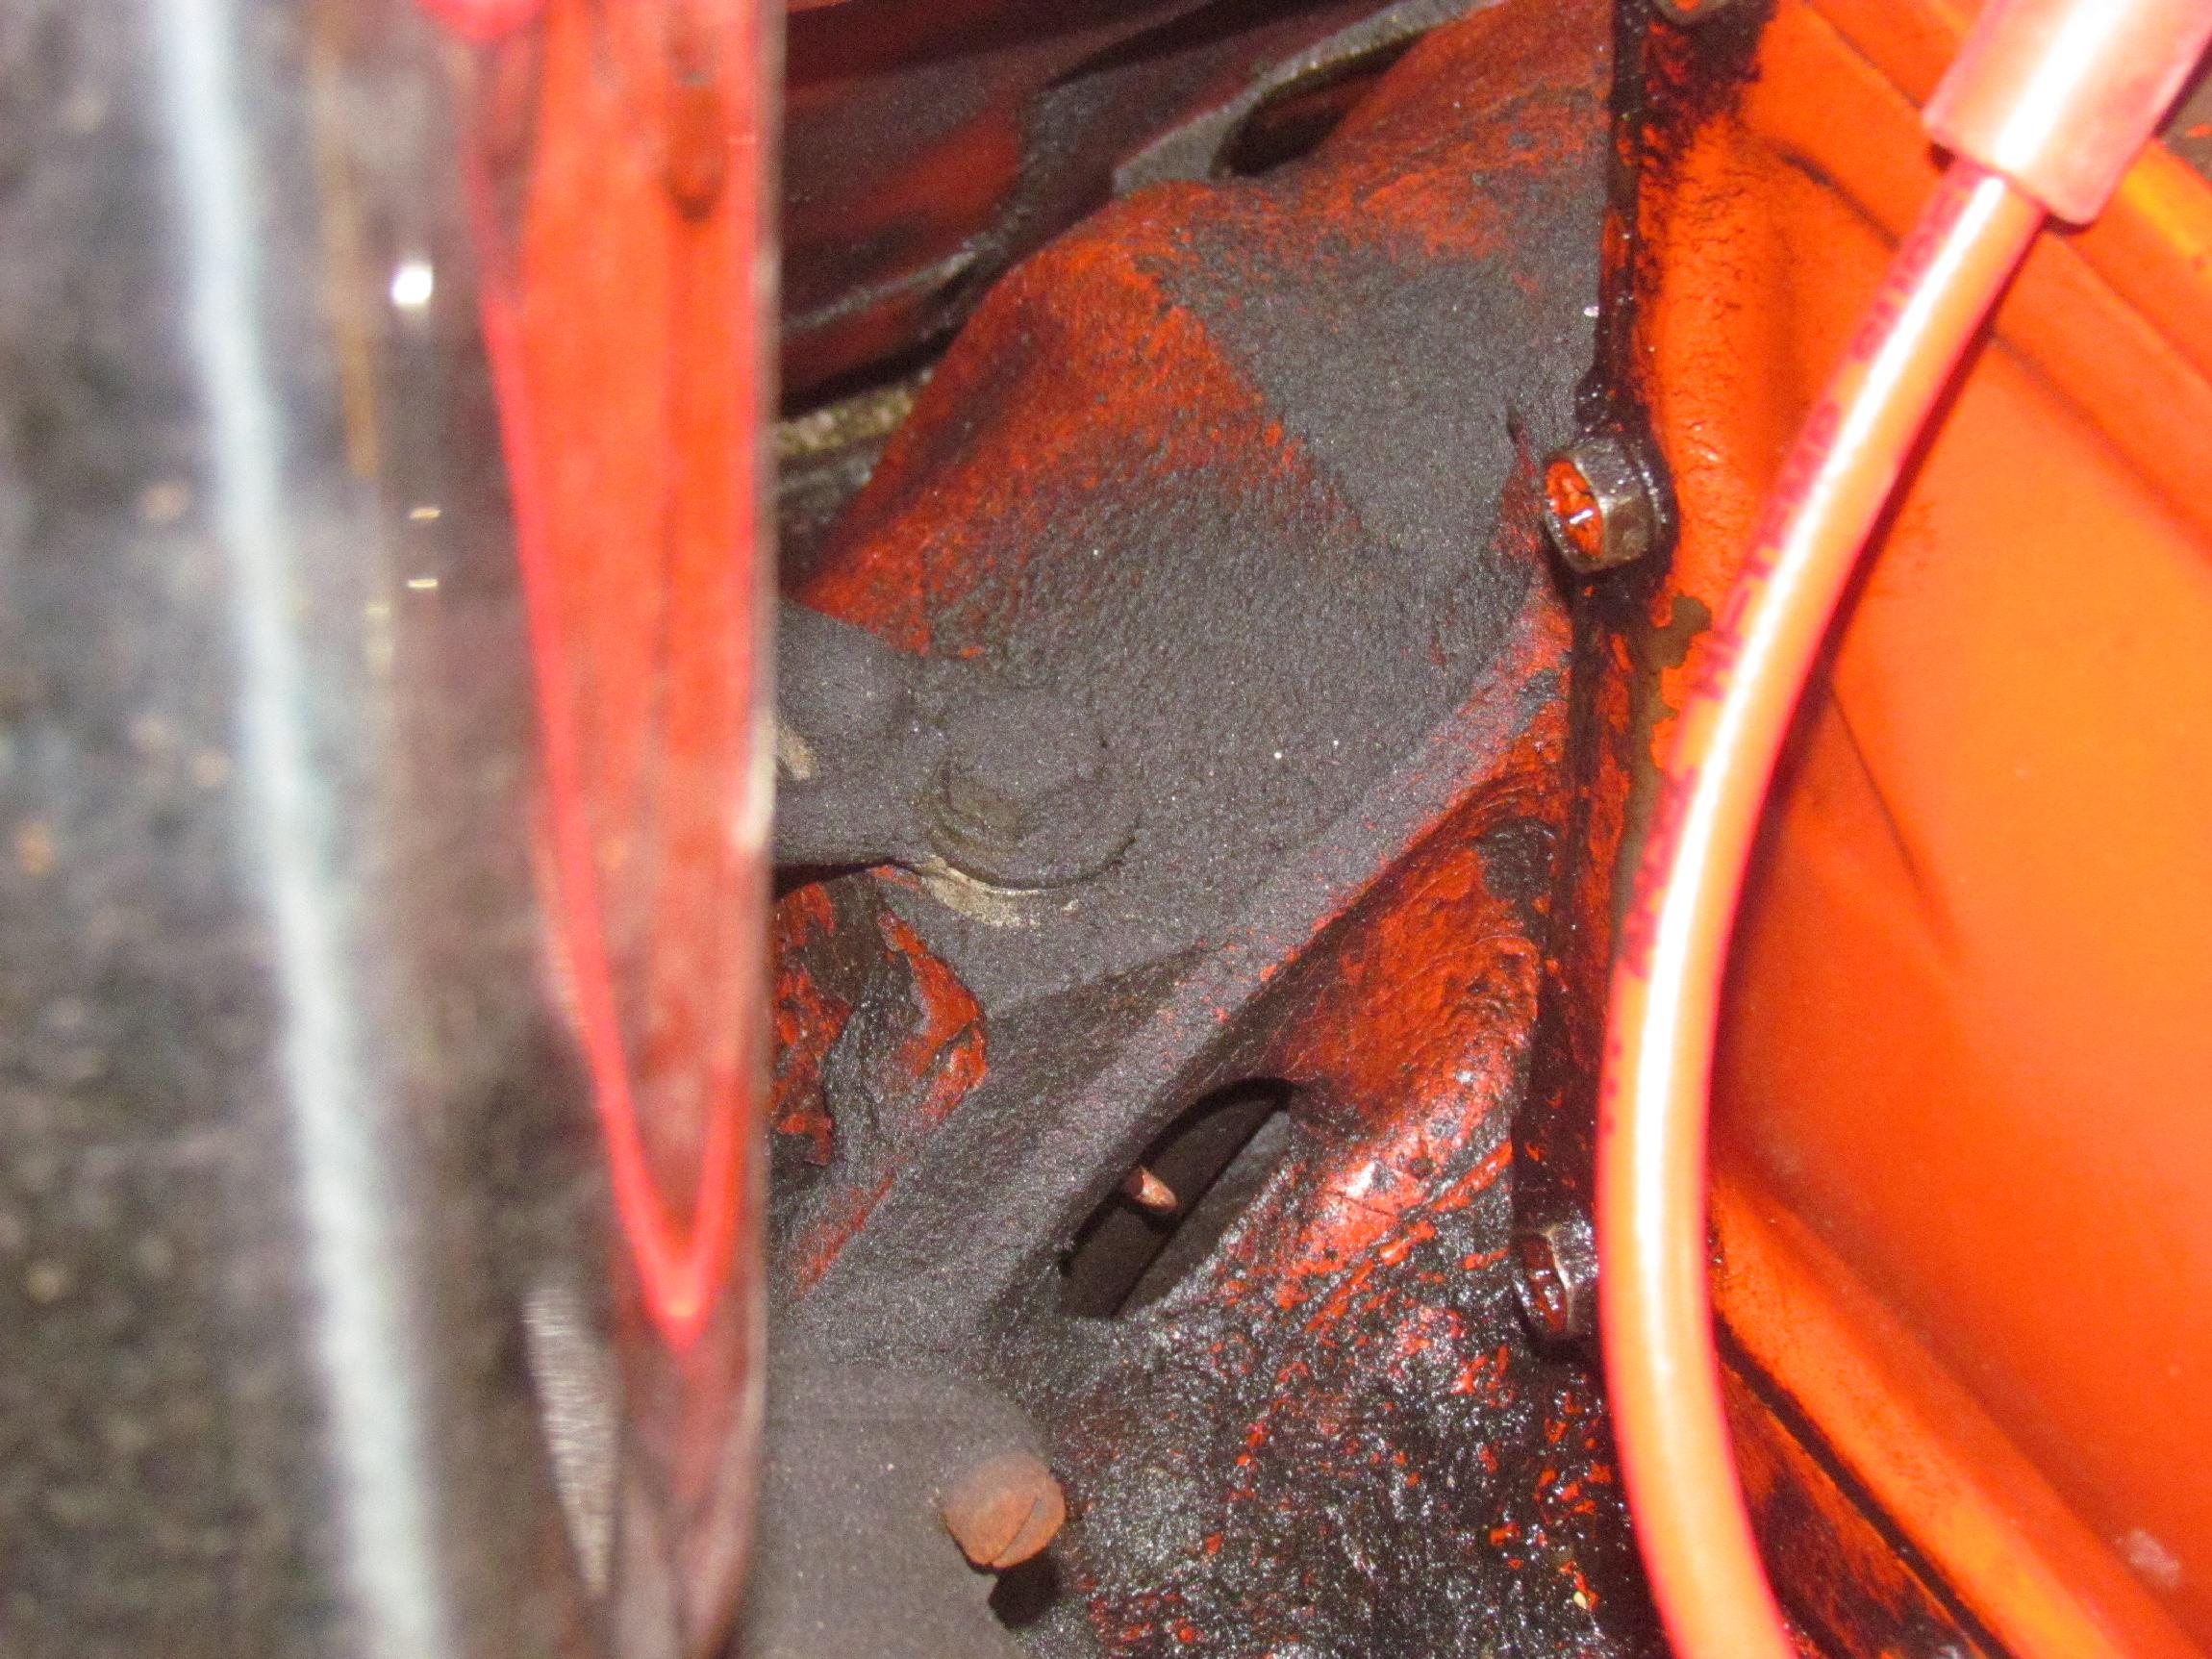 May
8th 2015 The battery
ground wire attaches to the bellhousing above the starter motor. It
hasn't received any cleaning attention for some time and I could spy
some loose electrical tape as well. I got in there with a couple of
applications of spray on Oil Eater before loosening up the hex bolt
with a 9/16" box end wrench.
May
8th 2015 The battery
ground wire attaches to the bellhousing above the starter motor. It
hasn't received any cleaning attention for some time and I could spy
some loose electrical tape as well. I got in there with a couple of
applications of spray on Oil Eater before loosening up the hex bolt
with a 9/16" box end wrench.
 Cannibalized
the braided ground strap from BillyBob and cleaned it up
with Oil Eater as well. Cleaned the ground connector from the battery
and re-taped it. There is a third, smaller, ground wire here that
disappears into the wiring harness. I reattached that as well. I can
now
move on to the next step in the starter problem troubleshooting.
Cannibalized
the braided ground strap from BillyBob and cleaned it up
with Oil Eater as well. Cleaned the ground connector from the battery
and re-taped it. There is a third, smaller, ground wire here that
disappears into the wiring harness. I reattached that as well. I can
now
move on to the next step in the starter problem troubleshooting.
Well, I haven't posted a log entry in a long time so, I'm gonna stop here and post one. The Deerslayer isn't out of the woods yet with various engine issues still to resolve. My daily commute continues to be an adventure. We will pick this up in the next Deerslayer log entry.
| < Back
to Intro |
You can email me at ![]() webmaster@laroke.com
webmaster@laroke.com
Issued Friday May 8, 2015
Updated Monday June 18, 2018
copyright © 2008-2018 Larry R. Kephart all rights reserved
| | LRK Home | | Bio Info | | Krash Khronicles | | LAROKE | |
| | BettyLou | | BillyBob's Garage | | Rat Patrol | | Deerslayer | | Elvira | |
| | Land of the Free and Home of the Brave | |
| | Keppylou's Art | | WWI Soldier's Diary | |