| | LRK Home | | Bio Info | | Krash Khronicles | | LAROKE | |
| | BettyLou | | BillyBob's Garage | | Rat Patrol | | Deerslayer | | Elvira | |
| | Land of the Free and Home of the Brave | |
| | Keppylou's Art | | WWI Soldier's Diary | |
Tinkering with Deerslayer
![]()
DEERSLAYER LINKS including vendor sites for parts and tools as well as sites for old truck and hot rod organizations
![]()
TINKERING WITH DEERSLAYER chronicles the day-by-day maintenance and improvements episodes for Deerslayer, a '37 Chevy farm truck hot rod.
CRUISIN' WITH DEERSLAYER Roadtrips, cruise-in's and truck show stories and tall tales.
TONY'S DUNGEON Tony Pascarella's forum entries at OldGMCtrucks.com regarding Deerslayer, particularly the 302 GMC engine build in his farmhouse basement.
![]()
DEERSLAYER MAINTENANCE Ever changing detailing, oil change, lube, etc. maintenance routines specifically developed for Deerslayer, including required tools, materials and procedures.
PROJECT NAILHEAD Chronicles the rebuild of a 1954 Buick Roadmaster 322 nailhead engine as a future replacement for Deerslayer's Jimmy 302.
35. In the Clutches (of Murphy)
 June
30th 2014
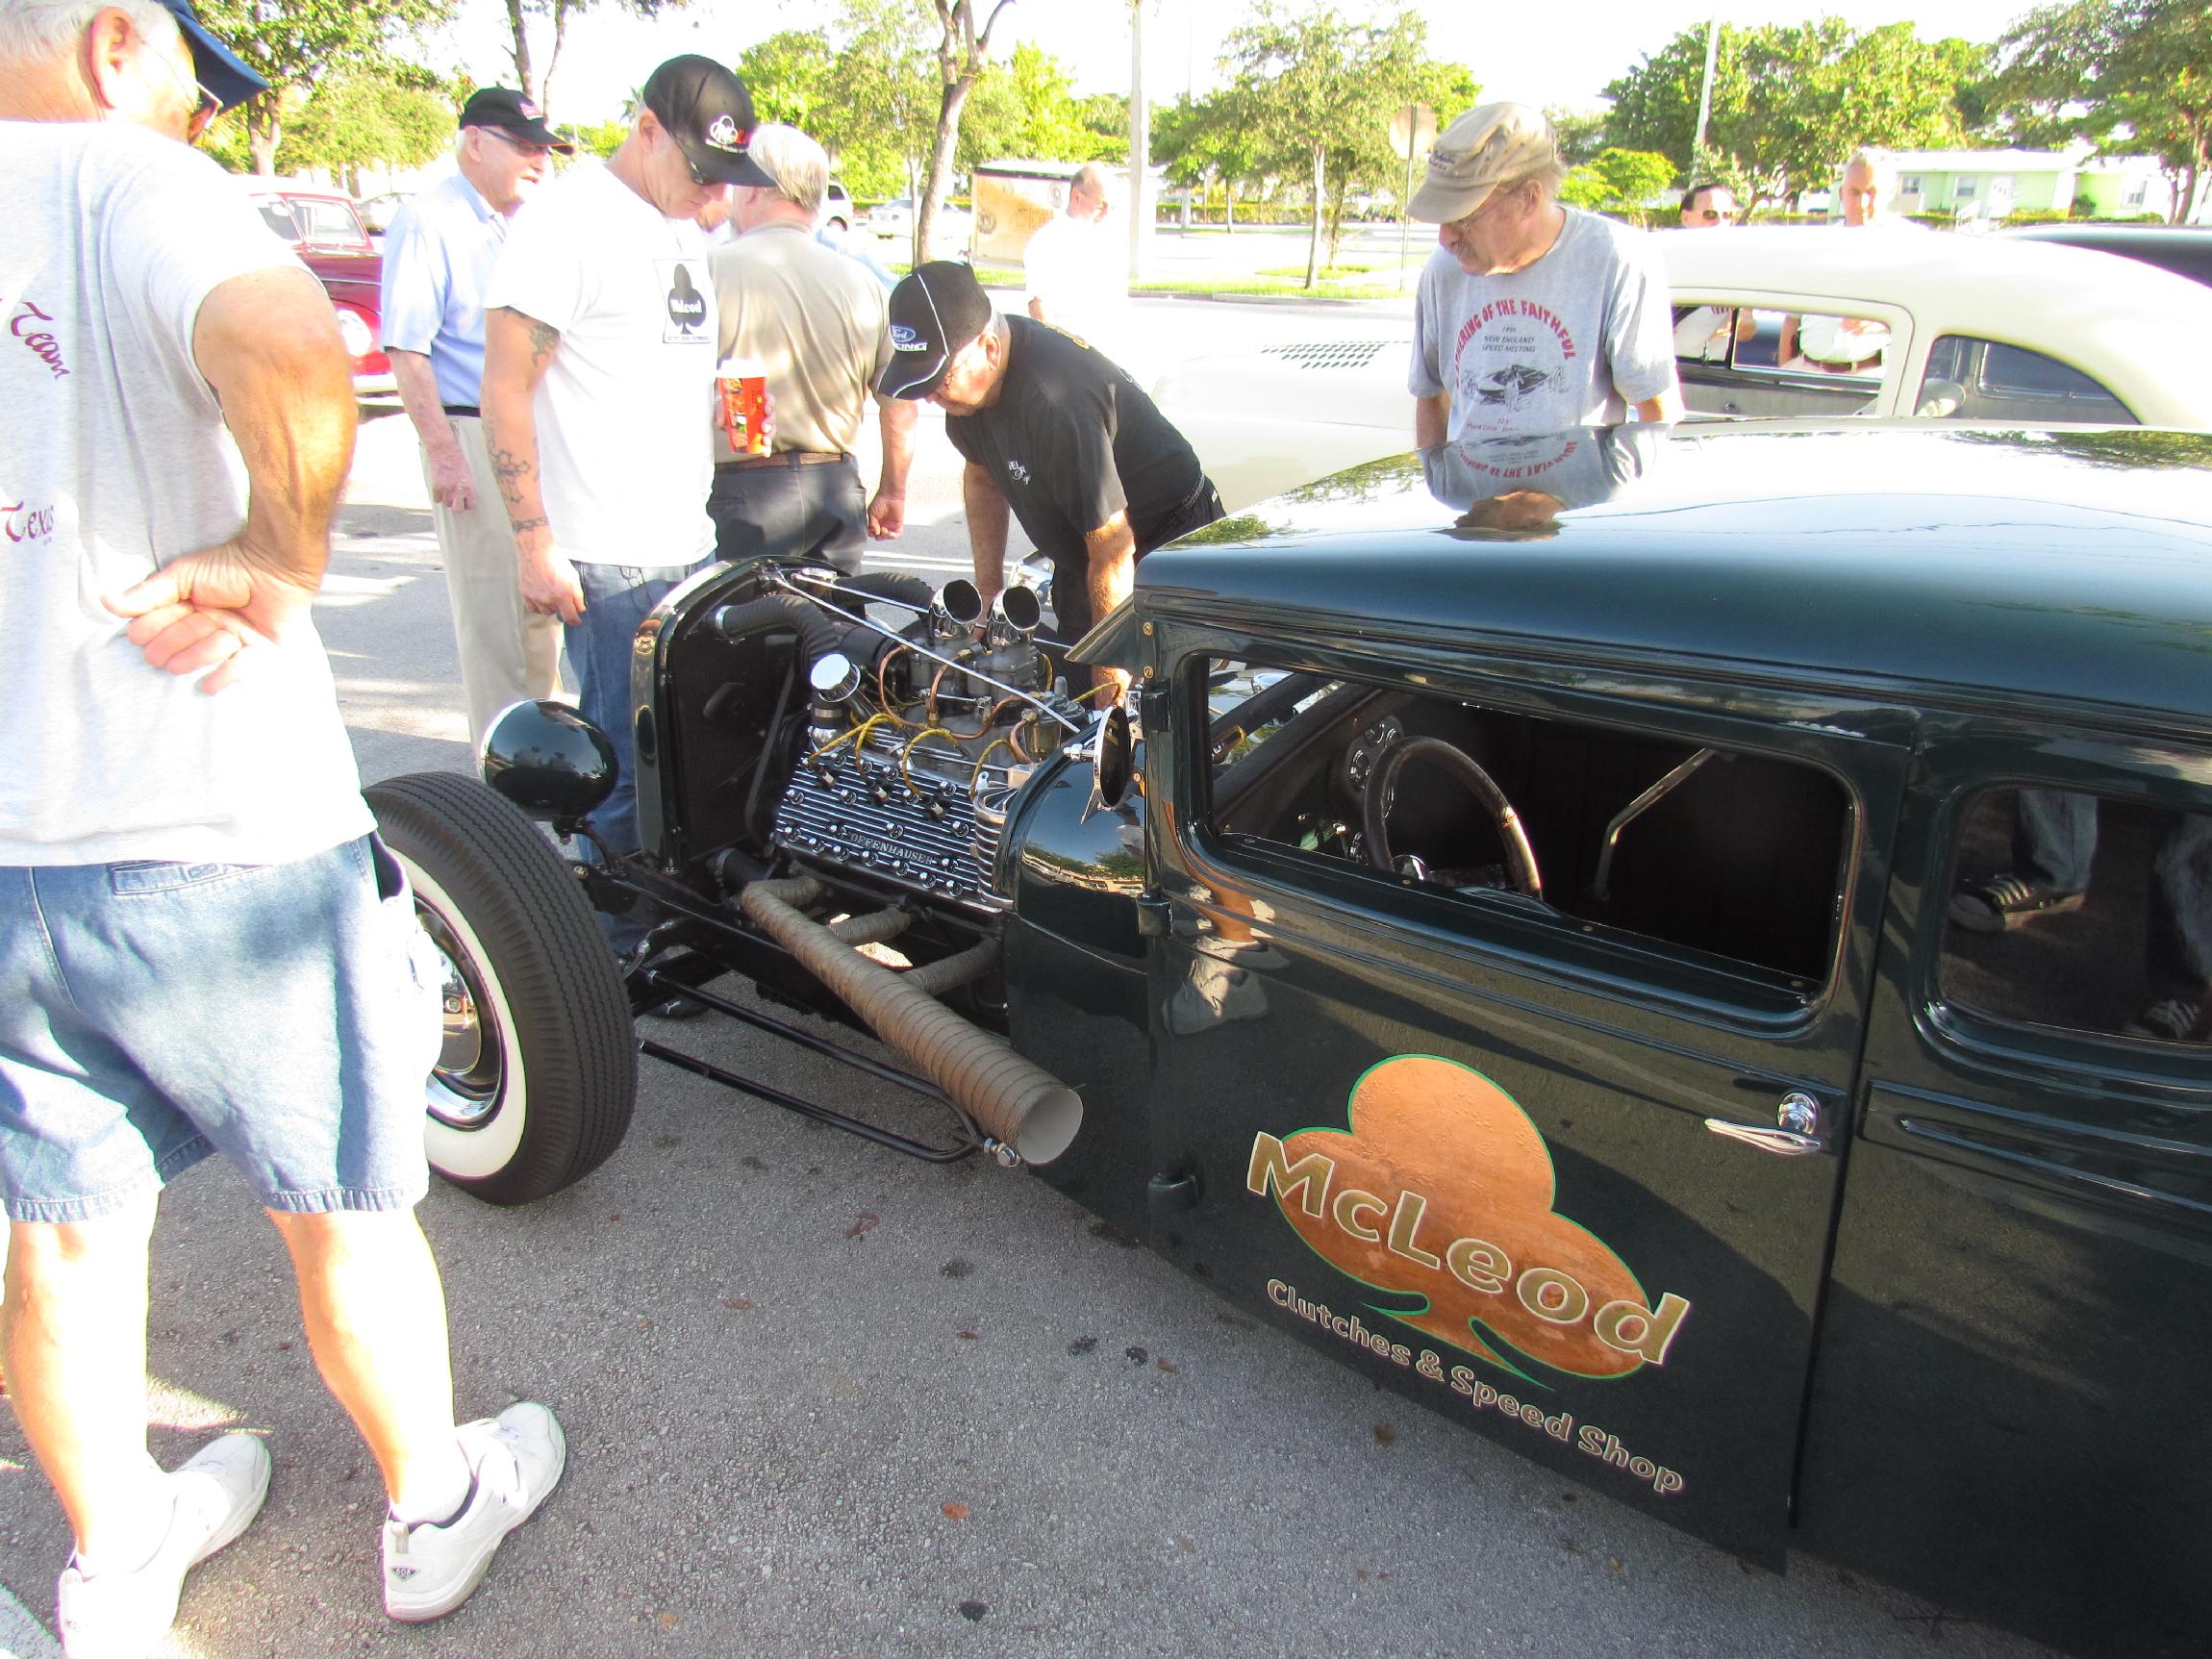
The Sunday morning cruise-in bunch hangs out at a Fort Lauderdale bagel
joint on most Sundays but on the last Sunday of the month, we
meet at the Dandy Donut Factory just east of I-95 on Hollywood Blvd. in
Hollywood , Florida. It was great weather yesterday and we had a better
than usual turnout, including a few new rides like the McLeod Clutches
and Speedshop coupe. This rod doesn't need any improvements but rodders
never let that stop them and this one is destined for a
vintage
blower setup down the road. The owner/builder, Brian Lee, is
conferring with Mike Cunningham
here who has built more blower motors than he can remember in his many
years of building for top drag racing teams.
June
30th 2014
The Sunday morning cruise-in bunch hangs out at a Fort Lauderdale bagel
joint on most Sundays but on the last Sunday of the month, we
meet at the Dandy Donut Factory just east of I-95 on Hollywood Blvd. in
Hollywood , Florida. It was great weather yesterday and we had a better
than usual turnout, including a few new rides like the McLeod Clutches
and Speedshop coupe. This rod doesn't need any improvements but rodders
never let that stop them and this one is destined for a
vintage
blower setup down the road. The owner/builder, Brian Lee, is
conferring with Mike Cunningham
here who has built more blower motors than he can remember in his many
years of building for top drag racing teams.
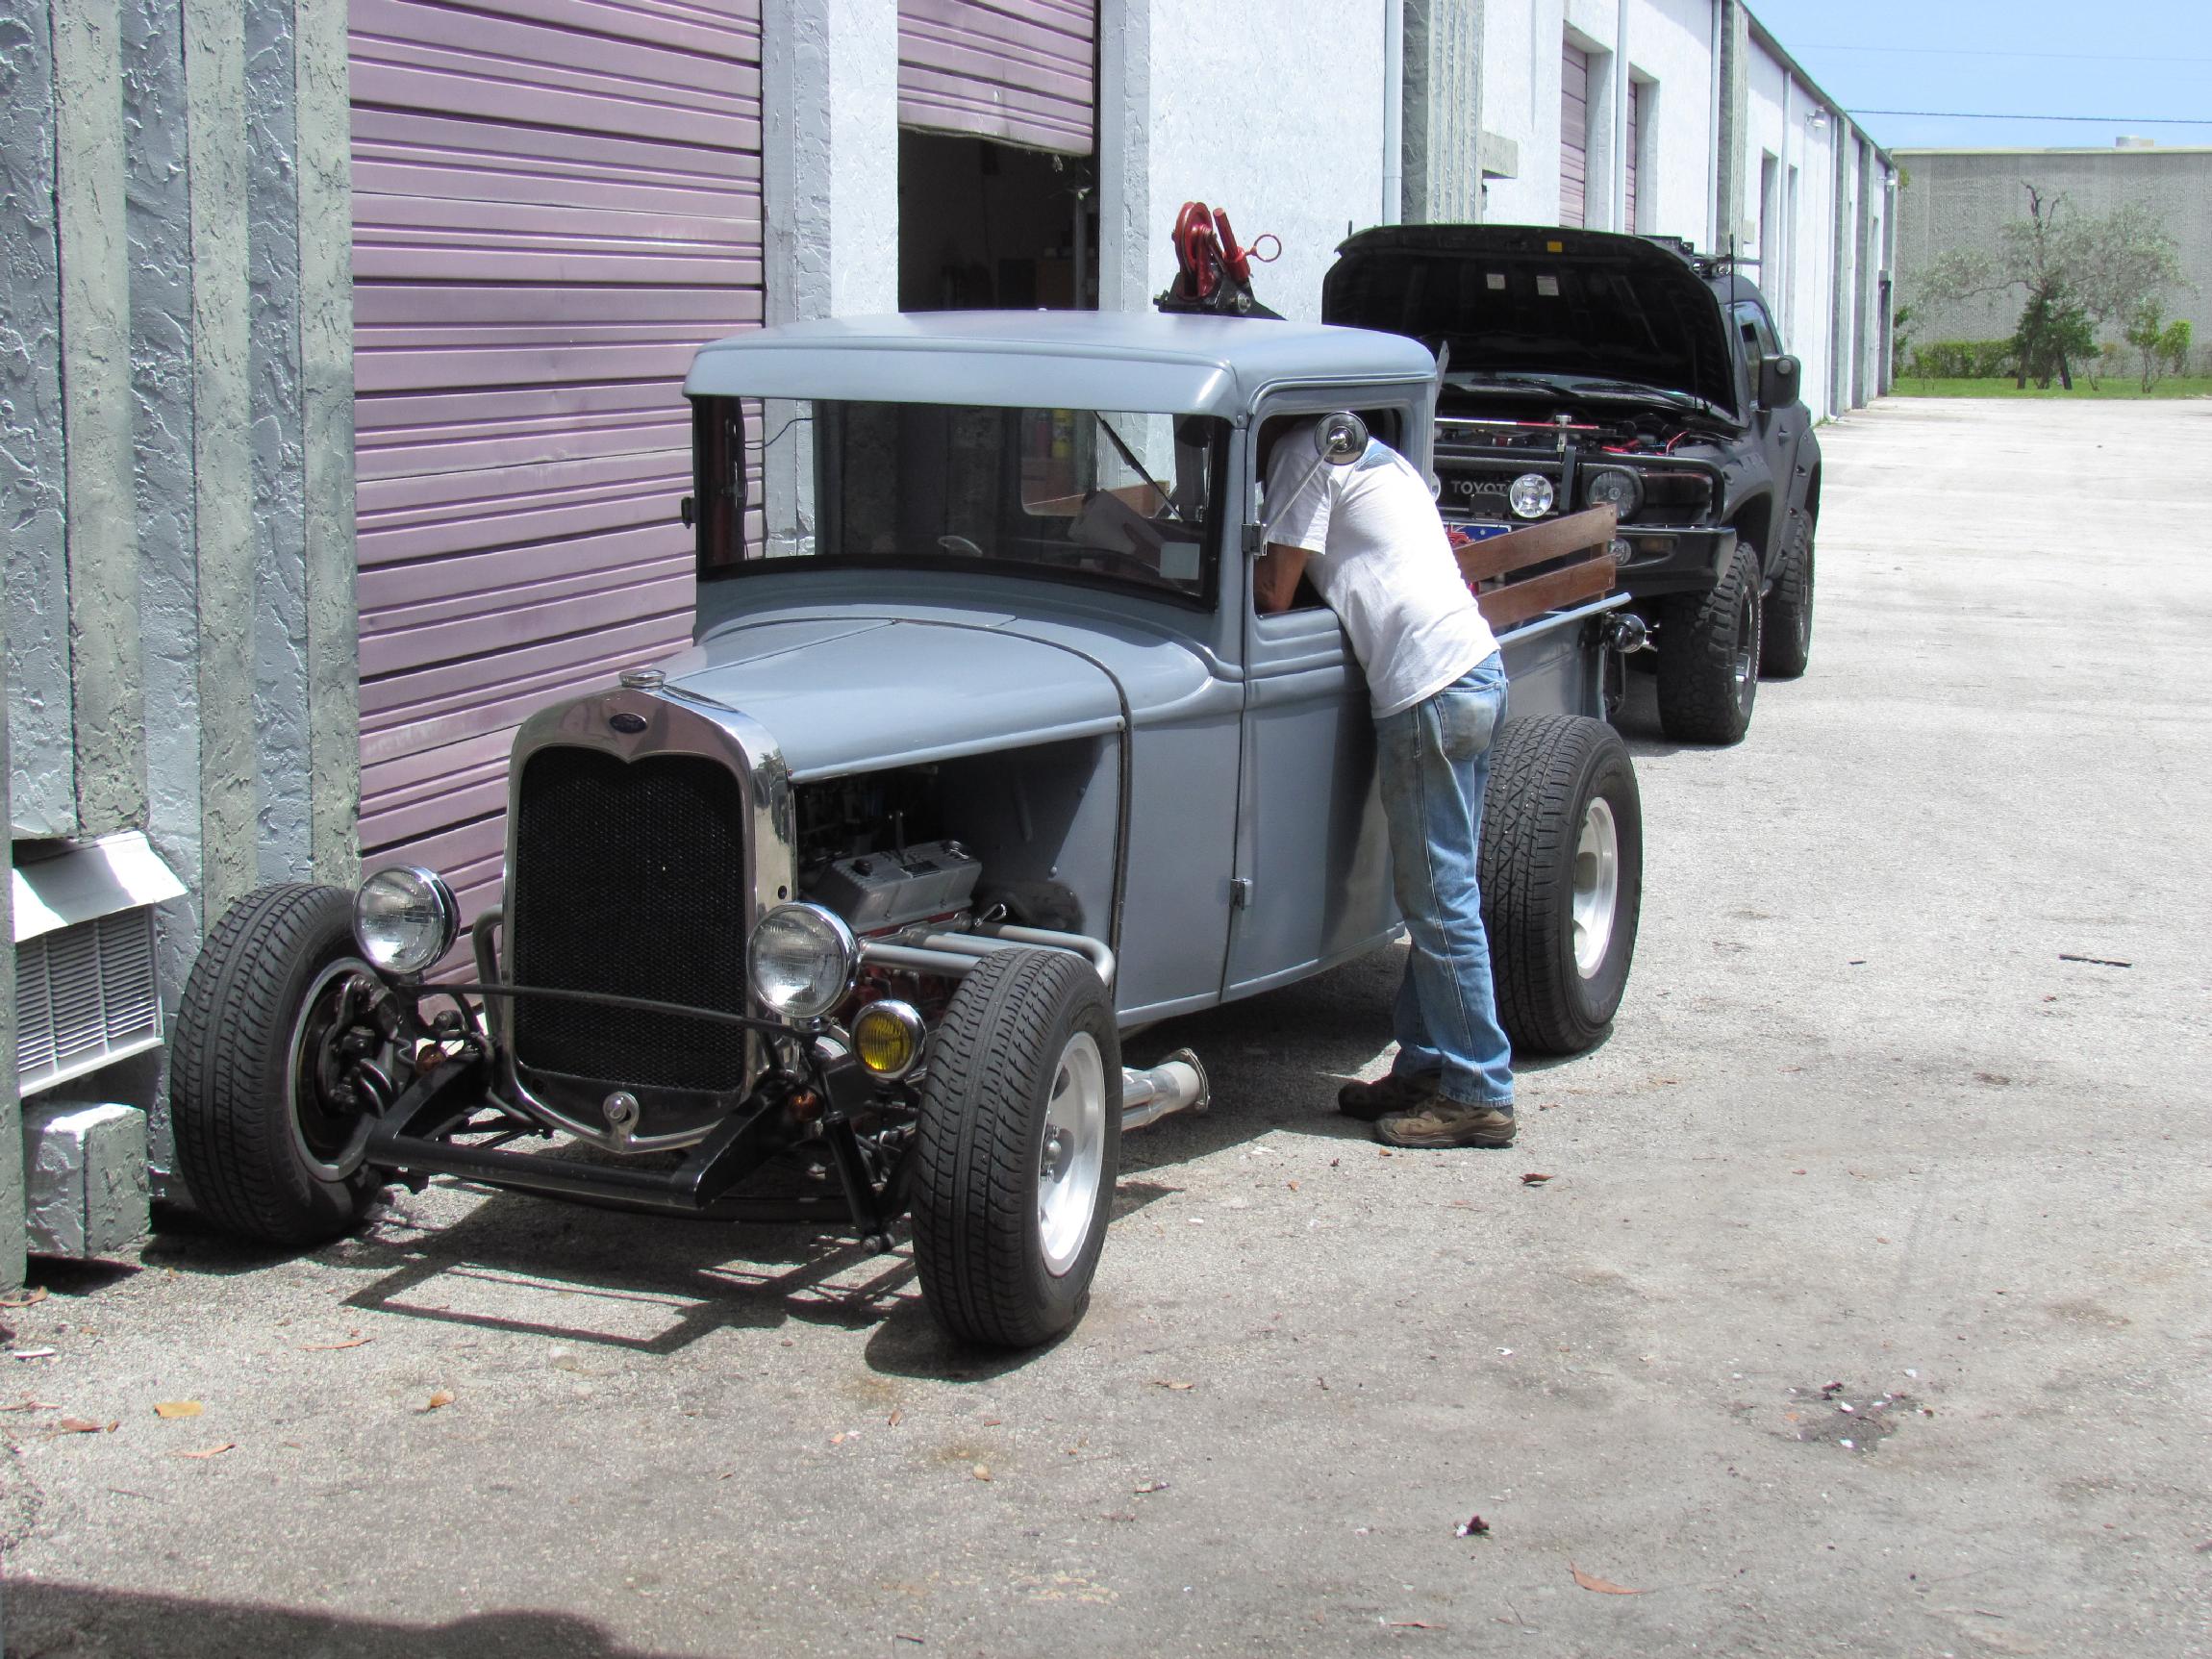
 July
23rd 2014
We've had a month of rainouts at the tuesday night cruise-in
at
Duffys in Delray Beach. Only a few of us have been showing up and even
fewer in show cars. Last nite, a fella named Sam arrived in this Model
A Roadster pickemup I had never seen before. He also has a silver '35
Chevy Roadster. I have seen that one before.
July
23rd 2014
We've had a month of rainouts at the tuesday night cruise-in
at
Duffys in Delray Beach. Only a few of us have been showing up and even
fewer in show cars. Last nite, a fella named Sam arrived in this Model
A Roadster pickemup I had never seen before. He also has a silver '35
Chevy Roadster. I have seen that one before.
 July
31st 2014
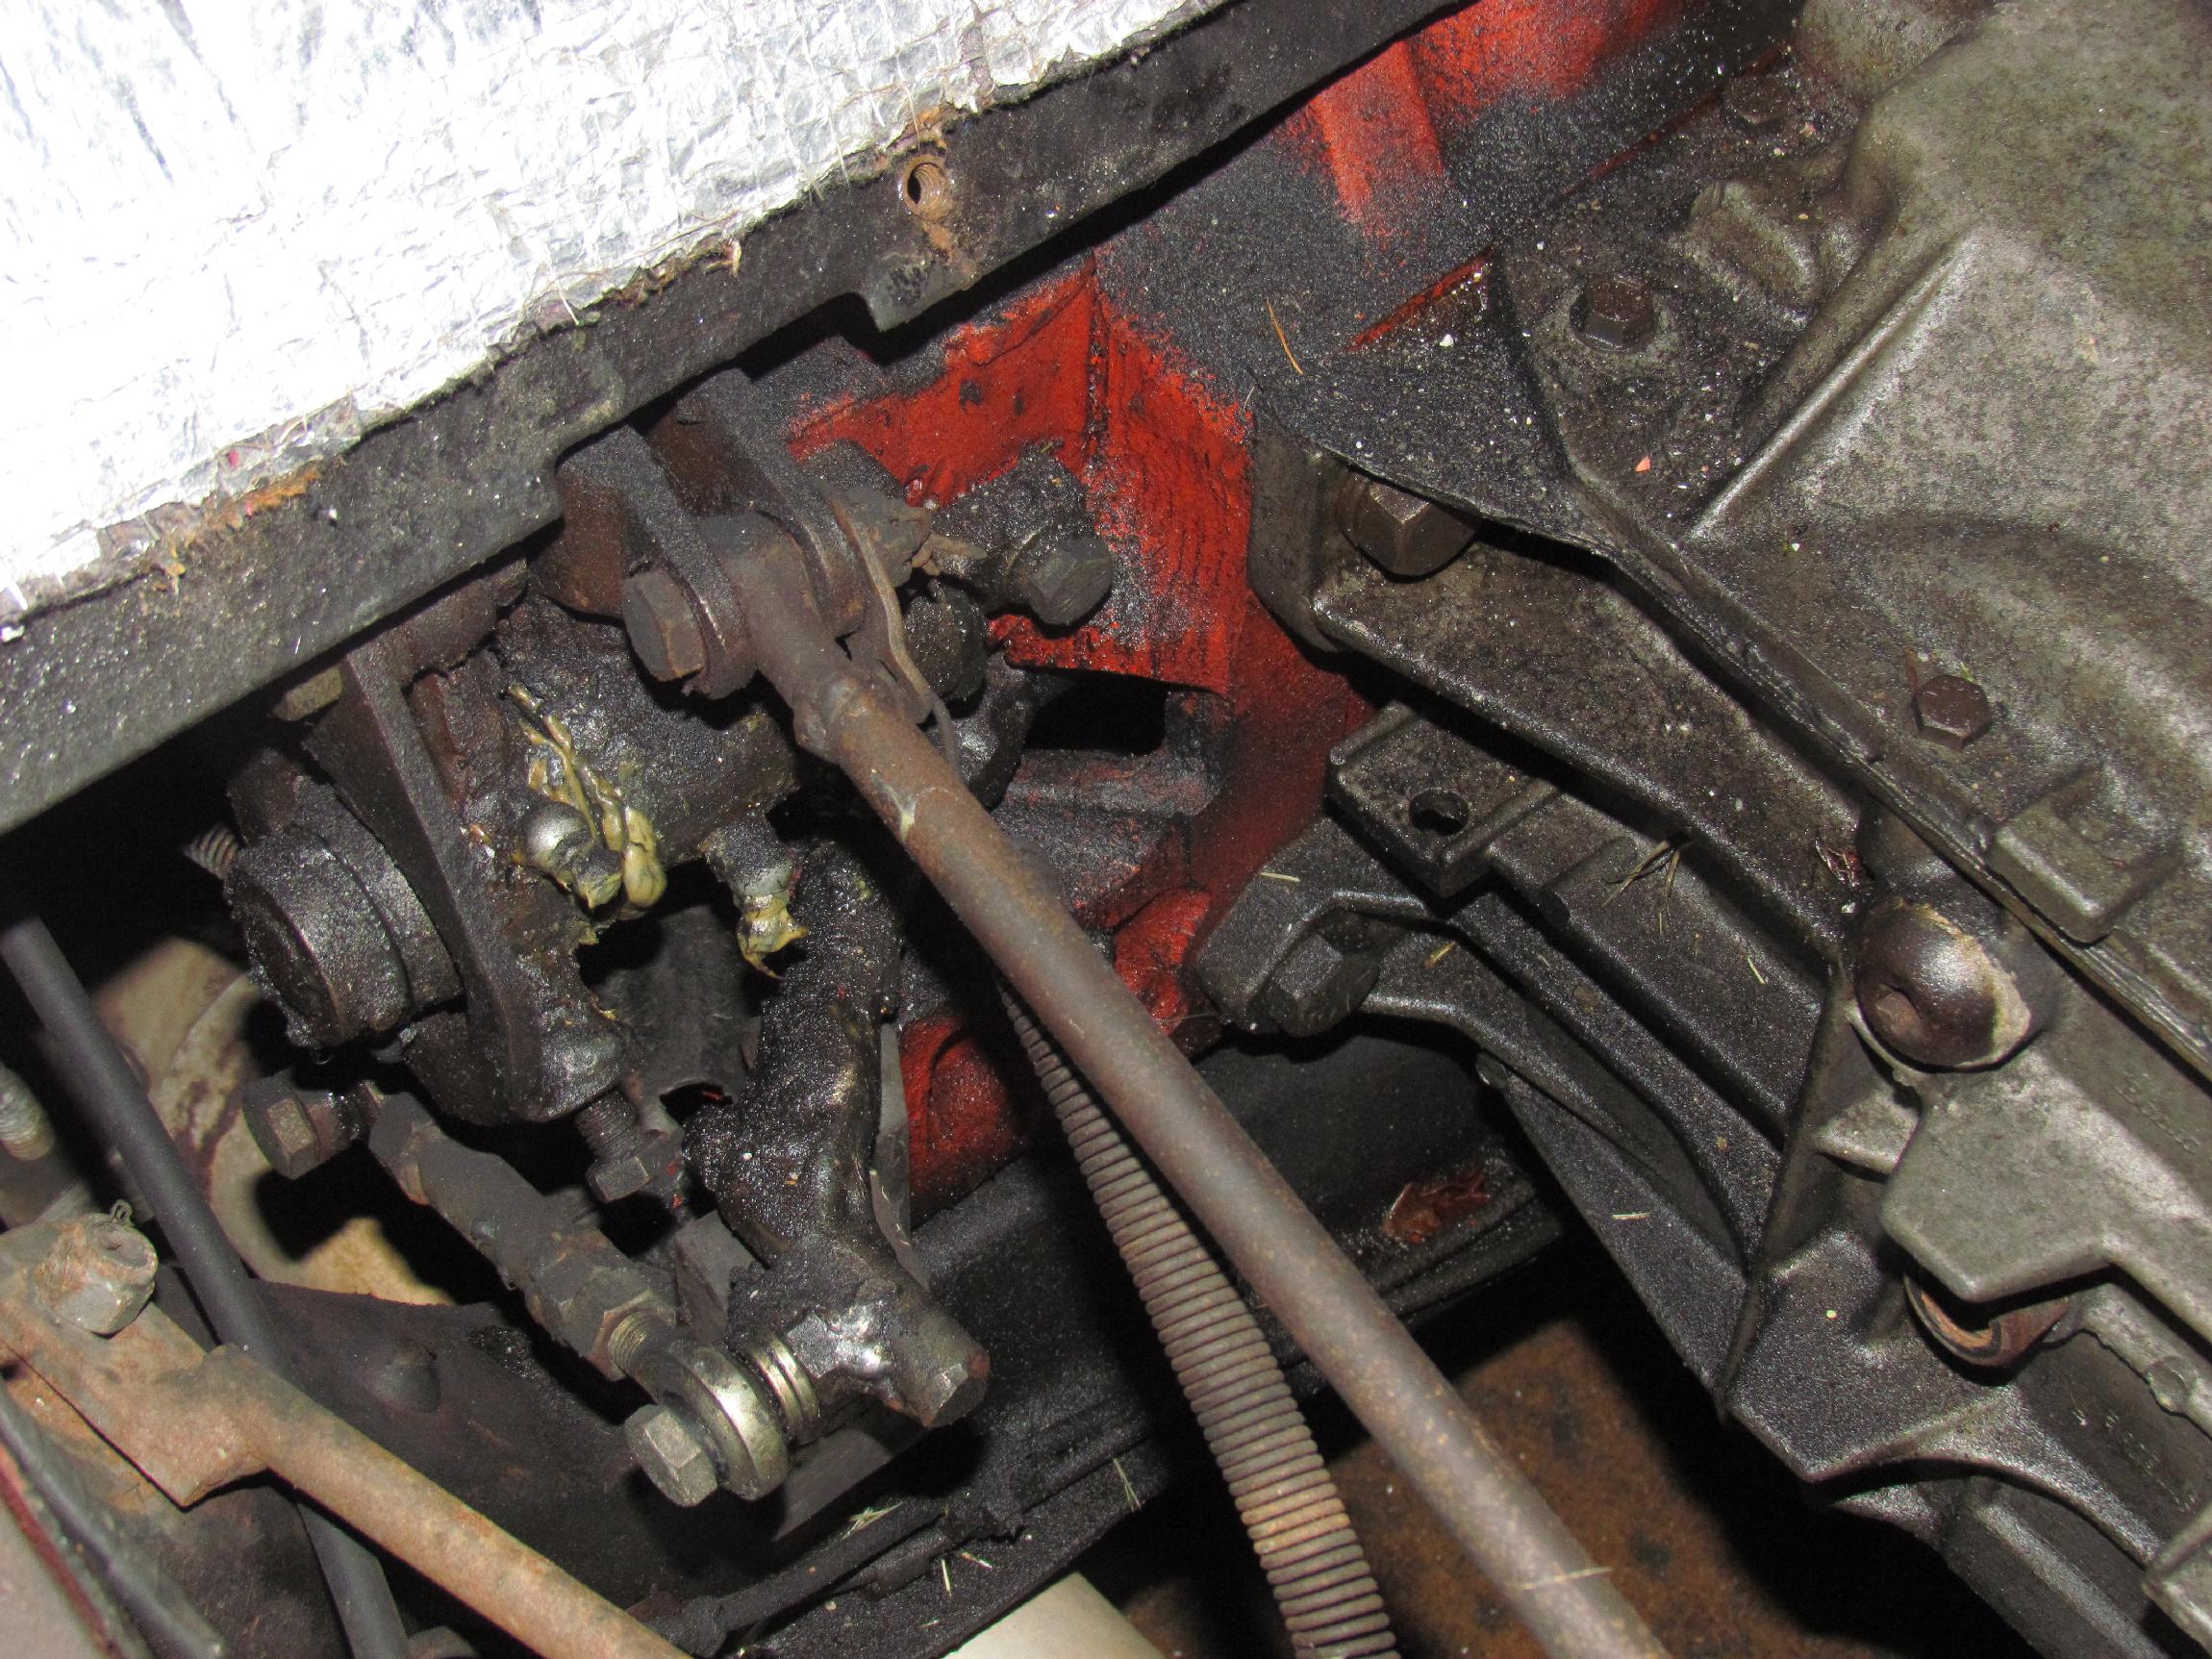
I haven't been doin' diddly in the shop so Murphy decided to
give
me a kick in the ass. I got two blocks from the shop this
morning
when I heard a slight clink under the truck and the clutch pedal got
easier to push. I soon found that I could not fully disengage the Hayes
clutch
anymore. Managed to limp back to the shop and get Deerslayer inside.
Shure am glad I didn't have to use reverse. Put on my work
duds
and pulled the floor in the Deerslayer cab. Was hopin' it was
the
linkage and I could weld it up and be on my way. No such luck. Linkage
looks to be fine. Gonna have to pull the clutch. Damnation!
July
31st 2014
I haven't been doin' diddly in the shop so Murphy decided to
give
me a kick in the ass. I got two blocks from the shop this
morning
when I heard a slight clink under the truck and the clutch pedal got
easier to push. I soon found that I could not fully disengage the Hayes
clutch
anymore. Managed to limp back to the shop and get Deerslayer inside.
Shure am glad I didn't have to use reverse. Put on my work
duds
and pulled the floor in the Deerslayer cab. Was hopin' it was
the
linkage and I could weld it up and be on my way. No such luck. Linkage
looks to be fine. Gonna have to pull the clutch. Damnation!
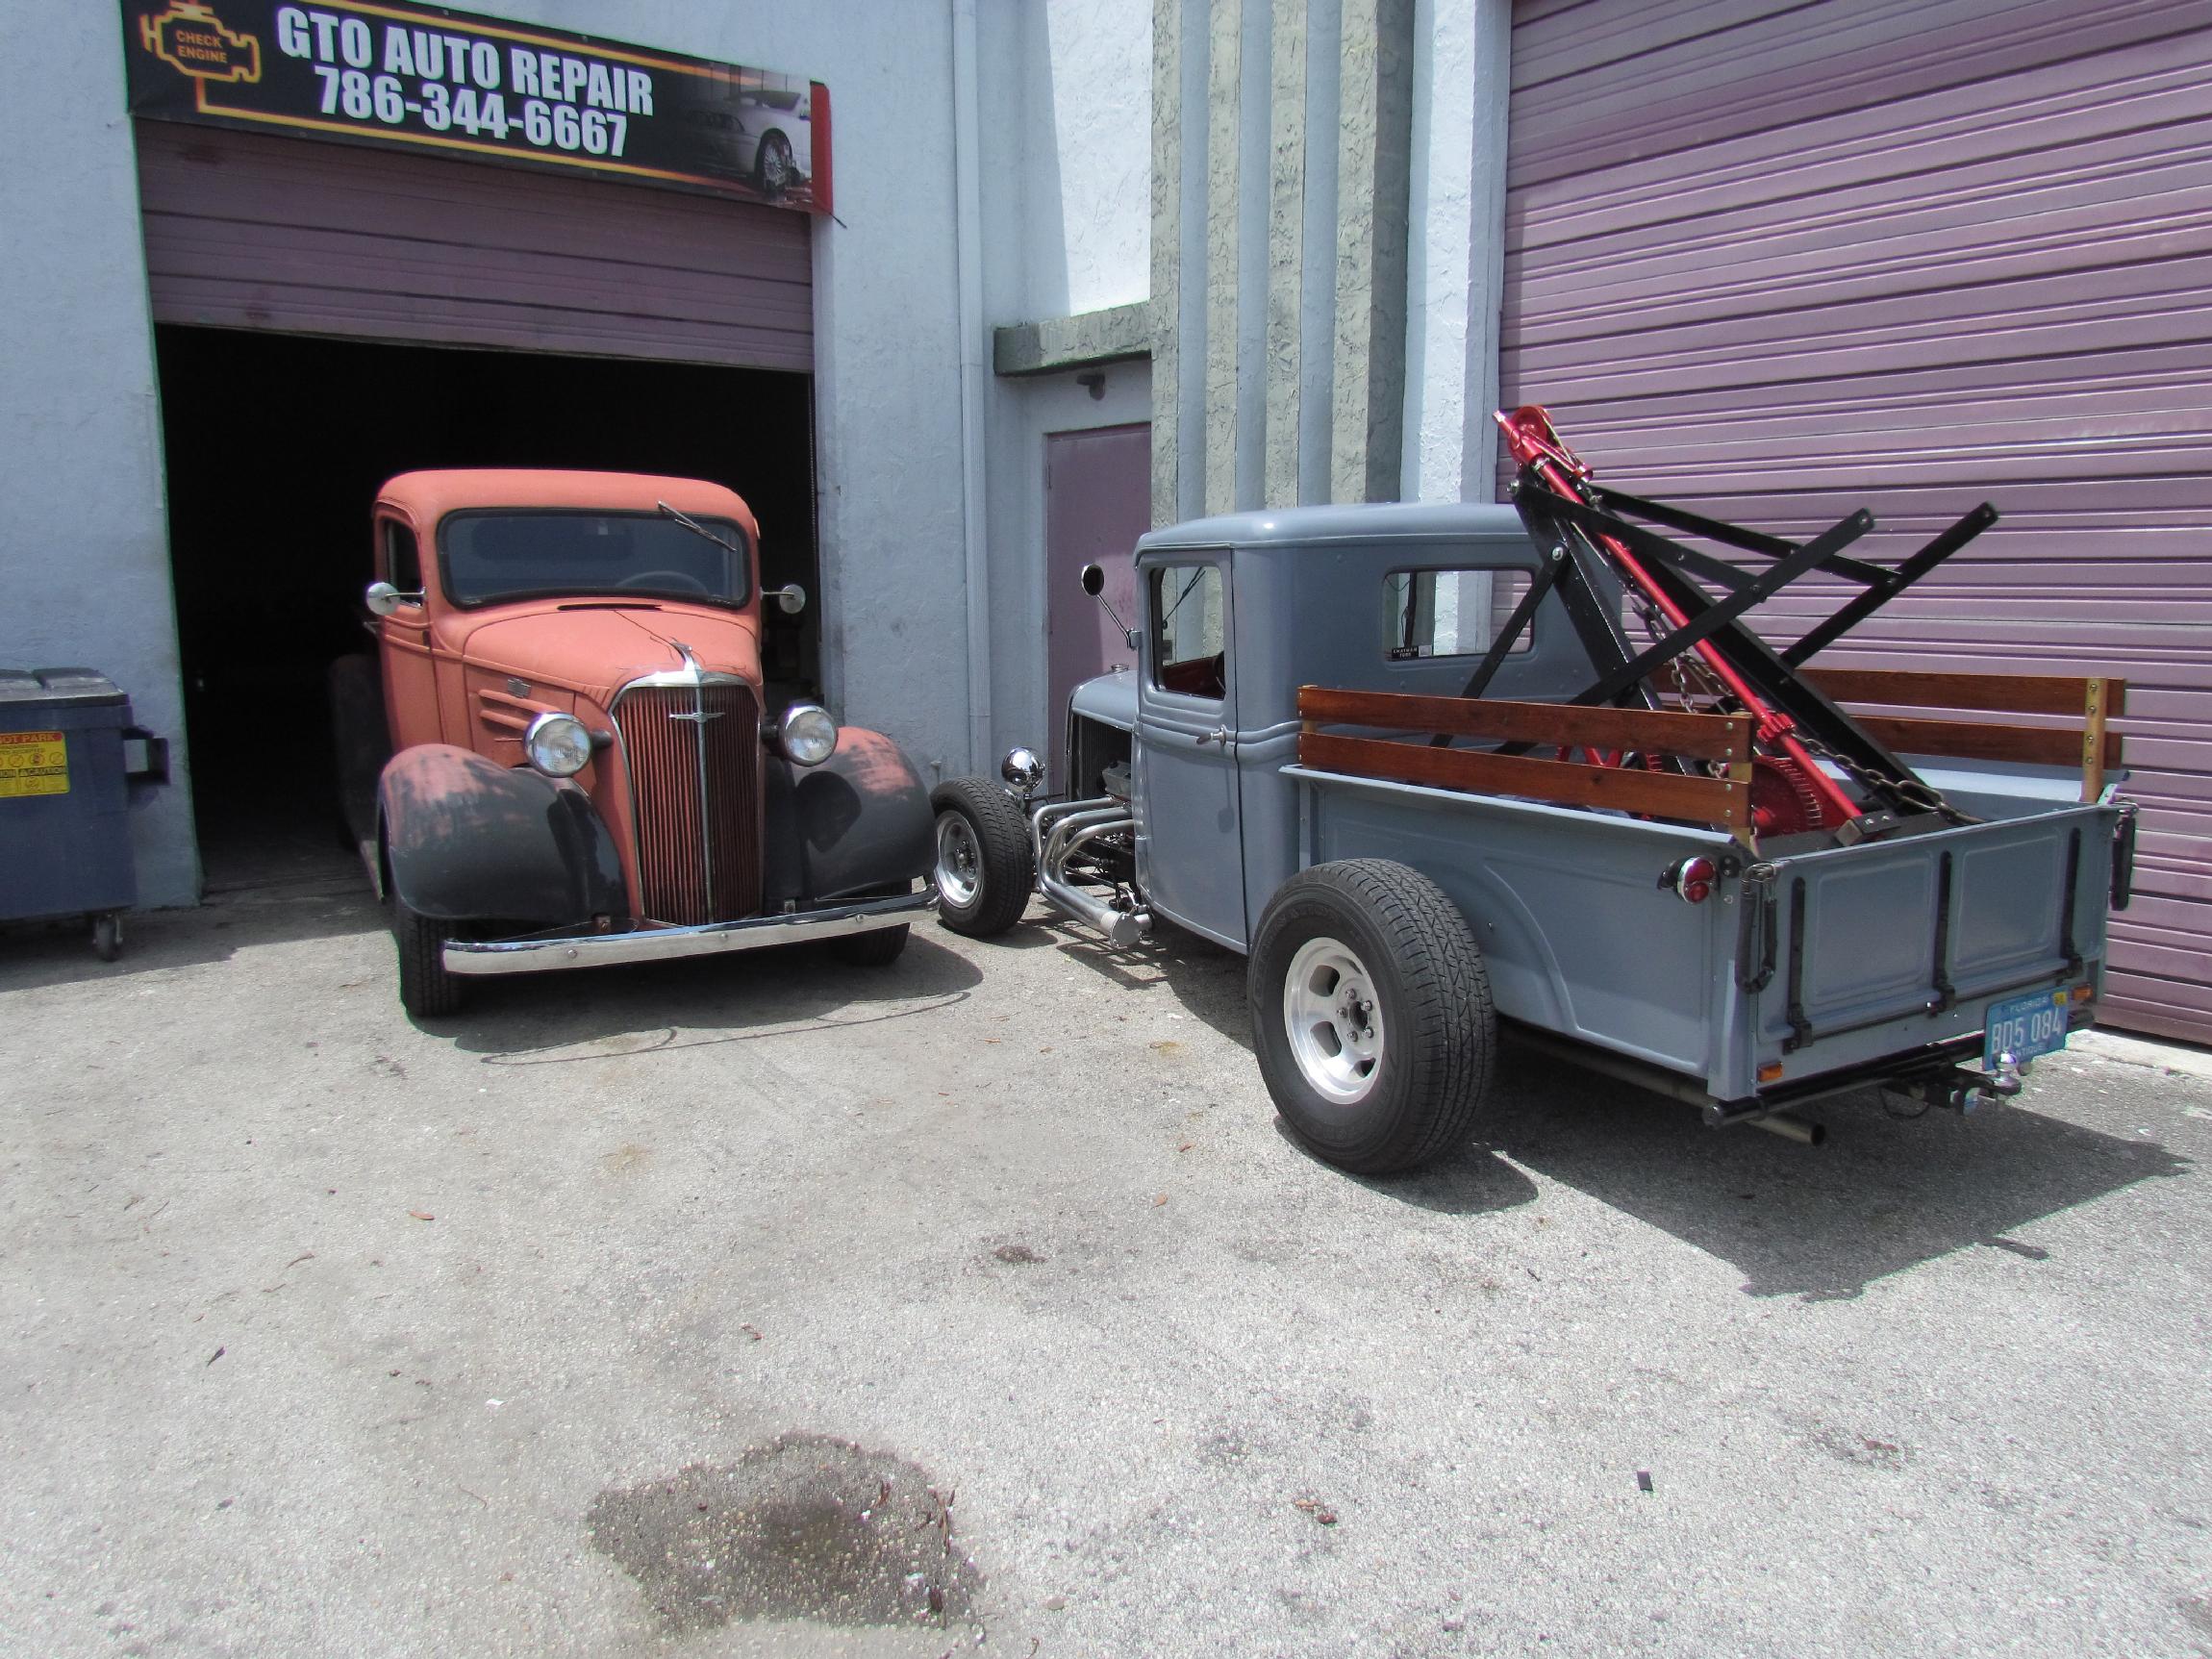
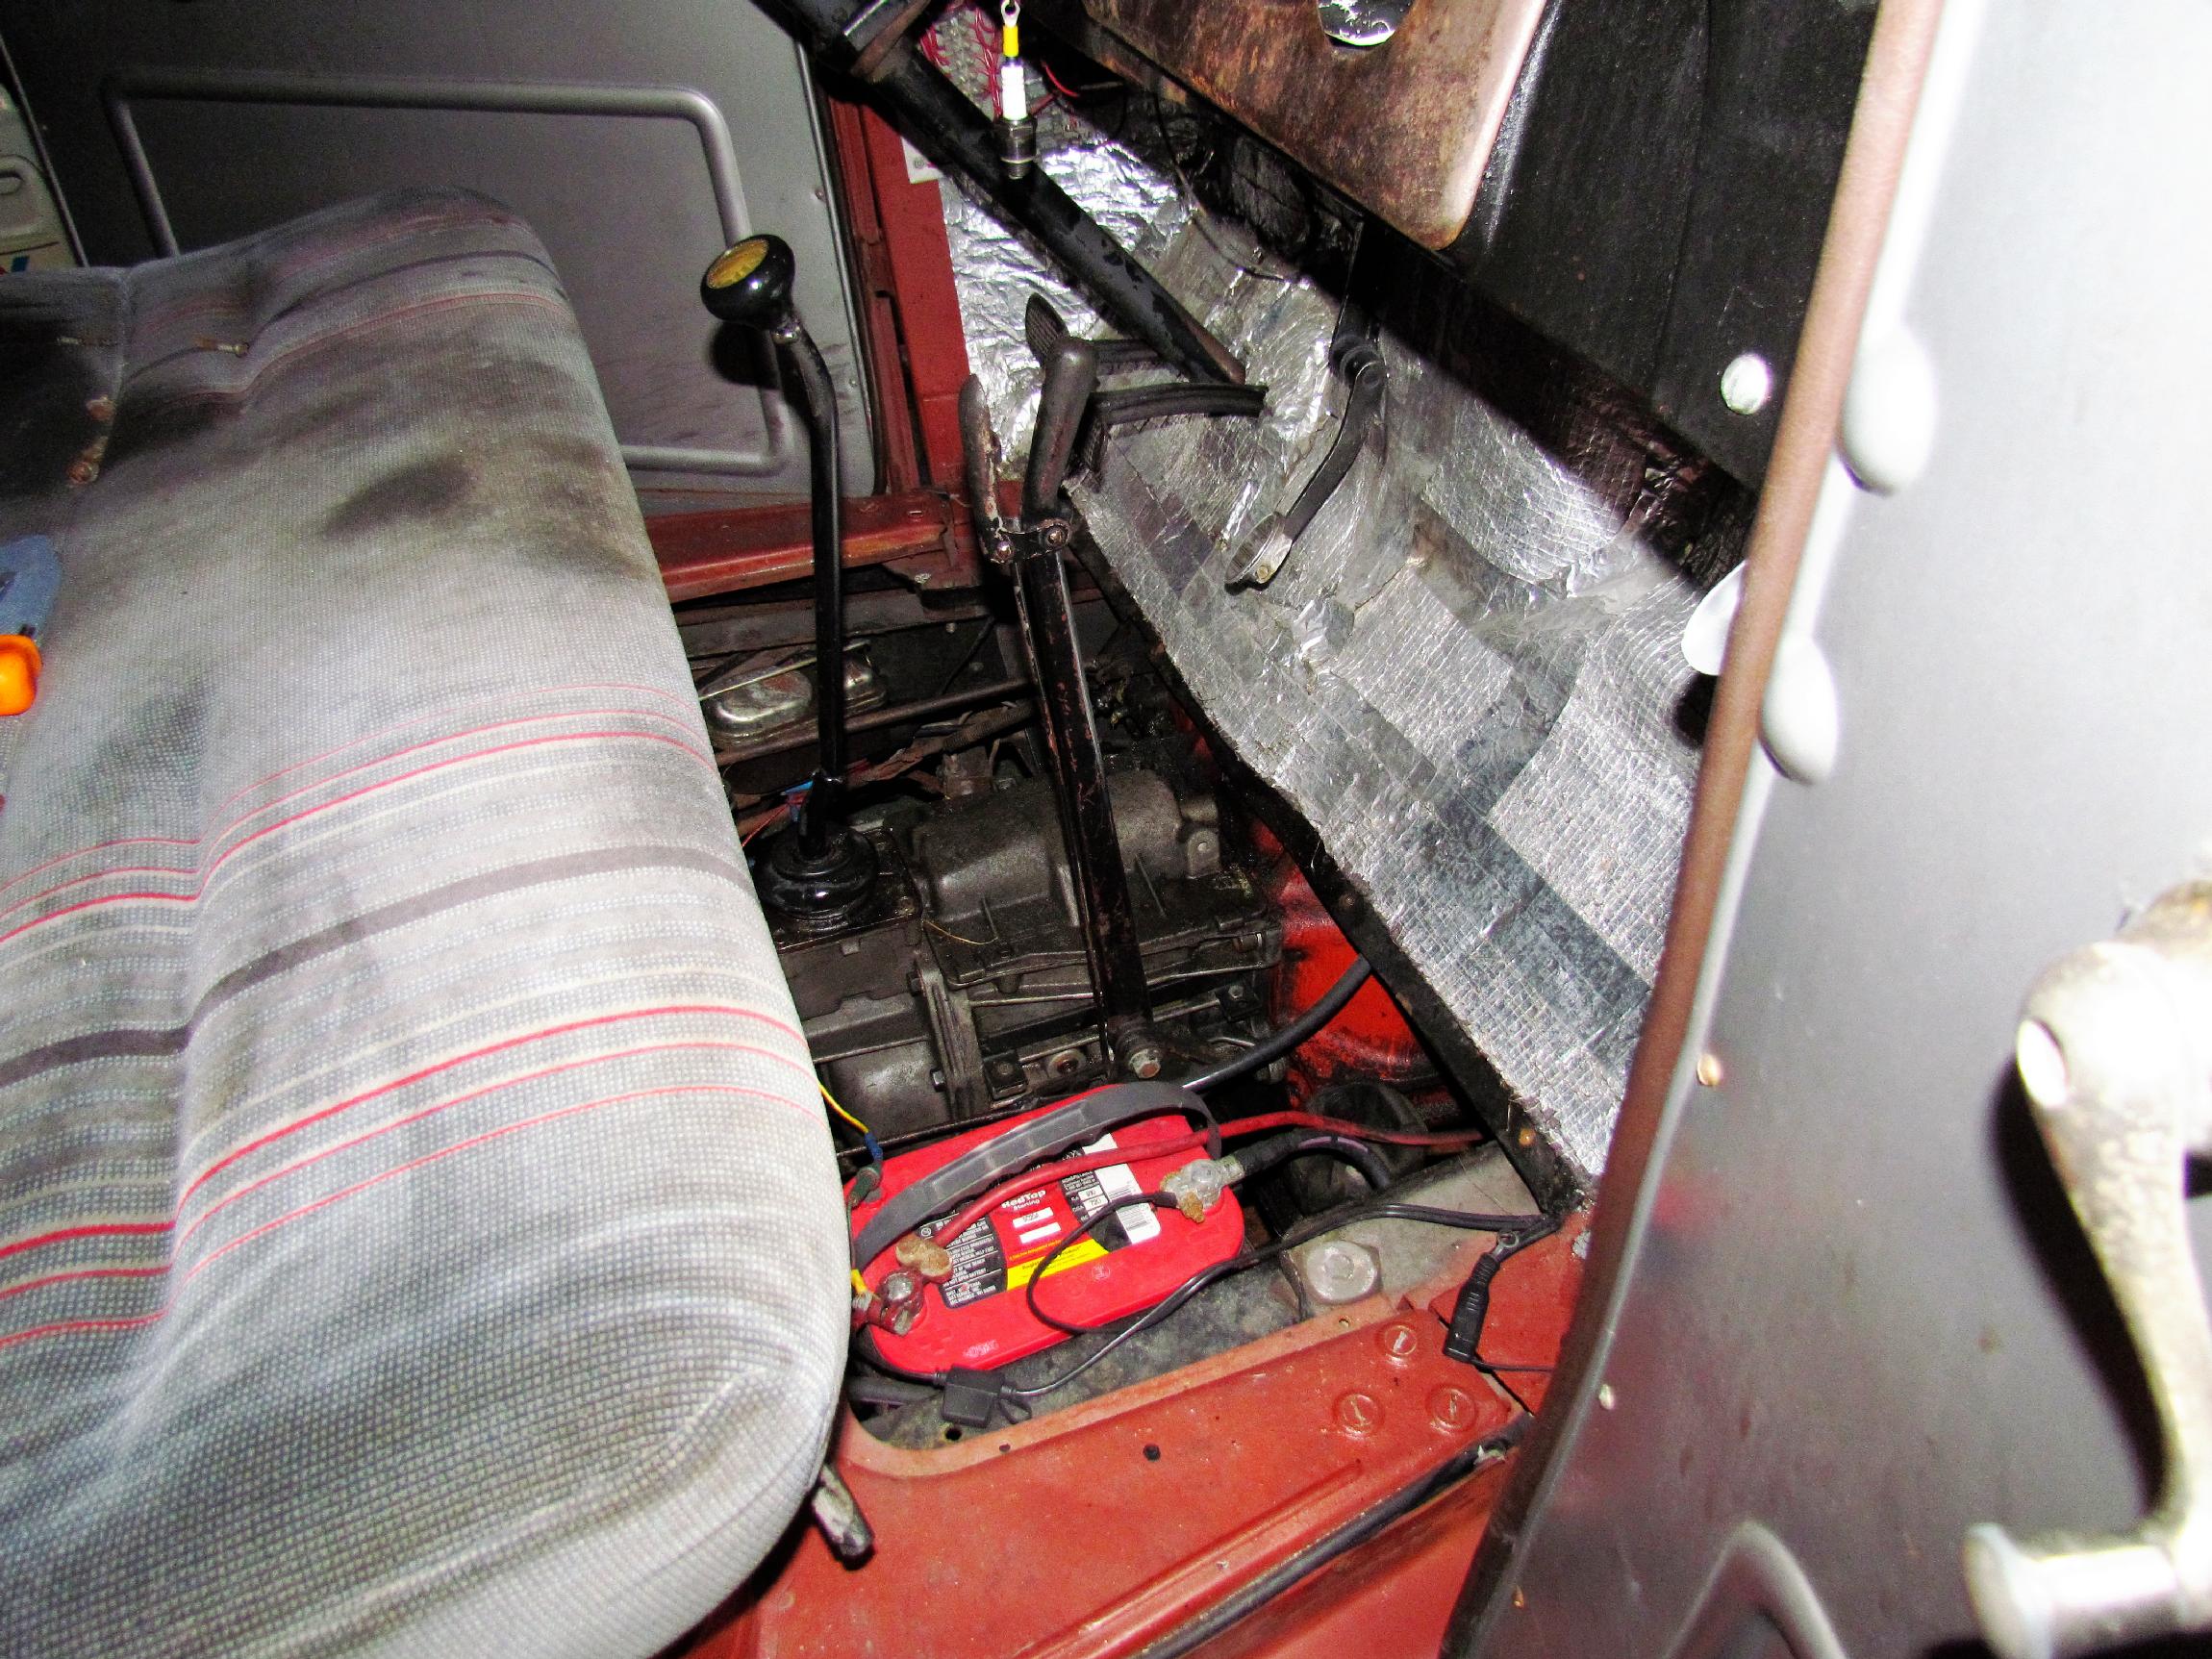 August
2nd 2014
My friend Gato, in the bay catty-corner from the BillyBob
Shop caught wind of the clutch malfunction and insisted on helping me
take it out. I told Gato that I didn't want to tie up his
lift but he said it wouldn't take more than ninety minutes and we could
start at eight-thirty Saturday morning. I got up earlier and
moved Deerslayer's battery, shift lever and handbrake lever
out of the way before Gato opened up his shop.
August
2nd 2014
My friend Gato, in the bay catty-corner from the BillyBob
Shop caught wind of the clutch malfunction and insisted on helping me
take it out. I told Gato that I didn't want to tie up his
lift but he said it wouldn't take more than ninety minutes and we could
start at eight-thirty Saturday morning. I got up earlier and
moved Deerslayer's battery, shift lever and handbrake lever
out of the way before Gato opened up his shop.
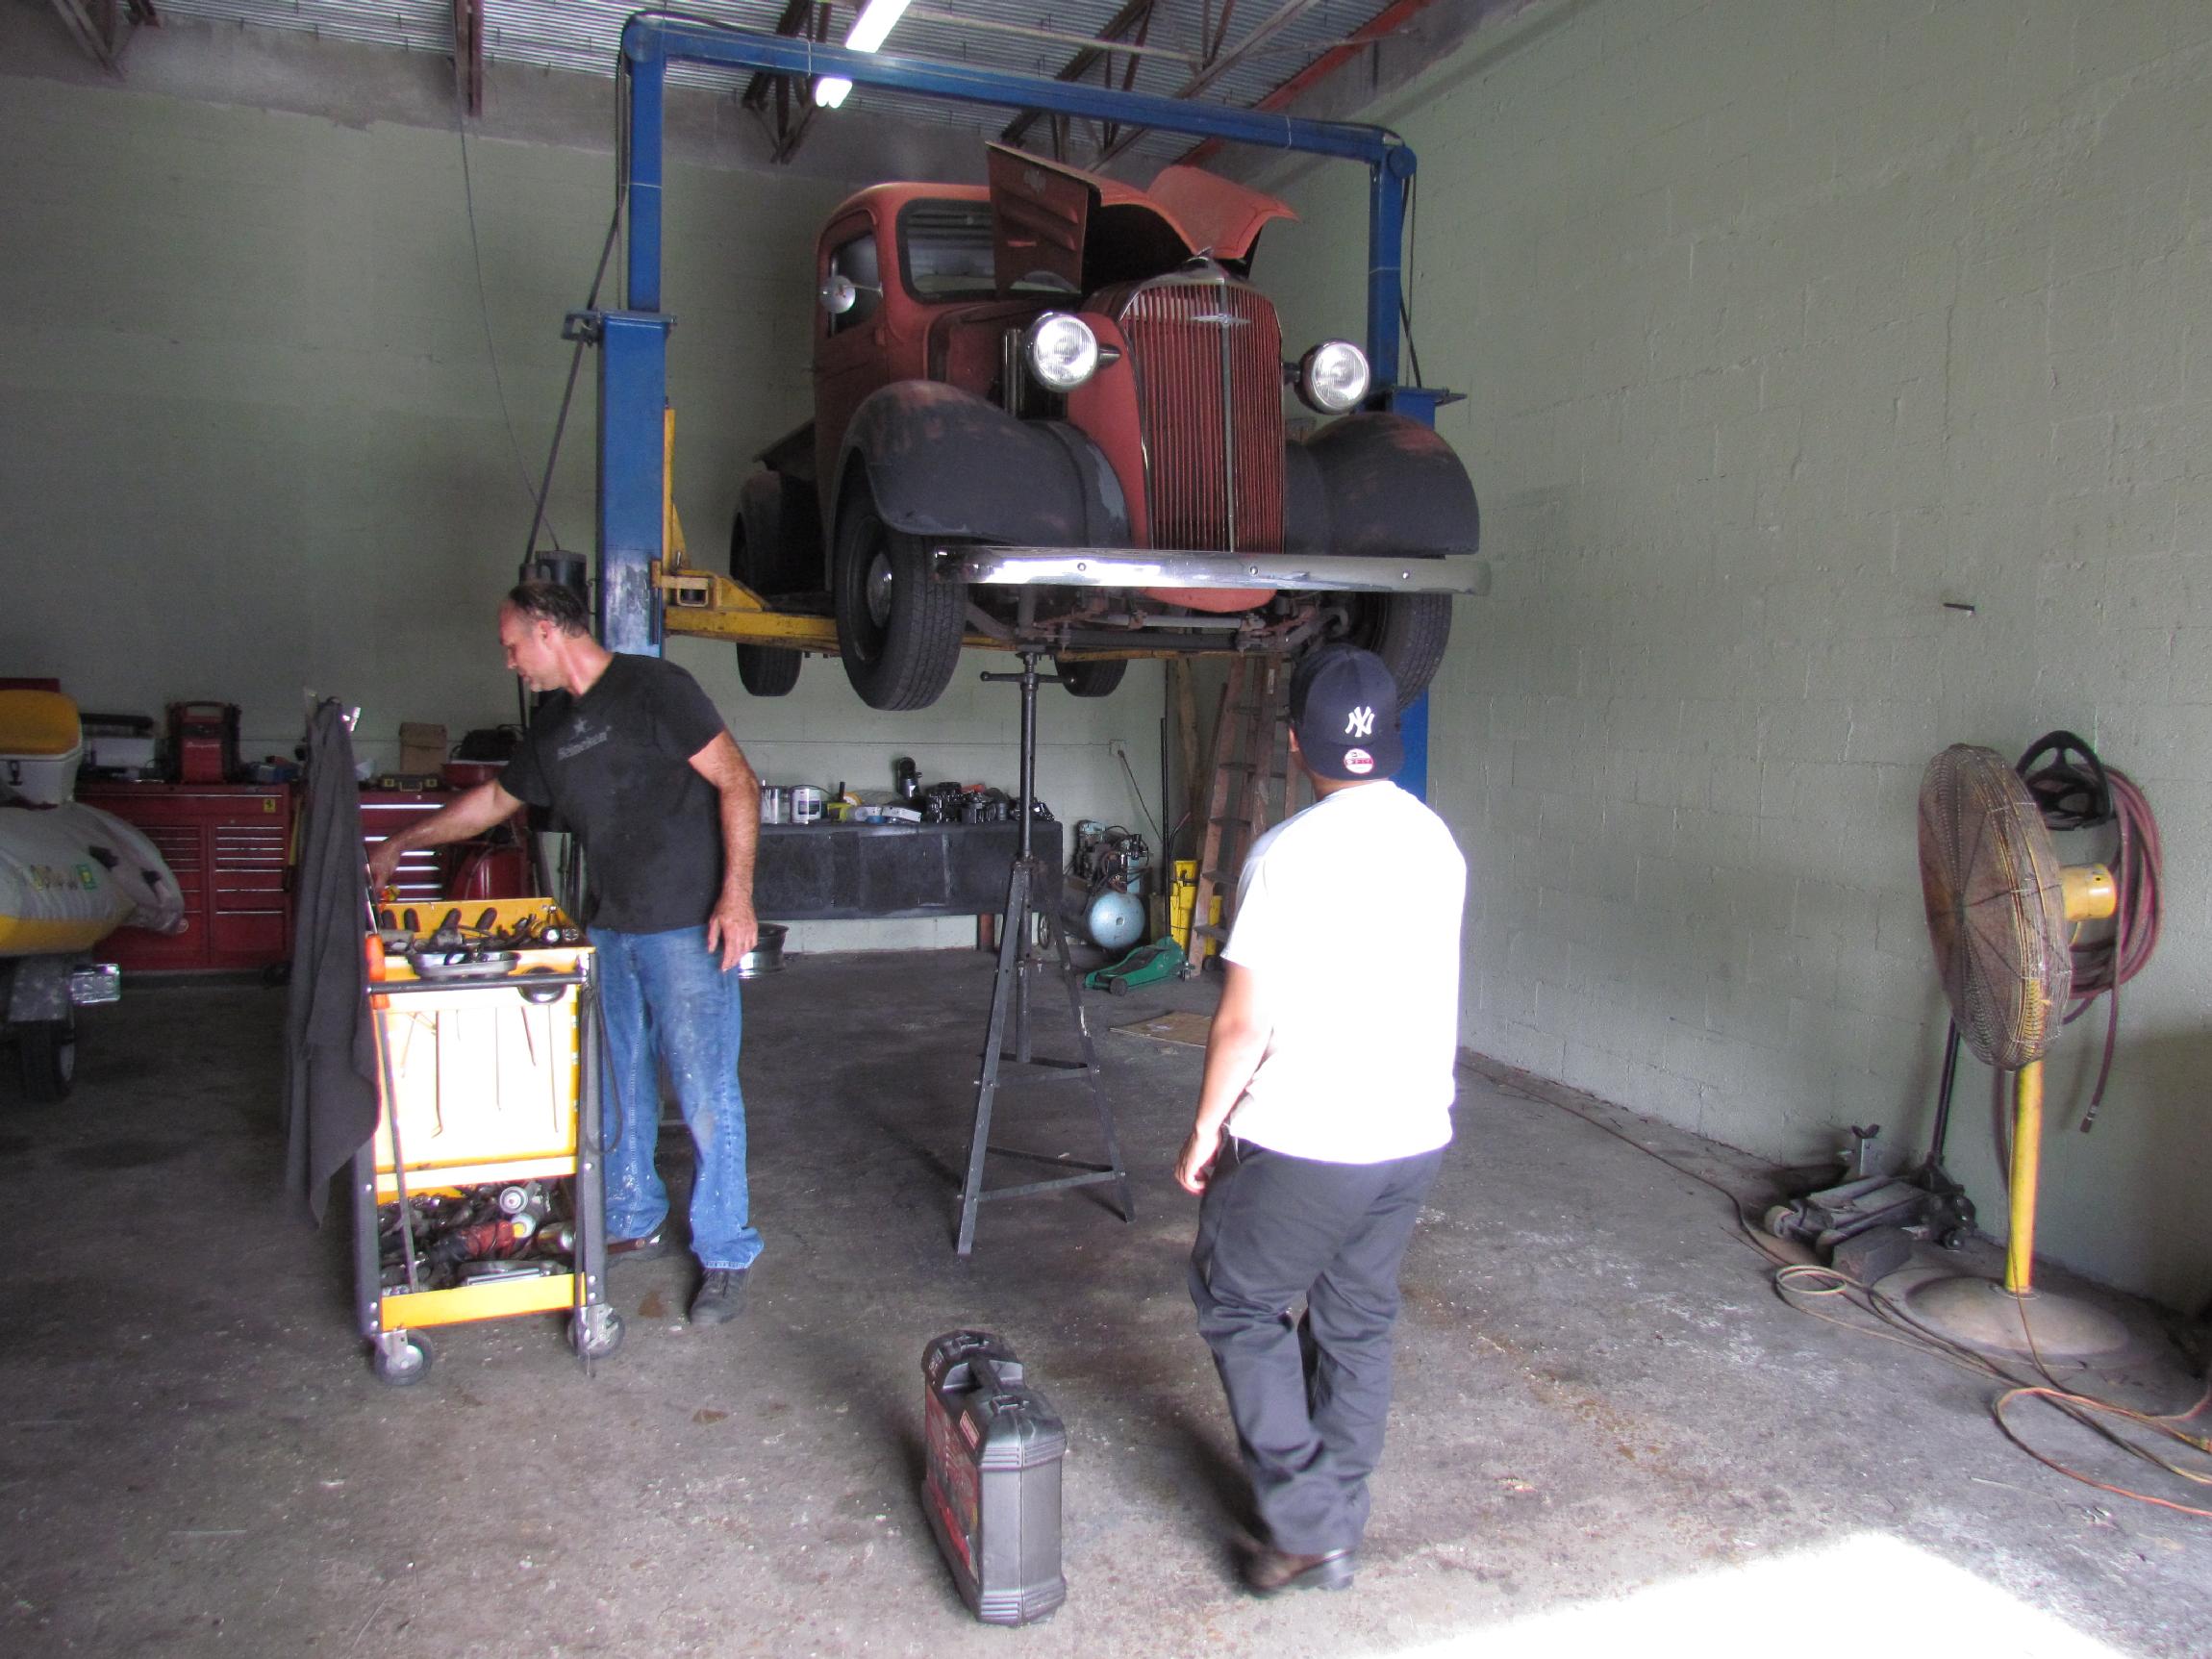
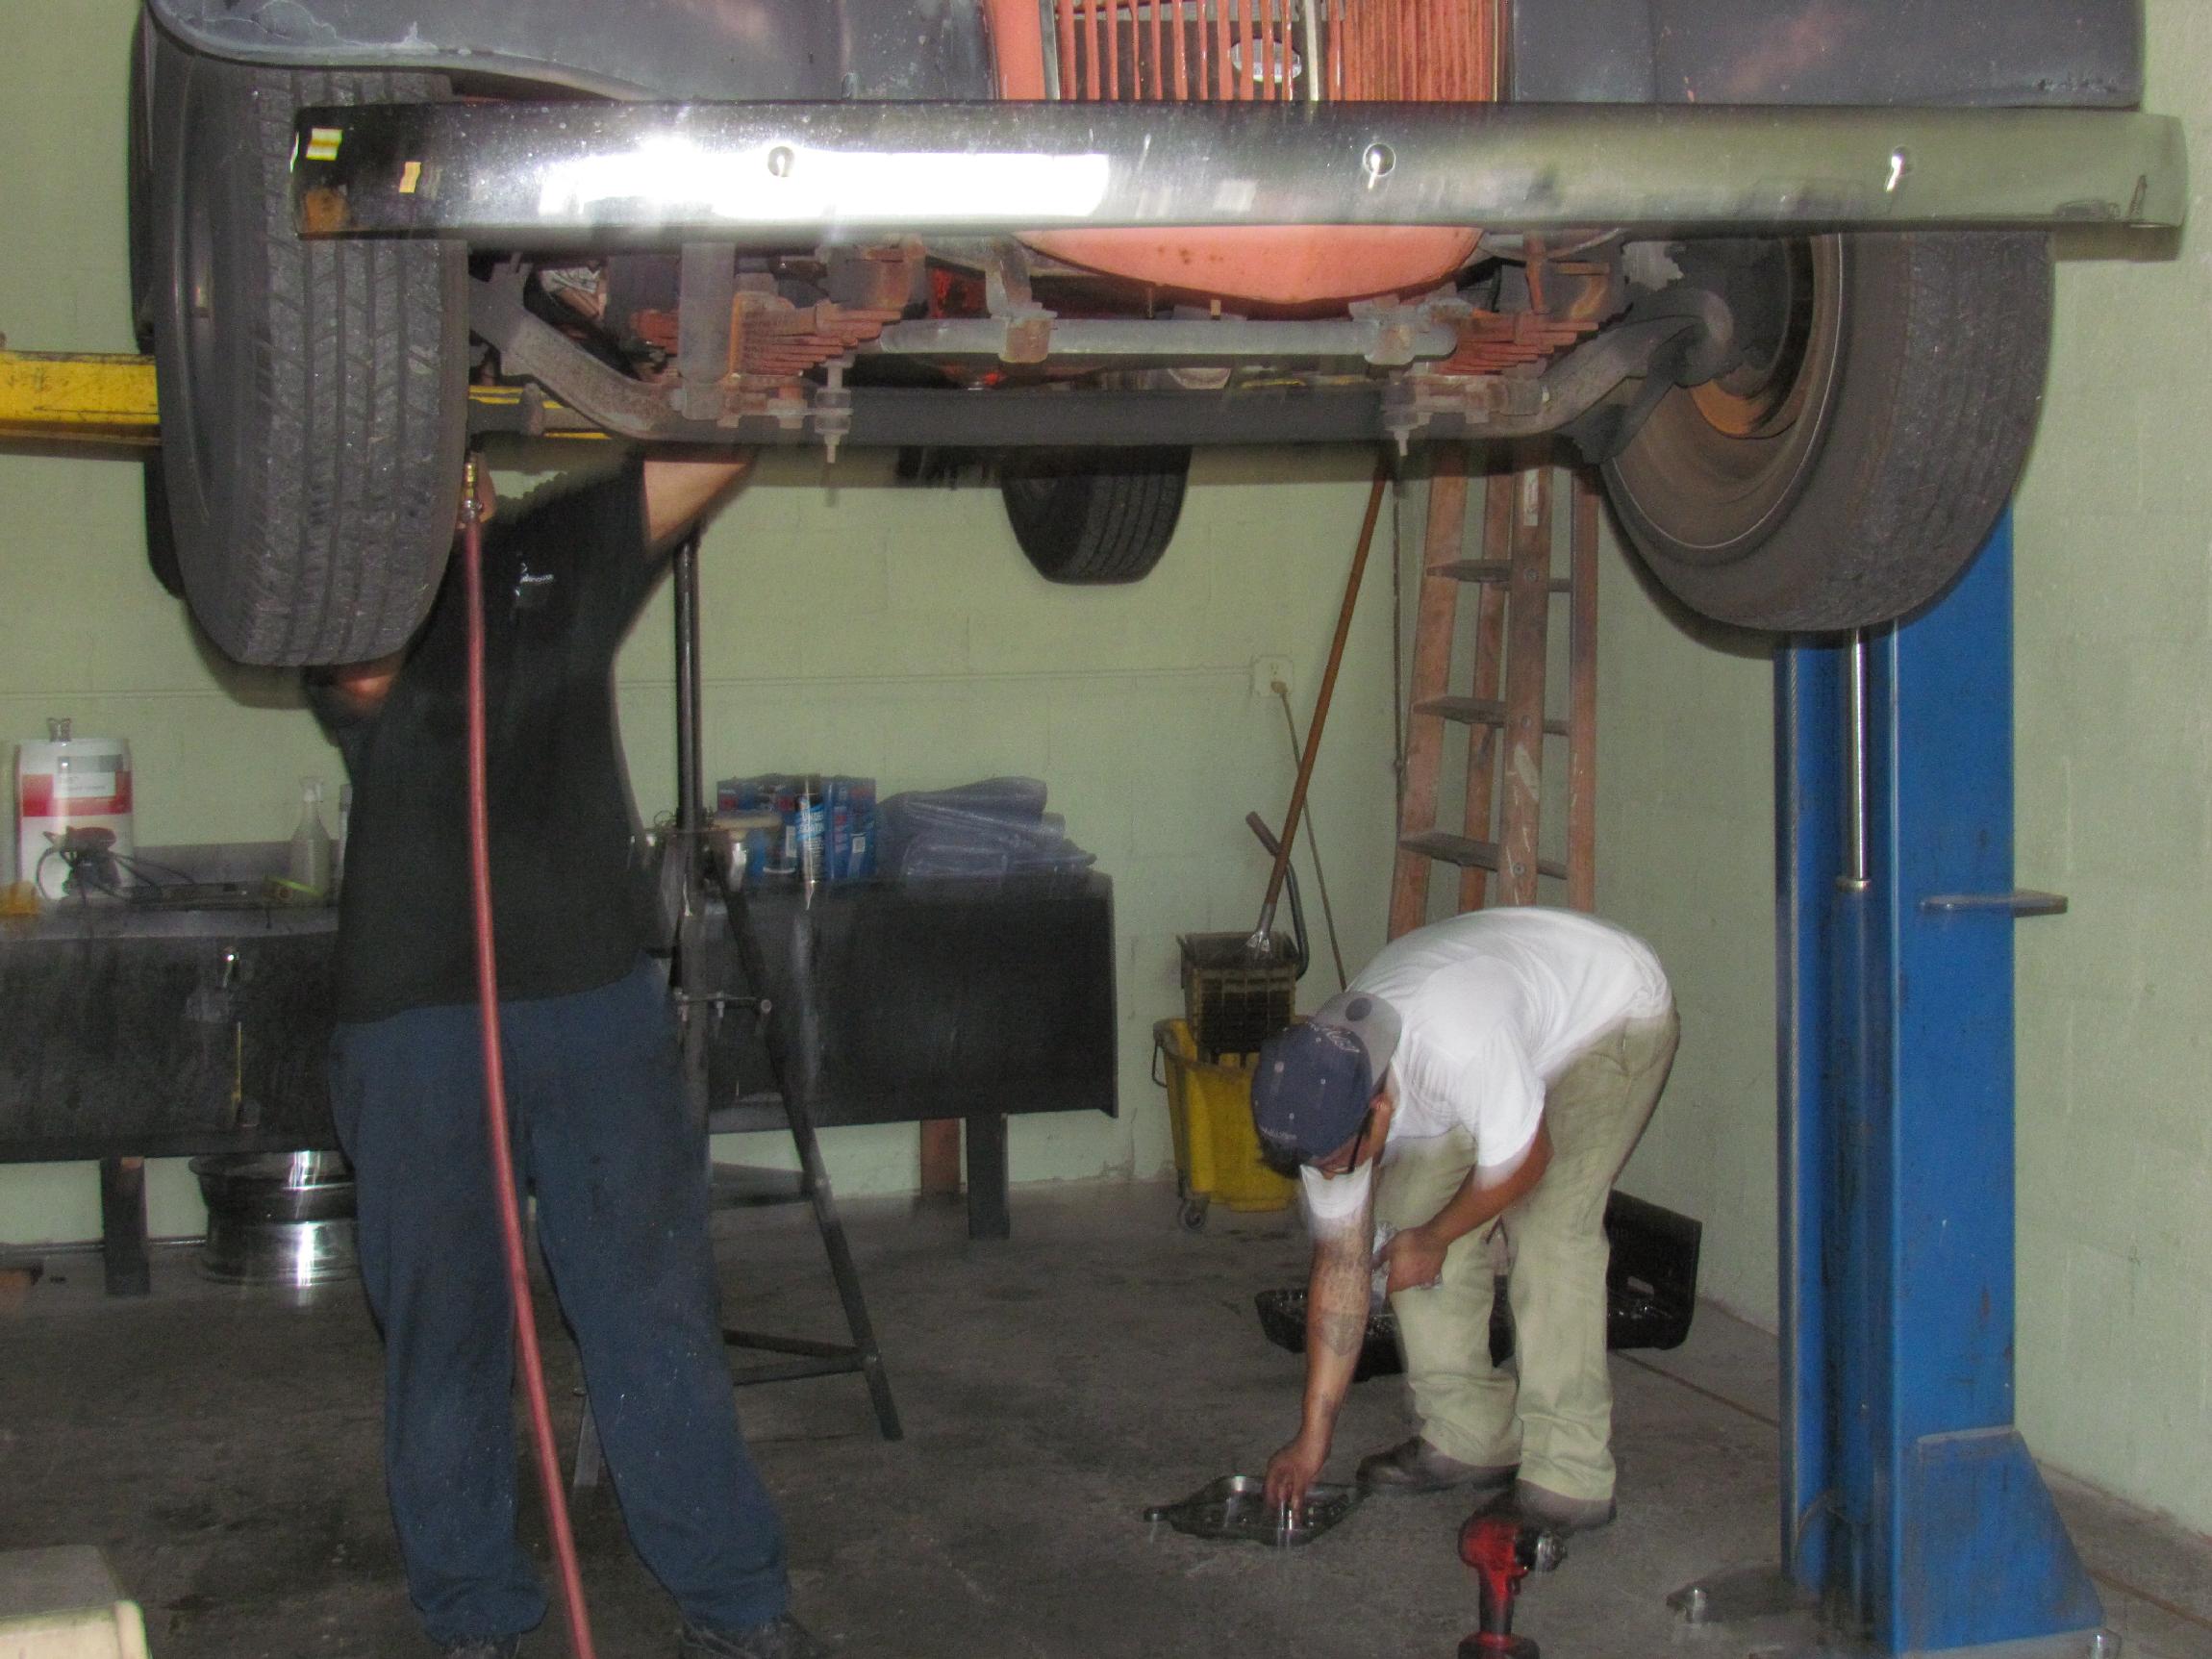
 At eight-thirty, Gato pushed the Deerslayer
to his lift with me, in the cab, steering. Gato works mostly on new
vehicles in his shop but he worked on old trucks years ago in his
native Argentina and knows his way around the old hardware. The only
time I was able to help was when I revealed the trick about getting the
clutch inspection cover off. There are two slotted screws at the rear
of this cover but they are directly over a frame crossmember where you
can't get access. I revealed the small holes in the crossmember
directly in line with the screws that a thin shank screwdriver can be
threaded thru to get at the cover screws. The cover itself is slotted
at these screws so they don't have to come completely out, only
loosened. I had forgotten that, however, and the cover almost bounced
off Gato's foot when it fell out.
At eight-thirty, Gato pushed the Deerslayer
to his lift with me, in the cab, steering. Gato works mostly on new
vehicles in his shop but he worked on old trucks years ago in his
native Argentina and knows his way around the old hardware. The only
time I was able to help was when I revealed the trick about getting the
clutch inspection cover off. There are two slotted screws at the rear
of this cover but they are directly over a frame crossmember where you
can't get access. I revealed the small holes in the crossmember
directly in line with the screws that a thin shank screwdriver can be
threaded thru to get at the cover screws. The cover itself is slotted
at these screws so they don't have to come completely out, only
loosened. I had forgotten that, however, and the cover almost bounced
off Gato's foot when it fell out.
 Gato did the lion's share of the work with his helper. About
the
only thing I did was take the drive shaft off and tape up the universal
joint so the cups wouldn't fall off and scatter the needle bearings to
the four winds. We were indeed done by ten o'clock when Gato and his
helper pushed the Deerslayer and me back into the BillyBob Shop. Now
the parts chasing begins.
Gato did the lion's share of the work with his helper. About
the
only thing I did was take the drive shaft off and tape up the universal
joint so the cups wouldn't fall off and scatter the needle bearings to
the four winds. We were indeed done by ten o'clock when Gato and his
helper pushed the Deerslayer and me back into the BillyBob Shop. Now
the parts chasing begins.
 August
5th 2014
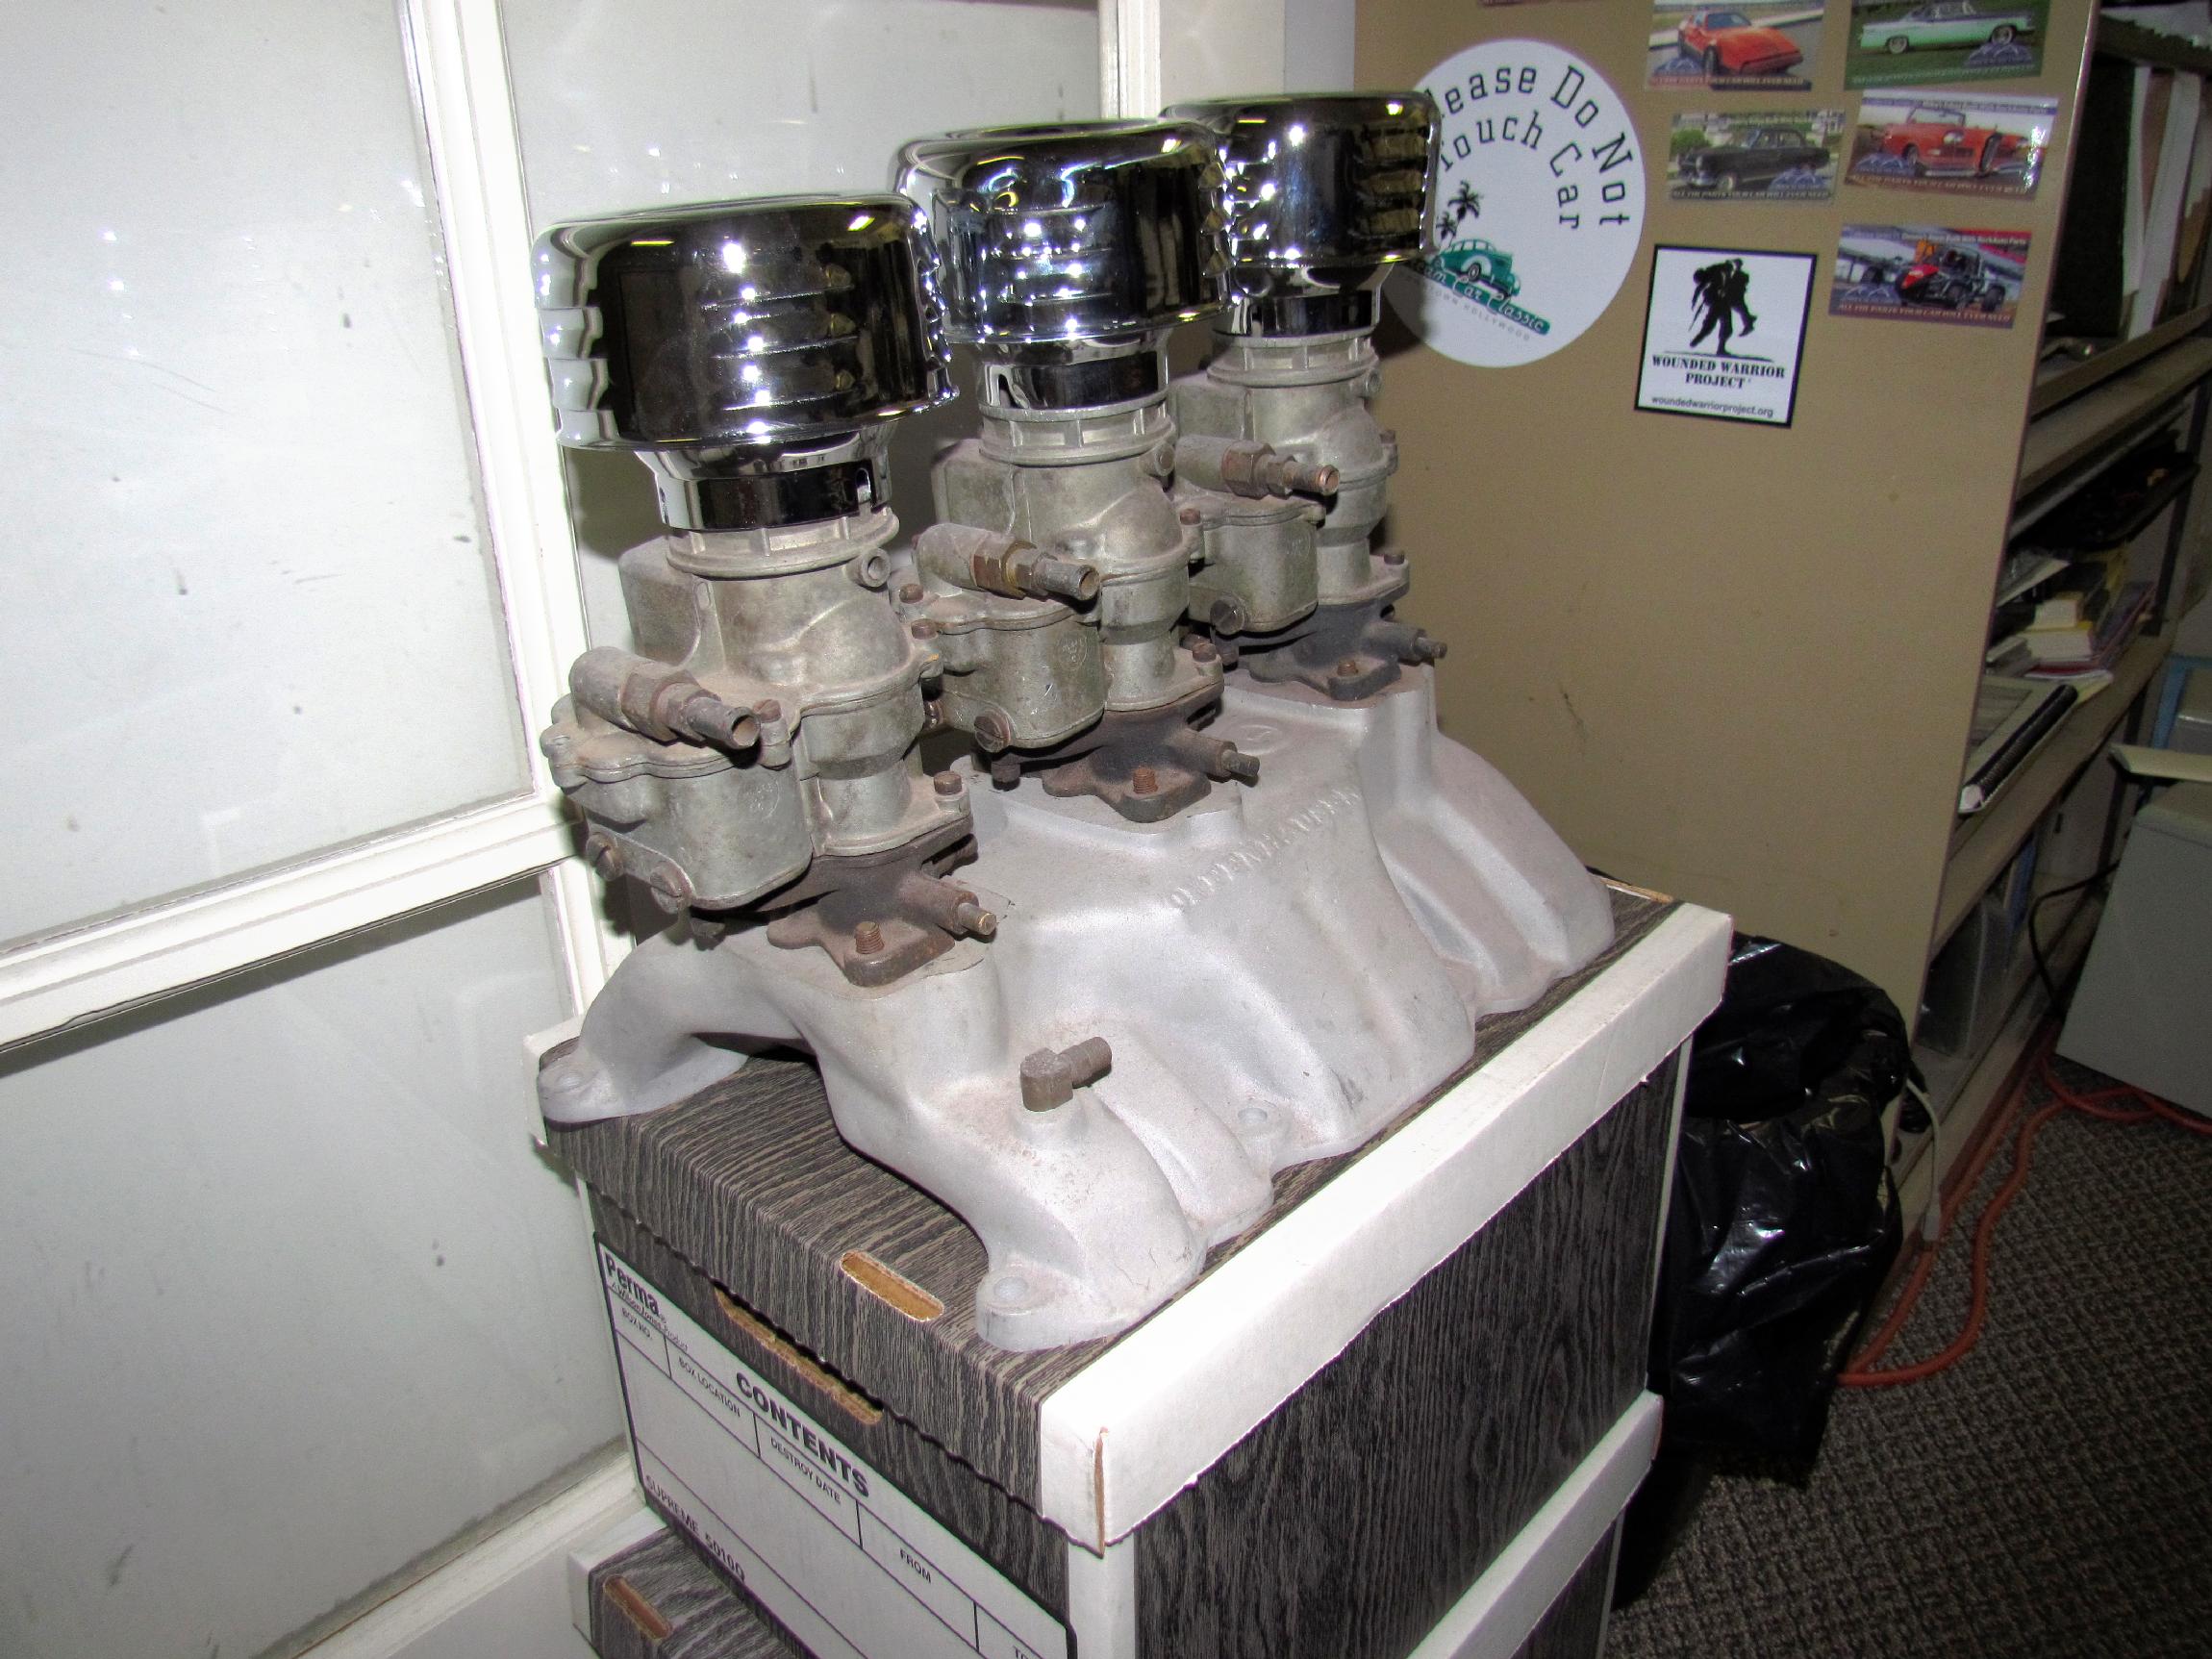
A couple of weeks ago, before the clutch failure, I found an
Offenhauser three deuce manifold for the Buick 264/322 with
three Holley 94's and new air
cleaners on eBay for about the same price as one new Edelbrock
94 at Summit. I paid the buy-it-now price and the
package arrived yesterday afternoon. One more goodie on the shelf for
Project Nailhead.
August
5th 2014
A couple of weeks ago, before the clutch failure, I found an
Offenhauser three deuce manifold for the Buick 264/322 with
three Holley 94's and new air
cleaners on eBay for about the same price as one new Edelbrock
94 at Summit. I paid the buy-it-now price and the
package arrived yesterday afternoon. One more goodie on the shelf for
Project Nailhead.
 August
11th 2014
Still waiting for clutch parts and crossing my fingers
hoping that when they arrive, they will be the correct
ones. I've ordered a Hays street/strip 11"
pressure
plate and a Hays 11" 26 spline disk from JEGS. I ordered a Borg Warner
N1716 throwout bearing from RockAuto. When the parts arrive, I'll
compare measurements to the removed items and, if everything looks
good, I'll start the reassembly. I was too unsure of a replacement for
the pilot bearing and the existing one looks pretty good so I'll leave
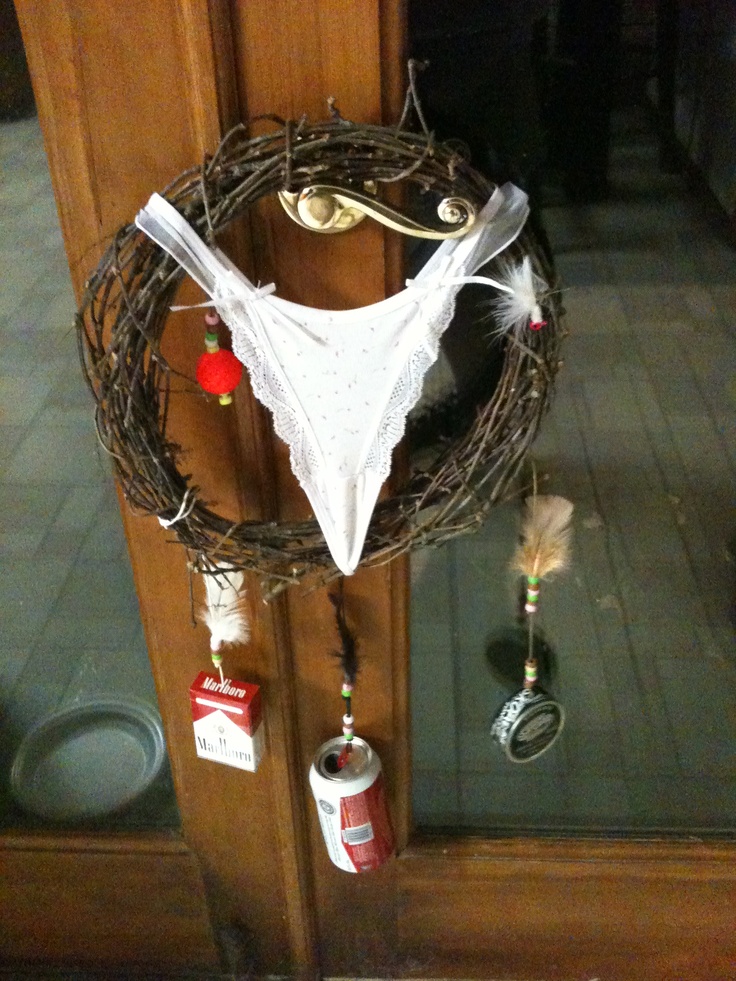
it alone. In the
mean time, I've been cruisin' the intarweb and if I ever run out of
projects around the BillyBob Shop, I'm going to make a redneck
dreamcatcher to hang on the wall.
August
11th 2014
Still waiting for clutch parts and crossing my fingers
hoping that when they arrive, they will be the correct
ones. I've ordered a Hays street/strip 11"
pressure
plate and a Hays 11" 26 spline disk from JEGS. I ordered a Borg Warner
N1716 throwout bearing from RockAuto. When the parts arrive, I'll
compare measurements to the removed items and, if everything looks
good, I'll start the reassembly. I was too unsure of a replacement for
the pilot bearing and the existing one looks pretty good so I'll leave
it alone. In the
mean time, I've been cruisin' the intarweb and if I ever run out of
projects around the BillyBob Shop, I'm going to make a redneck
dreamcatcher to hang on the wall.
 August
18th 2014
All the clutch repair parts arrived last Thursday - Hays 11"
street/strip pressure plate for the 302 Jimmy flywheel and
11", 26
spline disk to fit the Camaro T5 tranny from JEGS. A standard diaphram
clutch release bearing to fit the '47-'53 Chevy truck bellhousing came
from RockAuto. Did some rough eyeball comparisons to the existing parts
but procrastinated until Sunday to get under the truck.
August
18th 2014
All the clutch repair parts arrived last Thursday - Hays 11"
street/strip pressure plate for the 302 Jimmy flywheel and
11", 26
spline disk to fit the Camaro T5 tranny from JEGS. A standard diaphram
clutch release bearing to fit the '47-'53 Chevy truck bellhousing came
from RockAuto. Did some rough eyeball comparisons to the existing parts
but procrastinated until Sunday to get under the truck.
Upon closer inspection, I determined that the flywheel side snout of the old clutch disk had been ground down a few thousandths and remembered Tony having written about it once. I located my side angle grinder and performed the same operation on the new disk. Clutch surfaces were cleaned with Brakekleen and I commenced to put the new pressure plate and disk on the flywheel. Two hours of cursin' and gruntin' later, I admitted defeat. Creeping geezer status and spending too much time in the air-conditioned Flamingo Room on the sofa watching video instead of sweating out in the shop had turned me into a wimp of the first order. It's a tight fit squeezin' the pressure plate / disk combo thru the inspection cover opening of the bellhousing and then you have to hold it in place with one hand while trying to get one bolt started with the other hand. Doing this while laying on my back and reaching over my head defeated me. It's only about thirty pounds but after three times trying, my arms had turned to rubber and I had to give up.
This morning, I got up at five and tried it again before coming to work in the rental car. I had recouped enuf arm strength for one more try and I got two bolts in before I waned again. I consider this to be the most taxing operation of the whole job, judging from the previous times I've changed clutches.
 August
21st 2014
When I got to the shop Tuesday nite, I had planned a couple
of
more sweaty hours under the Deerslayer. Gato was standing in front of
his shop and he asked me when the parts for the clutch job were
arriving as he was anxious to finish the job. I told Gato of my
progress and that I'd noticed he'd gotten busy with real work so I was
plinking away at it by myself. He still wanted to help so we planned on
Wednesday afternoon to put it back up on his lift. When the time came,
my friend, Jon Carey arrived to help.
August
21st 2014
When I got to the shop Tuesday nite, I had planned a couple
of
more sweaty hours under the Deerslayer. Gato was standing in front of
his shop and he asked me when the parts for the clutch job were
arriving as he was anxious to finish the job. I told Gato of my
progress and that I'd noticed he'd gotten busy with real work so I was
plinking away at it by myself. He still wanted to help so we planned on
Wednesday afternoon to put it back up on his lift. When the time came,
my friend, Jon Carey arrived to help.
 Gato and his assistant, Junior, did most of the work again
while Jon kept a work light concentrated where Gato was looking. I had
gotten two bolts into the pressure plate / disk assembly finger tight,
previously. Gato was having trouble getting a third bolt started and
with better light on the task observed that the assembly was tight
against the bellhousing at the top. He asked if I was sure I had the
right pressure plate and Jon and I exchanged the "Oh Shit!" look.
Gato and his assistant, Junior, did most of the work again
while Jon kept a work light concentrated where Gato was looking. I had
gotten two bolts into the pressure plate / disk assembly finger tight,
previously. Gato was having trouble getting a third bolt started and
with better light on the task observed that the assembly was tight
against the bellhousing at the top. He asked if I was sure I had the
right pressure plate and Jon and I exchanged the "Oh Shit!" look.
I brought the old pressure plate over from the BillyBob Shop and Gato took the pressure plate I had struggled three hours to get in, back out for comparison. They were the same in dimension but Jon noticed scuff marks on three high points of the old pressure plate housing. Gato went back to putting the assembly back in again and made it work. Once, everything was bolted down against the new (thicker) disk, the situation was hunky-dory. At one point, Gato banged his head pretty good on Deerslayer's rear axle which made me cringe because if this happens to professionals, what chances do amateurs like me have to avoid injury?
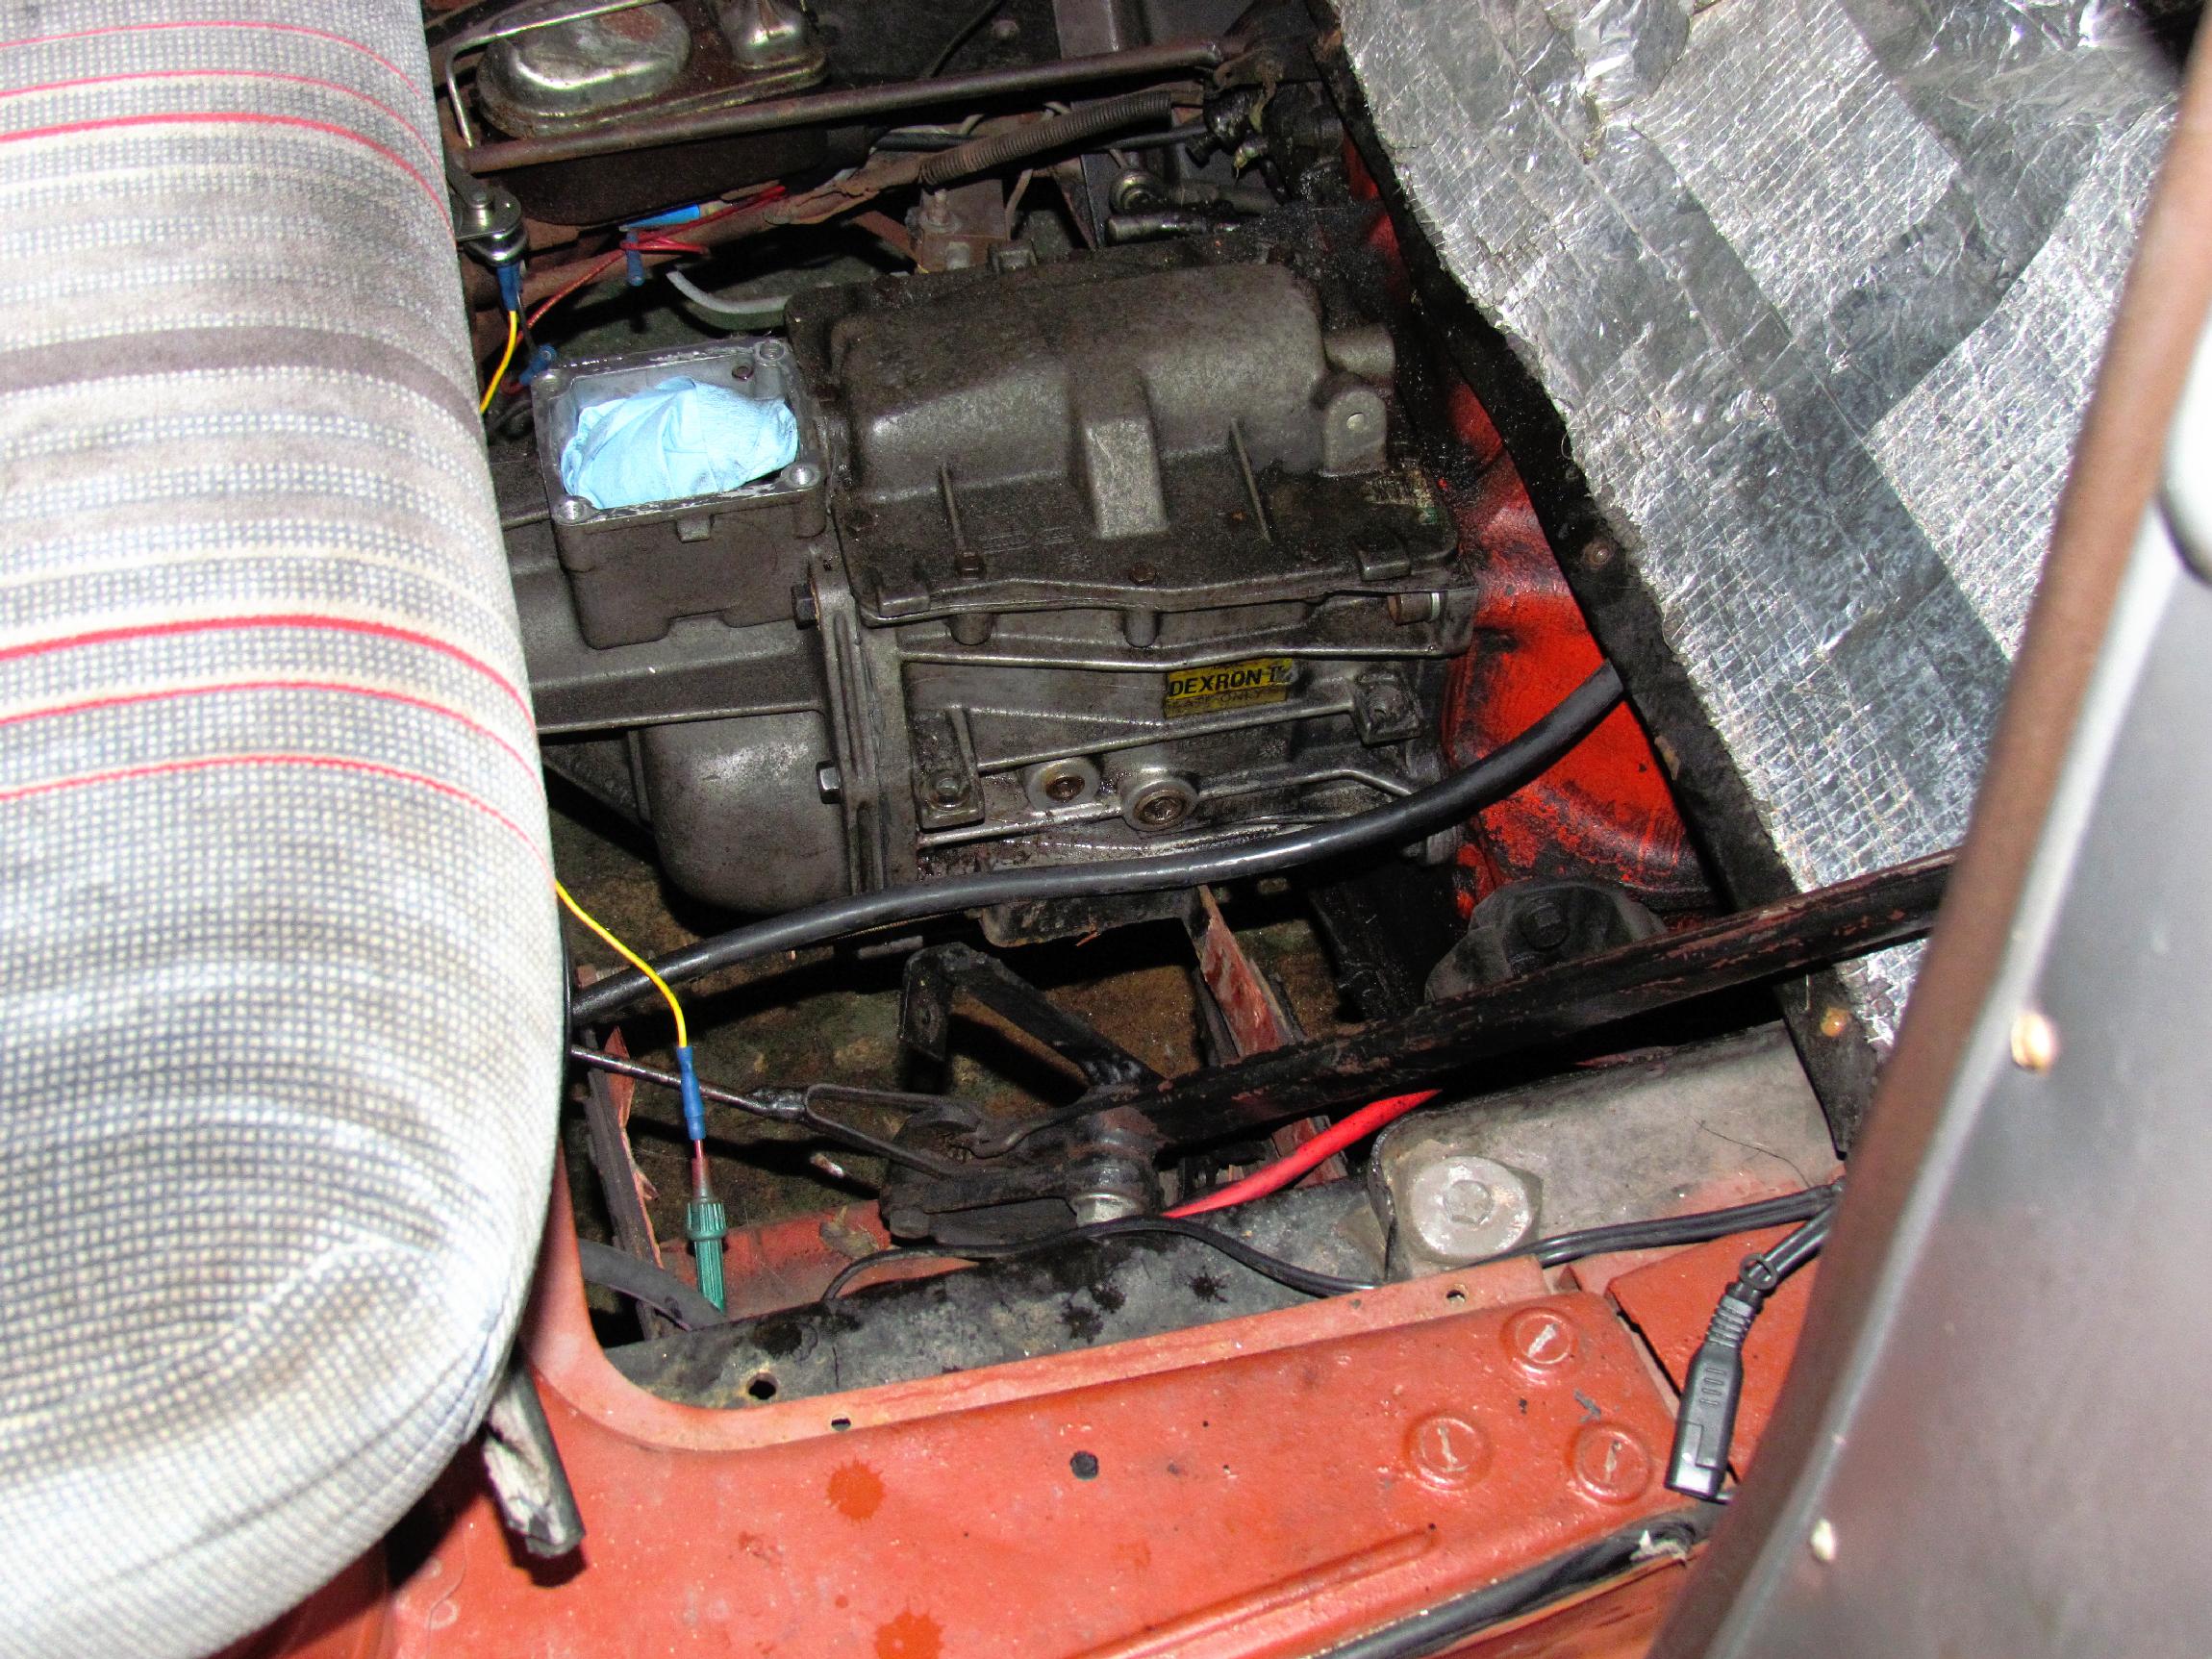
 About three, we rolled Deerslayer back to the BillyBob Shop
where Jon and I finished things up from inside the cab. After I topped
off the tranny fluid, the shift
lever, parking brake lever and battery were put back in the truck and
Jon replaced the fasteners on those items. The floor was laid in place
and I took a shakedown cruise around the block. Deerslayer is on the
road again! Jon is a machinist so, while I had him at the BillyBob
Shop, I had him look over the Nailhead internals. He suspects the
engine to have been rebuilt not long before it was retired because he
could not detect much wear. It may require very little, if any, machine
work. Good news all around today!
About three, we rolled Deerslayer back to the BillyBob Shop
where Jon and I finished things up from inside the cab. After I topped
off the tranny fluid, the shift
lever, parking brake lever and battery were put back in the truck and
Jon replaced the fasteners on those items. The floor was laid in place
and I took a shakedown cruise around the block. Deerslayer is on the
road again! Jon is a machinist so, while I had him at the BillyBob
Shop, I had him look over the Nailhead internals. He suspects the
engine to have been rebuilt not long before it was retired because he
could not detect much wear. It may require very little, if any, machine
work. Good news all around today!
| < Back
to Intro |
You can email me at ![]() webmaster@laroke.com
webmaster@laroke.com
Issued Thursday August 21, 2014
Updated Friday June 15, 2018
copyright © 2008-2018 Larry R. Kephart all rights reserved
| | LRK Home | | Bio Info | | Krash Khronicles | | LAROKE | |
| | BettyLou | | BillyBob's Garage | | Rat Patrol | | Deerslayer | | Elvira | |
| | Land of the Free and Home of the Brave | |
| | Keppylou's Art | | WWI Soldier's Diary | |