| | LRK Home | | Bio Info | | Krash Khronicles | | LAROKE | |
| | BettyLou | | BillyBob's Garage | | Rat Patrol | | Deerslayer | | Elvira | |
| | Land of the Free and Home of the Brave | |
| | Keppylou's Art | | WWI Soldier's Diary | |
Tinkering with Deerslayer
![]()
DEERSLAYER LINKS including vendor sites for parts and tools as well as sites for old truck and hot rod organizations
![]()
TINKERING WITH DEERSLAYER chronicles the day-by-day maintenance and improvements episodes for Deerslayer, a '37 Chevy farm truck hot rod.
CRUISIN' WITH DEERSLAYER Roadtrips, cruise-in's and truck show stories and tall tales.
TONY'S DUNGEON Tony Pascarella's forum entries at OldGMCtrucks.com regarding Deerslayer, particularly the 302 GMC engine build in his farmhouse basement.
![]()
DEERSLAYER MAINTENANCE Ever changing detailing, oil change, lube, etc. maintenance routines specifically developed for Deerslayer, including required tools, materials and procedures.
PROJECT NAILHEAD Chronicles the rebuild of a 1954 Buick Roadmaster 322 nailhead engine as a future replacement for Deerslayer's Jimmy 302.
34. Of Nailheads and Windshields
 April
7th 2014 Got started
late on saturday morning and didn't get much done all day. I was
thinkin' about hooking up the vacuum gauge when Gato walked in from his
shop next door and asked me if I was going to do any work today or just
think about it. I told him about the gauge and my concern for vacuum
leaks. Gato asked if I had any teflon tape and he gave me a roll when I
said no. The connection went smoothly and the gauge currently reads 14
inches at idle. Normal engines are around 18 inches but the
Deerslayer's Jimmy 302 has a lumpy cam so I don't know what normal is
for this engine. Time for a tuneup so I can establish a benchmark, I
suppose.
April
7th 2014 Got started
late on saturday morning and didn't get much done all day. I was
thinkin' about hooking up the vacuum gauge when Gato walked in from his
shop next door and asked me if I was going to do any work today or just
think about it. I told him about the gauge and my concern for vacuum
leaks. Gato asked if I had any teflon tape and he gave me a roll when I
said no. The connection went smoothly and the gauge currently reads 14
inches at idle. Normal engines are around 18 inches but the
Deerslayer's Jimmy 302 has a lumpy cam so I don't know what normal is
for this engine. Time for a tuneup so I can establish a benchmark, I
suppose.
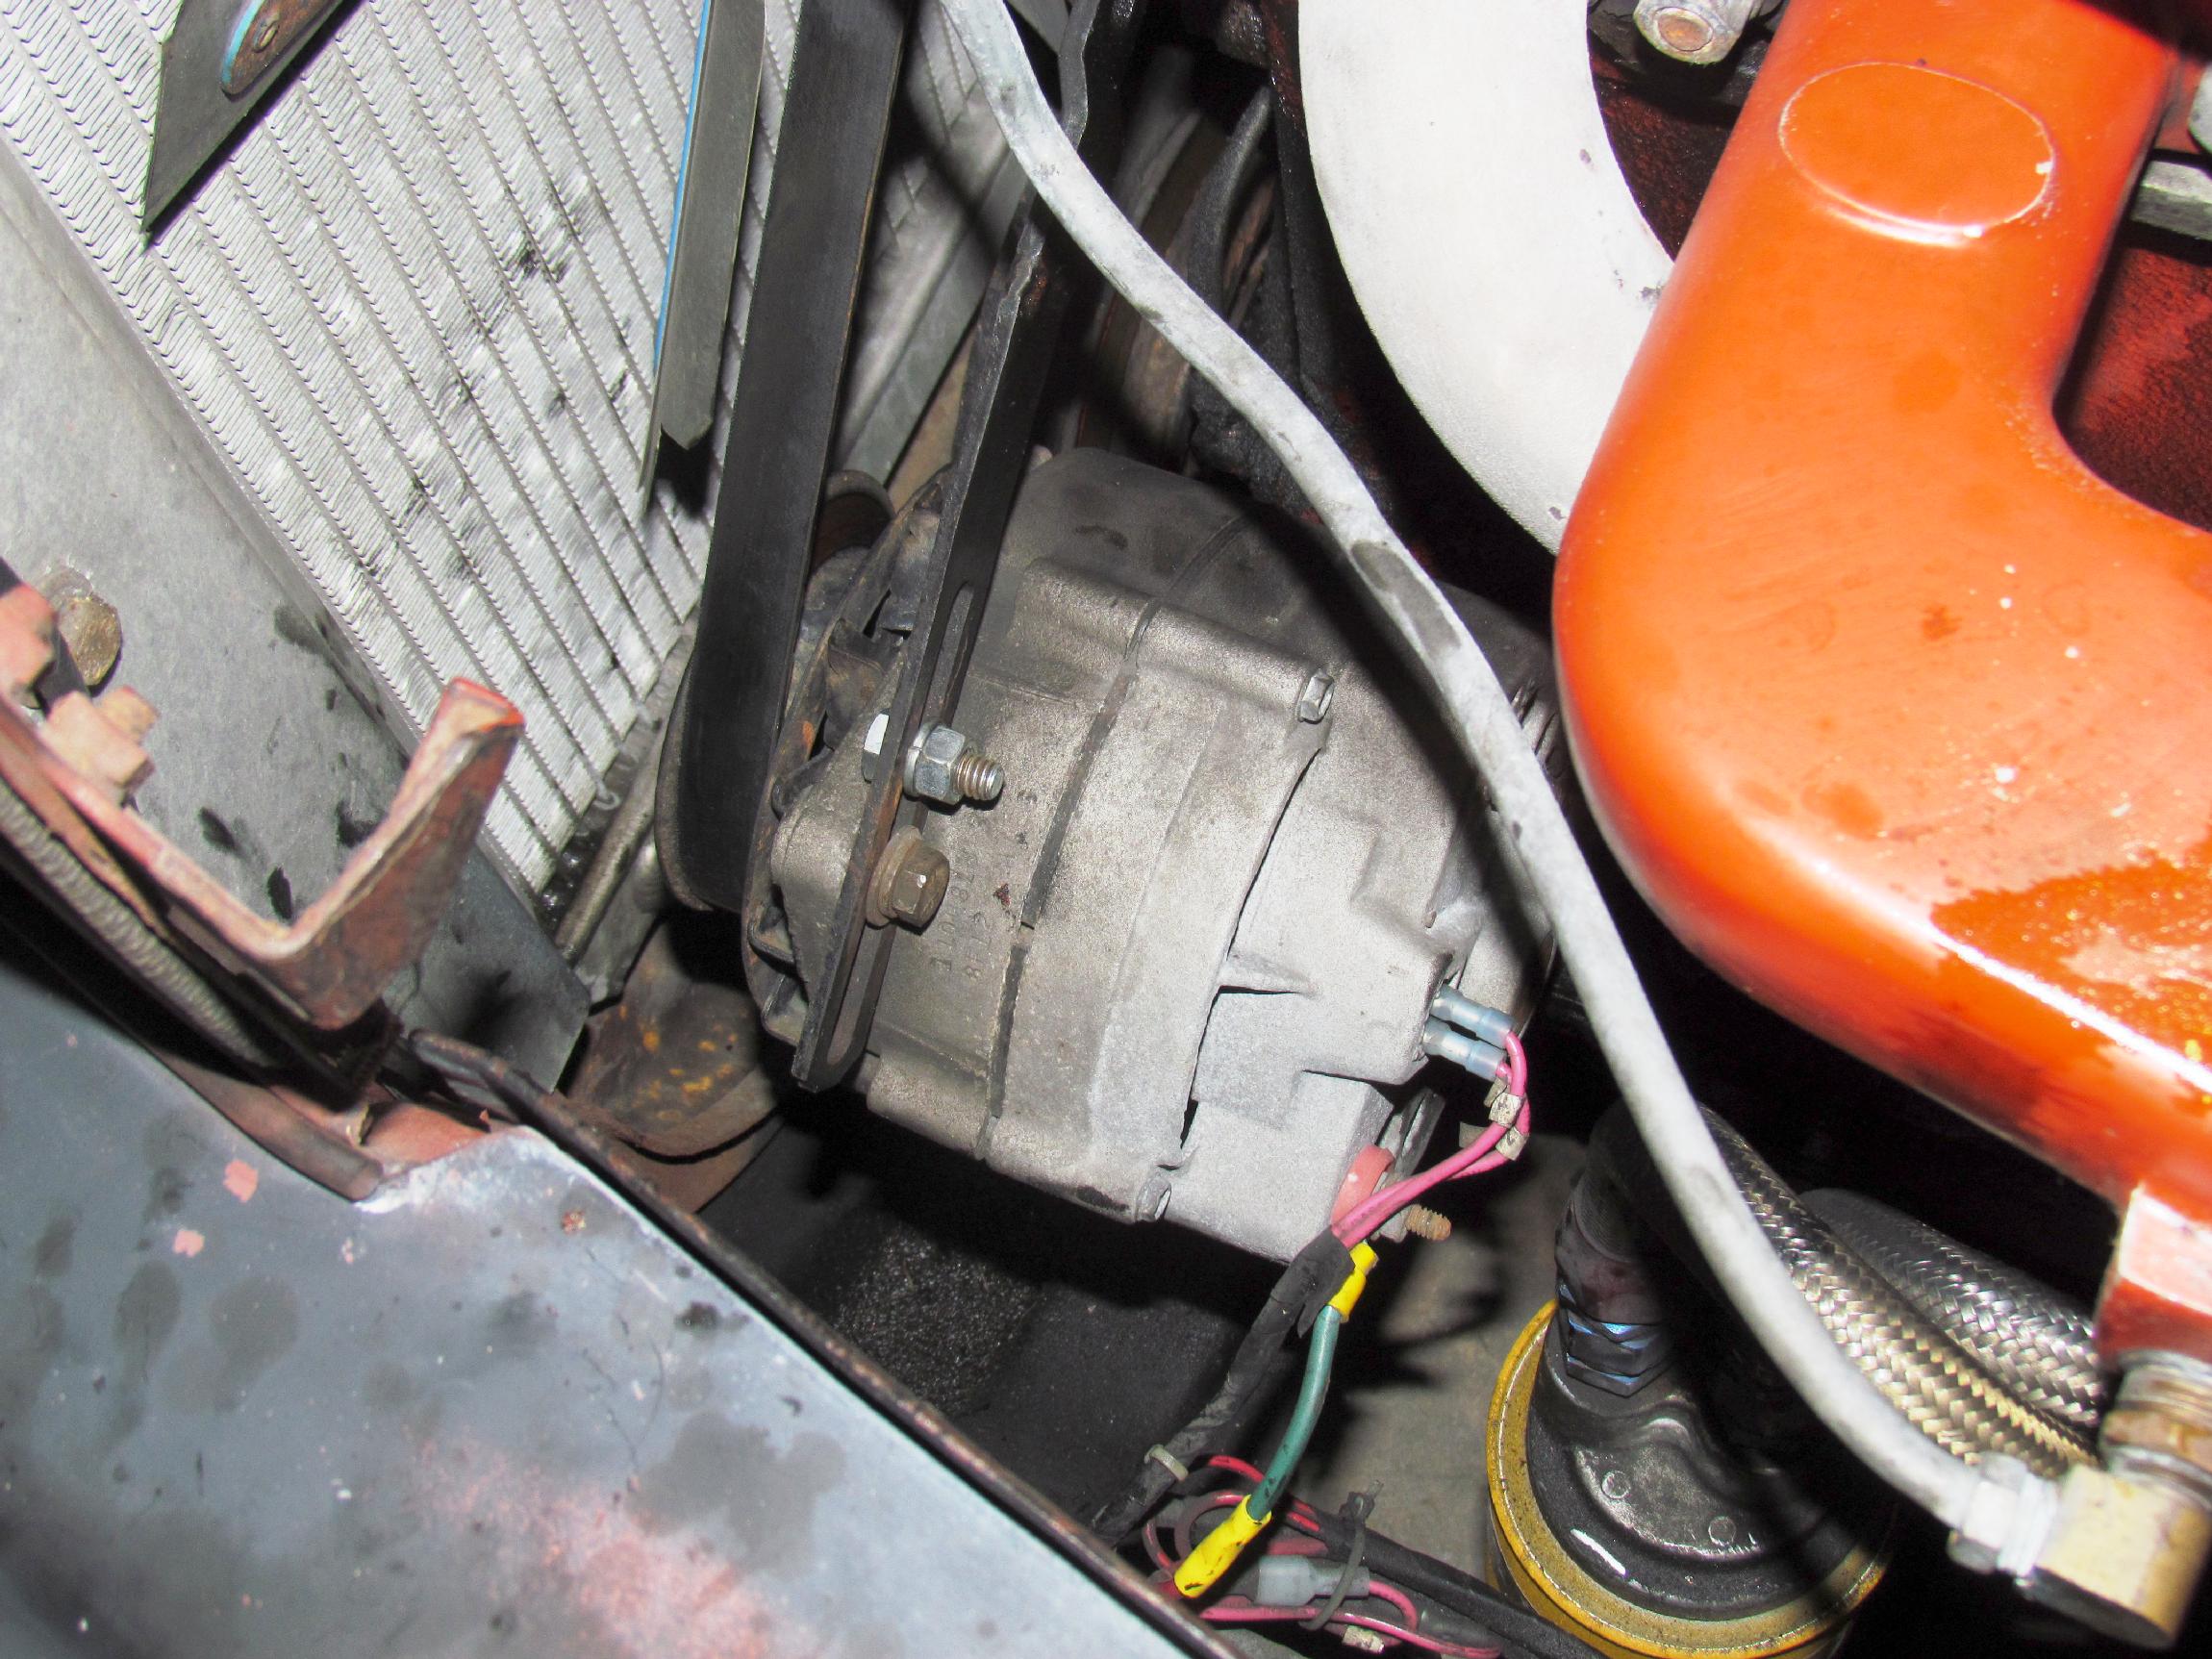
I noticed that while the engine was running, the alternator was wobbling around like a drunken sailor. I started to turn the bolt in the bracket slot to adjust the fanbelt tension only to find it frozen. Damnation! Well, at the cost of bruising my palm with the box end wrench and with the application of some PB Blaster, I was able to make a few turns and I got the tension a little tighter.
On sunday, on the way to the coffee cruise-in in Fort Lauderdale, I noticed that the alternator wasn't charging as much as it should. When I got to the bagel joint, lifted the hood and found the fanbelt to be very loose. I had made things worse on saturday, not better. Double damn! After coffee my friend, Jon Carey, got out his traveling tool kit and started messin' with the alternator bracket. Not the one with the slot on top but the hinge pivot thru bolt underneath the alternator. This bolt is completely out of sight and damn near impossible to get at (probably why my lazy ass mind ignored it on saturday). Jon managed to get a wrench on one end at the cost of some blood when something sharp in the cramped space caught his hand. He didn't have a wrench for the other end but at least we knew now that it was loose and I might be able to get to it without taking the fender and inner fender off.
 Deerslayer
and I made it back to the BillyBob Shop with the loose fanbelt and I
let the engine cool down before tackling the thru bolt problem. When
the engine had cooled enuf, I got a ratchet wrench on the front hex
after ten minutes of sweat, tears and cursing. A few more minutes and a
deep socket was on the other end of the bolt and it was successfully
tightened up again. Now, all I had to deal with was the frozen bolt in
the upper slotted bracket. A temporary redneck engineering solution was
employed - Another bolt, washer and nut was placed in the bracket slot
ahead of the alternator to act as a stop so the alternator could not
slide towards the block and lose fanbelt tension. This will allow me to
work on the frozen bolt at leasure. As I was patting myself on the back
with a cigar, I noticed that Deerslayer's fender now has a splash of
Jon Carey's blood to enrich its "patina".
Deerslayer
and I made it back to the BillyBob Shop with the loose fanbelt and I
let the engine cool down before tackling the thru bolt problem. When
the engine had cooled enuf, I got a ratchet wrench on the front hex
after ten minutes of sweat, tears and cursing. A few more minutes and a
deep socket was on the other end of the bolt and it was successfully
tightened up again. Now, all I had to deal with was the frozen bolt in
the upper slotted bracket. A temporary redneck engineering solution was
employed - Another bolt, washer and nut was placed in the bracket slot
ahead of the alternator to act as a stop so the alternator could not
slide towards the block and lose fanbelt tension. This will allow me to
work on the frozen bolt at leasure. As I was patting myself on the back
with a cigar, I noticed that Deerslayer's fender now has a splash of
Jon Carey's blood to enrich its "patina".
 April
21st 2014 The lights
have been out in the BillyBob Shop for the last ten days as I coped
with the effects of dental surgery on the new hole in my jaw and the
new slimness of my billfold. The only thing I got done was a finishing
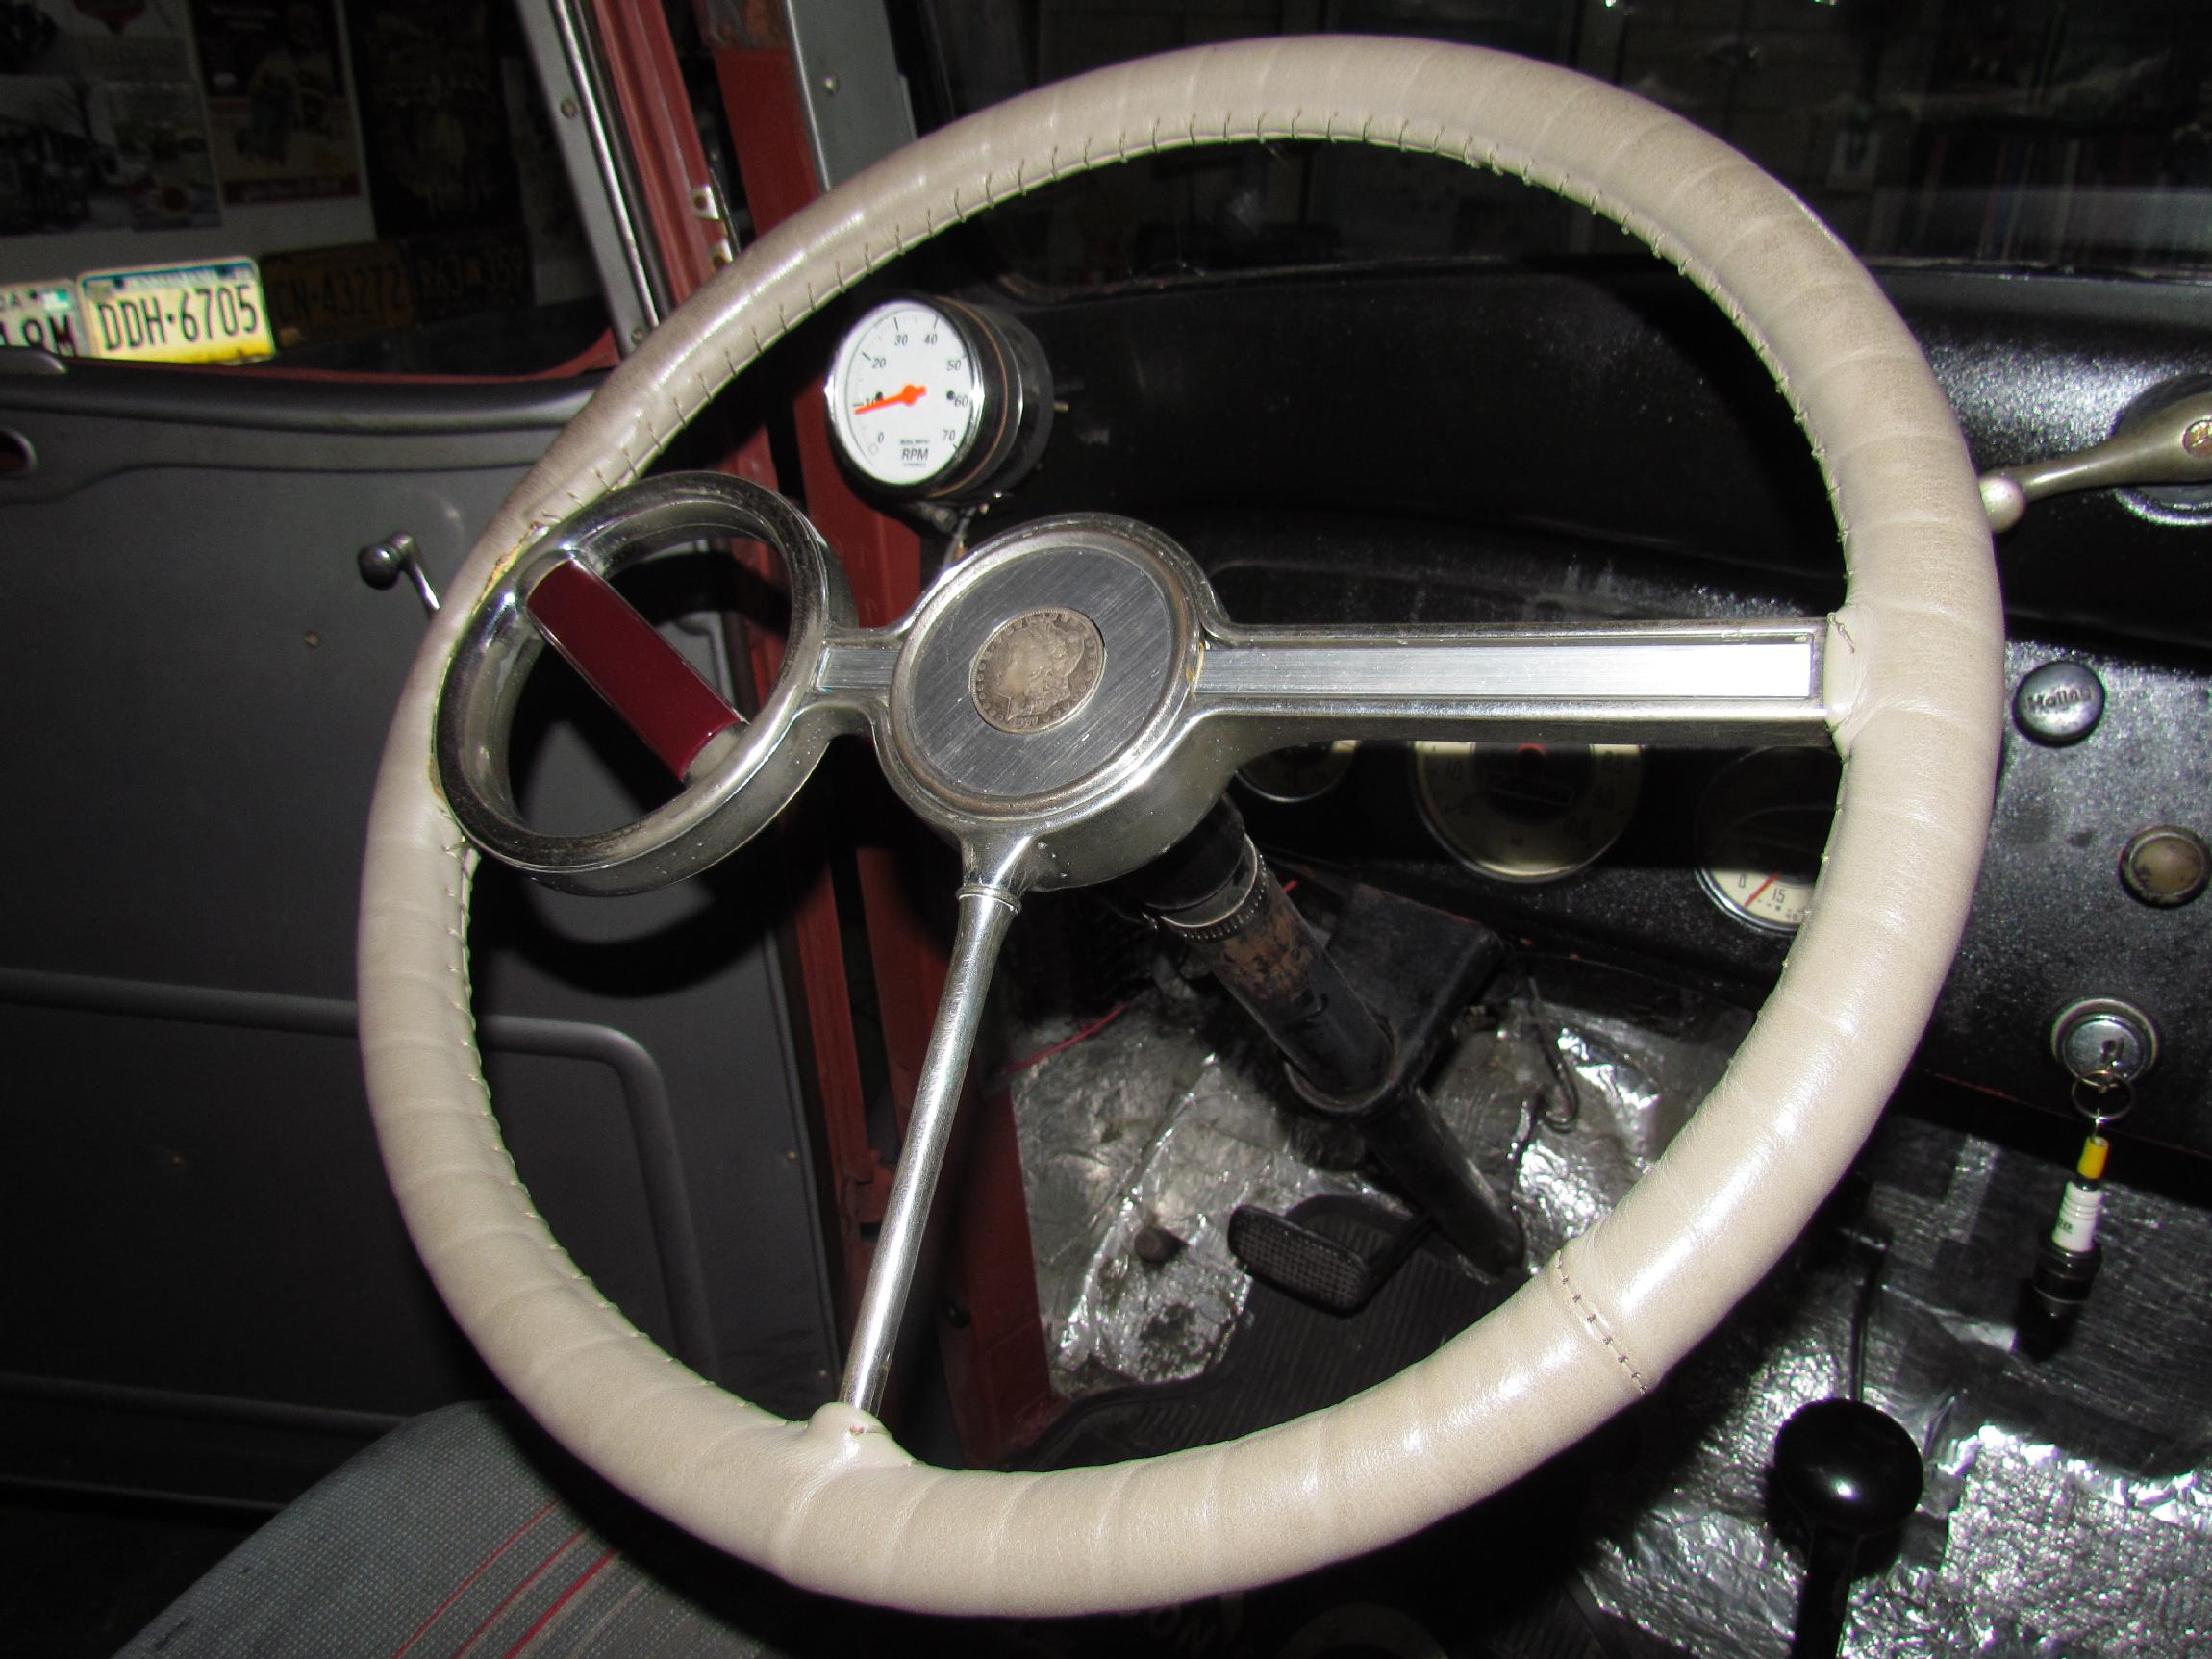
touch on the '40 Chevy Deluxe spinner steering wheel. The original
"Tenite" grip was missing in back and warped and cracked on the front
side. When a piece broke off, I relented and went for the pricy repops
from Chevies of the 40's. The maroon ones were the only available and
since the truck is a chalky rockabilly red, I deemed them to be
acceptable. prepped the area and adhered them to it with a couple of
dabs of clear RTV.
April
21st 2014 The lights
have been out in the BillyBob Shop for the last ten days as I coped
with the effects of dental surgery on the new hole in my jaw and the
new slimness of my billfold. The only thing I got done was a finishing
touch on the '40 Chevy Deluxe spinner steering wheel. The original
"Tenite" grip was missing in back and warped and cracked on the front
side. When a piece broke off, I relented and went for the pricy repops
from Chevies of the 40's. The maroon ones were the only available and
since the truck is a chalky rockabilly red, I deemed them to be
acceptable. prepped the area and adhered them to it with a couple of
dabs of clear RTV.
 May
5th 2014 Got back in
gear out in the shop on Saturday. Performed some monthly maintenance on
the Deerslayer then turned to the nailhead. I've had this 1954 Buick
Roadmaster engine for a few years now and all I've done with it so far
is buy some vintage speed parts for the rebuild. I need to start
working towards getting the block to the machine shop. Took the rocker
arm assemblies off first. Loosened each bolt of the asssembly, one turn
at a time, until all pressure from the valve springs was gone, then
took the bolts the rest of the way out and removed the assemblies.
Pulled out the pushrods next.
May
5th 2014 Got back in
gear out in the shop on Saturday. Performed some monthly maintenance on
the Deerslayer then turned to the nailhead. I've had this 1954 Buick
Roadmaster engine for a few years now and all I've done with it so far
is buy some vintage speed parts for the rebuild. I need to start
working towards getting the block to the machine shop. Took the rocker
arm assemblies off first. Loosened each bolt of the asssembly, one turn
at a time, until all pressure from the valve springs was gone, then
took the bolts the rest of the way out and removed the assemblies.
Pulled out the pushrods next.
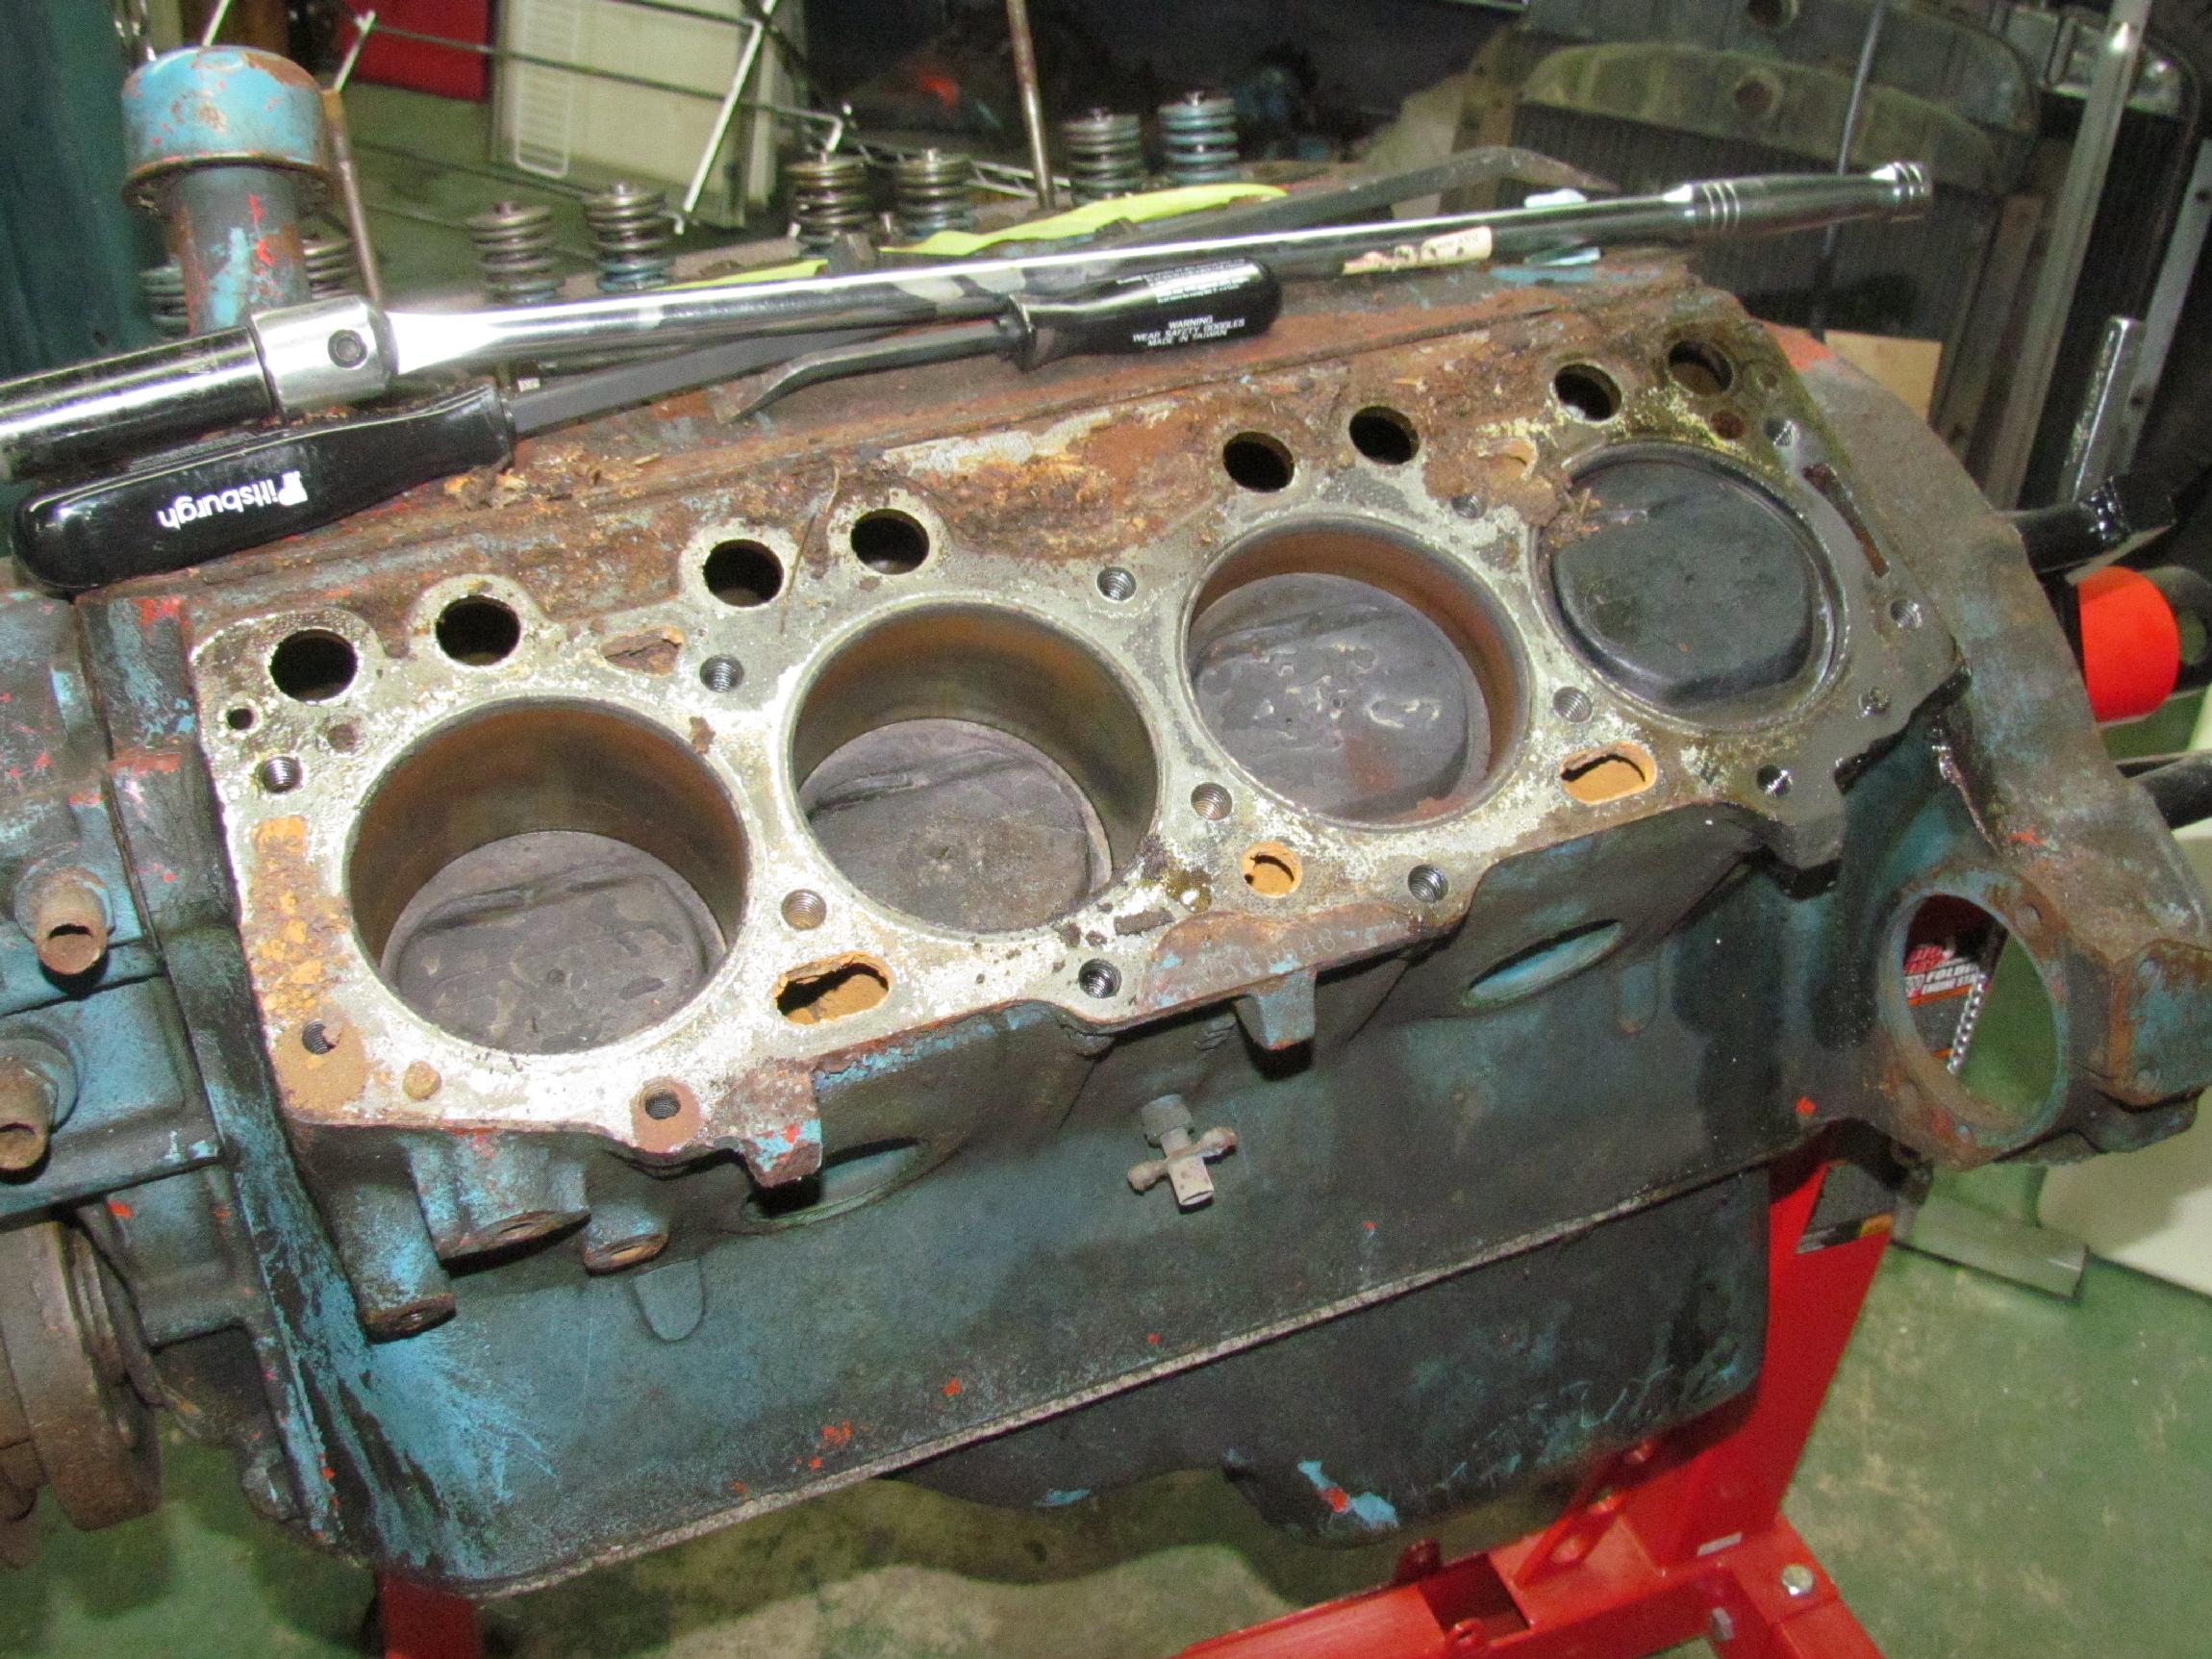
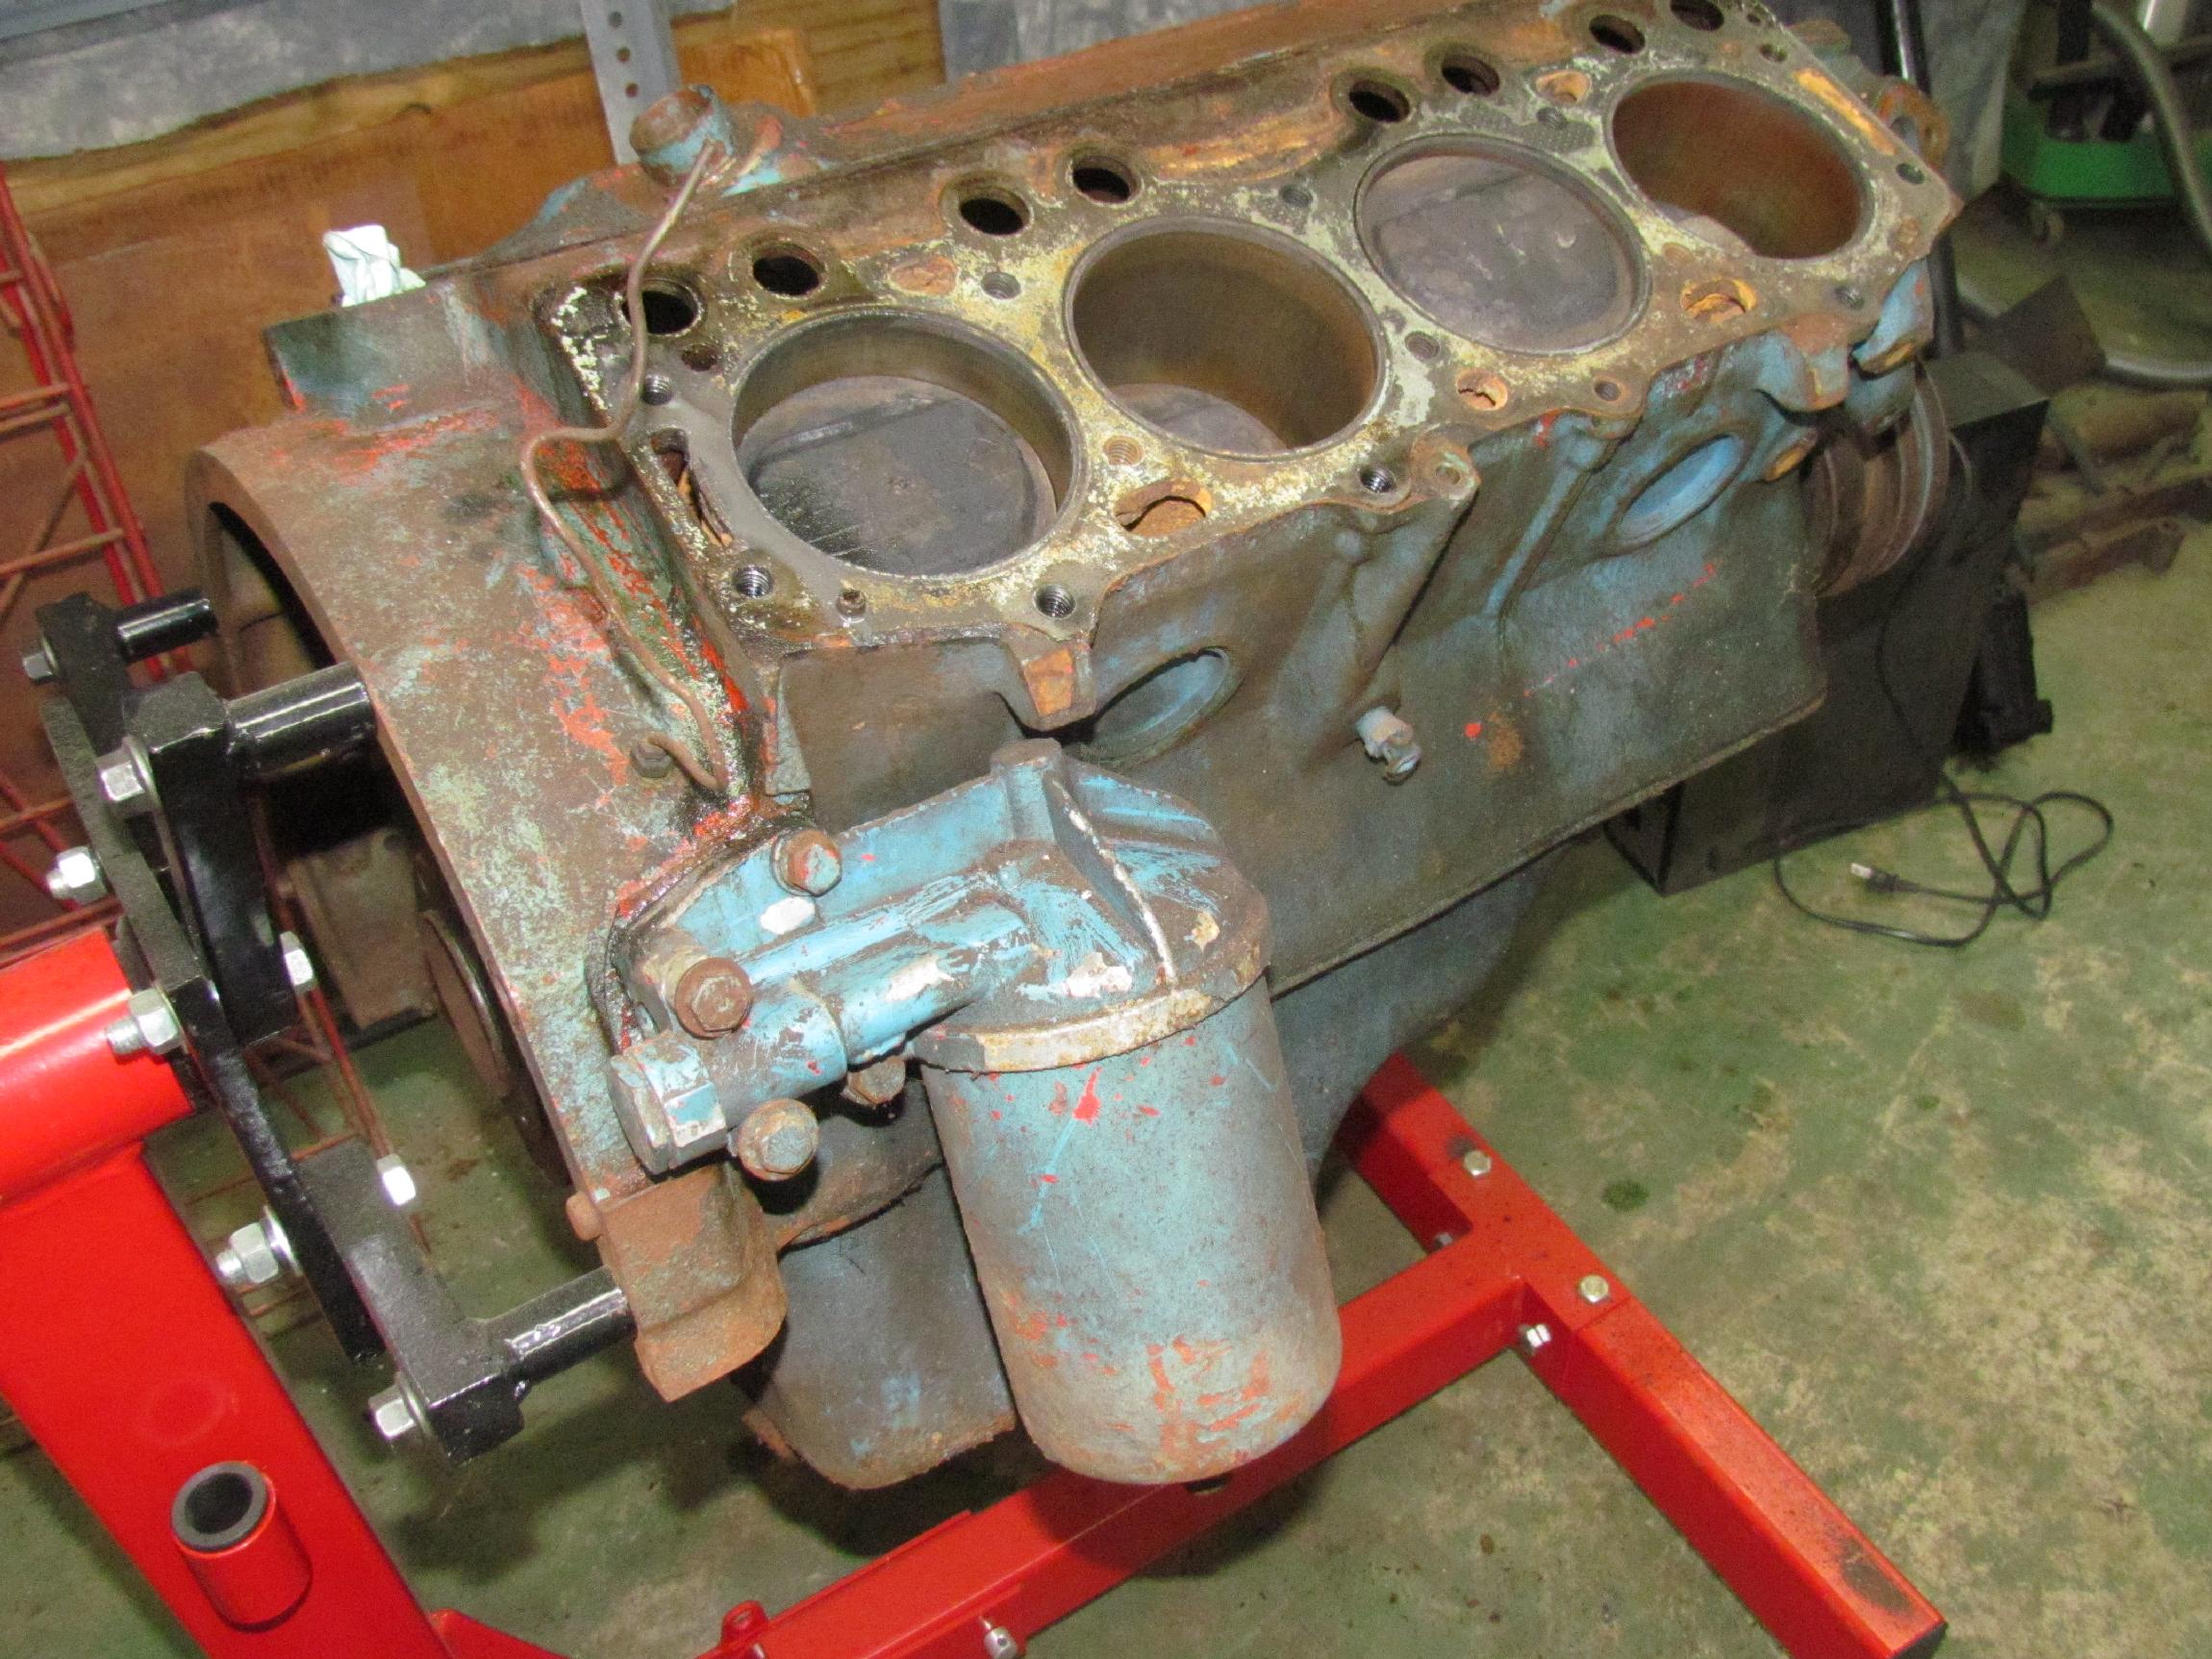
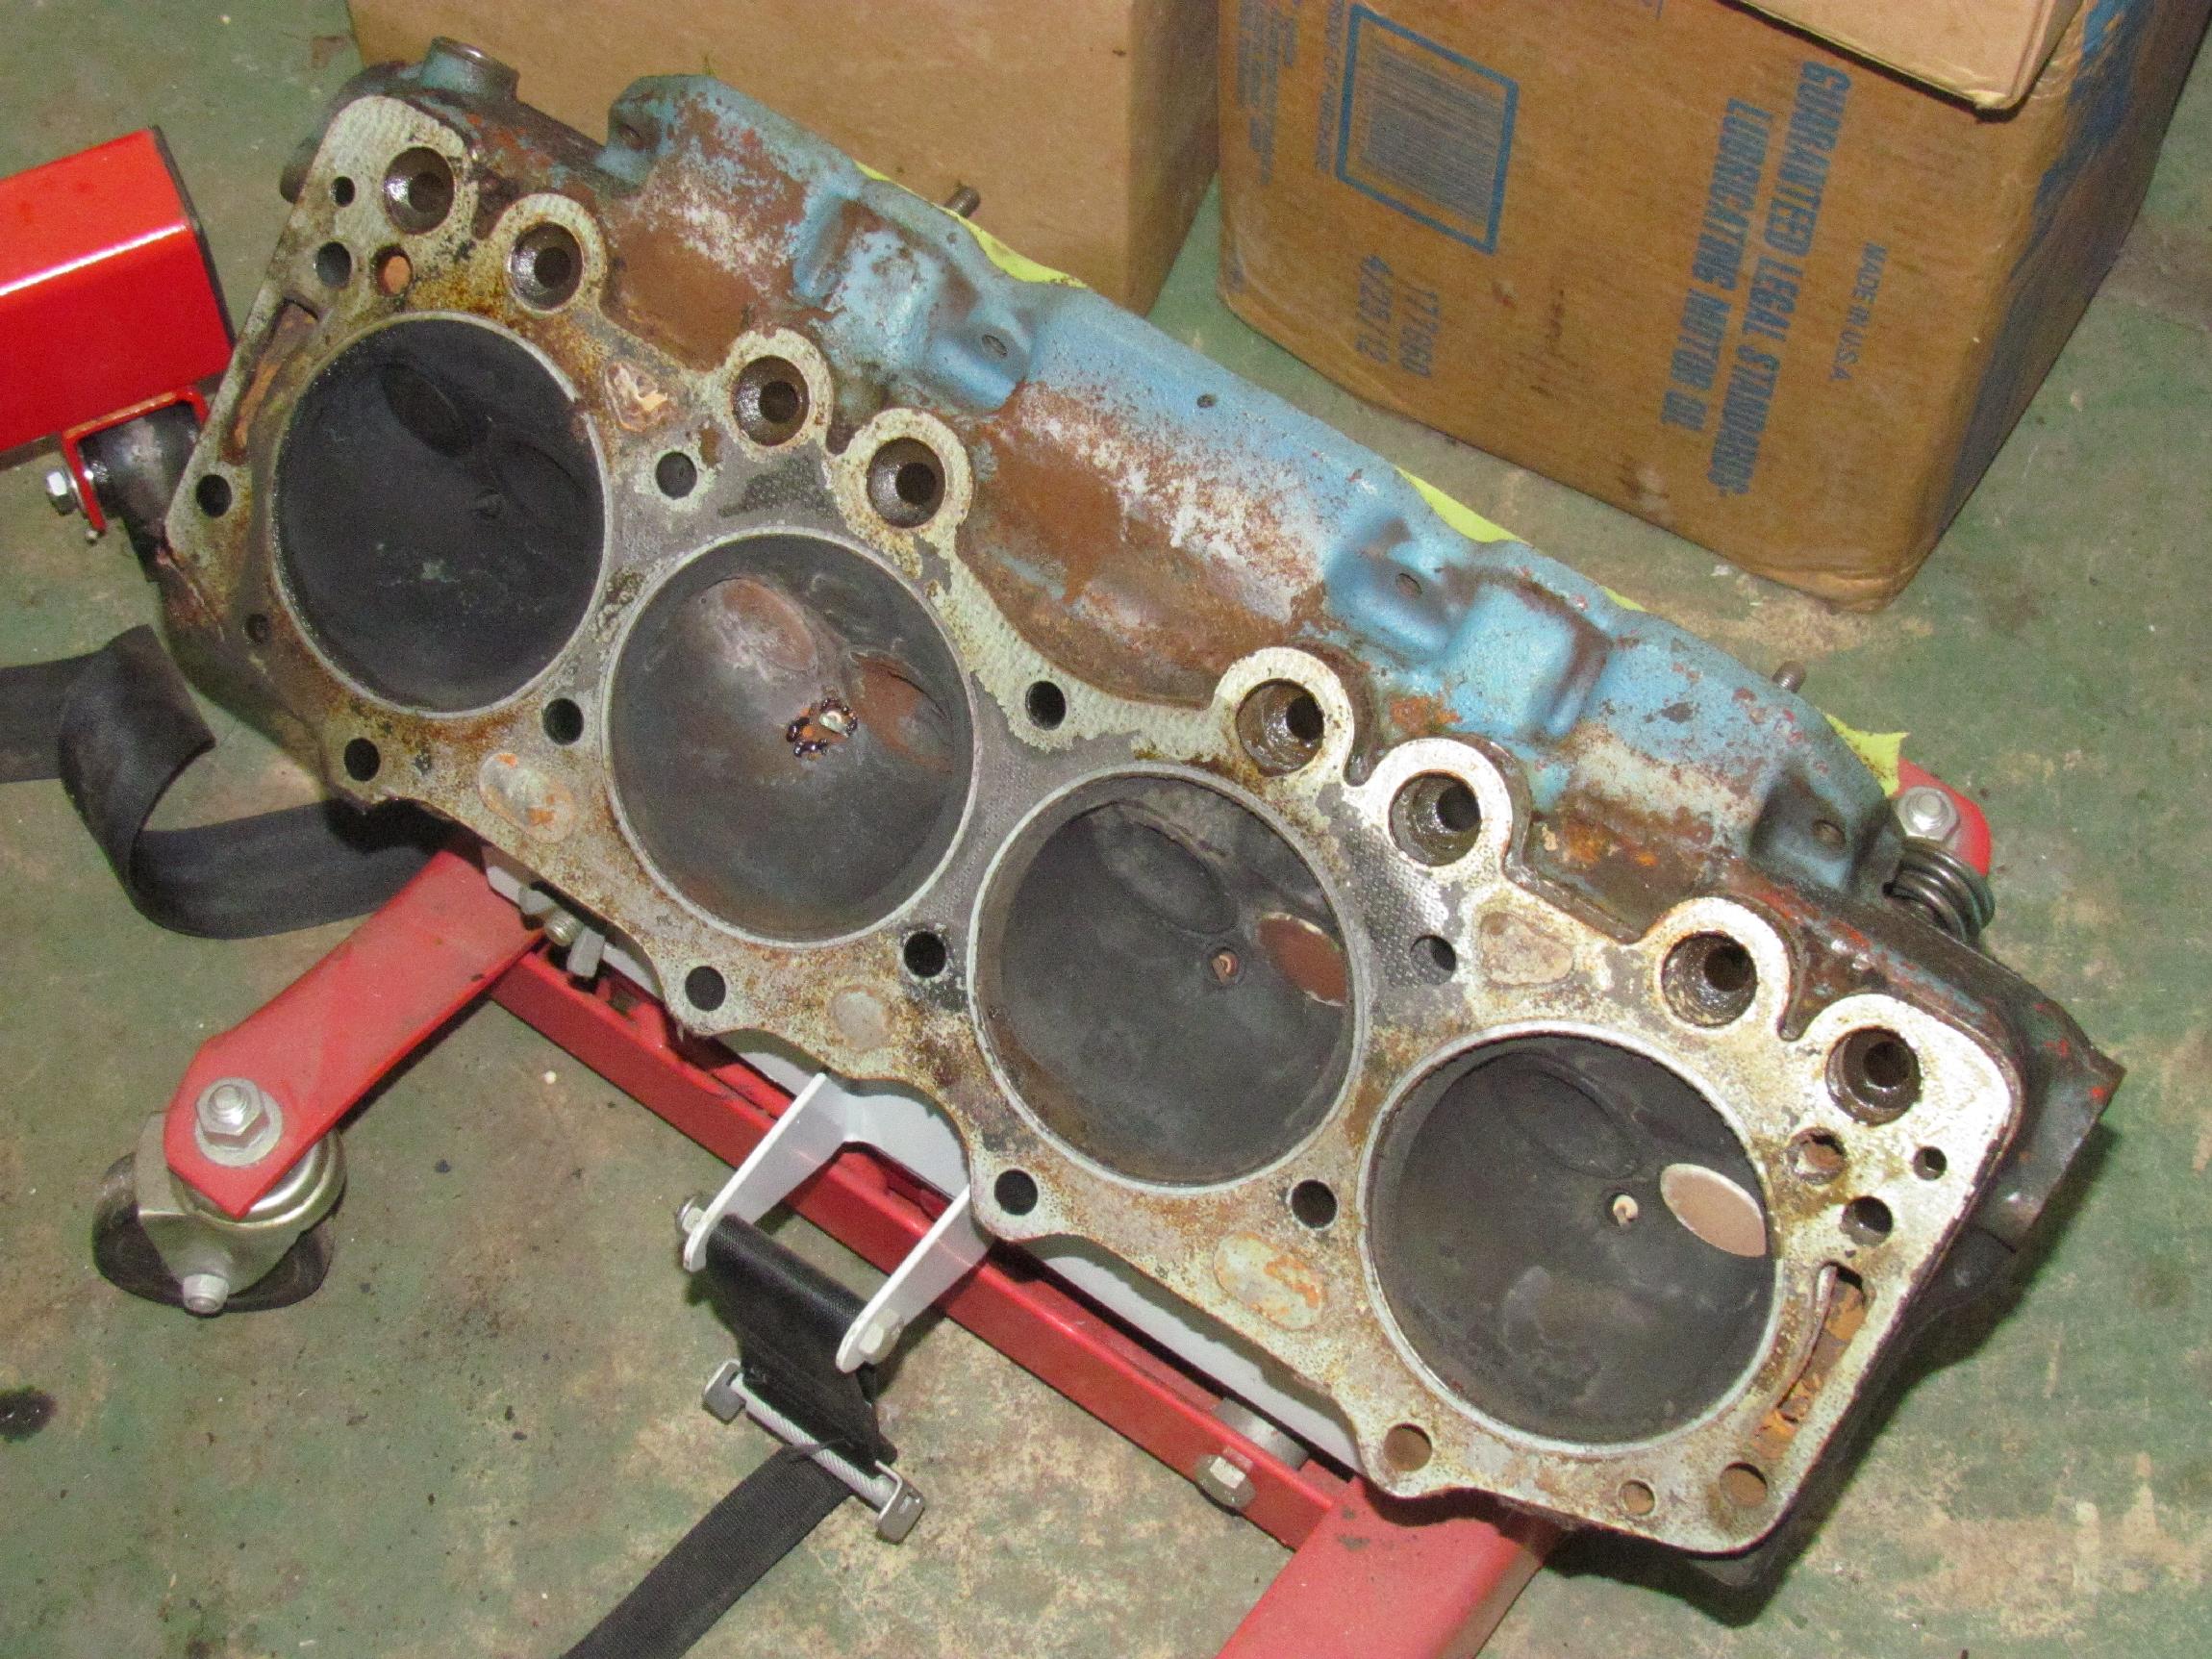 Removed
the heads next. Each head bolt was loosened until it was a quarter inch
out. Then big and small pry bars were used to break the head loose.
Head bolts were removed the rest of the way and the heads were lifted
off. Each head had two locating dowels in the block. The combustion
chambers are almost hemispherical and the spark plug is centrally
located. I believe the Buick design is considered a pent roof
combustion chamber. The block condition looks okay so far.
Removed
the heads next. Each head bolt was loosened until it was a quarter inch
out. Then big and small pry bars were used to break the head loose.
Head bolts were removed the rest of the way and the heads were lifted
off. Each head had two locating dowels in the block. The combustion
chambers are almost hemispherical and the spark plug is centrally
located. I believe the Buick design is considered a pent roof
combustion chamber. The block condition looks okay so far.
 After
the heads were shelved away, the valley cover, oil pressure fitting and
oil filter assembly were removed. Then the remaining oil and sludge
were drained. This pan had a full load of oil when my friends, Sam
Gagliano and Paul O'Keefe helped me pick it up seventy-five miles north
of here in Sam's trailer. A lot of that oil puddled on the floor of
Sam's trailer due, I think, to the loose timing chain cover.
After
the heads were shelved away, the valley cover, oil pressure fitting and
oil filter assembly were removed. Then the remaining oil and sludge
were drained. This pan had a full load of oil when my friends, Sam
Gagliano and Paul O'Keefe helped me pick it up seventy-five miles north
of here in Sam's trailer. A lot of that oil puddled on the floor of
Sam's trailer due, I think, to the loose timing chain cover.
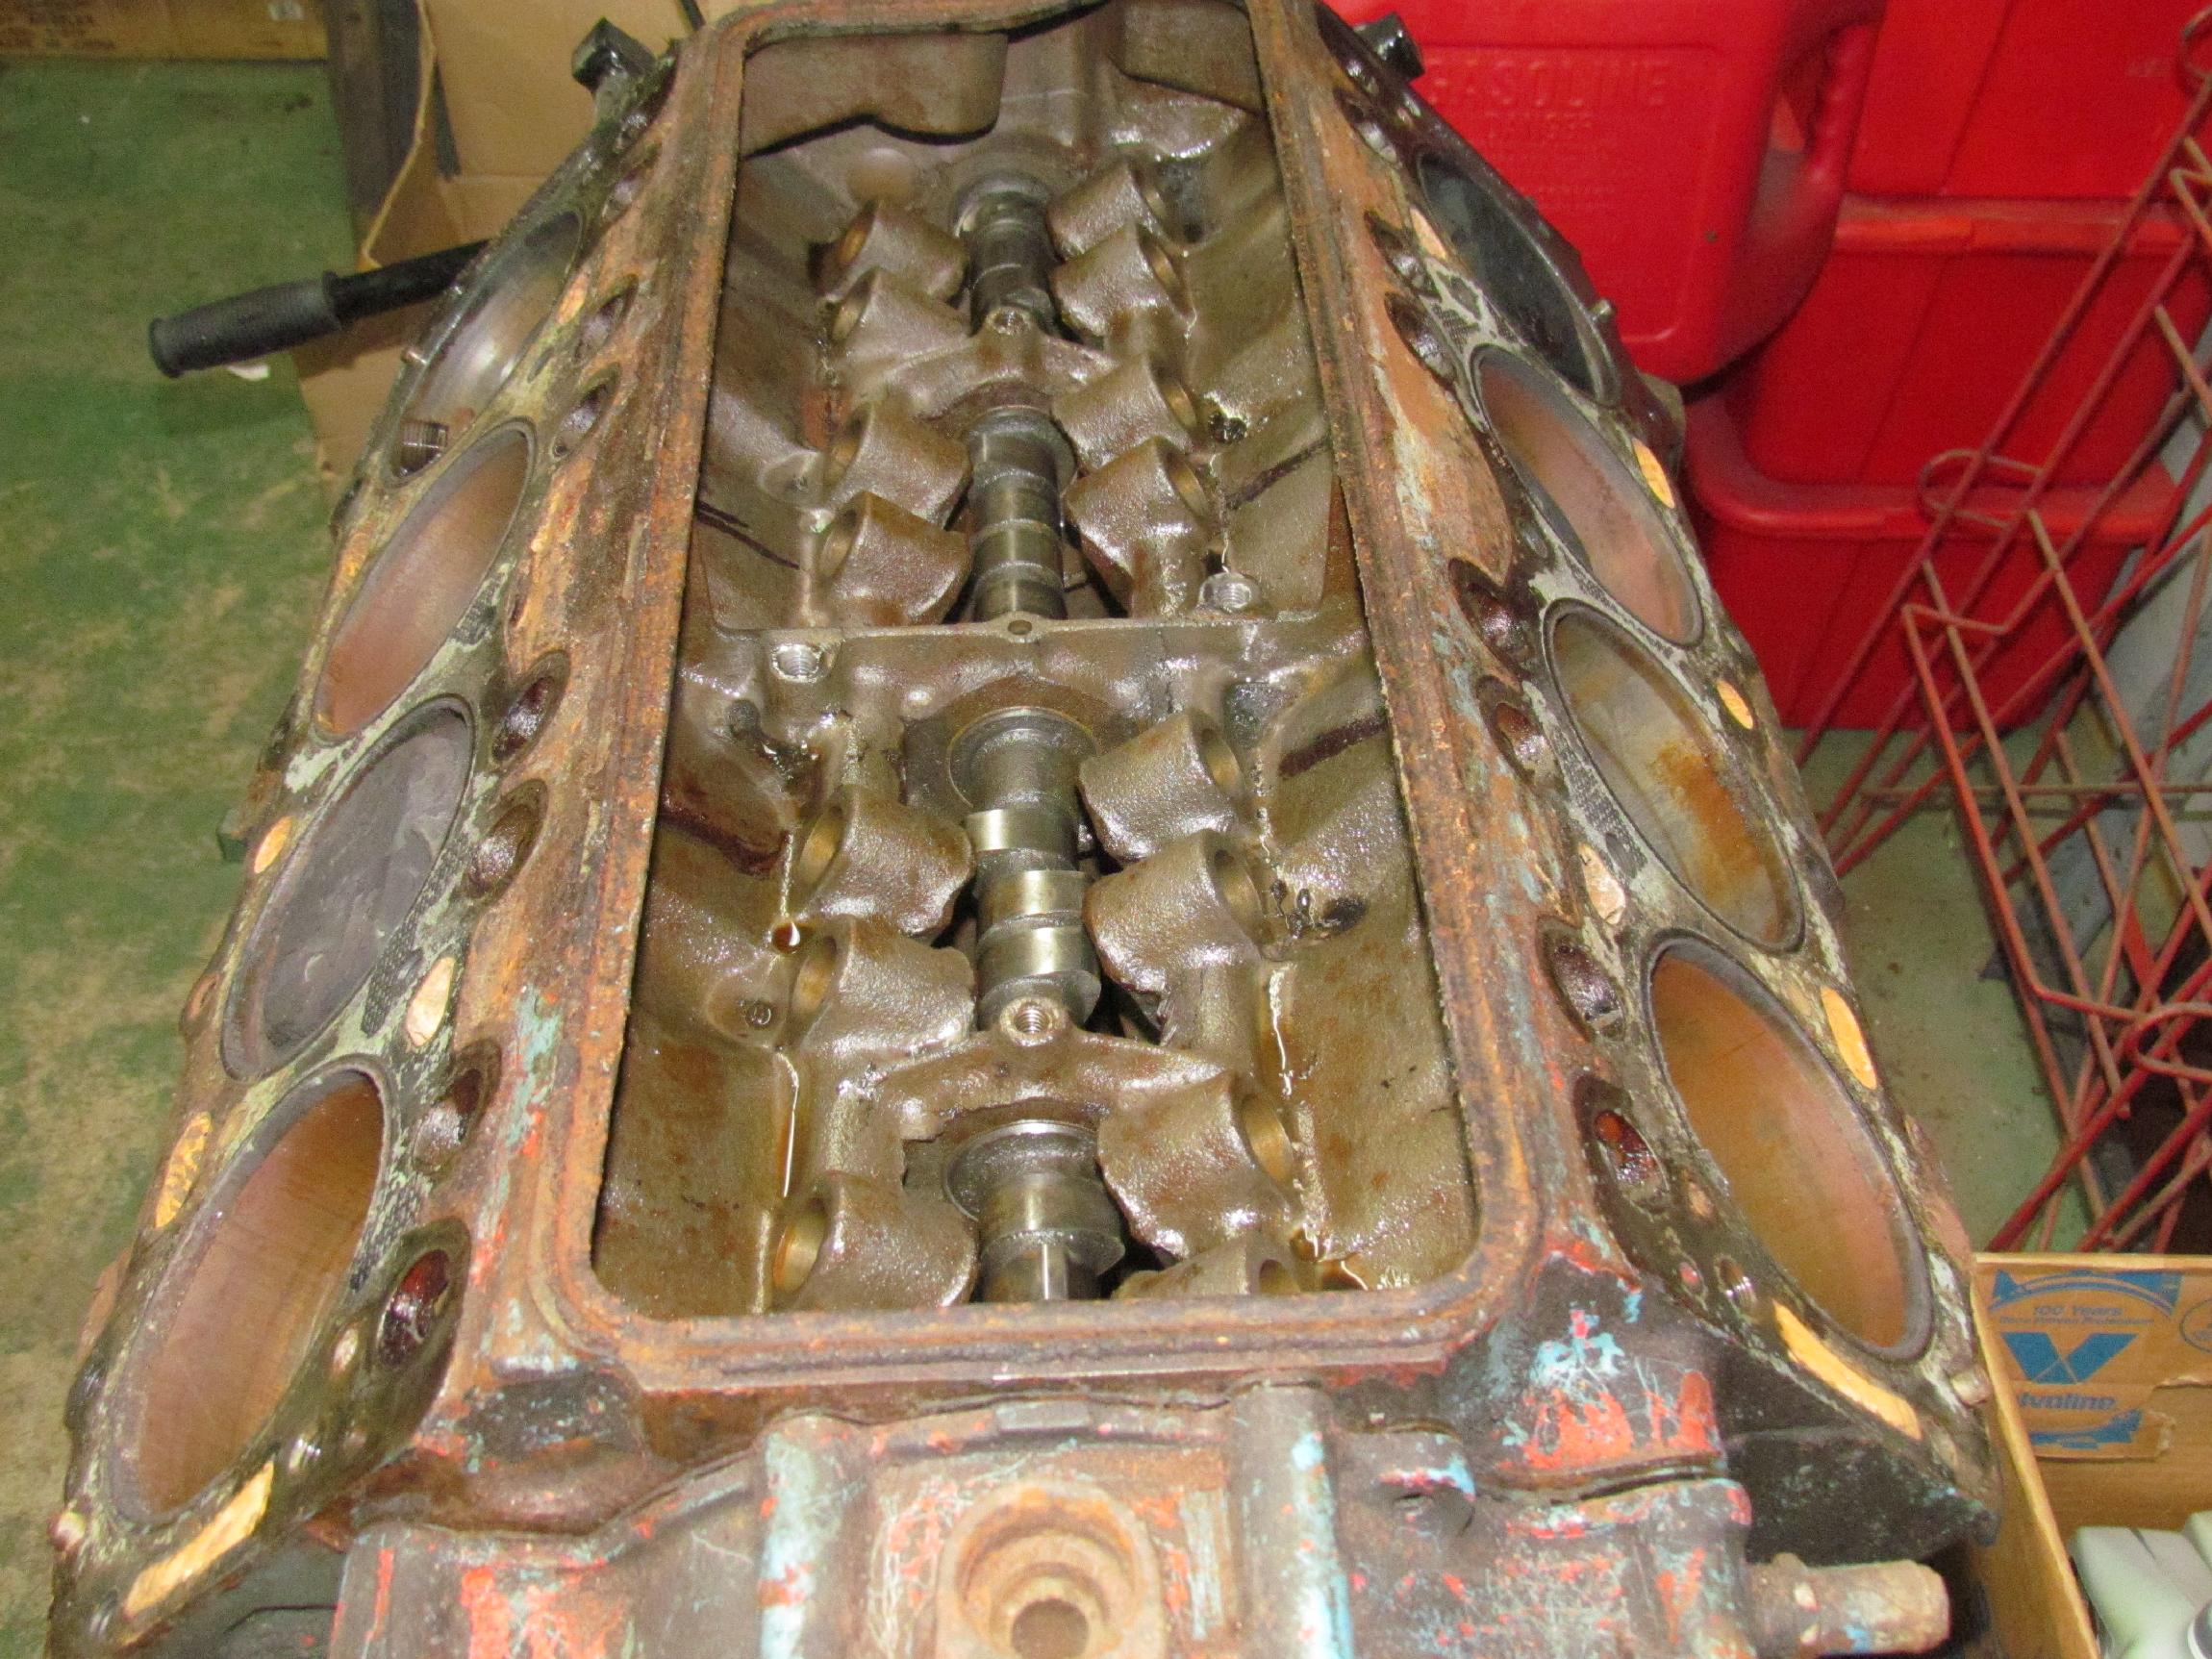 There
is a vertical sheet metal baffle dividing the lifter valley in two,
held in place with two cap screws. It was removed and the hydraulic
lifters removed. Camshaft wear does not look bad. These engines came
from the factory with jagged castings around the lifter enclosures.
This will be cleaned up with a die grinder before the engine goes back
together.
There
is a vertical sheet metal baffle dividing the lifter valley in two,
held in place with two cap screws. It was removed and the hydraulic
lifters removed. Camshaft wear does not look bad. These engines came
from the factory with jagged castings around the lifter enclosures.
This will be cleaned up with a die grinder before the engine goes back
together.
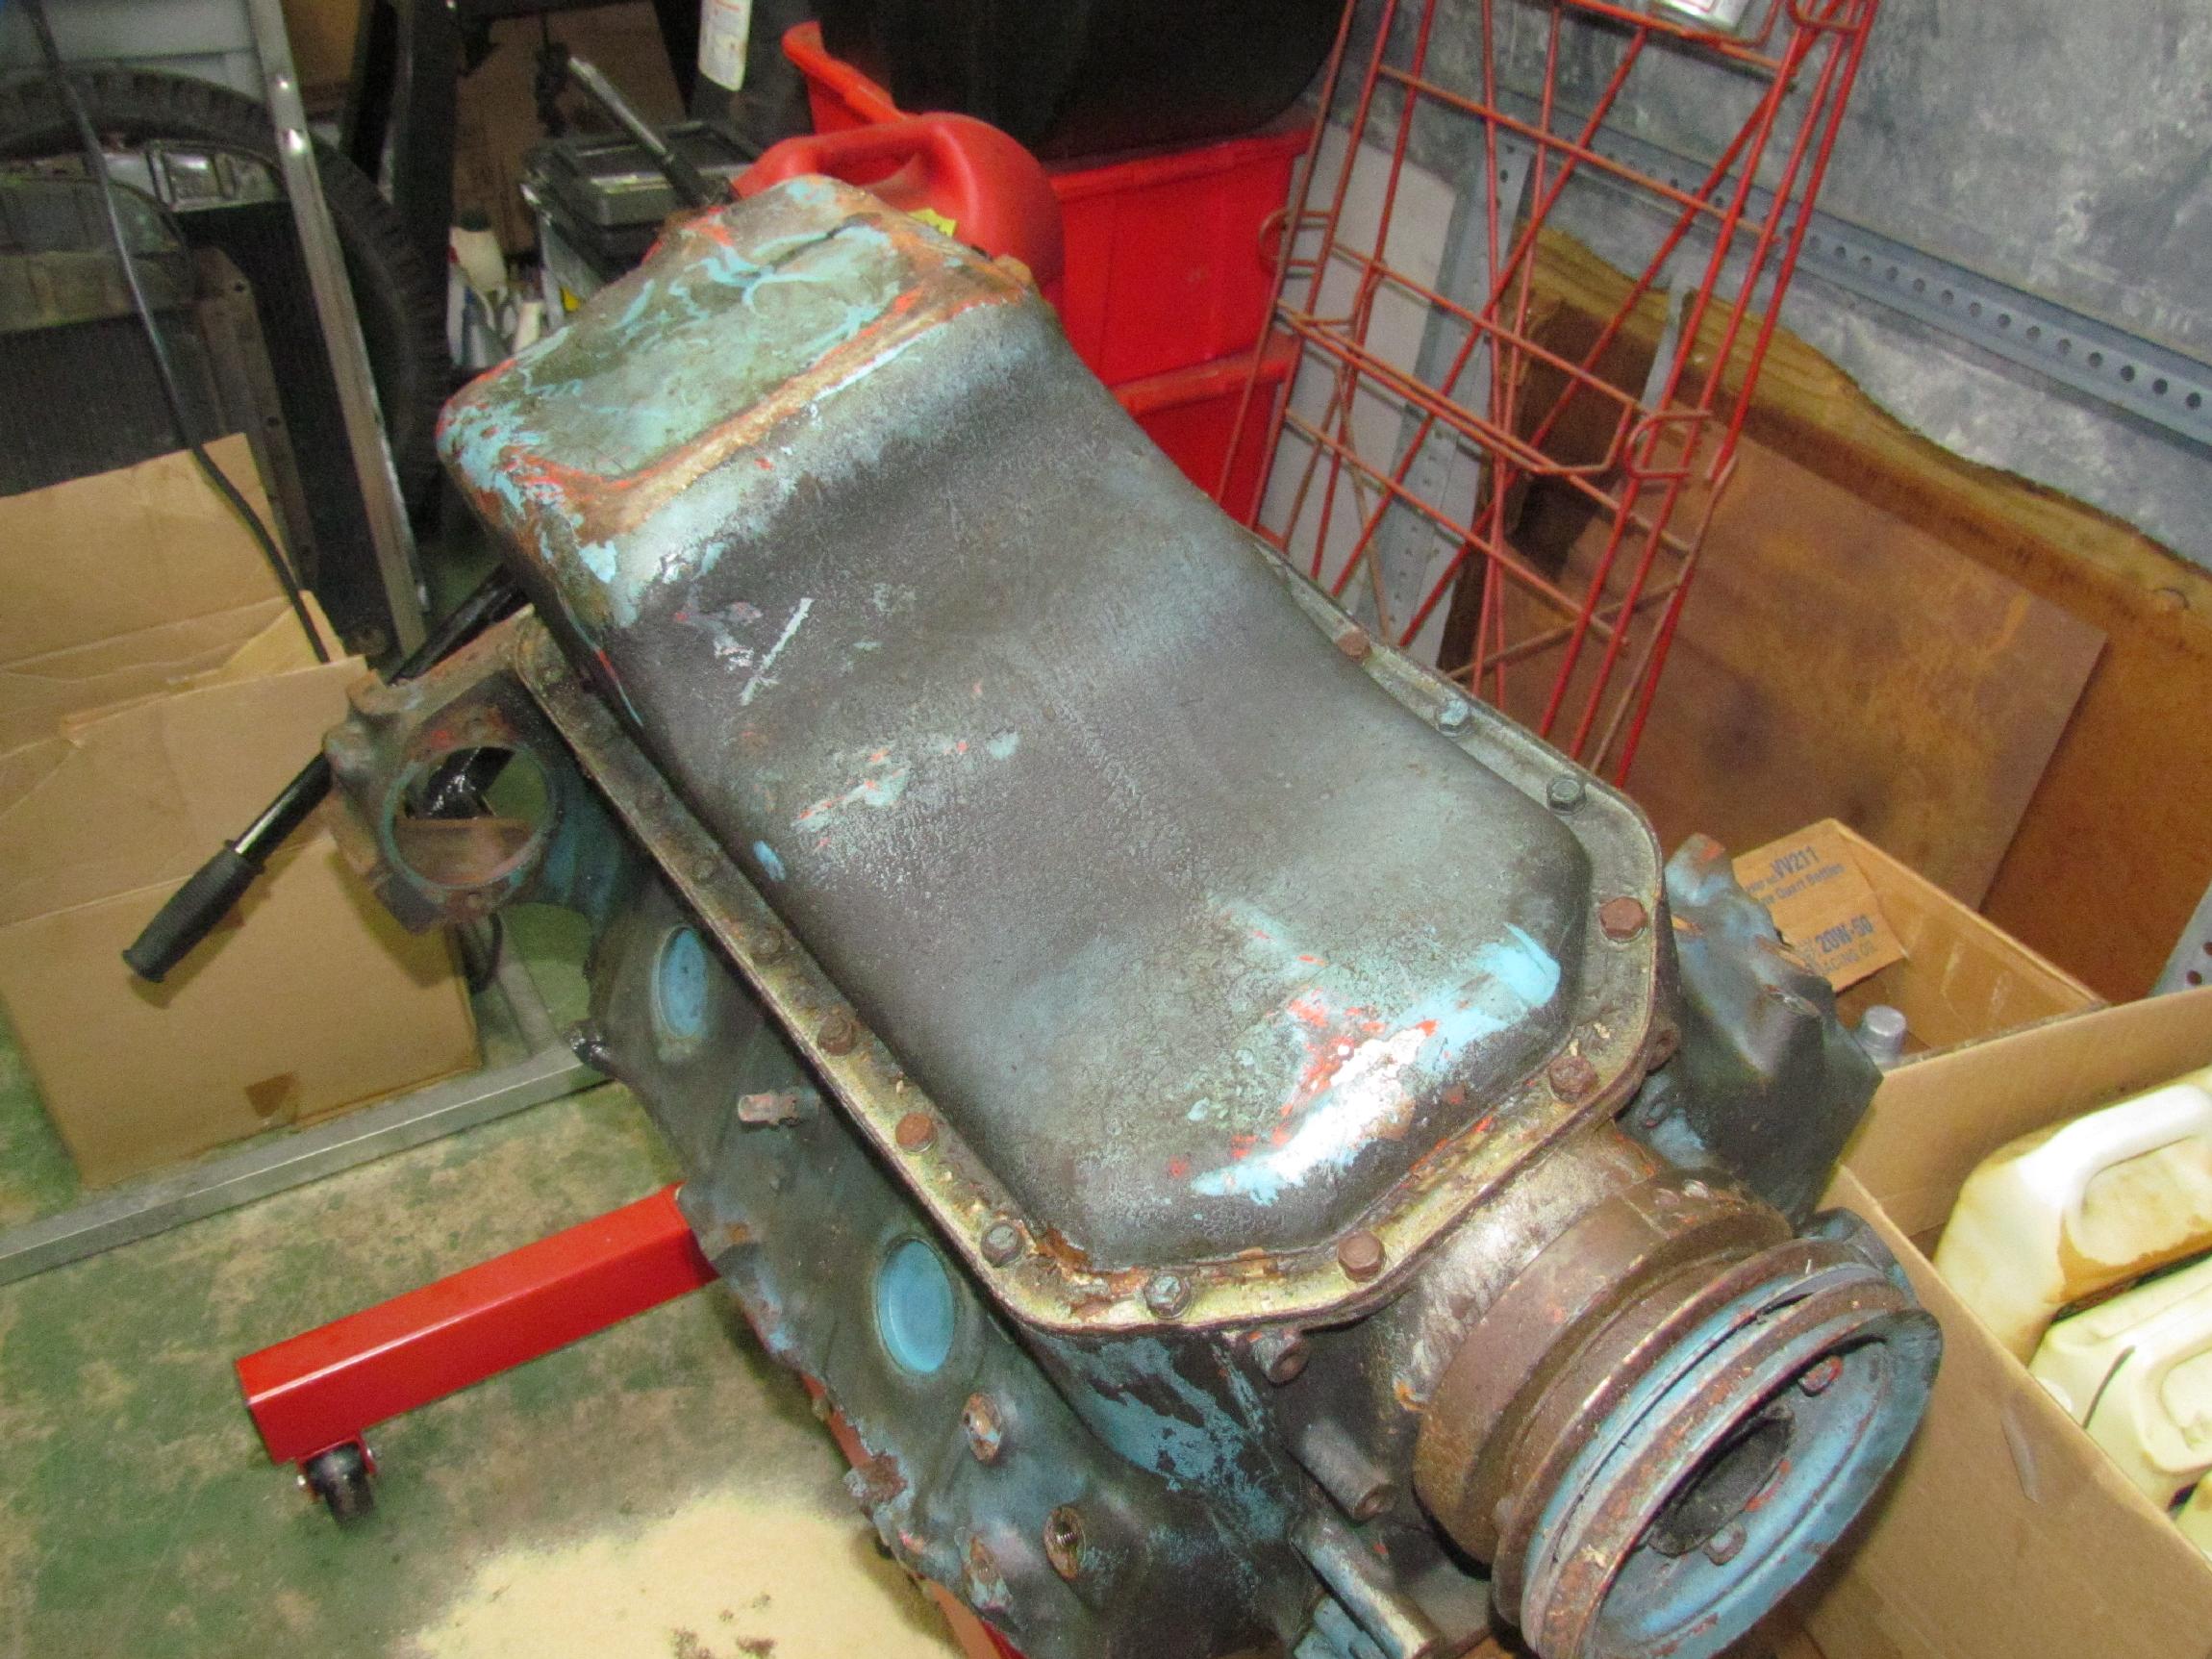 After
the oil was drained, the engine was flipped over and the oil pan was
removed along with the double pulley on the harmonic balancer. Nailhead
pans came in several shapes. I'm fortunate that this is a rear sump pan
and will probably not interfere with the Deerslayer's straight front
axle when it comes time for this engine to go in the truck. The pan is
in better shape than it appears and will not take much work to restore
it for reuse.
After
the oil was drained, the engine was flipped over and the oil pan was
removed along with the double pulley on the harmonic balancer. Nailhead
pans came in several shapes. I'm fortunate that this is a rear sump pan
and will probably not interfere with the Deerslayer's straight front
axle when it comes time for this engine to go in the truck. The pan is
in better shape than it appears and will not take much work to restore
it for reuse.
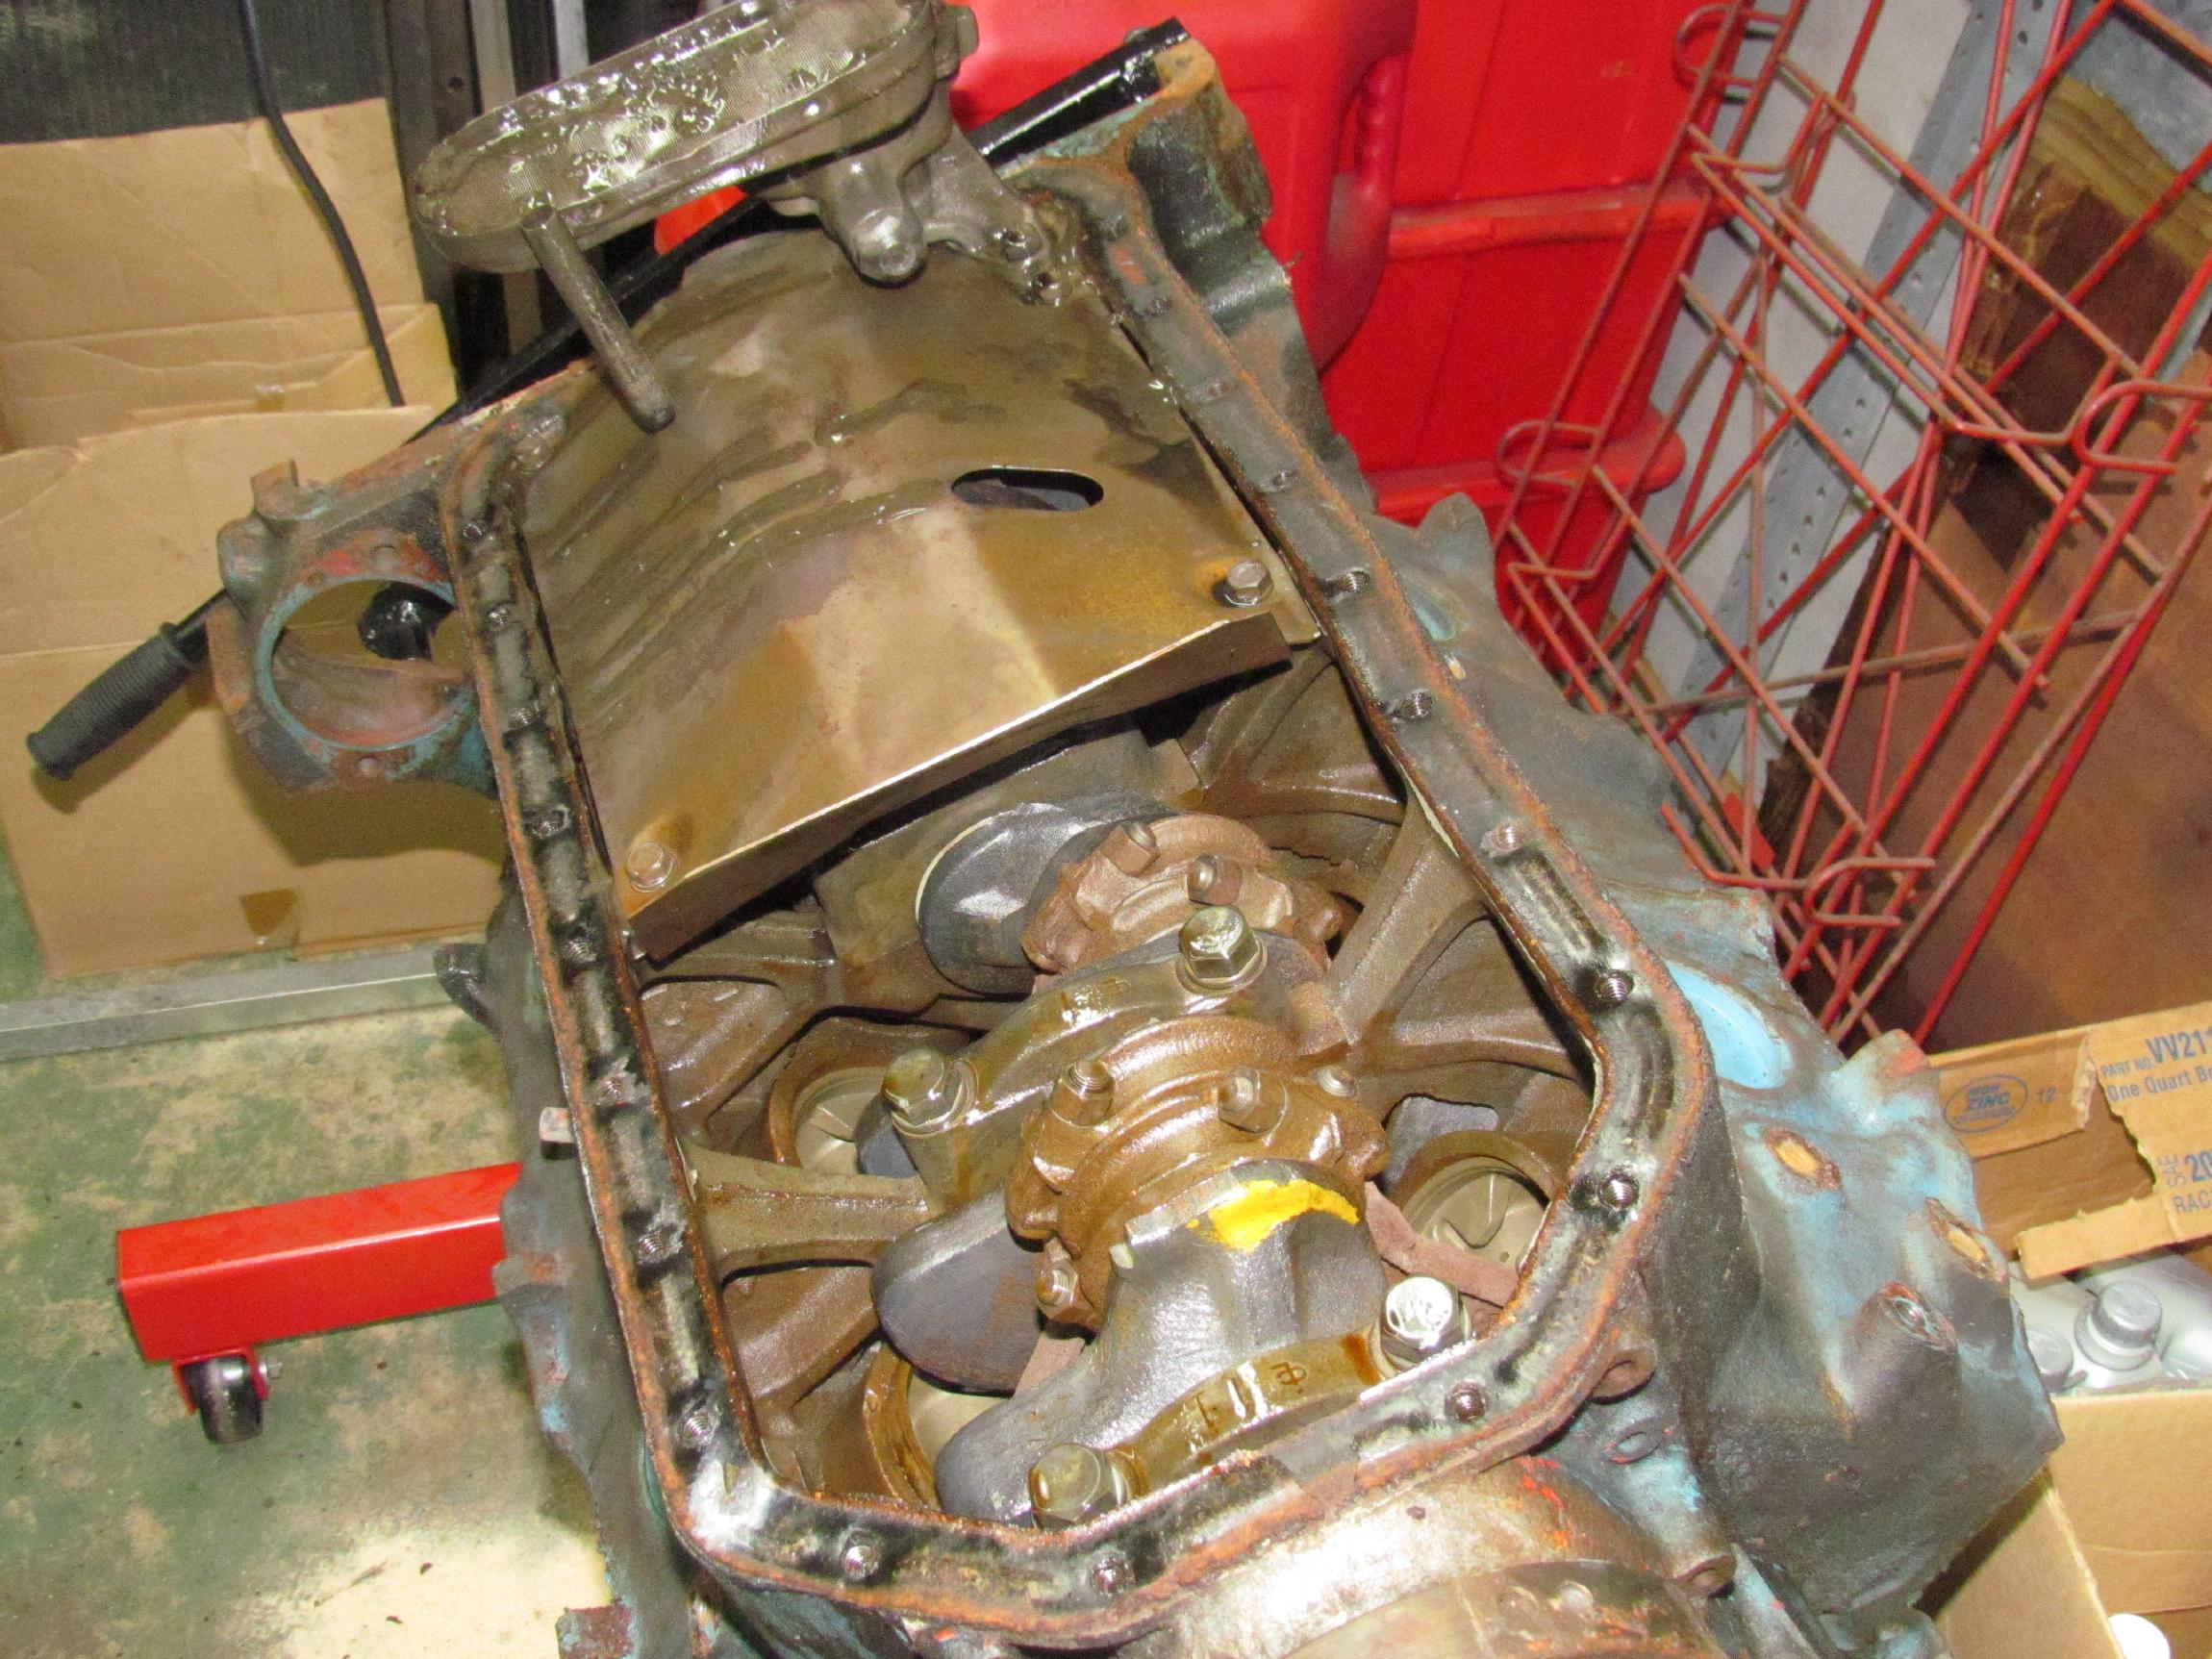 The
oil pump and pickup were unbolted next, followed by the sheet metal
baffle. I put these parts aside to clean later. Notice how the main
bearings reside in "bridges" between the block sides. There is no web
above them. You can pass your hand thru the open space.
The
oil pump and pickup were unbolted next, followed by the sheet metal
baffle. I put these parts aside to clean later. Notice how the main
bearings reside in "bridges" between the block sides. There is no web
above them. You can pass your hand thru the open space.
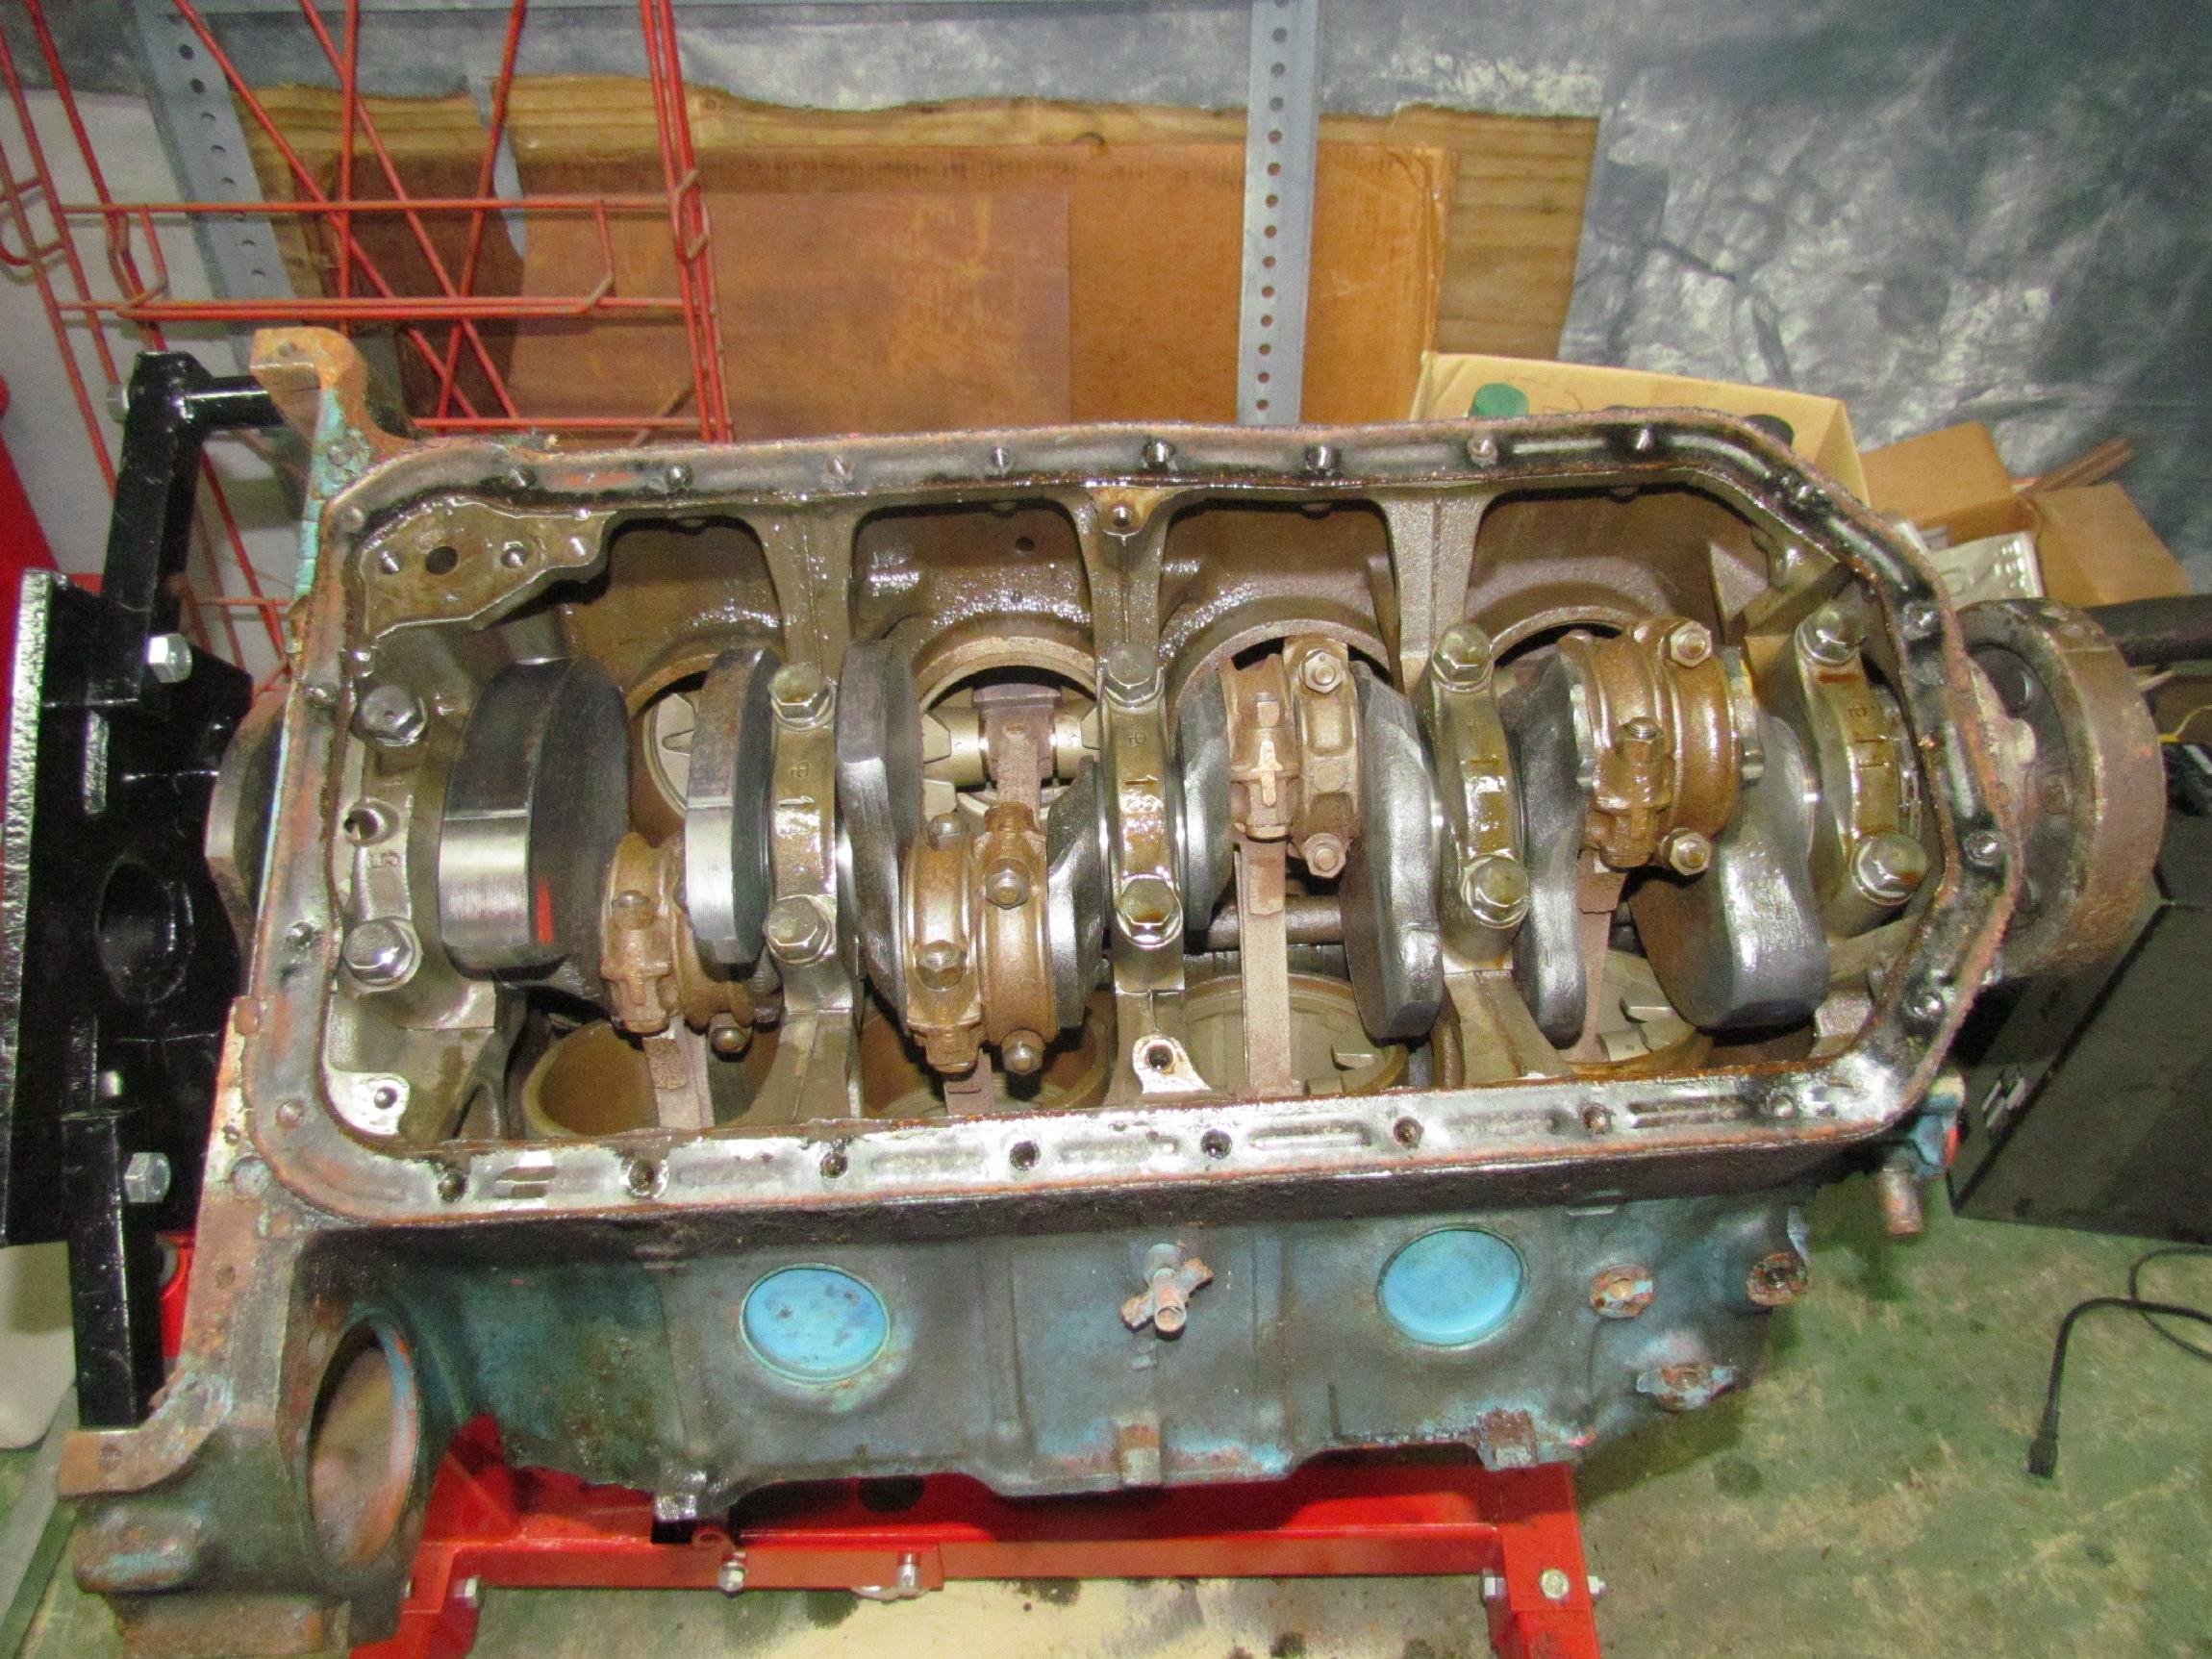 It's
crowded in the nailhead crankcase and there is not much room for
counterweights. Buick compensated for this by making the flexplate (or
flywheel) and the harmonic balancer part of the counterweight system.
They are indexed to the crankshaft. I have to do some research and
measurin' before I take the rotating assemblies apart to give me a
better idea of where I am with this engine.
It's
crowded in the nailhead crankcase and there is not much room for
counterweights. Buick compensated for this by making the flexplate (or
flywheel) and the harmonic balancer part of the counterweight system.
They are indexed to the crankshaft. I have to do some research and
measurin' before I take the rotating assemblies apart to give me a
better idea of where I am with this engine.
 May
12th 2014
My friend, Hank Langsenkamp, is downsizing his shop. He gave me a
workbench about six weeks ago. My intent was to take a friend to help
me so Hank didn't do any lifting. Well, at the Sunday morning coffee
cruise-in, Hank asked me, for about the third time, to follow him over
to the shop and pick the workbench up. I didn't have any excuses left
so I followed him to his shop where the two of us carried the workbench
from the back of Hank's shop to the Deerslayer. At least he let me
carry the end with the drawer and vise on it. When we got it in
Deerslayer's bed, I was more winded than Hank was. I sponged a beer off
Hank as an excuse to stick around for a few minutes to make sure that
there were no aftereffects on Hank. He was fine. I want to be like Hank
if I reach his age of eighty-three.
May
12th 2014
My friend, Hank Langsenkamp, is downsizing his shop. He gave me a
workbench about six weeks ago. My intent was to take a friend to help
me so Hank didn't do any lifting. Well, at the Sunday morning coffee
cruise-in, Hank asked me, for about the third time, to follow him over
to the shop and pick the workbench up. I didn't have any excuses left
so I followed him to his shop where the two of us carried the workbench
from the back of Hank's shop to the Deerslayer. At least he let me
carry the end with the drawer and vise on it. When we got it in
Deerslayer's bed, I was more winded than Hank was. I sponged a beer off
Hank as an excuse to stick around for a few minutes to make sure that
there were no aftereffects on Hank. He was fine. I want to be like Hank
if I reach his age of eighty-three.
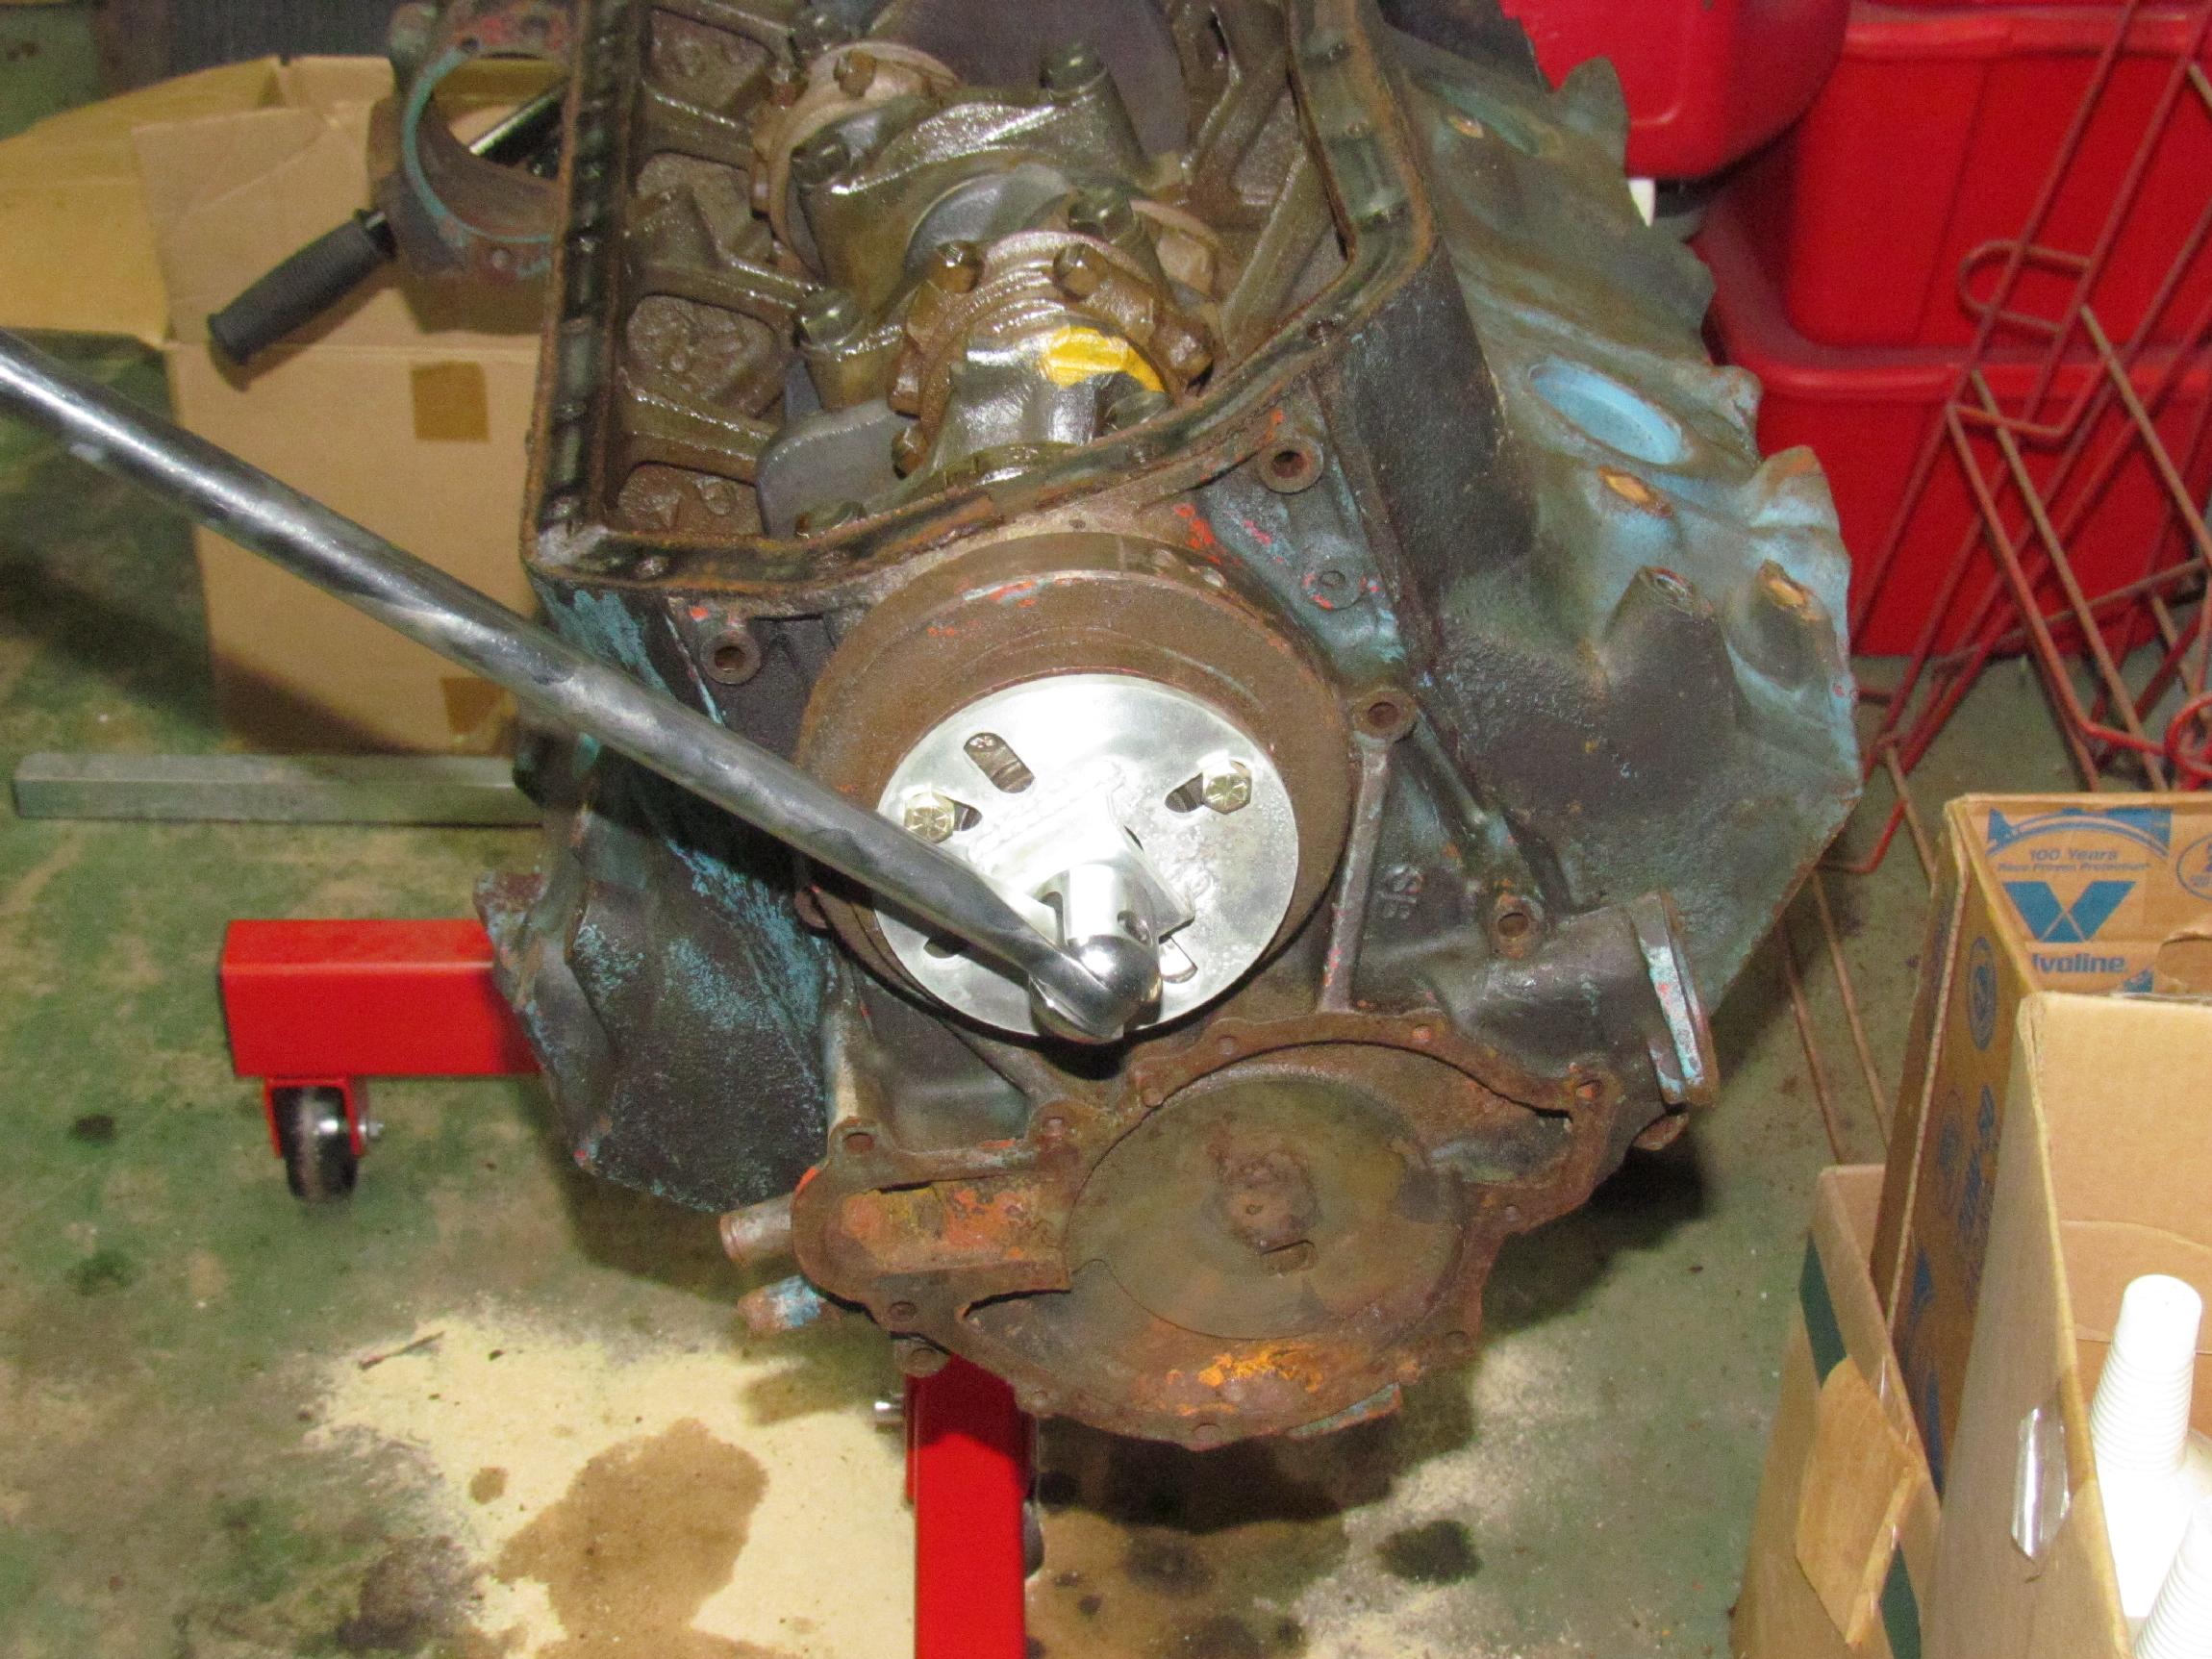 One
more nailhead update before I move to something else for a few days. I
was rootin' around in the shop when I came across a speciality tool I
got from Eastwood long enough ago that I'd completely
forgotten
it. It's an adapter you bolt to a harmonic balancer's puller holes that
has a 1/2 drive socket. A breaker bar can then be used to rotate the
crank easily. Since that is something I will want to do when I remove
the pistons, I decided to leave the harmonic balancer in place a while
longer.
One
more nailhead update before I move to something else for a few days. I
was rootin' around in the shop when I came across a speciality tool I
got from Eastwood long enough ago that I'd completely
forgotten
it. It's an adapter you bolt to a harmonic balancer's puller holes that
has a 1/2 drive socket. A breaker bar can then be used to rotate the
crank easily. Since that is something I will want to do when I remove
the pistons, I decided to leave the harmonic balancer in place a while
longer.
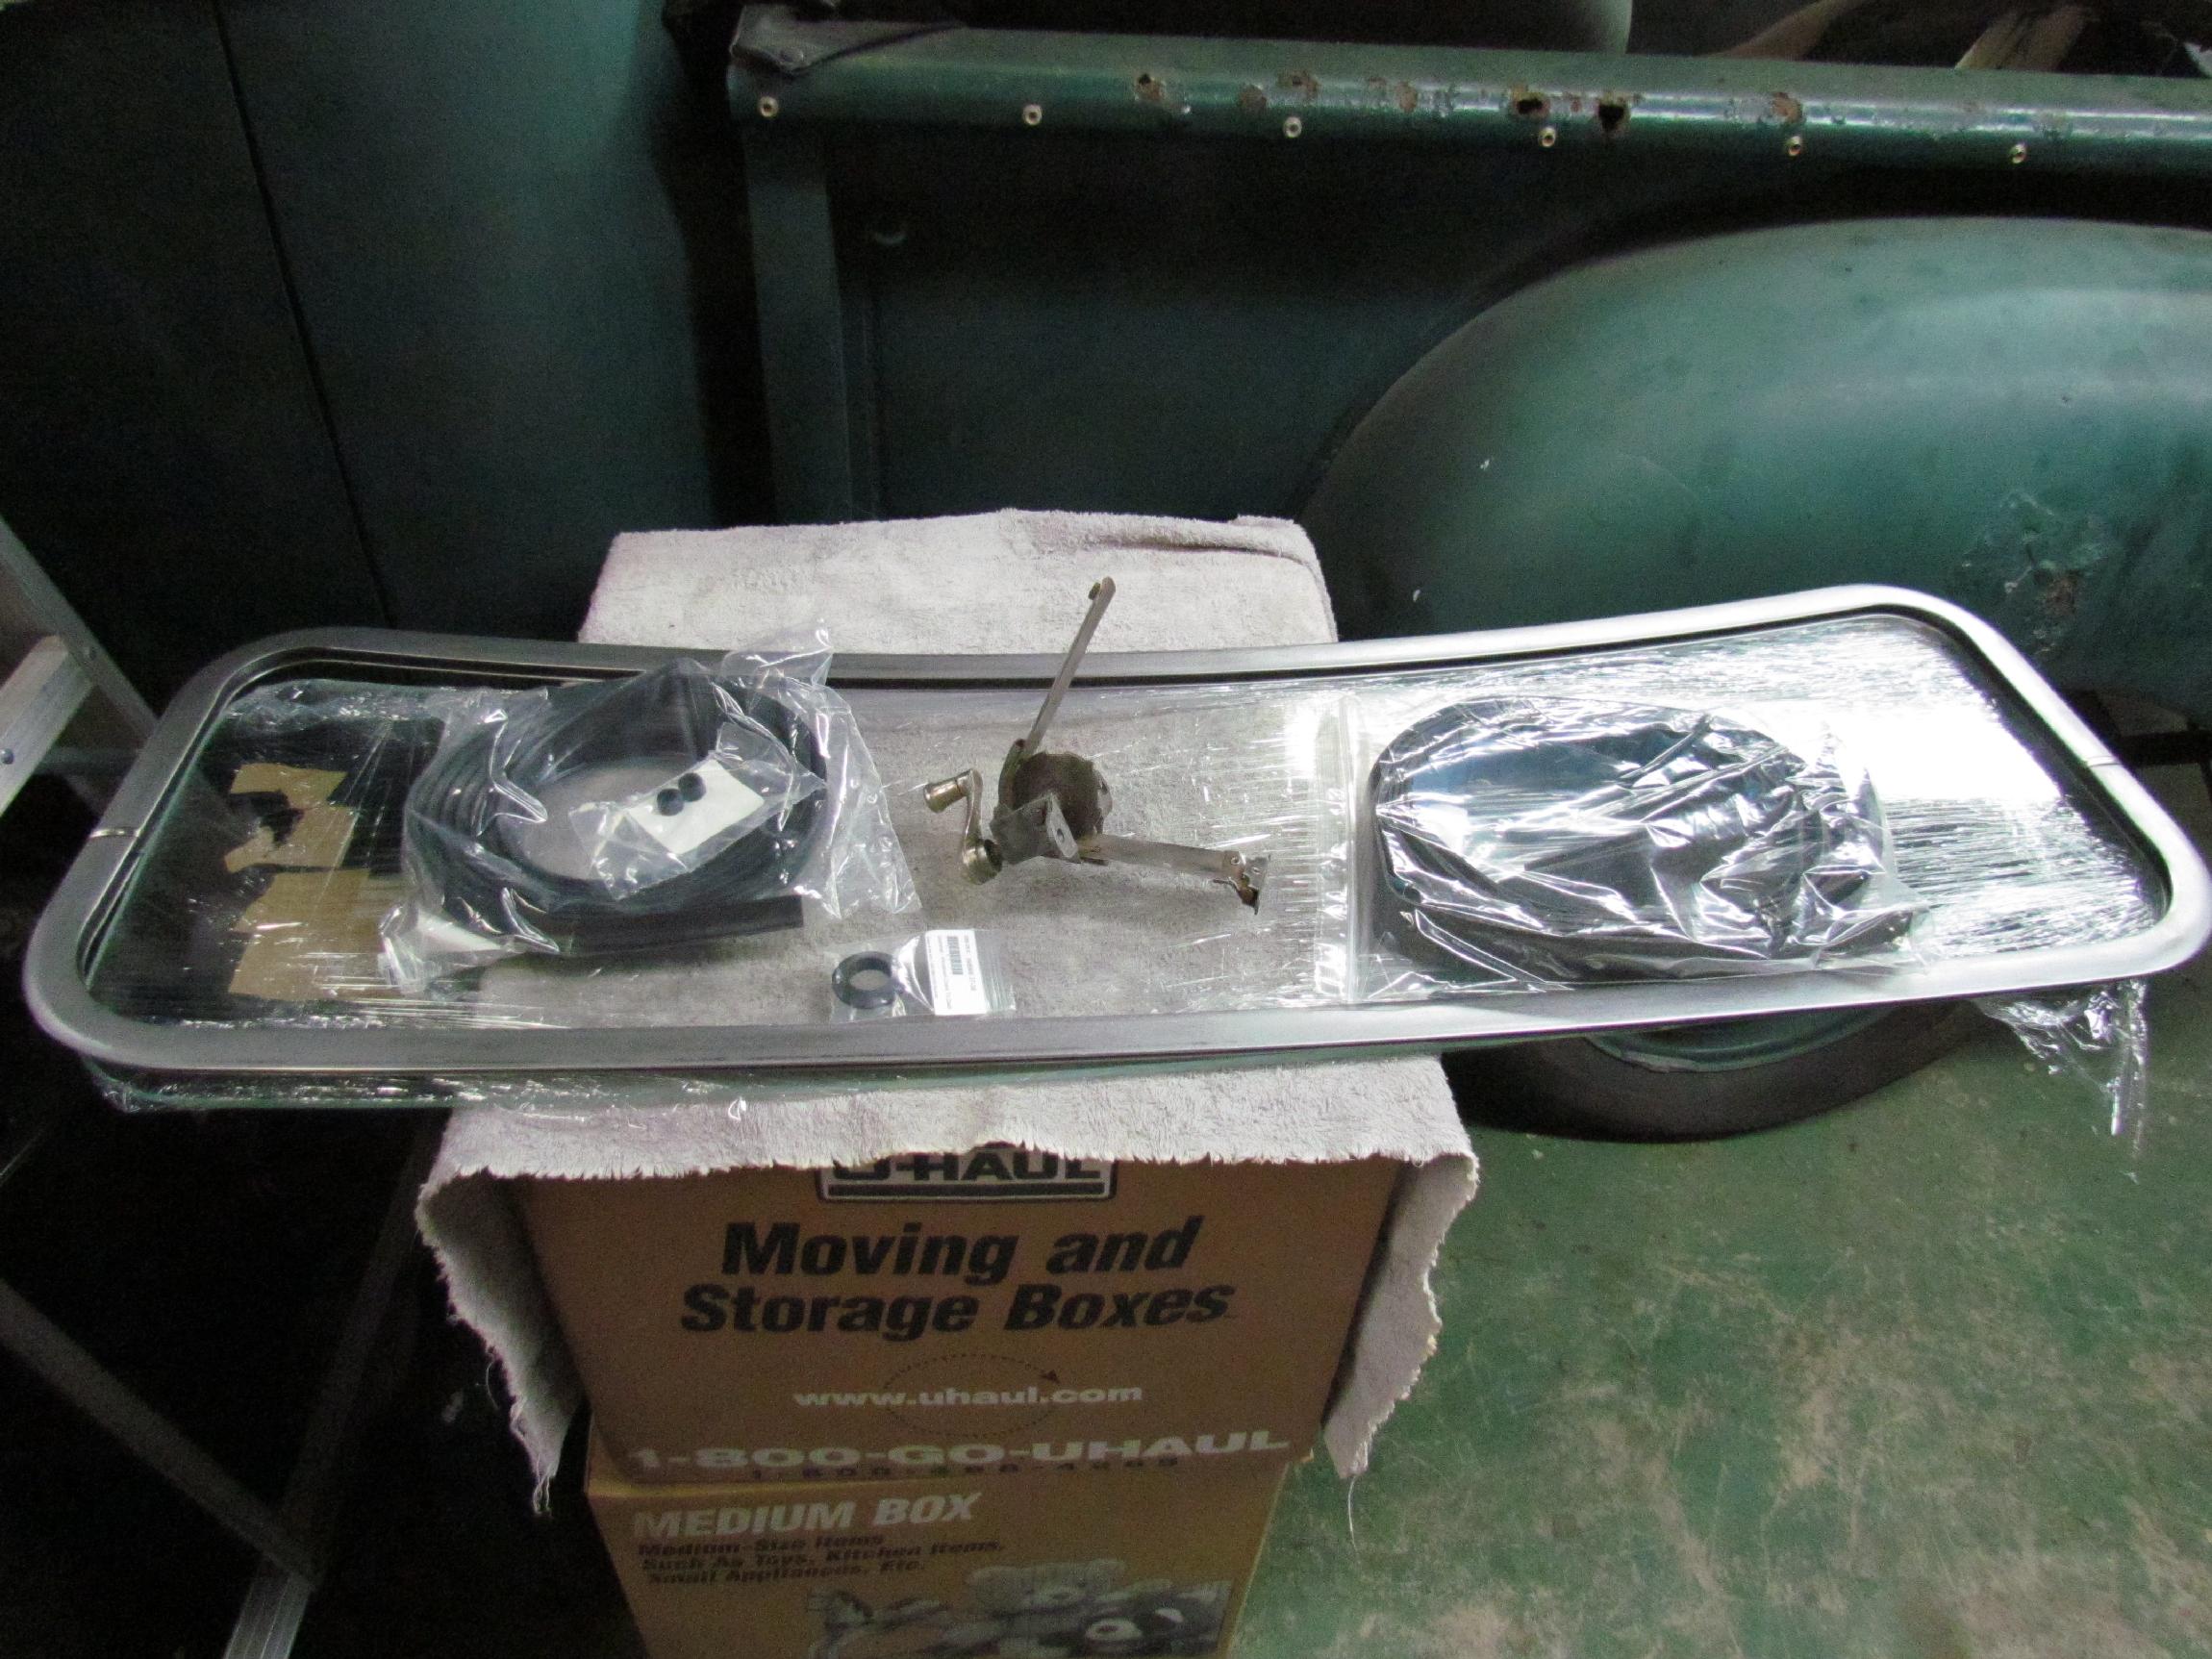 I've
gathered everything I think I'll need for the new Deerslayer windshield
job - New glass, new repop frame, new weatherstripping and windshield
bumpers, glass setting tape, a replacement windshield regulator in
fairly good condition, new grommet for the regulator and gloss black
powder coat. Time to get to it. The weatherstripping came from Steele
Rubber Products. The regulator came from an eBay vendor and the powder
from Columbia Coatings. The rest came from Chevys of the 40's.
I've
gathered everything I think I'll need for the new Deerslayer windshield
job - New glass, new repop frame, new weatherstripping and windshield
bumpers, glass setting tape, a replacement windshield regulator in
fairly good condition, new grommet for the regulator and gloss black
powder coat. Time to get to it. The weatherstripping came from Steele
Rubber Products. The regulator came from an eBay vendor and the powder
from Columbia Coatings. The rest came from Chevys of the 40's.
 Okay. Babysteps
here since
I'm in terra incognita. I separated the new windshield frame
into its component pieces for a trial fit of the windshield
glass. Also wanted to confirm I had the right glass setting tape. I had
ordered the tape, windshield frame and glass from the same
vendor in the hope everything would fit together the first time. Opened
up the setting tape pack and found two thicknesses to choose from and
there was enough of each to do a complete windshield. Cut a two inch
section off each and test fit the sample. The thicker tape was a tight
fit for a two inch strip and it would be really tough to cram a long
strip in the channel. The thinner tape felt about right.
Okay. Babysteps
here since
I'm in terra incognita. I separated the new windshield frame
into its component pieces for a trial fit of the windshield
glass. Also wanted to confirm I had the right glass setting tape. I had
ordered the tape, windshield frame and glass from the same
vendor in the hope everything would fit together the first time. Opened
up the setting tape pack and found two thicknesses to choose from and
there was enough of each to do a complete windshield. Cut a two inch
section off each and test fit the sample. The thicker tape was a tight
fit for a two inch strip and it would be really tough to cram a long
strip in the channel. The thinner tape felt about right.
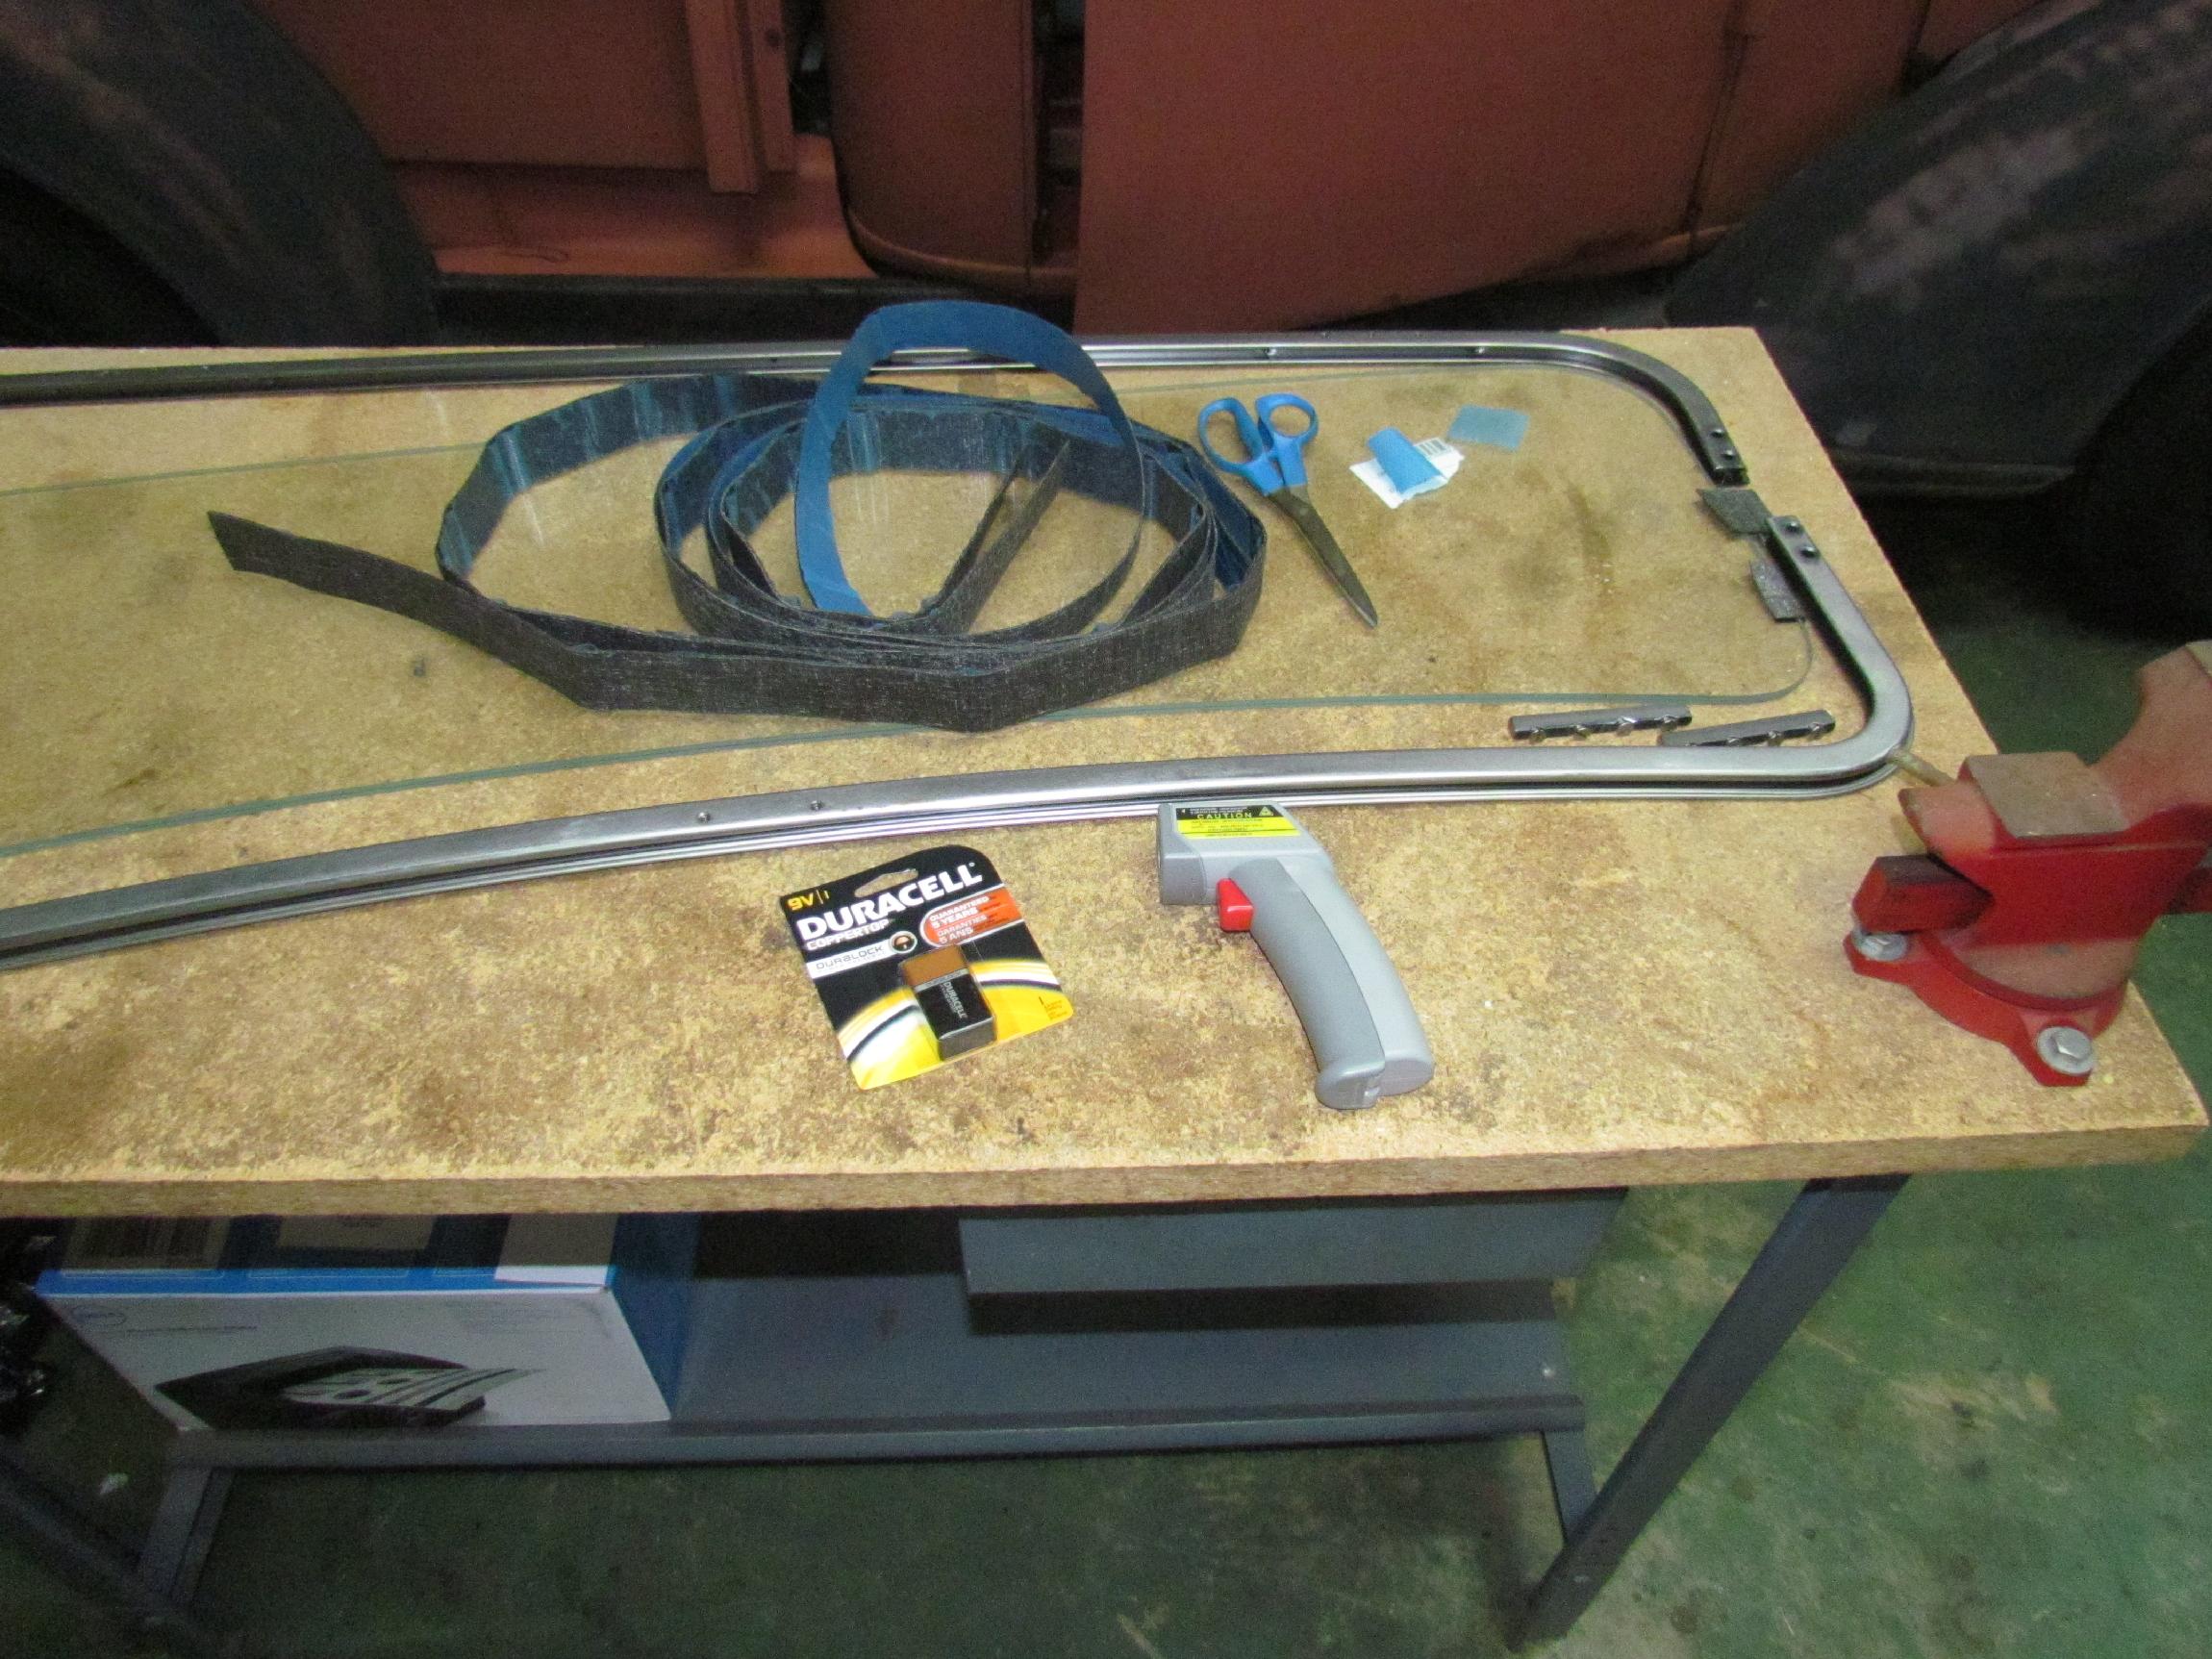 May
20th 2014
It was a lost weekend. The only thing I did
was to root around the shop in search of a laser thermometer which will
be used to monitor the windshield frame temperature during the
powdercoat curing process. My tool organization system beat me like a
rented mule again but I finally located it. Good news was that the
battery, tho' almost dead, had not corroded and destroyed the
electronics. Last nite, I picked up a battery and we're good to go.
May
20th 2014
It was a lost weekend. The only thing I did
was to root around the shop in search of a laser thermometer which will
be used to monitor the windshield frame temperature during the
powdercoat curing process. My tool organization system beat me like a
rented mule again but I finally located it. Good news was that the
battery, tho' almost dead, had not corroded and destroyed the
electronics. Last nite, I picked up a battery and we're good to go.
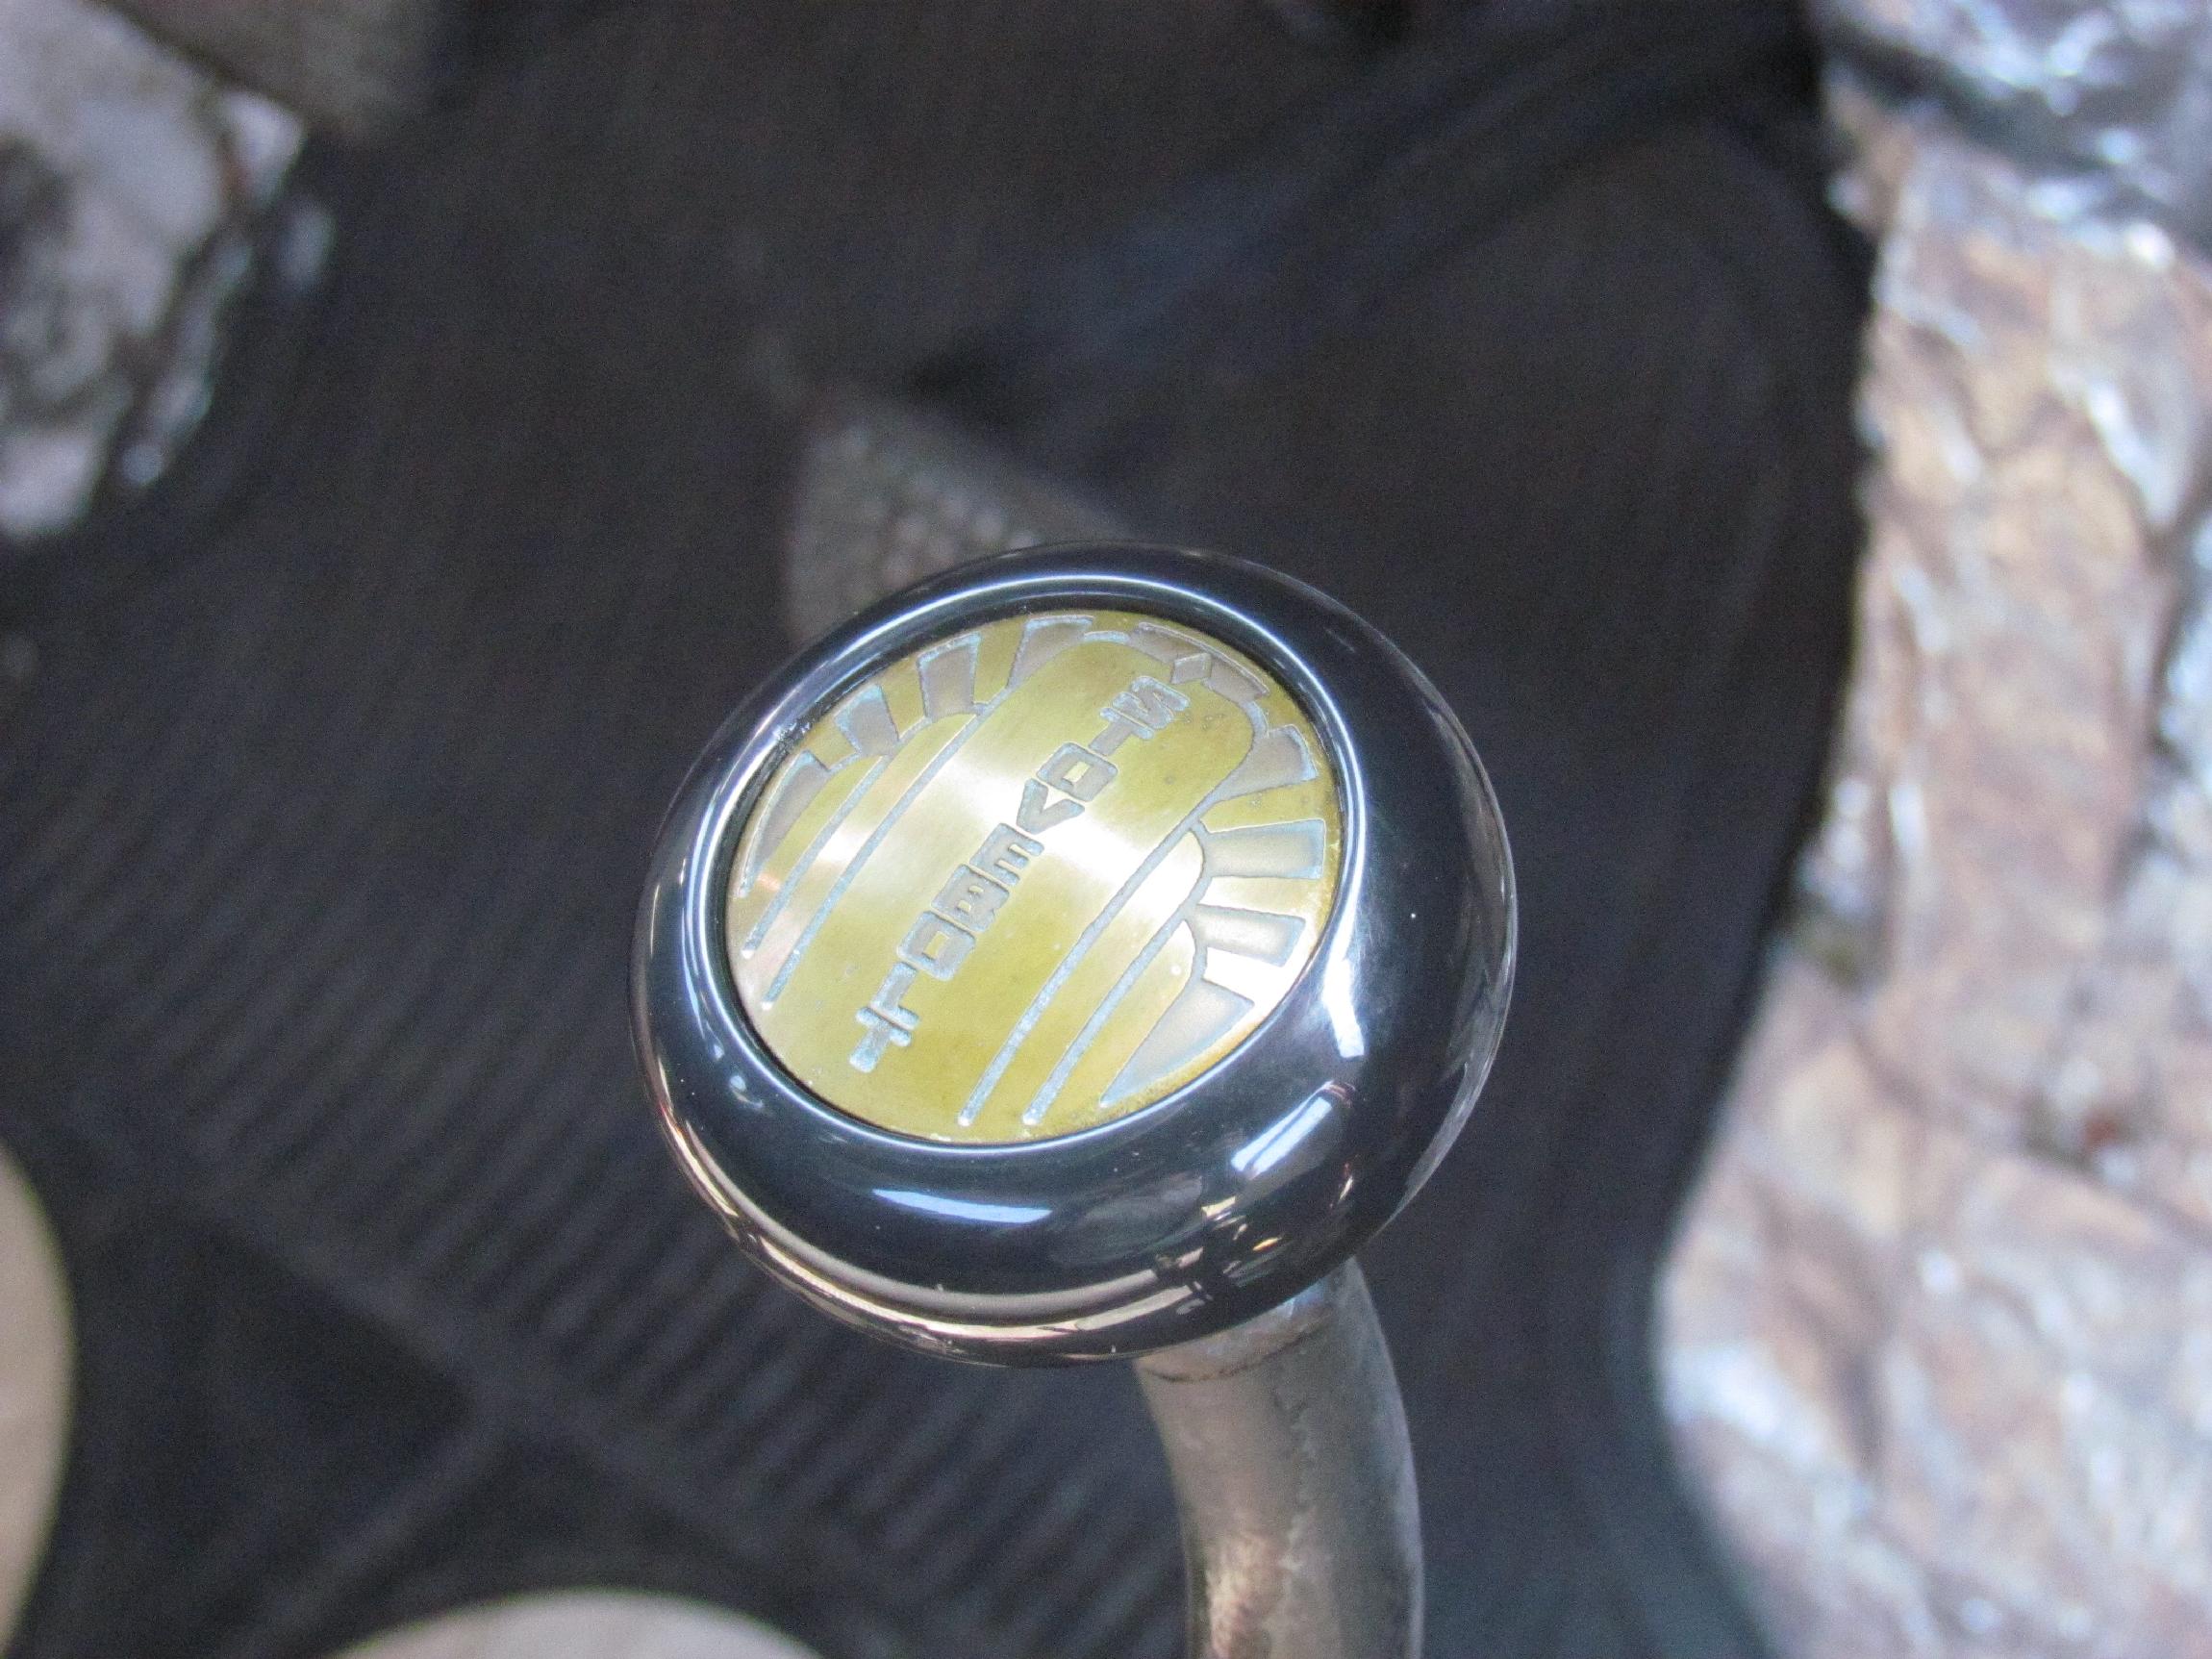 May 27th 2014
Didn't get much done over the weekend. Saturday was the all day Back to
the Beach show in Fort Lauderdale. Deerslayer was the equipment truck
and I was the roadie for Eugene "The Human Percolator" who set up to
spin music half way between the two band stands, but
I spent a lot of my time in the Elbow Room bar with friends. Sunday was
mostly a recovery day and Monday I just bounced around the BillyBob
Shop, not getting much of anything done. Today, the mail carrier
delivered a package from Mike Flanders of www.1954design.com,
a Art
Deco design "Stovebolt" shift knob for the Deerslayer, a quicky
installed bauble that gave me a false sense of progress for the time
being.
May 27th 2014
Didn't get much done over the weekend. Saturday was the all day Back to
the Beach show in Fort Lauderdale. Deerslayer was the equipment truck
and I was the roadie for Eugene "The Human Percolator" who set up to
spin music half way between the two band stands, but
I spent a lot of my time in the Elbow Room bar with friends. Sunday was
mostly a recovery day and Monday I just bounced around the BillyBob
Shop, not getting much of anything done. Today, the mail carrier
delivered a package from Mike Flanders of www.1954design.com,
a Art
Deco design "Stovebolt" shift knob for the Deerslayer, a quicky
installed bauble that gave me a false sense of progress for the time
being.
| < Back
to Intro |
You can email me at ![]() webmaster@laroke.com
webmaster@laroke.com
Issued Monday June 16, 2014
Updated Thursday June 14, 2018
copyright © 2008-2018 Larry R. Kephart all rights reserved
| | LRK Home | | Bio Info | | Krash Khronicles | | LAROKE | |
| | BettyLou | | BillyBob's Garage | | Rat Patrol | | Deerslayer | | Elvira | |
| | Land of the Free and Home of the Brave | |
| | Keppylou's Art | | WWI Soldier's Diary | |