| | LRK Home | | Bio Info | | Krash Khronicles | | LAROKE | |
| | BettyLou | | BillyBob's Garage | | Rat Patrol | | Deerslayer | | Elvira | |
| | Land of the Free and Home of the Brave | |
| | Keppylou's Art | | WWI Soldier's Diary | |
BillyBob Work-in-Progress Log
![]()
TRUCK LINKS including vendor sites for old parts, custom parts, and tools as well as sites for classic car and truck organizations
STORE Operating in association with Amazon.com, books, recordings and tools can be purchased.
PLANNING for the restoration including project schedule and cost estimates.
![]()
WORK-IN-PROGRESS is the restoration of parts of BillyBob that I can accomplish without a garage.
PRE-RESTORATION includes log entries of minor repairs and and adventures between time of purchase and the time when I started restoration, a piece at a time.
JR'S KORNER JR's Korner is the history of BillyBob before I got him authored by my brother, Wm. C. Kephart.
![]()
BILLYBOB MAINTENANCE Ever changing detailing, oil change, lube, etc. maintenance routines specifically developed for BillyBob, including required tools, materials and procedures.
STEALTH SHOP Urban residence design with large integrated shop and separate living quarters for a relative or renter.
26. Two-Forty A/C
Two-Forty or "240" air conditioning is what is in BillyBob. Two windows open and forty miles per hour, that is. Actually, the cab can be quite comfortable, I think, without aftermarket air conditioning with proper insulation and seat materials. The two vent windows in the door provide the most relief, supplemented by the cowl vent. I am also installing a Trico rubber-bladed vacuum fan for psychological cooling purposes (it really doesn't push much air but fools the brain a bit). But most of that is still in the future. Gonna be fixin' the broken passenger side vent window in this log entry.
 December
8th 2002 I was a Boy
Scout once (and still support them 'cept for the politically correct
San Francisco, Boston and Philadelphia councils) but, I wasn't prepared
when I got here this morning. After getting computer backups started at
the Krash Lab, I headed out to Home Depot for some mineral spirits.
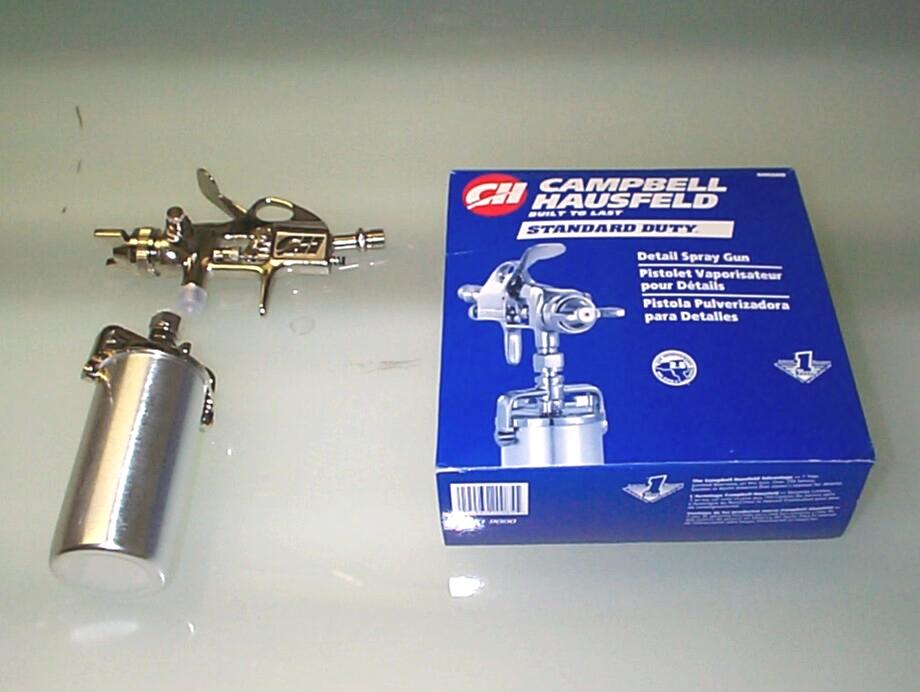
Picked up a Campbell Hausfeld Standard Duty Detail Spray Gun as an
"impulse buy" too. I've voiced my disappointment with clogged
rattlecans in these log entries and "Tony M" from the stovebolt.com forums suggested a
detail spray gun as a partial solution . . . You don't have to suggest
a shiny new tool to me twice. The spray gun was missing its spray
control knob so, I have another trip back to Home Depot ahead of me.
December
8th 2002 I was a Boy
Scout once (and still support them 'cept for the politically correct
San Francisco, Boston and Philadelphia councils) but, I wasn't prepared
when I got here this morning. After getting computer backups started at
the Krash Lab, I headed out to Home Depot for some mineral spirits.
Picked up a Campbell Hausfeld Standard Duty Detail Spray Gun as an
"impulse buy" too. I've voiced my disappointment with clogged
rattlecans in these log entries and "Tony M" from the stovebolt.com forums suggested a
detail spray gun as a partial solution . . . You don't have to suggest
a shiny new tool to me twice. The spray gun was missing its spray
control knob so, I have another trip back to Home Depot ahead of me.
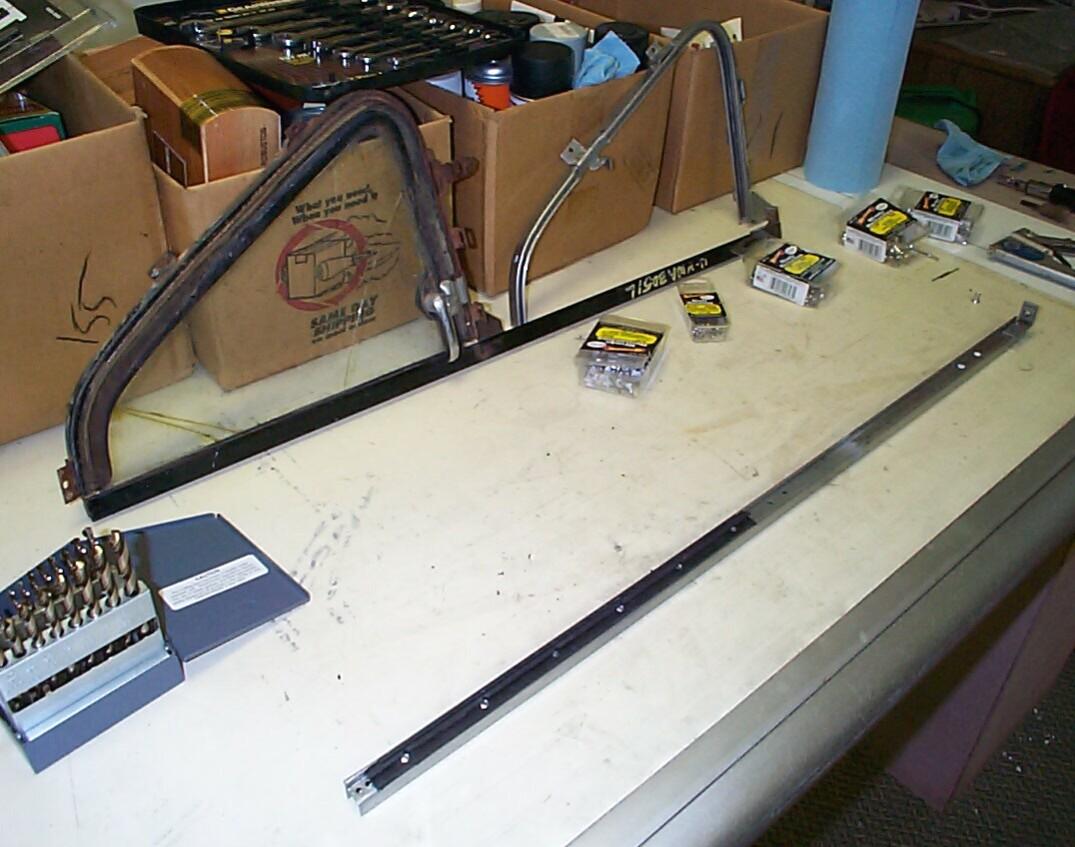
Still working on the used passenger side vent assembly I purchased from American Classic Truck Parts. I'm trying to take apart the vent window today. The vent window handle is held on its shaft with a 3/32" pin. I was lucky in that a few months ago I bought a Pittsburgh 13 pc. Pin Punch Set from Harbor Freight when it was on sale. It has the 3/32" punch which allowed me to get the old vent handle off in less than a minute.
 I
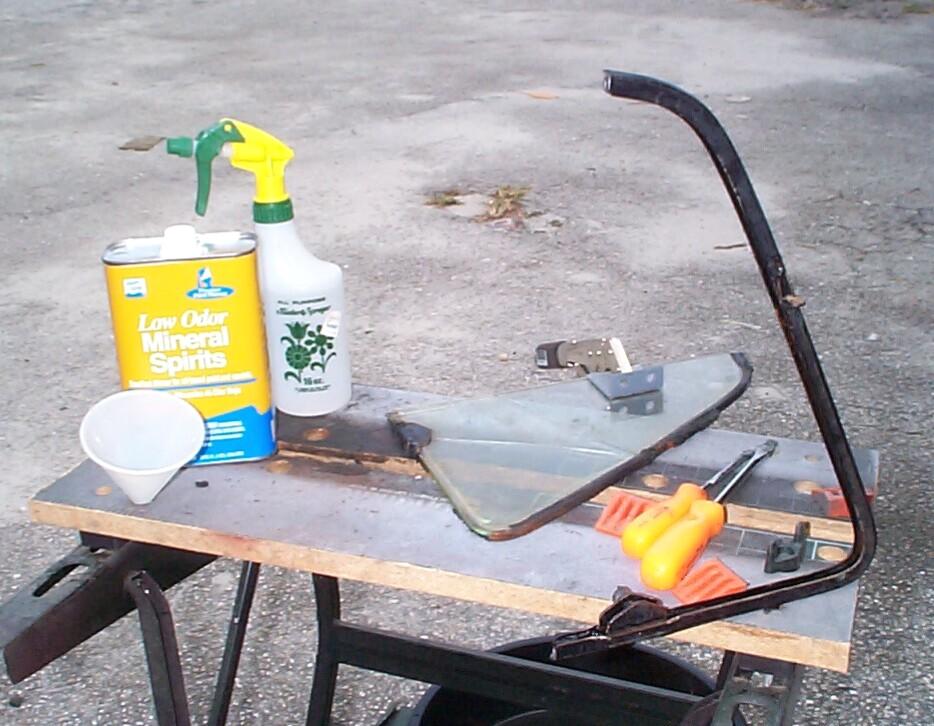
needed the mineral spirits for separating the vent window glass from
its frame. It is the recommended procedure in the Shop Manual. Jim
Richards, In his Classic Car Restorer's Handbook, uses gasoline for the
same task. I put the mineral spirits in a spray bottle and started
wetting down the vent window every few minutes. Also took the advice of
Billy "Hoot" Gibson from one of his ole trucks mailist response posts.
I
needed the mineral spirits for separating the vent window glass from
its frame. It is the recommended procedure in the Shop Manual. Jim
Richards, In his Classic Car Restorer's Handbook, uses gasoline for the
same task. I put the mineral spirits in a spray bottle and started
wetting down the vent window every few minutes. Also took the advice of
Billy "Hoot" Gibson from one of his ole trucks mailist response posts.
Very carefully Get two pieces of flat bar about three inches long wrap friction tape around both ends of both bars,about 4 wraps each put the bars on each side of the glass, get a pair of vise grips clamp them to the bars and start working the glass very slowly pulling outward with one hand and using a small screwdriver working the tip in the top and bottom of the glass and channel, that's where you have to be carefully because you can break the glass if you put to much pressure on the glass. Good luck it worked for me and that's the way we did it in the 50's. HooT58
I wasn't concerned about saving the glass I was removing, so I wasn't as careful as Billy suggests. He's right. carelessness with the screwdriver will break the glass in short order. I did break the glass but got it out in mostly one piece.
 December
28th 2002 Went back to
Home Depot. Their return policy is setup for Home Depot management
operational efficiency. What this means is that they didn't want to
give me the missing part. They just wanted to give me my money back. If
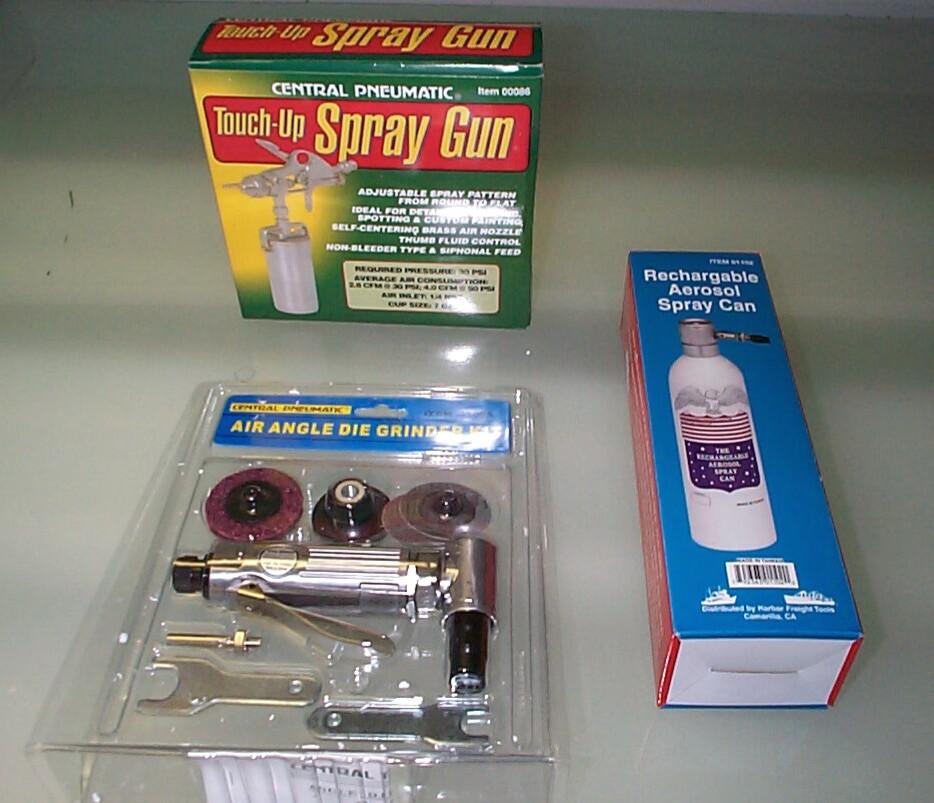
I wanted to, I could locate the spray gun again and buy another one. I
decided to order a cheaper gun from Harbor Freight instead. I ordered a
Central Pneumatic Touch-Up Spray Gun (item #00086) and a Central
Pneumatic Air Angle Die Grinder Kit (#41655), both of which were on
sale. The air grinder was a replacement for one that malfunctioned
during the floor pan Stage I repair over the Thanksgiving holiday
weekend. Also ordered a Rechargable Aerosol Spray Can (#01102). They
arrived earlier this week.
December
28th 2002 Went back to
Home Depot. Their return policy is setup for Home Depot management
operational efficiency. What this means is that they didn't want to
give me the missing part. They just wanted to give me my money back. If
I wanted to, I could locate the spray gun again and buy another one. I
decided to order a cheaper gun from Harbor Freight instead. I ordered a
Central Pneumatic Touch-Up Spray Gun (item #00086) and a Central
Pneumatic Air Angle Die Grinder Kit (#41655), both of which were on
sale. The air grinder was a replacement for one that malfunctioned
during the floor pan Stage I repair over the Thanksgiving holiday
weekend. Also ordered a Rechargable Aerosol Spray Can (#01102). They
arrived earlier this week.
 March
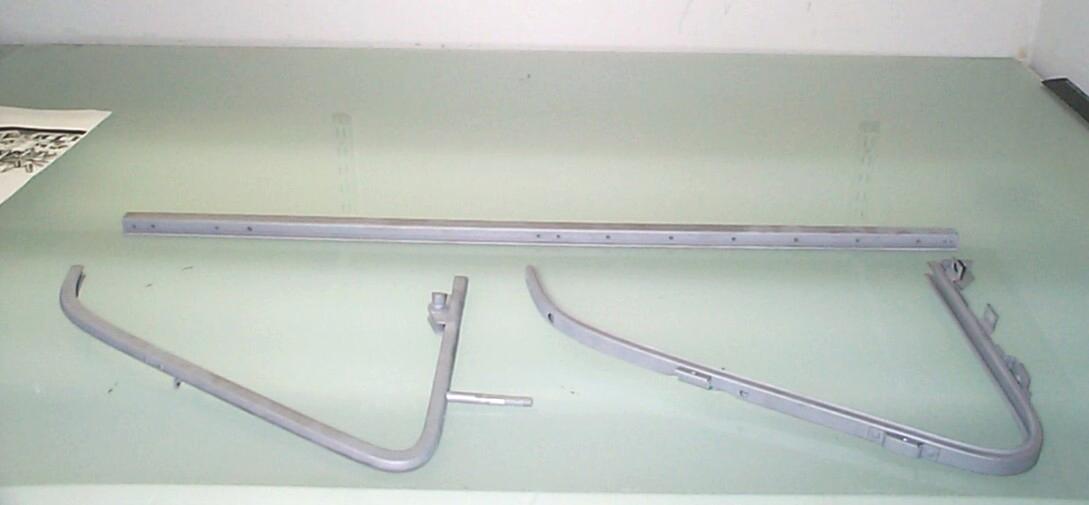
2nd 2003 Sandblasted
the three subassemblies of the passenger side vent window assembly
today. Took about three hours. The whole time this was going on, I
argued with myself about whether to powdercoat the subassemblies or
further disassemble them to their basic elements. By the time I
finished sandblasting, the further disassembly option had won out.
Decided to do the best job I could based on the current state of my
tool chest and knowledge. This operation is something I don't want to
do a second time if I don't have to.
March
2nd 2003 Sandblasted
the three subassemblies of the passenger side vent window assembly
today. Took about three hours. The whole time this was going on, I
argued with myself about whether to powdercoat the subassemblies or
further disassemble them to their basic elements. By the time I
finished sandblasting, the further disassembly option had won out.
Decided to do the best job I could based on the current state of my
tool chest and knowledge. This operation is something I don't want to
do a second time if I don't have to.
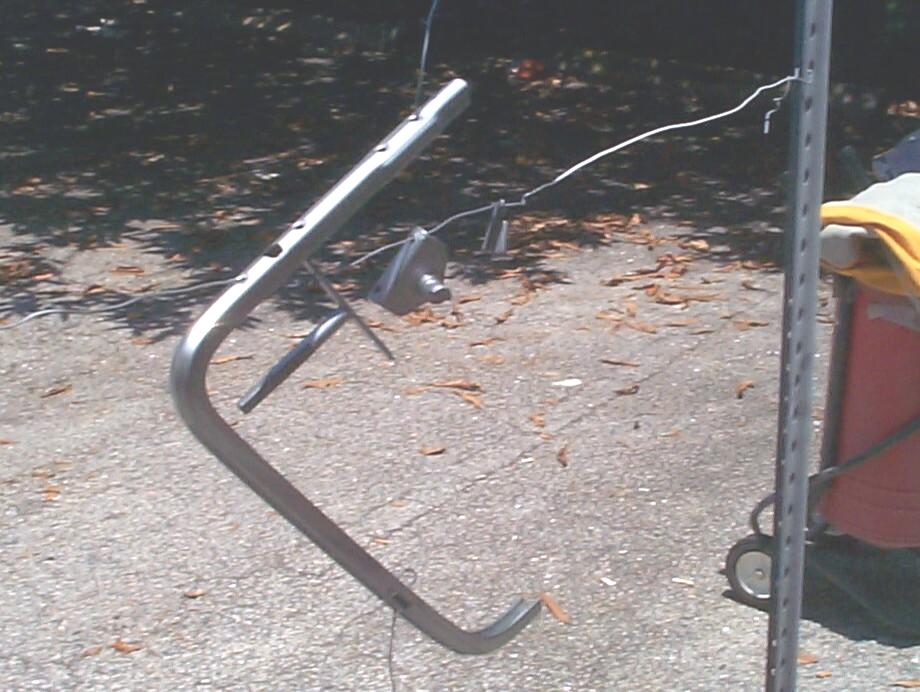
March 9th 2003 Decided to finish the long upright first. Wired the piece up to my homemade powdercoating frame and applied Eastwood's Metal Wash per instructions (using a generic spray bottle). Rinsed with clean water the same way and dried with a hair dryer. Next, Eastwood's Picklex was applied per directions (via spray bottle again) and rinsed with water. Immediately afterwards, the piece was dried and chemicals cooked off using the infared curing lamp. The upright is now streaked with a brown tint (normal results of the picklex, I hope).
 The
chrome powder from Columbia Coatings went on very
nicely. I musta had everything just right this time. I had to "walk"
the infared lamp along the length of the piece, curing for fifteen
minutes at each position. Powdercoating chrome is a two step process.
Both Eastwood
and Columbia Coatings provide a clear powder for the second coat. There
was a thread in one of the Stovebolt.com forums a while back about this
and the consensus was that the clear powder wasn't a very satisfactory
solution. At least one fella was using clear coat paint over the chrome
powdercoat with better reults. With this in mind, I ordered eight oz.
of Pelucid clear topcoat from POR15. I used a Preval disposable
spray gun to put the first coat of Pelucid on but, it was so messy, I
decided to brush coat the final coat. ~!@#$%^
That was an excercise in futility! The second coat crinkled the chrome
powdercoating. I'm gonna have to sandblast again and start over! Some
days the bear gets you.
The
chrome powder from Columbia Coatings went on very
nicely. I musta had everything just right this time. I had to "walk"
the infared lamp along the length of the piece, curing for fifteen
minutes at each position. Powdercoating chrome is a two step process.
Both Eastwood
and Columbia Coatings provide a clear powder for the second coat. There
was a thread in one of the Stovebolt.com forums a while back about this
and the consensus was that the clear powder wasn't a very satisfactory
solution. At least one fella was using clear coat paint over the chrome
powdercoat with better reults. With this in mind, I ordered eight oz.
of Pelucid clear topcoat from POR15. I used a Preval disposable
spray gun to put the first coat of Pelucid on but, it was so messy, I
decided to brush coat the final coat. ~!@#$%^
That was an excercise in futility! The second coat crinkled the chrome
powdercoating. I'm gonna have to sandblast again and start over! Some
days the bear gets you.
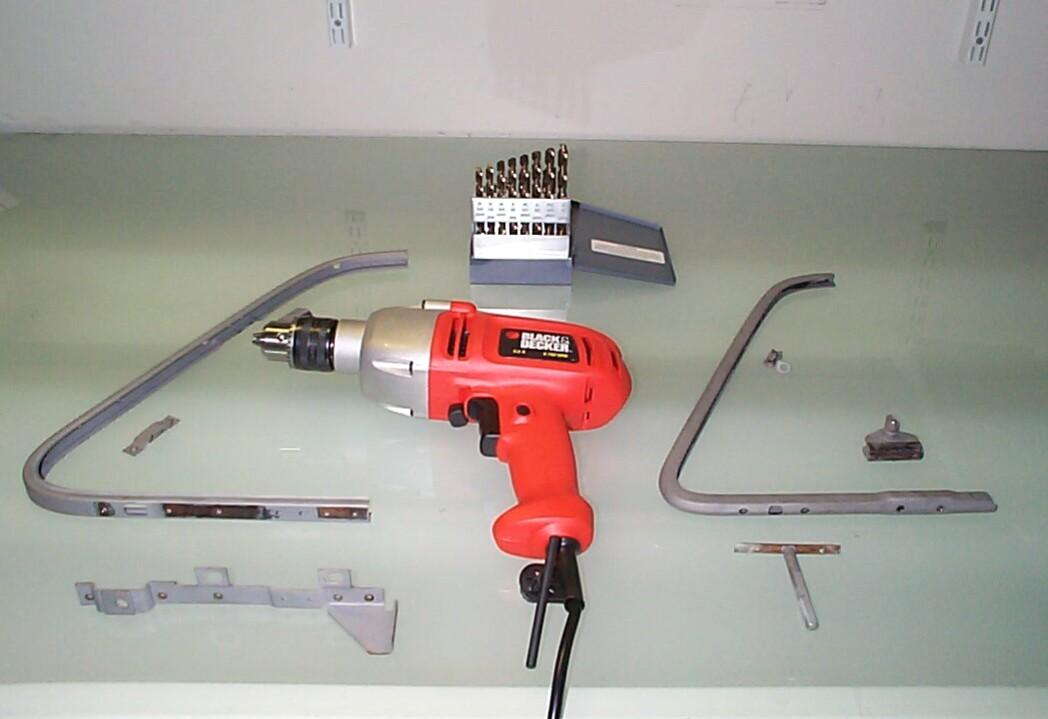 June
28th 2003 Been away
from this task for awhile. Started out today by further disassembling
the two vent window frame subassemblies. My portable drill battery
charger quit working sometime back and I haven't been able to replace
it yet. Since I do have power here under the BillyBob shadetree and I
tire of waiting for recharging batteries, I picked up a Black and
Decker 1/2" electric drill on my last trip to Home Depot. I drilled out
the remaining rivets in the subassemblies with a 1/8" drill bit.
Remainder of the day was spent on light maintenance. Gonna spend
Independence Day up in Pennslyvania and I've gotta work inside today so
the computer network will run smoothly without too many glitches for my
co-workers during my two-week absence.
June
28th 2003 Been away
from this task for awhile. Started out today by further disassembling
the two vent window frame subassemblies. My portable drill battery
charger quit working sometime back and I haven't been able to replace
it yet. Since I do have power here under the BillyBob shadetree and I
tire of waiting for recharging batteries, I picked up a Black and
Decker 1/2" electric drill on my last trip to Home Depot. I drilled out
the remaining rivets in the subassemblies with a 1/8" drill bit.
Remainder of the day was spent on light maintenance. Gonna spend
Independence Day up in Pennslyvania and I've gotta work inside today so
the computer network will run smoothly without too many glitches for my
co-workers during my two-week absence.
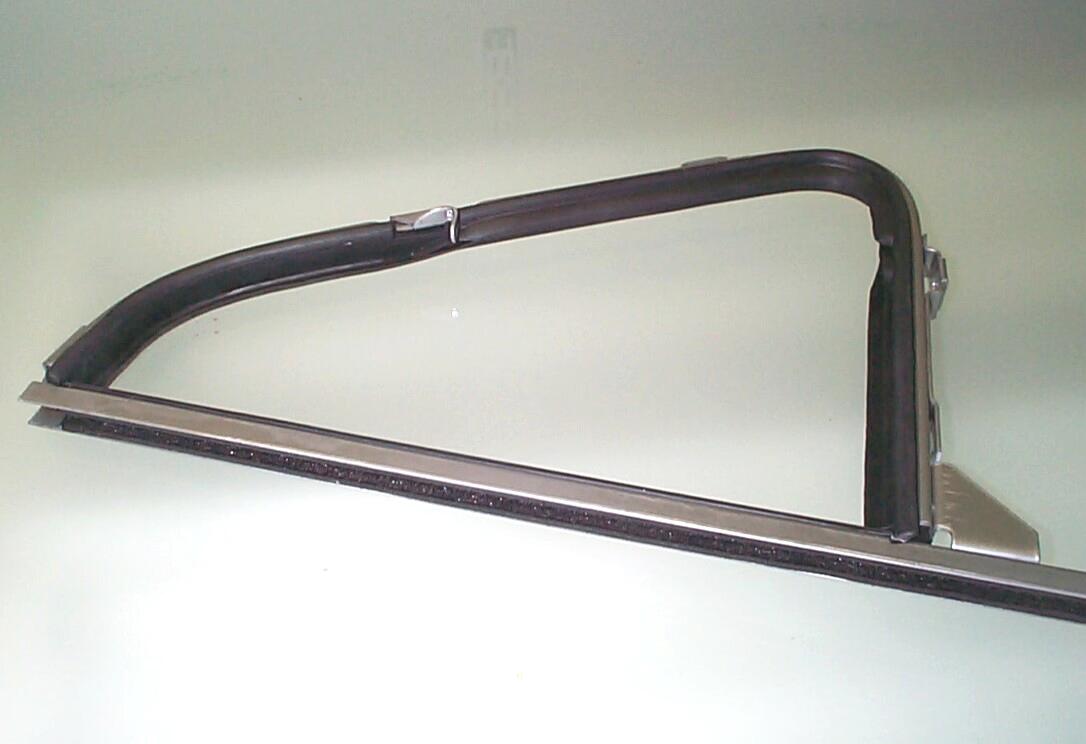
July 20th 2003 Last Sunday was spent sandblasting vent frame parts and general maintenance. The chrome powdercoat with Pelucid was a failure but it is proving very tough and darn hard to sandblast back off for another try. Next time I have a problem like this, I think I'll try paint remover chemicals. Today I started by blasting the upright a litte more and finished blasting the vent glass frame parts that were exposed by further disassembly. Gonna try to powdercoat those parts and re-assemble today.
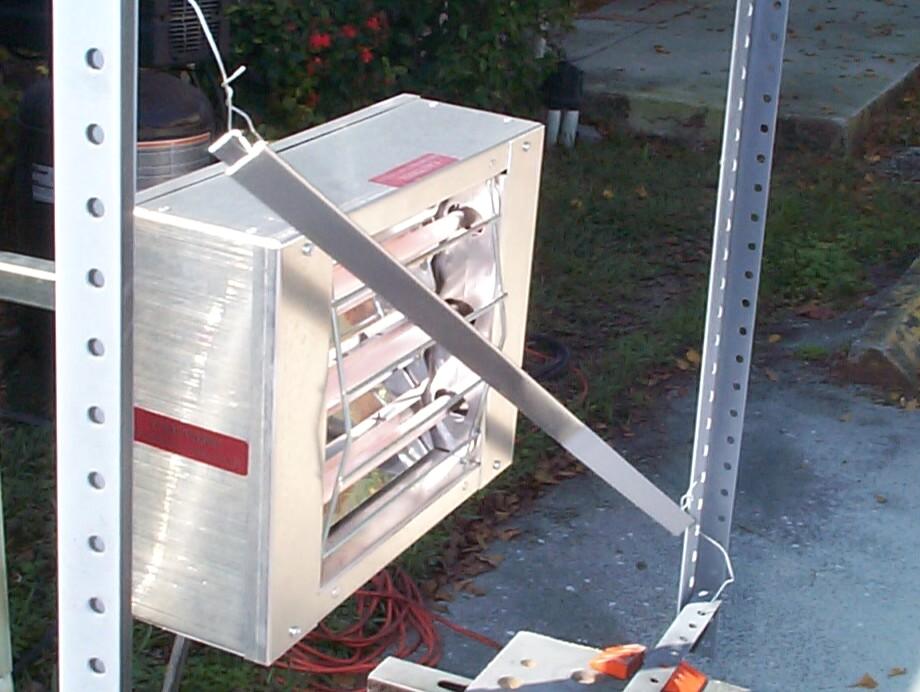
 Wired
the vent glass frame parts into my jerry-rigged powdercoating frame and
gave them the Metal Wash and Picklex treatments. Then cooked off the
chemicals for about twenty minutes. Applied Columbia Coatings Chrome
powder and cured for fifteen minutes, then applied their High Gloss
Clear and cured for thirty minutes. The chrome looked great before the
clear was applied. It had some of the mirror quality of real chrome or
stainless steel. The clear makes it more opaque, unfortunately, and it
begins to look more like gloss silver. Good enuf fer govmint work, tho,
and I'm not gonna fiddle with it any longer.
Wired
the vent glass frame parts into my jerry-rigged powdercoating frame and
gave them the Metal Wash and Picklex treatments. Then cooked off the
chemicals for about twenty minutes. Applied Columbia Coatings Chrome
powder and cured for fifteen minutes, then applied their High Gloss
Clear and cured for thirty minutes. The chrome looked great before the
clear was applied. It had some of the mirror quality of real chrome or
stainless steel. The clear makes it more opaque, unfortunately, and it
begins to look more like gloss silver. Good enuf fer govmint work, tho,
and I'm not gonna fiddle with it any longer.
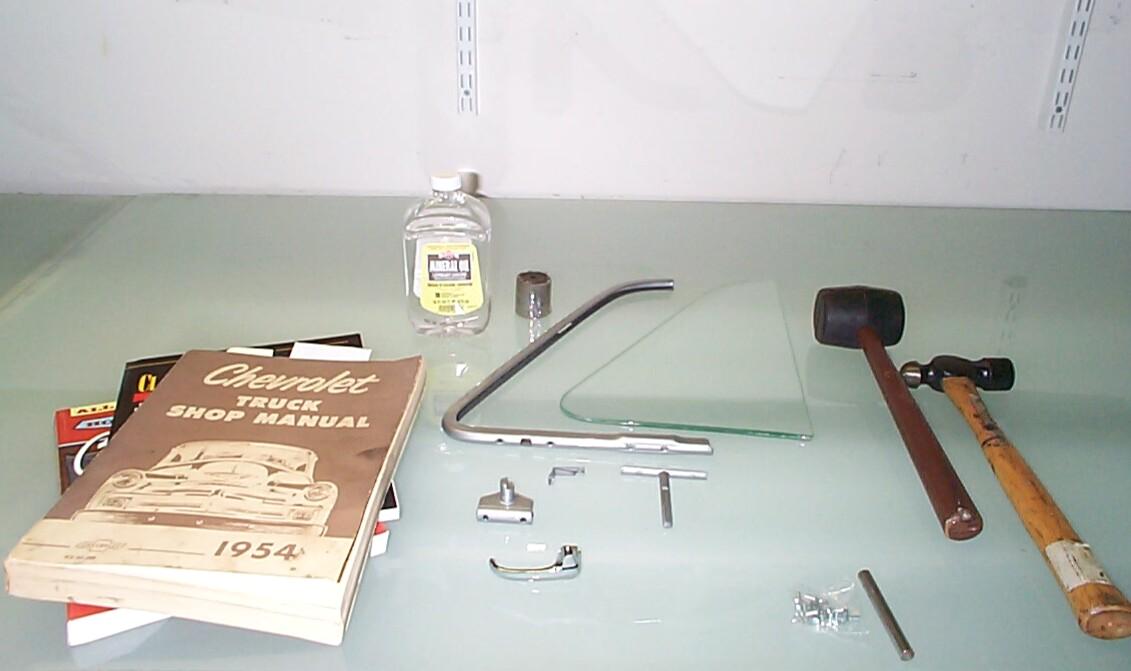 August
2nd 2003 'Sposed to
rain today (sixty percent chance) but I've been lucky so far. Mostly
did minor maintenance and interior cleaning on my Jeep 'til noon, then
started setting up to work on the vent frame some more. Gathered
manuals, hammers, mineral oil, new parts, glass setting tape and glass
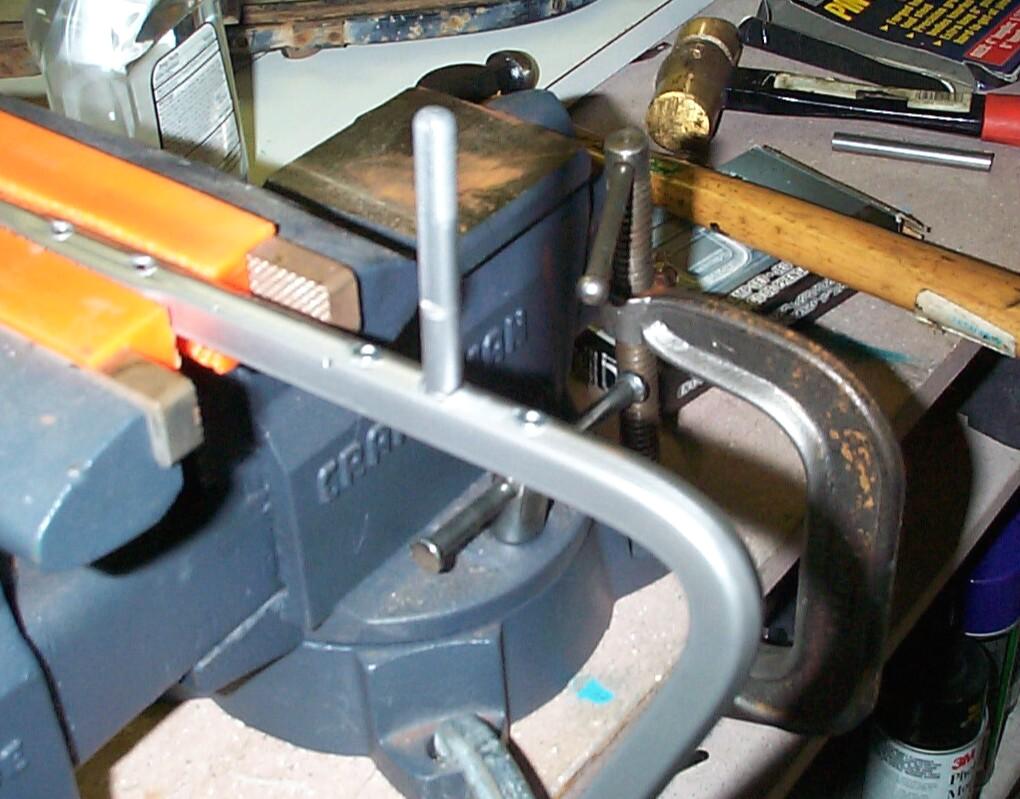
previously purchased from Chevy Duty. Then used C-clamps to
anchor my vise (with soft plastic jaw protectors) to a workstation
bookcase. I've also got the unrestored driver side vent assembly on
hand to study as a guide.
August
2nd 2003 'Sposed to
rain today (sixty percent chance) but I've been lucky so far. Mostly
did minor maintenance and interior cleaning on my Jeep 'til noon, then
started setting up to work on the vent frame some more. Gathered
manuals, hammers, mineral oil, new parts, glass setting tape and glass
previously purchased from Chevy Duty. Then used C-clamps to
anchor my vise (with soft plastic jaw protectors) to a workstation
bookcase. I've also got the unrestored driver side vent assembly on
hand to study as a guide.
 August
3rd 2003 Yesterday
ended in slight disappointment. I was having trouble installing the
original type rivets. First, the rivet setting tool was too big to fit
in the glass channel so I had to install the rivets backwards to use
the tool. Even then, I couldn't get the rivets tight and the tool was
maring the surface around the rivet opening. Then I gouged the
powdercoated vent frame surface ~!@#$%^.
That's it! This morning I went to Home Depot and picked up a box each
of steel and aluminium 1/8" short pop rivets. Got stopped by a fella in
the parking lot who asked me where "Timmy and Lassie" were. We talked
old trucks fer awhile. By the time I got back to the Krash Lab, I'd
decided on the steel rivets. I thought I needed the extra strength. The
pop rivets work fine. I put a dap of Permatex RTV Silicone Sealant in
the hole before installing the rivet and I plan on painting the heads
with touch-up silver along with the gouge I put in the vent frame. If I
keep making goofy mistakes, I'll end up with a Stage I job that I'll
have to revisit down the line.
August
3rd 2003 Yesterday
ended in slight disappointment. I was having trouble installing the
original type rivets. First, the rivet setting tool was too big to fit
in the glass channel so I had to install the rivets backwards to use
the tool. Even then, I couldn't get the rivets tight and the tool was
maring the surface around the rivet opening. Then I gouged the
powdercoated vent frame surface ~!@#$%^.
That's it! This morning I went to Home Depot and picked up a box each
of steel and aluminium 1/8" short pop rivets. Got stopped by a fella in
the parking lot who asked me where "Timmy and Lassie" were. We talked
old trucks fer awhile. By the time I got back to the Krash Lab, I'd
decided on the steel rivets. I thought I needed the extra strength. The
pop rivets work fine. I put a dap of Permatex RTV Silicone Sealant in
the hole before installing the rivet and I plan on painting the heads
with touch-up silver along with the gouge I put in the vent frame. If I
keep making goofy mistakes, I'll end up with a Stage I job that I'll
have to revisit down the line.
Installed the bottom vent pivot first. While I had it in the vise, I chased the threads on this pivot with a 5/16" - 24 die to remove the powdercoating. The upper pivot hinge half was next. Then the vent window handle saddle. Sanded down the handle pivot until the new repop chrome handle would fit over it. Will wait until after the glass is in place to install the handle
 Time
to put the glass in the channel. Clamped the glass in the vise (plastic
grips). Unrolled the setting tape and cut off a length two inches
longer than the channel. There's 'sposed to be enough setting tape in
this roll for both vent windows but, it ain't so, Joe! I'll have to
order more before I do the driver side. Used a one inch brush to spread
mineral oil on the glass side of the tape (what looked like the front
side), then draped it over the glass. Cut some kerf slots in the tape
at the bends so it wouldn't kink up too badly. Brushed the vent frame
channel with mineral oil and went about the business of pressing it
down over the glass and setting tape. Had to back off and try a couple
of times before I got a good enuf fit (not perfect but good enough).
Lightly tapped the frame with a rubber mallet to seat it better. Used a
bungie cord to pinch in the frame ends. After triming the excess
setting tape with a utility knife, I will let it cure overnite.
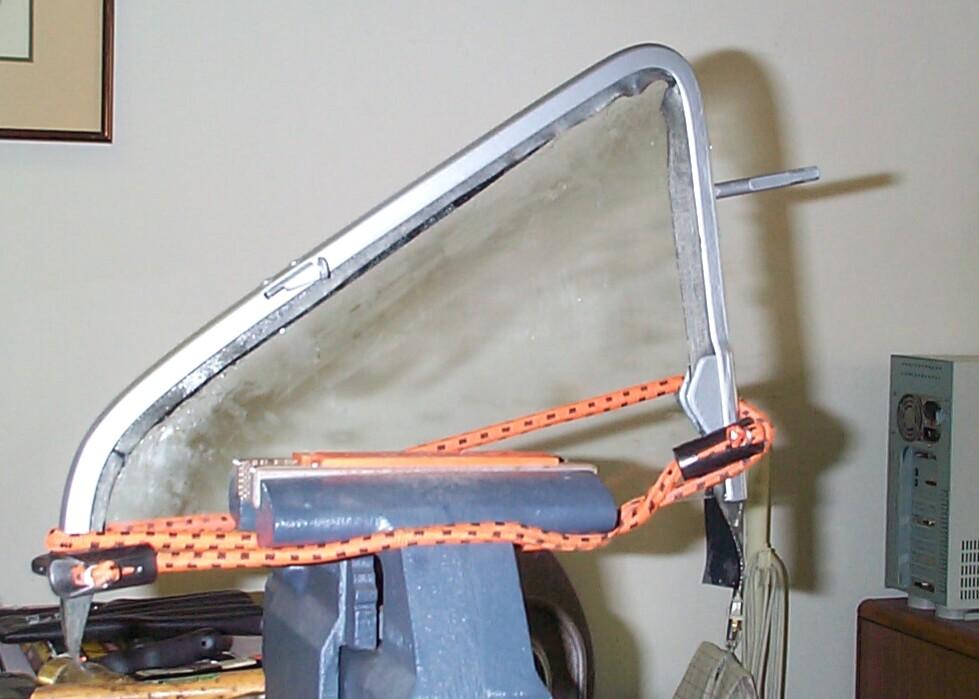
Time
to put the glass in the channel. Clamped the glass in the vise (plastic
grips). Unrolled the setting tape and cut off a length two inches
longer than the channel. There's 'sposed to be enough setting tape in
this roll for both vent windows but, it ain't so, Joe! I'll have to
order more before I do the driver side. Used a one inch brush to spread
mineral oil on the glass side of the tape (what looked like the front
side), then draped it over the glass. Cut some kerf slots in the tape
at the bends so it wouldn't kink up too badly. Brushed the vent frame
channel with mineral oil and went about the business of pressing it
down over the glass and setting tape. Had to back off and try a couple
of times before I got a good enuf fit (not perfect but good enough).
Lightly tapped the frame with a rubber mallet to seat it better. Used a
bungie cord to pinch in the frame ends. After triming the excess
setting tape with a utility knife, I will let it cure overnite.
 August
10th 2003 While waiting
out thunderstorms that have interrupted my other BillyBob jobs today, I
came inside to finish up the vent window. Had to go after the vent
window handle pivot with sandpaper and Dremel motor tool before the
handle and retaining pin would fit. After that the assembly was cleaned
up and bagged to await the finishing of the rest of the vent window
assembly. Wanted to sand blast the remaining pieces of the vent window
frame today but mother nature is not going to allow that.
August
10th 2003 While waiting
out thunderstorms that have interrupted my other BillyBob jobs today, I
came inside to finish up the vent window. Had to go after the vent
window handle pivot with sandpaper and Dremel motor tool before the
handle and retaining pin would fit. After that the assembly was cleaned
up and bagged to await the finishing of the rest of the vent window
assembly. Wanted to sand blast the remaining pieces of the vent window
frame today but mother nature is not going to allow that.
August 17th 2003 yesterday was a day of mixed success and failure with maintenance, chassis and electrical work so, I'm steppin' around the shadetree garage lightly today. Don't want no more setbacks this week! Started by sandblasting the outer vent window frame parts. Then went thru the prep and two-step chrome-clear powdercoating routine.
 August
23rd 2003 Doing
maintenance on the Jeep today. BillyBob is up in the warehouse with a
slightly toasted electrical charging system but that's a story for
another day. Didn't have time last sunday to assemble the outer vent
frame so I did that this morning too. Got busy with the RTV Clear
Sealant and the pop rivets and re-connected the outer frame mounting
brackets and hinge half. The weatherstripping is next but I'm gonna
wait until I have the divider upright powdercoated and the rest of the
vent window assembly parts ready to go back together.
August
23rd 2003 Doing
maintenance on the Jeep today. BillyBob is up in the warehouse with a
slightly toasted electrical charging system but that's a story for
another day. Didn't have time last sunday to assemble the outer vent
frame so I did that this morning too. Got busy with the RTV Clear
Sealant and the pop rivets and re-connected the outer frame mounting
brackets and hinge half. The weatherstripping is next but I'm gonna
wait until I have the divider upright powdercoated and the rest of the
vent window assembly parts ready to go back together.
August 31rd 2003 Might rain but I dragged out the sandblaster anyway. Finished re-blasting the vent window assembly upright. Weather held so I went on with the Metalwash, Picklex and chemical cookoff steps. Just as the chrome powdercoat stage started to cure, a passing cloud dumped a five-minute rain on the shadetree garage. Had to scramble to get the equipment undercover. When the rain stopped, I examined the damage and judged that I could continue with the curing process. A couple of raindrops had hit the upright below the window line where they will not be seen. Looks like a pox. Murphy's Pox, I guess. Baked on the Clearcoat . . . ~!@#$%^ Some nasty new blemishes in the visible area of the upright. This will have to be done over again! Third time's the charm, I hope.
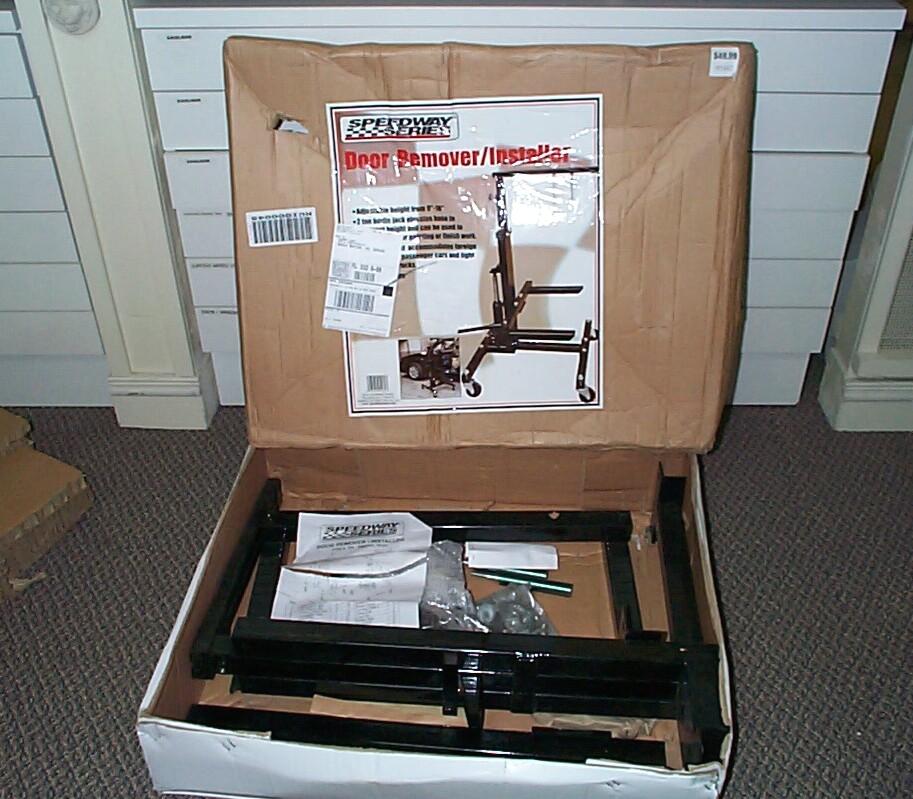 Got
a shiny new tool this week too. BillyBob's doors will have to come off
down the road for bodywork (if I ever get the vent windows finished)
and since I'm almost always alone when I need an extra hand, I went
looking for a door dolly after I saw one on a TV show, Trucks, I think.
Found one at TP Tools. Problem was the price
tag of $400 plus shipping. On a whim, I searched EBay and found this
one for $95 plus $60 shipping. I can live with that.
Got
a shiny new tool this week too. BillyBob's doors will have to come off
down the road for bodywork (if I ever get the vent windows finished)
and since I'm almost always alone when I need an extra hand, I went
looking for a door dolly after I saw one on a TV show, Trucks, I think.
Found one at TP Tools. Problem was the price
tag of $400 plus shipping. On a whim, I searched EBay and found this
one for $95 plus $60 shipping. I can live with that.
September 7th 2003 Not much done this weekend 'cept for "I don't care if it rains" maintenance. I'm still a little gun shy about pullin' out the powdercoating setup during "sixty percent chance of rain" weather reports. As luck would have it, it was overcast, but didn't rain on saturday. "Henri" is a good name for a storm system that turned out to be mostly bluster and of little substance.
September 14th 2003 Forty percent chance of rain but I'm gonna risk powdercoating the upright again this morning. I lightly sanded the blemished, visible area of the upright yesterday. You can powdercoat over powdercoat so I didn't take it down to bare metal this time. I wasn't sure last time because of the Pelucid clear coat so I played it safe with the sand blaster. Hung the upright up in the powdercoating frame and went through the Chrome and Clear powdercoat processes one more time. Jumpin' ~!@#$%^ It started raining on me again half way thru the Clear coat curing process. I hustled the lamp and powdercoating frame inside. This is really getting old.
September 21st 2003 Last week I wanted to start re-assembly after the powdercoating but discovered that I didn't have the new window channel that goes in the vent window assembly upright. It was up at the warehouse. I locked up the Krash Lab and went after it. When I got back I realised I was missing another vent window weatherstrip that was also up at the warehouse ~!@#$%^. I gave up for the day. Today I'm more prepared and the first task is to pop-rivet the window channel and vent weatherstrip to the upright . . . Foiled again! I'm gonna need some slightly longer pop rivets - three pieces to be riveted together. 1/8" short rivets don't cut it.
 September
28th 2003 Nice weather
today but, as luck would have it, BillyBob is up in his warehouse bay
with a leaking wheel cylinder. Did some scheduled maintenance on the
Renegade then came inside to work on the vent window assembly. Picked
up 1/8" medium length steel pop rivets at Home Depot on friday and they
did the trick for connecting the window channel, upright (division
channel) and vent window rear weatherstrip together. May have to do
some Dremel grinding on the deformed rivet ends when I go to fit the
window glass down the road. Won't know til I get there.
September
28th 2003 Nice weather
today but, as luck would have it, BillyBob is up in his warehouse bay
with a leaking wheel cylinder. Did some scheduled maintenance on the
Renegade then came inside to work on the vent window assembly. Picked
up 1/8" medium length steel pop rivets at Home Depot on friday and they
did the trick for connecting the window channel, upright (division
channel) and vent window rear weatherstrip together. May have to do
some Dremel grinding on the deformed rivet ends when I go to fit the
window glass down the road. Won't know til I get there.
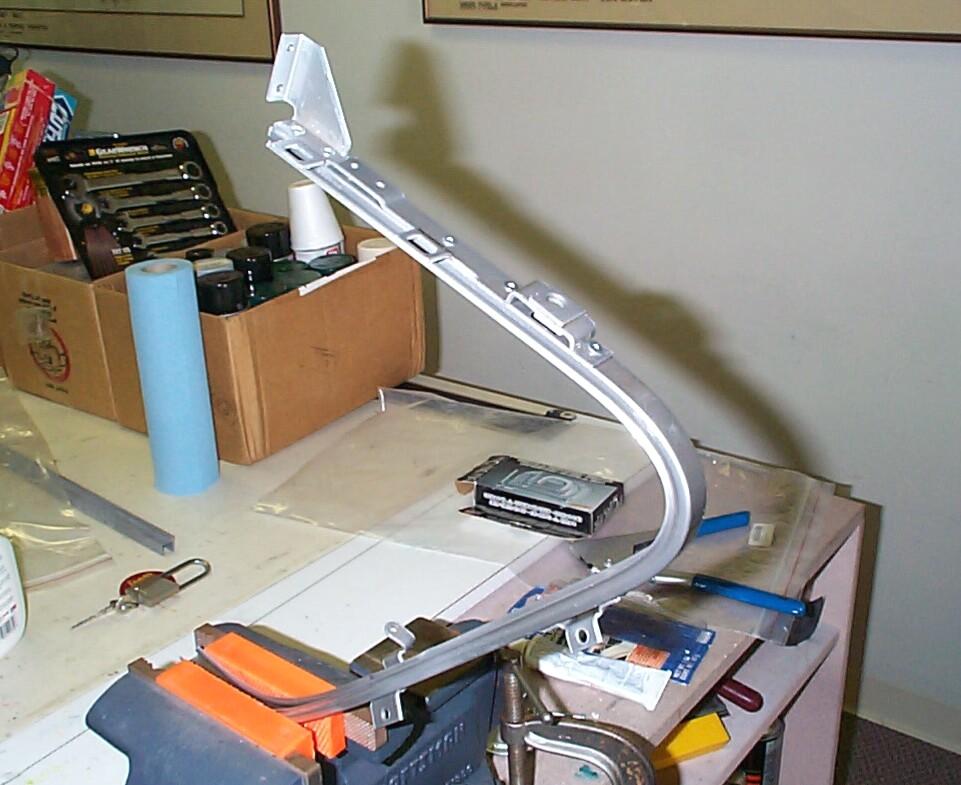
 Used
WD-40 to lube the main vent window weatherstrip which allowed me to
slip it into its channel without too much trouble. Then pop riveted the
vent window frame to the upright. Sposed to seal the gaps between the
two vent window weatherstrip pieces with weatherstrip adhesive, but I'm
gonna wait awhile for everything to take a set and the remains of the
WD-40 to dissipate.
Used
WD-40 to lube the main vent window weatherstrip which allowed me to
slip it into its channel without too much trouble. Then pop riveted the
vent window frame to the upright. Sposed to seal the gaps between the
two vent window weatherstrip pieces with weatherstrip adhesive, but I'm
gonna wait awhile for everything to take a set and the remains of the
WD-40 to dissipate.
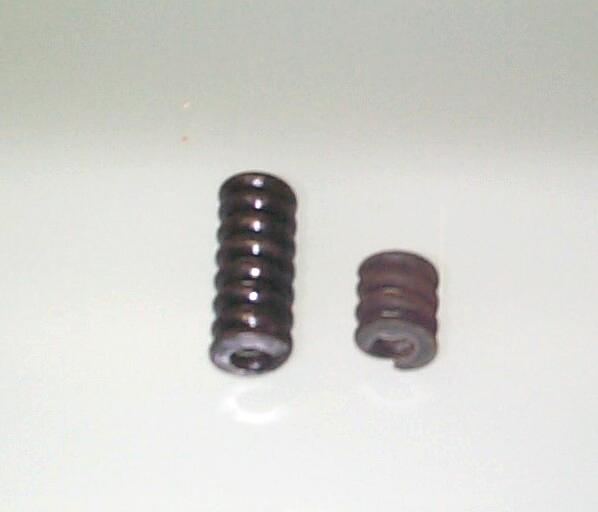 Put
the wing window into the assembly next. Located the vent window
tensioning spring I got thru Chevy Duty only to find that it is about
TWICE as long as the original and will not fit. Put the old one on
instead. Had to deal with the hinge rivet next . . . More than one
fella on the maillists has complained that the rivet setting tool
obtained thru the vendors (in my case Chevy Duty) does not work . . .
They're correct. The shoulder on this thing is too high and will only
set the rivet half way. I used the other end of the tool to finish
flattening out the rivet end but am not entirely satisfied with my
results. Maybe I'm just doin' it wrong.
Put
the wing window into the assembly next. Located the vent window
tensioning spring I got thru Chevy Duty only to find that it is about
TWICE as long as the original and will not fit. Put the old one on
instead. Had to deal with the hinge rivet next . . . More than one
fella on the maillists has complained that the rivet setting tool
obtained thru the vendors (in my case Chevy Duty) does not work . . .
They're correct. The shoulder on this thing is too high and will only
set the rivet half way. I used the other end of the tool to finish
flattening out the rivet end but am not entirely satisfied with my
results. Maybe I'm just doin' it wrong.
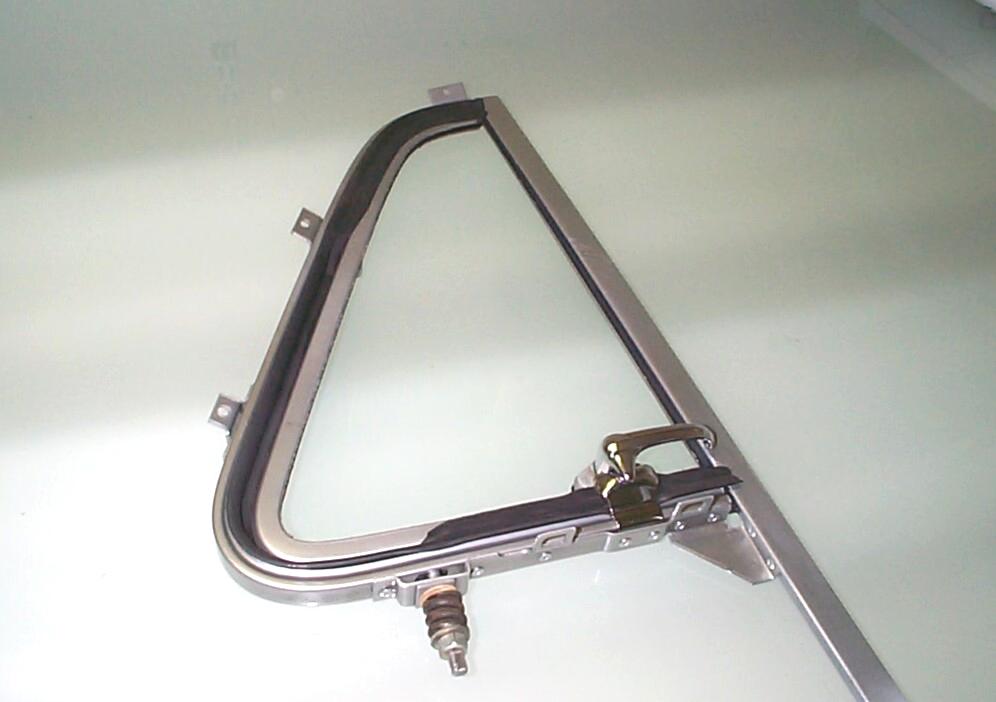 OK.
We're finished here for the time being. Looks like I was too good at
seating the vent window glass 'cause there's a slight gap between the
edge of the glass and the weatherstrip when closed and I don't know how
I'm gonna fix that. This thing is better than a Stage I job but I'm not
happy enough with it to call it a professional stage II accomplishment
. . . I'll do better on the driver side vent assembly. For those of you
who don't want to tackle this yourself, Bowtie Bits rebuilds both the
standard black and the deluxe stainless steel vent window assemblies.
OK.
We're finished here for the time being. Looks like I was too good at
seating the vent window glass 'cause there's a slight gap between the
edge of the glass and the weatherstrip when closed and I don't know how
I'm gonna fix that. This thing is better than a Stage I job but I'm not
happy enough with it to call it a professional stage II accomplishment
. . . I'll do better on the driver side vent assembly. For those of you
who don't want to tackle this yourself, Bowtie Bits rebuilds both the
standard black and the deluxe stainless steel vent window assemblies.
Gonna post this log entry and go soak my head in some TV couch potato activity. Got brake and electrical problems to report on down the road along with continued frame and cab work. Also gonna start a travel log soon if BillyBob will cooperate. It's gonna start out with a short beach road run down to Fort Lauderdale and back but everytime I schedule it something breaks on BillyBob to postpone the trip. We'll get there eventually tho'.
| < Back
to Intro |
You can email me at ![]() webmaster@laroke.com
webmaster@laroke.com
Issued Sunday September 28, 2003
Updated Friday February 16, 2018
copyright © 1996-2018 Larry Robert Kephart all rights reserved
| | LRK Home | | Bio Info | | Krash Khronicles | | LAROKE | |
| | BettyLou | | BillyBob's Garage | | Rat Patrol | | Deerslayer | | Elvira | |
| | Land of the Free and Home of the Brave | |
| | Keppylou's Art | | WWI Soldier's Diary | |