| | LRK Home | | Bio Info | | Krash Khronicles | | LAROKE | |
| | BettyLou | | BillyBob's Garage | | Rat Patrol | | Deerslayer | | Elvira | |
| | Land of the Free and Home of the Brave | |
| | Keppylou's Art | | WWI Soldier's Diary | |
BillyBob Work-in-Progress Log
![]()
TRUCK LINKS including vendor sites for old parts, custom parts, and tools as well as sites for classic car and truck organizations
STORE Operating in association with Amazon.com, books, recordings and tools can be purchased.
PLANNING for the restoration including project schedule and cost estimates.
![]()
WORK-IN-PROGRESS is the restoration of parts of BillyBob that I can accomplish without a garage.
PRE-RESTORATION includes log entries of minor repairs and and adventures between time of purchase and the time when I started restoration, a piece at a time.
JR'S KORNER JR's Korner is the history of BillyBob before I got him authored by my brother, Wm. C. Kephart.
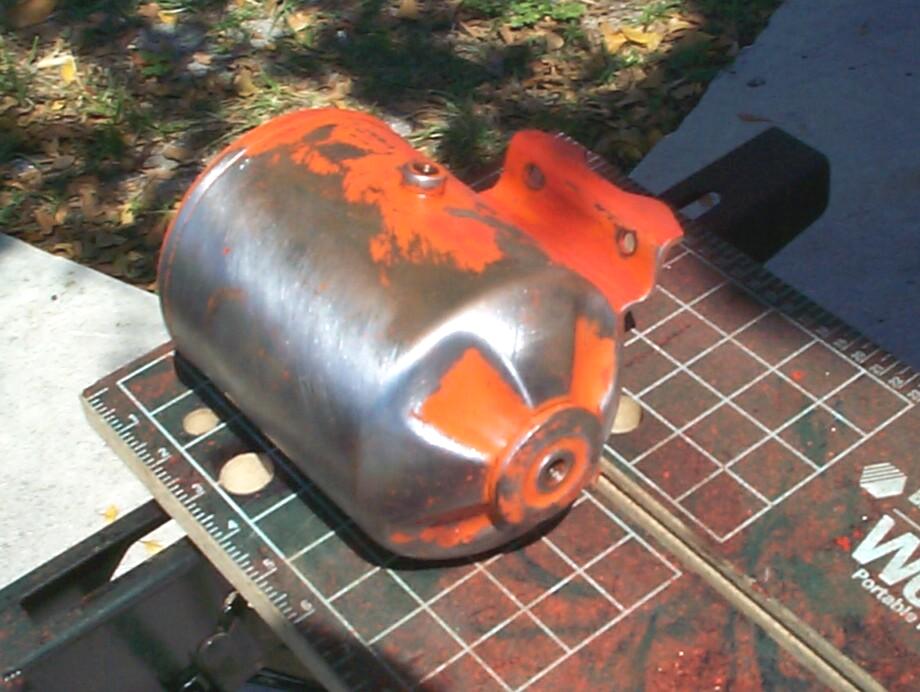
8. Timeout for an Oil Change
 March
18th 2001 An oil change
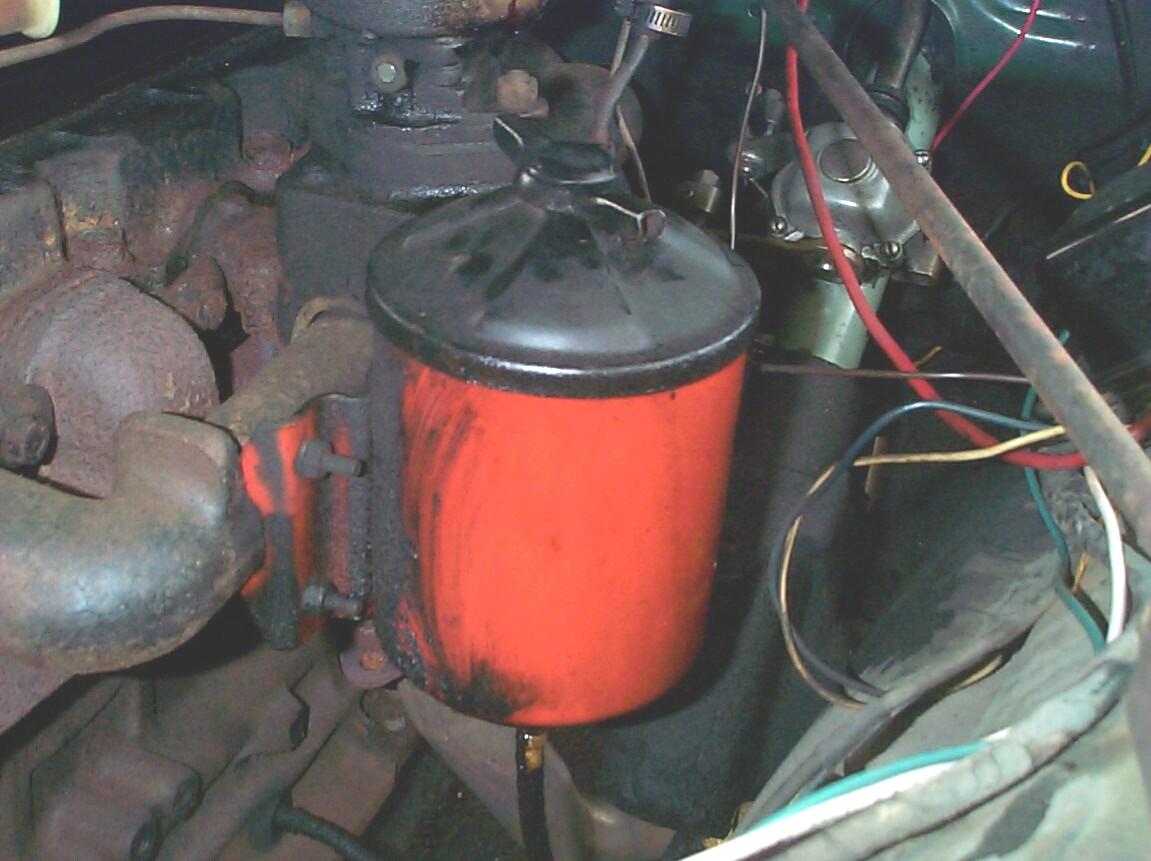
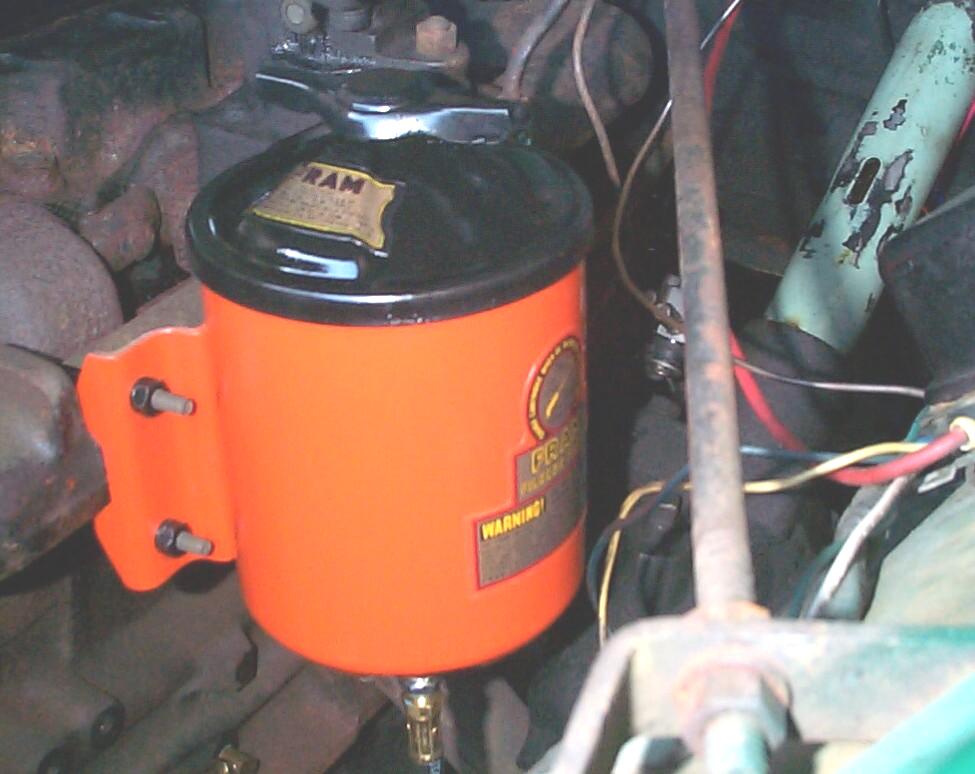
by itself is not worth writing home about, but since I've had BillyBob,
I've had oil changes done at the garage. I've been gathering tools for
doing the oil changes myself and I decided to refinish the external oil
filter cannister and replace the cannister-to-block oil lines at the
same time I do the first one and that's enough for a log entry. Here's
a pic of the oil cannister at the beginning of the process.
March
18th 2001 An oil change
by itself is not worth writing home about, but since I've had BillyBob,
I've had oil changes done at the garage. I've been gathering tools for
doing the oil changes myself and I decided to refinish the external oil
filter cannister and replace the cannister-to-block oil lines at the
same time I do the first one and that's enough for a log entry. Here's
a pic of the oil cannister at the beginning of the process.
First, what kind of oil? I'm following Bob Adler's recommendation of 10w30 SJ. Bob restores AD's for a livin' and he writes technical articles for "This Old Truck" including one on motor oil which is where this recommendation originates. The consensus of the ole truckers on the maillists is that the 235 CI inline six holds five quarts of oil plus one for the cannister for a total of six quarts.
 March
20th 2001 Originally, I
had planned this as a one day job at the Krash Lab, but since BillyBob
is laid up at the warehouse with transmission woes, I'll be stretching
it out with the oil change taking place at the warehouse and the
cannister refinishing at the Krash Lab. The silver lining to this dark
cloud is that the newly painted cannister will have a longer paint
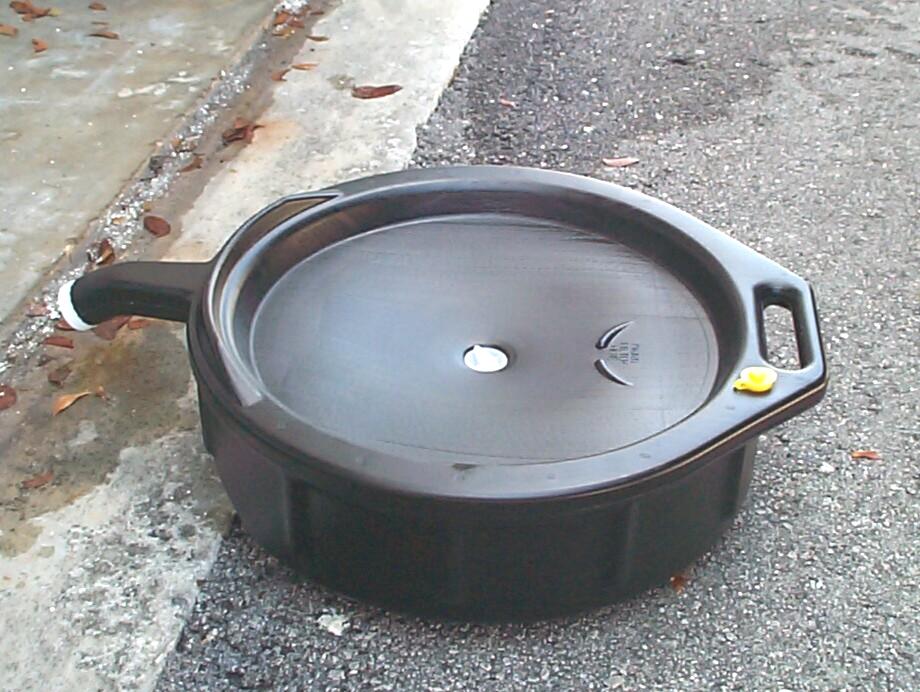
curing period before being pressed back into service. Went up to the
warehouse at lunch time to transfer some tools up there, review the
transmission situation, and start the oil draining into this 14 qt.
drainer/container I picked up at Discount Auto Parts a few months ago.
I haven't brought the jack stands up yet and I can barely squeeze
myself and the creeper under BillyBob. The oil pan bolt on BillyBob
takes a 7/8" wrench and it was on tight, but I got it off with the
proper magical incantations that every mechanic knows.
March
20th 2001 Originally, I
had planned this as a one day job at the Krash Lab, but since BillyBob
is laid up at the warehouse with transmission woes, I'll be stretching
it out with the oil change taking place at the warehouse and the
cannister refinishing at the Krash Lab. The silver lining to this dark
cloud is that the newly painted cannister will have a longer paint
curing period before being pressed back into service. Went up to the
warehouse at lunch time to transfer some tools up there, review the
transmission situation, and start the oil draining into this 14 qt.
drainer/container I picked up at Discount Auto Parts a few months ago.
I haven't brought the jack stands up yet and I can barely squeeze
myself and the creeper under BillyBob. The oil pan bolt on BillyBob
takes a 7/8" wrench and it was on tight, but I got it off with the
proper magical incantations that every mechanic knows.
 Back
in the sixties when I was becoming a reluctant expert on '59 Ford
transmissions, my Dad gave me one of his tools that he didn't use much
anymore to help me get gear oil in and out of these manual three-speeds
I always seemed to be working on. By some stroke of luck, I brought
this gadget to Florida with me when I moved here almost thirty years
ago. I haven't used the tool since then, but thought it might be useful
for the messy job of getting the old oil out of the cannister after the
element is removed. This is a much cursed task among the stovebolters
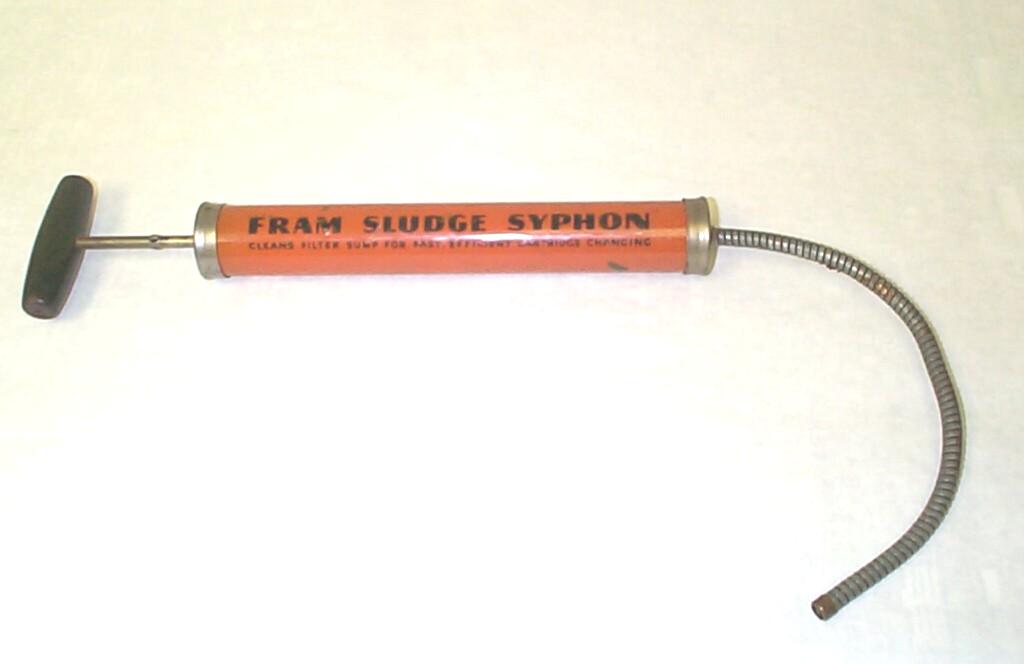
and ole truckers on the maillists. Imagine my surprise when I cleaned
the years of grime off this old tool to discover that it is a "FRAM
SLUDGE SYPHON", a tool made precisely for the purpose of cleaning the
old oil out of these cannister oil filters! The small text on the front
states "Cleans filter sump for fast, efficient cartridge
changing". On the back side are the words "How's
your oil filter?"
Back
in the sixties when I was becoming a reluctant expert on '59 Ford
transmissions, my Dad gave me one of his tools that he didn't use much
anymore to help me get gear oil in and out of these manual three-speeds
I always seemed to be working on. By some stroke of luck, I brought
this gadget to Florida with me when I moved here almost thirty years
ago. I haven't used the tool since then, but thought it might be useful
for the messy job of getting the old oil out of the cannister after the
element is removed. This is a much cursed task among the stovebolters
and ole truckers on the maillists. Imagine my surprise when I cleaned
the years of grime off this old tool to discover that it is a "FRAM
SLUDGE SYPHON", a tool made precisely for the purpose of cleaning the
old oil out of these cannister oil filters! The small text on the front
states "Cleans filter sump for fast, efficient cartridge
changing". On the back side are the words "How's
your oil filter?"
 March
21st 2001 Up at the
warehouse at lunch time again. Mostly troubleshooting transmission
problems, but found time to remove the existing oil filter cartridge
and "syphon" the old oil out of the cannister. The existing cartridge
is all metal on the outside and has "1006 NAPA" markings on it.
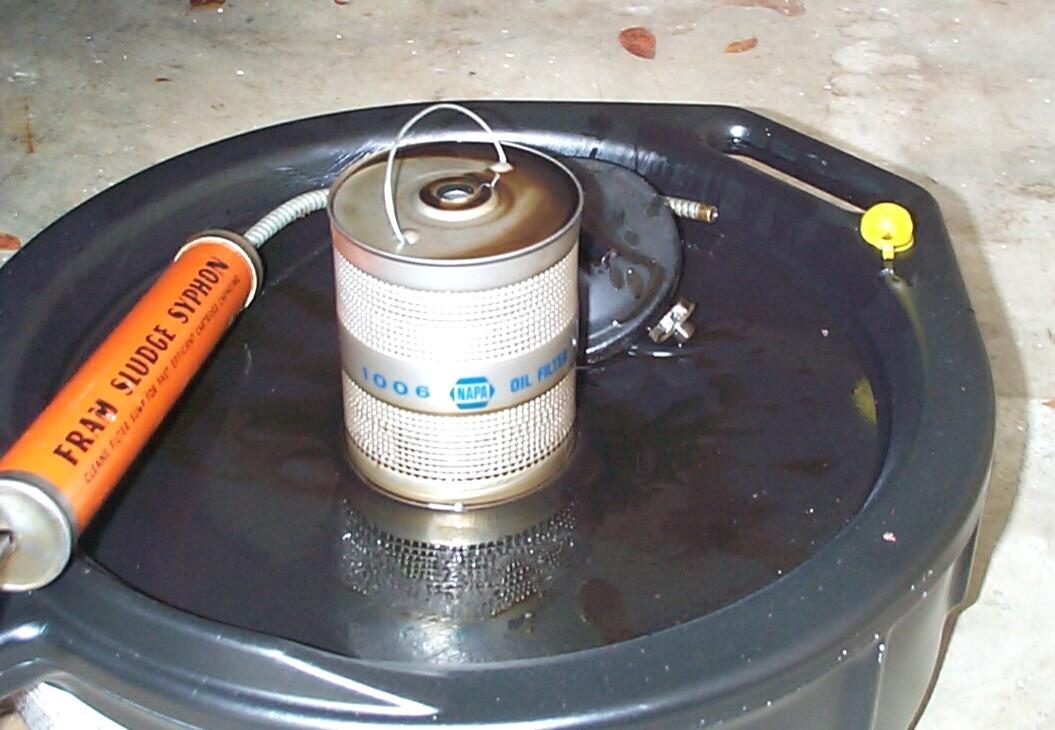
March
21st 2001 Up at the
warehouse at lunch time again. Mostly troubleshooting transmission
problems, but found time to remove the existing oil filter cartridge
and "syphon" the old oil out of the cannister. The existing cartridge
is all metal on the outside and has "1006 NAPA" markings on it.
 March
24th 2001 Went up to
the warehouse and removed the oil filter cannister and clamps. Had
trouble with the old hose connectors so I cut them in half and will
worry about getting them off the block later. Was half way back to the
Krash lab in Renegade when I realized I forgot the cannister top . . .
Oh well, I will make another trip later today or tomorrow. After I got
the hoses off the cannister (using a Craftsman 10" Clench Wrench), I
sprayed the cannister, inside and out, with Eastwood
Company's Undergone Industrial Cleaner/Degreaser (#31131Z).
It started bubbling the paint in places, so I proceeded to remove the
rest of the paint (at least two different shades of orange) with
alternate applications of the degreaser and sessions with the Eastwood
Cleaning Wheel (#31095) in my cordless drill.
March
24th 2001 Went up to
the warehouse and removed the oil filter cannister and clamps. Had
trouble with the old hose connectors so I cut them in half and will
worry about getting them off the block later. Was half way back to the
Krash lab in Renegade when I realized I forgot the cannister top . . .
Oh well, I will make another trip later today or tomorrow. After I got
the hoses off the cannister (using a Craftsman 10" Clench Wrench), I
sprayed the cannister, inside and out, with Eastwood
Company's Undergone Industrial Cleaner/Degreaser (#31131Z).
It started bubbling the paint in places, so I proceeded to remove the
rest of the paint (at least two different shades of orange) with
alternate applications of the degreaser and sessions with the Eastwood
Cleaning Wheel (#31095) in my cordless drill.
March 25th 2001 Left the cannister in a bucket of water last night when I left the Krash Lab. Picked up the cannister top at the warehouse on the way in this morning. Pulled the cannister out of the water and dried off with a hair dryer. After cleaning the cannister top with Eastwood's PRE, I put the top on and blew in the inlet (on the side) while trying to detect air on the bottom (outlet). I got nothin' but red cheeks. Dragged the air compressor out of the shed and proceeded to clean the center tube with a combination of compressed air and rag on a coathanger wire techniques until I got some air flow (and dislodged a lot of hard gunk). This thing may not have been working at all. BillyBob's always had good oil pressure. Maybe this is why. I'll bring a gun cleaning kit from home and work on this passage some more before re-assembly.
 I
grabbed a piece of one foot by two foot scrap of 1/4" Gatorboard (an
art material abundant here at the architectural office I work at) and
punched a small hole in it. I then assembled the cannister with the
gatorboard sandwiched between the cannister and its top. This way I can
open the Black and Decker Workmate, put the gatorboard on top, paint
the cannister orange, then flip the gatorboard over and paint the top
black. I put on latex gloves and cleaned both parts of the cannister
with Eastwood's PRE Cleaner and Paint Prep again after going over them
with a 3M Scuff Pad. A coat of Plasti-Kote Anti-Rust Primer was applied
to each part.
I
grabbed a piece of one foot by two foot scrap of 1/4" Gatorboard (an
art material abundant here at the architectural office I work at) and
punched a small hole in it. I then assembled the cannister with the
gatorboard sandwiched between the cannister and its top. This way I can
open the Black and Decker Workmate, put the gatorboard on top, paint
the cannister orange, then flip the gatorboard over and paint the top
black. I put on latex gloves and cleaned both parts of the cannister
with Eastwood's PRE Cleaner and Paint Prep again after going over them
with a 3M Scuff Pad. A coat of Plasti-Kote Anti-Rust Primer was applied
to each part.
 Before
the primer, I had screwed the severed hose connectors back in the
cannister to keep the threads clean. after the primer dried, the
cannister was sprayed with Plasti-Kote "Chrysler Orange Engine Paint
No. 226" (as close a match to FRAM orange as I could find). The
gatorboard was flipped over and the cannister cap was sprayed with
Eastwood's "Under Hood Black" (#1240Z).
Before
the primer, I had screwed the severed hose connectors back in the
cannister to keep the threads clean. after the primer dried, the
cannister was sprayed with Plasti-Kote "Chrysler Orange Engine Paint
No. 226" (as close a match to FRAM orange as I could find). The
gatorboard was flipped over and the cannister cap was sprayed with
Eastwood's "Under Hood Black" (#1240Z).
March 31st 2001 It's been a character builder of a week. On Thursday, the clutch on my Jeep went out. I've been thru this before with the same symptoms and the last time, it was a failed slave cylinder. Chrysler had a brillant idea with Renegade's model year - the slave cylinder is located inside the bellhousing to protect it from off-road hazards. The rub is that their first supplier of slave cylinders couldn't get their act together and Chrysler eventually changed suppliers. When these things go, the skid plates, drive shafts, transfer case, transmission and bellhousing have to come off to get at them! After I had Renegade flat-bed towed to the Mizner Park Citgo in Boca Raton close to the Krash Lab, I watched Carl, my mechanic, groan when I told him what I thought was wrong. With Renegade and BillyBob both out-of-action, my Boss lent me his Panzerwagon, a Mercedes 420 four door sedan, for transportation. The panzerwagon needed gas and power steering fluid but when I went to get it, I couldn't figure out how to open the hood or gas tank door! Humbled again, I threw the bottle of power steering fluid on the front seat and slinked home in shame. Things looked better by late Friday. Carl had determined that this time, it was the clutch master cylinder. I got Renegade back with several hundred dollars more in my pocket than I thought I would have at the end of this repair.
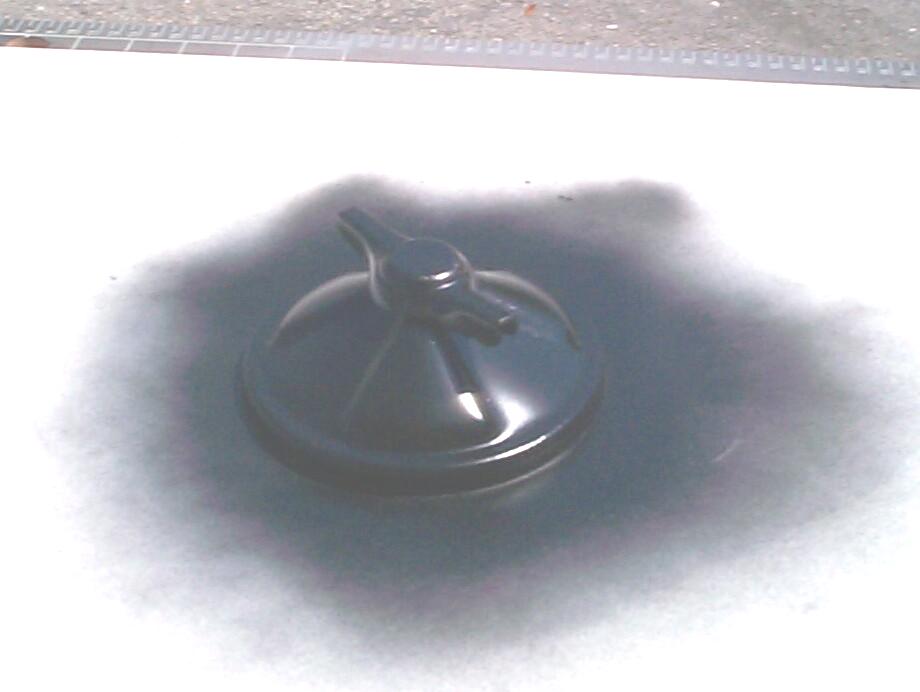
 Started
out today by putting the decals on the cannister and top, then an
application of PRE . . . OOPS! The PRE
started to eat the Under Hood black finish. I gave the cannister and
top a coat of Eastwood's Diamond Clear (#10200Z) to secure the decals
in place. The second coat of Diamond Clear started to fog the decal on
the top . . . Enough! I'm stopping at
this point before I really screw this up. When I ordered filter
elements and decals from Chevy-Duty, I also ordered replacement hoses
for the cannister. Here's a pic of the newly painted, decaled cannister
with the hoses attached.
Started
out today by putting the decals on the cannister and top, then an
application of PRE . . . OOPS! The PRE
started to eat the Under Hood black finish. I gave the cannister and
top a coat of Eastwood's Diamond Clear (#10200Z) to secure the decals
in place. The second coat of Diamond Clear started to fog the decal on
the top . . . Enough! I'm stopping at
this point before I really screw this up. When I ordered filter
elements and decals from Chevy-Duty, I also ordered replacement hoses
for the cannister. Here's a pic of the newly painted, decaled cannister
with the hoses attached.
Last week, I had performed a preliminary cleaning of the cannister Support U-bolts, washers and nuts in the Eastwood vibratory tumbler. Today, I submerged them in Eastwood's OxiSolv Rust Remover (#16026) for thirty minutes. Then used Eastwood's Metal Blackening System to blacken the U-bolt threads, then painted the remainder of the U-bolts, hex nuts and washers with Eastwood's Chassis Black paint.
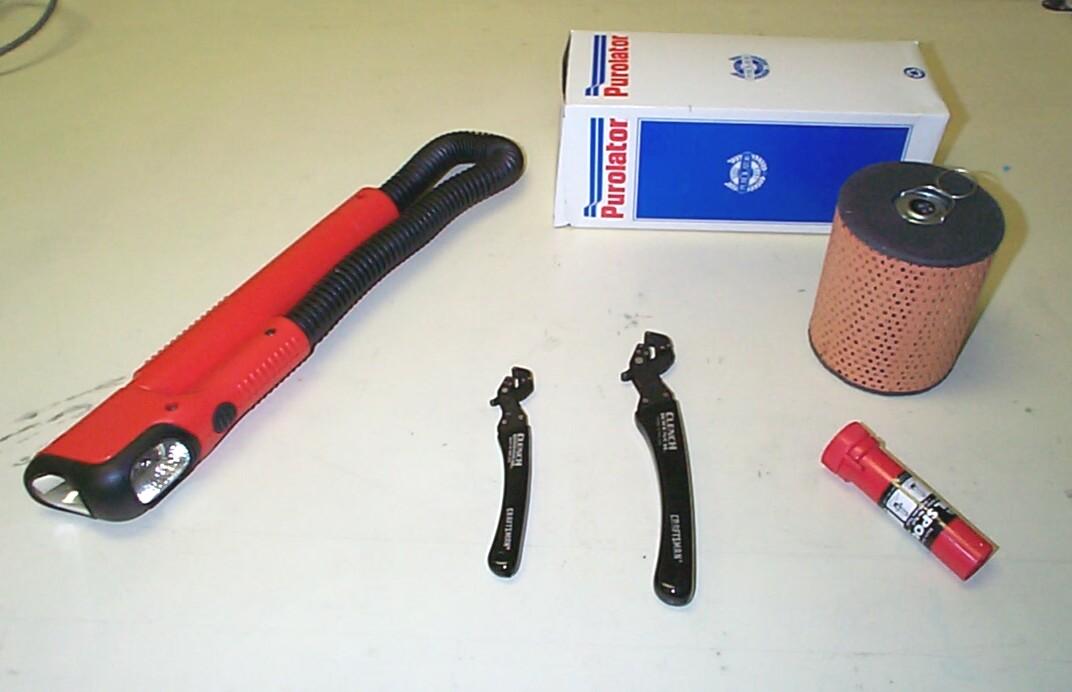 April
7th 2001 Gonna go up to
the warehouse in a little while to put the cannister back on BillyBob.
I've got the luxury to drag this out since I don't have the gearshift
part yet to get BillyBob mobile again. I've gathered 8" and 6"
Craftsman Clench Wrenches for the stubborn hose fittings still on the
block and a flex flashlight to see what I'm doin' up there (no electric
power at the warehouse). I picked up an oil spout at Discount Auto
Parts some time back and a couple of "C4" replacement oil filters from
Chevy-Duty.
April
7th 2001 Gonna go up to
the warehouse in a little while to put the cannister back on BillyBob.
I've got the luxury to drag this out since I don't have the gearshift
part yet to get BillyBob mobile again. I've gathered 8" and 6"
Craftsman Clench Wrenches for the stubborn hose fittings still on the
block and a flex flashlight to see what I'm doin' up there (no electric
power at the warehouse). I picked up an oil spout at Discount Auto
Parts some time back and a couple of "C4" replacement oil filters from
Chevy-Duty.
I used a gun cleaning kit (38/357 Cal, 9mm) to finish cleaning the oil return tube that runs down the center of the cannister. The specialized brushes, solvent and cloth patches in a typical kit do a good job, a lot better than my previous improvised coat hanger wire method.
Up at the warehouse, operations did not go smoothly but problems were not insurmountable. In other words, a typical day in the garage. In accord with Murphy's Law, the more inaccessible a connector is, the more frozen it is. The return hose came off the block by using the 8" clench wrench. No such luck with the supply hose which was connected to a brass tee to which the oil pressure gauge fitting was also connected. Couldn't get a good grip and, before long, the brass hose connector was smoothed from a hex to a cylinder shape. At this point I was successful removing the gauge fitting from the tee and the tee from the block.
Stopped at Discount Auto Parts for a new brass tee. There wasn't anything matching the tee on the customer accessible shelves and the one fella working the parts counter had a five customer backup. There were more personnel there but parts stocking seemed more inportant to him than waiting on people so I left. At the small Boca Raton NAPA store there are two people behind the parts counter and, of the three times I've been there so far, I've always been the only customer. I got a replacement for the brass tee. Back at the warehouse, I got all the hose connections together but not tightened. There seems to be a gap in my collection of open end wrenches - 9/16" to be exact. I'll need to pick up a couple before I can tighten the hoses.
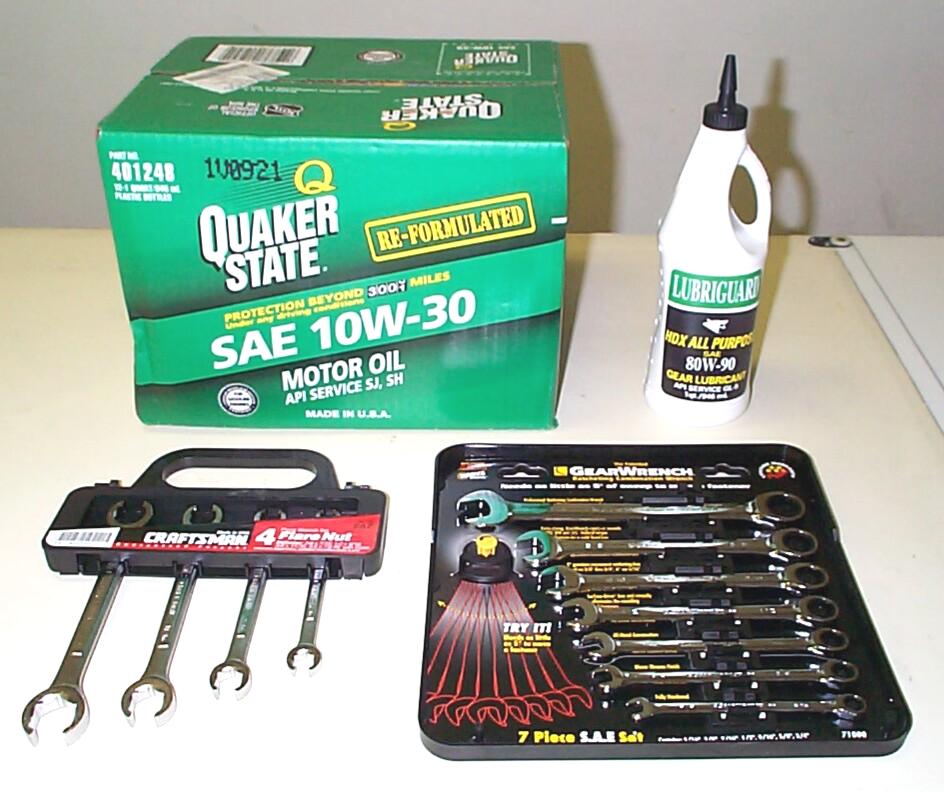 April
13th 2001 OK, so I went
to Sears and lost control. Instead of just picking up two 9/16" open
end wrenches, I splurged on a Craftsman Four Piece Flare Nut Wrench Set
and a Seven Piece GearWrench Ratcheting Combination Wrench Set. I
hadn't been buying many tools and parts since Renegade's clutch master
cylinder meltdown blew a hole in my budget and I was suffering tool
purchase withdrawal symptoms. Today, I picked up a case of Quaker State
10w30 SJ oil for the engine and 80w-90 Multi-Purpose Gear Lube for the
tranny and rear end at Discount Auto Parts.
April
13th 2001 OK, so I went
to Sears and lost control. Instead of just picking up two 9/16" open
end wrenches, I splurged on a Craftsman Four Piece Flare Nut Wrench Set
and a Seven Piece GearWrench Ratcheting Combination Wrench Set. I
hadn't been buying many tools and parts since Renegade's clutch master
cylinder meltdown blew a hole in my budget and I was suffering tool
purchase withdrawal symptoms. Today, I picked up a case of Quaker State
10w30 SJ oil for the engine and 80w-90 Multi-Purpose Gear Lube for the
tranny and rear end at Discount Auto Parts.
 April
14th 2001 Went up to
the warehouse and tightened the hose connections with the new wrenches.
I'll watch these connections for leaks for awhile since I disturbed the
threadlocker compound I used last week and I don't know what effect
that will have. Filled up the cannister to the inlet fitting on the
side with new oil and then put the new "C4" filter element in and
screwed on the top (with rubber o-ring gasket in place). Started
pouring the oil in the filler opening in the valve cover. Topped off
the tranny with gear lube. It was only down a quarter inch or less,
which was a relief. Not enuf room to manoeuvre under BillyBob in the
back with the spare tire carrier in the way, so I'll check the pumpkin
fluid level next time I have the truck back up on jack stands.
April
14th 2001 Went up to
the warehouse and tightened the hose connections with the new wrenches.
I'll watch these connections for leaks for awhile since I disturbed the
threadlocker compound I used last week and I don't know what effect
that will have. Filled up the cannister to the inlet fitting on the
side with new oil and then put the new "C4" filter element in and
screwed on the top (with rubber o-ring gasket in place). Started
pouring the oil in the filler opening in the valve cover. Topped off
the tranny with gear lube. It was only down a quarter inch or less,
which was a relief. Not enuf room to manoeuvre under BillyBob in the
back with the spare tire carrier in the way, so I'll check the pumpkin
fluid level next time I have the truck back up on jack stands.
Well, that's about it. Took longer than I thought it would. I understand BillyBob's oiling system a little better now. This week the part I needed to fix the gearshift arrived and by this time next week, BillyBob should be back on the road. The tale of that repair will be the subject of the next log entry.
| < Back
to Intro |
You can email me at ![]() webmaster@laroke.com
webmaster@laroke.com
Issued Saturday April 14, 2001
Updated Thursday May 11, 2017
copyright © 1996-2017 Larry Robert Kephart all rights reserved
| | LRK Home | | Bio Info | | Krash Khronicles | | LAROKE | |
| | BettyLou | | BillyBob's Garage | | Rat Patrol | | Deerslayer | | Elvira | |
| | Land of the Free and Home of the Brave | |
| | Keppylou's Art | | WWI Soldier's Diary | |