| | LRK Home | | Bio Info | | Krash Khronicles | | LAROKE | |
| | BettyLou | | BillyBob's Garage | | Rat Patrol | | Deerslayer | | Elvira | |
| | Land of the Free and Home of the Brave | |
| | Keppylou's Art | | WWI Soldier's Diary | |
Renegade's Patrol Log
![]()
JEEP LINKS including vendor sites for parts and tools as well as sites for jeep organizations
![]()
PATROL LOG includes log entries of minor repairs and and adventures between time of purchase and the present.
![]()
RENEGADE MAINTENANCE Ever changing detailing, oil change, lube, etc. maintenance routines developed for Renegade based on the BillyBob routines, including required tools, materials and procedures.
2. God is in the Details
After my Y2K resolution (see previous patrol log entry), I started dividing my weekend time between BillyBob and Renegade, performing work on one vehicle on Saturday and the other on Sunday.
I wanted to clean Renegade up first, Make him sparkle like he used too. In the past, I'd have someone detail Renegade a couple of times a year. Now, I decided to do that myself. I also started educating myself regarding the Jeep community on the Internet.
Several good Jeep websites have been located (see Jeep Links page) but, without a doubt, the most useful to me is the Wrangler Community Forum at JeepsUnlimited.com. This is a wonderful group of Jeep folks with a wealth of information and help, especially for a newbie like me.
A couple of years ago I bought a book on detailing cars. The problen was finding it in my cluttered apartment. It would almost be easier to re-order it from Amazon.com. I remembered the book being smaller in physical size than it actually is, so I ended up passing over it three times in the massive search that ensued. After a couple of days when I finally found the book ("Ultimate Auto Detailing" by David H. Jacobs), I started reading it during lunch at work, and applying my newly gained knowledge the following weekend. It takes several weeks to detail a jeep this way, but I'm building up a procedural routine for the future.
The table below lists to products I'm currently using in my detailing efforts.
| ITEM | PURCHASED | APPLICATION | COMMENTS |
| Discount Auto Parts Wheel Cleaner | Discount Auto Parts | all-purpose wheel cleaner | Jury's still out |
| Westley's Bleche-Wite | Discount Auto Parts | whitewall/blackwall tire cleaner | Works for me |
| Black Magic Tire Wet | Discount Auto Parts | tire dressing | Works for me |
| Raindance Carwash Concentrate | Walgreens | general purpose washing | Not enuf suds |
| Mequiar's Cleaner Wax | Discount Auto Parts | general purpose body wax | Works for me |
| Gunk Engine Brite | Bennett Auto Supply | Heavy Duty Degreaser | Makes a real mess |
| WD-40 | Walgreens | Lube softtop snaps and zippers | Apply with rag |
| Westley's Glass Cleaner | Discount Auto Parts | Clean Windshield | Works for me |
| Lemon Pledge | Walgreens | Dress softtop clear plastic windows | Works for me |
| 303 Aerospace Protectant | Leon Rosser Jeep | Dress softtop canvas | Great stuff but expensive |
| Armor All Protectant | Discount Auto Parts | Dress exterior and interior rubber, vinyl and plastic items | Apply with rag |
| Tuff Stuff Multi-Purpose Foam Cleaner | Discount Auto Parts | Interior fabric cleaner | The jury's still out |
| Scotchgard Upholstery Cleaner + protector | Discount Auto Parts | Interior fabric protectant | Works for me |
In addition to the above "consummables", I've bought several towels, two chamois, several sponges of different shapes, course and soft wash mitts, bucket, scrub brush, hair brush, tooth brush, 2" paint brush, q-tips and shop towels (paper). There are two caddies to carry this stuff and I also splurged by getting a Hitachi wet/dry shop vacuum.
I didn't know what to use on the top canvas and clear plastic until I read some of the posts at the JeepsUnlimited.com forum. Based on what I learned there, I purchased the 303 Protectant from the Leon Rosser Jeep Website for the canvas and Lemon Pledge locally.
March 12th 2000 When I ordered the 303 Protectant, I also ordered Hella Vision Plus H4 Headlamp replacements. The 303 arrived within the week (about a month ago). The Hella H4s arrived this week and I installed them today. The existing headlamp connectors had some corrosion. As luck would have it, I didn't have my electrical contact cleaner with me (this is in accord with Murphy's law). I substituted by applying rubbing alcohol to the existing headlamp connector blades, plugging into the socket, unplugging and cleaning the blades, and then repeating the process several times until most of the corrosion was gone. I also applied WD-40 to the retainer band screws and the trim ring screws (some of which were a little rusty) with a rag before buttoning things back up.
The Renegade package skid plates under the front and rear bumper plastic were beginning to look a little worse for wear. all the mounting bolts and washers were rusted as well as the diamond plate itself in areas. I want to refinish these skid plates so Liquid Wrench was applied to all the mounting bolts. Fifteen minutes later when I tried to take off the bolts, I was supprised to find they all moved easily. When I got all the bolts off, I found these skid plates were more cosmetic than functional. All the mounting bolts had been screwed into rather flimsy clips instead of nuts welded to the connecting flanges. My current plans are to refinish the skid plates and remount them but when I upgrade to aftermarket bumpers, I will get better mounting hardware if they will still fit with the new bumbers.
 March
19th 2000 It's rainin'
outside today like the proverbial texas steer urinating on a flat rock.
Hard to detail Renegade in weather like this. I've got a lot of
computer maintenance in the Krash Lab anyway and there is one thing I
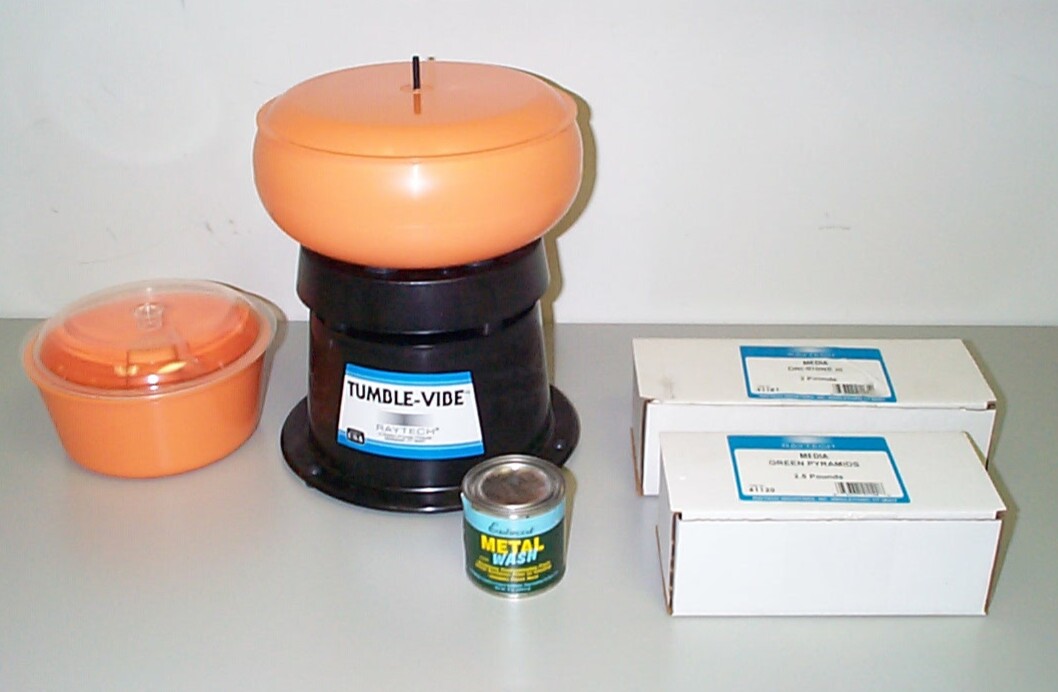
can do for Renegade inside. I ordered and received a "Vibratory Tumbler
System" (catalog #43204) for cleaning small parts from The
Eastwood Company last week. I also ordered a tin of "Metal
Wash" parts cleaner (#10120).
March
19th 2000 It's rainin'
outside today like the proverbial texas steer urinating on a flat rock.
Hard to detail Renegade in weather like this. I've got a lot of
computer maintenance in the Krash Lab anyway and there is one thing I
can do for Renegade inside. I ordered and received a "Vibratory Tumbler
System" (catalog #43204) for cleaning small parts from The
Eastwood Company last week. I also ordered a tin of "Metal
Wash" parts cleaner (#10120).
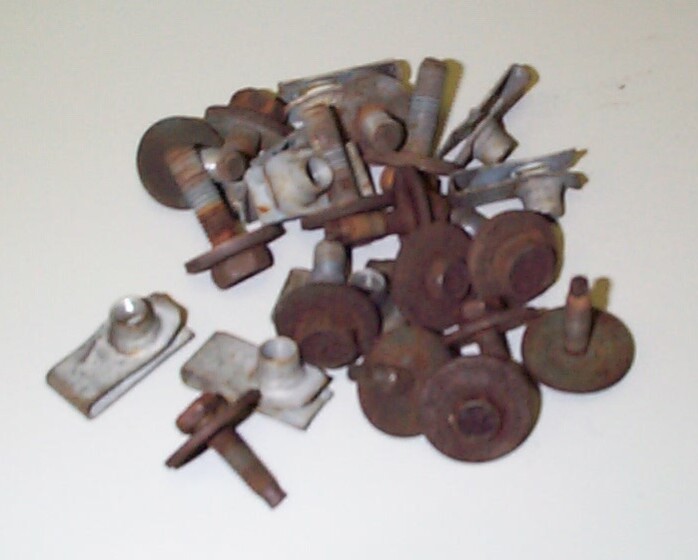 I
wanted to try out the new tumbler with the bolts, fasteners and clips I
had removed last week that were holding Renegade's front and rear skid
plates on. They were rusty, corroded and dirty with penetrating oil and
WD-40. Following the short instruction booklet I set up the tumbler in
a spare office (to isolate the noise somewhat as I didn't want it to
compete with the Allman Brothers Band music I was playing in the main
space). I assembled the wet/dry bowl, added the fasteners, covered them
with Green Rust Cutting Media (#43204A), added water and a teaspoon of
Metal Wash powder, and plugged it in. After about fifteen minutes I
figured I had too much water so I drained some off.
I
wanted to try out the new tumbler with the bolts, fasteners and clips I
had removed last week that were holding Renegade's front and rear skid
plates on. They were rusty, corroded and dirty with penetrating oil and
WD-40. Following the short instruction booklet I set up the tumbler in
a spare office (to isolate the noise somewhat as I didn't want it to
compete with the Allman Brothers Band music I was playing in the main
space). I assembled the wet/dry bowl, added the fasteners, covered them
with Green Rust Cutting Media (#43204A), added water and a teaspoon of
Metal Wash powder, and plugged it in. After about fifteen minutes I
figured I had too much water so I drained some off.
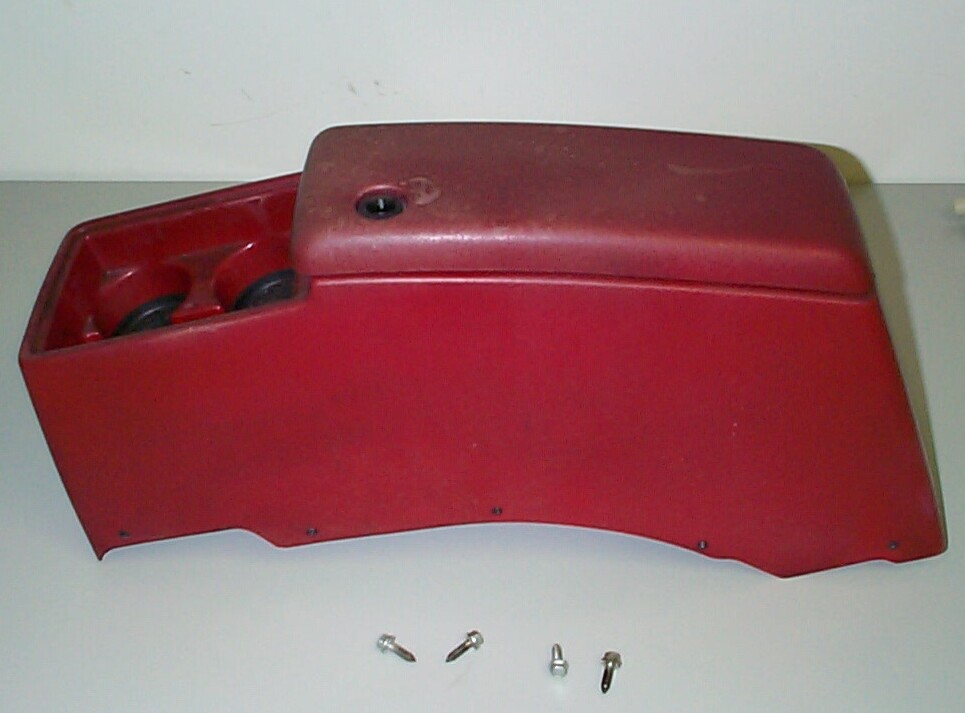 It
stopped raining by mid-afternoon enough that I could work inside
Renegade. I removed the stock console. Many Wrangler owners know that
the lock on this thing breaks almost as soon as you drive it off the
dealer's lot after purchase. I've ordered a Tuffy console from Leon Rosser
Jeep. As you can see, the sun has had its way with the top of the old
console. The interior door panels are faded too. I've got vinyl
refinishing products from Eastwood to bring to doors back to original
condition. I don't have a set of the torx wrenches required to get the
door panels off yet, so I will practice on the old console first.
It
stopped raining by mid-afternoon enough that I could work inside
Renegade. I removed the stock console. Many Wrangler owners know that
the lock on this thing breaks almost as soon as you drive it off the
dealer's lot after purchase. I've ordered a Tuffy console from Leon Rosser
Jeep. As you can see, the sun has had its way with the top of the old
console. The interior door panels are faded too. I've got vinyl
refinishing products from Eastwood to bring to doors back to original
condition. I don't have a set of the torx wrenches required to get the
door panels off yet, so I will practice on the old console first.
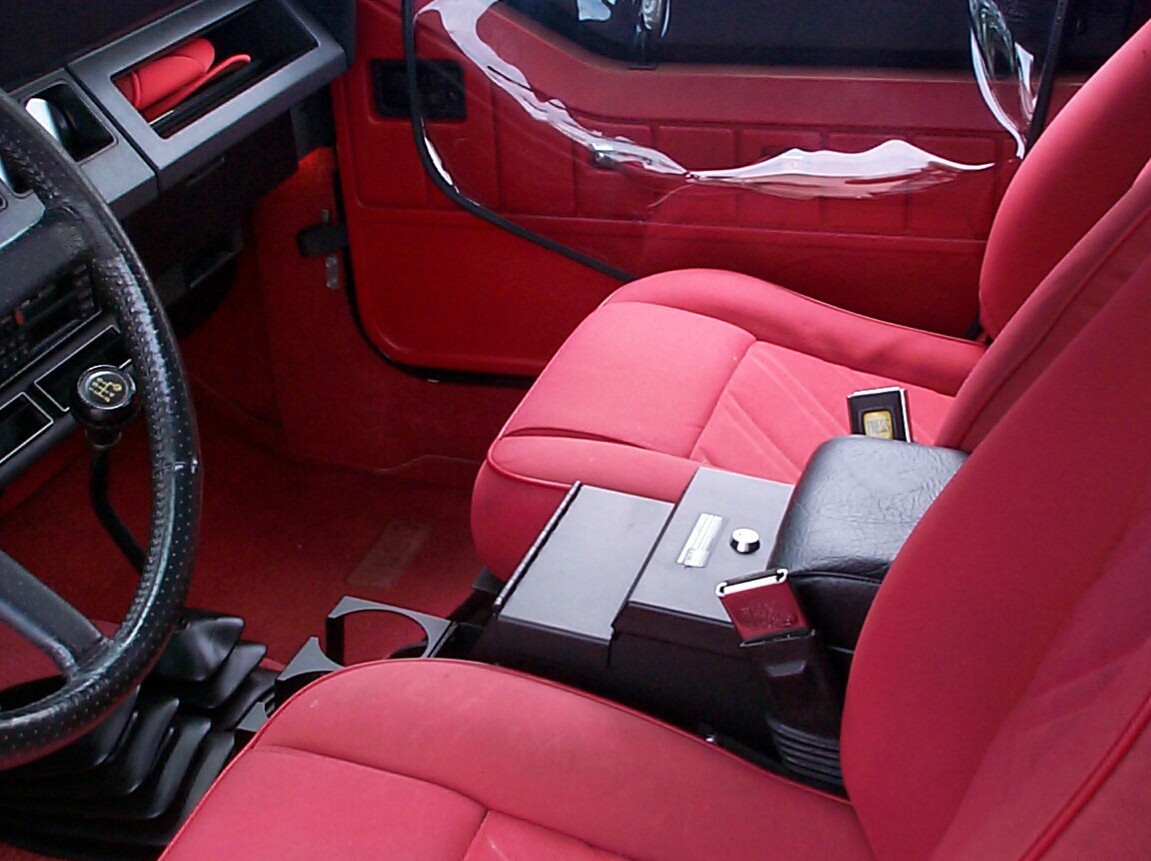 March
26th 2000 The Tuffy
console arrived early in the week. Installation was pretty
straightforward. I didn't have anybody to help me holding a wrench
topside while I tightened up the anchorbolts underneath Renegade so I
wedged a box end wrench in position and held it down with a brick. This
solution worked fine. While under Renegade, I noticed with much
consternation that the gas tank was leaking somewhere. This is an
oversized tank with full enveloping skid plate which was part of the
1991 Renegade option package. Because of the skid plate I can't tell
where it's leaking but it must be near the top front of the tank. I
topped off the tank on Thursday. When I jacked up the back end to
remove the jack stands, the gas leak got worse . . . by the time the
rear wheels were lowered to the ground the leak stopped. I'm gonna wait
until the tank is almost empty and see if I can get the skid plate off.
March
26th 2000 The Tuffy
console arrived early in the week. Installation was pretty
straightforward. I didn't have anybody to help me holding a wrench
topside while I tightened up the anchorbolts underneath Renegade so I
wedged a box end wrench in position and held it down with a brick. This
solution worked fine. While under Renegade, I noticed with much
consternation that the gas tank was leaking somewhere. This is an
oversized tank with full enveloping skid plate which was part of the
1991 Renegade option package. Because of the skid plate I can't tell
where it's leaking but it must be near the top front of the tank. I
topped off the tank on Thursday. When I jacked up the back end to
remove the jack stands, the gas leak got worse . . . by the time the
rear wheels were lowered to the ground the leak stopped. I'm gonna wait
until the tank is almost empty and see if I can get the skid plate off.
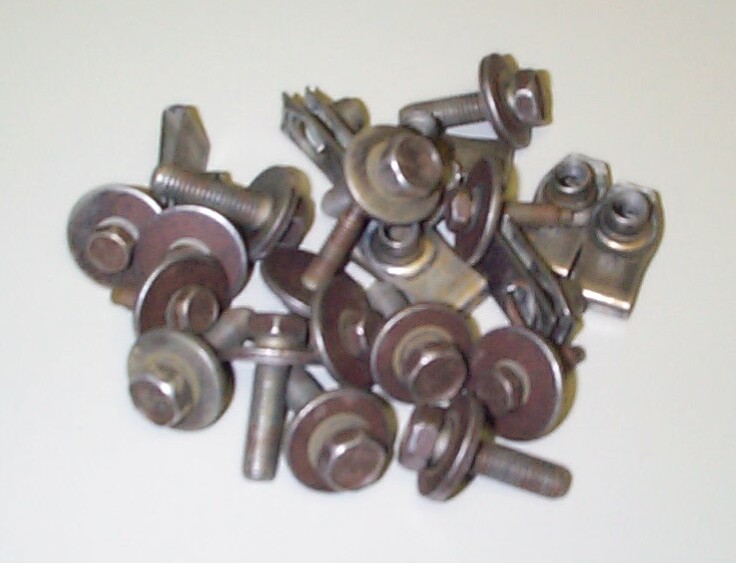 Back
to the tumbler with the skid plate bolts. After three eight hour
sessions with the rust-cutting media this is what they look like. Next
week I'm going to experiment with the dry polishing media and after
that with the new zinc-plating kit I purchased from Eastwood.
Back
to the tumbler with the skid plate bolts. After three eight hour
sessions with the rust-cutting media this is what they look like. Next
week I'm going to experiment with the dry polishing media and after
that with the new zinc-plating kit I purchased from Eastwood.
May 2nd 2001 I've been neglecting Renegade again in favor of BillyBob and, I've been paying for it. It's been fourteen months and several things have happened.
- Gas Tank blowout: I kept putting off investigating
the gas leak and it got worse. Finally, I came out one morning to see a
steady stream of gas pouring out even with the tank half empty. I took
it to my gas station, Mizner Park Citgo. It's a plastic tank and
apparently bio-degradable too! It was ruptured and I needed a new one
at a hit of over $365 for the tank alone! Renegade has only been
off-road once so far. Like the disintegrating radiators, there is no
excuse for this failure. I had the mechanics perform a tune-up and
injector cleaning at the same time and got Renegade back for just under
a grand.
- Top blow-off: I was coming up the A-1-A beach highway
after the office Christmas party when a gust of wind ripped the leading
edge of the softtop away from the support frame ~!@#$%^
This event changed several of my holiday travel plans. I ordered a new
"Besttop" and managed to get BillyBob running the next day after
repairing his starter. Renegade took up residence in BillyBob's
warehouse bay until the new top arrived.
- Clutch failure: A few years ago, the clutch slave
cylinder failed. By the way, clutch and tire failures are not covered
by Chrysler's 7 Year/70,000 Mile "Bumper-to-Bumper" Warranty. It's an
internal slave cylinder so skid plates, drive shafts, transfer case,
tranny and bellhousing have to come out to get at it. Last month,
Renegade started having the same symptoms again. This time, it was the
clutch master cylinder which is easier, and therefore cheaper, to get
at.
- Battery dry: Yesterday, Renegade barely turned over when I cranked the starter. This morning, I checked the battery and it needed about a pint and a half of water . . . ~!@#$%^ My own darn fault for not checking often enuf. I web-ordered an Optima Red Top from Quadratec and managed to get Renegade up to Billybob's warehouse. I'll be drivin' the old truck until the new battery gets here.
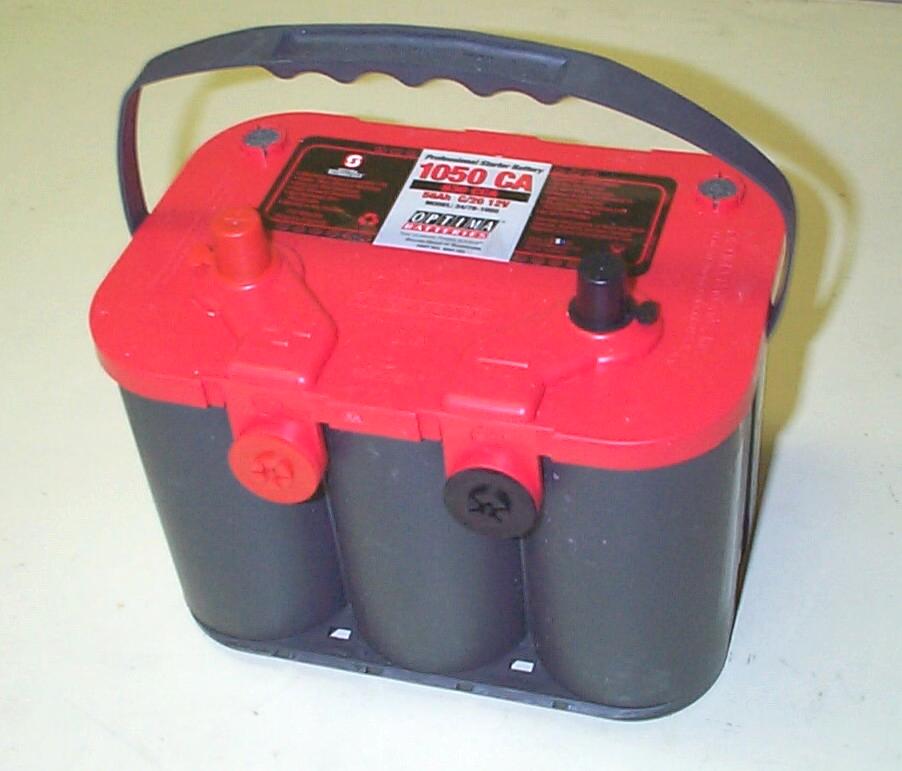 May
14th 2001 The Optima
battery arrived from Quadratec last week. I installed it today up at
BillyBob's warehouse bay and Renegade is back on the road again. The
only thing I don't like when doing this type of work on Renegade is the
~!@#$%^ alarm system. When you go to
connect the battery, the alarm screams bloody murder . . . the clicker
on my key fob wouldn't work for some reason and I had to put the key in
the ignition, turn to on and disengage the alarm toggle switch. Shure
is loud in an enclosed space!
May
14th 2001 The Optima
battery arrived from Quadratec last week. I installed it today up at
BillyBob's warehouse bay and Renegade is back on the road again. The
only thing I don't like when doing this type of work on Renegade is the
~!@#$%^ alarm system. When you go to
connect the battery, the alarm screams bloody murder . . . the clicker
on my key fob wouldn't work for some reason and I had to put the key in
the ignition, turn to on and disengage the alarm toggle switch. Shure
is loud in an enclosed space!
January 11th 2003 I know I haven't been paying enuf attention to Renegade. I spend most of my weekends on BillyBob. I've got BillyBob in good enuf shape to be a daily driver now and am to the point where I can devote some of my shadetree garage time to the Jeep too. Last year, Renegade got new boots - 31 x 10.50 R 15 LT Goodyear Wrangler AT tires. These are about as big as you can fit with the stock suspension and wheels. I don't do any rock climbing or I'd be rubbing everywhere. Full steering lock would cause rubbing against the spring leaves until I put a washer under each wheel stop (located on the spindles).
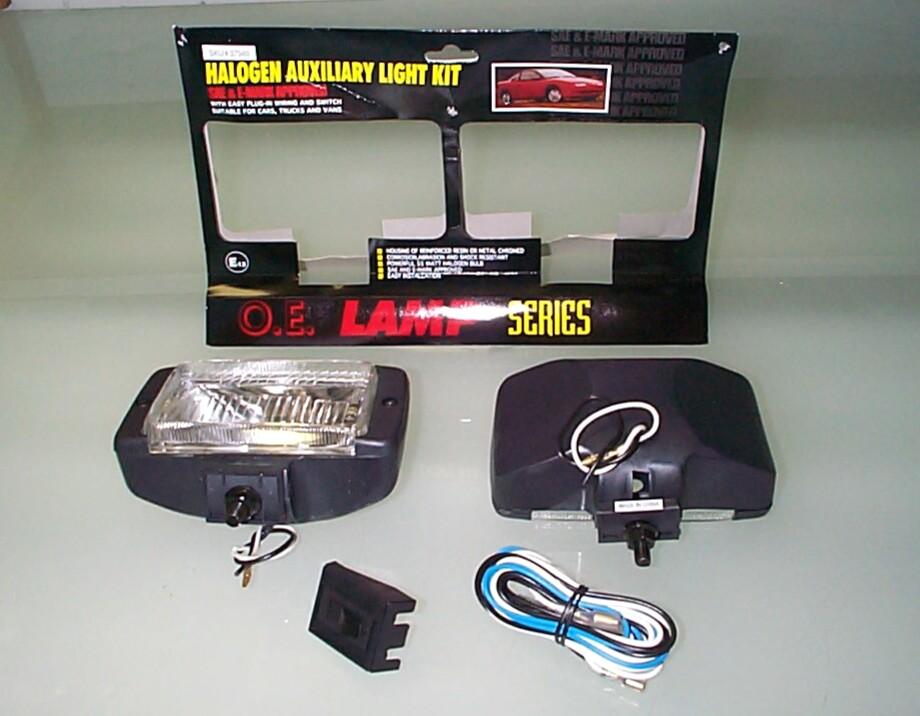 Also
bought a pair of halogen driving lights for less than twenty bucks when
they were on sale from Harbor Freight last year. The
driving lights that had come with the Renegade package had given up the
ghost years ago. One of the lamps were burnt out and both housings were
rusted thru. My main consideration in picking up the Harbor Freight
replacements was that they were small enough to fit in the front fender
recesses. Decided to see if I could install then today.
Also
bought a pair of halogen driving lights for less than twenty bucks when
they were on sale from Harbor Freight last year. The
driving lights that had come with the Renegade package had given up the
ghost years ago. One of the lamps were burnt out and both housings were
rusted thru. My main consideration in picking up the Harbor Freight
replacements was that they were small enough to fit in the front fender
recesses. Decided to see if I could install then today.
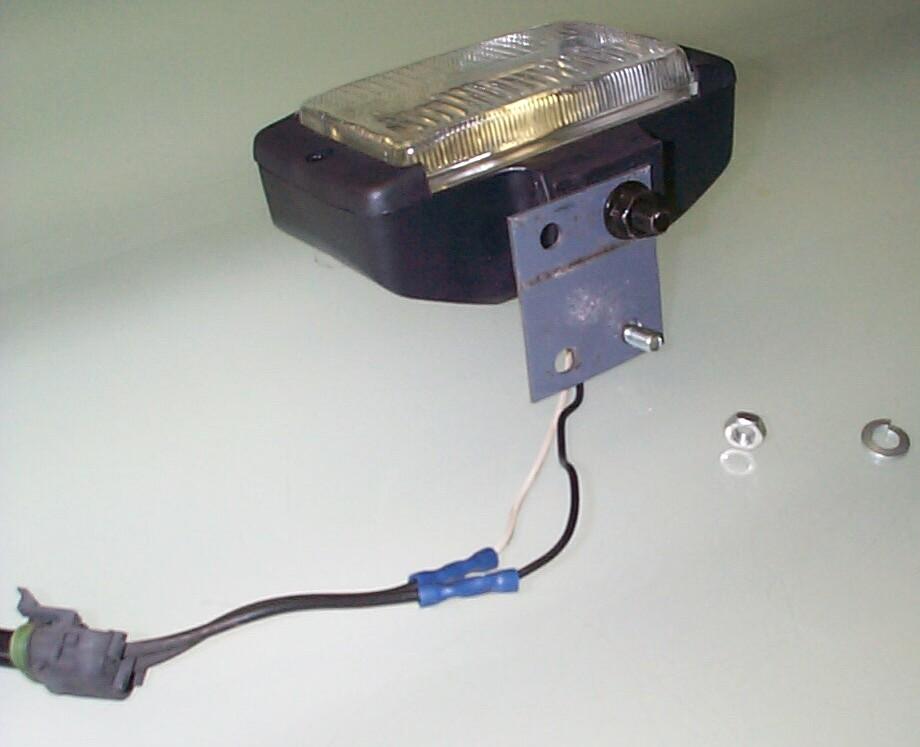 Removed
the old lights and plastic recess "cup" they sit in. Compared the old
lights with the new ones. The mounting bolts on the new lights were
about an inch farther forward than the old lights. The new lights would
not clear the fender support they bolt to because of this mounting
displacement. I needed a mounting extension of some sort. Rummaged
around in my spare parts boxes for a while and came up with some metal
shelving angles. Pounded the angles flat with a sledge hammer . . .
Perfect! Even had holes in the right location already. Bolted these
extension plates to the new light mounts and turned to the wiring. The
old lights had a molded connector attaching them to the Jeep wiring
harness. I cut the connectors off the old lights, stripped the wires
and crimped them to the wires from the new lights (black to black wire,
white to black and white stripe wire).
Removed
the old lights and plastic recess "cup" they sit in. Compared the old
lights with the new ones. The mounting bolts on the new lights were
about an inch farther forward than the old lights. The new lights would
not clear the fender support they bolt to because of this mounting
displacement. I needed a mounting extension of some sort. Rummaged
around in my spare parts boxes for a while and came up with some metal
shelving angles. Pounded the angles flat with a sledge hammer . . .
Perfect! Even had holes in the right location already. Bolted these
extension plates to the new light mounts and turned to the wiring. The
old lights had a molded connector attaching them to the Jeep wiring
harness. I cut the connectors off the old lights, stripped the wires
and crimped them to the wires from the new lights (black to black wire,
white to black and white stripe wire).
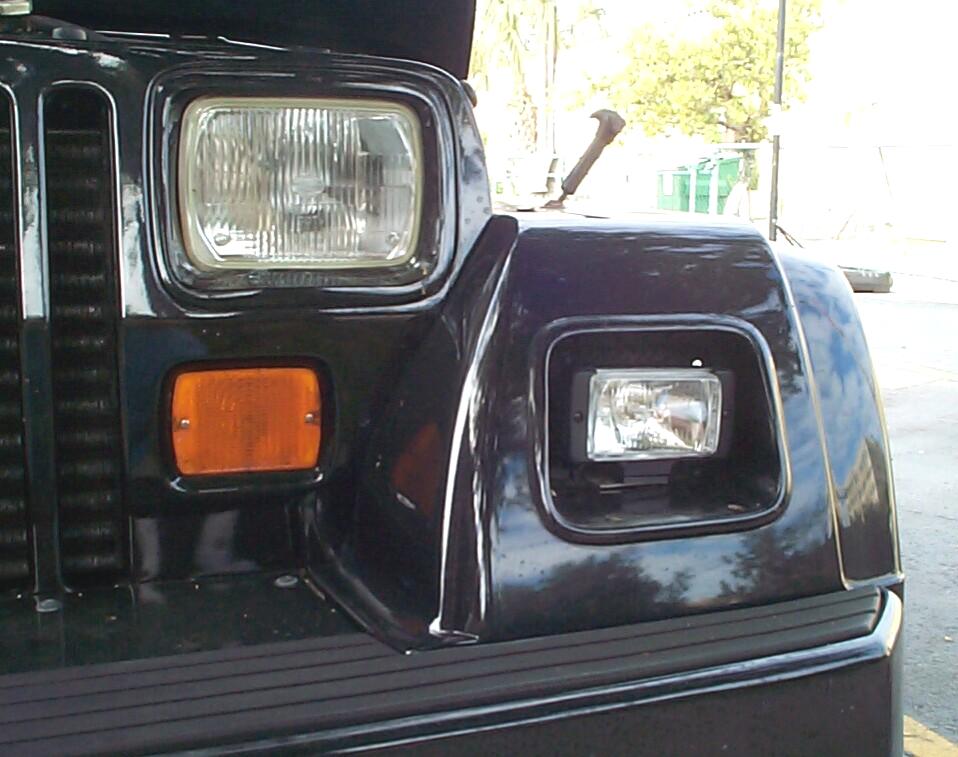
 Did
a test fit of the passenger side light without the plastic recess "cup"
in place. Tested the lights with the old driver side light in place.
Works good. Old light is very dim compared to the new light. Now all I
have to do is cut a 3/4" by 3/4" slot out of the back of the plastic
recess cup to clear the new light mounting bolts. My Dremel motor tool
made short work of this task.
Did
a test fit of the passenger side light without the plastic recess "cup"
in place. Tested the lights with the old driver side light in place.
Works good. Old light is very dim compared to the new light. Now all I
have to do is cut a 3/4" by 3/4" slot out of the back of the plastic
recess cup to clear the new light mounting bolts. My Dremel motor tool
made short work of this task.
 Got
everything connected and the bodywork back in place. Sometime down the
road, I'll take things back apart to repaint the plastic recess cups
and new brackets. Rusted screws holding the cups in will be replaced
too. Well, this log entry is long enuf to finally post to the patrol
log. It's about time. Been some three years since I've posted anything
to this part of the web site. Got more improvements planned for
Renegade. I don't think it'll be another three years before I post
again.
Got
everything connected and the bodywork back in place. Sometime down the
road, I'll take things back apart to repaint the plastic recess cups
and new brackets. Rusted screws holding the cups in will be replaced
too. Well, this log entry is long enuf to finally post to the patrol
log. It's about time. Been some three years since I've posted anything
to this part of the web site. Got more improvements planned for
Renegade. I don't think it'll be another three years before I post
again.
| < Back to Intro |
You can email me at ![]() webmaster@laroke.com
webmaster@laroke.com
Issued Saturday January 11, 2003
Updated Wednesday April 25, 2018
copyright © 1996-2018 Larry Robert Kephart all rights reserved
| | LRK Home | | Bio Info | | Krash Khronicles | | LAROKE | |
| | BettyLou | | BillyBob's Garage | | Rat Patrol | | Deerslayer | | Elvira | |
| | Land of the Free and Home of the Brave | |
| | Keppylou's Art | | WWI Soldier's Diary | |