| | LRK Home | | Bio Info | | Krash Khronicles | | LAROKE | |
| | BettyLou | | BillyBob's Garage | | Rat Patrol | | Deerslayer | | Elvira | |
| | Land of the Free and Home of the Brave | |
| | Keppylou's Art | | WWI Soldier's Diary | |
Renegade's Patrol Log
![]()
JEEP LINKS including vendor sites for parts and tools as well as sites for jeep organizations
![]()
PATROL LOG includes log entries of minor repairs and and adventures between time of purchase and the present.
![]()
RENEGADE MAINTENANCE Ever changing detailing, oil change, lube, etc. maintenance routines developed for Renegade based on the BillyBob routines, including required tools, materials and procedures.
3. Bulking Up
 January
26th 2003 January has
been colder than usual this year in South Florida and, on the weekends,
it's just not fun to work outside. Today is the first warm sunday in
two weeks. I've started exercising, not because I want to, but because
I have to if I want to stay mobile as I head into my senior years. I
tried "exercising restraint" but that didn't work. Well, if I have to
bulk up, so does Renegade. I'm gonna start by replacing the stock air
intake system with a Funnel Ram Intake System I ordered from Quadratec
a couple of weeks ago.
January
26th 2003 January has
been colder than usual this year in South Florida and, on the weekends,
it's just not fun to work outside. Today is the first warm sunday in
two weeks. I've started exercising, not because I want to, but because
I have to if I want to stay mobile as I head into my senior years. I
tried "exercising restraint" but that didn't work. Well, if I have to
bulk up, so does Renegade. I'm gonna start by replacing the stock air
intake system with a Funnel Ram Intake System I ordered from Quadratec
a couple of weeks ago.
 This
is a pretty easy and straightforward upgrade. The inside of the
polished tube had to be cleaned up a bit as it was still covered with
polish residue and the 6mm bolt, lock washer and nut was a bit too
small to connect the support bracket to the old air box support grommet
(It pulled right thru the hole in the grommet). I had to search my
spare parts boxes for a 5/16" flat washer to make it work.
This
is a pretty easy and straightforward upgrade. The inside of the
polished tube had to be cleaned up a bit as it was still covered with
polish residue and the 6mm bolt, lock washer and nut was a bit too
small to connect the support bracket to the old air box support grommet
(It pulled right thru the hole in the grommet). I had to search my
spare parts boxes for a 5/16" flat washer to make it work.
 March
9th 2003 Installed a
Poweraid Helix Throttle Body Spacer today. Got this from Quadratec too.
Pretty straightforward installation . . . I would peg it as a "one
Budweiser degree of difficulty" task. I'm not used to working with
metric connectors or aluminum since I spend most of my time working on BillyBob. Managed to
find the 6mm socket I needed in my computer tools kit. Didn't know if
the bolts that came with this kit were stainless steel so, I used
anti-seize compound just to be safe during assembly. Took about twenty
minutes.
March
9th 2003 Installed a
Poweraid Helix Throttle Body Spacer today. Got this from Quadratec too.
Pretty straightforward installation . . . I would peg it as a "one
Budweiser degree of difficulty" task. I'm not used to working with
metric connectors or aluminum since I spend most of my time working on BillyBob. Managed to
find the 6mm socket I needed in my computer tools kit. Didn't know if
the bolts that came with this kit were stainless steel so, I used
anti-seize compound just to be safe during assembly. Took about twenty
minutes.
 August
30th 2003 Got a pair
replacement mirrors (Quick Mirror II Black) from Quadratec. I'm tired
of adjusting the factory mirrors. Everytime I go over forty mph, they
fold back like elephant ears, no matter how many times I tighten up the
adjuster (under the rubber bellows). It's a gamble. Maybe these new
mirrors will have the same problem, but they have other advantages too.
They connect to the windshield frame, not the doors so, you still have
mirrors if you take the doors off. They also adjust quickly for a
windshield down condition. Ran into trouble right off the bat. The
windshield hinge torx screws are too tight. Only one came loose and the
other ones ate up the T40 torx bit. I sprayed them with Kroil
penetrating oil and left them until I can get a new Torx bit and and
adapter to put it in my impact wrench.
August
30th 2003 Got a pair
replacement mirrors (Quick Mirror II Black) from Quadratec. I'm tired
of adjusting the factory mirrors. Everytime I go over forty mph, they
fold back like elephant ears, no matter how many times I tighten up the
adjuster (under the rubber bellows). It's a gamble. Maybe these new
mirrors will have the same problem, but they have other advantages too.
They connect to the windshield frame, not the doors so, you still have
mirrors if you take the doors off. They also adjust quickly for a
windshield down condition. Ran into trouble right off the bat. The
windshield hinge torx screws are too tight. Only one came loose and the
other ones ate up the T40 torx bit. I sprayed them with Kroil
penetrating oil and left them until I can get a new Torx bit and and
adapter to put it in my impact wrench.
 Been
havin' problems with passenger side half-door for some time now. First,
the key lock quit working tho' you could still lock the door with the
inside rocker lever. Then, sometime later, the outside door handle quit
working and the only way to open the door was with the inside door
handle. Today, nothing worked and I couldn't get the door open, period.
Time to take it apart, I guess. Took the top off, hoping I could lift
the door skin frame out . . . can't quite get it out with the door
closed but, I got lucky for the first time today and the inside door
handle started working again. With the door skin off, I could take the
inside door pull off and pull out the door skin frame guides. The
interior door panel could be pried off with the help of a flat-bladed
screwdriver then. The problem, as far as I can tell, was the failure of
a plastic retainer clip that connected the rod from the key lock to the
latch assembly. Yet another failure on Renegade due to a ~!@#$%^
plastic part! Took the key lock to latch assembly rod out and now the
inside door lock and both door handles work again. The broken part must
have been blocking the latch assembly in some way.
Been
havin' problems with passenger side half-door for some time now. First,
the key lock quit working tho' you could still lock the door with the
inside rocker lever. Then, sometime later, the outside door handle quit
working and the only way to open the door was with the inside door
handle. Today, nothing worked and I couldn't get the door open, period.
Time to take it apart, I guess. Took the top off, hoping I could lift
the door skin frame out . . . can't quite get it out with the door
closed but, I got lucky for the first time today and the inside door
handle started working again. With the door skin off, I could take the
inside door pull off and pull out the door skin frame guides. The
interior door panel could be pried off with the help of a flat-bladed
screwdriver then. The problem, as far as I can tell, was the failure of
a plastic retainer clip that connected the rod from the key lock to the
latch assembly. Yet another failure on Renegade due to a ~!@#$%^
plastic part! Took the key lock to latch assembly rod out and now the
inside door lock and both door handles work again. The broken part must
have been blocking the latch assembly in some way.
September 11th 2003 REMEMBER WTC, the Pentagon, Shanksville PA. Let's Roll! Been a heck of a week so far. Tuesday, Renegade started acting up, hard to keep him lit and engine would stall on the slightest load. Nursed him along but was still ten blocks from the Mizner Park Citgo station when he gave out. Called AAA and settled down to wait. At least it was a nice day and a nice neighborhood. Young fella in a ricer stopped to help and so did a police officer. Nice to know some people still do that. Got Renegade back last night. The citgo mech techs installed a new coil, fuel pump and filter. Works better now than before. Doesn't have to crank for ten seconds before starting anymore for one thing.
 October
25th 2003 Finally got
the new Torx bit and socket adapter for my impact wrench. This is the
only way to fly when you have the plenty of accessibility to the
fasteners you're trying to remove. All the torx screws came out without
further trouble using the impact wrench. The new mirrors were installed
and adjusted. All fasteners and set screws were tightened with
threadlocker blue. The old flappin' elephant ear mirrors were removed
(again using the impact wrench) and the fastener holes filled with
clear silicone sealant.
October
25th 2003 Finally got
the new Torx bit and socket adapter for my impact wrench. This is the
only way to fly when you have the plenty of accessibility to the
fasteners you're trying to remove. All the torx screws came out without
further trouble using the impact wrench. The new mirrors were installed
and adjusted. All fasteners and set screws were tightened with
threadlocker blue. The old flappin' elephant ear mirrors were removed
(again using the impact wrench) and the fastener holes filled with
clear silicone sealant.
August 27th 2004 JEEZ!! The ~!@#$%^ cooling system blew out again today on the way up to the Krash Lab. There was no warning light and I didn't notice the gauge but as soon as I turned off the engine in the parking lot, the hood was engulfed in steam. Some even seeped thru the dashboard so, at first, I thought it might be an electrical fire. A lot of coolant was dumped on the pavement. After the engine cooled down, I topped off the radiator with water and drove Renegade the two blocks to my garage, Mizner Park Citgo. The score at this point while I'm waiting to find out what went south this time is that Renegade, at sixty thou miles on the odo, is running on his third radiator and second water pump. I'm stuck without a vehicle since BillyBob doesn't have his new windshield installed yet so, the boss lent me the big Mercedes panzerwagon to use for a few days.
August 28th 2004 It turned out that the lower radiator hose had ruptured. I missed this on my preliminary inspection for some reason. Timing is everything and this time I lost out. I have all the hoses up at my warehouse but was waiting to get BillyBob back on the road as a daily driver before tackling the cooling system work. I let Carl at Citgo replace the hoses and thermostat and flush the system and put my parts back on the shelf. He was done by quitting time and it was a good thing too, because the Panzerwagon's battery turned out to be dead. The Mercedes must have an intermittant short 'cause it was good last sunday when I did routine maintenance on it.
 August
27th 2005 Replaced the
spark plug wires today. It's a pretty simple job as long as you replace
one-wire-at-a-time. Take a wire off, match it up with a new wire, apply
a bit of dialectric grease to the terminals and press the new wires
into place. This is a bit more difficult then it is working on BillyBob
since things are tighter and there is not as much room for your fingers
to get a grip.
August
27th 2005 Replaced the
spark plug wires today. It's a pretty simple job as long as you replace
one-wire-at-a-time. Take a wire off, match it up with a new wire, apply
a bit of dialectric grease to the terminals and press the new wires
into place. This is a bit more difficult then it is working on BillyBob
since things are tighter and there is not as much room for your fingers
to get a grip.
 The
new boots of the Accel "Super Stock Spiral Wire" cables I got from
Quadratec are thicker than the originals and it is hard to tell when
you've got the terminal firmly seated. I started Renegade's engine a
few times during the process to make sure I had things in place and the
engine wasn't missing. When I got done, the engine seemed to be running
smoother but that may have been my mind playin' tricks on me. Looked
sharper at any rate.
The
new boots of the Accel "Super Stock Spiral Wire" cables I got from
Quadratec are thicker than the originals and it is hard to tell when
you've got the terminal firmly seated. I started Renegade's engine a
few times during the process to make sure I had things in place and the
engine wasn't missing. When I got done, the engine seemed to be running
smoother but that may have been my mind playin' tricks on me. Looked
sharper at any rate.
 October
16th 2005 The Optima
battery has worked out well for Renegade and when it's time for a
replacement, I'll get another Optima. The stock battery hold-down is a
poor fit for the Optima so I got a billet hold-down made for the optima
from Quadratec and put it
on today. Next, I'll have to clean up the corrosion around the battery
box.
October
16th 2005 The Optima
battery has worked out well for Renegade and when it's time for a
replacement, I'll get another Optima. The stock battery hold-down is a
poor fit for the Optima so I got a billet hold-down made for the optima
from Quadratec and put it
on today. Next, I'll have to clean up the corrosion around the battery
box.
December 30th 2005 Dropped of my rent check this morning. Clutch started acting funny and by the time I cleared the apartment complex main gate, I couldn't shift ~!@#$%^ Losing clutch hydraulics for the third time in a little over 60K miles! Last time it was the master cylinder. The first time it was the slave cylinder. I shure hope it's the master again if I have a choice about it. Turned the Jeep off, put it in 2nd gear and restarted. I still had a small amount of clutch action at this point and I could keep the engine running at stop lights. By the time I made it to the Krash Lab, I was almost out of fluid. I had some luck and didn't have to stop in the last few blocks. When I pulled into my parking space and braked, it killed the engine, even with the clutch pedal fully depressed.
January 1st 2006 New Year's Day. There's fluid in the resevoir but it's down a smidgeon. There's some wetness on the bellhousing bottom but I don't know whether it's DOT 3 fluid or not. Put the tranny in neutral and started the engine. I also have a cold engine fast idle (2,500 rpm) problem that just started in the last week too. With the clutch pedal floored, I can shift thru all gears. ???? Would a slow leaking slave cylinder cause this behaviour?
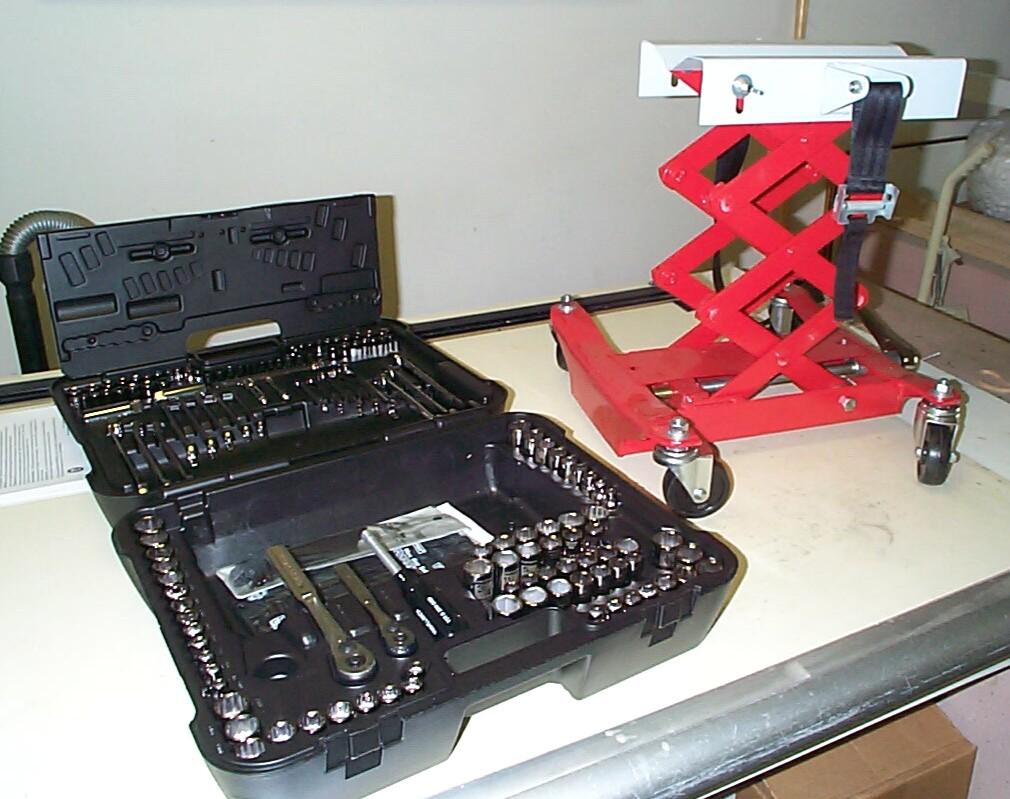 January
5th 2006 Started
gathering tools. Ordered a 190 piece mechanic's tool set from Sears
'cause I don't have any metric tools and my english sockets are a
hodge-podge built up over the years one at a time as I needed them.
Ordered a transmission jack from Eastwood (see story below). As long as
I am going to all this trouble, I might as well take this opportunity
to install a performance clutch. I ordered a Centerforce I from
Quadratec along with a Hurst Billet Shifter (I wanted at least one
"visible" improvement for all this effort). I will wait until the
clutch parts arrive to determine what else I need.
January
5th 2006 Started
gathering tools. Ordered a 190 piece mechanic's tool set from Sears
'cause I don't have any metric tools and my english sockets are a
hodge-podge built up over the years one at a time as I needed them.
Ordered a transmission jack from Eastwood (see story below). As long as
I am going to all this trouble, I might as well take this opportunity
to install a performance clutch. I ordered a Centerforce I from
Quadratec along with a Hurst Billet Shifter (I wanted at least one
"visible" improvement for all this effort). I will wait until the
clutch parts arrive to determine what else I need.
Thirty-five years ago when I was a young man, I and the bank were the proud owners of a '69 AMC Javelin SST with 290 CI V8, Carter 4-bbl AFB carb, Borg-Warner T-10 4-speed with Factory Hurst Competition Plus linkage. Somethin' went south with the clutch. Even then, finding a throw-out bearing for an AMC was almost as hard as locating a full set of seats for a suburban.
I got the bearing and put the front of the Javelin on jack stands. The stock exhaust system formed a "Y" under the transmission before running into a single muffler. I dropped the exhaust at the headers and left it connected at the back on the car. Laying on my back under the car, on the exhaust system, I started to unbolt the transmission. I thought the T-10 was an aluminium housing model and wouldn't be much heaver than my old '59 Ford three-speed which I had become an expert removing and re-installing.
I was about to be severely punished for my lapse of intelligence. (Some American general once said "Supidity is always punished more swiftly than evil".) As I pulled the transmission out of the pilot bearing and clutch splines I suddenly became aware that it was the cast-iron T-10 and I didn't have the strength to keep it from racing to mother earth. Problem was, my knee was between it and mother earth. When the T-10 came in contact with my knee, my body's autopilot functions tried to get me away from the transmission by tuning hard over on my left side. This reaction in the confined space under the Javelin caused a second contact point: my right shoulder and a rather sharp muffler clamp . . . and, oh yeh, the T-10 was still on my knee.
Bleeding at shoulder and knee, I first made a few of the sounds all injured animals make. I continued on into the sounds that only humans can add for emphasis. This continued until my mother came out of the house and told me to stop cussin' before one of the neighbors called the police. That's one mistake I've only made once and now I can laugh about it.
 January
10th 2006 Received the
Centerforce Clutch from Quadratec. It includes the new slave cylinder
throwout bearing assembly. No wonder these damn things fail - the
frakin' thing is made of plastic! Darn! I'm just old-fashioned, I
guess, but I would be much more comfortable with metal hydraulic parts,
radiators and gas tanks. Just about everything that has failed on
Renegade, so far, has been made completely of partly of plastic.
January
10th 2006 Received the
Centerforce Clutch from Quadratec. It includes the new slave cylinder
throwout bearing assembly. No wonder these damn things fail - the
frakin' thing is made of plastic! Darn! I'm just old-fashioned, I
guess, but I would be much more comfortable with metal hydraulic parts,
radiators and gas tanks. Just about everything that has failed on
Renegade, so far, has been made completely of partly of plastic.
January 10th 2006 Got the Hurst Billet Shifter from Quadratec in the middle of the week and the Craftsman 190 pc Mechanics Tool Set arrived today. I'm almost ready to tear into Renegade's innards but I still need a clutch alignment tool.
January 17th 2006 The Boss asked me to move one of my three vehicles to the back parking lot by the shed since we will be having some big client meetings here fer awhile. Renegade was the obvious choice. The slave cylinder had filled back up enuf that I had some clutch, but not much. Tried to start him yesterday to make the move but the battery charge was too low. This Optima battery is only 4-1/2 years old. It shouldn't be going bad yet, I'm thinkin'. Brought in my portable jumpstarter this morning and got Renegade going. The idle was OK from the git-go. I ordered a replacement Fuel Injection Idle Air Control Valve from RockAuto yesterday so, that's probably the reason everything is hunky-dory again and I won't need it. I had enuf clutch control to back Renegade across the main parking lot, over the bumper block, sidewalk and landscape strip on the other side, to the rear lot beside the shed.
 January
29th 2006 Renegade was
due for an oil
change so the engine was warmed up and I changed the oil and
filter. The battery is still low so I removed it and put it on the
charger. This looks like a good opportunity to cleanup and refinish the
battery box area. Cleaned it with Simple Green and scrubbrush first.
Then, PRE Paint Prepped it and sprayed rusted areas with Eastwood's
rattlecan Rust Encapsulator. Took the charger off the battery when it
read 12.07 volts. A half hour later it was down to 11.94 volts. I don't
like the looks of this. Put it back in Renegade but didn't hook it up.
January
29th 2006 Renegade was
due for an oil
change so the engine was warmed up and I changed the oil and
filter. The battery is still low so I removed it and put it on the
charger. This looks like a good opportunity to cleanup and refinish the
battery box area. Cleaned it with Simple Green and scrubbrush first.
Then, PRE Paint Prepped it and sprayed rusted areas with Eastwood's
rattlecan Rust Encapsulator. Took the charger off the battery when it
read 12.07 volts. A half hour later it was down to 11.94 volts. I don't
like the looks of this. Put it back in Renegade but didn't hook it up.
February 11th 2006 Not a bad day weatherwise for a change. Blue sky, low sixties, no wind. Still, I can't get much done (no two day projects). The boss and I are planning to go up to the polo grounds tomorrow for the Boca Raton Collector Car Auction. I'm back to finishing off the battery box. Time to run a 3M scuff pad over it and give it a coat of Eastwood's Chassis Black. First, I checked the battery which I disconnected a couple of weeks back. It is holding at 11.76 volts. I'm not sure yet but I think I need a new one.
The UPS guy arrived a week or two ago with a Clutch Alignment Tool Set. I was having trouble finding a cheap, Jeep-specific tool and a clutch alignment tool is definitely necessary in this case. The good news is that I'll also be able to use this tool set on BillyBob down the road when I install his overdrive tranny.
After the scuff pad, the battery box area was treated with PRE Paint Prep and rattlecan Chassis Black.
 May
27th 2006 Chance of
rain today but none in sight yet so I started pulling the tools out of
the shed for the "Big Clutch Repair". It's taken me months to get the
stones to tackle this job. Renegade has been broken since new year's.
Pushed the Jeep into the middle of the rear lot and put the rear end in
the air on jackstands. The very first nut (transmission mount nut) I
tried to remove was stripped and would do nothing but spin on the bolt!
I took this as a bad omen.
May
27th 2006 Chance of
rain today but none in sight yet so I started pulling the tools out of
the shed for the "Big Clutch Repair". It's taken me months to get the
stones to tackle this job. Renegade has been broken since new year's.
Pushed the Jeep into the middle of the rear lot and put the rear end in
the air on jackstands. The very first nut (transmission mount nut) I
tried to remove was stripped and would do nothing but spin on the bolt!
I took this as a bad omen.
May 28th 2006 Wasted yesterday after the stripped nut incident. Thought long and hard about letting the garage handle this job. Even stopped at the garage on the way home to the Krash Pad, only to find out that my mechanic, Carl, who has done most of the work in the past few years on Renegade, is no longer employed there. Carl did good work and I don't want to start with a new mech at this point so I decided to stick with the original plan of doing the work myself.
 The
bad omens persist. Renegade is fighting me every step of the way so
far. It took much too long to get the big crossmember off. I'm glad I
purchased the tranny jack 'tho. I would'uv been one jack short
otherwise. The floor jack is under the oil pan with a block of wood to
keep the engine from dropping. The first use of the tranny jack was to
support the frame crossmember while the bolts were removed. Another
tool I'm very grateful for at this point is the impact wrench . . . The
crossmsmber bolts were tight!
The
bad omens persist. Renegade is fighting me every step of the way so
far. It took much too long to get the big crossmember off. I'm glad I
purchased the tranny jack 'tho. I would'uv been one jack short
otherwise. The floor jack is under the oil pan with a block of wood to
keep the engine from dropping. The first use of the tranny jack was to
support the frame crossmember while the bolts were removed. Another
tool I'm very grateful for at this point is the impact wrench . . . The
crossmsmber bolts were tight!
Next problem was the shift lever. After dropping the tranny assembly three inches, you are 'sposed to lift the boot off the shift lever tower and depress the retaining ring and turn counterclockwise. My fingers were not strong enuf to preform this task in the tight space alloted. Went at it from above instead. Fought with the shift knobs to get them off then, fought with the carpet to get at the shift boot retaining capscrews. Even with two hands and my Mark I eyeballs on the task, it took a few choice words to work the retaining ring but I finally got it loose. Stuffed a clean rag in the shift tower hole to keep dirt out of the tranny.
Speedo gear and electronic connectors on the left side were pretty straightforward. Then I came to my next problem - the slave cylinder hydraulic fitting. Frozen tight. My tubing wrenches are not the best quality and they tend to give a bit and round off the fitting. I used the tubing wrench with visegrips, then MAPP torch heat. You can't use too much heat tho' due to ~!@#$%^ plastic in close proximity. I used Kroil penetrating oil with the torch next but I'm a bit wary of contaminating the hydraulic fluid with this method.
 June
3rd 2006 OK, I've
gotten over the fact that this job is going to take longer than one
weekend for a guy with my work ethic. Today, I'm gonna take off the
remaining parts that aren't mentioned in the Hayne's Repair Manual and
also make sure all the bellhousing bolts will come out easily next week
when I attempt to replace the clutch. The manual says nothing about the
transfer case shifter which has to come off if the tranny assembly is
going to move straight back. It also says nothing about the exhaust
system connection to the tranny mount which also has to come off. I
measured the distance that the shift rod end protruded from the lever
fitting (3/4") before taking it apart so I won't be screwed when it
comes time to re-assemble this thing.
June
3rd 2006 OK, I've
gotten over the fact that this job is going to take longer than one
weekend for a guy with my work ethic. Today, I'm gonna take off the
remaining parts that aren't mentioned in the Hayne's Repair Manual and
also make sure all the bellhousing bolts will come out easily next week
when I attempt to replace the clutch. The manual says nothing about the
transfer case shifter which has to come off if the tranny assembly is
going to move straight back. It also says nothing about the exhaust
system connection to the tranny mount which also has to come off. I
measured the distance that the shift rod end protruded from the lever
fitting (3/4") before taking it apart so I won't be screwed when it
comes time to re-assemble this thing.
What I didn't realize was that the end of the shift rod was flattened so it couldn't be removed from the fitting without grinding. ~!@#$%^ I had to disconnect the rod and the lever it activates at the transfer case and remove the whole thing as an assembly. I managed to get the transmission mount removed from the bottom of the tranny and the catalytic converter flange with the help of the impact wrench and penetrating oil. Loosening the bellhousing bolts was more problematic. The Haynes manual is no help here. It simply states "Remove to bolts securing the transmission bellhousing to the engine." There are at least three different sizes involved. Does the starter motor have to come off? I guess I find out by trial and error next week.
June 10th 2006 Hot, muggy and overcast. Hurricane season is here. Gonna work slow and steady today and start out on java instead of brew to get a little more done. Started trying to get the bellhousing bolts out. Went for the two at the top first. These were flanged capscrews that I couldn't see and had to locate by touch. A 10mm 6pt socket seemed to fit but, like the rest of the fasteners on this job, were too tight to turn with the little leverage I could muster. Dropped the engine as far as I could with the floor jack and wood block under the oil pan and managed to reach them with the impact wrench on an extension. They didn't turn out to be standard hex heads and the impact wrench tore them up a bit but did get them out. Later internet searches revealed them to be "reversed (external) torx E-12 capscrews"
Next, a short capscrew above the starter motor on the front side was removed with a 13mm socket. I could see this one but it was still hard to reach. Stopped long enuf to position and strap the tranny jack to the tranny/transfer case assembly. Starter motor was held on with a 15mm bolt on the backside and a 14mm bolt on the front side. The impact wrench had to be used on the 14mm bolt. Wiring was left in place on the starter and it was located off to the side on top of the frame rail.
 Tried
to get the hydraulic line fitting apart one more time. No joy. Cut the
line south of the fitting (slave cylinder side) with some battery cable
cutters since I'm replacing this part anyway. I'll deal with the line
later. Next came another 13mm short capscrew at the bottom front
opposite the oil pan drain plug. The two bottom bellhousing bolts were
loosened next. They turned out to be 18mm thru bolts. Finally, the last
two bolts were removed from the bellhousing sides with the impact
wrench. These were 16mm. I think I'm ready to pull this thing. I went
looking for my Pittsburgh Pry Bar Set I picked up on sale at Harbor
Freight a few years ago. Started with the pry bars . . . OOPS!
Found one more 13mm short capscrew on the front driver side high up.
OK! Again with the pry bars. It's not working. This thing doesn't want
to come apart and that doesn't bode well for getting it back together
again either, I'm thinking.
Tried
to get the hydraulic line fitting apart one more time. No joy. Cut the
line south of the fitting (slave cylinder side) with some battery cable
cutters since I'm replacing this part anyway. I'll deal with the line
later. Next came another 13mm short capscrew at the bottom front
opposite the oil pan drain plug. The two bottom bellhousing bolts were
loosened next. They turned out to be 18mm thru bolts. Finally, the last
two bolts were removed from the bellhousing sides with the impact
wrench. These were 16mm. I think I'm ready to pull this thing. I went
looking for my Pittsburgh Pry Bar Set I picked up on sale at Harbor
Freight a few years ago. Started with the pry bars . . . OOPS!
Found one more 13mm short capscrew on the front driver side high up.
OK! Again with the pry bars. It's not working. This thing doesn't want
to come apart and that doesn't bode well for getting it back together
again either, I'm thinking.
The only interference I can see is possibly the exhaust cross-over pipe but I don't think that's the problem. I'll go ahead and try to get it off since I can't think of anything else right now. Disconnected the cross-over pipe at the catalytic converter and let the exhaust system drop down. Tried with the pry bars some more and made some small progress. Found another electrical connector and a vacuum hose connection on top of the tranny that's not mentioned in the Hayne's manual and disconnected that. By adjusting the jacks and using the pry bars in between, I eventually got things backed apart about four inches. That's when I discovered that the cross-over pipe would have to come off at the header too so that the bellhousing could drop down enough to clear the transmission tunnel. Disconnected the oxygen sensor, then the cross-over pipe bolts. I had good luck for a change and they came loose easily with hand tools despite being rusted beyond all get out.
 The
tranny/transfer case assembly was out! It looked like rain so I
scrambled to get everything under cover and had those beers I've been
waiting on all day. I got everything under cover and next week we'll
deal with the new clutch, weather permitting.
The
tranny/transfer case assembly was out! It looked like rain so I
scrambled to get everything under cover and had those beers I've been
waiting on all day. I got everything under cover and next week we'll
deal with the new clutch, weather permitting.
 June
17th 2006 When I pulled
the tranny/transfer assembly and got my first look at Renegade's
clutch, I was surprised to find it covered with surface rust. The
splines on the end of the tranny input shaft were rusted too. I'm
thinking that this may have been the reason I had problems pulling it
apart. Good thing I'm putting in a new clutch since I may have warped
the disk with my pry bar actions. Been thinkin' about this puzzle all
week and the only reason I can think of that the clutch is rusty is the
one time I had Renegade in the water back in '91 or '92. I tried to
take a shortcut across the I-95 median late at night up in Stuart to
head in the other direction and ended up in a retention pond. I put it
in four-wheel drive and got it out but it was deep enough to get into
the clutch.
June
17th 2006 When I pulled
the tranny/transfer assembly and got my first look at Renegade's
clutch, I was surprised to find it covered with surface rust. The
splines on the end of the tranny input shaft were rusted too. I'm
thinking that this may have been the reason I had problems pulling it
apart. Good thing I'm putting in a new clutch since I may have warped
the disk with my pry bar actions. Been thinkin' about this puzzle all
week and the only reason I can think of that the clutch is rusty is the
one time I had Renegade in the water back in '91 or '92. I tried to
take a shortcut across the I-95 median late at night up in Stuart to
head in the other direction and ended up in a retention pond. I put it
in four-wheel drive and got it out but it was deep enough to get into
the clutch.
 After
I got the tools put of the shed this morning, the first order of
business was to remove the clutch. I loosened the clutch bolts one at a
time with the impact wrench, hand tightening each one back up before
moving on to the next one. Once they were all loosened, they were
removed by hand, one turn at a time in a criss-cross pattern to evenly
release the pressure and avoid warping the pressure plate assembly. The
clutch bolts were thrown in the tumbler for a cleaning session and the
flywheel was cleaned with brake cleaner. It's a decision point and I
decided to go the easy way. The flywheel has a few small patches of
blue discoloration but it is smooth and there is no scoring so I am not
going to remove it to have it resurfaced. If I'm making a mistake here,
I'll be taking it apart again down the road but I do not flog this
vehicle much and I think it will be fine.
After
I got the tools put of the shed this morning, the first order of
business was to remove the clutch. I loosened the clutch bolts one at a
time with the impact wrench, hand tightening each one back up before
moving on to the next one. Once they were all loosened, they were
removed by hand, one turn at a time in a criss-cross pattern to evenly
release the pressure and avoid warping the pressure plate assembly. The
clutch bolts were thrown in the tumbler for a cleaning session and the
flywheel was cleaned with brake cleaner. It's a decision point and I
decided to go the easy way. The flywheel has a few small patches of
blue discoloration but it is smooth and there is no scoring so I am not
going to remove it to have it resurfaced. If I'm making a mistake here,
I'll be taking it apart again down the road but I do not flog this
vehicle much and I think it will be fine.
I also discovered that I was sent the wrong pilot bearing and that it is much too big. Examination of the existing pilot bearing revealed no damage as far as I could tell so I left it in place. I added a small dab of chassis grease and spread it with a Q-tip.
 OK!
Reached a milestone. Finished taking things apart. Now we're to the
point of tryin' to get things back together again. Lined up the new
clutch with the alignment tool and put the clutch bolts in finger
tight. Continued to check alignment while I tightened the clutch bolts
down in a criss-cross pattern. Finally got the torque wrench out and
finished up with the bolts torqued down in a criss-cross pattern to
forty footpounds. Continued to clean bellhousing bolts and starter
bolts in the tumbler.
OK!
Reached a milestone. Finished taking things apart. Now we're to the
point of tryin' to get things back together again. Lined up the new
clutch with the alignment tool and put the clutch bolts in finger
tight. Continued to check alignment while I tightened the clutch bolts
down in a criss-cross pattern. Finally got the torque wrench out and
finished up with the bolts torqued down in a criss-cross pattern to
forty footpounds. Continued to clean bellhousing bolts and starter
bolts in the tumbler.
 June
24th 2006 Typical
Florida summer day. Rain forecast and storm cells are forming to the
west. It started sprinkling while I was getting the tools out of the
shed. After it let up, I wheeled the tranny/transfer case assembly
outside. Removed the old hydraulic clutch release bearing first. Masked
off the electrical plugs and openings then got out my Grime blaster
washer wand I purchased from Eastwood a few years ago. Went over
tranny/transfer case with a degreaser/water solution and brushes. Got
the worst off and almost good enuf fer government work. Will probably
give it another degreasing session next week. Stopped the Renegade work
to tinker with BillyBob fer awhile.
June
24th 2006 Typical
Florida summer day. Rain forecast and storm cells are forming to the
west. It started sprinkling while I was getting the tools out of the
shed. After it let up, I wheeled the tranny/transfer case assembly
outside. Removed the old hydraulic clutch release bearing first. Masked
off the electrical plugs and openings then got out my Grime blaster
washer wand I purchased from Eastwood a few years ago. Went over
tranny/transfer case with a degreaser/water solution and brushes. Got
the worst off and almost good enuf fer government work. Will probably
give it another degreasing session next week. Stopped the Renegade work
to tinker with BillyBob fer awhile.
July 22nd 2006 The shadetree garage was wet when I got to the Krash Lab but, otherwise, the weather was fine for working. Pulled the tools out of the shed and performed monthly maintenance on BettyLou. Last week, the universal joint yoke on the transfer case for the front driveshaft was cleaned, masked, prepped, primed with Eastwood's Rust Encapsulator and painted with Eastwood's "Spray Gray" paint.
Installed the new hydraulic slave cylinder/clutch release bearing assembly next. Will have to wait until tomorrow to try to get the tranny/transfer case back into Renegade as a light rain started and didn't let up.
 July
23rd 2006 The shadetree
garage was dry when I arrived at the Krash Lab so I started task at
hand without the usual delay. Put the bellhousing bolts into the
tumbler for a cleaning session and dragged the tranny/transfer case
assembly out to the back stoop for final preparation before going back
into the Jeep. The transmission fluid level was checked and the shift
tower bolts were loosened while they were accessible for the later
installation of the Hurst shifter. The front transmission shaft and
splines were cleaned and given a very light coat of white lithium
grease.
July
23rd 2006 The shadetree
garage was dry when I arrived at the Krash Lab so I started task at
hand without the usual delay. Put the bellhousing bolts into the
tumbler for a cleaning session and dragged the tranny/transfer case
assembly out to the back stoop for final preparation before going back
into the Jeep. The transmission fluid level was checked and the shift
tower bolts were loosened while they were accessible for the later
installation of the Hurst shifter. The front transmission shaft and
splines were cleaned and given a very light coat of white lithium
grease.
That done, the assembly was grunted into position underneath the Jeep and jacked up. Using both the tranny jack and the Jeep's sissors jack under the oil pan, the engine and bellhousing were brought into alignment and gradually eased together. Some spare steel rods were also used to align bolt holes. It took a fair amount of cussin' but not as much as I expected and I had all the bellhousing bolts in with threadlocker blue by early afternoon. The bolts went in easy without any hangups so I'm fairly confident I'm in good shape inside the bellhousing where I can't see anything.
July 29th 2006 Got a late start today but by mid-morning I knew Murphy was clearly in charge. When I started to get the Hurst shifter ready to install, the instructions stated that I had to pry the plastic cup bushing off the old shifter to place on the new Hurst shifter. When I did that, it went flying off into space to land somewhere in the bowels of the Krash Lab. ~!@#$%^ I searched for a couple of hours but gave up having found nothing but dust balls, desicated lizards and roach carapaces for my trouble. I must not be the only maroon to screw this simple operation up because Hurst conveniently provides the Chrysler part number for this little item (83500-519). I got online and ordered one from Chrysler Parts Direct
 After
mopin' around a bit, I went after the transfer case shift mechanism
with the wire cup in the electric angle grinder, followed by PRE Paint
Prep and a couple of light coats of Eastwood's OEM Trim Black paint.
Then it started sprinkling in the shadetree garage just enuf to be a
nusiance and cause me to drag the tools inside.
After
mopin' around a bit, I went after the transfer case shift mechanism
with the wire cup in the electric angle grinder, followed by PRE Paint
Prep and a couple of light coats of Eastwood's OEM Trim Black paint.
Then it started sprinkling in the shadetree garage just enuf to be a
nusiance and cause me to drag the tools inside.
July 30th 2006 Murphy is still with me today, it seems. After having problems with both simple tasks I performed on BillyBob this morning, I turned back to the Jeep. Tried to put the starter motor back on and ran into thread problems with the bigger of the two bolts right off. It doesn't want to start straight and 'tho I can get a tap started, I can't turn it because the oil pan is too close. I have to get some kind of adapter for the square shank of the tap so I can turn it with a wrench. I kept at it with the inadequate tools at hand until I skinned a knuckle. This will wait for now.
August 6th 2006 I am now in possession of a "Tap Socket" set I found at, and purchased from, McMaster-Carr during the week. I also received a clutch hydraulic line from Chrysler Parts Direct. I am pretty much from the old school of double-flared steel line and threaded fittings for hydraulics so this dang thing is pretty alien to me at the present. From some internet research, I've gathered that this is a "quick release" fitting. The fly in the buttermilk is that it is a "no release" fitting if you don't have the special tool or knowledge of how to work it. Another problem I have is that I still seem to be missing an intermediate fitting since the fitting on the clutch release bearing is the standard double-flare fitting and there is no way to mate it to the end of the hydraulic line with what I have.
OK. On to things I can do. With the tap socket set, I was able the tap the starter bolt hole in the bellhousing. I squirted oil in the hole, ran the tap M10 x 1.5 tap in and cleaned out the metal shavings with a Q-tip. Installed the starter bolts with Threadlocker Blue and ran into 'nother puzzling problem . . . the upper starter bolt would not run the whole way in ~!@#$% Whiskey Tango Foxtrot! I solved this problem with a handful of flat washers fer now but I'm not a happy camper over it.
While I was under the Jeep, I re-connected the electrical lines and the hose line to the tranny/transfer case. I got a hose clamp for the hose line but I chose too small and it's back to the FLAPS for another trip. My replacement bushing for the shifter was 'sposed to arrive on Friday but the UPS web page tells me it's hung up in Jacksonville terminal for some unknown reason. My face is black-n-blu from runnin' into walls in the last two weeks no matter which vehicle I'm workin' on. My maternal Grandmother used to say "sugar" when she was ticked off. If she was real angry, she would say "sugarbowl!" Like the blogger Dax Montana, I'll say "Just Damn!"
August 12th 2006 I've been thinkin' all week about the starter motor bolts and no matter how I run at it, I have to come to the sick belly conclusion that I've screwed the pooch and put the wrong bolts in the wrong places. Why tell everyone about it? To save some other poor smuck from pulling a bonehead move like this. I woulduv' saved myself a lotta grief by just going back and re-reading my disassembly commentary above where I document the starter removal. Just Damn!
After dragging out the tools, I rectified the starter motor bolt situation first and retreived my "spacer" washers for 'nother day. The 14mm bolt felt tight enuf in its new 15mm bolt hole but we'll keep an eye on it fer awhile to see if it needs further attention. Got a bigger hose clamp at the FLAPS yesterday and installed that on the hose to the tranny/transfer case next. The shifter bushing arrived via UPS during the week and now I can resume the shifter installation.
 Put
the new bushing on the Hurst shifter per Hurst instructions. Then
removed the old shifter tower and installed the Hurst shifter with the
old capscrews and studs. The front stud has clearance issues with the
Hurst shifter body which is bigger in diameter than the original shift
tower but it will go in. This is where the wheels fell off this week.
The transfer case shifter bracket has two holes that fit over the
shifter tower studs that are on the driver side. Due to the new shifter
clearance problem, the front bracket hole will not seat on the stud.
The hex nut for this stud is flanged and also too big for the new
shifter. My first solution is to grind the front bracket hole into a
slot to get it seated on the stud and then get a smaller hex nut down
the road. Too bad that I had the slot ground out by the time I thought
of a better idea. I would replace the front stud with one of the
capscrews that came with the shifter for later model Jeeps and use four
flat washers to make up for the stud nut height that the bracket seats
on. That worked but the capscrews are short and only a few threads got
purchase. Took the capscrew back out and replaced it with the stud
again because the stud is a quarter inch longer below the stud nut and
can screw in farther with the washer spacers. This worked and I think
it would have worked without making the mounting hole into a slot.
Nutin' for it now.
Put
the new bushing on the Hurst shifter per Hurst instructions. Then
removed the old shifter tower and installed the Hurst shifter with the
old capscrews and studs. The front stud has clearance issues with the
Hurst shifter body which is bigger in diameter than the original shift
tower but it will go in. This is where the wheels fell off this week.
The transfer case shifter bracket has two holes that fit over the
shifter tower studs that are on the driver side. Due to the new shifter
clearance problem, the front bracket hole will not seat on the stud.
The hex nut for this stud is flanged and also too big for the new
shifter. My first solution is to grind the front bracket hole into a
slot to get it seated on the stud and then get a smaller hex nut down
the road. Too bad that I had the slot ground out by the time I thought
of a better idea. I would replace the front stud with one of the
capscrews that came with the shifter for later model Jeeps and use four
flat washers to make up for the stud nut height that the bracket seats
on. That worked but the capscrews are short and only a few threads got
purchase. Took the capscrew back out and replaced it with the stud
again because the stud is a quarter inch longer below the stud nut and
can screw in farther with the washer spacers. This worked and I think
it would have worked without making the mounting hole into a slot.
Nutin' for it now.
 Hurst
provides a boot at the bottom of the shift lever that is secured with a
plastic wire tie. I think this is cheap and would have preferred a hose
clamp. And yeah, you guessed it, I screwed it up putting it on. Mein
Gott! I didn't have any more wire ties big enuf to replace the one I
ruined so, I secured it with duct tape. Next, the lower boot was
wrassled off the old shifter with the help of a screwdriver and WD-40.
Then it was fitted over the two shift levers and tightened down with
the seven capscrews to align it and seat it in the mastic (sticky black
stuff) around the floorboard hole. The two leading capscrews were
removed again and the upper boot was placed over the shift levers and
the leading screws were screwed in again, this time thru both boots and
floorboard. Then the same was done with the remaining five screws. The
shift knobs were replaced . . . Another snag. The Hurst lever threaded
portion is not long enuf for the original shift knob and the locking
nut both. I had to leave the locking nut off. I finished up by
adjusting the transfer case linkage.
Hurst
provides a boot at the bottom of the shift lever that is secured with a
plastic wire tie. I think this is cheap and would have preferred a hose
clamp. And yeah, you guessed it, I screwed it up putting it on. Mein
Gott! I didn't have any more wire ties big enuf to replace the one I
ruined so, I secured it with duct tape. Next, the lower boot was
wrassled off the old shifter with the help of a screwdriver and WD-40.
Then it was fitted over the two shift levers and tightened down with
the seven capscrews to align it and seat it in the mastic (sticky black
stuff) around the floorboard hole. The two leading capscrews were
removed again and the upper boot was placed over the shift levers and
the leading screws were screwed in again, this time thru both boots and
floorboard. Then the same was done with the remaining five screws. The
shift knobs were replaced . . . Another snag. The Hurst lever threaded
portion is not long enuf for the original shift knob and the locking
nut both. I had to leave the locking nut off. I finished up by
adjusting the transfer case linkage.
 November
11th 2006 With the goal
in sight, I dropped the ball. There's only a few things left to do to
get Renegade back on the road, but I've been putting them off for
months. Started back up again today. Cleaned the tranny mount assembly
and masked off the rusty exhaust bracket on it for painting. Hung it up
in the tree and PRE Paint Prepped it. Gave the bracket a coat of Rust
Encapsulator followed by a couple of coats of Detail Gray after the
Rust Encapsulator cured. I noticed that one of the universal joint
bearing cups on the rear driveshaft had escaped the yoke and was loose
in the ziplock bag I had placed over the end of the driveshaft. I
managed to chase down all the roller bearings and get it back together
and taped.
November
11th 2006 With the goal
in sight, I dropped the ball. There's only a few things left to do to
get Renegade back on the road, but I've been putting them off for
months. Started back up again today. Cleaned the tranny mount assembly
and masked off the rusty exhaust bracket on it for painting. Hung it up
in the tree and PRE Paint Prepped it. Gave the bracket a coat of Rust
Encapsulator followed by a couple of coats of Detail Gray after the
Rust Encapsulator cured. I noticed that one of the universal joint
bearing cups on the rear driveshaft had escaped the yoke and was loose
in the ziplock bag I had placed over the end of the driveshaft. I
managed to chase down all the roller bearings and get it back together
and taped.
 November
26th 2006 Cleaned,
Masked, PRE Paint Prepped and hung the driveshafts in the tree for
painting. Gave each a heavy coat of Rust Encapsulator followed by a
couple of coats of Eastwood's Spray Gray. Discovered that the ziplock
baggie on one end of the front driveshaft had ruptured and this time I
wasn't as lucky as I had been with the rear shaft. Searched in the
roach turds on the floor of the shed with flashlight and magnifying
glass but, in the end, came up two roller bearings short. I'll have to
order a universal joint to get the rollers I need. The rollers support
each other and if there are gaps, they will probably go diagonal on you
and destroy the joint in short order.
November
26th 2006 Cleaned,
Masked, PRE Paint Prepped and hung the driveshafts in the tree for
painting. Gave each a heavy coat of Rust Encapsulator followed by a
couple of coats of Eastwood's Spray Gray. Discovered that the ziplock
baggie on one end of the front driveshaft had ruptured and this time I
wasn't as lucky as I had been with the rear shaft. Searched in the
roach turds on the floor of the shed with flashlight and magnifying
glass but, in the end, came up two roller bearings short. I'll have to
order a universal joint to get the rollers I need. The rollers support
each other and if there are gaps, they will probably go diagonal on you
and destroy the joint in short order.
March 3rd 2007 Renegade has been neglected for some months now. The clutch job is at fourteen months and counting. Last week I spent some time preparing to get going again. The skid plate was dropped and the transmission mount and exhaust header were fitted loosely in place. This morning I cleaned old thread sealant off the mounting bolts and replaced it with new anti-seize compound. The mount and exhaust header bolts were then tightened up. The exhaust sensor was re-installed too, with a dab of anti-seize.
The bottom of the frame rails where the skid plate bolts onto are rusted so I went over them with a wire cup in the electric angle grinder followed by PRE Paint Prep and a rattlecan coat of Eastwood's Rust Encapsulator. After that cured, a coat of Eastwood's Chassis Black was applied.
March 18th 2007 Last weekend, the skidplate/transmission support was cleaned and painted with Chassis Black. Today, I'd planned to re-install it along with the driveshafts. The rear driveshaft was re-installed. Then I stopped because it looked like I'd have more room to work on the hydraulic line without the front driveshaft and skidplate in my way.
April 7th 2007 I've been having problems coming to grips with the clutch hydraulic line ever since I started this project. I don't like the plastic molded line with it's mis-named "quick-disconnect" at the release bearing end and it's specialized o-ring bayonet fitting at the master cylinder end. After buying a universal quick release tool kit (you don't want to know how much that cost), I still could not get it apart AARRRRUGH!! That cut's it! I am going back to good old rat rod school tech and make my own line with steel tubing and standard flare fittings. This log entry has gotten way too long (it spans more than four years!). I'm posting it now because fabricating the clutch line will take awhile longer and then I anticipate a devil of a time getting Renegade started again since he's been sitting for fifteen months now with only one bottle of Sta-bil to keep him from gumming up. More blood, sweat and beers to come.
| < Back
to Intro |
You can email me at ![]() webmaster@laroke.com
webmaster@laroke.com
Issued Monday April 9, 2007
Updated Thursday April 26, 2018
copyright © 1996-2018 Larry Robert Kephart all rights reserved
| | LRK Home | | Bio Info | | Krash Khronicles | | LAROKE | |
| | BettyLou | | BillyBob's Garage | | Rat Patrol | | Deerslayer | | Elvira | |
| | Land of the Free and Home of the Brave | |
| | Keppylou's Art | | WWI Soldier's Diary | |