| | LRK Home | | Bio Info | | Krash Khronicles | | LAROKE | |
| | BettyLou | | BillyBob's Garage | | Rat Patrol | | Deerslayer | | Elvira | |
| | Land of the Free and Home of the Brave | |
| | Keppylou's Art | | WWI Soldier's Diary | |
Renegade's Patrol Log
![]()
JEEP LINKS including vendor sites for parts and tools as well as sites for jeep organizations
![]()
PATROL LOG includes log entries of minor repairs and and adventures between time of purchase and the present.
![]()
RENEGADE MAINTENANCE Ever changing detailing, oil change, lube, etc. maintenance routines developed for Renegade based on the BillyBob routines, including required tools, materials and procedures.
8. One damn thing after another
 September
27th 2015
Yesterday, I
finally spent a few hours in the BillyBob Shop before the heat and
humidity sent me scrambling for cover. Ever since I got Renegade back
on the road as a daily driver, I've been suffering with chassis noise
much like a lawn service trailer makes when crossing railroad tracks.
Sounds like things are falling apart under there sometimes. It sounds
bad but feels fine. There is no wobbling or erratic tracking behavior.
I've been under the Jeep half a dozen times trying to find something
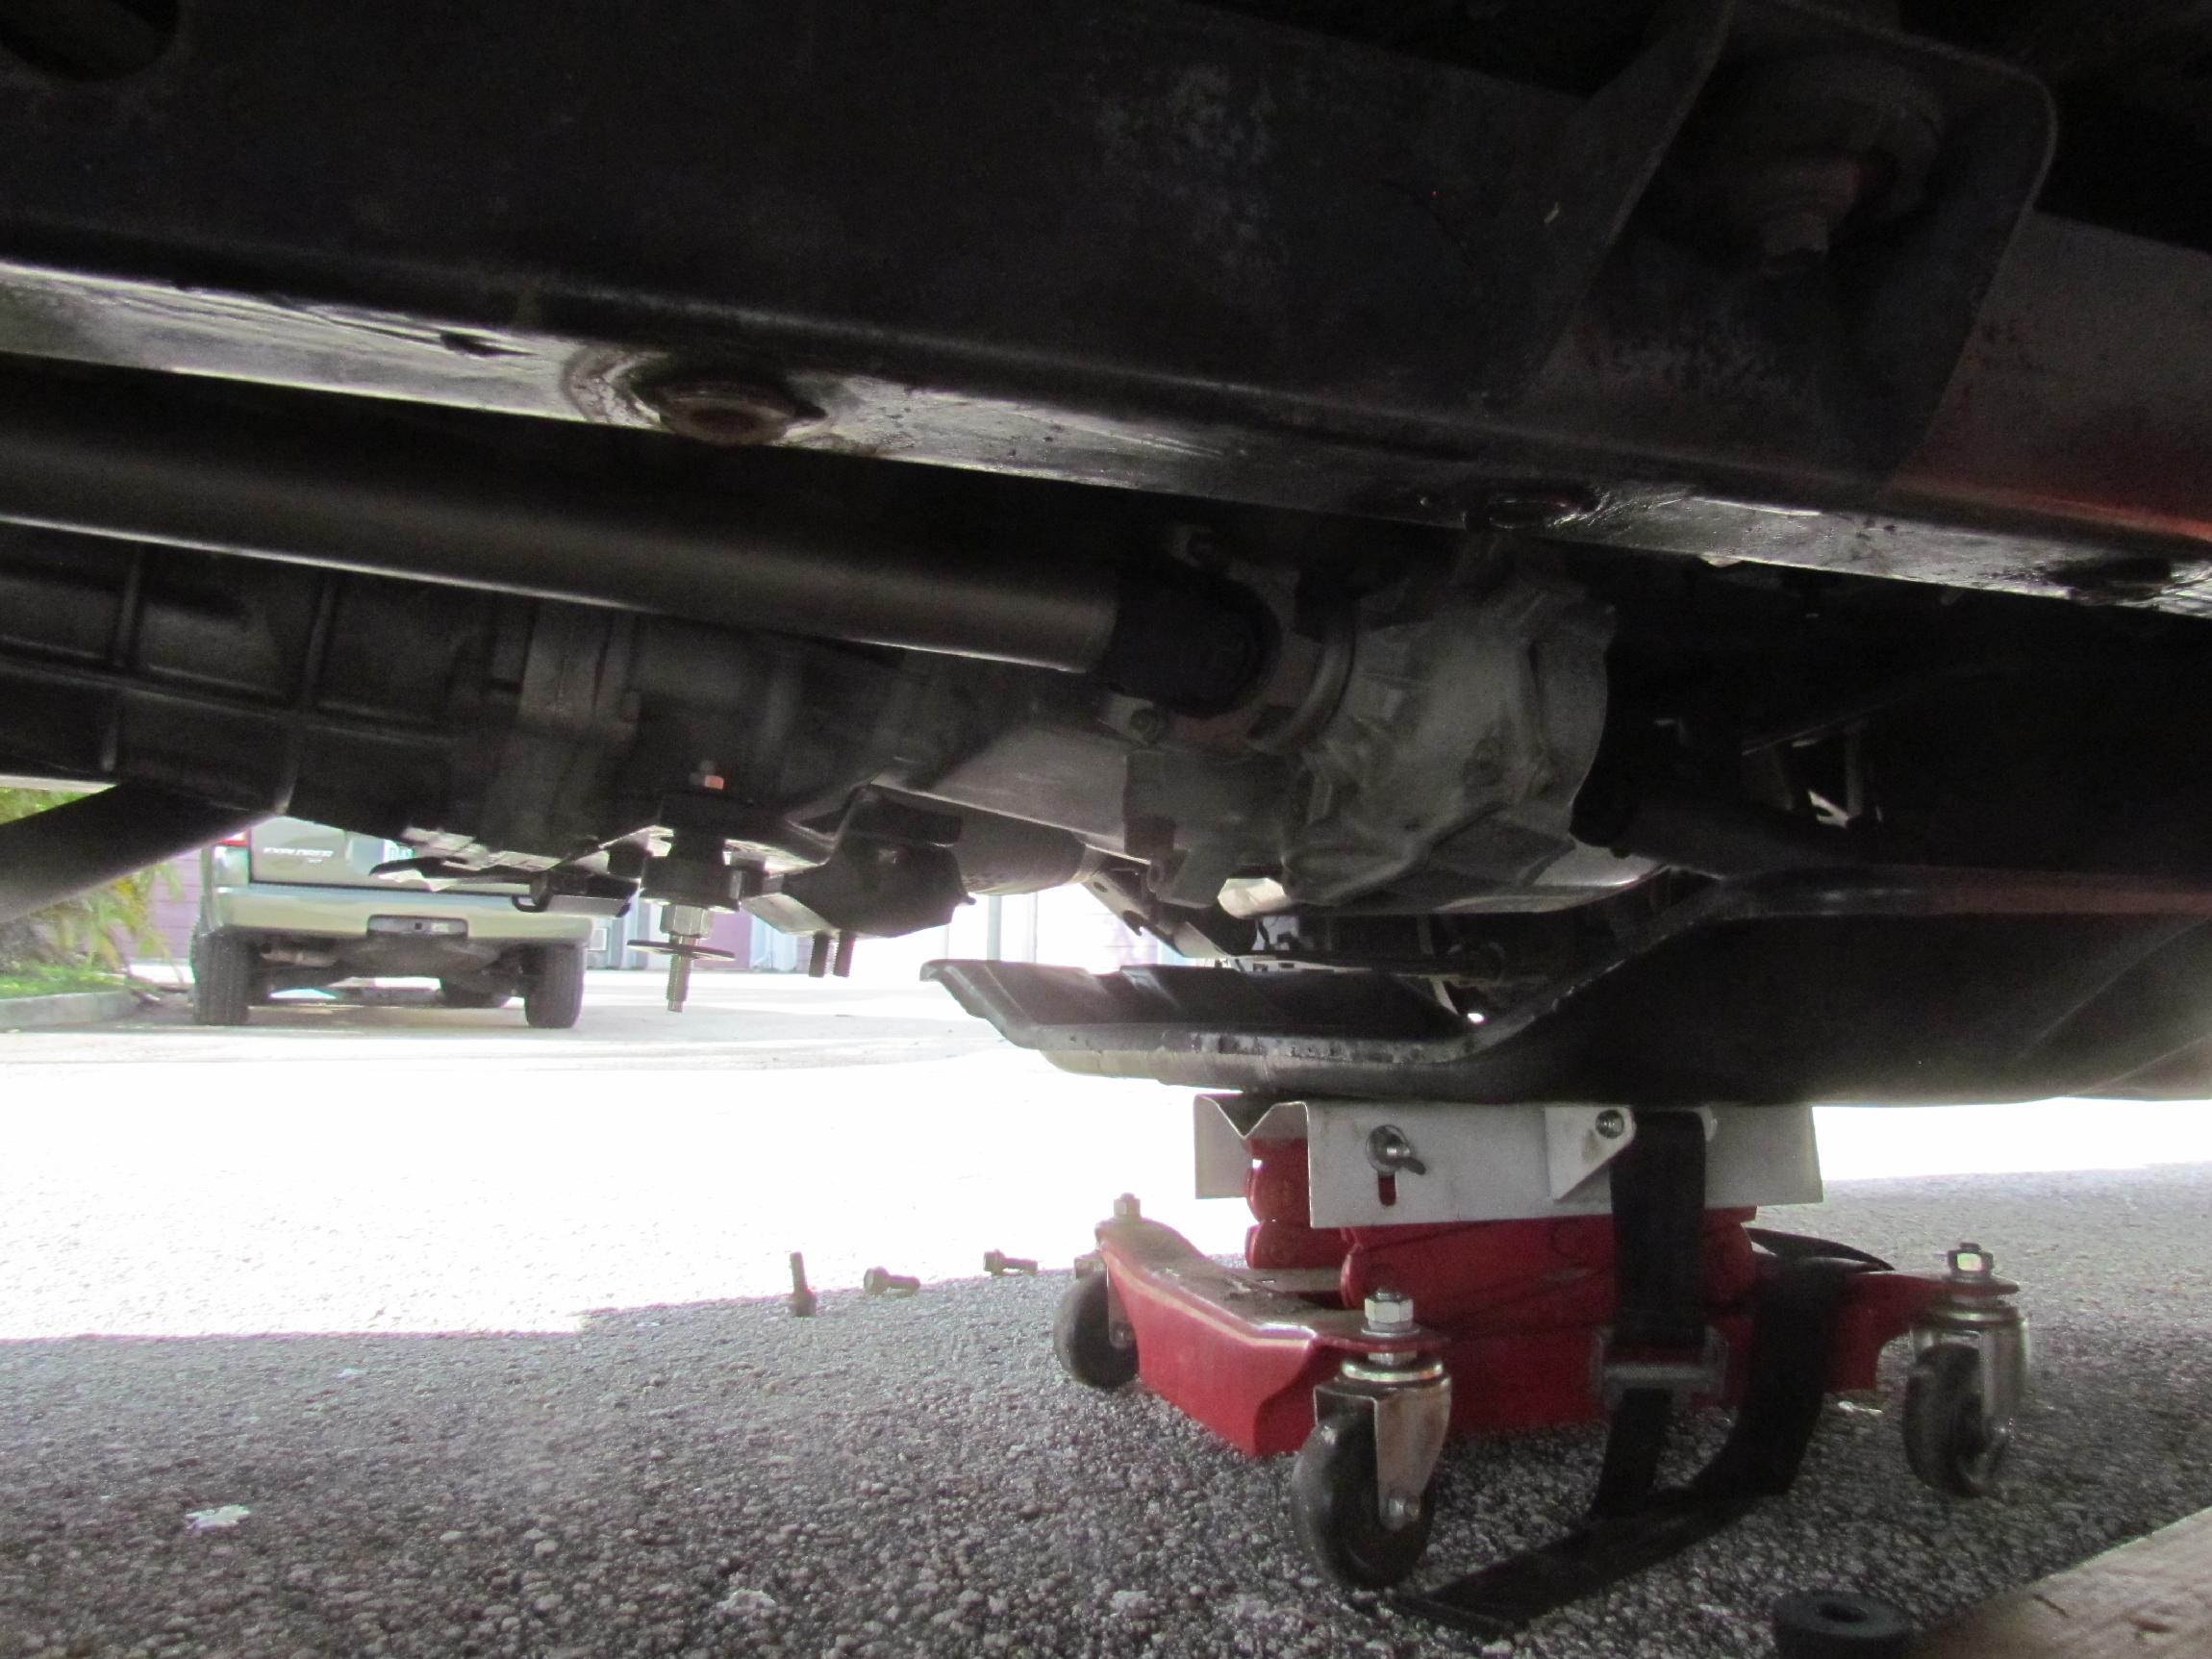
loose. I did find that the transfer case stabilizer nut on the bottom
of the crossmember to be loose but can't be tightened as it's stripped.
Couldn't find the stabilizer by itself for sale so I got a complete
engine mount kit (engine mounts, transmission mount and stabilizer)
since it was in the range of only forty bucks. Yesterday, I got the
grinder out and ground the stripped nut off. Then, propped up the drive
train with a scissors jack and lowered the crossmember with a
transmission jack. After I had it all back together, took a run around
the parking lot and I'm still trying to convince myself that there is
an improvement to the chassis noise problem.
September
27th 2015
Yesterday, I
finally spent a few hours in the BillyBob Shop before the heat and
humidity sent me scrambling for cover. Ever since I got Renegade back
on the road as a daily driver, I've been suffering with chassis noise
much like a lawn service trailer makes when crossing railroad tracks.
Sounds like things are falling apart under there sometimes. It sounds
bad but feels fine. There is no wobbling or erratic tracking behavior.
I've been under the Jeep half a dozen times trying to find something
loose. I did find that the transfer case stabilizer nut on the bottom
of the crossmember to be loose but can't be tightened as it's stripped.
Couldn't find the stabilizer by itself for sale so I got a complete
engine mount kit (engine mounts, transmission mount and stabilizer)
since it was in the range of only forty bucks. Yesterday, I got the
grinder out and ground the stripped nut off. Then, propped up the drive
train with a scissors jack and lowered the crossmember with a
transmission jack. After I had it all back together, took a run around
the parking lot and I'm still trying to convince myself that there is
an improvement to the chassis noise problem.
 October
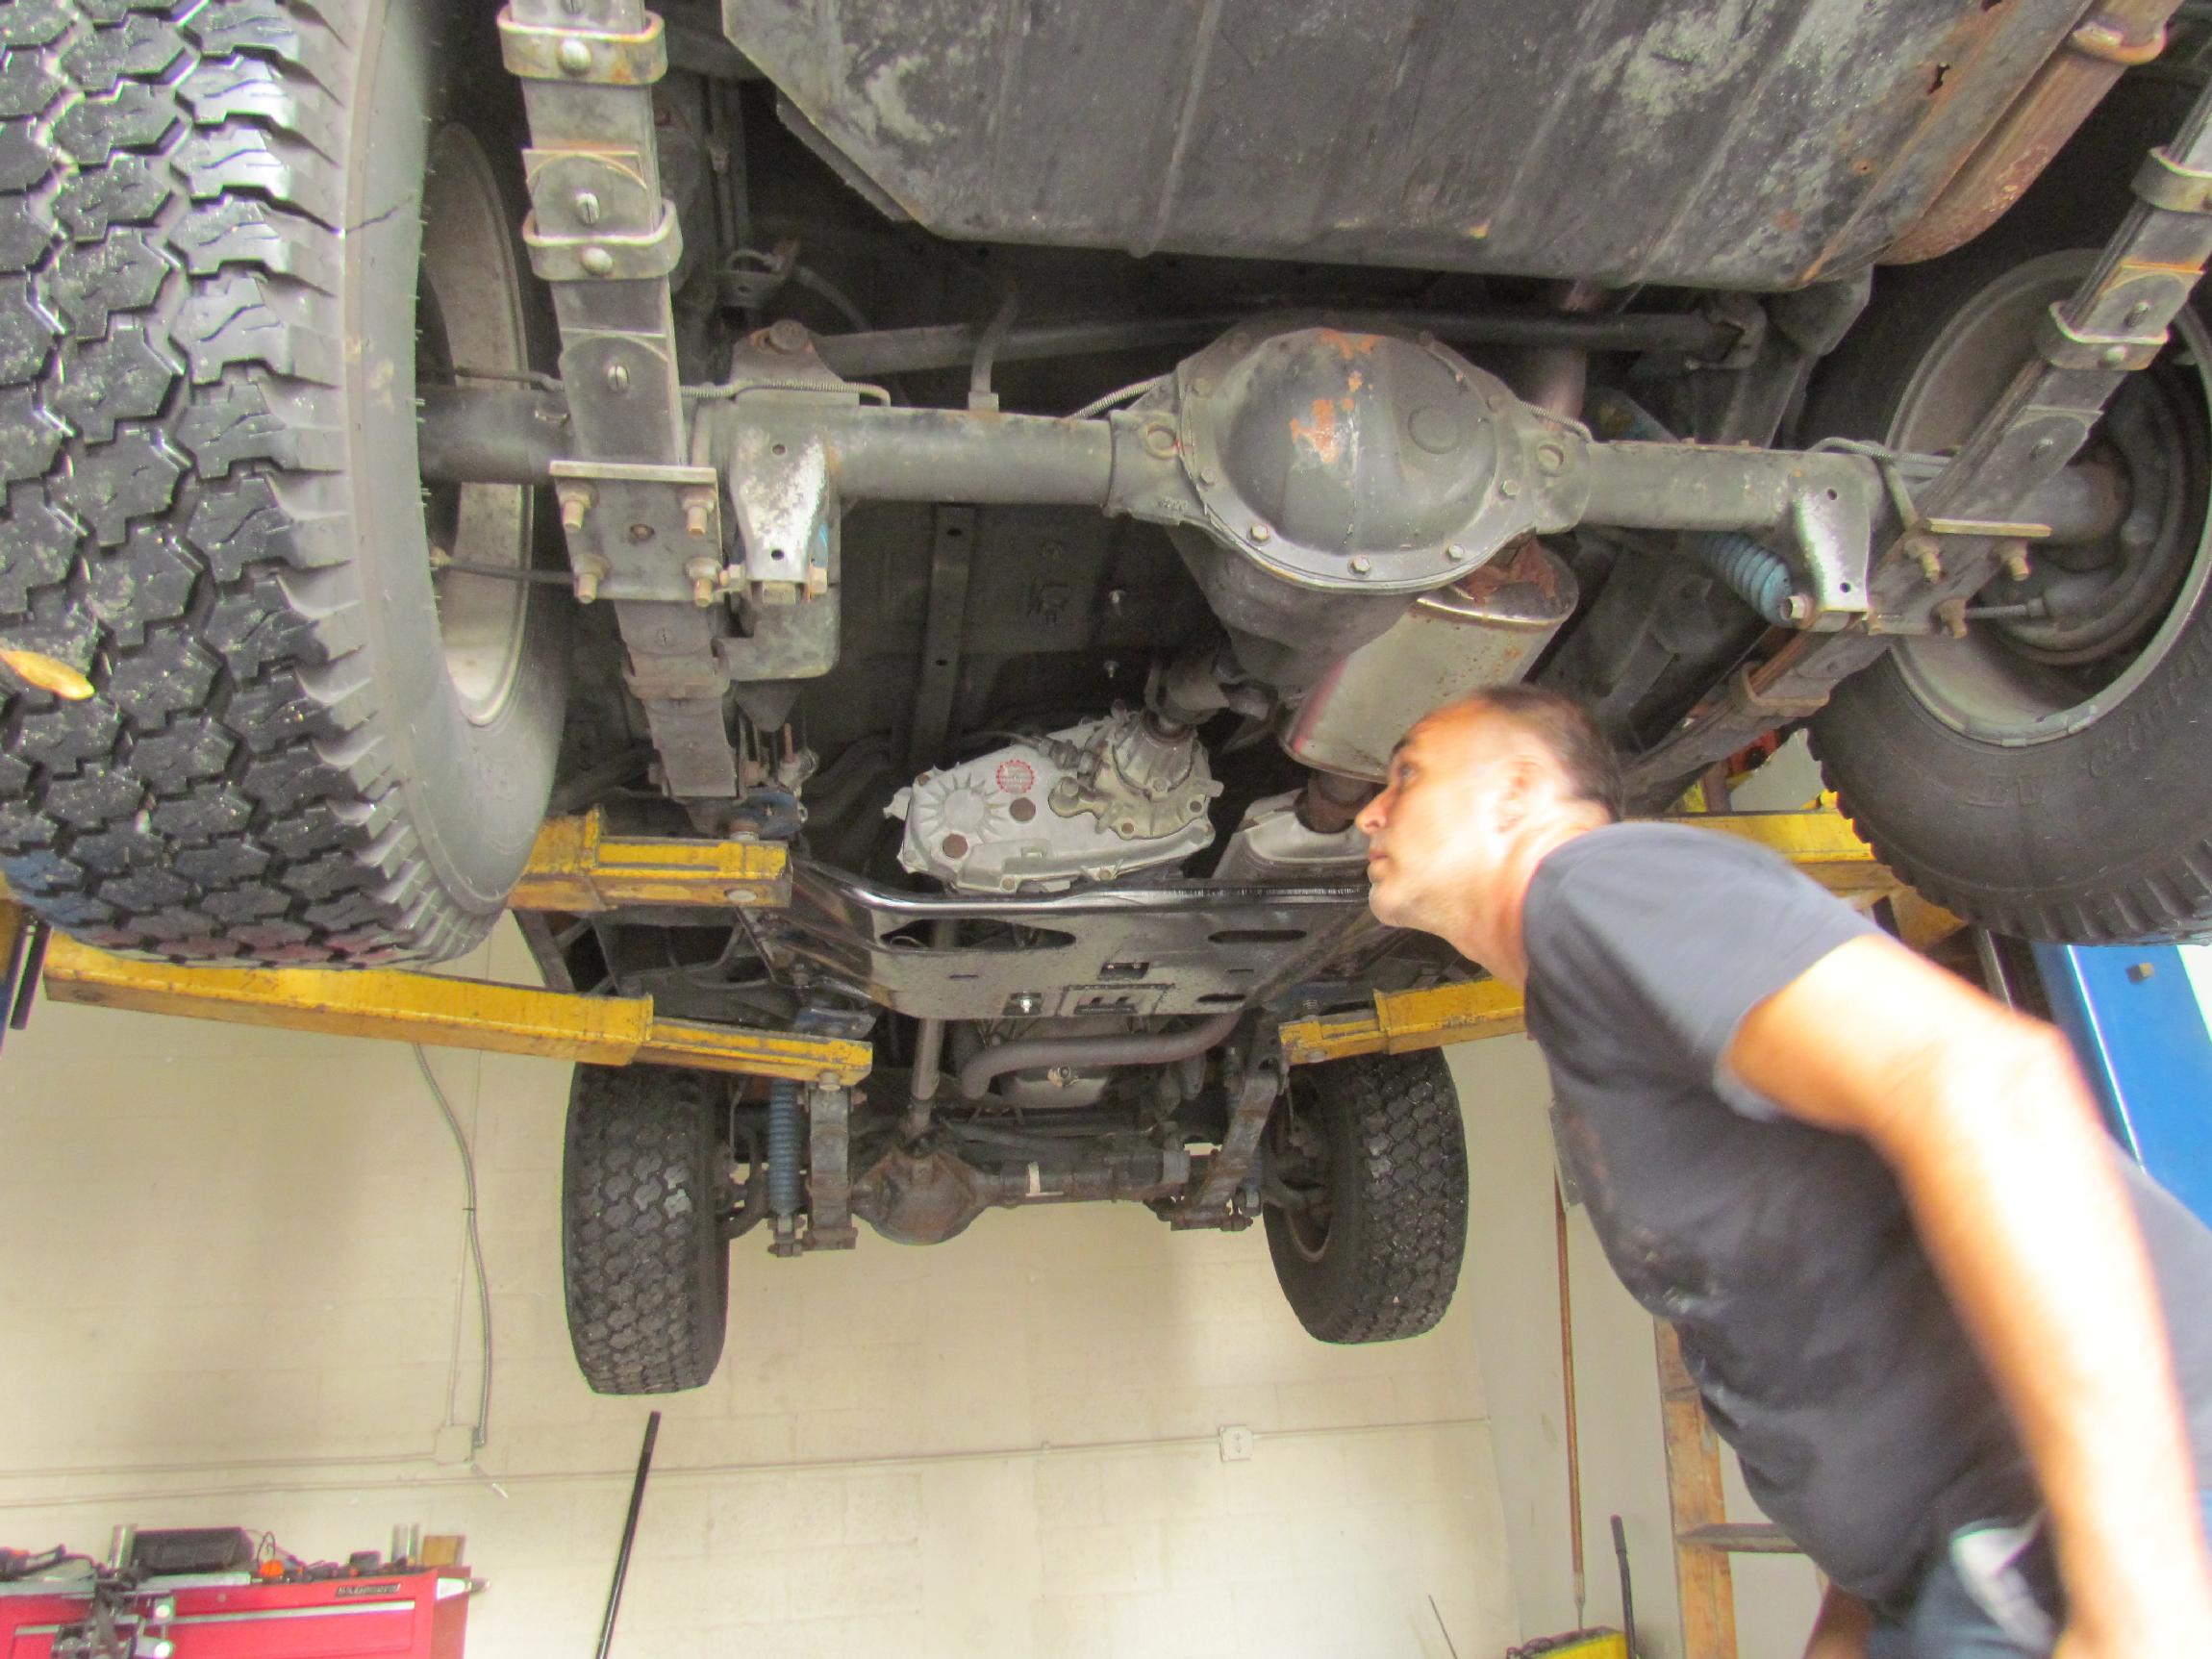
7th 2015 On Saturday
when Gato stopped by, I told him about the chassis noise and that I
hadn't found it yet. He offered to put it up on his lift (GTO Auto
Repair) to get a better look on Wednesday after he got some other work
out of the way. Gato found a problem straight off.
October
7th 2015 On Saturday
when Gato stopped by, I told him about the chassis noise and that I
hadn't found it yet. He offered to put it up on his lift (GTO Auto
Repair) to get a better look on Wednesday after he got some other work
out of the way. Gato found a problem straight off.
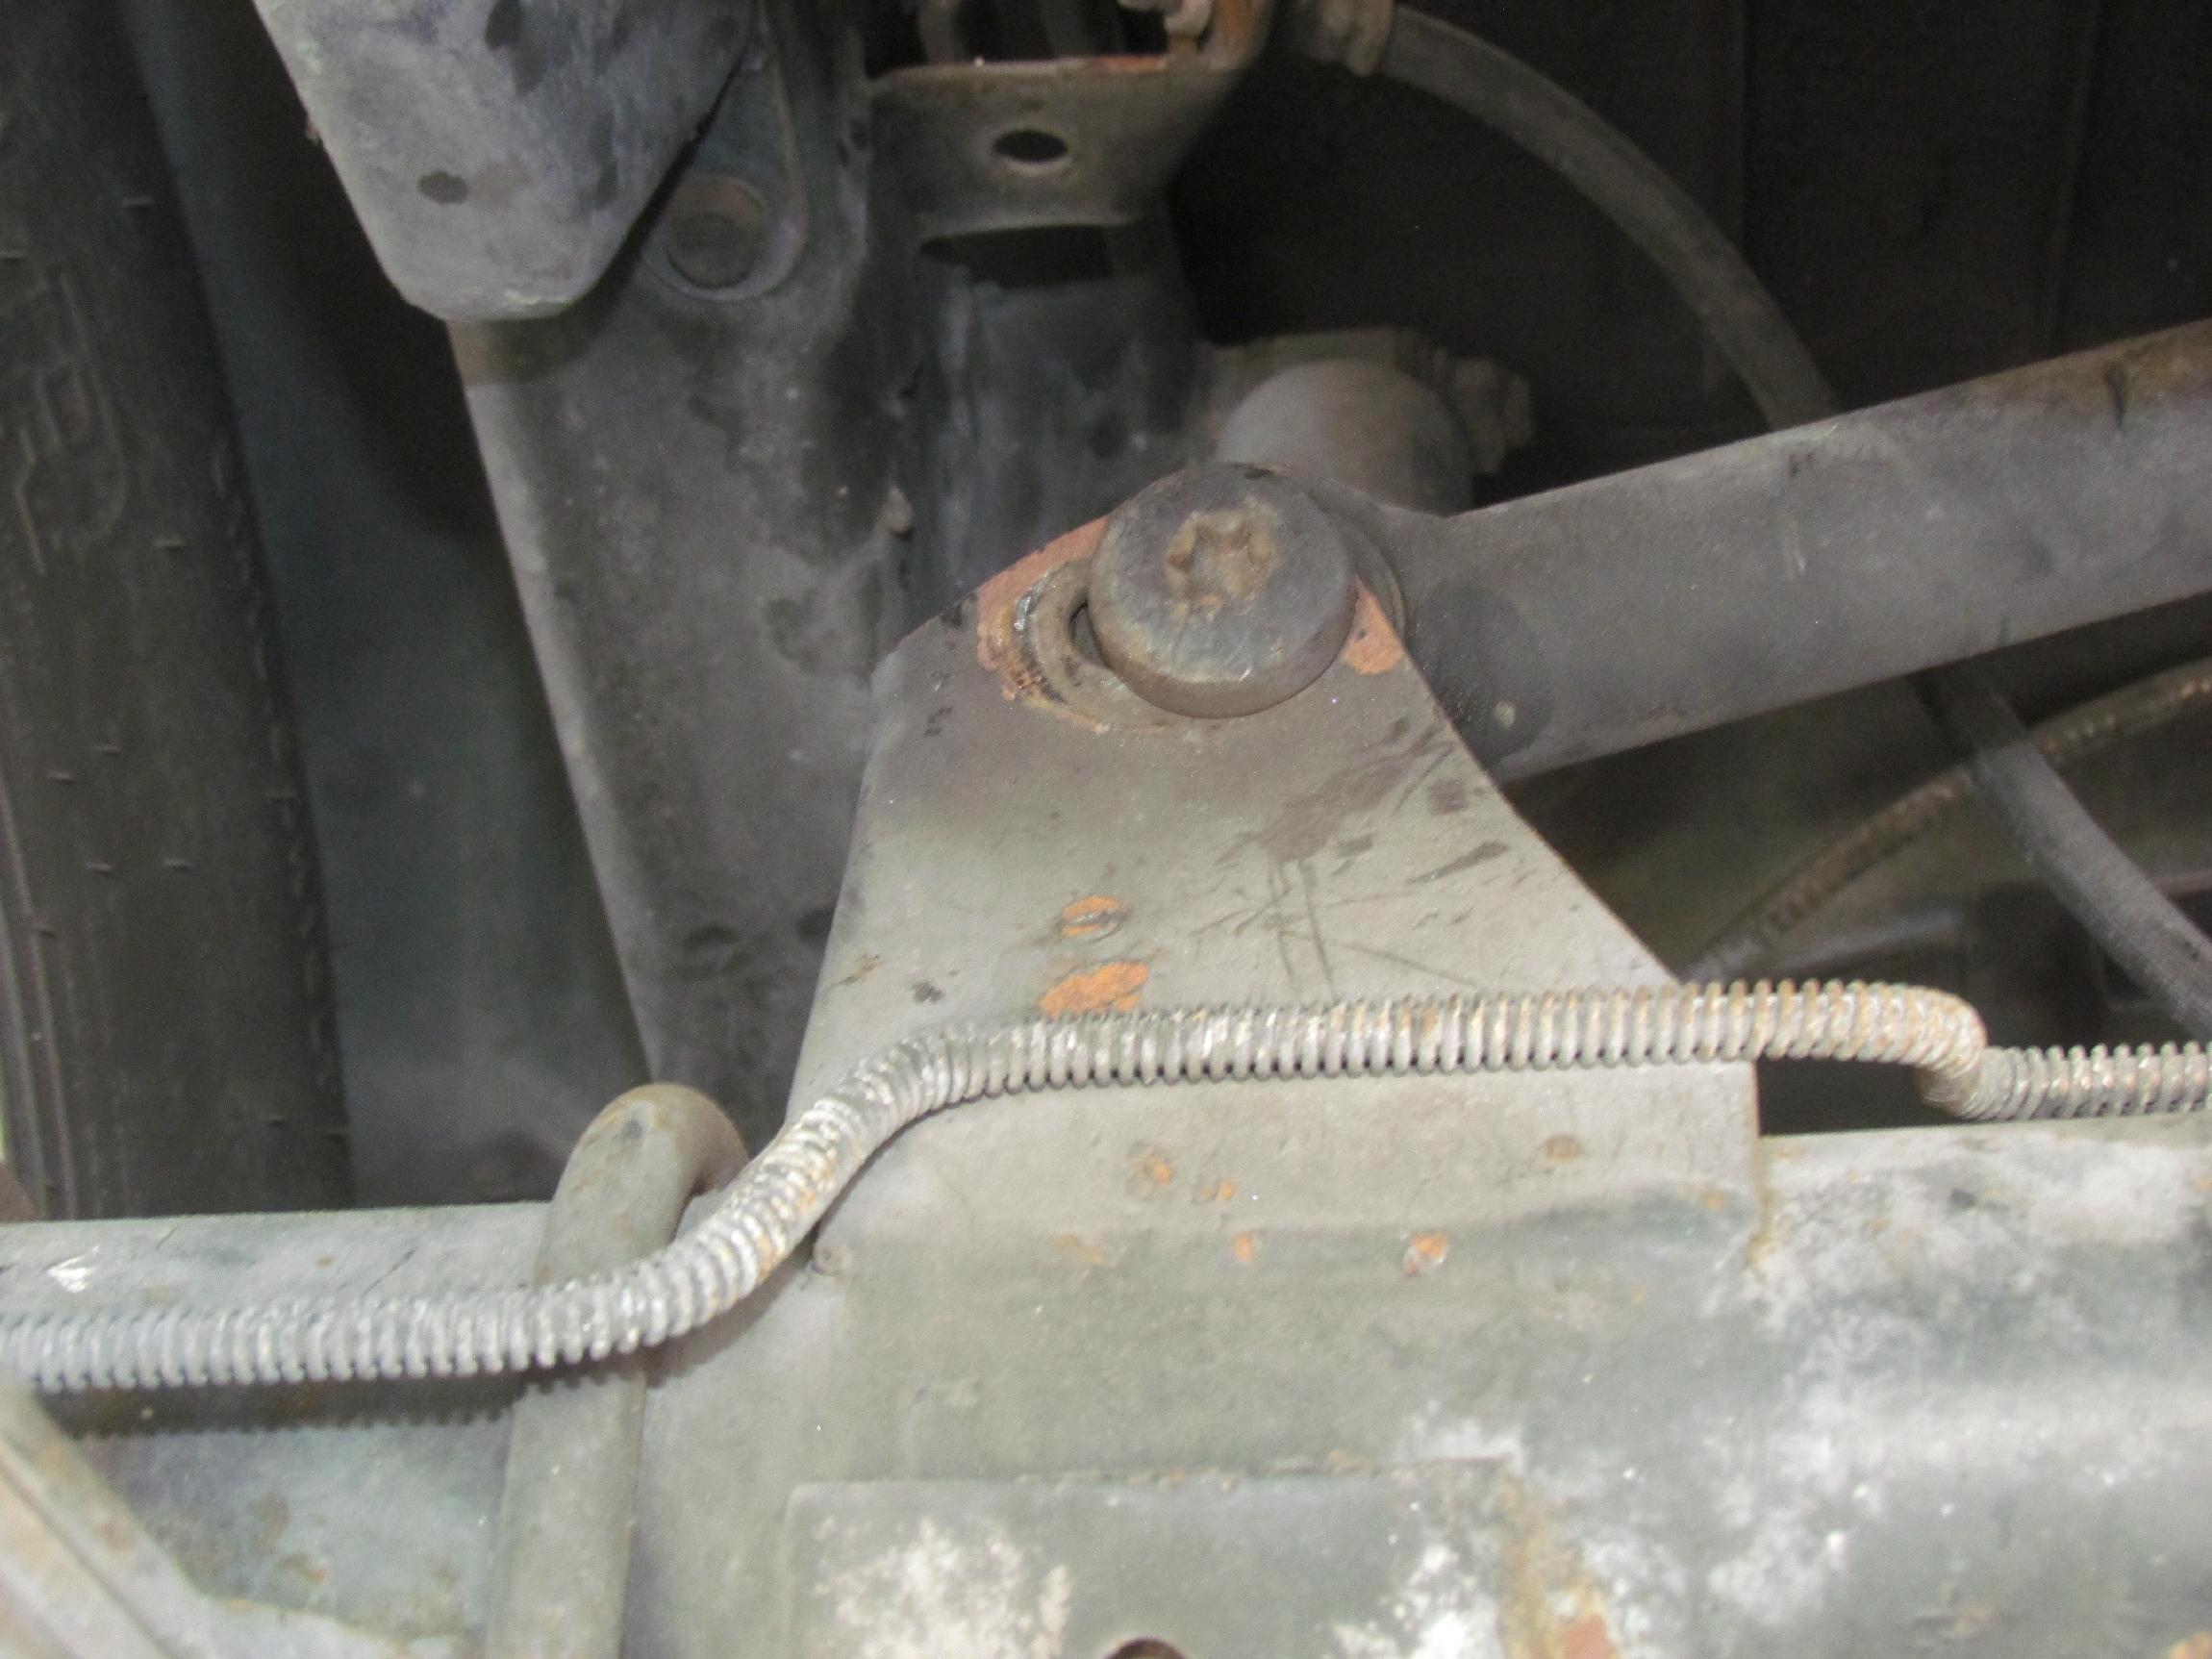 The
panhard rod mount on the rear axle was loose. I could only blame myself
for this because back when I installed the Gale Banks Catback exhaust
system, I had to remove the rod to get the tailpipe in. Gato
ran
the nut in, then lowered Renegade to the ground to tighten it up with
the suspension at its normal riding height. I don't know why Jeep puts
a
panhard rod on this vehicle since the parallel leaf springs already
perform the job of laterally locating the axle. Seems redundant to me.
The
panhard rod mount on the rear axle was loose. I could only blame myself
for this because back when I installed the Gale Banks Catback exhaust
system, I had to remove the rod to get the tailpipe in. Gato
ran
the nut in, then lowered Renegade to the ground to tighten it up with
the suspension at its normal riding height. I don't know why Jeep puts
a
panhard rod on this vehicle since the parallel leaf springs already
perform the job of laterally locating the axle. Seems redundant to me.
In the afternoon there was a power outage up in Boca and when the power came back, the computer network didn't so I had to make a run to the Krash Lab to get the network up for my co-workers. The chassis noises were gone. Gato had nailed it. On the trip back from the Krash Lab, however, the left front brake started sticking again. It's one damn thing after another.
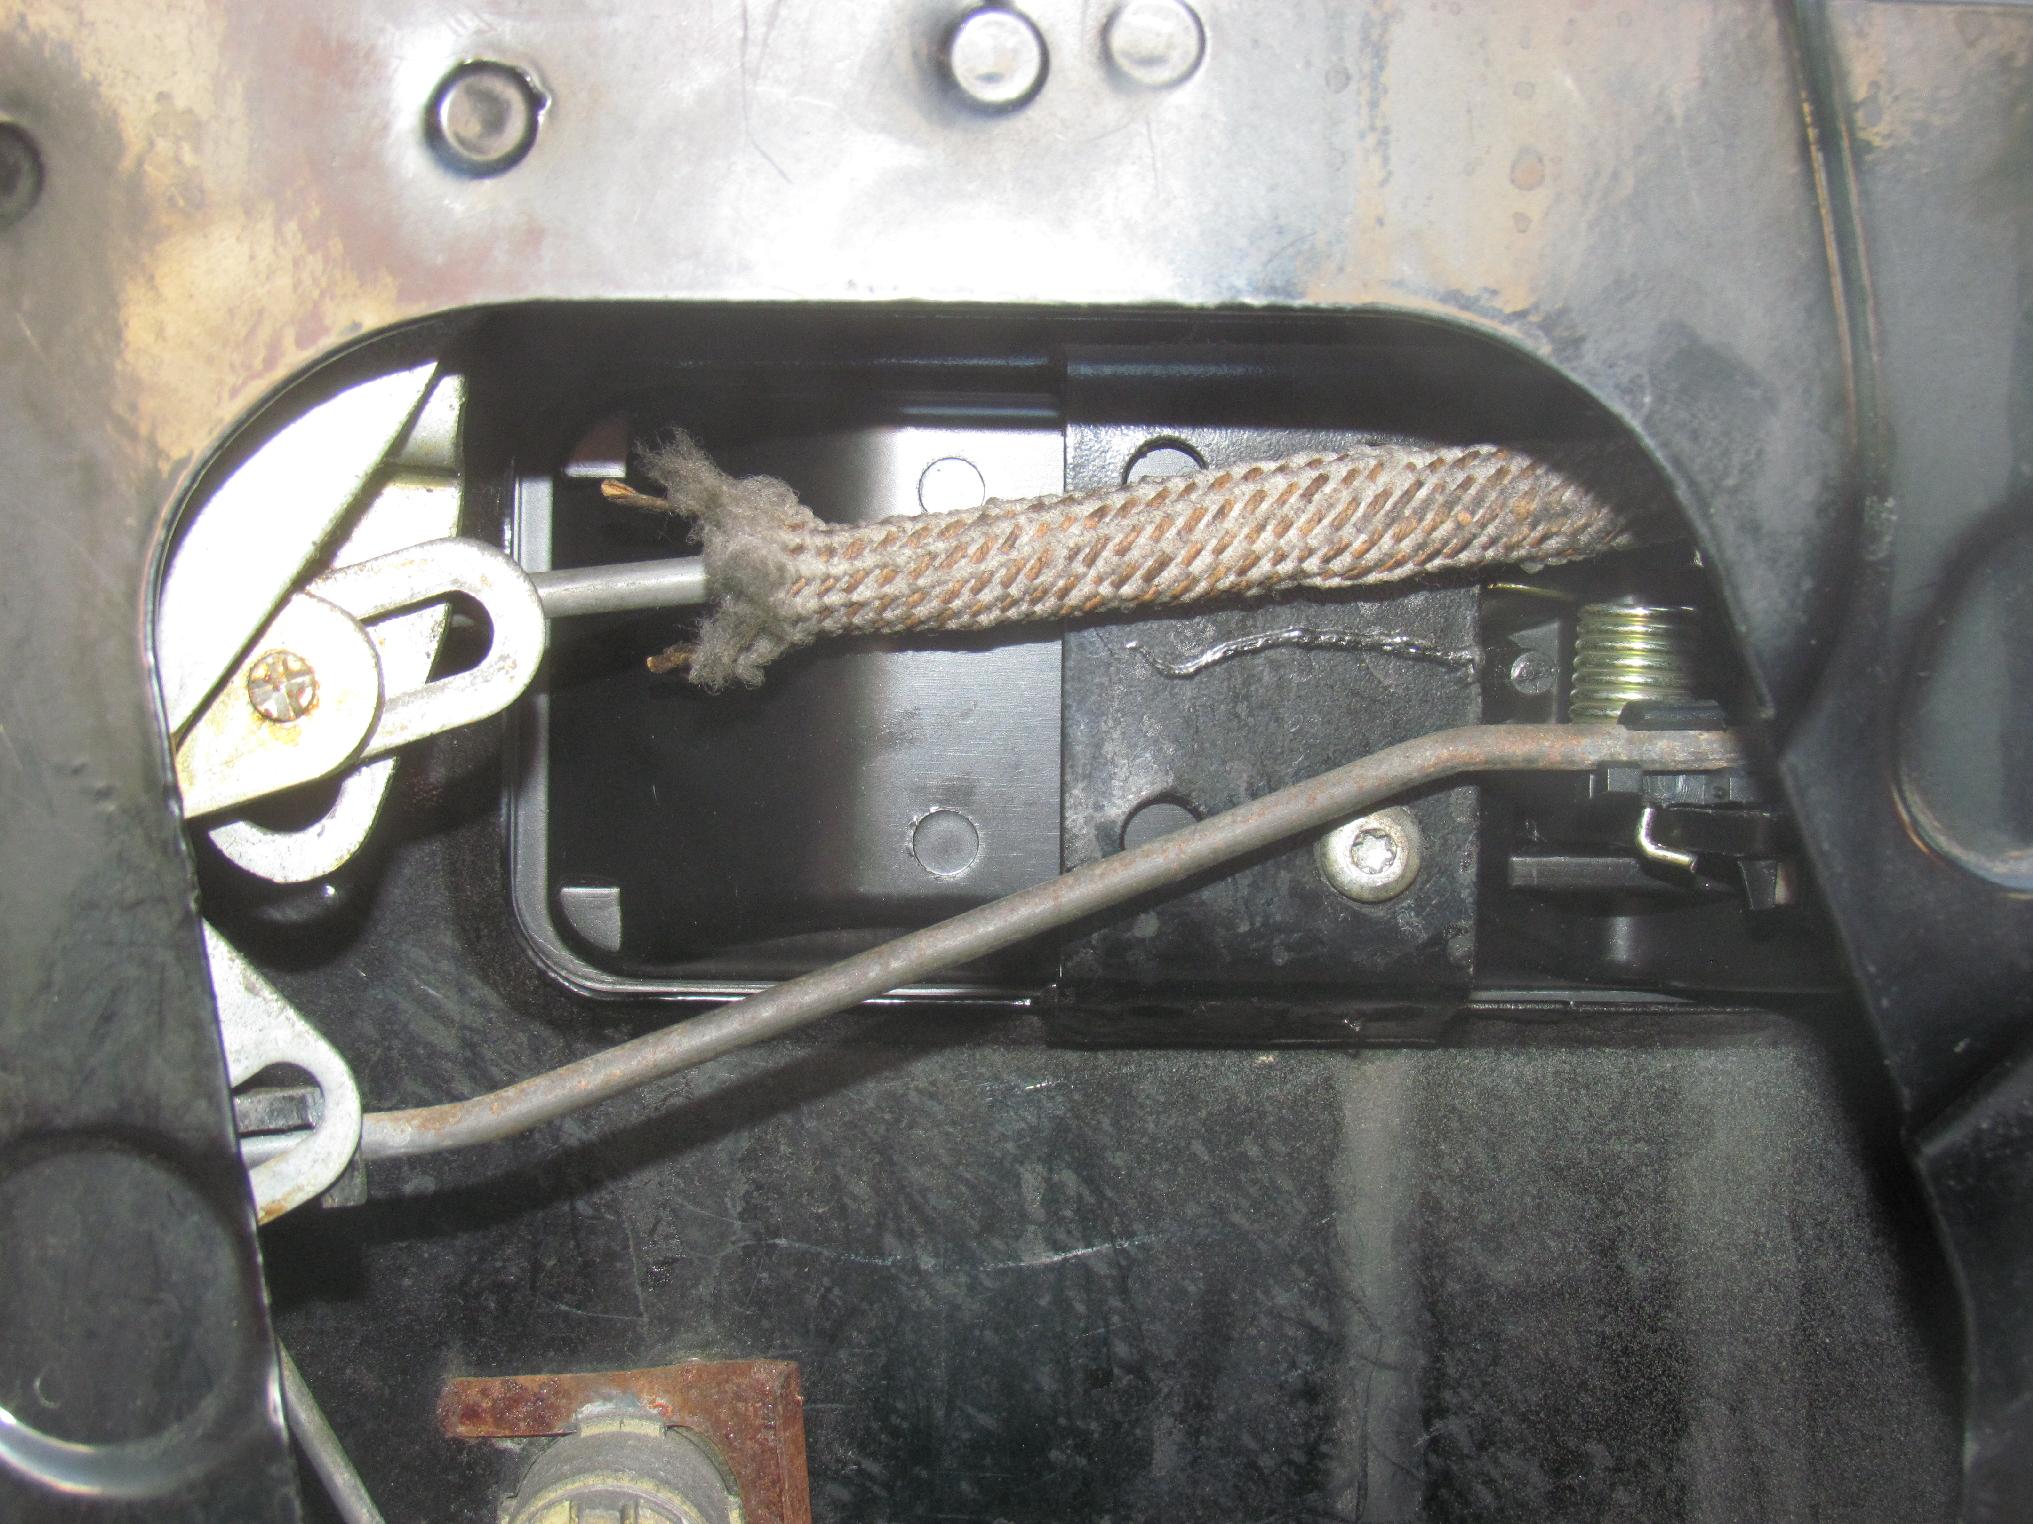
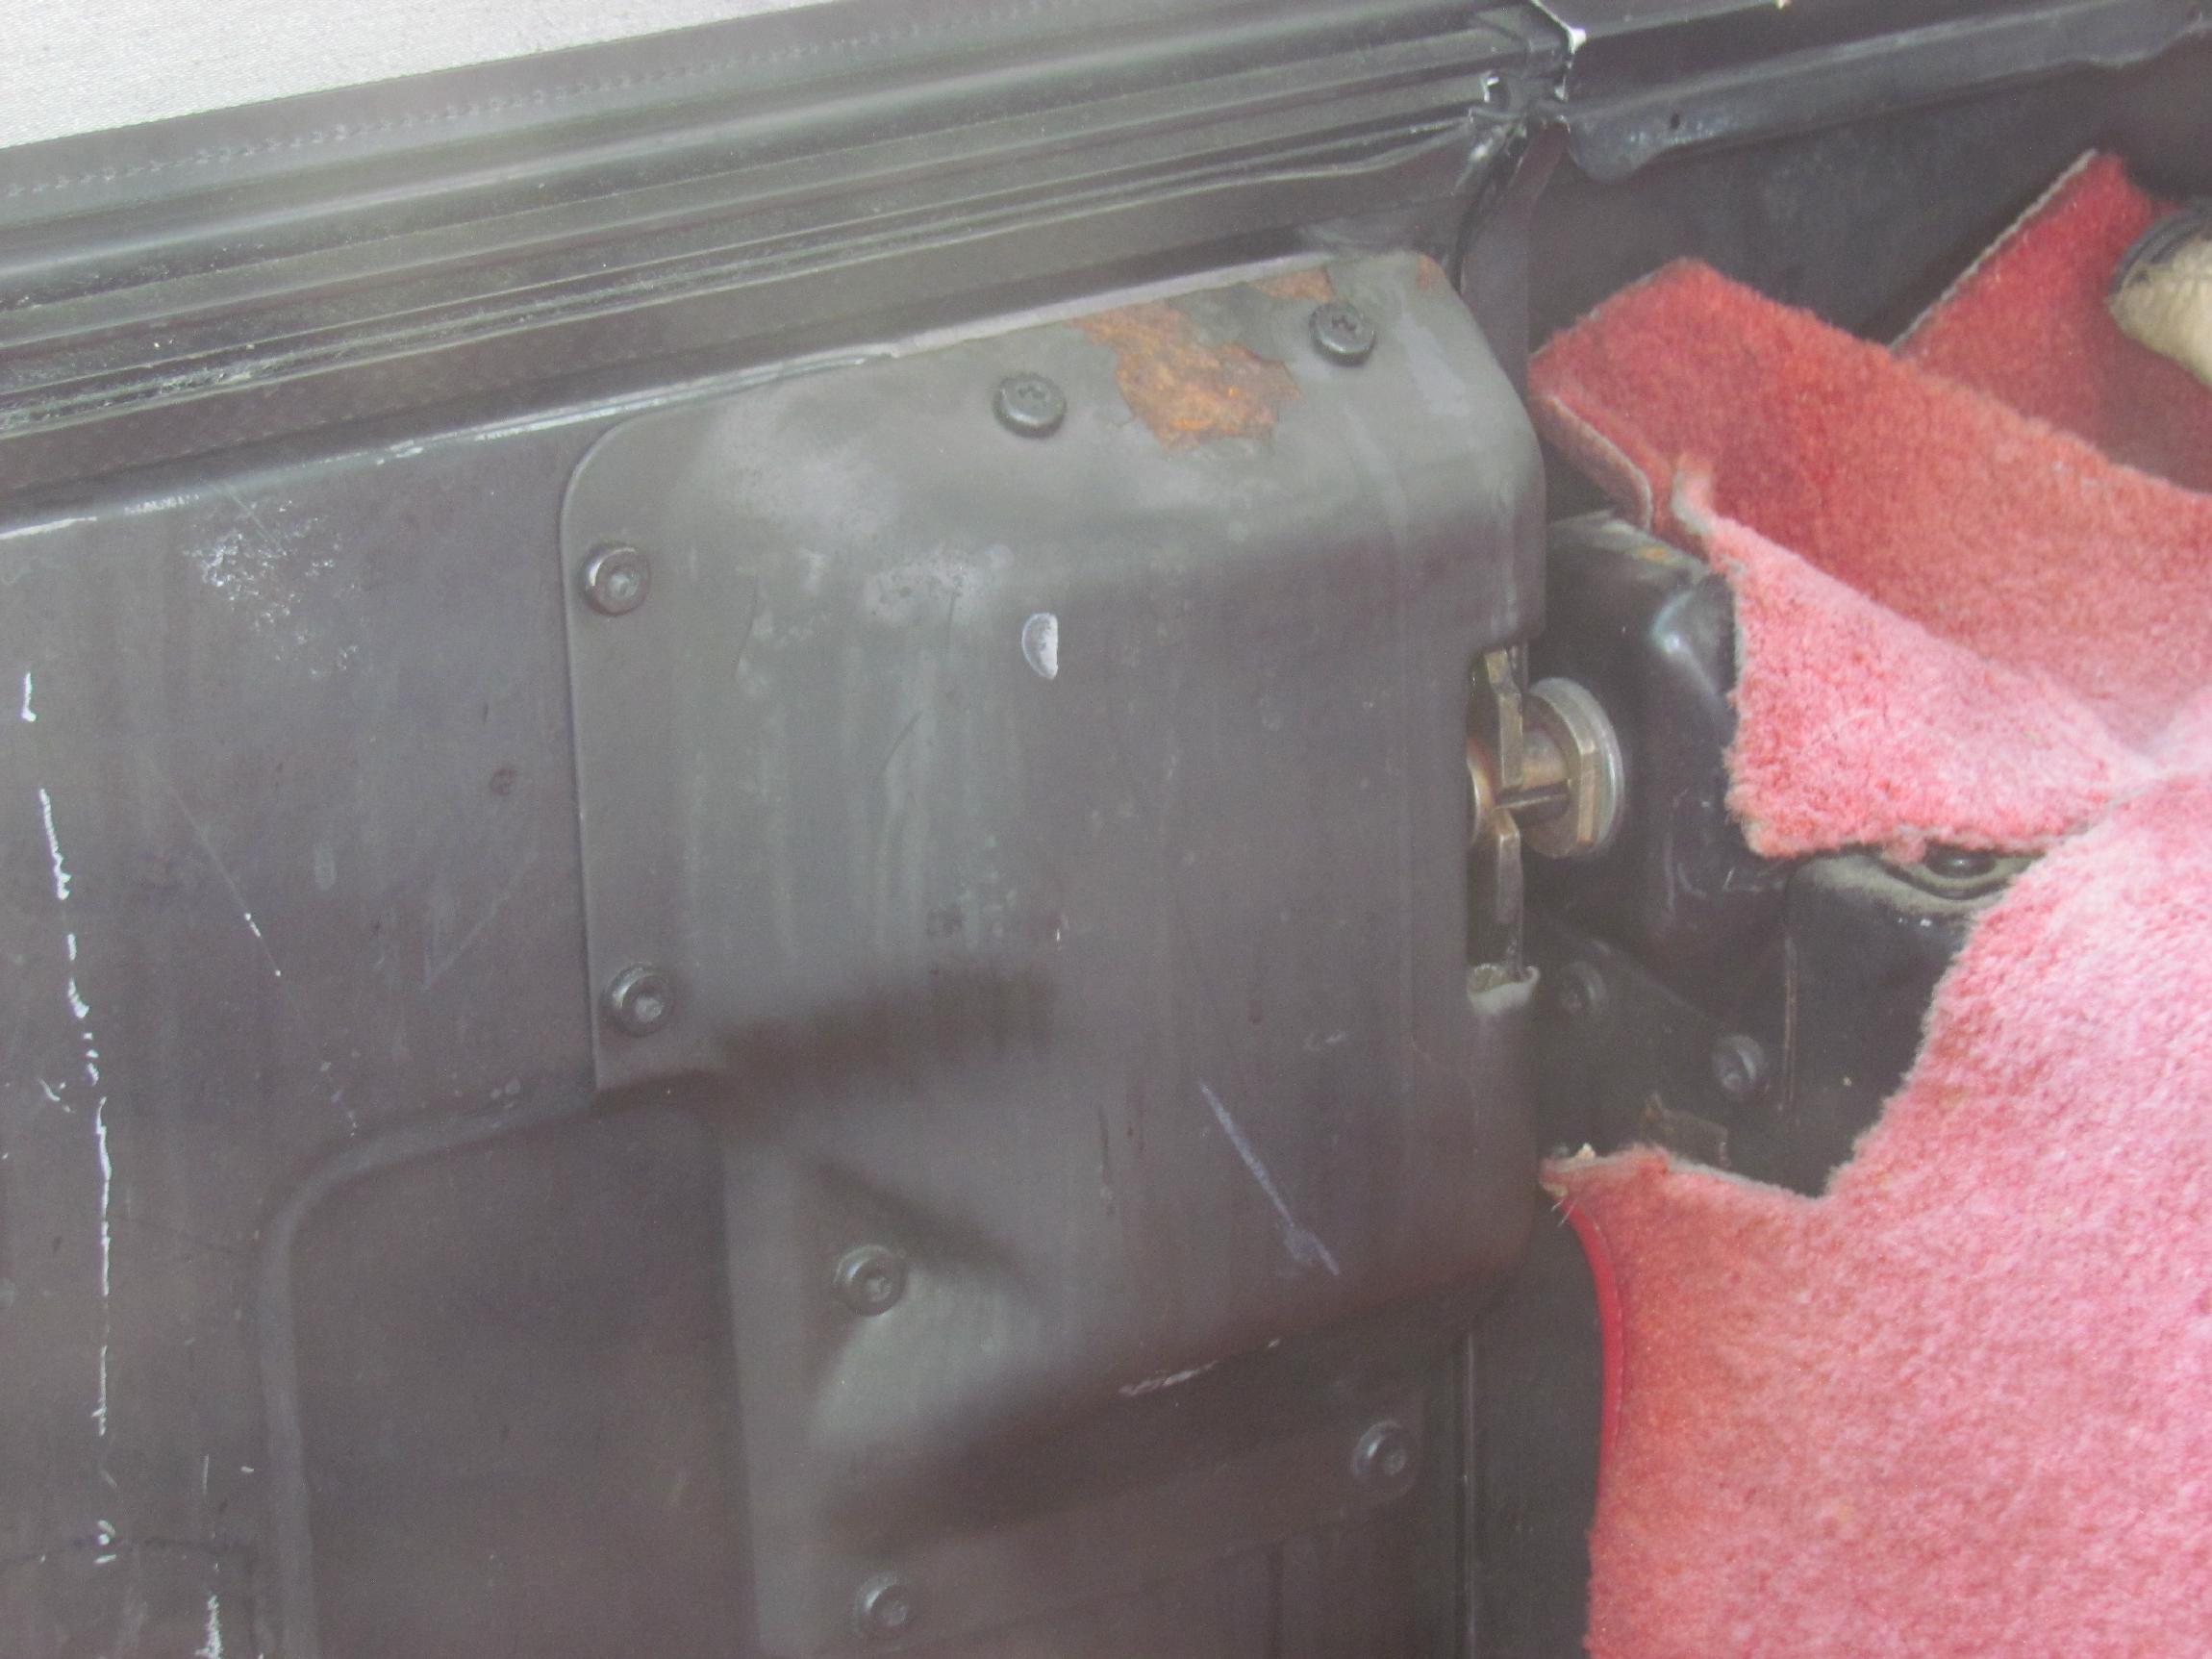 Before
Gato was ready for me yesterday, I repaired the tailgate latch.
It had stopped working soon after I got Renegade back on the
road. Several weeks ago, I took the latch cover off. It was a Catch-22
operation. When the latch broke, it would not open anymore. However, to
get the latch cover off the tailgate has to be open. Damnation! I
crawled into the back over the front seat and took the latch cover torx
cap screws out. Two were concealed, however, between latch and striker.
These I got out with tedious vice-grip technique. Latch cover still
would not come off as the latch fits through a hole in the cover, not a
slot. Damnation again.I was able to bend the cover enough to the side
to get my hand in there and explore by touch. After several
curses, I found a loose rod and hole it belonged to and was able, with
more curses, to get them back together long enuf to get the tailgate
open.
Before
Gato was ready for me yesterday, I repaired the tailgate latch.
It had stopped working soon after I got Renegade back on the
road. Several weeks ago, I took the latch cover off. It was a Catch-22
operation. When the latch broke, it would not open anymore. However, to
get the latch cover off the tailgate has to be open. Damnation! I
crawled into the back over the front seat and took the latch cover torx
cap screws out. Two were concealed, however, between latch and striker.
These I got out with tedious vice-grip technique. Latch cover still
would not come off as the latch fits through a hole in the cover, not a
slot. Damnation again.I was able to bend the cover enough to the side
to get my hand in there and explore by touch. After several
curses, I found a loose rod and hole it belonged to and was able, with
more curses, to get them back together long enuf to get the tailgate
open.
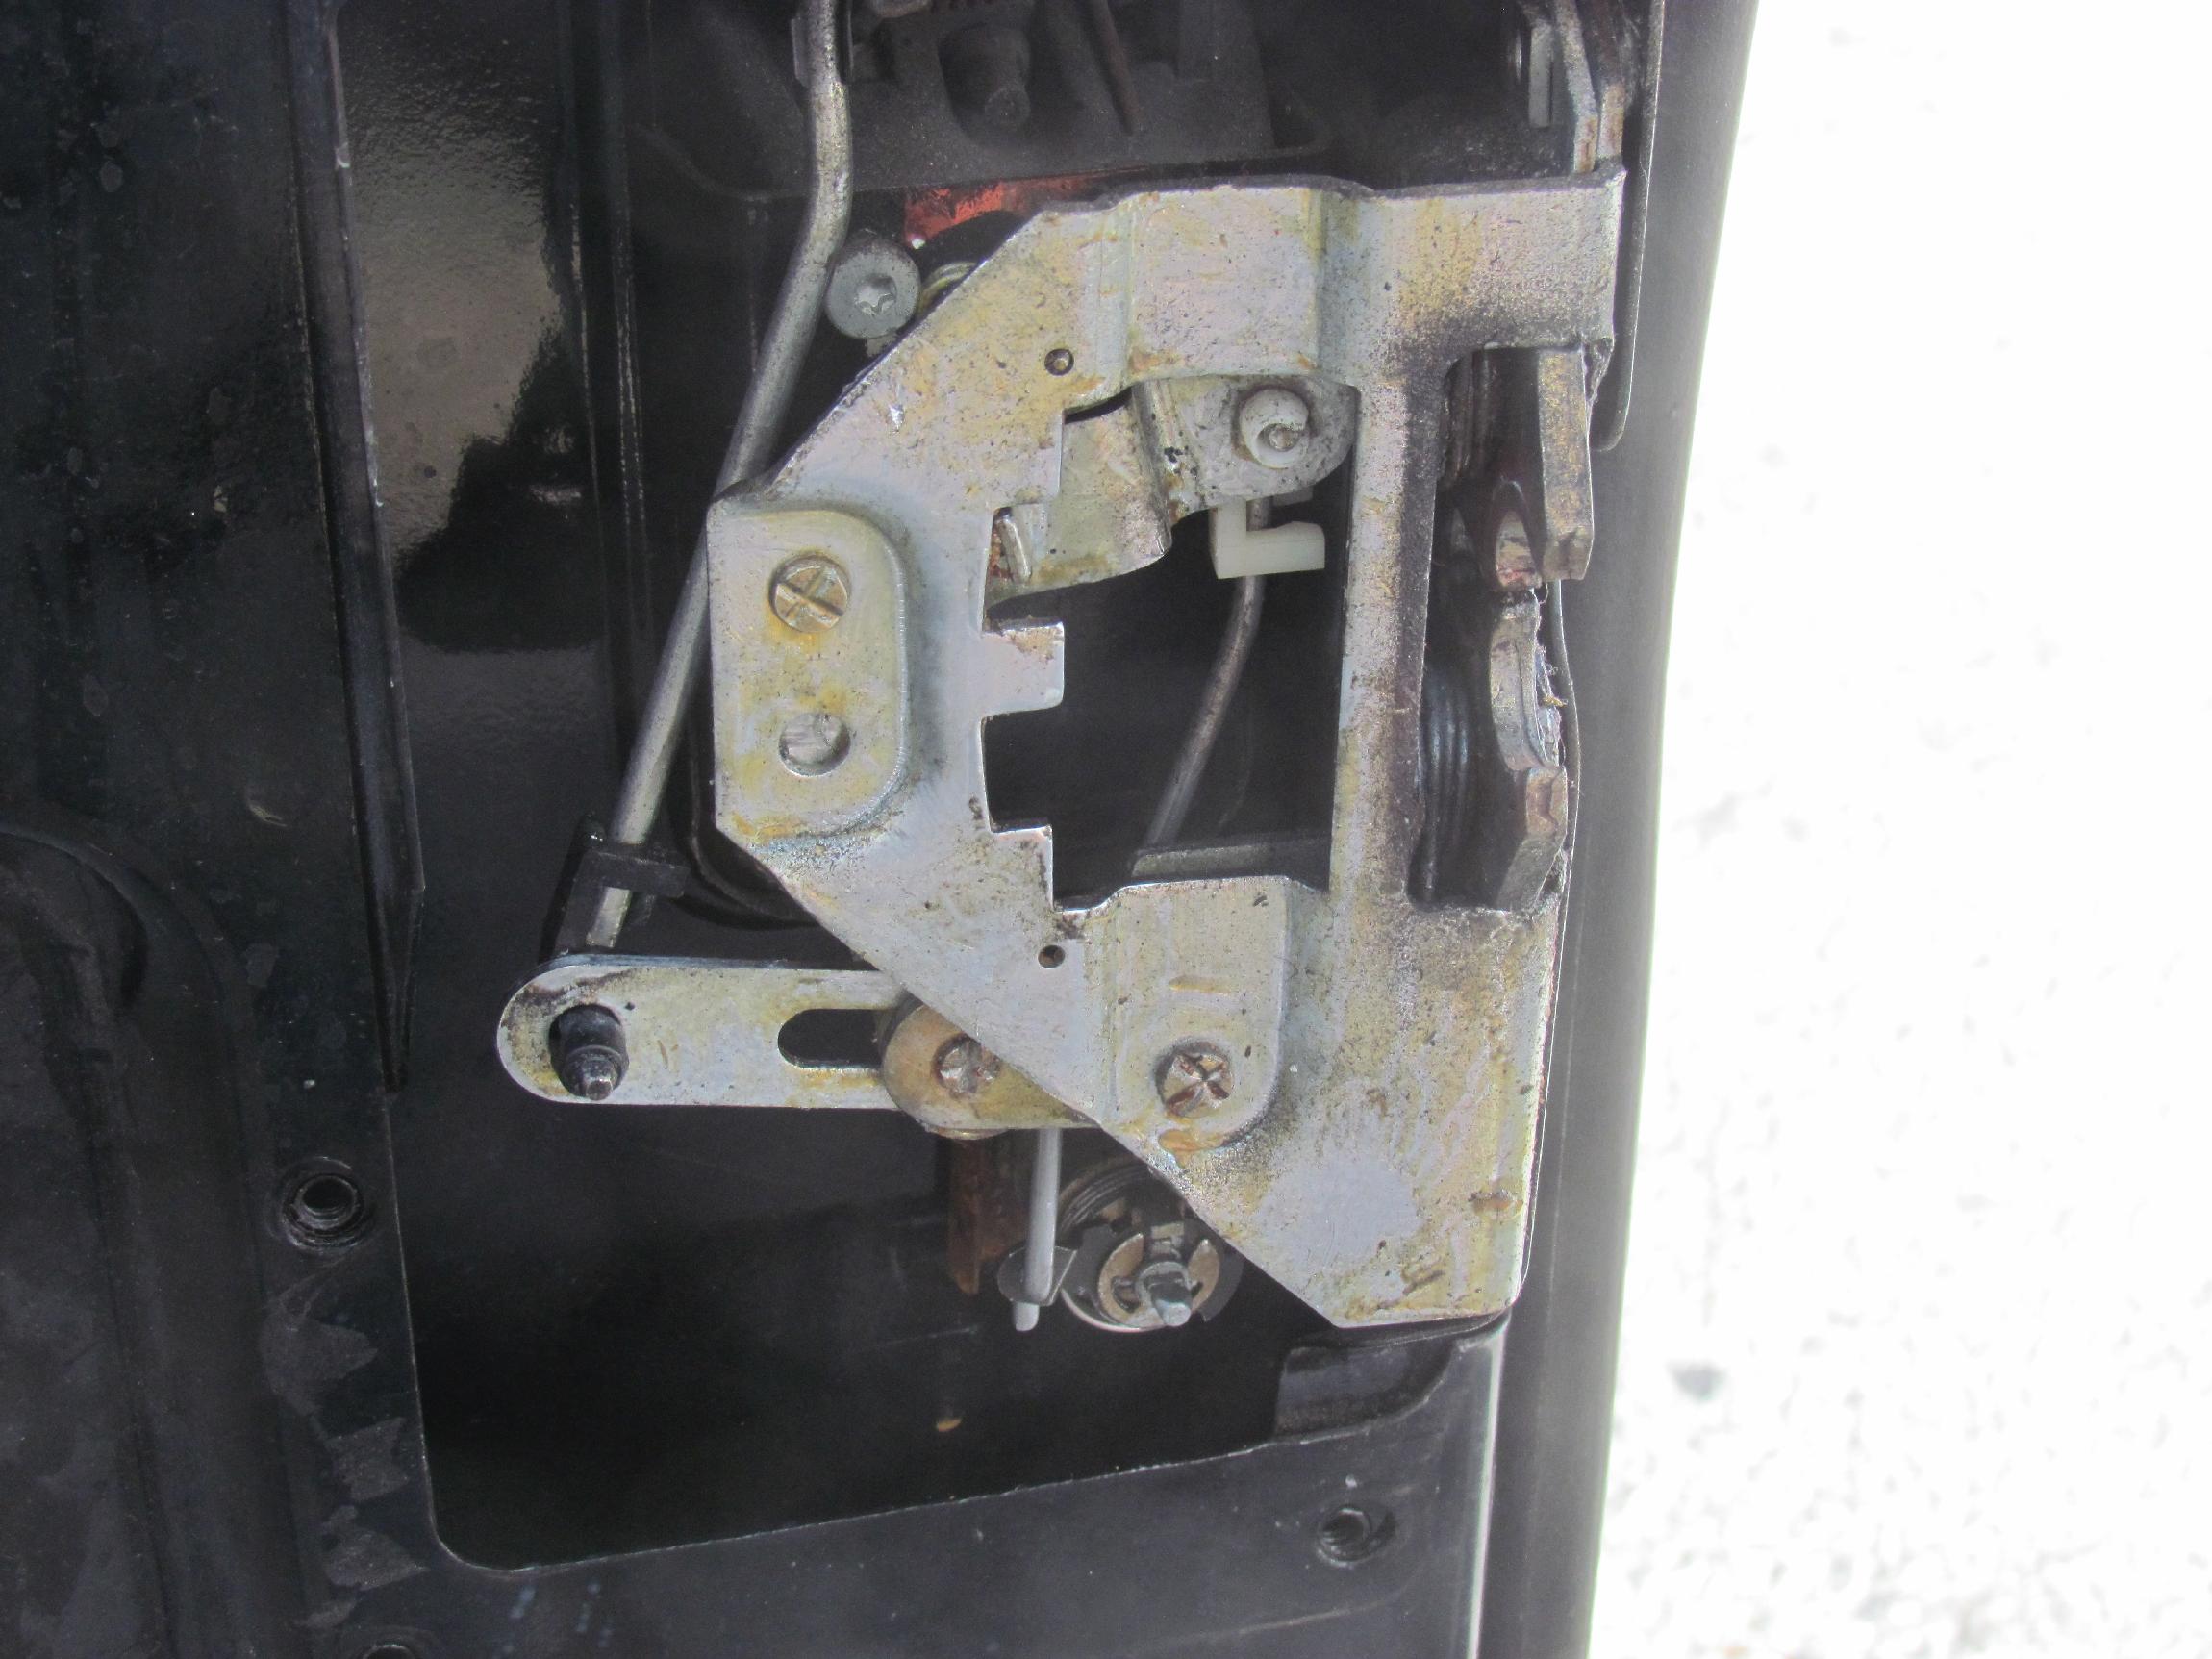 The
lock rod plastic retainer clip had become brittle and broke and then
the rod fell out. I consider these biodegradable plastic
items to be a dubious engineering achievement. I decided to thread the
end of the rod and put double hex nuts on it to fix the thing. This
idea didn't work so well. Had to disconnect the rod from the lock
cylinder for this task and, in the process, sent the e-clip that
secures this connection sailing into space. Triple Damnation! After I
threaded the rod and fitted it, I abandoned this solution. It would
work but the rod is substantially smaller than the hole it fits in and
the
solution was therefore sloppy. The accursed plastic clip fits around
the
rod where it fits thru the hole and , as such, is also a bushing.
The
lock rod plastic retainer clip had become brittle and broke and then
the rod fell out. I consider these biodegradable plastic
items to be a dubious engineering achievement. I decided to thread the
end of the rod and put double hex nuts on it to fix the thing. This
idea didn't work so well. Had to disconnect the rod from the lock
cylinder for this task and, in the process, sent the e-clip that
secures this connection sailing into space. Triple Damnation! After I
threaded the rod and fitted it, I abandoned this solution. It would
work but the rod is substantially smaller than the hole it fits in and
the
solution was therefore sloppy. The accursed plastic clip fits around
the
rod where it fits thru the hole and , as such, is also a bushing.
 It
took several weeks and a few false purchases but I finally ended up
with an e-clip assortment from McMaster-Carr and a rod retainer clip
assortment from Clips and Fasteners that would work. In the meantime, I
had cleaned and painted the tailgate latch cover. I got the rod
retainer clip installed but it was loose where it clipped to the rod.
If it comes loose because of this, I will secure it with a zip tie. I
didn't think to do that until I had the latch cover back on. A 1/4"
e-clip secured the lock cylinder connection. I sprayed some white
lithium grease on rubbing parts before I replaced the latch cover and
put paid to this operation.
It
took several weeks and a few false purchases but I finally ended up
with an e-clip assortment from McMaster-Carr and a rod retainer clip
assortment from Clips and Fasteners that would work. In the meantime, I
had cleaned and painted the tailgate latch cover. I got the rod
retainer clip installed but it was loose where it clipped to the rod.
If it comes loose because of this, I will secure it with a zip tie. I
didn't think to do that until I had the latch cover back on. A 1/4"
e-clip secured the lock cylinder connection. I sprayed some white
lithium grease on rubbing parts before I replaced the latch cover and
put paid to this operation.
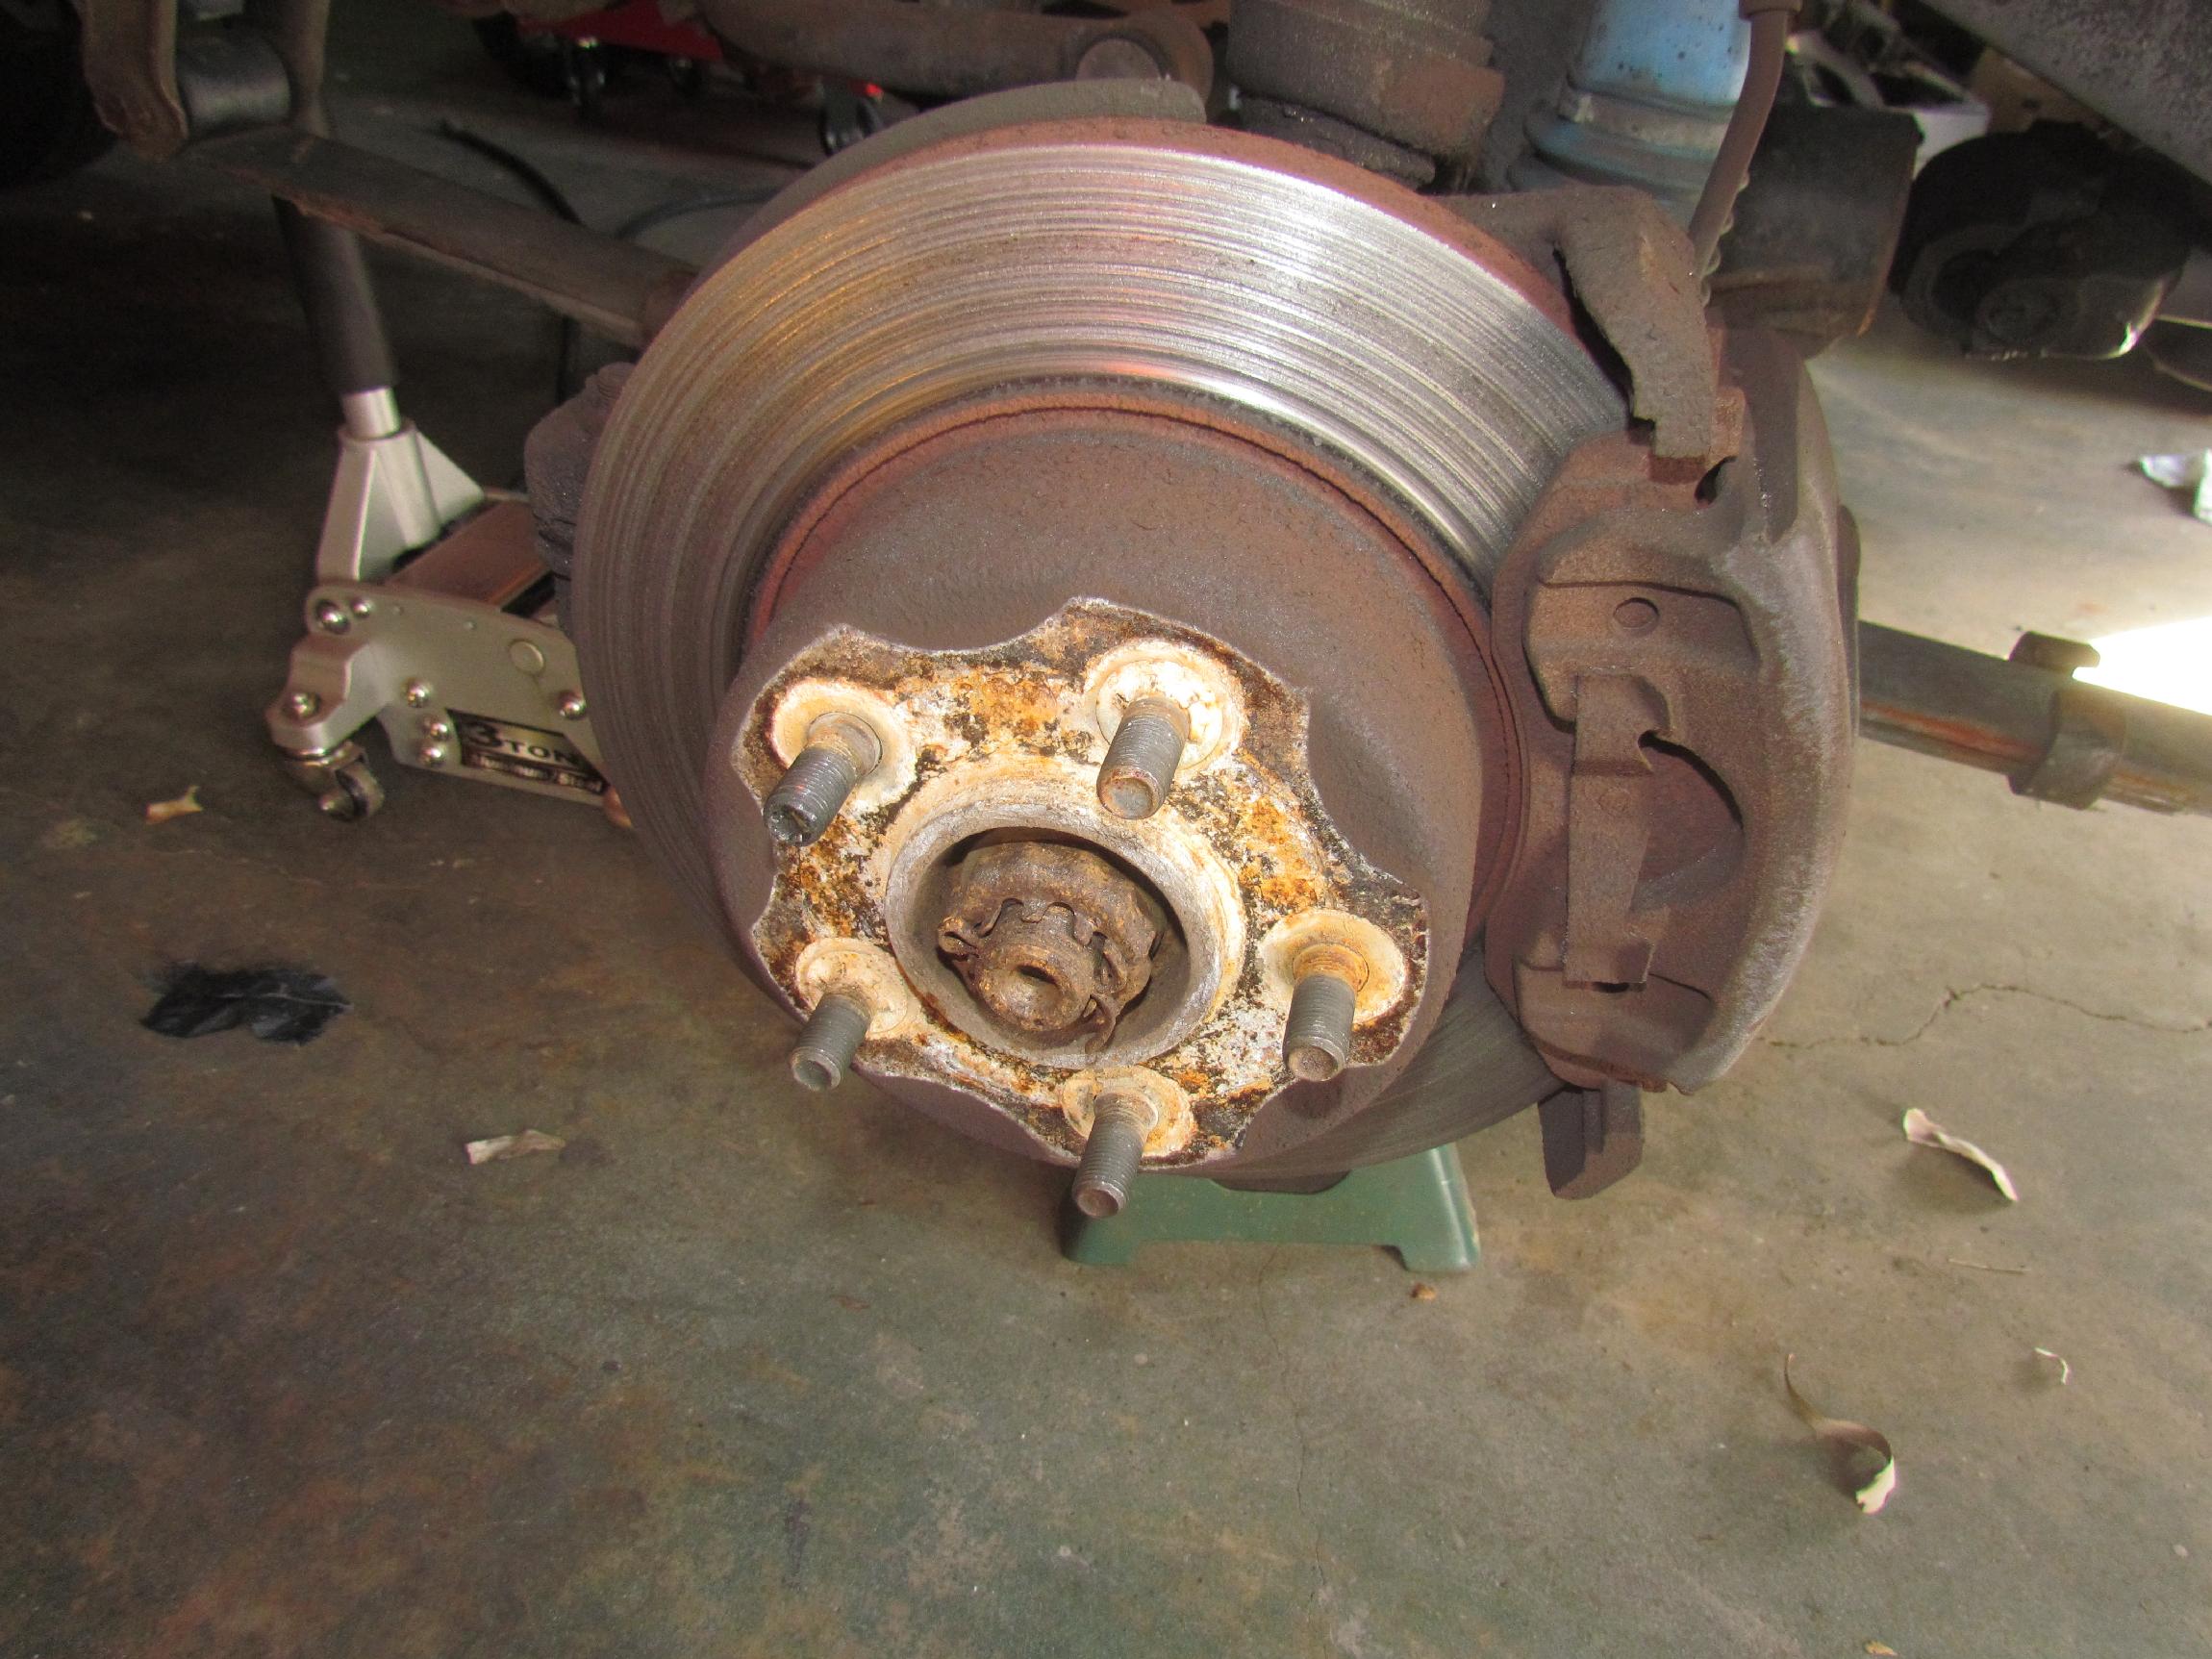 December
20th 2015 Over the
weekend, Renegade's front disk brakes were replaced. Been having
trouble with the driver side sticking ever since I got it out of the
warehouse. Gathered the parts and kept putting it off. Last week the
situation hit critical mass. It was metal on metal and I hoped it
wasn't as bad as it sounded every time I came to a stop. Saturday was
spent cleaning and rearranging the BillyBob Shop so I could get the
front end of the Jeep into it for the work. After the Jeep was up on
jack stands and the wheels removed, this is what the driver side brake
looked like.
December
20th 2015 Over the
weekend, Renegade's front disk brakes were replaced. Been having
trouble with the driver side sticking ever since I got it out of the
warehouse. Gathered the parts and kept putting it off. Last week the
situation hit critical mass. It was metal on metal and I hoped it
wasn't as bad as it sounded every time I came to a stop. Saturday was
spent cleaning and rearranging the BillyBob Shop so I could get the
front end of the Jeep into it for the work. After the Jeep was up on
jack stands and the wheels removed, this is what the driver side brake
looked like.
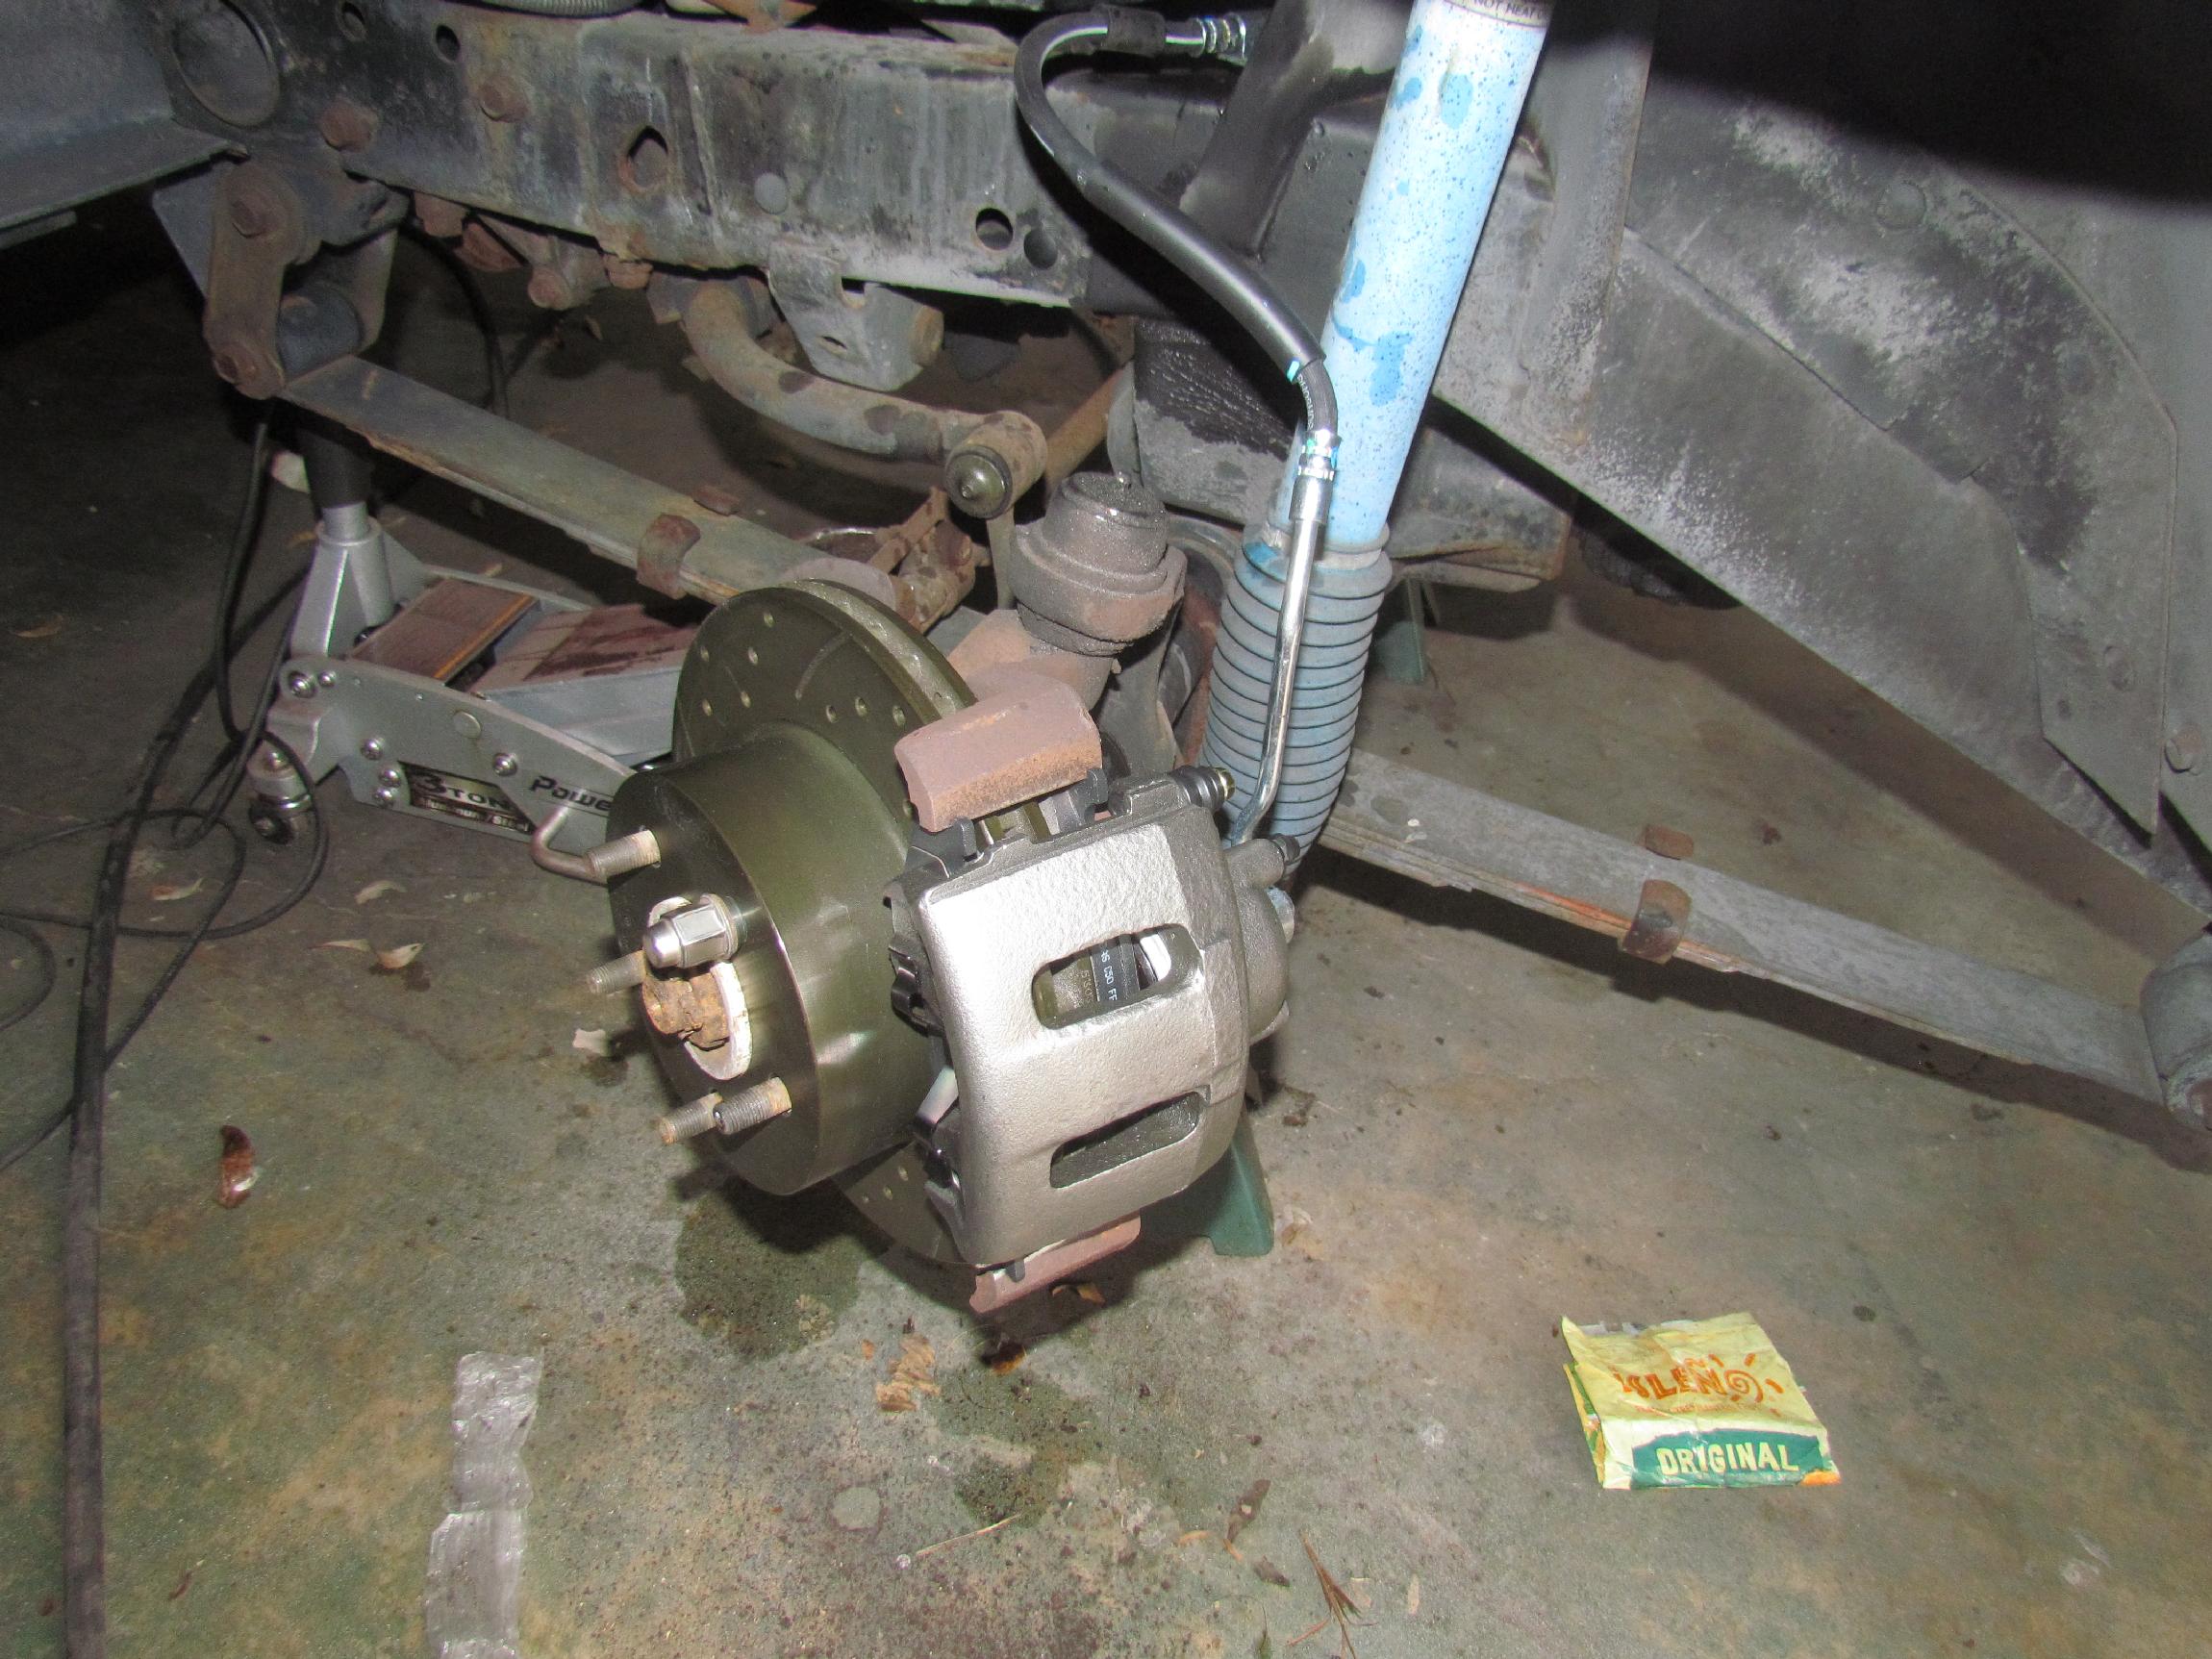 I
had watched the Youtube vids and read the manuals but, having never
worked with disk brakes before, I was apprehensive and, with
Renegade, there are always gotchas that I don't anticipate. This job
was no exception in the gotcha department. First task on Sunday was
replacing the brake hoses, a half hour job on the trucks, but not
Renegade. The hose bracket is part of the hose assembly and held in
place on top of the frame rail with one of the accursed Torx cap
screws. The fly in the buttermilk is that said fastener resides
directly below the inner fender well and said fender well is one of the
few items of real steel on this plastic Jeep. On top of that,
everything was rusted, including the hose fitting and on the driver
side, the intake air box had to be removed to get access. Much cursing
was deployed but, after a couple of hours, I got things apart, losing
one of the Torx screws in the process. The new hoses were installed and
buttoned up as best could be. The reason the hoses were replaced was
because I suspected the driver side hose had swollen nearly shut and
was not releasing the caliper when the brakes were released.
I
had watched the Youtube vids and read the manuals but, having never
worked with disk brakes before, I was apprehensive and, with
Renegade, there are always gotchas that I don't anticipate. This job
was no exception in the gotcha department. First task on Sunday was
replacing the brake hoses, a half hour job on the trucks, but not
Renegade. The hose bracket is part of the hose assembly and held in
place on top of the frame rail with one of the accursed Torx cap
screws. The fly in the buttermilk is that said fastener resides
directly below the inner fender well and said fender well is one of the
few items of real steel on this plastic Jeep. On top of that,
everything was rusted, including the hose fitting and on the driver
side, the intake air box had to be removed to get access. Much cursing
was deployed but, after a couple of hours, I got things apart, losing
one of the Torx screws in the process. The new hoses were installed and
buttoned up as best could be. The reason the hoses were replaced was
because I suspected the driver side hose had swollen nearly shut and
was not releasing the caliper when the brakes were released.
Except for having to employ a BFH (Big Friggin' Hammer) to get the old (twenty-four years) calipers and rotors off, the rest of the job went smoothly. The Youtube videos helped in this area. None of the many I watched covered the brake hose replacement and now I know why. Then, I broke my Power Bleeder tool while trying to replace the rotted vinyl tubing on it and rendered it unusable for this job. Got out my old Mitivac vacuum bleeder and suffered with it for a hour and a half but eventfully got solid pedal. Put the tires back on for a test drive and it nearly took the limit of my strength to manhandle the oversize wheels on. Closed the shop on this one and retreated to the Flamingo Room to nurse my aches and pains.
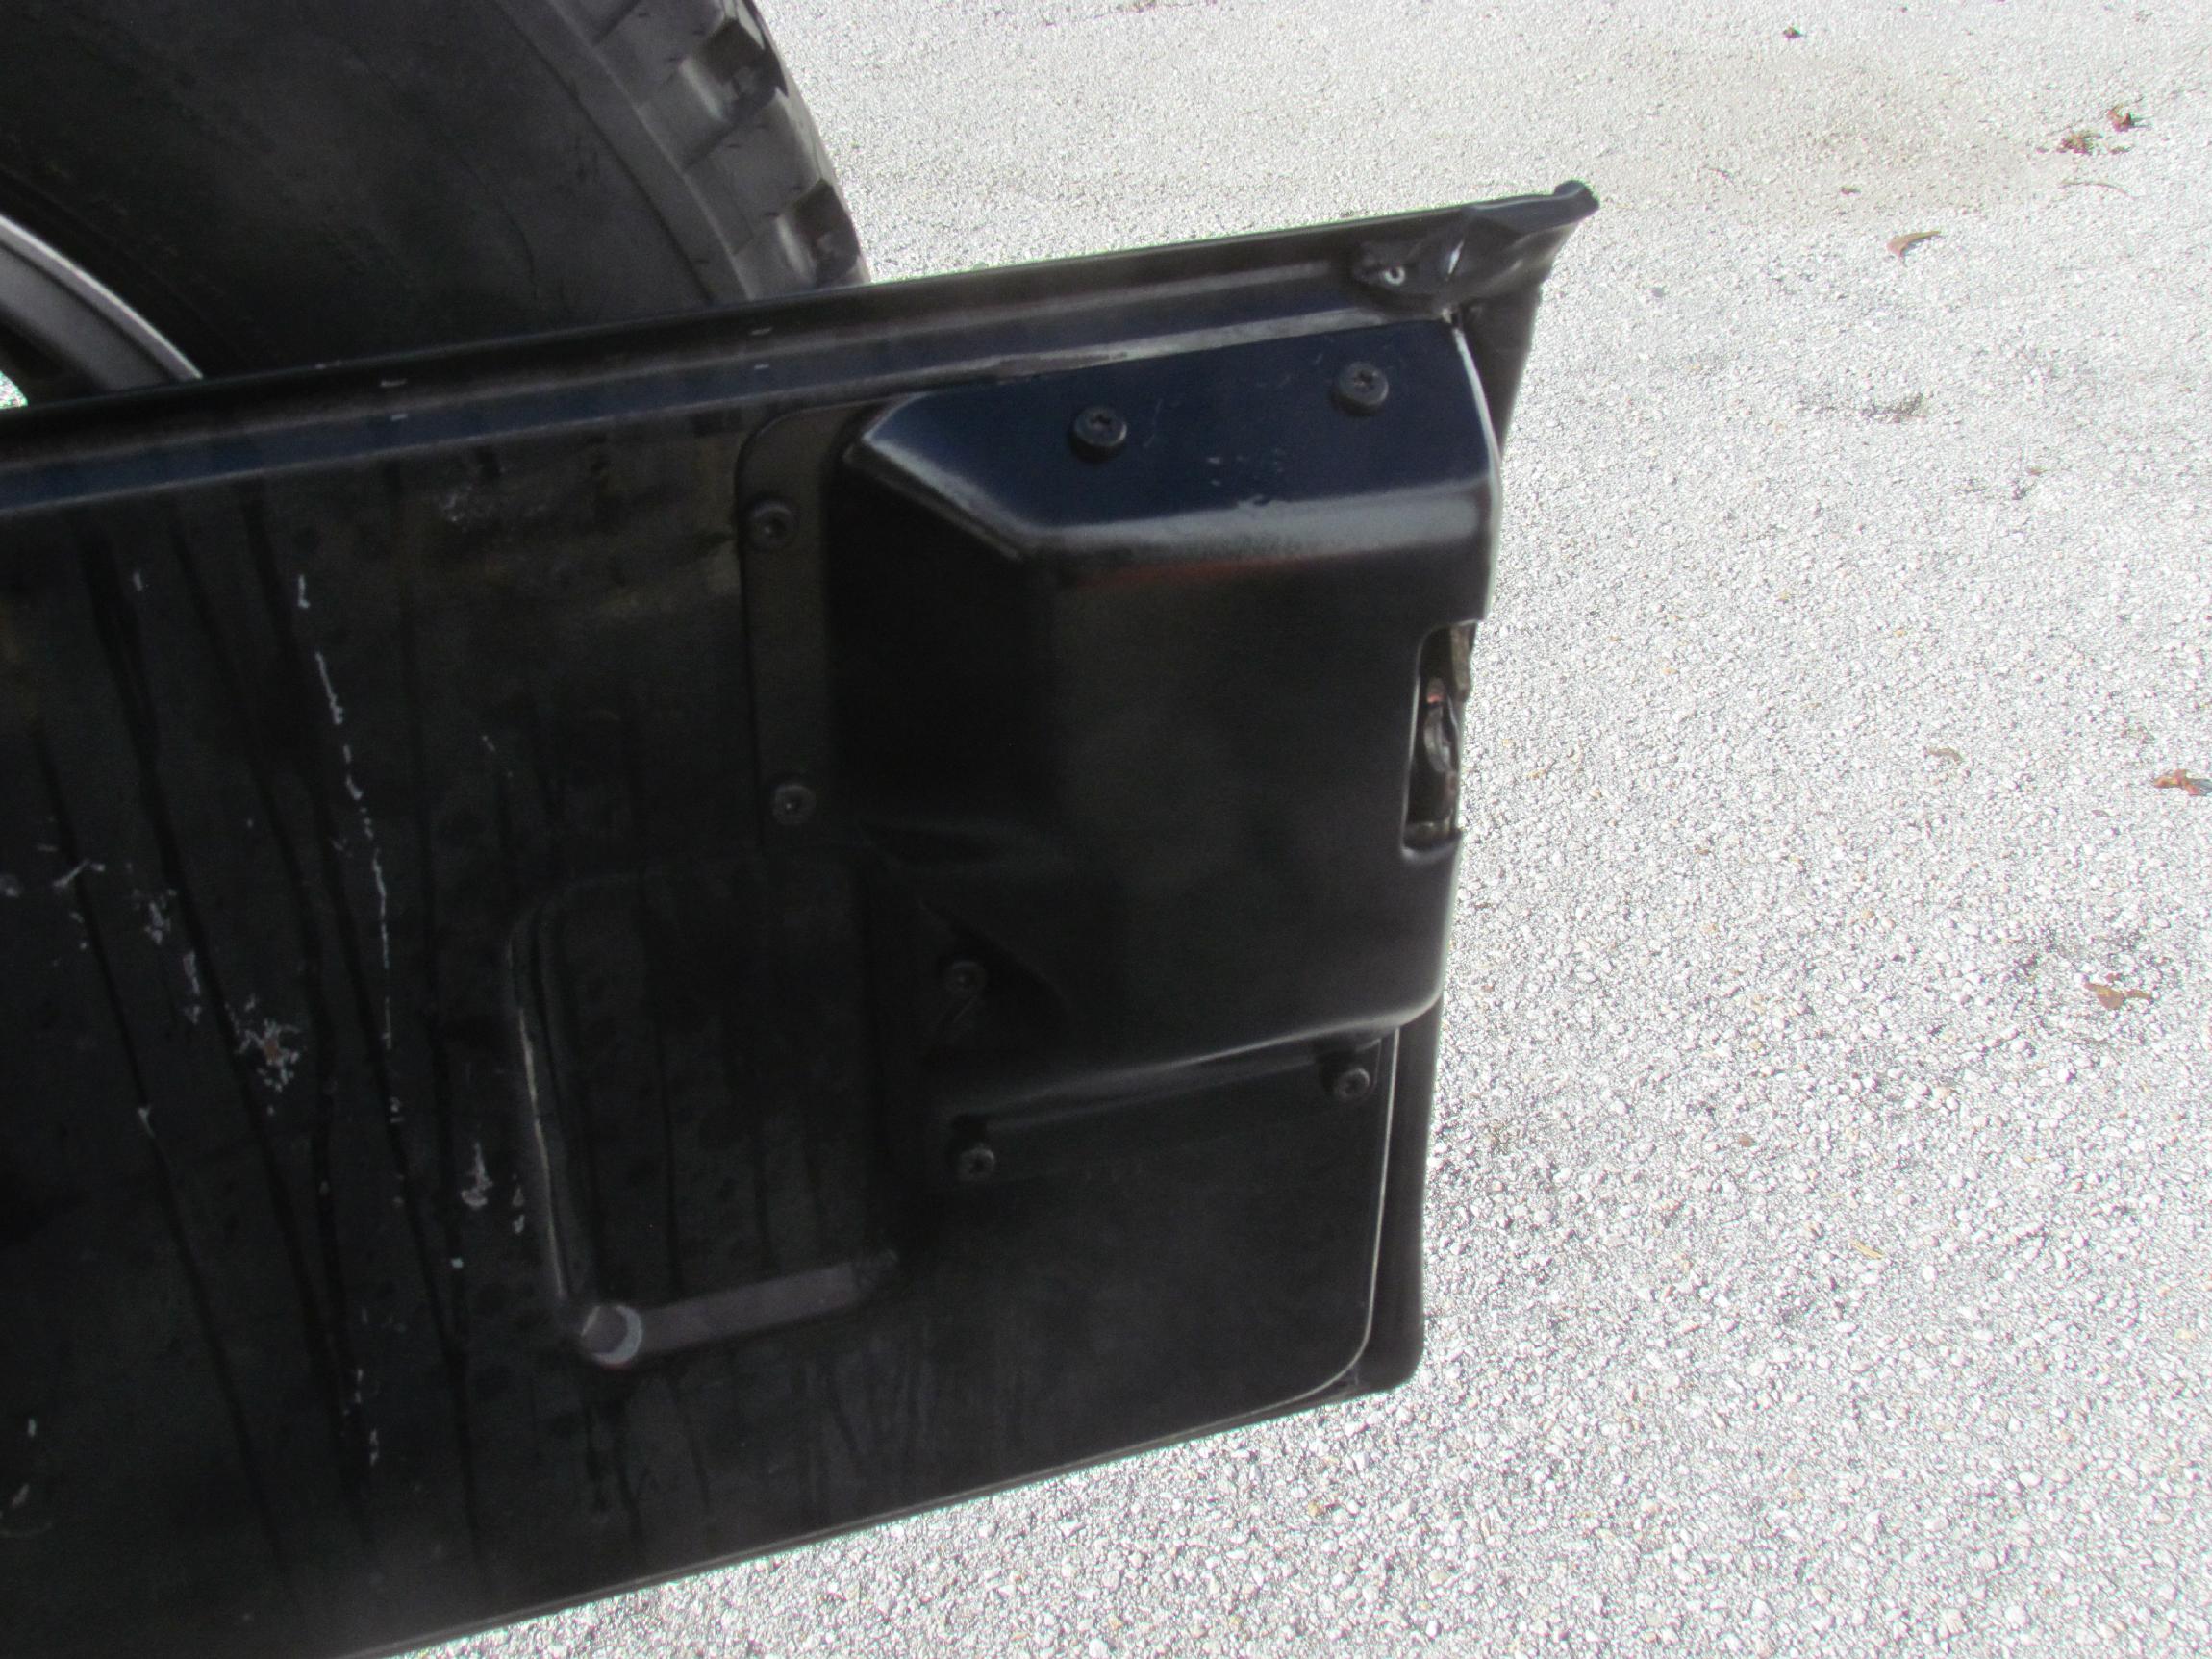
 April
2nd 2016 About six
weeks back, the outside driver's door latch on the Renegade broke. This
wouldn't have been a big deal 'cept the the inside door latch was
already broken and I hadn't gotten around to attending to it yet. This
time my procrastination antics put my tail in a sling. The only way to
get at the latch was taking the inner door panel off and that can't be
done with the soft skin portion of the door in place. I was reduced to
climbing in and out of the soft skin window while I pondered the
situation.
April
2nd 2016 About six
weeks back, the outside driver's door latch on the Renegade broke. This
wouldn't have been a big deal 'cept the the inside door latch was
already broken and I hadn't gotten around to attending to it yet. This
time my procrastination antics put my tail in a sling. The only way to
get at the latch was taking the inner door panel off and that can't be
done with the soft skin portion of the door in place. I was reduced to
climbing in and out of the soft skin window while I pondered the
situation.
I finally found a source for the soft skin frames and ordered a pair. Today was the day I got the sawzall out and cut the soft skin frame off. I was then able to pop off the inner door panel. Now. I can get the door open by manipulating the rods inside the door by hand until I can repair the latches.
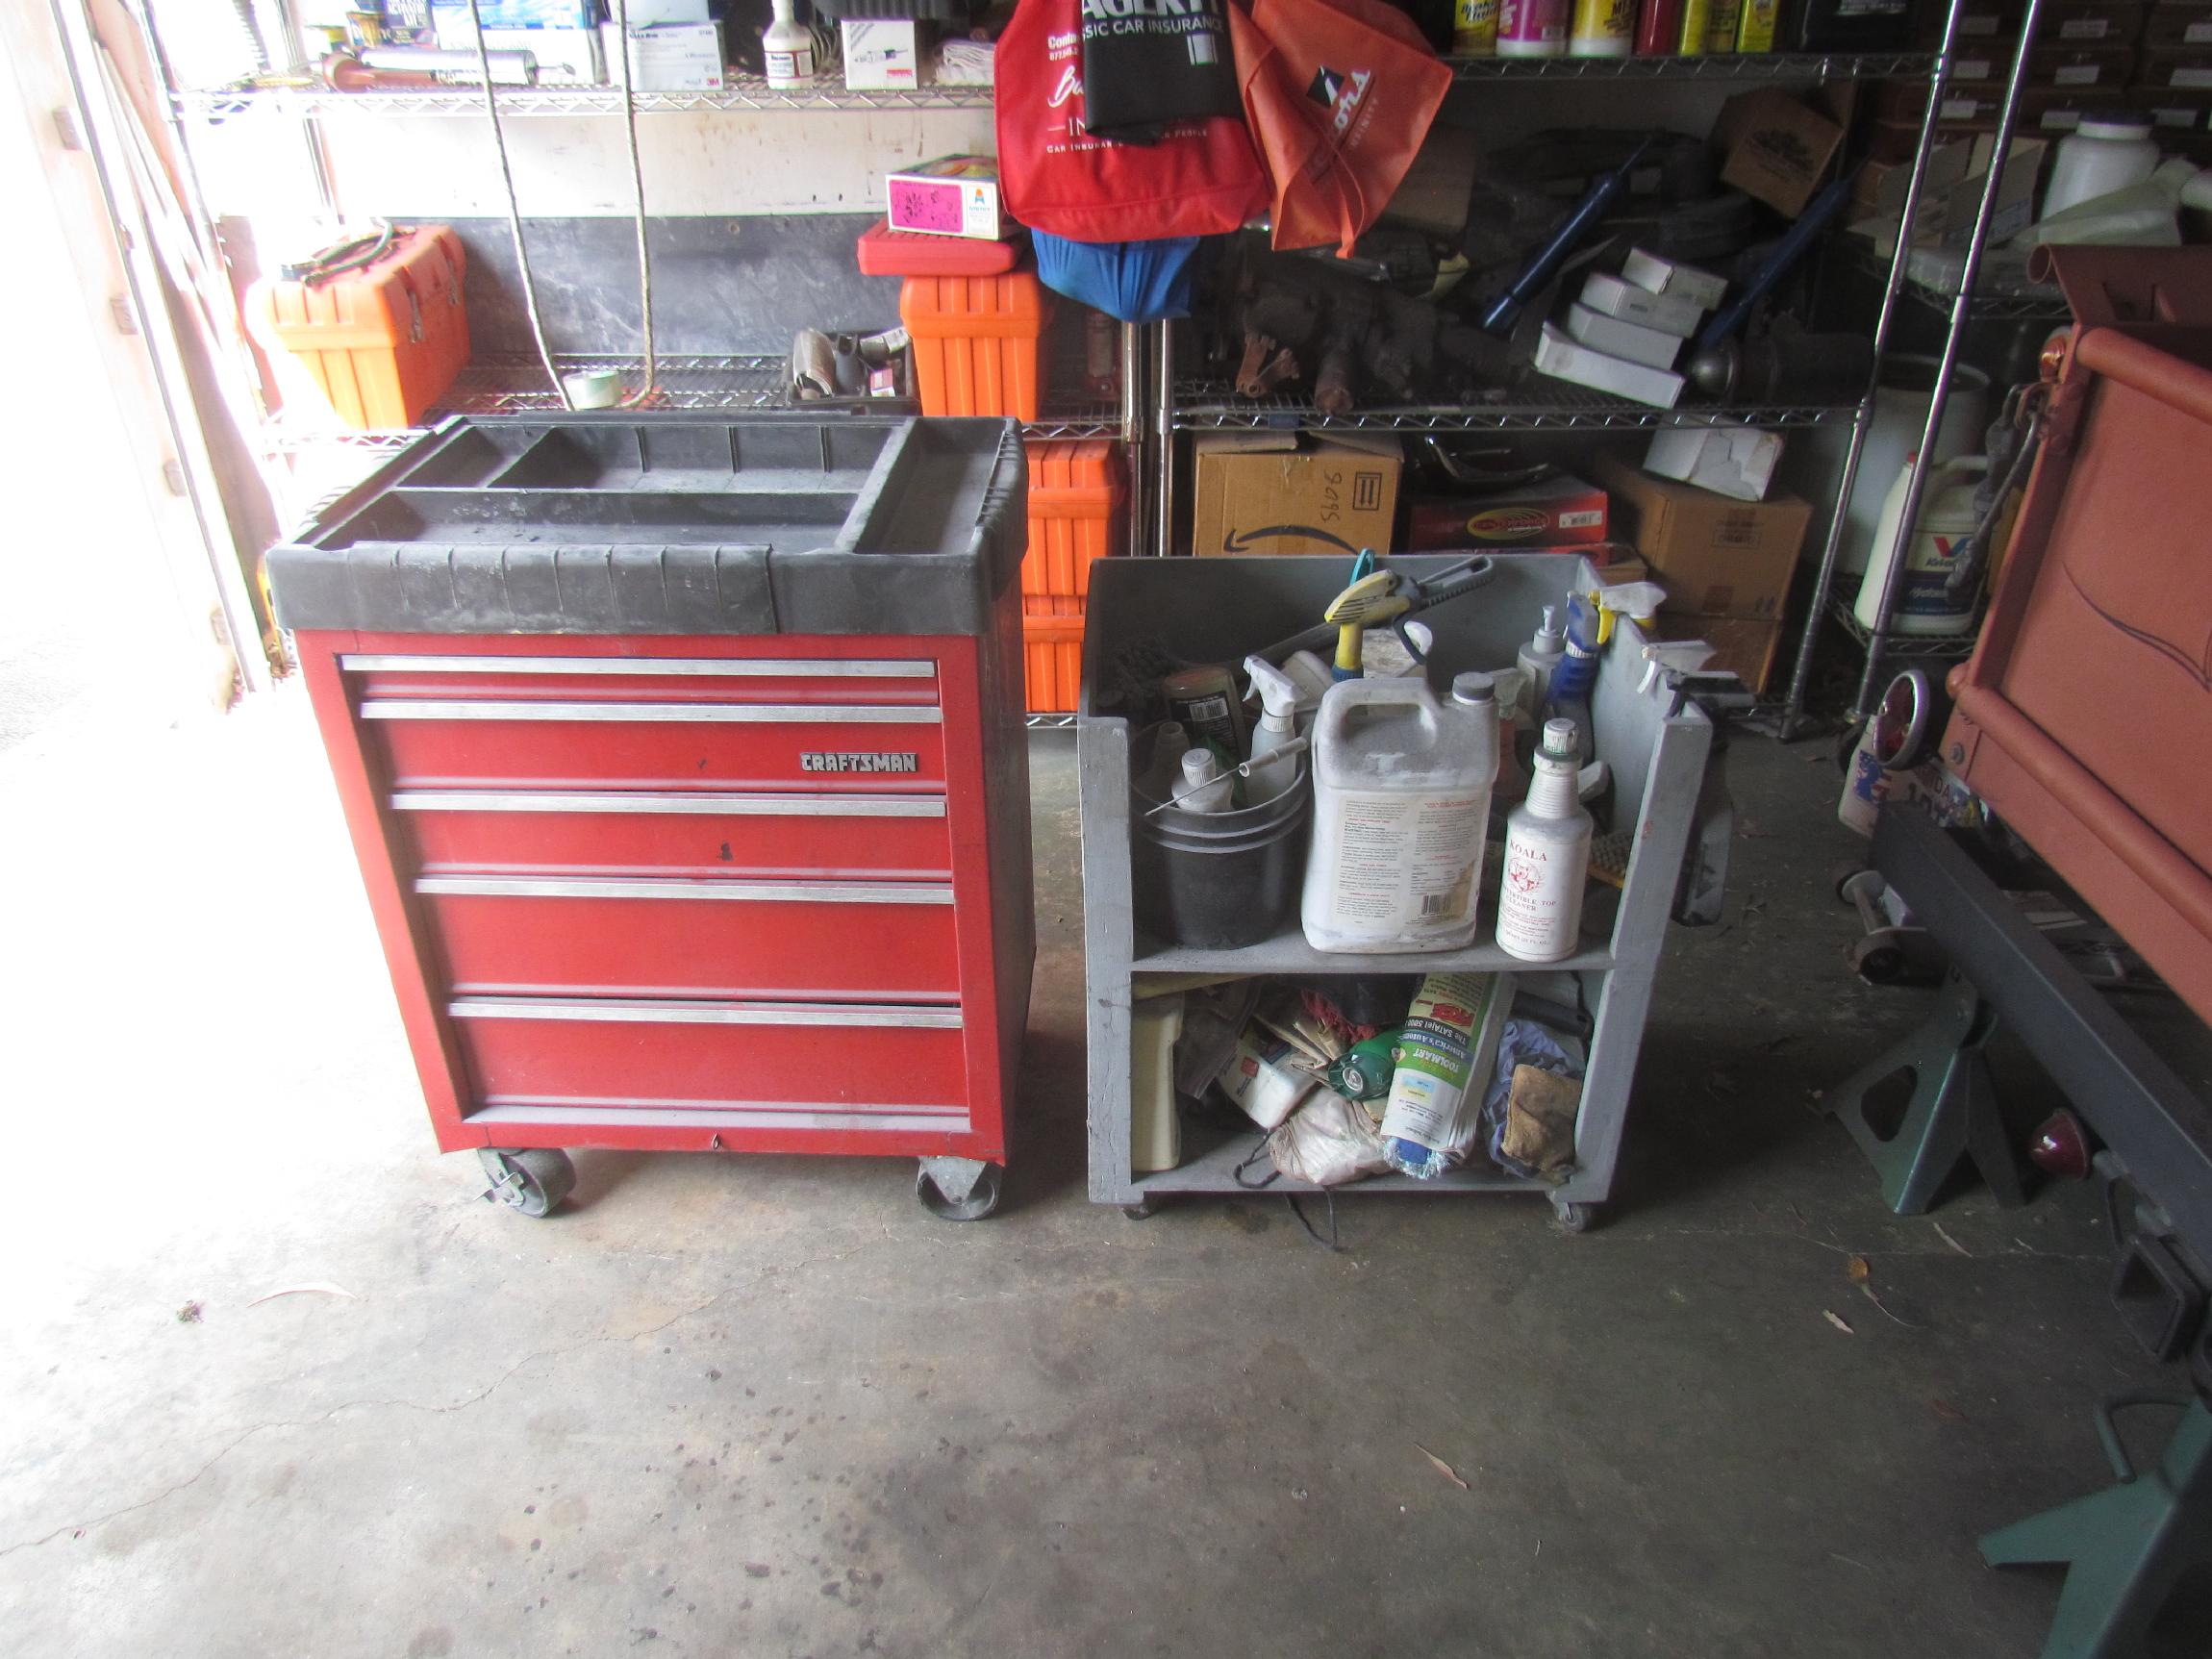 It's the end of a melancholy week. Last Saturday, old time car buddy,
Anthony Messuri, passed away unexpectedly. I used to tell Anthony that
following his '51 Merc leadsled up I-95 was like being in the wake of a
big sports fisherman. My friend, Gato, was also finishing up moving his
shop, GTO Auto Repair. out of our complex. He gave me a Craftsman tool
cart and a homemade detailing cart he no longer had use for. I think I
can put the tool cart to good use. The good news is that he will only
be about a half mile away at his new digs. I got into the beer of the
day, Florida Beer Company Sweet Stout, much too early to get much work
done. It, too, was bittersweet.
It's the end of a melancholy week. Last Saturday, old time car buddy,
Anthony Messuri, passed away unexpectedly. I used to tell Anthony that
following his '51 Merc leadsled up I-95 was like being in the wake of a
big sports fisherman. My friend, Gato, was also finishing up moving his
shop, GTO Auto Repair. out of our complex. He gave me a Craftsman tool
cart and a homemade detailing cart he no longer had use for. I think I
can put the tool cart to good use. The good news is that he will only
be about a half mile away at his new digs. I got into the beer of the
day, Florida Beer Company Sweet Stout, much too early to get much work
done. It, too, was bittersweet.
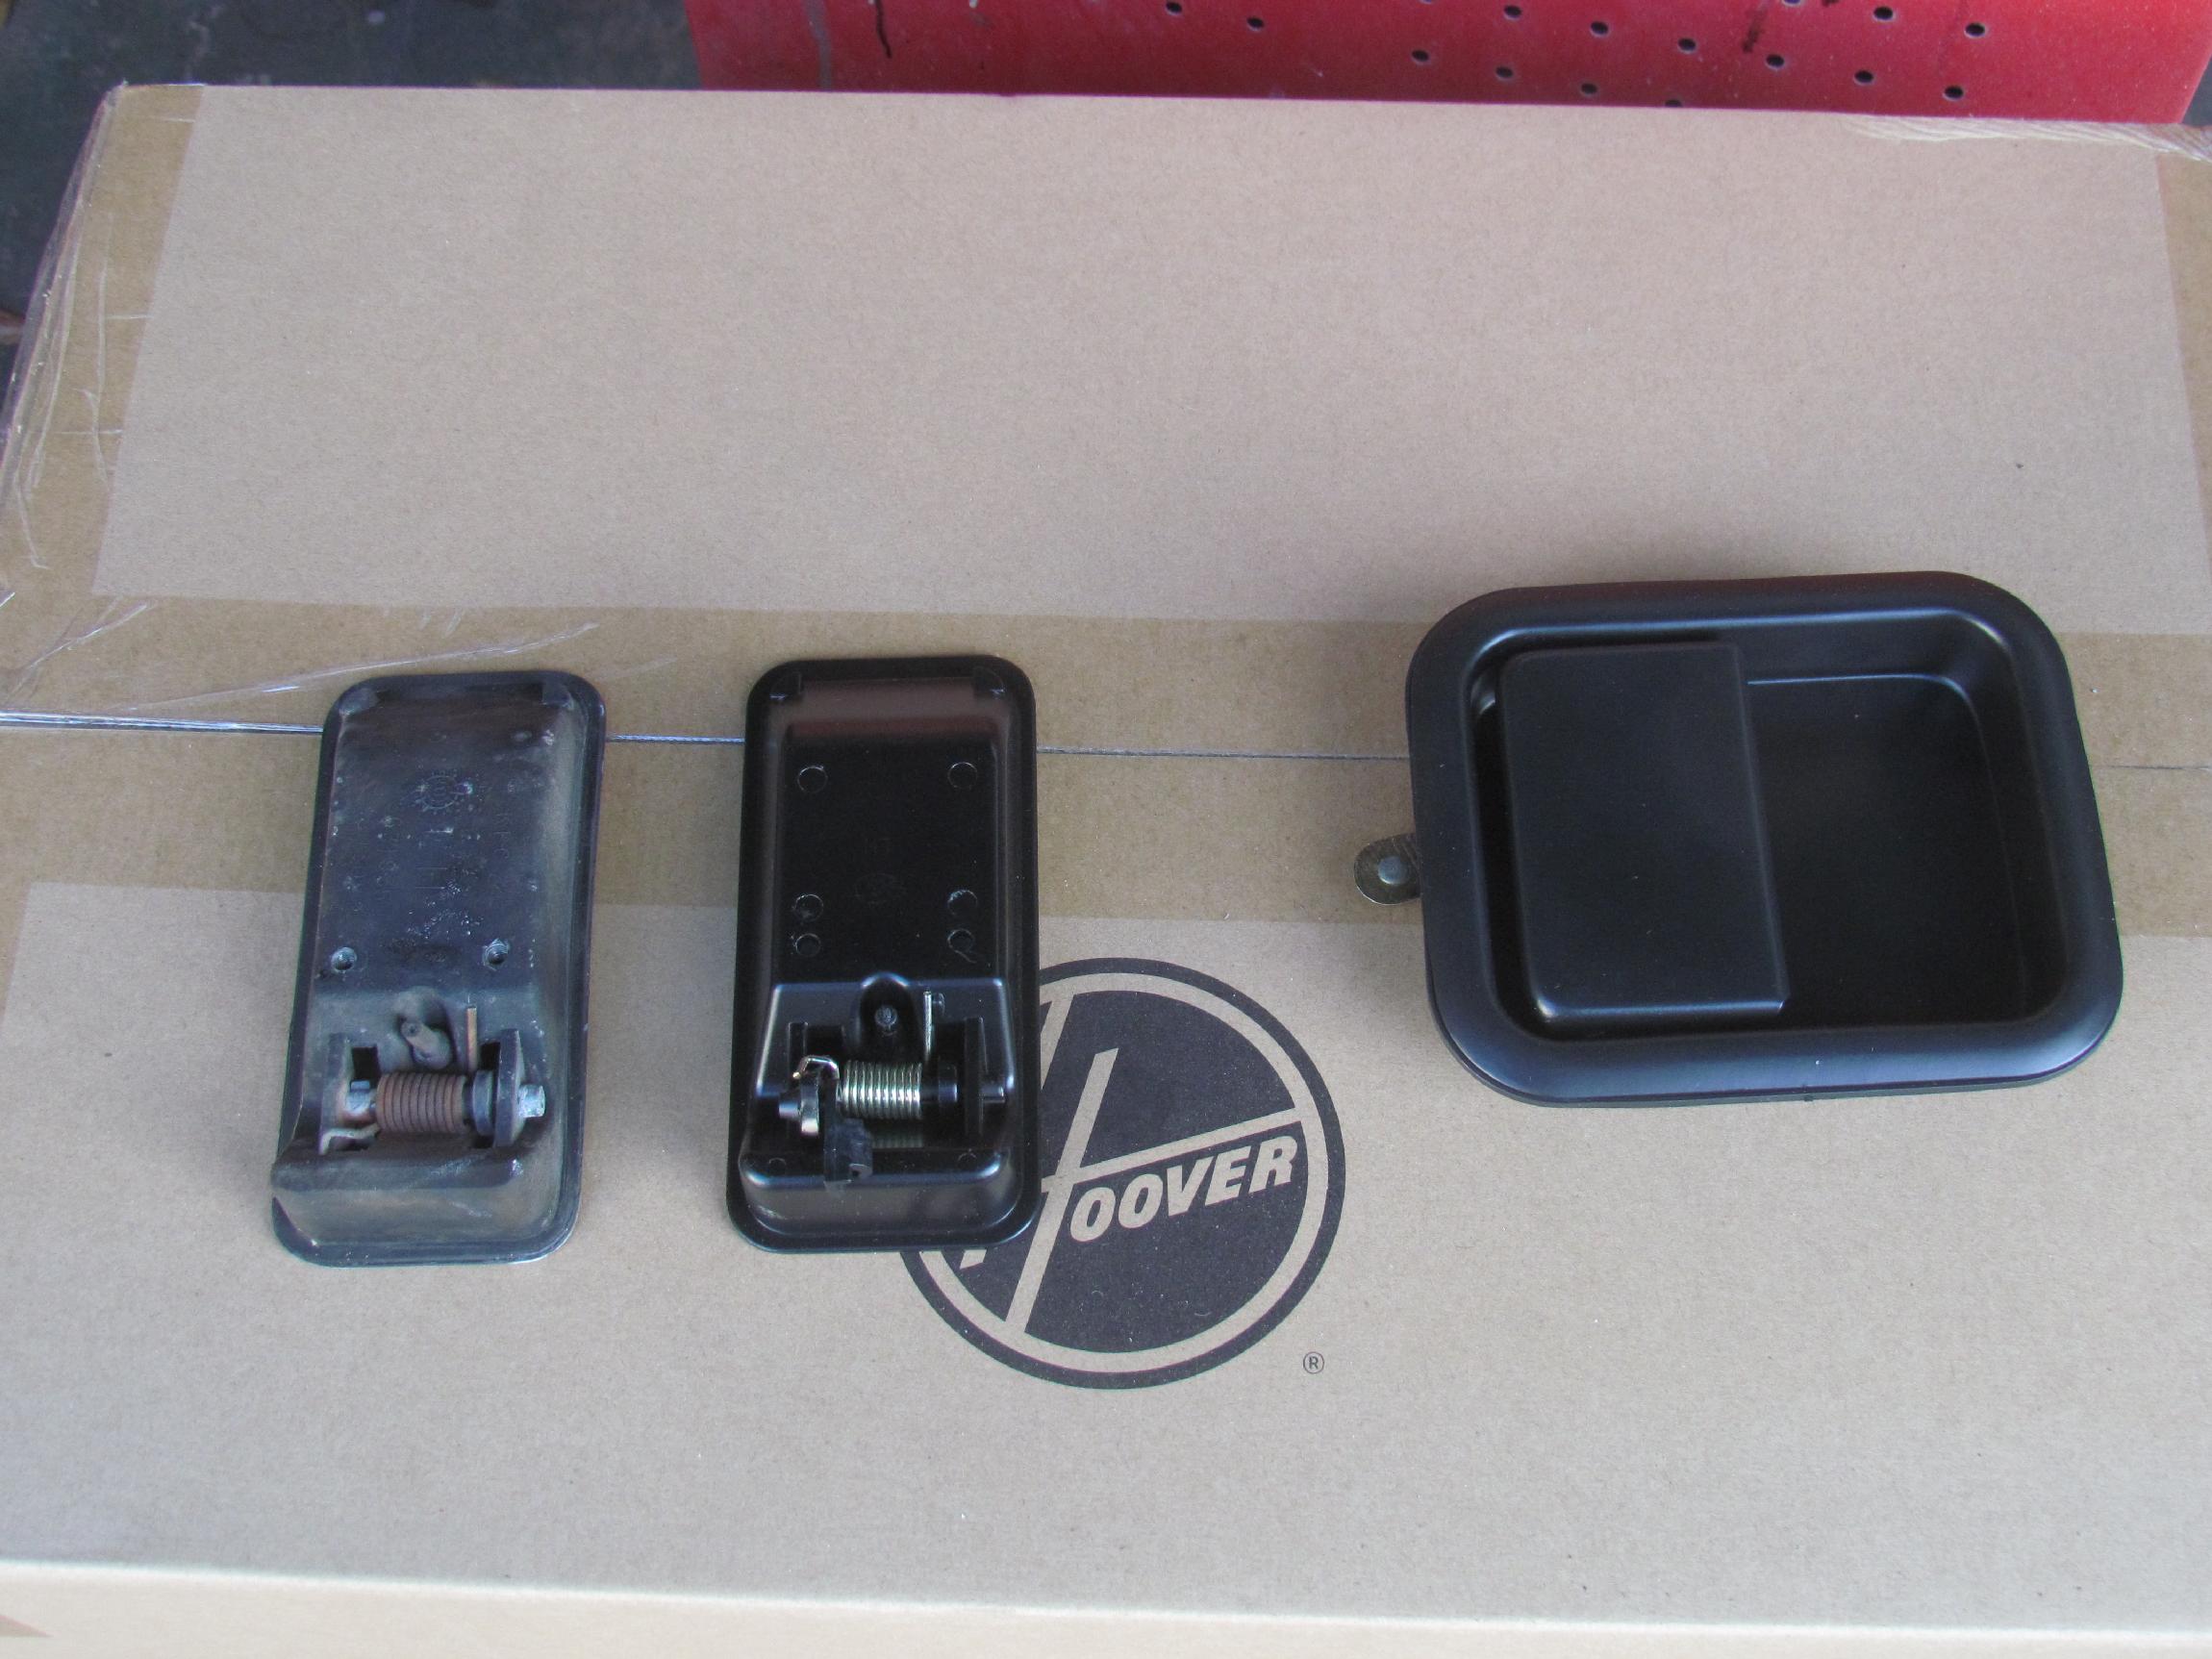 April
16th 2016 I finally got
the correct outside door latch for Renegade's half door. I had
mistakenly ordered
the latch for the full size door first time around. This happens often
with the Jeep and I am building up an inventory of spare parts.
April
16th 2016 I finally got
the correct outside door latch for Renegade's half door. I had
mistakenly ordered
the latch for the full size door first time around. This happens often
with the Jeep and I am building up an inventory of spare parts.
 The
old latch came out and the new one went in easily enough since I had
the correct torx screw bit for the job. The new latch even had a new
plastic rod retainer on it so I won't have to go in search of another
obscure part. I'm not finished yet. I still have to get the inside
latch working as well as the key lock.
The
old latch came out and the new one went in easily enough since I had
the correct torx screw bit for the job. The new latch even had a new
plastic rod retainer on it so I won't have to go in search of another
obscure part. I'm not finished yet. I still have to get the inside
latch working as well as the key lock.
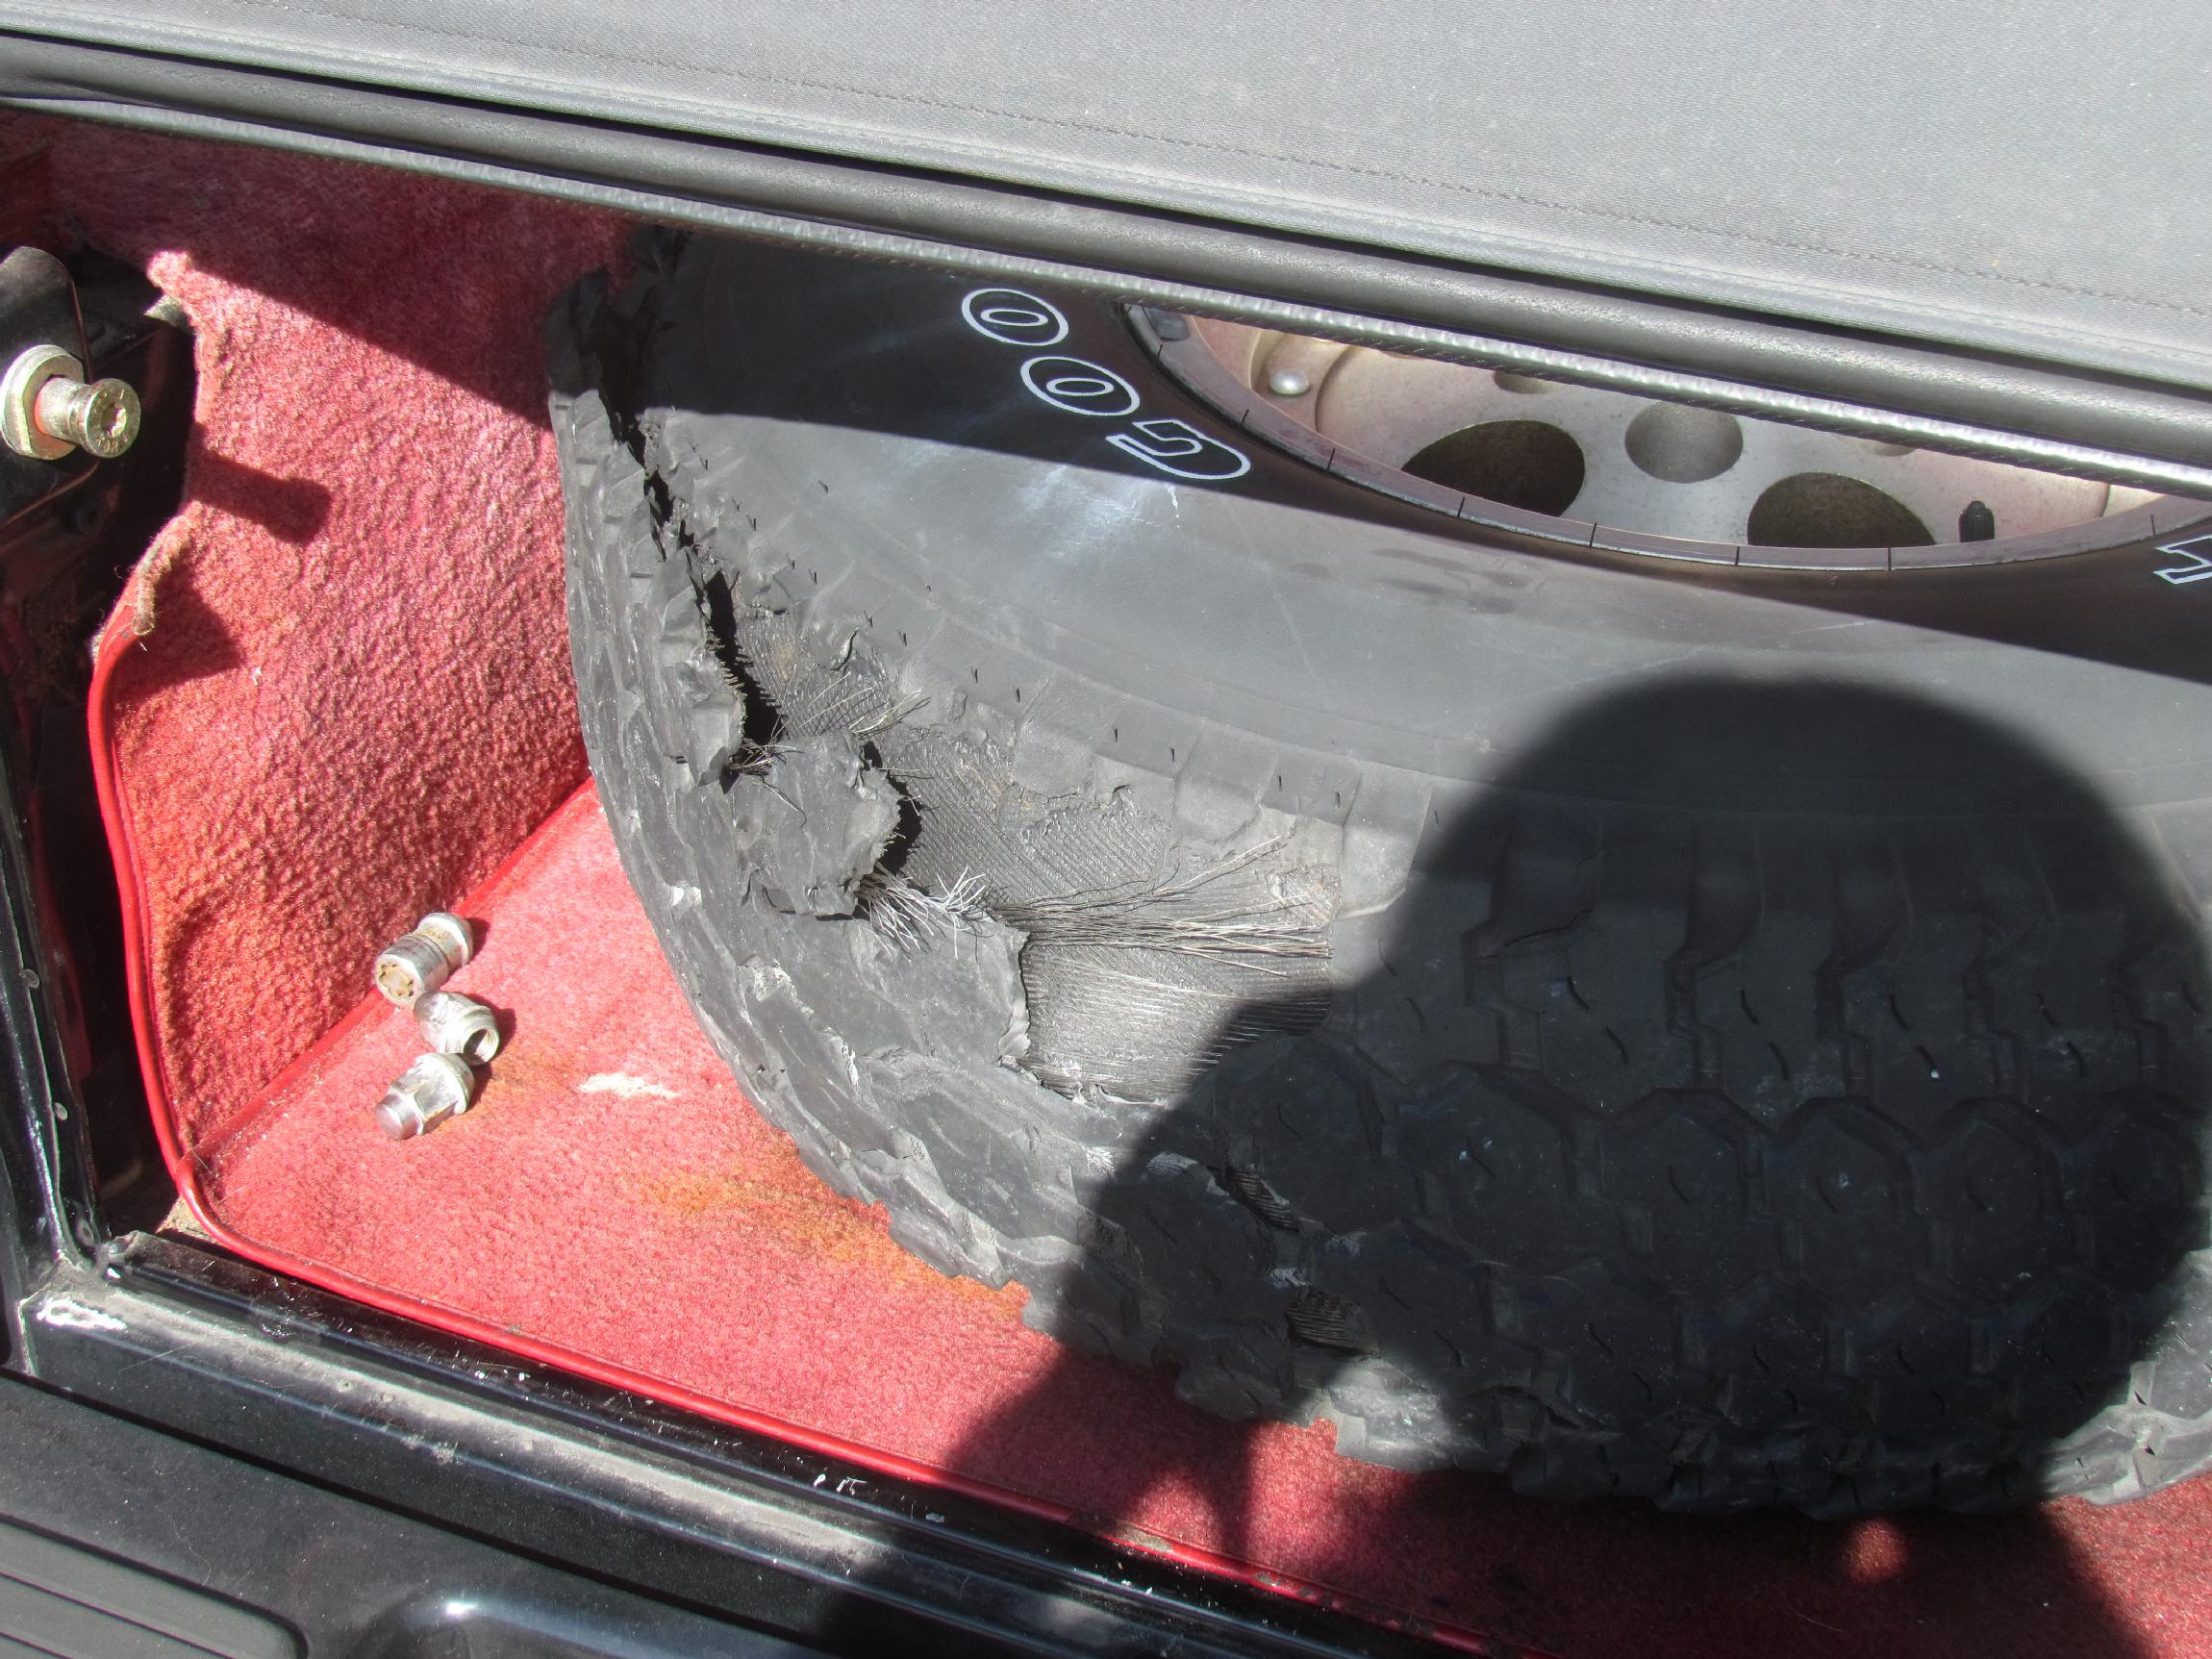 June
29th 2016 Good
luck and bad luck on the way in to the Krash Lab this morning. I was
running late and it was already daylight. That's good. About half way
there, the right front tire on Renegade came apart. That's bad. Traffic
was still light and I was able to pull over to a fairly safe spot.
That's good. I was not going fast so the tire disintegration did not
tear up Renegade's fiberglass fender. That's real good. It was the
passenger side tire so my ass was not hangin' out in traffic as I
changed it. That's good. Was able to get the spare on and back on my
way in about twenty minutes. That's good.
June
29th 2016 Good
luck and bad luck on the way in to the Krash Lab this morning. I was
running late and it was already daylight. That's good. About half way
there, the right front tire on Renegade came apart. That's bad. Traffic
was still light and I was able to pull over to a fairly safe spot.
That's good. I was not going fast so the tire disintegration did not
tear up Renegade's fiberglass fender. That's real good. It was the
passenger side tire so my ass was not hangin' out in traffic as I
changed it. That's good. Was able to get the spare on and back on my
way in about twenty minutes. That's good.
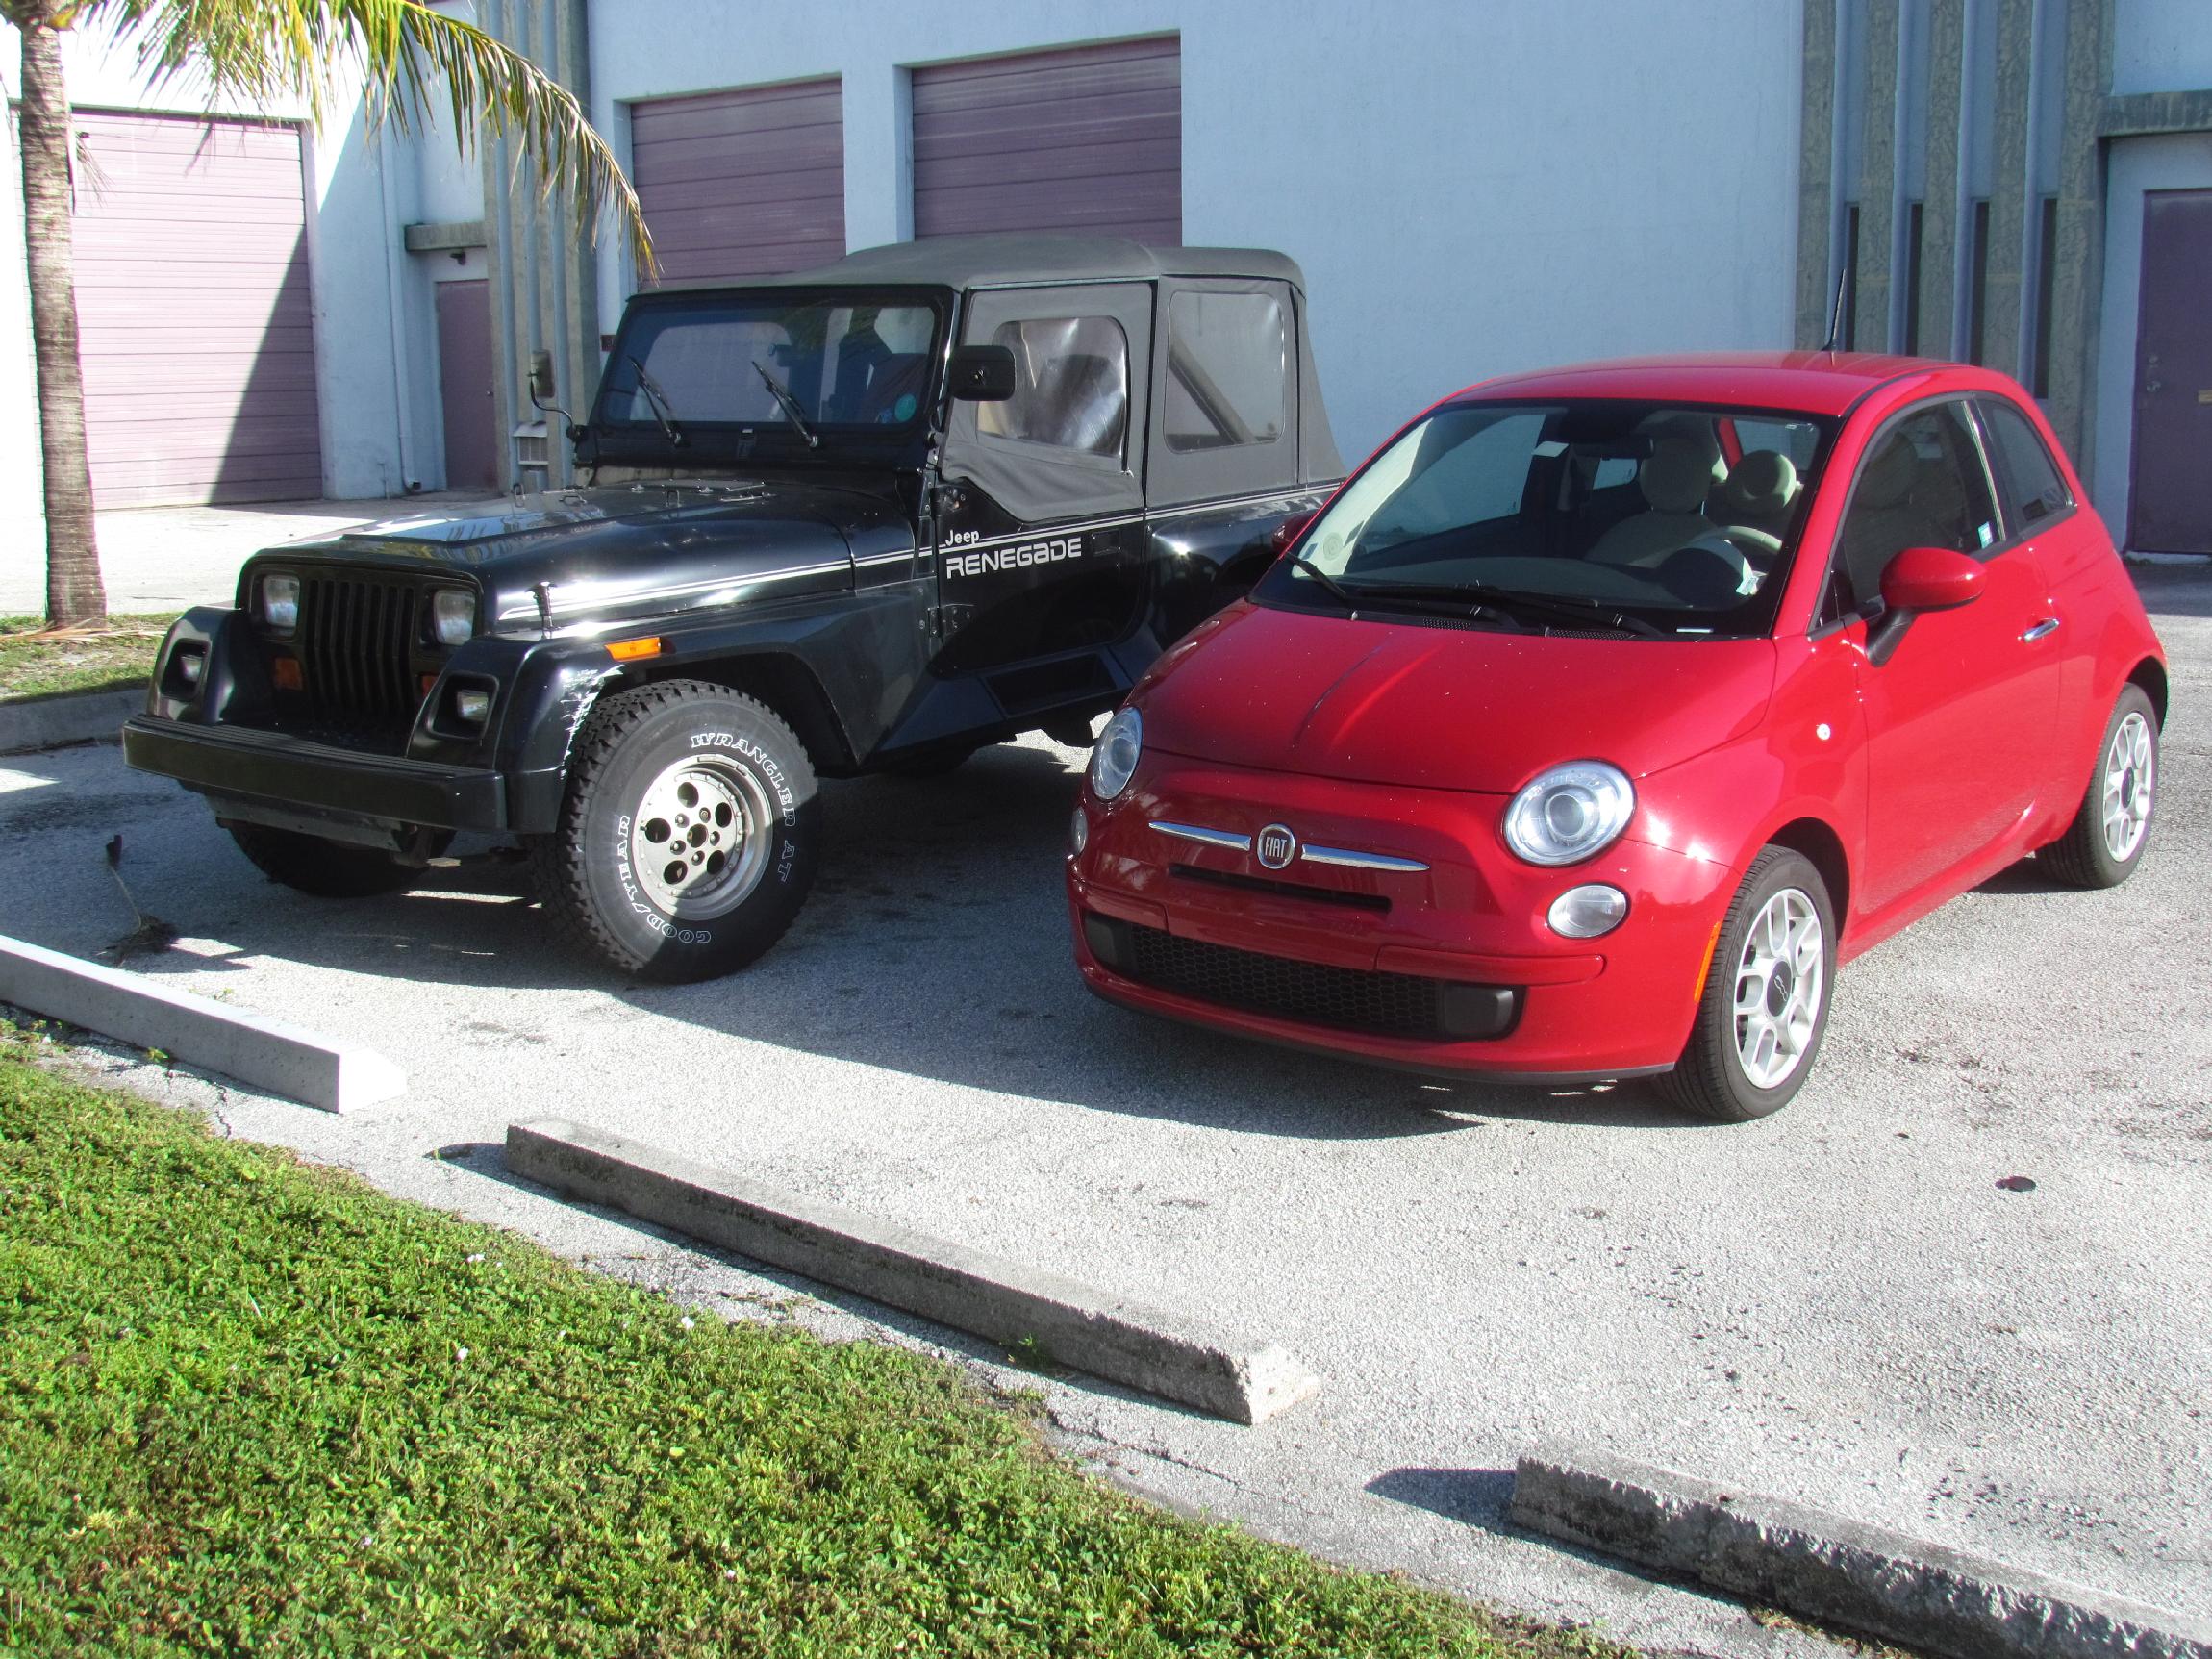 July
20th 2016 More
good luck and bad luck. Driving to the Shop from the Krash Lab a week
ago Sunday
evening, Renegade started sounding worse and worse. The failing power
steering pump (I think), that had been exhibiting a whine for some time
now, also started ticking like a playing card in a bicycle spoke.
Steering has been stiff for a few weeks as well. That's bad. The last
three blocks also had serpentine belt screeching and nasty metal
clunking that I could not identify but I did make it to the shop
parking lot. That's good. Once again all my vehicles are down for the
count. That's bad. The Enterprise rental place is a five minute walk
from the BillyBob Shop and I was able to rent a Fiat 500 junebug
econobox in short order on Monday morning. That's good. Nice little car
but I'm puzzled by the 140 MPH speedo.
July
20th 2016 More
good luck and bad luck. Driving to the Shop from the Krash Lab a week
ago Sunday
evening, Renegade started sounding worse and worse. The failing power
steering pump (I think), that had been exhibiting a whine for some time
now, also started ticking like a playing card in a bicycle spoke.
Steering has been stiff for a few weeks as well. That's bad. The last
three blocks also had serpentine belt screeching and nasty metal
clunking that I could not identify but I did make it to the shop
parking lot. That's good. Once again all my vehicles are down for the
count. That's bad. The Enterprise rental place is a five minute walk
from the BillyBob Shop and I was able to rent a Fiat 500 junebug
econobox in short order on Monday morning. That's good. Nice little car
but I'm puzzled by the 140 MPH speedo.
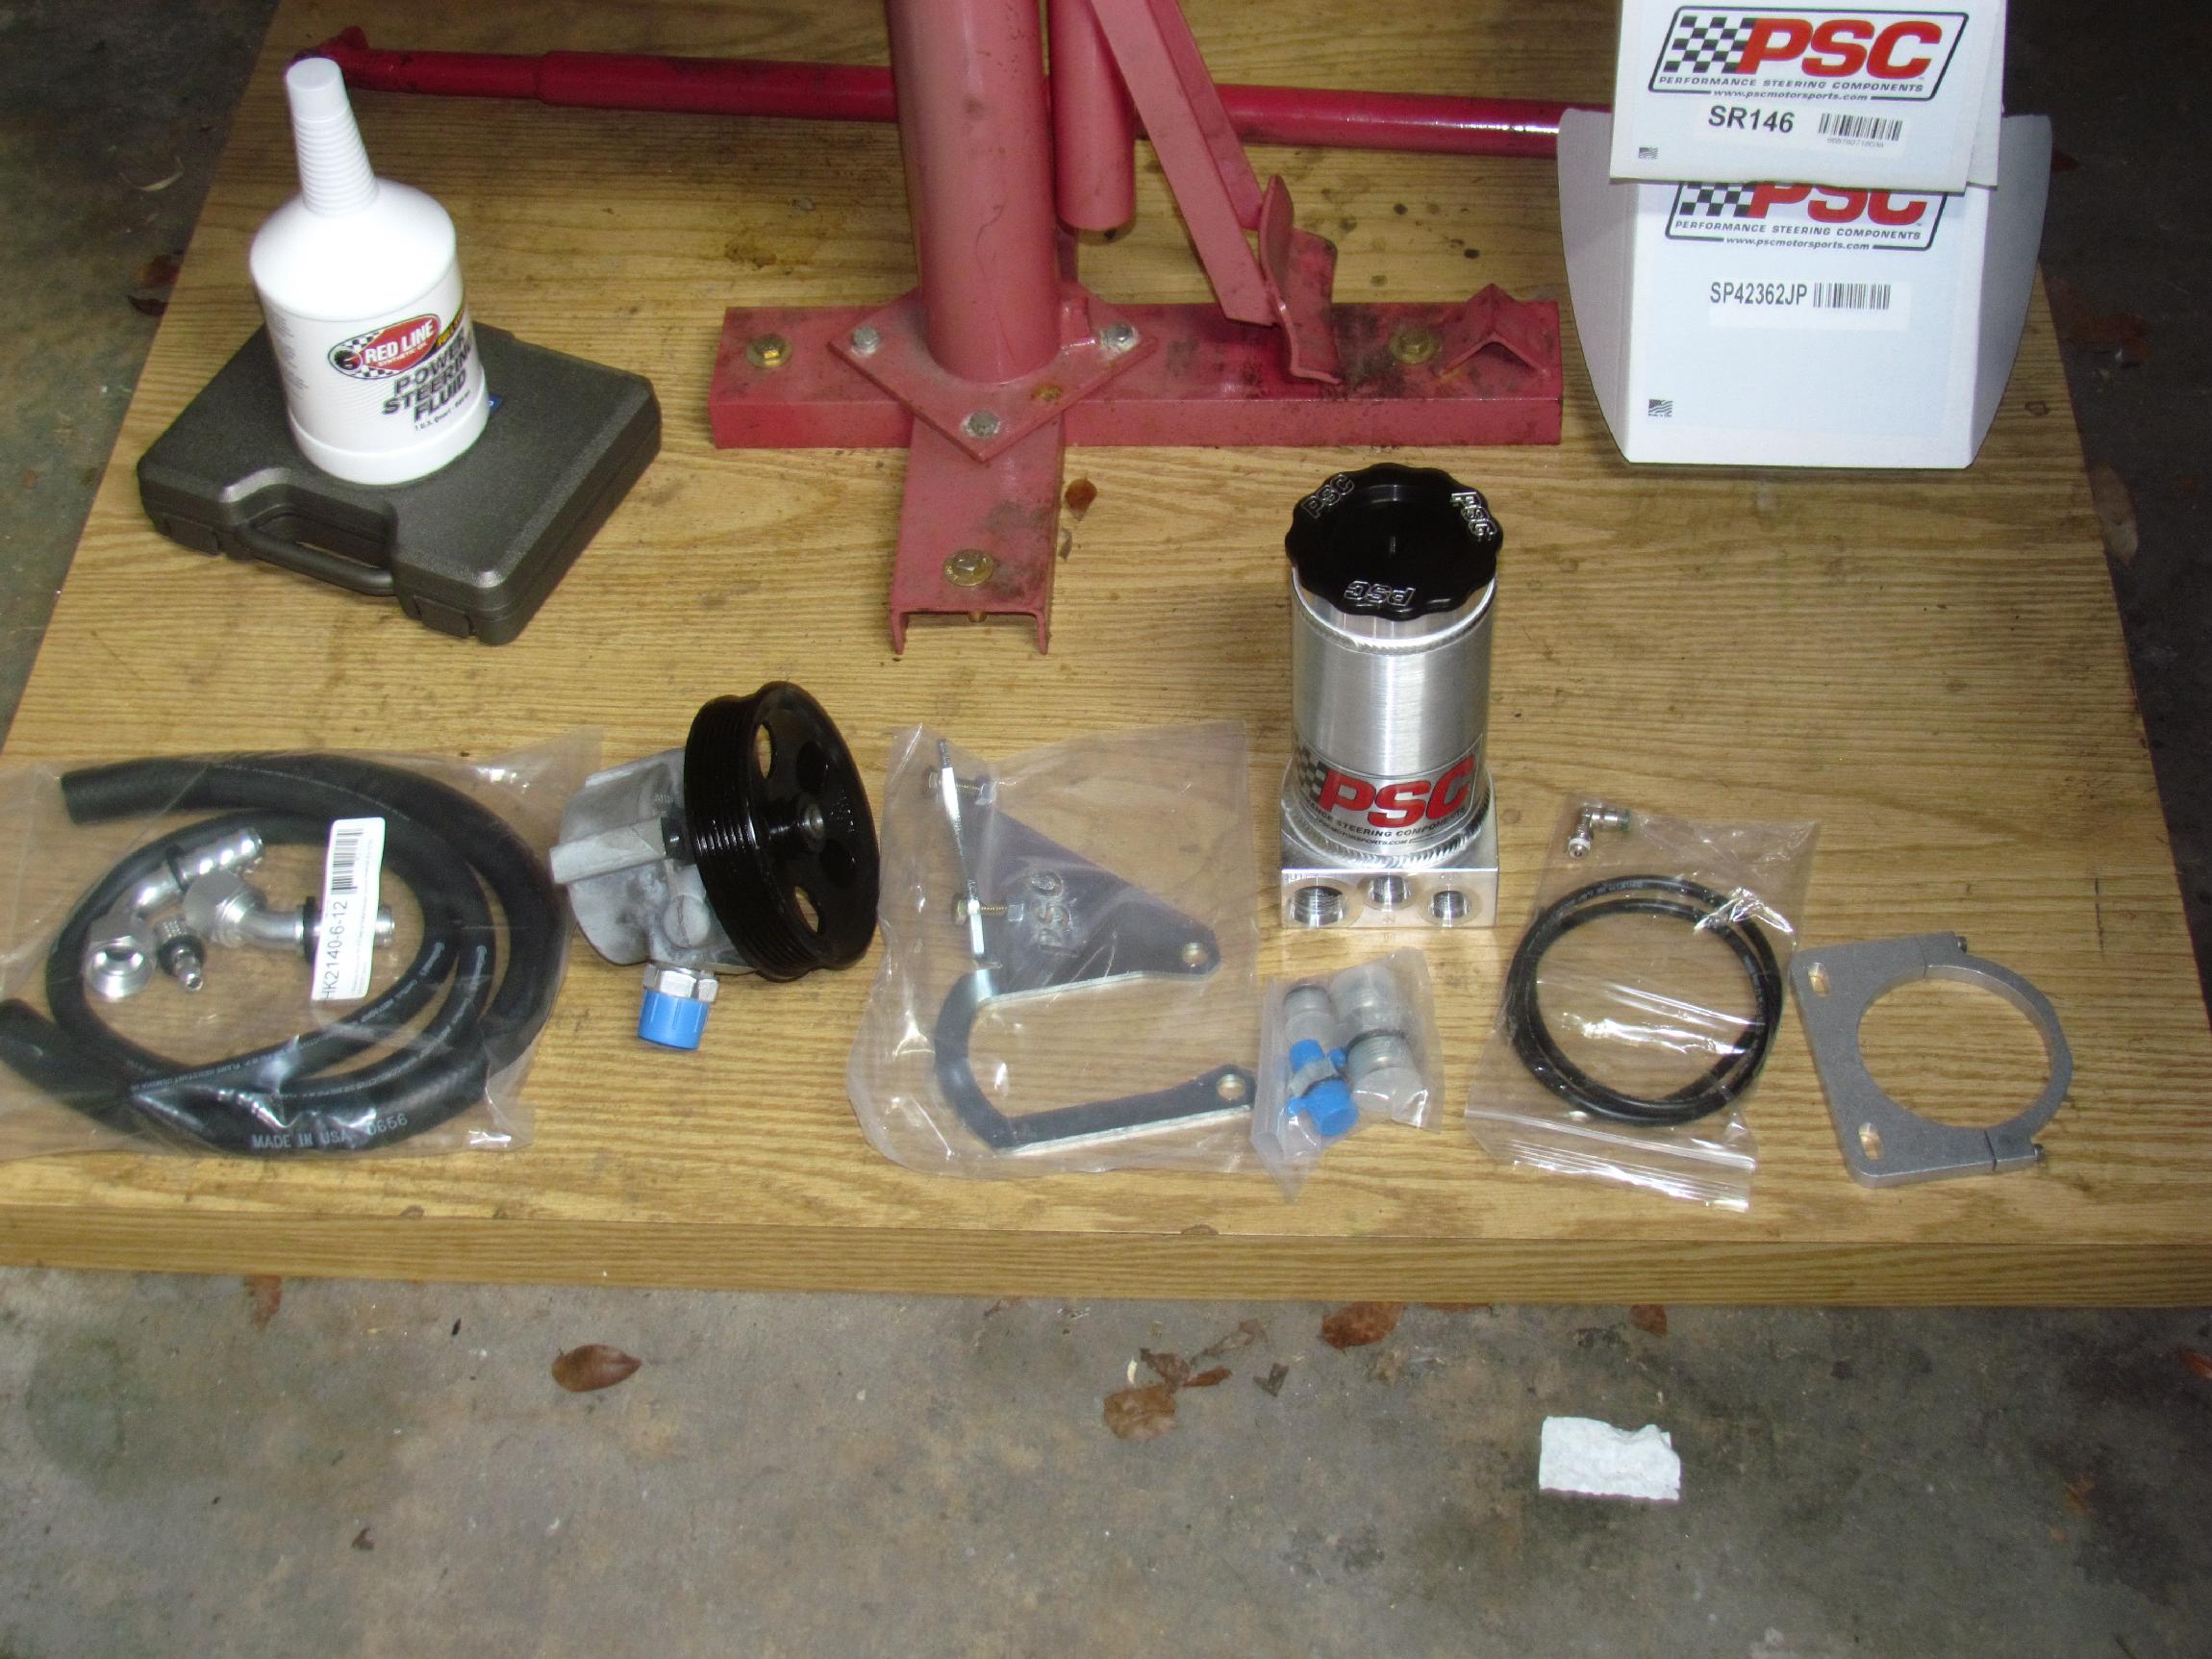
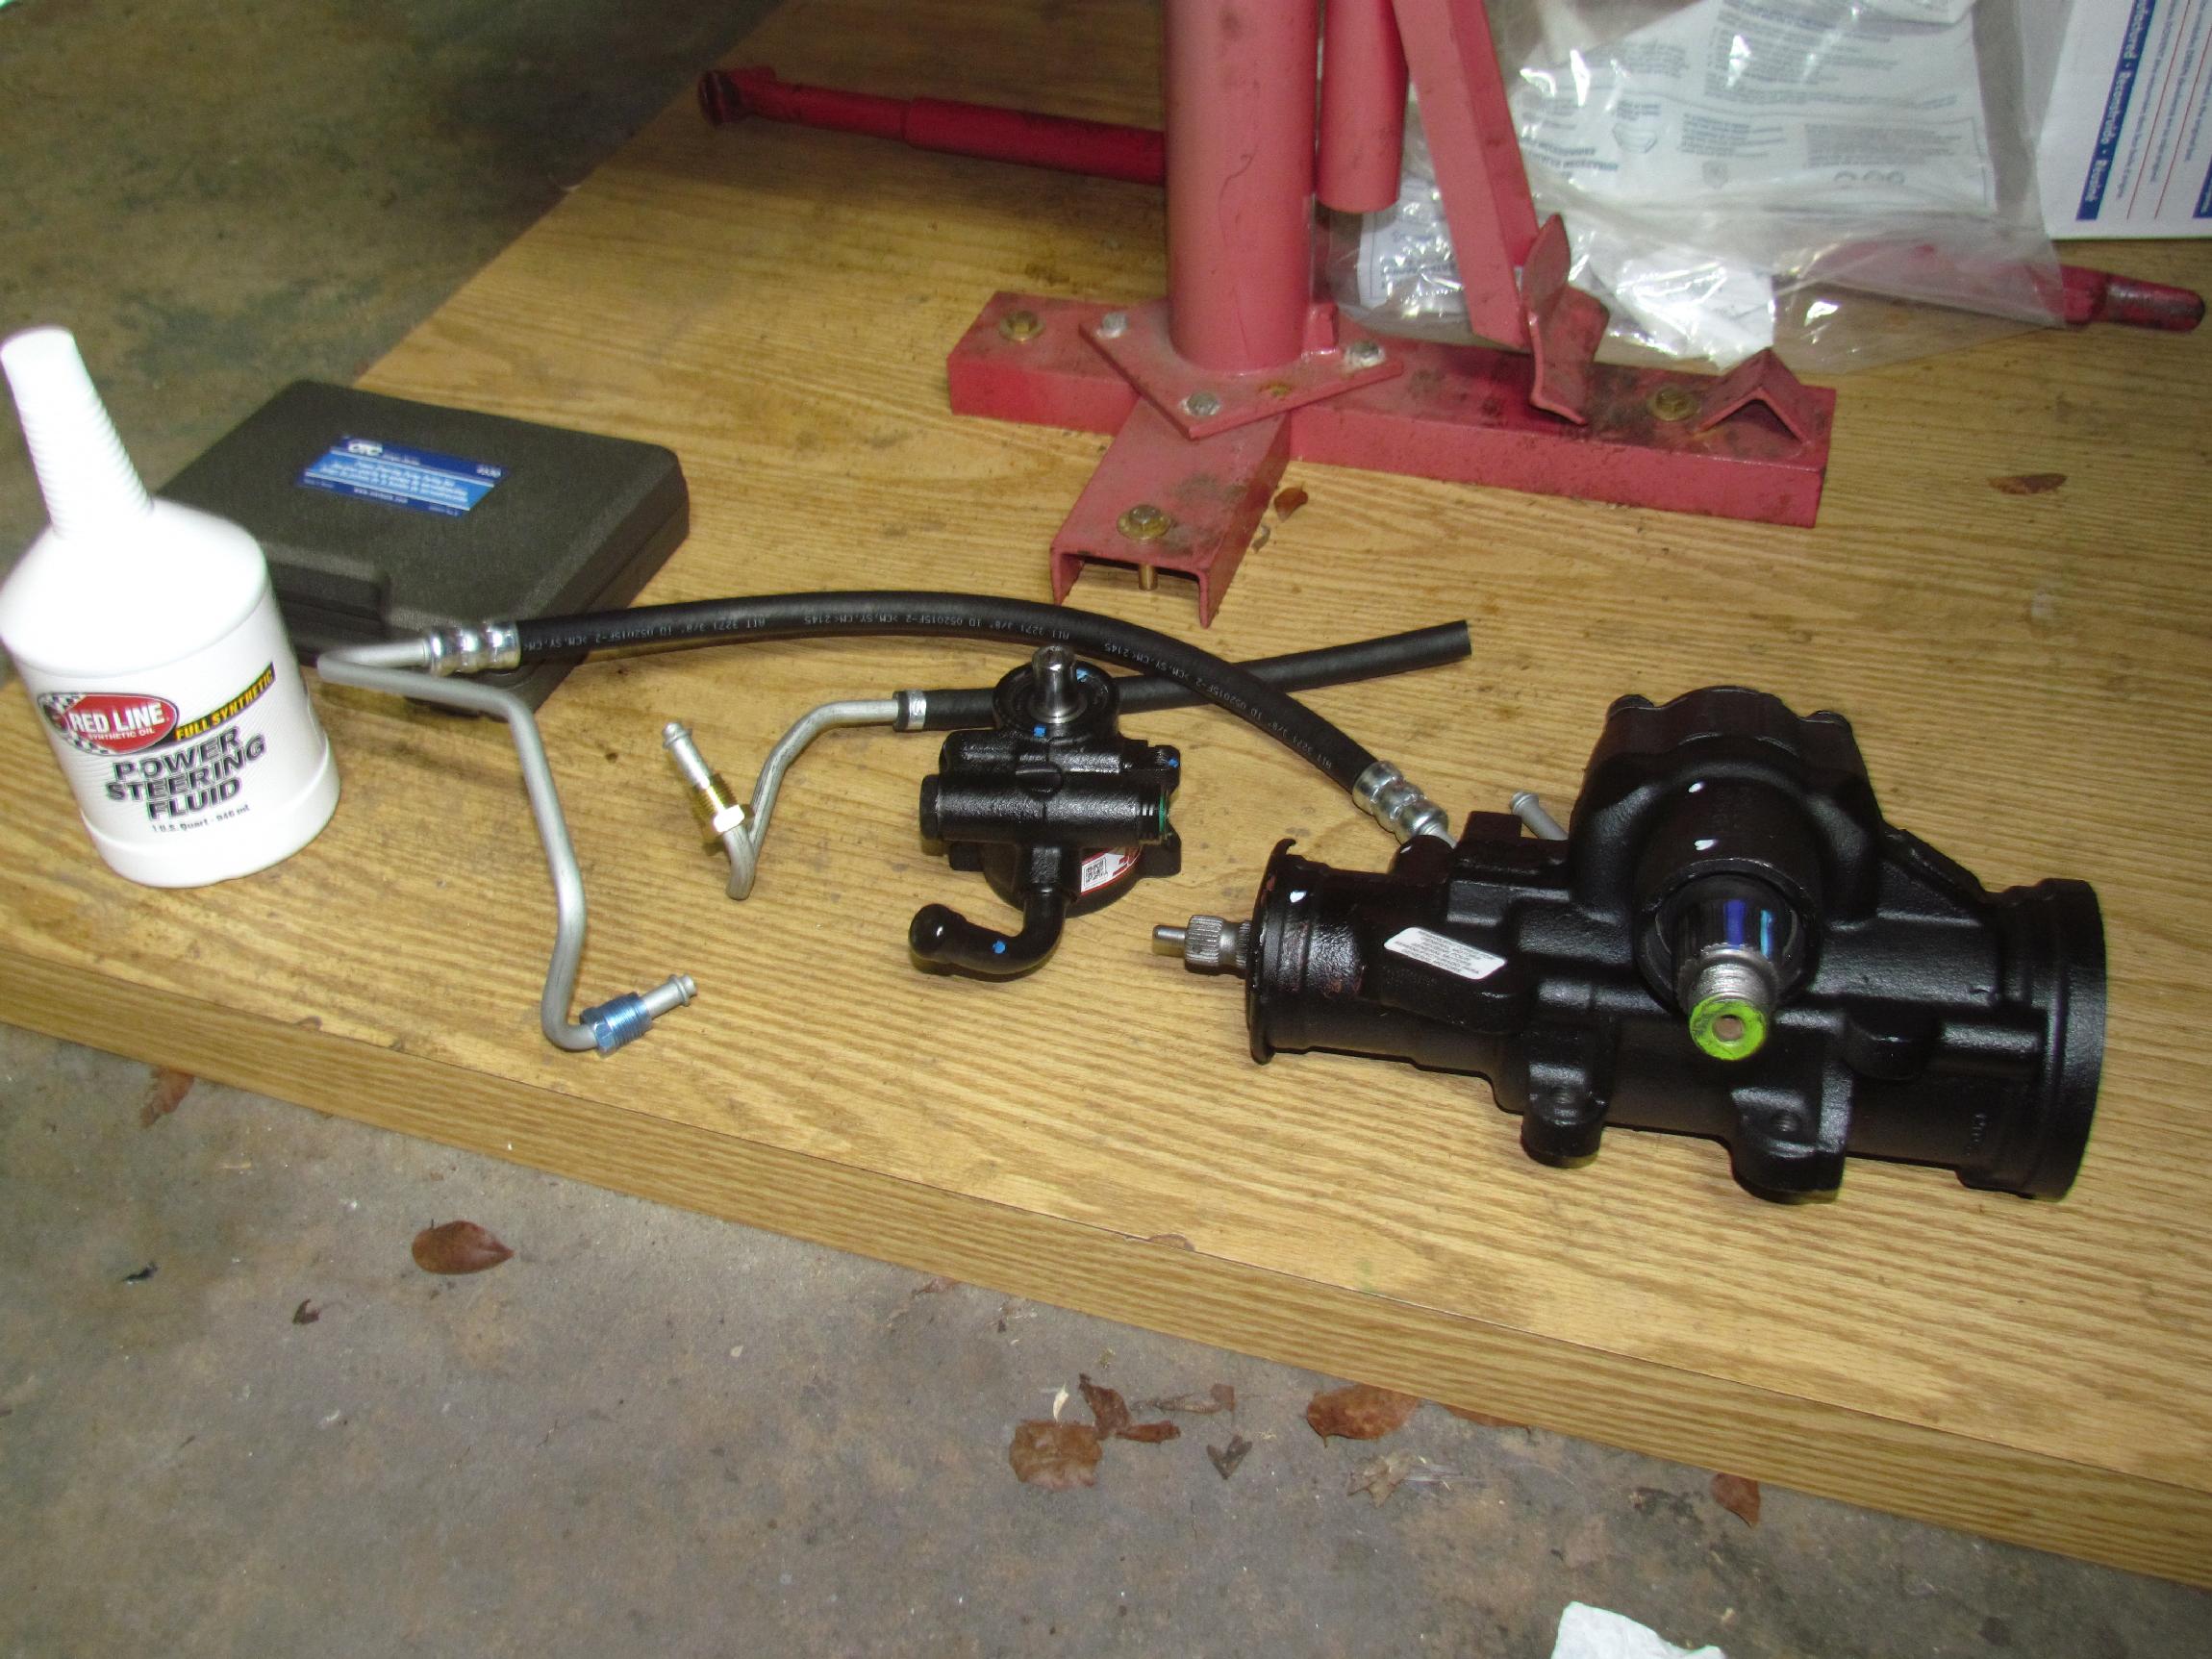 July
21st 2016 Procuring
the
parts for Renegade's repairs are SNAFU. This happens often with the
Jeep for unknown reasons. I don't like working on the Jeep much and
Renegade knows this it seems. My policy with Renegade, when something
breaks, is to use performance replacements. This is to reward the hot
rodder in me with something shiny for my efforts. This time I ordered a
PSC Motorsports High Performance Steering Pump Kit from Quadratec and a
1998 Dodge Durango Steering Gear Box (direct bolt in replacement for
the stock Jeep steering gear) from RockAuto and Redline Power Steering
Fluid thru Amazon. All these items were ordered with expedited
shipping. The next day when I noticed no movement on the Quadratec
order, I logged in to discover it had been backordered. Arrugh! Went
back to RockAuto and ordered a standard power steering pump kit with
hoses. As of today, I have the stock steering pump, stock hoses,
Durango steering
gear box, the steering pump fluid and a steering pump pulley tool. The
stock hoses arrived separately in a later shipment. Ironically, the
backordered steering pump has hoses. Like I said: SNAFU.
July
21st 2016 Procuring
the
parts for Renegade's repairs are SNAFU. This happens often with the
Jeep for unknown reasons. I don't like working on the Jeep much and
Renegade knows this it seems. My policy with Renegade, when something
breaks, is to use performance replacements. This is to reward the hot
rodder in me with something shiny for my efforts. This time I ordered a
PSC Motorsports High Performance Steering Pump Kit from Quadratec and a
1998 Dodge Durango Steering Gear Box (direct bolt in replacement for
the stock Jeep steering gear) from RockAuto and Redline Power Steering
Fluid thru Amazon. All these items were ordered with expedited
shipping. The next day when I noticed no movement on the Quadratec
order, I logged in to discover it had been backordered. Arrugh! Went
back to RockAuto and ordered a standard power steering pump kit with
hoses. As of today, I have the stock steering pump, stock hoses,
Durango steering
gear box, the steering pump fluid and a steering pump pulley tool. The
stock hoses arrived separately in a later shipment. Ironically, the
backordered steering pump has hoses. Like I said: SNAFU.
 July
25th 2016 Timing is everything.
When I had all the parts and tools assembled for the Renegade's
steering repair, I got notification from Quadratec that the backordered
performance steering pump kit was shipping but . . . there was a
problem with the credit card. SNAFU again! Called Quadratec and got
that straightened out and the pump kit was finally on it's way. During
the ride
to the Krash Lab a couple of days back. a "Generic Warning Light" lit
up on the
rental Fiat 500 dash. Ay, Caramba! Murphy is aware of my
procrastination and he is beating me like a rented mule for it.
July
25th 2016 Timing is everything.
When I had all the parts and tools assembled for the Renegade's
steering repair, I got notification from Quadratec that the backordered
performance steering pump kit was shipping but . . . there was a
problem with the credit card. SNAFU again! Called Quadratec and got
that straightened out and the pump kit was finally on it's way. During
the ride
to the Krash Lab a couple of days back. a "Generic Warning Light" lit
up on the
rental Fiat 500 dash. Ay, Caramba! Murphy is aware of my
procrastination and he is beating me like a rented mule for it.
Well, just damn! The performance steering pump kit arrived with only 2 pages of cryptic instructions that are not application specific and I couldn't find any more detailed info on either the Quadratec or the PSC Motorsports websites. This is gonna require some DPM thinking and I don't have the time for that. Guess I'll install the stock replacement pump for now to get Renegade back on the road.
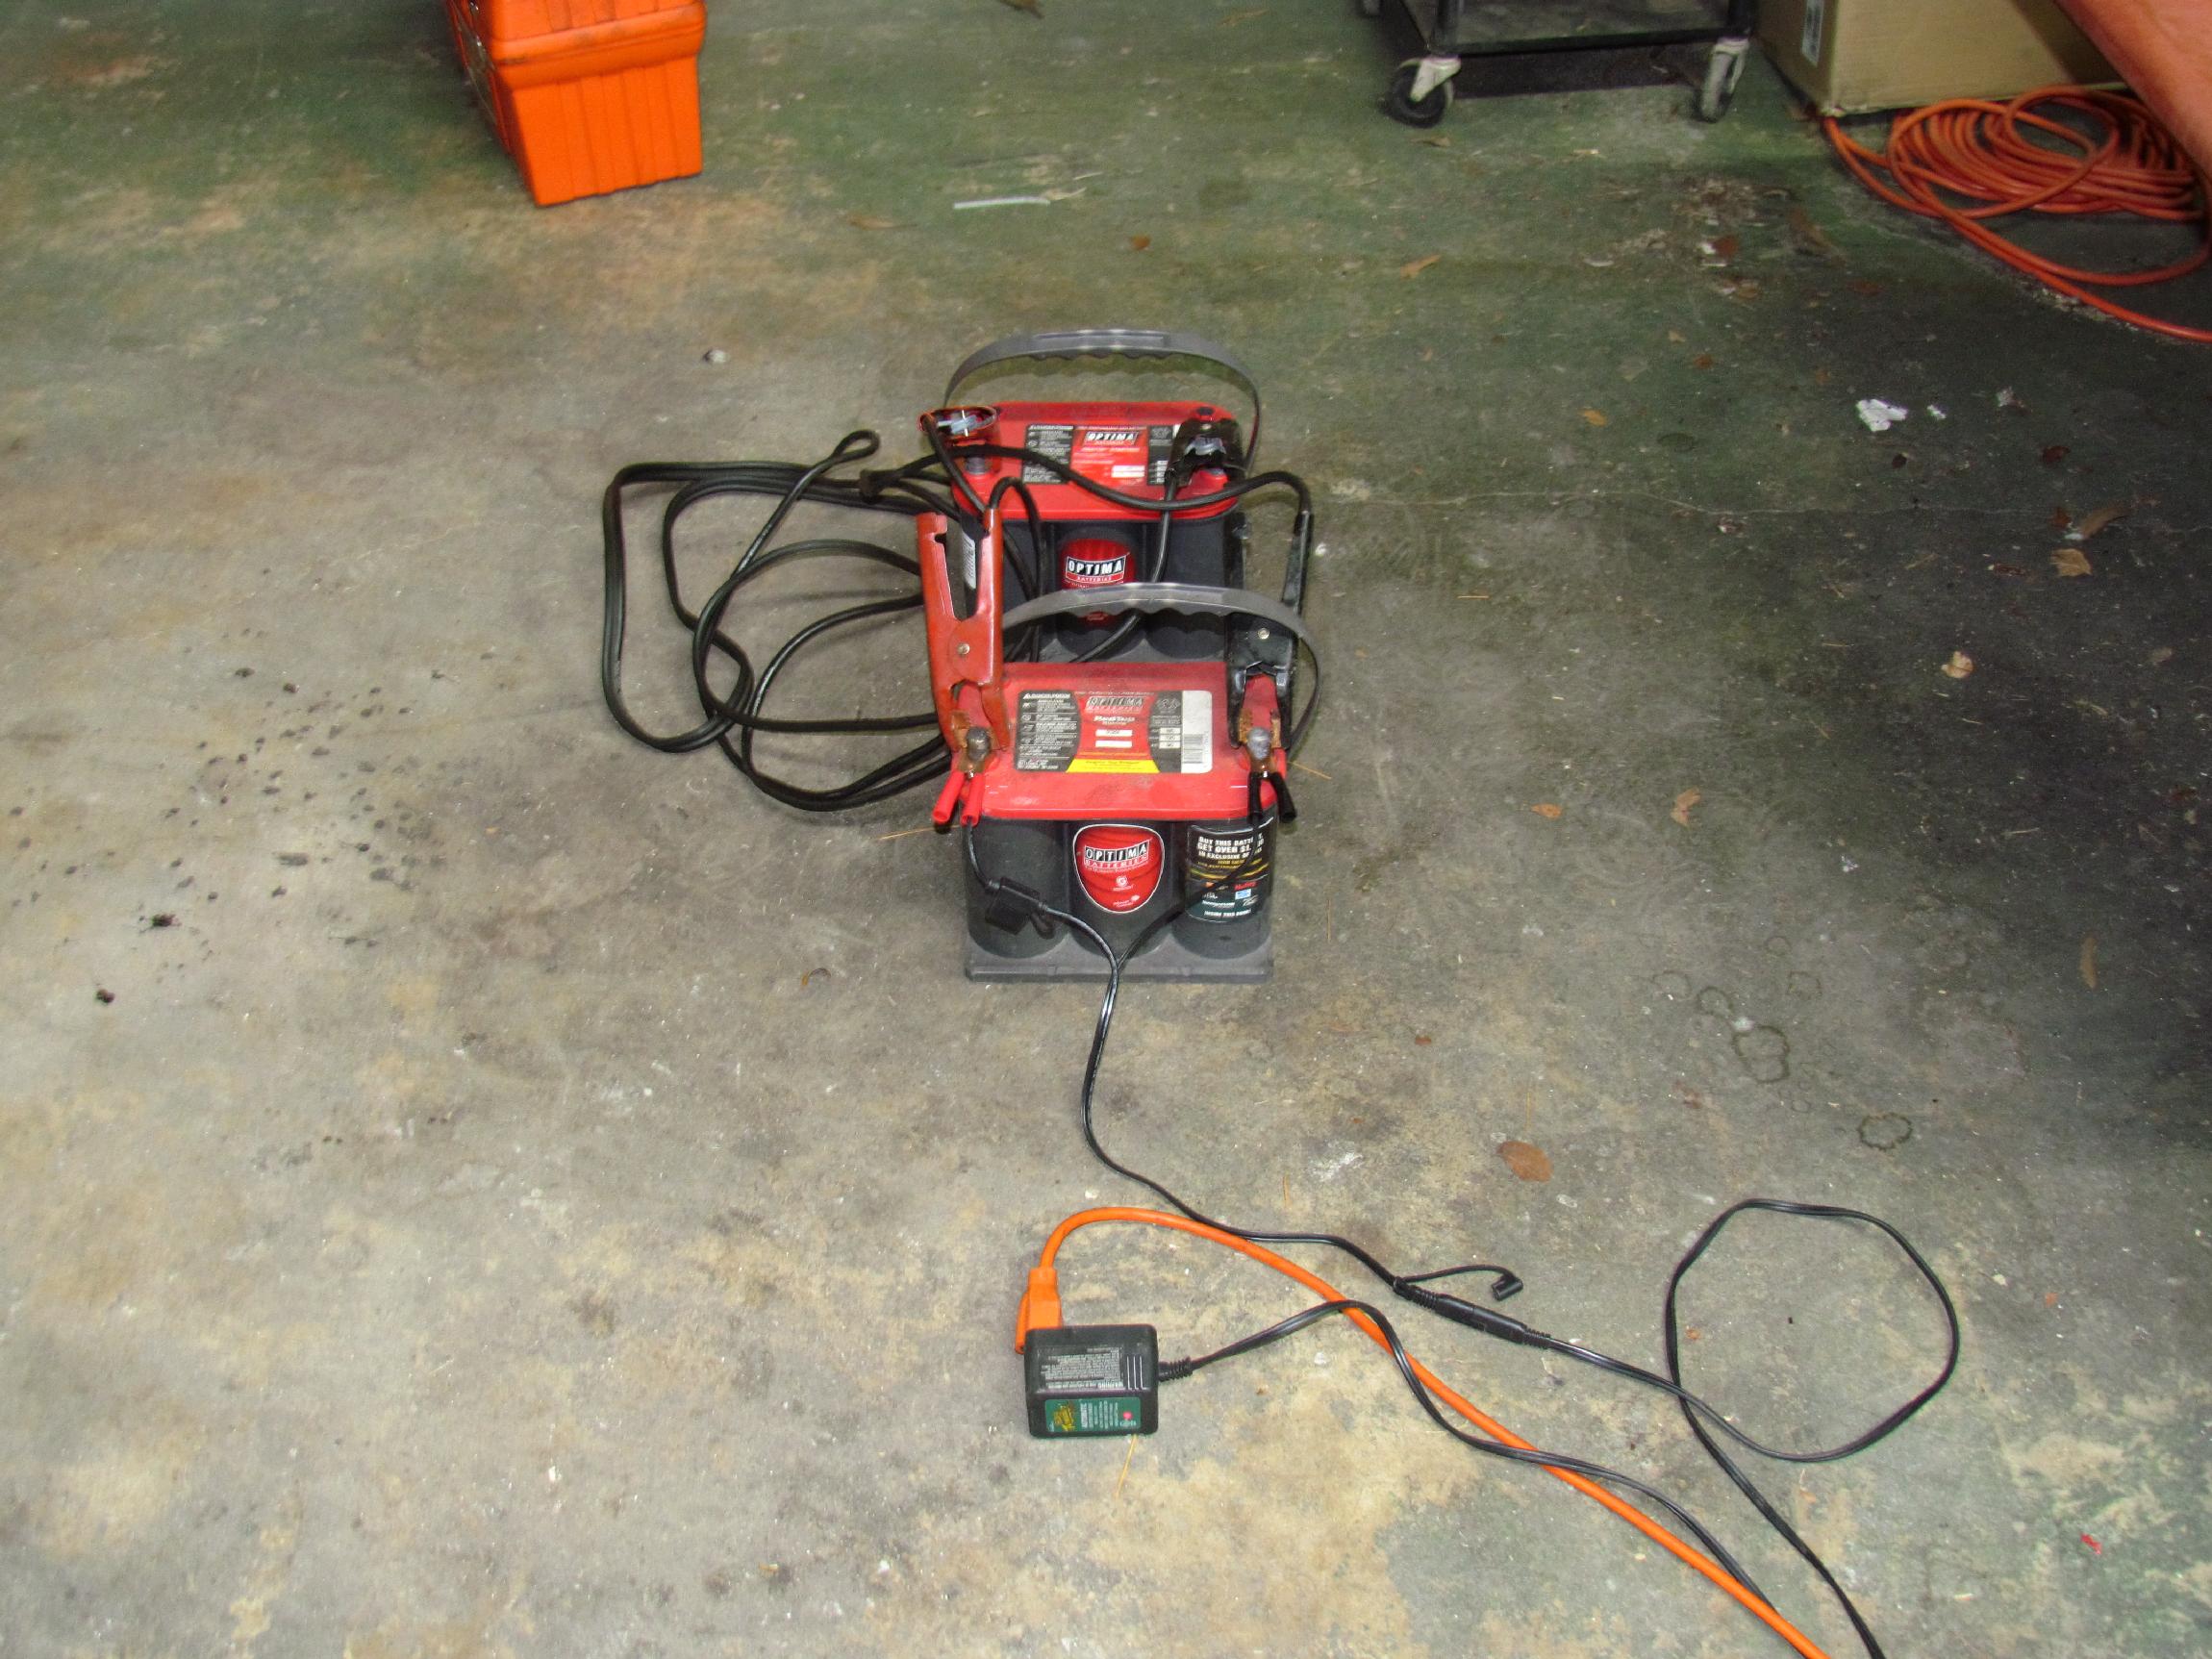 March
1st 2017 Renegade
has sat in front of the BillyBob Shop for over seven months
now. I anticipate electrical and fuel problems to go along with the
broken steering. Pulled the Jeep battery and brought it into the shop.
Voltmeter reading was 5.42 volts. Battery chargers won't charge an
Optima battery lower than about nine volts. I
tossed a
battery a few years ago for this reason. Then I learned a trick. If you
attach the low battery to a fully charged battery in parallel and
connect the charger the the good battery, it will charge the low
battery. When the low battery reading comes up enough, you can
disconnect them from each other and top them off in the usual
manner. Beer of the day was Mendocino Brewing Company's Red Tail Amber
Ale. It didn't agree with me.
March
1st 2017 Renegade
has sat in front of the BillyBob Shop for over seven months
now. I anticipate electrical and fuel problems to go along with the
broken steering. Pulled the Jeep battery and brought it into the shop.
Voltmeter reading was 5.42 volts. Battery chargers won't charge an
Optima battery lower than about nine volts. I
tossed a
battery a few years ago for this reason. Then I learned a trick. If you
attach the low battery to a fully charged battery in parallel and
connect the charger the the good battery, it will charge the low
battery. When the low battery reading comes up enough, you can
disconnect them from each other and top them off in the usual
manner. Beer of the day was Mendocino Brewing Company's Red Tail Amber
Ale. It didn't agree with me.
July 18th 2017 Dayum! Time flies. It's been two years since the last Renegade episode was posted. Renegade waits forlornly in the shop parking lot for me to get back to him. I decided it's past time to post an update due to an e-mail I got from another Renegade owner, Riemer Faber. He was nice enuf to write and send me some pics of his Renegade so I thought I would bring things up to the present and send him a link. Lord knows when I'll get back to workin' on the Jeep again.
| < Back
to Intro |
You can email me at ![]() webmaster@laroke.com
webmaster@laroke.com
Issued Tuesday July 17, 2017
copyright © 1996-2017 Larry Robert Kephart all rights reserved
| | LRK Home | | Bio Info | | Krash Khronicles | | LAROKE | |
| | BettyLou | | BillyBob's Garage | | Rat Patrol | | Deerslayer | | Elvira | |
| | Land of the Free and Home of the Brave | |
| | Keppylou's Art | | WWI Soldier's Diary | |