| | LRK Home | | Bio Info | | Krash Khronicles | | LAROKE | |
| | BettyLou | | BillyBob's Garage | | Rat Patrol | | Deerslayer | | Elvira | |
| | Land of the Free and Home of the Brave | |
| | Keppylou's Art | | WWI Soldier's Diary | |
Project Nailhead Log
![]()
DEERSLAYER LINKS including vendor sites for parts and tools as well as sites for old truck and hot rod organizations
![]()
TINKERING WITH DEERSLAYER chronicles the day-by-day maintenance and improvements episodes for Deerslayer, a '37 Chevy farm truck hot rod.
CRUISIN' WITH DEERSLAYER Roadtrips, cruise-in's and truck show stories and tall tales.
TONY'S DUNGEON Tony Pascarella's forum entries at OldGMCtrucks.com regarding Deerslayer, particularly the 302 GMC engine build in his farmhouse basement.
![]()
DEERSLAYER MAINTENANCE Ever changing detailing, oil change, lube, etc. maintenance routines specifically developed for Deerslayer, including required tools, materials and procedures.
PROJECT NAILHEAD Chronicles the rebuild of a 1954 Buick Roadmaster 322 nailhead engine as a future replacement for Deerslayer's Jimmy 302.
2. Cleanup and Investigation
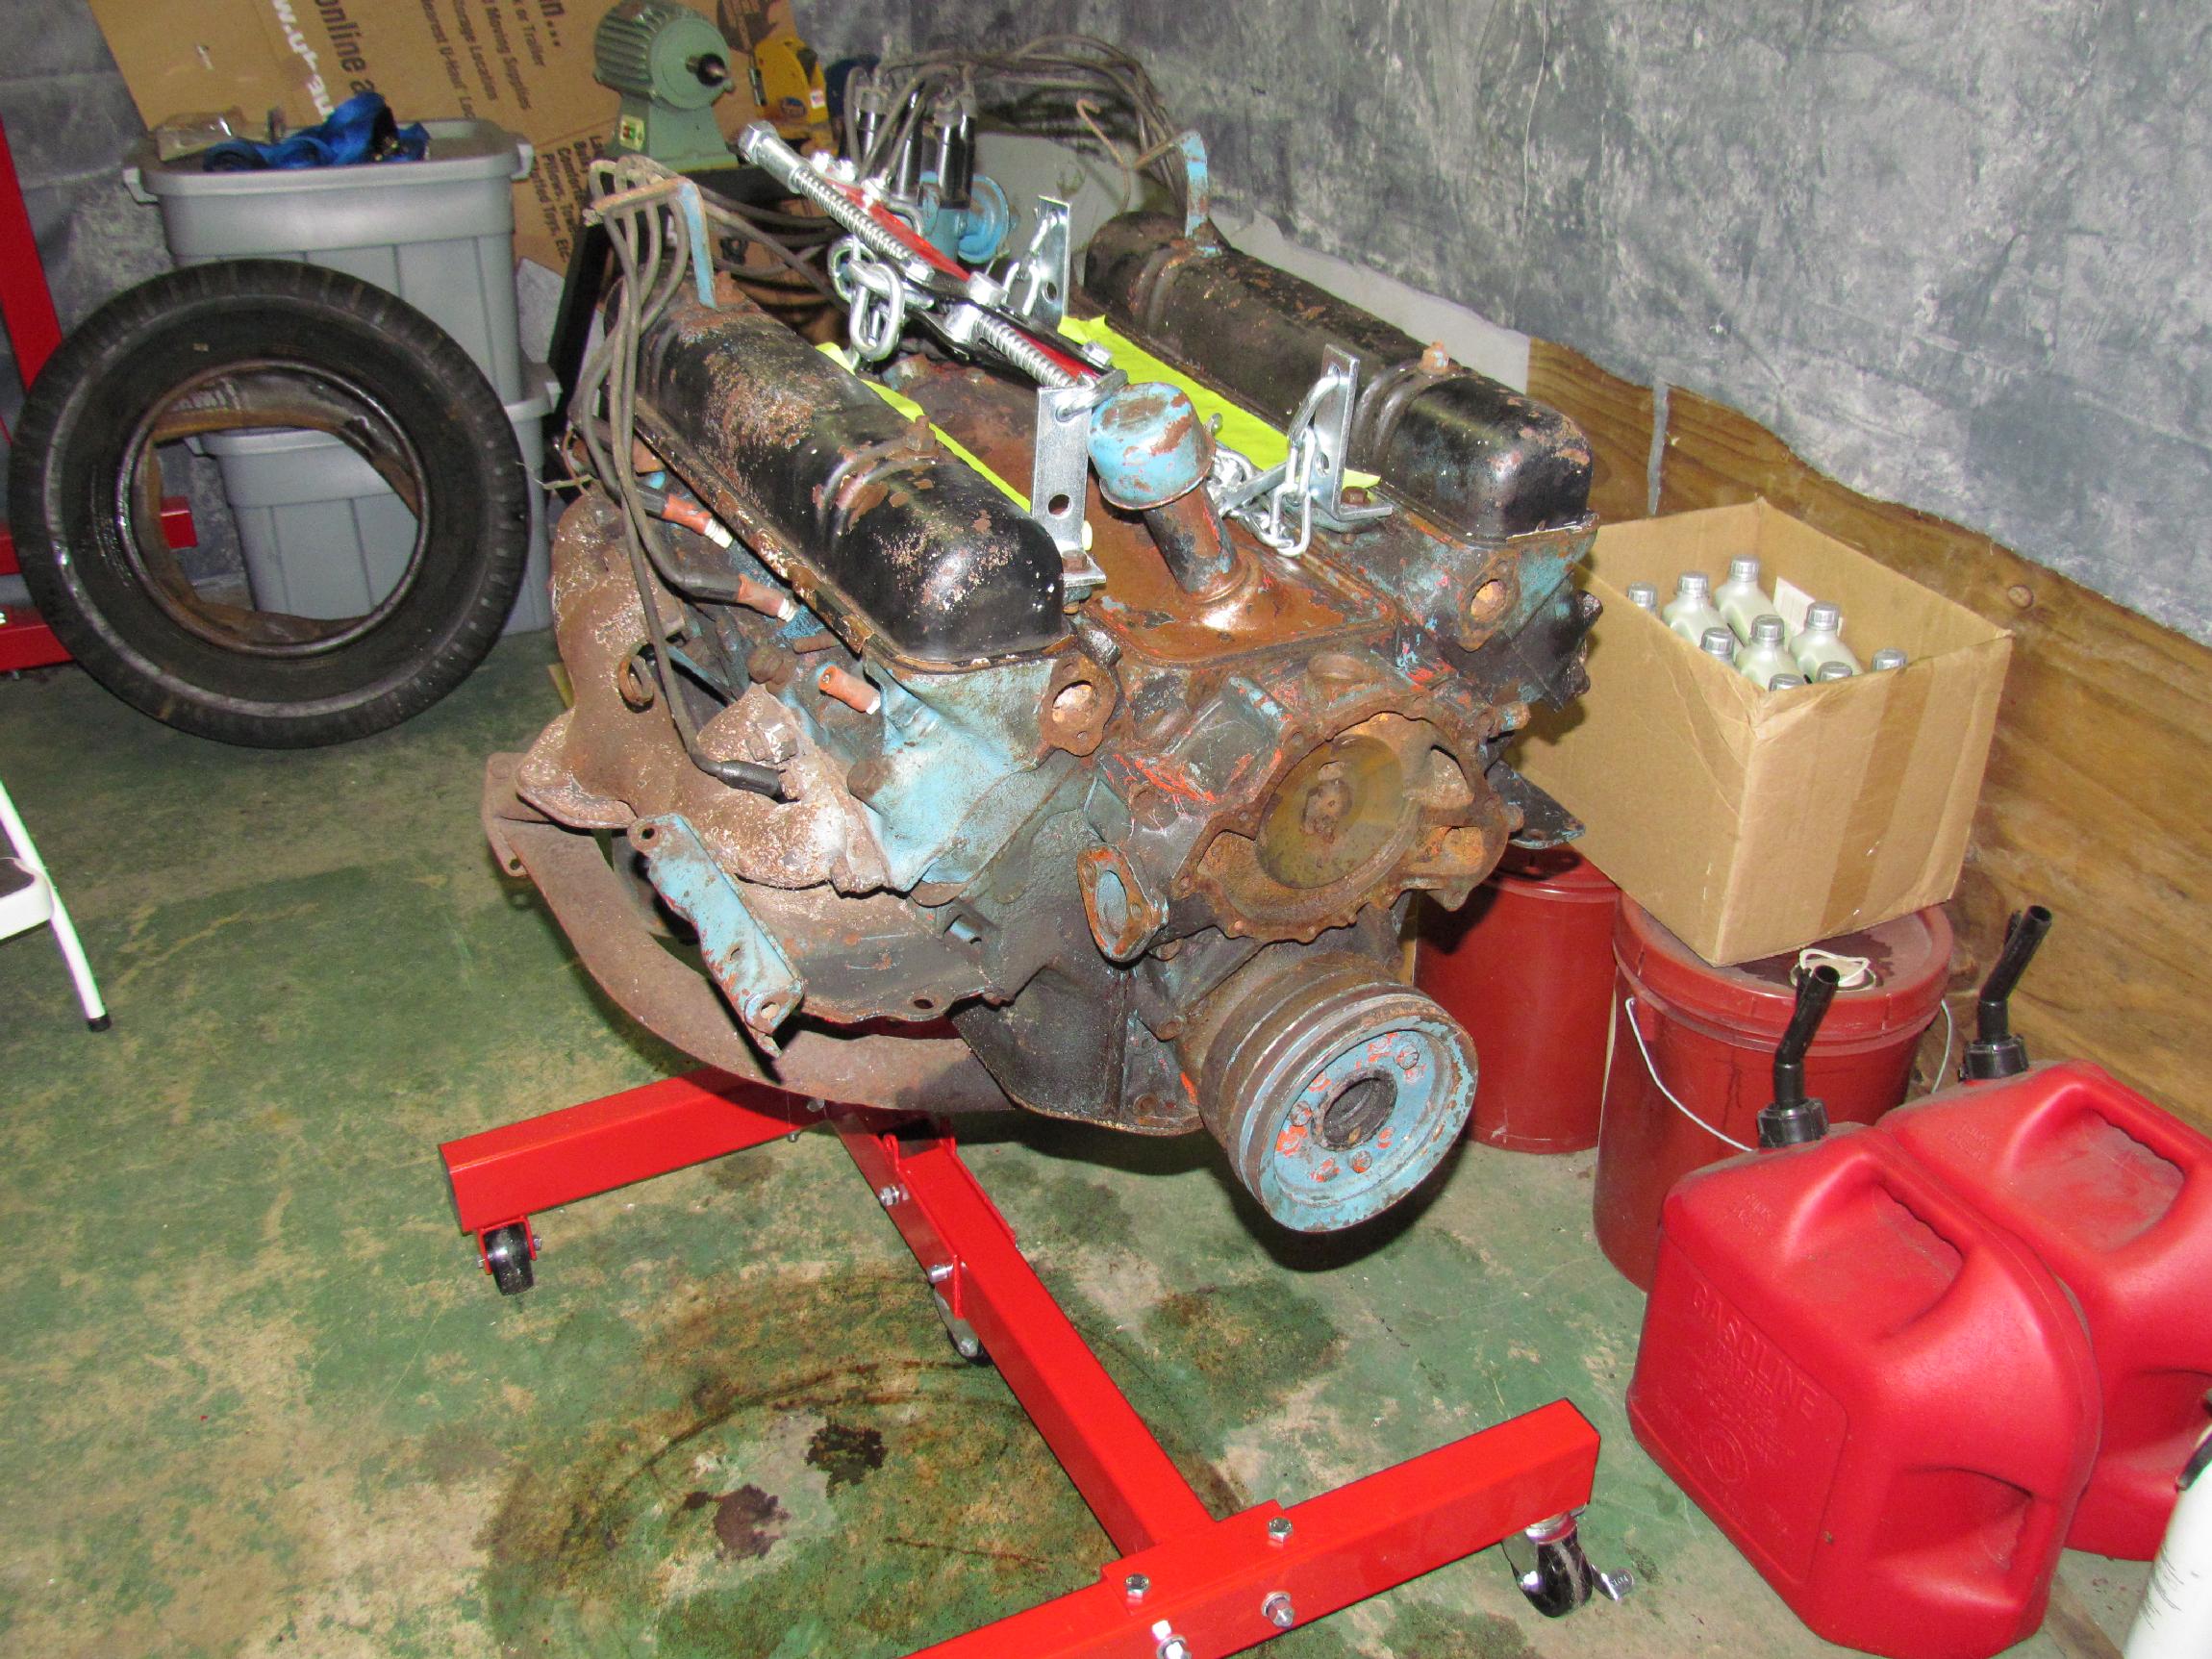
February 3rd 2012 On wednesday, my friends, Sam and Paul, helped me pick up the nailhead from Ed Stagmiller in Palm City, Florida. The first order of business will be to get the nailhead mounted on my engine stand for cleanup.
 February
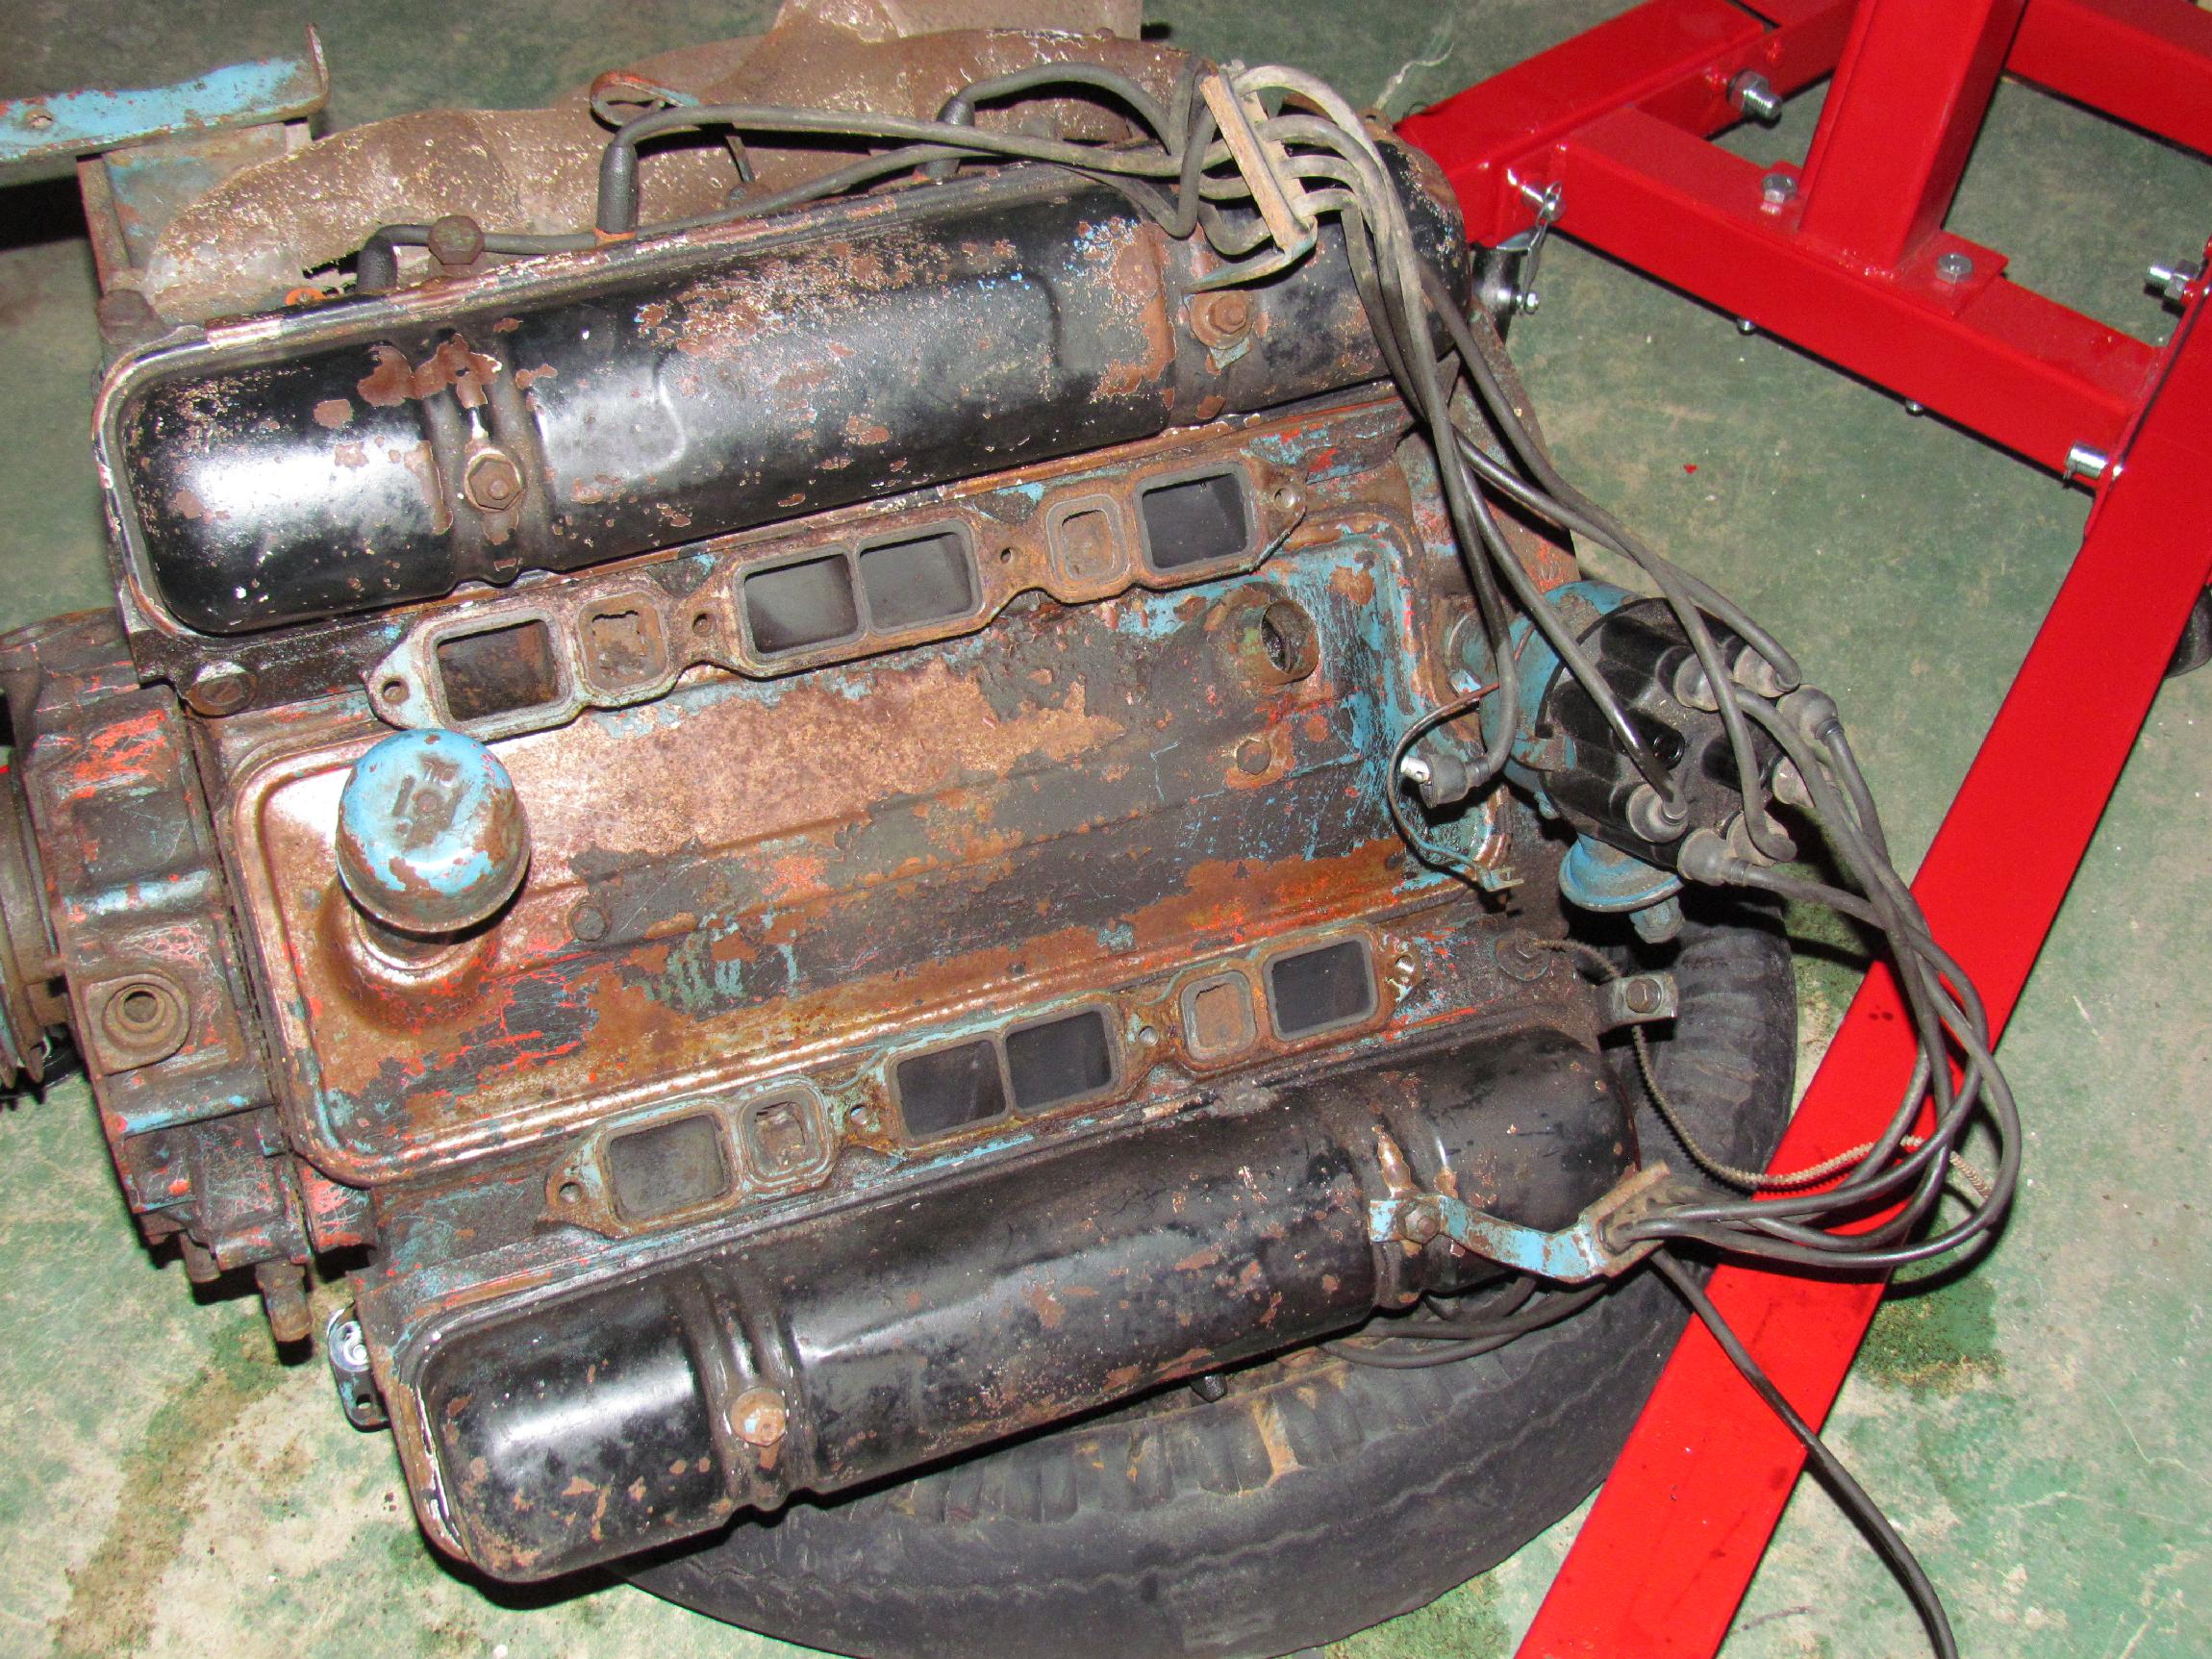
4th 2012 Took the
intake manifold and carb off the nailhead as a unit in order to get
attachment locations for the engine leveler hoist apparatus. I will be
able to lift the engine with the four furthermost manifold bolts.
February
4th 2012 Took the
intake manifold and carb off the nailhead as a unit in order to get
attachment locations for the engine leveler hoist apparatus. I will be
able to lift the engine with the four furthermost manifold bolts.
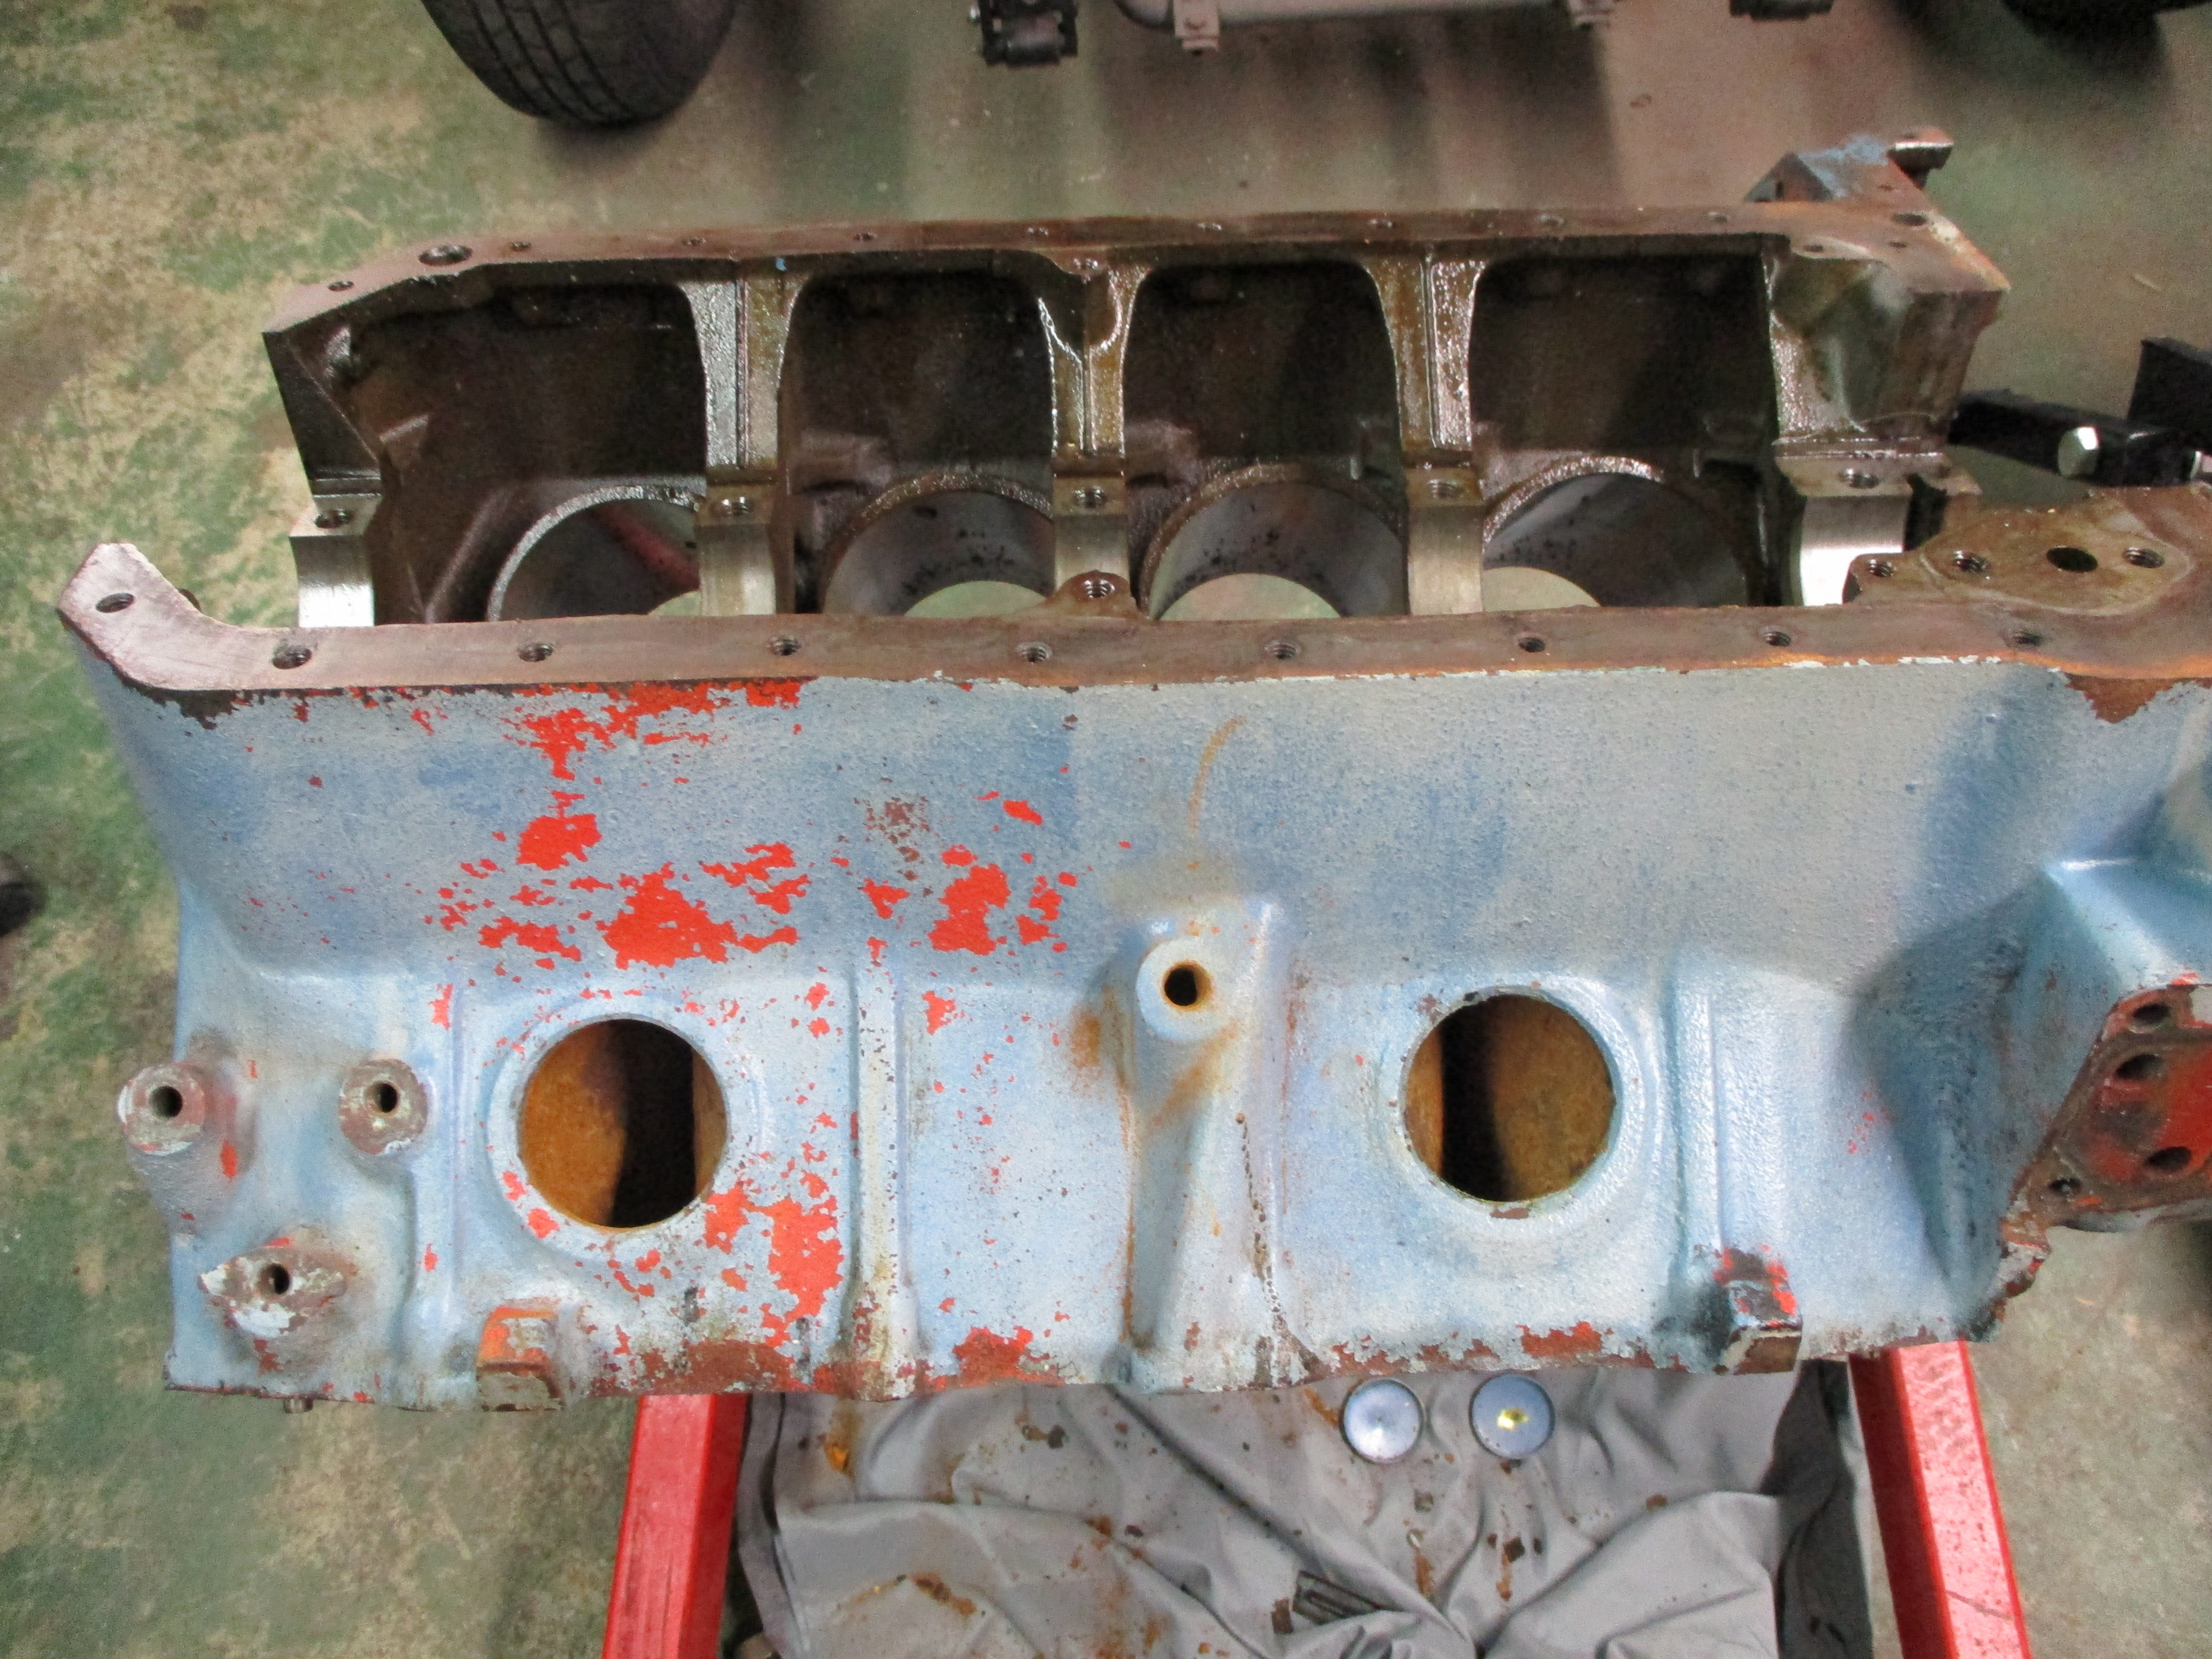
This engine has three different paint colors on it, none of them are Buick green. We've got a generic black, Chevy orange and Poncho blue. Additionally, all the timing chain cover bolts are missing. Maybe, that area is where all the oil escaped the crankcase onto Sam Gagliano's trailer floor.
 February
8th 2012 Last nite
after I got the nailhead mounted on the engine stand, I located the
serial number, V546848-7. On the Buicks.net
engine identification page, this indicates that the block, at
least, came from a '54 Series 70 Buick (Roadmaster) and was a 322.
February
8th 2012 Last nite
after I got the nailhead mounted on the engine stand, I located the
serial number, V546848-7. On the Buicks.net
engine identification page, this indicates that the block, at
least, came from a '54 Series 70 Buick (Roadmaster) and was a 322.
 February
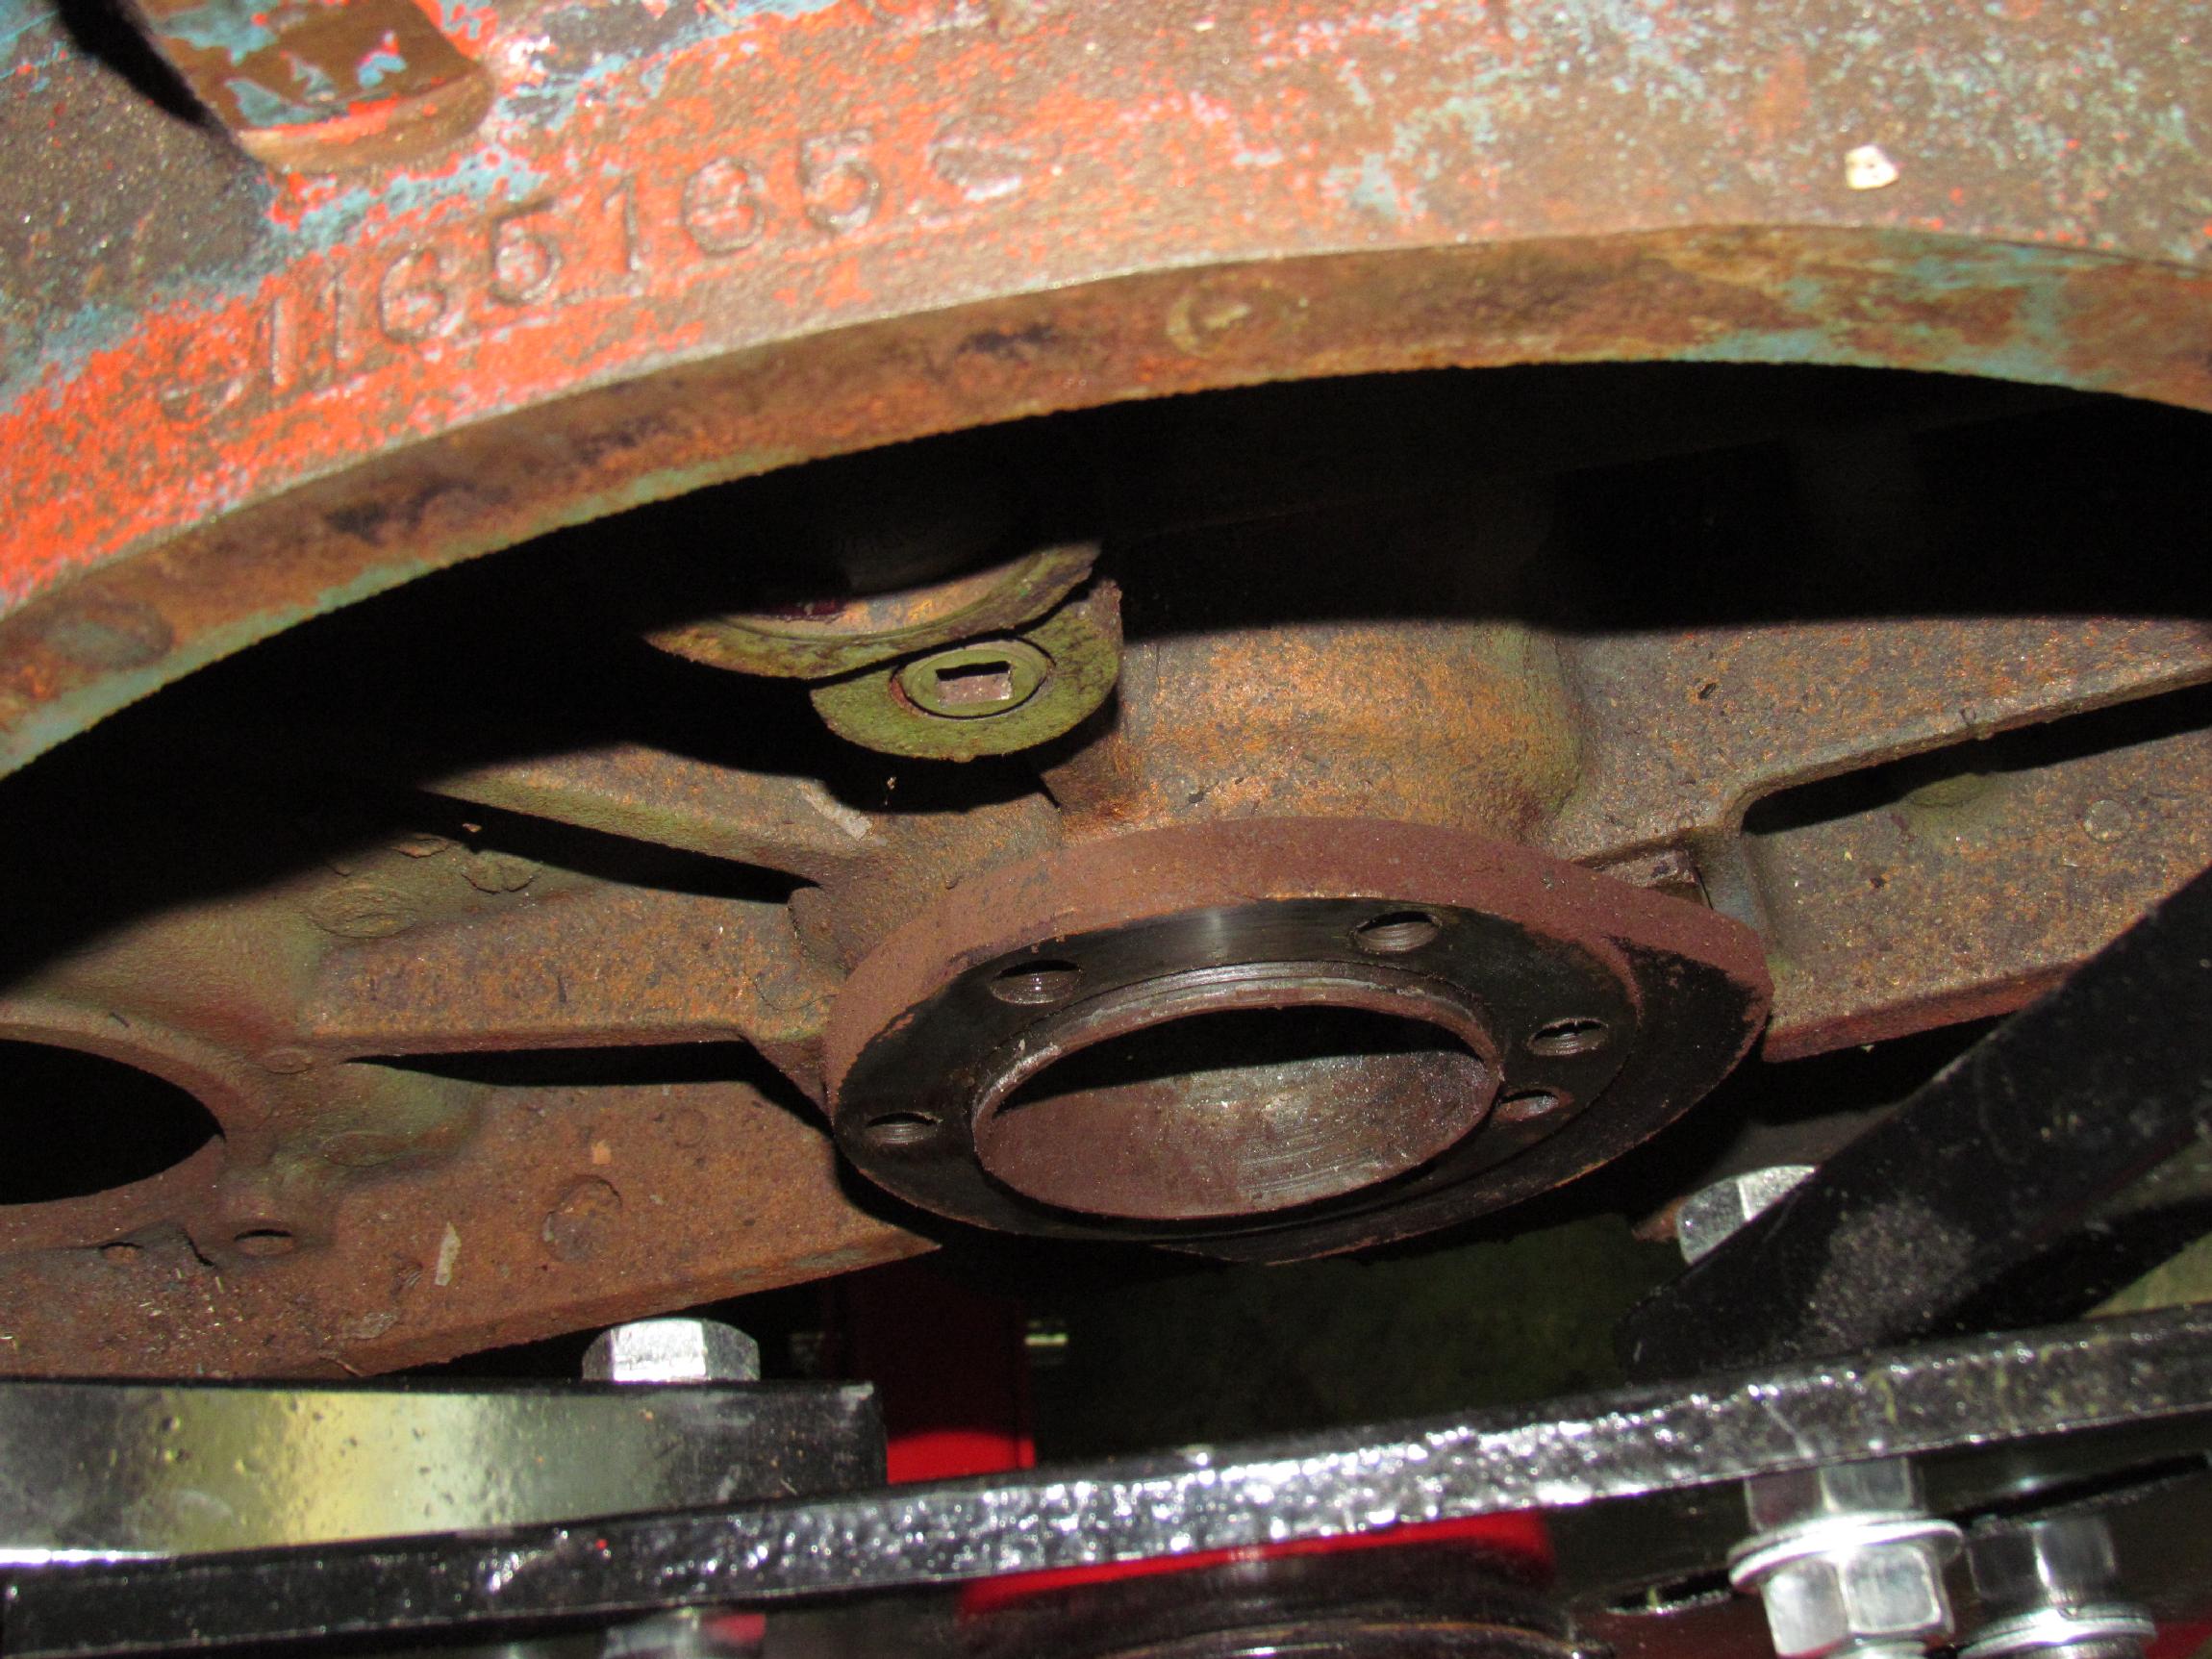
28th 2012 I pulled the
flexplate from the nailhead to compare dimensions to the new flywheel
from Russ Martin. There were no problems turning the engine or getting
the bolts loose. The new flywheel lined up with the flexplate. The six
bolts are evenly spaced and you can install the flywheel wrongly but
the flywheel and the crankshaft both have "registration" holes that you
line up to get it on right.
February
28th 2012 I pulled the
flexplate from the nailhead to compare dimensions to the new flywheel
from Russ Martin. There were no problems turning the engine or getting
the bolts loose. The new flywheel lined up with the flexplate. The six
bolts are evenly spaced and you can install the flywheel wrongly but
the flywheel and the crankshaft both have "registration" holes that you
line up to get it on right.
 November
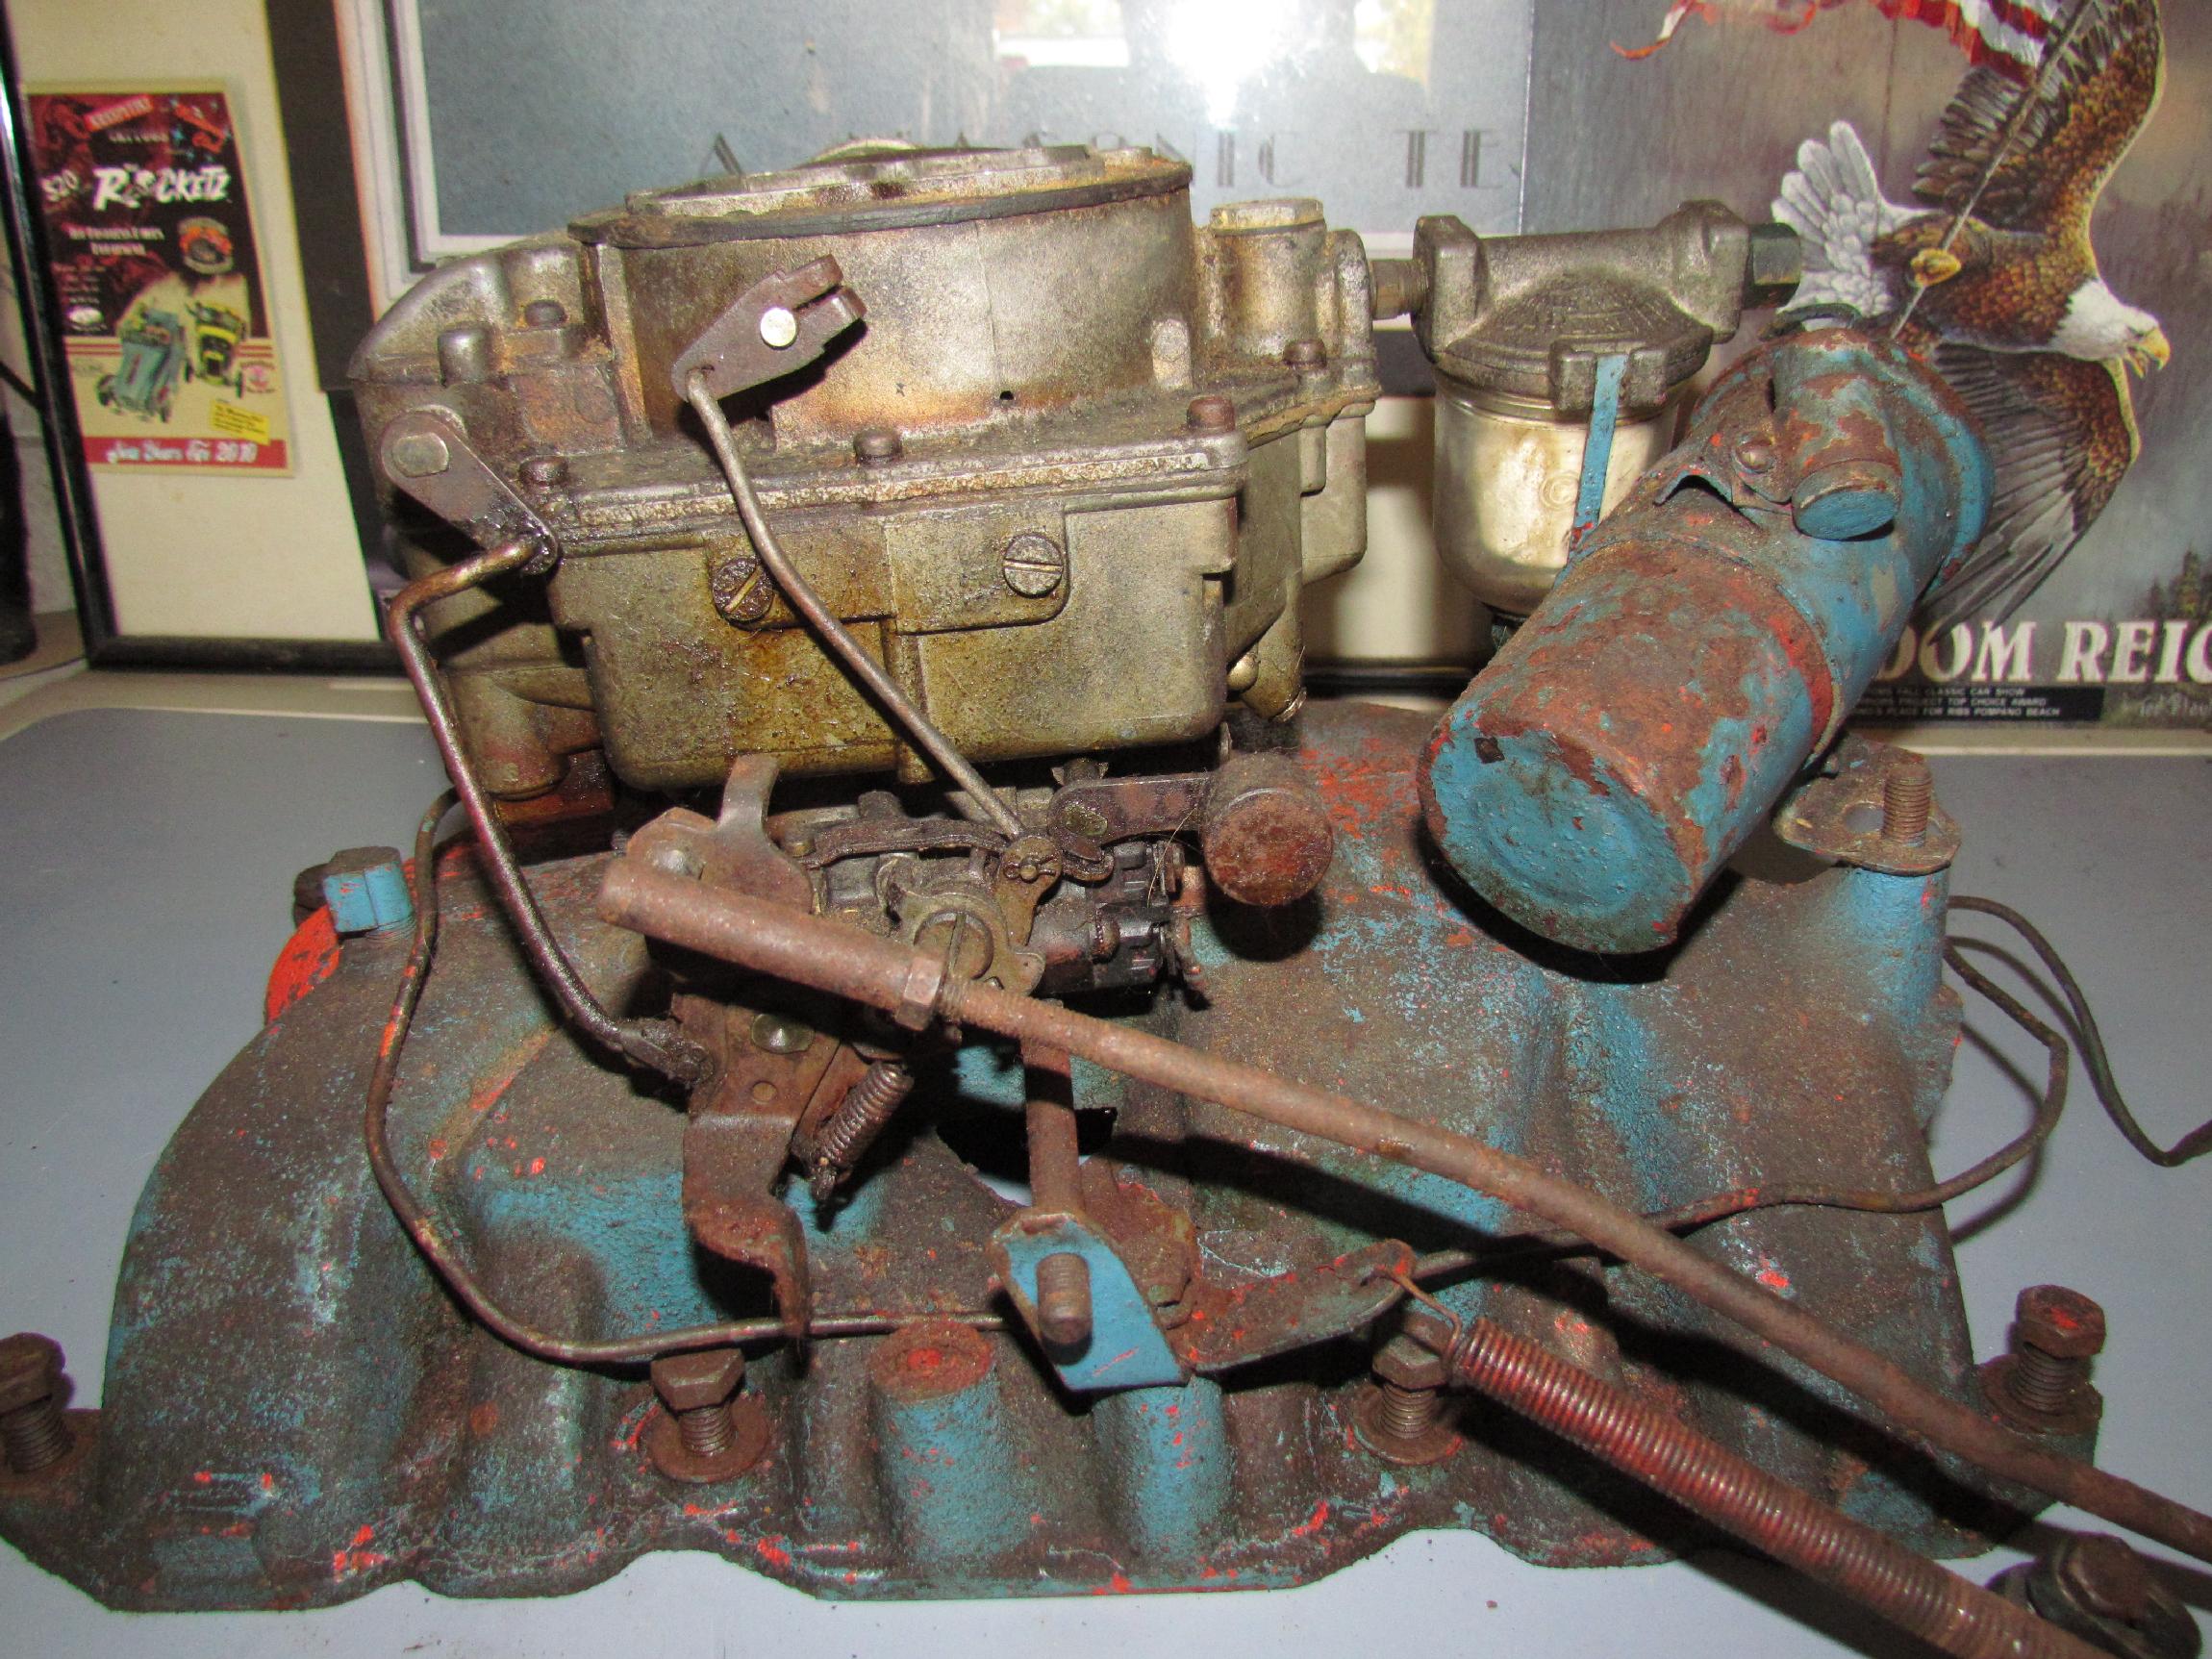
26th 2012 Cleaned up my
workbench to start working on the nailhead's carburetor. Initial
cleanup to find the numbers on the carb is the first task. Then I
should be able to order a carb kit for it. Took the coil off the
manifold and stored it with the other nailhead parts. The glass bowl
fuel filter is next but the fitting is frozen so I hit it with a blast
of Kroil penetrating oil and left it for the day.
November
26th 2012 Cleaned up my
workbench to start working on the nailhead's carburetor. Initial
cleanup to find the numbers on the carb is the first task. Then I
should be able to order a carb kit for it. Took the coil off the
manifold and stored it with the other nailhead parts. The glass bowl
fuel filter is next but the fitting is frozen so I hit it with a blast
of Kroil penetrating oil and left it for the day.
March 31st 2014 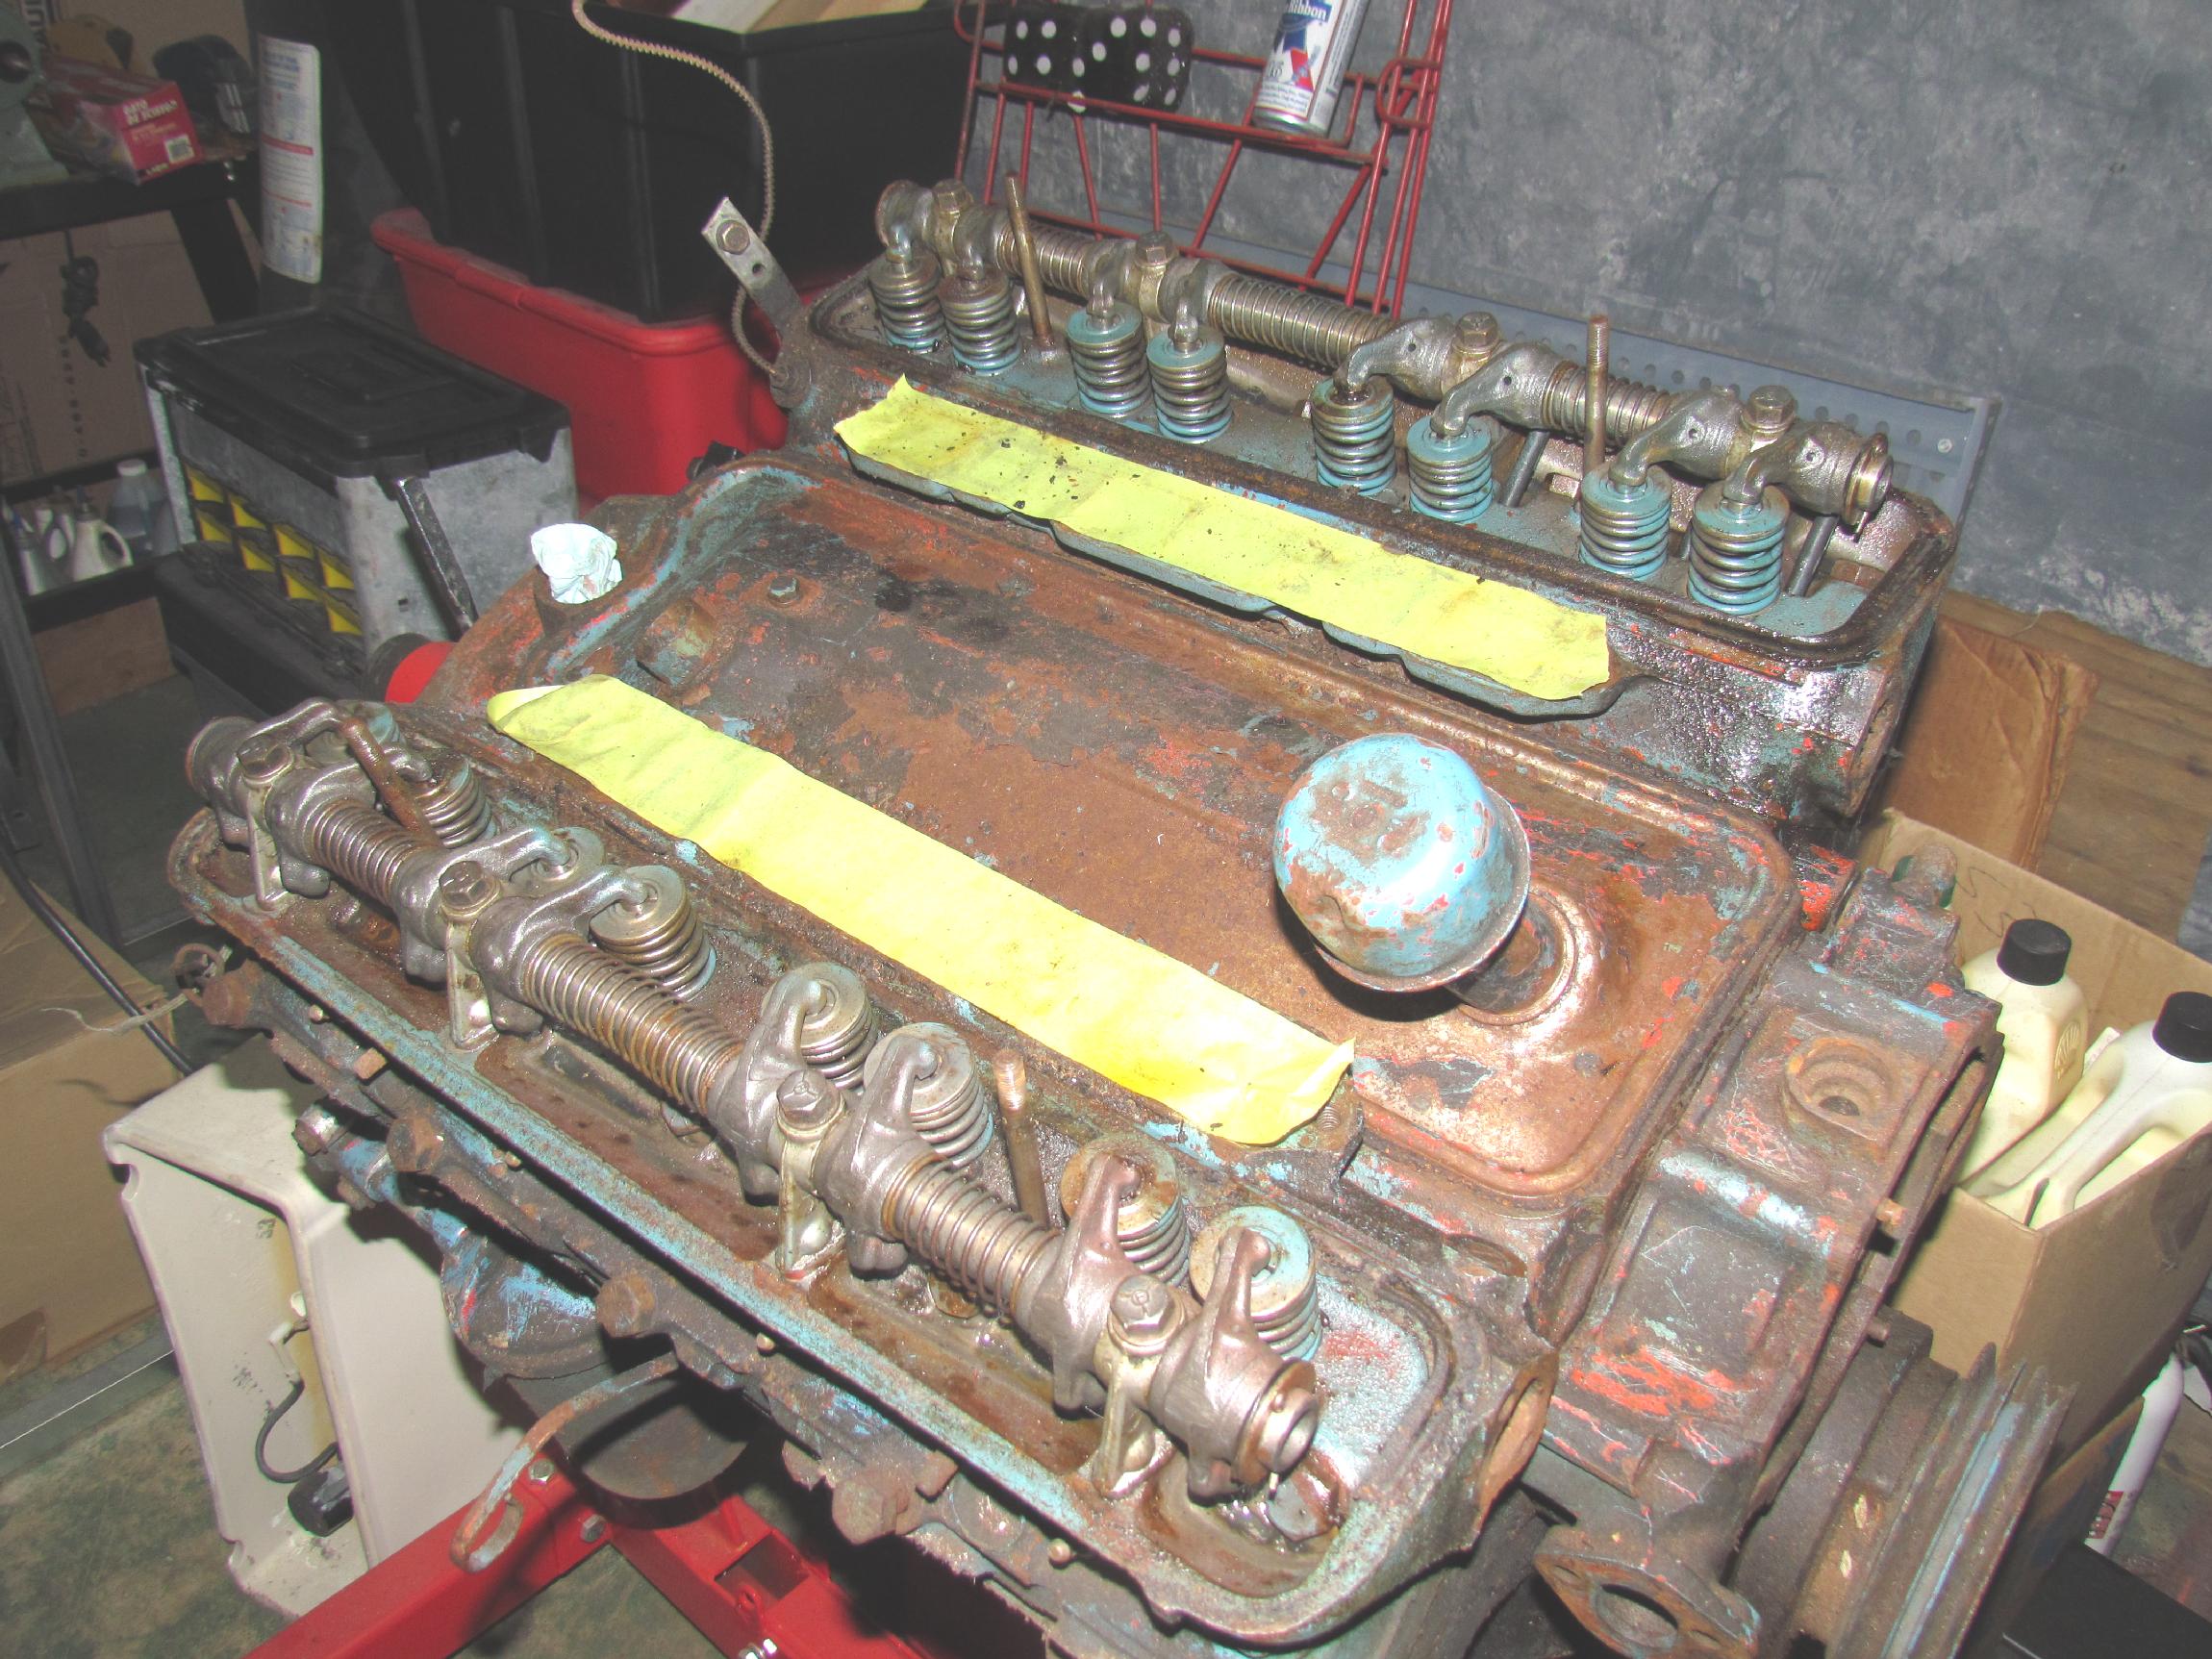 Trying
to pick up the pace on Project Nailhead. I've found a source for
adjustable rockers for the old engine but I will have to send in my old
rocker assemblies in exchange so I pulled the valve covers to see how
much gunk I was going to have to clean up for shipping. Pleasantly
surprised to see how clean the existing assemblies are. Also removed
the engine mount brackets.
Trying
to pick up the pace on Project Nailhead. I've found a source for
adjustable rockers for the old engine but I will have to send in my old
rocker assemblies in exchange so I pulled the valve covers to see how
much gunk I was going to have to clean up for shipping. Pleasantly
surprised to see how clean the existing assemblies are. Also removed
the engine mount brackets.
 May
5th 2014 I've had this
1954 Buick Roadmaster engine for a few years now and all I've done with
it so far is buy some vintage speed parts for the rebuild. I need to
start working towards getting the block to the machine shop. Took the
rocker arm assemblies off first. Loosened each bolt of the asssembly,
one turn at a time, until all pressure from the valve springs was gone,
then took the bolts the rest of the way out and removed the assemblies.
Pulled out the pushrods next.
May
5th 2014 I've had this
1954 Buick Roadmaster engine for a few years now and all I've done with
it so far is buy some vintage speed parts for the rebuild. I need to
start working towards getting the block to the machine shop. Took the
rocker arm assemblies off first. Loosened each bolt of the asssembly,
one turn at a time, until all pressure from the valve springs was gone,
then took the bolts the rest of the way out and removed the assemblies.
Pulled out the pushrods next.
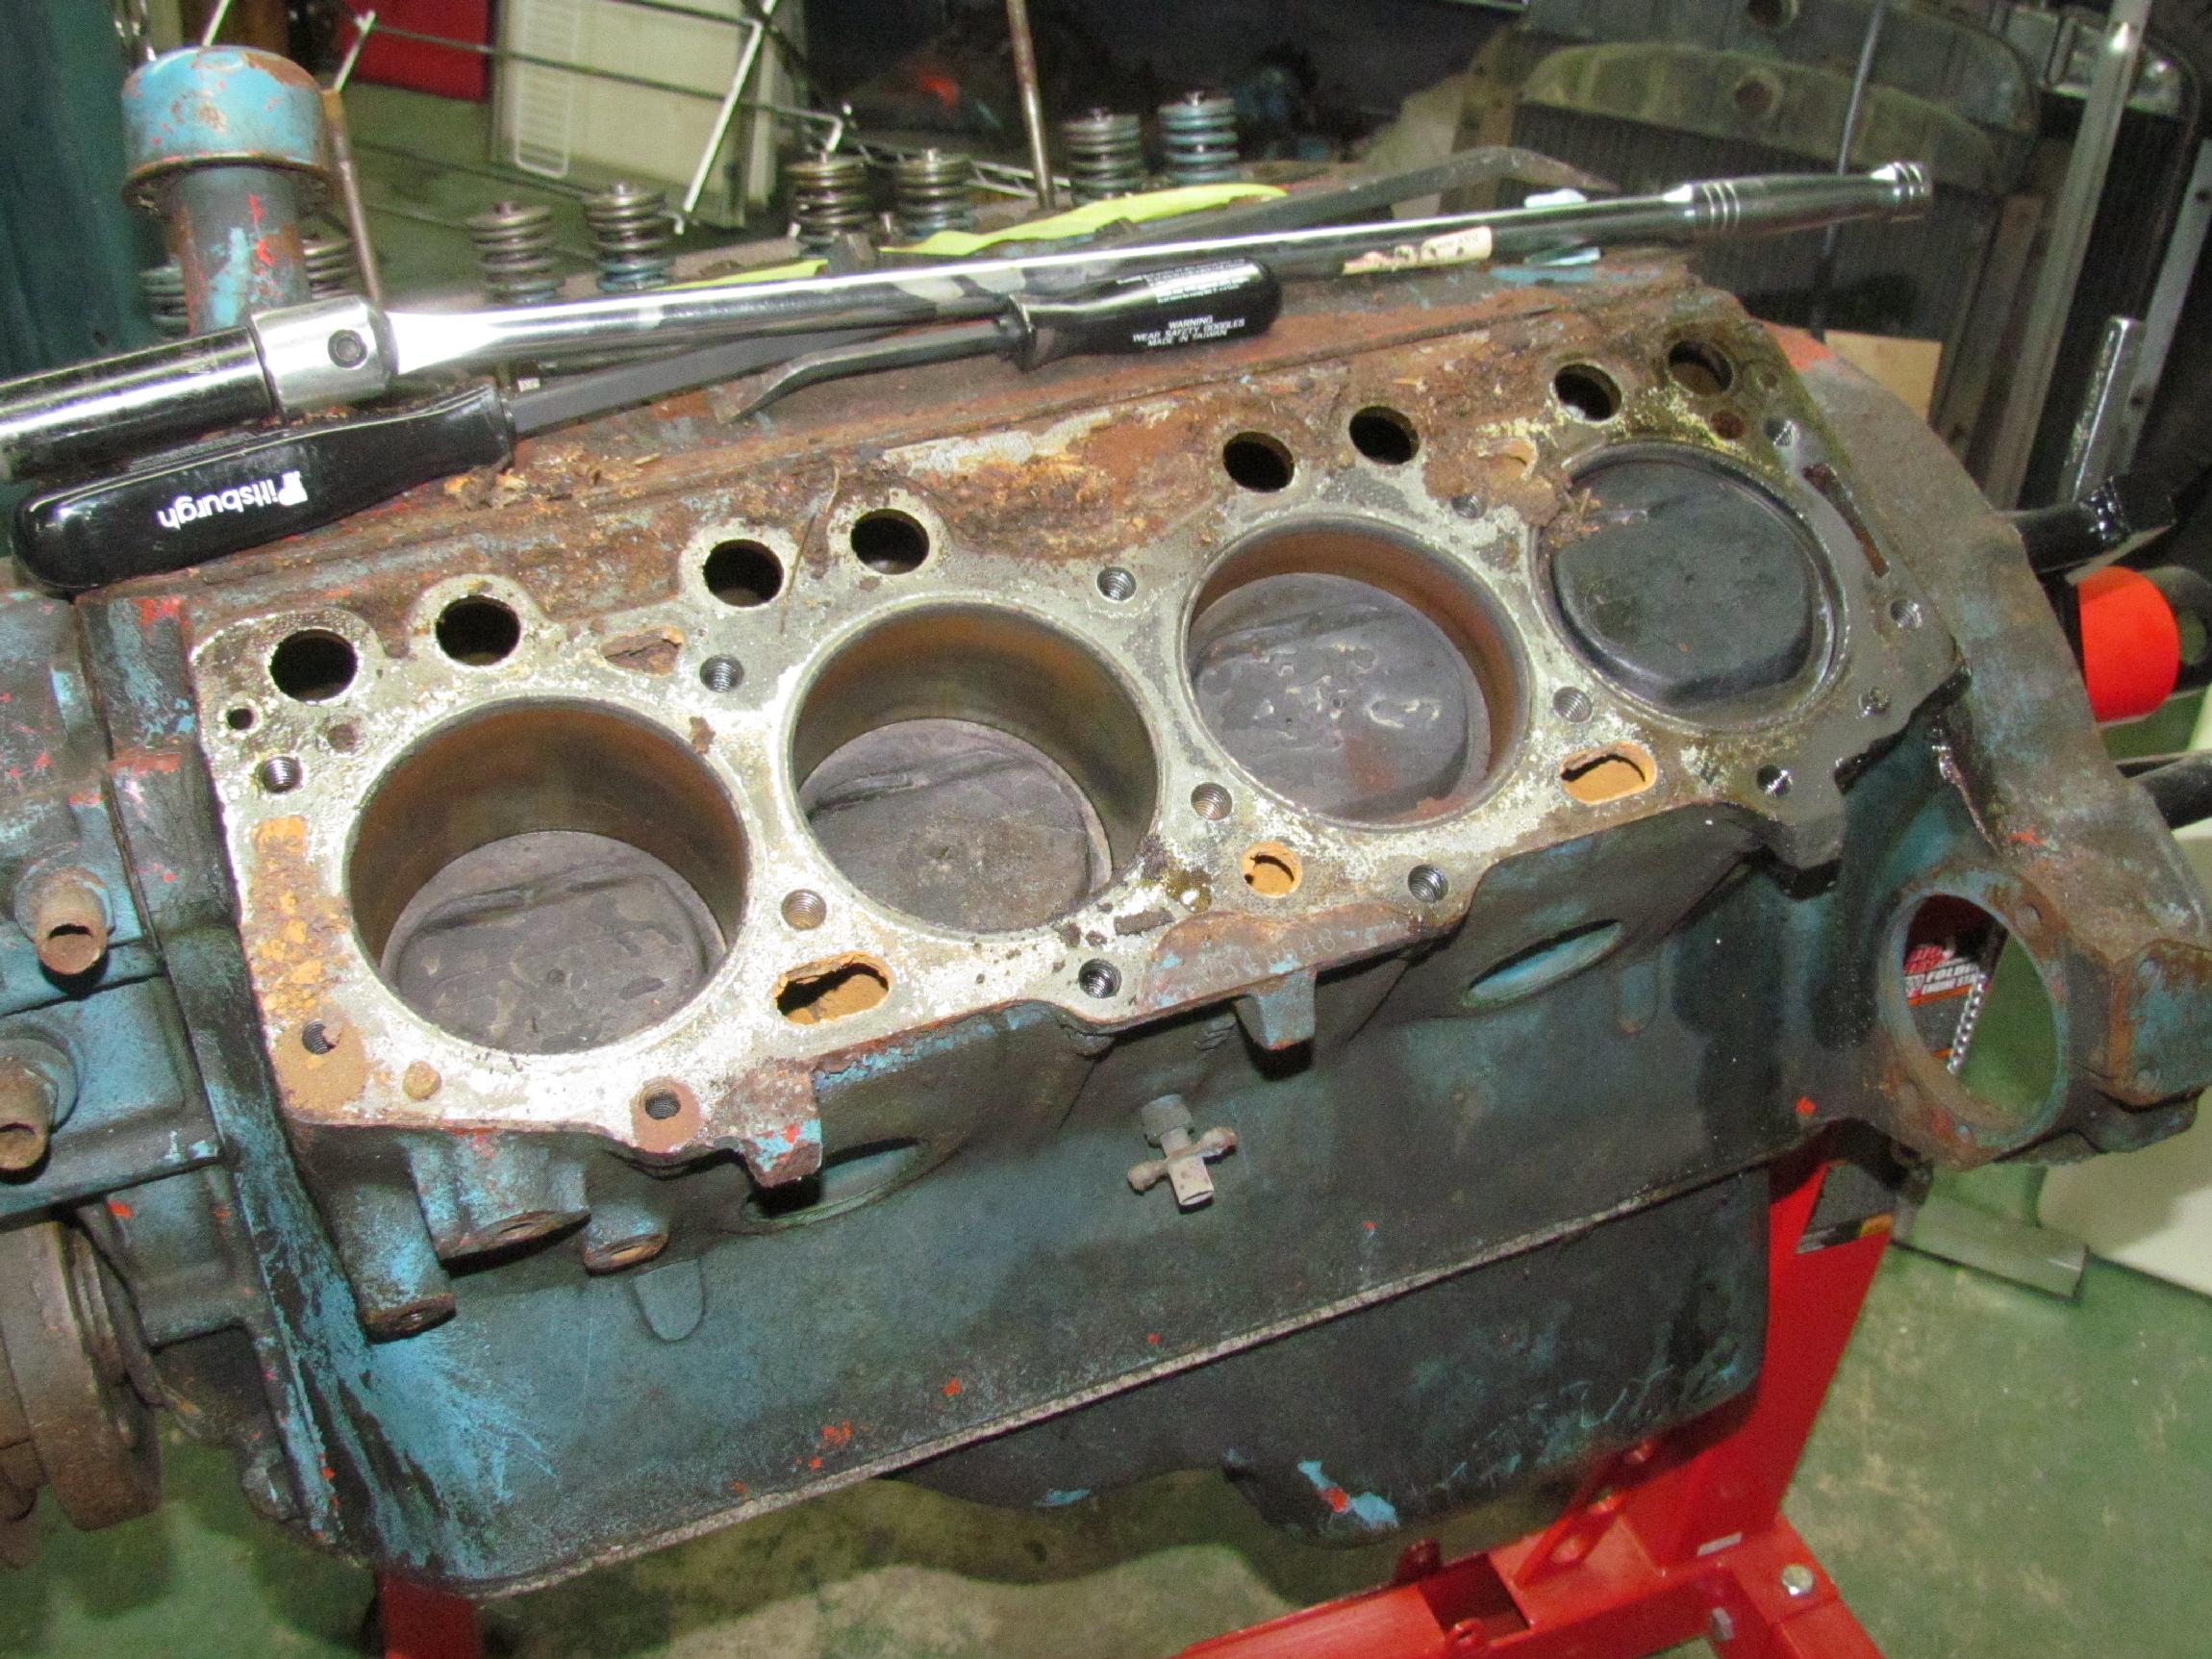
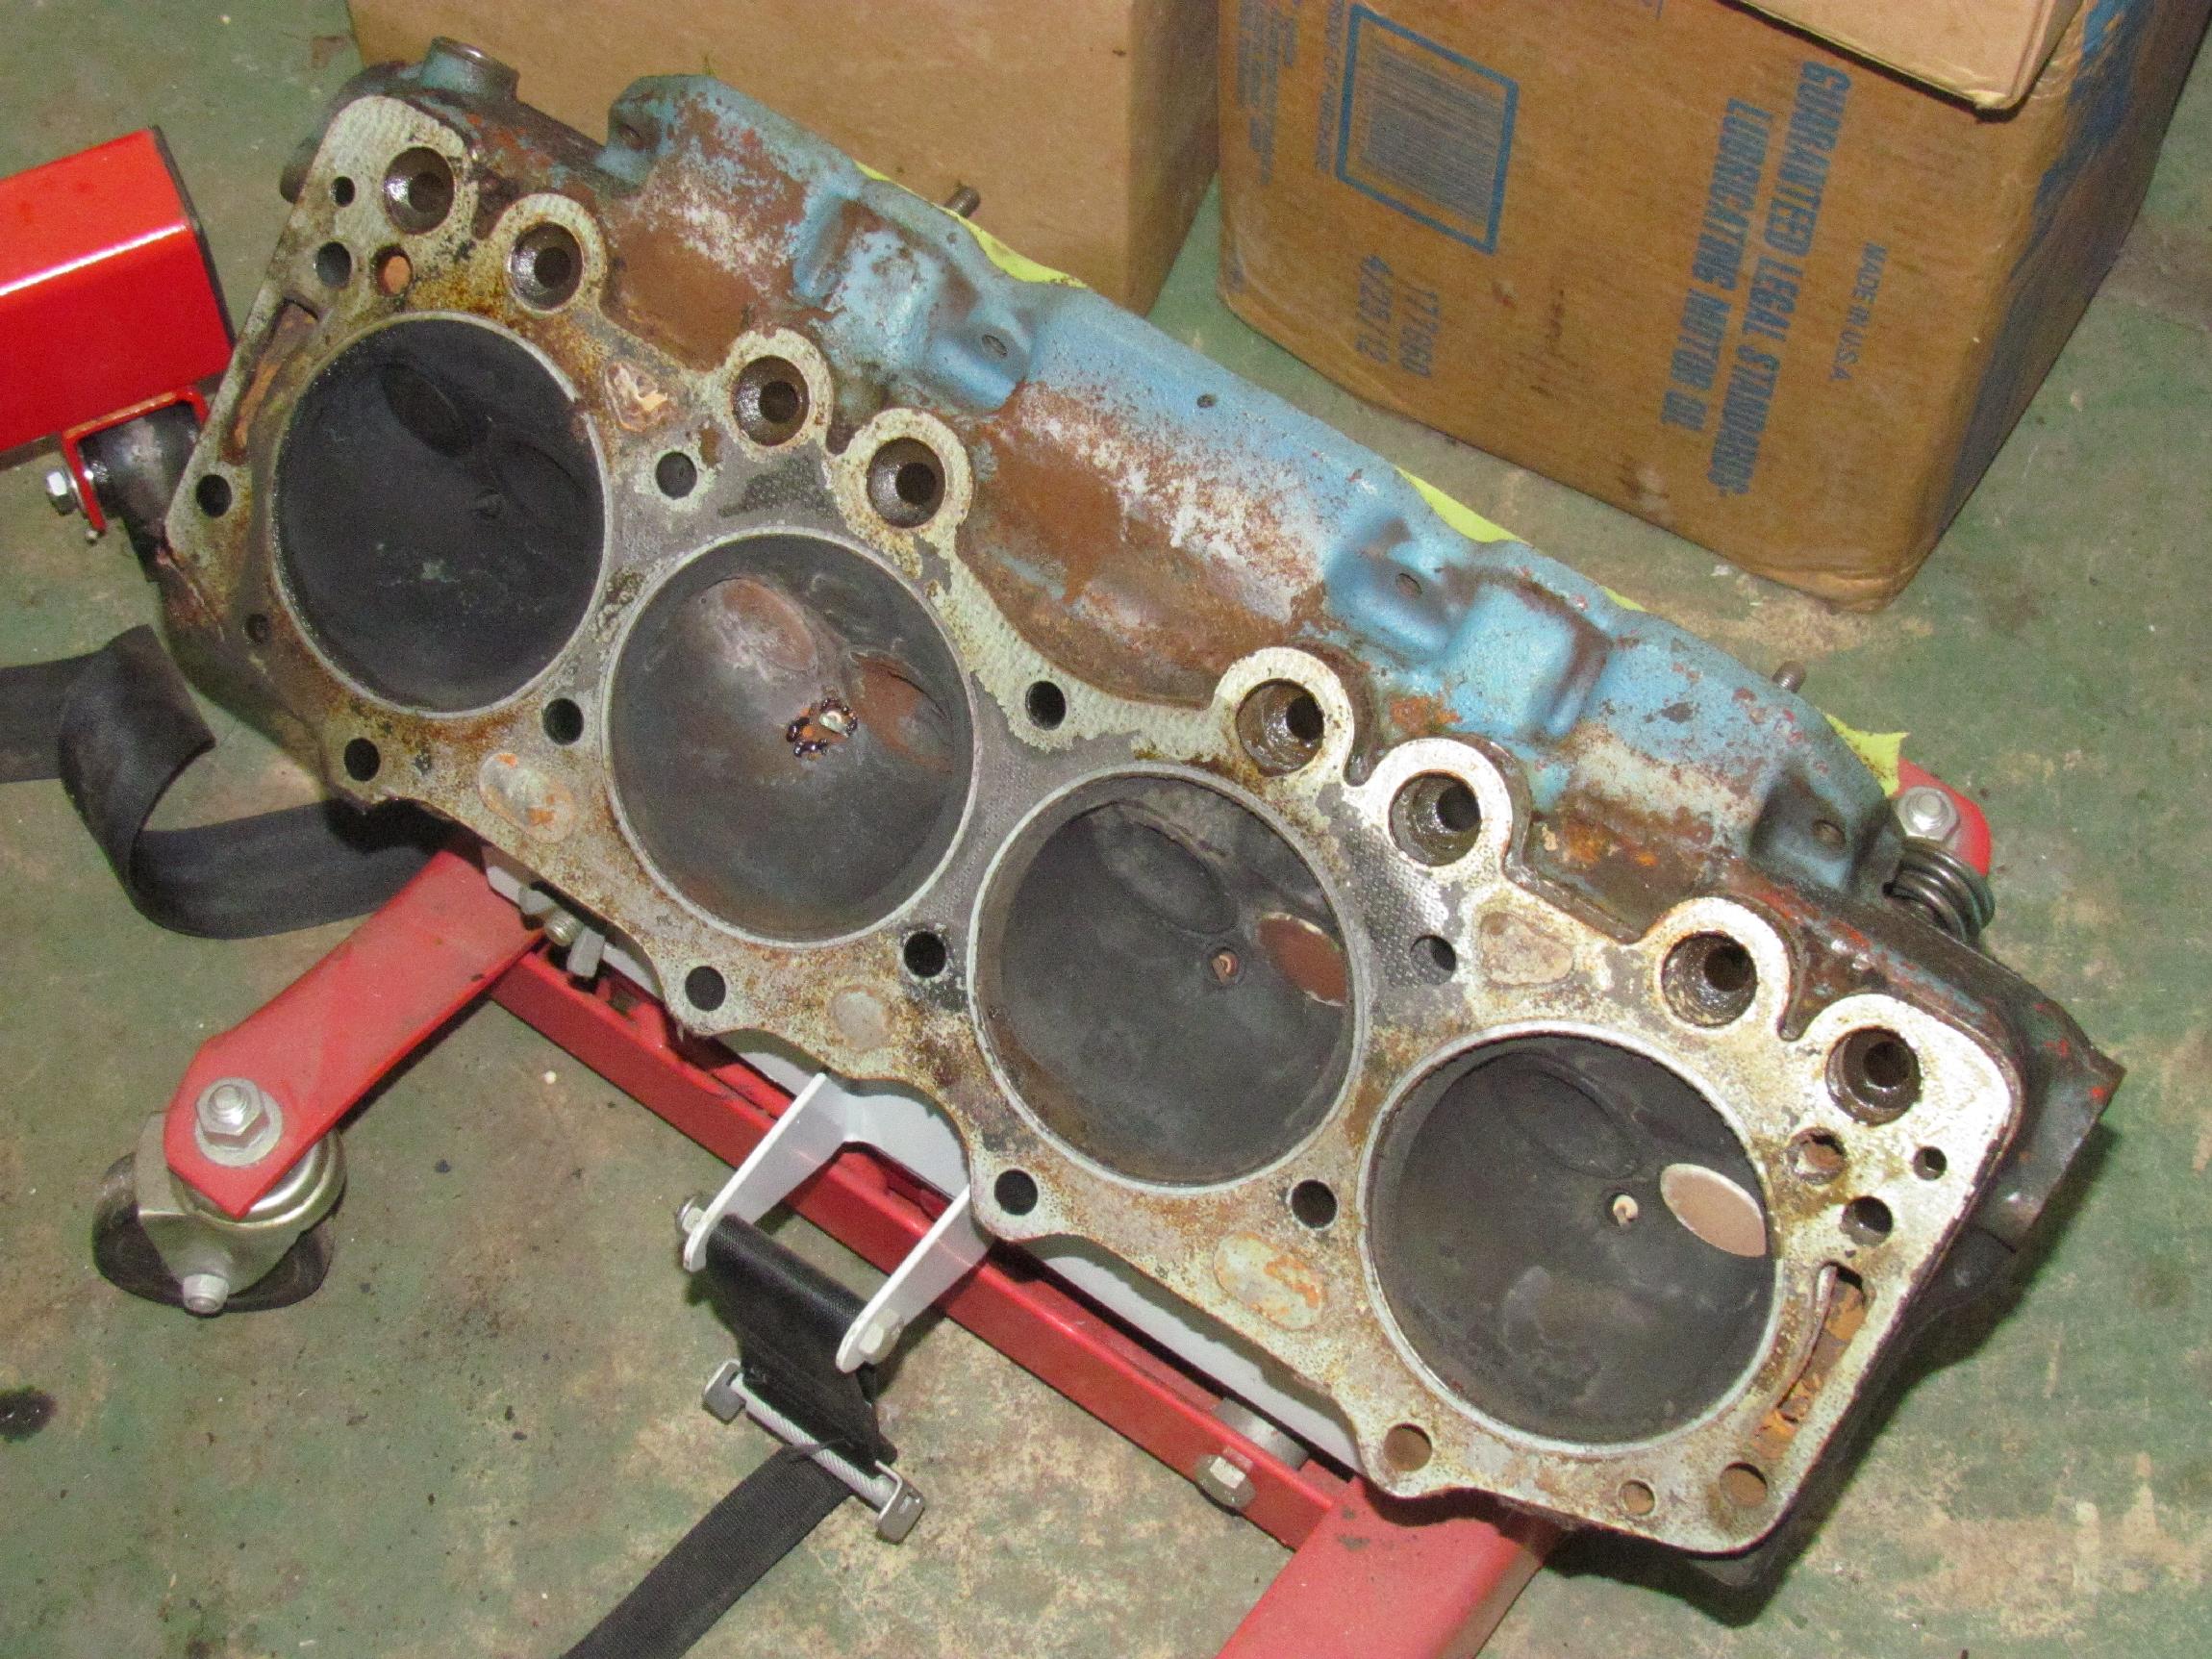 Removed
the heads next. Each head bolt was loosened until it was a quarter inch
out. Then big and small pry bars were used to break the head loose.
Head bolts were removed the rest of the way and the heads were lifted
off. Each head had two locating dowels in the block. The combustion
chambers are almost hemispherical and the spark plug is centrally
located. I believe the Buick design is considered a pent roof
combustion chamber. The block condition looks okay so far.
Removed
the heads next. Each head bolt was loosened until it was a quarter inch
out. Then big and small pry bars were used to break the head loose.
Head bolts were removed the rest of the way and the heads were lifted
off. Each head had two locating dowels in the block. The combustion
chambers are almost hemispherical and the spark plug is centrally
located. I believe the Buick design is considered a pent roof
combustion chamber. The block condition looks okay so far.
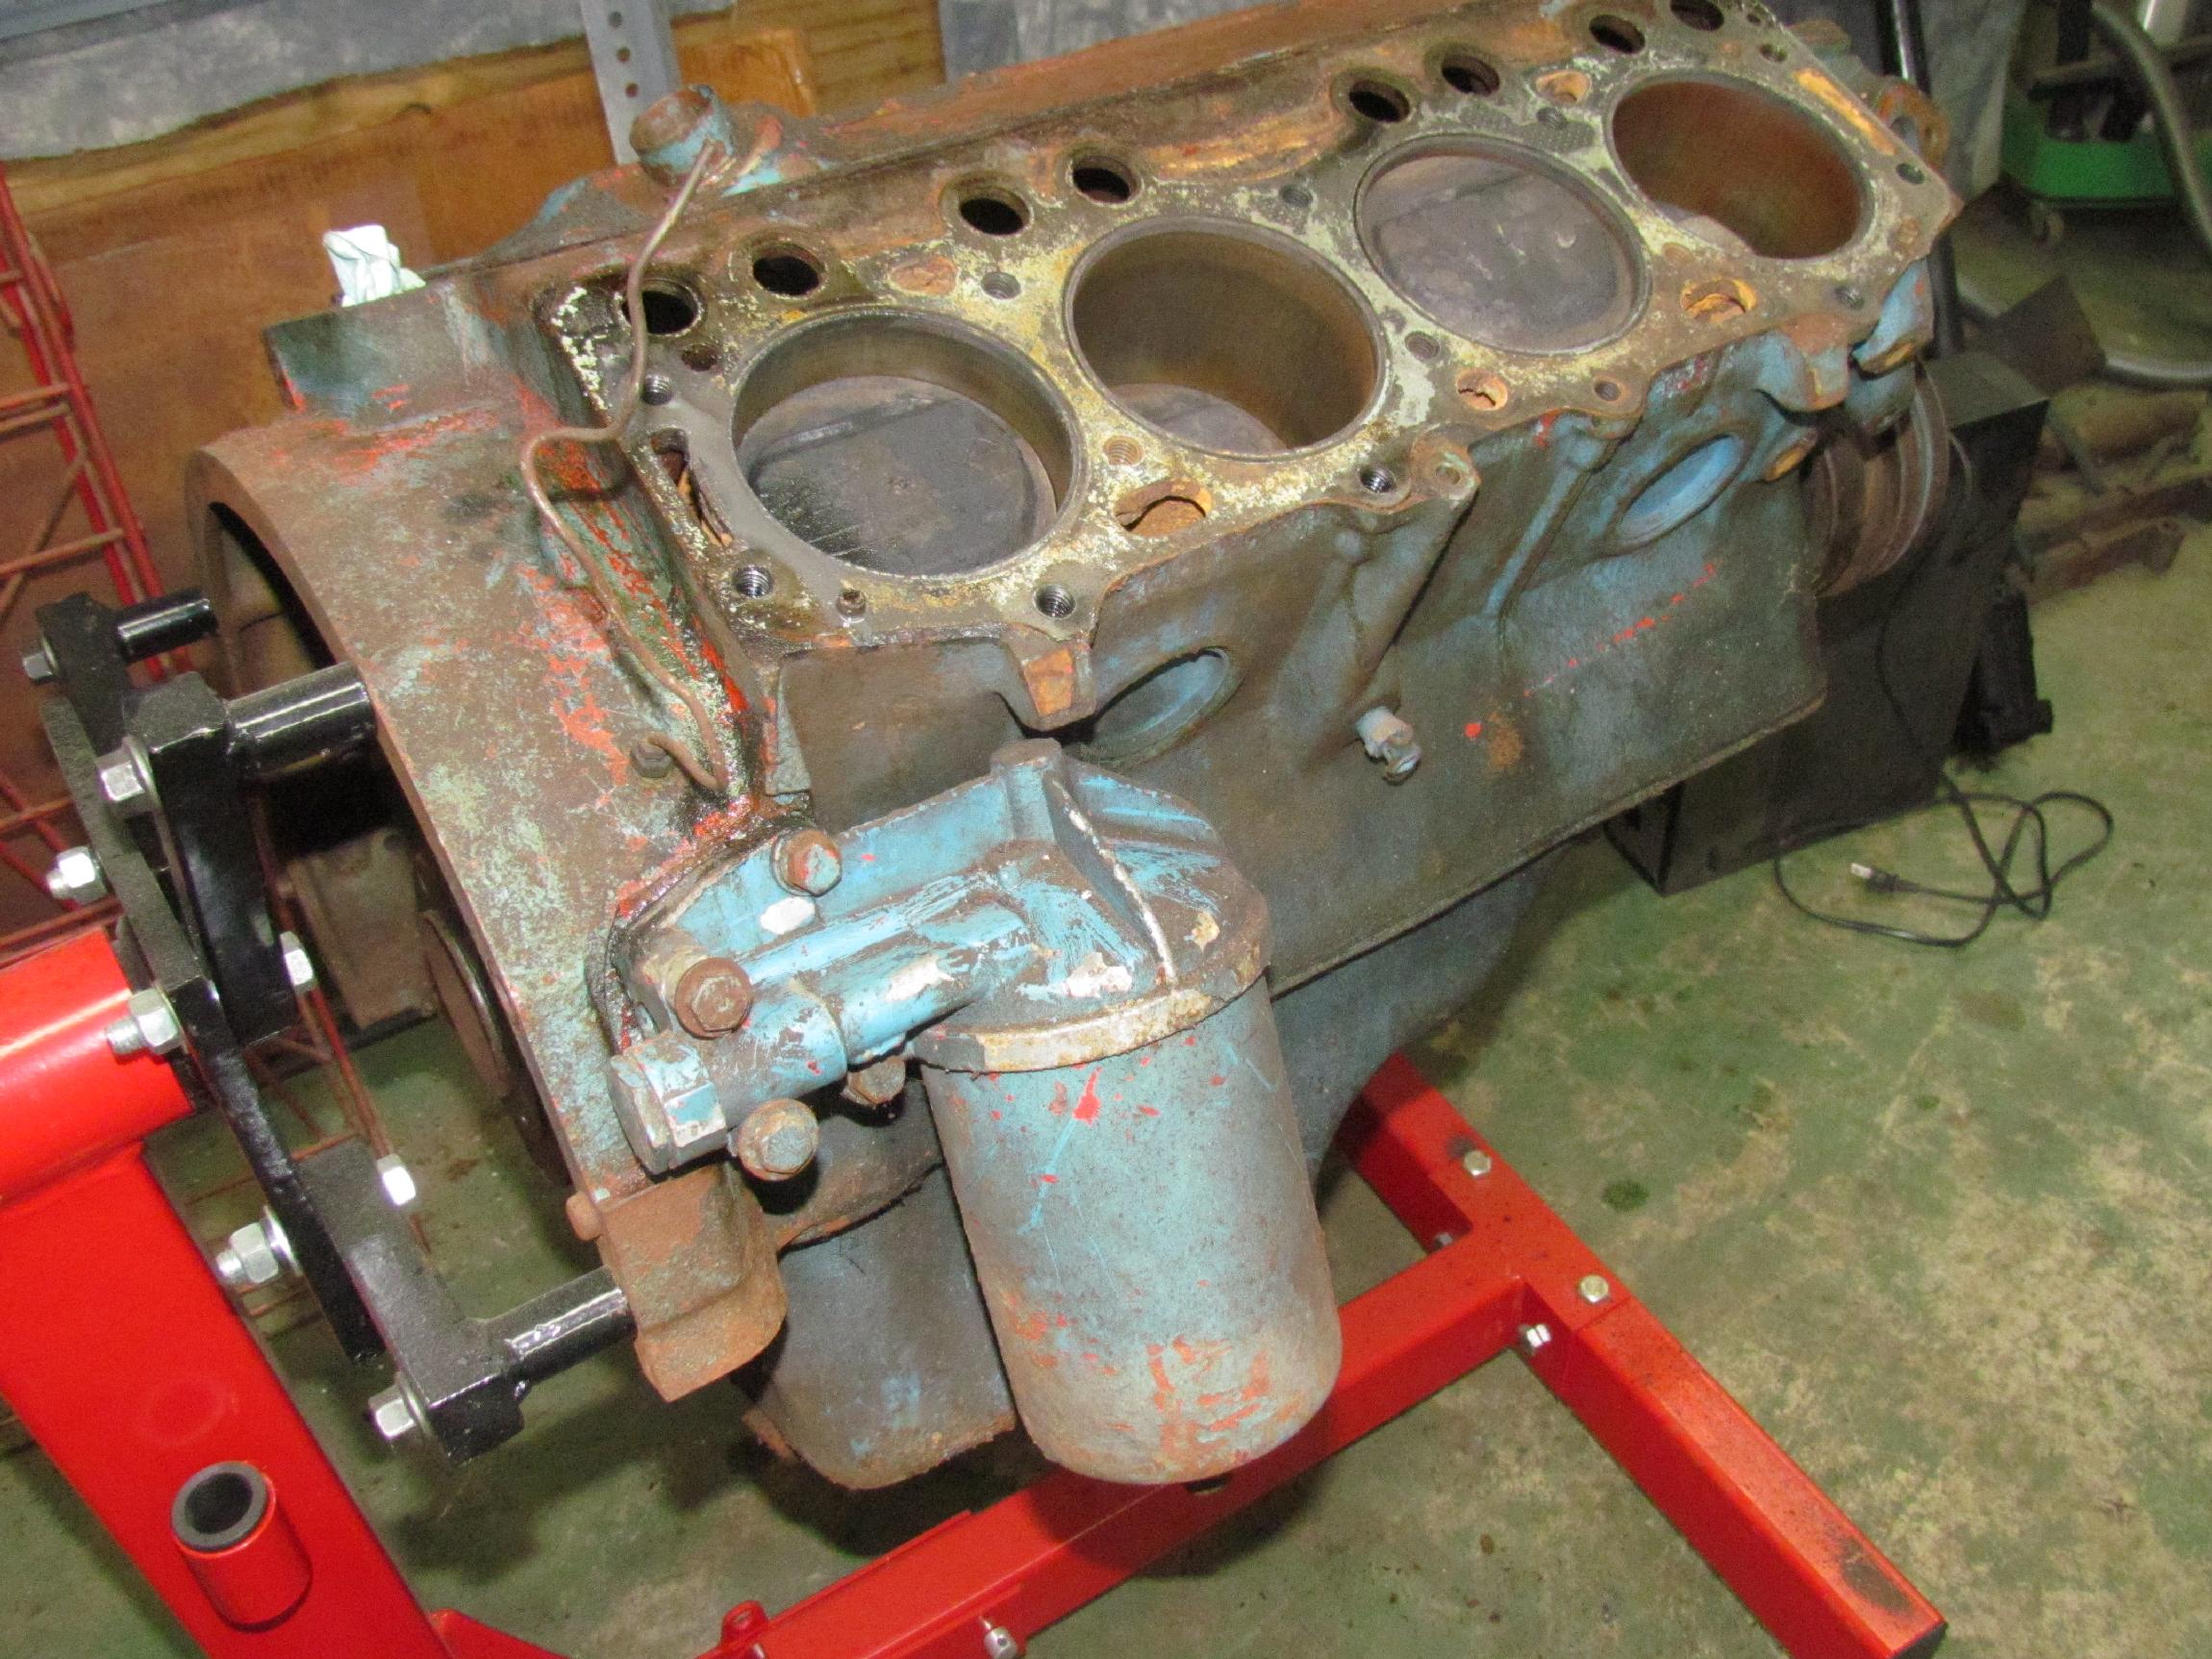 After
the heads were shelved away, the valley cover, oil pressure fitting and
oil filter assembly were removed. Then the remaining oil and sludge
were drained. This pan had a full load of oil when my friends, Sam
Gagliano and Paul O'Keefe helped me pick it up seventy-five miles north
of here in Sam's trailer. A lot of that oil puddled on the floor of
Sam's trailer due, I think, to the loose timing chain cover.
After
the heads were shelved away, the valley cover, oil pressure fitting and
oil filter assembly were removed. Then the remaining oil and sludge
were drained. This pan had a full load of oil when my friends, Sam
Gagliano and Paul O'Keefe helped me pick it up seventy-five miles north
of here in Sam's trailer. A lot of that oil puddled on the floor of
Sam's trailer due, I think, to the loose timing chain cover.
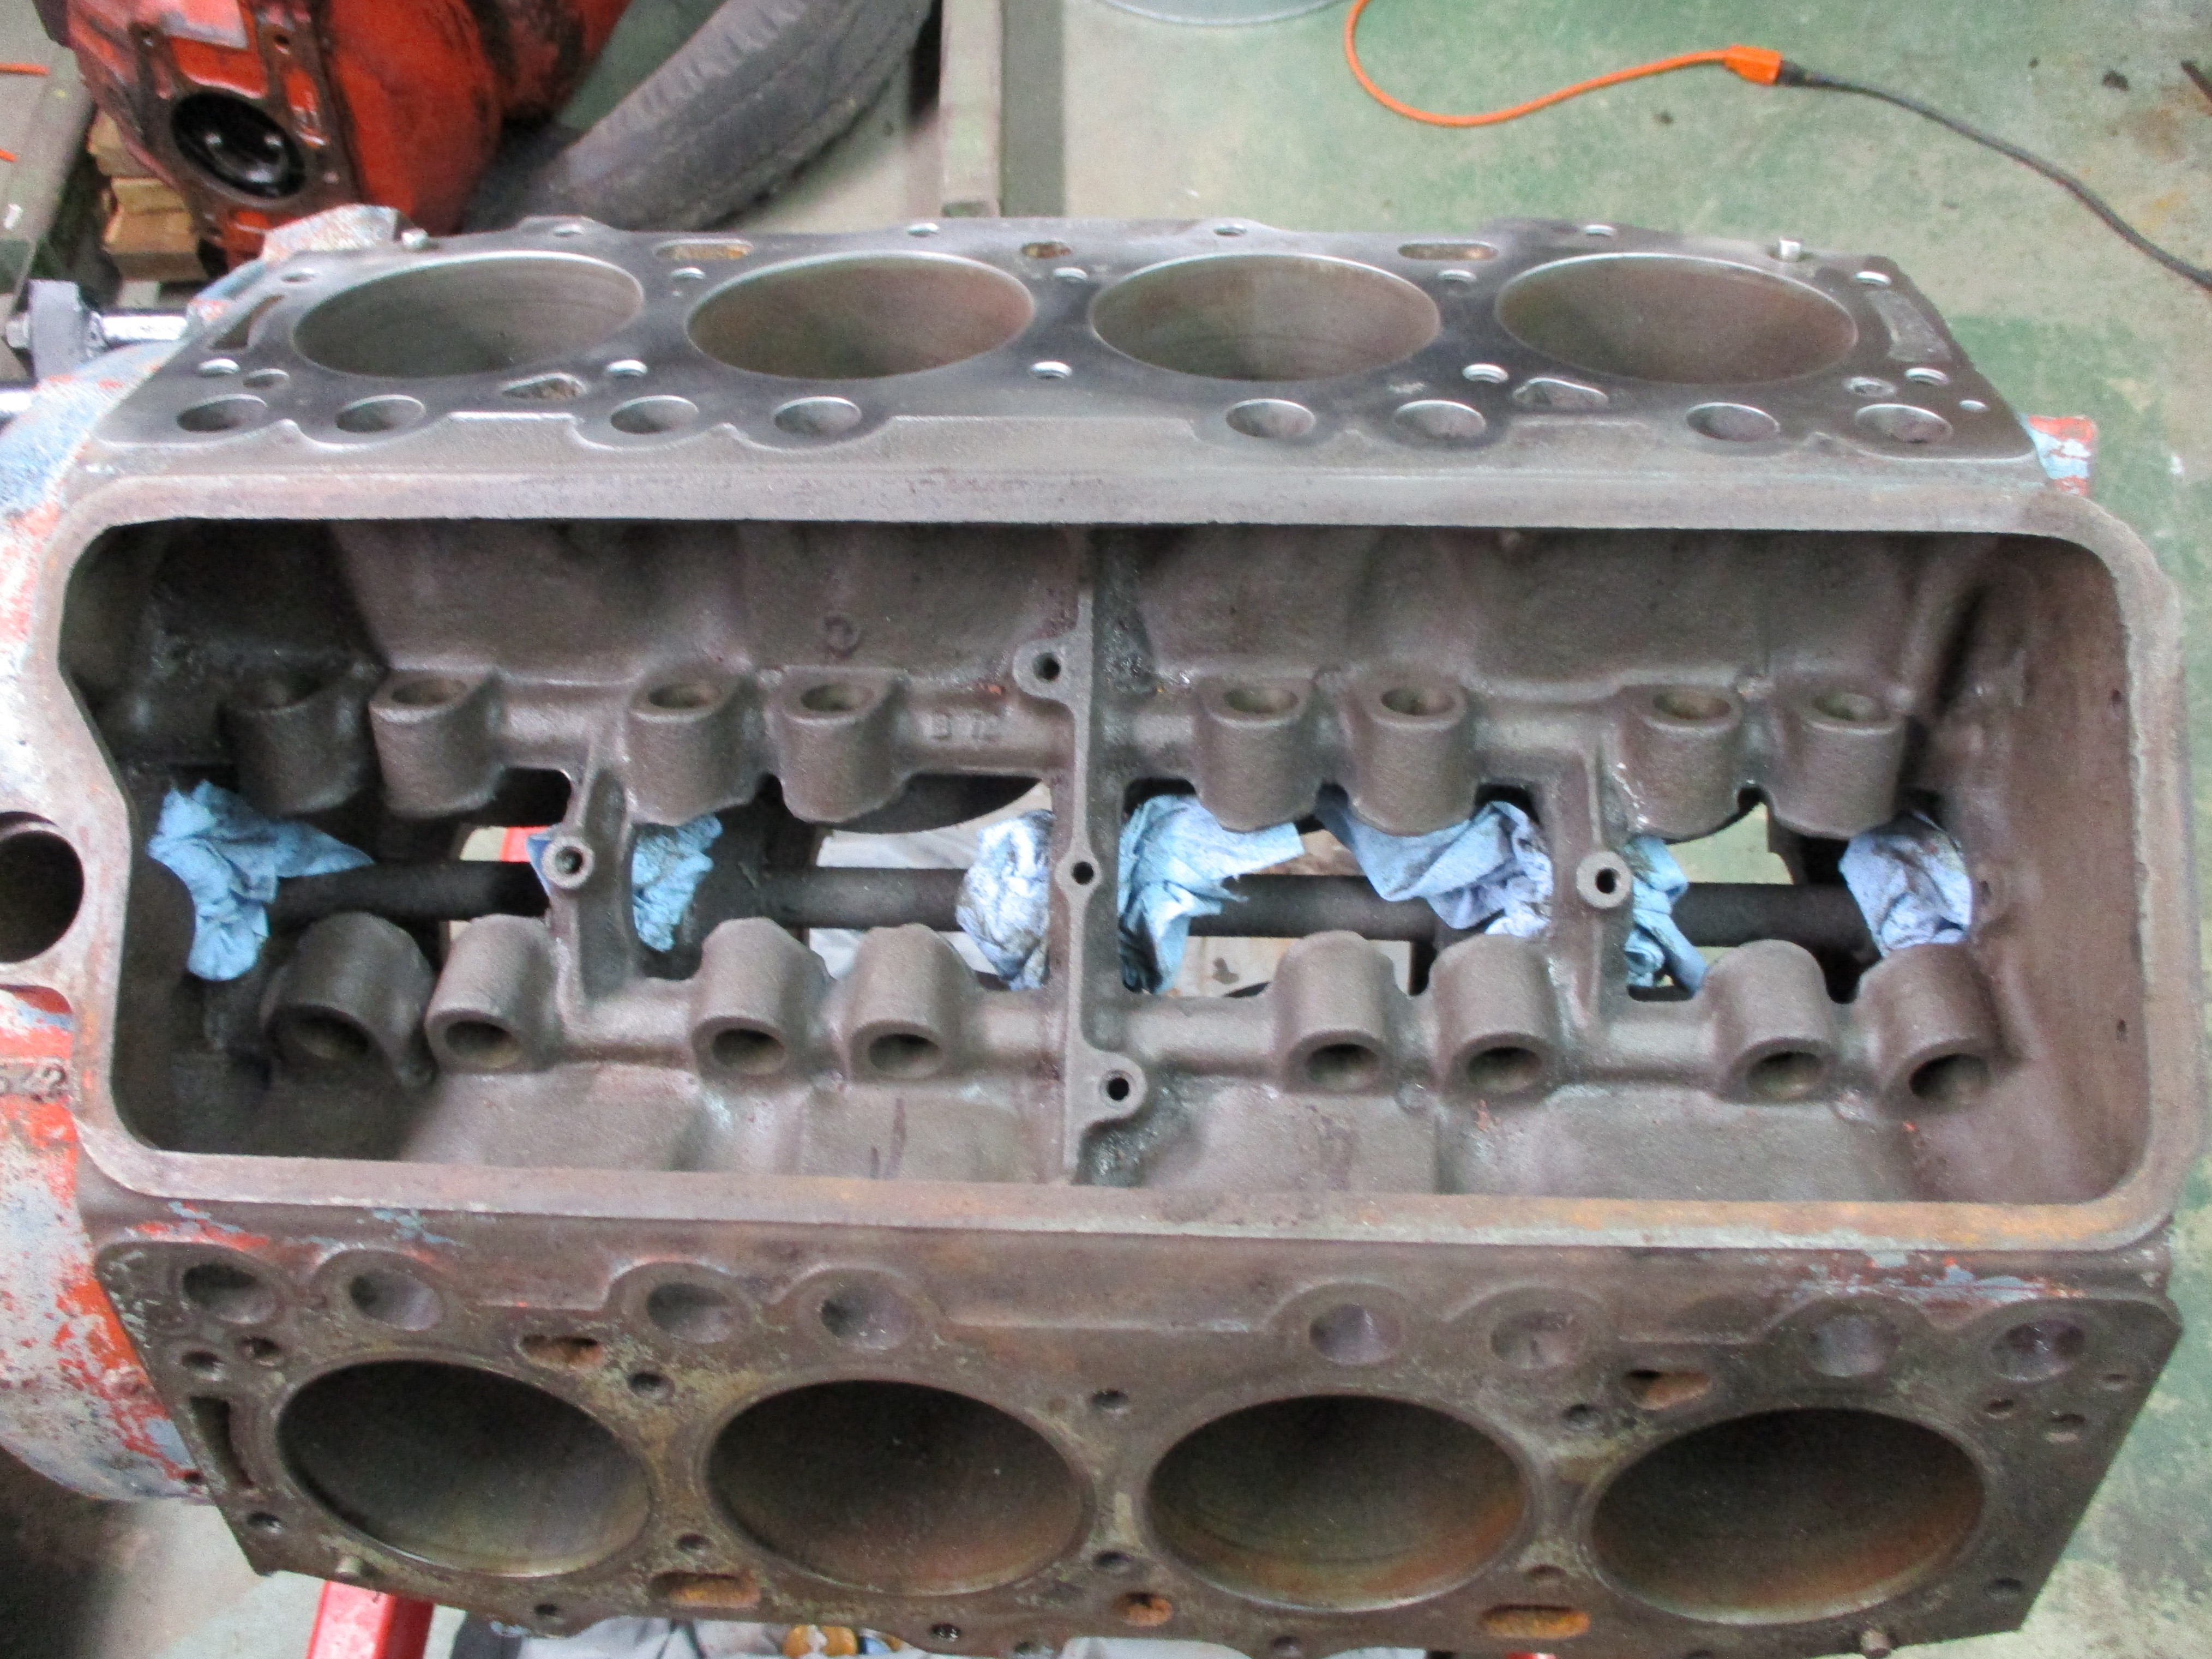
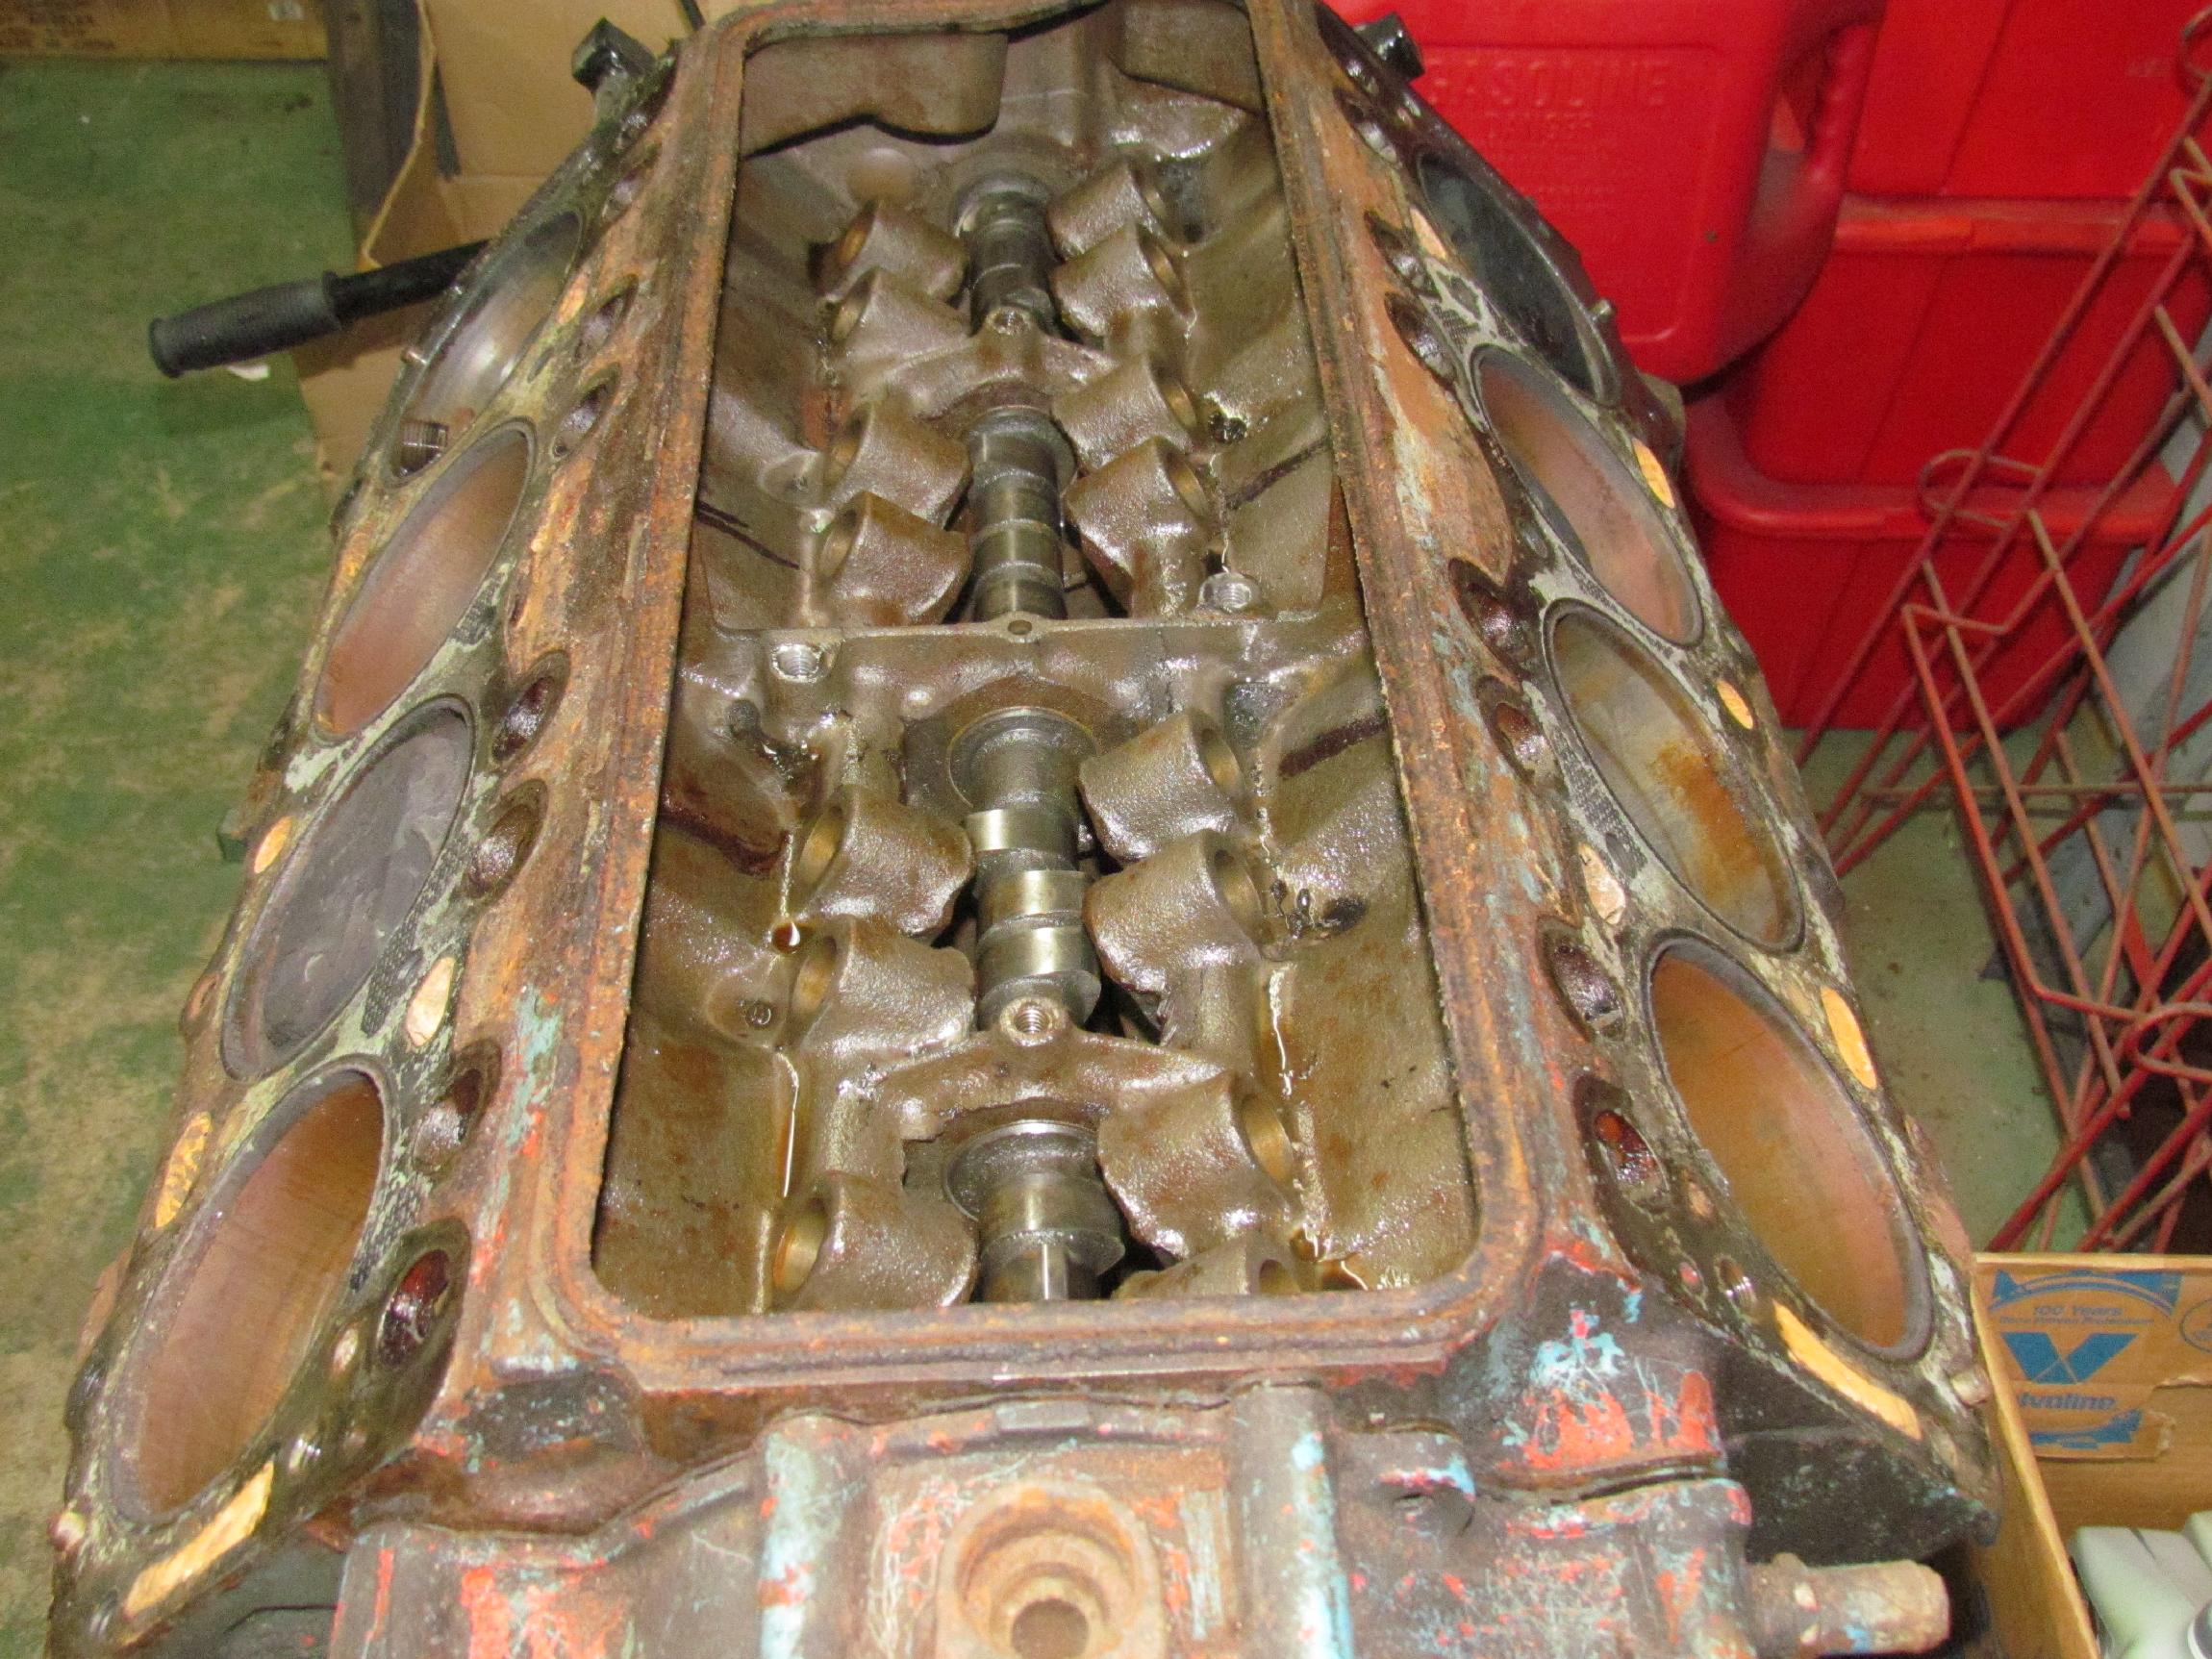 There
is a vertical sheet metal baffle dividing the lifter valley in two,
held in place with two cap screws. It was removed and the hydraulic
lifters removed. Camshaft wear does not look bad. These engines came
from the factory with jagged castings around the lifter enclosures.
This will be cleaned up with a die grinder before the engine goes back
together.
There
is a vertical sheet metal baffle dividing the lifter valley in two,
held in place with two cap screws. It was removed and the hydraulic
lifters removed. Camshaft wear does not look bad. These engines came
from the factory with jagged castings around the lifter enclosures.
This will be cleaned up with a die grinder before the engine goes back
together.
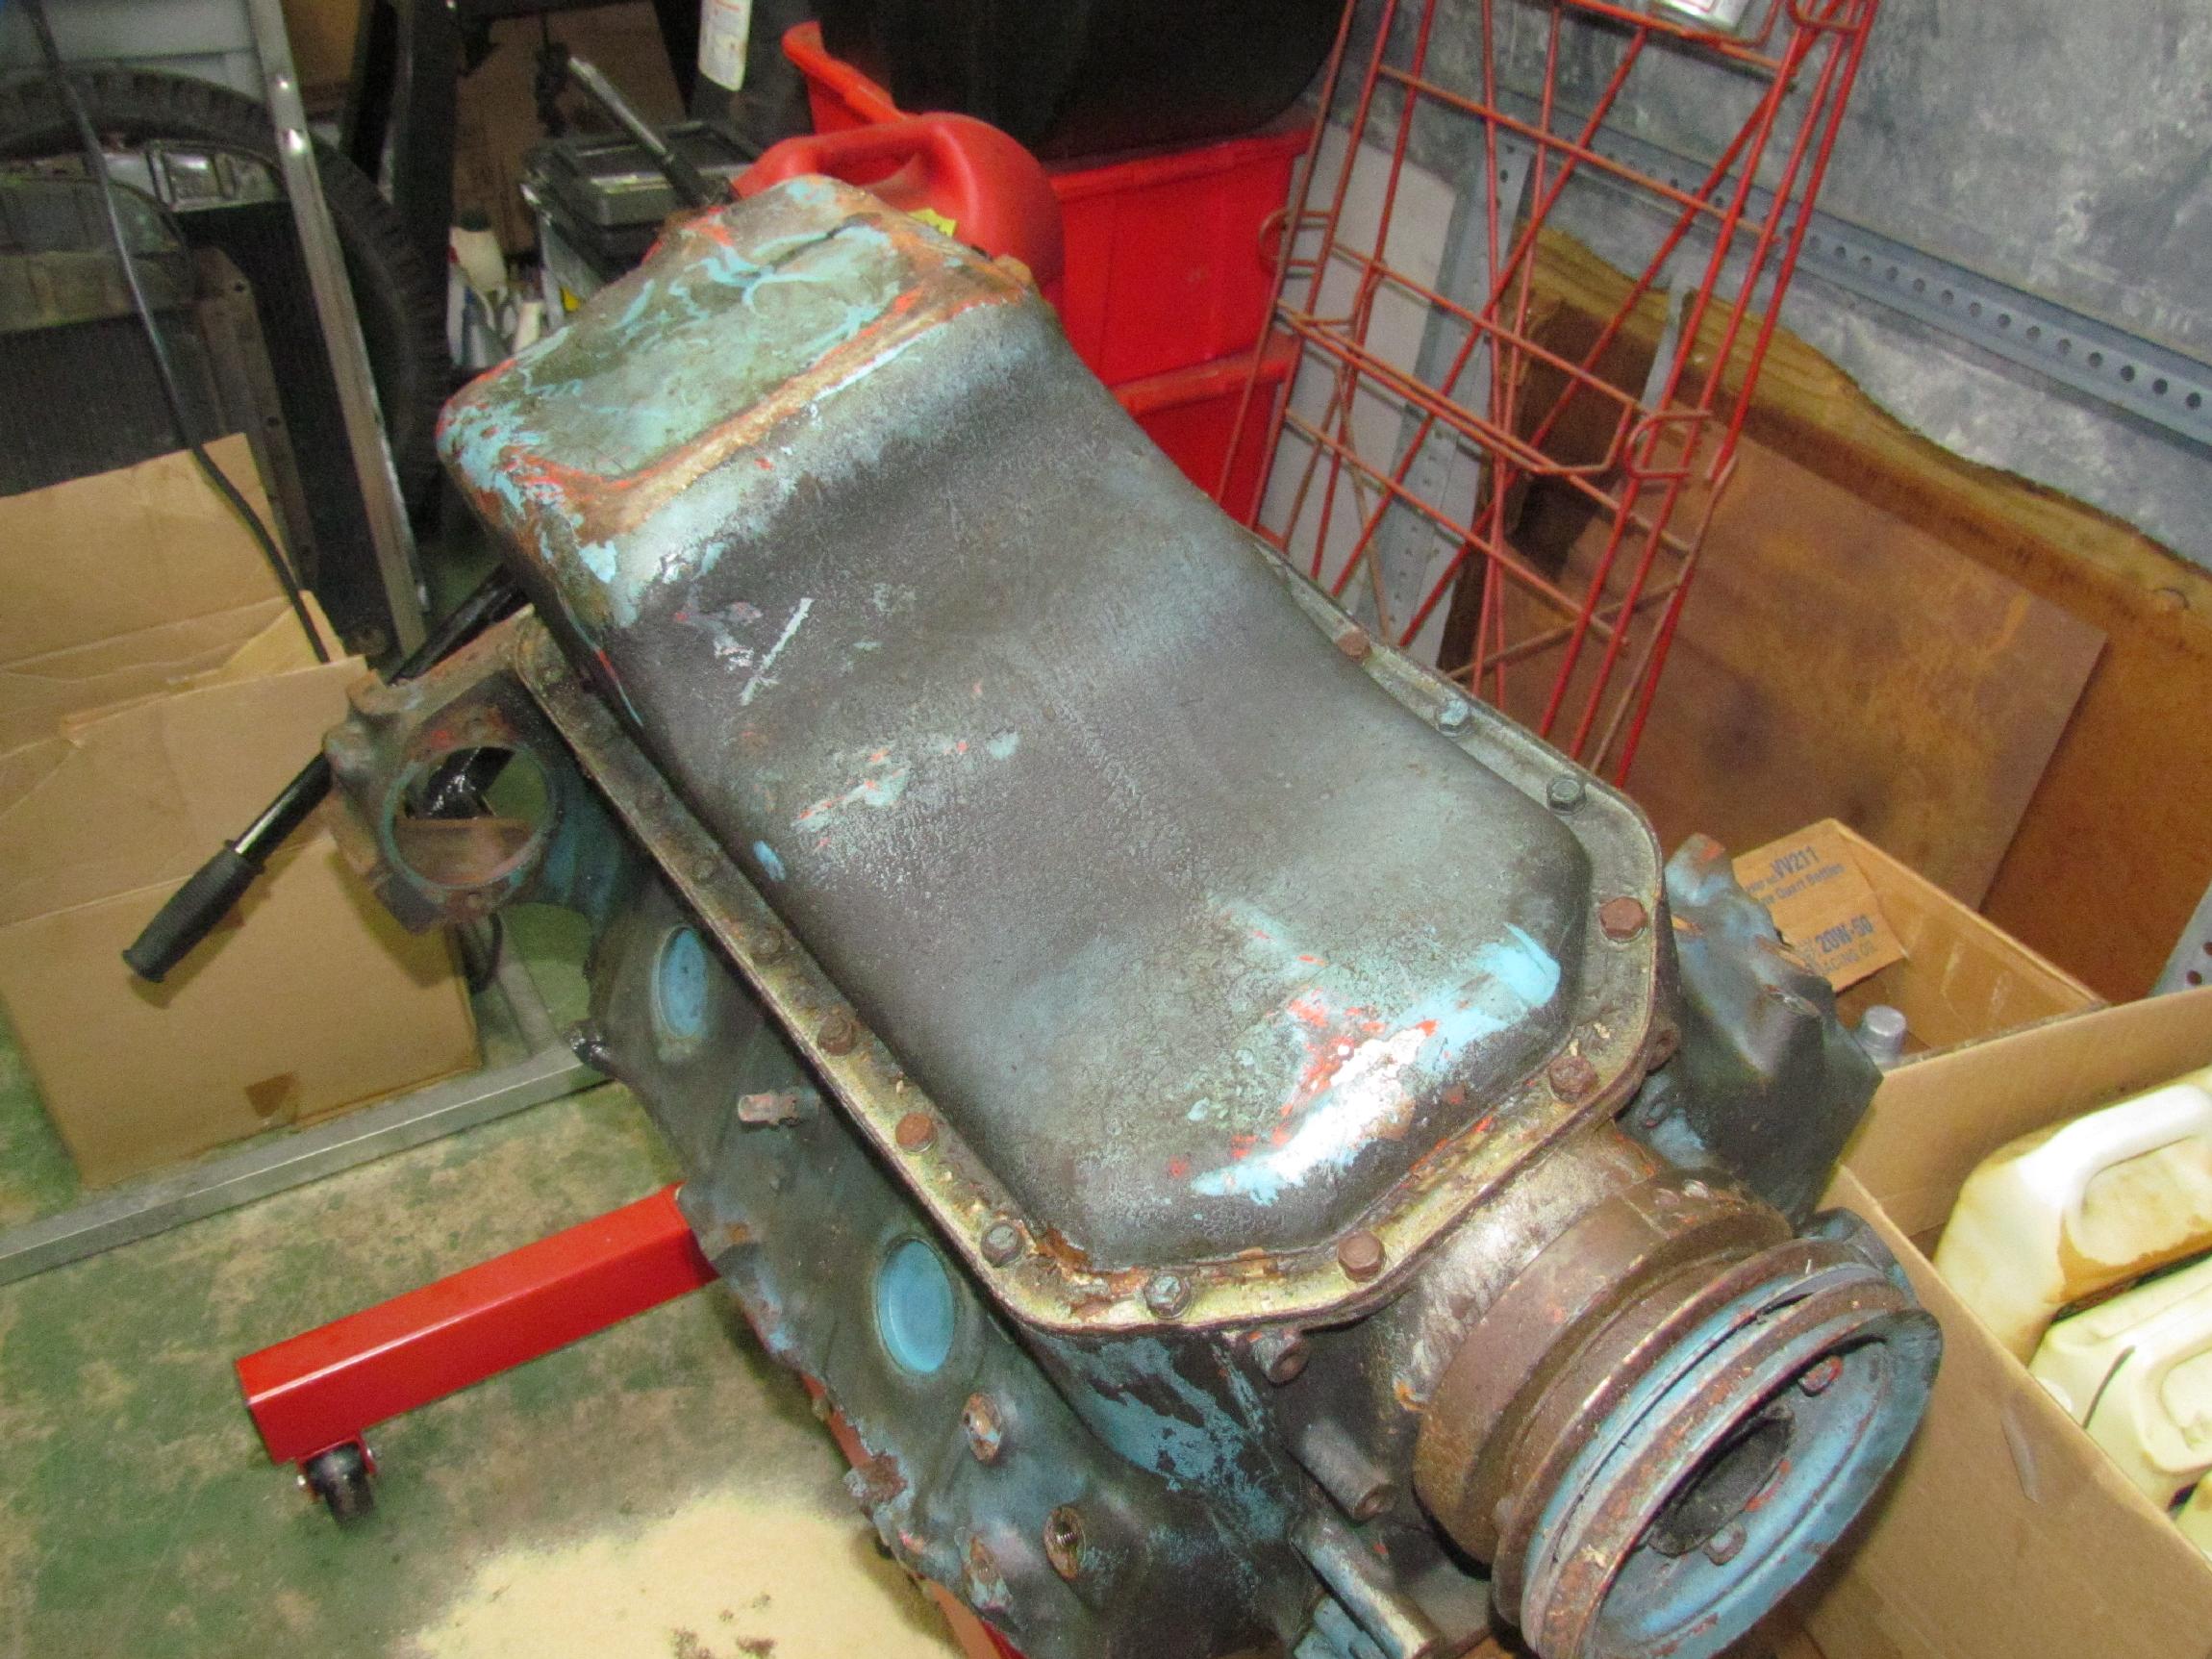 After
the oil was drained, the engine was flipped over and the oil pan was
removed along with the double pulley on the harmonic balancer. Nailhead
pans came in several shapes. I'm fortunate that this is a rear sump pan
and will probably not interfere with the Deerslayer's straight front
axle when it comes time for this engine to go in the truck. The pan is
in better shape than it appears and will not take much work to restore
it for reuse.
After
the oil was drained, the engine was flipped over and the oil pan was
removed along with the double pulley on the harmonic balancer. Nailhead
pans came in several shapes. I'm fortunate that this is a rear sump pan
and will probably not interfere with the Deerslayer's straight front
axle when it comes time for this engine to go in the truck. The pan is
in better shape than it appears and will not take much work to restore
it for reuse.
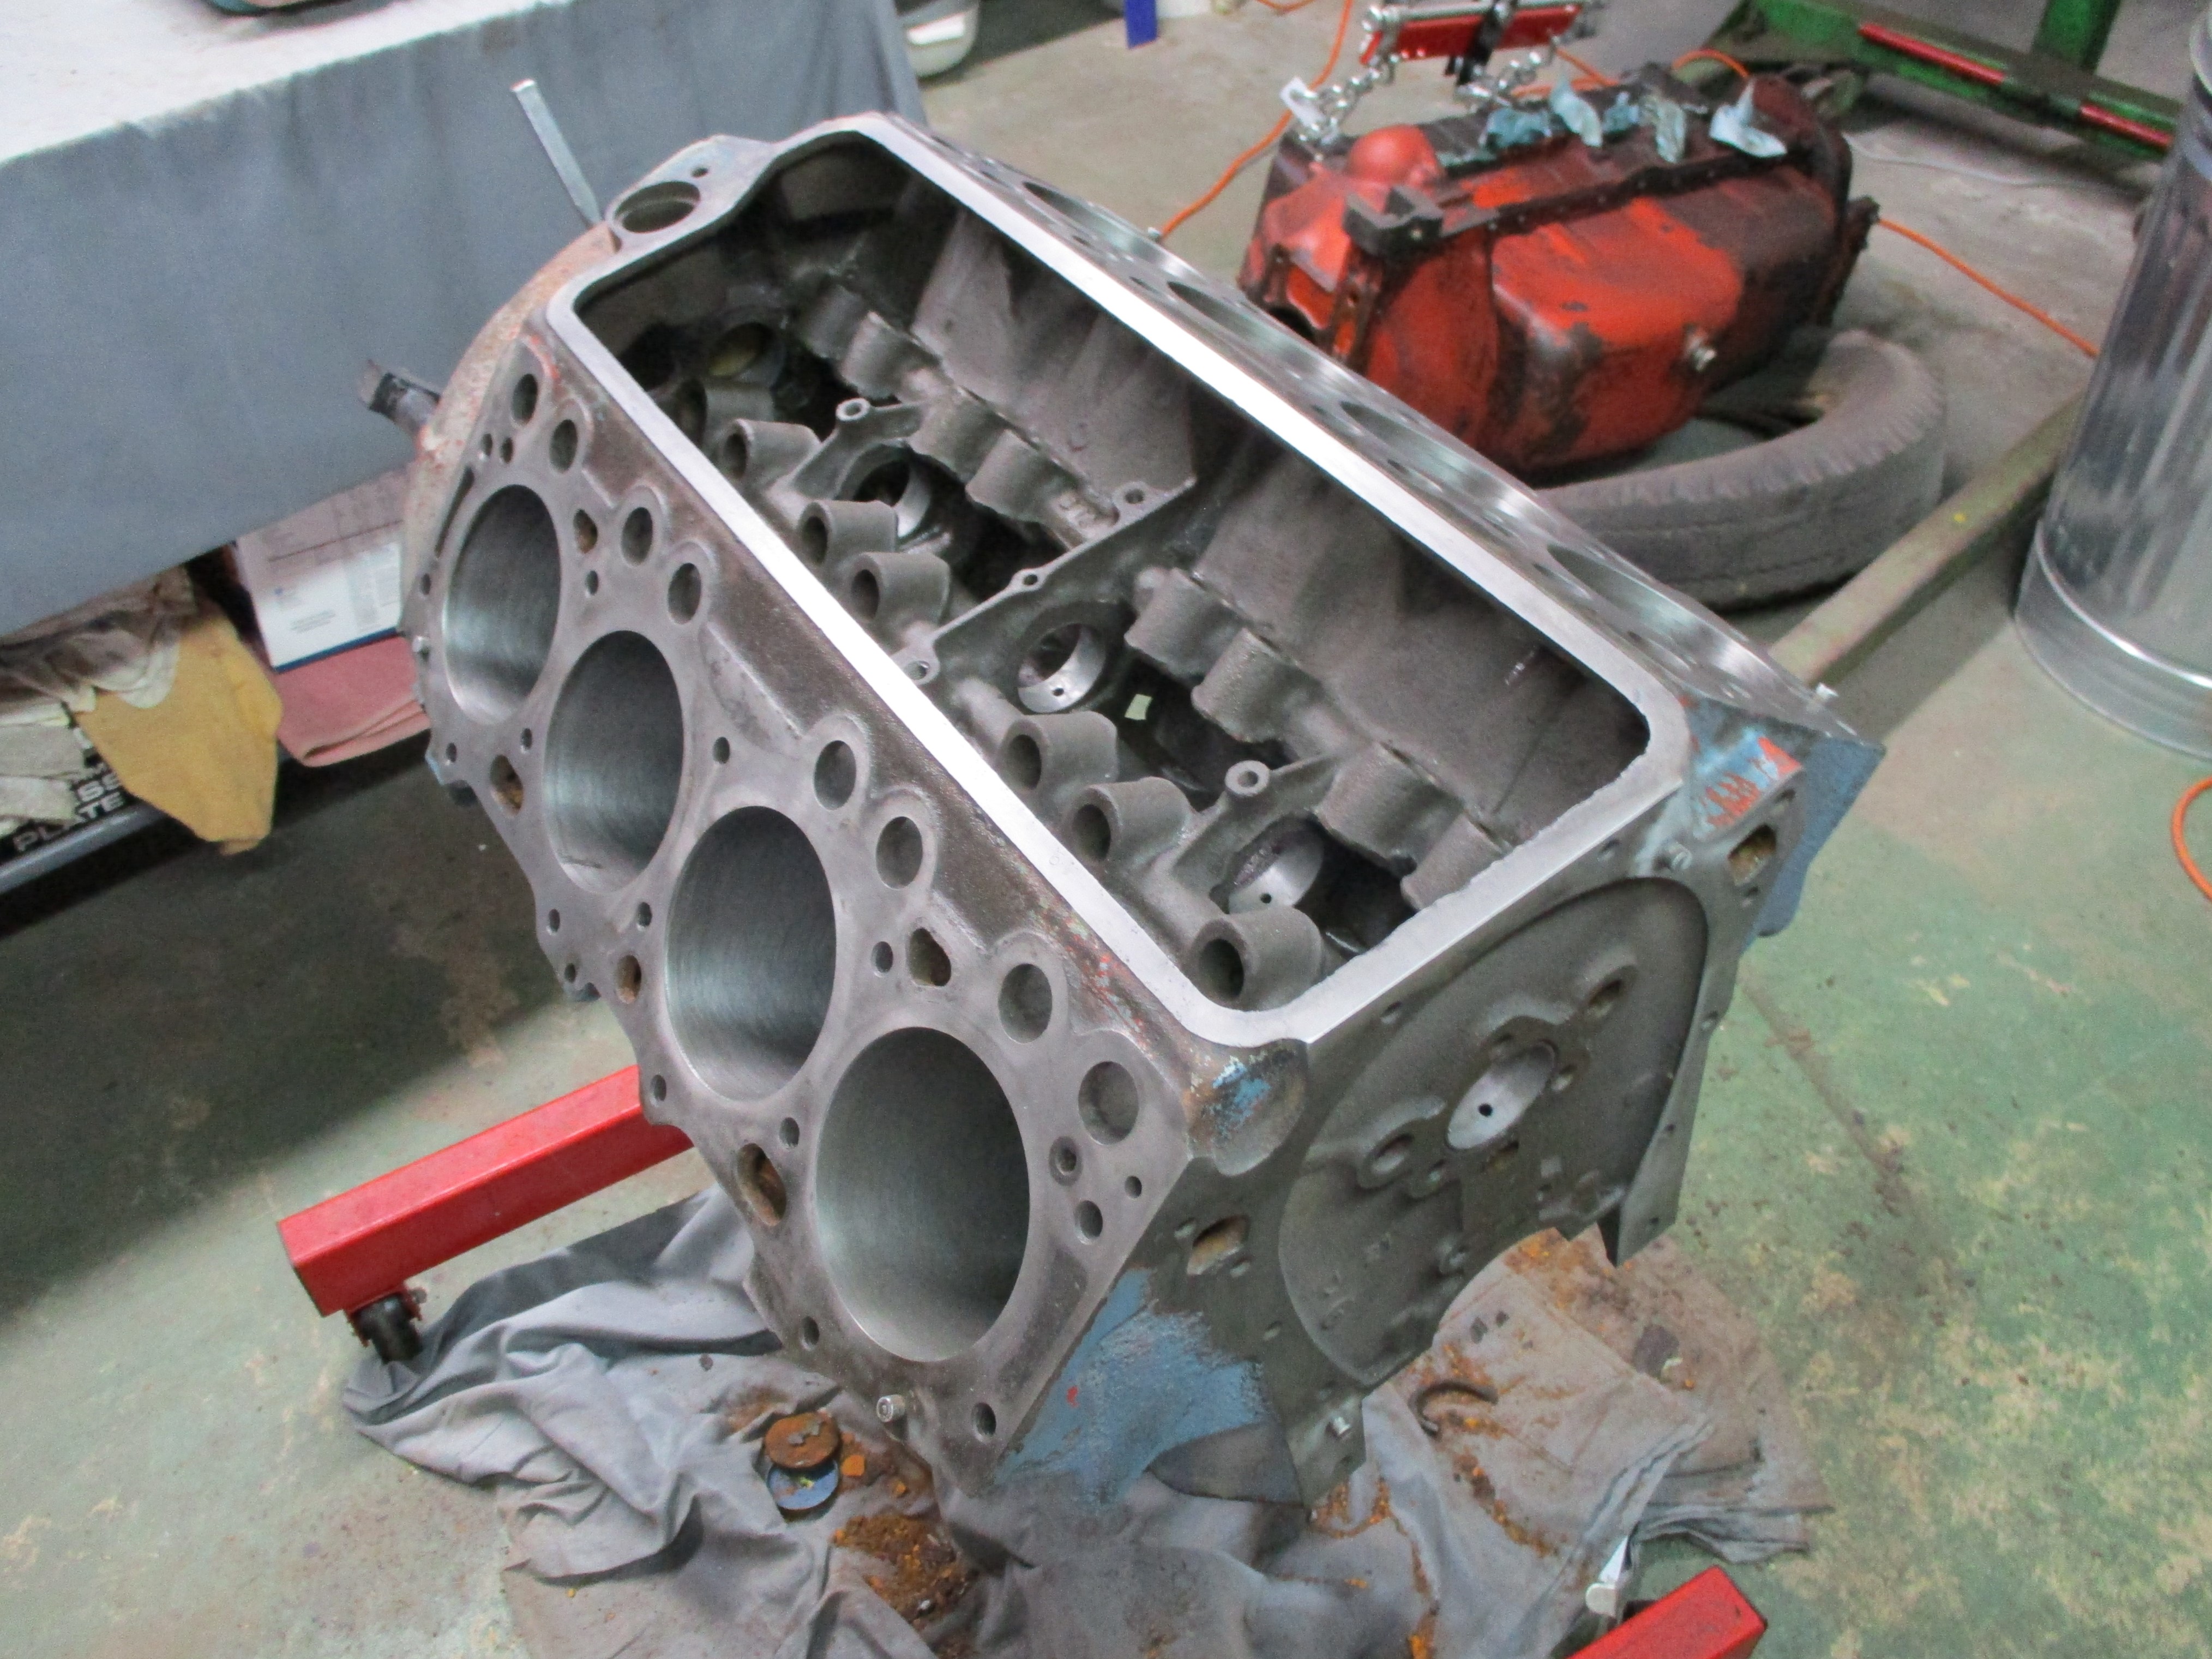
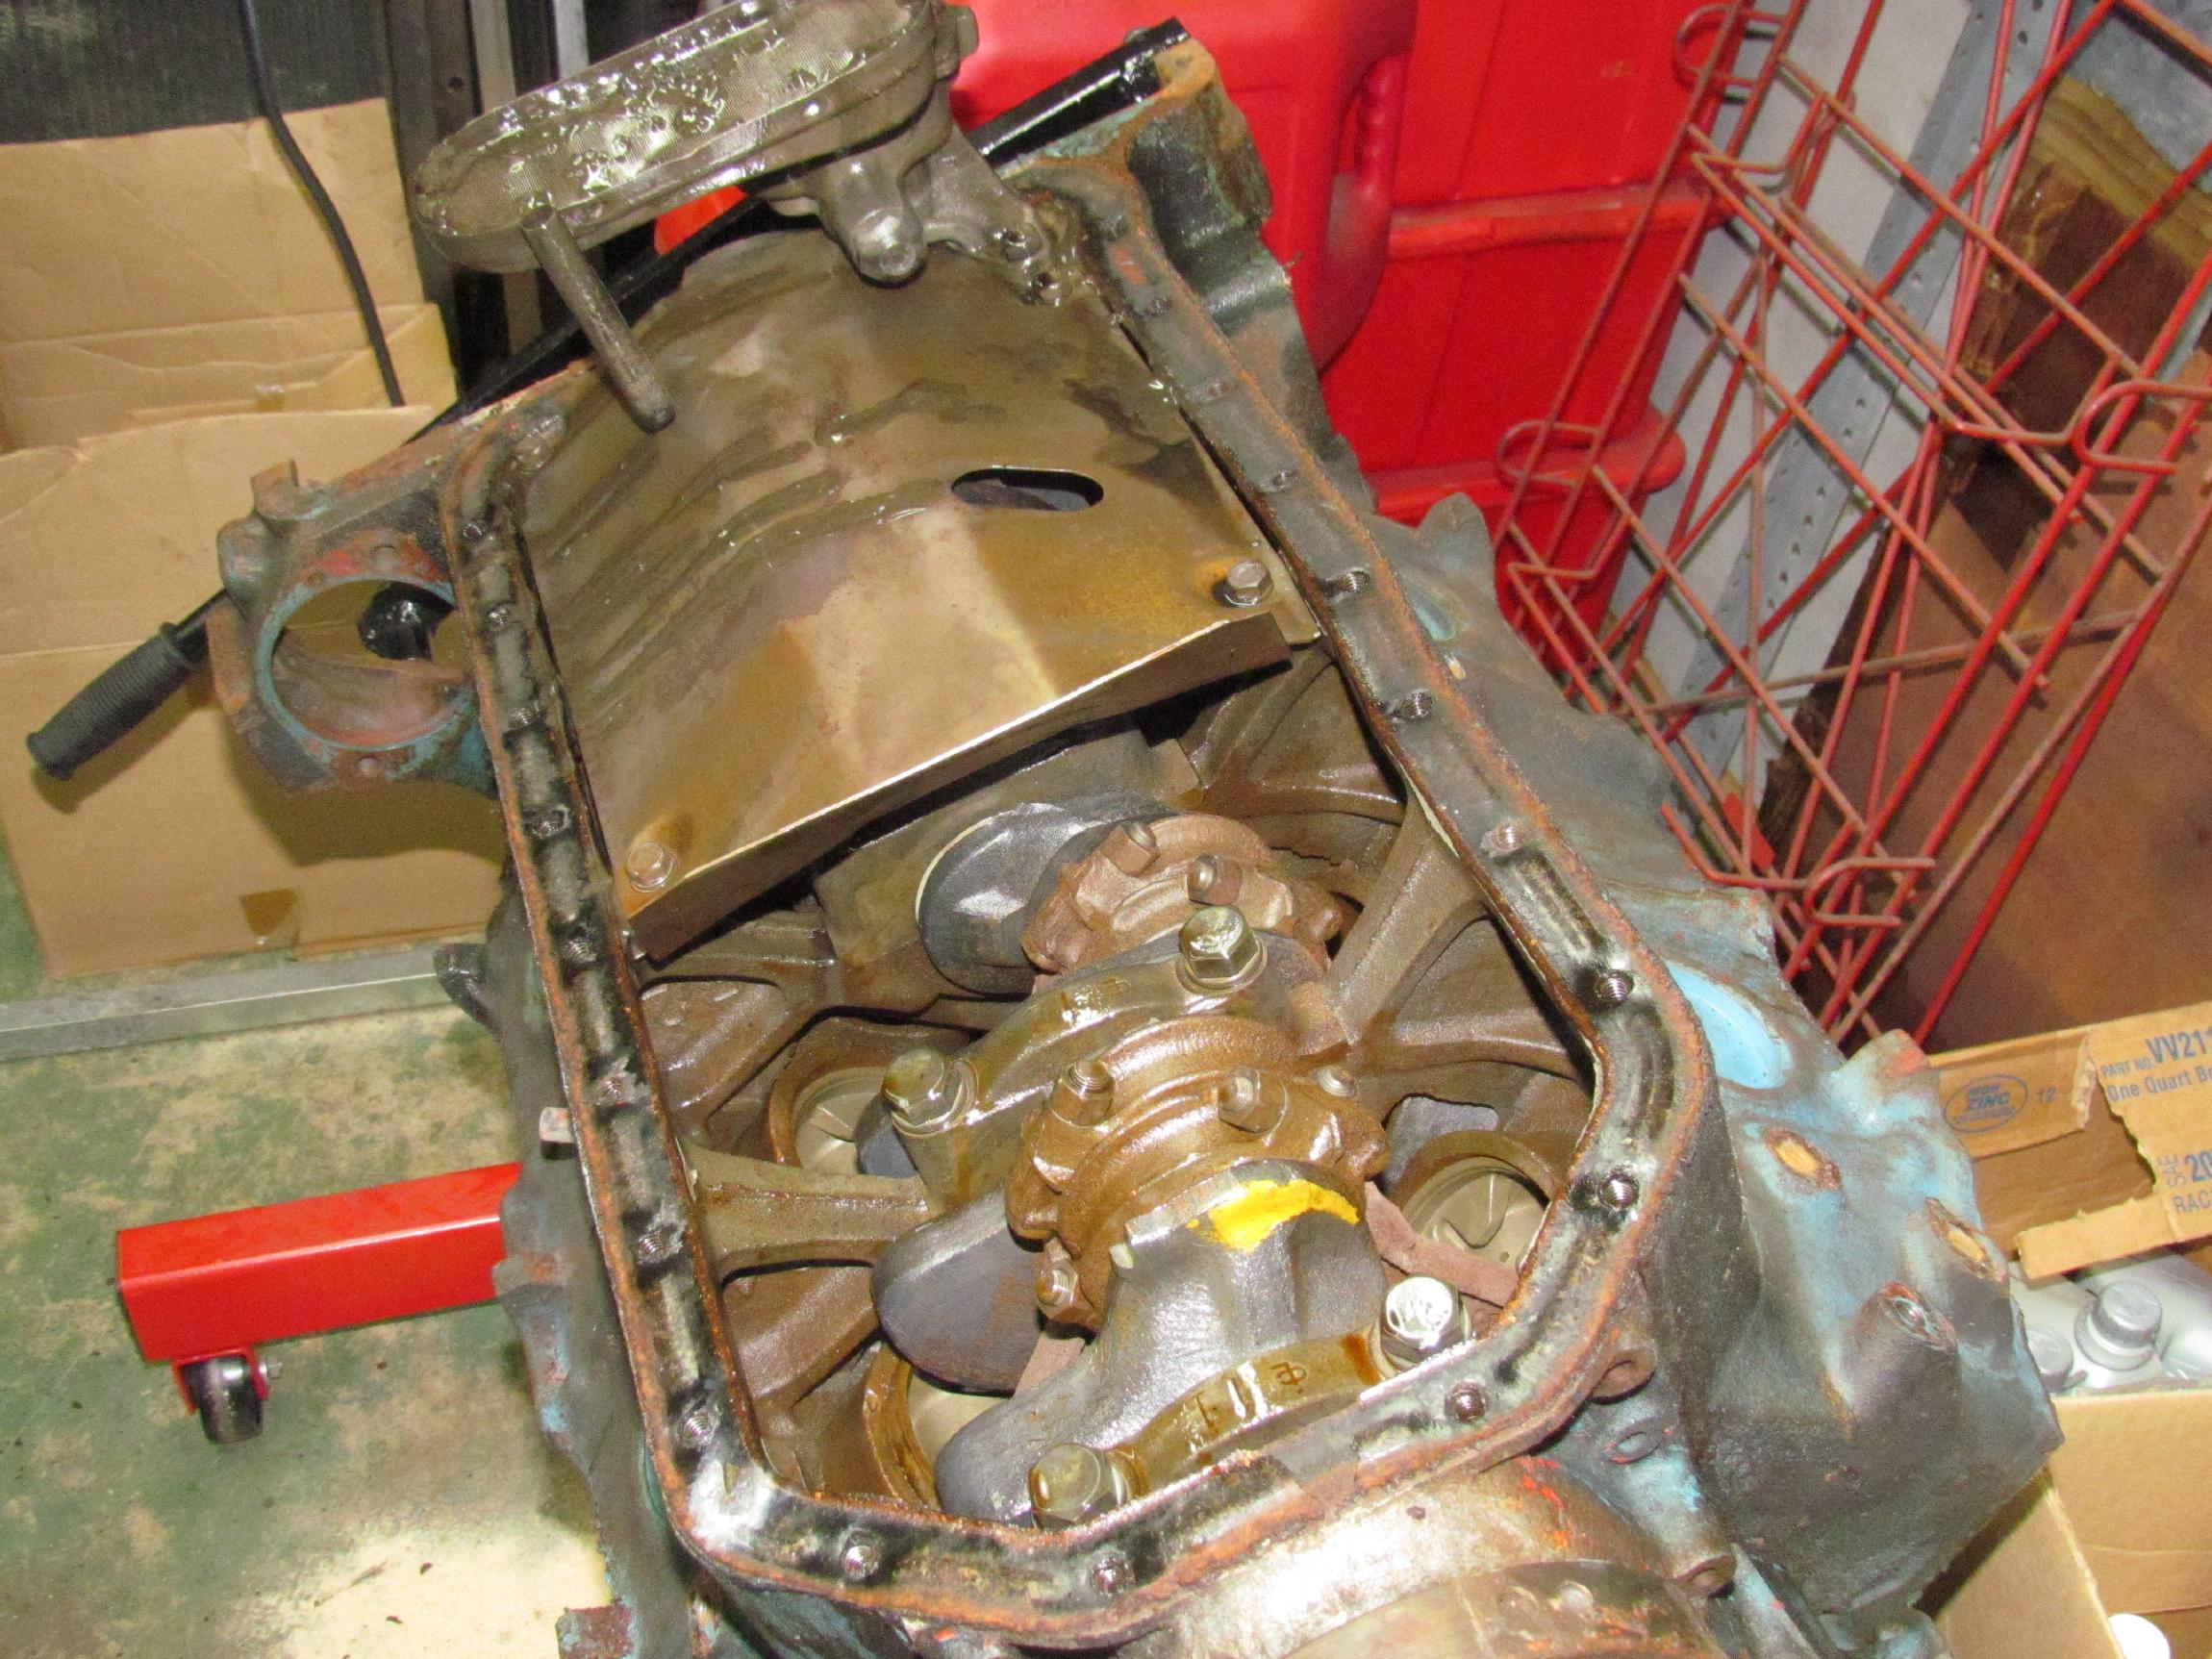 The
oil pump and pickup were unbolted next, followed by the sheet metal
baffle. I put these parts aside to clean later. Notice how the main
bearings reside in "bridges" between the block sides. There is no web
above them. You can pass your hand thru the open space.
The
oil pump and pickup were unbolted next, followed by the sheet metal
baffle. I put these parts aside to clean later. Notice how the main
bearings reside in "bridges" between the block sides. There is no web
above them. You can pass your hand thru the open space.
 It's
crowded in the nailhead crankcase and there is not much room for
counterweights. Buick compensated for this by making the flexplate (or
flywheel) and the harmonic balancer part of the counterweight system.
They are indexed to the crankshaft. I have to do some research and
measurin' before I take the rotating assemblies apart to give me a
better idea of where I am with this engine.
It's
crowded in the nailhead crankcase and there is not much room for
counterweights. Buick compensated for this by making the flexplate (or
flywheel) and the harmonic balancer part of the counterweight system.
They are indexed to the crankshaft. I have to do some research and
measurin' before I take the rotating assemblies apart to give me a
better idea of where I am with this engine.
 September
23rd 2020
Getting back in the saddle. Baby steps. The magneto spurred me to
fiddle with the nailhead a bit. I pulled number one piston. no ridge at
the top of the cylinder so it tapped out easily with the help of brass
hammer and drift and wooden block. The rod bearings look like they were
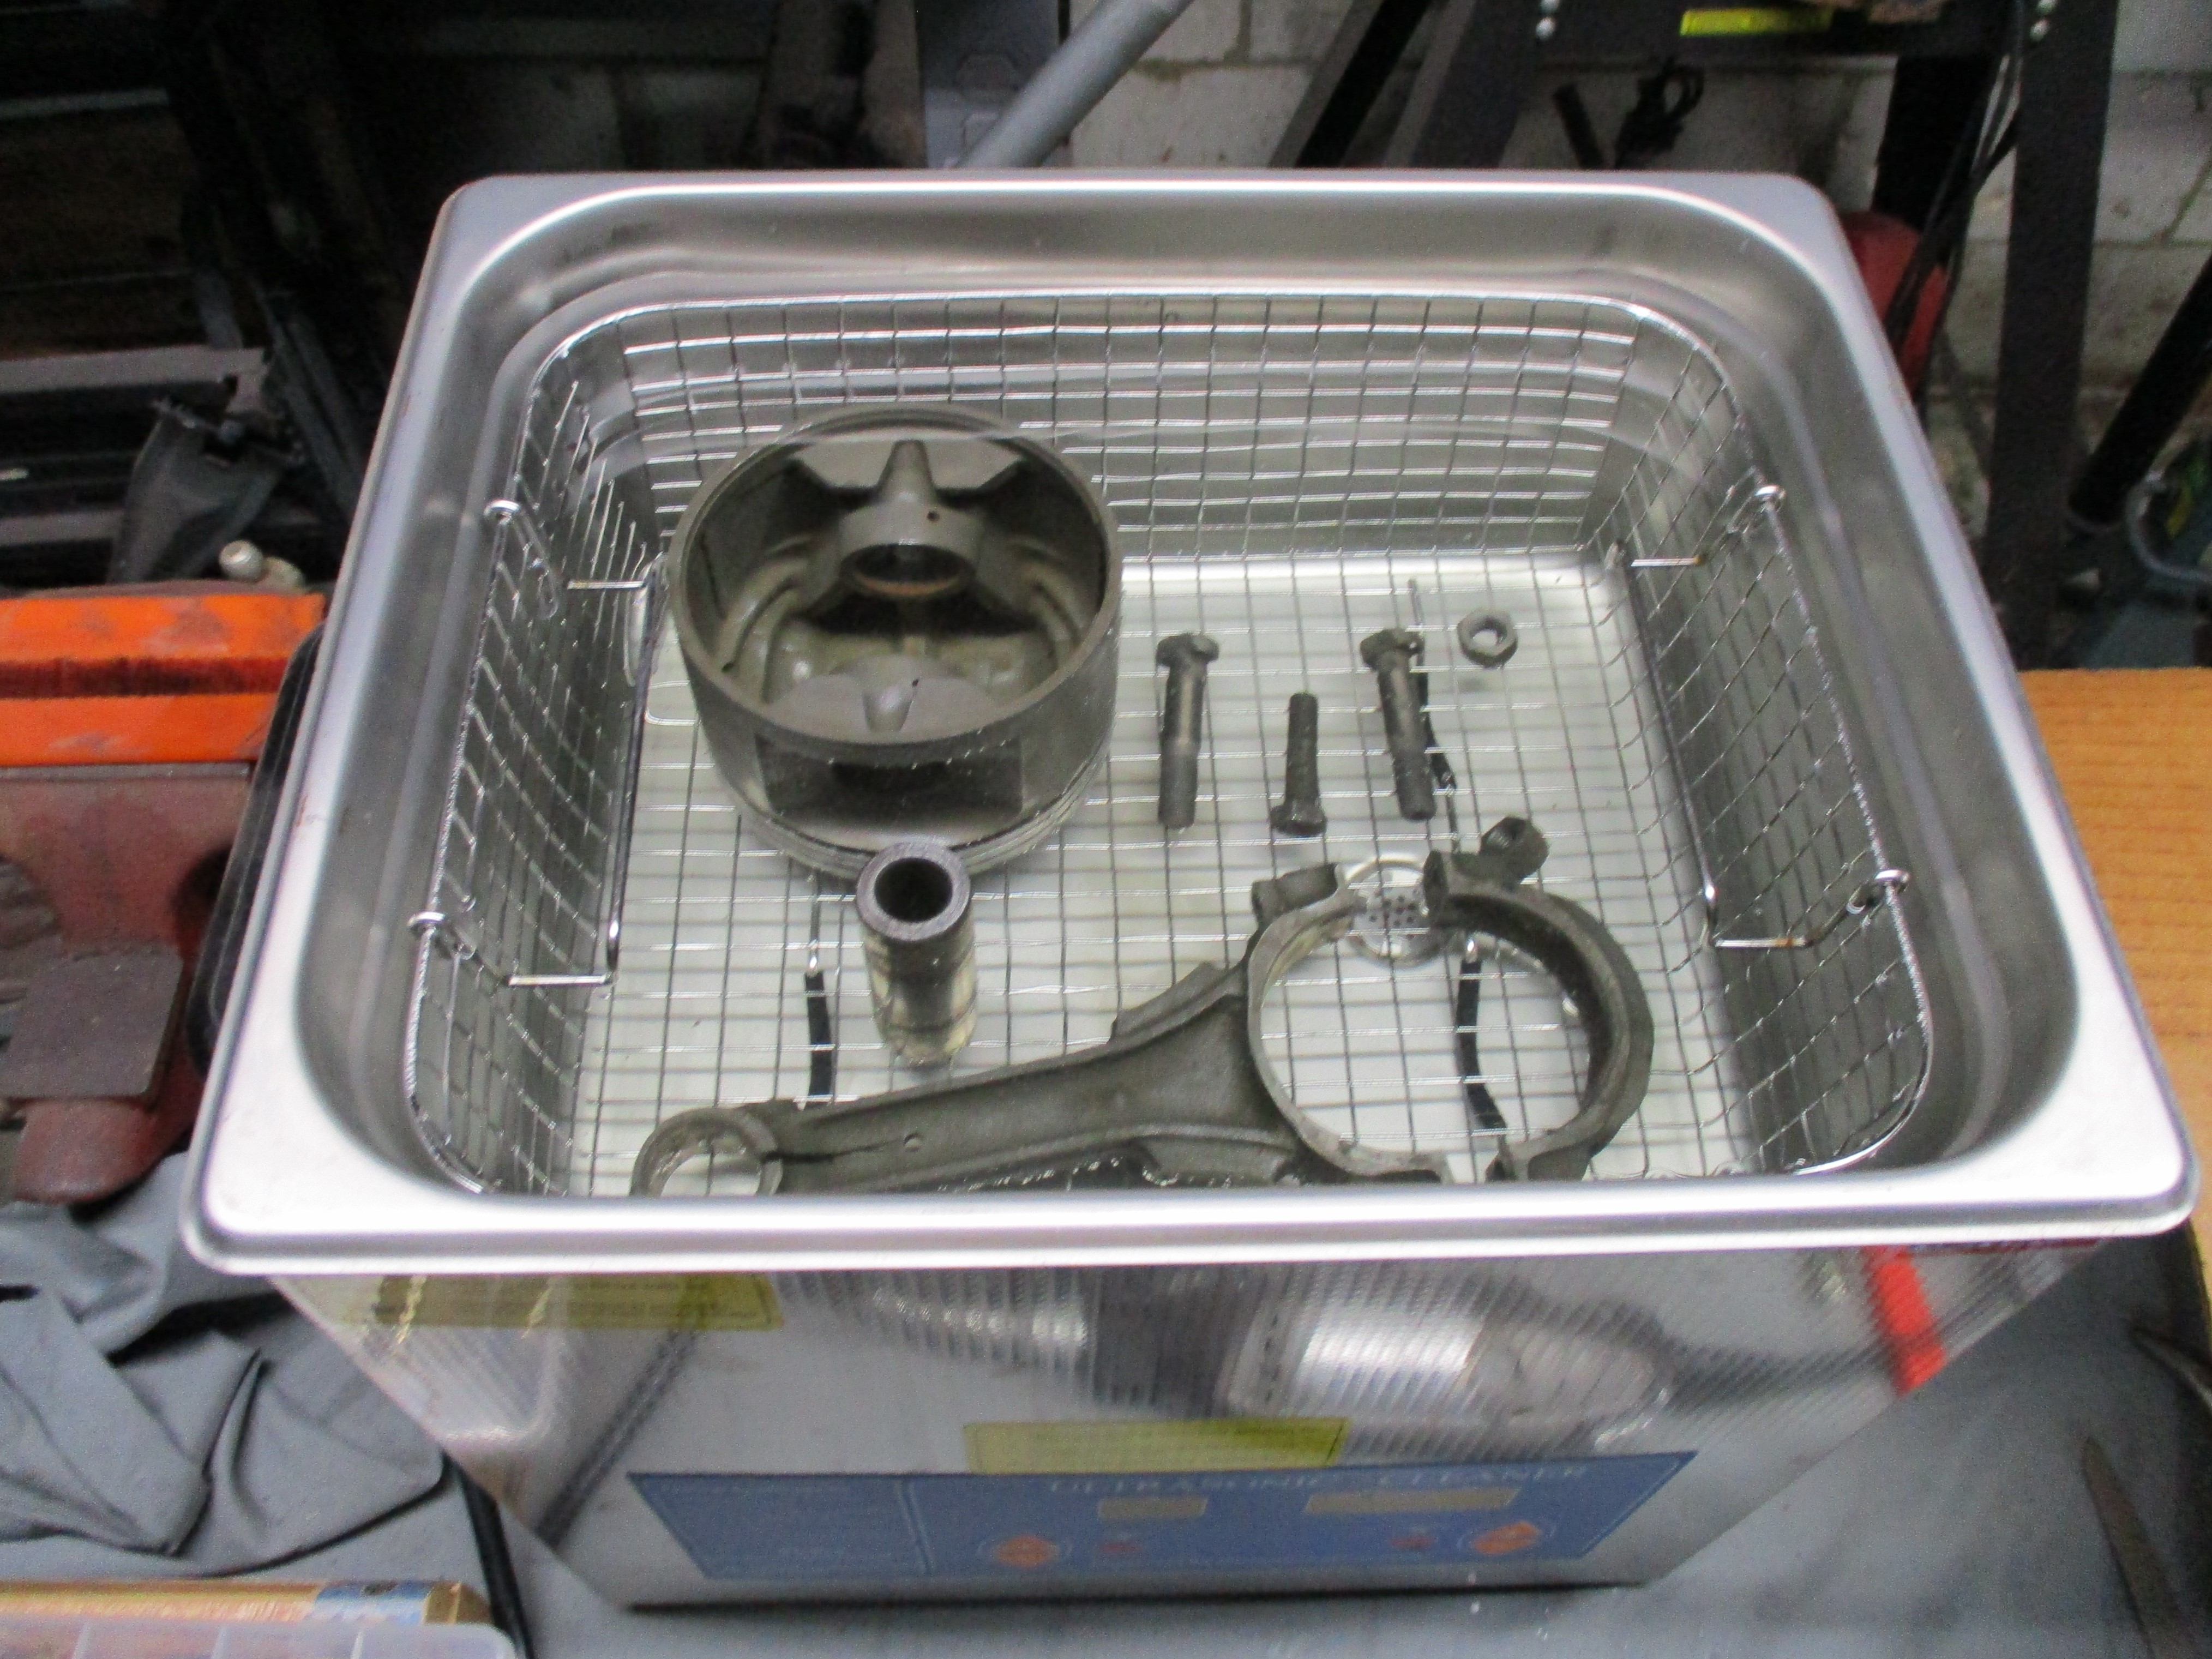
installed yesterday. Put the piston assembly in the parts washer
oileater soup for initial cleaning. The wrist pin is semi-floating with
a pinch clamp at the top of the rod. Still have to figure out how the
pin retainers work.
September
23rd 2020
Getting back in the saddle. Baby steps. The magneto spurred me to
fiddle with the nailhead a bit. I pulled number one piston. no ridge at
the top of the cylinder so it tapped out easily with the help of brass
hammer and drift and wooden block. The rod bearings look like they were
installed yesterday. Put the piston assembly in the parts washer
oileater soup for initial cleaning. The wrist pin is semi-floating with
a pinch clamp at the top of the rod. Still have to figure out how the
pin retainers work.
Also picked up a set of solid lifters for the Isky
Street/Strip cam from Northwestern Auto Supply Inc. They arrived today
and I took a cursory look at them.
 February
22nd 2021
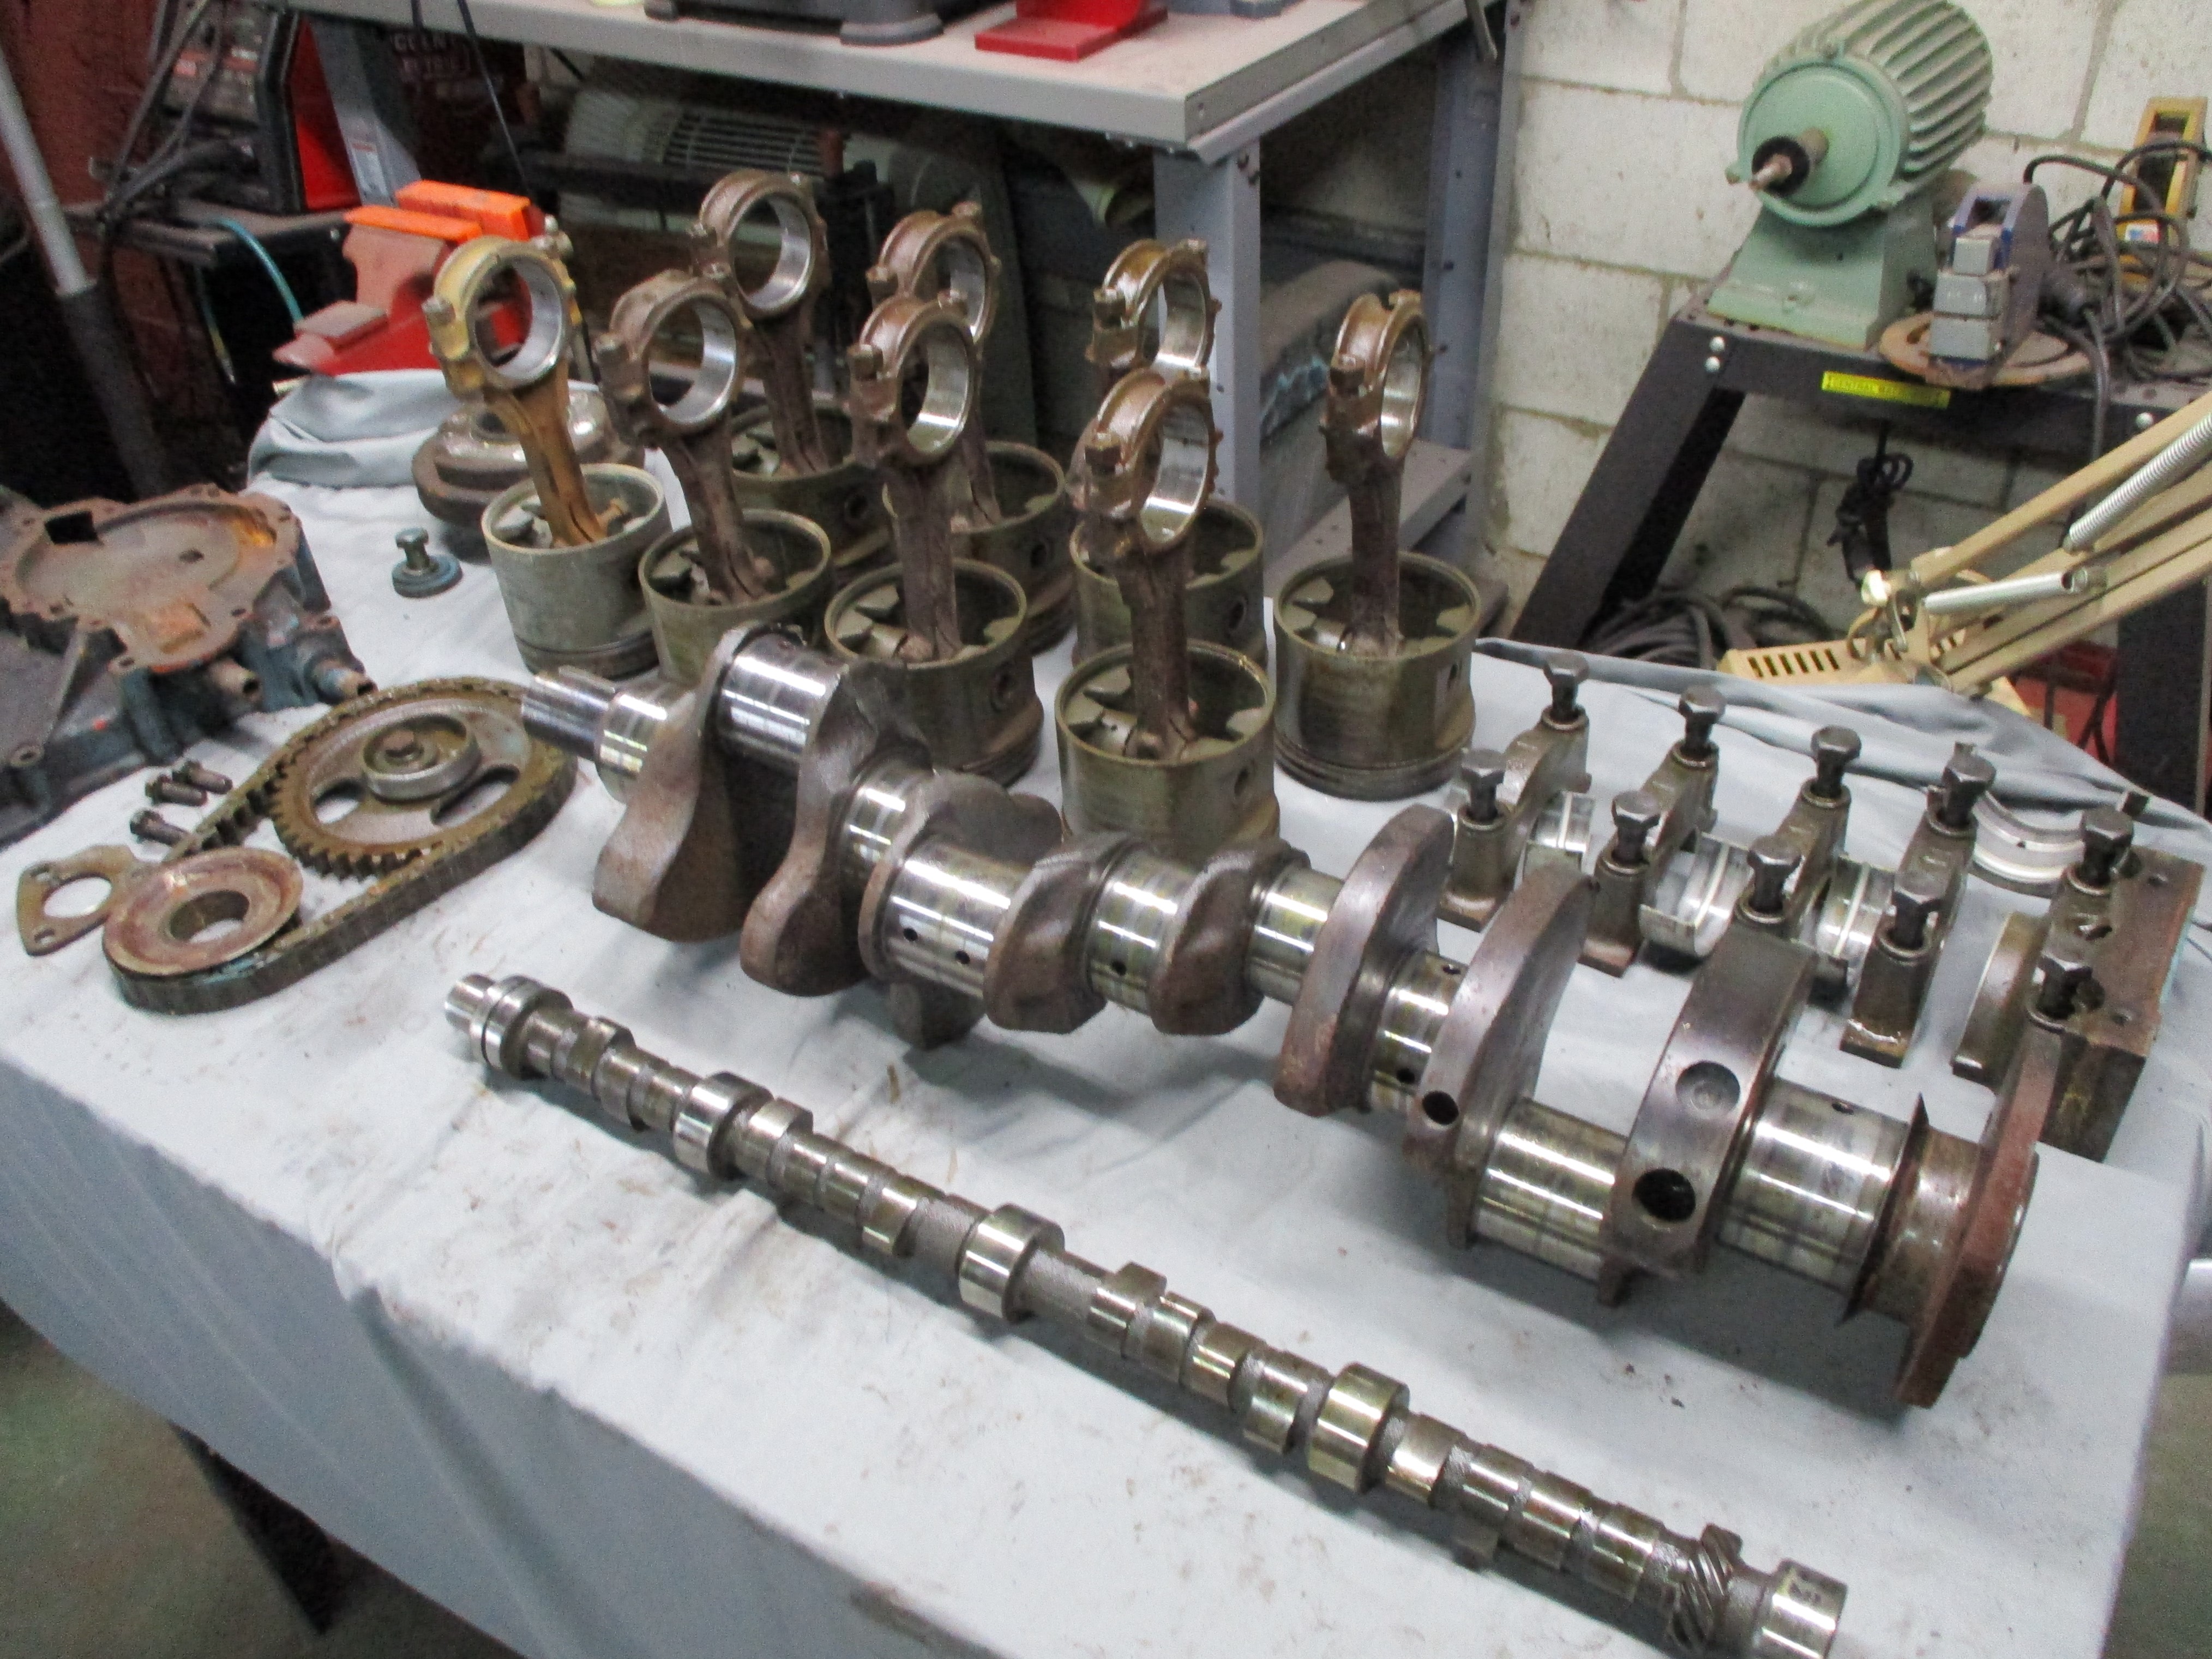
Took out the remaining seven piston assemblies, balancer,
timing gear cover and timing gears and chain. Only problems I had was
getting the timing gear off the crankshaft. I took this progress as a
good
omen.
February
22nd 2021
Took out the remaining seven piston assemblies, balancer,
timing gear cover and timing gears and chain. Only problems I had was
getting the timing gear off the crankshaft. I took this progress as a
good
omen.
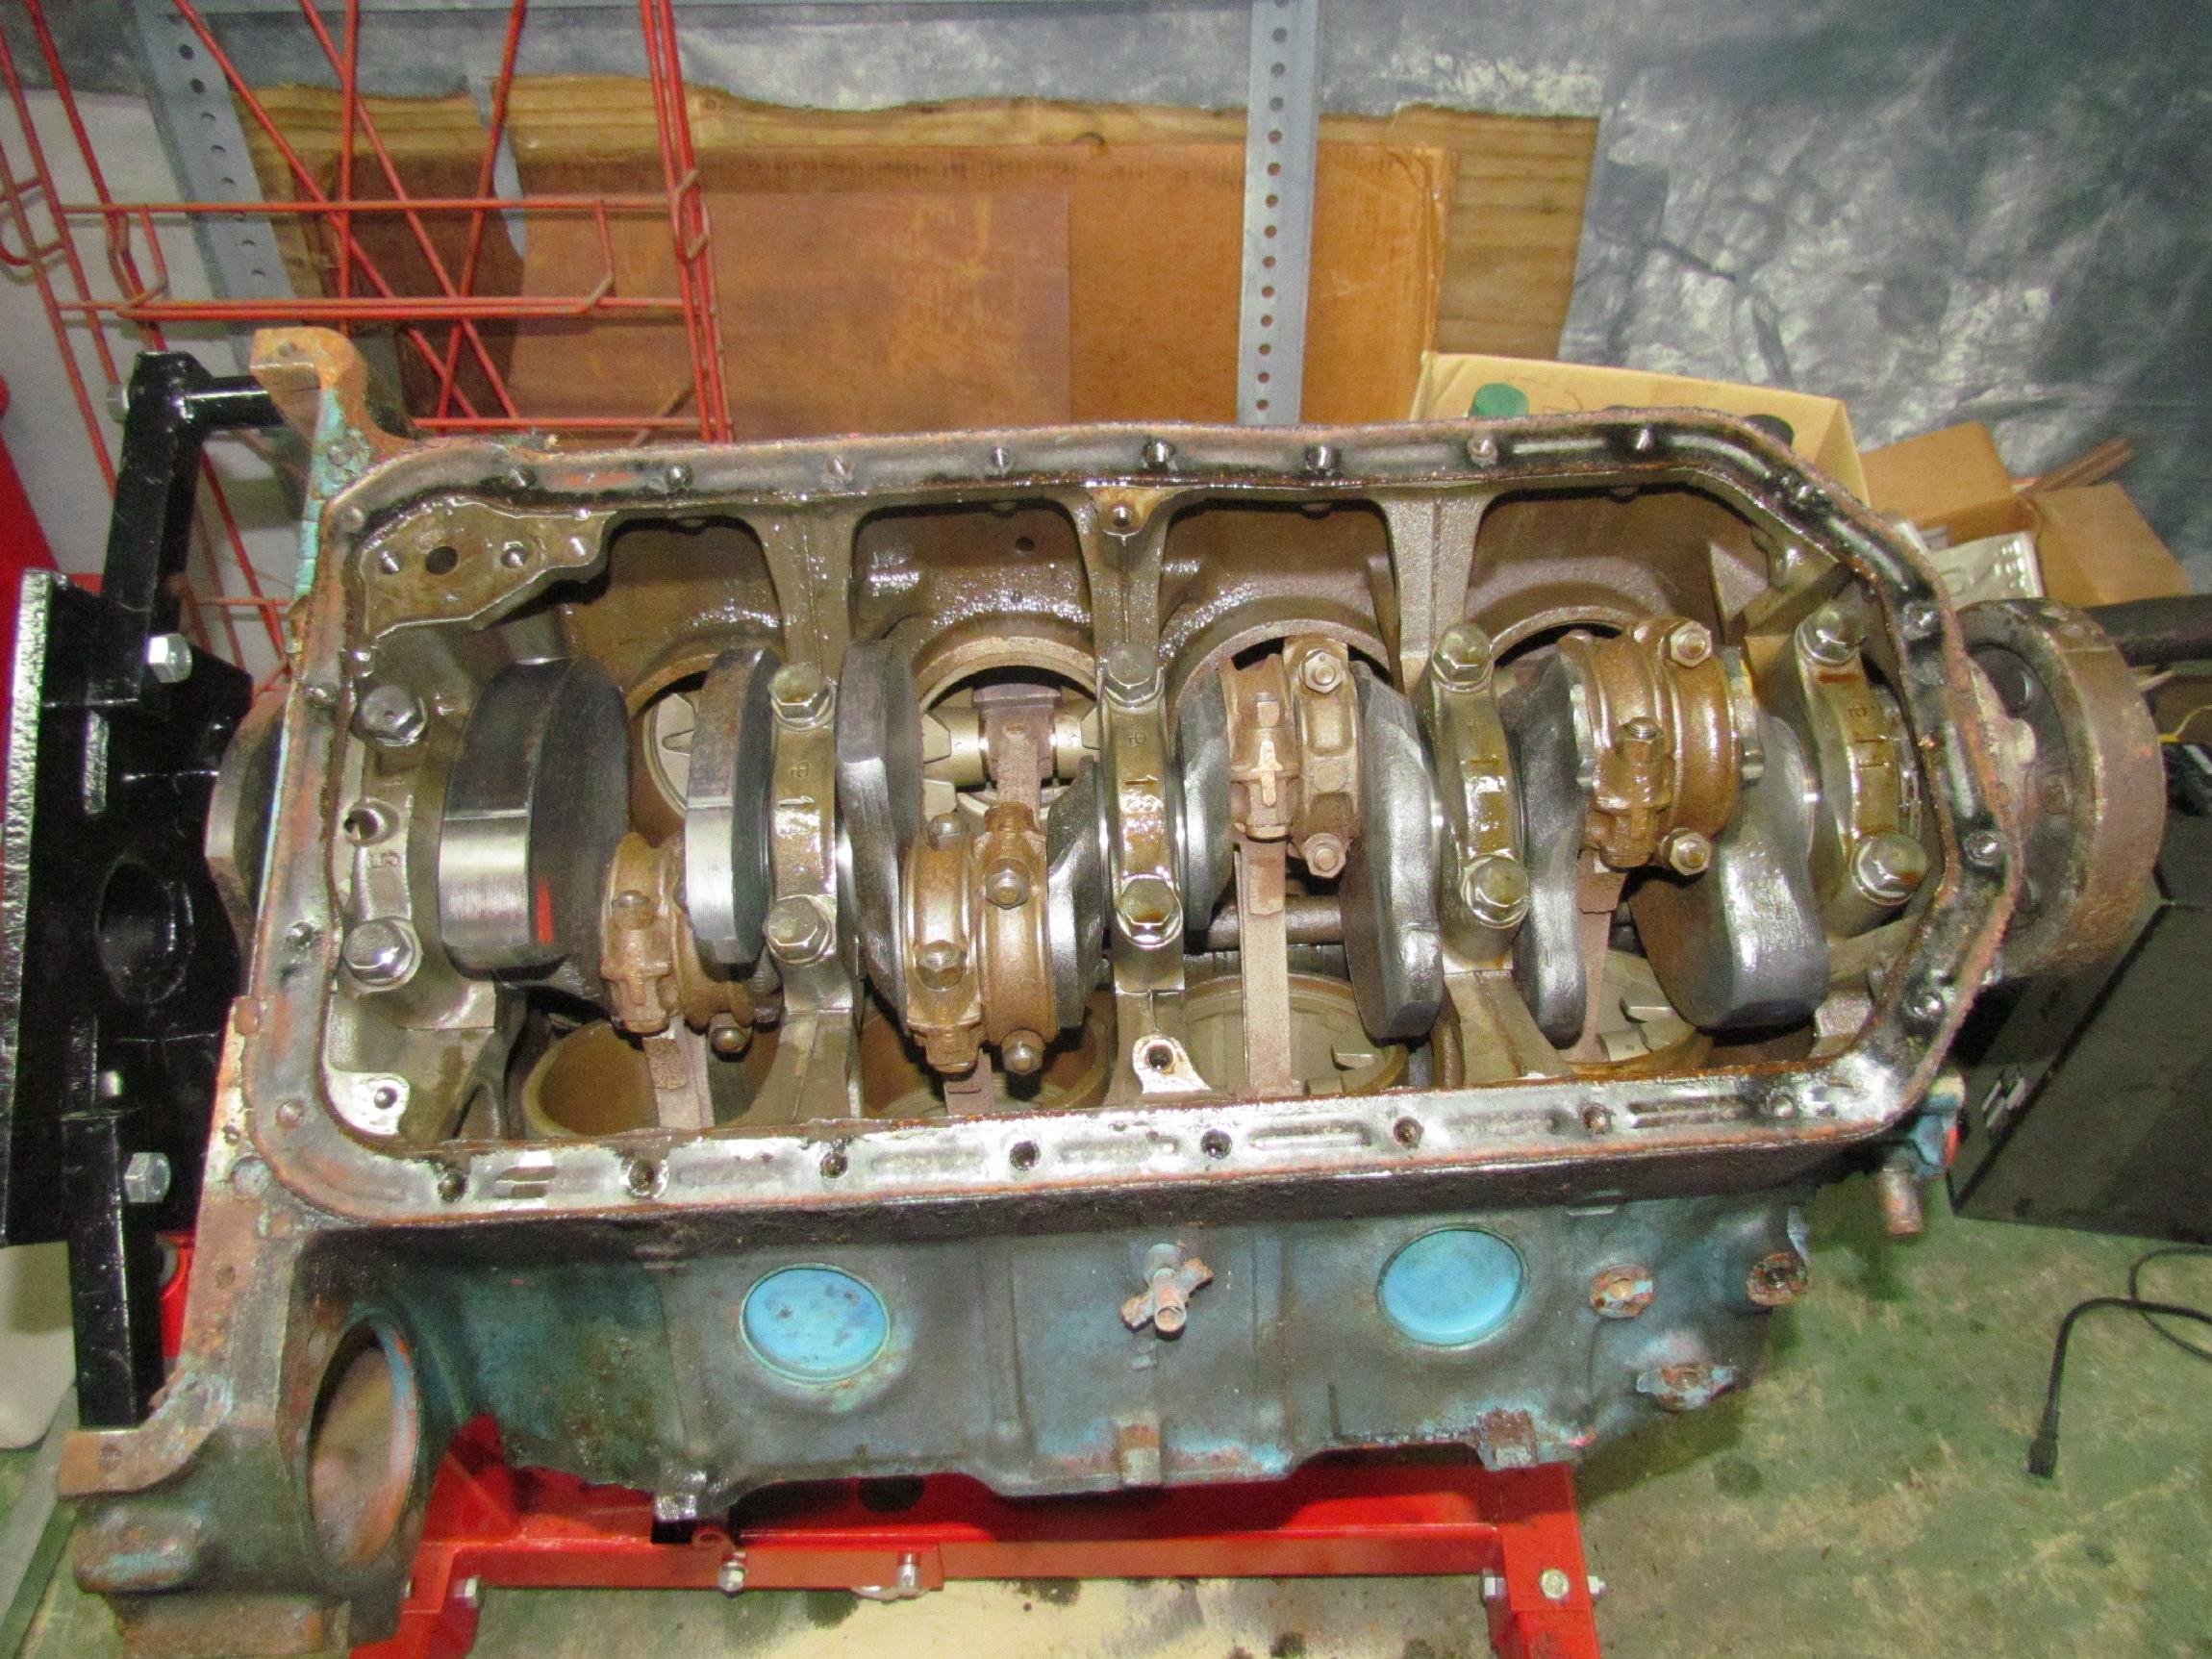
On Saturday, the crankshaft and bearings were removed, along with the camshaft. The only things remaining on the block are the cam bearings, freeze plugs and oil galley plugs.
Also gave the block it's first cleaning with Oileater and
rags. That got ninety percent of the dirt and grease off.
 March
6th 2021
Scraped gasket bits off the block with a razor scrapper. Sent for a
specialized tool to remove the freeze plugs but that was a
waste of money. The removal tool wasn't any easier than a common
chisel. Some days are like that. Removed gobs of loose rust from the
water jacket with a telescoping pocket magnet. Removed the drainage
petcock from the driver side bank and cleaned the rust from the hole
where the passenger side petcock once was, I presume.
March
6th 2021
Scraped gasket bits off the block with a razor scrapper. Sent for a
specialized tool to remove the freeze plugs but that was a
waste of money. The removal tool wasn't any easier than a common
chisel. Some days are like that. Removed gobs of loose rust from the
water jacket with a telescoping pocket magnet. Removed the drainage
petcock from the driver side bank and cleaned the rust from the hole
where the passenger side petcock once was, I presume.
 March
7th 2021
The jagged, sharp casting flash at the bottom of the lifter bores had
never been smoothed on this nailhead block so, I used my newly
rediscovered burrs
with the electric die grinder to take the edges off. Nothing fancy,
just enough to eliminate small bits from breaking off.
March
7th 2021
The jagged, sharp casting flash at the bottom of the lifter bores had
never been smoothed on this nailhead block so, I used my newly
rediscovered burrs
with the electric die grinder to take the edges off. Nothing fancy,
just enough to eliminate small bits from breaking off.
 March
11th 2021
Made the first pass at cleaning the flat machined block surfaces with
scotchbrite "cookies" in the air-powered angle grinder. I know this
method is controversial but I don't have the gumption to do this by
hand and I'm a sucker for shiny metal.
March
11th 2021
Made the first pass at cleaning the flat machined block surfaces with
scotchbrite "cookies" in the air-powered angle grinder. I know this
method is controversial but I don't have the gumption to do this by
hand and I'm a sucker for shiny metal.
After watching Matt on Iron Trap Garage clean sheet metal, I decided to take a pass with the Eastwood SCT Surface Conditioning Tool with the 120 grit drum (the finest grit I currently have) instead of the Scotchbrite cookies as an experiment.
The experiment was a success. Only took ten minutes for one
bank, including a short time out for a gasket scraping. Advantages of
the SCT drum is that it is five inches wide, runs at a slower speed and
is electric. I also ordered a finer grit drum for future ops.
Meanwhile, I'm still struggling with the oil galley plugs. All
I've managed, so far, is to drive two of the little buggers in deeper.
 March
15th 2021
Finished the first pass with SCT and angle grinder tools. Went on to
deal with the pesky oil galley plugs that are giving me conniption
fits. Concentrated on the one threaded pipe plug first. I got a 5/16"
pipe plug socket last week and was able to break the plug loose with a
24" breaker bar after heating up the plug with the MAP torch and
quenching with penetrating oil.
March
15th 2021
Finished the first pass with SCT and angle grinder tools. Went on to
deal with the pesky oil galley plugs that are giving me conniption
fits. Concentrated on the one threaded pipe plug first. I got a 5/16"
pipe plug socket last week and was able to break the plug loose with a
24" breaker bar after heating up the plug with the MAP torch and
quenching with penetrating oil.
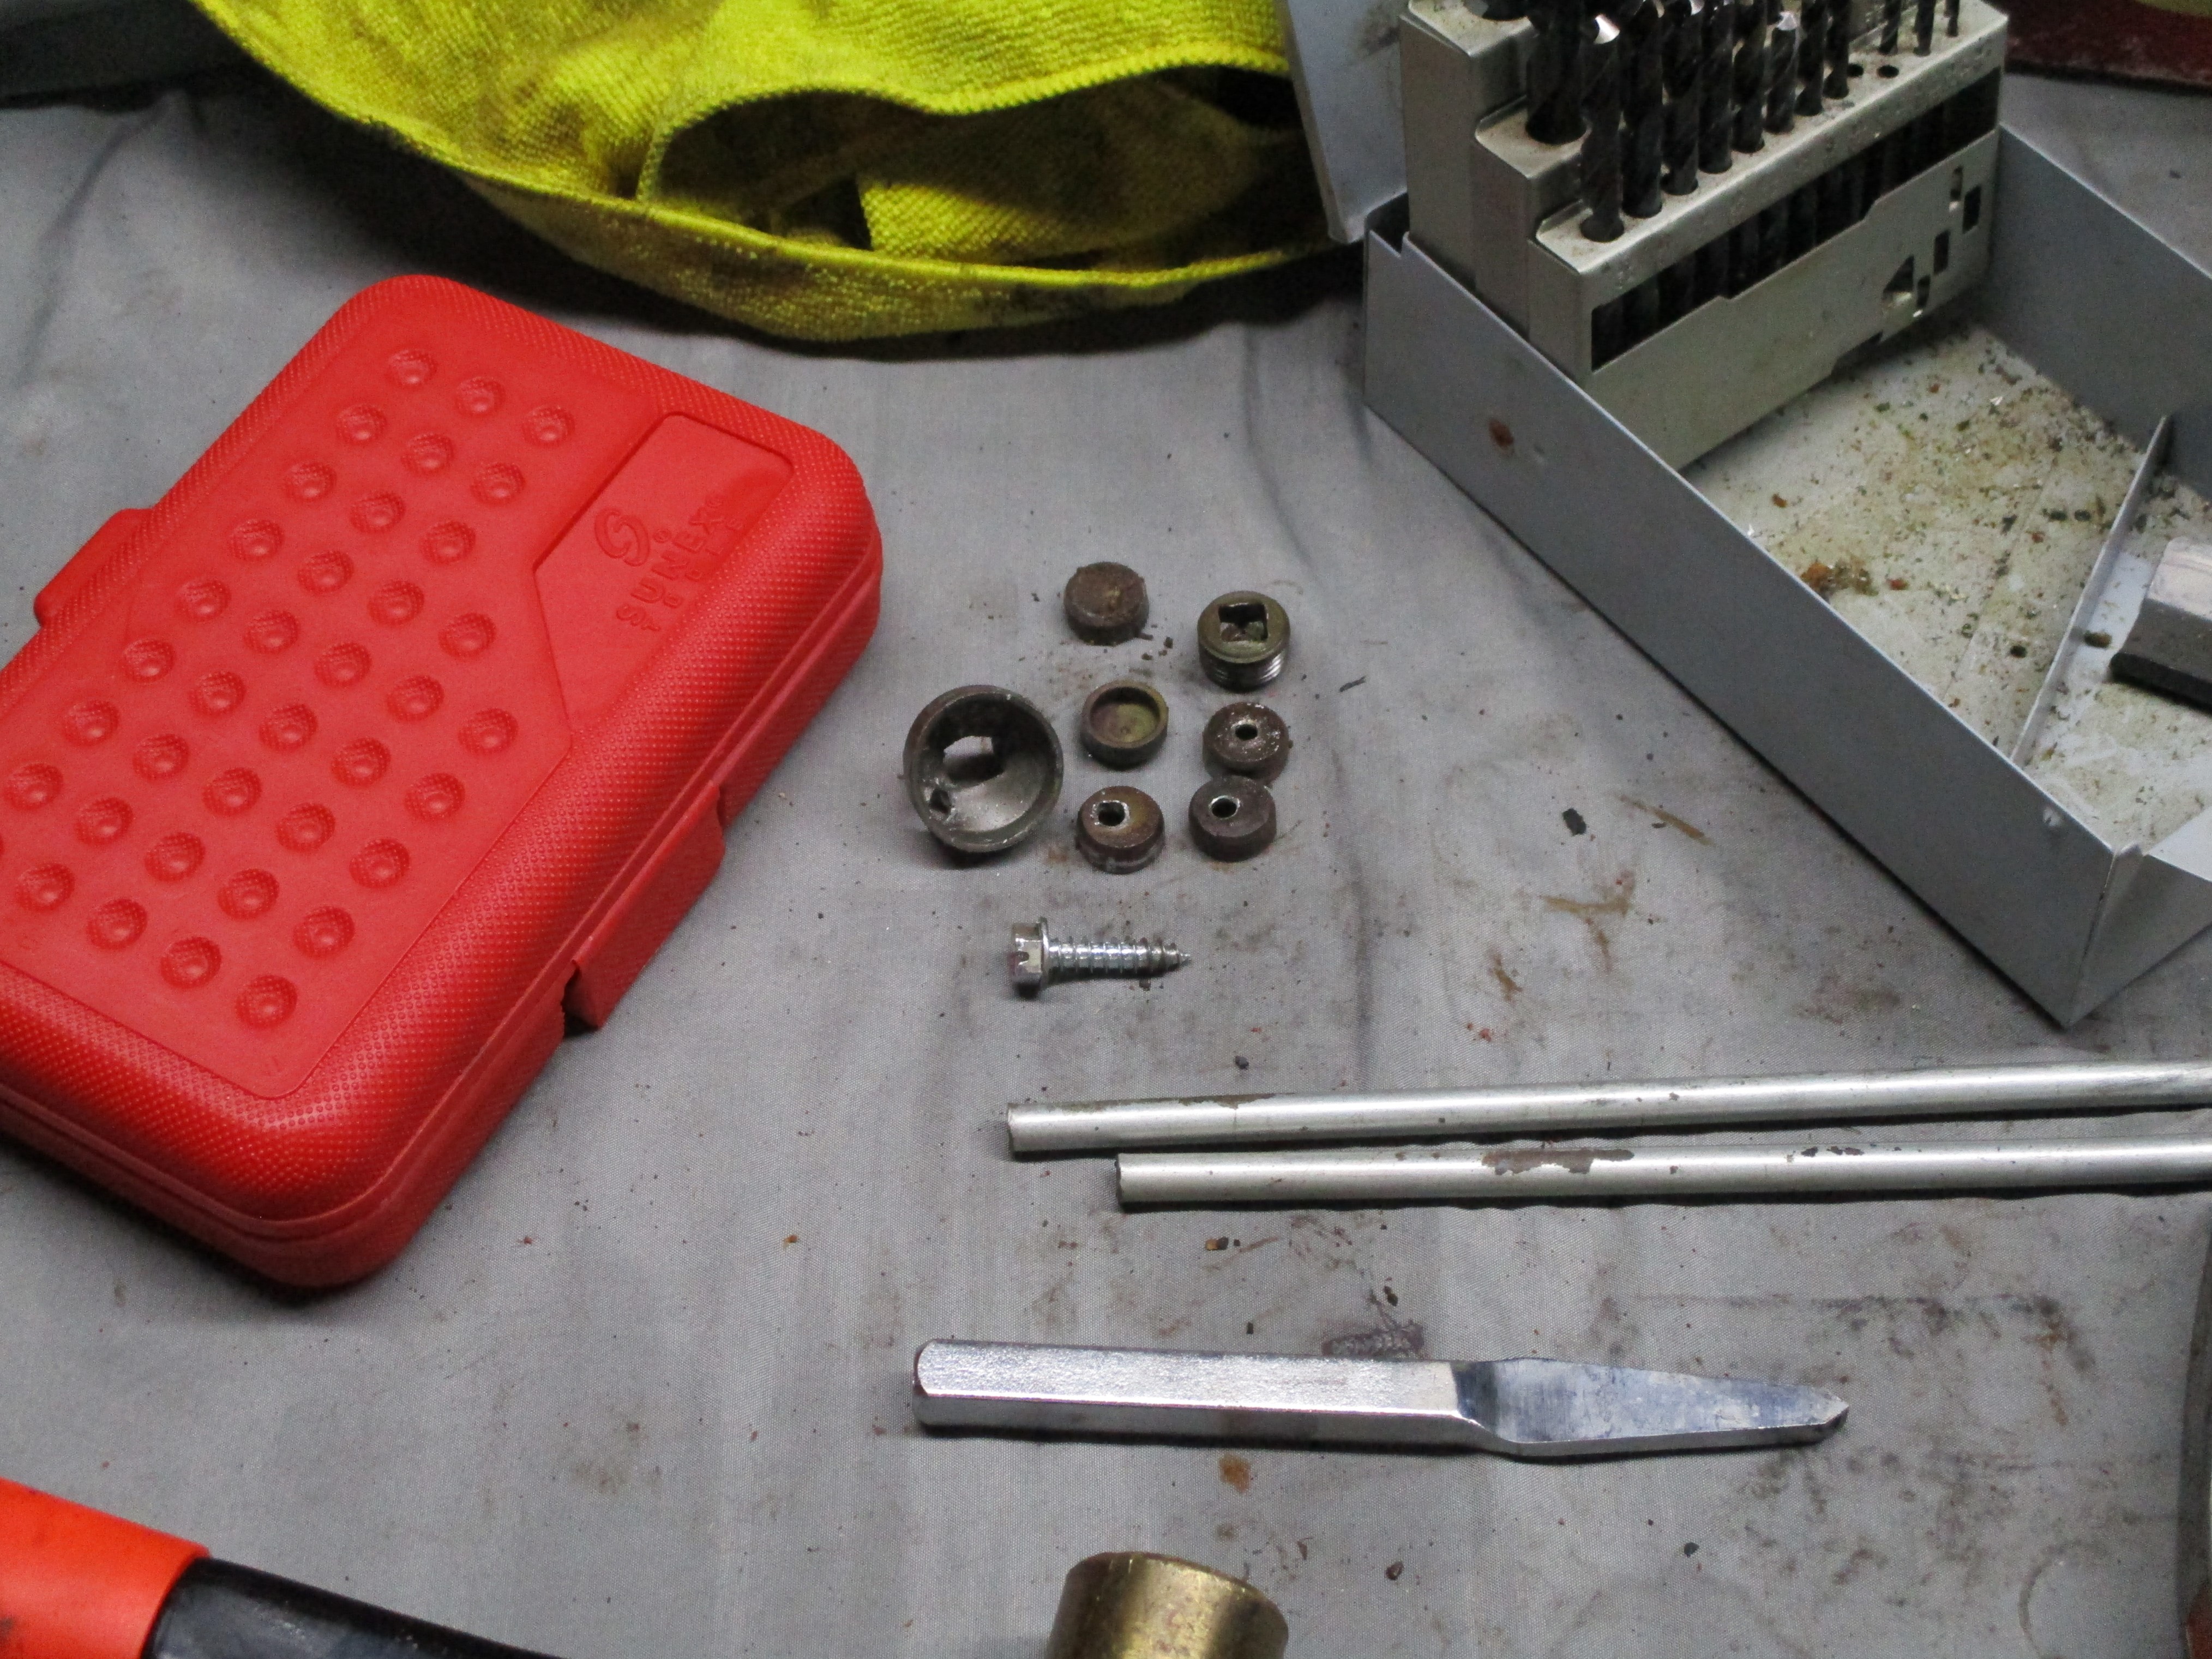
Several of the press in plugs were drilled with a small hole and pulled out with a self-tapping bolt and claw hammer. The press in plugs at the opposite ends of the galleys were tapped out from behind by placing two steel rods in the galleys and tapping from the opposite end. These rods were from my teenage days for locating the '59 Ford transmission I was changing so often.
The last press in plug was a 1" dia plug at the back of the block. Its purpose was to give access to the smaller press in plug at the end of the lifter galley. I pulled and pulled without luck until I realized that I could drive it in and it would fall to the floor. I'm a little slow sometimes.
Professional mechanics
deal with these plugs on a daily basis and think little of it,
but for me, this was an epic struggle. I had to go into Deep
Ponder Mode after each failure and there was a lot of that but, it's
behind me now. Onward.
 March
22nd 2021
Continued the nailhead block cleaning operations. Used a ball hone on a
drill motor to refresh the cylinder bores and get the 45 degree
cross-hatch. Marvel Mystery Oil provided lubrication.
March
22nd 2021
Continued the nailhead block cleaning operations. Used a ball hone on a
drill motor to refresh the cylinder bores and get the 45 degree
cross-hatch. Marvel Mystery Oil provided lubrication.
Did a final pass of the machined surfaces with a 320 grit drum in the SCT tool. Cleaned the cylinders, lifter bores and oil passages with nylon bottle brushes, Oileater and Hoppes number 9 passes.
Chased all the bolt holes with thread straightener
taps after cleaning with telescoping magnet and compressed air passes.
The block is now ready for its hot soapy water cleaning.
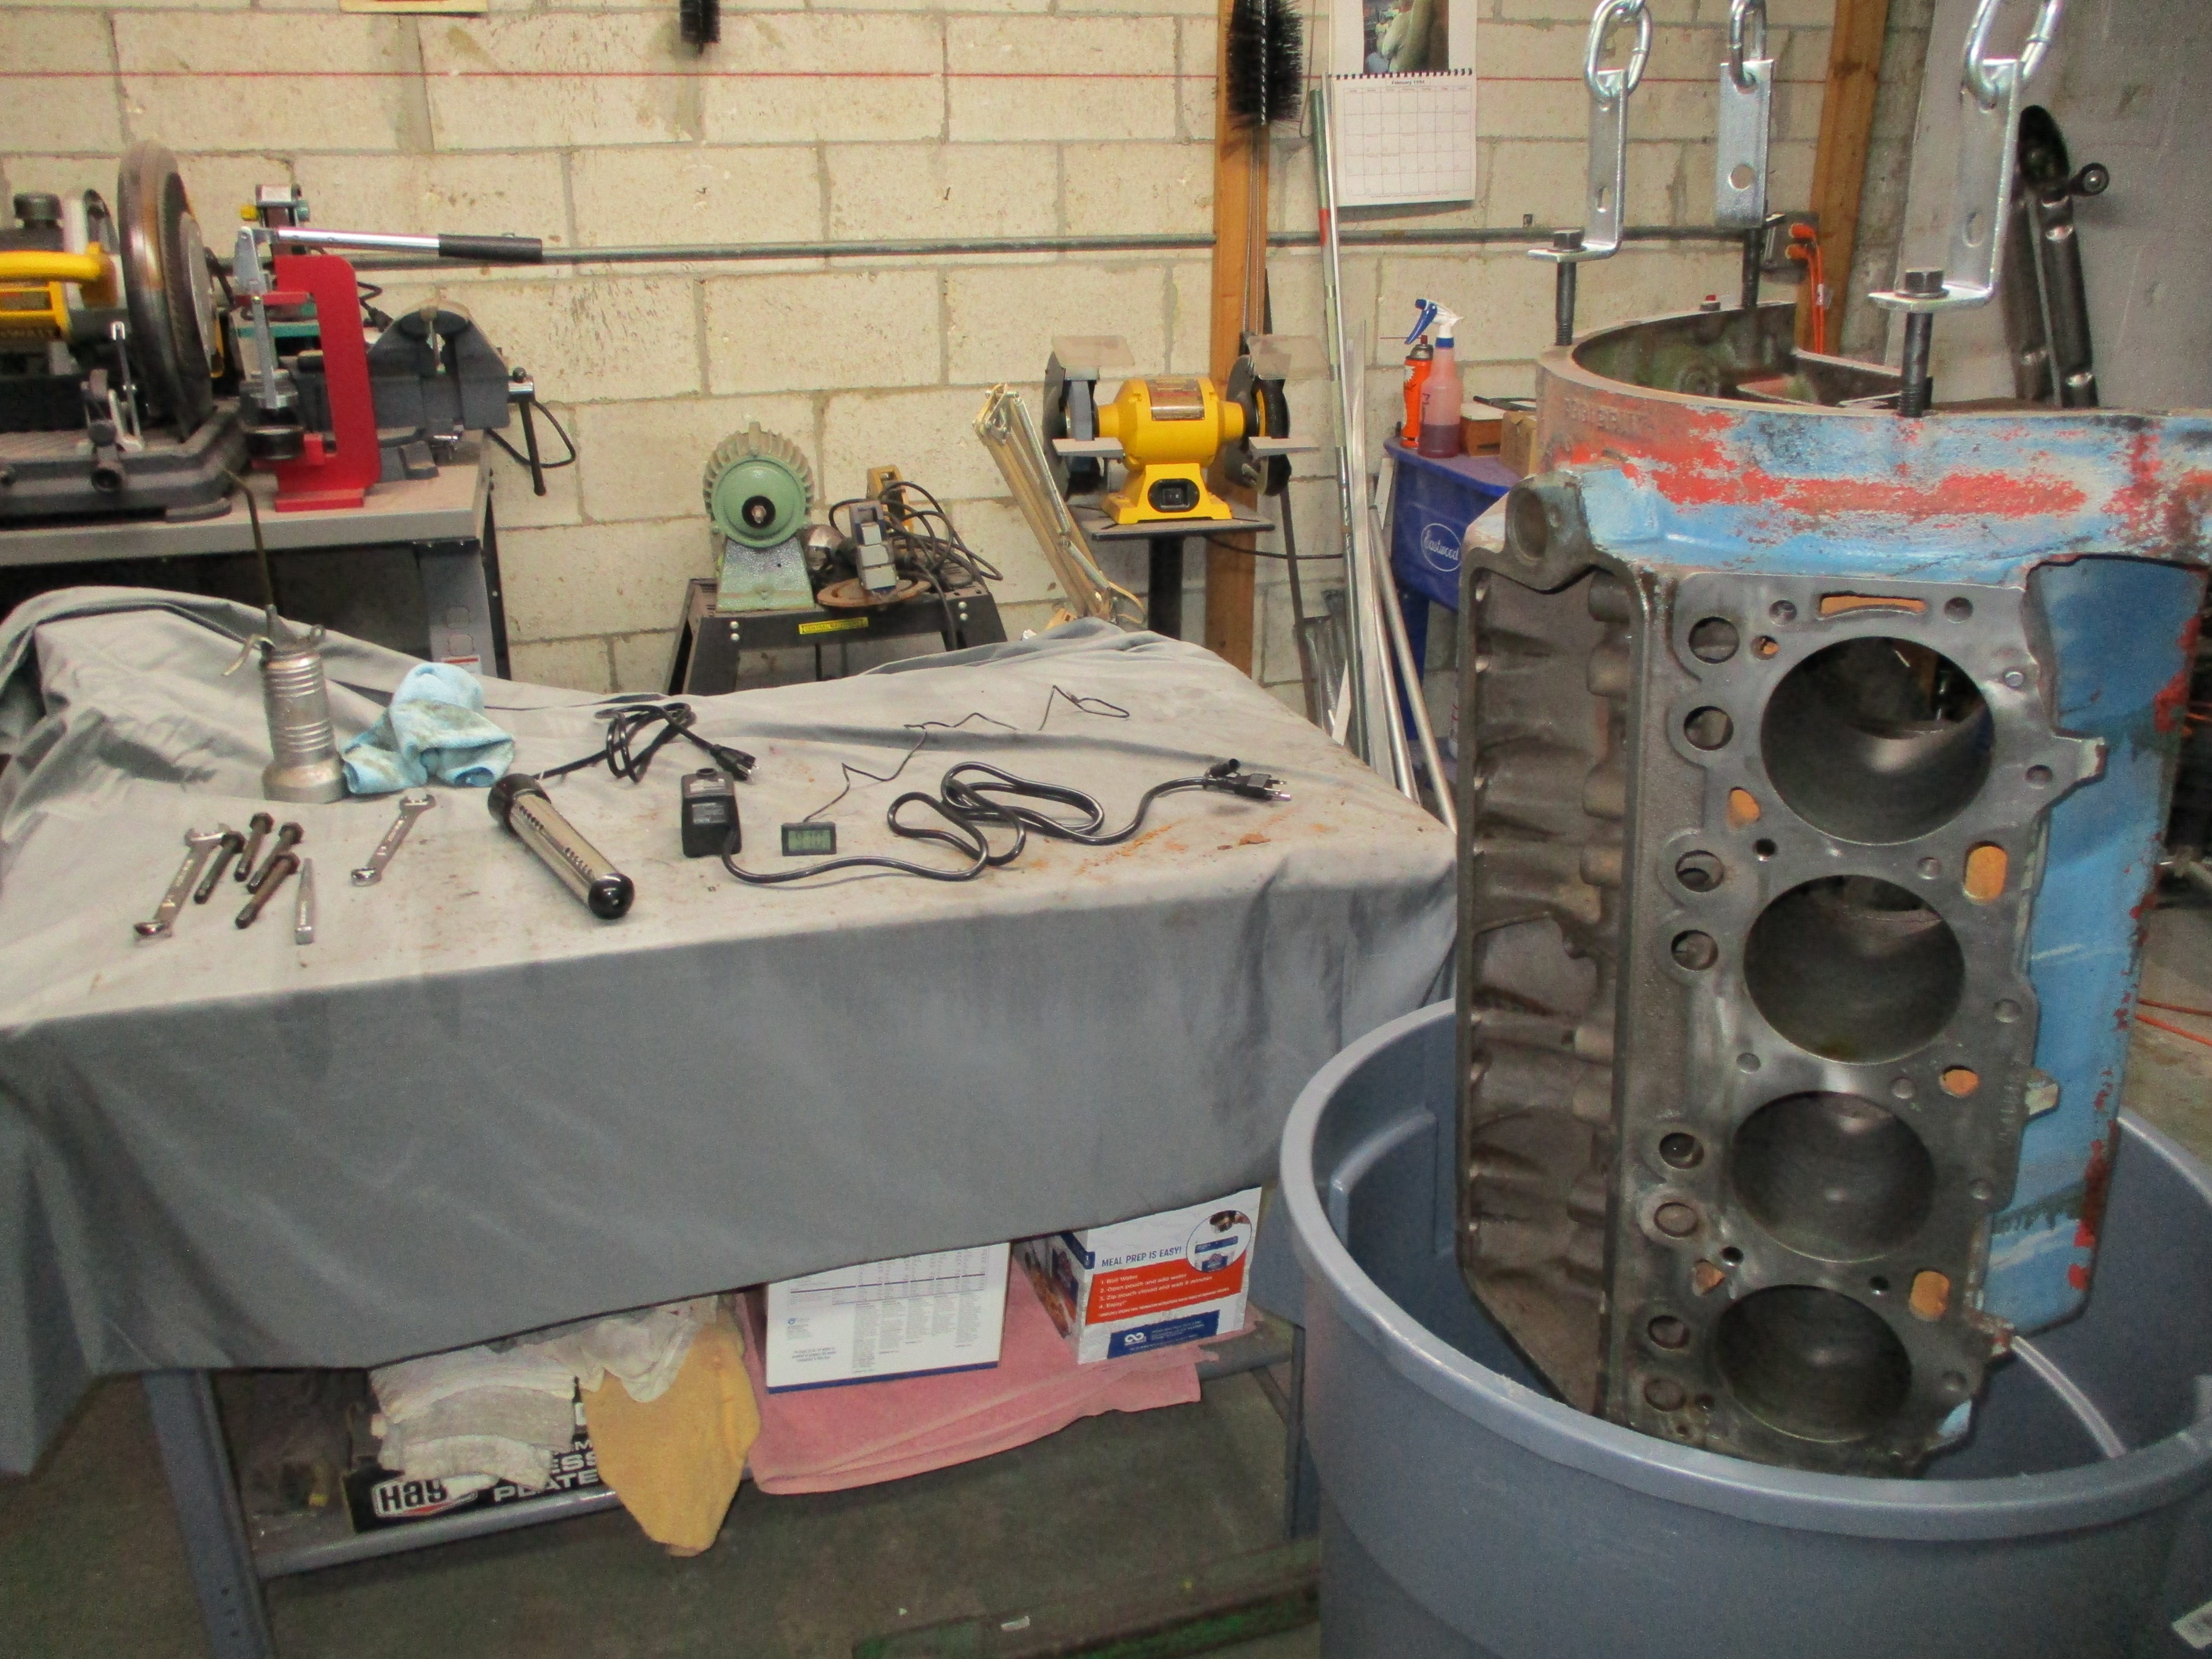 April
8th 2021
Started setting up a DIY hot tank for the engine cleaning. Cleaned a
plastic trash
can the landlord's contractor left behind when he absconded with my
fourteen foot step ladder. Found a hole in the bottom which was
probably the reason he left it. Ordered one off the intarweb.
April
8th 2021
Started setting up a DIY hot tank for the engine cleaning. Cleaned a
plastic trash
can the landlord's contractor left behind when he absconded with my
fourteen foot step ladder. Found a hole in the bottom which was
probably the reason he left it. Ordered one off the intarweb.
Filled it with water and
lowered the nailhead block into it. Placed a submersible spa pump for
circulation and a submersible heating element, digital thermometer and
a small amount of
Dawn dishwashing soap and watched a bit to see that the suds didn't get
out of control.
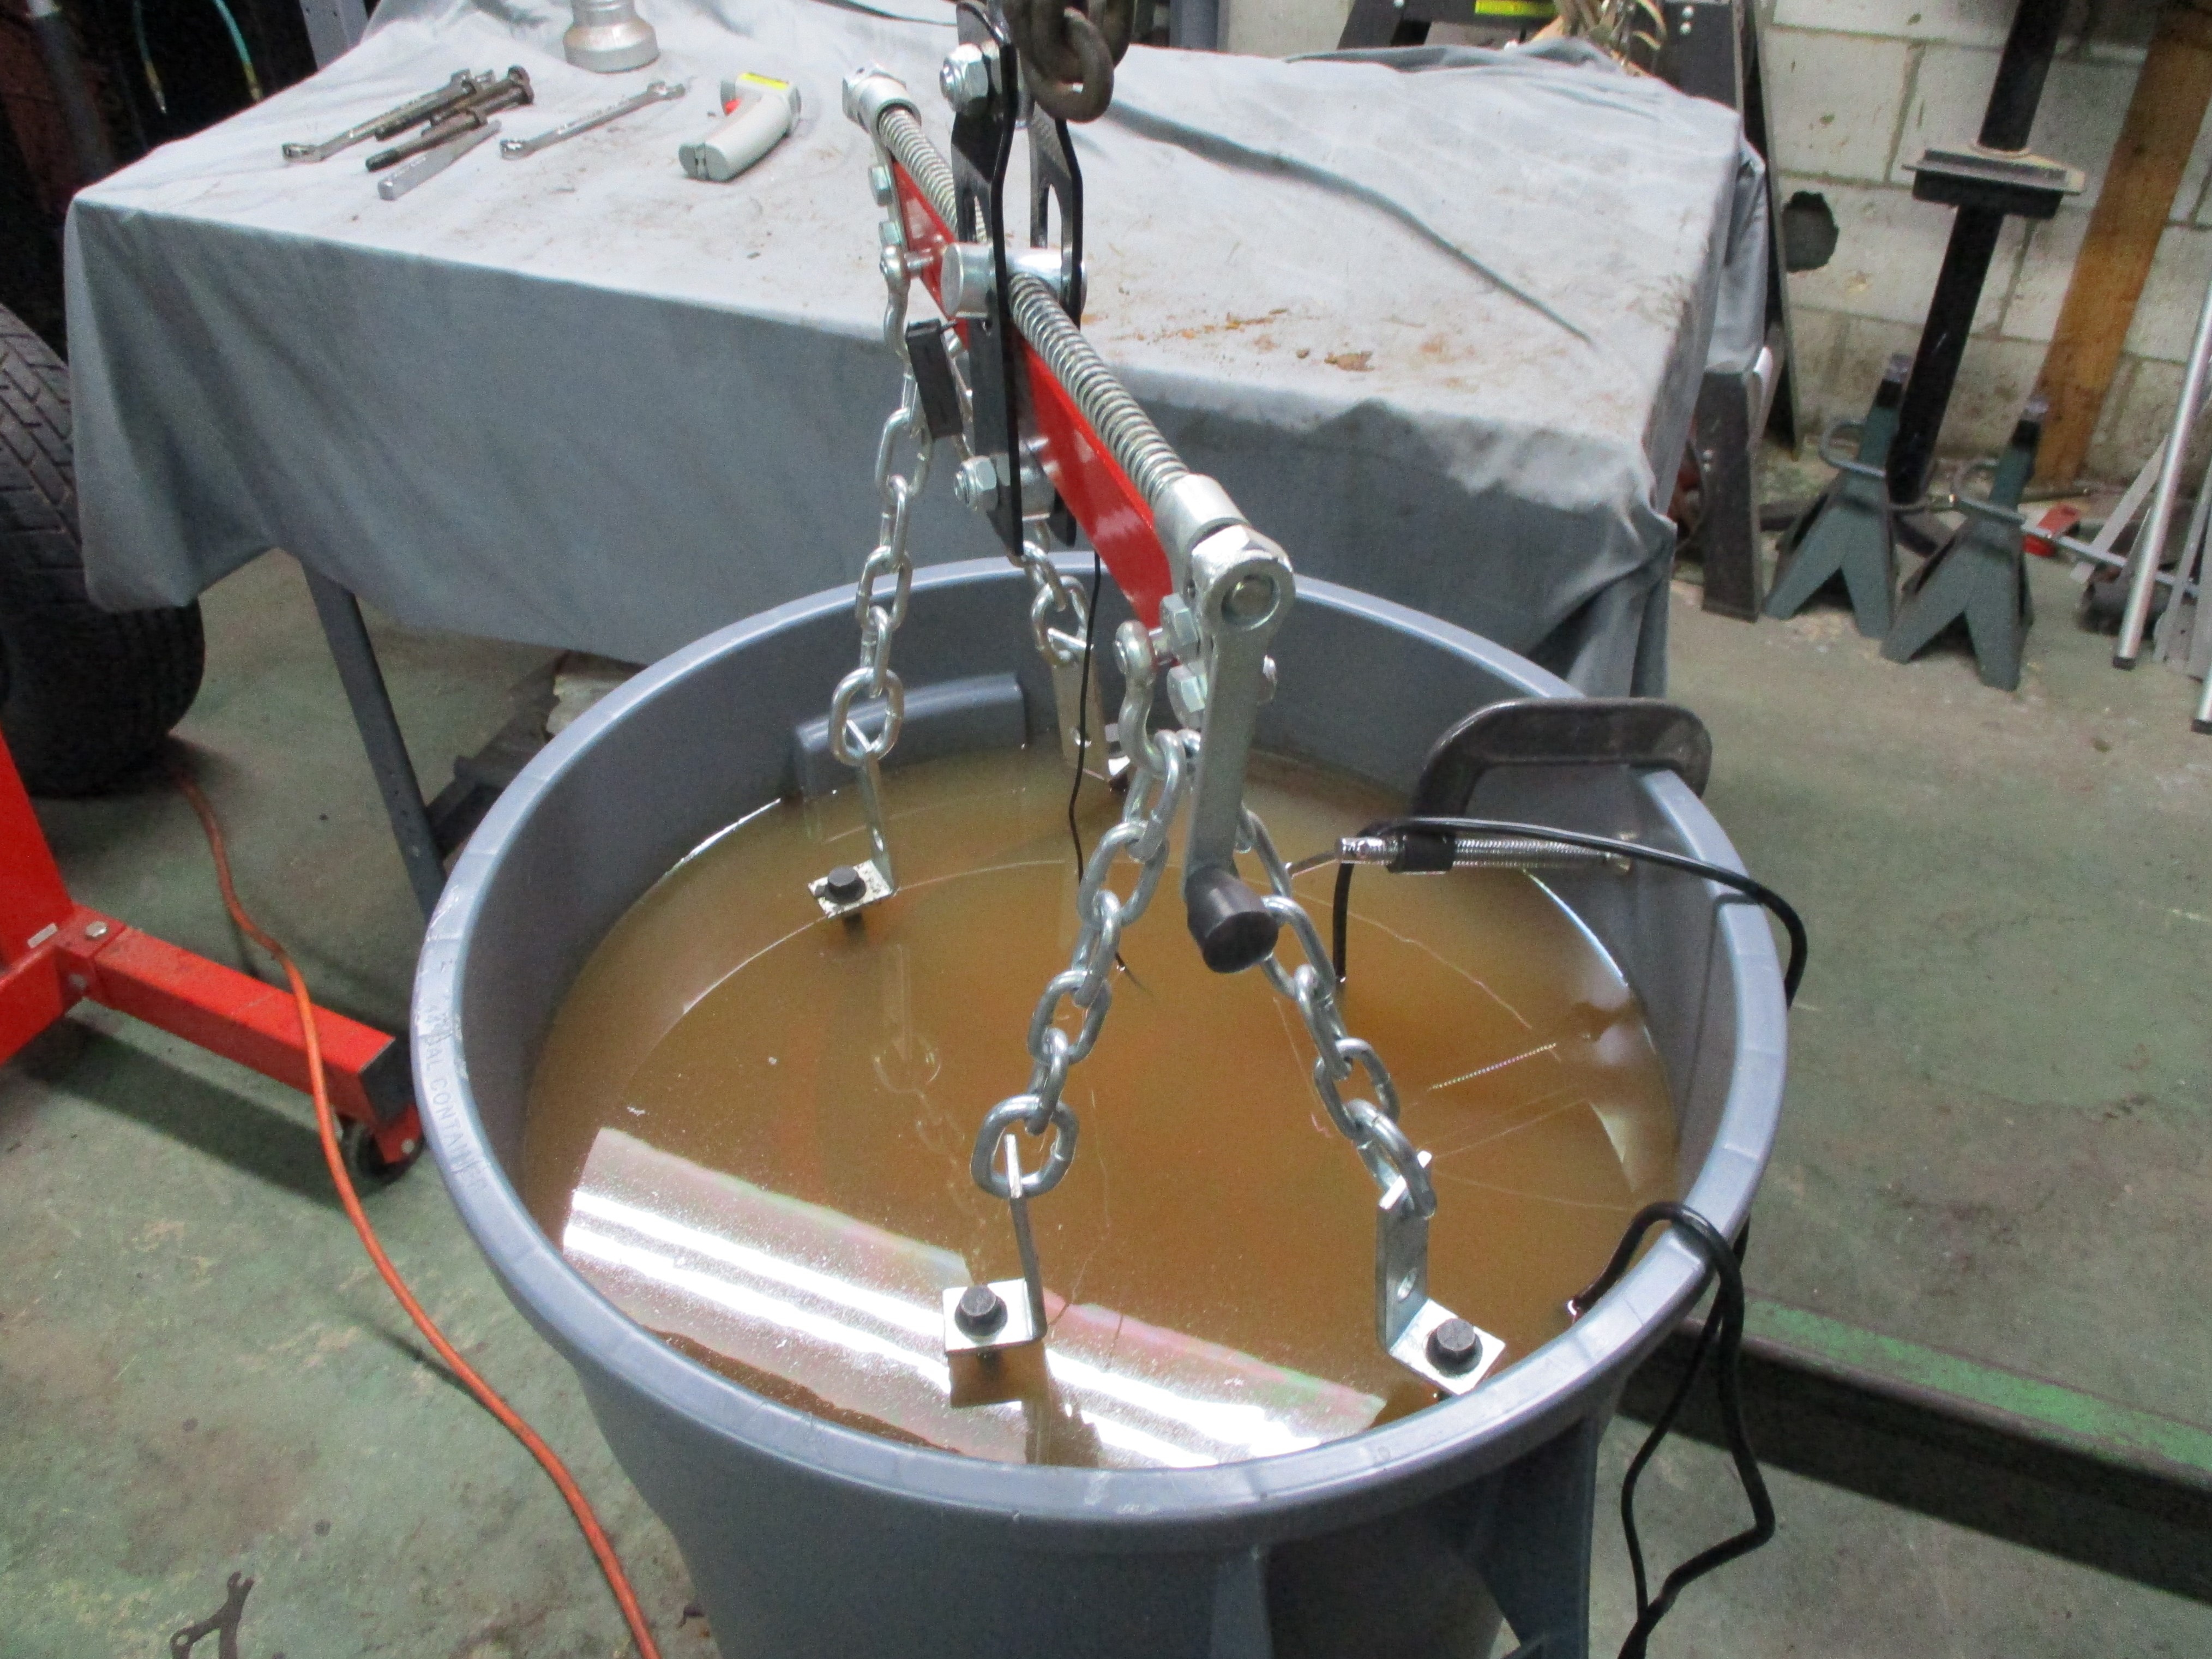 April
12th 2021 Took almost thirty-five gallons to
submerge the
block. Had to monitor the operation closely as the heating element
would have the water boiling if left alone. No switch or thermostat on
it. The pump turned out to be more of an aquarium pump than a spa pump.
I kept the heat between 130 and 140 degrees as I did not know how much
heat the plastic tub could take. The water
moved in a slow circular pattern without suds. When the nailhead was
pulled from the dirty soup, it was blown dry with
my electric weed blower and an air hose.
April
12th 2021 Took almost thirty-five gallons to
submerge the
block. Had to monitor the operation closely as the heating element
would have the water boiling if left alone. No switch or thermostat on
it. The pump turned out to be more of an aquarium pump than a spa pump.
I kept the heat between 130 and 140 degrees as I did not know how much
heat the plastic tub could take. The water
moved in a slow circular pattern without suds. When the nailhead was
pulled from the dirty soup, it was blown dry with
my electric weed blower and an air hose.
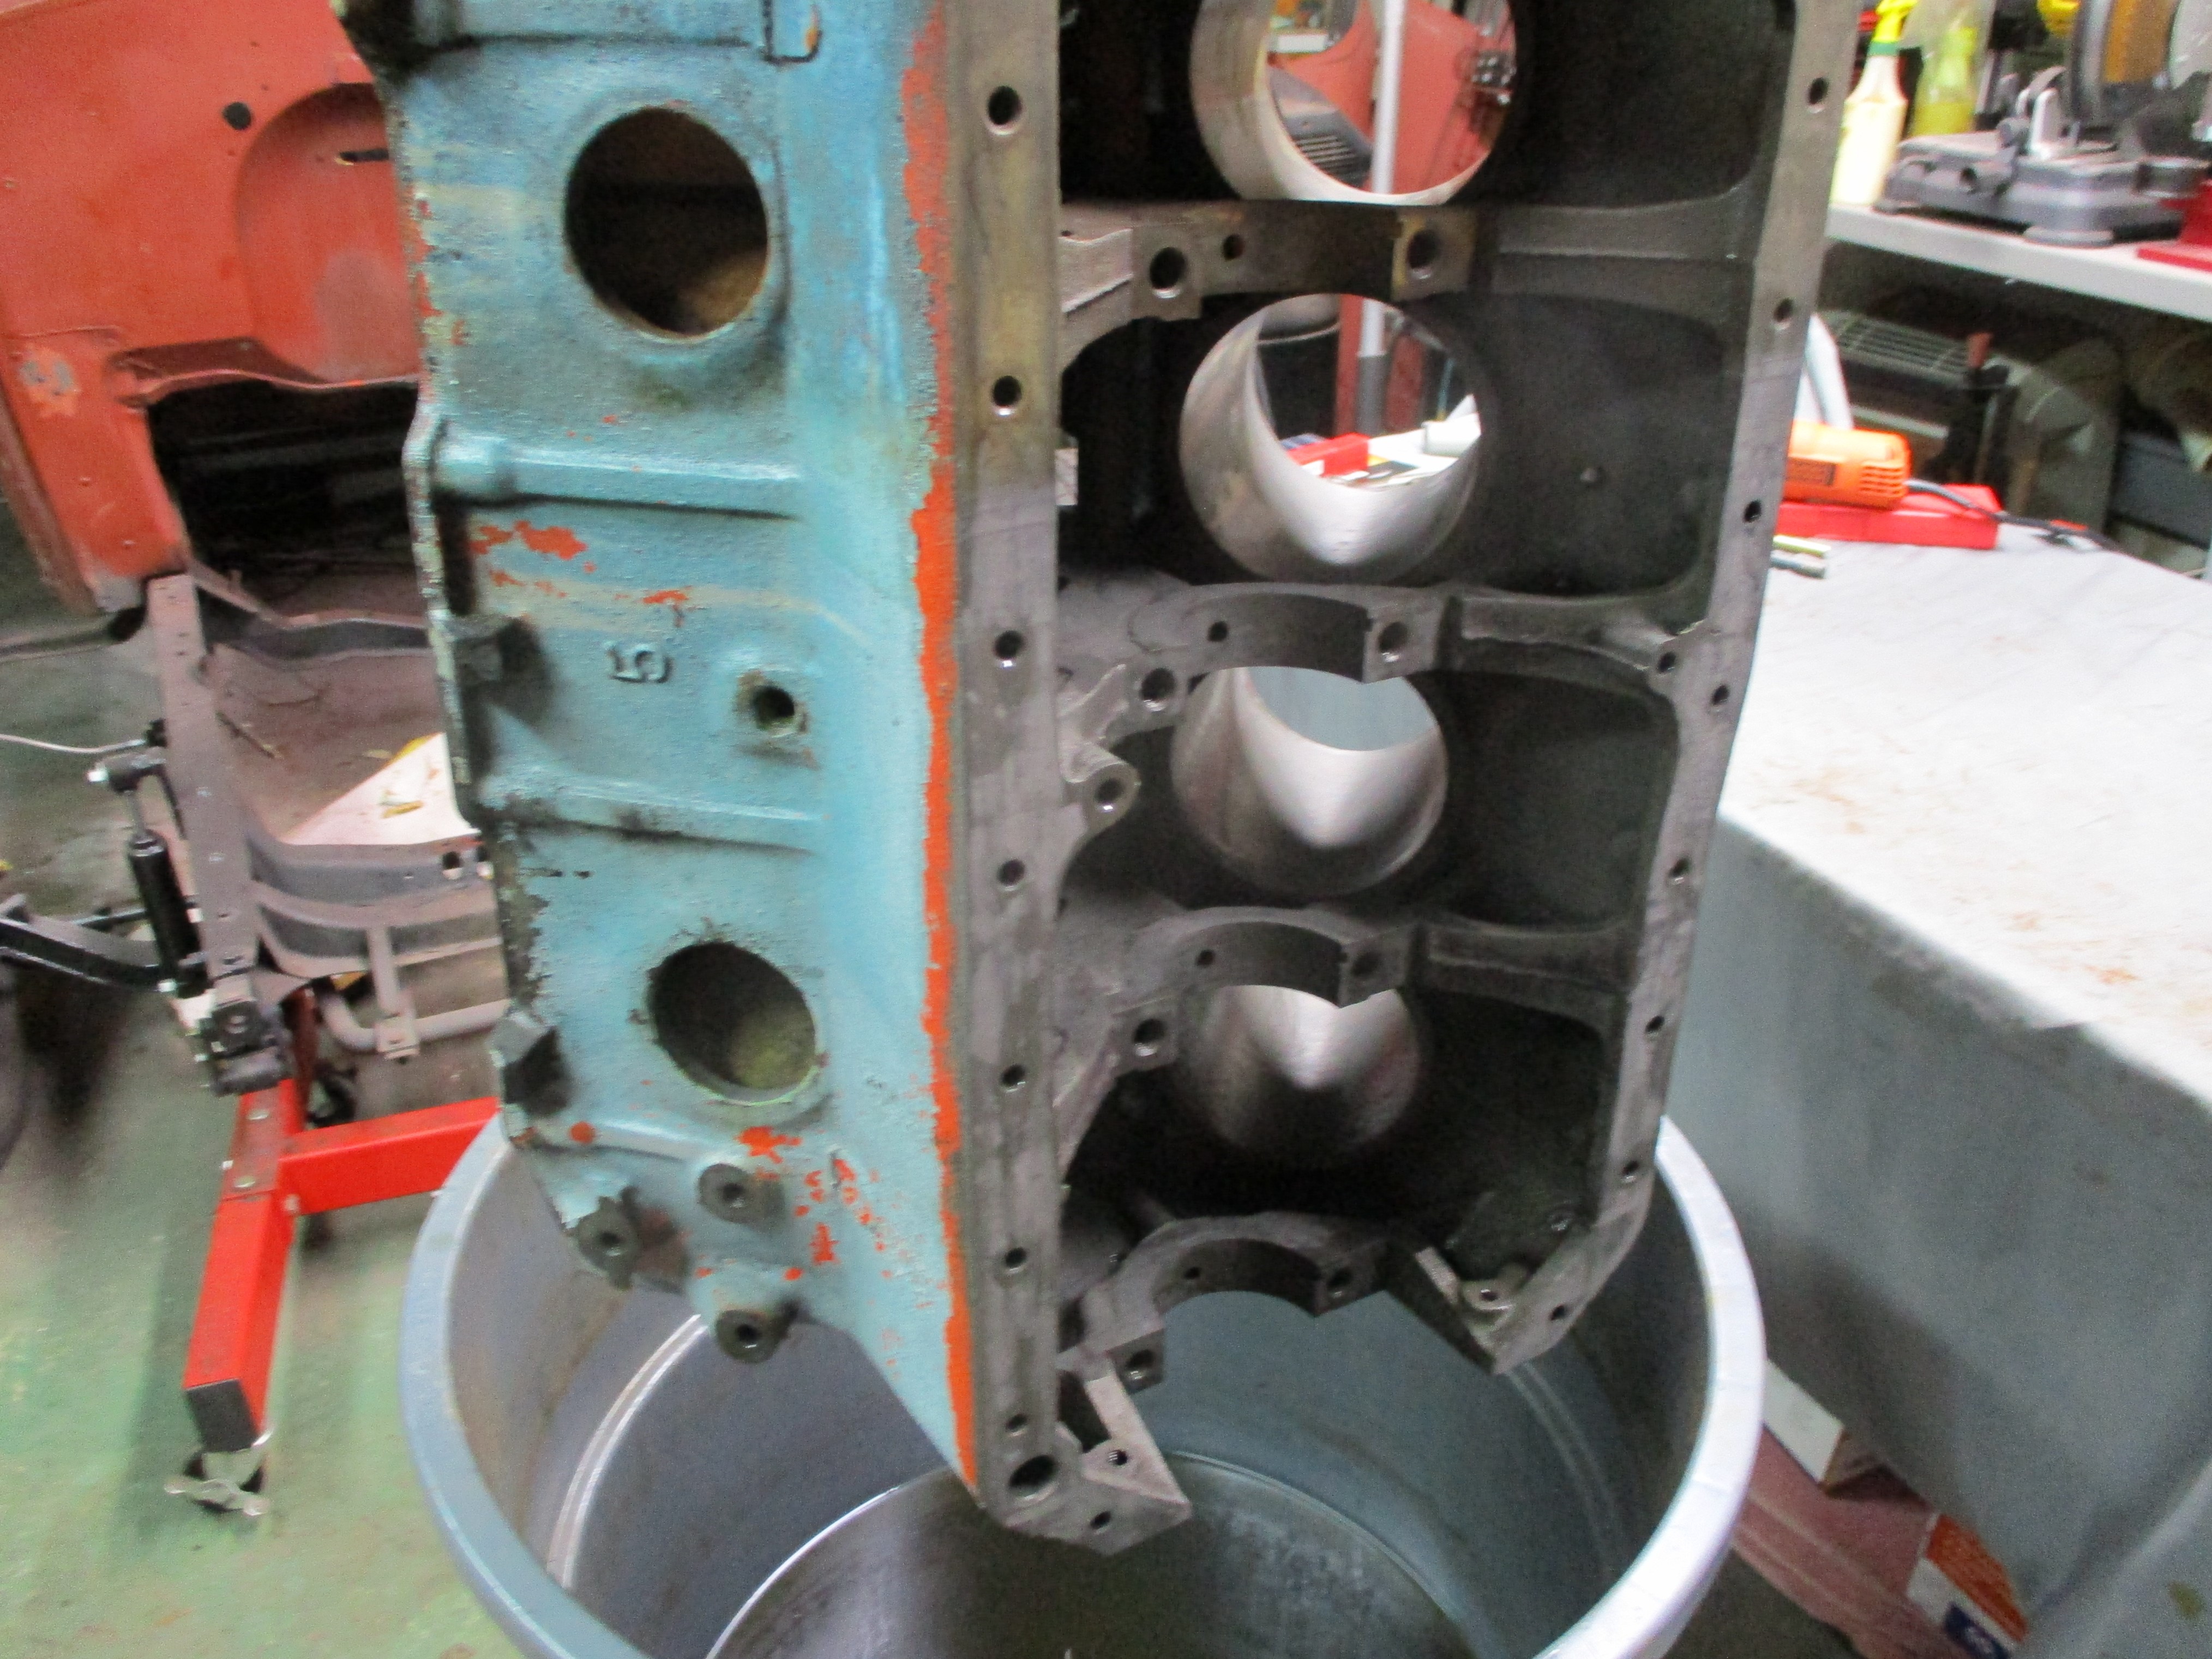 May 5th
2021 When the engine hoist broke, I
sidetracked into
a lazy streak for a couple of weeks but I think I'm back on track now.
Onward to the nailhead
derusting ops. The
water was drained and replaced
with twenty gallons of Evapo-Rust for the waterjacket derusting. Since
I didn't have
the quantity needed to completely submerge the block, the operation has
to be a two-step dance, front half first, then the rear half of the
block, two days in the soup for each.
May 5th
2021 When the engine hoist broke, I
sidetracked into
a lazy streak for a couple of weeks but I think I'm back on track now.
Onward to the nailhead
derusting ops. The
water was drained and replaced
with twenty gallons of Evapo-Rust for the waterjacket derusting. Since
I didn't have
the quantity needed to completely submerge the block, the operation has
to be a two-step dance, front half first, then the rear half of the
block, two days in the soup for each.
 June
29th
2021 Put tools away from the nailhead block painting and
cleared the deck for the next operation - pistons and crankshaft.
Disassembled piston assembly one and spent some deep ponder mode
thinking on how to go about cleaning the various components.
June
29th
2021 Put tools away from the nailhead block painting and
cleared the deck for the next operation - pistons and crankshaft.
Disassembled piston assembly one and spent some deep ponder mode
thinking on how to go about cleaning the various components.
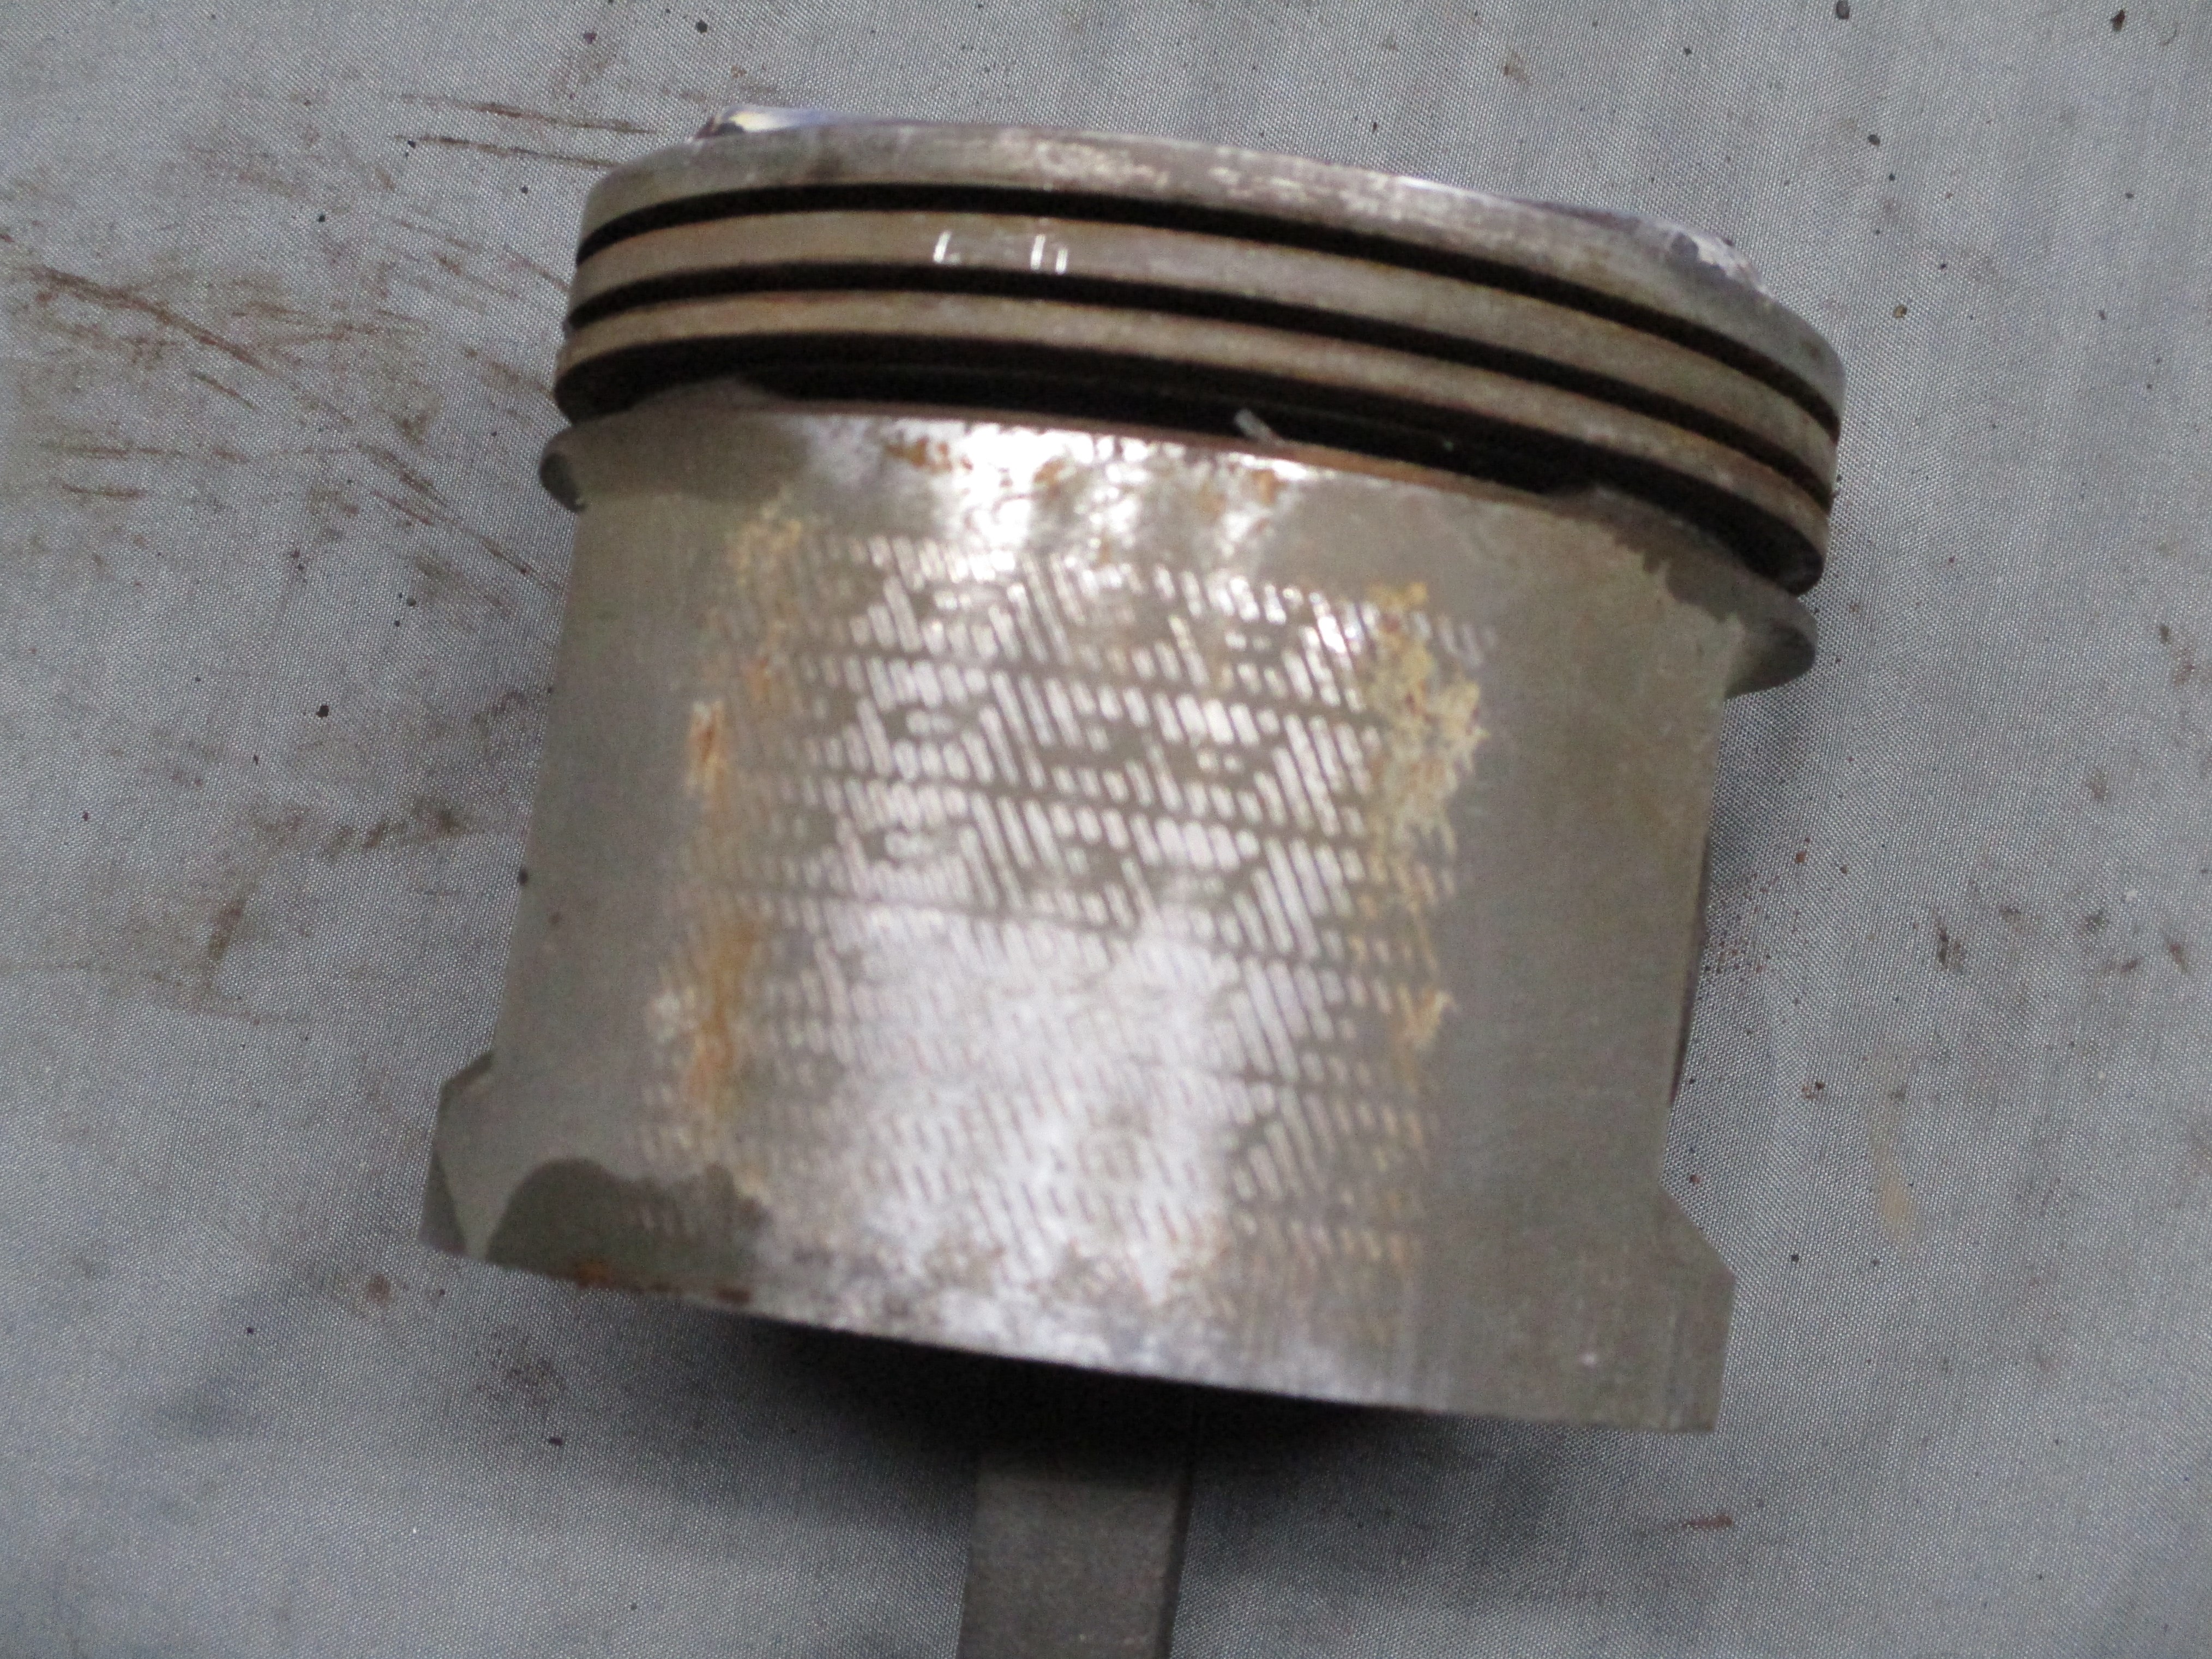
I am at sea since I haven't done this before and was concerned about removing the wrist pin retainers because I couldn't see them. Turns out I couldn't see them because there aren't any. The wrist pin is held against movement by the connecting rod pinch clamp.
Examining the piston showed a chunk missing behind the oil
ring. I could see the oil ring from inside the piston. That can't be
good. I went back into ponder mode again.
 June
30th
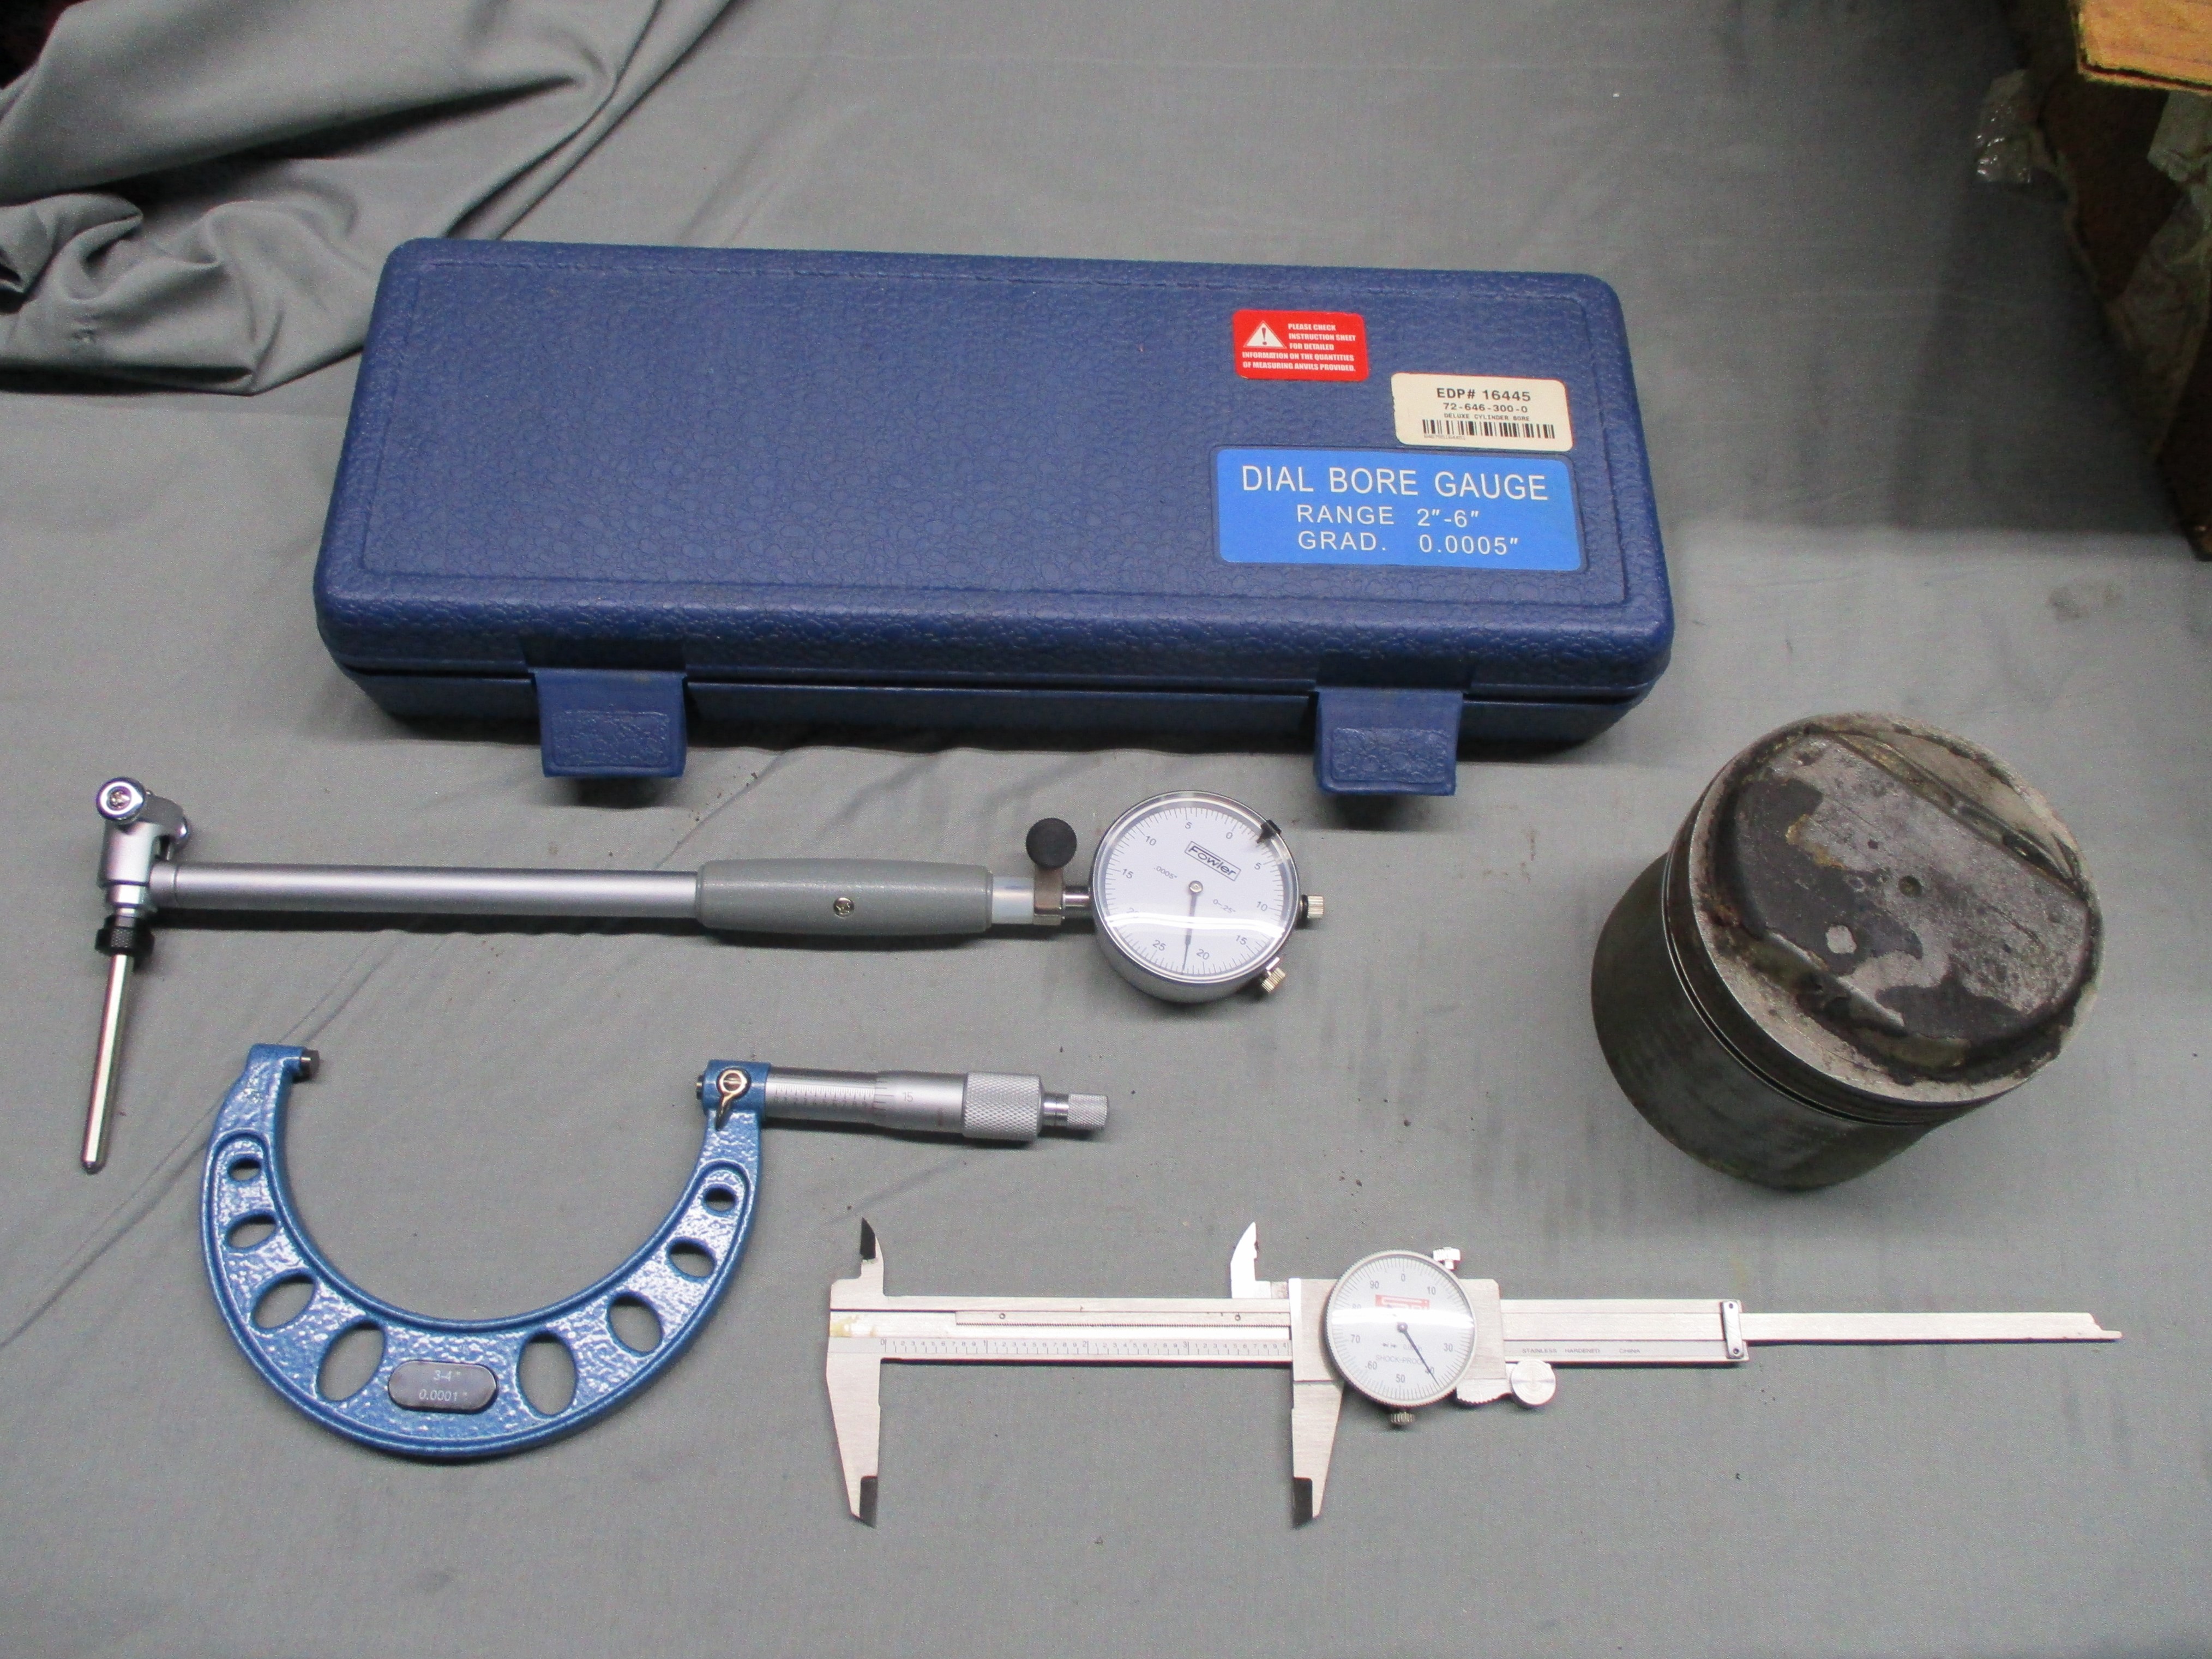
2021 Hunted up my dial bore gauge. micrometers and dial
caliper and commenced to measuring the
nailhead cylinders so I can order rings and maybe new pistons.
June
30th
2021 Hunted up my dial bore gauge. micrometers and dial
caliper and commenced to measuring the
nailhead cylinders so I can order rings and maybe new pistons.
Fumbled around for awhile as I'm new to this and my OEM eyes don't help much, but I eventfully came up with a WAG of forty thousandths oversize pistons and bore. I'm going to keep at it until I'm more comfortable with my findings and I'm going to see if my machinist friend, John, will swing by after Sunday coffee to check my measurements.
I would like to find '56 heads, pistons and rods for this
build but, I've been unsuccessful in that search and I may have to live
with what I have. The only certain thing is that more research is in
order.
 July
7th
2021 At four inches, my biggest mic is too small for this job,
so I ordered a five inch mic, one day delivery. Cleaned the number one
rod, cap, wrist pin and bolts in an overnite Evapo-Rust submersion and
fiddled with the piston some. The rings are flush and corroded. I
couldn't budge any of them.
July
7th
2021 At four inches, my biggest mic is too small for this job,
so I ordered a five inch mic, one day delivery. Cleaned the number one
rod, cap, wrist pin and bolts in an overnite Evapo-Rust submersion and
fiddled with the piston some. The rings are flush and corroded. I
couldn't budge any of them.
I took the piston to the Sunday coffee cruise-in. John didn't make it but Dave Sexton told me the marks on the thrust sides of the piston were from knurling and they were still pretty fresh. I took a look at all the pistons when I got back to the BillyBob Shop and they all have the knurling.
Continued to measure the pistons with micrometer and cylinder bores with dial bore gauge and telescoping bore gauge until I had confidence in my measurements. Have decided to stay with the pistons I have.
Got the corroded, stuck rings out of piston one with MAP
torch, Kroil penetrating oil, small pick and needlenose pliers
hand-to-hand combat technique.
 July
8th
2021 Cleaning no. one piston assembly. Figuring out what
works, what works better and in what order. When I establish a
procedure, the other seven will go quicker. That's the theory anyway.
July
8th
2021 Cleaning no. one piston assembly. Figuring out what
works, what works better and in what order. When I establish a
procedure, the other seven will go quicker. That's the theory anyway.
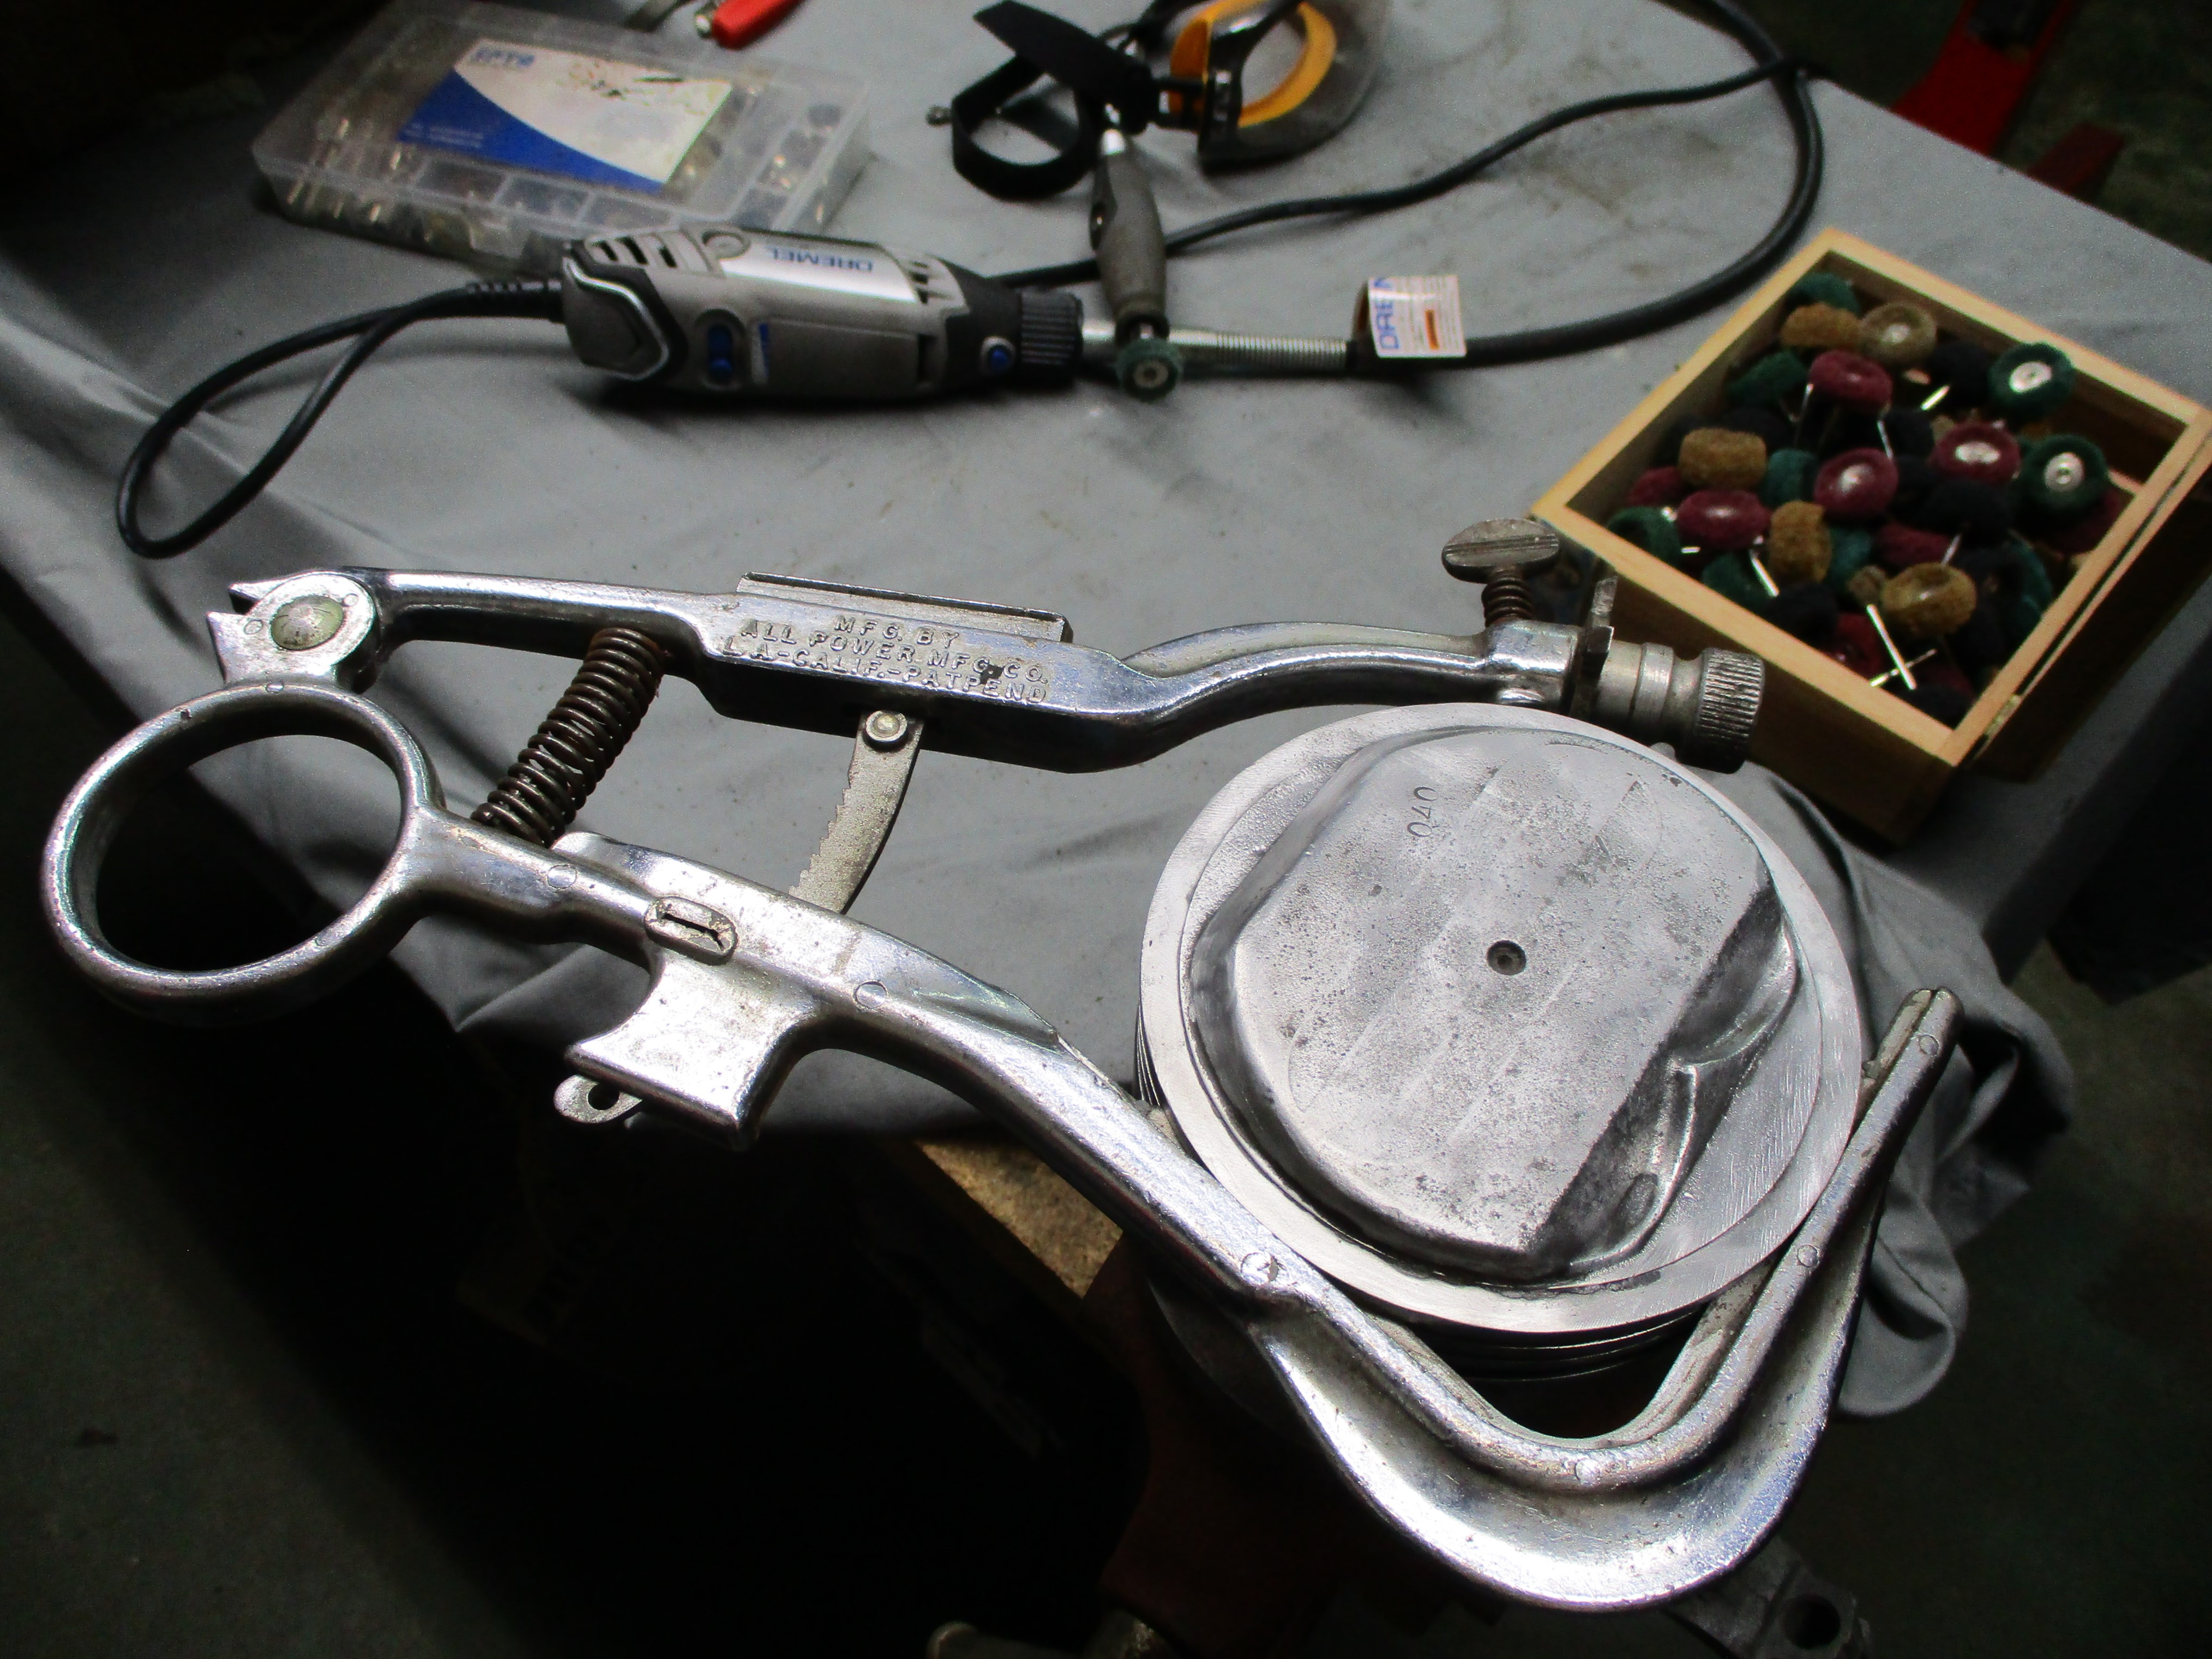
Dragged out my Dad's ancient piston ring groove cleaner and tried to intuit how to use it. This arrived on my doorstep a few years ago, addressed to "Mr Nimrod". My brother's short note that accompanied it, said it should come in handy in three or four years when I got around to BillyBob's stovebolt engine, the last engine Dad used it on in the eighties when my brother owned the truck.
Did some initial cleaning of the piston with Scotchbrite buffs
in the Dremel motor tool after knocking the worst carbon off the top
with Scotchbrite cookies in an air angle grinder. The piston was marked
with 040 on the top.
 July
12th
2021 Developed a procedure for the nailhead piston assembly
cleanup:
1) Remove the rings; 2) Clean ring grooves; 3) Submerge assembly in
Oileater parts washer for an hour; 4) Dissemble piston assembly; 5)
Submerge piston in Chem-Dip; 6); Go over all parts that need it with
the Scotchbrite
buffs in the Dremel tool; 7) Submerge all parts in an ultrasonic
cleaner session; 8) Submerge rod, cap, wrist pin and bolts
in Evapo-Rust; Give all parts a light coating of Marvel Mystery Oil and
reassemble loosely. This procedure may need fine tuning. We'll see how
it goes for now.
July
12th
2021 Developed a procedure for the nailhead piston assembly
cleanup:
1) Remove the rings; 2) Clean ring grooves; 3) Submerge assembly in
Oileater parts washer for an hour; 4) Dissemble piston assembly; 5)
Submerge piston in Chem-Dip; 6); Go over all parts that need it with
the Scotchbrite
buffs in the Dremel tool; 7) Submerge all parts in an ultrasonic
cleaner session; 8) Submerge rod, cap, wrist pin and bolts
in Evapo-Rust; Give all parts a light coating of Marvel Mystery Oil and
reassemble loosely. This procedure may need fine tuning. We'll see how
it goes for now.
 July
19th
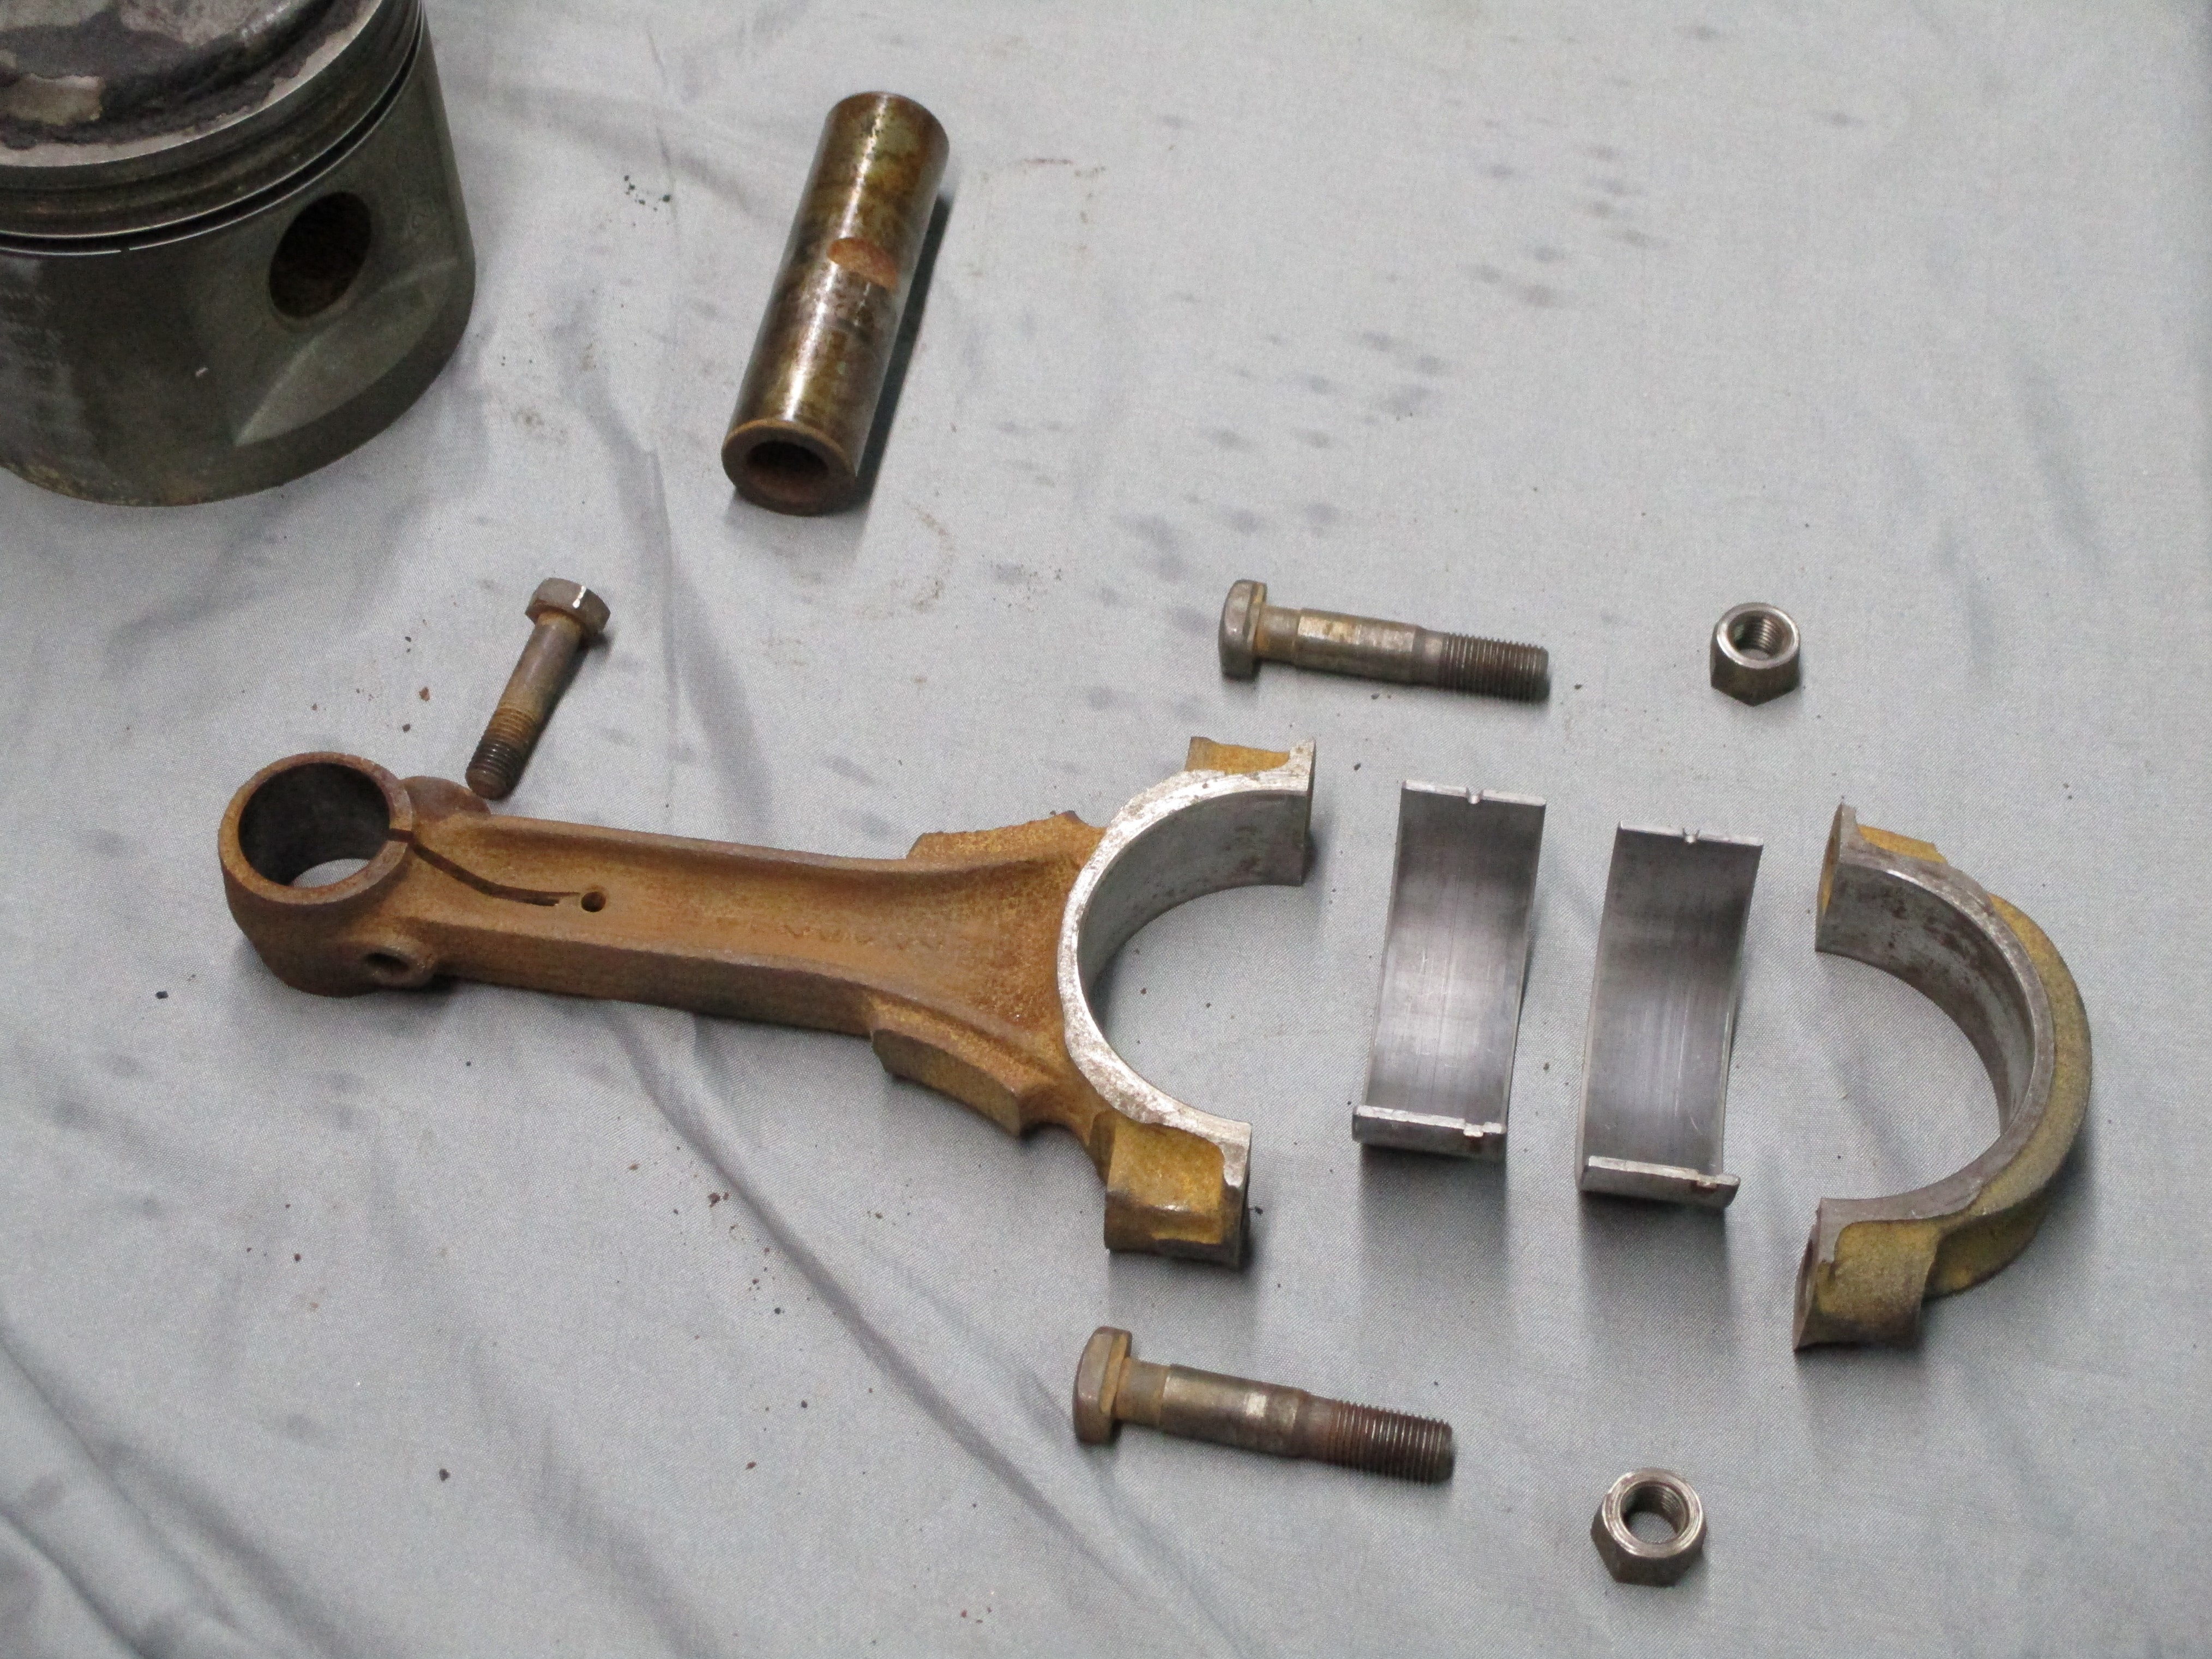
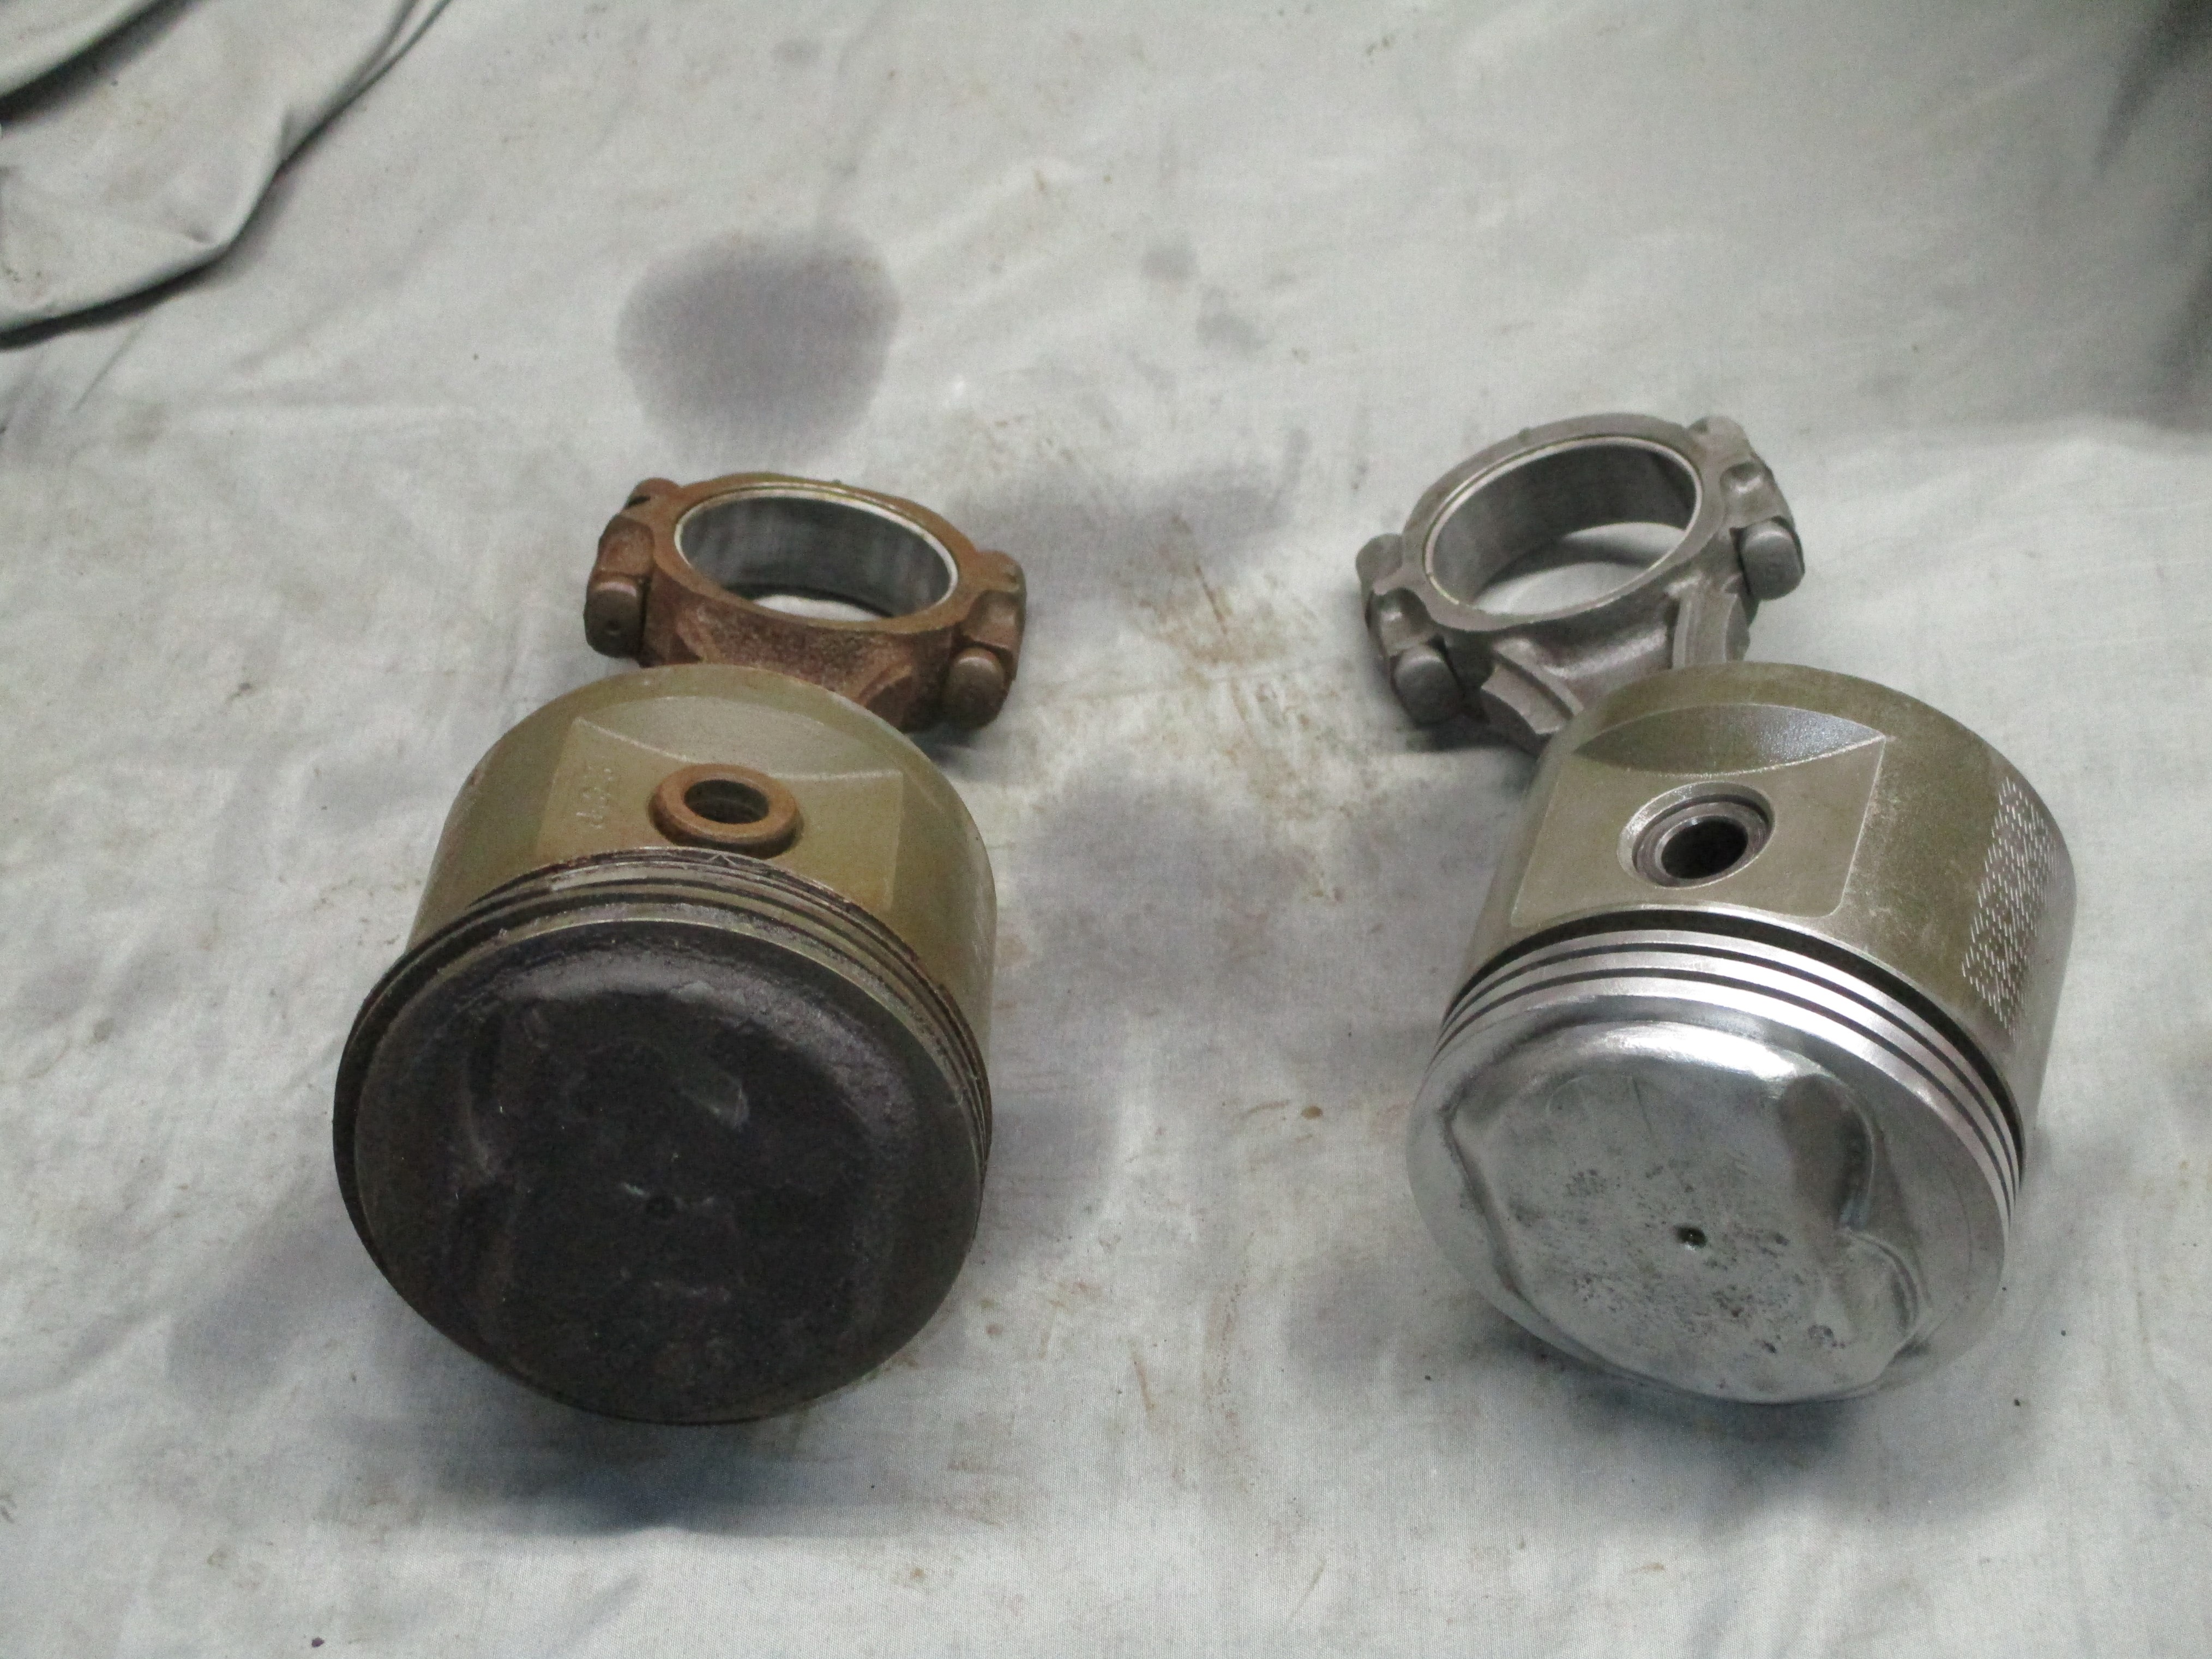
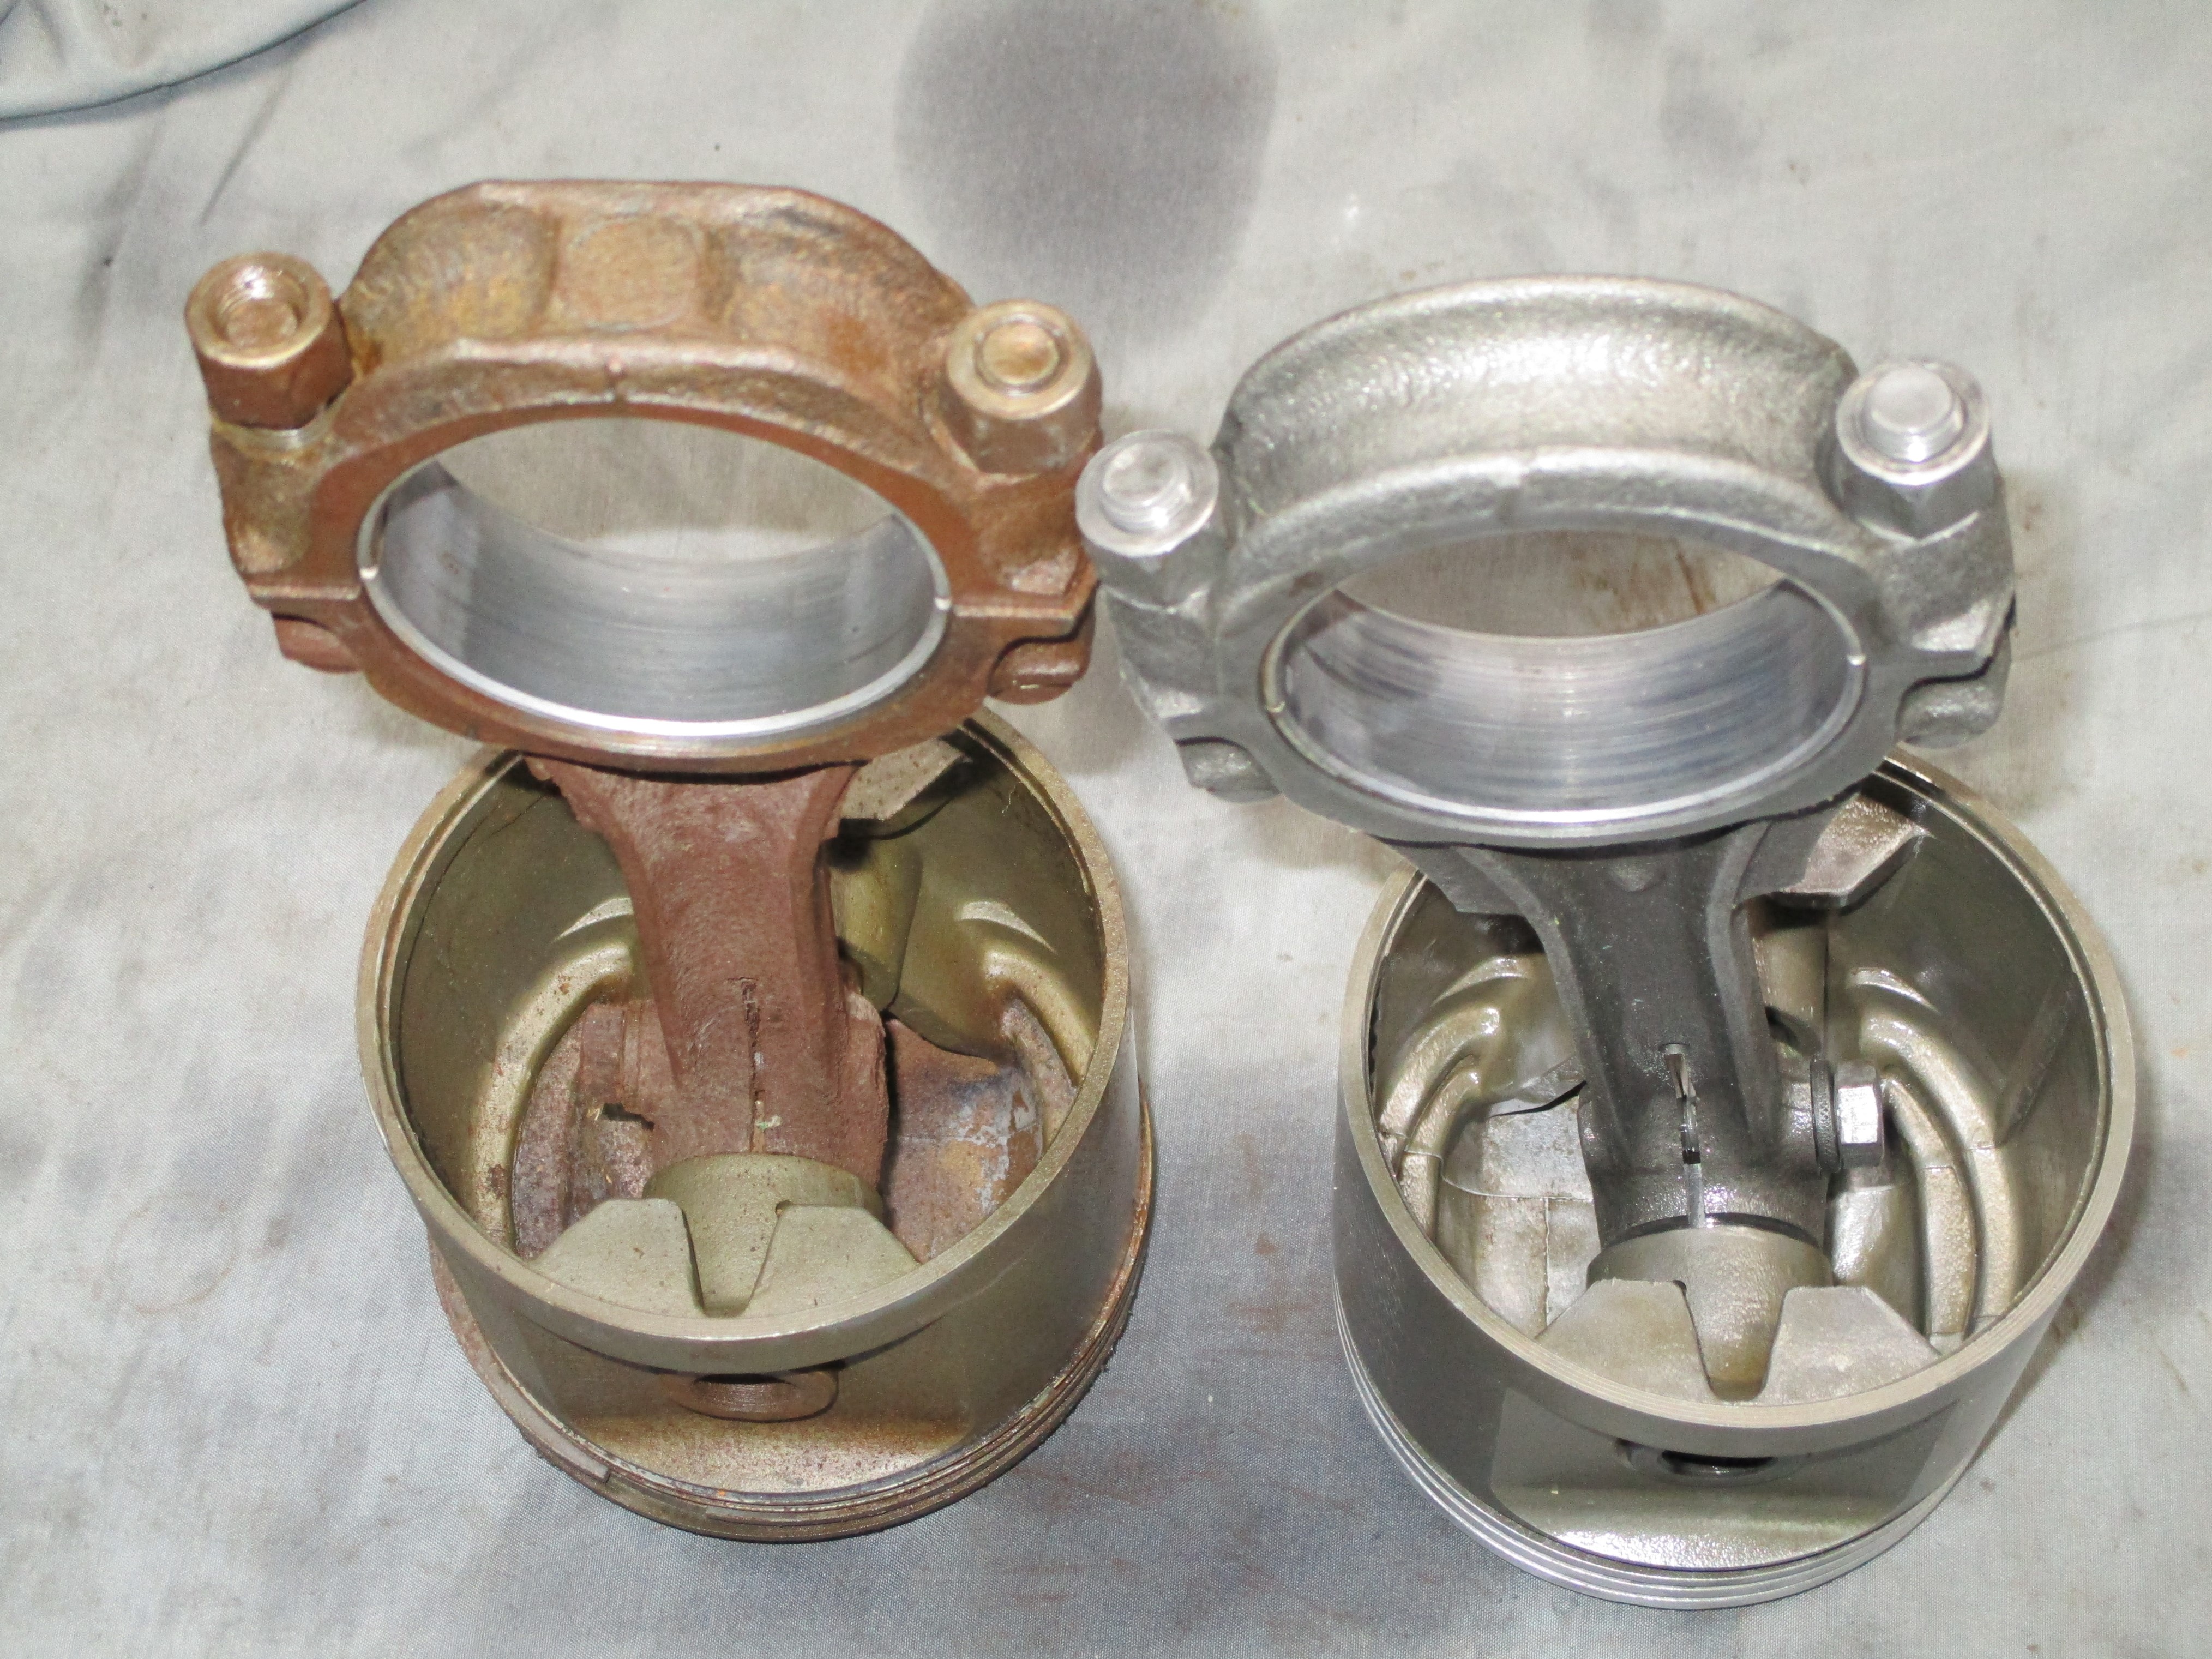
2021 Nailhead piston assembly operations continue. This is
cleaned assembly two compared to untouched assembly three. Something
else to observe about these two assemblies is that the "ears" just
above the crankshaft end of rod three are almost ground away whereas
there is still plenty of meat in the ears of rod two. Rod three also
has a beefier cap than two which might account for some of this. I'll
weigh things down the road to see what's what.
July
19th
2021 Nailhead piston assembly operations continue. This is
cleaned assembly two compared to untouched assembly three. Something
else to observe about these two assemblies is that the "ears" just
above the crankshaft end of rod three are almost ground away whereas
there is still plenty of meat in the ears of rod two. Rod three also
has a beefier cap than two which might account for some of this. I'll
weigh things down the road to see what's what.
 I've got
three and a half assemblies cleaned at this point and
I've modified the procedure as well. The procedure was revised to clean
the piston top
carbon. Scotchbrite cookies were too aggressive and Dremel buffs didn't
cut it alone. A brass wire wheel in an electric die grinder did the
trick. Dad's ancient groove
cleaning tool tortured me more than it
tortured the ring grooves. I got better results with using a broken
ring as a cleaning tool. The ultrasonic cleaning session leaves
aluminum dull and ferrous metal slightly rusty so the Evapo-Rust dip
was
moved to the last step before lightly oiling with Marvel Mystery oil.
and the piston gets a shine up with wire wheel again.
I've got
three and a half assemblies cleaned at this point and
I've modified the procedure as well. The procedure was revised to clean
the piston top
carbon. Scotchbrite cookies were too aggressive and Dremel buffs didn't
cut it alone. A brass wire wheel in an electric die grinder did the
trick. Dad's ancient groove
cleaning tool tortured me more than it
tortured the ring grooves. I got better results with using a broken
ring as a cleaning tool. The ultrasonic cleaning session leaves
aluminum dull and ferrous metal slightly rusty so the Evapo-Rust dip
was
moved to the last step before lightly oiling with Marvel Mystery oil.
and the piston gets a shine up with wire wheel again.
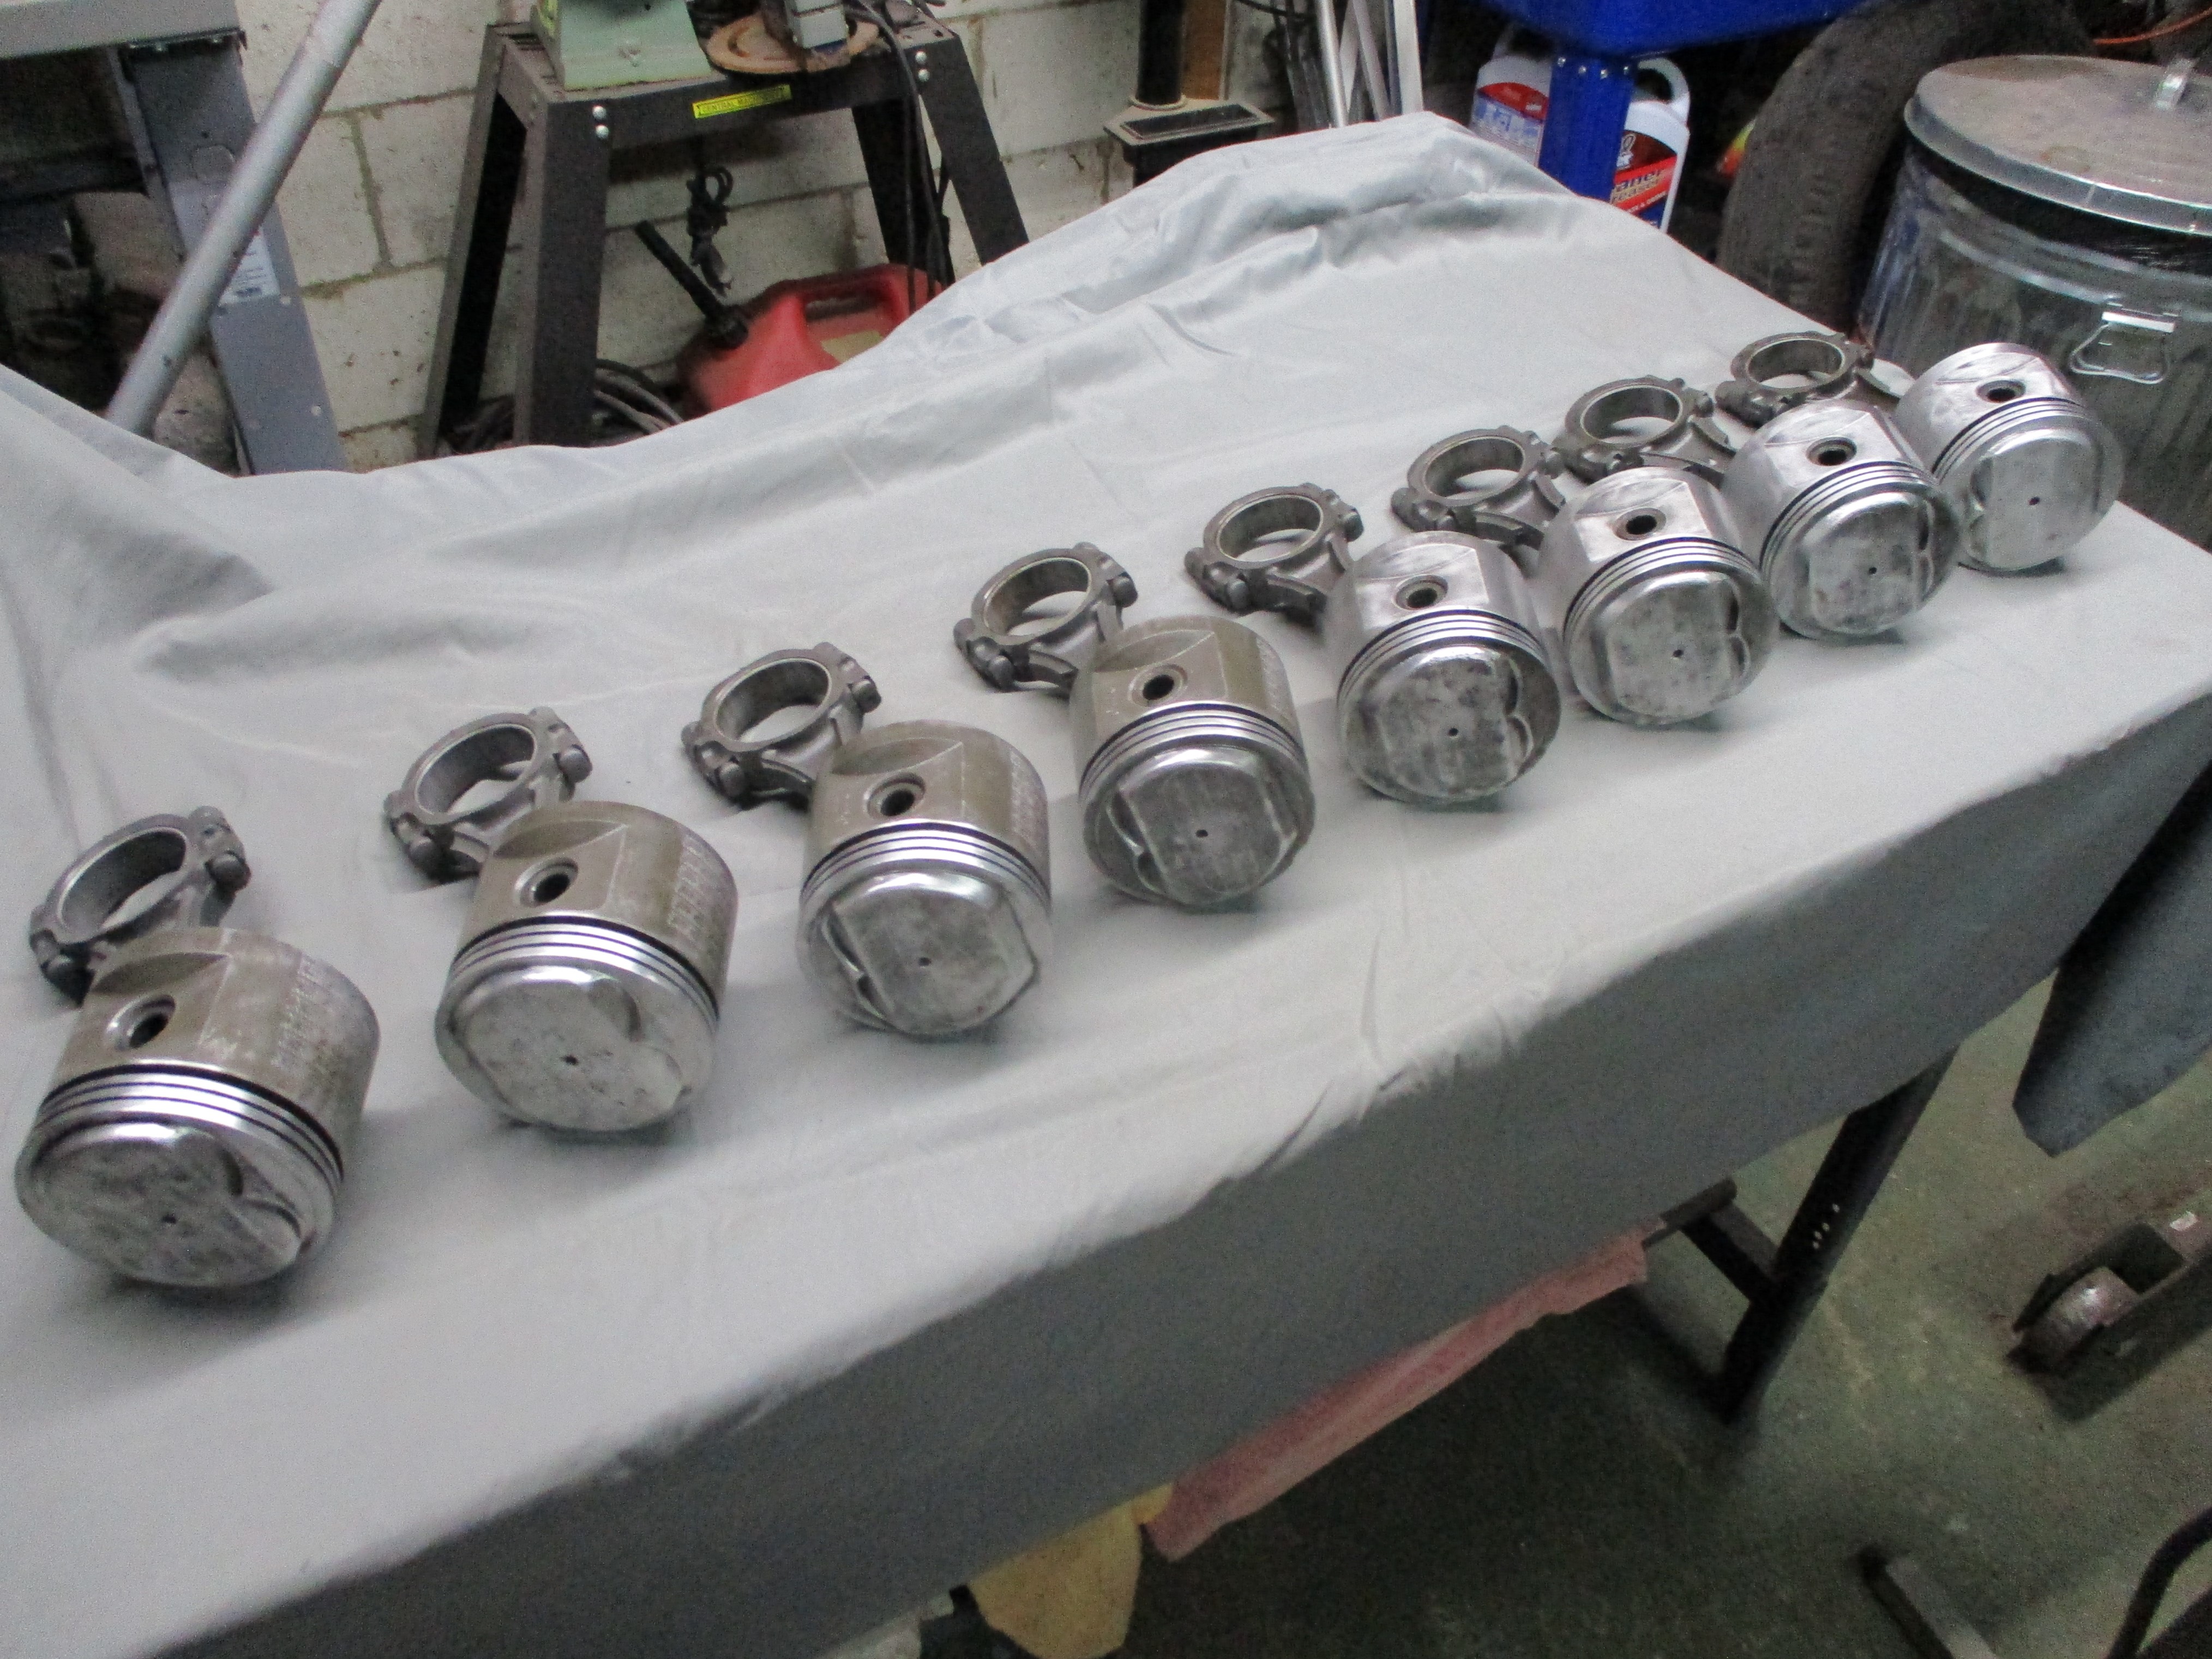
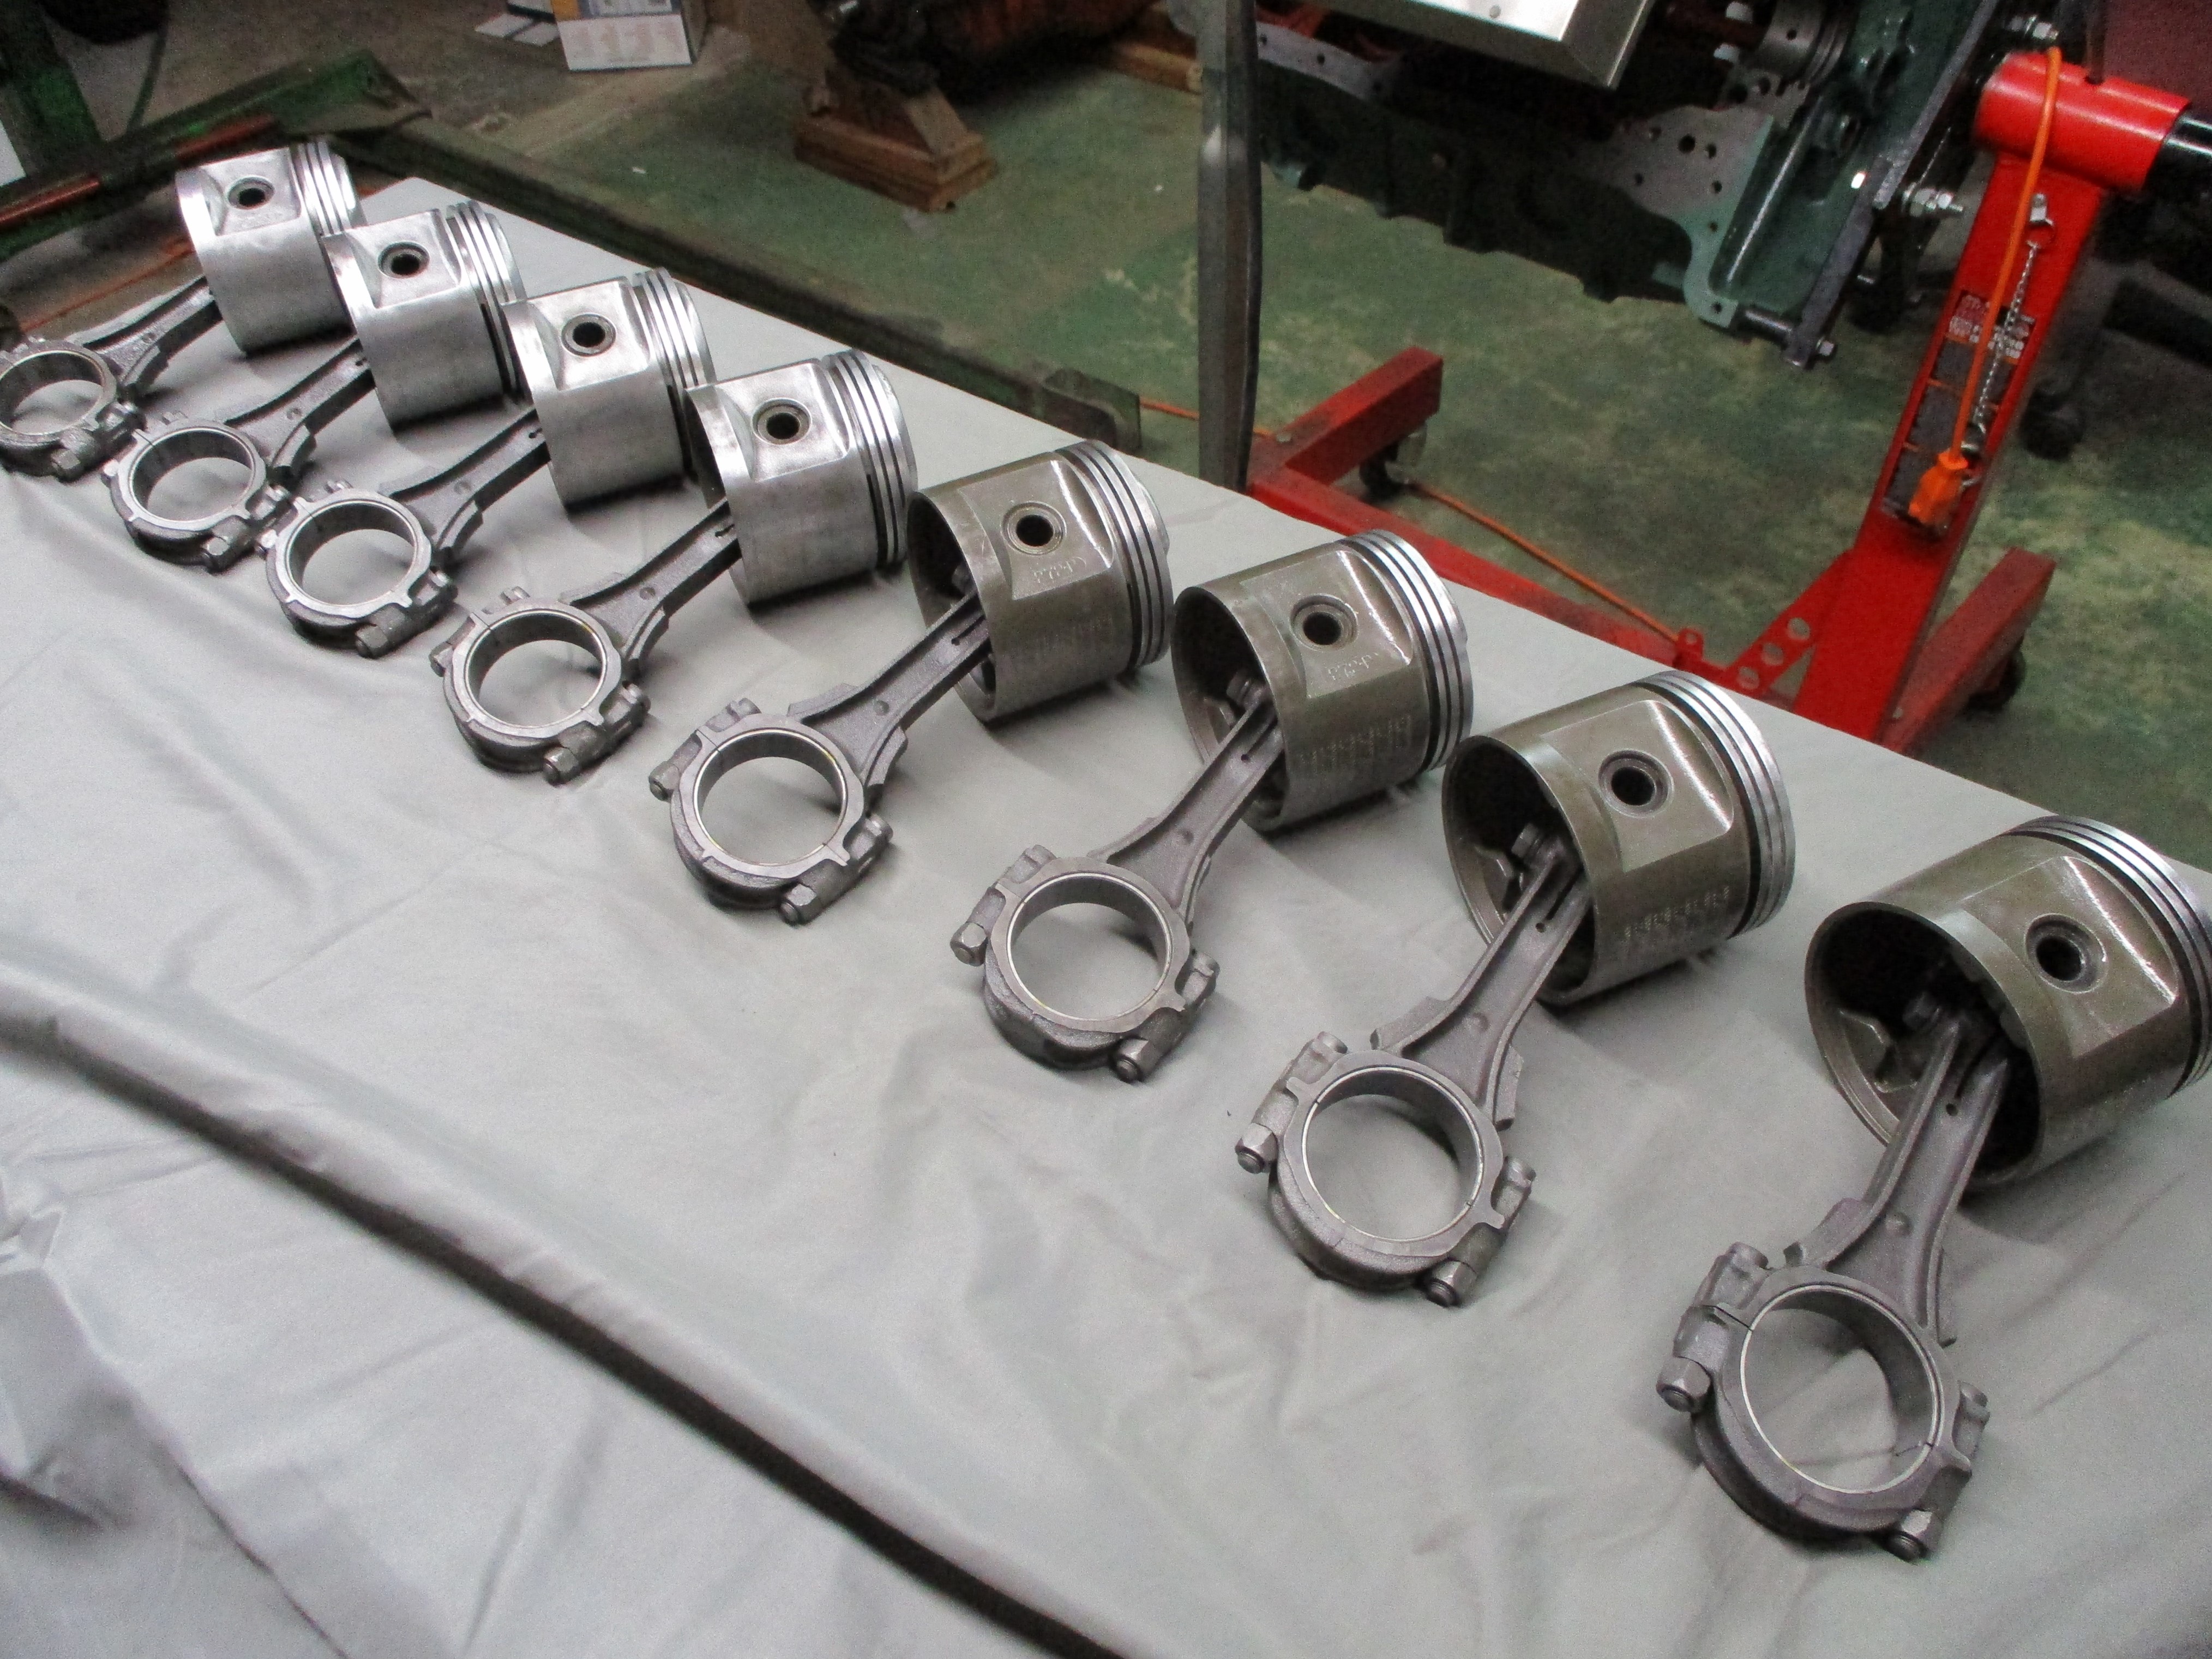 August
2nd
2021 Took longer than I thought it would to clean the eight
nailhead piston assemblies but I've always been over optimistic
regarding deadlines. The piston assemblies are now clean and will be
set aside. Updated the procedure for the nailhead piston assembly
cleanup along the way for future reference.
August
2nd
2021 Took longer than I thought it would to clean the eight
nailhead piston assemblies but I've always been over optimistic
regarding deadlines. The piston assemblies are now clean and will be
set aside. Updated the procedure for the nailhead piston assembly
cleanup along the way for future reference.
 1) Remove
the rings; 2) Disassemble piston assembly; 3)
Submerge all
parts in Oileater parts washer for an hour; 4)
Submerge piston in Chem-Dip for thirty minutes; 5) Remove remaining
carbon on piston top with brass wire wheel in electric die grinder; 6)
Go over rest of piston with
the Scotchbrite
buffs in the Dremel tool; 7) Clean ring grooves;
8) Submerge all parts in an ultrasonic
cleaner session, 99 minutes 80 degrees C; 9) Submerge rod, cap, wrist
pin and bolts
in Evapo-Rust for up to twenty-four hours; 10) Shine up the piston
again with another, shorter, wire wheel and Scotchbrite buff session;
11) Give all parts a light coating
of Marvel Mystery Oil
and
reassemble loosely.
1) Remove
the rings; 2) Disassemble piston assembly; 3)
Submerge all
parts in Oileater parts washer for an hour; 4)
Submerge piston in Chem-Dip for thirty minutes; 5) Remove remaining
carbon on piston top with brass wire wheel in electric die grinder; 6)
Go over rest of piston with
the Scotchbrite
buffs in the Dremel tool; 7) Clean ring grooves;
8) Submerge all parts in an ultrasonic
cleaner session, 99 minutes 80 degrees C; 9) Submerge rod, cap, wrist
pin and bolts
in Evapo-Rust for up to twenty-four hours; 10) Shine up the piston
again with another, shorter, wire wheel and Scotchbrite buff session;
11) Give all parts a light coating
of Marvel Mystery Oil
and
reassemble loosely.
 August
3rd
2021 Crankshaft, main bearings and caps are next on the to-do
list. Cleaning is first, then measuring what we have. I'm in deep
ponder mode and taking some YouTube continuing education courses.
August
3rd
2021 Crankshaft, main bearings and caps are next on the to-do
list. Cleaning is first, then measuring what we have. I'm in deep
ponder mode and taking some YouTube continuing education courses.
 August
4th
2021 Started with the main bearing caps, using an abbreviated
procedure that I used to clean the rods. All these caps are stamped
with a number and arrow so I can batch clean them without worrying
about mixing them up. Segments of the rear seal were still in the sides
of the rear main cap so, I have to dig that out first.
August
4th
2021 Started with the main bearing caps, using an abbreviated
procedure that I used to clean the rods. All these caps are stamped
with a number and arrow so I can batch clean them without worrying
about mixing them up. Segments of the rear seal were still in the sides
of the rear main cap so, I have to dig that out first.
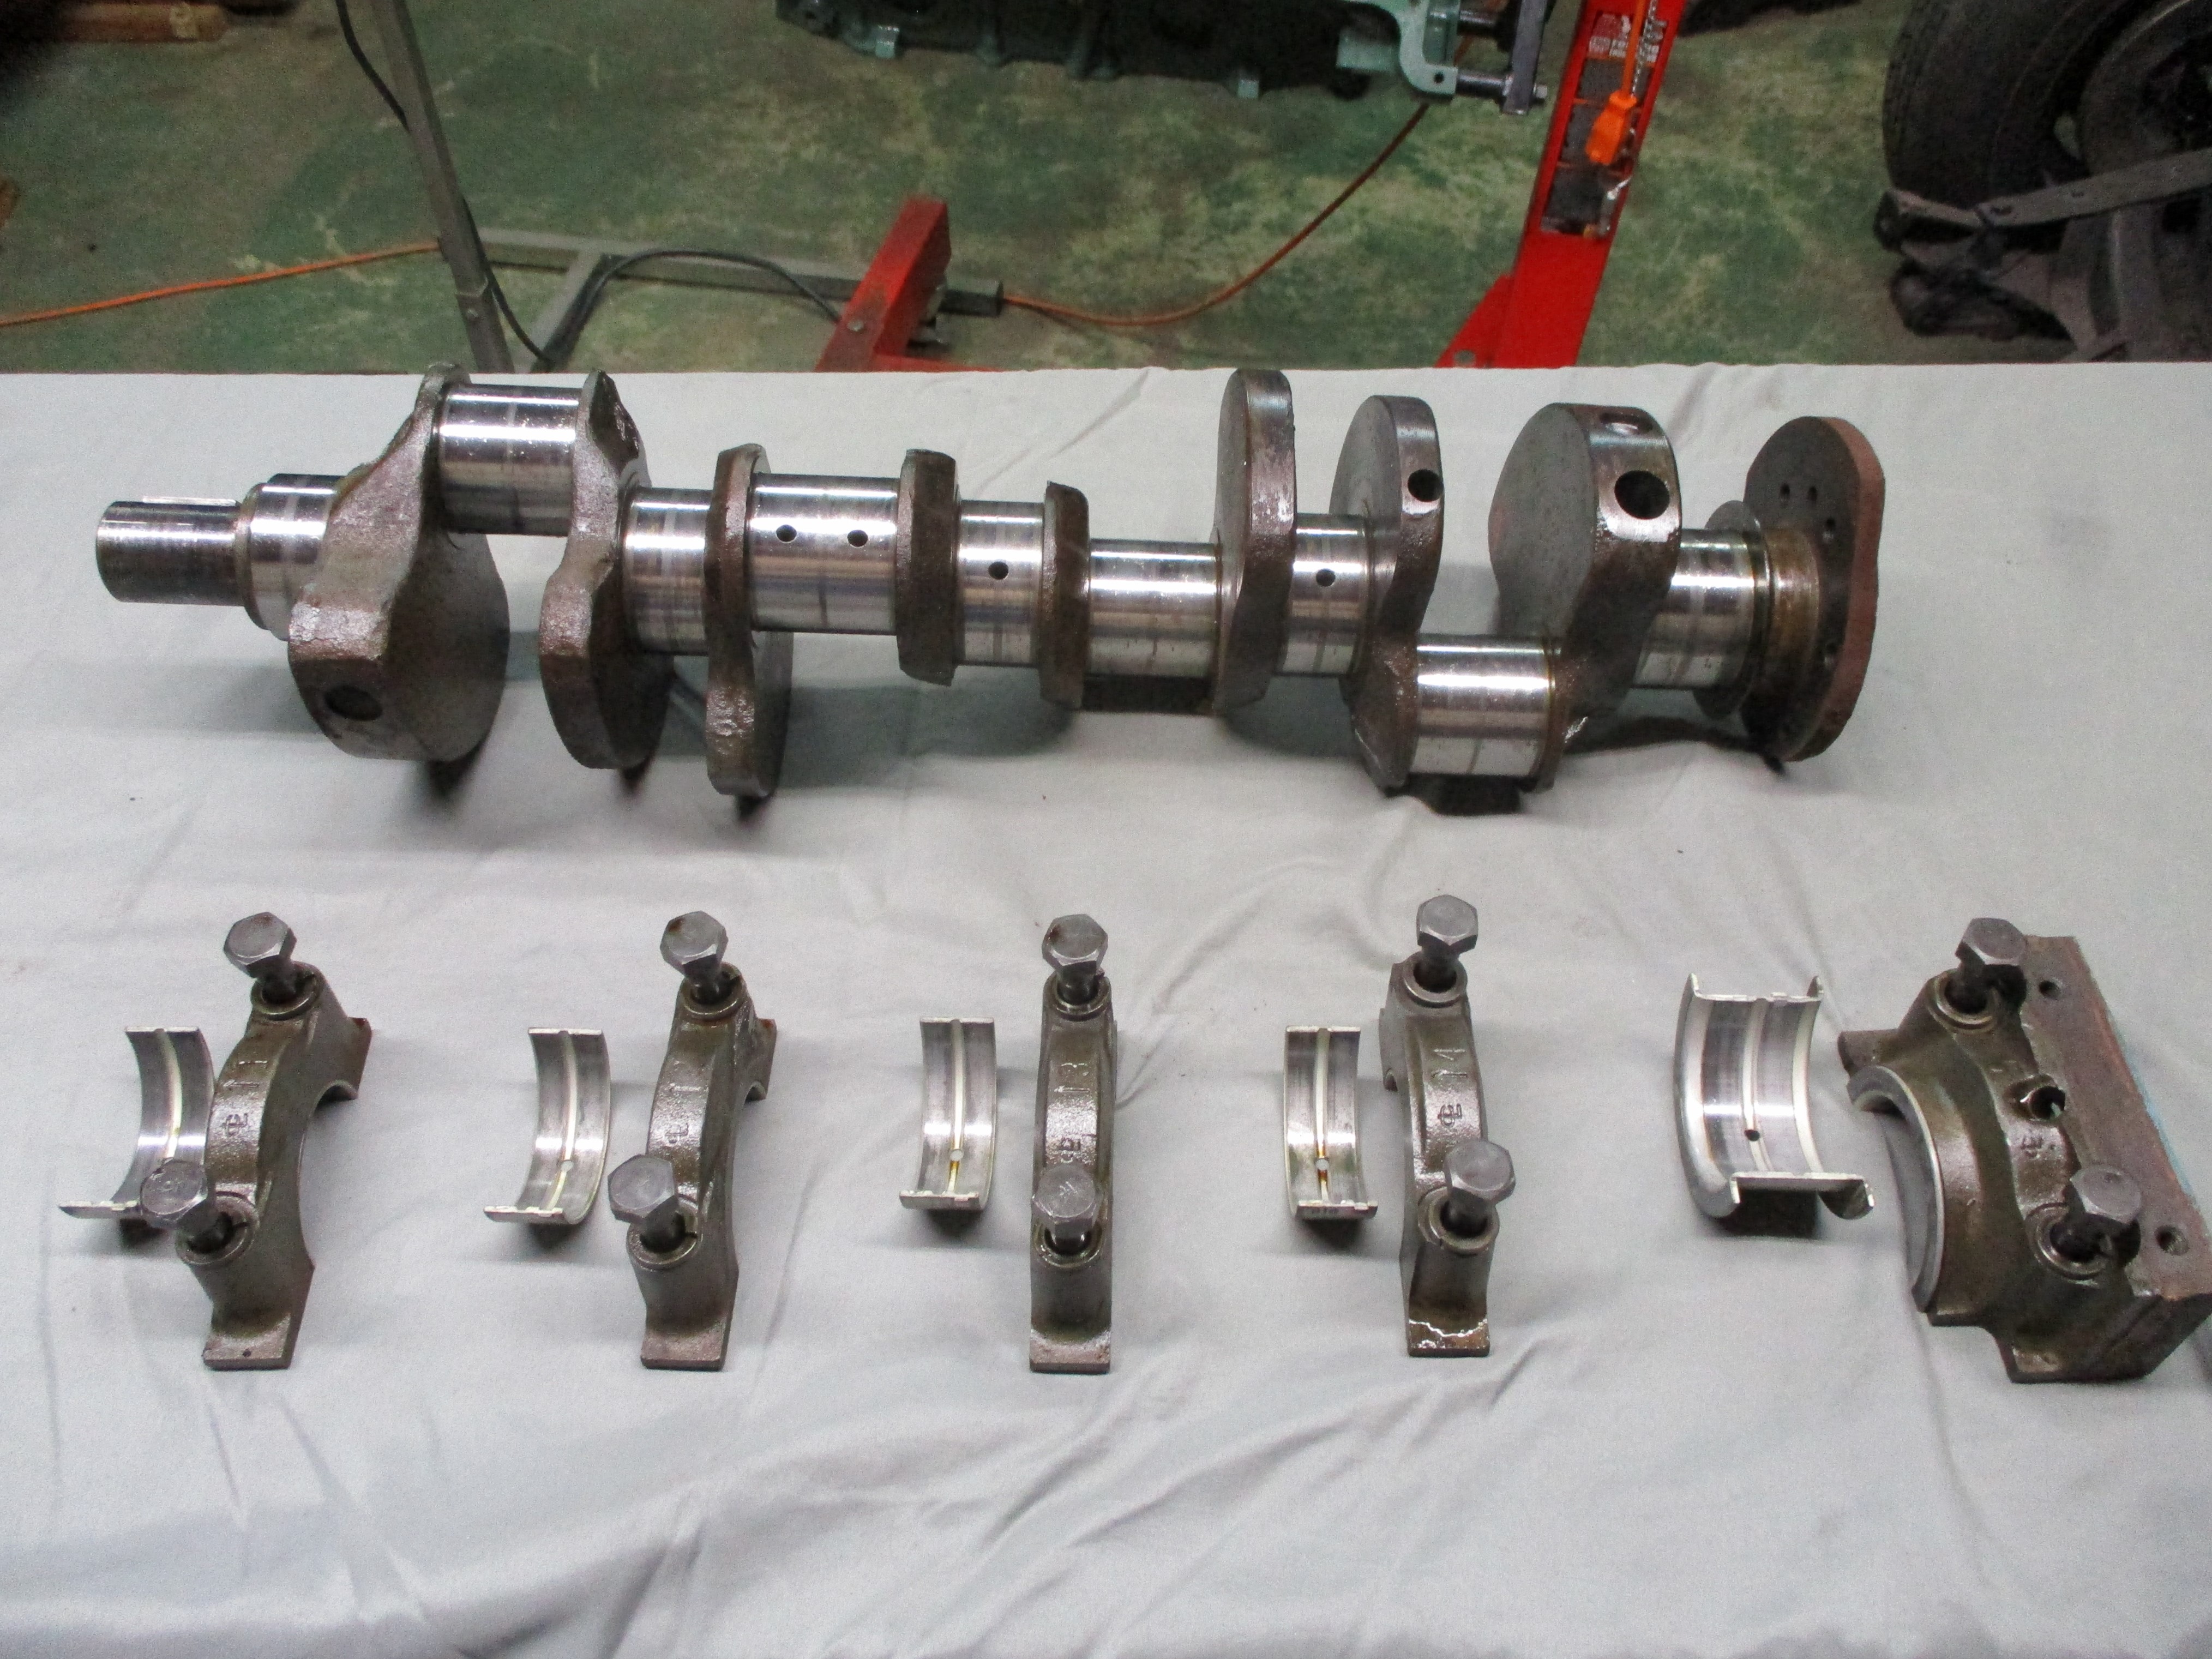
My friend, David Kerry, a professional performance engine builder and fabricator, had several concerns after viewing the pic of the crank and mains.
That crank needs micro polishing, the oil holes need chamfering please tell me you are not using those old bearings ? The wear pattern indicates the block needs line honing.
I'm gonna try to address those concerns but probably not to
everybody's satisfaction, 'cept mine. Easiest first. When I got back to
the shop, I located and blew the dust off my Starrett straightedge
along with my thinnest feeler gauge (0.0015"). Tried to slip the feeler
gauge under the straightedge in four places (both sides, front and
back) of each main bearing journal, It didn't go under anywhere. I'm
happy with that result.
Chamfering the oil holes was under my radar. I hadn't thought
about chamfering the oil holes so, I'm
researching that now but polishing my crank was always part to the
program. The jury's still out on the bearings, both mains and rods.
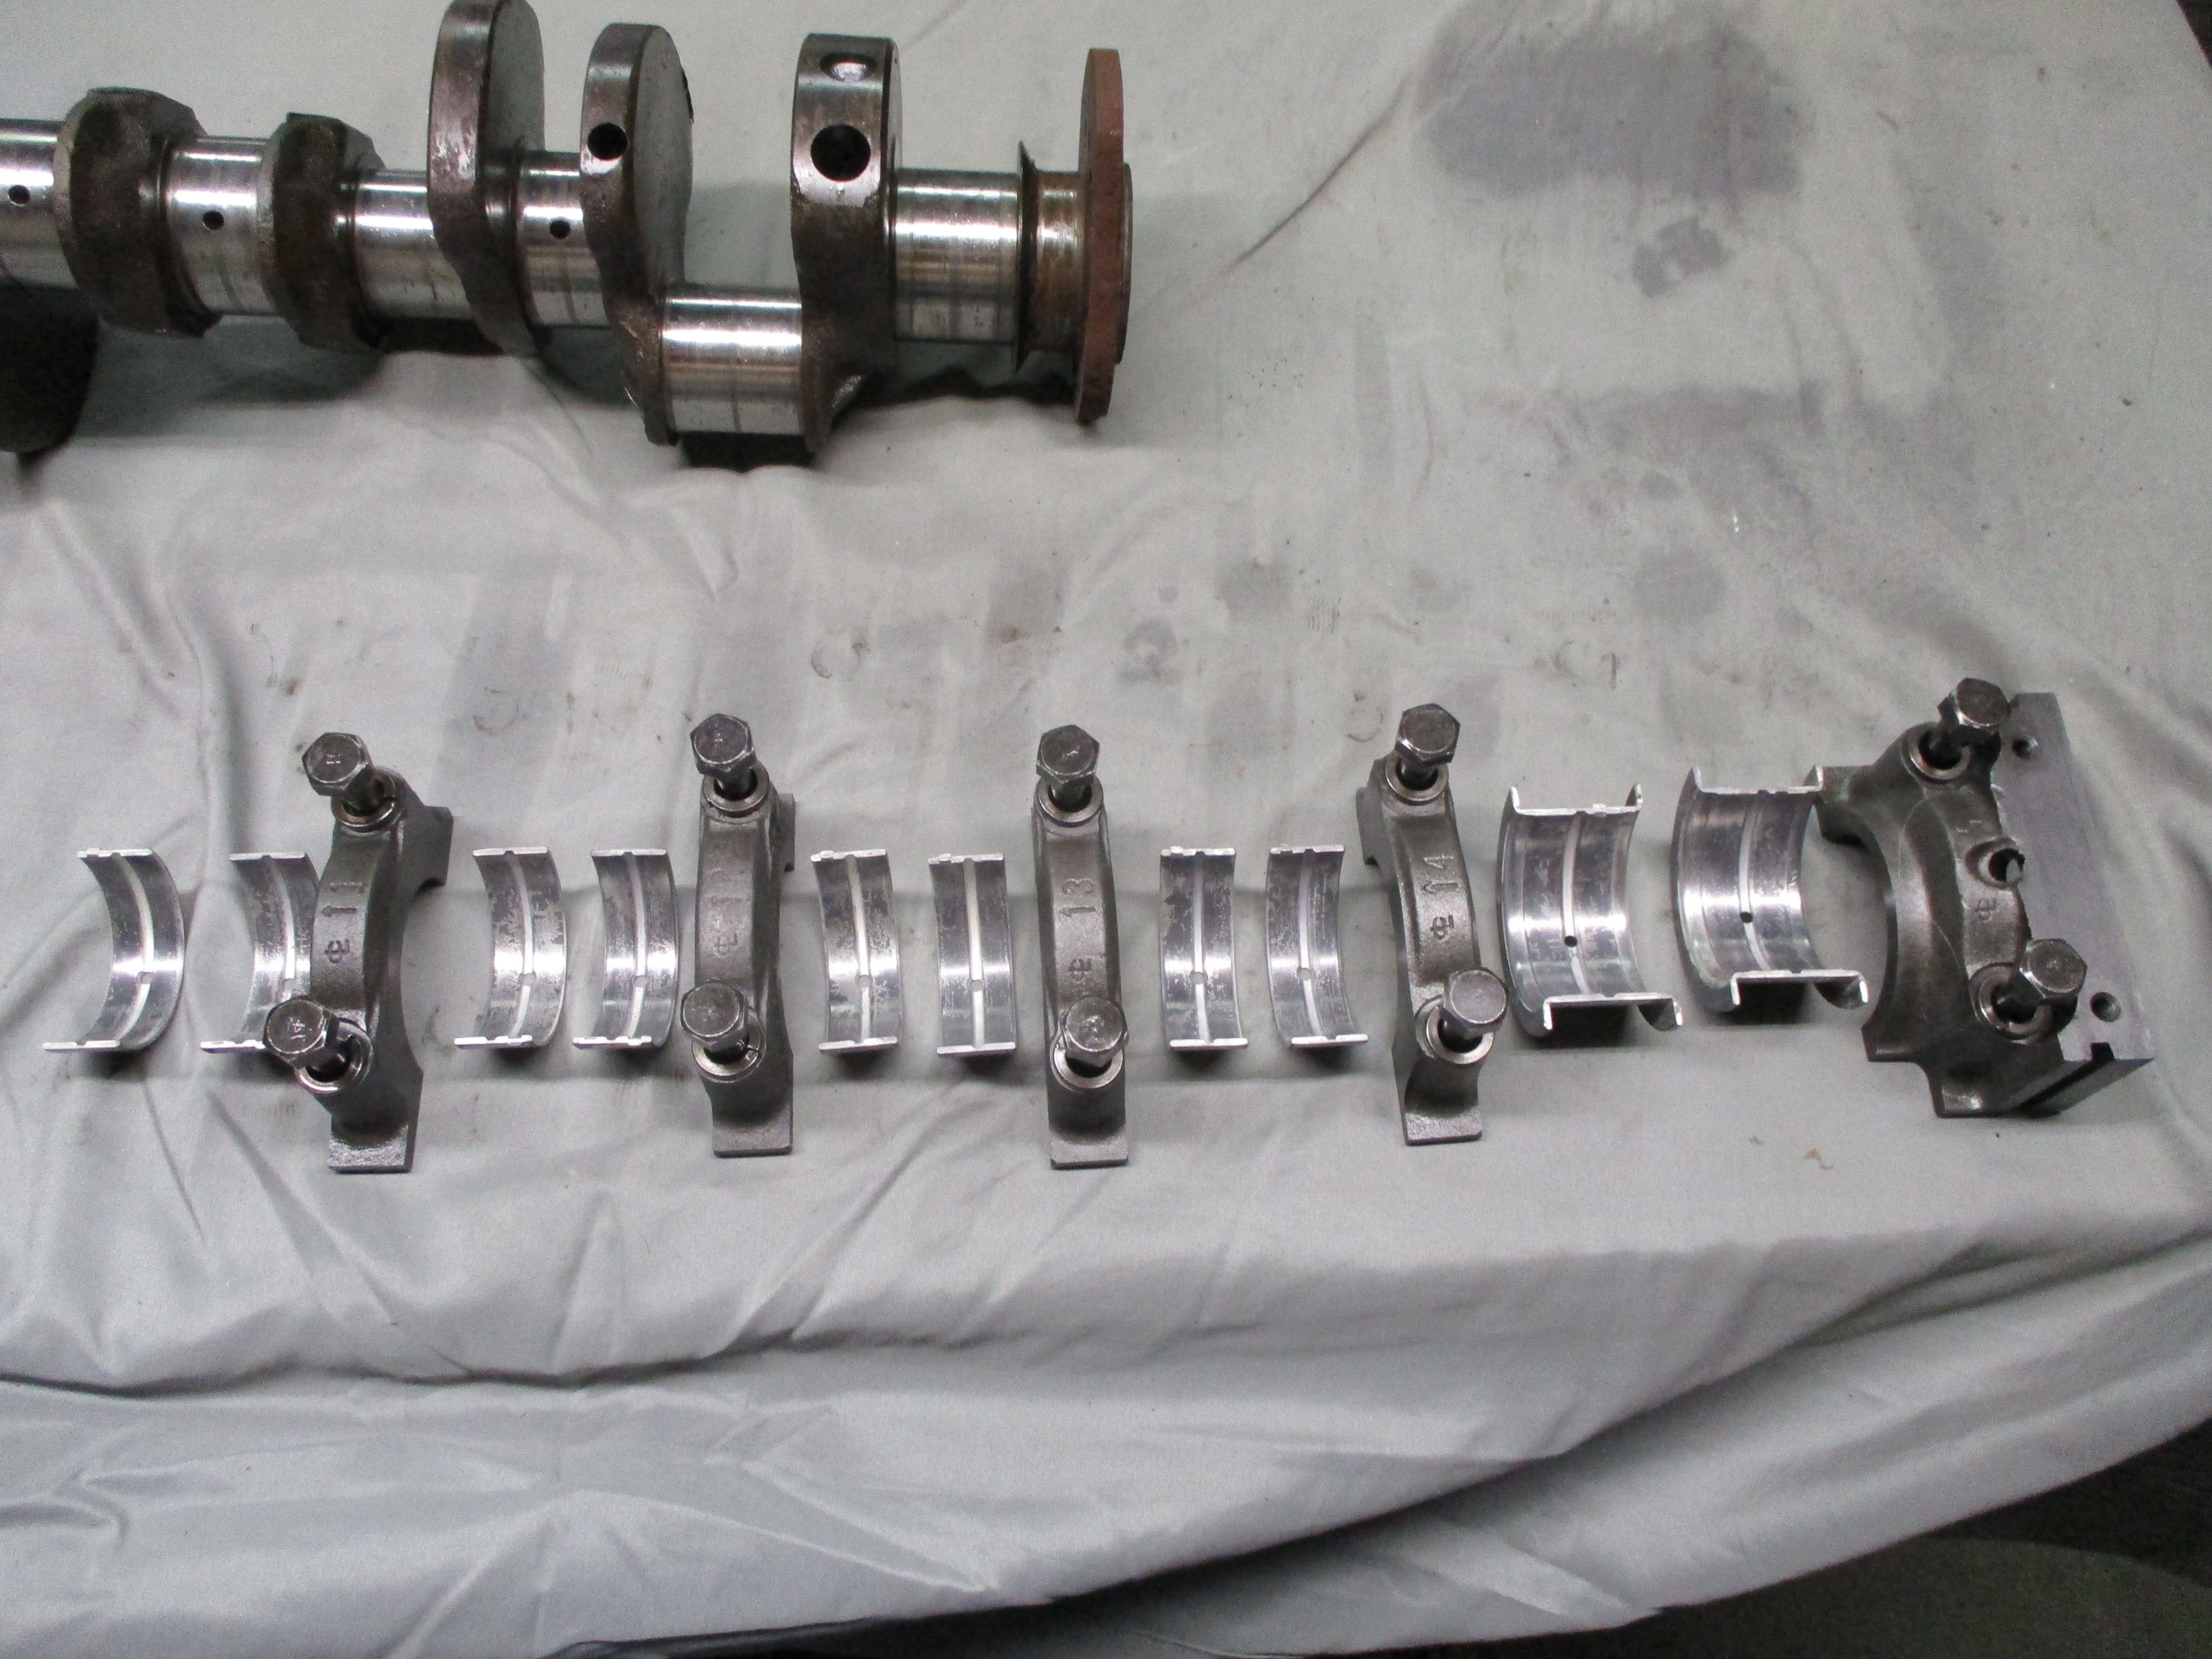 August
9th
2021 Main bearing caps and bolts were submerged in the
Oileater parts washer soup for an hour. That revealed paint
overspray and rear seal remnants still in the rear cap so they were dug
out and wire wheeled with the Dremel tool, then another session in the
parts washer. The bearings themselves got an hour's session in 100%
Oileater, not the Oileater/water mix in the parts washer.
August
9th
2021 Main bearing caps and bolts were submerged in the
Oileater parts washer soup for an hour. That revealed paint
overspray and rear seal remnants still in the rear cap so they were dug
out and wire wheeled with the Dremel tool, then another session in the
parts washer. The bearings themselves got an hour's session in 100%
Oileater, not the Oileater/water mix in the parts washer.
Then, the the caps and bolts got a session in the Ultrasonic cleaner at 80 degrees C for 99 minutes and that was followed by a dip in Evapo-Rust for the caps. No rust on the bolts and they were set aside.
The bearings also got a separate Ultrasonic
cleaner session. They came out of the Ultrasonic the worse for wear,
not looking as good as when they went in. I lightly buffed one of the
thrust bearing halves and took it with me, along with the unbuffed half
to the Sunday morning coffee cruise-in. The consensus among my fellow
Senile and Surly Club members was that the bearings were serviceable,
but new ones would be better if available. I lightly buffed the
remaining bearings and put them aside with the main caps which got a
light coating of Marvel Mystery Oil.
 August
10th
2021 Went over the nailhead crankshaft with Oileater. A
couple of the counterbalances had red and yellow paint marks. Found a
shard on one of the counterbalances from machining that almost drew
blood. Looks like both the machinist and the builder missed it. I took
it off.
August
10th
2021 Went over the nailhead crankshaft with Oileater. A
couple of the counterbalances had red and yellow paint marks. Found a
shard on one of the counterbalances from machining that almost drew
blood. Looks like both the machinist and the builder missed it. I took
it off.
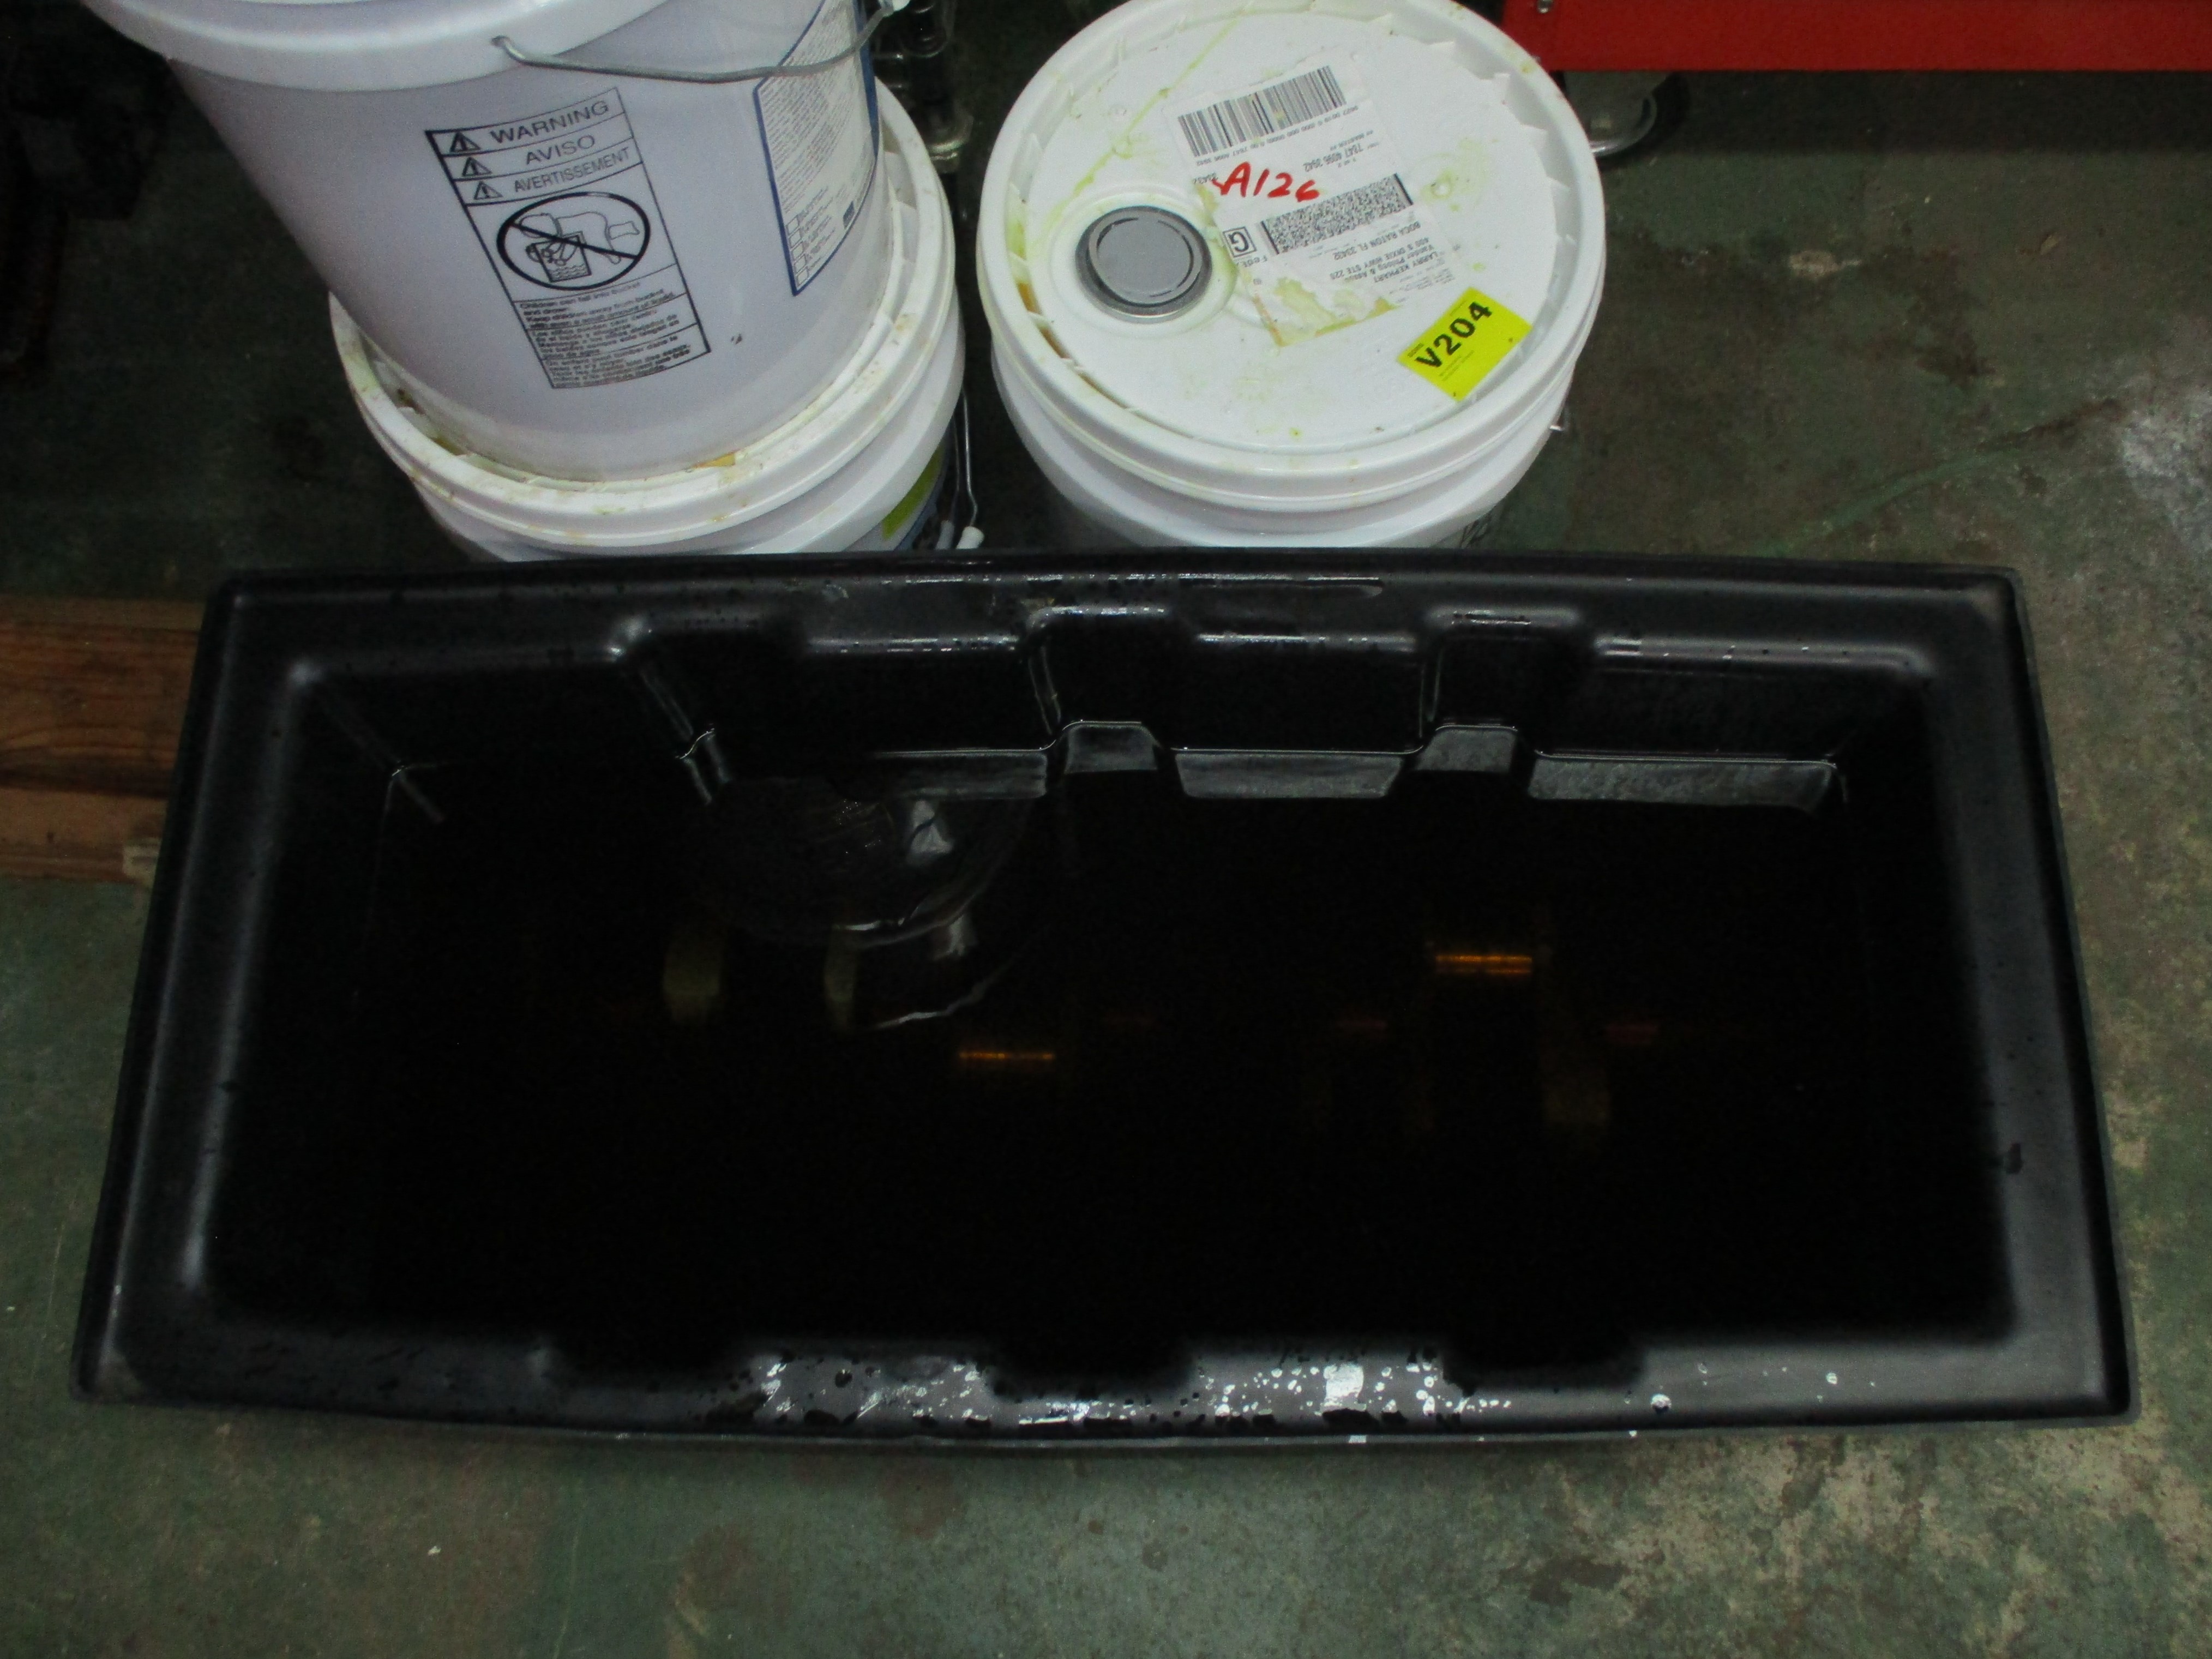
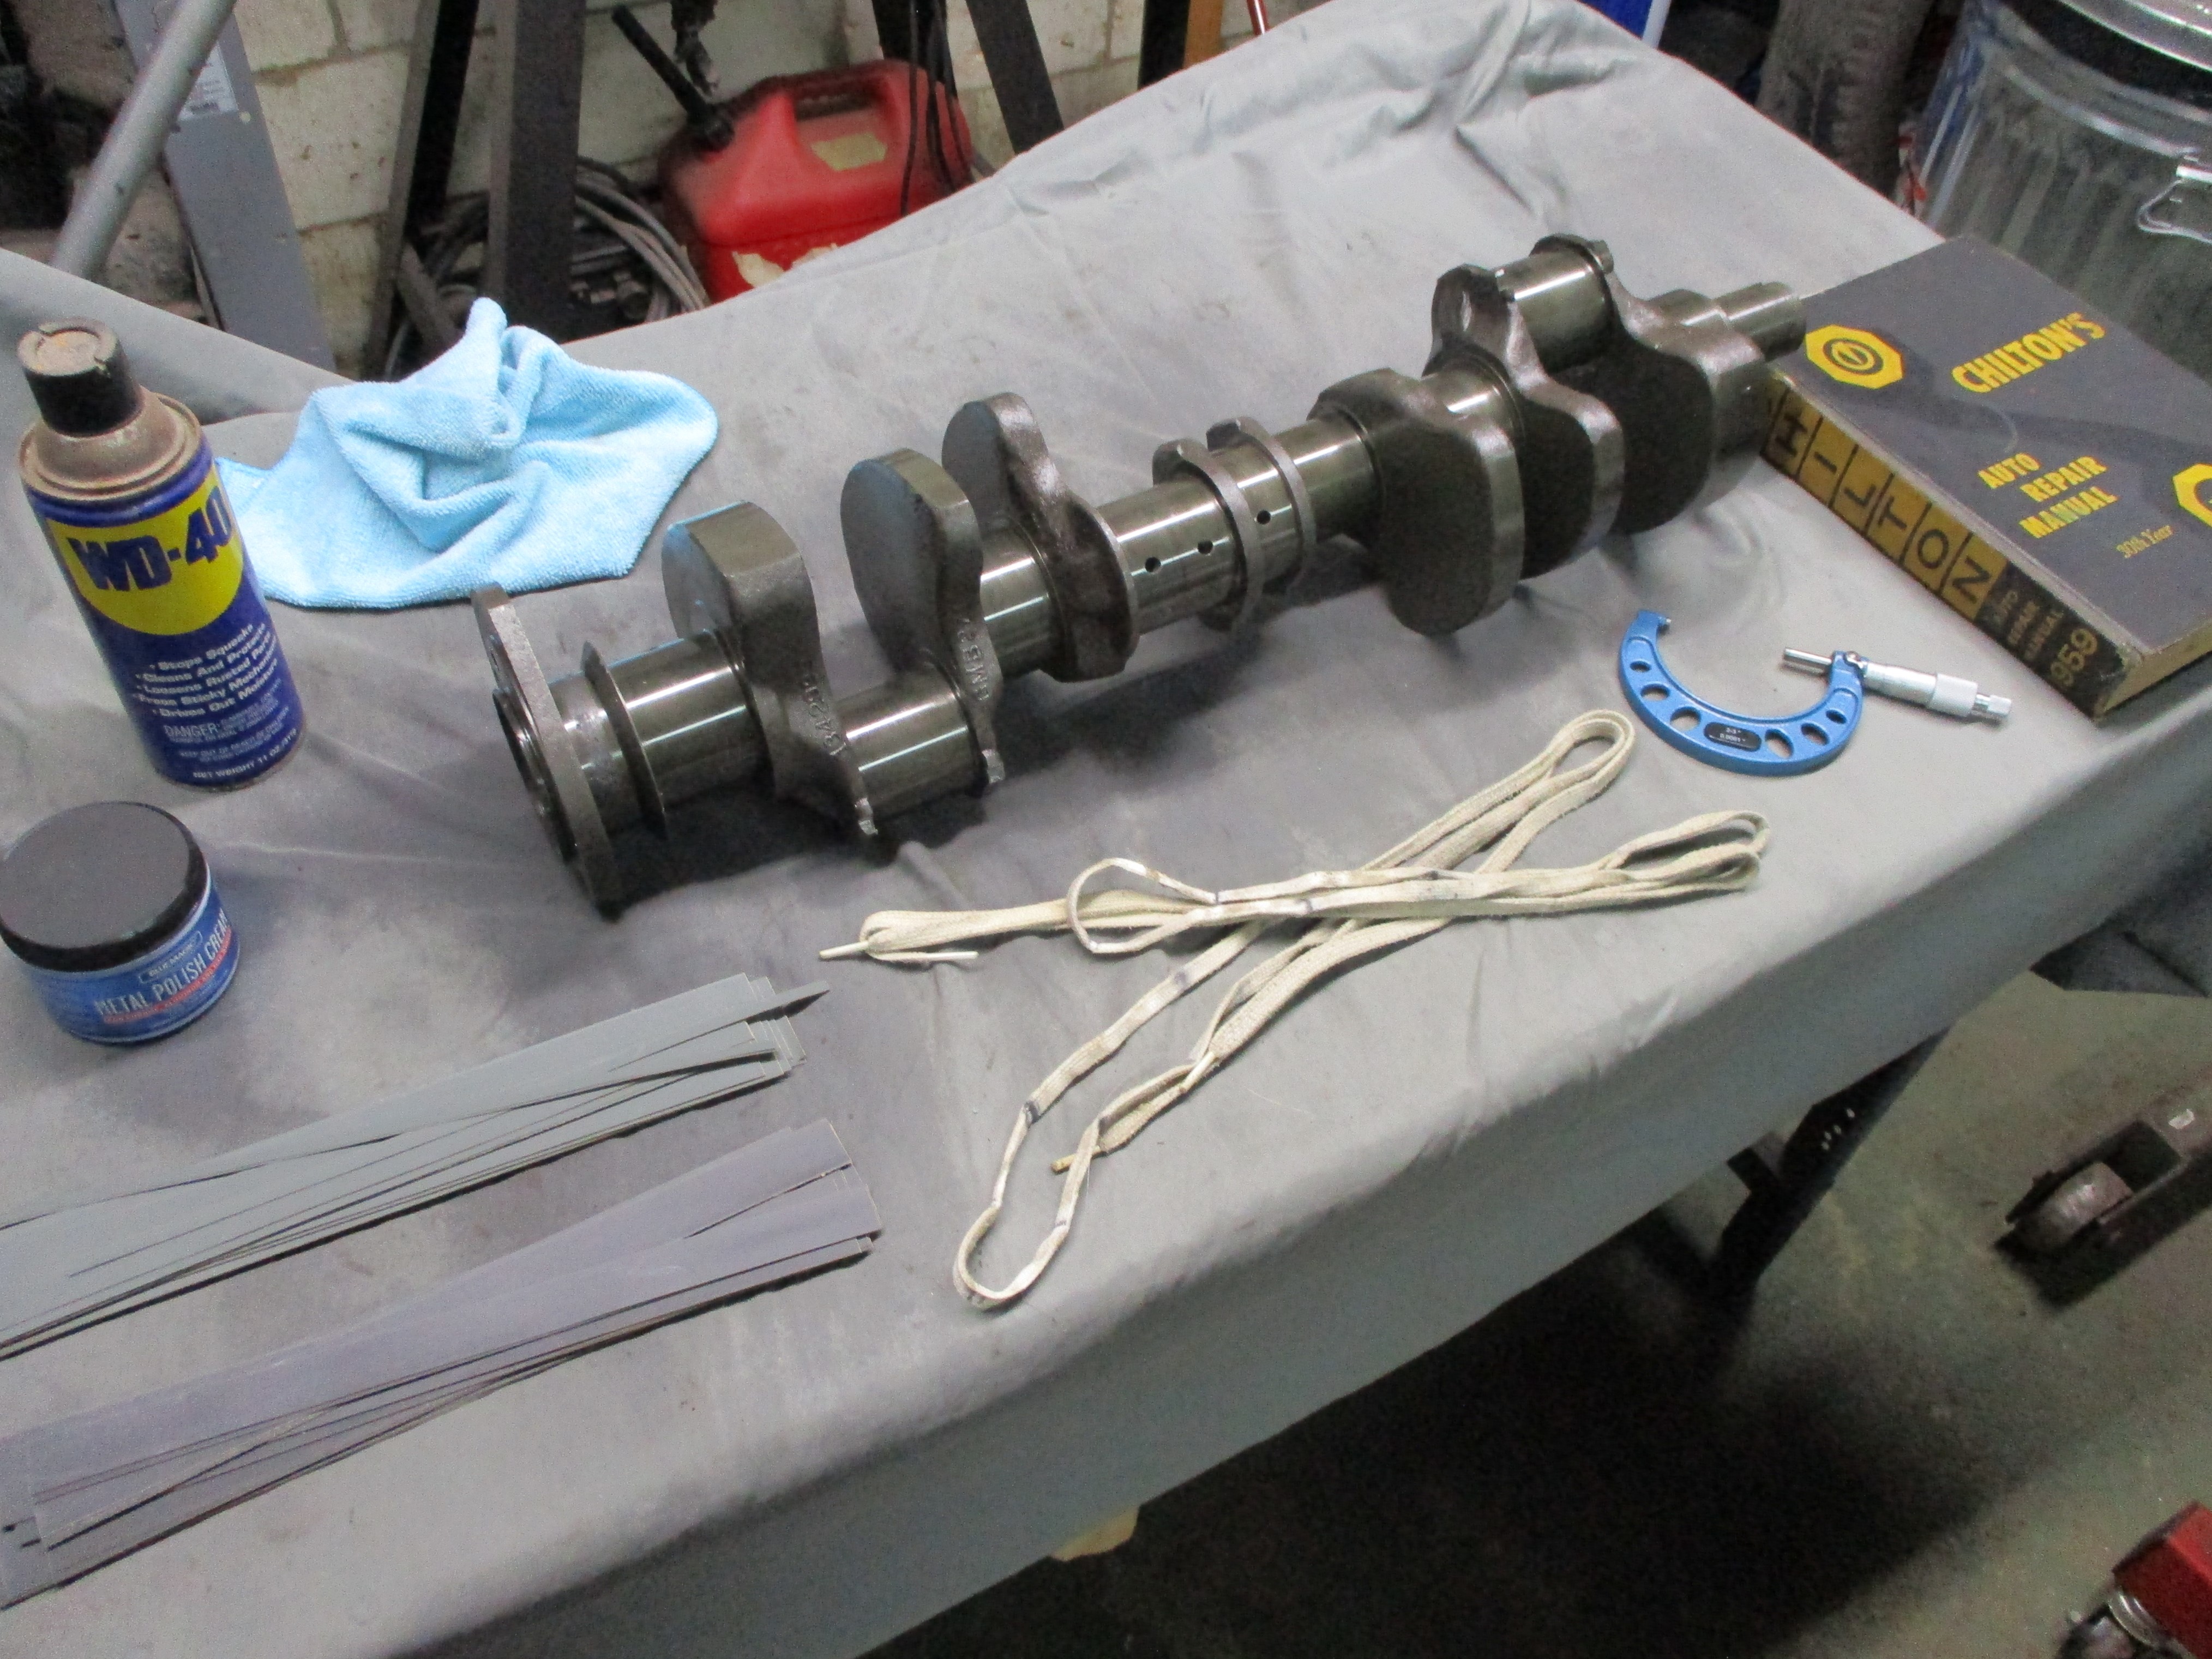
Decided to take the rust off the crankshaft by submerging it
in Evapo-Rust so, I cleaned up my tire leak testing tub that is just
the right
size for this job. Required 12 gallons to submerge the crankshaft.
 August
13th
2021 Pulled the crankshaft from the Evapo-Rust dip after
twenty-four hours, misted it with Marvel Mystery Oil and started
setting up to polish the journals. Cut
sheets of 800 and 1000 grit wet/dry sandpaper into strips as wide as
the
journals and cannibalized my oldest pair of PF Flyers for shoestrings
to provide motive power for the polishing. WD-40 to wet the paper and
Blue Magic polish for the finish.
August
13th
2021 Pulled the crankshaft from the Evapo-Rust dip after
twenty-four hours, misted it with Marvel Mystery Oil and started
setting up to polish the journals. Cut
sheets of 800 and 1000 grit wet/dry sandpaper into strips as wide as
the
journals and cannibalized my oldest pair of PF Flyers for shoestrings
to provide motive power for the polishing. WD-40 to wet the paper and
Blue Magic polish for the finish.
Got Dad's '59 Chilton Manual out to check the specs for main
and rod journals and commenced measuring the crank journals with a 3"
micrometer. I was confused by my initial readings as my precision
measurement Kung Fu is not strong. I will recalibrate the mic and go
again.
 August
16th
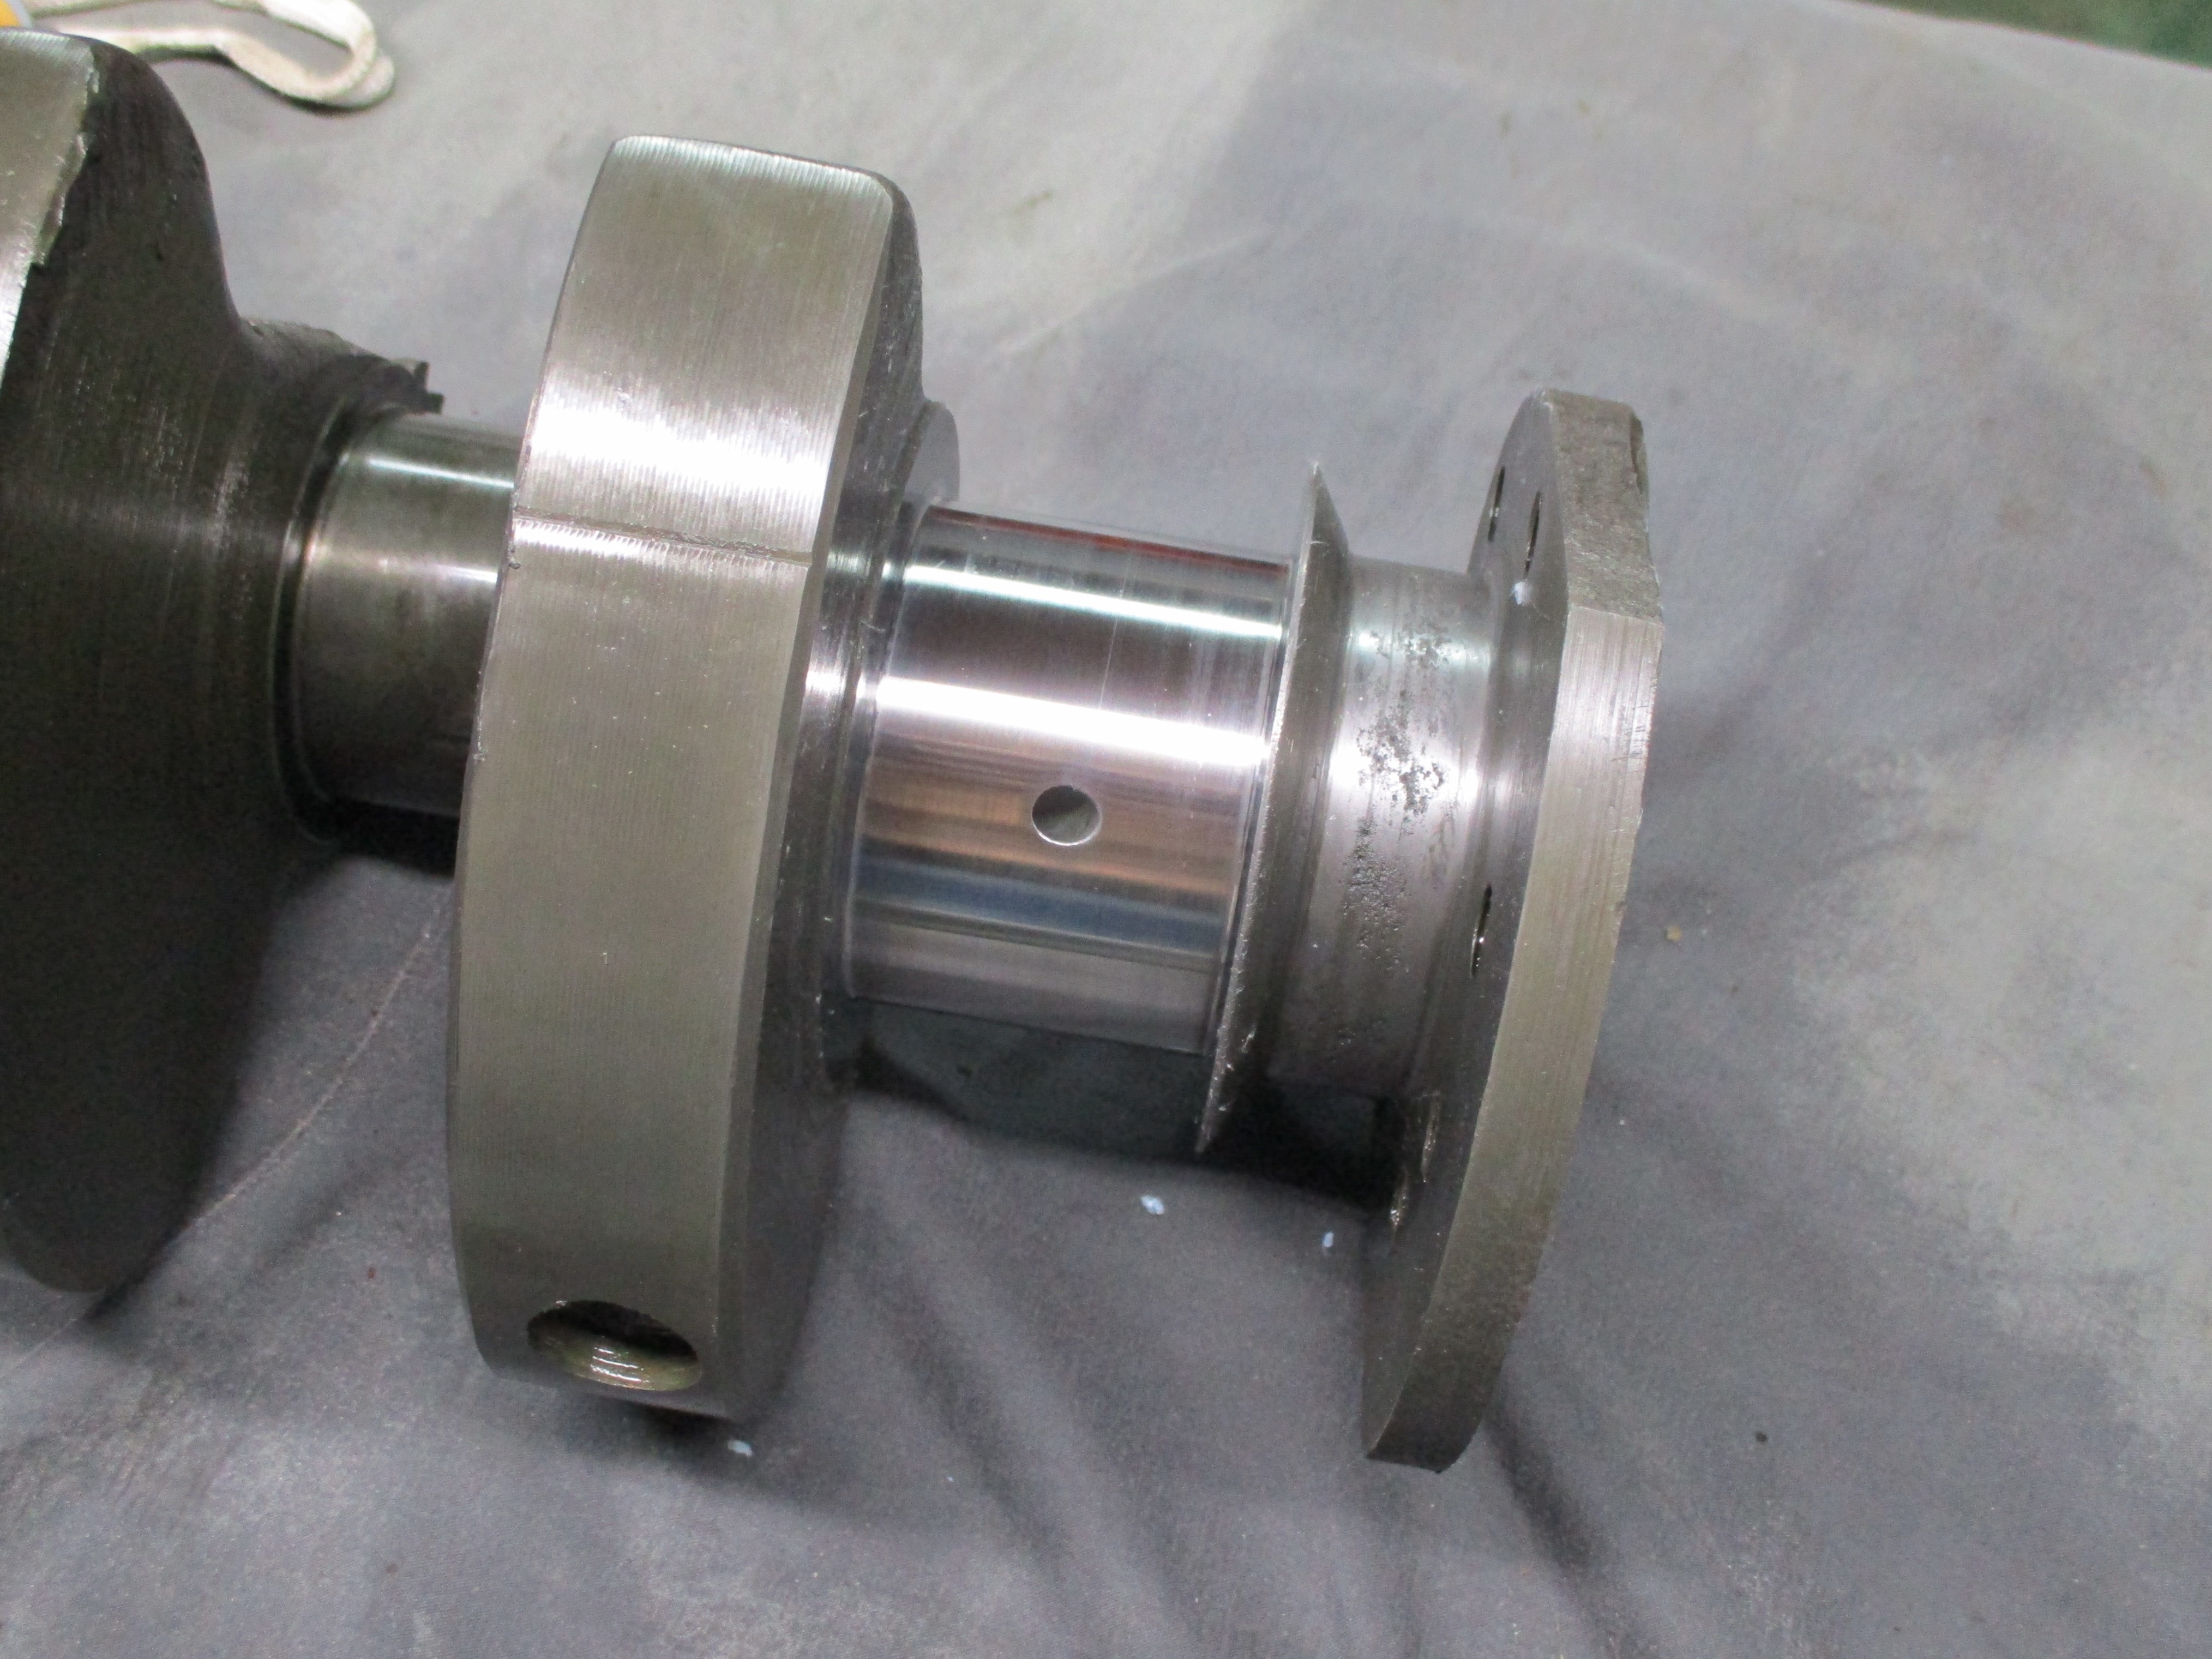
2021 Was a little bit under the weather over the weekend,
probably due to barometric changes of Fred passing by and blowin' the
stink off us. I relapsed into lazy for most of the weekend. I did get
started with the nailhead crankshaft polishing and ran into pitting of
the rear main seal surface. Spent some time pondering the best approach
to fixing that problem.
August
16th
2021 Was a little bit under the weather over the weekend,
probably due to barometric changes of Fred passing by and blowin' the
stink off us. I relapsed into lazy for most of the weekend. I did get
started with the nailhead crankshaft polishing and ran into pitting of
the rear main seal surface. Spent some time pondering the best approach
to fixing that problem.
 August
19th
2021 Polishing the nailhead crank journals is taking some
time. Ops
went a little faster once I established a rhythm. Almost finished with
the first pass of 800 grit paper.
August
19th
2021 Polishing the nailhead crank journals is taking some
time. Ops
went a little faster once I established a rhythm. Almost finished with
the first pass of 800 grit paper.
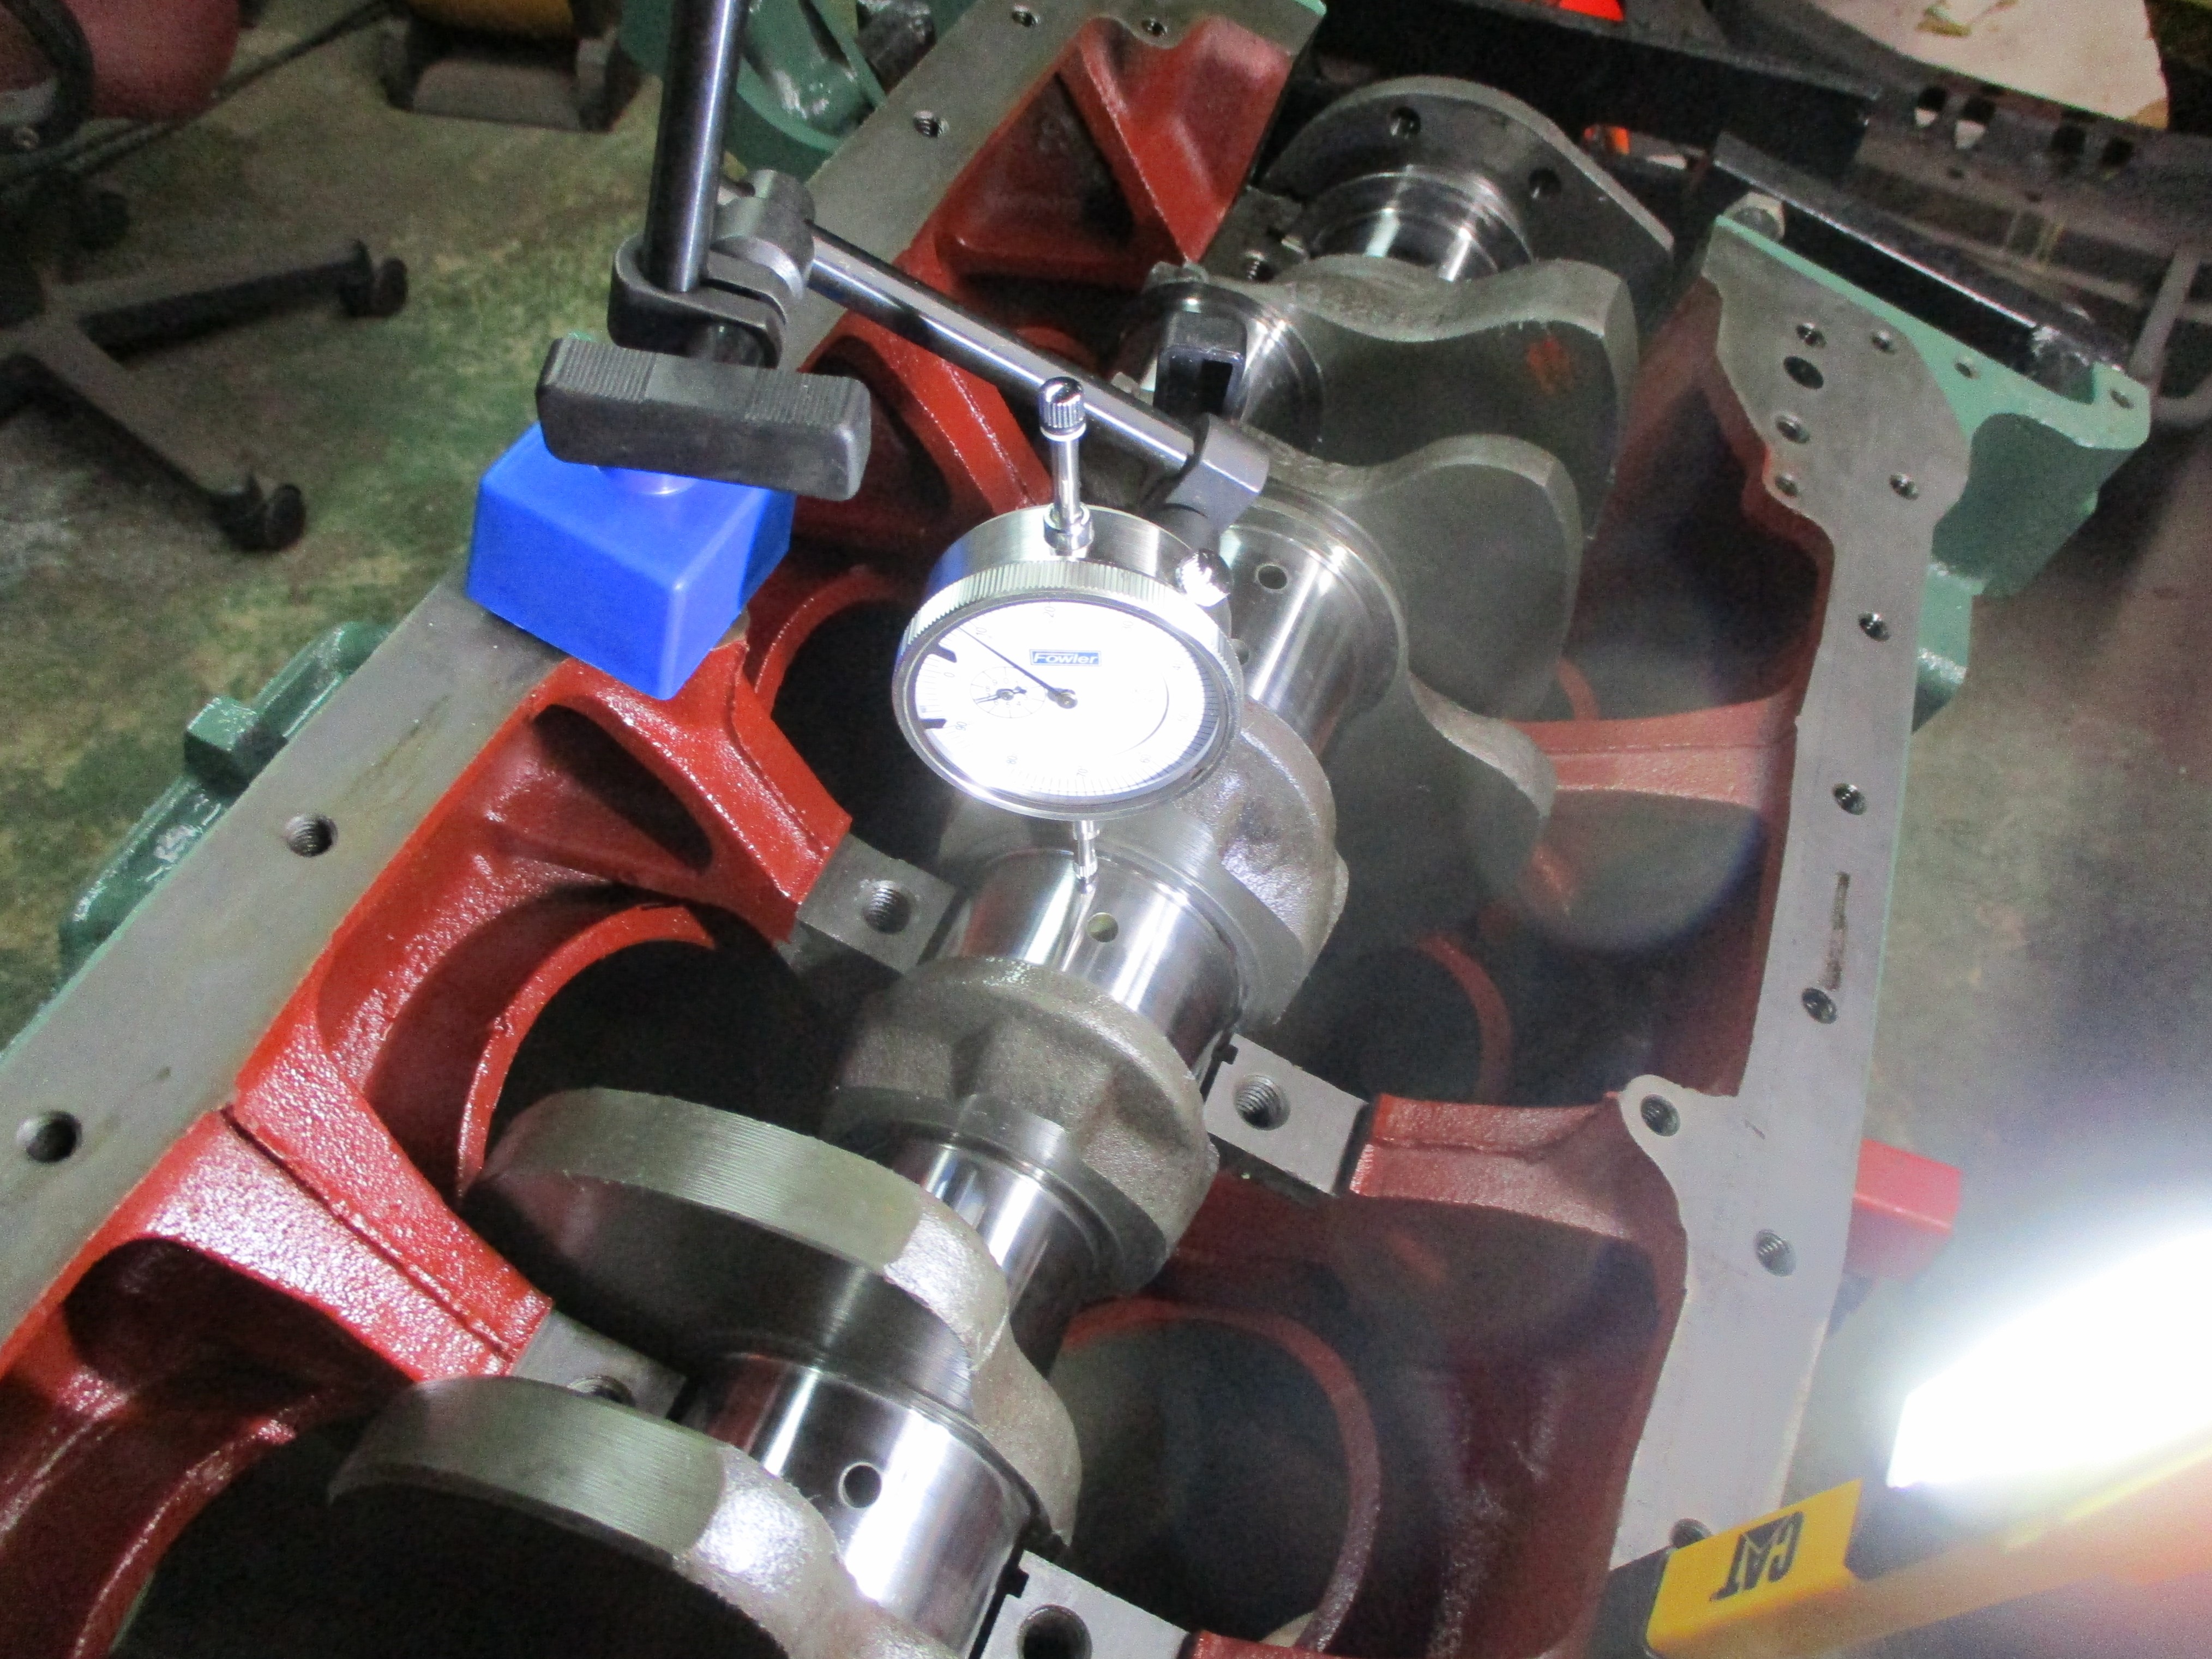
My friend, Dave Kerry, asked about run out and offered that he had the v-blocks and precision dial indicator to check it. Decided to take a timeout from the polishing tedium and do an initial check myself.
Since I don't have v-blocks to support the crankshaft, I oiled main journal one and five bearing halves and installed them in the block, then the crankshaft followed, touching only the two bearing halves. I set up my dial indicator to measure the run out at main journal three. First time I've used the dial indicator and I fumbled around a bit setting it up. It didn't come with instructions.
Measuring the journal, front and back, resulted in readings of .009 and .0085 inches between low and high points. I haven't researched run out yet and my WAG is that some of this could be due to journal out-of-round. My next step, after polishing operations are complete will be to check all main journals for run out and to mic the high and low points to check out-of-round.
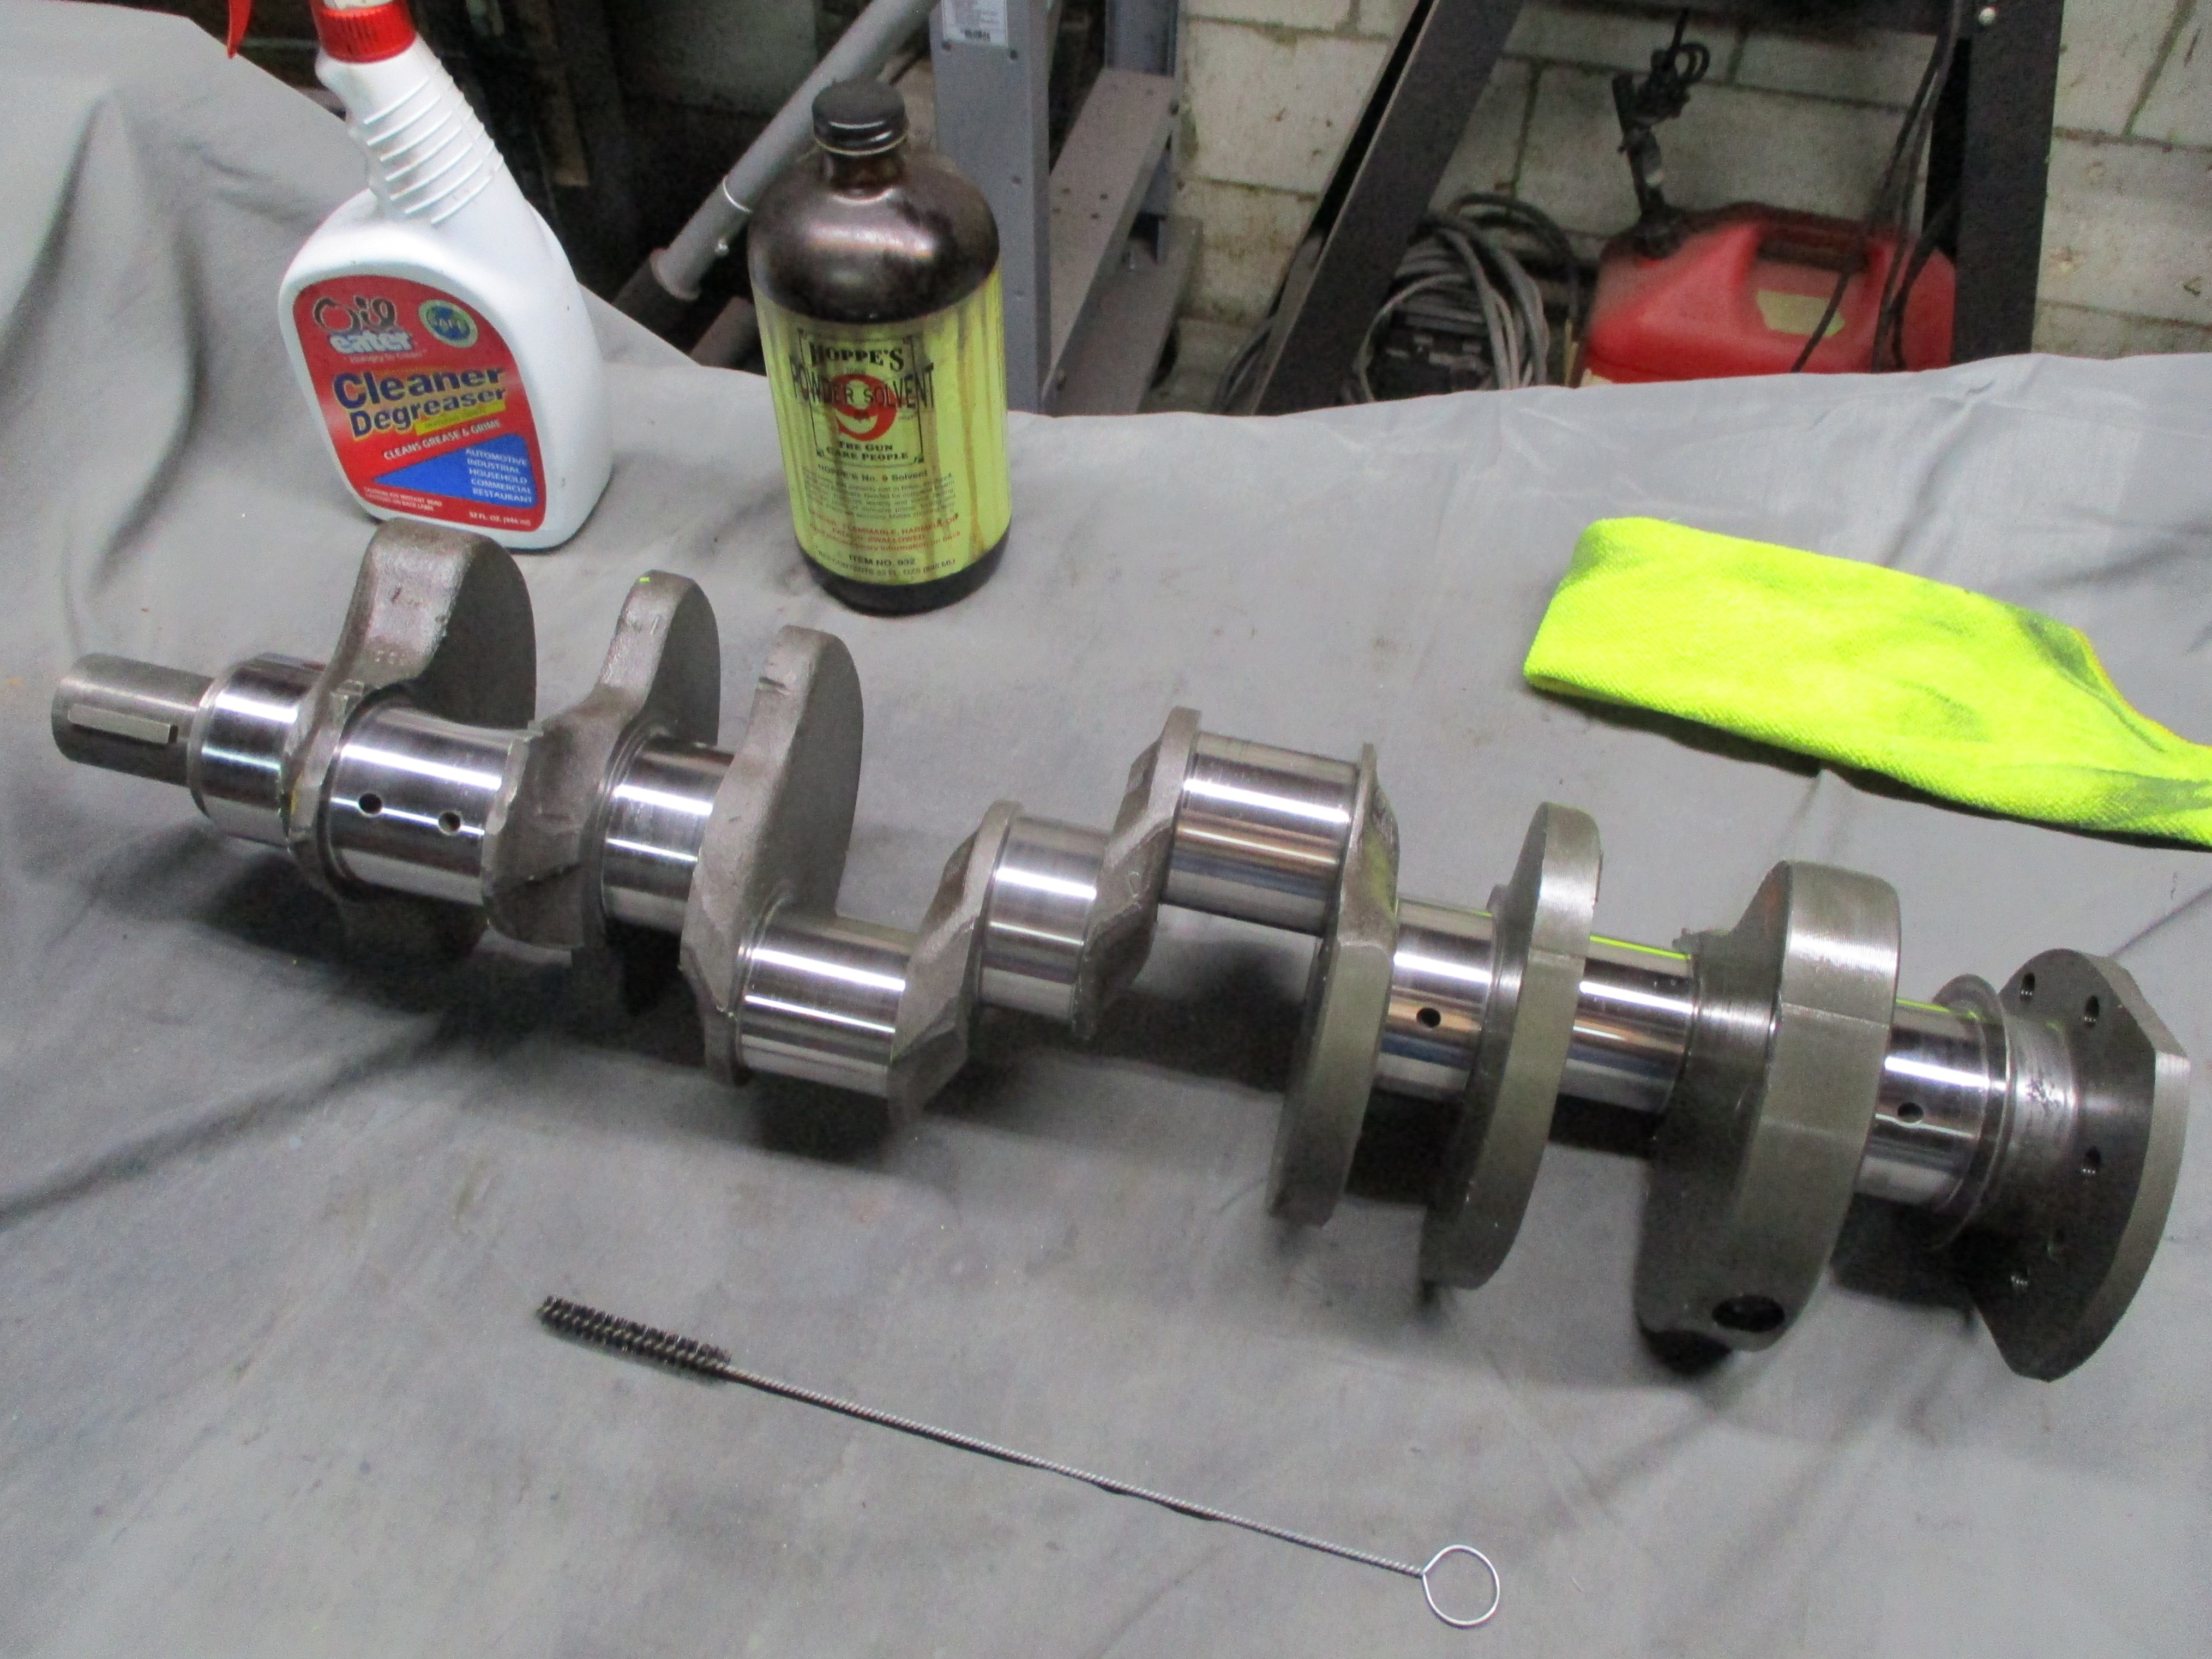 August
26th
2021 Hot August nights sapping my energy in the shop. It's a
broiler, even at midnight. I slacked off for a couple of days but then
got back to it before I lost my momentum. Finished the nailhead crank
journal
polishing with 800
grit, 1000 grit and Blue Magic passes. Cleaned the oil passages with
nylon brushes, Oileater and
Hoppes number 9 passes.
August
26th
2021 Hot August nights sapping my energy in the shop. It's a
broiler, even at midnight. I slacked off for a couple of days but then
got back to it before I lost my momentum. Finished the nailhead crank
journal
polishing with 800
grit, 1000 grit and Blue Magic passes. Cleaned the oil passages with
nylon brushes, Oileater and
Hoppes number 9 passes.
Decided against chamfering for this low RPM shadetree build.
Now it's time to measure, measure, measure.
You can email me at ![]() webmaster@laroke.com
webmaster@laroke.com
Issued Wednesday February 15, 2012
Updated Thursday August 26, 2021
copyright © 2012-2021 Larry Robert Kephart all rights reserved
| | LRK Home | | Bio Info | | Krash Khronicles | | LAROKE | |
| | BettyLou | | BillyBob's Garage | | Rat Patrol | | Deerslayer | | Elvira | |
| | Land of the Free and Home of the Brave | |
| | Keppylou's Art | | WWI Soldier's Diary | |