| | LRK Home | | Bio Info | | Krash Khronicles | | LAROKE | |
| | BettyLou | | BillyBob's Garage | | Rat Patrol | | Deerslayer | | Elvira | |
| | Land of the Free and Home of the Brave | |
| | Keppylou's Art | | WWI Soldier's Diary | |
Tinkering with Deerslayer
![]()
DEERSLAYER LINKS including vendor sites for parts and tools as well as sites for old truck and hot rod organizations
![]()
TINKERING WITH DEERSLAYER chronicles the day-by-day maintenance and improvements episodes for Deerslayer, a '37 Chevy farm truck hot rod.
CRUISIN' WITH DEERSLAYER Roadtrips, cruise-in's and truck show stories and tall tales.
TONY'S DUNGEON Tony Pascarella's forum entries at OldGMCtrucks.com and H.A.M.B. regarding Deerslayer, particularly the 302 GMC engine build in his farmhouse basement.
![]()
DEERSLAYER MAINTENANCE Ever changing detailing, oil change, lube, etc. maintenance routines specifically developed for Deerslayer, including required tools, materials and procedures.
PROJECT NAILHEAD Chronicles the rebuild of a 1954 Buick Roadmaster 322 nailhead engine as a future replacement for Deerslayer's Jimmy 302.
2. Cool runnings, Mon
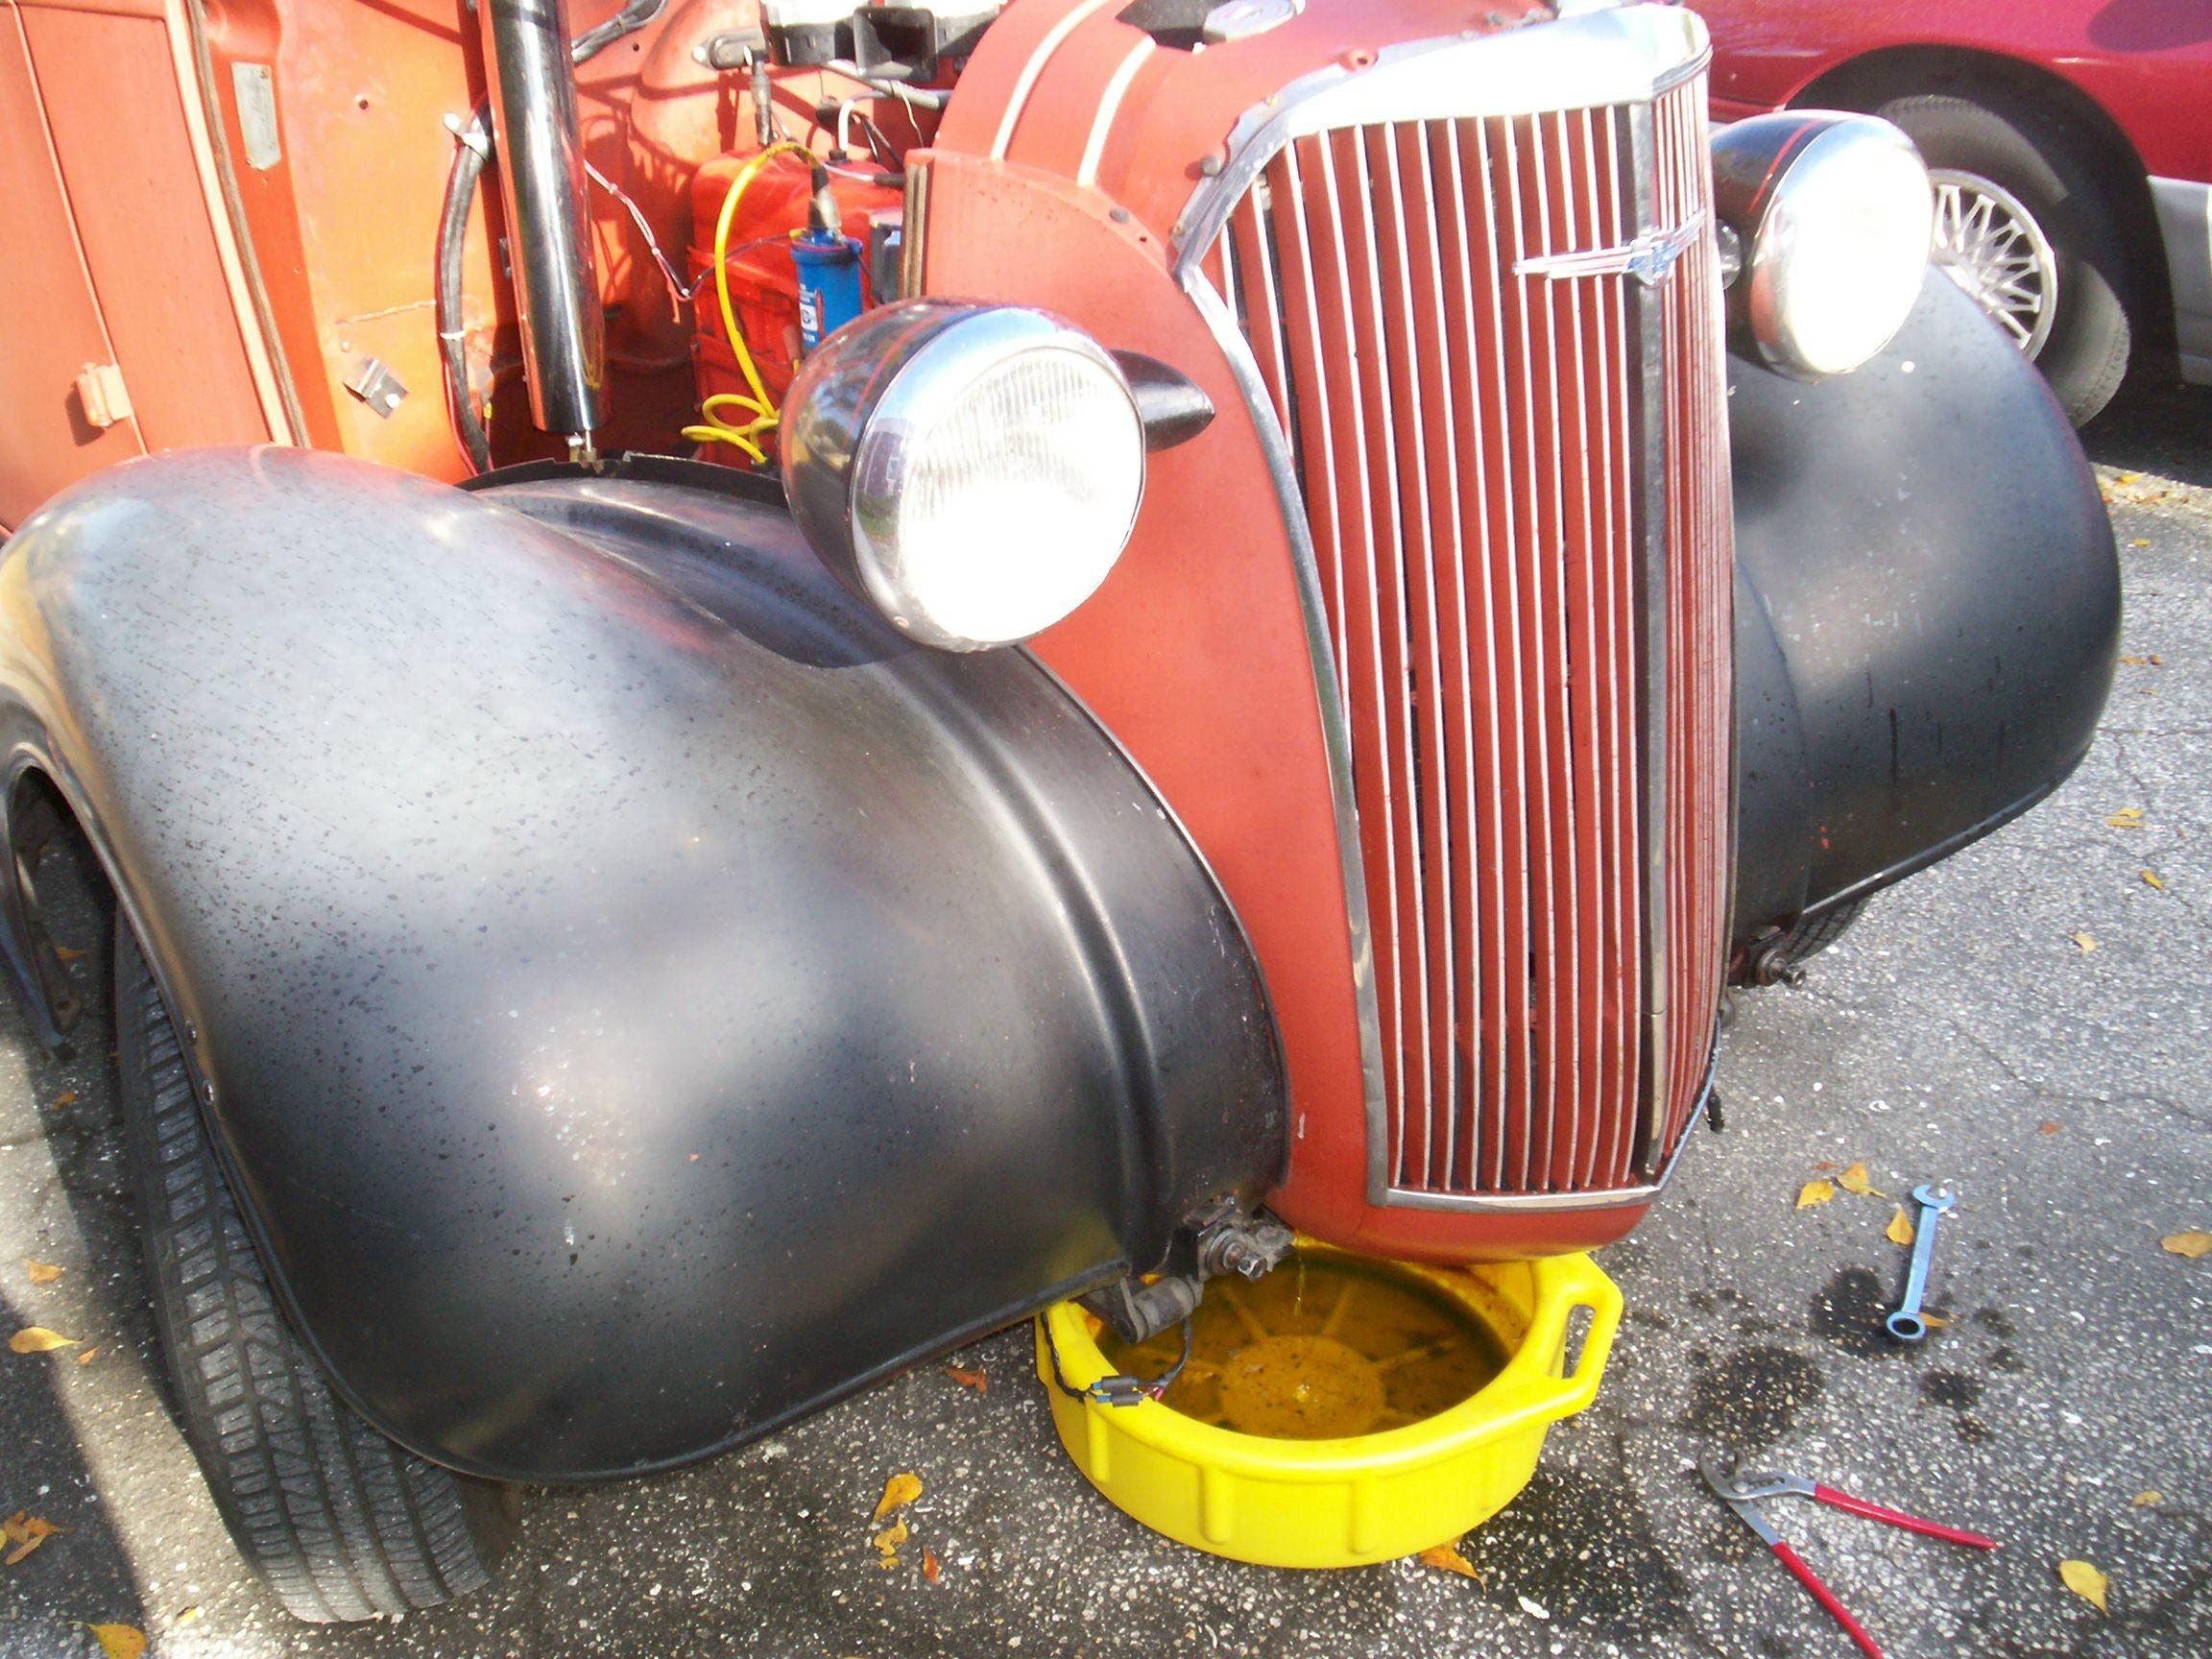
March 14th 2009 It's a good weather day and I think I'm gonna need all of it. Today is D-day for the new radiator installation. At the end of the last Deerslayer log entry, it was mentioned that this task was coming up and not long after that was published, Tony Pascarella, Deerslayer's builder, e-mailed me the following:
Larry,when I put the GMC engine in there I moved the radiator foward avout 2 inches from stock.The radiator is pushed foward as far as possible against the nose piece cross support.I trimmed the slides of the sheetment side supports on the radiator to do this. So measure carefully. I removed the whole nose to access the radiator.It's not too bad of a job. Open the hood and remove the hood rear pivot hold down,one screw each side.Gently slide back the hood and set aside,2 people job.Remove the wires fron the terminal block right side front noting locations. Remove two bolts on the front of the wish bone brace.Working under the front fenders remove the bolt holding on the fenders to the nose piece.All hoses disconnected,cooling drained,two people can lift the complete nose and set it, grill down, on padding. Have fun,T
This email changed my plans. Up until I got it, I was under the impression that I could remove the nose separate from the radiator and core support. If that is not possible, the assembly is too heavy for me to lift alone, as Tony states. There is rarely anyone else at the Krash lab when I need help with the vehicles so I had to think of something else. A few years back, I found a door jack on eBay in the neighborhood of a C-note. Times were better then and I snapped it up even tho' I wasn't yet ready to take the doors off BillyBob. The retail prices I'd seen for the door lifts were around $400. The jack was still up in the warehouse bay in it's shipping box. I brought it down last weekend and assembled it. I think it will work splendidly.
 When
I got here this morning, I opened the rear gate and manouvered
Deerslayer into the back lot and around BettyLou. First order of
business was to remove the front bumper to accomodate the door lift.
The Tony-fabbed turn signal brackets were unbolted and the turn signal
lights were swung up out of the way. The two bumper bracket to frame
bolts were removed and the whole bumper assembly came off. I stored it
in the bed. The hood was removed next as Tony describes 'cept I didit
by myself. Awkward but doable. Drained the radiator, then filled it
back up with water, ran the engine a few minutes, and drained it again
for a quik-n-durty flush.
When
I got here this morning, I opened the rear gate and manouvered
Deerslayer into the back lot and around BettyLou. First order of
business was to remove the front bumper to accomodate the door lift.
The Tony-fabbed turn signal brackets were unbolted and the turn signal
lights were swung up out of the way. The two bumper bracket to frame
bolts were removed and the whole bumper assembly came off. I stored it
in the bed. The hood was removed next as Tony describes 'cept I didit
by myself. Awkward but doable. Drained the radiator, then filled it
back up with water, ran the engine a few minutes, and drained it again
for a quik-n-durty flush.
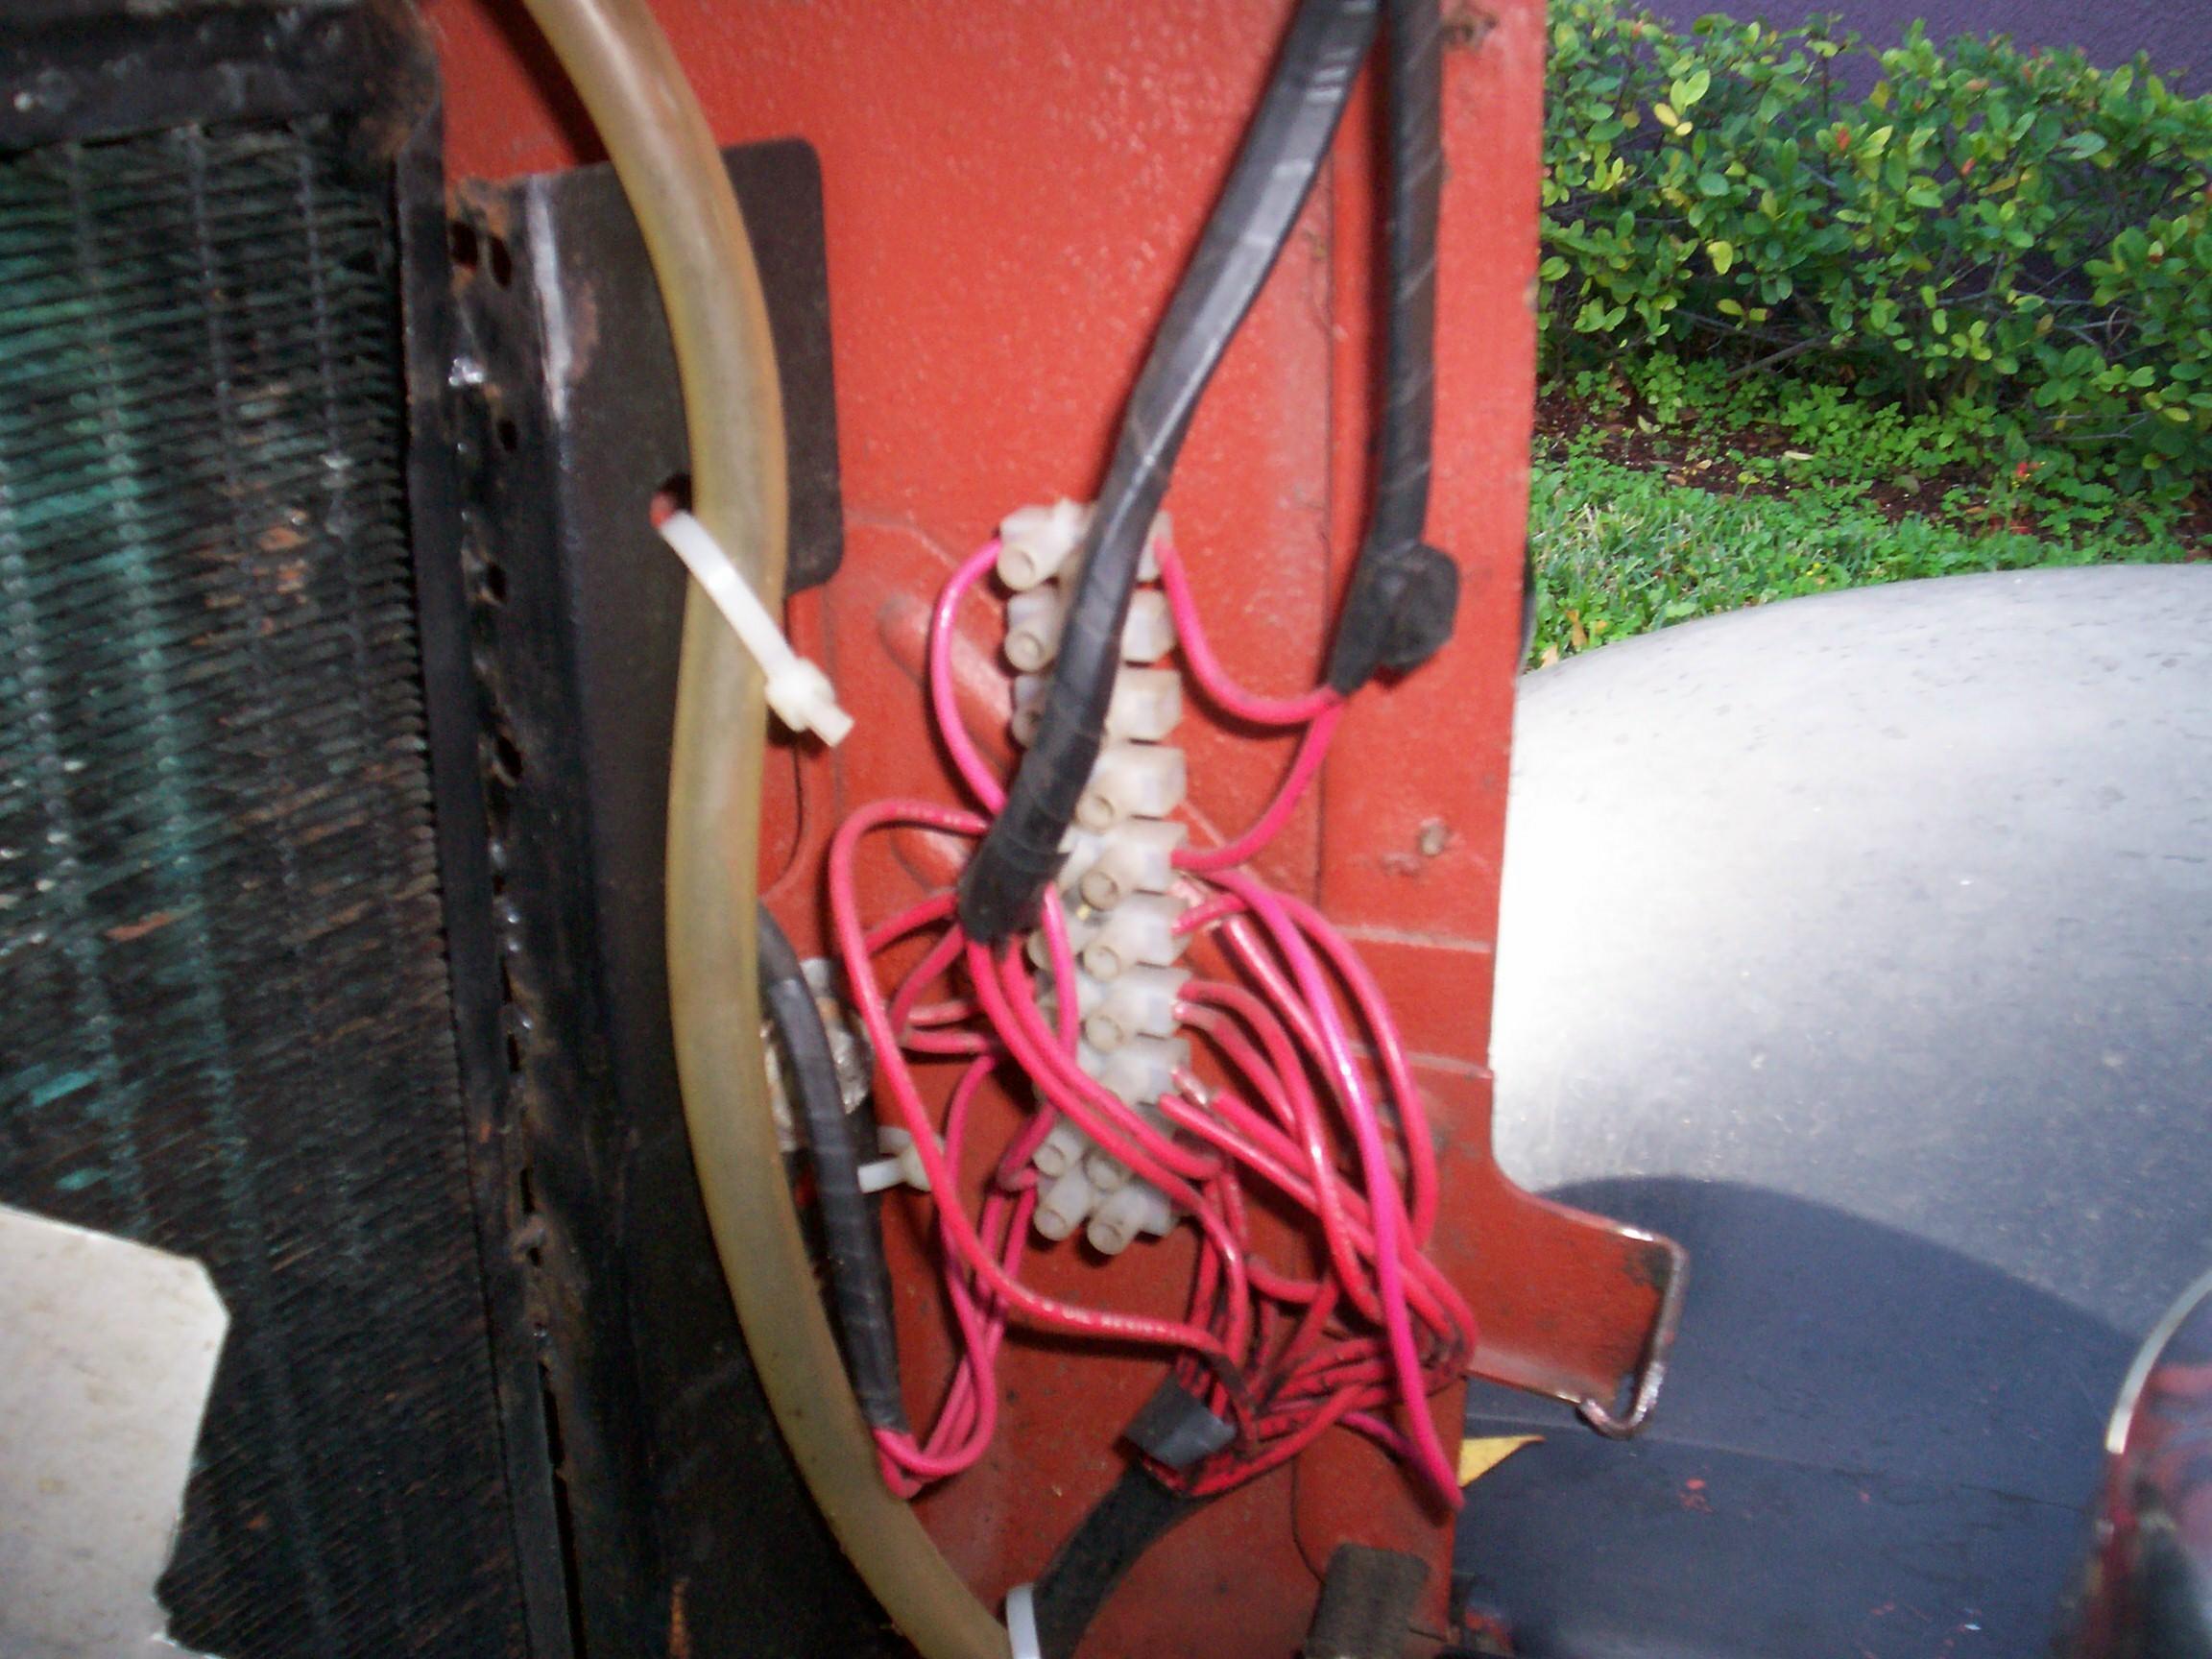 Removed
the terminal block wires next. Used masking tape for wire labels but I
flubbed it. I should have made the labels in a manner that no sticky
side of a piece of tape was left exposed. Neglecting to do this
guaranteed I would bave a balled up rat's nest to contend with when I
rewired the terminal block . . . and I did. The wishbone brace bolts
were removed and the front fender bolts and fender supports were
removed from the nose piece. While I wuz under there, I saw that Tony
had made his tube shock brackets out of spring shackle sides. I had
never looked at them closely before. Neat trick.
Removed
the terminal block wires next. Used masking tape for wire labels but I
flubbed it. I should have made the labels in a manner that no sticky
side of a piece of tape was left exposed. Neglecting to do this
guaranteed I would bave a balled up rat's nest to contend with when I
rewired the terminal block . . . and I did. The wishbone brace bolts
were removed and the front fender bolts and fender supports were
removed from the nose piece. While I wuz under there, I saw that Tony
had made his tube shock brackets out of spring shackle sides. I had
never looked at them closely before. Neat trick.
 Disconnected
the hoses and finally removed the core support bolt and spring
assemblies from the front frame crossmember. Put the door lift into
position with a board across it's forks to support the bottom of the
nose. Secured the top of the lift to the hood spear with a couple of
bungie cords. Pulled the fenders away from the nose and hooked them
over the frame ends to clear the support studs projecting from each
side. Lifted the nose a couple of inches with the lift and walked it
away from the truck. It was all nice-n-easy so far.
Disconnected
the hoses and finally removed the core support bolt and spring
assemblies from the front frame crossmember. Put the door lift into
position with a board across it's forks to support the bottom of the
nose. Secured the top of the lift to the hood spear with a couple of
bungie cords. Pulled the fenders away from the nose and hooked them
over the frame ends to clear the support studs projecting from each
side. Lifted the nose a couple of inches with the lift and walked it
away from the truck. It was all nice-n-easy so far.
 The
front of the 302 and pan bottom are getting a little grubby so I took
time out to hit the engine with a grime blaster and degreaser session.
It's not spic-n-span, just mo better than it was. Then went inside to
work on the nose while the shadetree area dried out again.
The
front of the 302 and pan bottom are getting a little grubby so I took
time out to hit the engine with a grime blaster and degreaser session.
It's not spic-n-span, just mo better than it was. Then went inside to
work on the nose while the shadetree area dried out again.
 The
whole nose assembly was rolled into the Krash lab. Got out the straight
edge and measuring tape. I took measurements from the back edge of the
nose sheetmetal (where the hood sides meet it) to the face of the
radiator core at four locations roughly adjacent to the four lower
captured nuts of the core support. This came to 5" and 5" at the top
and 5-3/8" and 5-5/8" at the bottom. The existing radiator was only
about 3/4" in front of the fan and I have to maintain that distance.
The
whole nose assembly was rolled into the Krash lab. Got out the straight
edge and measuring tape. I took measurements from the back edge of the
nose sheetmetal (where the hood sides meet it) to the face of the
radiator core at four locations roughly adjacent to the four lower
captured nuts of the core support. This came to 5" and 5" at the top
and 5-3/8" and 5-5/8" at the bottom. The existing radiator was only
about 3/4" in front of the fan and I have to maintain that distance.
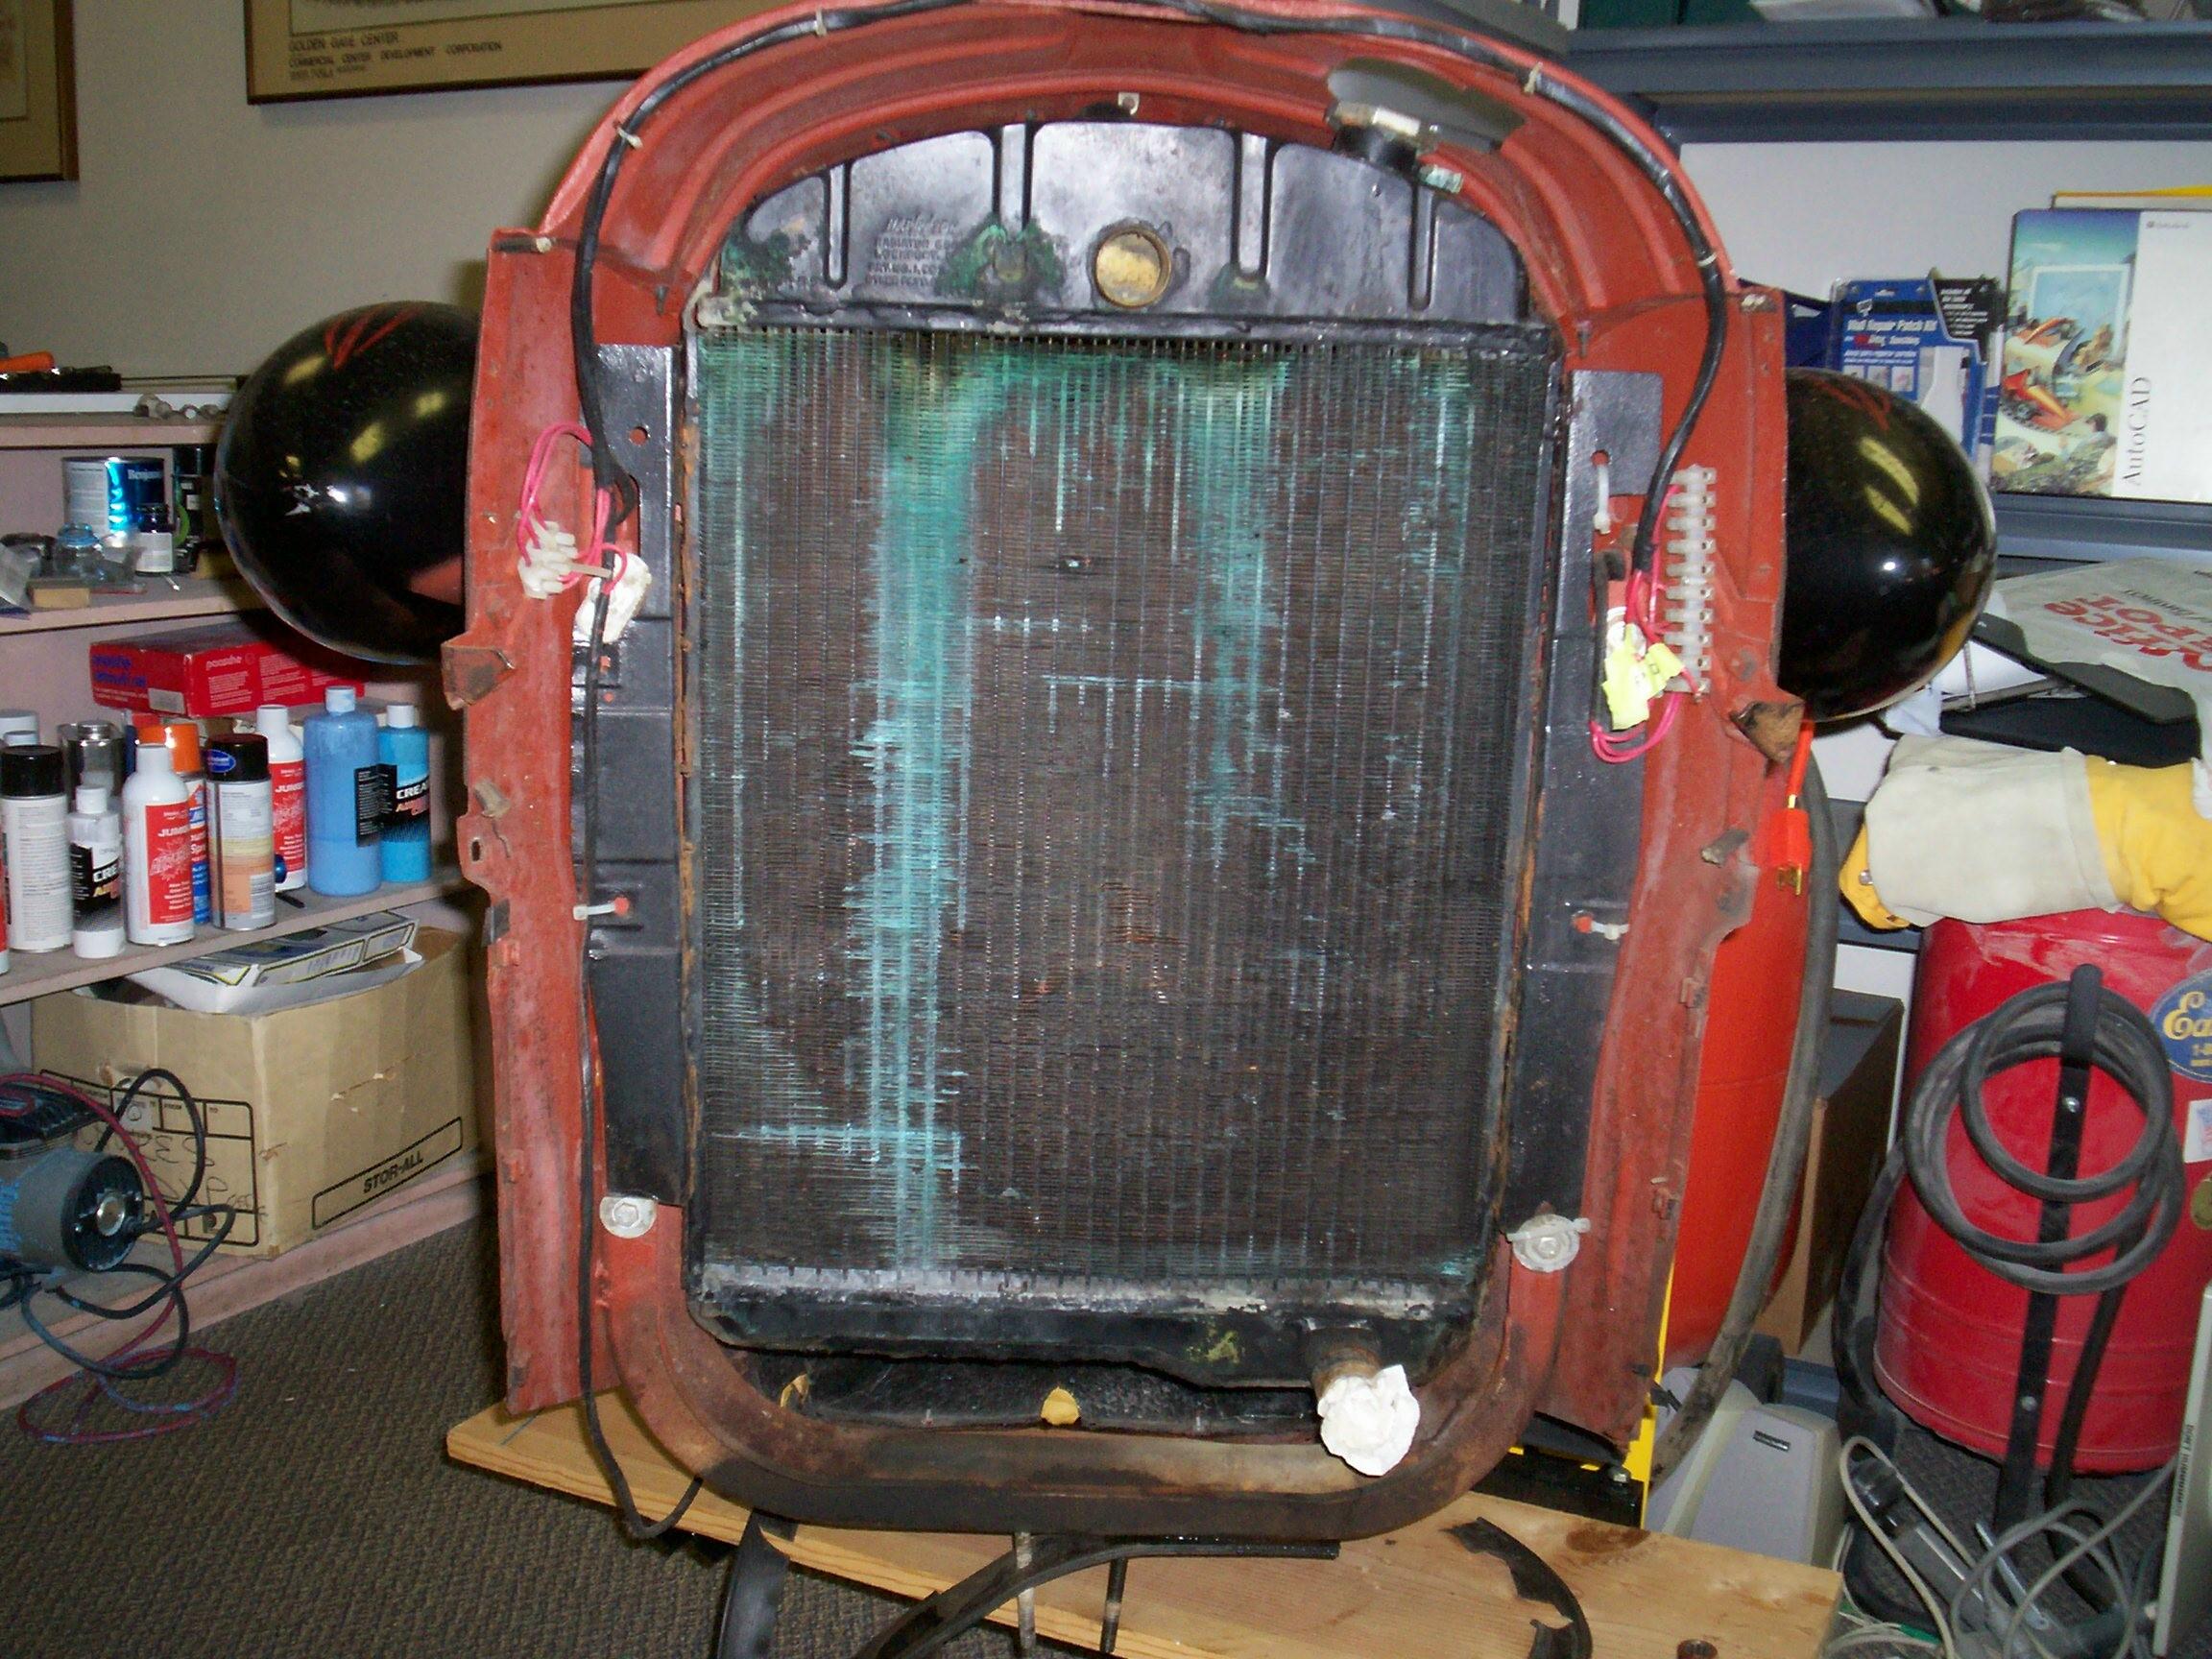
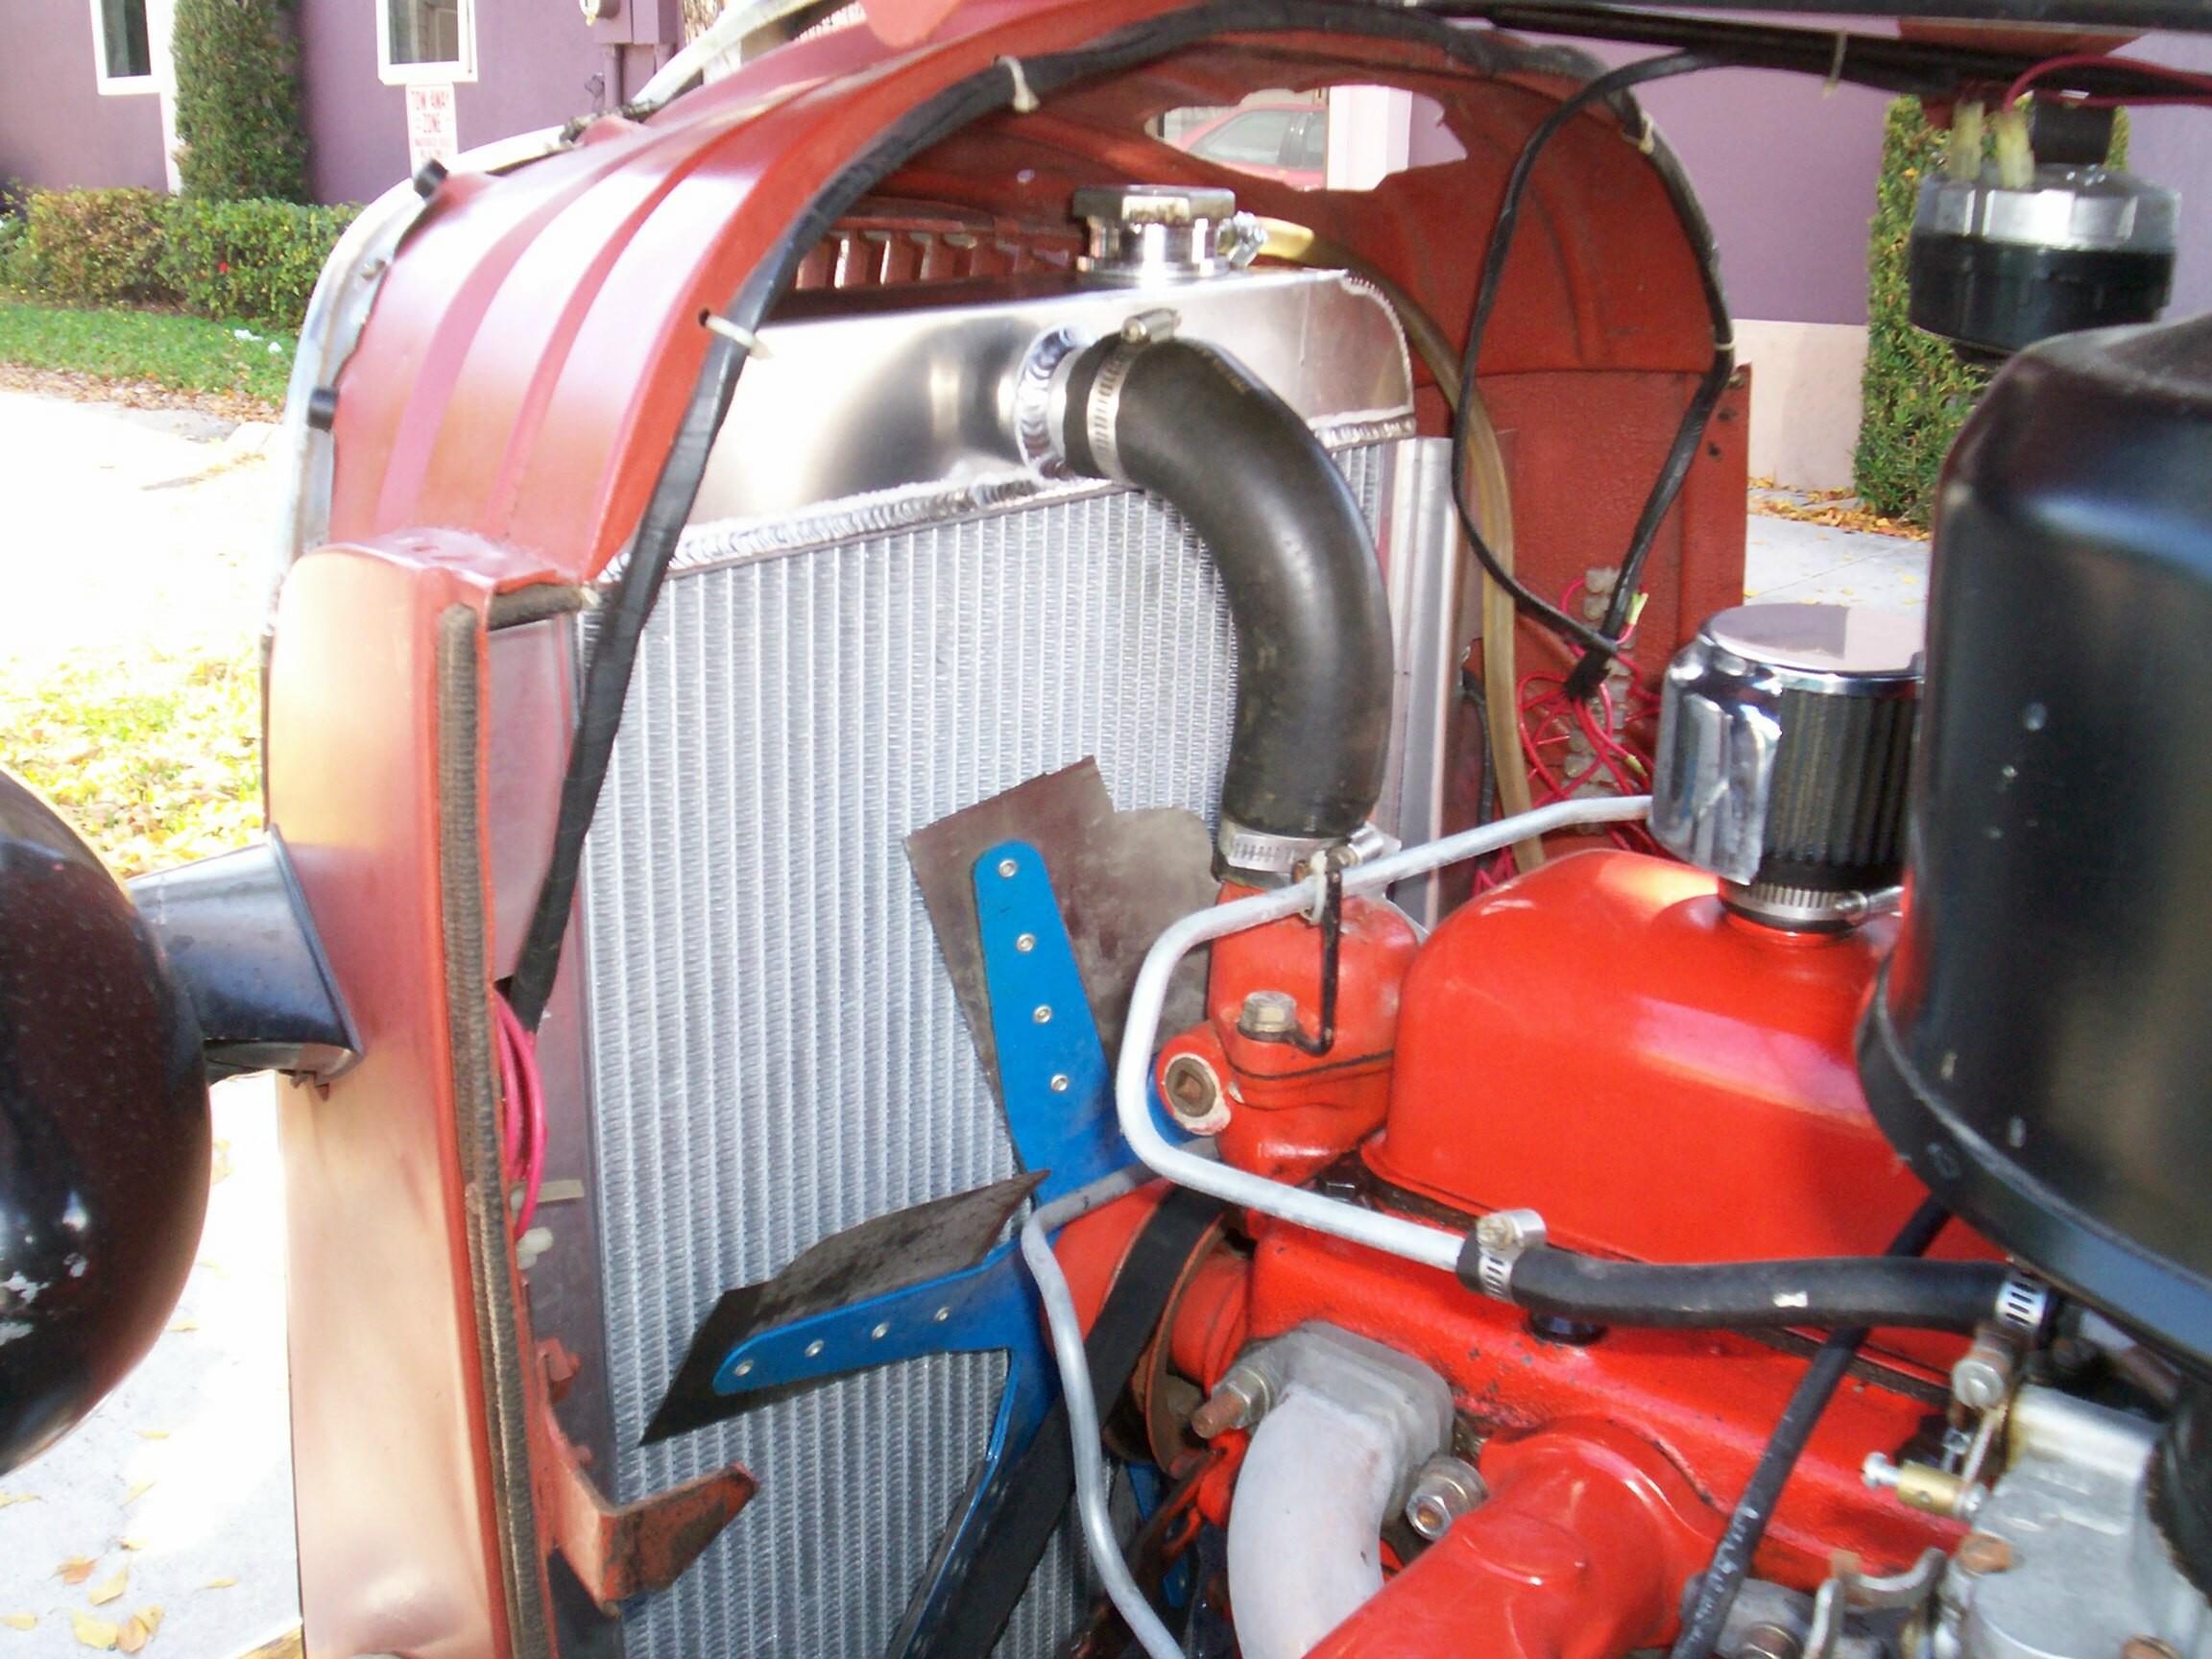
 After
taking these measurements about half a dozen times, the old radiator is
unbolted and set beside the new one for comparison. The fly in the
buttermilk is that the new PRC radiator is about an inch thicker than
the original. It is also narrower, side to side which I don't see as a
problem yet. The big problem is the depth. The old radaitor was stuffed
into the nose as deep as it would go.
After
taking these measurements about half a dozen times, the old radiator is
unbolted and set beside the new one for comparison. The fly in the
buttermilk is that the new PRC radiator is about an inch thicker than
the original. It is also narrower, side to side which I don't see as a
problem yet. The big problem is the depth. The old radaitor was stuffed
into the nose as deep as it would go.
Started doing the fab work on the side support angles. Quickly determined that the short leg of the supplied angles had to go against the radiator on either side and the long leg against the core support. First task was to notch the angles for the headlight wires. Got out my 5/8" hole saw to make the notch and finished up with a hack saw. I discovered a trick that I'm sure all old timers know and is probably so basic that you never see it in any of the forums. Spray WD-40 on the hack saw blade. Makes things so much easier. It was a Homer Simpson epiphany for me.
 With
the side angles notched, the angles were C-clamped to the core support
and I stole the receptionist's typewriter white-out to mark the
captured nut mounting holes from the back for drilling. After
center-punching and drilling the mounting holes, the side angles were
bolted on the the core support and I messed around with positioning the
new radiator until it was time to go home to the Krash pad. It was a
dawn-to-dusk day with no beer or cigar breaks. The economy has got me
scimpin' a bit on those two neccessities. Things have changed. In my
former life of nightclubin' fool, it's the truck parts I'd be scimping
on.
With
the side angles notched, the angles were C-clamped to the core support
and I stole the receptionist's typewriter white-out to mark the
captured nut mounting holes from the back for drilling. After
center-punching and drilling the mounting holes, the side angles were
bolted on the the core support and I messed around with positioning the
new radiator until it was time to go home to the Krash pad. It was a
dawn-to-dusk day with no beer or cigar breaks. The economy has got me
scimpin' a bit on those two neccessities. Things have changed. In my
former life of nightclubin' fool, it's the truck parts I'd be scimping
on.
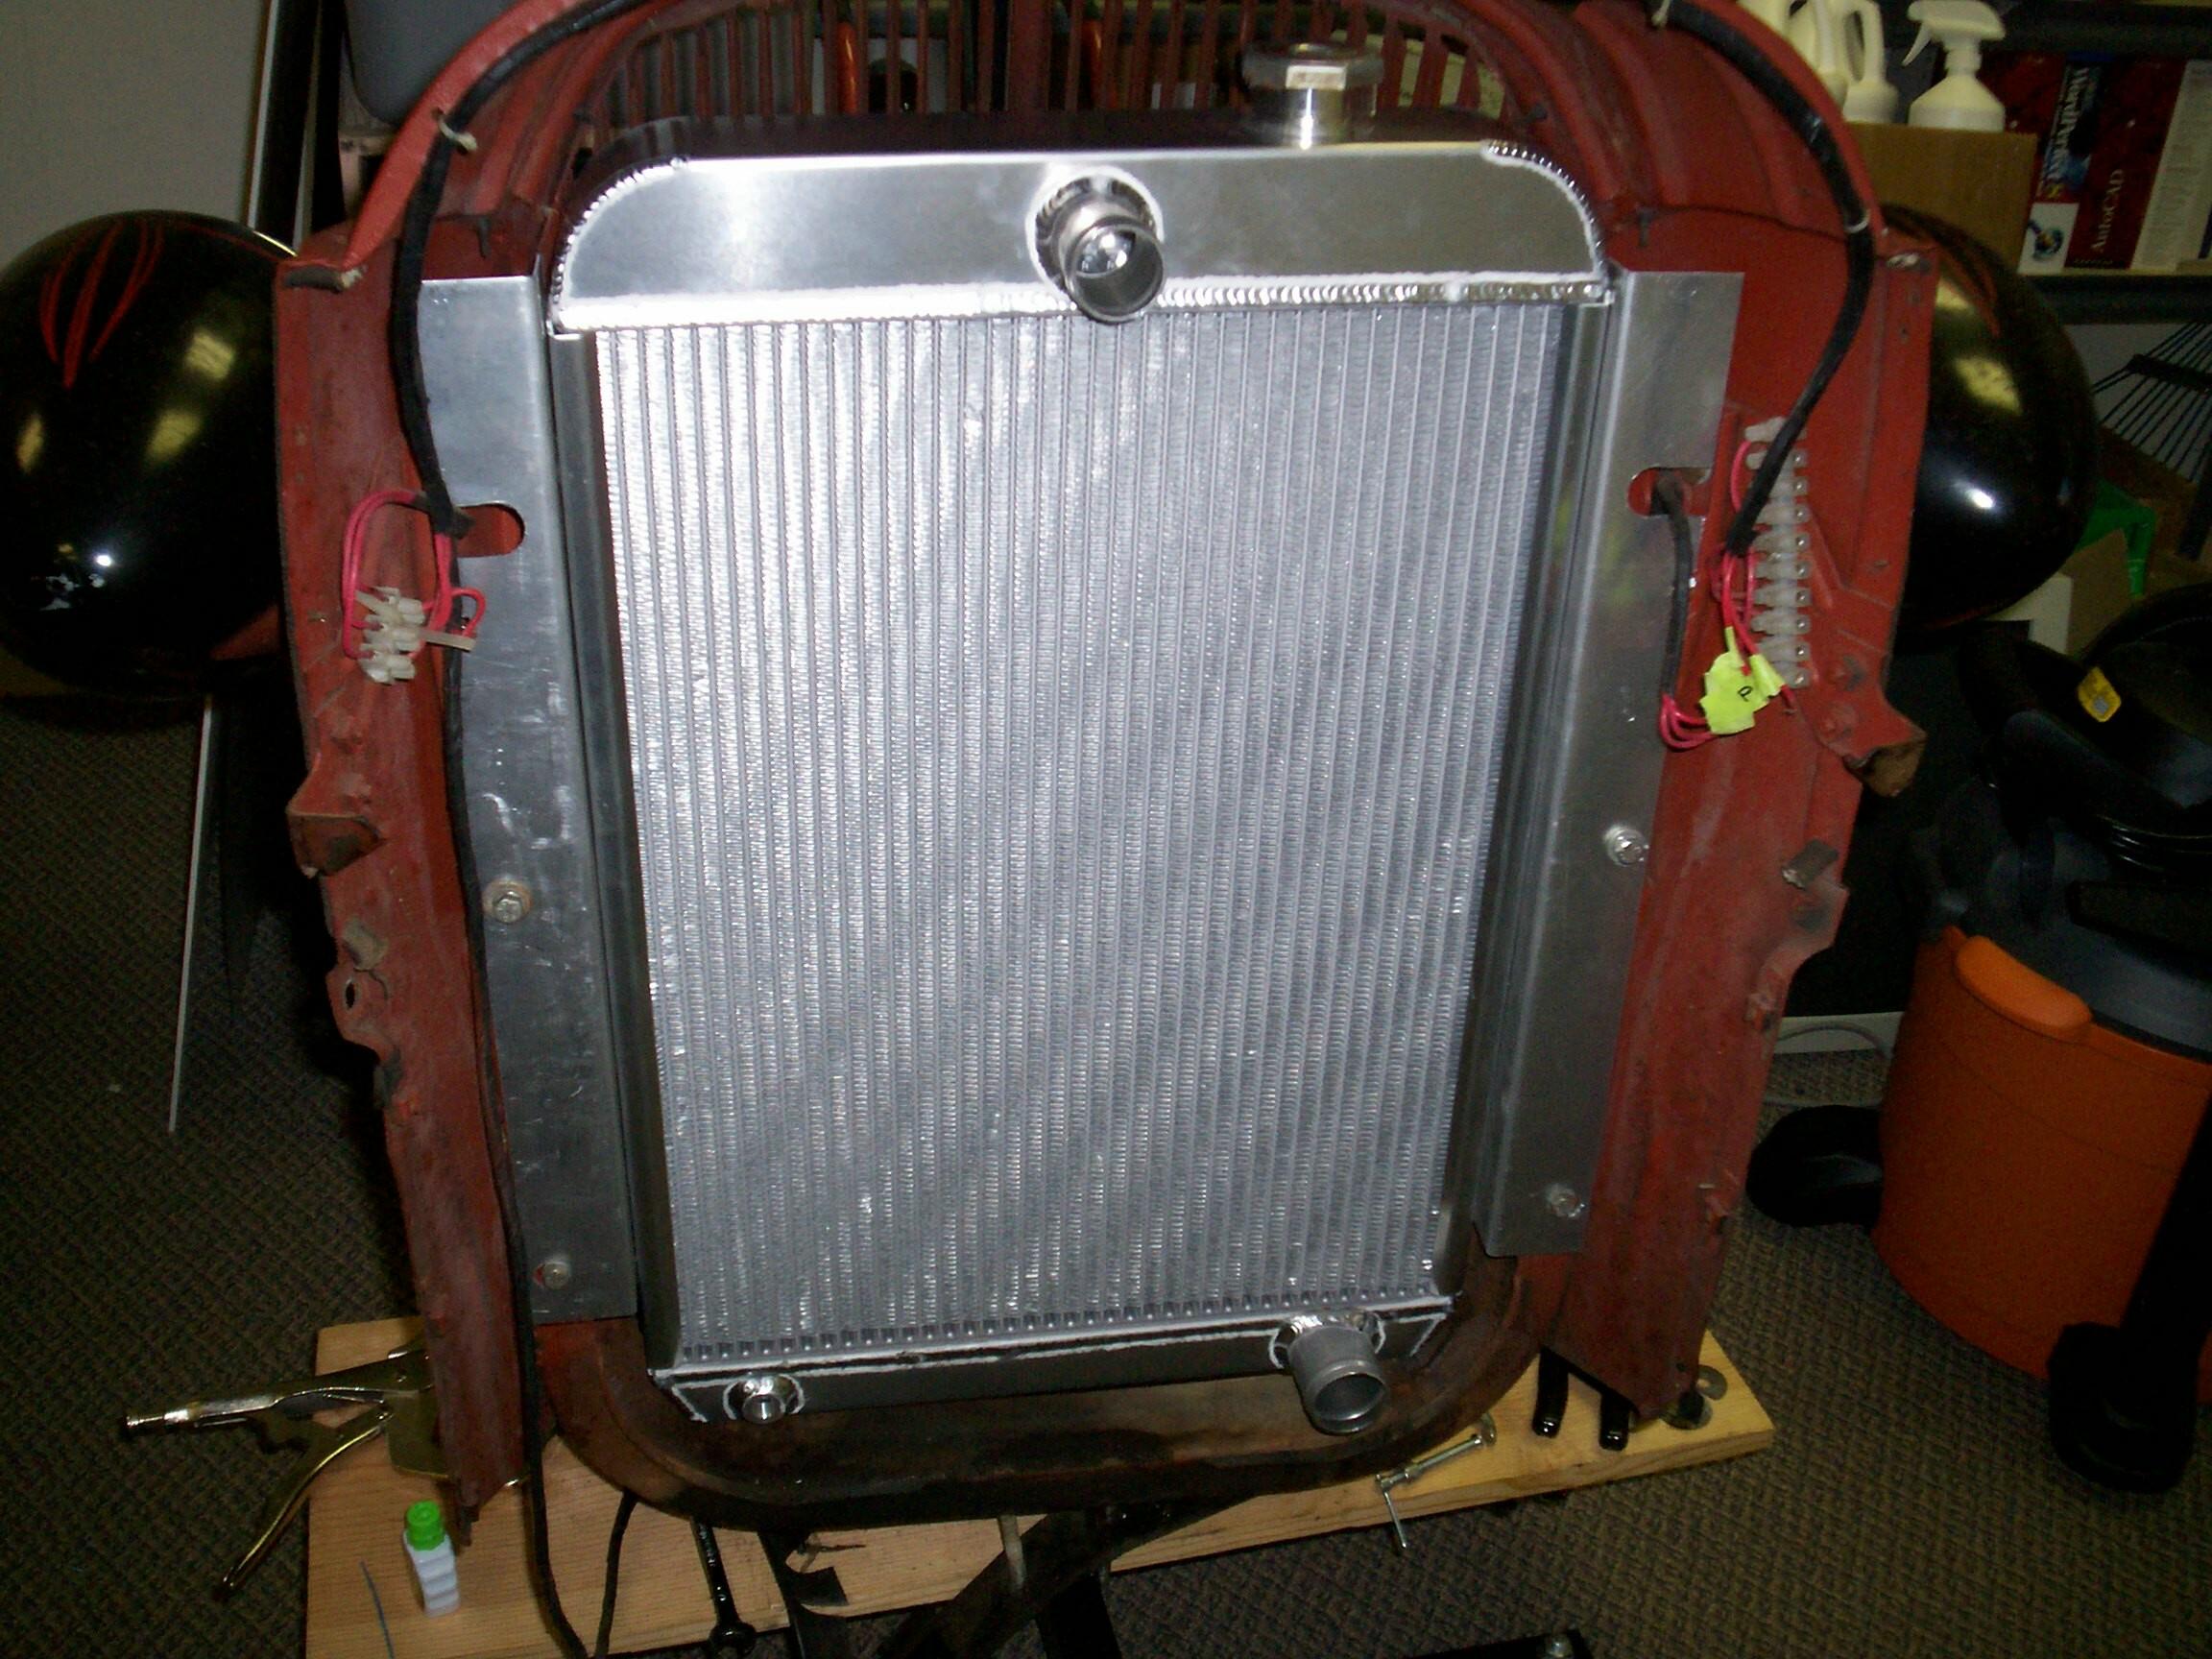
March 15th 2009 Back to the Krash lab at dawn in BillyBob to pick up where I left off yesterday. The good weather is holding. The perplexing problem facing me when I left last nite was that the new radiator needed to go deeper into the nose to maintain enuf fan clearance. Can't do it as is. Rolled the dice and sawzalled the cross support. Then cut an inch off the splash apron below it. I'll puzzle out how to fix that later. Now with the radiator as deep into the nose as it will go, I have the 5", 5" top and 5-1/2", 5-1/2" bottom measurements that I need. Marked a line at the radiator and side angle junctions and removed the radiator and side angles again.
 Wondered
all nite how to mark the short legs of the angles for the holes for the
small radiator carriage bolts. It's blind so I couldn't use the
typewriter white-out trick again. I needn't have worried. When I lined
up the side angles with the marks, the short leg didn't cover any of
the holes! I had to scrounge up a bunch of big flat washers and fender
washers. This solution is not elegant but will work since the radiator
can't go any further into the nose and pull away from the washers. Once
again, this begs a better solution down the road.
Wondered
all nite how to mark the short legs of the angles for the holes for the
small radiator carriage bolts. It's blind so I couldn't use the
typewriter white-out trick again. I needn't have worried. When I lined
up the side angles with the marks, the short leg didn't cover any of
the holes! I had to scrounge up a bunch of big flat washers and fender
washers. This solution is not elegant but will work since the radiator
can't go any further into the nose and pull away from the washers. Once
again, this begs a better solution down the road.
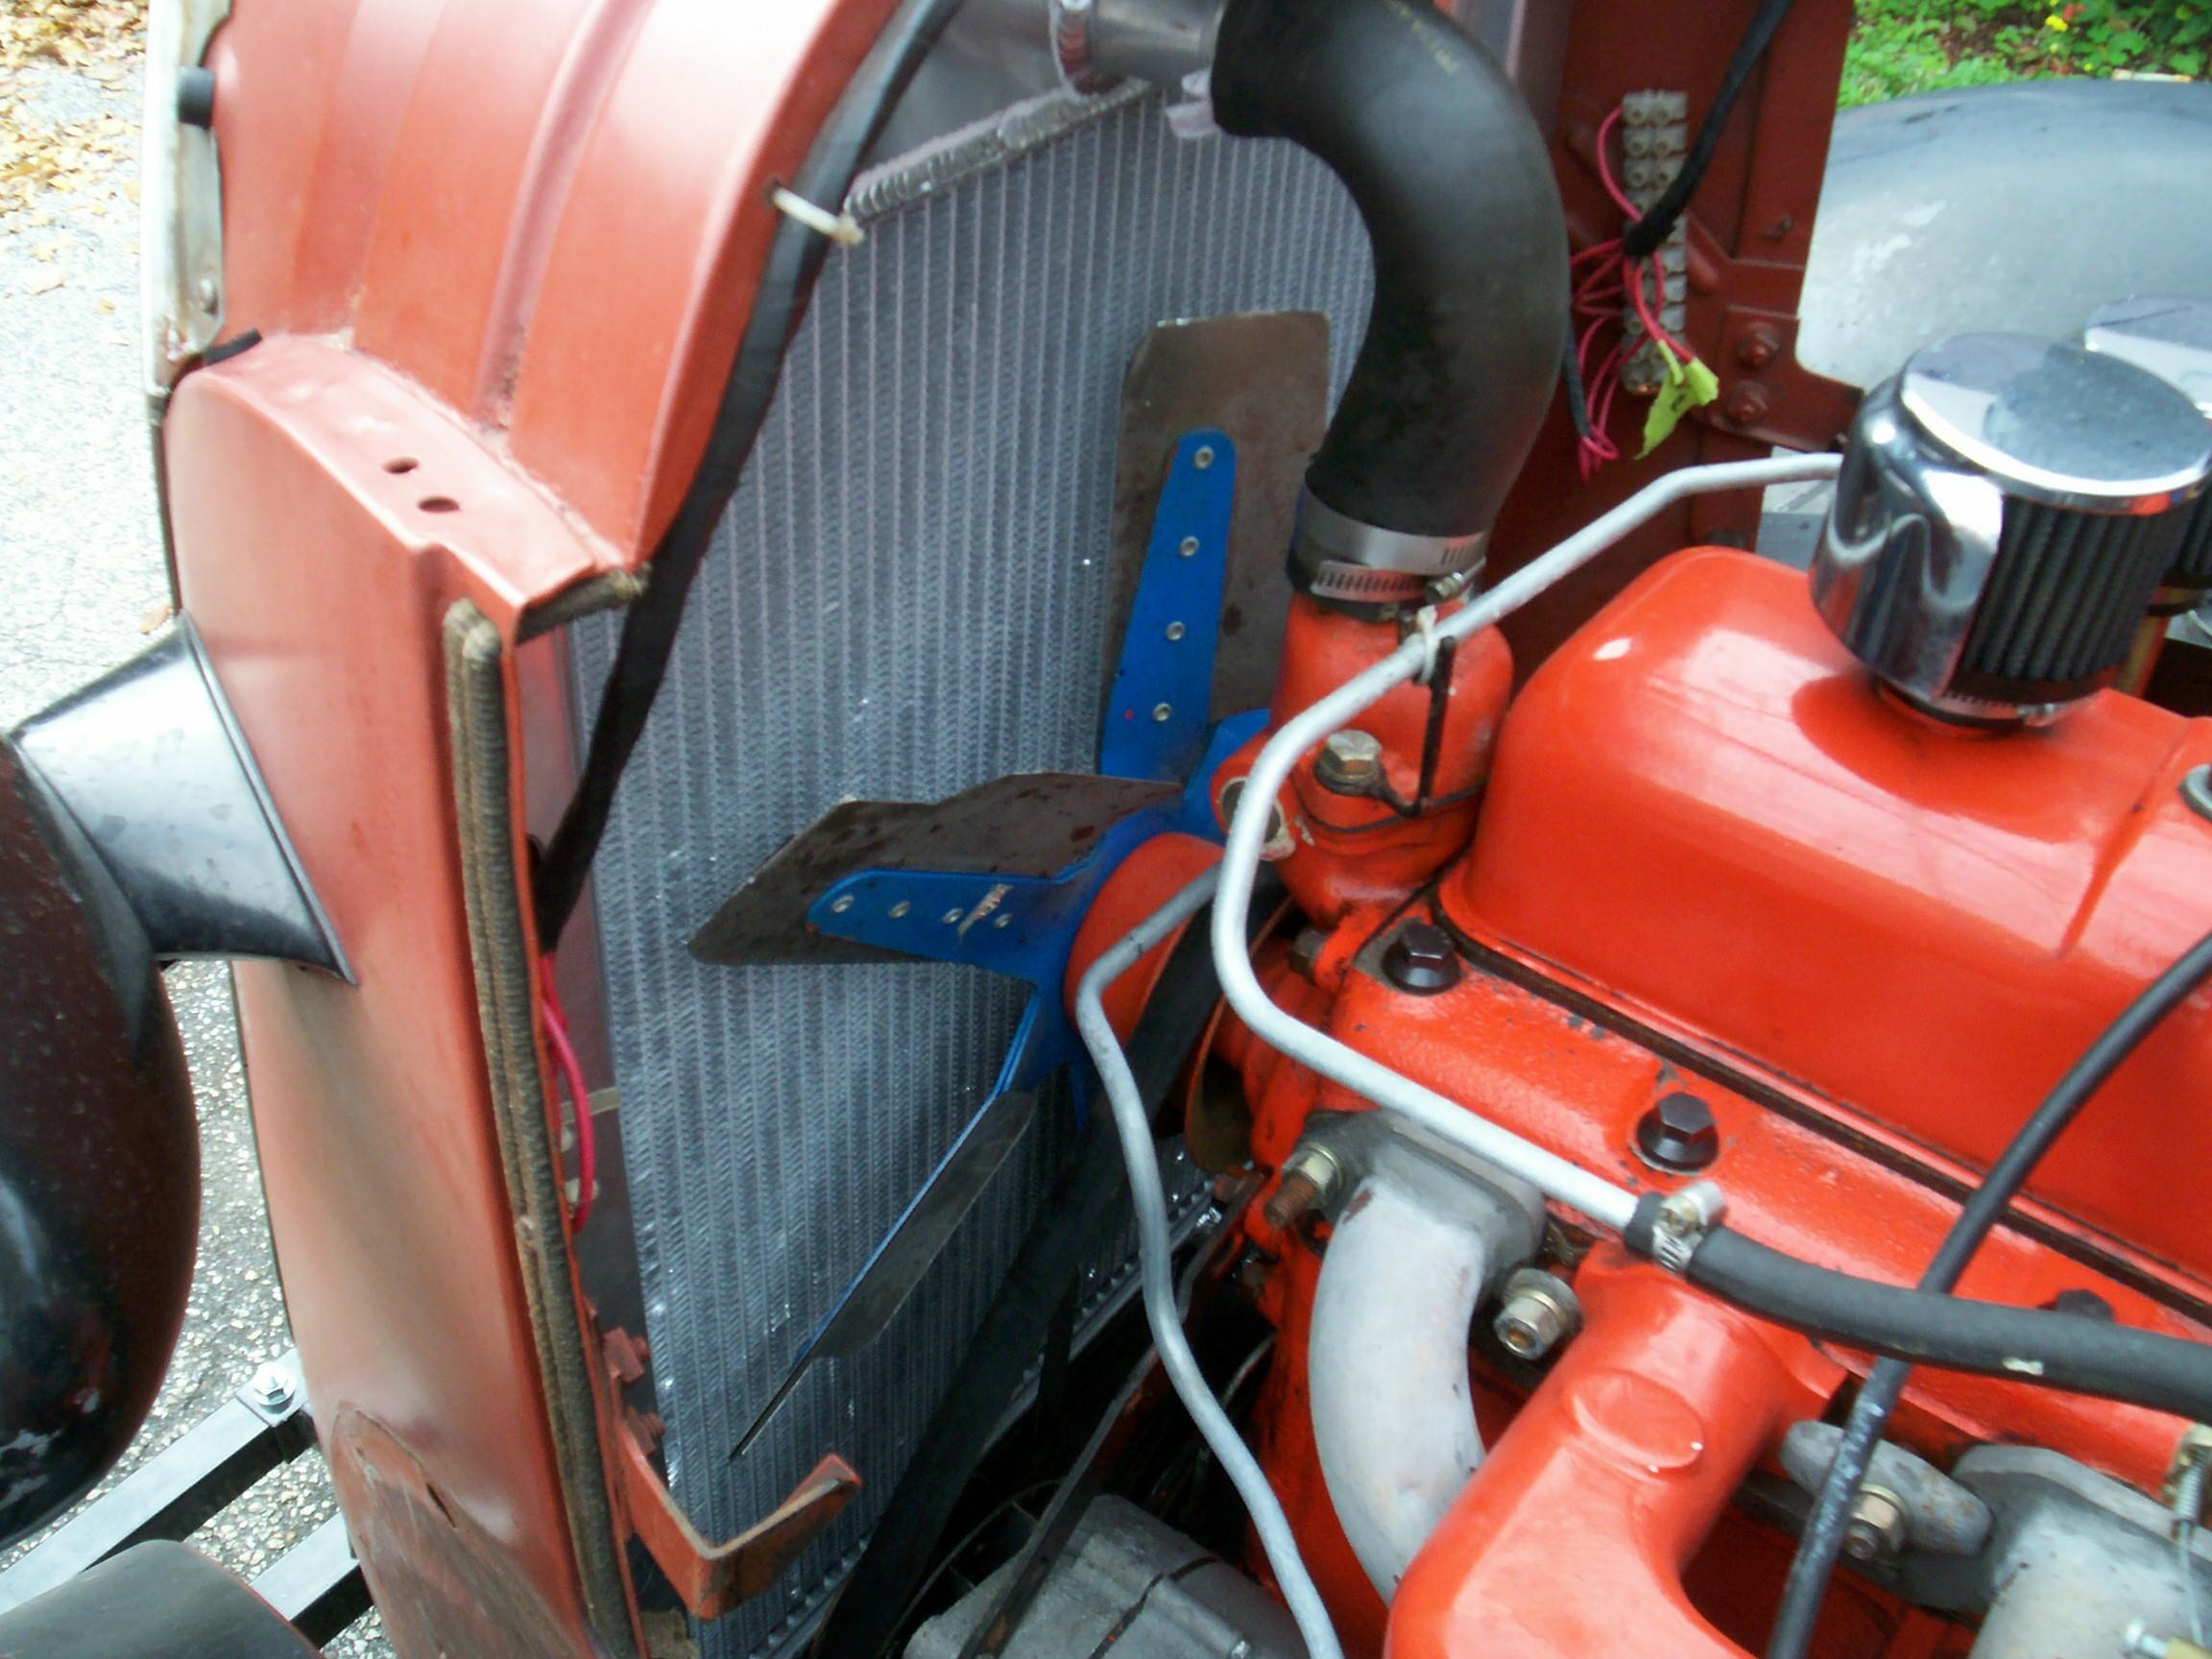
I thought I might have gained enough time to make the cruise-in tonite. The radiator, with attached side angles, was installed in the nose and it was wheeled back out to Deerslayer. The leading edge of the fenders were hooked over the frame ends again, spreading them enough to ease the nose back into position. The lift was raised to get the core support over the front cross member and the nose was lowered into place. The nose was leaning away from the engine and I was in the process of swinging it up to connect the wishbone when it dawned on me that now would be a good time to put the bottom radiator hose on while I had more room to do it. Curses! It is a larger diameter outlet on the new radiator. Struggled with it for some time without success even after spraying with WD-40. Since this is a replacement radiator for a Chevy, I pulled out BillyBob's spare hoses from the roadtrip boxes. They weren't any bigger. They were the same so at least I know now what Tony used for hoses. I did have to pull a bigger hose clamp from the supplies as the original on the old radiator was too small. I finally cut a 1/4" slit in the end of the hose to get it started and got it on. The hose clamp was positioned beyond the slit so I don't think I'll have any trouble with it.
 Okay.
Swing the nose up to meet the wishbone support again. UUhhhmm, the tips
of the fan blades look really close to the side angles. It wasn't an
issue with the old radiator due to its additional core width. I turned
the engine over with the starter a few times without the ignition on.
Shure nuff! The blades are hitting. Swing down the nose again and
remove the fan blade after loosening the fan belt.
Okay.
Swing the nose up to meet the wishbone support again. UUhhhmm, the tips
of the fan blades look really close to the side angles. It wasn't an
issue with the old radiator due to its additional core width. I turned
the engine over with the starter a few times without the ignition on.
Shure nuff! The blades are hitting. Swing down the nose again and
remove the fan blade after loosening the fan belt.
 Guessimating
that a half inch of the fan blade tips would be enuf, I taped the
blades to mark the cuts. I tried the sawzall first but I shouldn't
have. All weekend, I've been avoiding a warehouse run to get my
sheetmetal tools. Now, I can't avoid it any longer. Put the tools away
and locked things up for a stinking twenty minute trip and ran up there
in BillyBob. My plan when I got back was to use tin-snips on the
flex-fan blades. When I opened the sheetmetal tool box, I was rewarded
with sight of my hand nibbler which I had forgotten about. This was the
perfect tool for the job. It cuts a clean line without curling the
metal. I was done in fifteen minutes.
Guessimating
that a half inch of the fan blade tips would be enuf, I taped the
blades to mark the cuts. I tried the sawzall first but I shouldn't
have. All weekend, I've been avoiding a warehouse run to get my
sheetmetal tools. Now, I can't avoid it any longer. Put the tools away
and locked things up for a stinking twenty minute trip and ran up there
in BillyBob. My plan when I got back was to use tin-snips on the
flex-fan blades. When I opened the sheetmetal tool box, I was rewarded
with sight of my hand nibbler which I had forgotten about. This was the
perfect tool for the job. It cuts a clean line without curling the
metal. I was done in fifteen minutes.
 Fan
back on the engine with Threadlocker blue on the nuts and fan belt
re-tensioned. Nose swung up into position a third time. Wishbone
connected and engine turned over again to check clearance. It's a go,
Houston, for fender re-engagement. One small snag. The rubber welting
fell out. After a couple of minutes, I figured out how to hold the
welting in place with masking tape good enuf to get the bolts started.
After the bolts were all started but before final tightening, the tape
was pulled out. After the fenders and supports were on, I went on to
the terminal block. I'd been saving all my best cuss words for this
part of the job an' I used 'em all . . . more than once. Besides my
fumble fingers and retreating eyesight and the aforementioned rat's
nest of tape labels sticking together, I ran into a problem I didn't
forsee. I had already gotten the most difficult terminals done (the
ones with two wires going in the same receptacle). I had taken the
label off wire 8d (8th terminal down from the top) and turned my eyes
away to find the screwdriver. When I turned back, I saw two wires,
close together, without labels! There appeared to be one loose wire not
connected to anything that I hadn't seen before. All Tony's wires are
red. I had to guess. I guessed and went on. When all the wires were
connected, I tested the lights. I didn't have turn signals until I
grounded the brackets. Didn't have headlights. I switched wire 8d and
hoped for the best.
Fan
back on the engine with Threadlocker blue on the nuts and fan belt
re-tensioned. Nose swung up into position a third time. Wishbone
connected and engine turned over again to check clearance. It's a go,
Houston, for fender re-engagement. One small snag. The rubber welting
fell out. After a couple of minutes, I figured out how to hold the
welting in place with masking tape good enuf to get the bolts started.
After the bolts were all started but before final tightening, the tape
was pulled out. After the fenders and supports were on, I went on to
the terminal block. I'd been saving all my best cuss words for this
part of the job an' I used 'em all . . . more than once. Besides my
fumble fingers and retreating eyesight and the aforementioned rat's
nest of tape labels sticking together, I ran into a problem I didn't
forsee. I had already gotten the most difficult terminals done (the
ones with two wires going in the same receptacle). I had taken the
label off wire 8d (8th terminal down from the top) and turned my eyes
away to find the screwdriver. When I turned back, I saw two wires,
close together, without labels! There appeared to be one loose wire not
connected to anything that I hadn't seen before. All Tony's wires are
red. I had to guess. I guessed and went on. When all the wires were
connected, I tested the lights. I didn't have turn signals until I
grounded the brackets. Didn't have headlights. I switched wire 8d and
hoped for the best.
Connected the remaining hoses and tightened the fender bolts and wishbone bolts. Muscled the hood back into position and secured the rear hinge. It opens and closes properly. Yeah! Put the front bumper assembly back on and re-installed the turn signal lights. I'm getting tired and really looking forward to a couple of cold ones at the cruise-in. Poured in over two gallons of Prestone 50/50 coolant and started the engine. Checked the electrical again while watching the temp gauge. All lights are working and so are the horns. Good! When the temp got to 180, I shut it down again. When The temp went down, I topped the radiator off but it didn't take much coolant so I don't think there are air pockets. Started the engine again and let it run up to operating temp. Stayed right in the middle and I'm not seeing any leaks. I think we're good here. I'm a hour late but I can make it home to the Krash pad and grab a five minute shower and make the cruise-in before the girls roll the beer cart out into the parking lot.
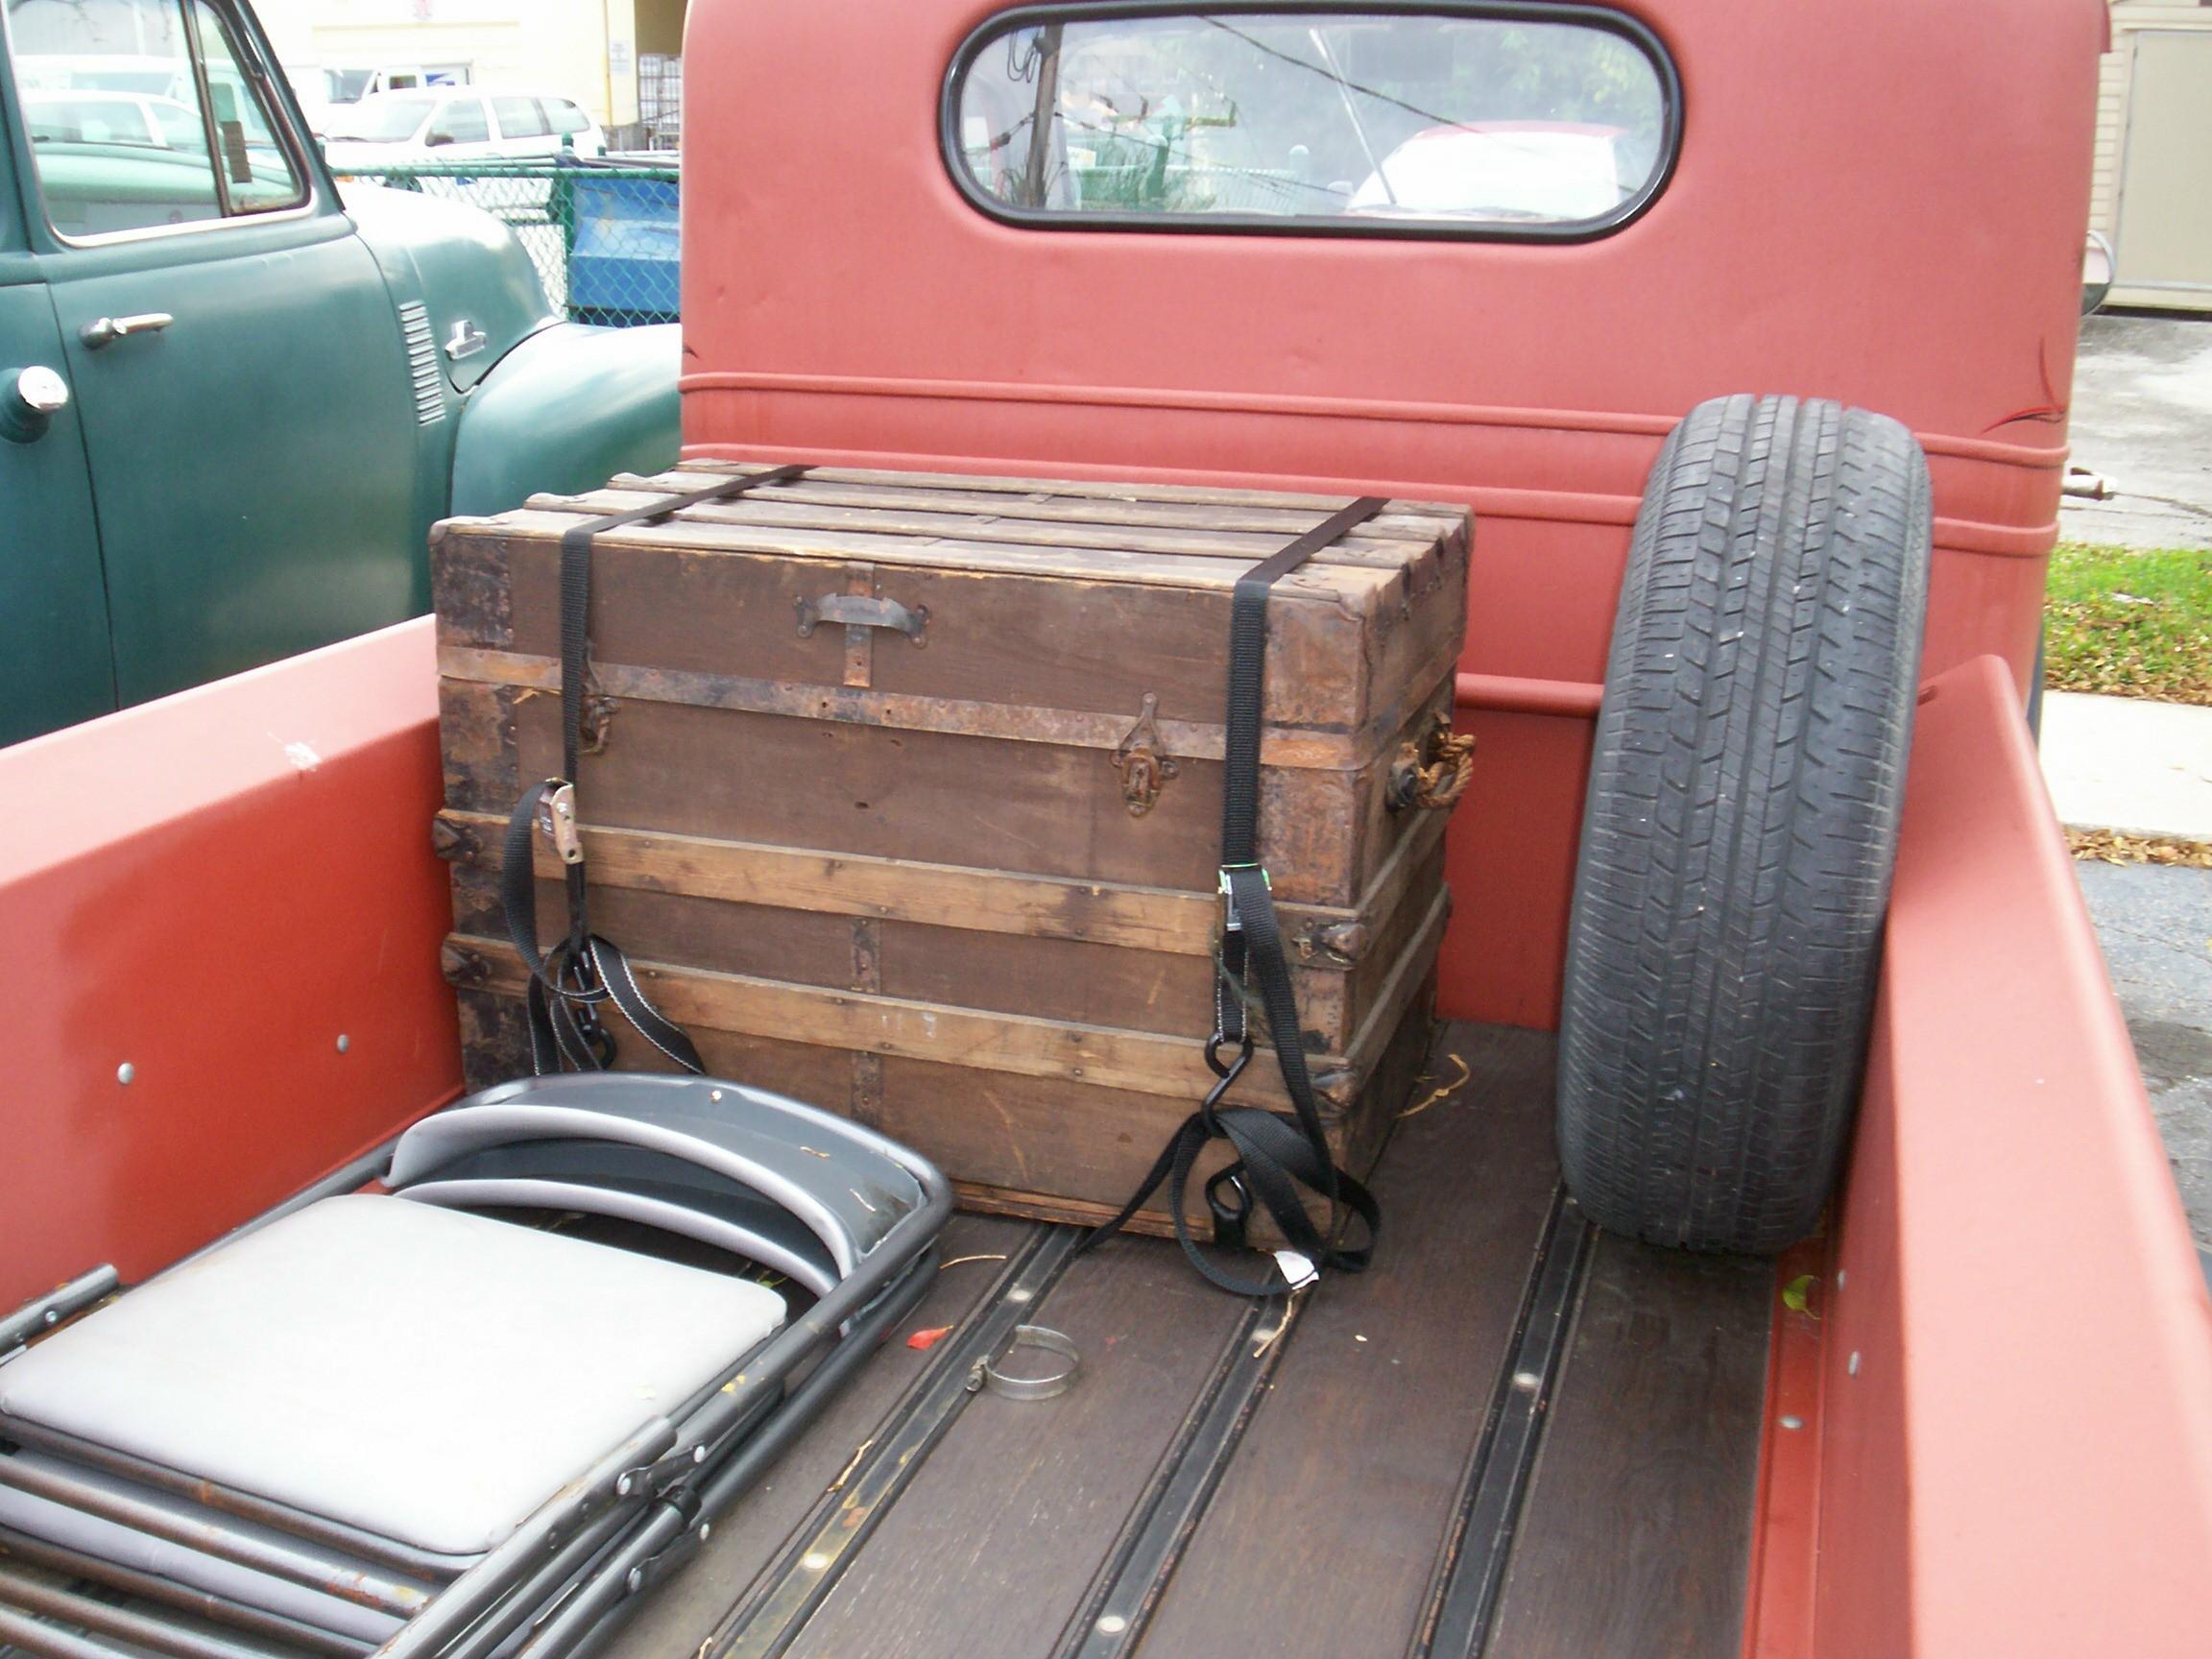 March
28th 2009 The monday
after the radiator install, I dragged one of my old trunks, inherited
from my maternal grandparents, down to Deerslayer from the Krash Pad
and put it in the pickup bed. Tuesday nite was a cruse-in. I planned to
bolt down the trunk in the bed and fill it with supplies for the
Billetproof Run the following nite. Mother nature intravened and we had
two days of monsoon rains. The sky cleared up enuf on thursday nite for
me to scramble around and get the trunk secured for friday morning's
departure. I found enough bolts, flat washers and hexnuts to do the job
in my spare bolts hoard at the back of the shed. Threw my tools in the
trunk along with some universal supplies and fluids from the BillyBob
travel boxes and, Finshed up by strapping the lid down with a couple of
tie downs, also from the BillyBob collection.
March
28th 2009 The monday
after the radiator install, I dragged one of my old trunks, inherited
from my maternal grandparents, down to Deerslayer from the Krash Pad
and put it in the pickup bed. Tuesday nite was a cruse-in. I planned to
bolt down the trunk in the bed and fill it with supplies for the
Billetproof Run the following nite. Mother nature intravened and we had
two days of monsoon rains. The sky cleared up enuf on thursday nite for
me to scramble around and get the trunk secured for friday morning's
departure. I found enough bolts, flat washers and hexnuts to do the job
in my spare bolts hoard at the back of the shed. Threw my tools in the
trunk along with some universal supplies and fluids from the BillyBob
travel boxes and, Finshed up by strapping the lid down with a couple of
tie downs, also from the BillyBob collection.
Today, I woke up late. It was only a few minutes but it put me off my pace. I use the word pace with some caution. Most people would not recognise my glacial methodology as being anywhere near a "pace". I stopped for gas at the Sunoco station I now frequent. One on the mechanics, Terry, wanted to know about the Billetproof run. I handed him a stack of pics I took and printed out on the Krash Lab copier. The wind caught them and they were flying around all over. Took a few more minutes for Terry and I to collect them all. Due to the Billetproof run, both monthly maintenance and quarterly maintenance are due on Deerslayer. Finished up monthly maintenance but realized I couldn't use the floor jack for quarterly maintenance because the hydraulic fluid I needed to get the jack working again is still up at the warehouse. I'll pick it up when I exchange BillyBob for Renegade tomorrow morning and then do quarterly maintenance. Spent the rest of the day detailing Deerslayer until time to head down the beach road to Fort Lauderdale for a saturday nite cruise-in. Beer of the day is Harpoon Brewery's Harpoon Brown Session Ale.
March 29th 2009 Last nite was earth hour where everybody was 'sposed to turn out the lights for a hour. I observed as fellow truck guy "Geezer" did. I didn't have any bright ideas between 8:30 and 9:30. Switched vehicles up at the warehouse, first thing, and brought back the hydraulic oil for the floor jack with me. Topped the jack off and it was working again. Performed quarterly maintenance on Deerslayer. Diffy oil is holding good. Lubed all the zerk fittings. Brake fluid is down in the front chamber of the master cylinder on a regular basis. Checked for leaks and the first length of line from the master cylinder is wet. Managed to tighten this line at both ends 1/8 turn. We'll see if that helps any. Added some water to the battery.
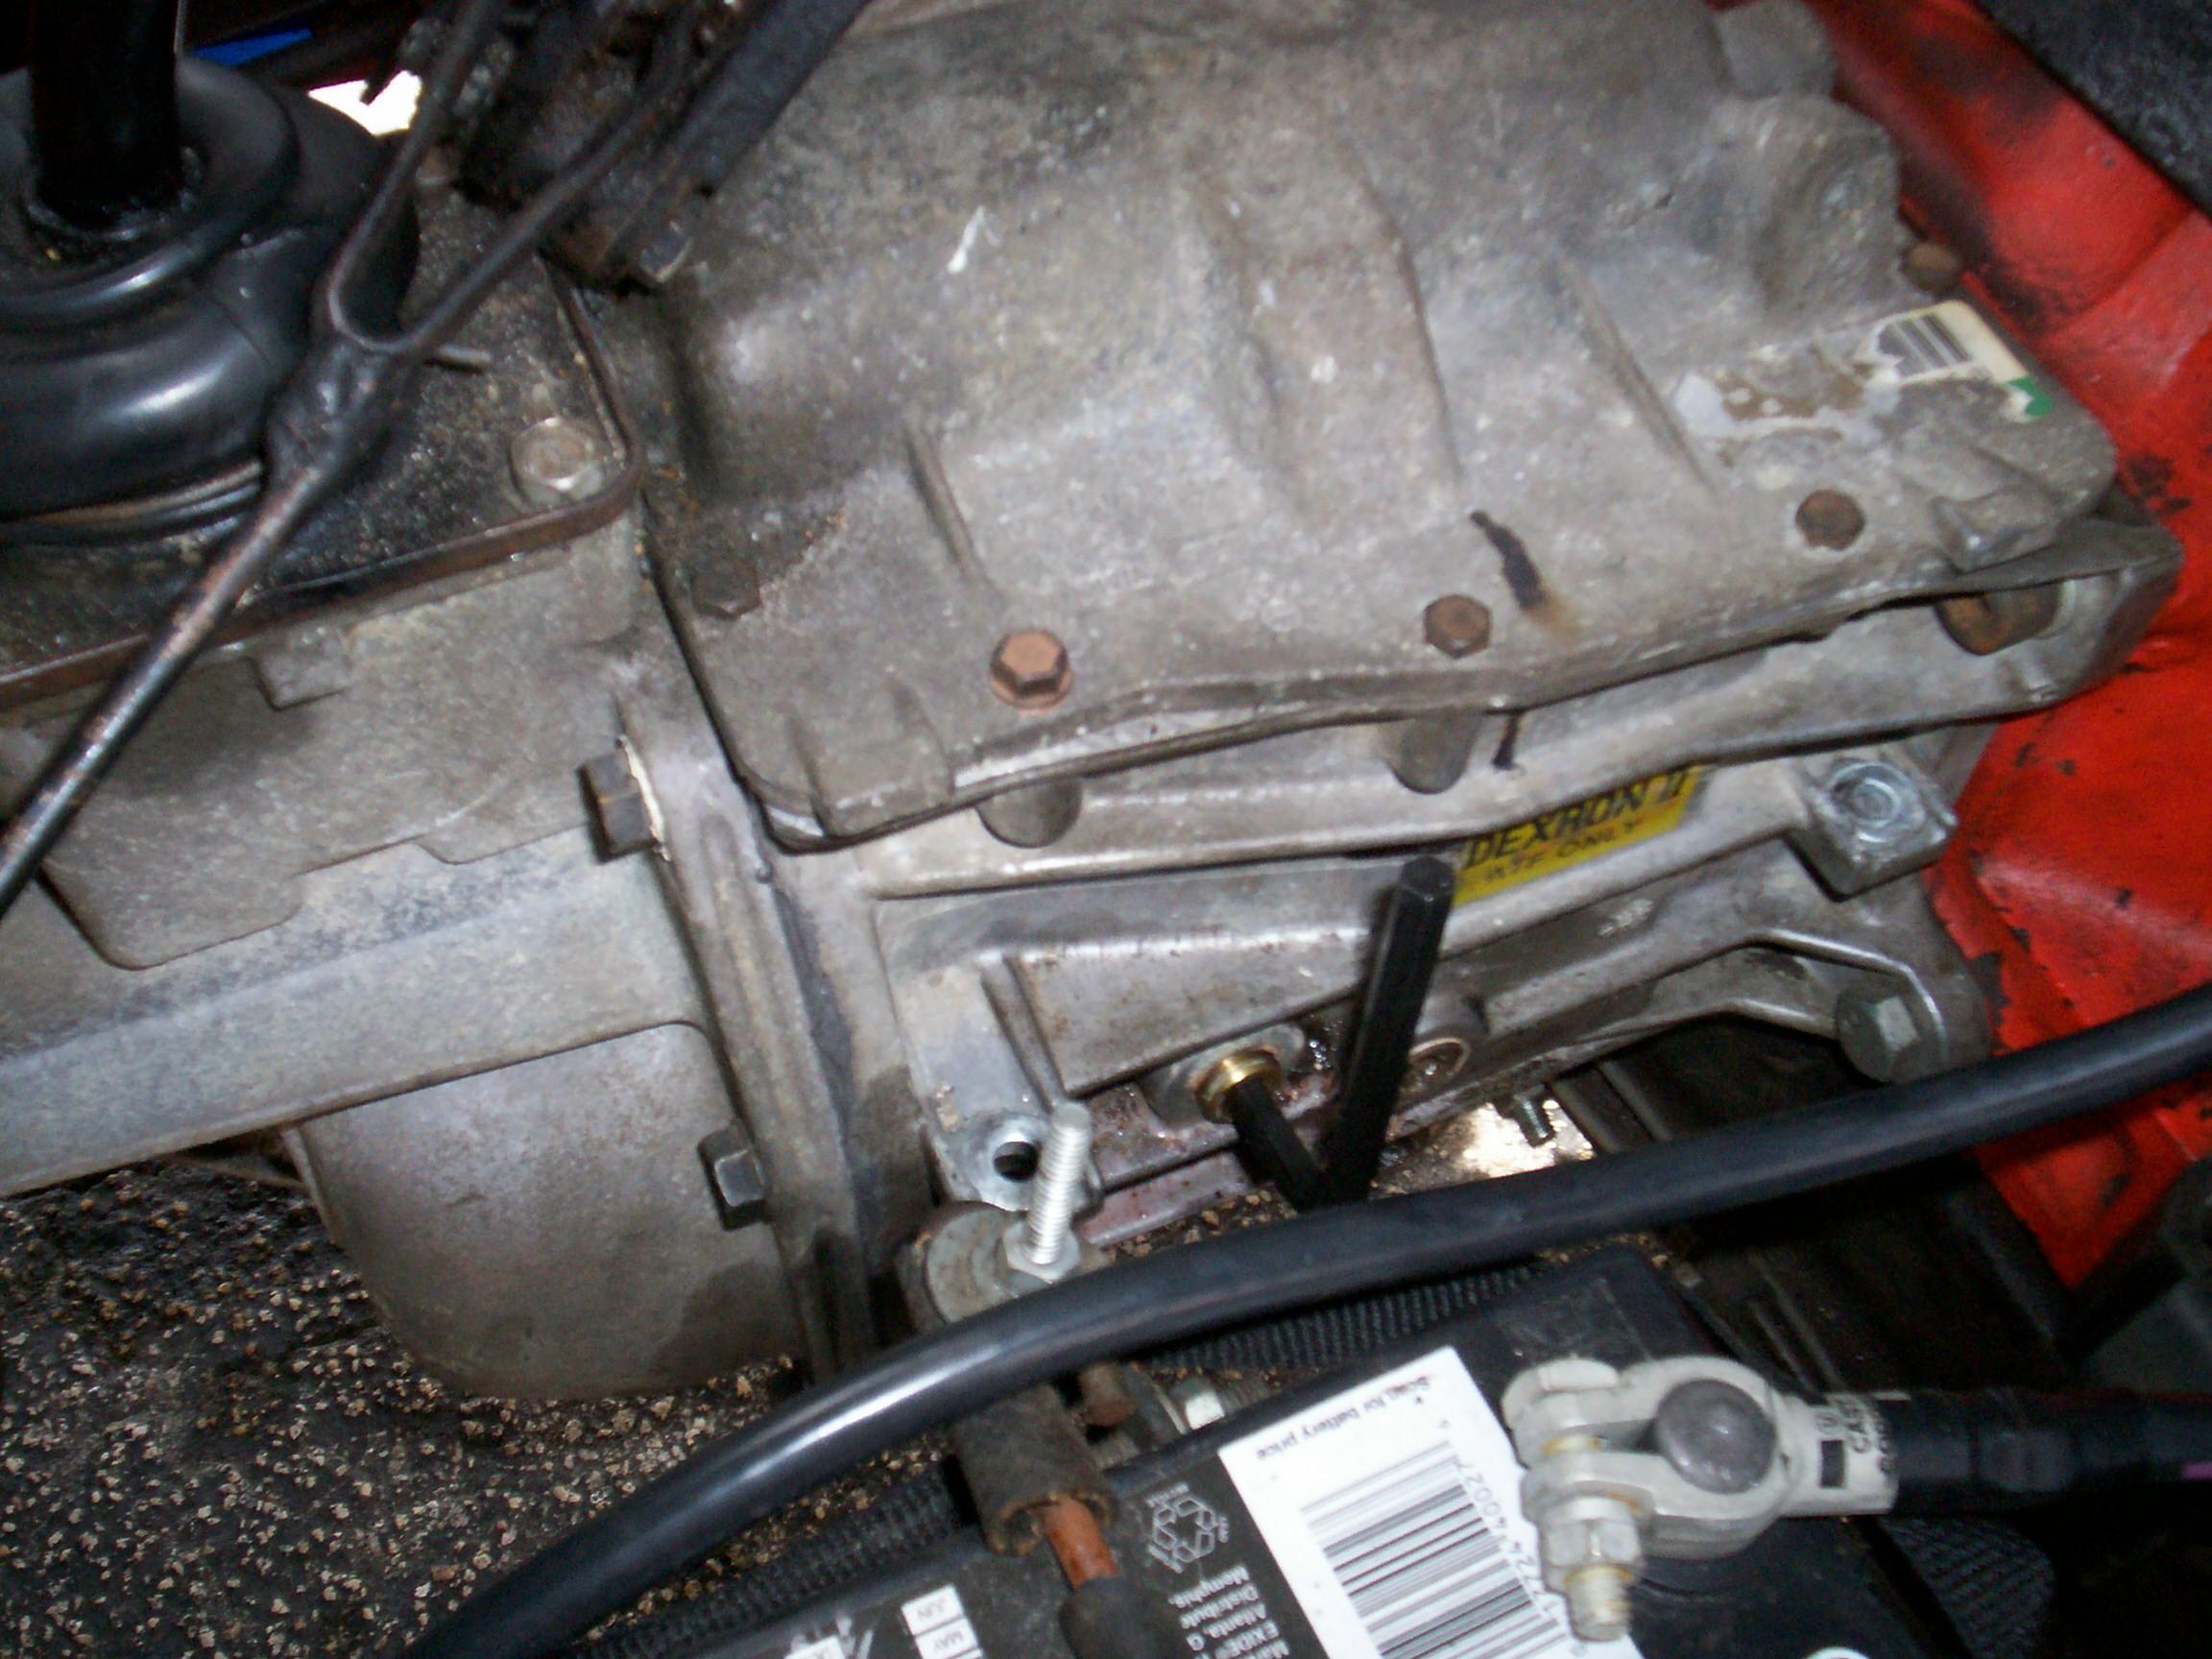 Checked
the tranny fluid. Took me some time to figure out how to do this. Tony
helped me to find the correct fill hole which is higher on the right
side than the normal fill hole because the tranny sits straight up in
Deerslayer. In the Camaro, it sat at an angle. The parking brake
assembly has to come off the side of the tranny to get at the plug.
Once I found the plug, I couldn't get it out. Not any of my square
drives would fit it. I was comptemplating a Rube Goldberg solution of
jacking up the side of the truck to put the tranny at the angle it was
in the Camaro and using the old fill hole when I had a Homer Simpson
moment. Maybe it's not a square drive. Maybe the plug takes a allen
wrench. Shure nuff, a 8mm allen wrench was the solution. The delay in
figuring this out also saved me from putting gear oil in the tranny and
finding out from Tony that it takes ATF, not gear oil.
Checked
the tranny fluid. Took me some time to figure out how to do this. Tony
helped me to find the correct fill hole which is higher on the right
side than the normal fill hole because the tranny sits straight up in
Deerslayer. In the Camaro, it sat at an angle. The parking brake
assembly has to come off the side of the tranny to get at the plug.
Once I found the plug, I couldn't get it out. Not any of my square
drives would fit it. I was comptemplating a Rube Goldberg solution of
jacking up the side of the truck to put the tranny at the angle it was
in the Camaro and using the old fill hole when I had a Homer Simpson
moment. Maybe it's not a square drive. Maybe the plug takes a allen
wrench. Shure nuff, a 8mm allen wrench was the solution. The delay in
figuring this out also saved me from putting gear oil in the tranny and
finding out from Tony that it takes ATF, not gear oil.
Added steering gear lube to the gear box and oiled the throttle linkage. It rained on me in the shadetree garage a couple of times thru all this. After the second time, I put the tools away and went home to the Krash pad. I passed up the sunday nite cruise-in and just laid around the shanty. Beer of the day is RYPE Orange Tingled Wheat Beer from the Four+ Brewing Company. It gave me a sour belly.
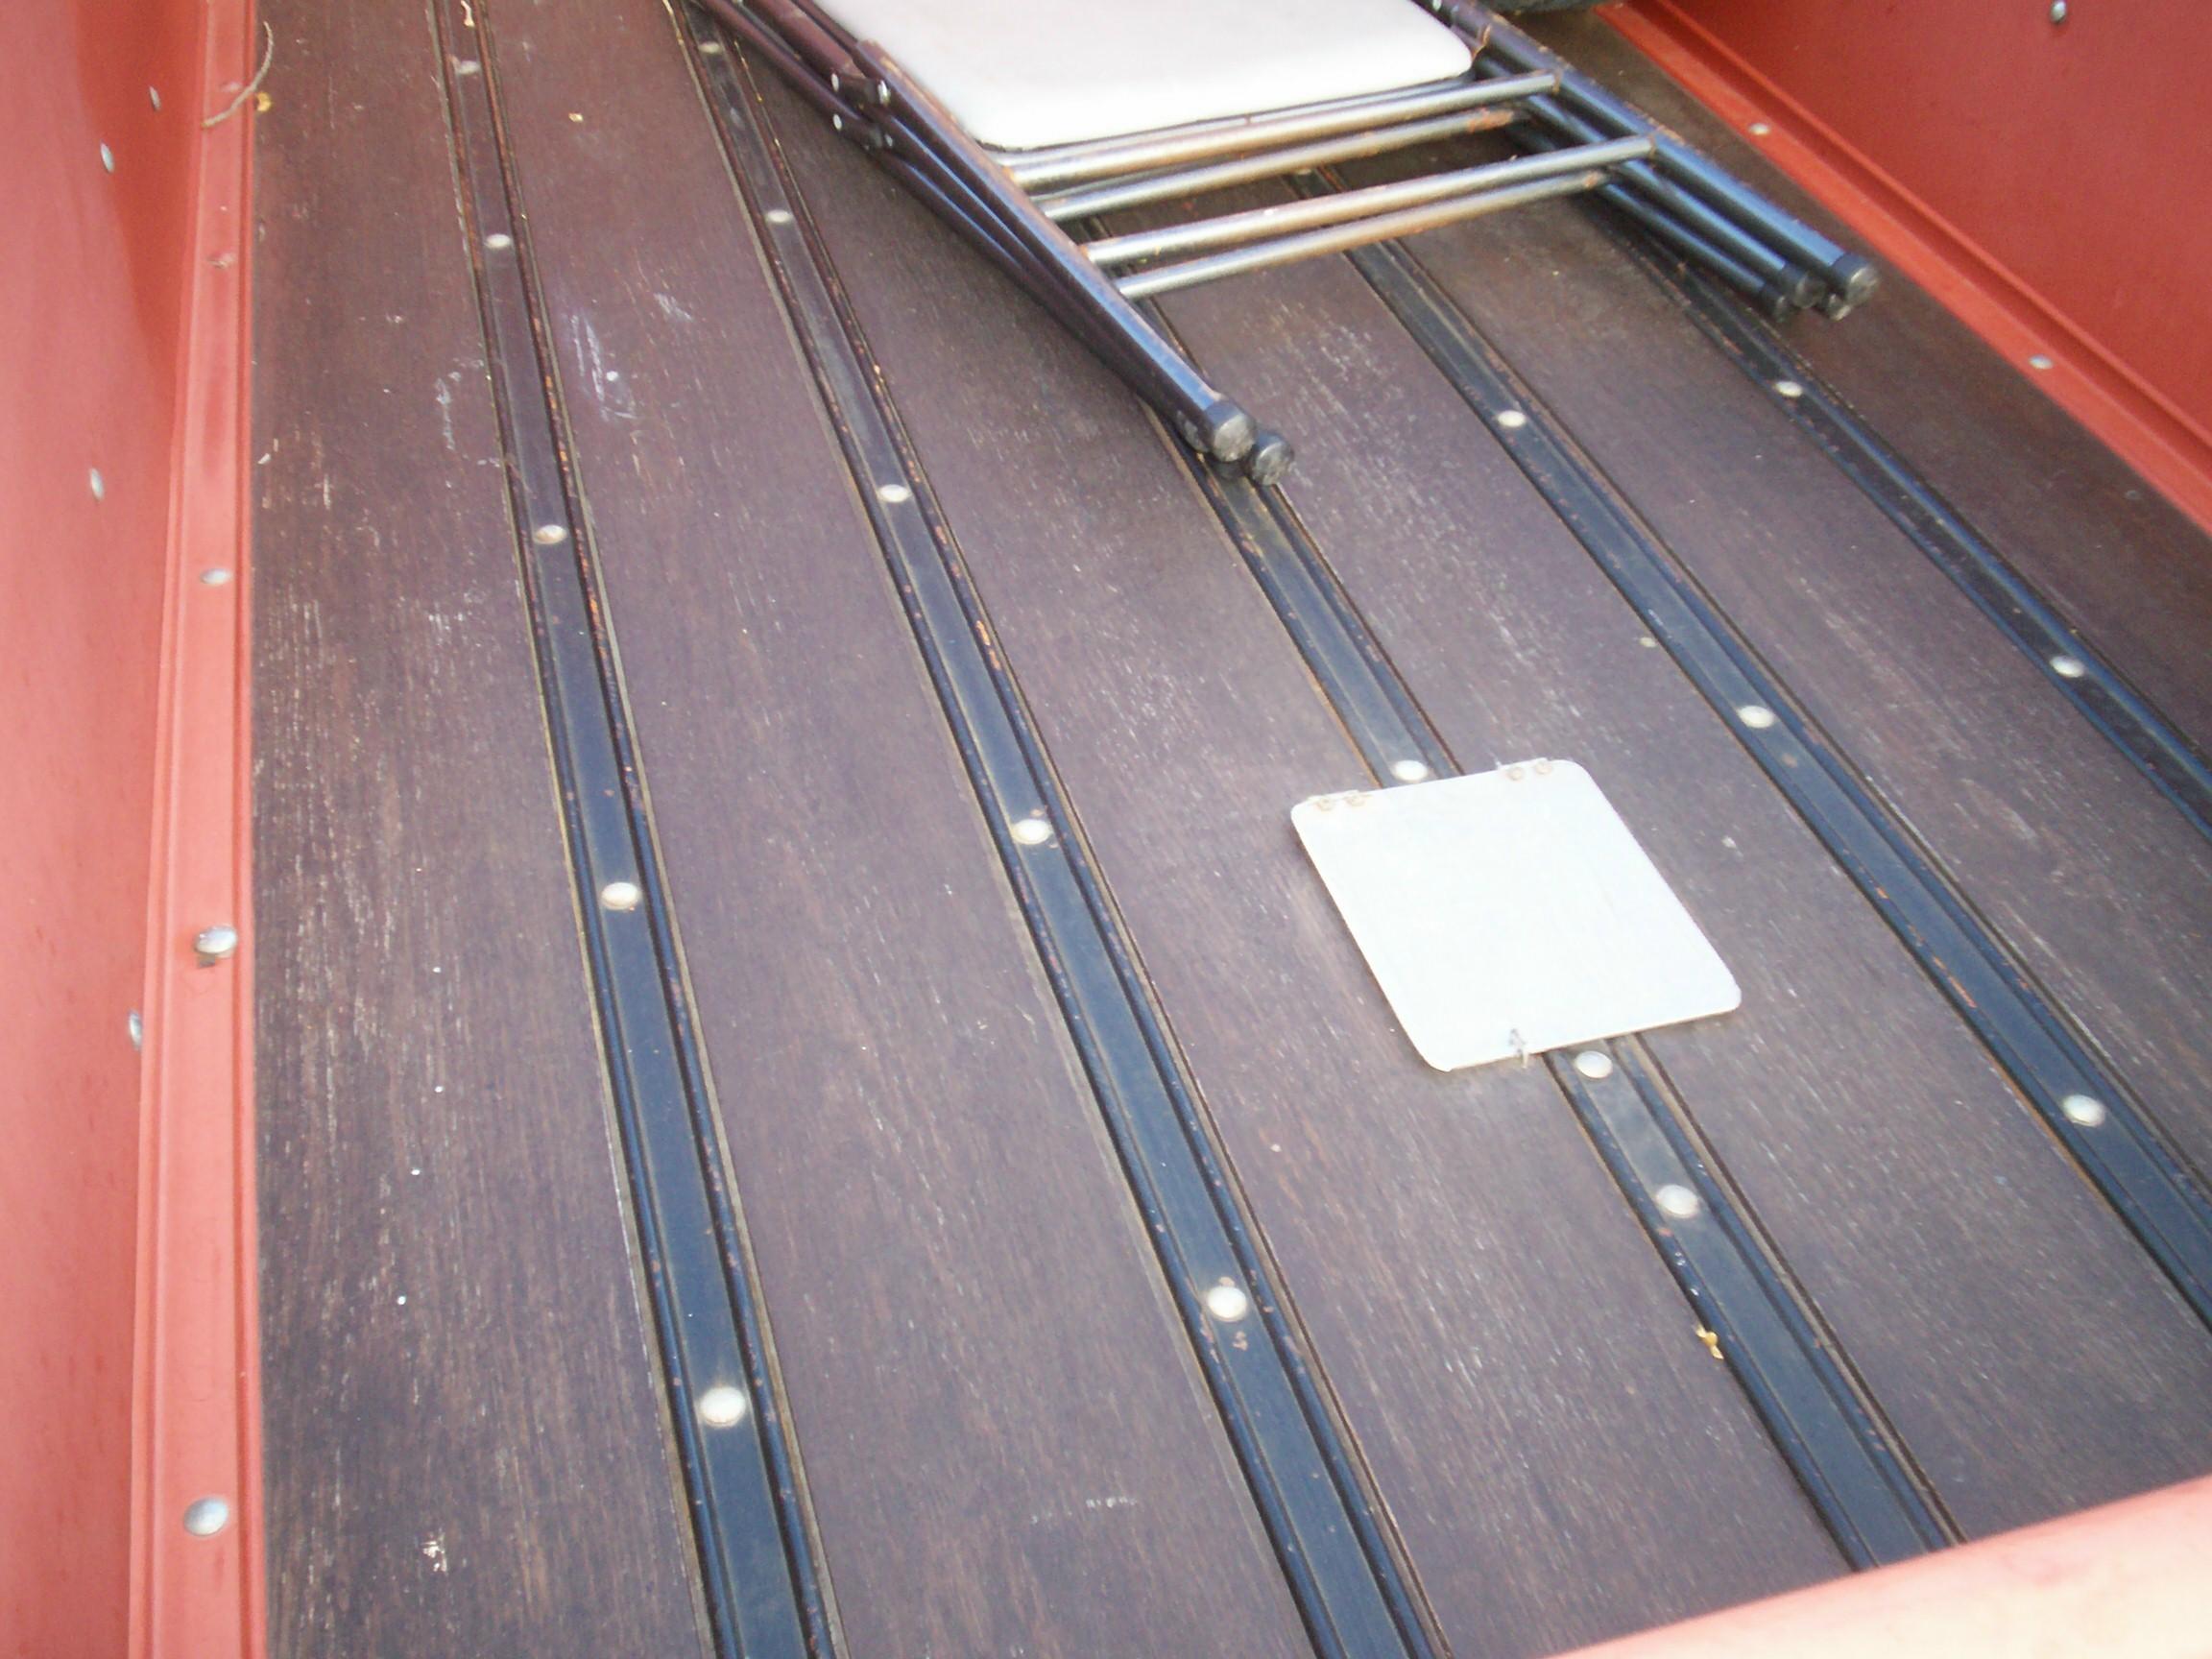
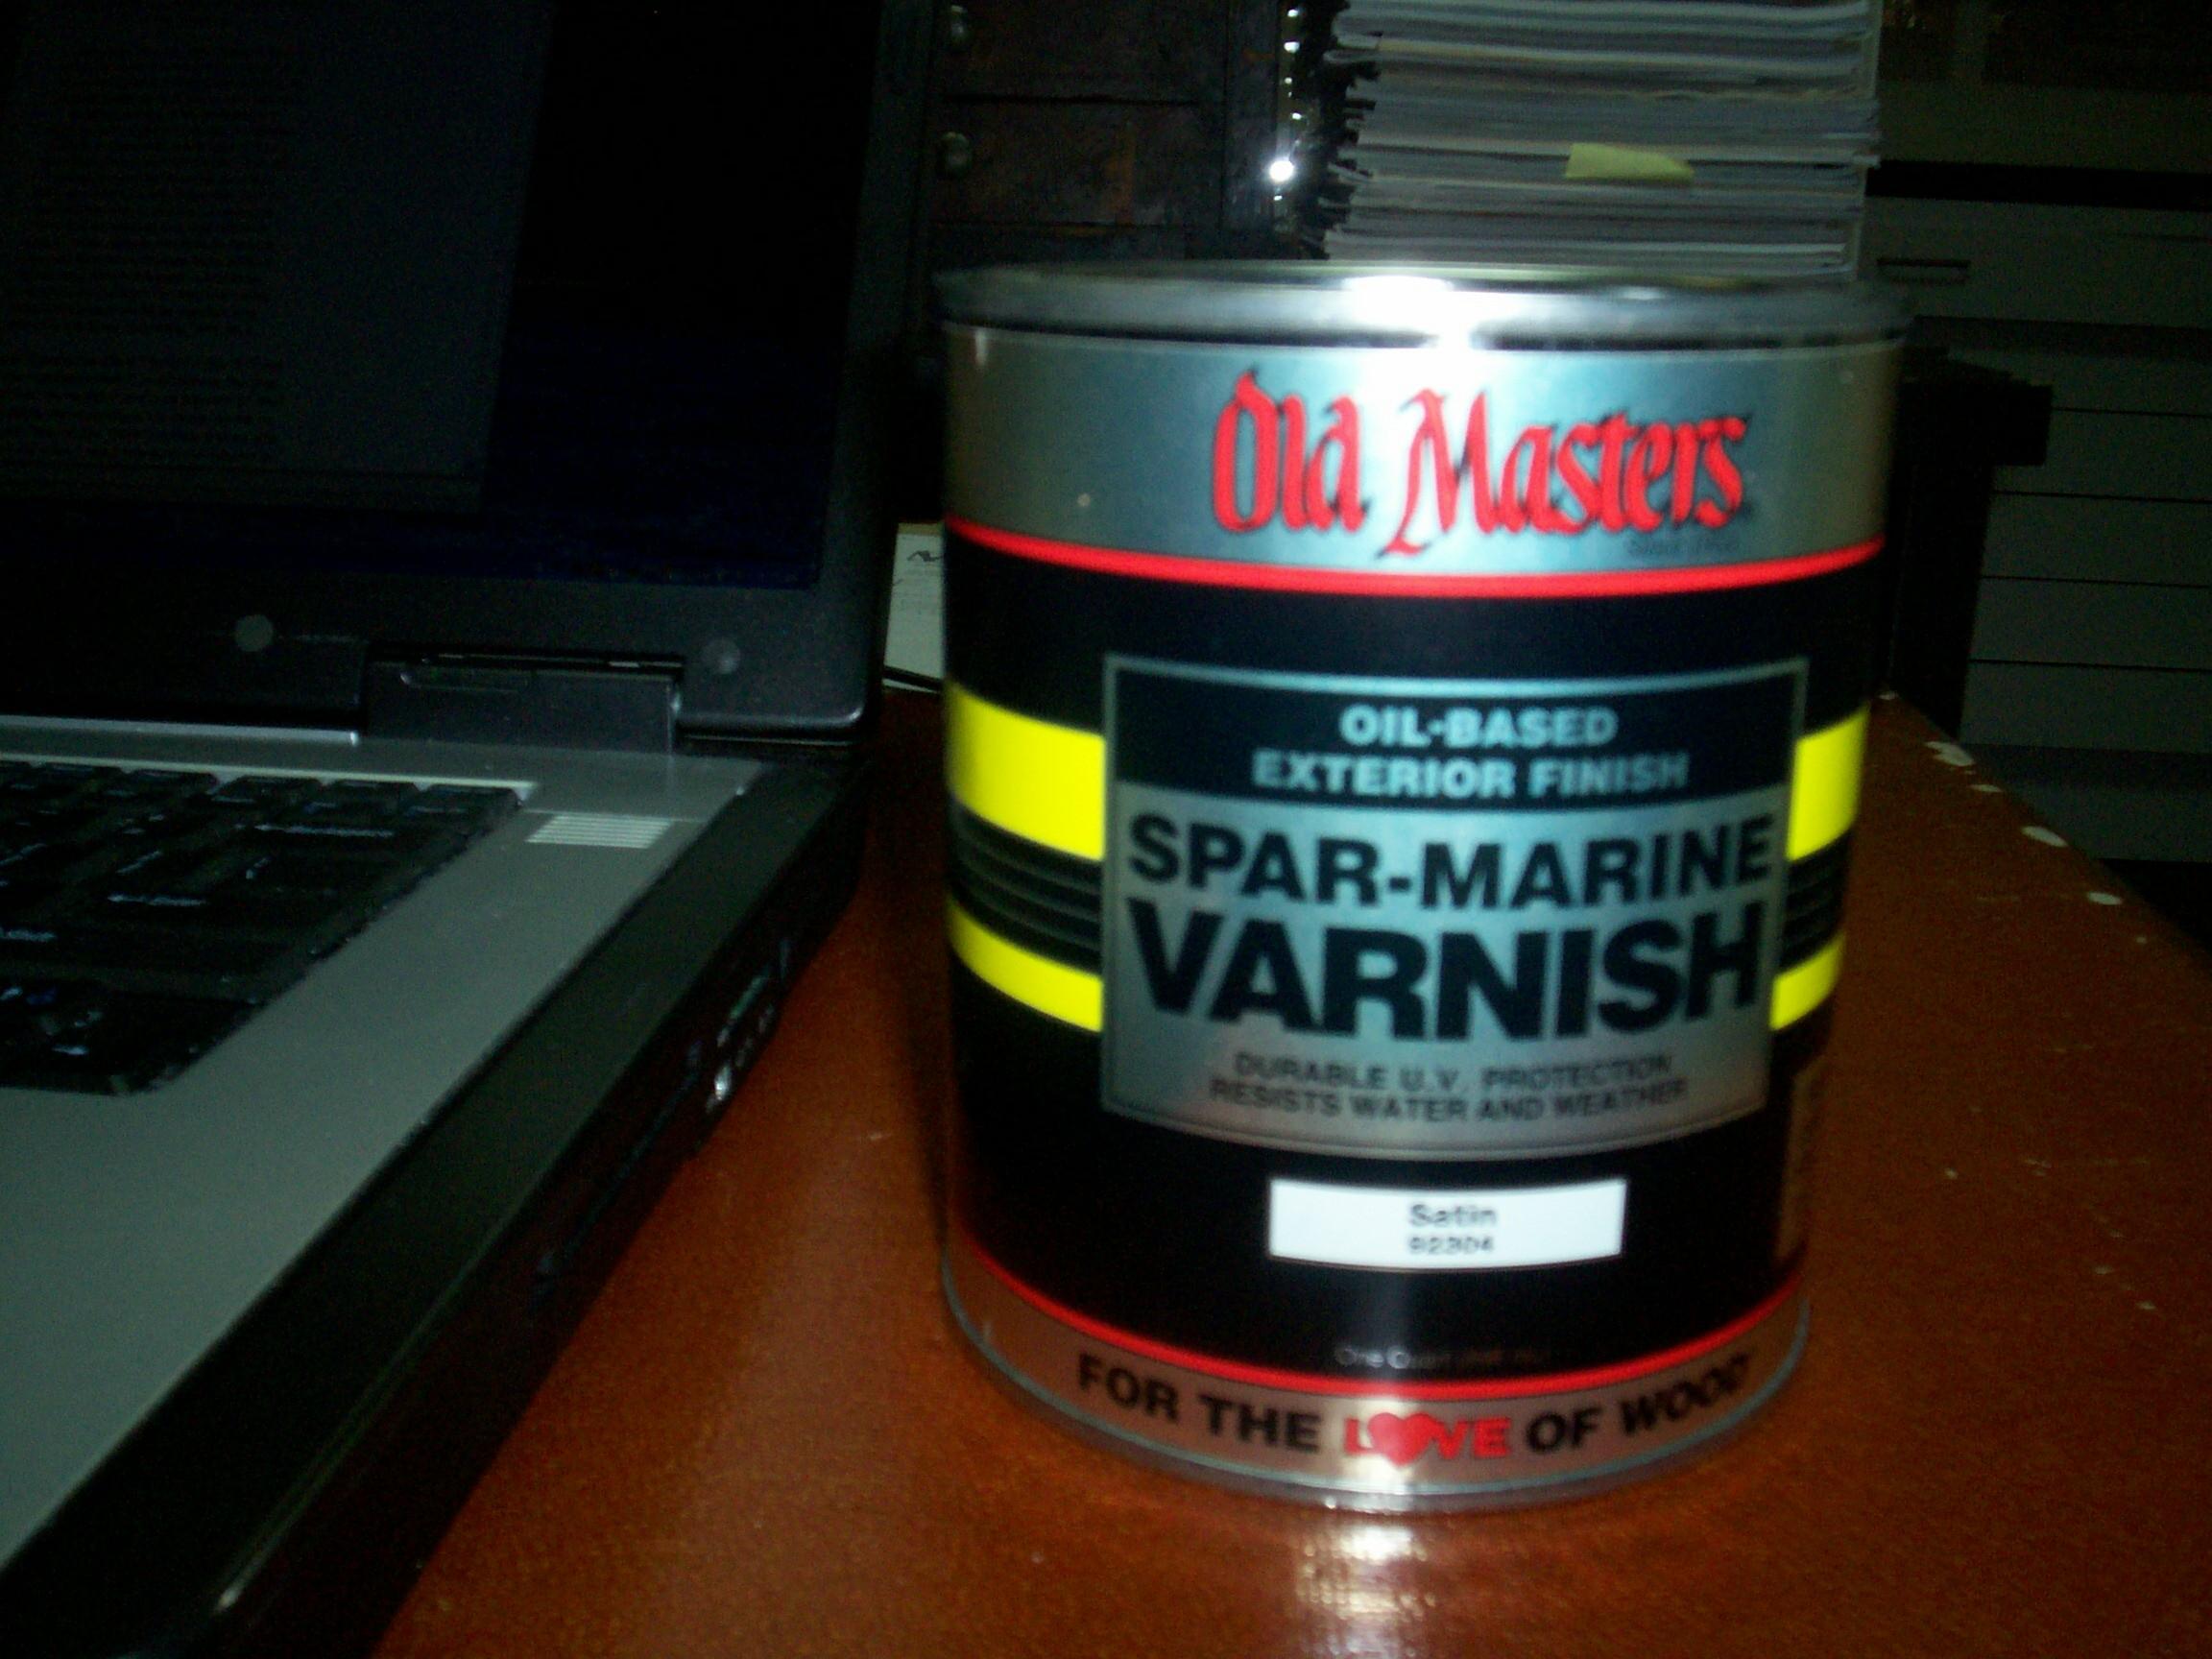 April
1st 2009 I want to
refinish Deerslayer's bed before the Florida sun does much damage to
the oak bed boards. After some intarweb research, I decided on Old
Masters Spar-Marine Varnish in a satin finish. Normally, I'd order it
on the Internet but because I recently suffered a 25% pay reduction due
to the economy, I'm being more frugal these days with my money and more
spendy with my time. I found a local dealer for the stuff three miles
from the Krash lab and got a quart for $21. The Internet price
including shipping would have been close to $40.
April
1st 2009 I want to
refinish Deerslayer's bed before the Florida sun does much damage to
the oak bed boards. After some intarweb research, I decided on Old
Masters Spar-Marine Varnish in a satin finish. Normally, I'd order it
on the Internet but because I recently suffered a 25% pay reduction due
to the economy, I'm being more frugal these days with my money and more
spendy with my time. I found a local dealer for the stuff three miles
from the Krash lab and got a quart for $21. The Internet price
including shipping would have been close to $40.
 April
5th 2009 Didn't get any
wrench time over the weekend. I opted out of the friday nite cruise-in
due to wind and overcast skies but the rest of the weekend was
showtime. On saturday, Deerslayer and I followed my fellow "Just Us
Motor Club" member, Anthony, up to the ABACOA town center show and
cruise that they hold the first saturday of every month. He flies low,
hellbent for leather, in his '51 Merc sled and when we got on the
turnpike, we covered the fifty miles there in short order. Following
the Merc was like being in the wake of a big sports fisherman cruising
up the Intracoastal Waterway.
April
5th 2009 Didn't get any
wrench time over the weekend. I opted out of the friday nite cruise-in
due to wind and overcast skies but the rest of the weekend was
showtime. On saturday, Deerslayer and I followed my fellow "Just Us
Motor Club" member, Anthony, up to the ABACOA town center show and
cruise that they hold the first saturday of every month. He flies low,
hellbent for leather, in his '51 Merc sled and when we got on the
turnpike, we covered the fifty miles there in short order. Following
the Merc was like being in the wake of a big sports fisherman cruising
up the Intracoastal Waterway.
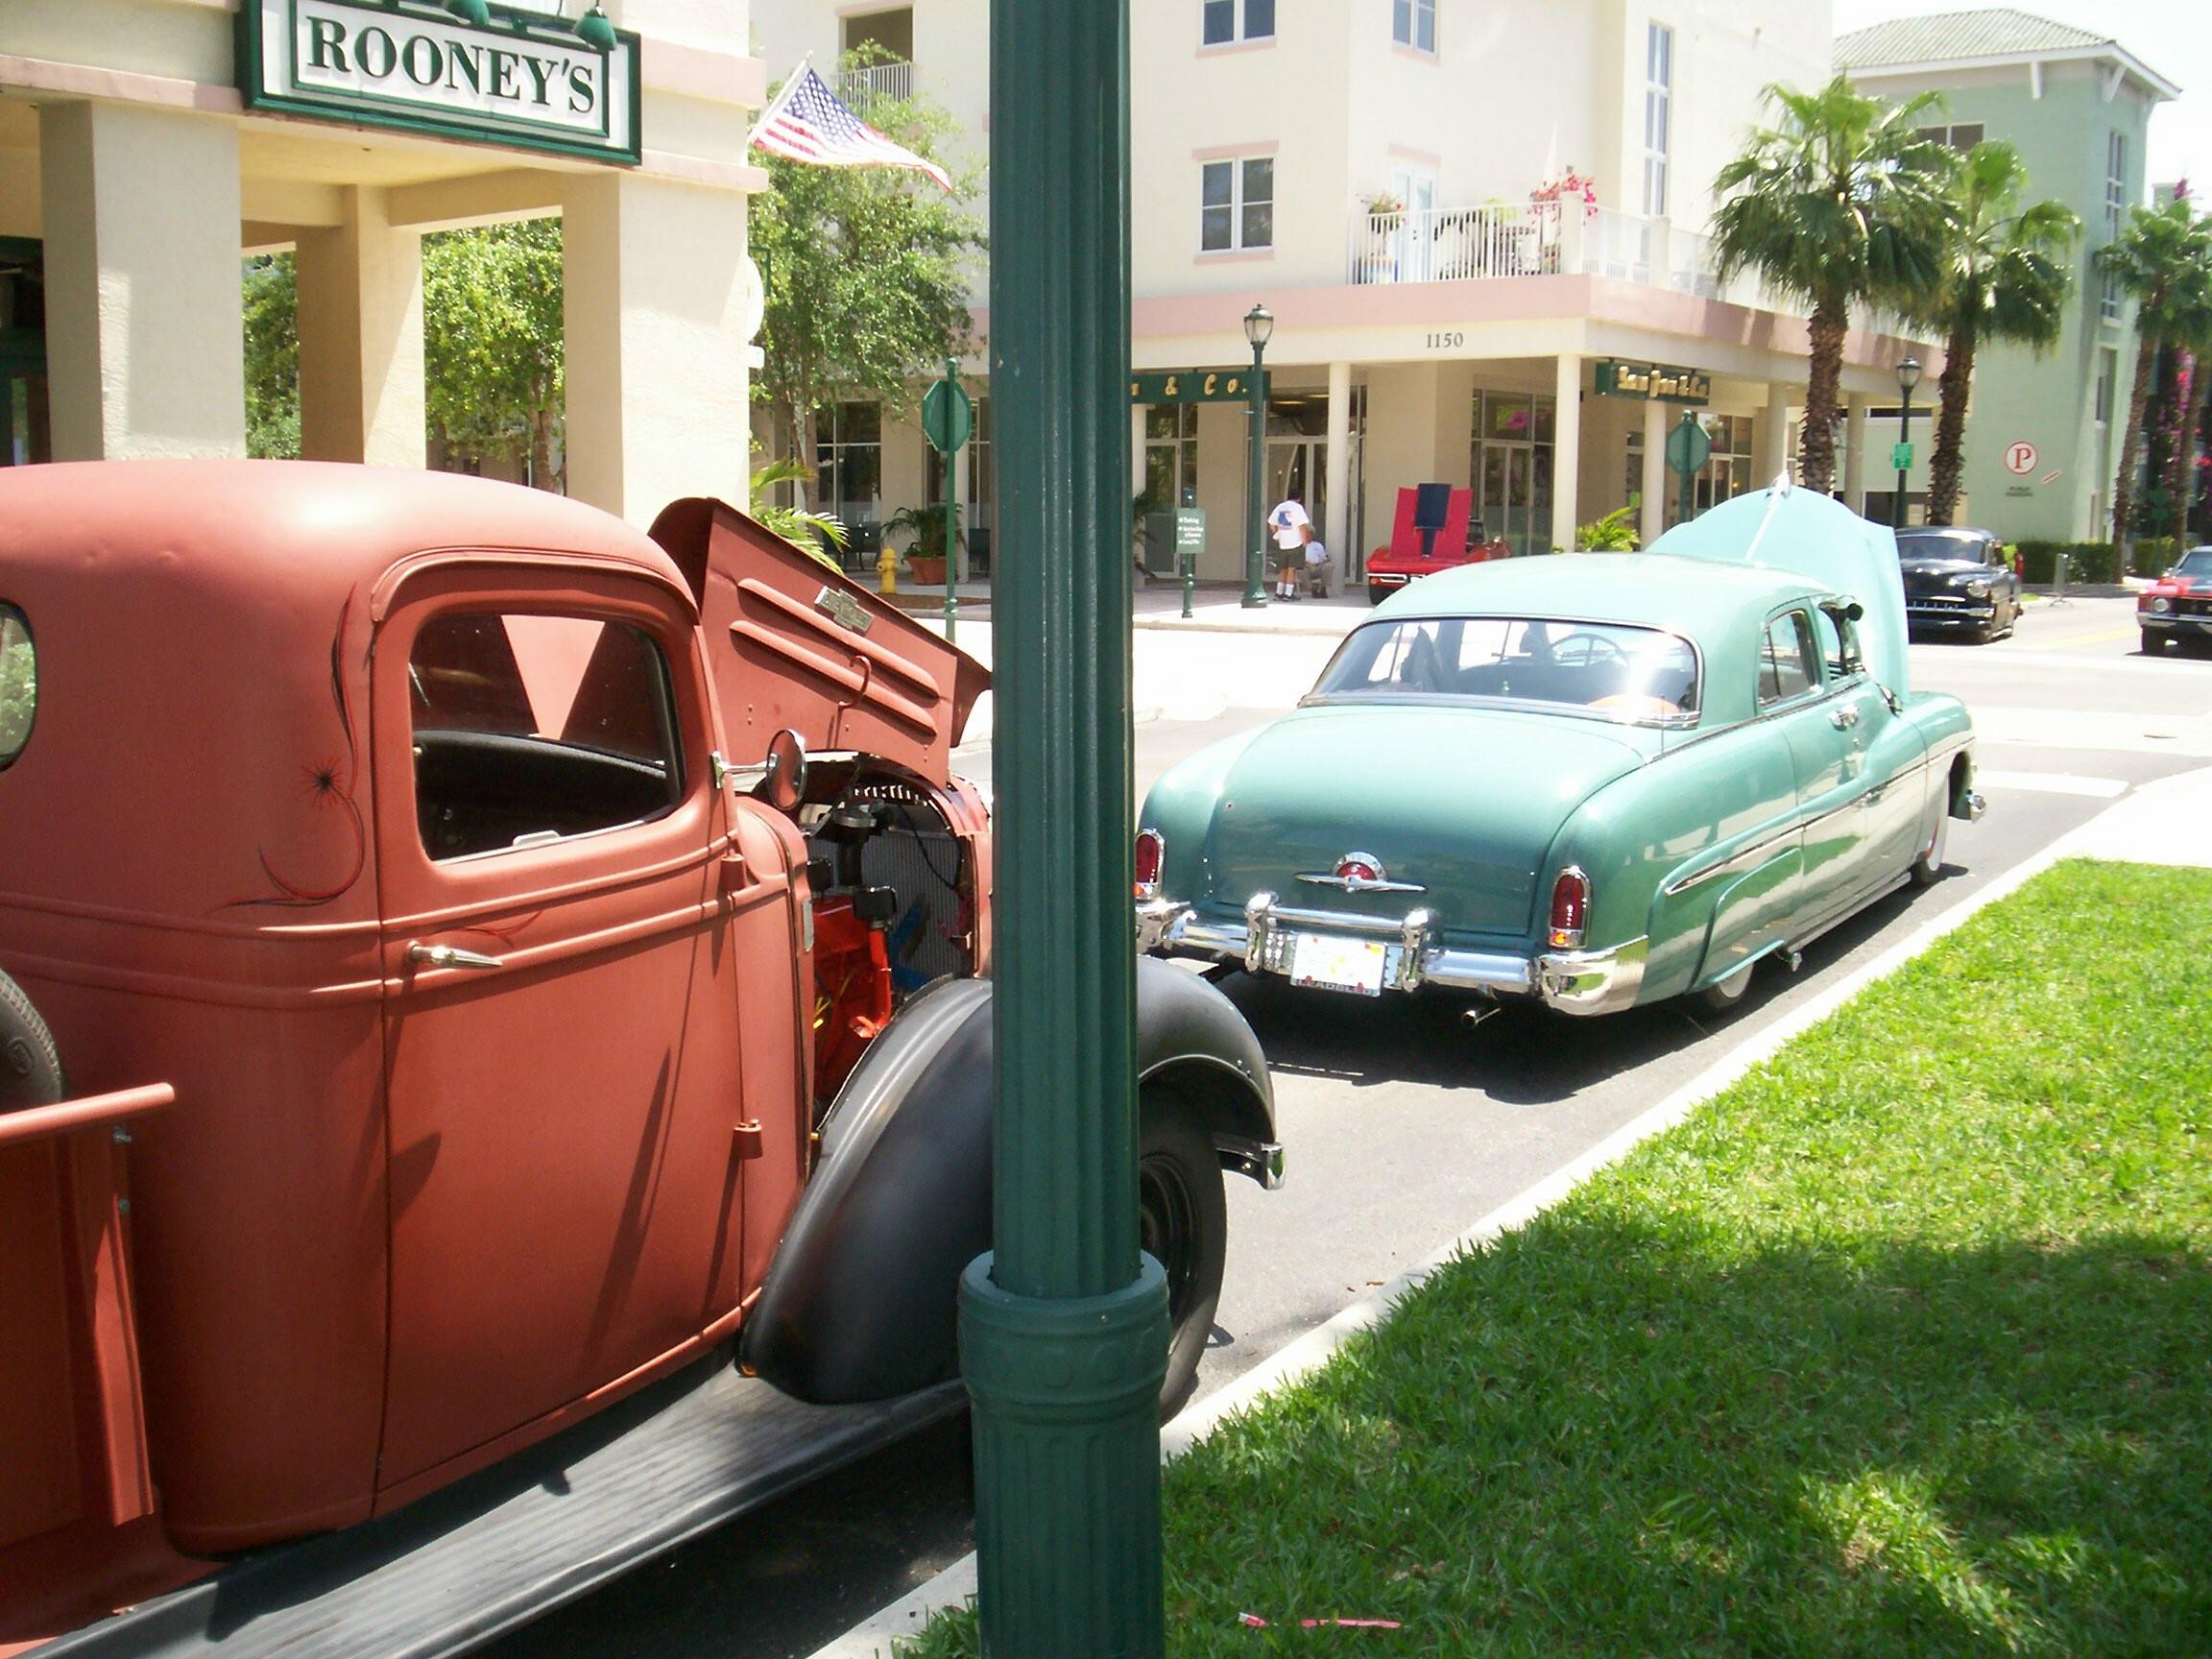
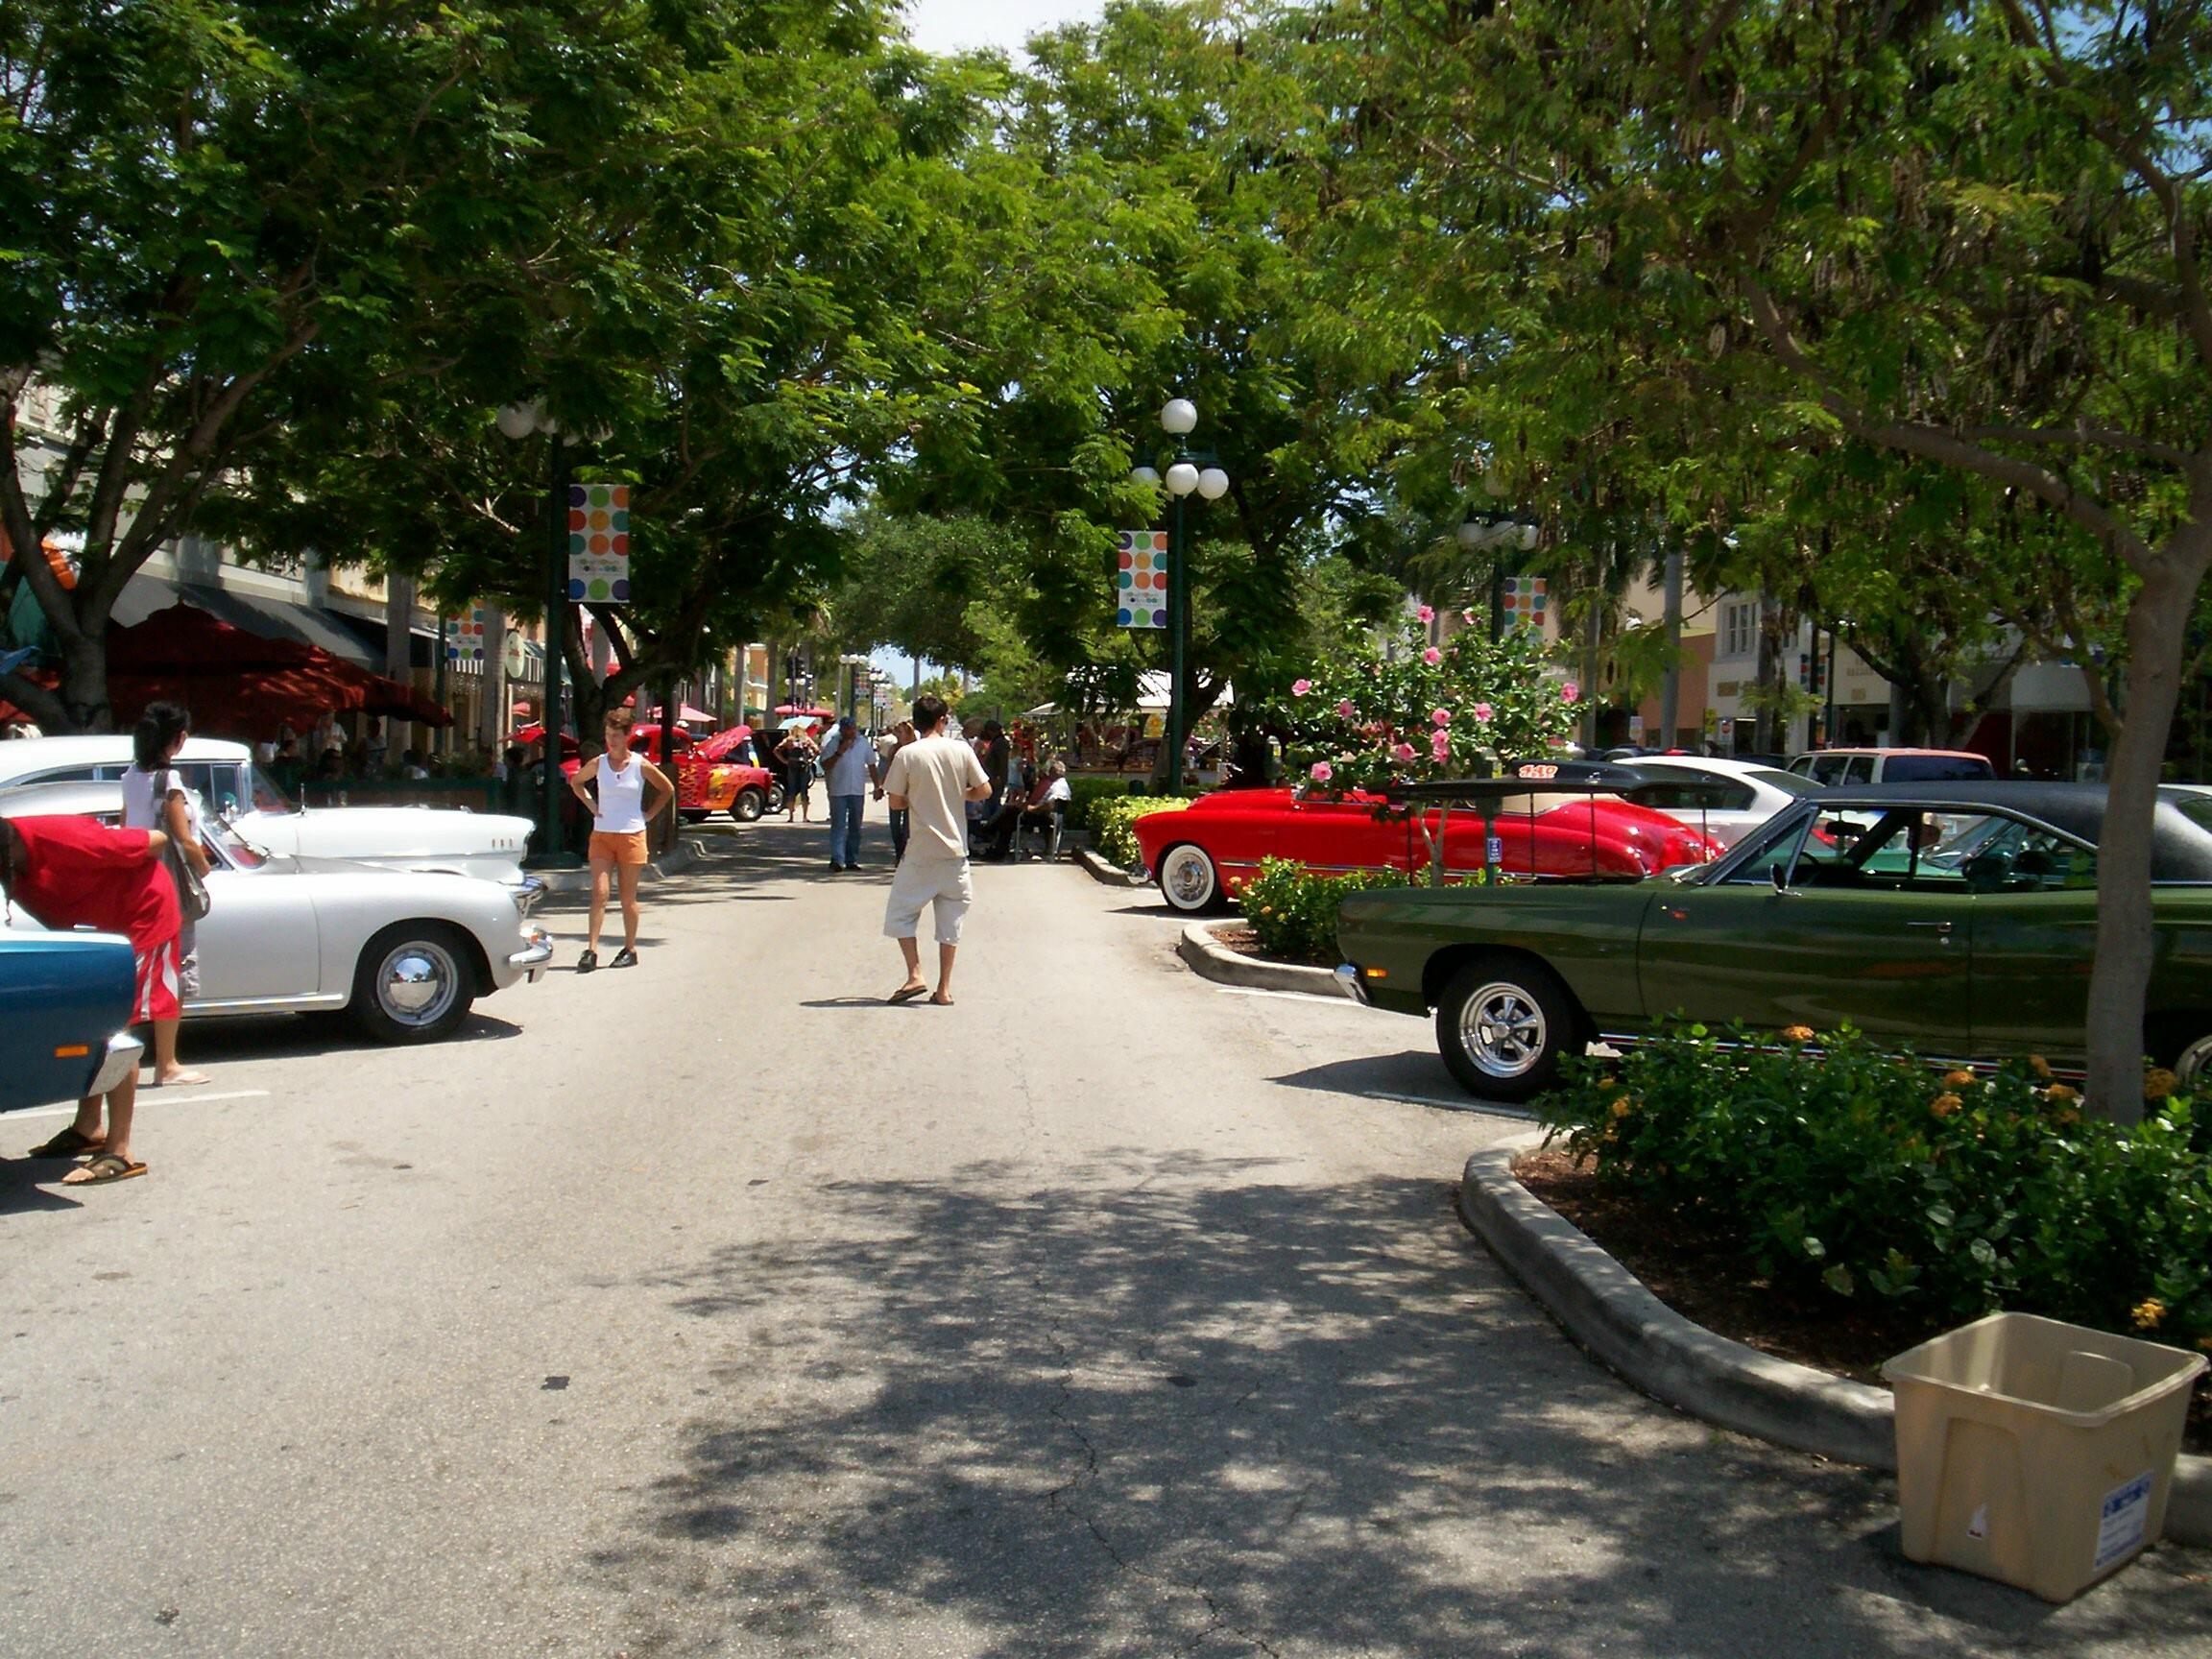 Today,
when I got up, the weather was still perfect so I decided to go to the
monthly Dream Car Classic show in "old downtown" Hollywood, Florida.
Attendance wasn't all that good and there weren't that many cars near
me. I got there early enuf to get a good spot under the trees so I
stayed put. You have to get there early and it being Palm Sunday might
have had something to do with the sparse attendence.
Today,
when I got up, the weather was still perfect so I decided to go to the
monthly Dream Car Classic show in "old downtown" Hollywood, Florida.
Attendance wasn't all that good and there weren't that many cars near
me. I got there early enuf to get a good spot under the trees so I
stayed put. You have to get there early and it being Palm Sunday might
have had something to do with the sparse attendence.
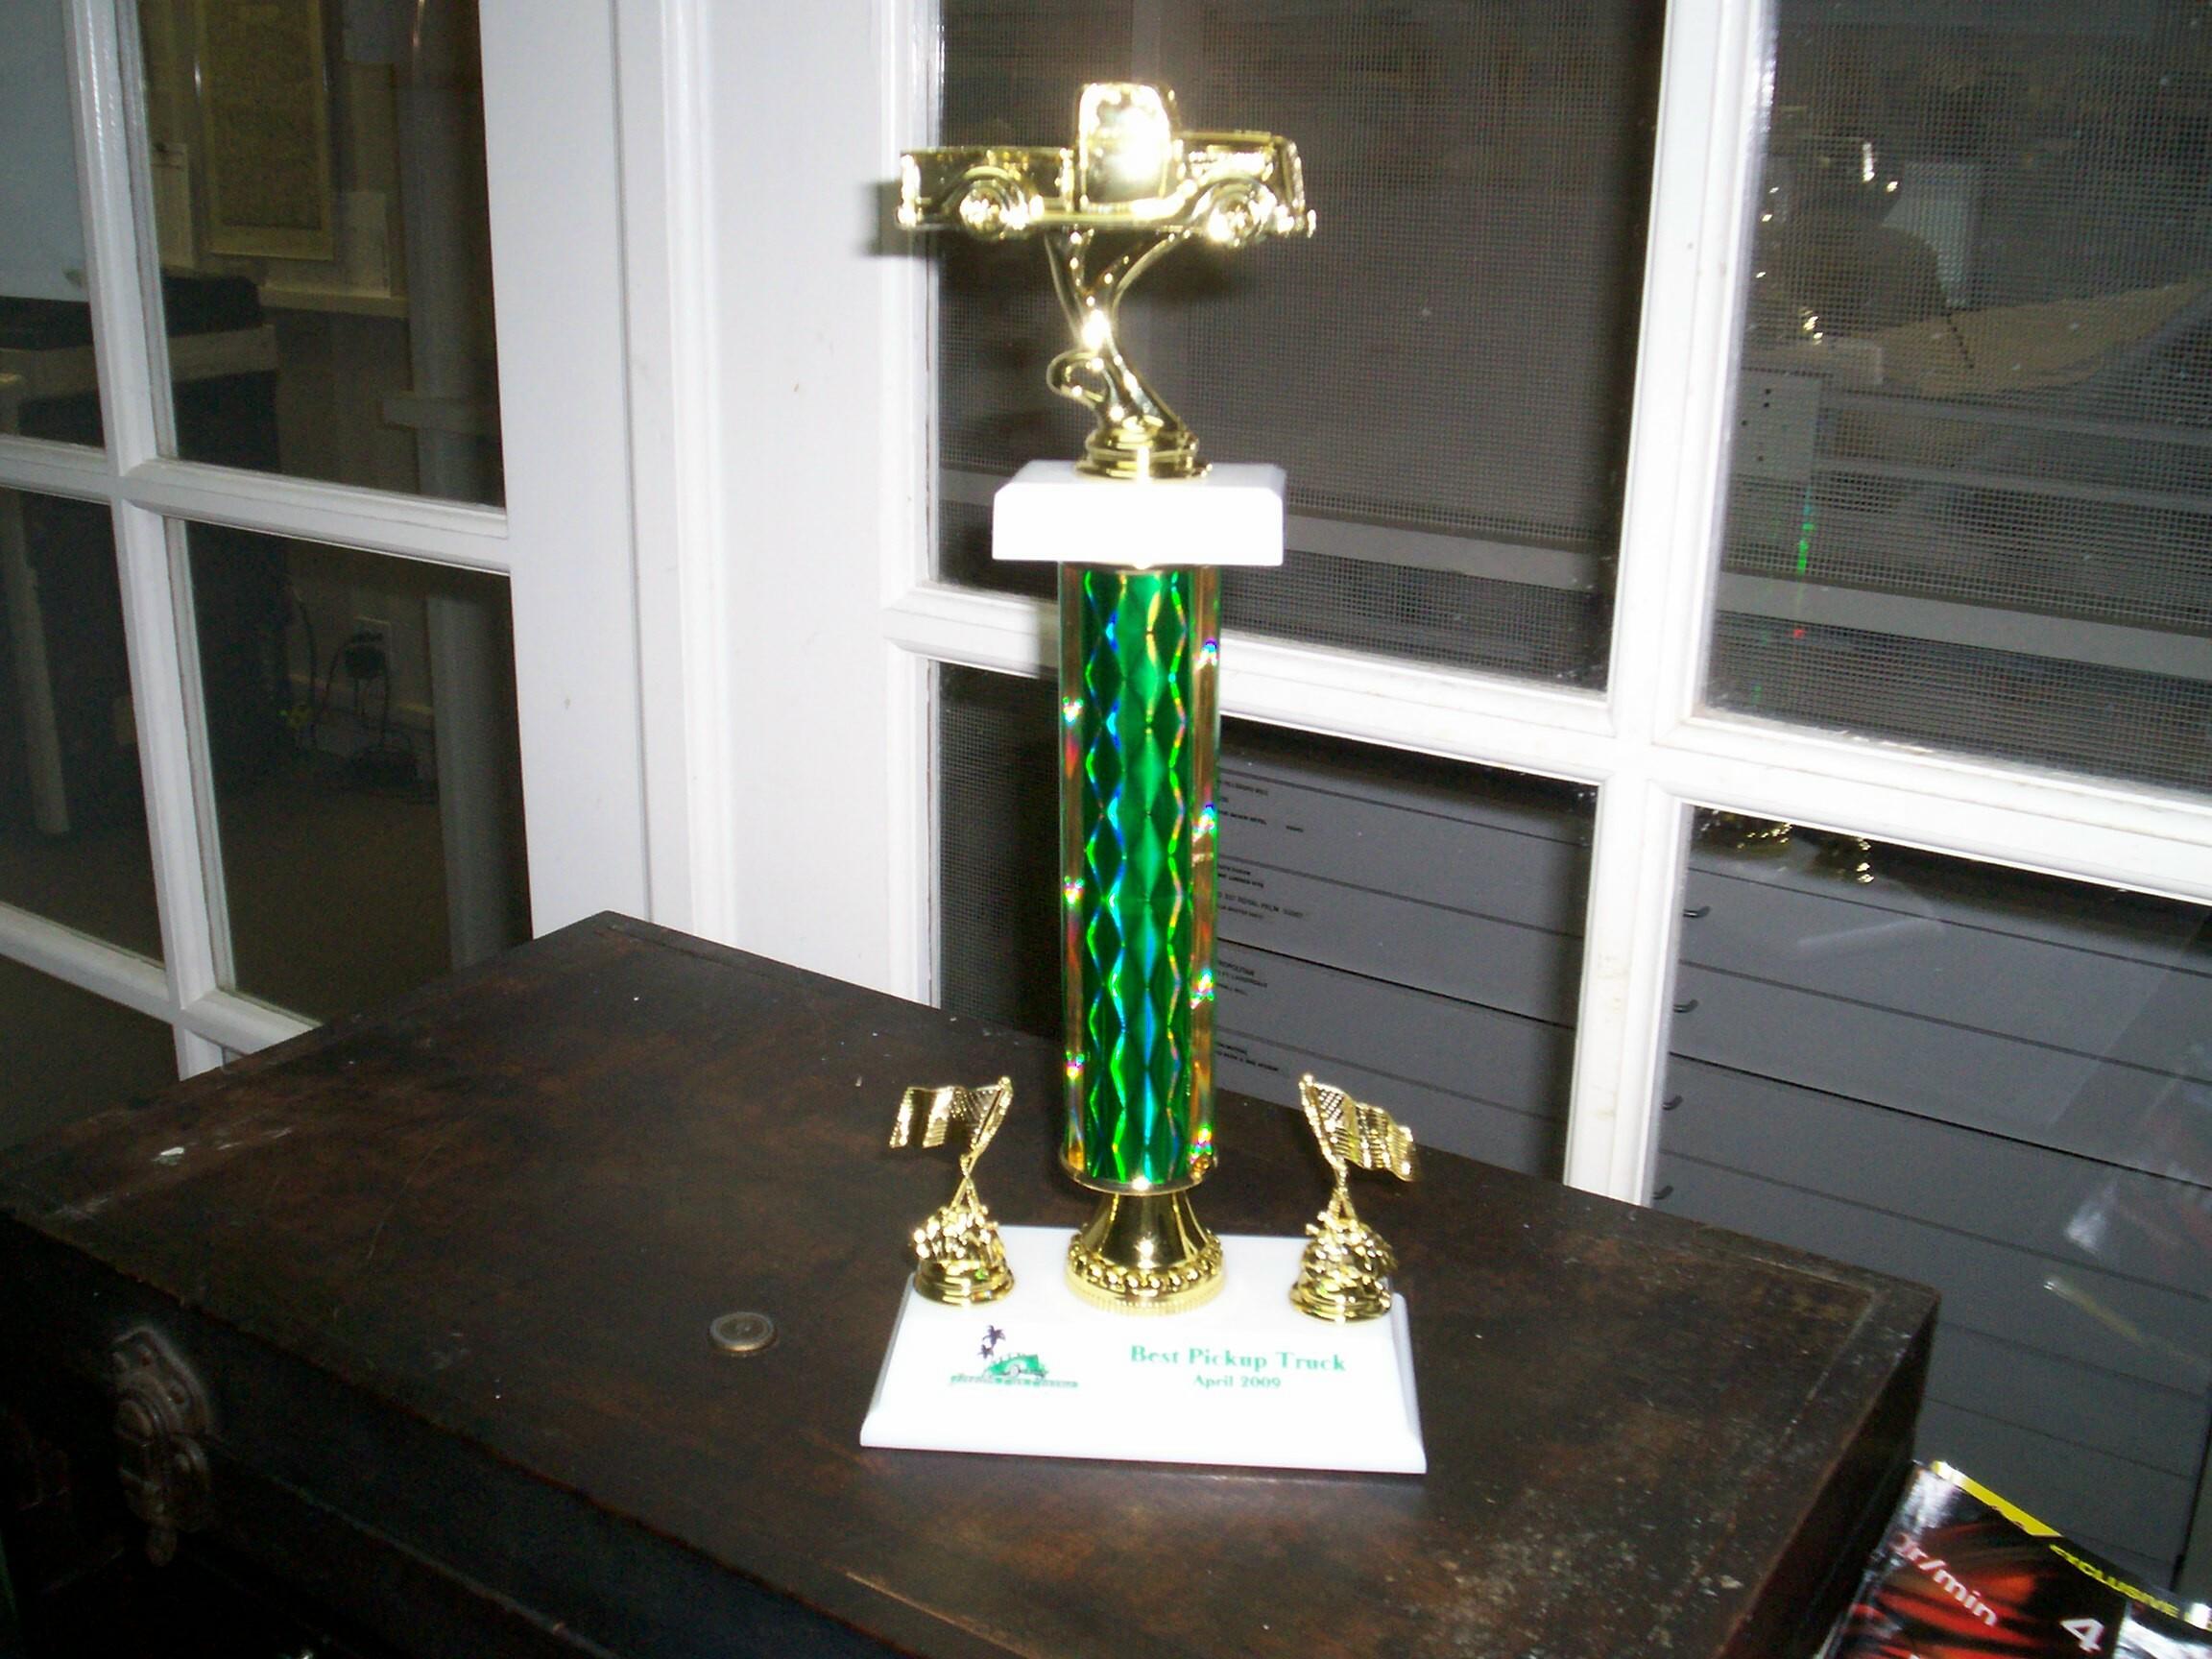 Deerslayer
got his second award since there were only two trucks in the show. We
beat out an old '46 Binder for "Best Truck". Got a trophy with a truck
that actully looks like a '37 Chebby on top of it. Got a tee shirt too.
The tee shirt is more useful to me. I wear my show tee shirts to the
cruise-ins until they get worn. Then they get to spend time under the
trucks with me in the gunk.
Deerslayer
got his second award since there were only two trucks in the show. We
beat out an old '46 Binder for "Best Truck". Got a trophy with a truck
that actully looks like a '37 Chebby on top of it. Got a tee shirt too.
The tee shirt is more useful to me. I wear my show tee shirts to the
cruise-ins until they get worn. Then they get to spend time under the
trucks with me in the gunk.
Finished up the weekend with the weekly sunday nite cruise-in in Coral Springs, Florida. Beer of the day is Harpoon Brewery's Hibernian Irish Style Red Ale.
April 8th 2009 Tonite was Las Olas cruise-in nite down in Fort Lauderdale. The Boss was plannin' to take the '39 Caddy but that didn't work out and I went solo. When I arrived at the staging area parking lot, some guys were unloading a Pro Street Rolls-Royce off a carrier. It had a blown hemi for power. We cued up to move out to the street show area and I pulled in to follow my friends, Anthony and Lou. I got twenty feet out of the parking space when Deerslayer cut out on me. First time ever and he wouldn't start up again. I was last in line and nobody noticed I was missing. A bystander helped me push Deerslayer back into the parking space and I lifted the hood. There was no sputter. The engine just cut off. Feels like a spark problem but I checked the carby first anyway. Pulled the air cleaner and watched while the bystander cranked it and I fiddled with the carby linkage. It has gas. Next, I pulled the coil wire off the dizzy and held it close to the valve cover while the bystander cranked again. I had spark going from coil to dizzy. Pulled a plug wire next even tho' I thought I wouldn't be able to see a spark. When my helper turned the engine this time, it started up on five cylinders. I put the plug wire back on, thanked the guy for his help and went to find my friends. They had held a space open for me on the street.
Deerslayer's problem looks like a loose coil wire. At least that's the solution I'm rootin' for. The ignition was on during the short troubleshooting process so I don't think it's the switch. Could be an intermittant problem with the coil, condenser or ballast resistor, I suppose. After awhile, I quit fusin' over it and wrapped my dirty hands around an Anglers Pale Ale from the Uinta Brewing Company. Small as it is, this is the first time I ever fixed a road breakdown on my own. Later, I made the aquaintance of fellow HAMBer, "Movinman" and a several of his "Saints and Sinners Car Club" members and gave them the Deerslayer tech review. Deerslayer made the journey back to the Krash pad at the end of the nite without signs of further problems.
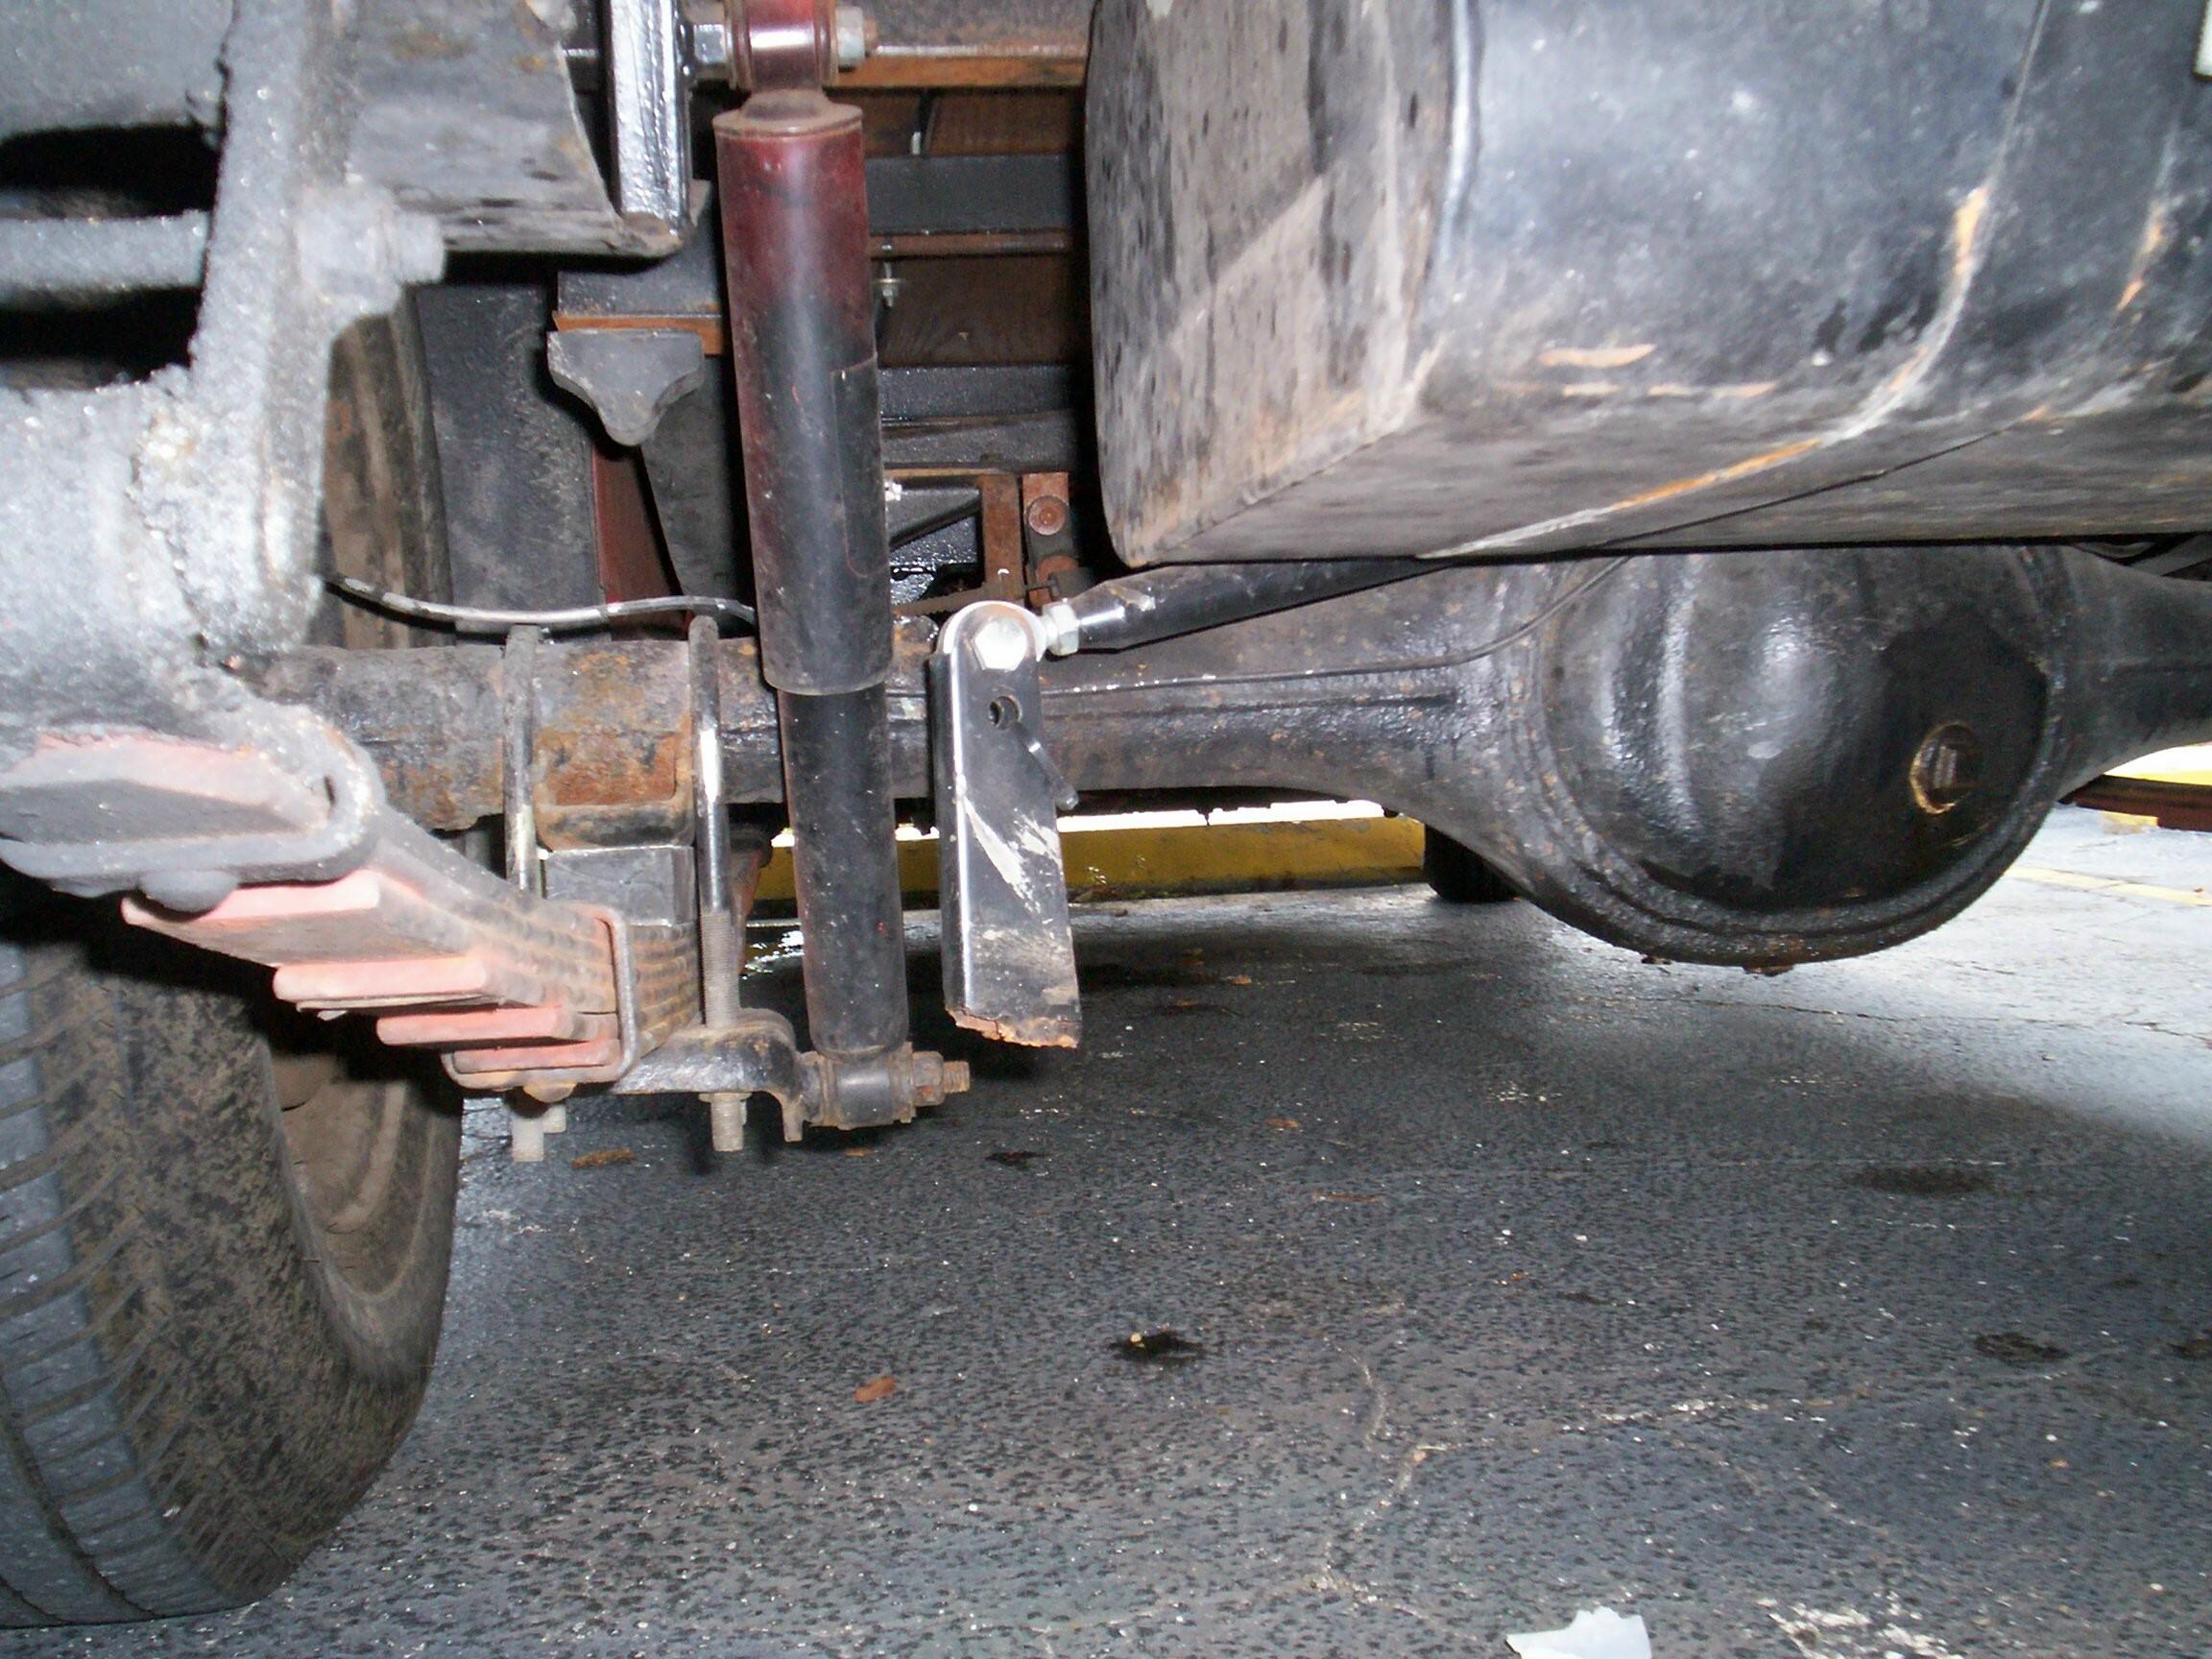 April
11th 2009 Deerslayer
has picked up some new noticable rattles when going over speed bumps
and the like. I carry a couple of folding chairs in the bed for
cruise-ins but they haven't made noise like this before. I'm not doing
anything today and I'm waiting at the Krash lab for the Boss to pick me
up on the way to the Barrett-Jackson Auction in West Palm Beach. Just
walking around Deerslayer with a Sam Adams and making a visual
inspection. Tony had little peices of electrical tape and rubber in
various places to stop rattles including several on the tailgate. Most
of the tailgate pieces have fallen off and maybe that's the source, I
tell myself. Then I look underneath . . . Holy Hanna! The panhard rod
has broken loose at the axle weld. Lucky for me, the pumpkin and the
gas tank are just close enuf to each other to prevent the loose panhard
rod end from falling on the pavement. I'll disconnect it for now and
repair it when I relearn how to use my MIG in the next few weeks.
April
11th 2009 Deerslayer
has picked up some new noticable rattles when going over speed bumps
and the like. I carry a couple of folding chairs in the bed for
cruise-ins but they haven't made noise like this before. I'm not doing
anything today and I'm waiting at the Krash lab for the Boss to pick me
up on the way to the Barrett-Jackson Auction in West Palm Beach. Just
walking around Deerslayer with a Sam Adams and making a visual
inspection. Tony had little peices of electrical tape and rubber in
various places to stop rattles including several on the tailgate. Most
of the tailgate pieces have fallen off and maybe that's the source, I
tell myself. Then I look underneath . . . Holy Hanna! The panhard rod
has broken loose at the axle weld. Lucky for me, the pumpkin and the
gas tank are just close enuf to each other to prevent the loose panhard
rod end from falling on the pavement. I'll disconnect it for now and
repair it when I relearn how to use my MIG in the next few weeks.
 April
18th 2009 Beautiful
weather today, the kind we Floridians look forward to. Good weather for
the task I had planned, re-finishing the bed wood. The varnish
manufacturer recommends a mineral spirits wipedown as prep for
previously finished surfaces. I rooted around in the shed for mineral
spirits which I had last used when rebuilding a vent window for
BillyBob back in aught-two (that I still haven't installed yet). I
found the can but the mineral spirits had spirited away into the
atmosphere a long time ago. I briefly pondered using something else but
decided to wait until I got a new can of mineral spirits. I went ahead
with other work.
April
18th 2009 Beautiful
weather today, the kind we Floridians look forward to. Good weather for
the task I had planned, re-finishing the bed wood. The varnish
manufacturer recommends a mineral spirits wipedown as prep for
previously finished surfaces. I rooted around in the shed for mineral
spirits which I had last used when rebuilding a vent window for
BillyBob back in aught-two (that I still haven't installed yet). I
found the can but the mineral spirits had spirited away into the
atmosphere a long time ago. I briefly pondered using something else but
decided to wait until I got a new can of mineral spirits. I went ahead
with other work.
April 20th 2009 Yesterday, I changed Deerslayer's oil and filter and not much else. This morning, I went to Lowe's for a new can of mineral spirits. When I came back out to start Deerslayer for the ride back to the Krash Lab, he ran for a few seconds and cut out again. One time can be written off as an anomaly. Two times signals impending doom. Guess it's not a loose coil wire after all. Did the best troubleshooting I could without a helper this time. Put the end of the coil wire from the dizzy on top of the valve cover so I could see it when cranking the engine from inside the cab. Didn't see a spark this time. Put the coil wire back in the dizzy and tried one more time. Deerslayer started and stayed running.
Decided now was the time to put Tony's HEI dizzy and coil in. After work, I started, following the detailed instructions Tony laid out for me at OldGMCtrucks.com.
Just jump a wire across the ballast terminals.Rotate the engine to tdc,the rotor pointing at number one plug terminal so you know the crank is in the correct position.Normal engine running rotation is clockwise viewed from the front.Removing the plugs makes the engine easiy to rotate with the fan.There's two marks on the damper I scribed,as you rotate the engine clockwise the first mark is 34 degrees,the second mark is TDC.position the damper about a 1/3 past TDC towards the total advance mark.Now carefully remove the points distributor.The hei cap with wires should have a mark on the number one wire,but actually it makes no difference so long as the rotor is lined up with a terminal you'll call number one.The HEI is set up to drop in,don't disturb the clamp,it should drop right in with the clamp bottoming out on the block,lining up with the retaining bolt hole..You'll see how the rotor turns as you install the distributor,it might take a few tries,you may have to take a long screwdriver to rotate the oil pump drive a little bit this way or that so the distributor bottoms out on the clamp.Do not attemp to tighten the distributor unless it bottoms on the clamp easily,be maybe a 1/16 inch clearance between the clamp and block.Install the clamp bolt and snug it down in the middle of the adjustment slot.Now see where the rotor points and check the cap,call that number one and do the wires so they reach properly in the firing order ,clockwise,153624.Now remove the coil,install the funky looking HEI coil.The big black wire that was on the cannister coil positive goes to the HEI coil terminal marked positive.The red wire on the cannister coil negative terminal is for the tach,put that on the HEI coil negative.There's a small wiring harness that plugs into the two short HEI distributor leads,the lead with black tape goes to coil positive,the other to negative. Ok,should start right up,leave off the vacuum hose.At idle the timing will be about 1/3 the way up from on the damper TDC mark.More important on this engine is to check full advance.Rev the engine quickly to 3000 rpm or so and you'll see the timing mark advance then stop at full advance.You're using a timing light of course,lol.That gets set on the second mark,34 degrees.There's also a 34 full advance mark on the flywheel visable in the normal timing position in the clutch housing hole above the starter. Let me know if you have any issues, Tony
Put both wires on the same terminal of the ballast resistor to bypass it. Pulled the plugs and rotated the engine as directed. Noted position of rotor and pulled old dizzy. Installed the HEI dizzy and coil. I wuz runnin' out of daylight but I got the plugs in and plug wires on before I ran into a snafu. The HEI coil terminals are these unsatisfying, thin spade terminals and I had to connect one thin and one thick wire to the positive one. I finally found a suitable terminal of the right size for the thick wire in the shed but it would not accomodate both wires. The thin wire was piggybacked on the thick wire with a clamp on tee connector. Not pretty.
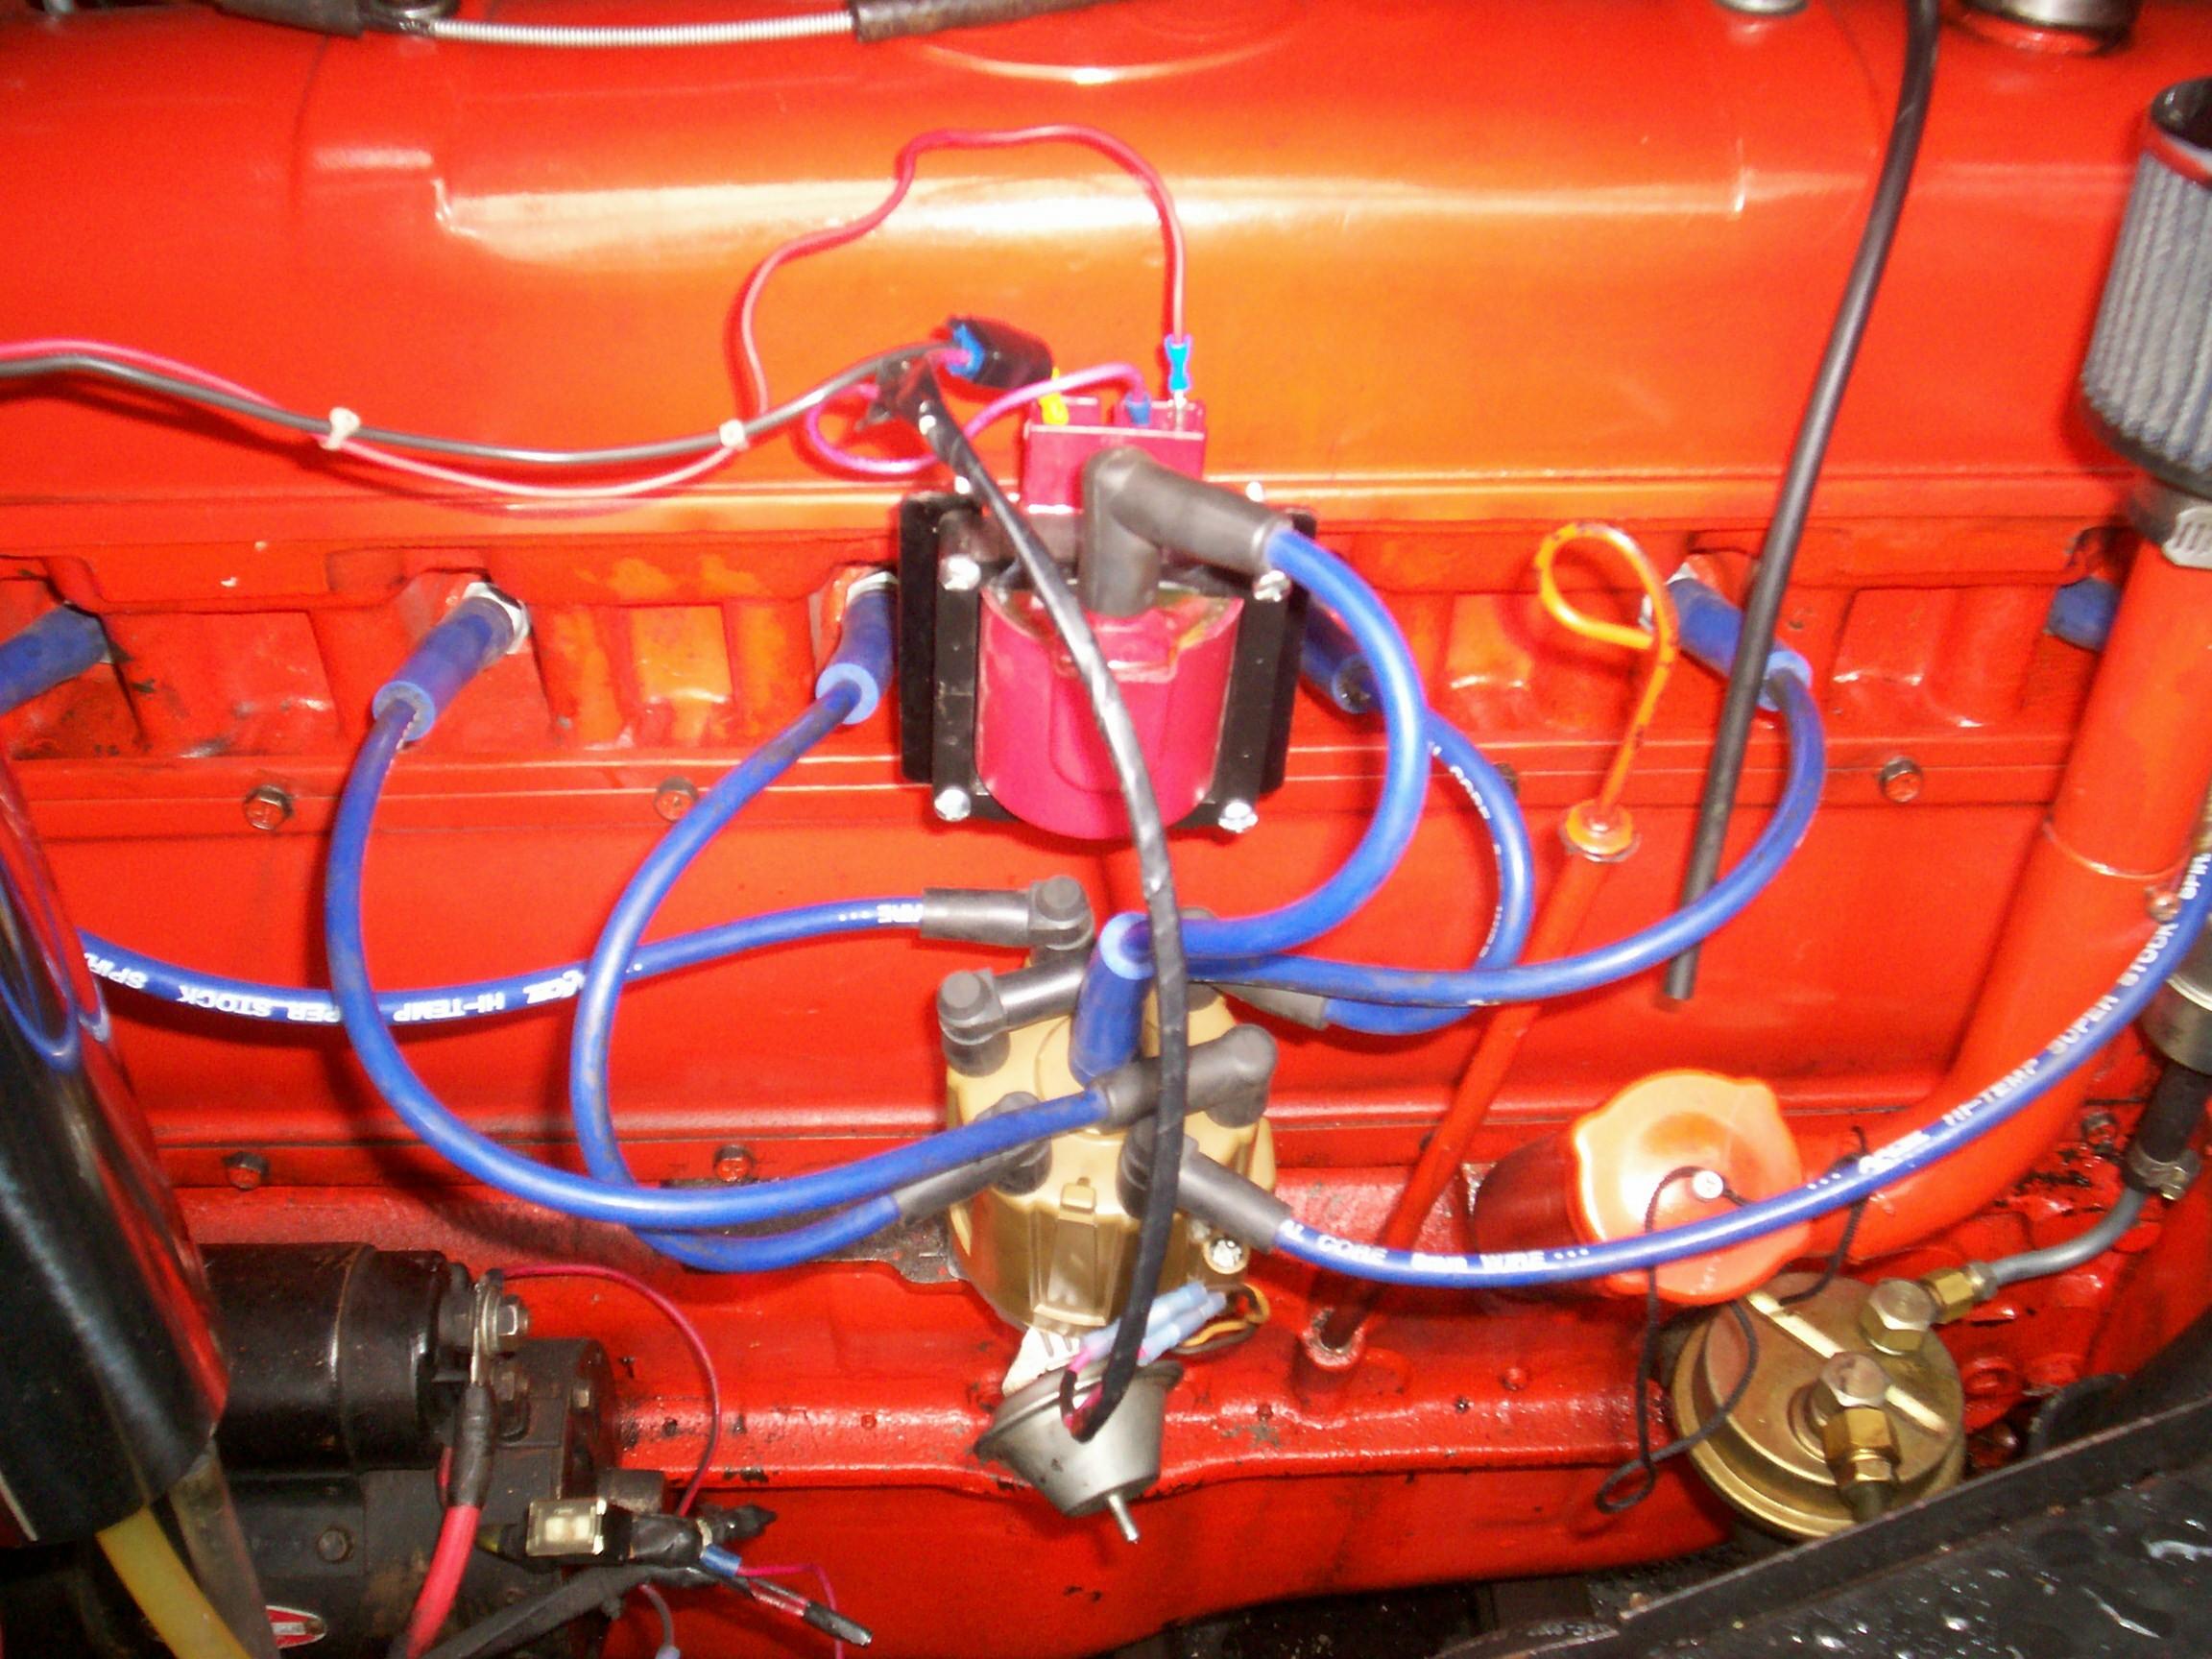 Time
to start it up. It wouldn't fire. Messed around with the wires for
awhile but no joy. The only thing I know when I put the tools in the
shed and drive BillyBob home to the Krash Pad is that I have spark to
the positive side of the coil. I wake up in the middle of the night and
can't sleep. This is normal for me. Then it hits me like a eight pound
sledge on my sandaled foot! I got the firing order right, fifteen is
too young, thirty-six is too old, twenty-four is just right but . . . I
did it counter-clockwise! Damnation!
Time
to start it up. It wouldn't fire. Messed around with the wires for
awhile but no joy. The only thing I know when I put the tools in the
shed and drive BillyBob home to the Krash Pad is that I have spark to
the positive side of the coil. I wake up in the middle of the night and
can't sleep. This is normal for me. Then it hits me like a eight pound
sledge on my sandaled foot! I got the firing order right, fifteen is
too young, thirty-six is too old, twenty-four is just right but . . . I
did it counter-clockwise! Damnation!
April 21st 2009 At lunch time, after the morning monsoon let up, I went out to the shadetree and corrected the plug wiring. Still no joy. I don't appear to be getting any juice between the coil and the dizzy. I'll be taking BillyBob to the cruise-in tonite if it don't rain anymore today. I'll mess around with this some more on wednesday but this episode is gettin' long so you guys will have to wait ontil the next work-in-progress log entry for the resolution of the ignition troubles.
| < Back
to Intro |
You can email me at ![]() webmaster@laroke.com
webmaster@laroke.com
Issued Tuesday April 21, 2009
Updated Wednesday May 2, 2018
copyright © 2008-2018 Larry R. Kephart all rights reserved
| | LRK Home | | Bio Info | | Krash Khronicles | | LAROKE | |
| | BettyLou | | BillyBob's Garage | | Rat Patrol | | Deerslayer | | Elvira | |
| | Land of the Free and Home of the Brave | |
| | Keppylou's Art | | WWI Soldier's Diary | |