| | LRK Home | | Bio Info | | Krash Khronicles | | LAROKE | |
| | BettyLou | | BillyBob's Garage | | Rat Patrol | | Deerslayer | | Elvira | |
| | Land of the Free and Home of the Brave | |
| | Keppylou's Art | | WWI Soldier's Diary | |
Elvira's Enhancement Log
![]()
ELVIRA LINKS including vendor sites for parts and tools as well as sites for GM organizations
![]()
ENHANCEMENT LOG includes log entries of repairs and enhancements between the time of arrival in Florida and the present.
![]()
ELVIRA MAINTENANCE Ever changing detailing, oil change, lube, etc. maintenance routines developed for Elvira based on what Cadillac will allow, including required tools, materials and procedures.
2. Growing Pains
 December 10th
2018
I've had more than my share of flat tires over the years with all my
rides so, it came as no surprise when OnStar sent me an e-mail about
noon, telling me Elvira's driver side rear tire was down to 24 PSI.
Went out to the office parking lot to investigate. I had checked it at
five am when I got in the car to come to work and it was in the range
of 35 PSI. Shure enuf! It was down to 24 PSI. Damnation!
Could not hear a leak or find a puncture by feel. Got Elvira's air pump
out of the trunk and hooked it up. Glad, I examined this thing
beforehand because it has two hoses and settings, just air and air with
goop. and air with goop is the default. I want just air, if I can get
away with it. I was surprised. It got it back up to 35 PSI in less than
two minutes. I rolled Elvira forward in the parking space before
shutting her off, in case she was sitting on a screw or nail. Still
couldn't find anything amiss by feel alone.
December 10th
2018
I've had more than my share of flat tires over the years with all my
rides so, it came as no surprise when OnStar sent me an e-mail about
noon, telling me Elvira's driver side rear tire was down to 24 PSI.
Went out to the office parking lot to investigate. I had checked it at
five am when I got in the car to come to work and it was in the range
of 35 PSI. Shure enuf! It was down to 24 PSI. Damnation!
Could not hear a leak or find a puncture by feel. Got Elvira's air pump
out of the trunk and hooked it up. Glad, I examined this thing
beforehand because it has two hoses and settings, just air and air with
goop. and air with goop is the default. I want just air, if I can get
away with it. I was surprised. It got it back up to 35 PSI in less than
two minutes. I rolled Elvira forward in the parking space before
shutting her off, in case she was sitting on a screw or nail. Still
couldn't find anything amiss by feel alone.
 Twenty-four
hours later and the tire pressure was back down to 26 PSI. It wasn't a
one time anomaly or a prankster letting air out. I have a slow leak to
track down. I rearranged my dash readouts so I could monitor tire
pressures at a glance for the duration of this irritation and set
myself a schedule to air up every morning before leaving the shop.
Twenty-four
hours later and the tire pressure was back down to 26 PSI. It wasn't a
one time anomaly or a prankster letting air out. I have a slow leak to
track down. I rearranged my dash readouts so I could monitor tire
pressures at a glance for the duration of this irritation and set
myself a schedule to air up every morning before leaving the shop.
 December 19th
2018
Burned a vacation day to meet with the landlord's fire extinguisher
inspector. He was a no-show. There was lots of excitement, tho', as a
crew were tearing off the BillyBob Shop roof. After some Elvira
cleaning, I sat in my customary Deep Ponder Mode perch and smoked
ceegars and quaffed craft beer. My neighbor, Shaundar, from a few doors
down arrived to tell me about the dirtstorm heading my way. Lots of
debris was falling from his ceiling.
December 19th
2018
Burned a vacation day to meet with the landlord's fire extinguisher
inspector. He was a no-show. There was lots of excitement, tho', as a
crew were tearing off the BillyBob Shop roof. After some Elvira
cleaning, I sat in my customary Deep Ponder Mode perch and smoked
ceegars and quaffed craft beer. My neighbor, Shaundar, from a few doors
down arrived to tell me about the dirtstorm heading my way. Lots of
debris was falling from his ceiling.
 The roofers were using my
power but they weren't in front of my
overhead door yet so, I moved Elvira to the far side of the parking lot
and put a drop cloth over the parts in Deerslayer's bed. It was a good
move because some sizable items and patching tar escaped thru a sizable
hole directly above Deerslayer. Lucky, I was at the shop or I'd have
tar on some of my parts. I have a new layer of dirt over everything
now. When I walk around, my sneakers crunch. Beer of the day was Smaltz
Brewing Company's No Shtick 8% Hoppy Ale.
The roofers were using my
power but they weren't in front of my
overhead door yet so, I moved Elvira to the far side of the parking lot
and put a drop cloth over the parts in Deerslayer's bed. It was a good
move because some sizable items and patching tar escaped thru a sizable
hole directly above Deerslayer. Lucky, I was at the shop or I'd have
tar on some of my parts. I have a new layer of dirt over everything
now. When I walk around, my sneakers crunch. Beer of the day was Smaltz
Brewing Company's No Shtick 8% Hoppy Ale.
 November 21st
2019 I didn't do any maintenance on Elvira while the
county had the street in front of the BillyBob Shop torn up. There was
no point. She got dirty as soon as I left the compound. Well the street
is finally paved. Detailing isn't something I enjoy doing so I have to
give myself incentives. Additionally, there is only one light tube
still burnin' in Elvira's end of the shop. The low light,
combined with my original equipment eyeballs makes for what I call
"blind detailing". technique. I'm also smoking too many cigars and not
enjoying them. I settled on detailing in small doses so it
takes me a week or more to go full cycle and then start the next
detailing
cycle and I only allow myself a cigar while I'm detailing Elvira. It's
all good.
November 21st
2019 I didn't do any maintenance on Elvira while the
county had the street in front of the BillyBob Shop torn up. There was
no point. She got dirty as soon as I left the compound. Well the street
is finally paved. Detailing isn't something I enjoy doing so I have to
give myself incentives. Additionally, there is only one light tube
still burnin' in Elvira's end of the shop. The low light,
combined with my original equipment eyeballs makes for what I call
"blind detailing". technique. I'm also smoking too many cigars and not
enjoying them. I settled on detailing in small doses so it
takes me a week or more to go full cycle and then start the next
detailing
cycle and I only allow myself a cigar while I'm detailing Elvira. It's
all good.
 March 24th
2021 Elvira is a high maintenance gal. She's been feeling
neglected watching me work on the Deerslayer and has started punishing
me for it. A month ago I took her to the dealer for an oil change and
she insisted on a set of new shoes. It ended up just shy of fourteen
hundred bucks to buy her back from the dealer.
March 24th
2021 Elvira is a high maintenance gal. She's been feeling
neglected watching me work on the Deerslayer and has started punishing
me for it. A month ago I took her to the dealer for an oil change and
she insisted on a set of new shoes. It ended up just shy of fourteen
hundred bucks to buy her back from the dealer.
Elvira wasn't finished with me yet. A week later, three interior carbon fiber trim pieces started to separate from their backing. We are past warranty but this is turning planned obsolescence into an art form.
The best price I could find on the intarweb for these three
items was $708 so I know if I had the dealer fix this, it would be
north of a grand. We're gonna take a different approach. Beer of the
day was Dick's Brewing Company's Dick's Barley Wine Ale.
 March 29th
2021 When I removed Elvira's trim pieces with a plastic pry
tool, I tried to carefully follow the one line of instructions
regarding this
procedure in the 9,289 page service manual but still managed to break
three of the plastic retaining tabs. Glued them back in place with
Gorilla Glue.
March 29th
2021 When I removed Elvira's trim pieces with a plastic pry
tool, I tried to carefully follow the one line of instructions
regarding this
procedure in the 9,289 page service manual but still managed to break
three of the plastic retaining tabs. Glued them back in place with
Gorilla Glue.
The carbon fiber pieces were also Gorilla Glued back onto
their
backings and clamped for the glue to cure. I got these spring clamps
over a decade ago, probably an impulse purchase. They were made for
this job. The springs are strong and the orange jaws are hinge mounted
to conform to the work. Background music was
Cruising with Ruben and the Jets.
 April 5th
2021 Each piece was glued and clamped for twenty-four hours.
Another twenty-four hours were allowed to pass after taking the clamps
off. The glove box piece required additional gluing so it went thru the
process a second time. There is precious little glue in the Gorrilla
Super glue Gel tubes and I ended up using all four of the tubes I
purchased.
April 5th
2021 Each piece was glued and clamped for twenty-four hours.
Another twenty-four hours were allowed to pass after taking the clamps
off. The glove box piece required additional gluing so it went thru the
process a second time. There is precious little glue in the Gorrilla
Super glue Gel tubes and I ended up using all four of the tubes I
purchased.
Installation was slightly easier than getting them out in the
first place. The leading edge of each piece hooked in place to line it
up and gentle pressure was applied to all the tab locations until
seated. Beer of the day was Dick's Brewing Company's Dick's Mountain
Amber Ale.
 June 13th
2023 Finally found enuf of my lost ambition to git around to
some TLC for Elvira. She is my only driver at this point and I need
to make her happy. Bidenflation has me doin' as much of the work as I
can. Got a couple of six-paks of Mobil 1 5W-30 oil and a couple of AC
Delco Pro PF63 filters (Dayum! are these things little), along with a
pair of wheel ramps for my first oil change attempt.
June 13th
2023 Finally found enuf of my lost ambition to git around to
some TLC for Elvira. She is my only driver at this point and I need
to make her happy. Bidenflation has me doin' as much of the work as I
can. Got a couple of six-paks of Mobil 1 5W-30 oil and a couple of AC
Delco Pro PF63 filters (Dayum! are these things little), along with a
pair of wheel ramps for my first oil change attempt.
Jacked Elvira's front up to put the ramps under the front wheels and found out the the anti-theft device was working as the alarm went off at the car's change in attitude (having the radio fob in my pocket didn't count fer anything). First attempt result was no joy. Elvira's clearance on the ground in front is bout 4-1/2" and the ramps added another 4-1/2" and nine inches isn't enuf to get my fat head under the car to where the filter and drain plug are.
This was early Sunday afternoon, in the heat of the South Florida summer day, and already I was spent. Drove Elvira off the ramps and retired to the deep ponder mode chair for some reflection. No beer today.
 June 16th
2023
Elvira only has four sanctioned lift points, one behind each front
wheel and one in front of each rear wheel. There is no place to put a
jackstand since the jack is using the lift point. I had come across a
way to use a
floor jack as a jackstand in my intarweb travels but lost track of it.
I finally hit on the magic search term to conjour it again "floor jack
lock". Ordered one from Summit. Also discovered how to position Elvira
in her docking bay on an angle so I have room to work around the entire
car.
June 16th
2023
Elvira only has four sanctioned lift points, one behind each front
wheel and one in front of each rear wheel. There is no place to put a
jackstand since the jack is using the lift point. I had come across a
way to use a
floor jack as a jackstand in my intarweb travels but lost track of it.
I finally hit on the magic search term to conjour it again "floor jack
lock". Ordered one from Summit. Also discovered how to position Elvira
in her docking bay on an angle so I have room to work around the entire
car.
I
can't fathom why but many modern vehicles have pinch weld seams
running thru their lift points so I had to get a hard rubber slotted
puck to protect the pinch seam from the jack. The AGM Jack Rod Stand
arrived on Thursday. I'm all set now to take another run at this.
 June 19th
2023
Lifted
Elvira's passenger side front onto the ramp, and lifted the driver side
higher with the floor
jack and locked it. Had enuf room to work now. There is good access
underneath to
both the oil filter and drain plug thru the engine brace. Plug was tight and there was only
room for my short 15mm six-point socket on a 3/8" drive ratchet.
Not much leverage and there was some cussin'. Drained the oil and
removed the
filter. Put a thin film of oil on the new filter gasket and screwed it
on hand tight. Reinstalled the drain plug. Lowered the driver side off
the jack. Poured in 7 qts of Mobil 1 oil
and started the engine, eased Elvira's passenger side off the ramp..
Pulled up the oil life indicator on the dash
display and reset it to 100%. Beer of the day was Sprecher Brewing Co's
Abbey Triple Belgian Style Ale.
June 19th
2023
Lifted
Elvira's passenger side front onto the ramp, and lifted the driver side
higher with the floor
jack and locked it. Had enuf room to work now. There is good access
underneath to
both the oil filter and drain plug thru the engine brace. Plug was tight and there was only
room for my short 15mm six-point socket on a 3/8" drive ratchet.
Not much leverage and there was some cussin'. Drained the oil and
removed the
filter. Put a thin film of oil on the new filter gasket and screwed it
on hand tight. Reinstalled the drain plug. Lowered the driver side off
the jack. Poured in 7 qts of Mobil 1 oil
and started the engine, eased Elvira's passenger side off the ramp..
Pulled up the oil life indicator on the dash
display and reset it to 100%. Beer of the day was Sprecher Brewing Co's
Abbey Triple Belgian Style Ale.
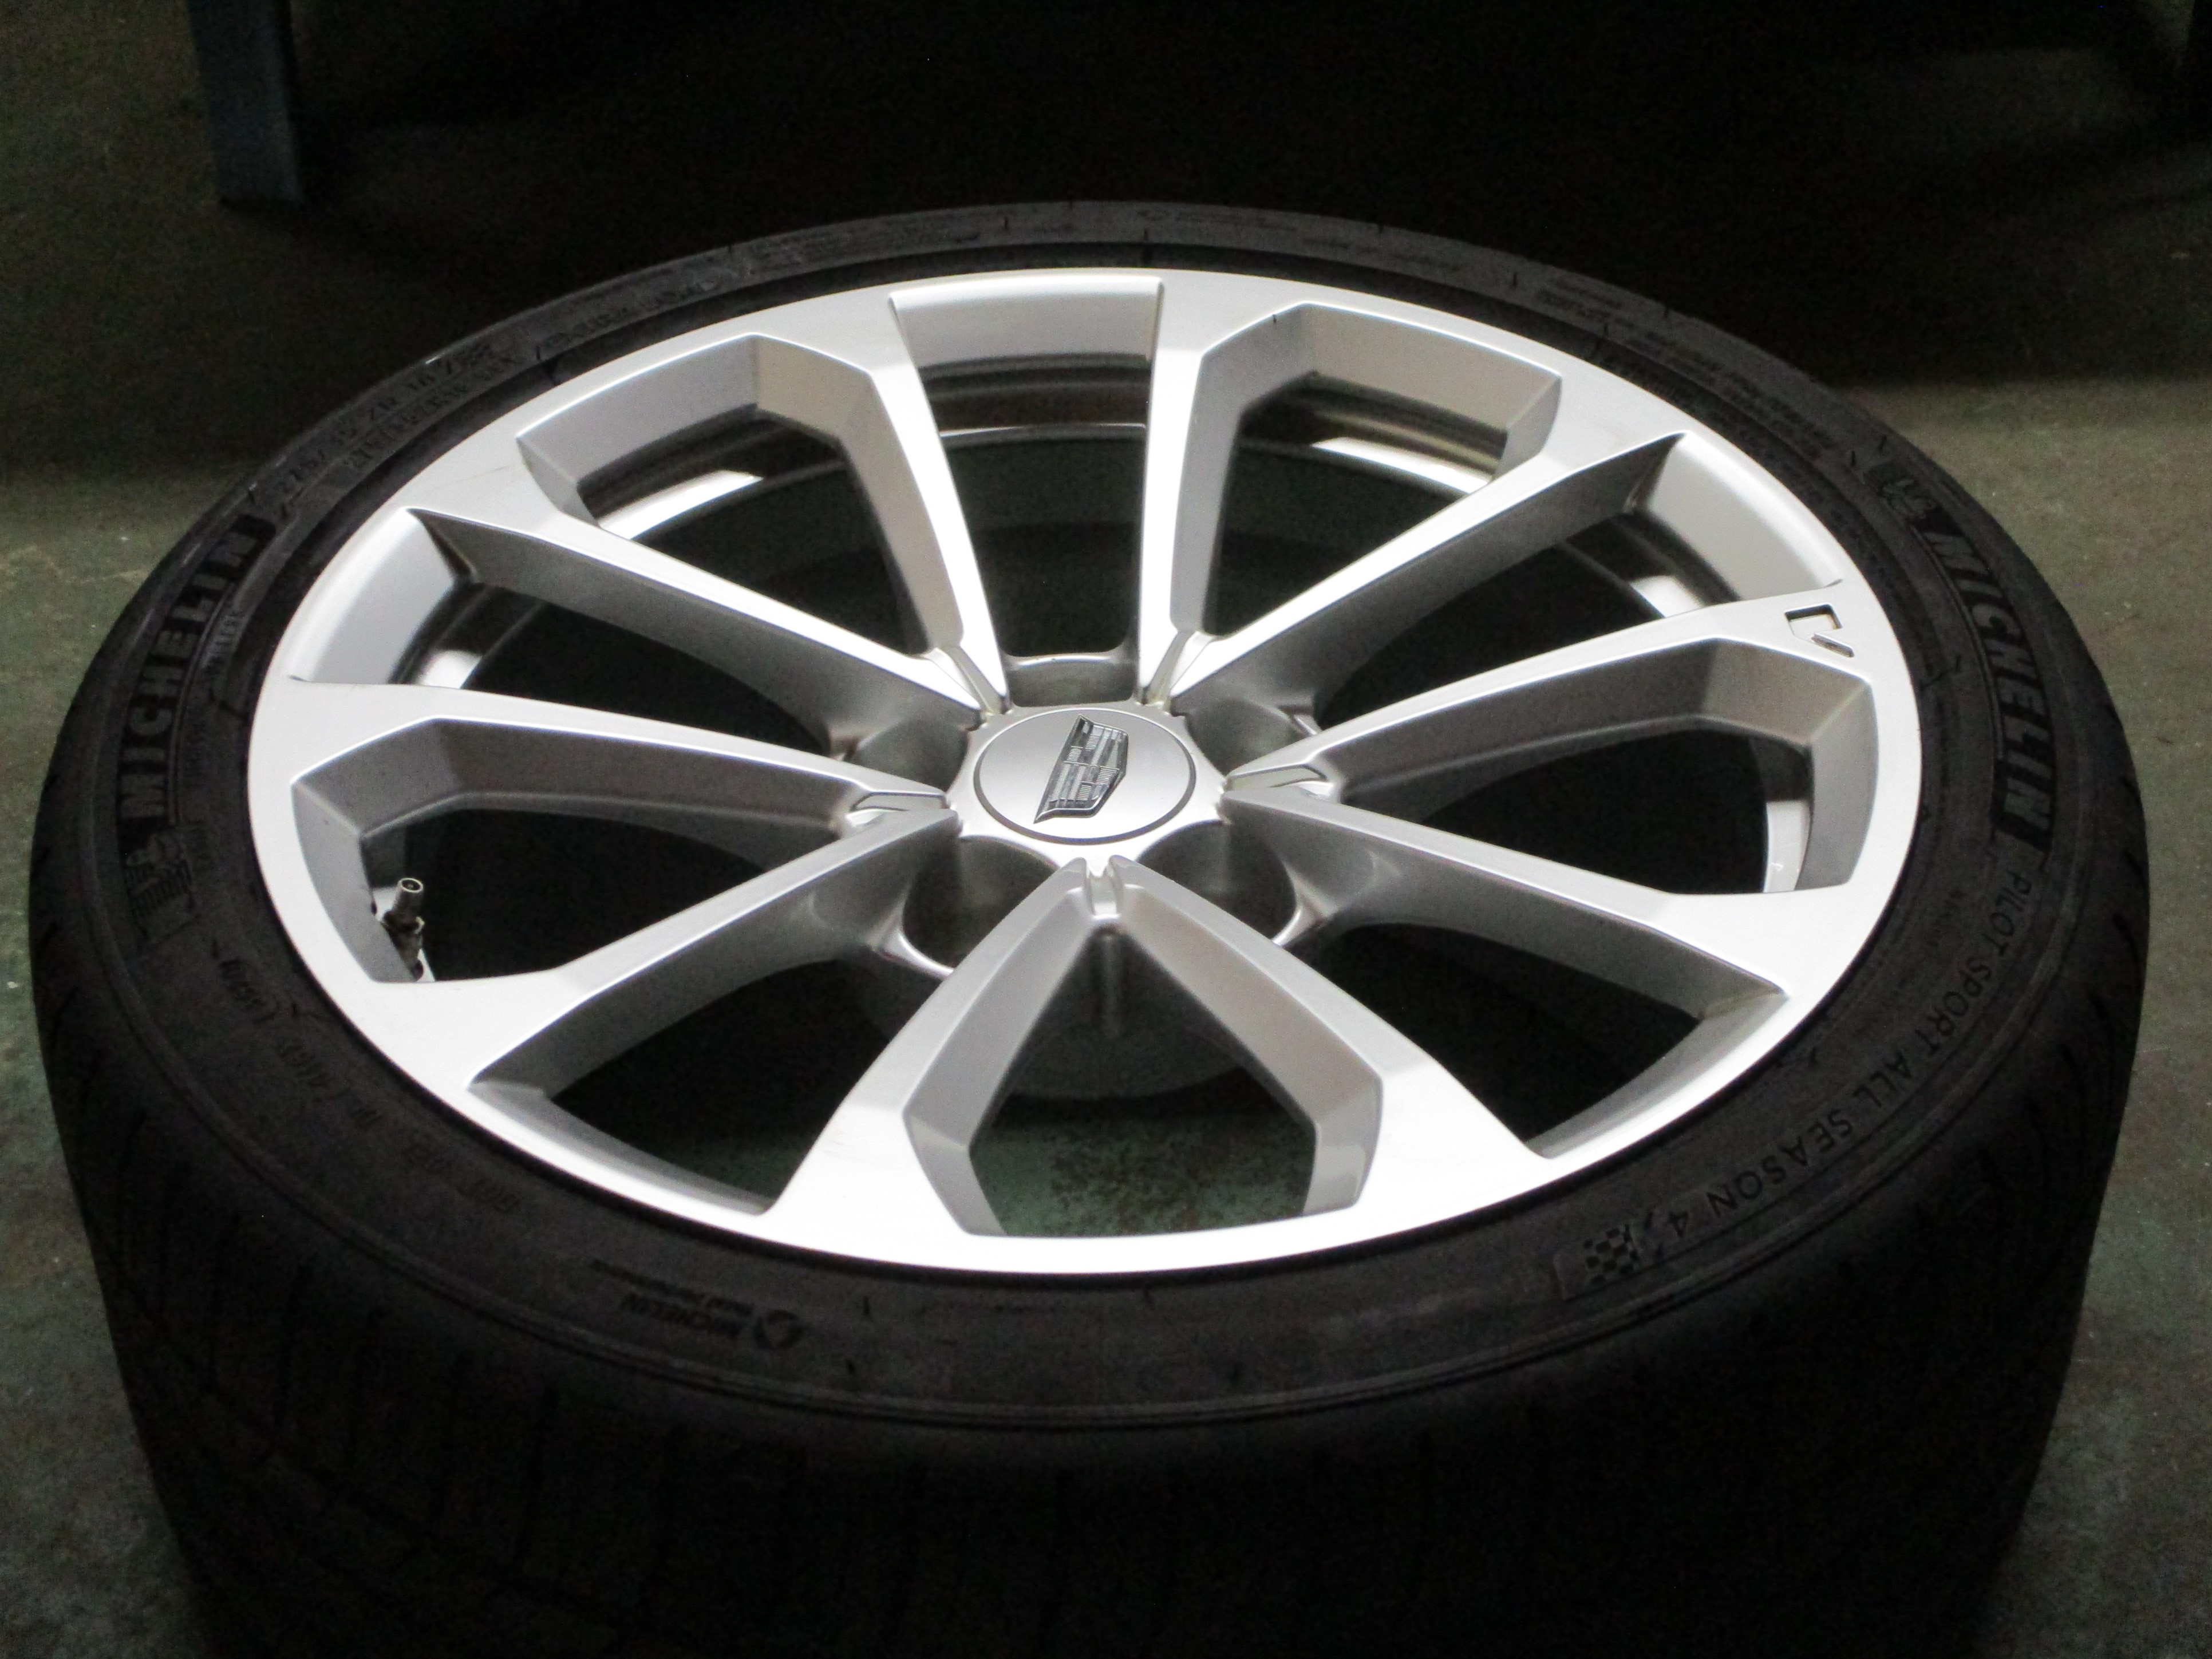
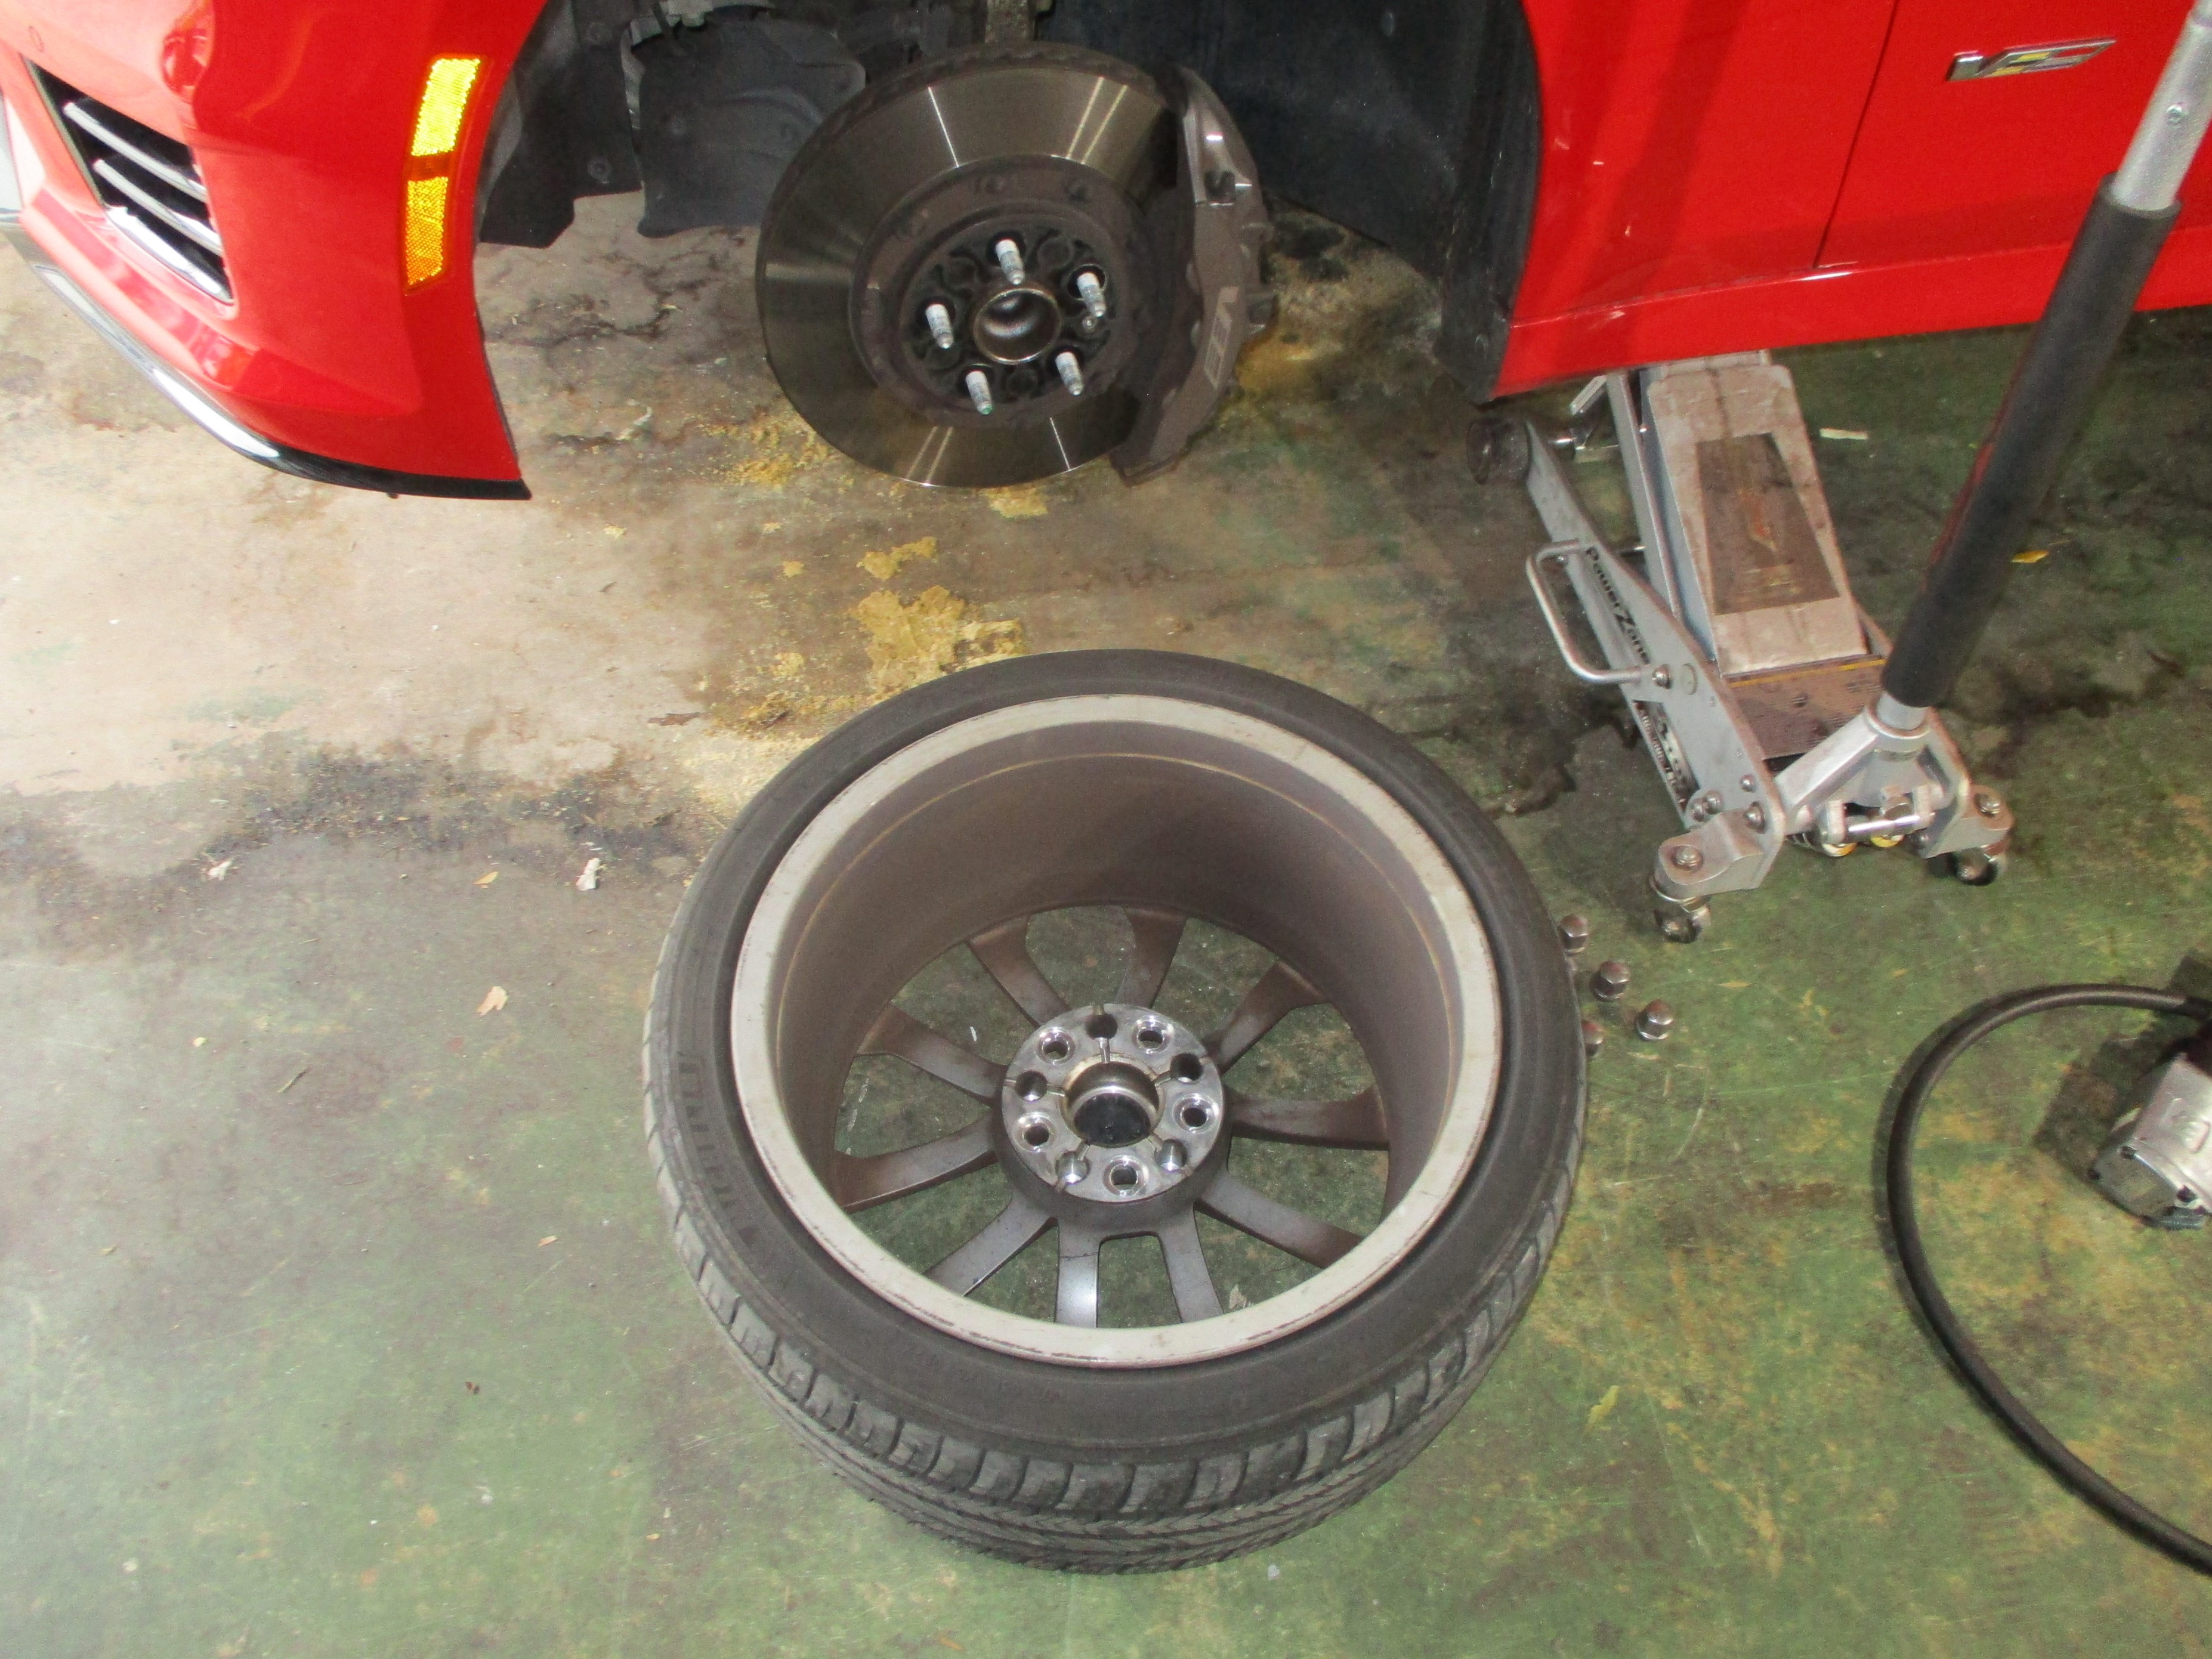 June 24th 2023
Lifted Elvira's driver side with the floor jack and locked it. Took the
lug nuts off with impact wrench and commenced to cleaning, first with
Dawn soap and water, followed by Scrub-Free and Scotchbrite Dobie pad.
Used a Wonder Wheel decal remover drill attachment to clean up old
balance weight adhesive a bit. That finally got it clean enuf to finish
up with Wash-Wax All prior to applying ArmorAll Brake Dust Repellent.
June 24th 2023
Lifted Elvira's driver side with the floor jack and locked it. Took the
lug nuts off with impact wrench and commenced to cleaning, first with
Dawn soap and water, followed by Scrub-Free and Scotchbrite Dobie pad.
Used a Wonder Wheel decal remover drill attachment to clean up old
balance weight adhesive a bit. That finally got it clean enuf to finish
up with Wash-Wax All prior to applying ArmorAll Brake Dust Repellent.
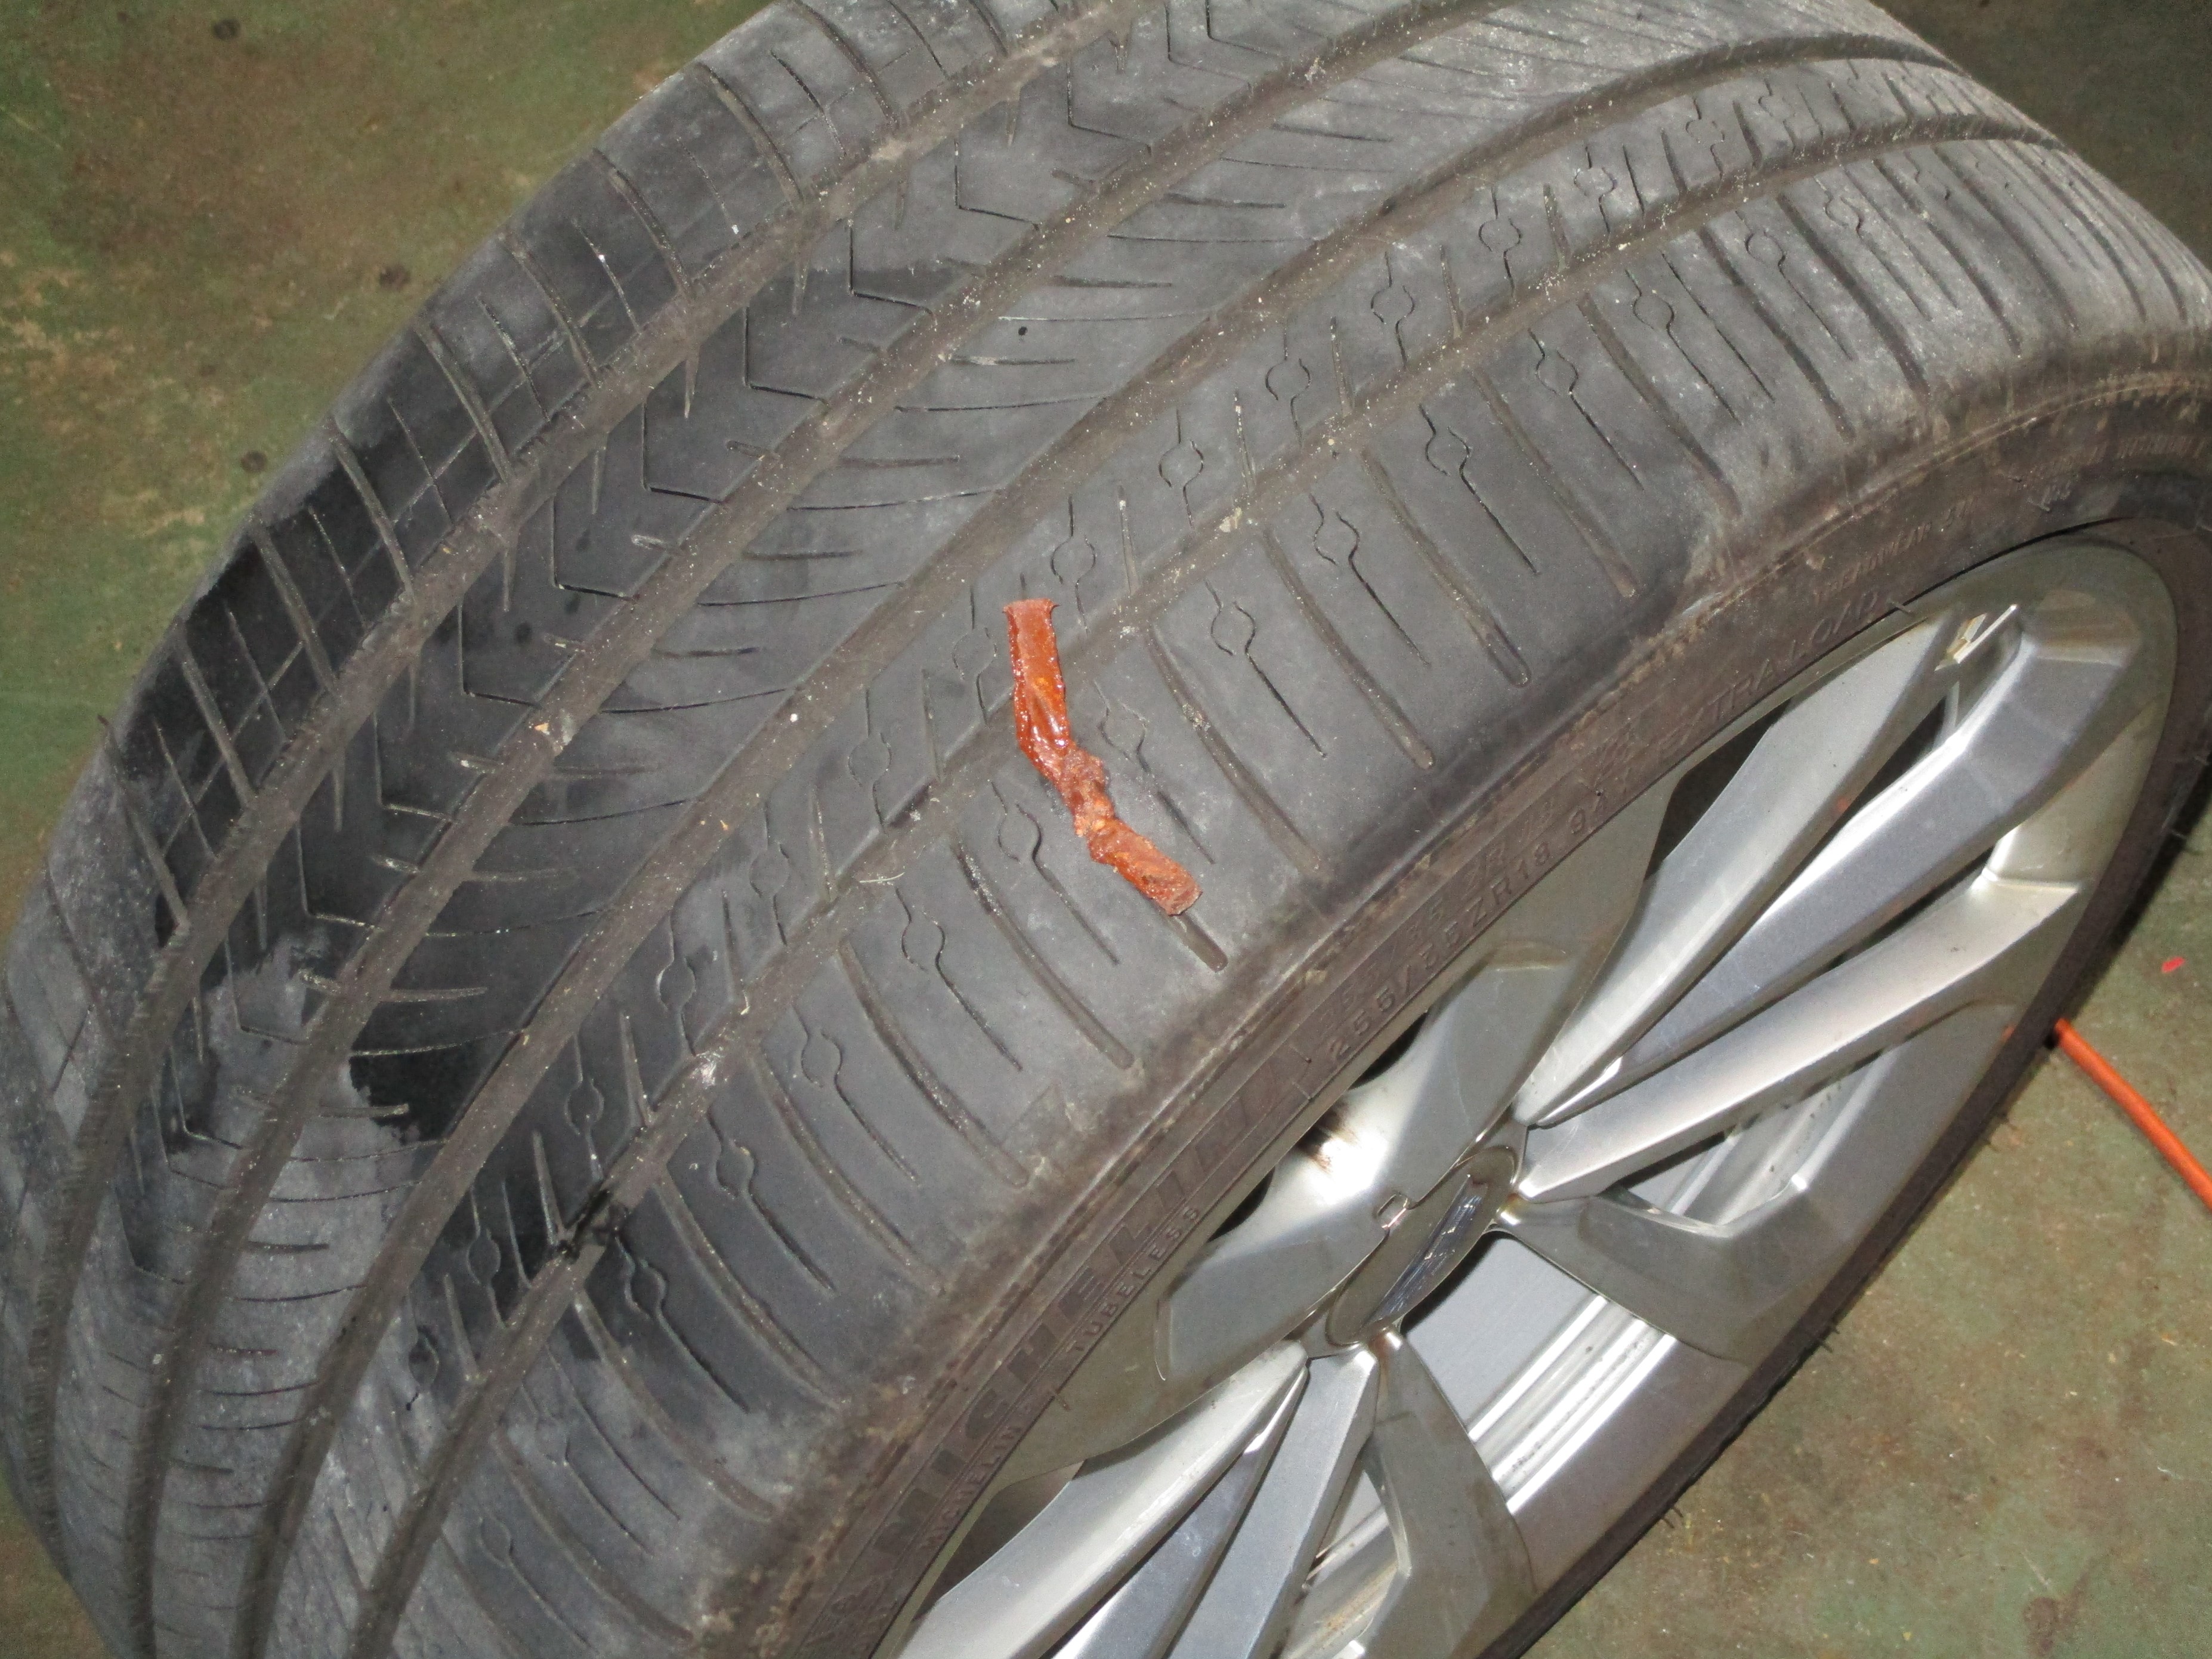
 This tire had a slow leak and I attended to that next and that's
when the wheels fell off, no fun intended. Found the puncture which
turned out to be a long, small diameter screw. Took some amount of
hand-to-hand combat with needle-nose vise-grips to get that sucker out.
Then, I had a devil of a time getting both the plug probe and insertion
tools in. I had to resort to the eight pound sledge to help them along. One wheel down, three to go. After four hours with just this one wheel, I retreated to the
air-conditioning for afternoon siesta.
This tire had a slow leak and I attended to that next and that's
when the wheels fell off, no fun intended. Found the puncture which
turned out to be a long, small diameter screw. Took some amount of
hand-to-hand combat with needle-nose vise-grips to get that sucker out.
Then, I had a devil of a time getting both the plug probe and insertion
tools in. I had to resort to the eight pound sledge to help them along. One wheel down, three to go. After four hours with just this one wheel, I retreated to the
air-conditioning for afternoon siesta.
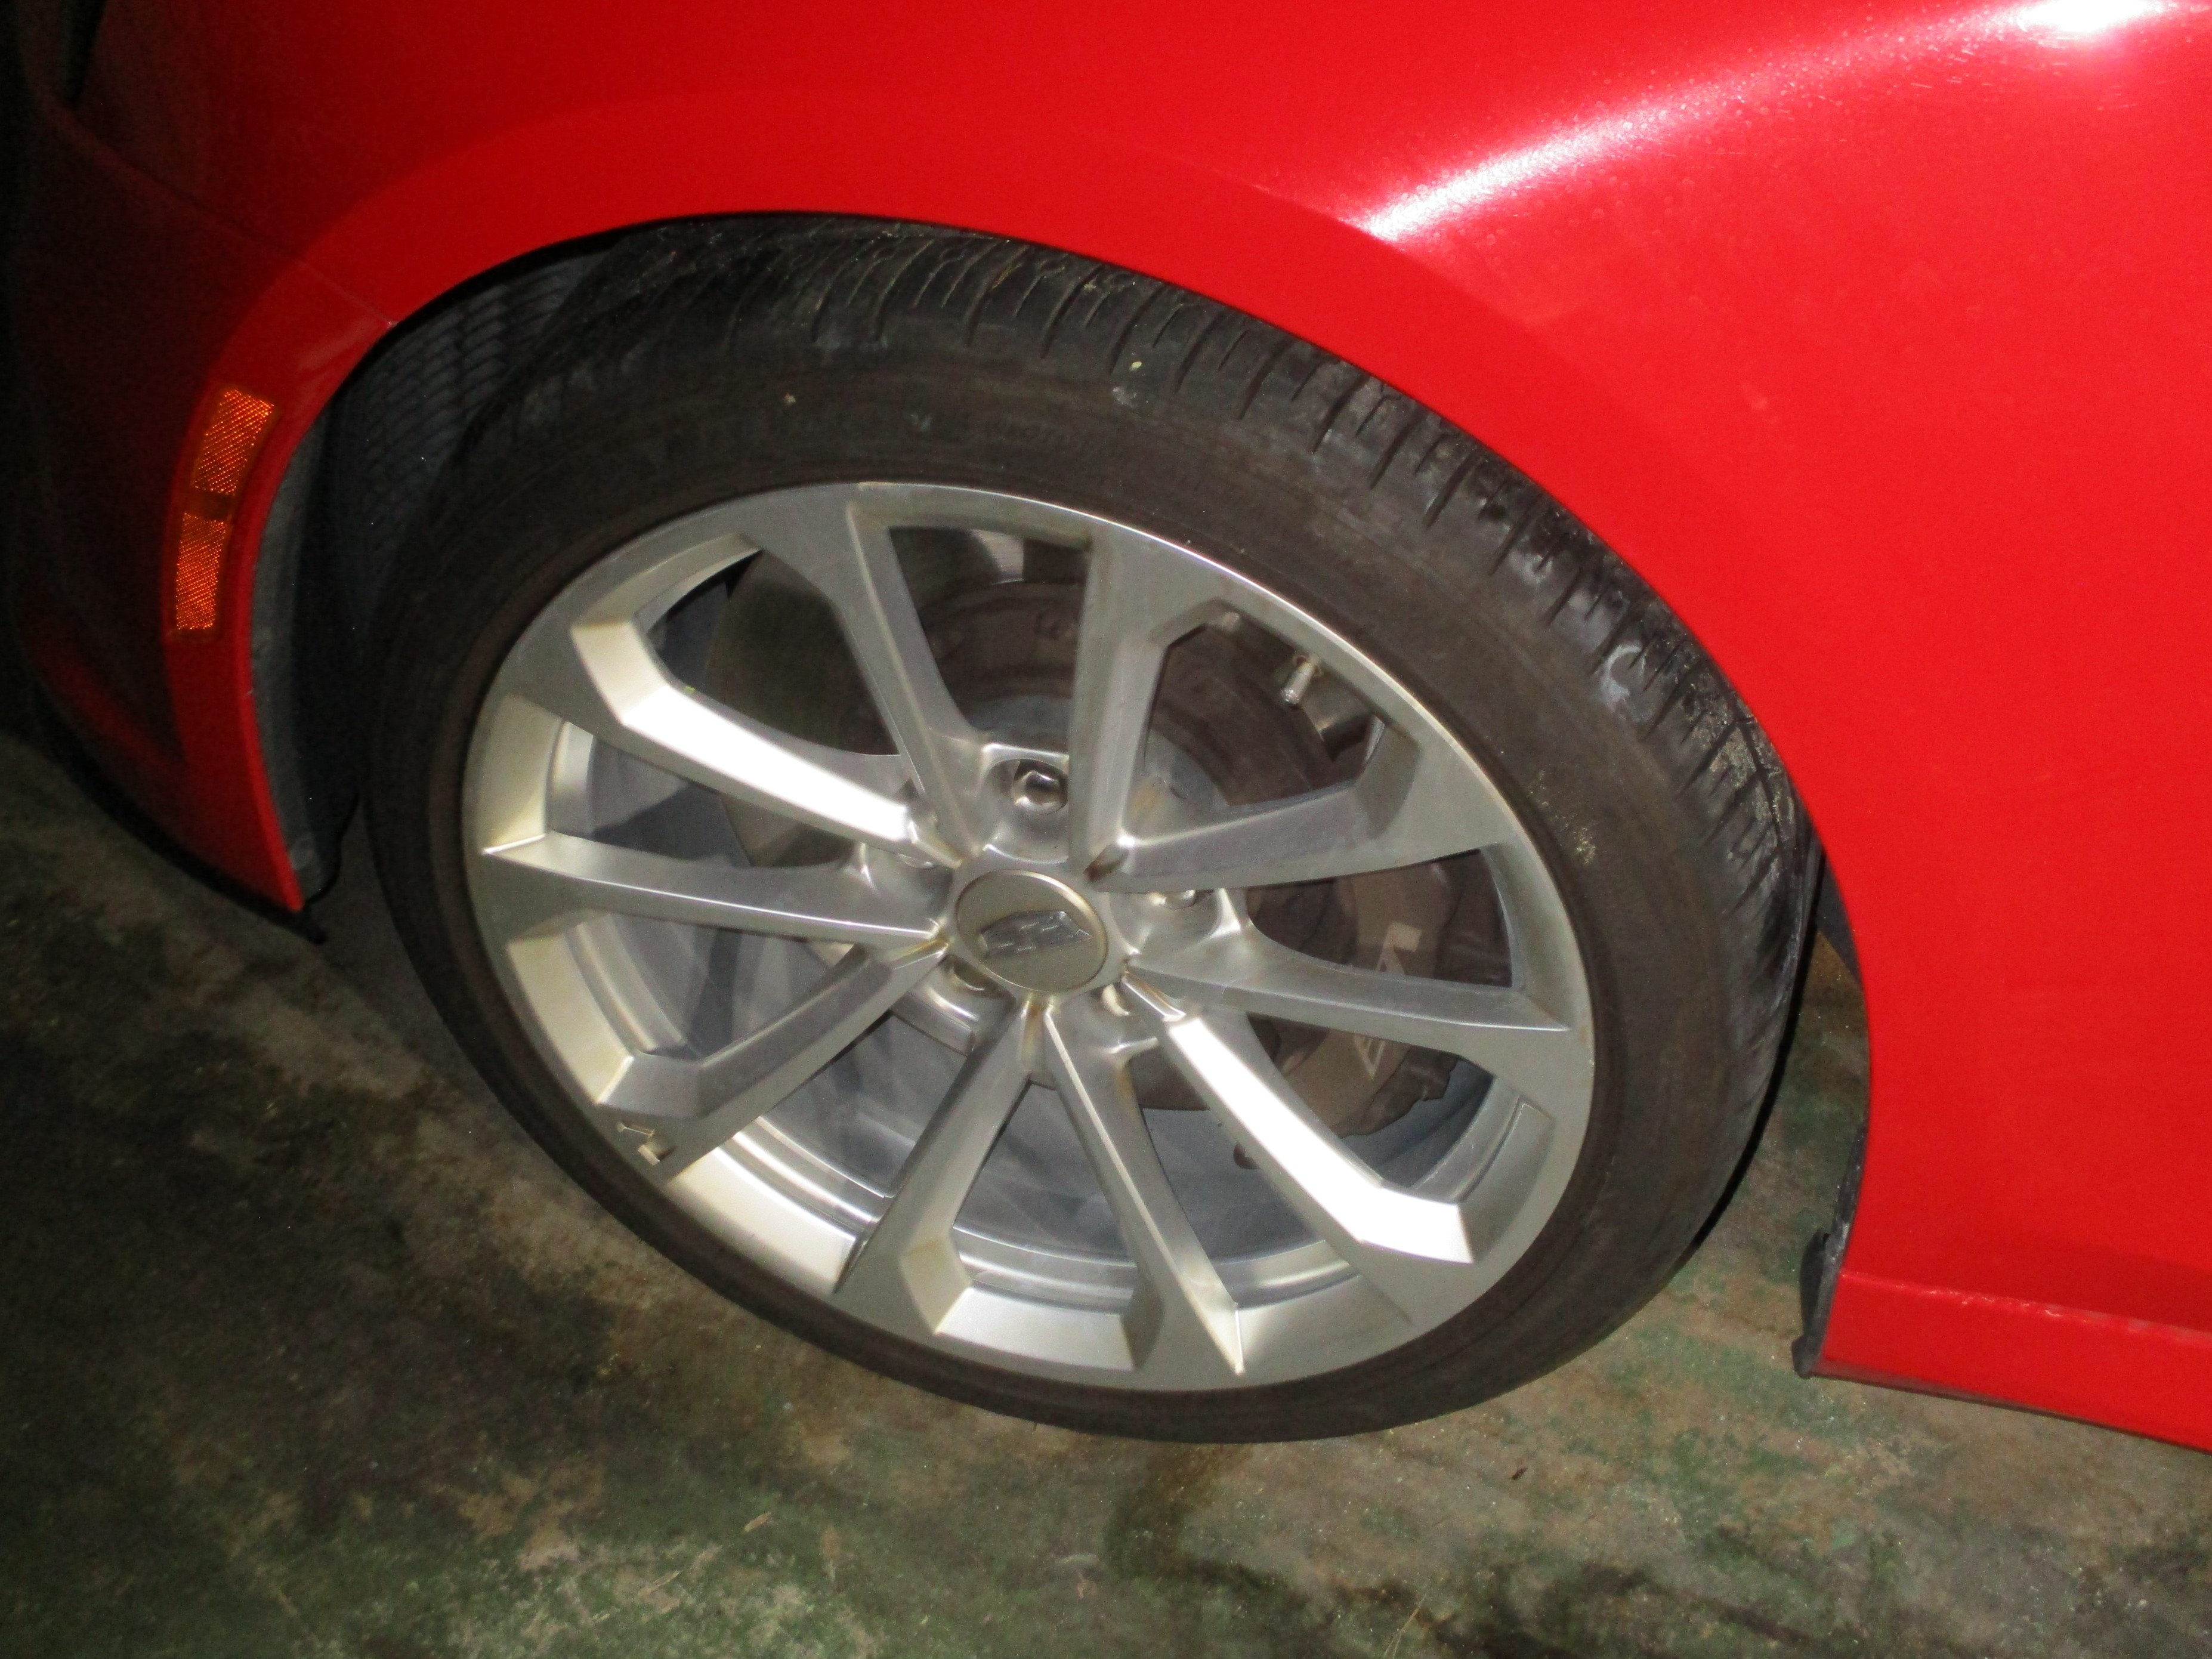
 I didn't. have a good gut feeling about my tire repair but I came back
out to the shop in early evening and put the wheel back on, torqued the
lugs to 140 lbft and aired the tire to 39 psi. Left the tools out
because I don't think this wheel is finished with me yet. Beer of the
day was Ellicottville Brewing Co's Salted Caramel Coldspresso Ale.
I didn't. have a good gut feeling about my tire repair but I came back
out to the shop in early evening and put the wheel back on, torqued the
lugs to 140 lbft and aired the tire to 39 psi. Left the tools out
because I don't think this wheel is finished with me yet. Beer of the
day was Ellicottville Brewing Co's Salted Caramel Coldspresso Ale.
 June 25th 2023 The
tire lost three lbs of pressure overnite and I headed off to the Senile
and Surly Car Club Sunday morning coffee meet at Dave's shop in Davie
with 36lbs of pressure and by the time I arrived, it was down to 27lbs.
Oh Fudge! When we split up, it was at 6lbs and I aired it back
up to 39 with Elvira's tire pump. Pulling into the
BillyBob Shop, It was down to 24lbs again. Damnation!
June 25th 2023 The
tire lost three lbs of pressure overnite and I headed off to the Senile
and Surly Car Club Sunday morning coffee meet at Dave's shop in Davie
with 36lbs of pressure and by the time I arrived, it was down to 27lbs.
Oh Fudge! When we split up, it was at 6lbs and I aired it back
up to 39 with Elvira's tire pump. Pulling into the
BillyBob Shop, It was down to 24lbs again. Damnation!
After lunch, I pulled the wheel again and took to digging out the defective plug with pick and pliers. Took over an hour. Put Merichrome on a blister (Yeah, I'm old school). At the advice of one of my car buddies, the BFH was traded for a small drill bit which was used to enlarge the puncture a smidgeon. Probed and inserted the plug by hand which wasn't easy but was doable this time without the hammer. Aired up to 39lbs again and retired for a few hours. Came back out at 2AM and saw the tire was down to 20lbs. Curses!
Nothing for it but to put the wheel back on and go to work. Found I couldn't lift the wheel this time to put it on the lugs. After several tries I gave up the direct lift in favor of q different approach. Rolled out my creeper and put the wheel on it. Lifted the end of the creeper up, levering the wheel into alignment with the lugs and pushed it on. Torqued to 140 lbft and aired it to 39lbs again. Aired up my portable air tank and put it in Elvira's trunk with the air pump and tire gauge and headed for the office. It dropped to 37lbs in the first half mile then remained there for the rest of the ten mile trip.
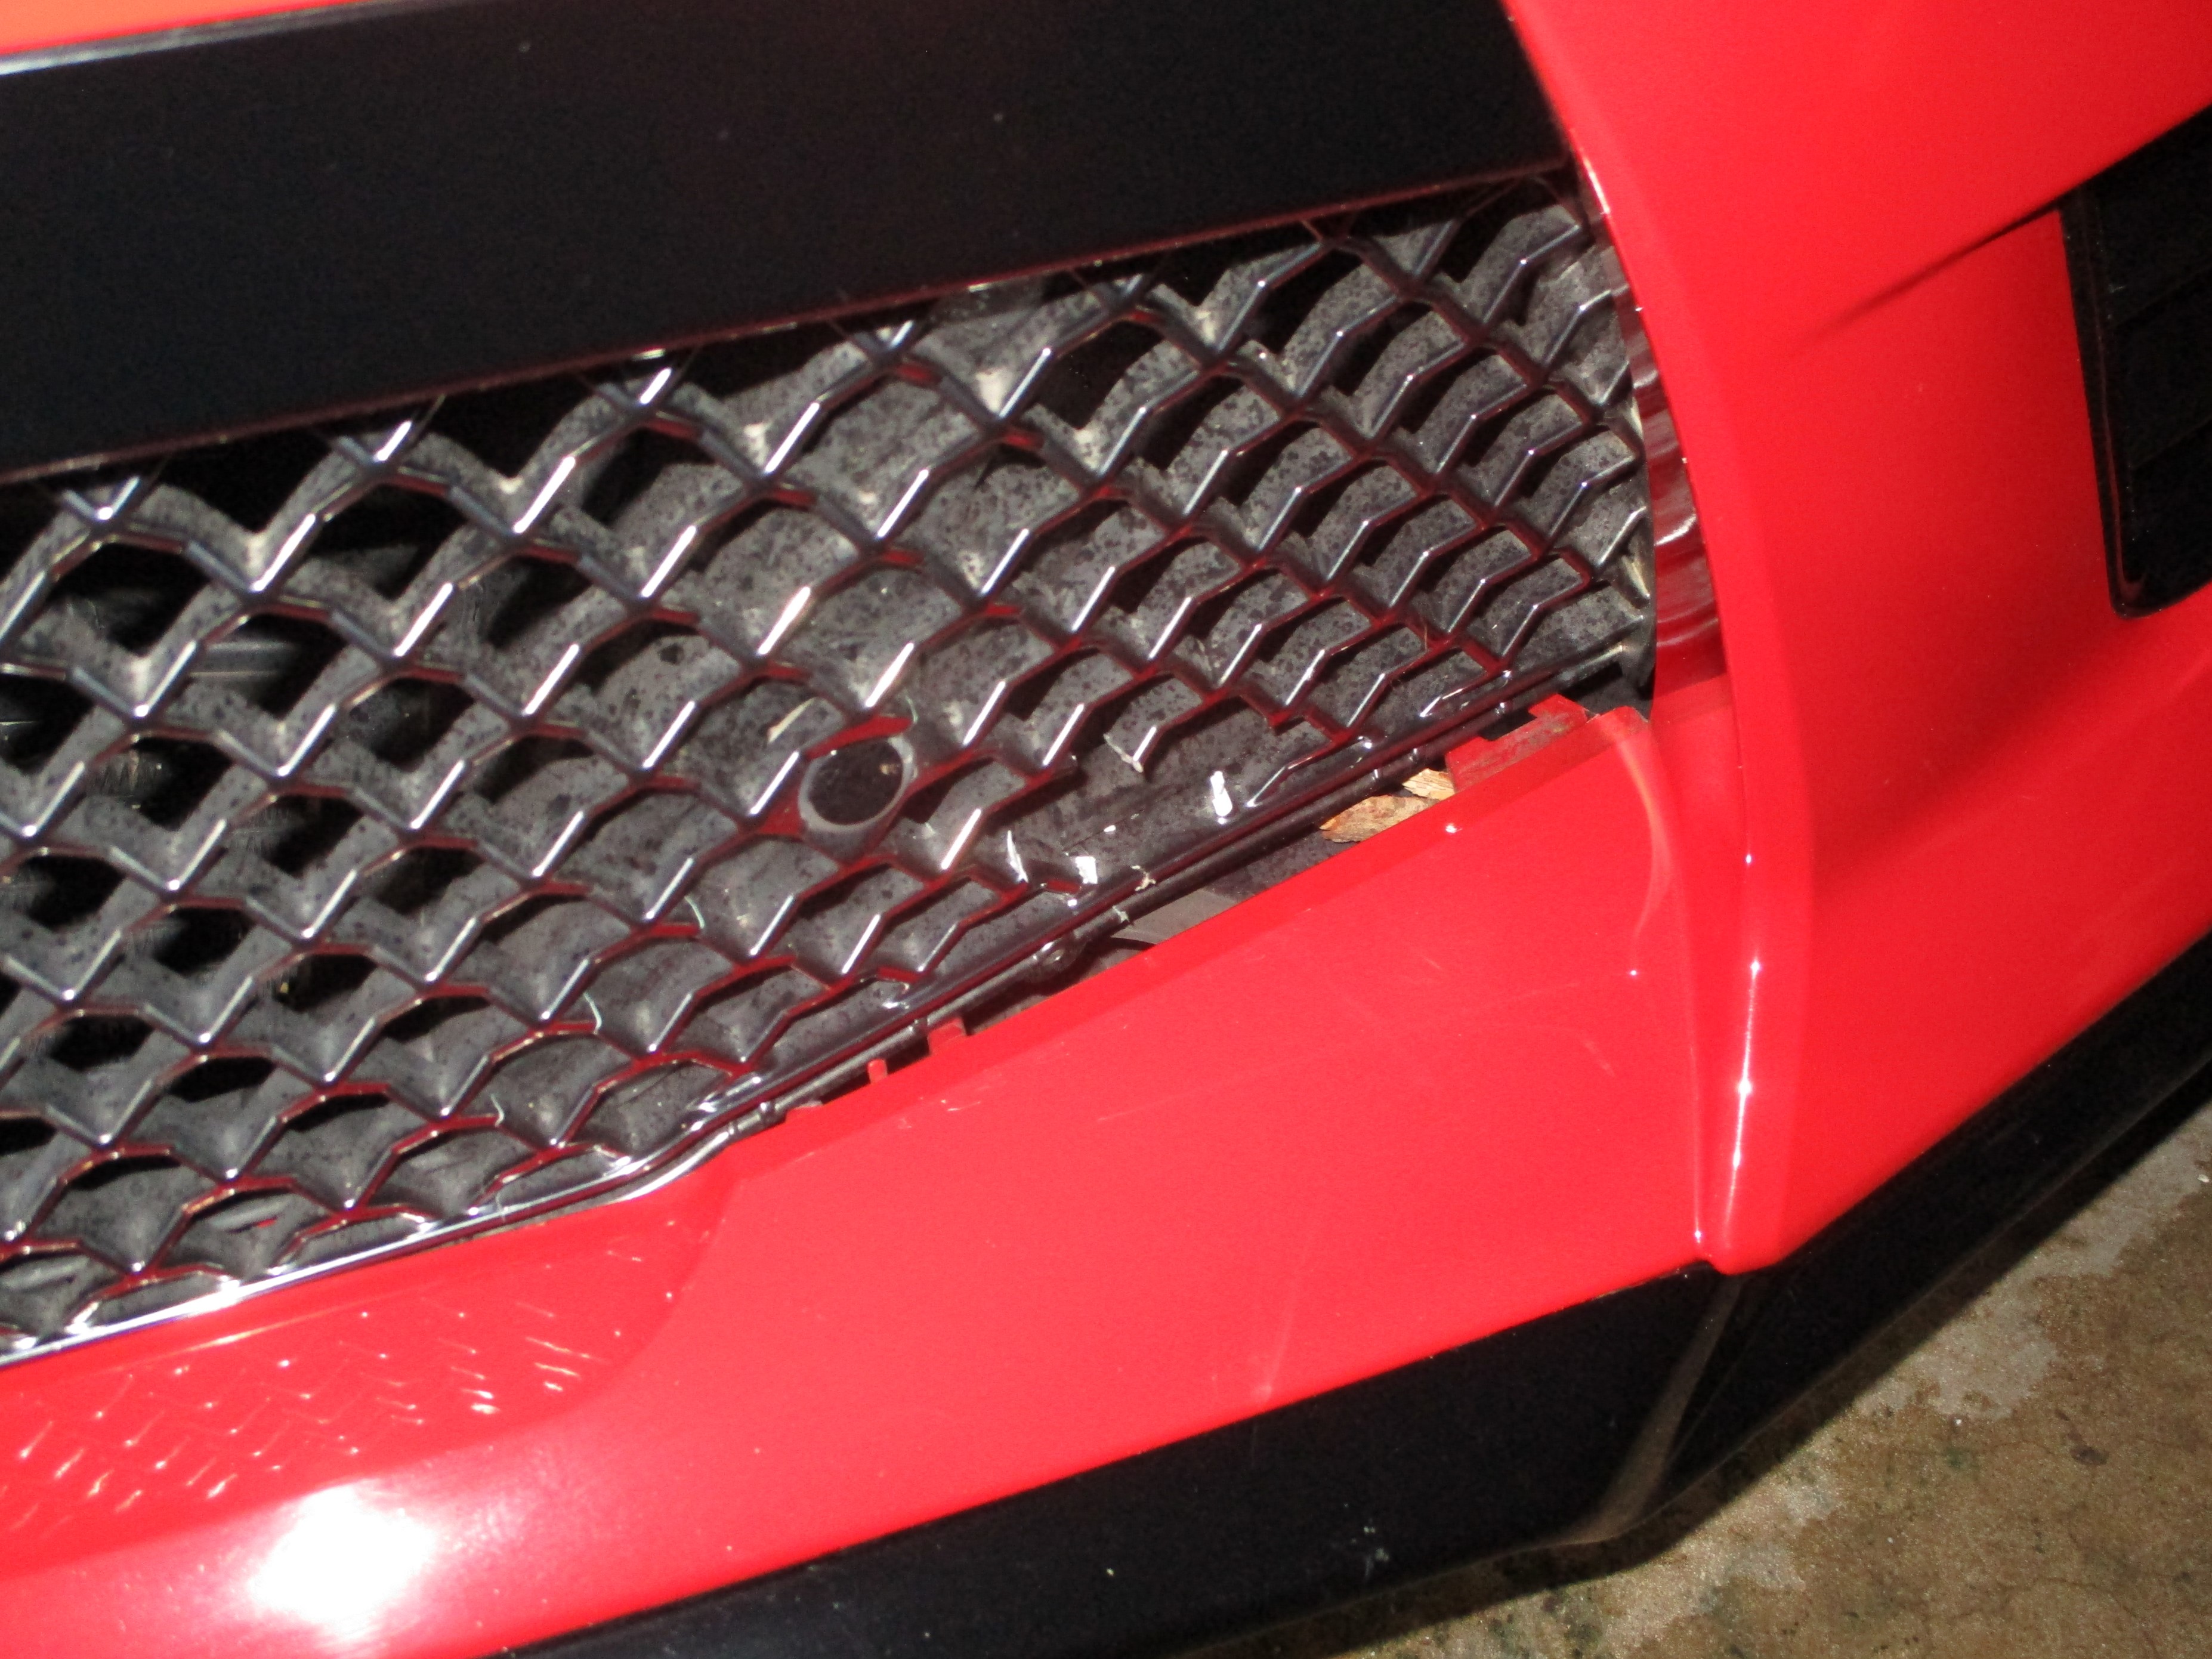 February 19th 2024 Been a couple of months since I've done any detailing on Elvira so, I started trying to get a discipline going again on Saturday. When I got to the front end, there was an unpleasant surprise waiting for me. The lower front grille had a 2" hole in it and about six inches of the driver's side was bent into the opening! Damnation! Wot the heck happened here? Don't know but it is going to require a new grille. This is not something I can fab up with the materials at hand.
Like any high-maintenance babe, there are no trivial repairs or operations with Elvira. Started looking for a replacement grille. The only aftermarket items I could find were black as the younger guys like the stealth look. I prefer the chrome finish Elvira came with. Found a stock grille at GM Parts Warehouse and ordered it. Came in at just over four C-notes with shipping. Probably not too bad, considering how rare this car is
 April 18th 2024 Back to tire punctures. Elvira is a magnet for tire punctures. I still haven't gotten the front driver side tire fixed and it needs to be brought back up to pressure everytime I go someplace.
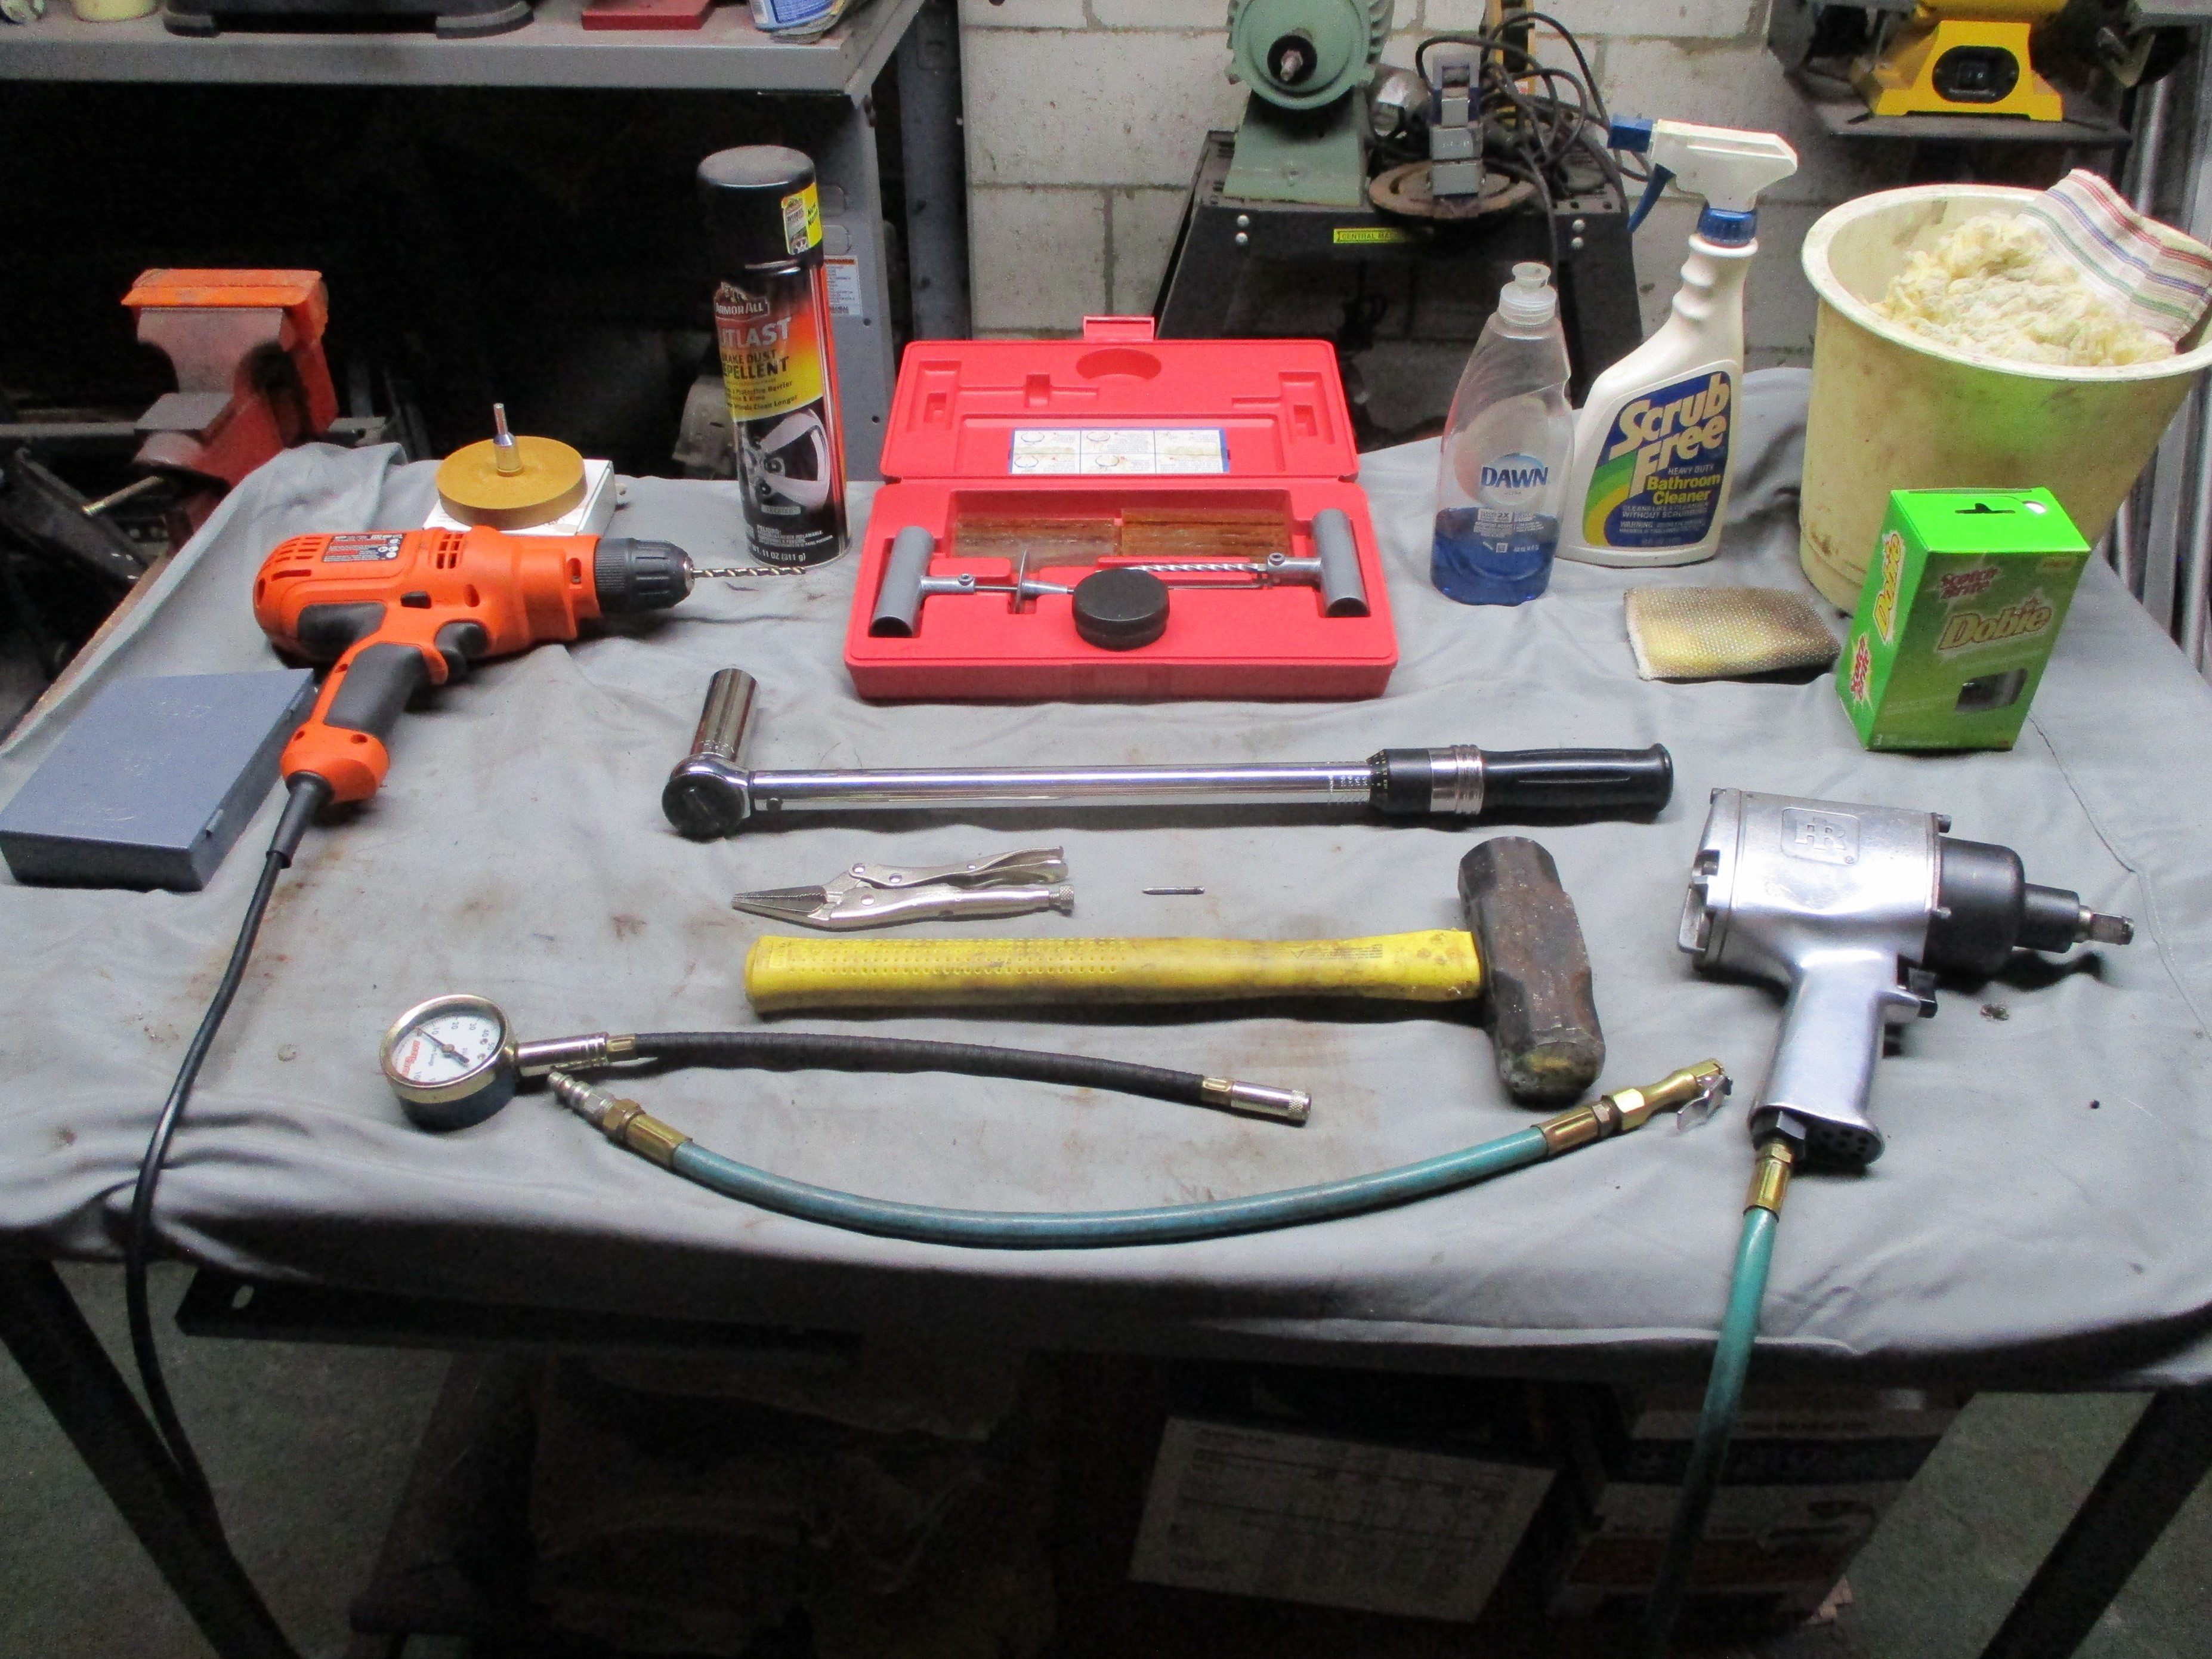
 My
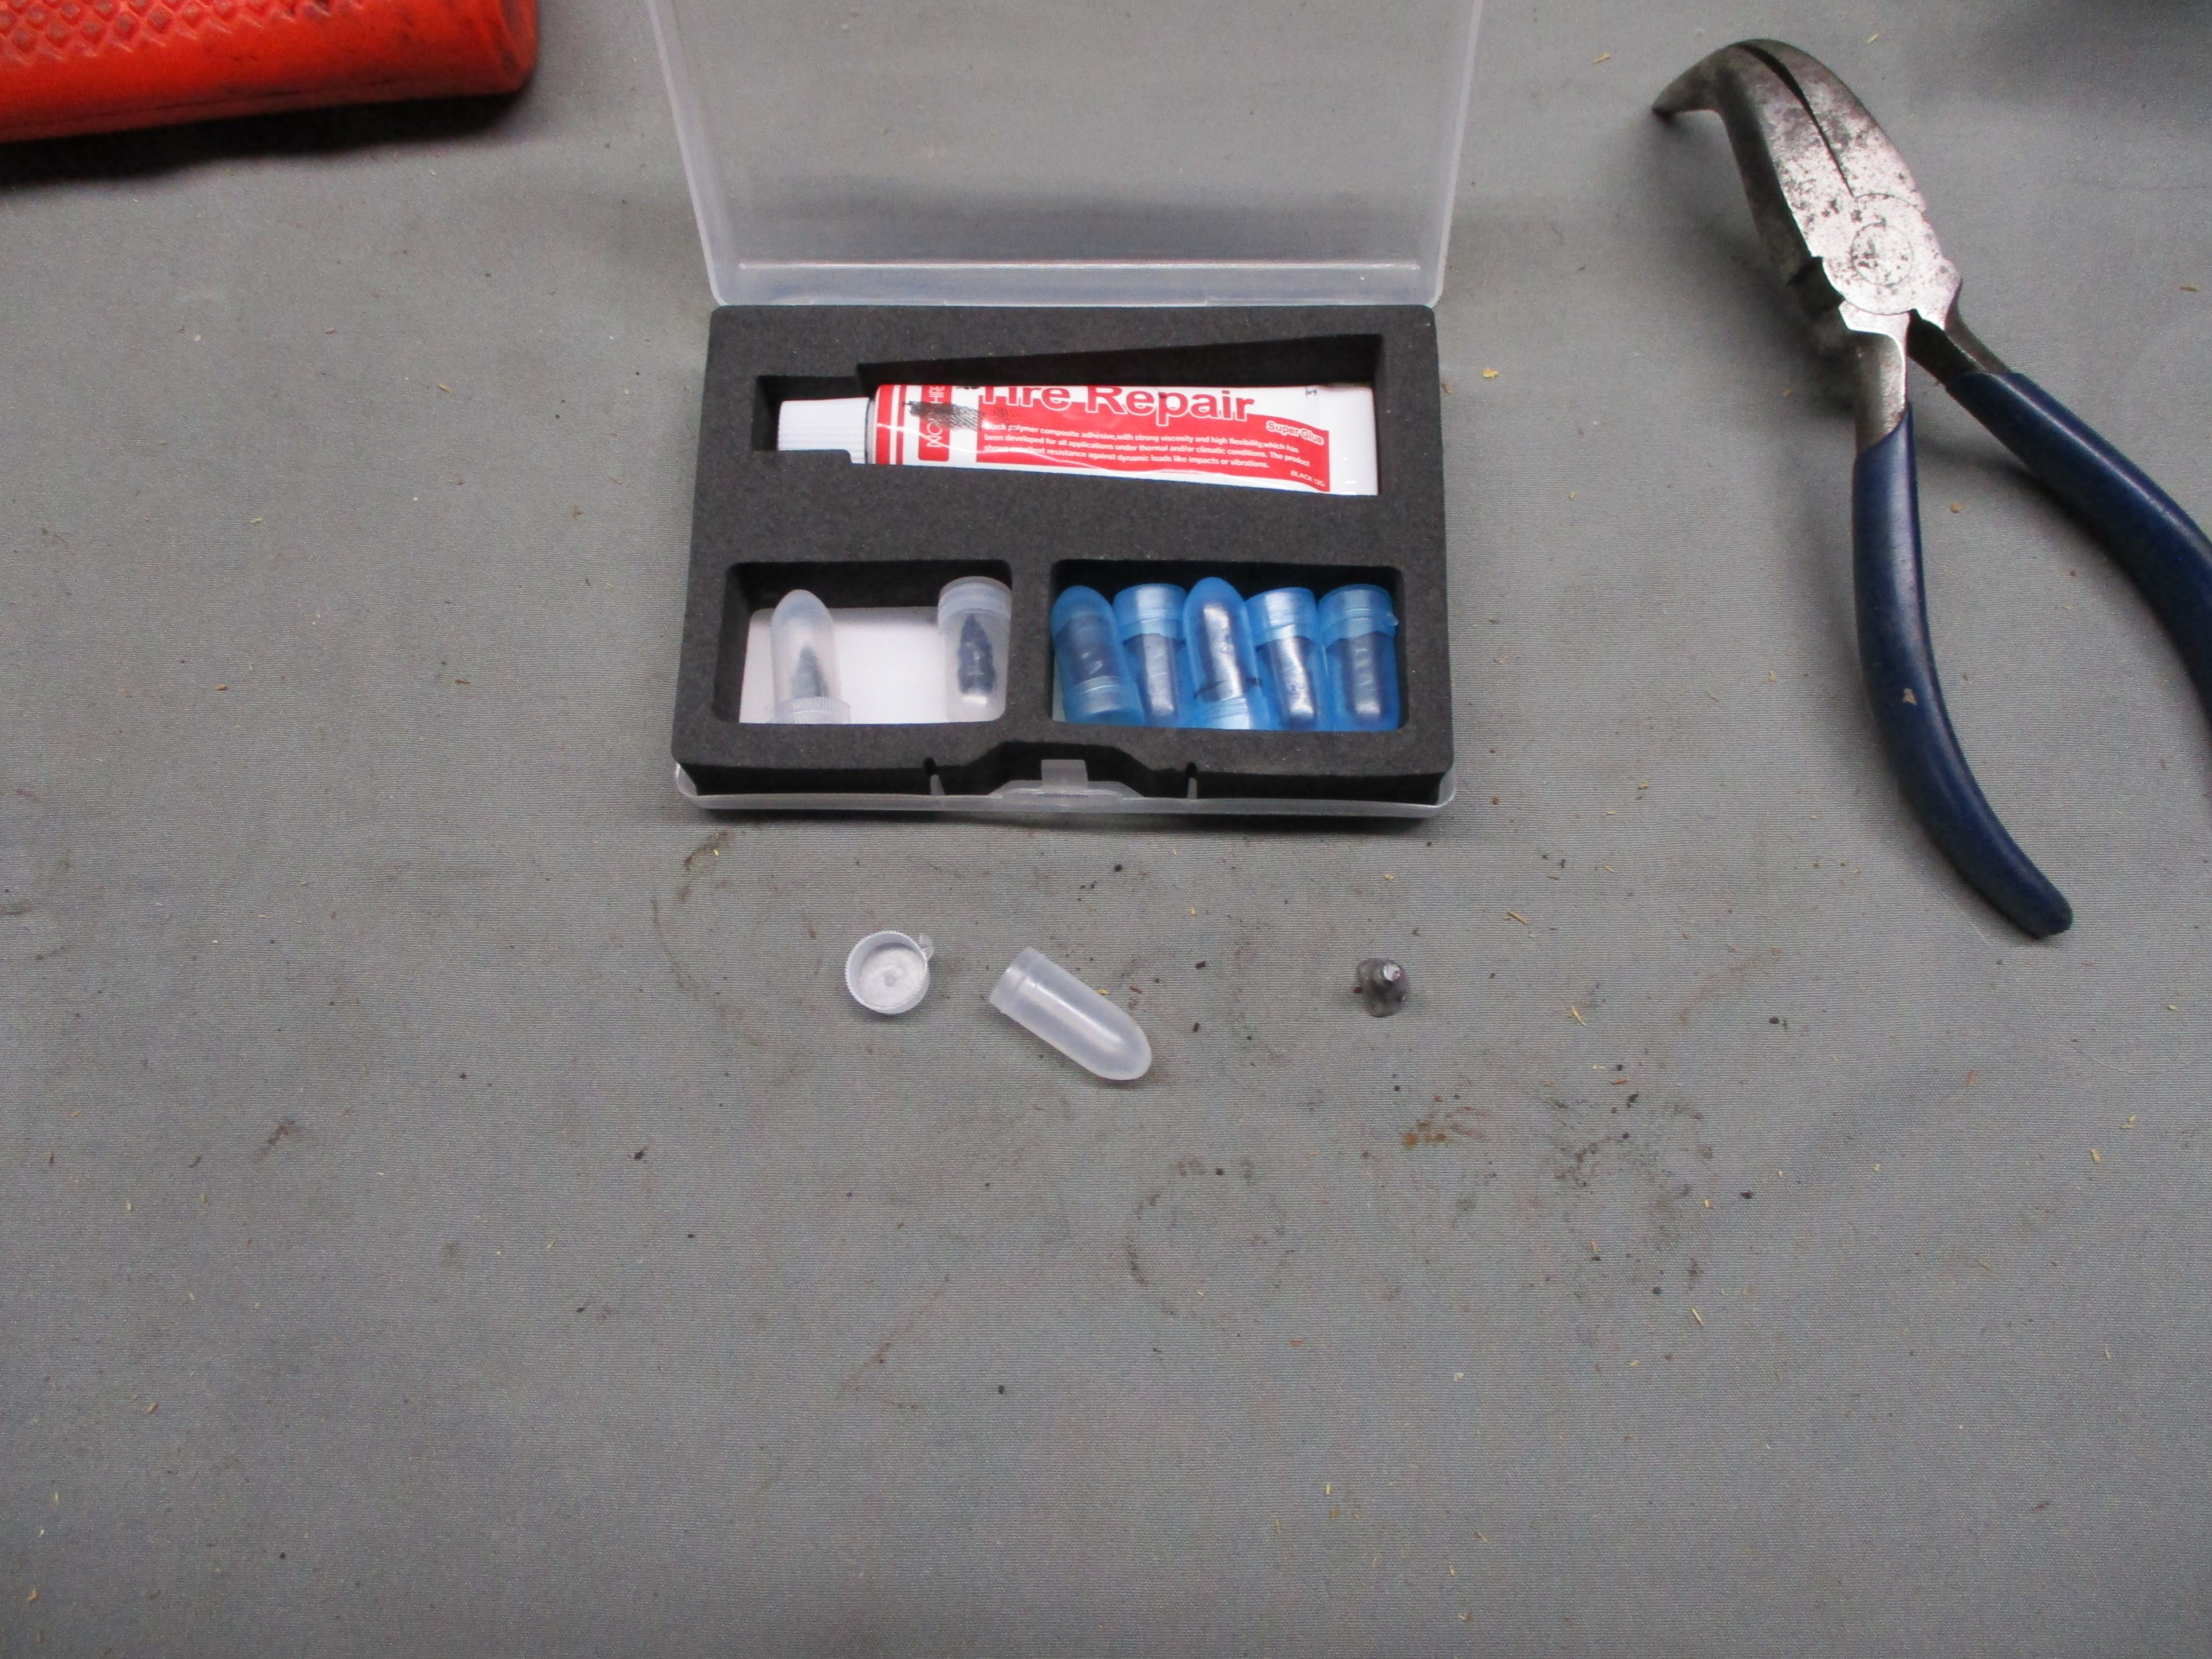
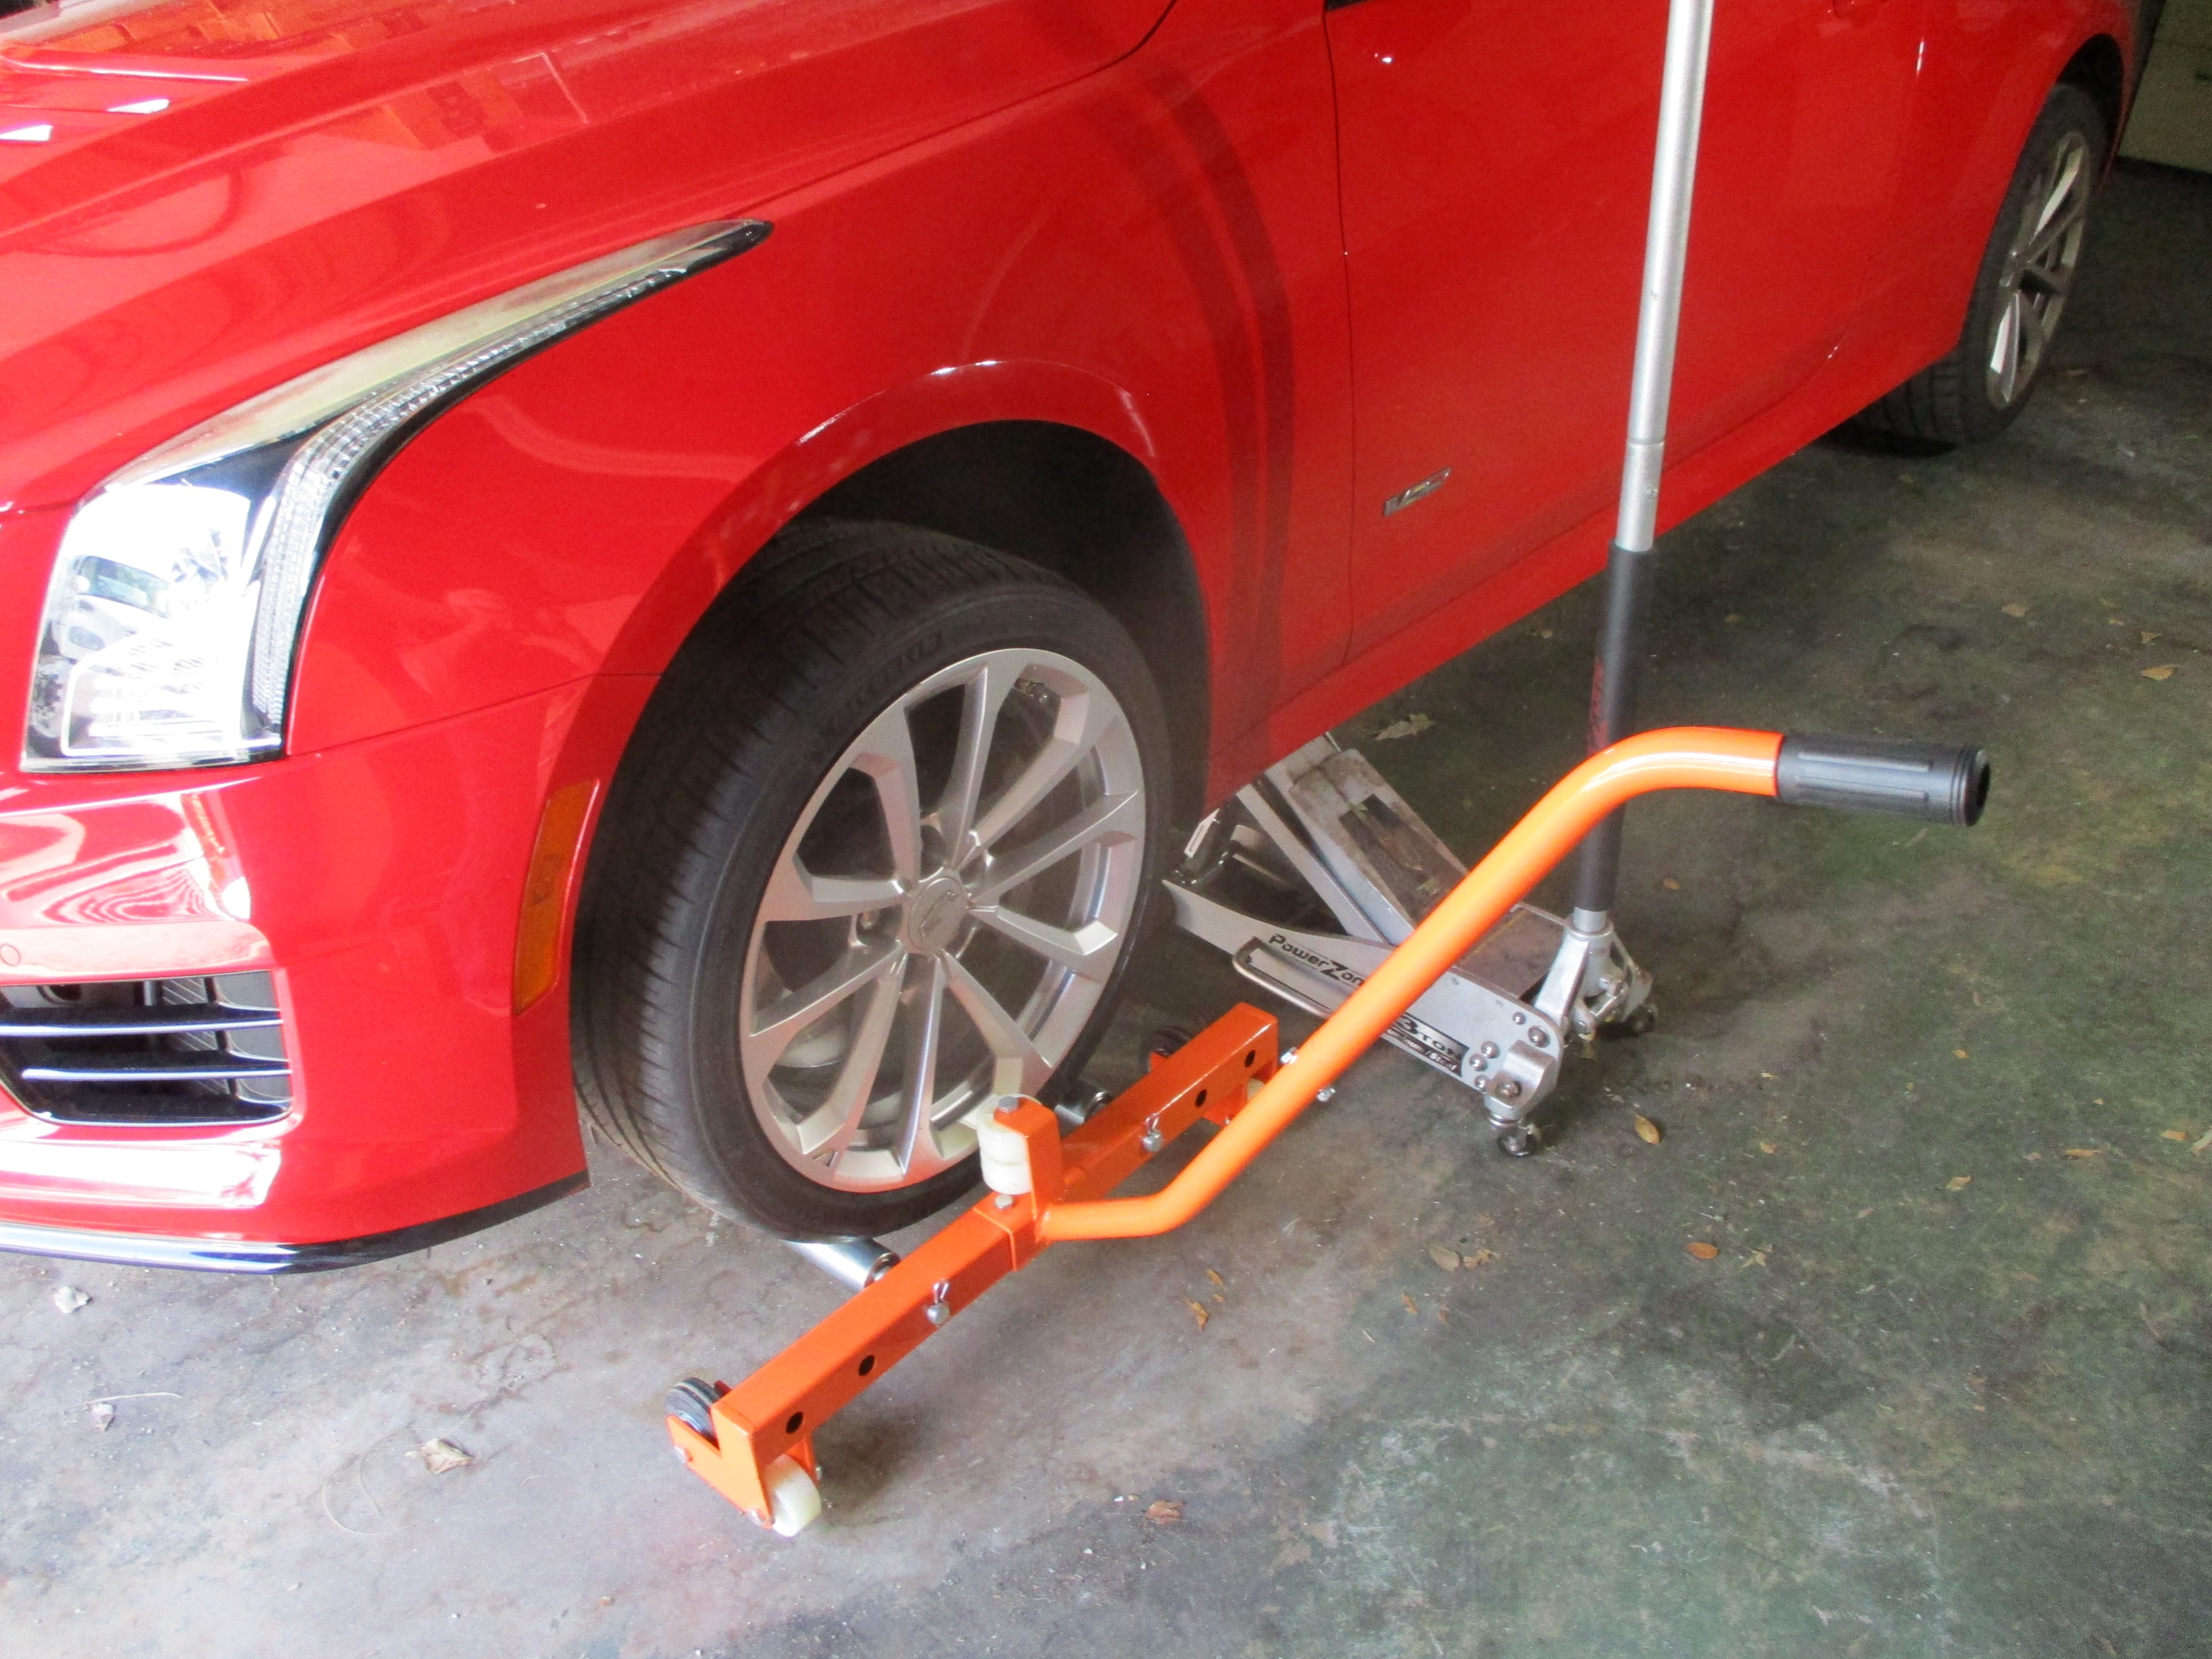
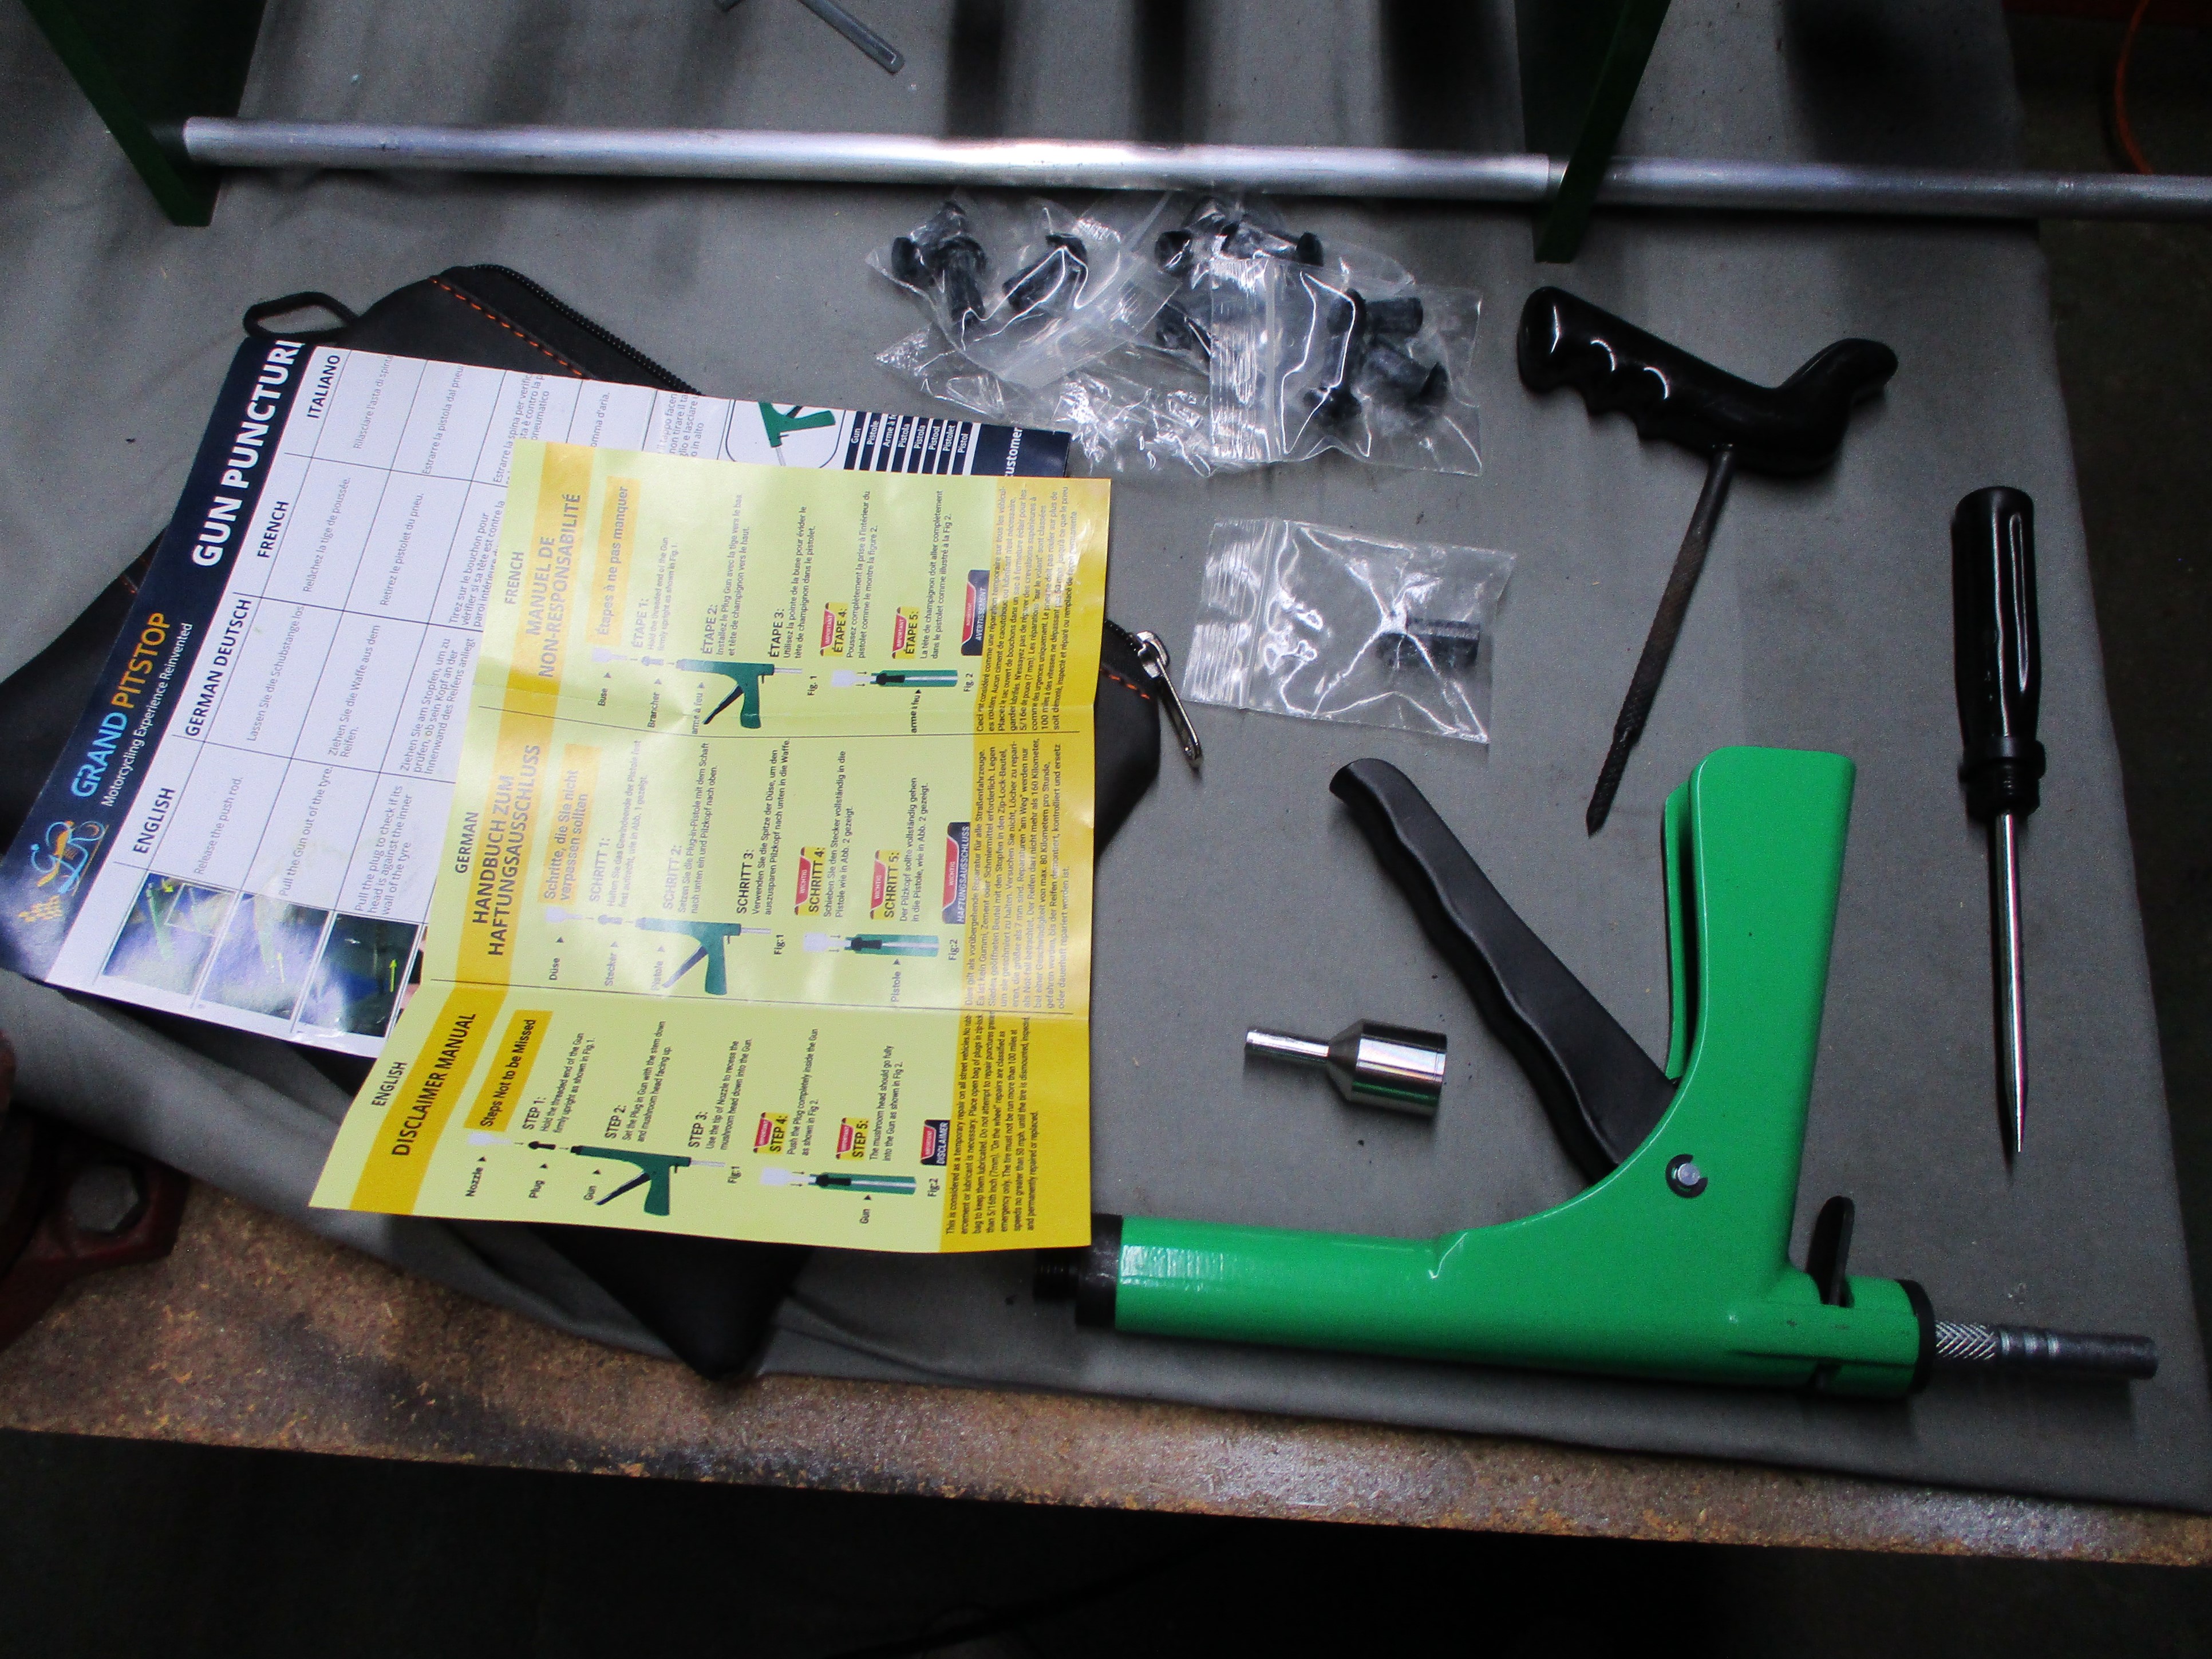
tire repair kit was thirteen years old so, on the chance that the "bacon strips" have dried out, I ordered a new kit. Of course there's also a chance that I screwed up the procedure, twice, so I watched a few videos to refine my technique. I also got a different type of tire repair kit that consists of glue and glue covered plugs that screw into the puncture. I'm getting too weak to put these tires back on the car once I have them off so, I got a tire dolly as well to give me an assist.
My
tire repair kit was thirteen years old so, on the chance that the "bacon strips" have dried out, I ordered a new kit. Of course there's also a chance that I screwed up the procedure, twice, so I watched a few videos to refine my technique. I also got a different type of tire repair kit that consists of glue and glue covered plugs that screw into the puncture. I'm getting too weak to put these tires back on the car once I have them off so, I got a tire dolly as well to give me an assist.
Came out of the office last Tuesday to find two of Elvira's tires almost flat! !@##$%% I looked pretty ridiculous with two battery tire pumps going at the same time.
 On Wednesday, I pulled Elvira's rear passenger tire to clean the wheel and try to fix the puncture. It turned out to be a small diameter screw, bent partially over in the tread area. Tried to pull it out with bent needlenose pliers and it broke off. @#$%^& I drove the remainder of the broken off screw over a quarter of an inch deeper into the tire with a punch, then finished clearing the puncture with a drill. I put a dollop of tire glue into the hole and screwed in one of the small glue-covered plugs that came with the kit. Poured soapy water over the plug - no bubbles this time, a good omen. It was ten AM. Aired the tire up to 36 psi and checked the tire hourly for air loss. It was still holding at 36 psi when my friend, Jon Carey arrived shorty after noon with some machine work he had done for me and it was still holding when he left mid-afternoon.
 I remounted the wheel and it is still holding now. I will again attempt to fix the front driver side tire with this method this weekend when Elvira is due for an oil change and I clean the other wheels.
April 25th 2024 On Saturday, I pretty much wore myself out, pulling the other three wheels and cleaning them and also trying to patch the driver side front tire for the fourth time. I ended up puting two of the larger screw plugs in the old wound and still getting soapy water bubbles. I was crestfallen. I was dehydrated and drained of energy by the time I got Elvira back on the floor. I was somewhat cheered to see, on Sunday morning, that the tire was losing air at half the previous rate but I'm finished trying to do a better job with the tire on the wheel. It might take a patch on the inside but that's beyond my capabilities at the BillyBob Shop.
 May
30th 2024 Two days after my last update, I awoke on Saturday with a sore throat, sneezing and drippy nose. Curses! The first three weeks of May were days of weakness and not hitting on all cylinders. Didn't do anything 'cept go to my office job. I finally felt chipper enuf by the Memorial Day weekend to get back to Elvira and Deerslayer work in the shop. Now, of course, it's blast furnace season in South Florida.
May
30th 2024 Two days after my last update, I awoke on Saturday with a sore throat, sneezing and drippy nose. Curses! The first three weeks of May were days of weakness and not hitting on all cylinders. Didn't do anything 'cept go to my office job. I finally felt chipper enuf by the Memorial Day weekend to get back to Elvira and Deerslayer work in the shop. Now, of course, it's blast furnace season in South Florida.
Didn't get anything done until yesterday. Elvira was in dire need of an oil change so I struggled with that for four hours. Most of the effort was in getting the front end high enuf to work under. Got a new airbag jack but it was a rch too tall to slide under the car so the driver side front had to be lifted with the floor jack and placed on the four inch ramp. The passenger side was lifted with the floor jack a similar distance. Then the driver side was lifted with the airbag jack to full height and the four inch ramp replaced with a twelve inch ramp Jon Carey had given me. Then the passenger side jacked up the full height with the floor jack and the other twelve inch ramp placed.
By the time I got the old filter off and the troublesome drain plug out (still not enuf leverage under there for my diminished strength), I was spent. Got it drained, filtered and plugged and lowered the car again thru the same tedious process. It was mid-day by that point and I was too hot and tired to carry on. I dragged my dehydrated butt into the Flamingo Room and finished the job with seven quarts of new oil just before I came to the office this morning. Beer of the day was Yazoo Brewing Company's Dos Perros. Background music was Allman Brothers Band Beginnings.
 July 12th 2024 On Wednesday I decided to try fixing the leaking driver's side front tire one last time before throwing in the towel and taking Elvira to a tire store. Pulled the wheel once again and ran a wire wheel in my drill motor over the previous patch to expose the heads of the two screw plugs embedded in the earlier failed bacon strip plugs.
This allowed me to back the screw plugs out and replace them with a "mushroom" plug system I had ordered and received sometime back. Instructions were sketchy and required some study to get the procedure down but this kit will be my first choice in upcoming tire puncture adventures.
After the previous screw plug repair, the tire had to be filled once a day. A few weeks ago, it started losing air at the rate of four pounds an hour. Now it is losing at about one pound per hour. I have until Wednesday to decide if I want to try to stitch one more mushroom plug into the rift or take Elvira to the tire shop. Beer of the day was Tivoli Brewing Company's Bo Girl Pilsner. Background music was Bruce Springsteen's Darkness on the Edge of Town.
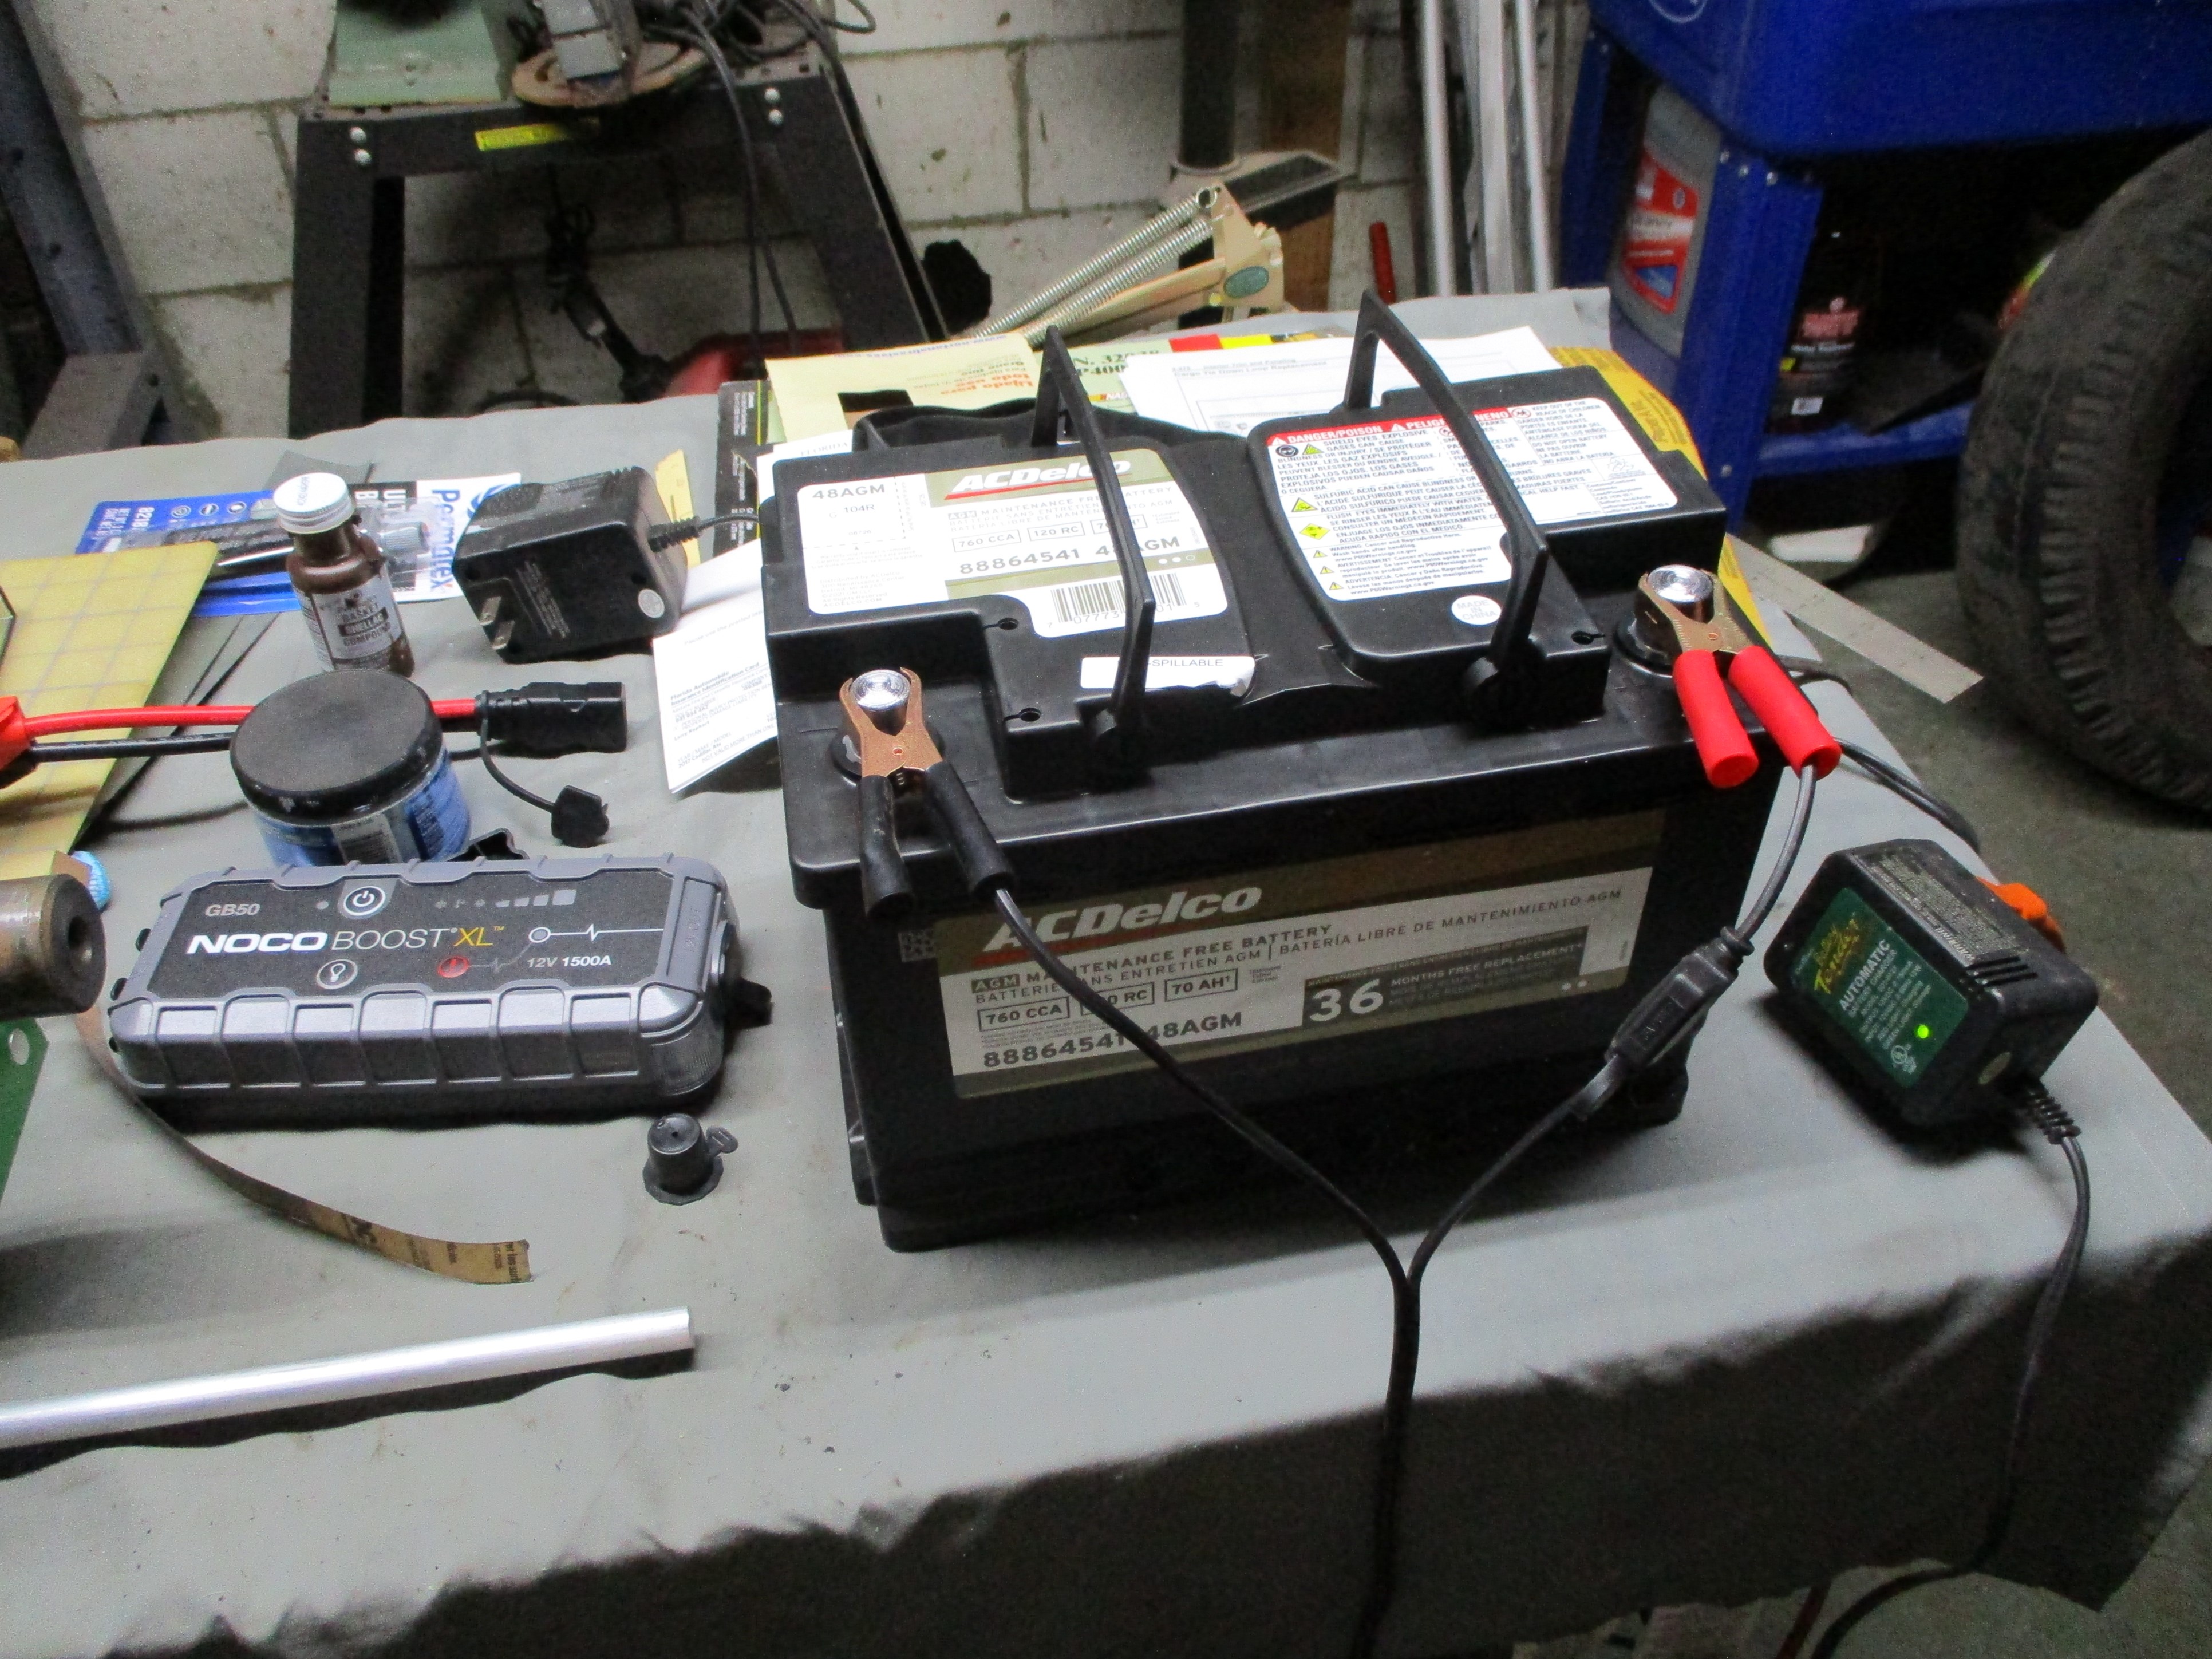 November 9th 2024 The five month South Florida summer is winding down and the BillyBob Shop temperatures have subsided back into my ever-shrinking comfort zone. Elvira, being the high maintenance babe that she is. is screaming for attention and, since she is my only mobile transportation, I have to attend to her first. I am still plagued with the front tire leak but more worrisome currently is the battery. It's almost eight years old and having trouble holding a charge. Being the procrastinator I am, I got a lithium battery jump charger a while back to guard against being stranded. Had to use it last nite for the first time when I stopped for gas on the way to the office. After fueling, the engine wouldn't turn over. The jump starter got me on the road again. When I got back to the BillyBob Shop, I got the new battery, purchased a week or so ago, out of its packing and hunted up one of my trickle chargers to top it off.
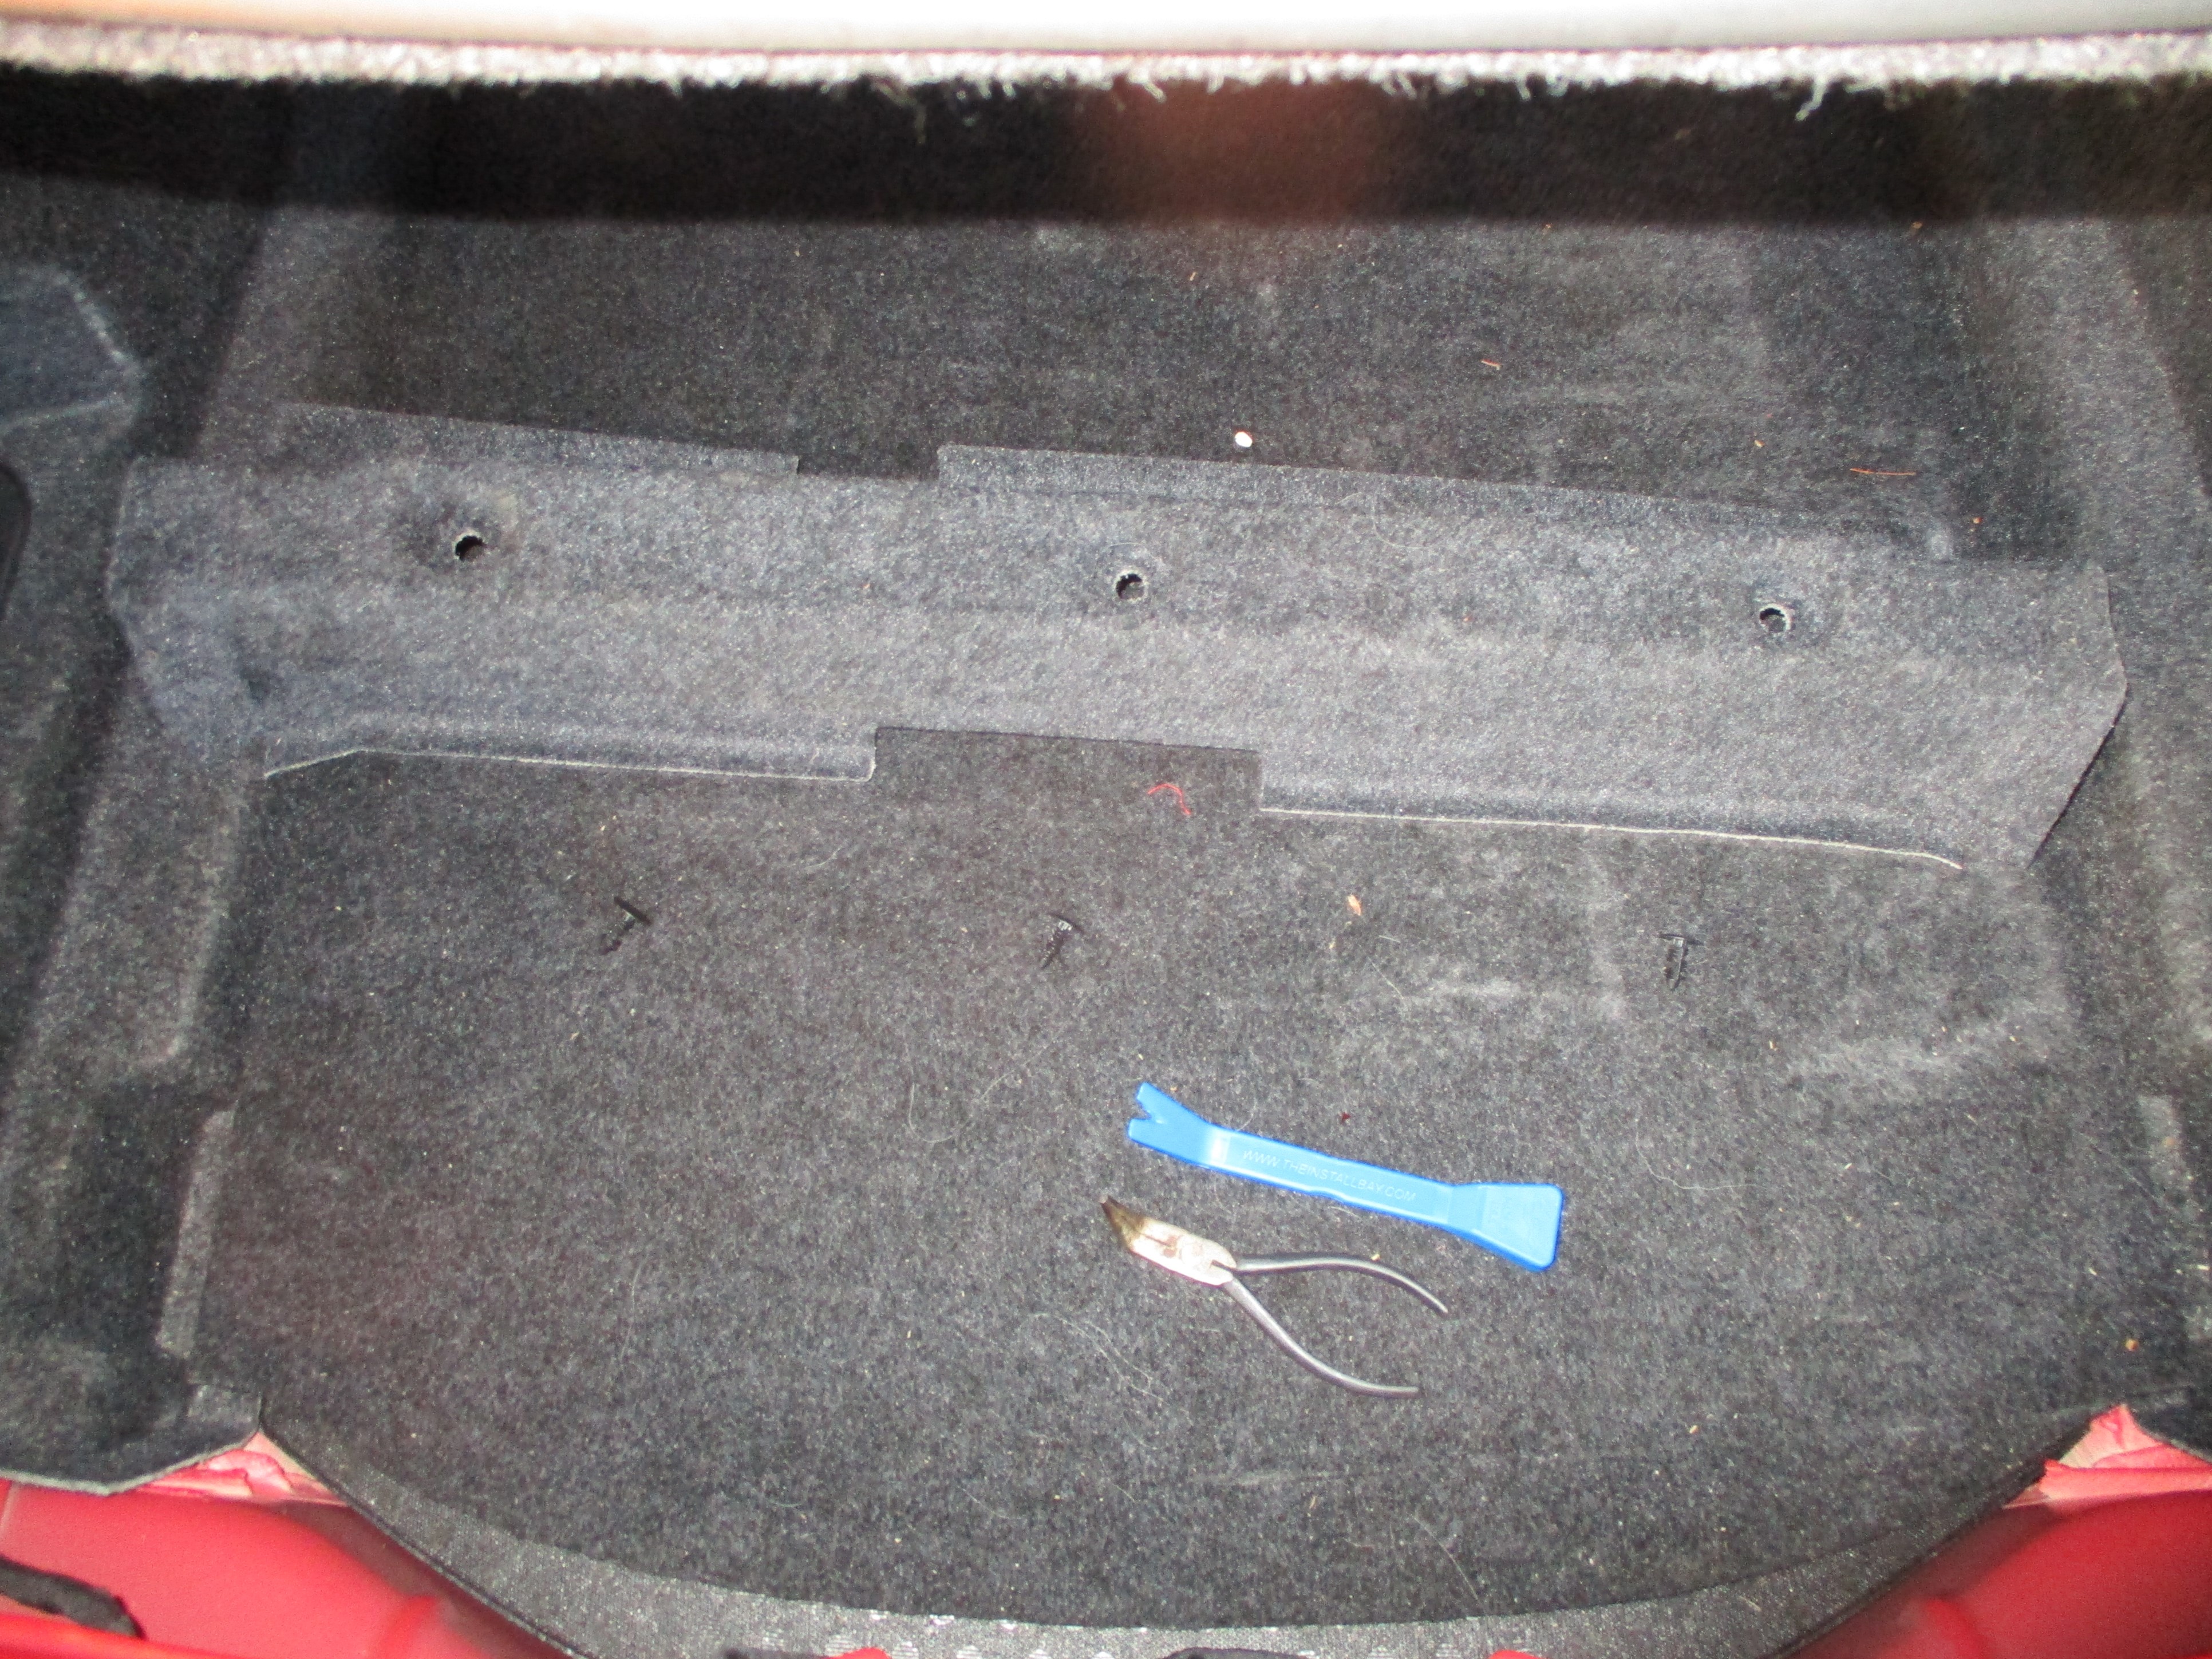
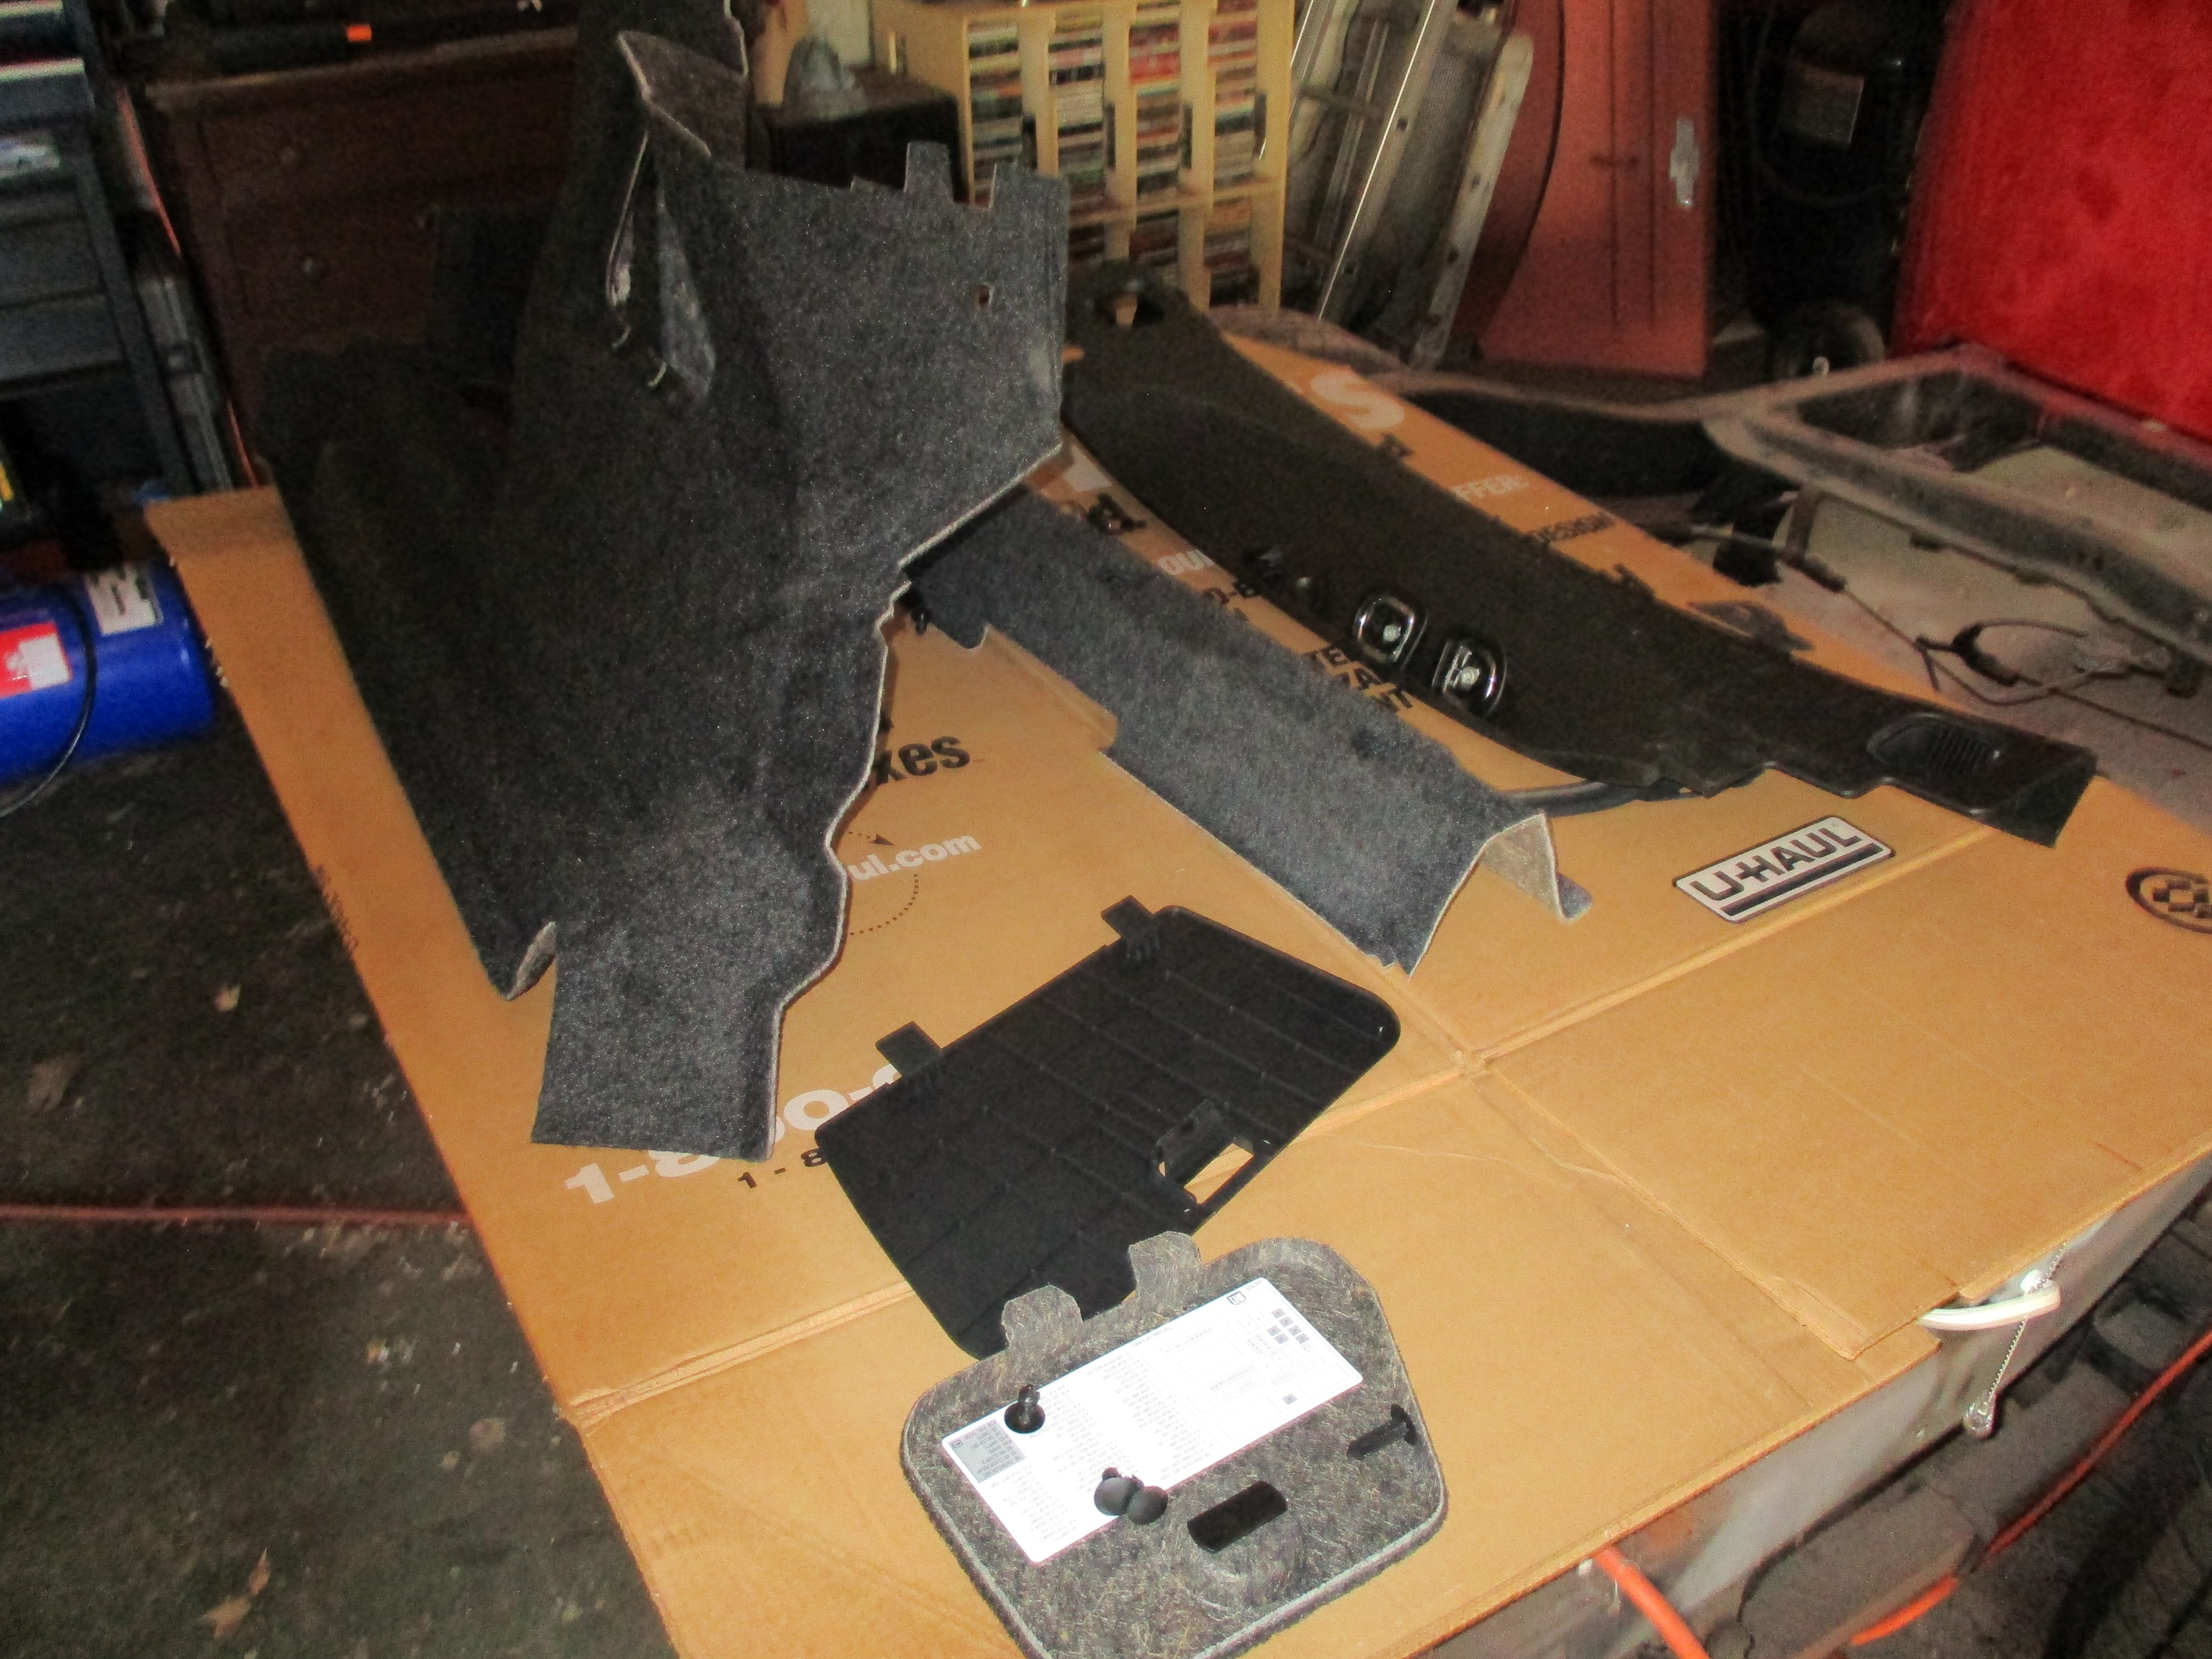 Took me ninety minutes to remove three trunk trim pieces to allow access to the battery. The trunk sill was easier than anticipated. It was held in place with two torx bolts at the tie-downs and four clips. The trim across the rear of the trunk took the longest. It was held in place by three "christmas tree" fasteners that were sunk in deep wells for some inexplicable reason. Had to use a narrow plastic pry to start, then finish up with bent needle-nose pliers. The seat back was also in the way. Finally, the large fender side panel could come out. It was held in place by five christmas tree fasteners, two of which were in the passenger compartment and one on a tab concealed under another trim piece that I pried out of the way rather than removing completely.
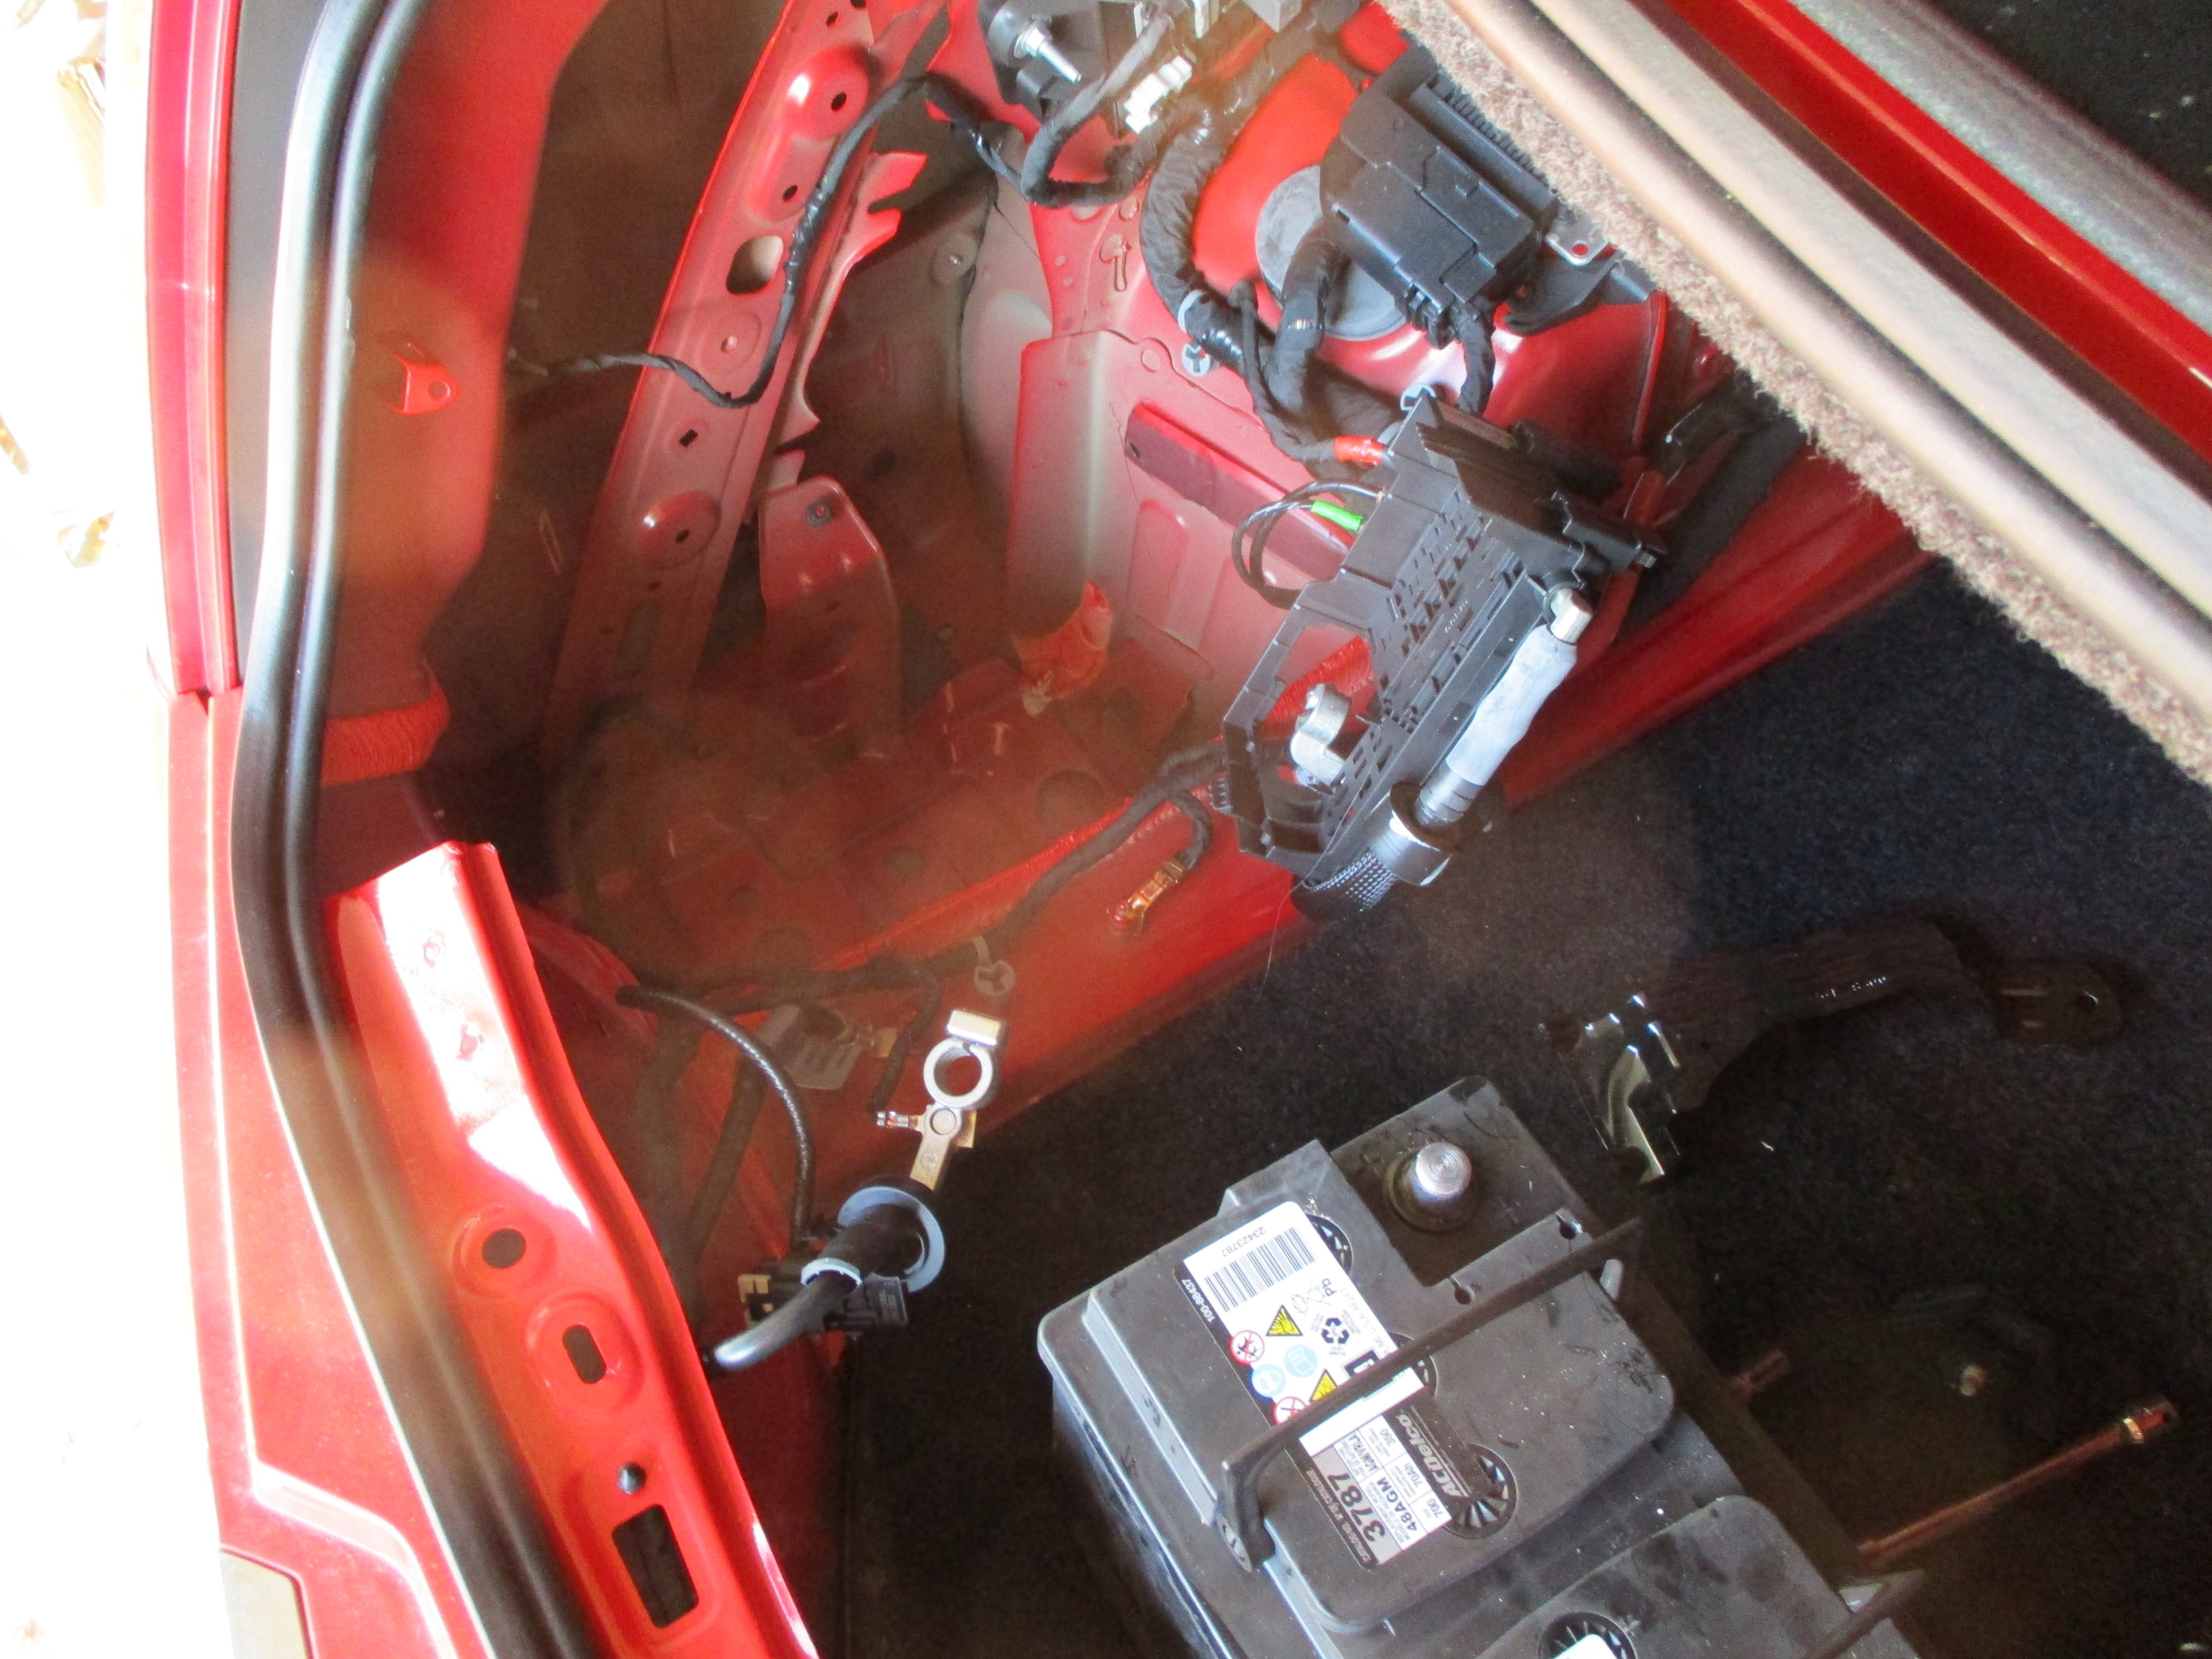 Time to disconnect and remove the failing battery. There is a "gotcha" to observe, not mentioned in the manual that I could find. Do not disconnect the battery with the ignition on, or accessory on or alarm system. It can trigger the "one-time" onstar battery, which will then discharge and need to be replaced as well. The second gotcha, once the battery is disconnected is not to close the trunk lid as it is an electrical latch and not keyed. The negative terminal was disconnected, then the positive terminal and a fuse buss that attaches to the top of the battery taken off and moved to the side. The top sheet metal battery retainer was removed next and then another retainer bolt, down low on the battery negative end. Last, a battery vent line was removed from the negative end of the battery and the battery lifted out with the two built-in handles.
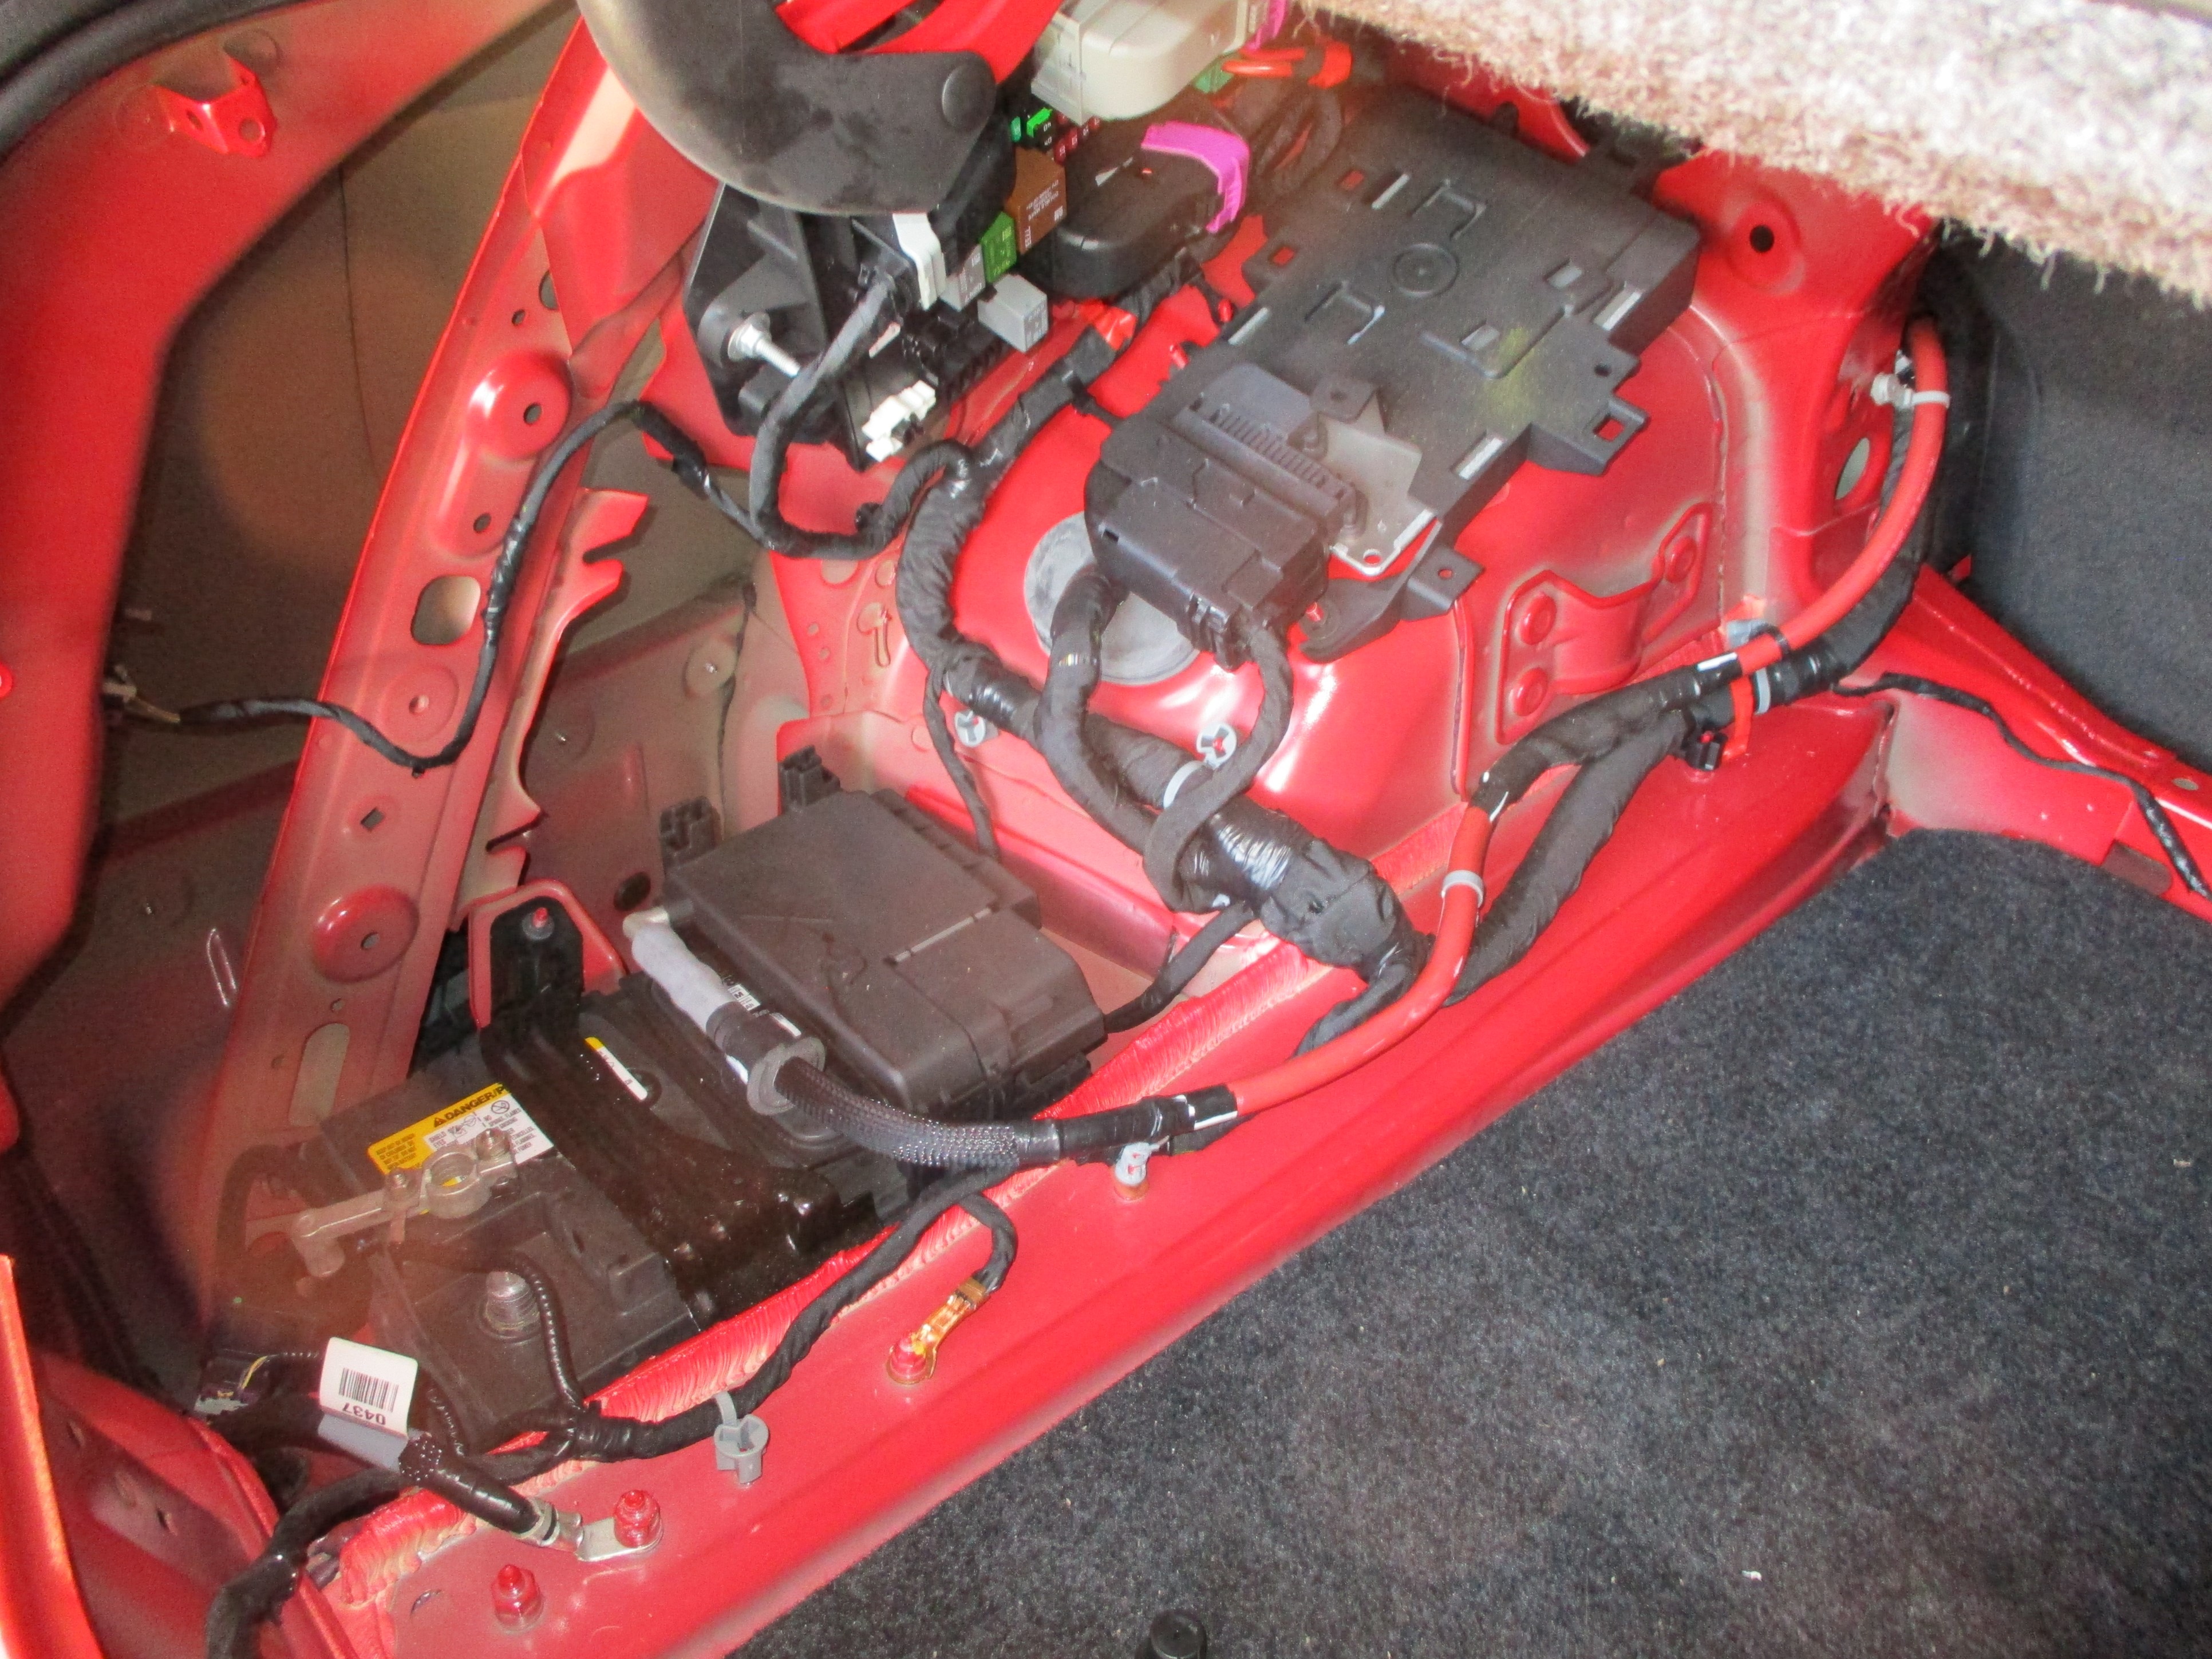 There was one more gotcha to attend to before the new battery could be lowered into place. This battery has vent openings at both ends of the battery. The old battery had a plastic plug in the vent opening on the positive end of the battery. This plug was removed and installed in the new battery. I had trouble with the battery retainers going back into place but finally got it to go back together. The vent line was inserted and the fuse buss snapped back in place on top of the battery. Positive terminal was tightened up, then the negative terminal. Time for the moment of truth. Jumped in Elvira and fired her up. She started with gusto and there were no sparks or escaping smoke.
My radio settings were gone and the tire pressure sensors were blank but everything else seemed to work okay. I'll leave the trunk trim pieces out for a few days until I'm sure everything works. Three and a half hours and I was spent and dehydrated. Temperatures are in the high eighties but the humidity is still high and it does me in. Beer of the day was Tivoli Brewing Company's Mountain Squeeze Juicy IPA. Background music was Rhino's Hot Rods & Custom Classics box set.
 November 13th 2024 Still messin' with post battery replacement adjustments. Tire pressure sensors returned on their own. The CUE touchscreen is frozen and has been for some time so I cannot use it to get my favorite radio station back. Lucky for me that is one task I can manage with voice command so I activated the voice command button on the steering wheel and waited for the prompt, then said "Tune to SiriusXM 26" and, voila! I have my music again. The IntelliBeam headlight dimming system appears to be inactive. I will have to research that if it doesn't right itself.
 Confident that I don't have to physically mess around with the new battery any more, the trunk trim pieces were re-installed. I was pleasantly surprised that the trim went back together easier than it came apart. Started detailing operations. Read the Owner Manual and found out how to toggle Intellibeam on again. Beer of the day was Brothers Craft Brewing Company's American Amber Ale. Background music was The Doo Wop Box set.
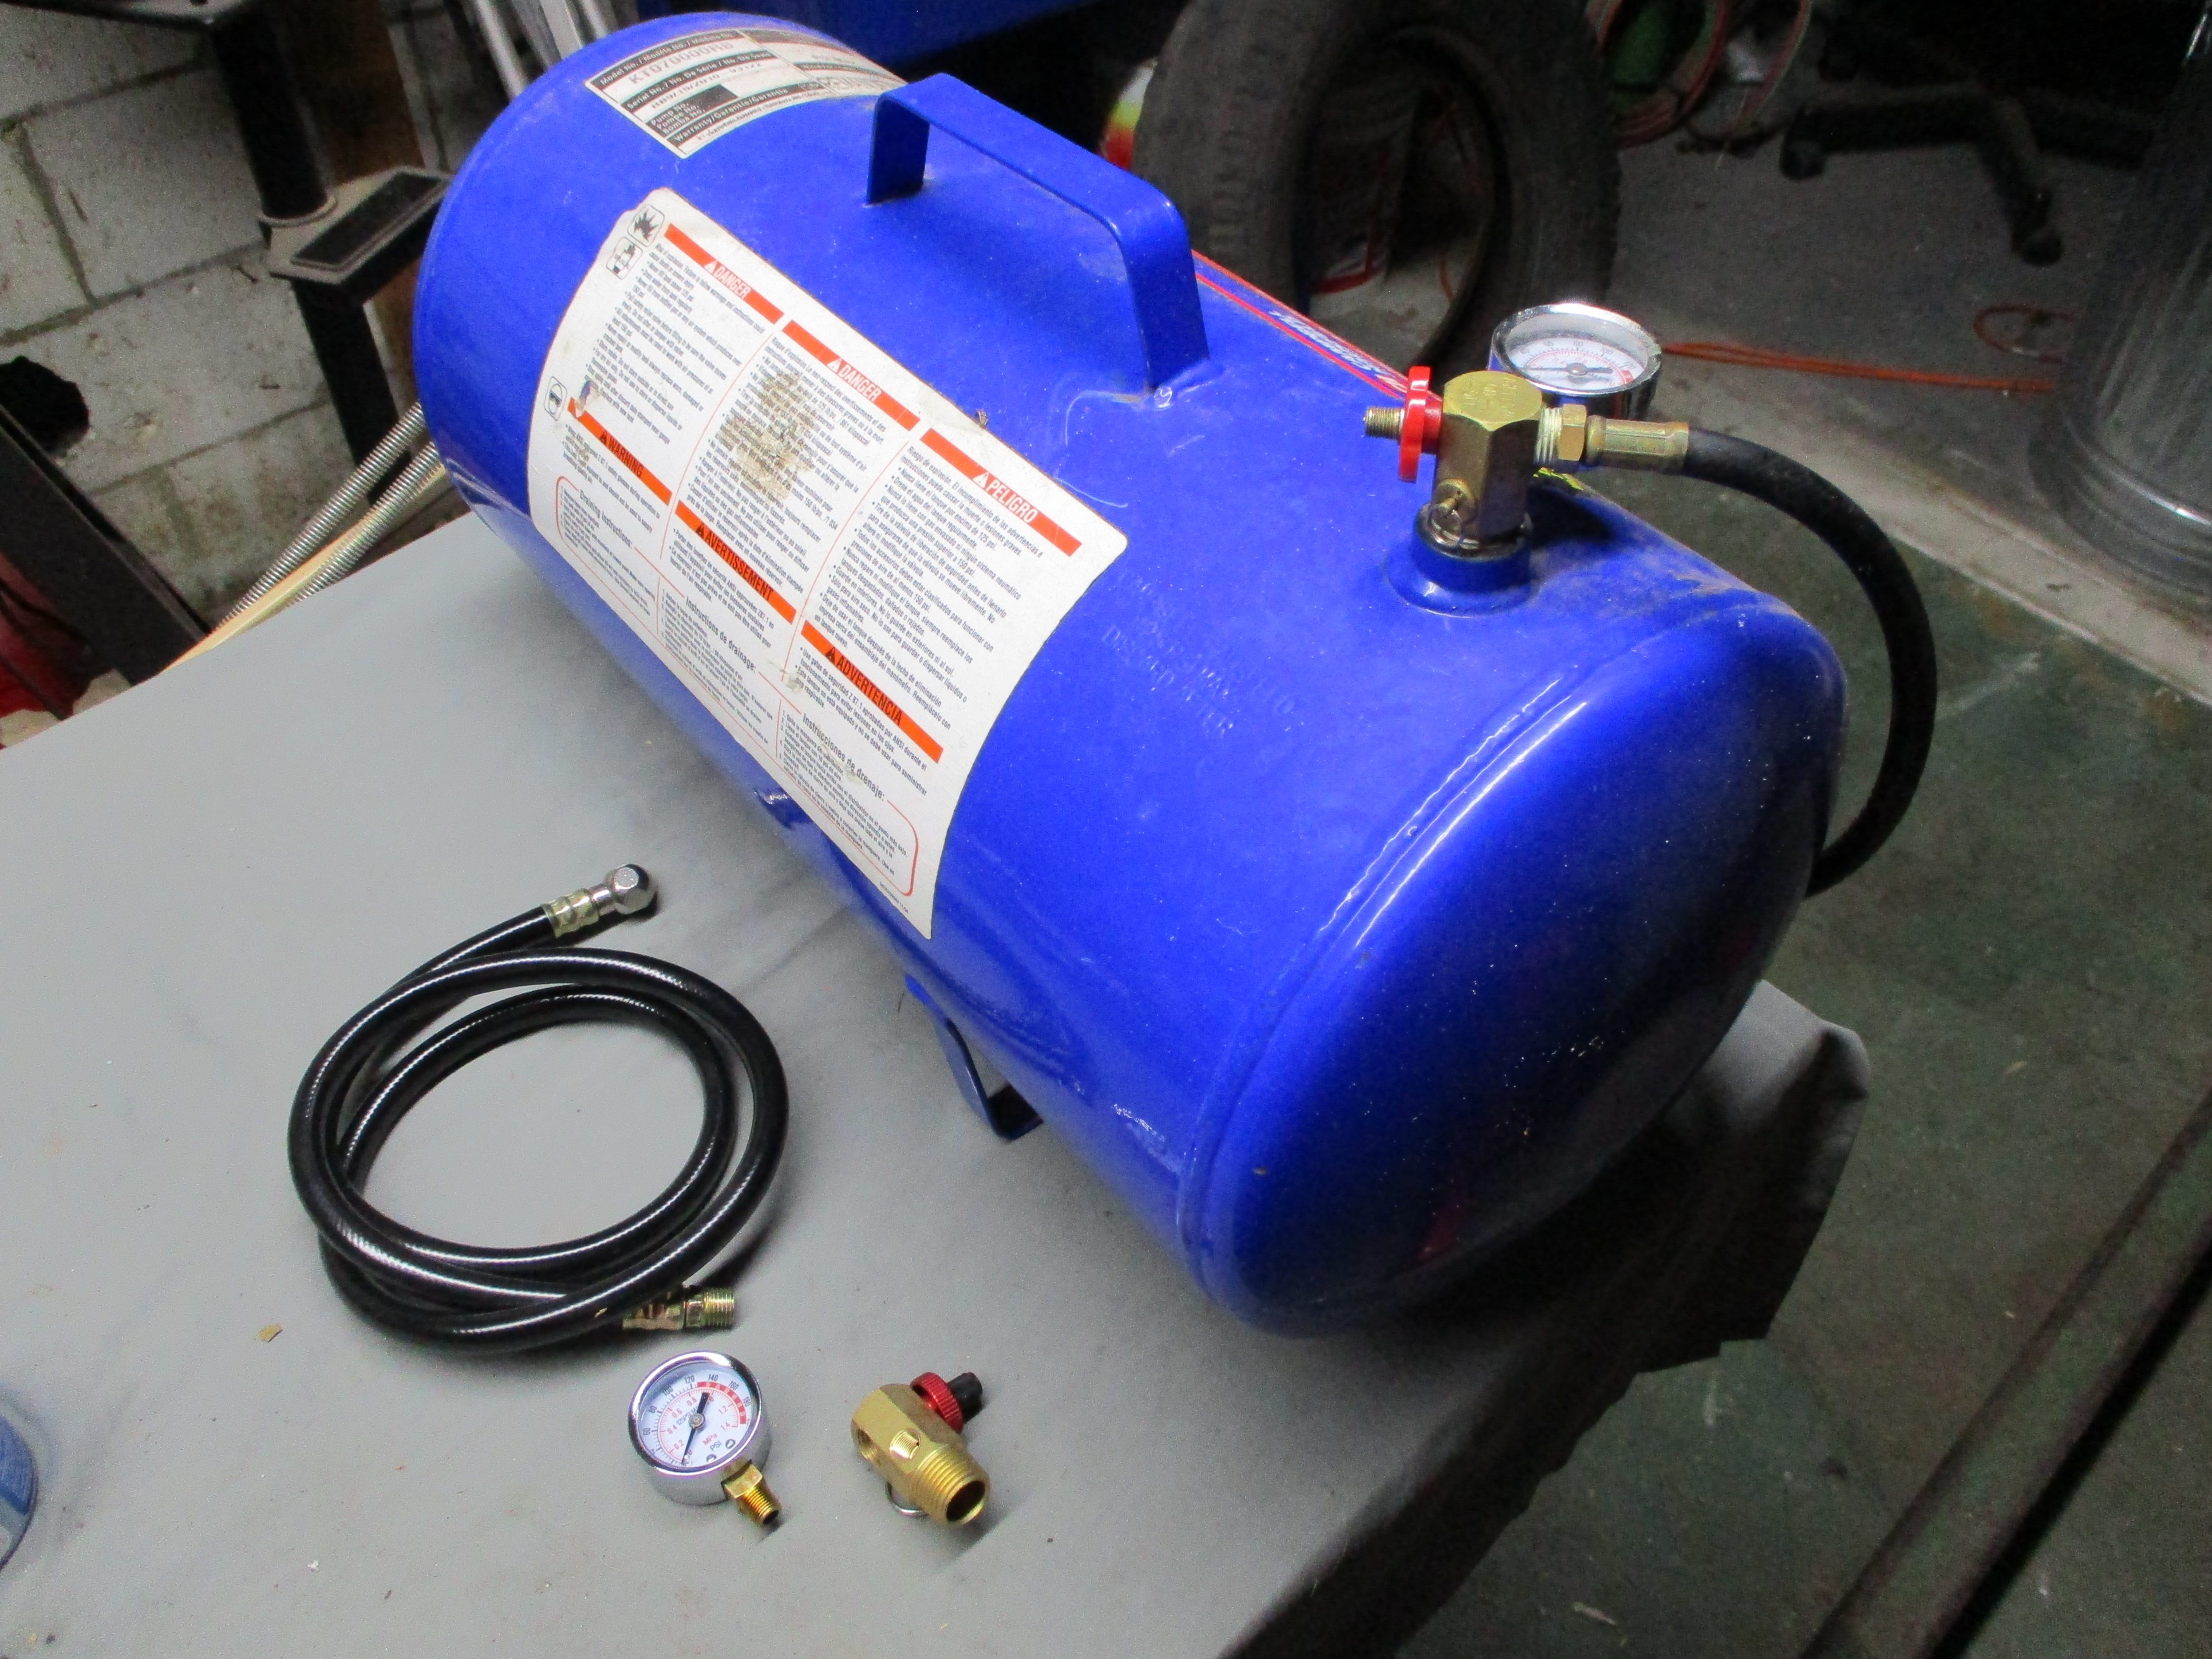 December 2nd 2024 Topping off Elvira's driver side front tire leak a couple of times a day has taken its toll on my air equipment. My favored battery air pump air hose sprung a leak and I tried to fix that with a shrink wrap sleeve but it didn't work. My older battery air pump won't hold a charge anymore and conks out after pumping five pounds. As luck, or design, would have it, the air hose thread is different and I can't jerry-rig a workable pump with components from both ~!@##$$. I ordered a new pump. My air compressor won't hold air for long and my portable air tank has developed a leak as well!
I had a repair kit for the air tank in inventory and fixed the air tank. My teflon tape Kung Fu is not strong. The tape keeps bunching up like plastic food wrap and I always have to do the righty-tighty, lefty-loosey mantra in my head to get it on the threads in the right direction. I cursed my way thru it and the tank still loses air but at a greatly reduced rate. Beer of the day was Harpoon Brewery's Big League IPA. Background music was Wild, Fast and Out of Control 50's rock and roll box set.
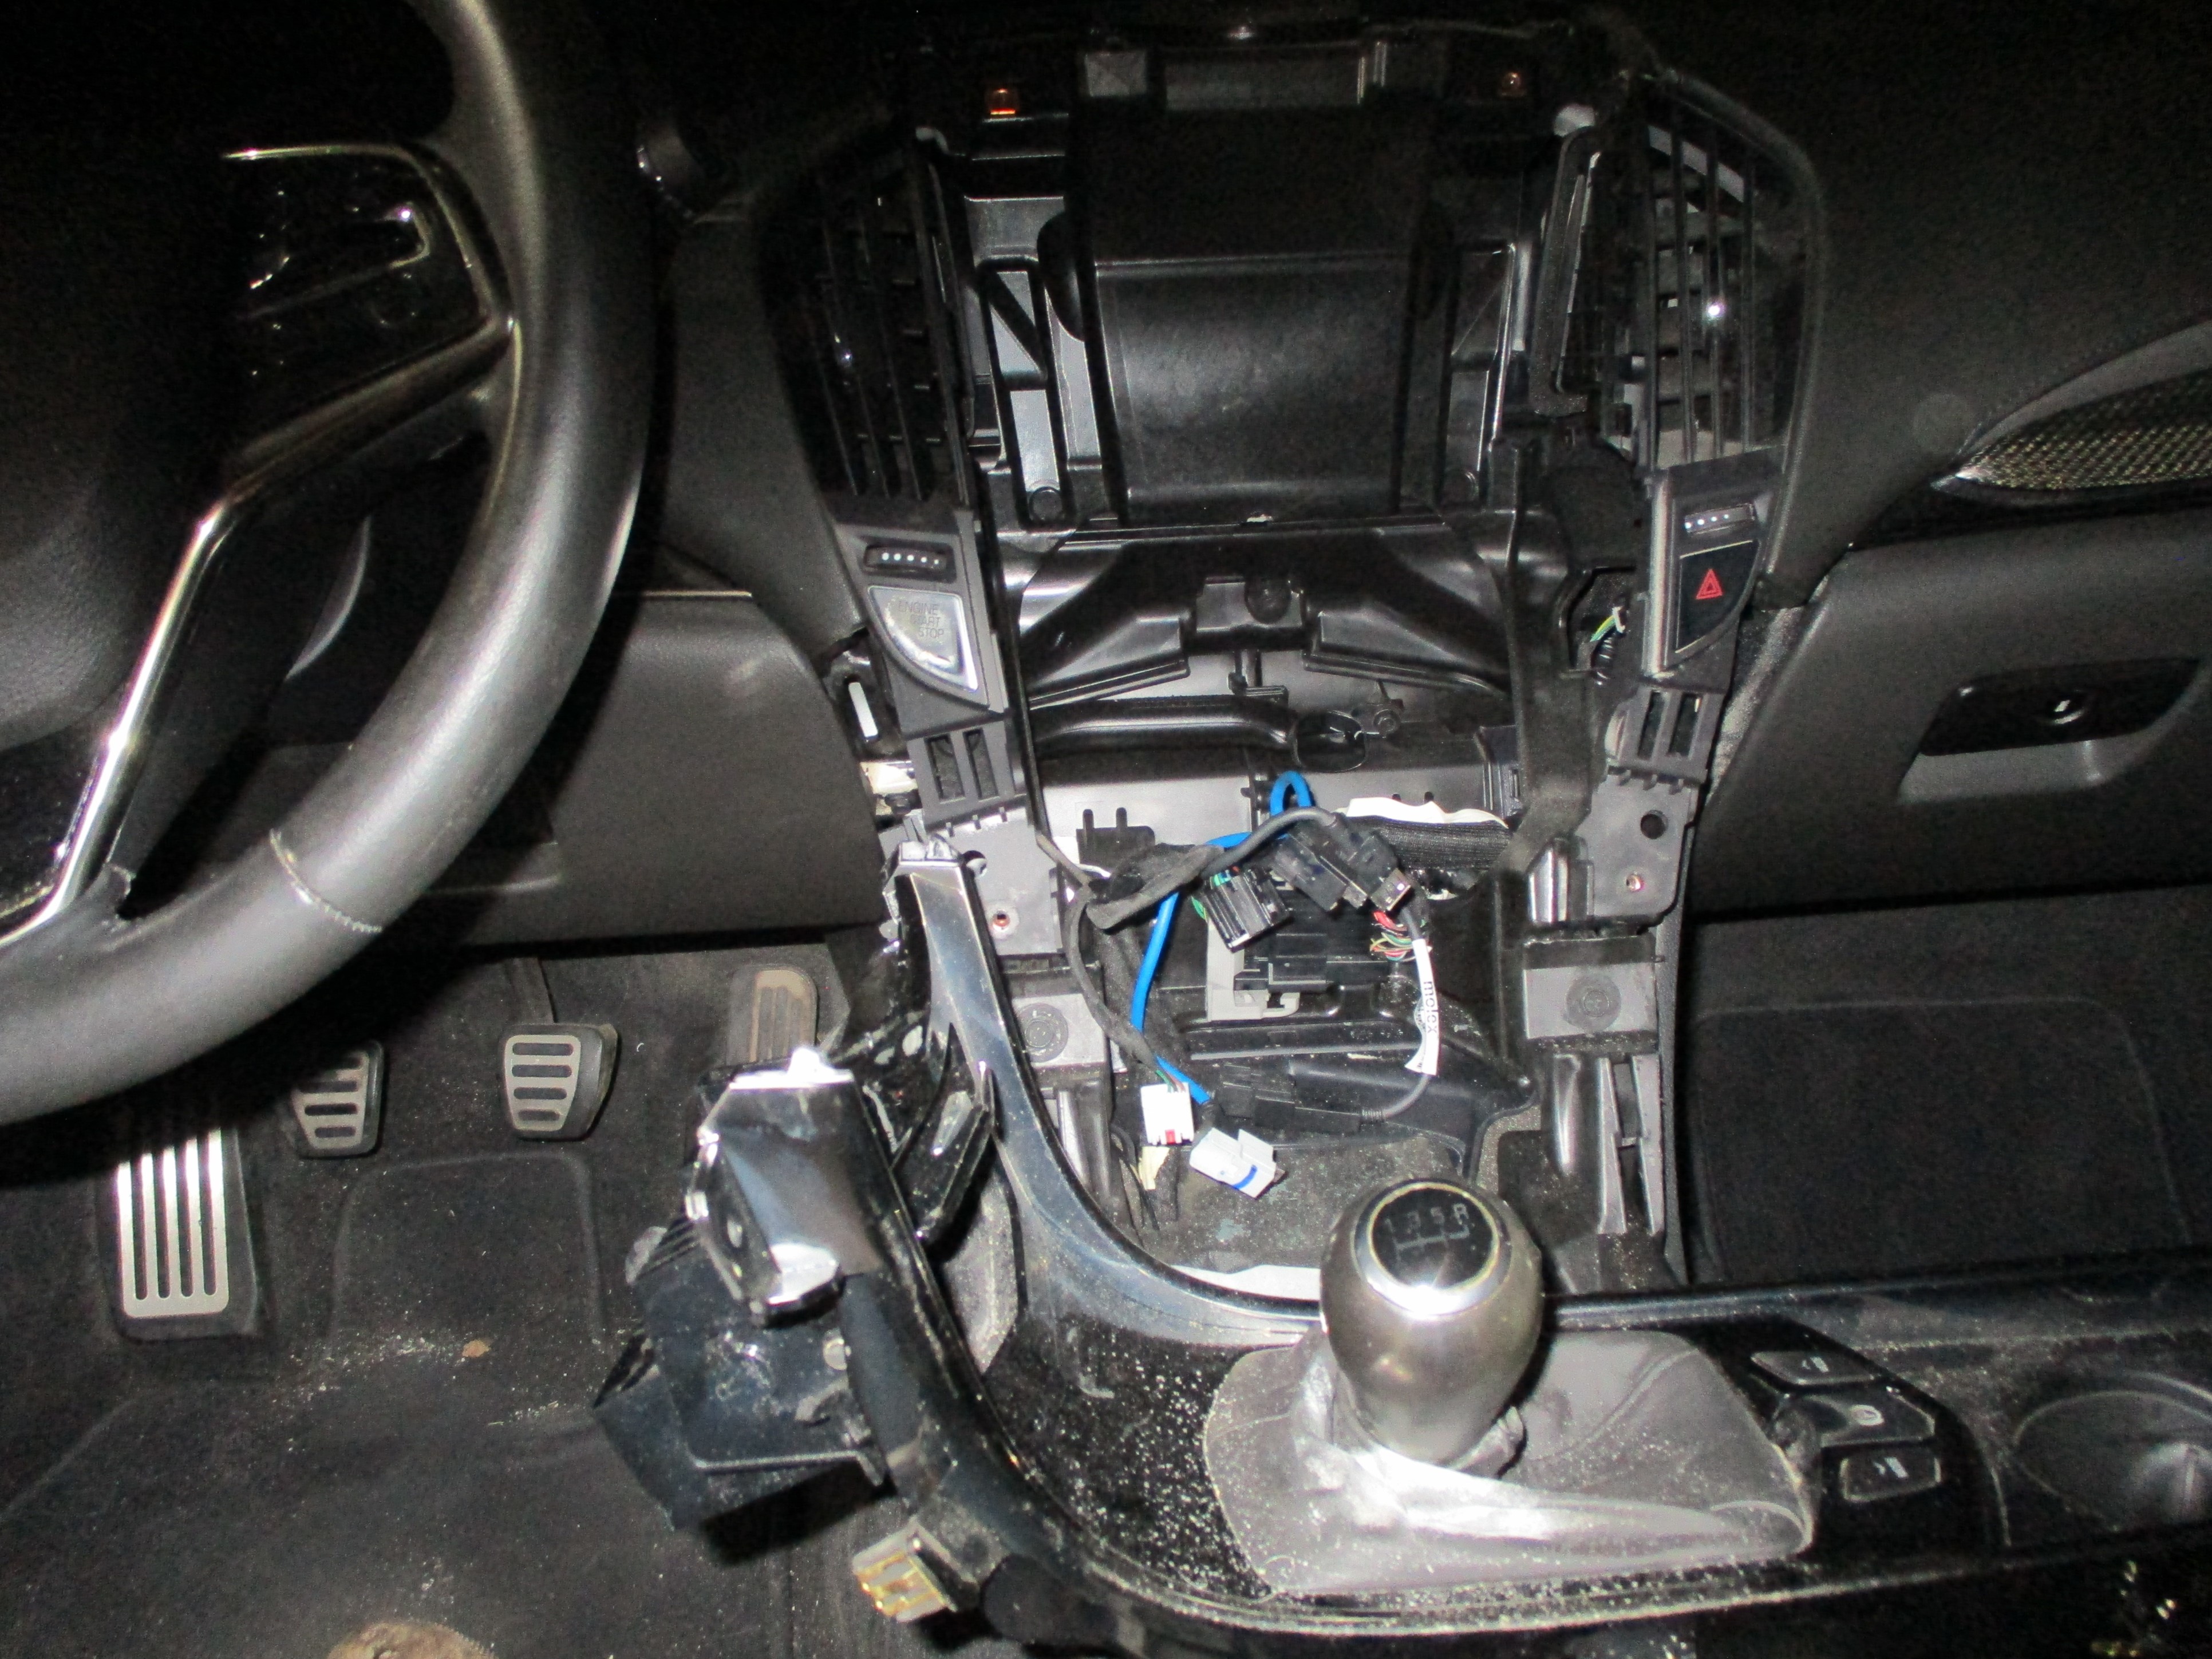 March 30th 2025 Finally got around to replacing Elvira's defective touch screen. Can't use the navigation system otherwise and I need it as I can't read street signs until I'm practically under them with my original equipment eyes. I've had the replacement touchscreen for a long time but no repair on Elvira is trivial and I always hesitate to tear into my only running ride. First, the entire CUE system has to be removed from the car. Six hidden capscrews and five wiring harness connectors disconnected to get it out after removing four interior trim items.
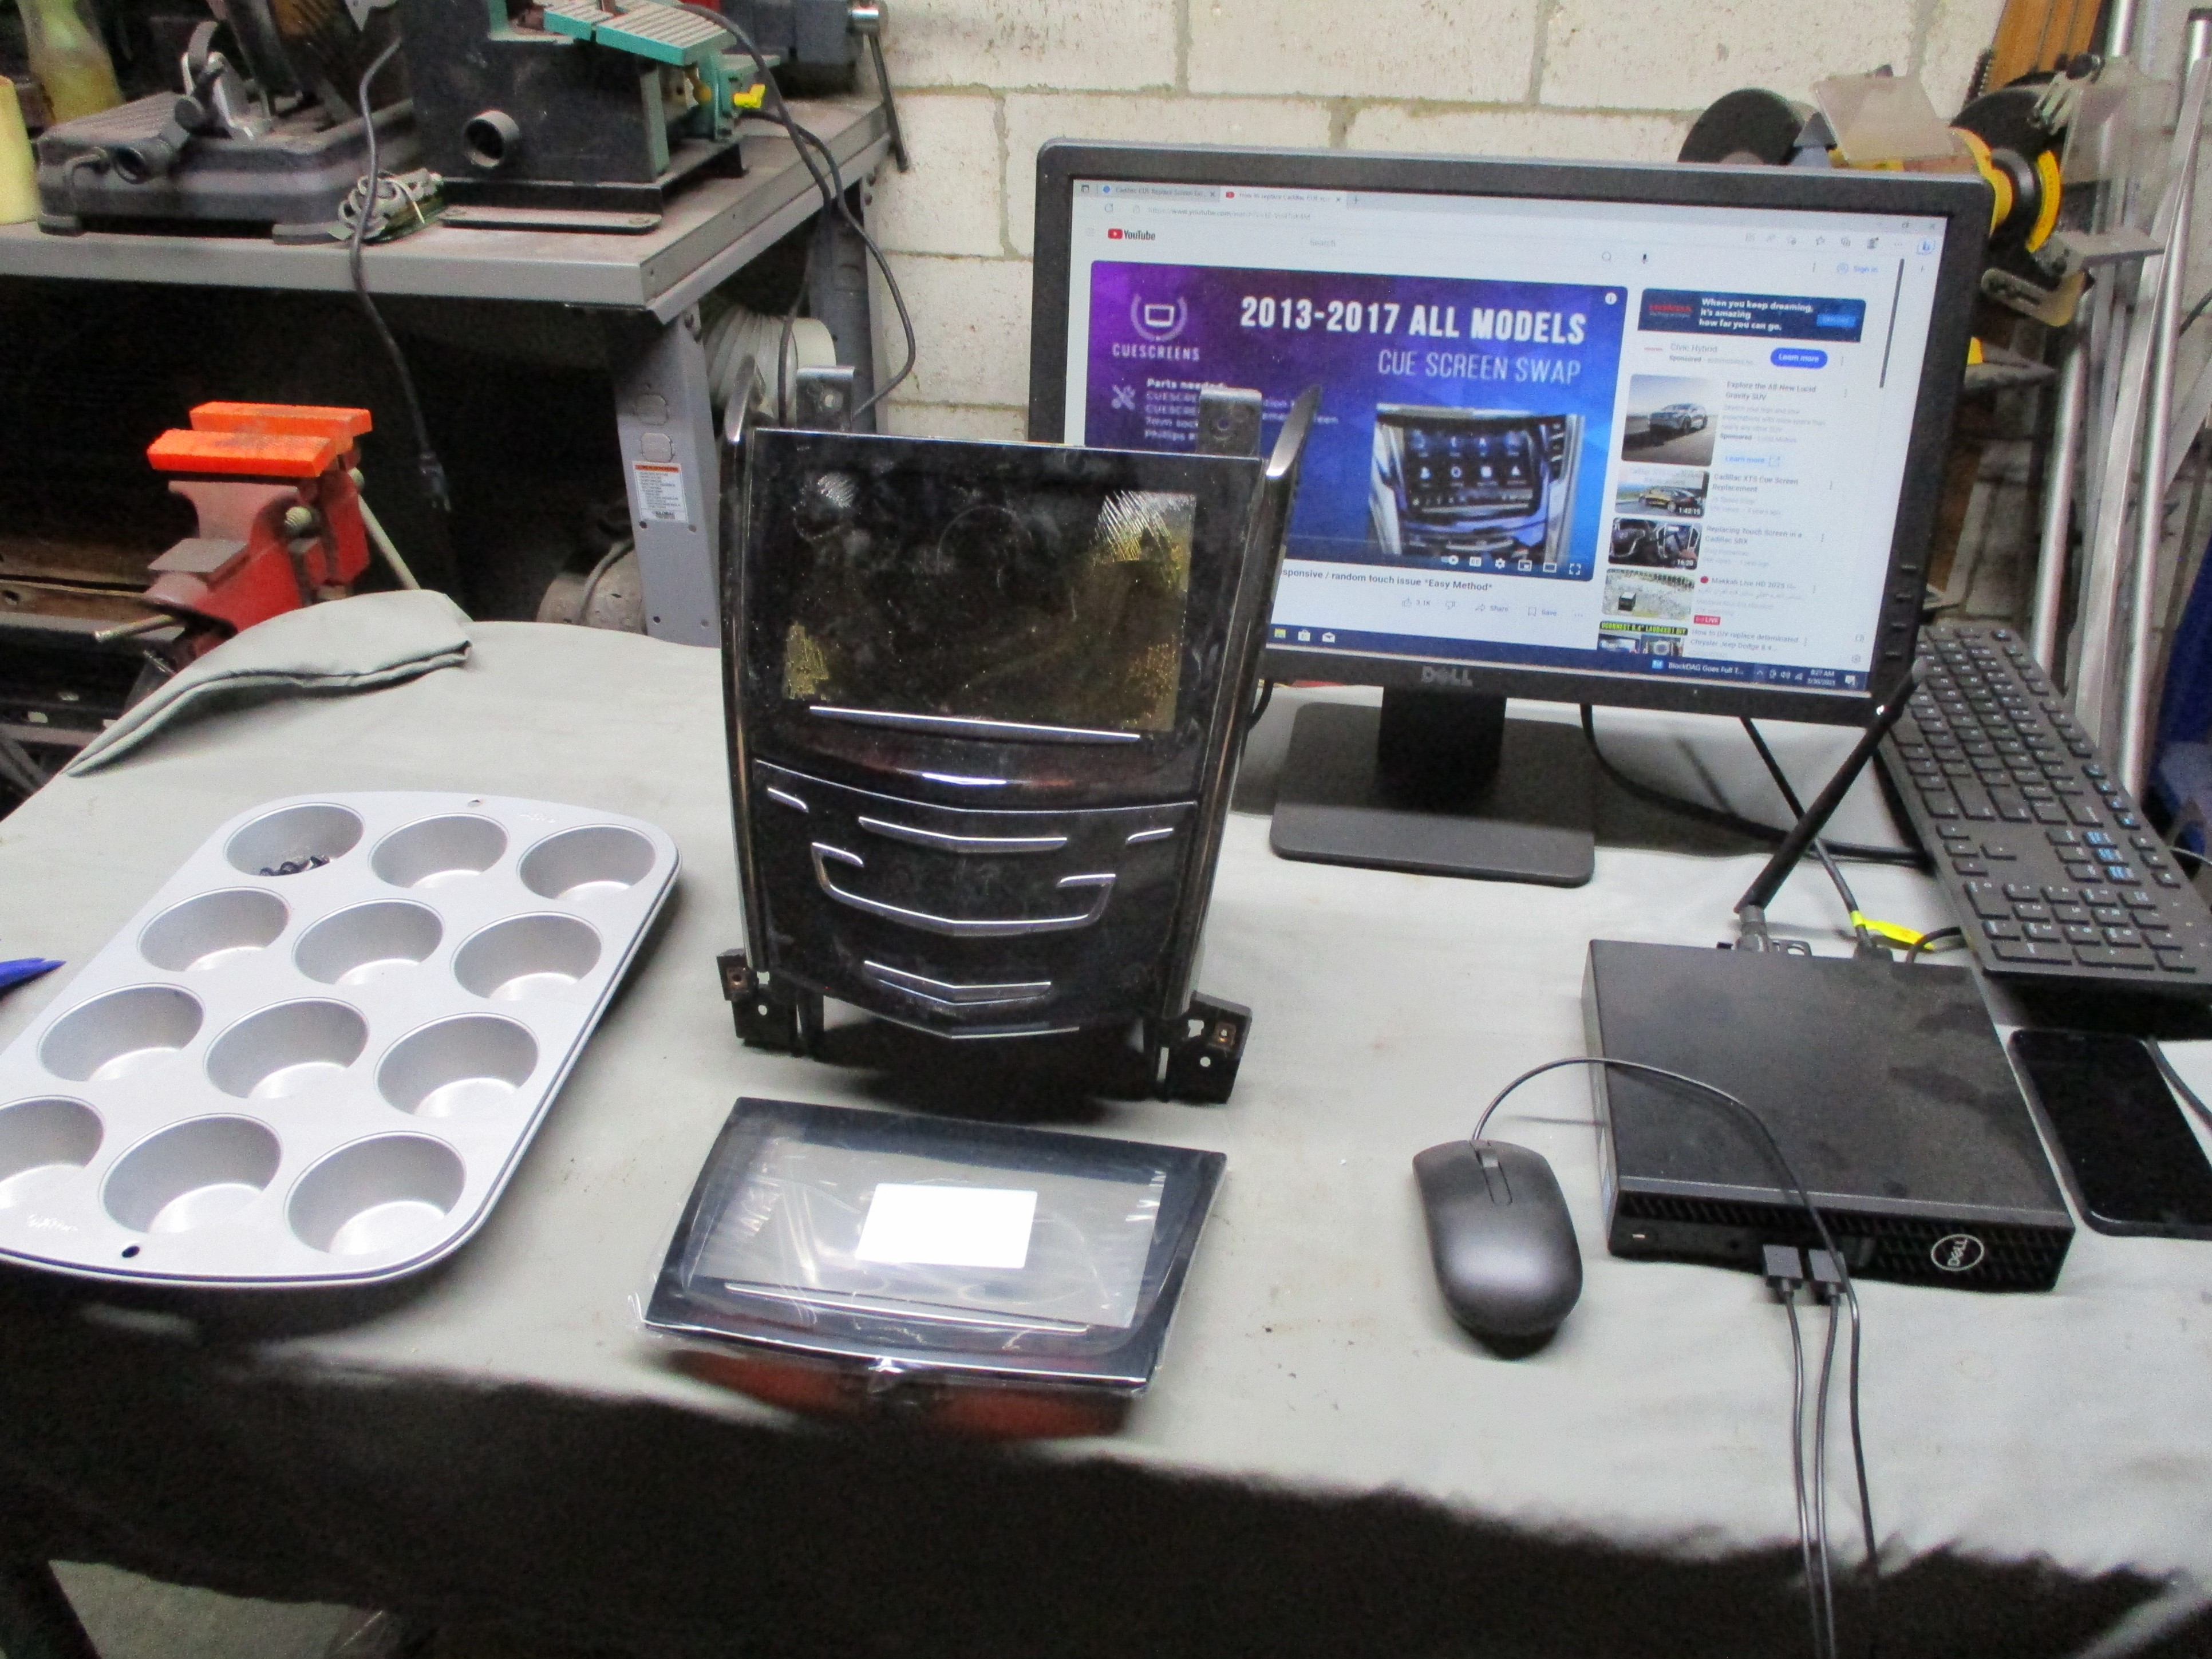 The Cadillac touchscreen is a defective design that has a high failure rate. I got the replacement from cuescreens.com and they have excellent installation videos. The fly in the buttermilk is that I don't have a intarweb connection at the BillyBob Shop. I jerryrigged a interweb connection by using my iPhone as a WiFi hotspot for my computer. It worked and I was able to access the installation videos.
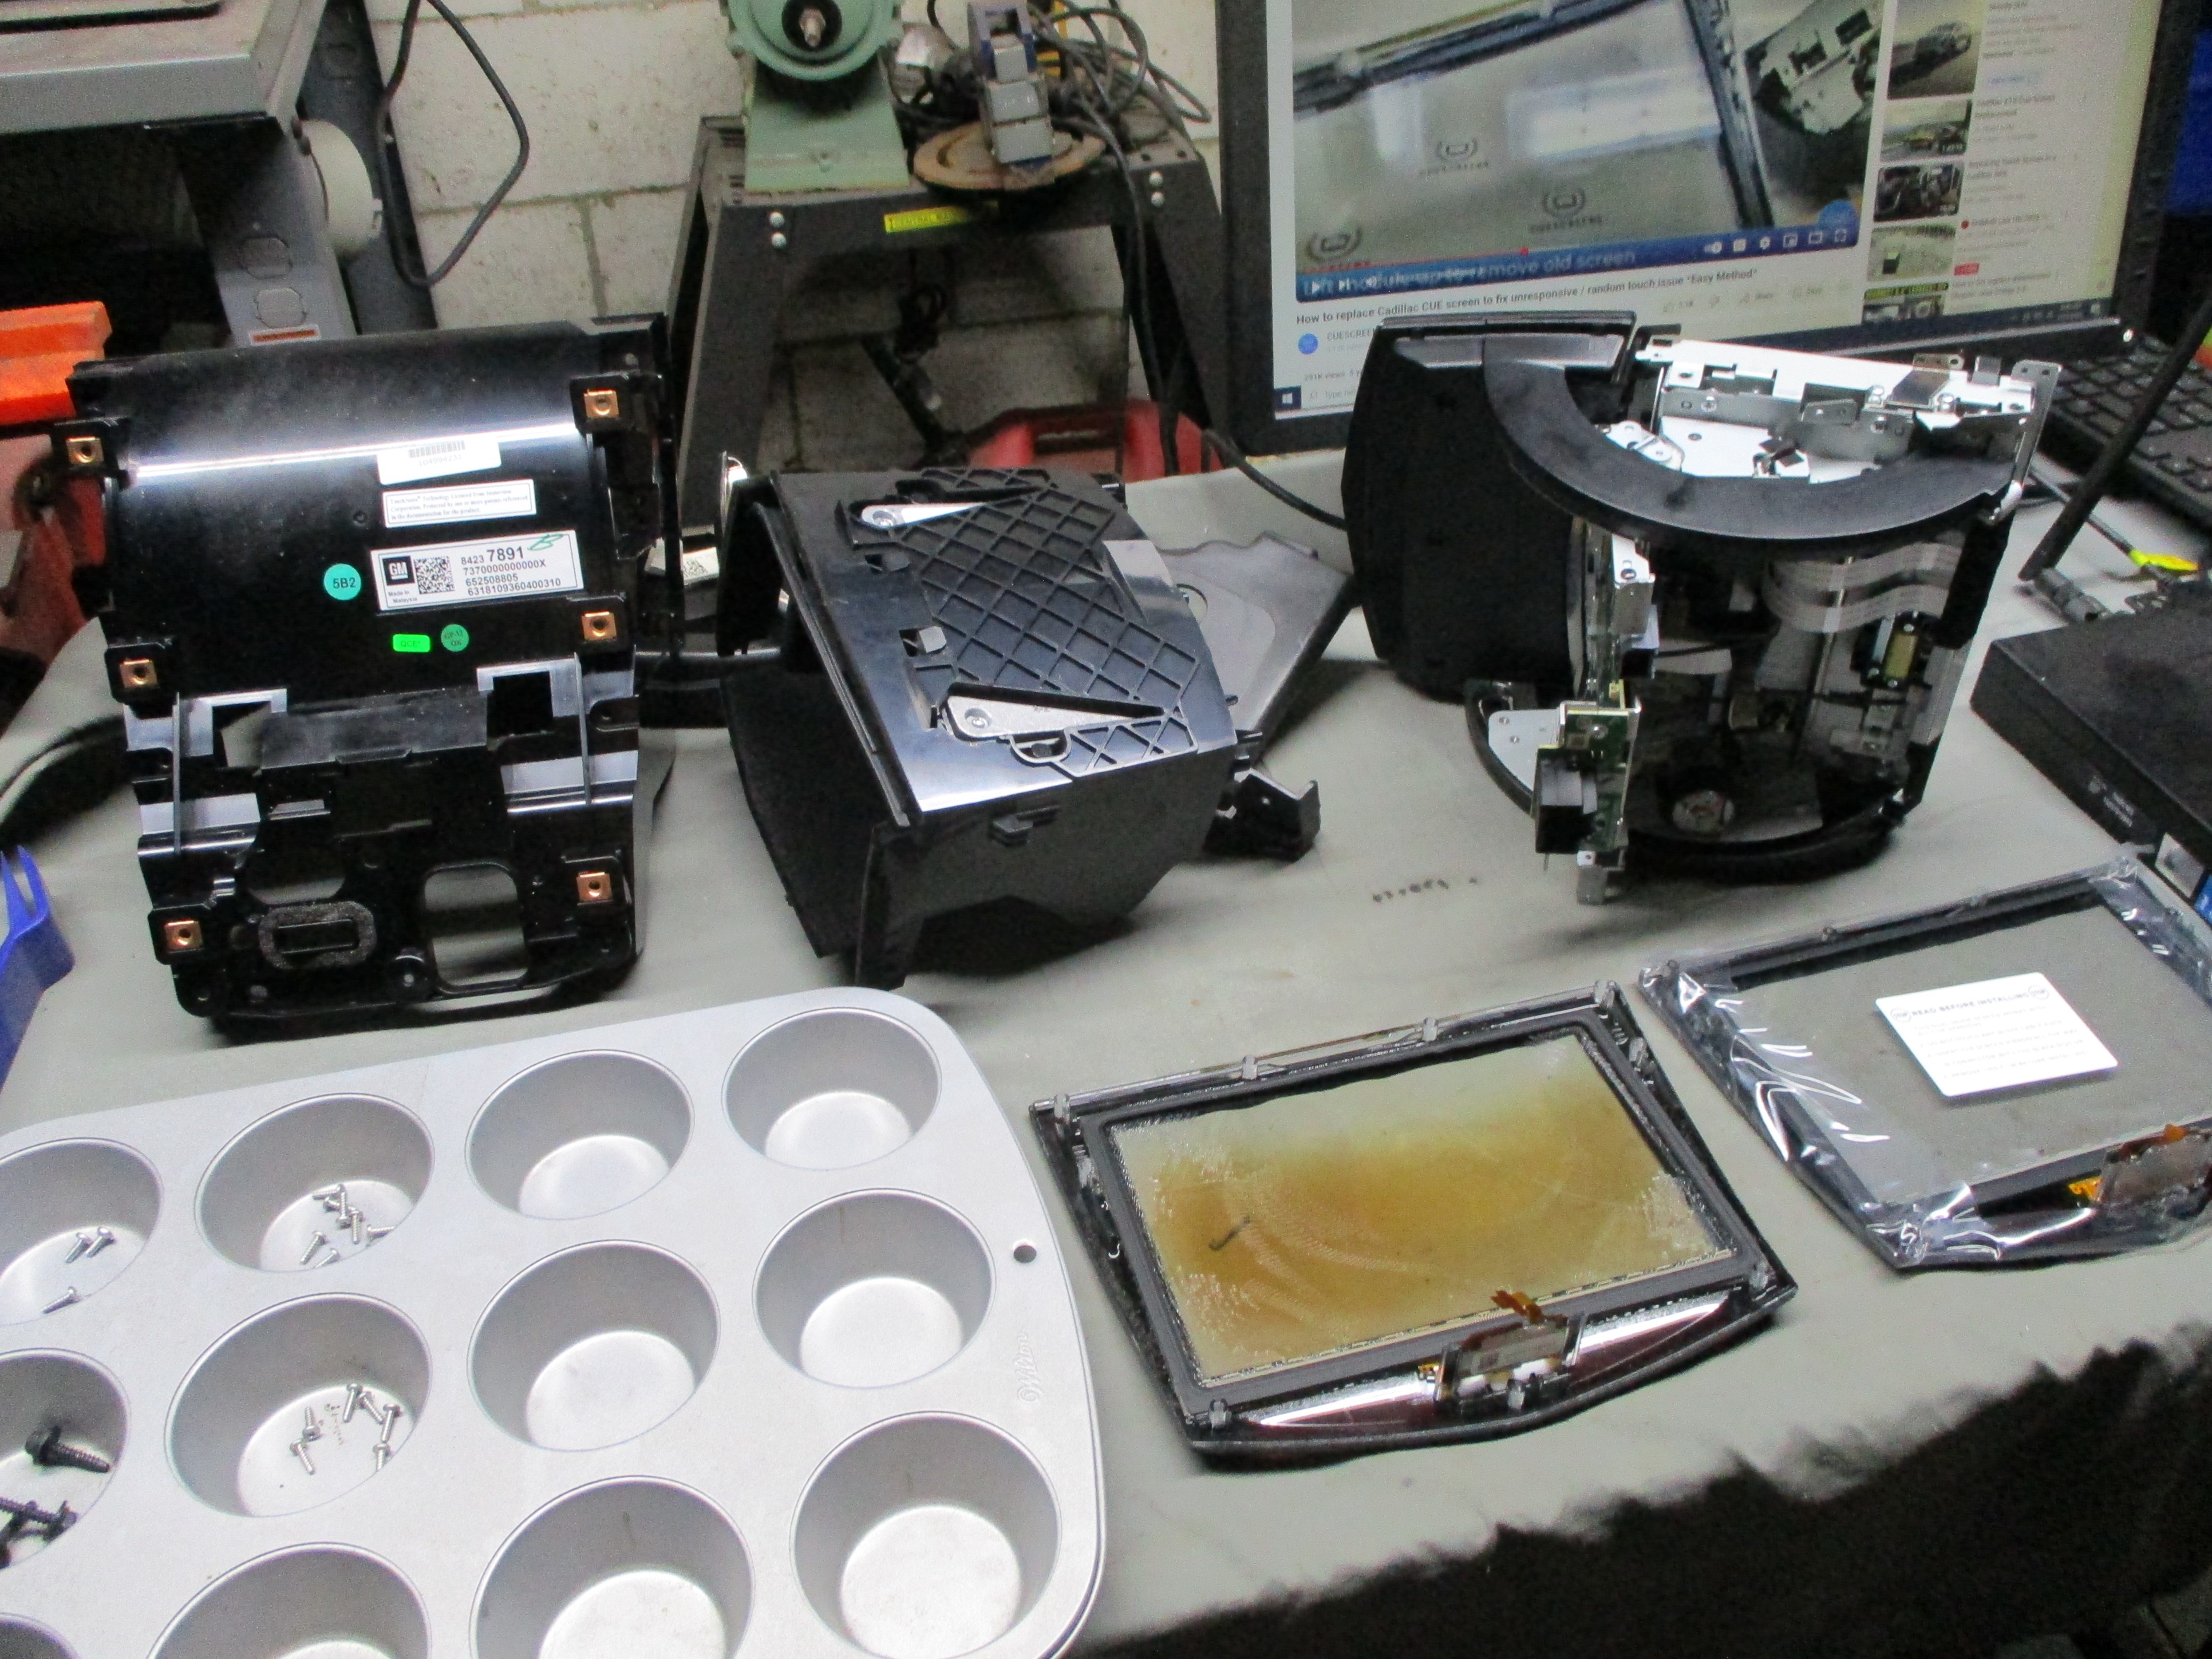 The CUE module has to be peeled like an onion to get to the point where the touchscreen can be replaced. Close to forty screws attaching a half dozen brackets and sub-assemblies have to be removed. slow, organized and methodical gets the job done. Beer of the day was Brothers Craft Brewing Company's Great Outdoors Virginis Pale Ale.
 April 2nd 2025 Still having trouble with Elvira's interior carbon fiber trim peeling off the backing. The thin carbon fiber veneer is brittle and dimensionally unstable. I've glued the trim onto the backing wit Gorilla glue which failed after a couple of months. Then again with super gorilla glue which failed within a week. I'm trying again with a product called Shoe Goo Black Shoe Repair Adhesive. I started off badly by slicing into the tube with the box cutter while trying to get it out of the cursed plastic packaging. Damnation!
Working this goo is much like working JB Weld. I slathered it on both the carbon fiber trim and the backing pretty good and then clamped the two together. The black goo oozed out in a few places but am not going to attempt to clean that up until the adhesive sets up. Then I'll employ X-Acto knife and acetone solvent technique. Beer of the day was Harpoon Brewery's Winter Warmer Cinnamon & Nutmeg Holiday Ale.
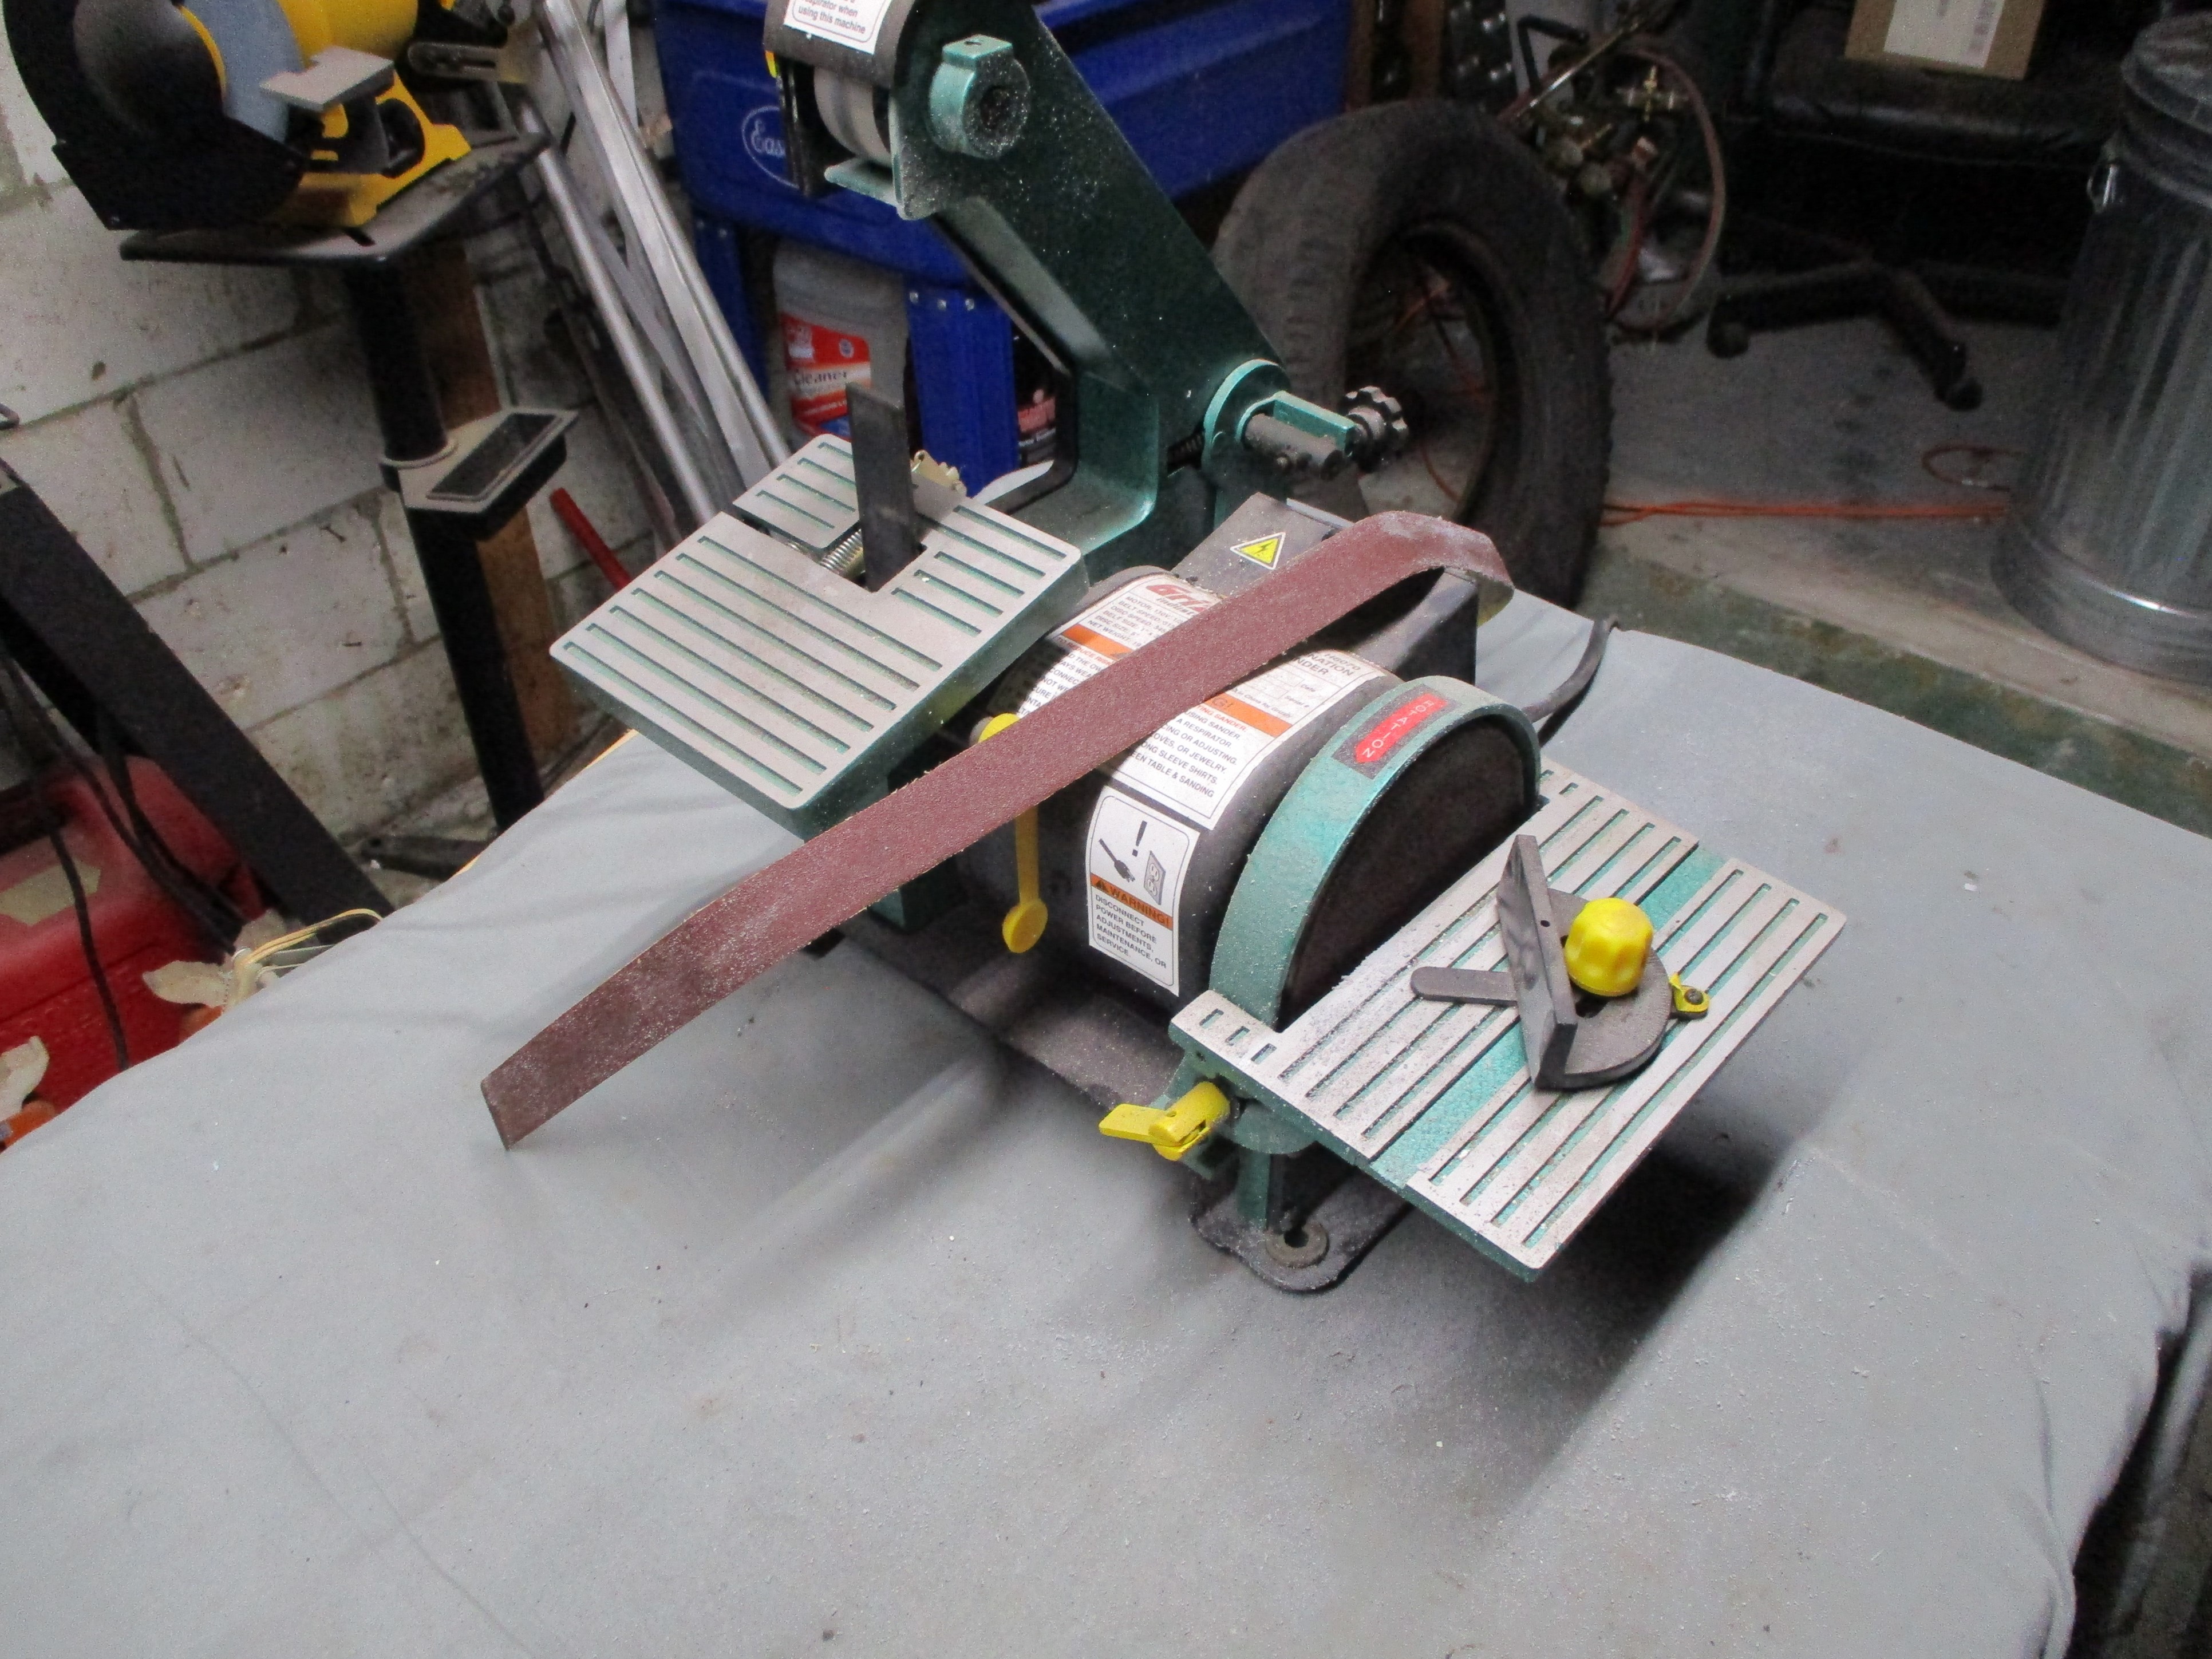 April 7th 2025 Well, the x-Acto knife and acetone method for getting excess Shoe Goo off Elvira's carbon fiber trim didn't work out so, I had to try something else. I blew the dust off a hobby belt sander I purchased years ago but never used. It was getting the job done when the belt sheared in half. I was able to finish up using the disk sander on the end of this gadget.
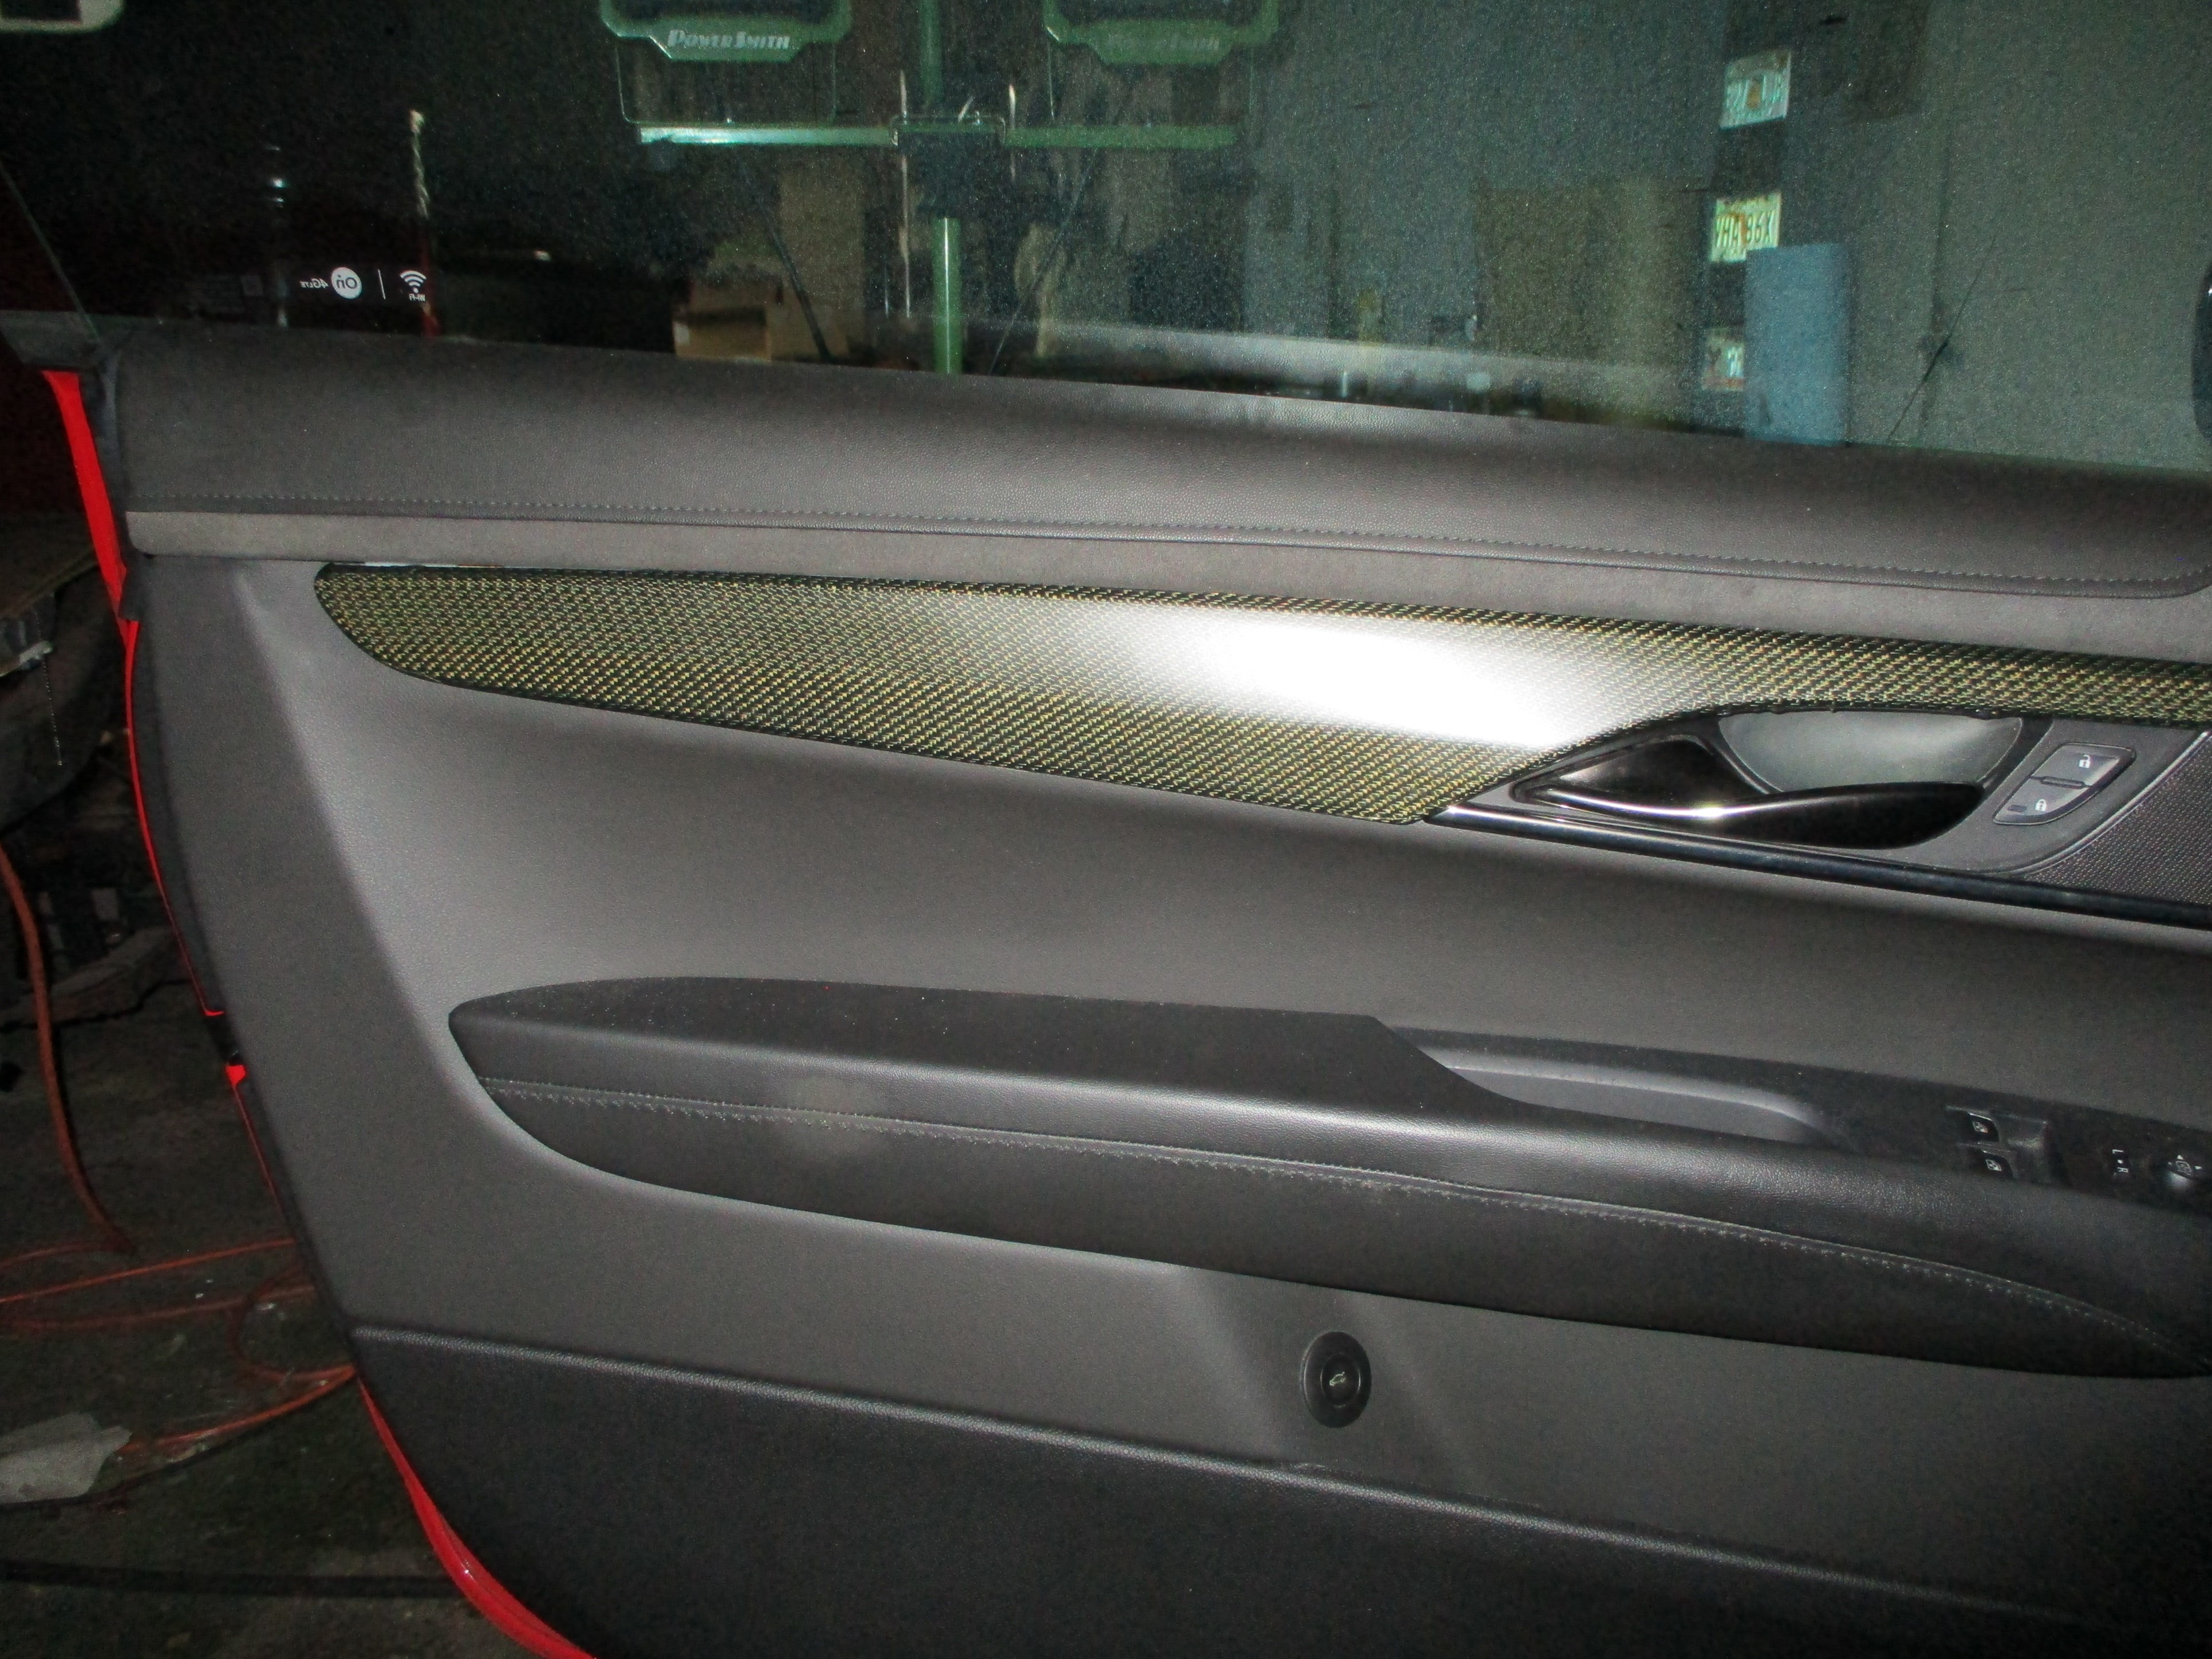 That worked. The thrice repaired trim assembly was snapped back into place on Elvira's driver door and looks good as new. I will watch and wait a couple of months and, if the trim is still holding, I will repair the other two trim pieces (passenger door and glove box). Beer of the day was Living the Dream Brewing Company's Fly Reel Amber traditional amber ale.
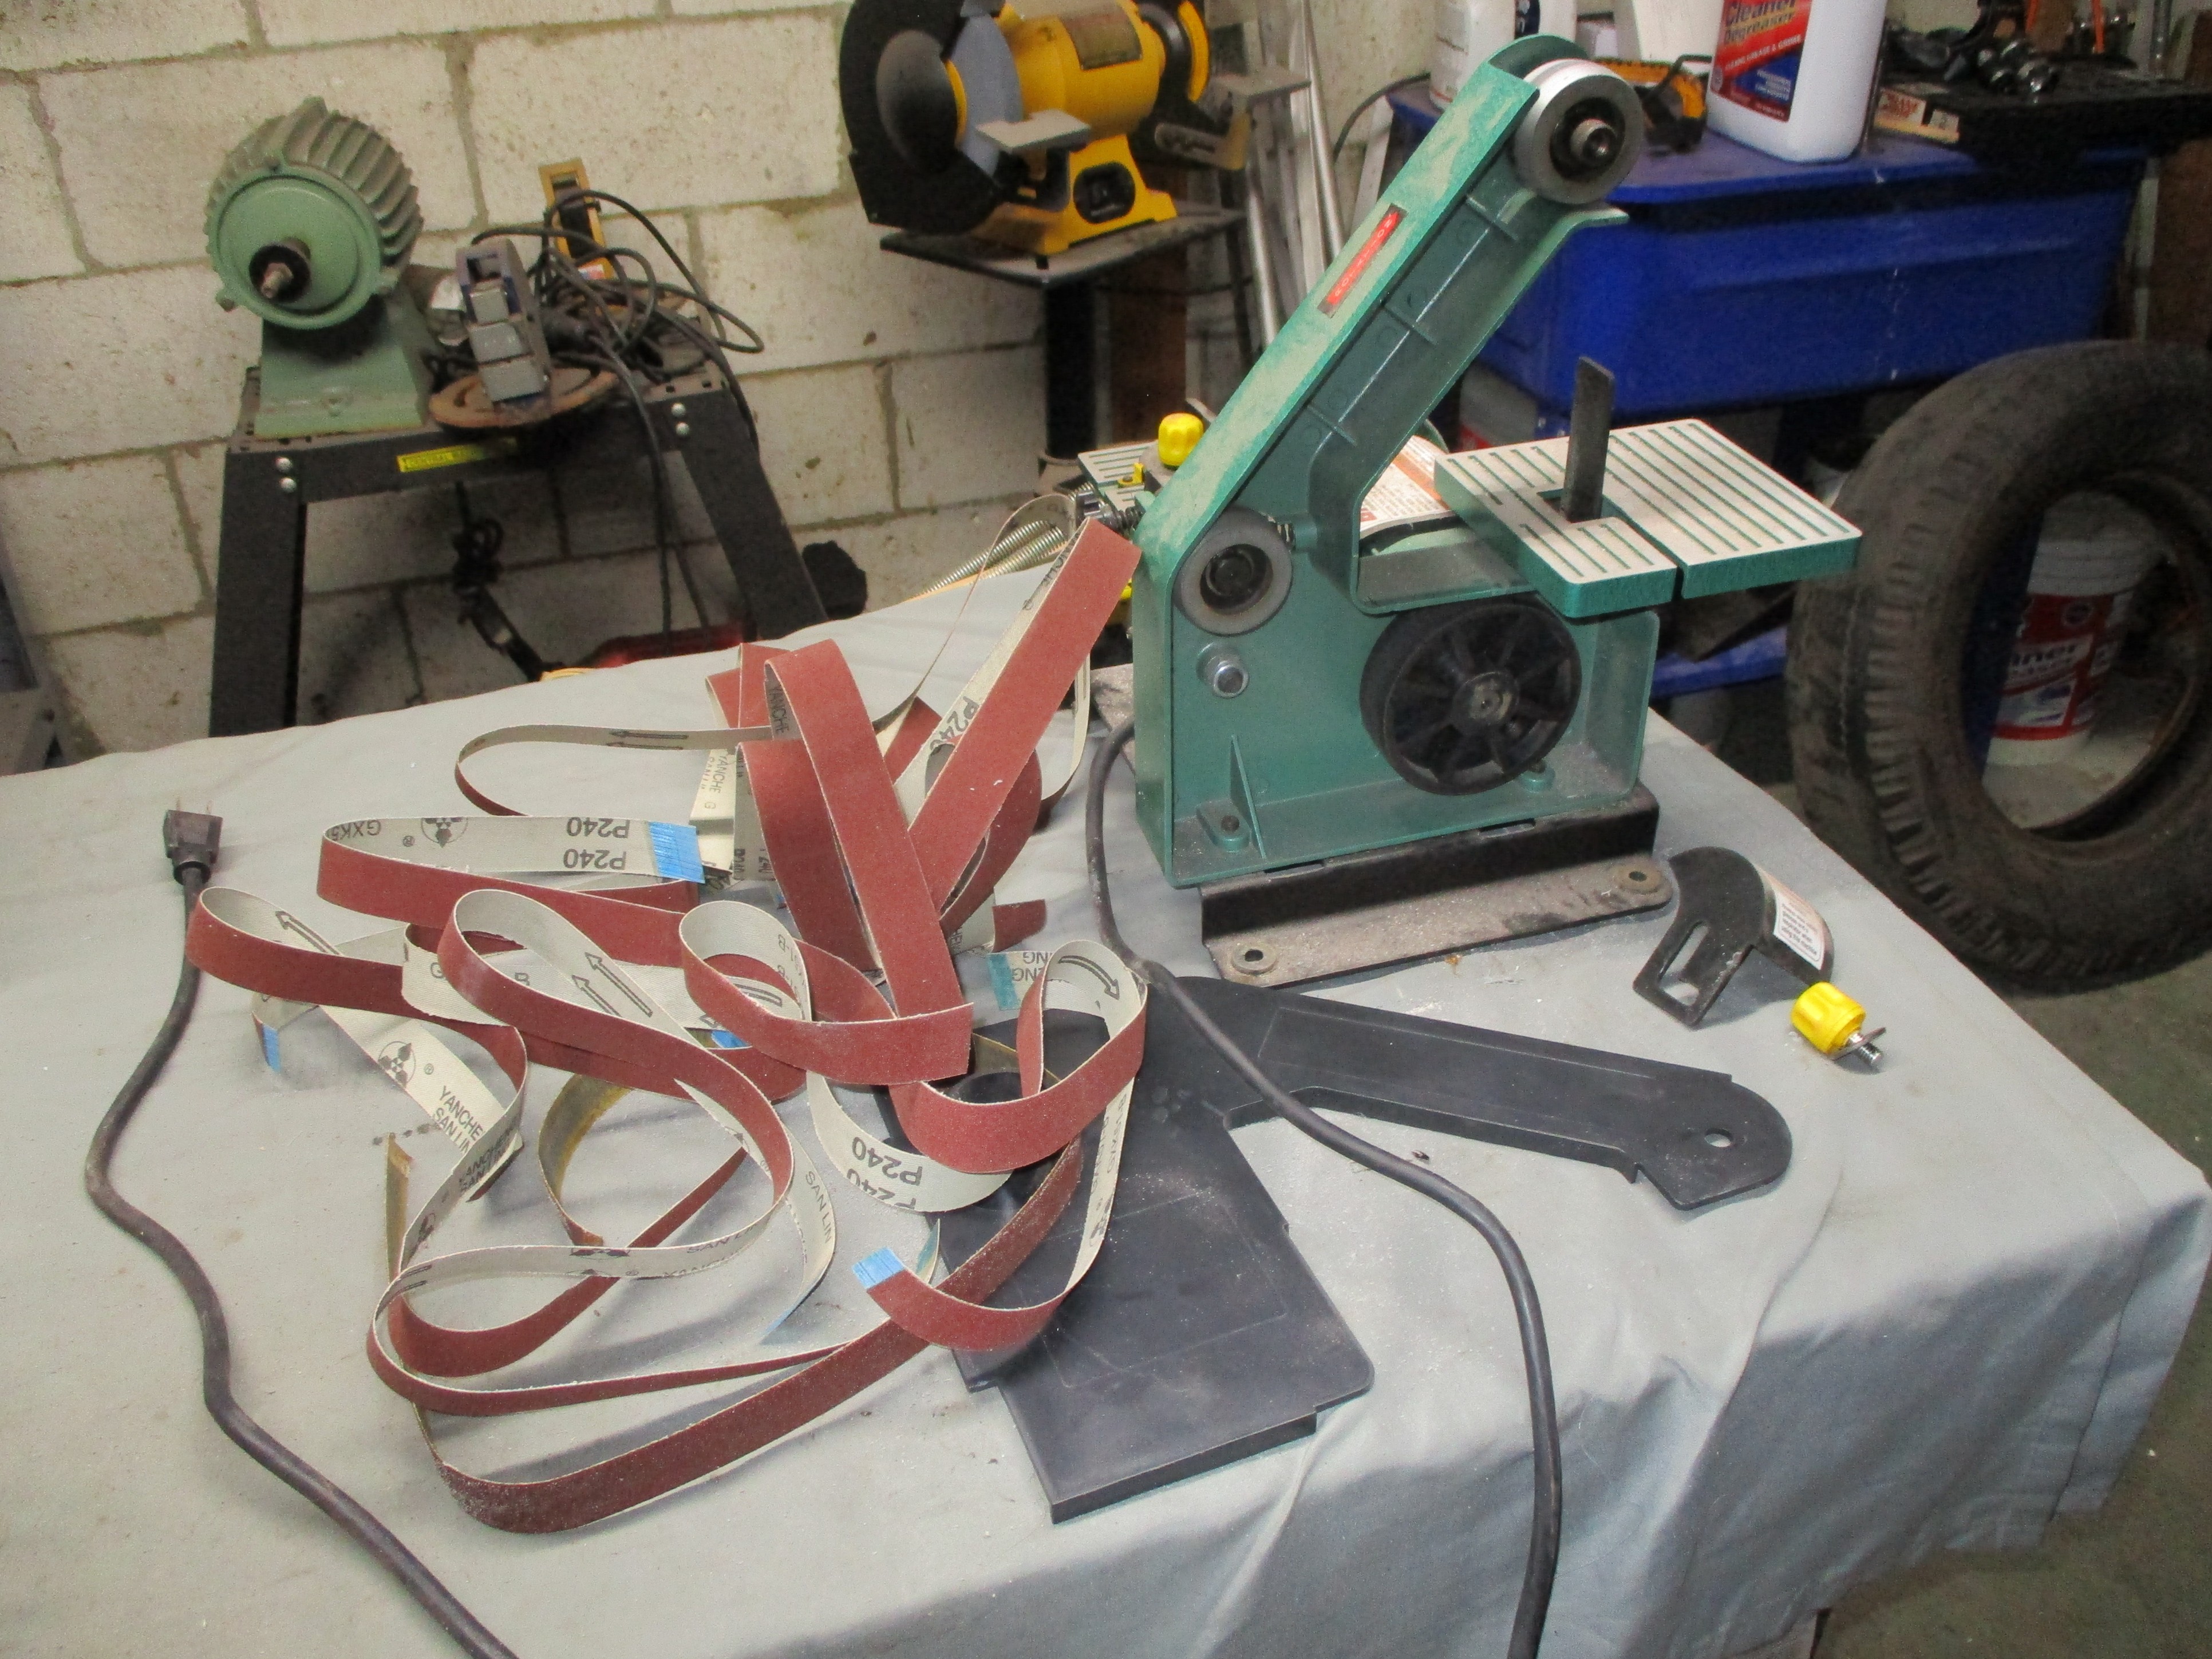 May 1st 2025 Decided to put a new belt on the hobby sander before I put it away. Found the belts I purchased with the sander and proceded to re-belt it. That's when I found the original belt had not sheared as I thought. The tape holding the two ends of the loop together had given up the ghost. All ten of my replacement belts had the same affliction. These belts were 1" x 30" Aluminum Oxide 240 grit by Powertec but they were chicom belts from blowchow. I ordered replacements from another manufacturer but they will probably be chicom as well.
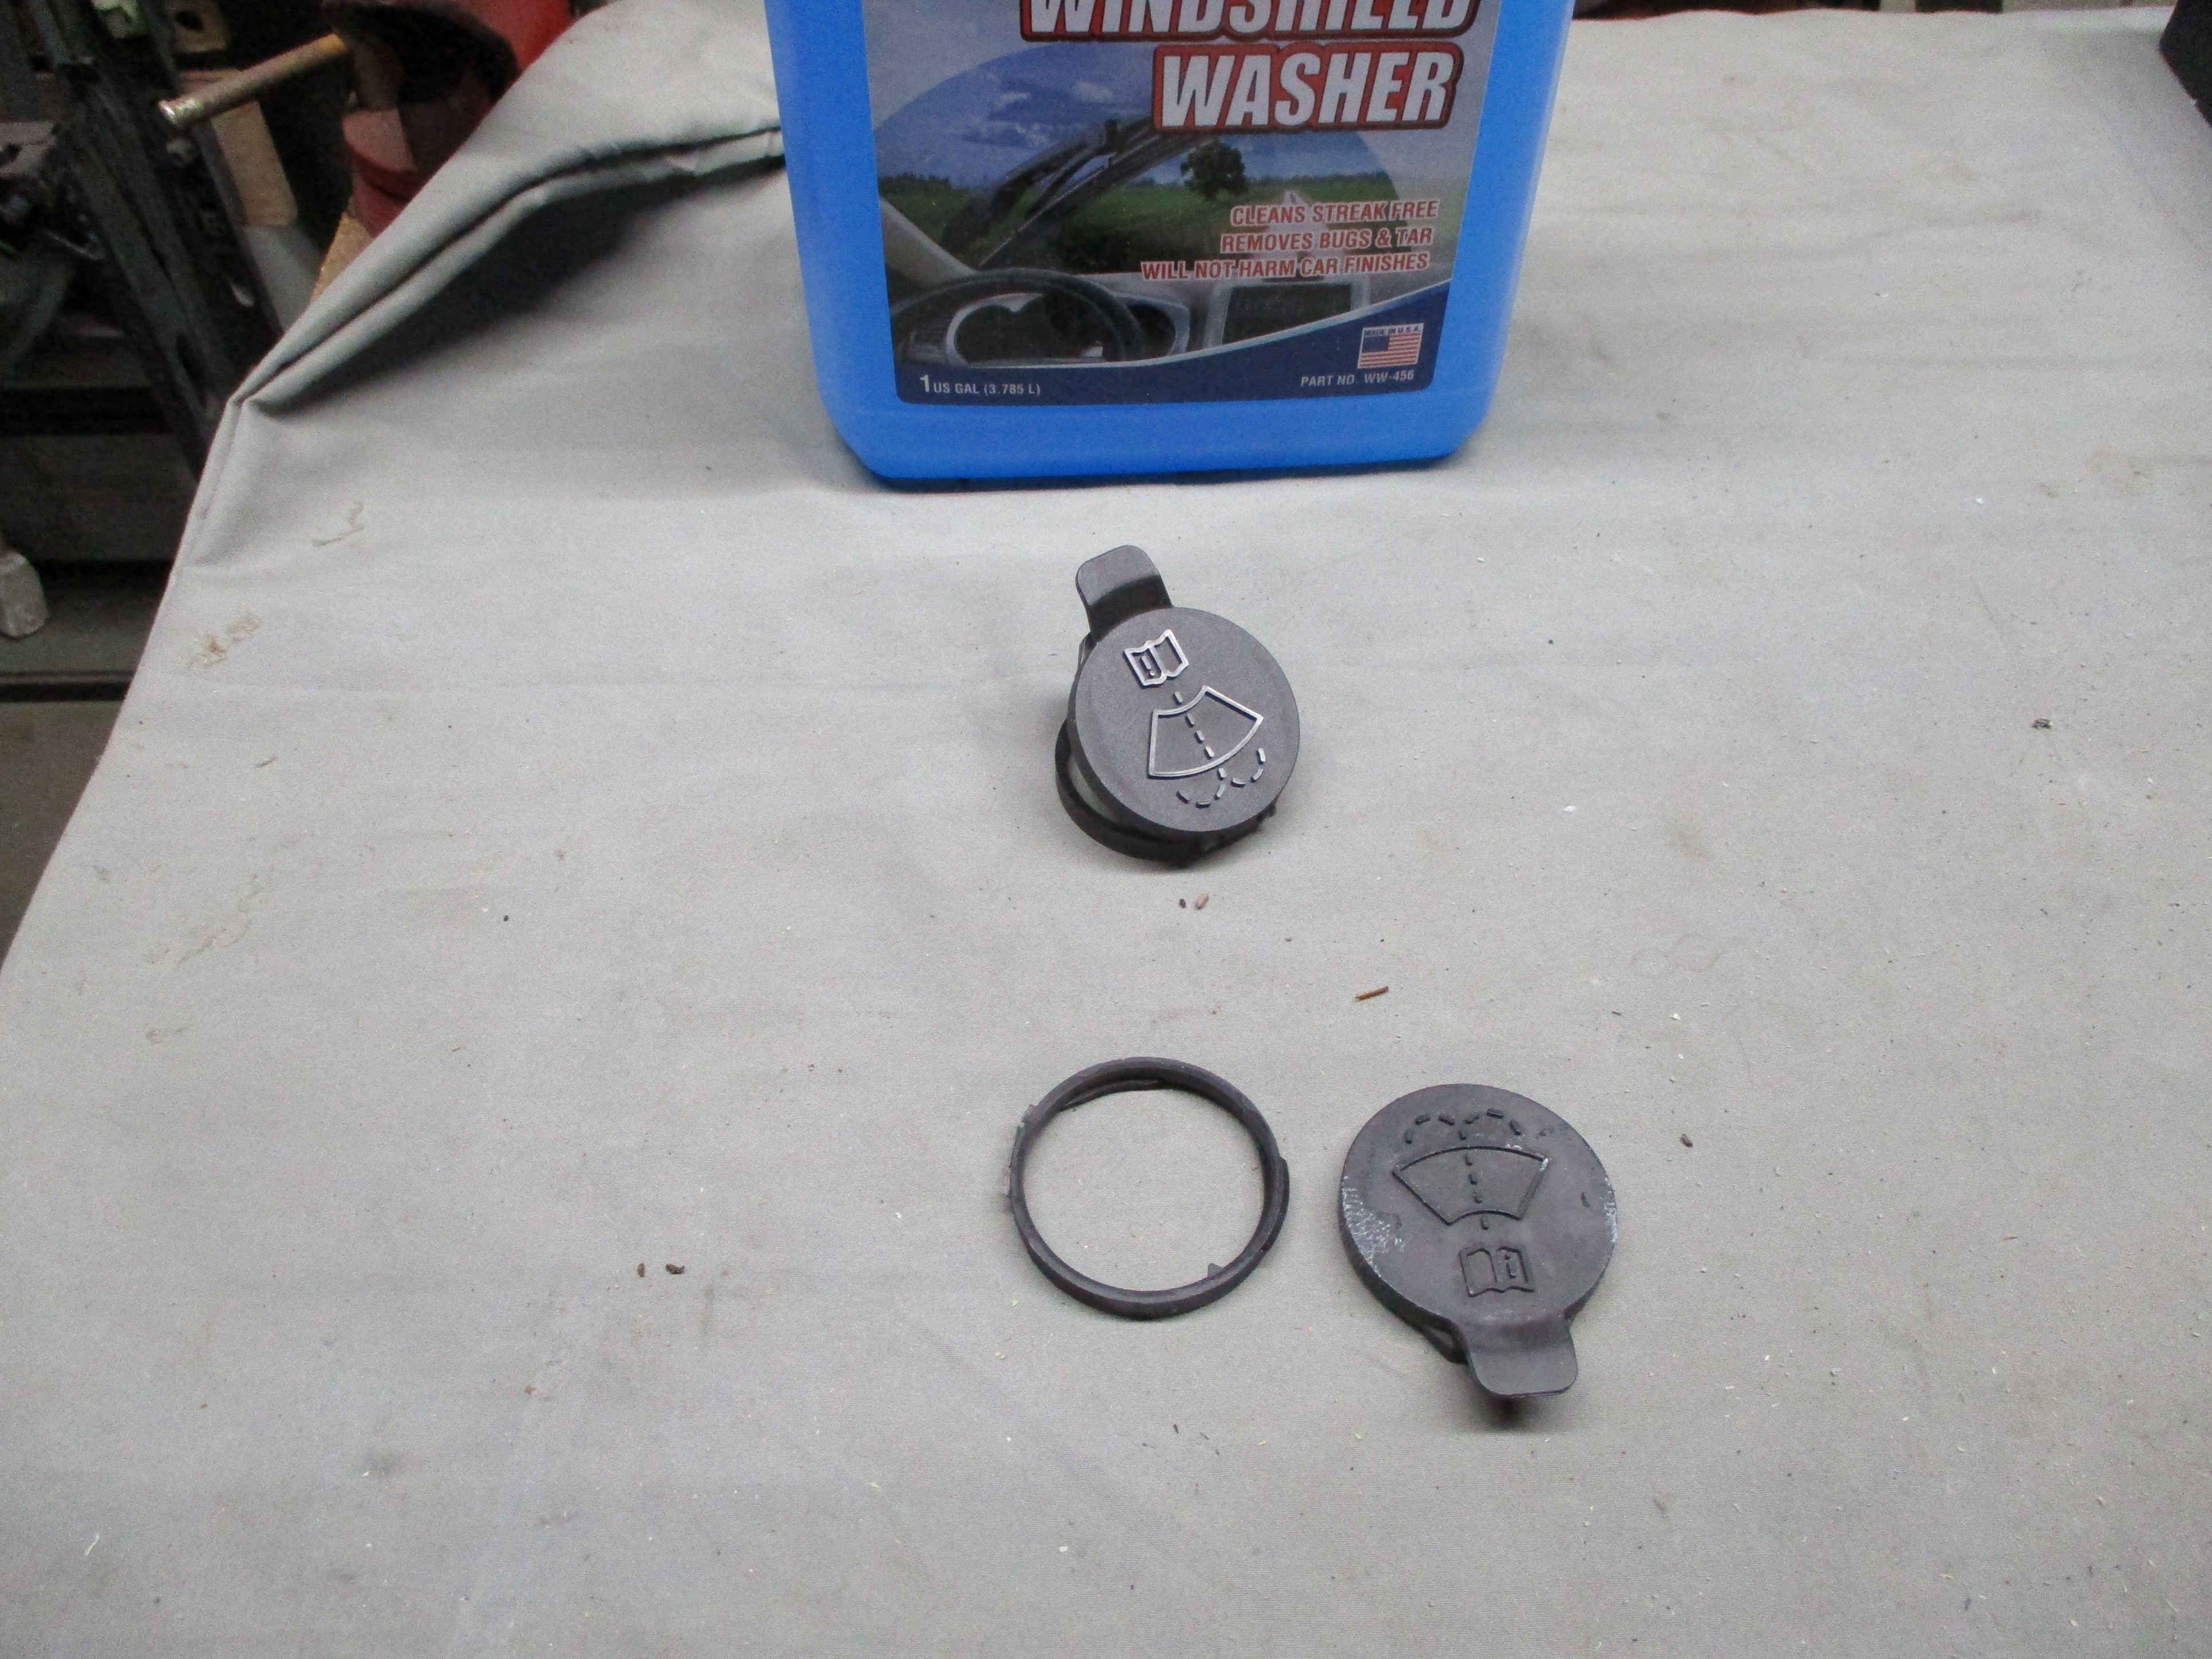 May 2nd 2025 A few weeks ago, I opened the windshield washer fluid reservoir to check the fluid level. Mind you, I've only done this about three times in the nine years I've owned Elvira so, imagine my surprise when the cap breaks off in my hand at the hinge. Crikey! I spent some deep ponder mode time wondering where I was going to find this part and if I was going to have to buy the whole tank as an assembly. There was no need for worry, however. When I got to the Krash Kubicle at work and crafted the proper search term, I found a page full of these caps at various vendors and a YouTube replacement video to boot. GM uses this cap in several of their models and, as is their practice with many of their flawed parts, keep using the inventory of flawed parts as replacements rather than issue an improved part.
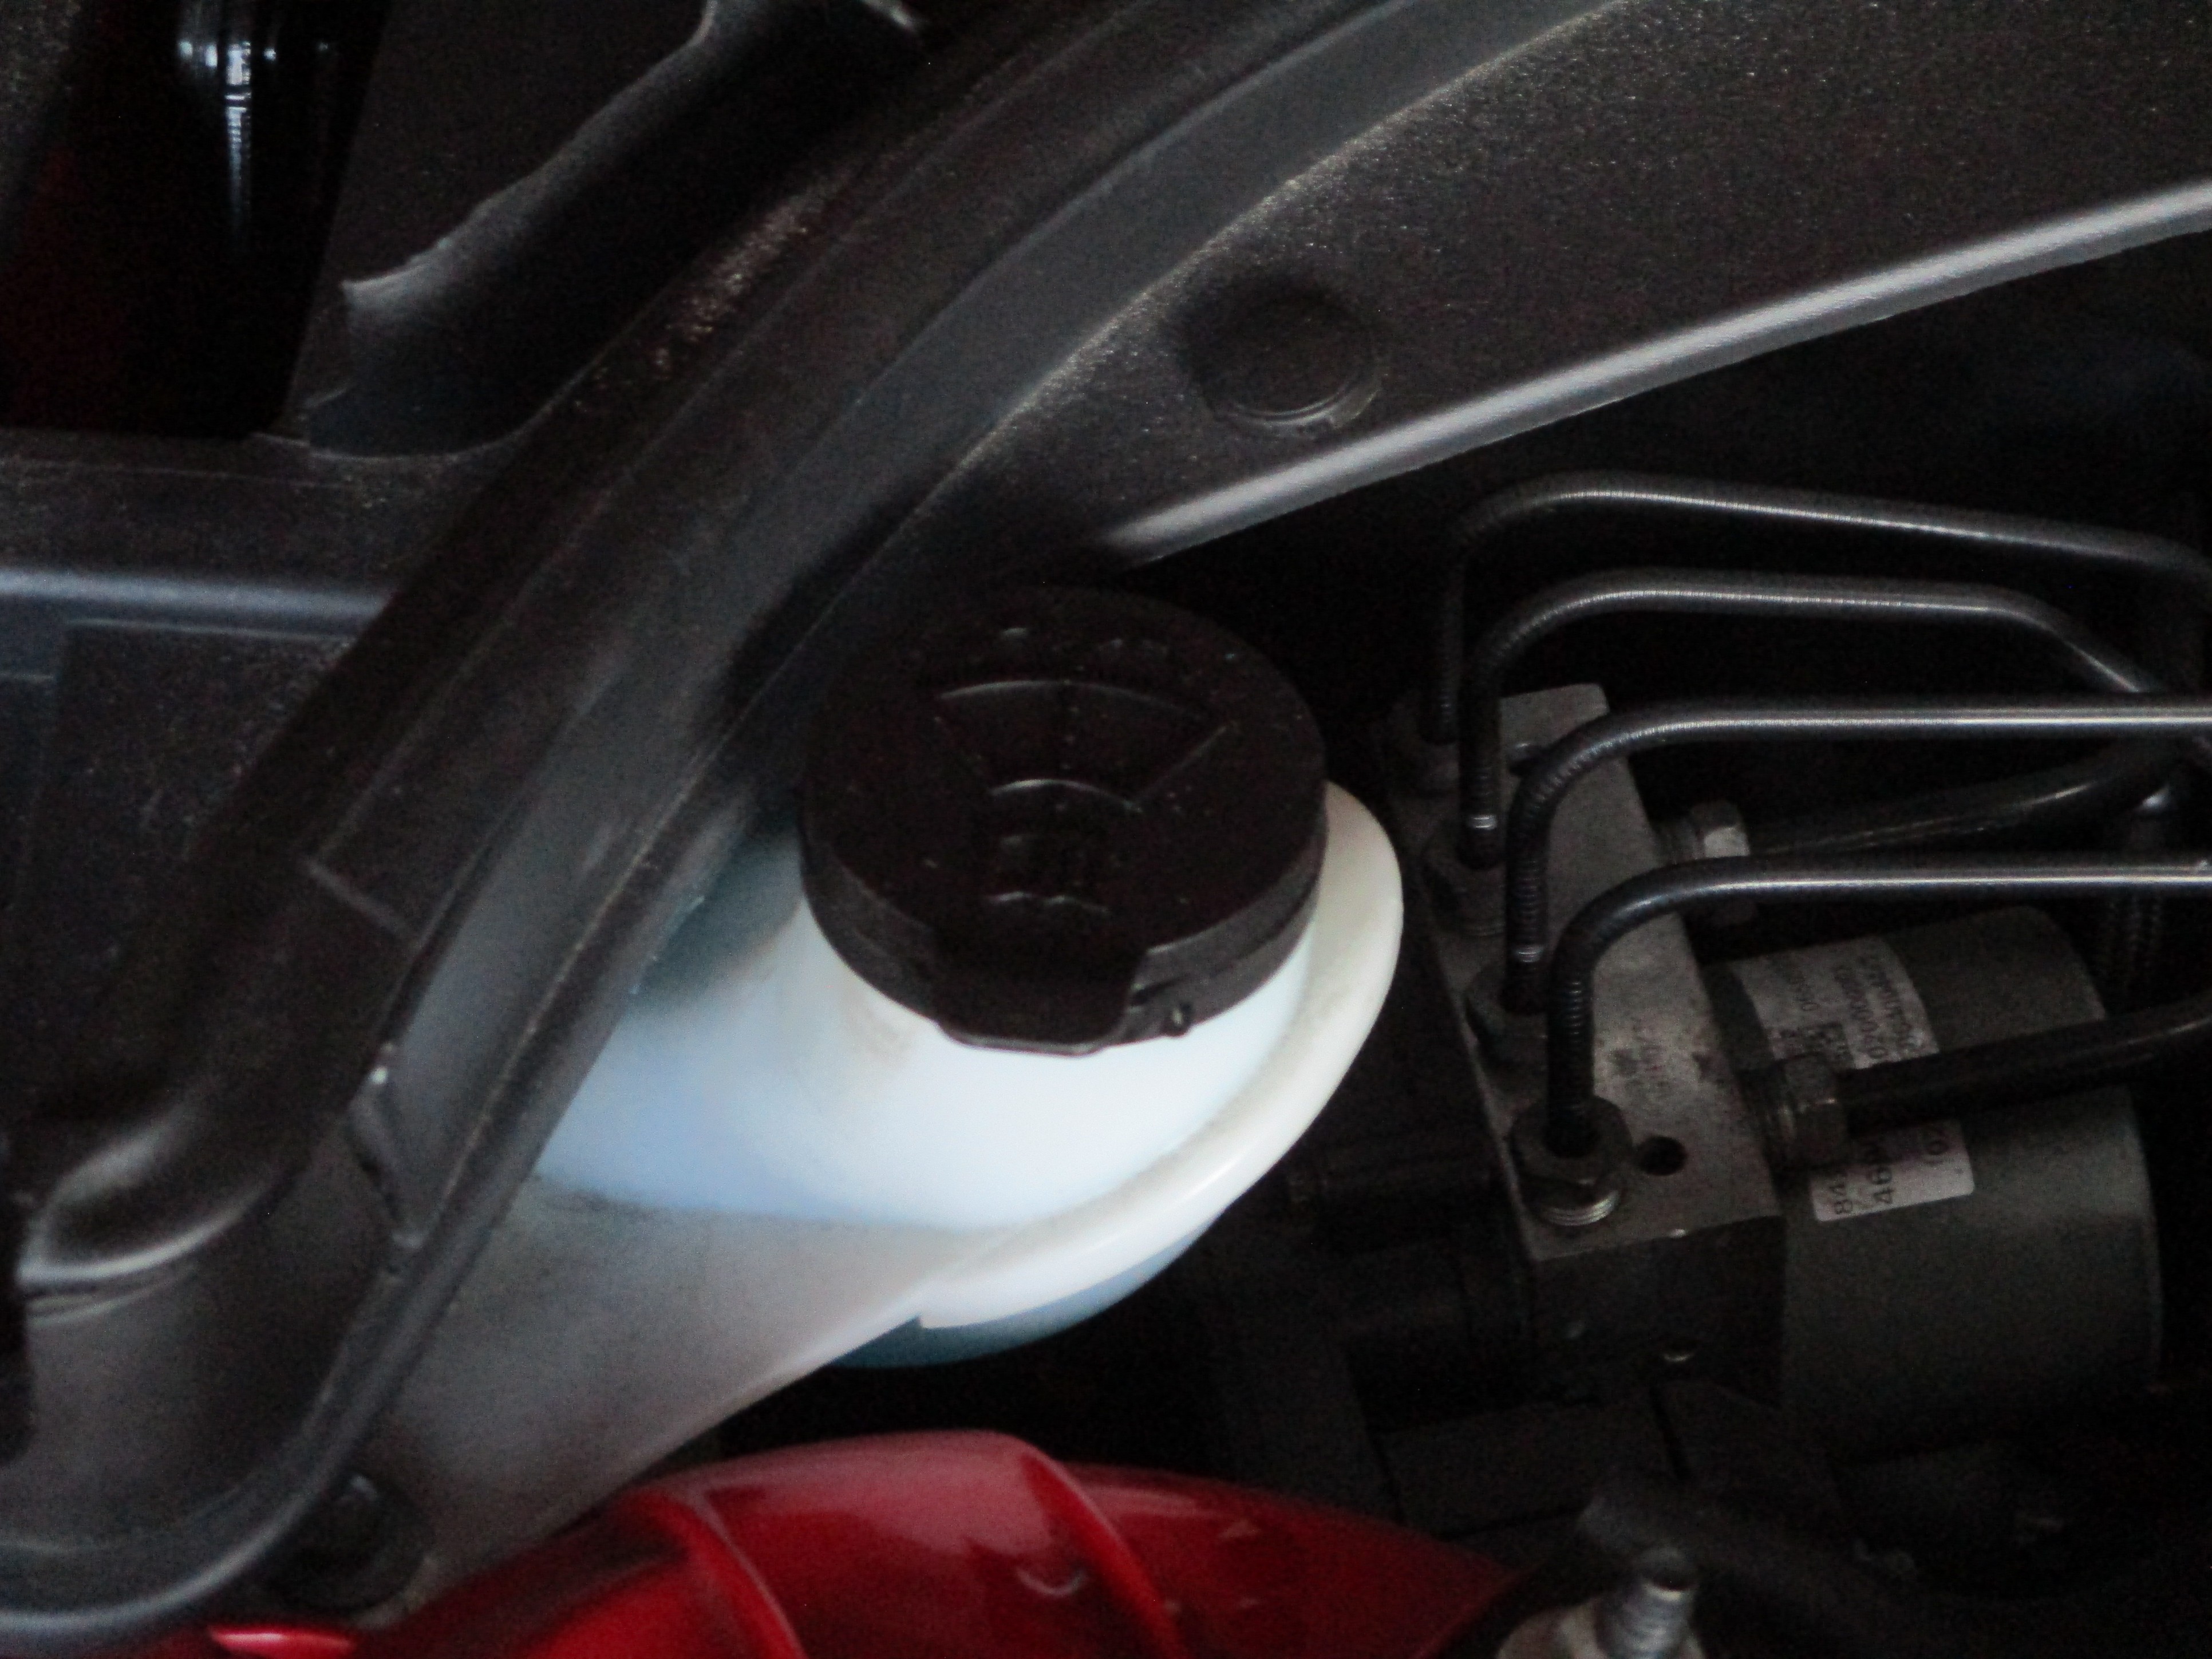 Installation was easier than I expected. I only needed my OEM fingertips to get the old bio-degradable collar off and snap the new cap and collar into place. Took less than thirty seconds and another minute to clean a funnel and top the reservoir off with washer fluid. Beer of the day was Dick's Brewing Company's Dick Danger Ale. Background music was from a Rick Nelson box set.
ou can email me at ![]() webmaster@laroke.com
webmaster@laroke.com
Issued Friday May 2, 2025
copyright © 2016-2025 Larry Robert Kephart all rights reserved
| | LRK Home | | Bio Info | | Krash Khronicles | | LAROKE | |
| | BettyLou | | BillyBob's Garage | | Rat Patrol | | Deerslayer | | Elvira | |
| | Land of the Free and Home of the Brave | |
| | Keppylou's Art | | WWI Soldier's Diary | |