| | LRK Home | | Bio Info | | Krash Khronicles | | LAROKE | |
| | BettyLou | | BillyBob's Garage | | Rat Patrol | | Deerslayer | | Elvira | |
| | Land of the Free and Home of the Brave | |
| | Keppylou's Art | | WWI Soldier's Diary | |
BettyLou's Restoration Log
![]()
BETTYLOU LINKS including vendor sites for parts and tools as well as sites for MoPar organizations
![]()
RESTORATION LOG includes log entries of repairs and restoration between the time of arrival in Florida and the present.
![]()
BETTYLOU MAINTENANCE Ever changing detailing, oil change, lube, etc. maintenance routines developed for BettyLou based on the BillyBob routines, including required tools, materials and procedures.
1. Easy Beginnings
Into the Breach
August 27th 2005 We'll start off this log with a short summary of what has happened since BettyLou arrived in Florida in February at the back of a U-Haul truck, "Henry". I got her insured right away with Allstate. Mom's Pennsylvania registration renewal was one of the last things she did and it was good for the whole year of 2005. Kept BettyLou at the Krash Lab and took her on short neighborhood trips every couple of weeks to keep the battery charged and juices flowin'. Finally got around to the Florida title transfer paperwork and that took me three separate trips to FDOT. First time I went with proof of insurance, death certificates, Mom's will, Pennsylvania title and registration, the Concorde's apprasial for her last tax return, etc. but it wasn't enuf.
They had signs on the walls tellin' me I couldn't get any farther if I didn't have a special form for out-of-state transfers filled out. The form was to verify VIN and mileage and had to be notarized. They don't walk out into the parking lot to verify it for themselves anymore like they did with BillyBob. Took the form back to the Krash Lab with me, filled it out and got it notarized. Back to FDOT a few days later.
Got half way thru the process this time when we hit another snag. I don't have a bill-of-sale. This is an inheritance. Came back to the Krash Lab again with another form. Everyone a party to the will had to sign-off. Good thing JR likes me. I had to send the form to JR for his signature. When the form got back from Pittsburgh, went back up to FDOT for the third time. Came back with the title transfer complete and a new Florida Specialty tag "Florida Salutes Veterans". I think both Mom and Dad would approve.
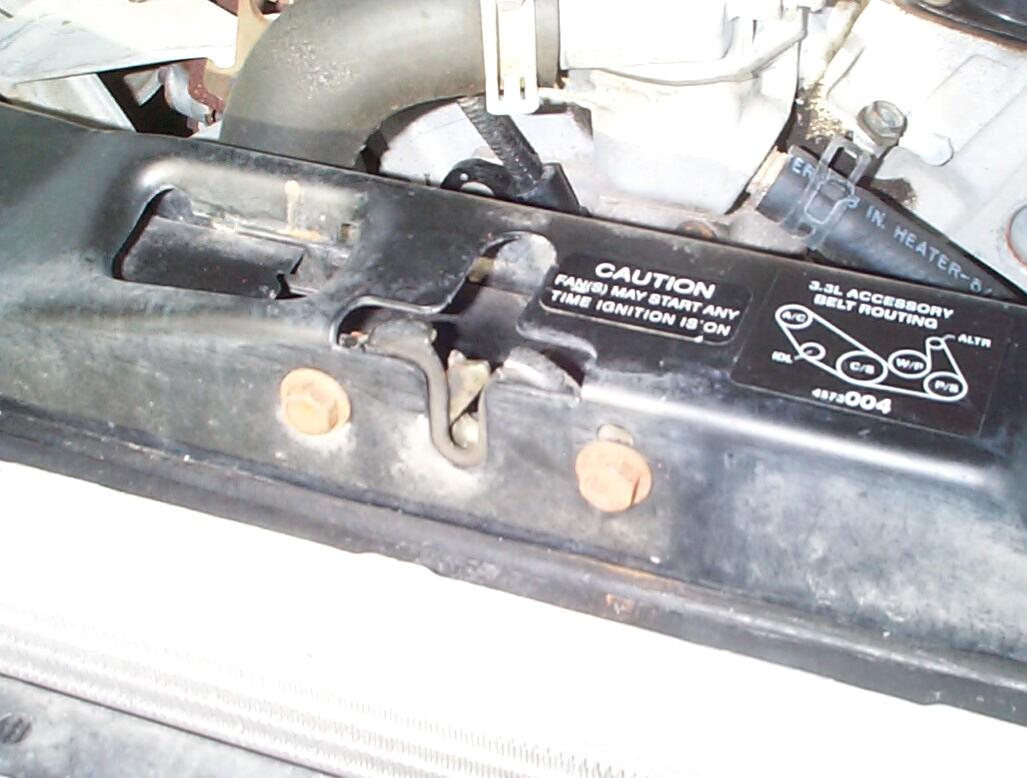 Starting
out BettyLou's restoration with babysteps while I learn more about the
car. Last week when the engine bay was degreased, the radiator/hood
latch support bar cap screws stood out like a sore thumb 'cause they
are all rusted. I ordered Black Fnsh Stl Serrated Hex Flange Cap Screw
M8 Size, 25mm Length, 1.25mm Pitch, Fully Threaded replacement
fasteners from McMaster-Carr.
~!@#$%^ metric. Now I'm gonna hafta
get more tools. Damn that Jimmah Carter!
Starting
out BettyLou's restoration with babysteps while I learn more about the
car. Last week when the engine bay was degreased, the radiator/hood
latch support bar cap screws stood out like a sore thumb 'cause they
are all rusted. I ordered Black Fnsh Stl Serrated Hex Flange Cap Screw
M8 Size, 25mm Length, 1.25mm Pitch, Fully Threaded replacement
fasteners from McMaster-Carr.
~!@#$%^ metric. Now I'm gonna hafta
get more tools. Damn that Jimmah Carter!
 At
least these things aren't rusted solid. It's nice not having to spend
half a day just getting the old bolt out like most of the original
fasteners on BillyBob. I replaced the cap screws one-at-a-time with
threadlocker blue. The support bar was cleaned with simple green during
the process. I had to improvise a makeshift hood prop while I did this
work because the gas hood support struts are about played out. Should
probably replace those soon.
At
least these things aren't rusted solid. It's nice not having to spend
half a day just getting the old bolt out like most of the original
fasteners on BillyBob. I replaced the cap screws one-at-a-time with
threadlocker blue. The support bar was cleaned with simple green during
the process. I had to improvise a makeshift hood prop while I did this
work because the gas hood support struts are about played out. Should
probably replace those soon.
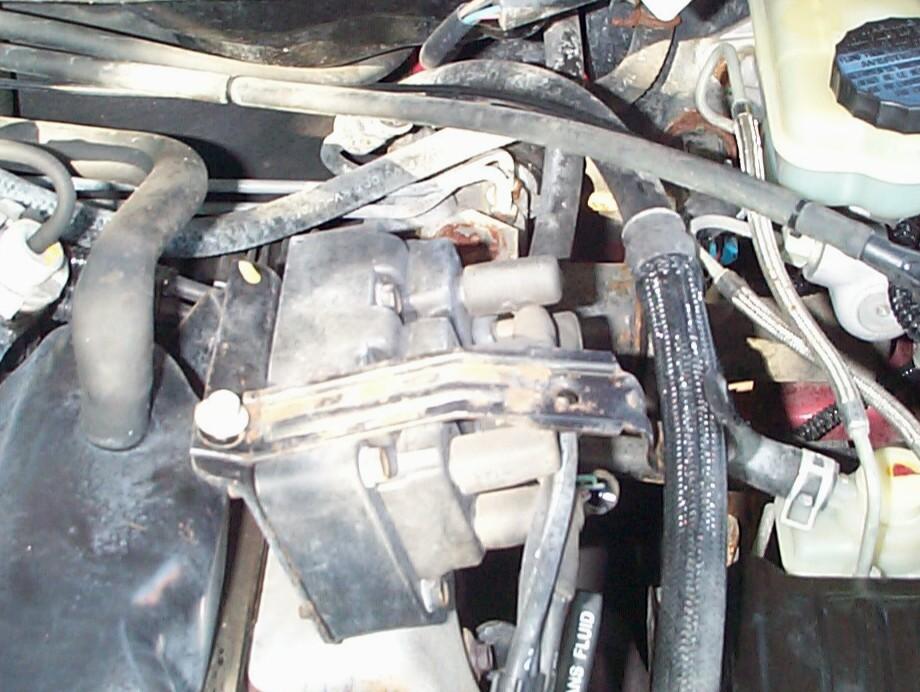 September
25th 2005 Had to
sandblast some BillyBob parts today
and I noticed a hose bracket on the coil pack was beginning to rust, so
I removed it for blasting and re-finishing. ~!@#$%^
I haven't gotten any metric tools yet so I was stuck for twenty minutes
until I found a socket in one of my computer tool kits that would fit
the cap screw holding the bracket on.
September
25th 2005 Had to
sandblast some BillyBob parts today
and I noticed a hose bracket on the coil pack was beginning to rust, so
I removed it for blasting and re-finishing. ~!@#$%^
I haven't gotten any metric tools yet so I was stuck for twenty minutes
until I found a socket in one of my computer tool kits that would fit
the cap screw holding the bracket on.
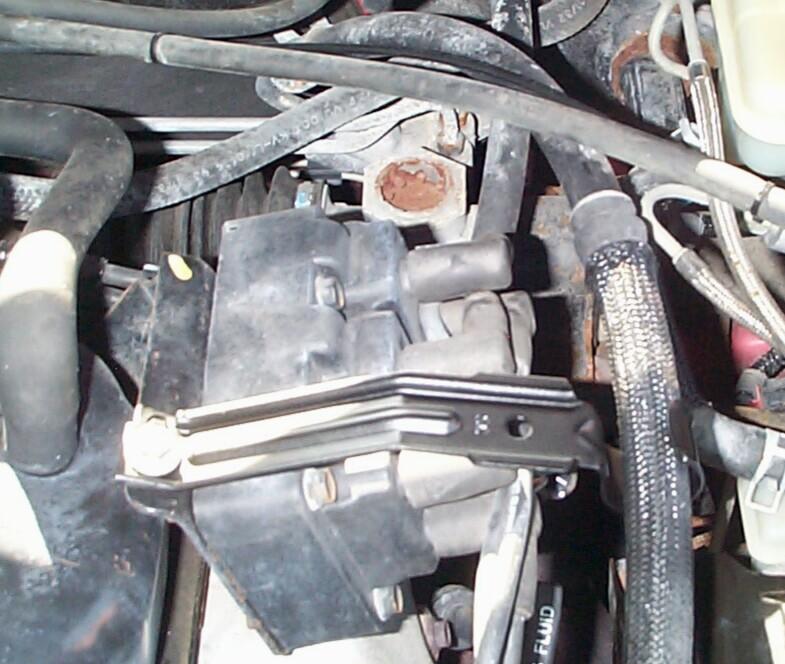 I
used my SpeedBlaster I got from Eastwood
to clean up the rust on the hose bracket. Then it was given a couple of
coats of Eastwood's Self-Etching Primer followed two hours later by a
couple of coats of Eastwood's Underhood Black rattlecan paint. Oh-Oh,
Now I've gone and done it! Looks like I'm gonna have to clean and spif
up the coil pack now.
I
used my SpeedBlaster I got from Eastwood
to clean up the rust on the hose bracket. Then it was given a couple of
coats of Eastwood's Self-Etching Primer followed two hours later by a
couple of coats of Eastwood's Underhood Black rattlecan paint. Oh-Oh,
Now I've gone and done it! Looks like I'm gonna have to clean and spif
up the coil pack now.
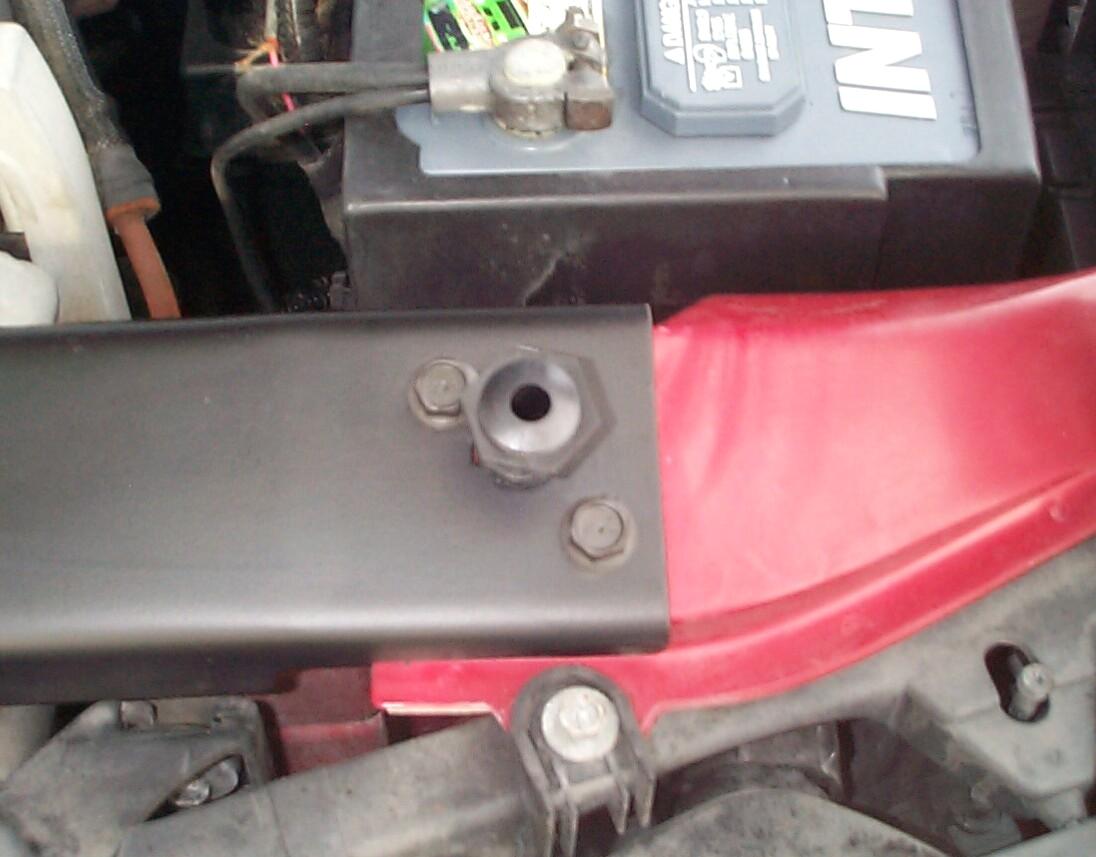
 October
15th 2005 I bought new
AC Delco hood struts thru RockAuto.com.
Replaced the worn-out original struts today. Took a couple of minutes
to figure out how the attachment joints work. From then on out, it's a
five minute job with a small flat blade screwdriver. The attachments at
each end of the struts are small ball joints with the balls on the car
and the ball cups on the struts. The ball cups are sheet metal and are
secured by plastic locking caps. The locking caps are a press fit and
are gently pryed off with the screwdriver. After the caps are removed,
the ball cup has enuf clearance around it so it can pe pryed off the
ball. The new struts are pressed on the balls and new locking caps
pressed in around the ball cups by hand.
October
15th 2005 I bought new
AC Delco hood struts thru RockAuto.com.
Replaced the worn-out original struts today. Took a couple of minutes
to figure out how the attachment joints work. From then on out, it's a
five minute job with a small flat blade screwdriver. The attachments at
each end of the struts are small ball joints with the balls on the car
and the ball cups on the struts. The ball cups are sheet metal and are
secured by plastic locking caps. The locking caps are a press fit and
are gently pryed off with the screwdriver. After the caps are removed,
the ball cup has enuf clearance around it so it can pe pryed off the
ball. The new struts are pressed on the balls and new locking caps
pressed in around the ball cups by hand.
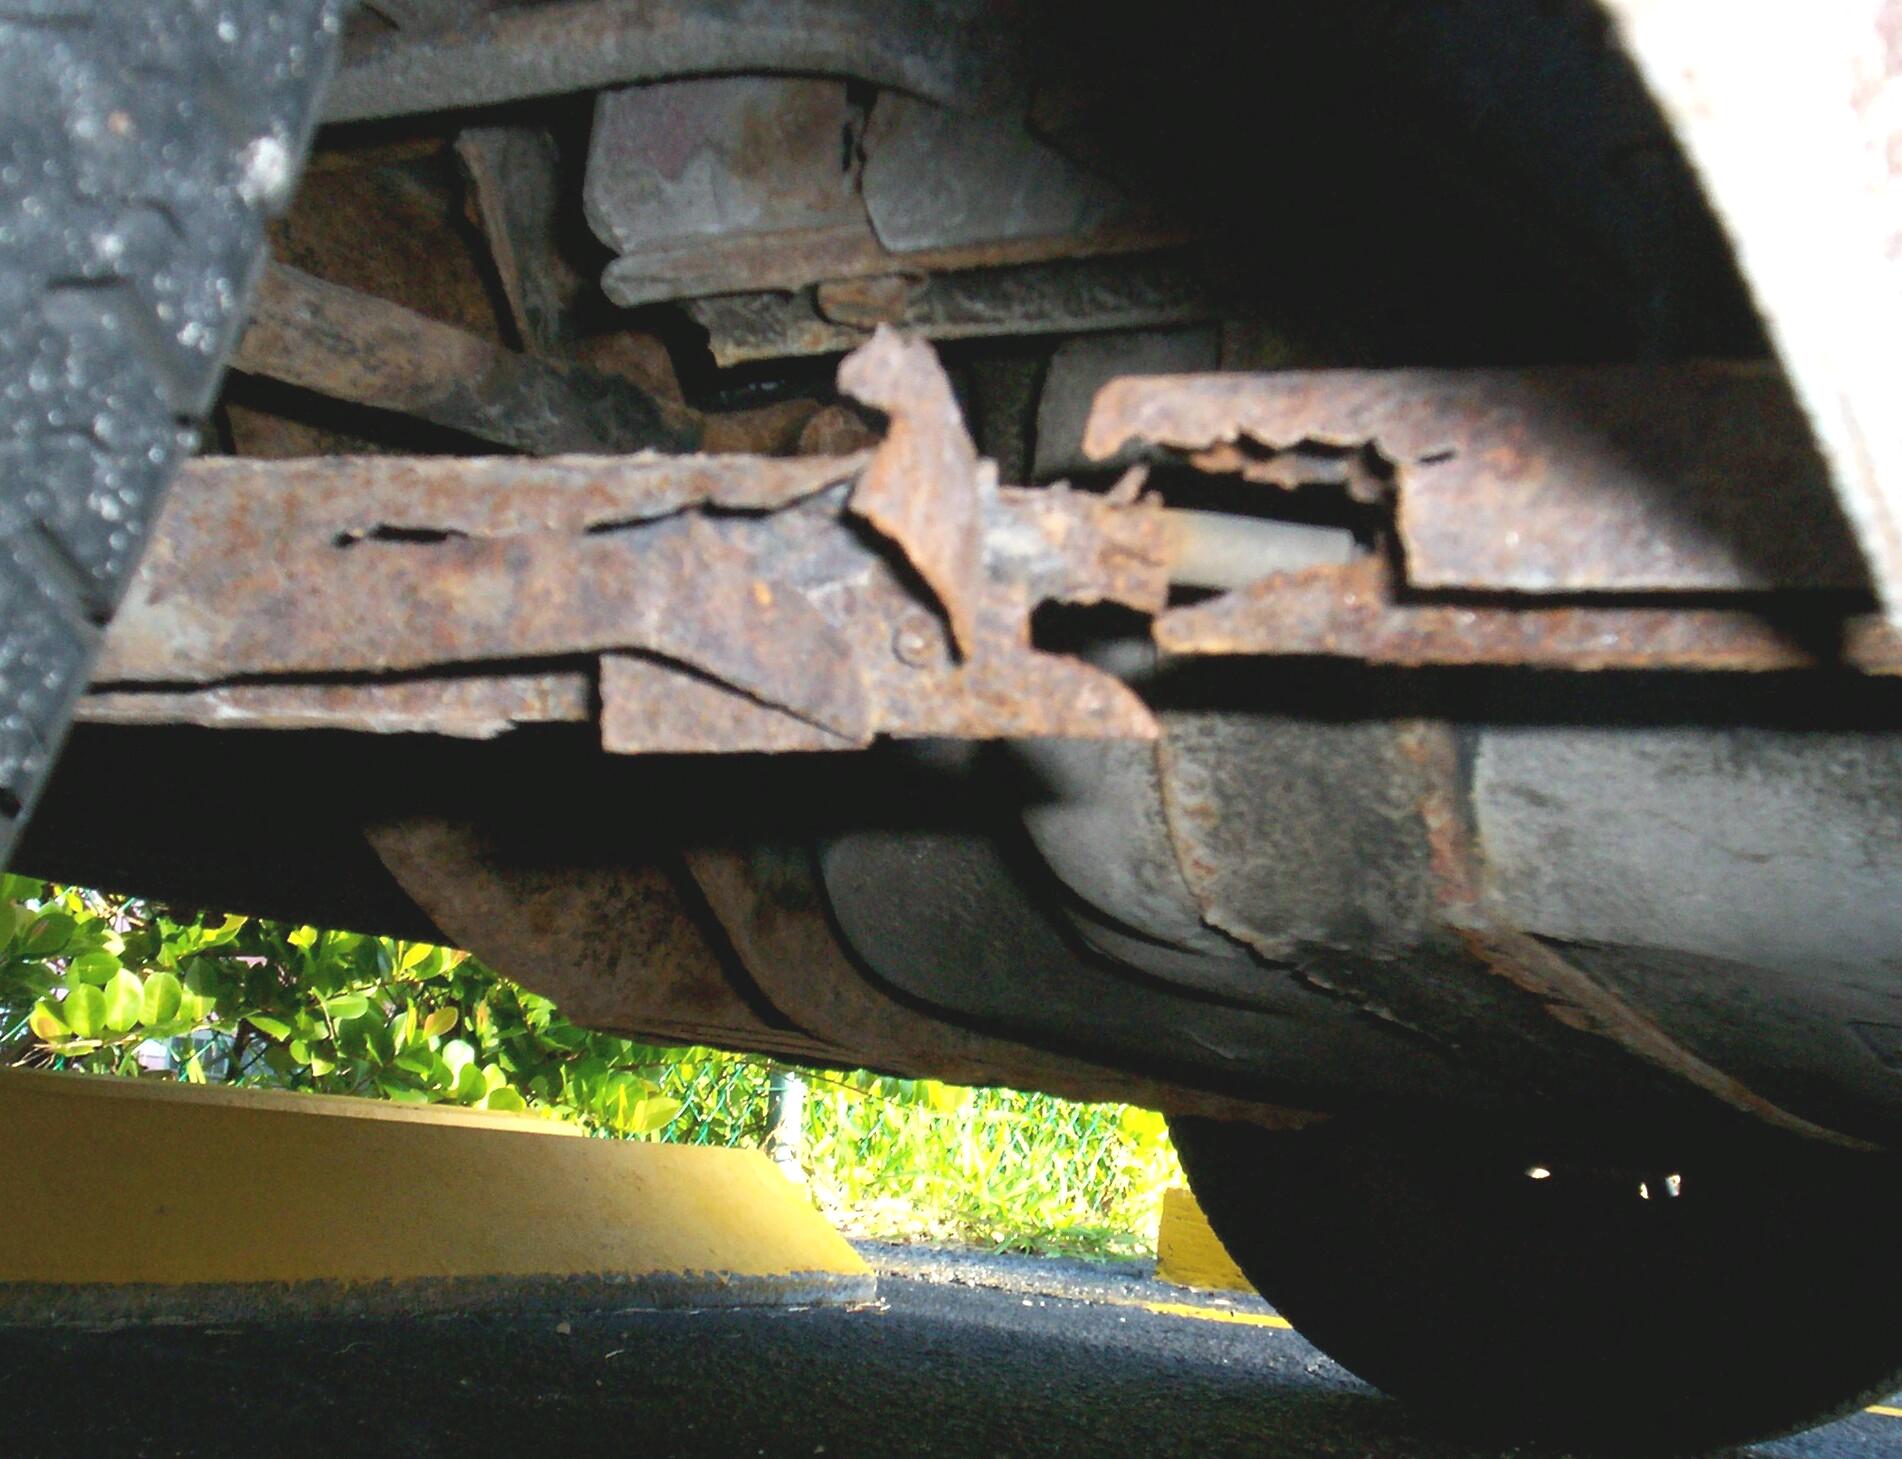 July
22nd 2006 Started to
get a rumble in the rear end when I encountered speed bumps so, when I
performed monthly maintenance this morning, I investigated. The
passenger side trailing arm has rusted thru and there's about two
inches of metal completely missing in the middle!! Geez!
BettyLou has spent most of her life garaged and only has 19,000 miles
on the odo but eleven years of short trips over Pennsylvania winter
road salt has done a number on her. Her unpainted chassis components
are in worst shape than anything I've seen on BillyBob. It's a good
thing I drive like an old man. Still, I'm surprised that it hasn't
drgraded her handling characteristics. The FLAPS don't carry trailing
arms. I'll have to go to a dealer.
July
22nd 2006 Started to
get a rumble in the rear end when I encountered speed bumps so, when I
performed monthly maintenance this morning, I investigated. The
passenger side trailing arm has rusted thru and there's about two
inches of metal completely missing in the middle!! Geez!
BettyLou has spent most of her life garaged and only has 19,000 miles
on the odo but eleven years of short trips over Pennsylvania winter
road salt has done a number on her. Her unpainted chassis components
are in worst shape than anything I've seen on BillyBob. It's a good
thing I drive like an old man. Still, I'm surprised that it hasn't
drgraded her handling characteristics. The FLAPS don't carry trailing
arms. I'll have to go to a dealer.
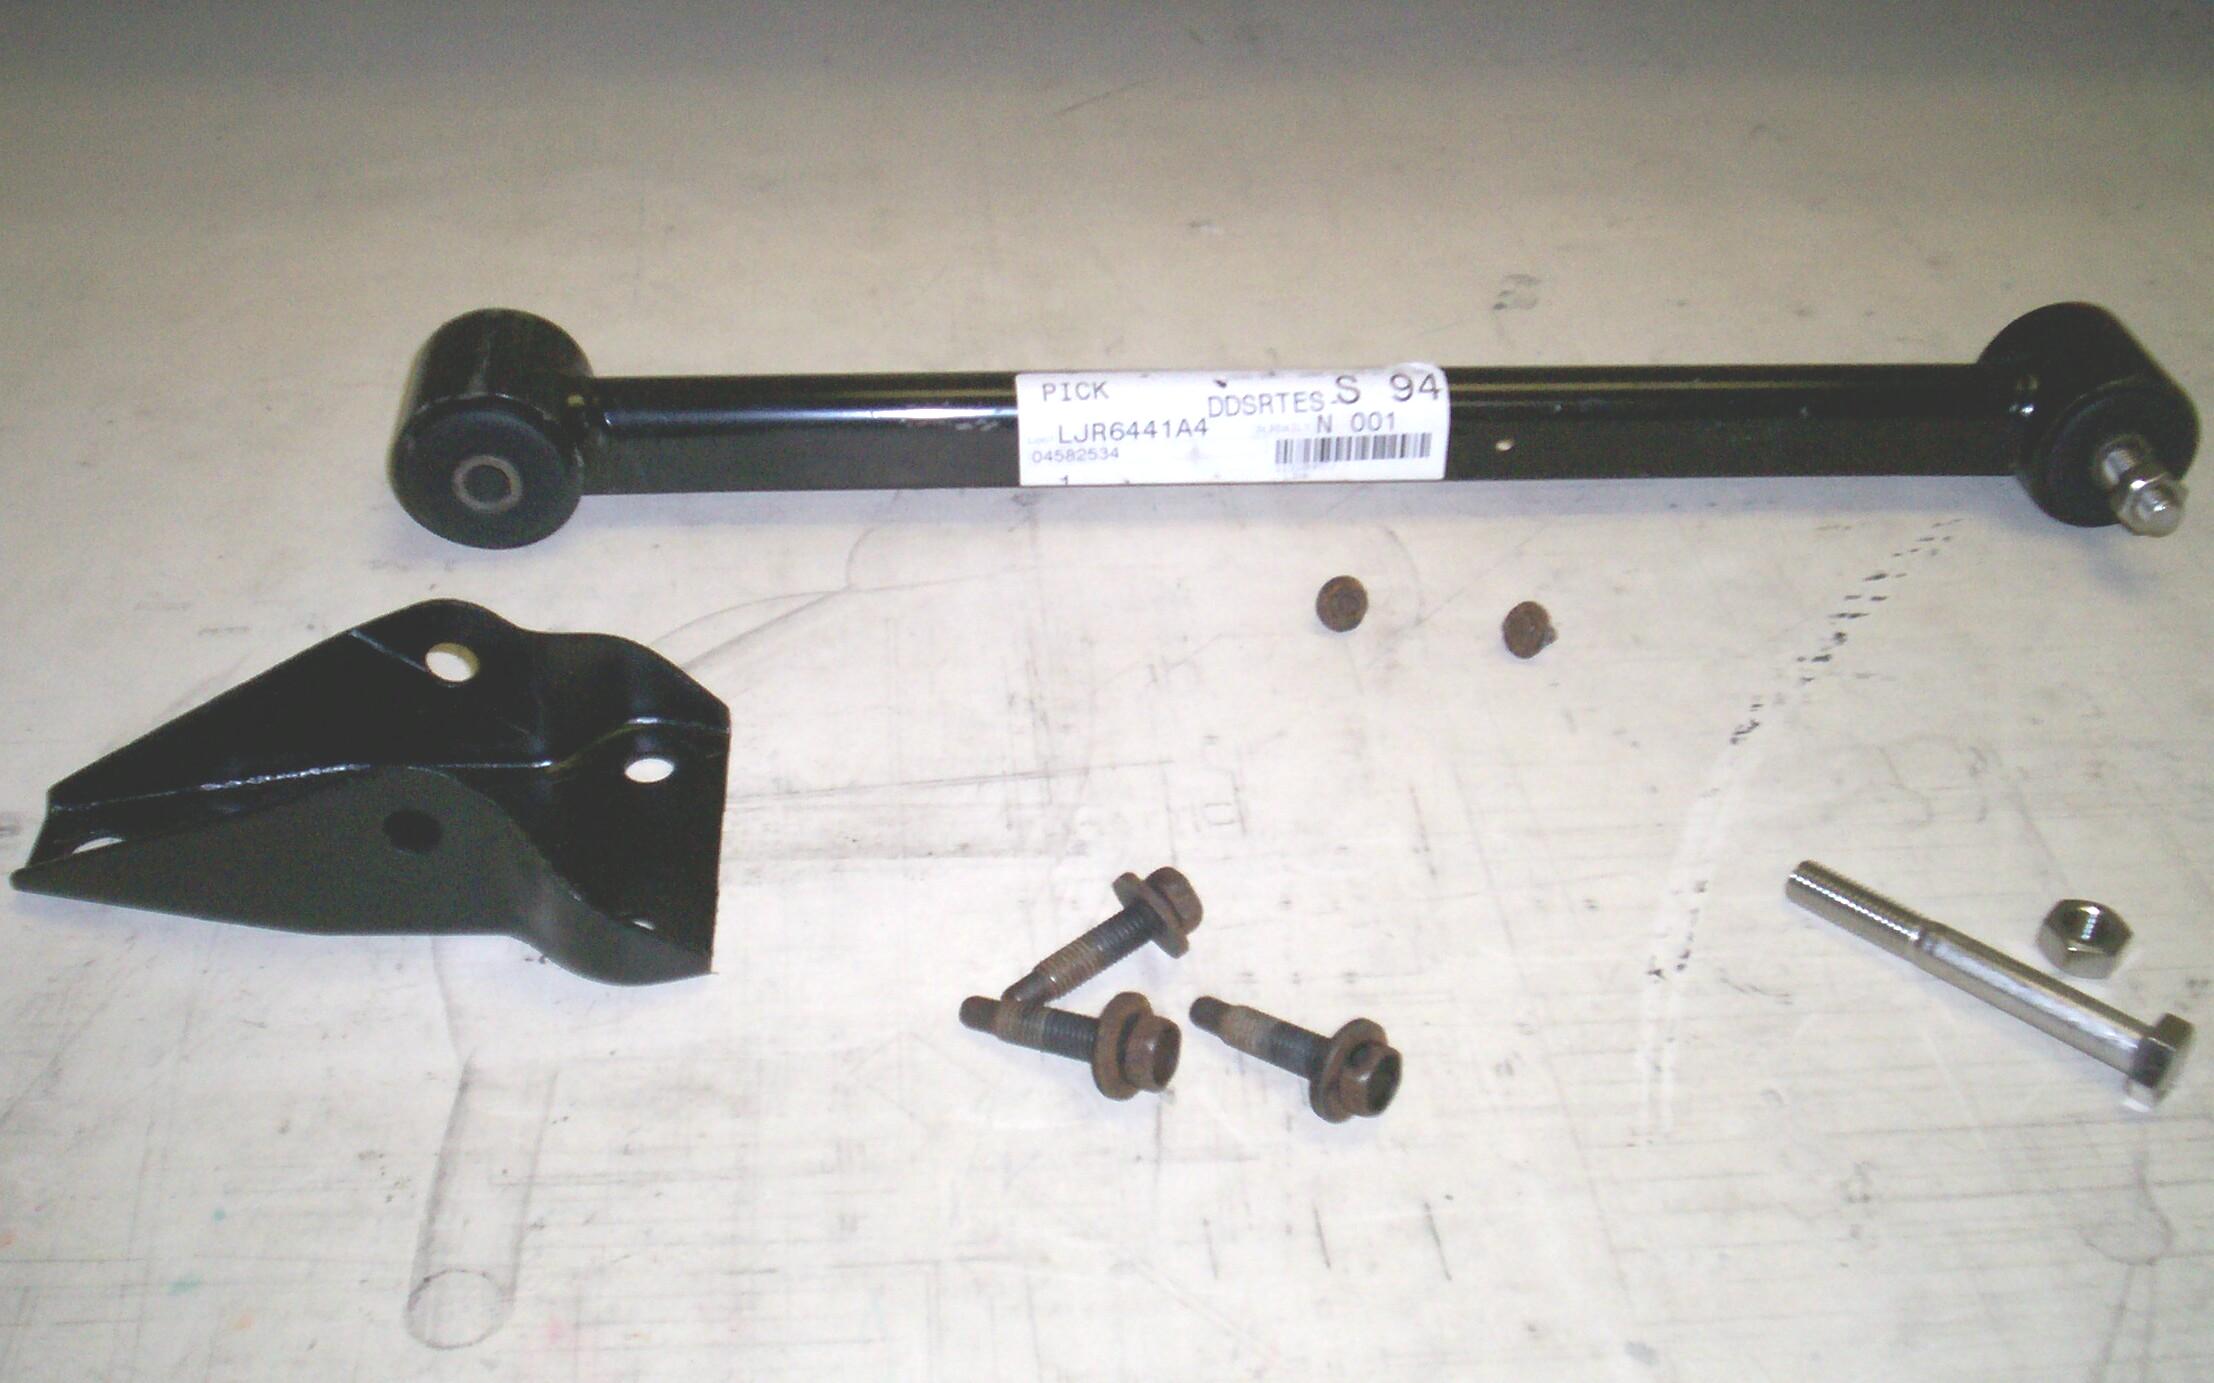
August 5th 2006 I found Chrysler Parts Direct on the net and ordered a trailing arm from them. Left and right trailing arms were not listed so I assumed that either "one size fits all" or that they were sold as pairs. The package arrived by UPS on tuesday and it was the "one size fits all" deal. I will have to buy another one for the other side. No hardware was included either so, I will have to be careful and try to get at least one rusted bolt out intact for measurement purposes.
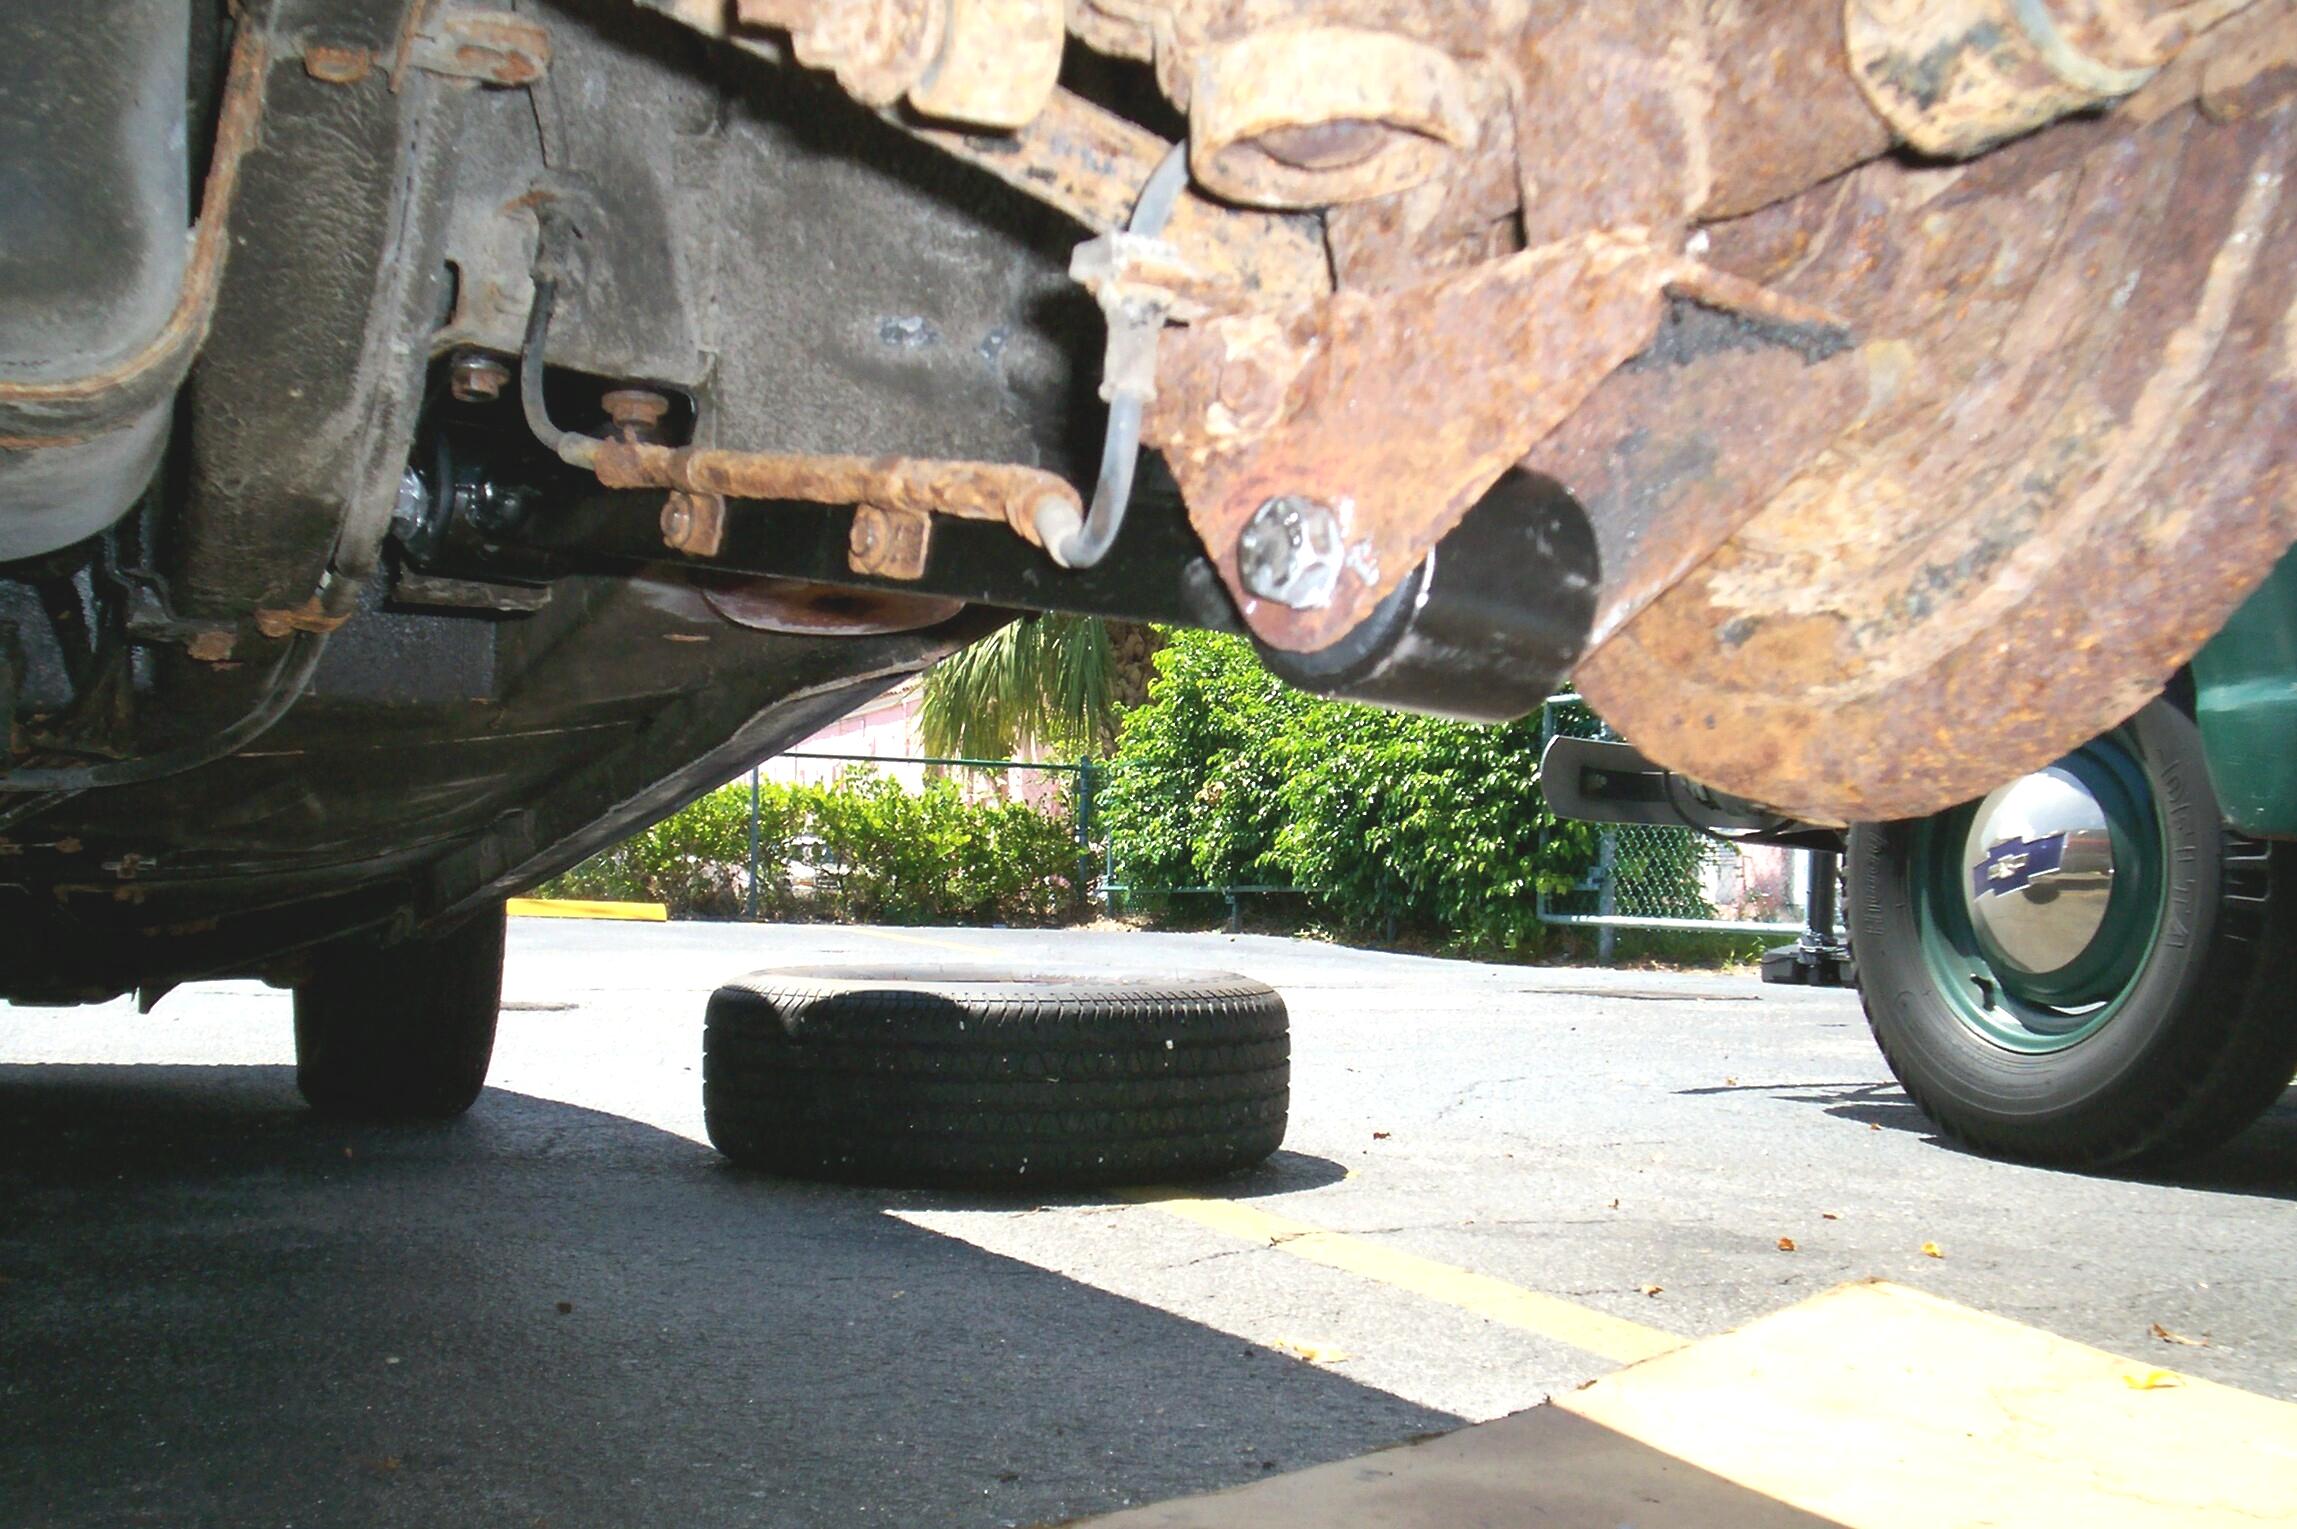
 Saturday
weather started good under the shadetree and I jacked the passenger
side rear quarter of BettyLou up and put a jackstand under the
crossmember. Took the wheel off after wire-brushing the rusted lugs and
beheld this grim sight. There's a lot of restoration work to do here
and under the front end as well I suspect. Well, you accomplish a big
job by breaking it down into little jobs. Might as well get to it.
Saturday
weather started good under the shadetree and I jacked the passenger
side rear quarter of BettyLou up and put a jackstand under the
crossmember. Took the wheel off after wire-brushing the rusted lugs and
beheld this grim sight. There's a lot of restoration work to do here
and under the front end as well I suspect. Well, you accomplish a big
job by breaking it down into little jobs. Might as well get to it.
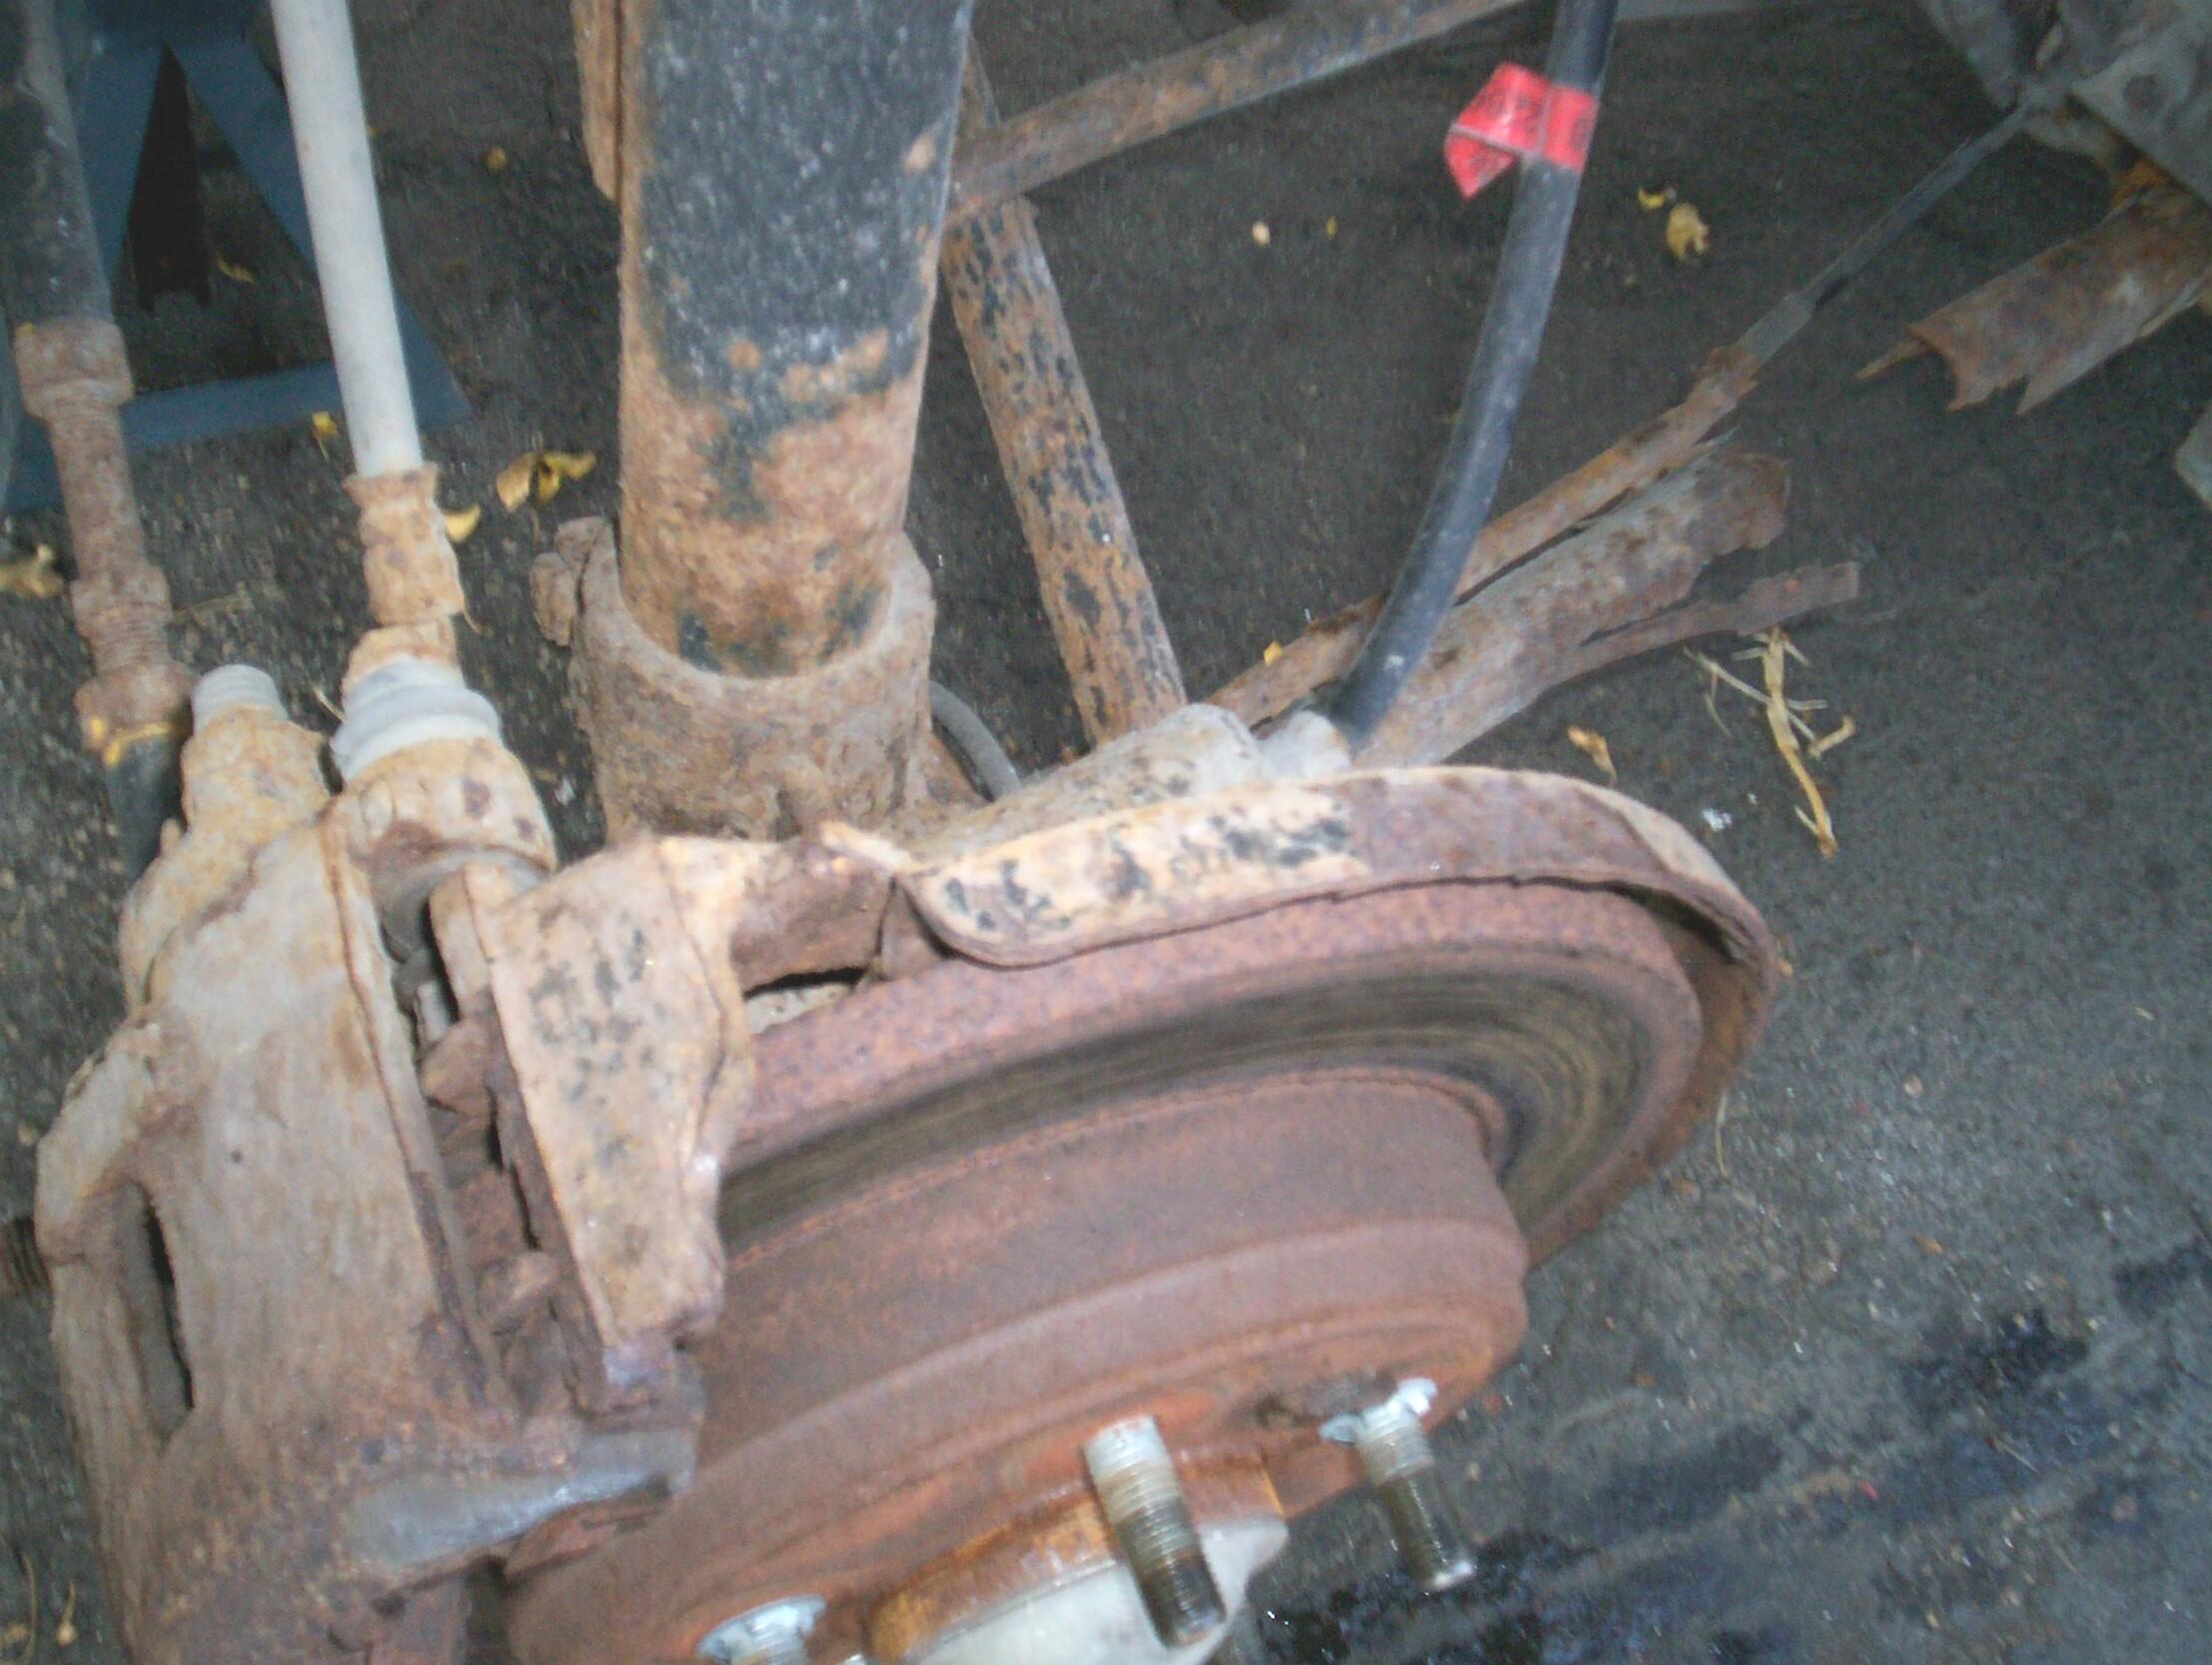
Two small capscrews (10mm wrench) hold the ABS brake line to the side of the trailing arm. These were wire-brushed with a small wheel in the air-powered angle grinder and given a dose of Kroil penetrating oil. I managed to get them out without destroying 'em. Next came the trailing arm thru bolt at the hub end. After wire-brushing, the bolt head took a 15mm wrench while the hex nut fit an 11/16" best. The hex nut was heated up with a MAPP torch, then quenched with penetrating oil. The impact wrench was used on the bolt head side since that was the only side I could get at with the tool. It had no effect whatever. It's time to pull out the electric angle grinder.
Used the grinder to grind the bolt head off but the bolt is rusted in the trailing arm sleeve because I could not punch it thru. There is not enuf room for the grinder or my cut-off wheel on the other side of the bracket without removing the disk brake and it appears to be more rusted in place than the trailing arm so I don't want to go that route. I'm at a stalemate and need to think on this some.
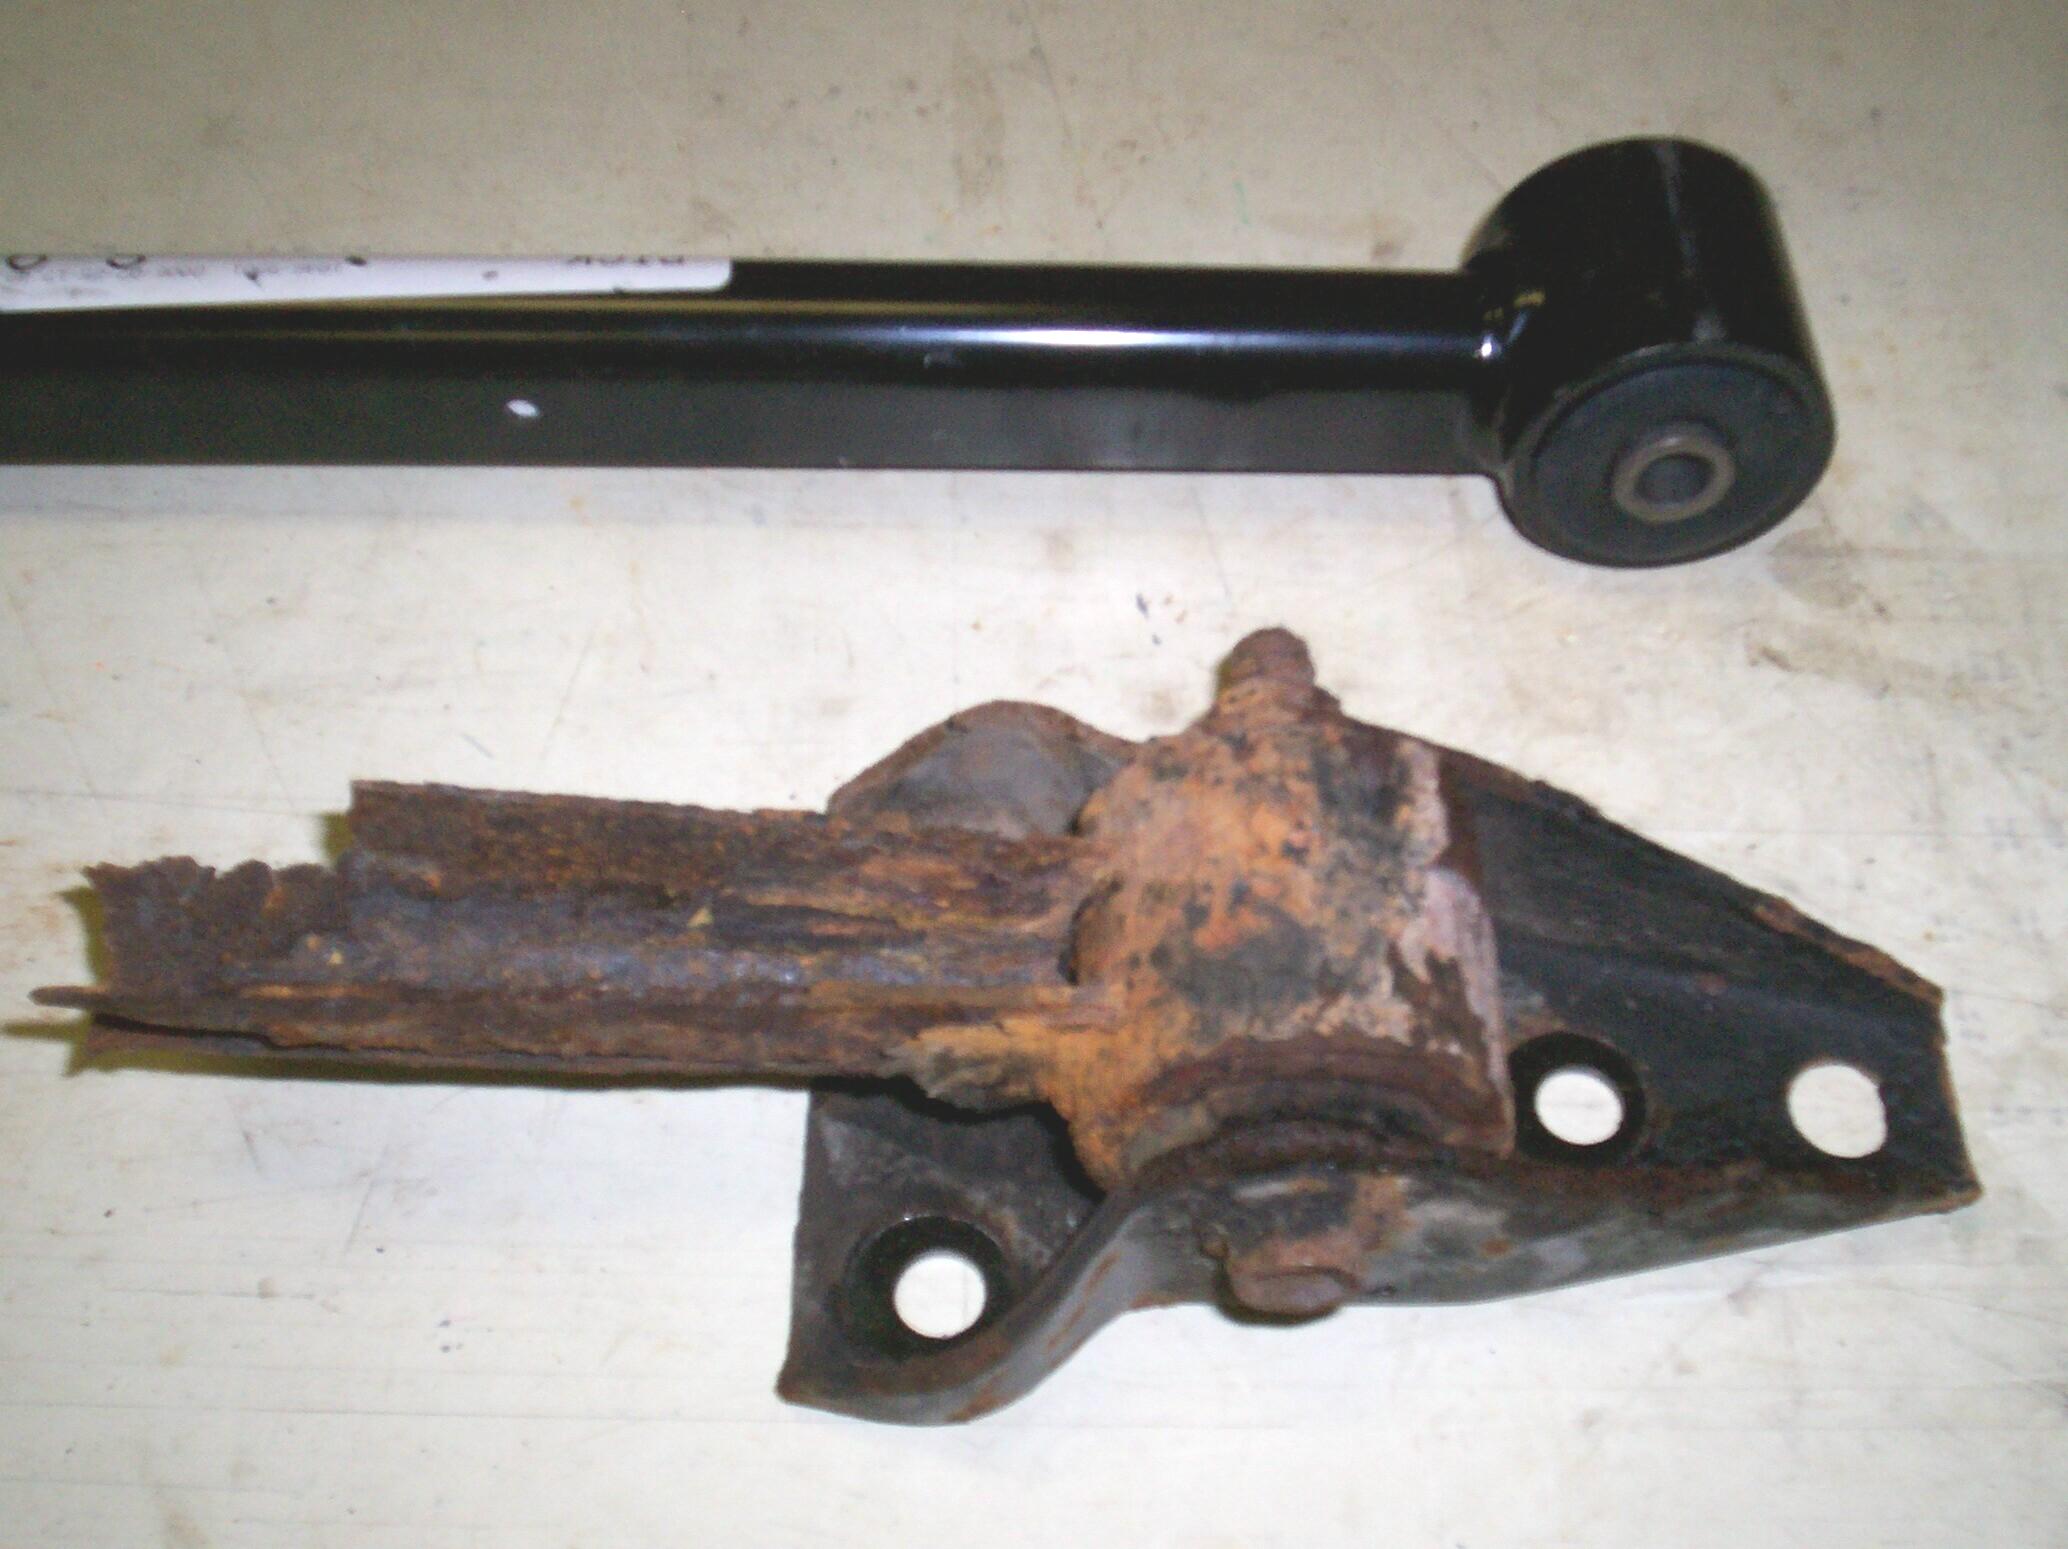 The
other and of the trailing arm at the body mount is even more
inaccessible and puts me into a state of despair until I realize that I
can remove the whole bracket. The bracket bolts are not rusted beyond
recognition like the other bolts in this assembly and they come out
with the impact wrench in a few minutes. Even tho' I can now work on
this piece at a workbench, I still have the same rusted-in-place bolt
problem. I use the torch and penetrating oil quench method again and
manage to get the hex nut on this end off with the impact wrench. I
still can not drive the bolt out of the trailing arm tho', even with a
sledge hammer. I will be able to measure for replacement nuts and
bolts, however. My hopes of getting this job done today are dashed.
The
other and of the trailing arm at the body mount is even more
inaccessible and puts me into a state of despair until I realize that I
can remove the whole bracket. The bracket bolts are not rusted beyond
recognition like the other bolts in this assembly and they come out
with the impact wrench in a few minutes. Even tho' I can now work on
this piece at a workbench, I still have the same rusted-in-place bolt
problem. I use the torch and penetrating oil quench method again and
manage to get the hex nut on this end off with the impact wrench. I
still can not drive the bolt out of the trailing arm tho', even with a
sledge hammer. I will be able to measure for replacement nuts and
bolts, however. My hopes of getting this job done today are dashed.
August 13th 2006 I've been wanting a sawzall for some time and I looked at this rusted trailing arm problem as an excuse to finally get one. I ordered one from McMaster-Carr along with some extra blades and new Metric 18-8 SS hex head cap screws, M12 size, 90 MM length, 1.75 MM pitch bolts and nuts for the trailing arms. The items arrived quickly as they always do with McMaster-Carr and I got a chance to try the sawzall on the bracket/trailing arm remnant today after quarterly maintenance on BillyBob. The sawzall did not turn out to be the right tool for this job but at least I have one now. I finally got the bracket separated from the trailing arm with the electric angle grinder. I still have to get the other end off the strut on the car.
August 19th 2006 After doing some degreasing work on BillyBob, I turned my attention to the trailing arm bracket. Used the wire cup in the electric angle grinder to clean it up, then hung it up in the tree to PRE Paint prep it and give it a coat of Eastwood's Rust Encapsulator. While that was drying, I put the bracket bolts and the ABS brake line capscrews in the tumbler for a cleaning session. Finished the bracket off later in the afternoon with two coats of Eastwood's Chassis Black rattlecan paint.
 August
26th 2006 Sunny and hot
today. I got a late start but I have all the parts to replace the
trailing arm ready to go and, if I can get the rest of the rusted out
trailing arm off the car, BettyLou will be marginally roadworthy again
by the end of the day. I used the 4.5" electric grinder wheel between
the wheel strut bracket and the trailing arm pivot and finally cut thru
to get the trailing arm remains off. It was very dirty work because the
grinder had to burn thru the rubber bushing portion before it got to
the steel bolt and I ended up with liquified rubber particles all over
me, on my face shield and in my hair. ~!@#$%^
August
26th 2006 Sunny and hot
today. I got a late start but I have all the parts to replace the
trailing arm ready to go and, if I can get the rest of the rusted out
trailing arm off the car, BettyLou will be marginally roadworthy again
by the end of the day. I used the 4.5" electric grinder wheel between
the wheel strut bracket and the trailing arm pivot and finally cut thru
to get the trailing arm remains off. It was very dirty work because the
grinder had to burn thru the rubber bushing portion before it got to
the steel bolt and I ended up with liquified rubber particles all over
me, on my face shield and in my hair. ~!@#$%^
 The
small ABS brake line capscrews were driven in the holes on the new
trailing arm with the impact wrench to tap the threads, then removed
again. This is a lot easier on the workbench than it is under the car.
The unthreaded portion of the new stainless steel trailing arm bolts
were slathered with anti-seize compound and run first thru the body
bracket, then the wheel strut bracket after the body bracket was bolted
back in place. I had to do this twice as I got the trailing arm upside
down on the first try and realized it would act as a trough to hold
water.
The
small ABS brake line capscrews were driven in the holes on the new
trailing arm with the impact wrench to tap the threads, then removed
again. This is a lot easier on the workbench than it is under the car.
The unthreaded portion of the new stainless steel trailing arm bolts
were slathered with anti-seize compound and run first thru the body
bracket, then the wheel strut bracket after the body bracket was bolted
back in place. I had to do this twice as I got the trailing arm upside
down on the first try and realized it would act as a trough to hold
water.
The ABS brake line was bolted on the side of the trailing arm and the trailing arm bolts were tightened up. Threadlocker Blue was used on all fastener threads. I realized at this point that the inner steel bushing in the trailing arm ends was a bit longer than the trailing arm end is wide and that when the bolt is tightened, it becomes stationary and all the movement of the joint is in the rubber part of the bushing. Joints of this type should be tightened when the vehicle is at ride height so that there is no stress in the rubber when the car is at rest. I loosened the bolts again and put BettyLou's wheel back on. Took her off the jackstands and tightened the bolts again. It's a little more difficult with the wheel on to get a wrench on the hex nut because it's inside the rim but it can be done.
Good! I can drive BettyLou again. I will order another trailing arm for the other side. and concentrate on getting Renegade back on the road and working on BillyBob. When the Jeep is running again, we'll work on that other trailing arm. Then, after that, new disks, calibers and backing plates for the brakes are next on my list. It's time to put the tools back in the shed for today and go grab a burger.
| < Back to Intro |
You can email me at ![]() webmaster@laroke.com
webmaster@laroke.com
Issued Monday August 28, 2006
Updated Wednesday April 25, 2018
copyright © 1996-2018 Larry Robert Kephart all rights reserved
| | LRK Home | | Bio Info | | Krash Khronicles | | LAROKE | |
| | BettyLou | | BillyBob's Garage | | Rat Patrol | | Deerslayer | | Elvira | |
| | Land of the Free and Home of the Brave | |
| | Keppylou's Art | | WWI Soldier's Diary | |