STEP 4:


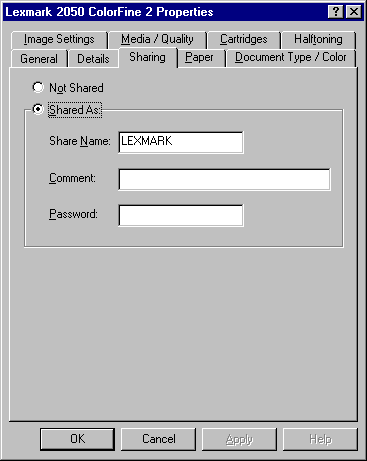
Click the "Shared As" Radio Button. Then, enter a "Share Name" for the printer to be known as by other users on the network (It is a good idea to follow DOS naming conventions here to avoid problems with older, DOS and Windows 3.x legacy applications you are still using).
Optionally, you can enter a description in the "Comment" Field. Other users on the network can see this comment if they look at the printer's Properties "Detail" Tab.
Password protection for the printer is also optional. Making an entry in the "Password" Field will enable password protection. Leaving the Password Field blank will allow all network users access to the printer.
|
![]()